Introduction
Build a Cat TV House: It’s ‘Meow’ or Never! Dive into our DIY guide – perfect for crafty humans and curious cats. Less fuss, more fun; join the ranks of happy cat architects. Let’s create a feline masterpiece with a whisker of whimsy!

Overview
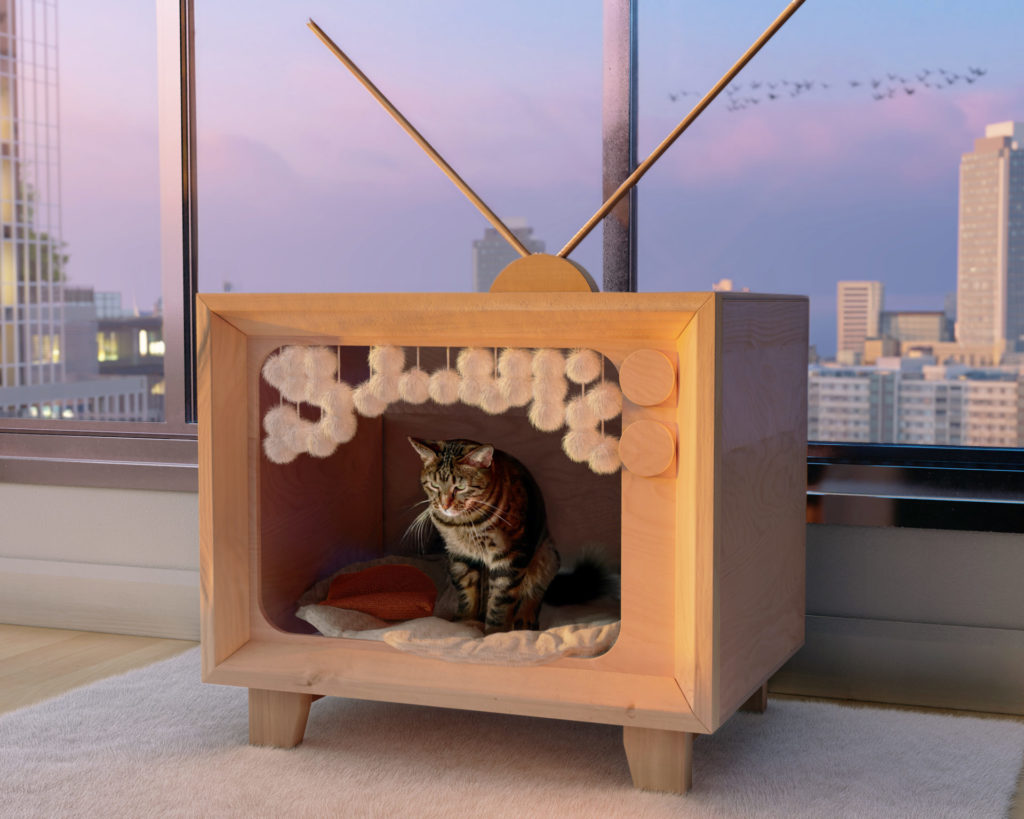
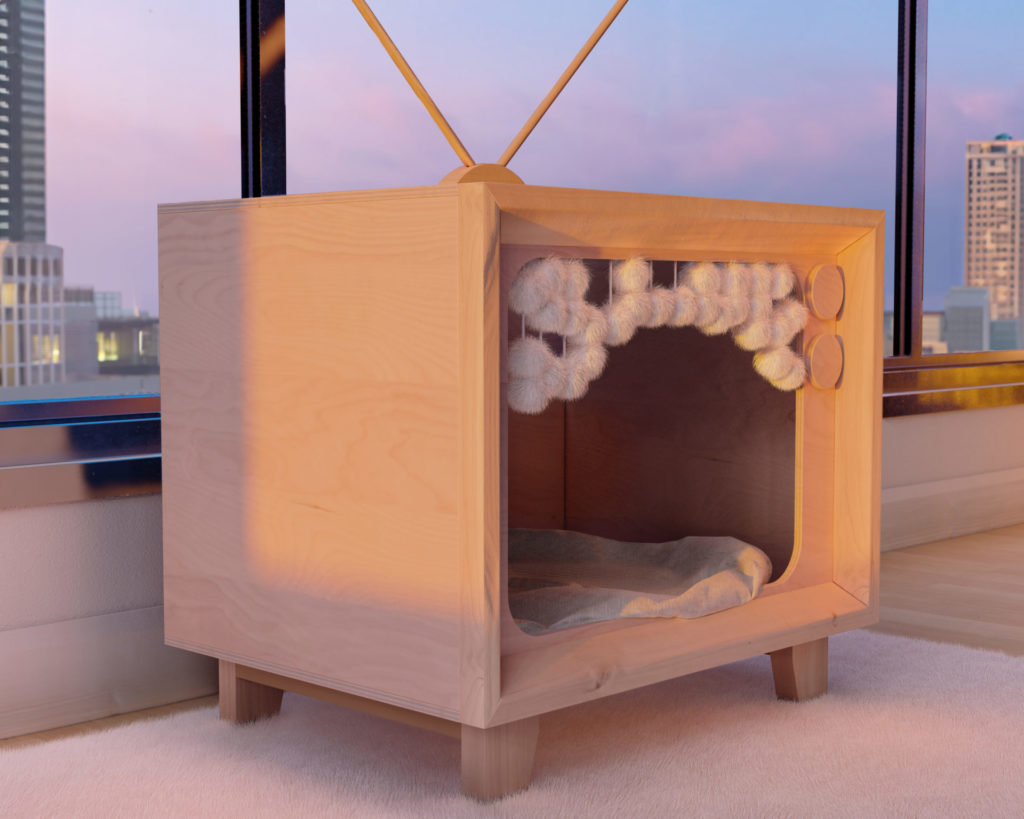
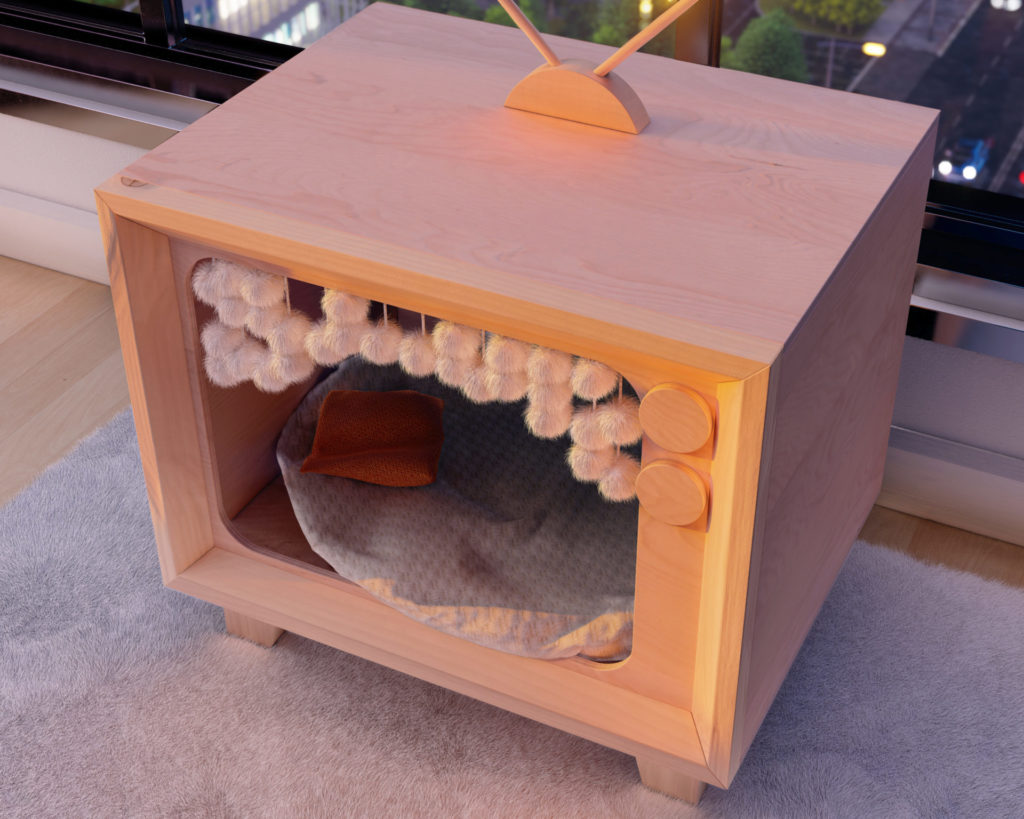
Imagine a cat house that not only provides a snug refuge for your pet but also serves as an eye-catching piece of decor that sparks conversations. Our Vintage TV Cat House does just that, blending retro aesthetics with the comforts of modern pet furniture. Envisioned for those who cherish both their feline friends and a touch of nostalgia, this unique cat bed, shaped like a classic television, is a crafty intersection of whimsy and function.
Specifications
The cat house is designed with precision and care, utilizing sturdy plywood and common construction lumber to ensure durability and safety. It’s an ideal project even for woodworking beginners, with a comprehensive guide walking you through each step from start to finish. The guide is meticulously detailed, featuring:
- A complete cut list to minimize waste
- A shopping list to ensure you have all materials on hand
- A material list with exact measurements
- Clear imperial measurements for ease of understanding
- Diagrams for visual reference
- Written instructions alongside image descriptions to cover all learning styles
A Feline's Haven
Cats aren’t just pets; they’re family members who deserve their own special place. The Vintage TV Cat House is that place. It’s a cozy corner that invites your cat to observe, nap, and play, offering a sense of security and the comfort they crave. Its inviting design mimics the warmth of a television set from a bygone era, a novel retreat for any pet.
Customization Options
Your cat’s personality is unique, and their house can be too. With options to stain or paint, you can match the cat house to your home’s decor or let it stand out with a pop of color. The guide includes tips on maintenance, staining, painting, and caring for the cat house, allowing you to personalize it while ensuring it stays clean and comfortable for your pet for years to come.
Conclusion
The Vintage TV Cat House is more than just a pet bed; it’s a testament to your style and love for your cat. By purchasing the DIY PDF plan, you’re not only investing in your cat’s happiness but also engaging in a fulfilling project that results in a masterpiece for your home. With easy-to-follow instructions and support materials, anyone can turn a few sheets of plywood into a stylish and cozy space for their beloved pet. Transform your living space and delight your furry companion – purchase your plan today and start building a home within your home for your cherished cat.
Time
4 hours (varies with experience)
Cost
$50 (Costs may vary based on location and supplier.)
Skill level required
Beginner
DIY TV Cat House PDF Plan
What is included in the PDF download?
- Easy to read step by step instructions
- Material list
- Tools needed
- Helpful links to materials and tools needed
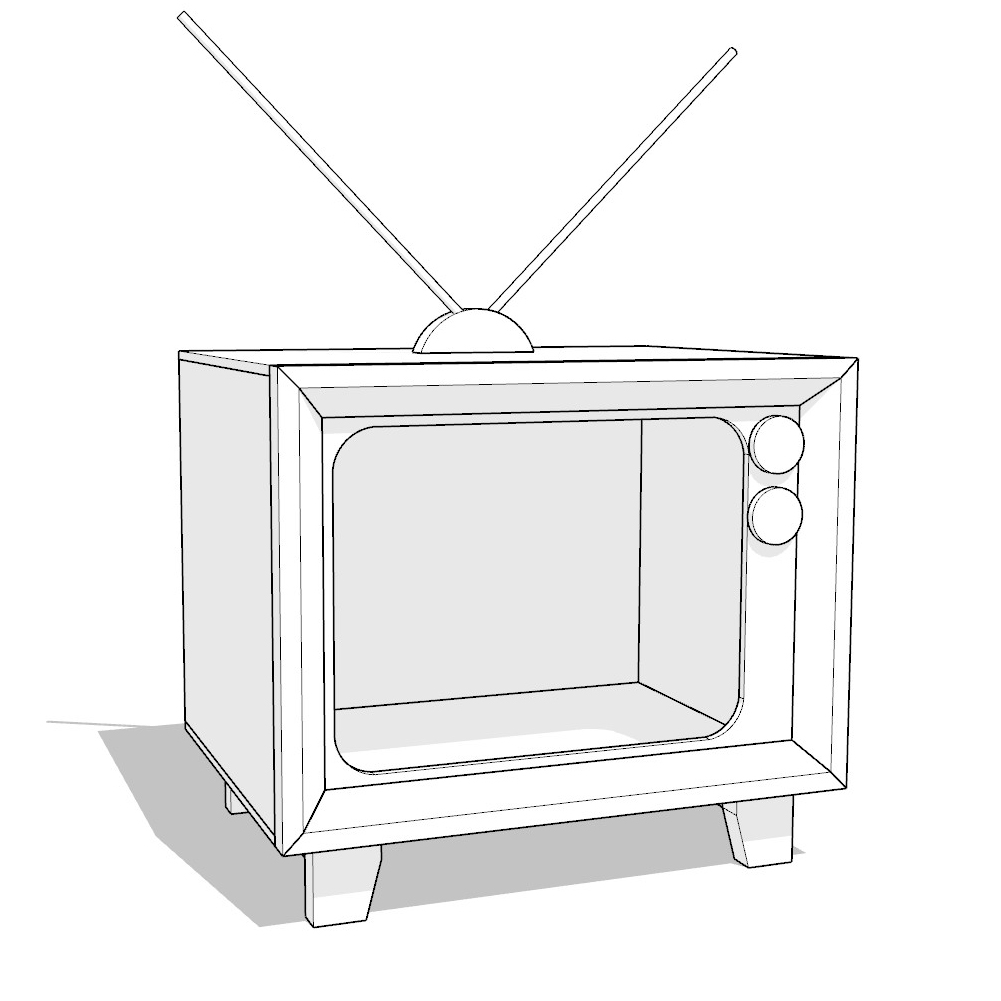
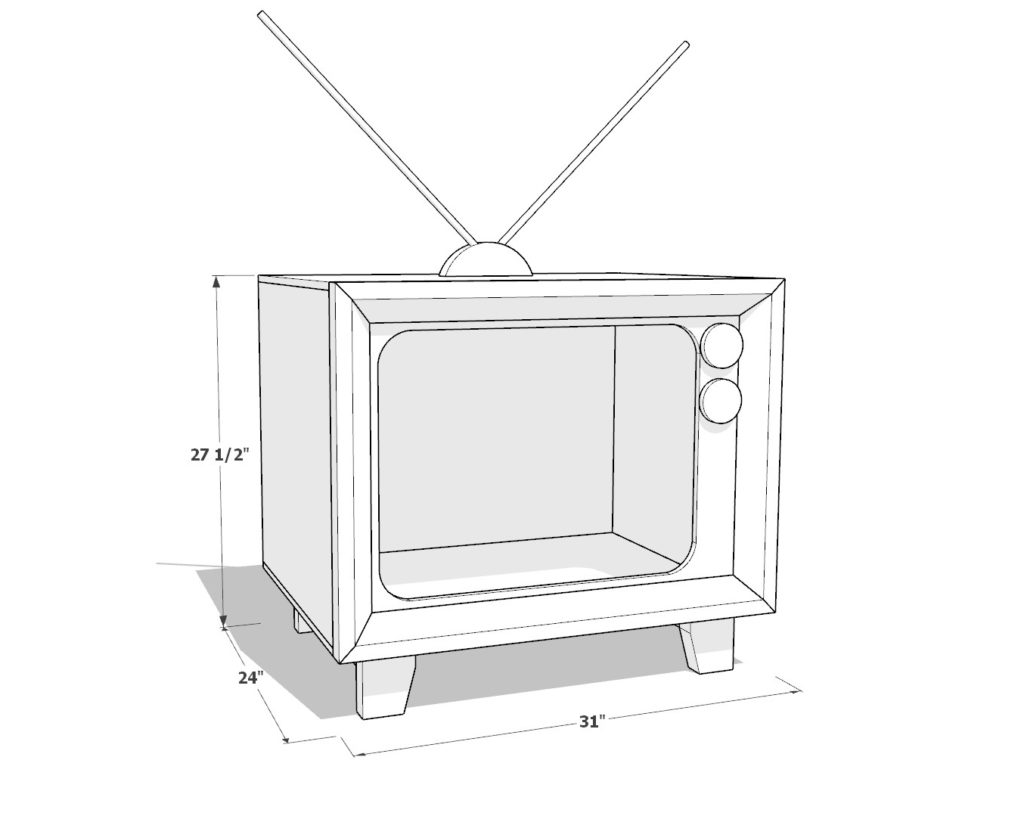
DIY Vintage TV Cat House Dimensions
Tools Needed for This Project:
Available with the purchase of the DIY plan PDF.
Lumber Shopping & Cut List
Available with the purchase of the DIY plan PDF.
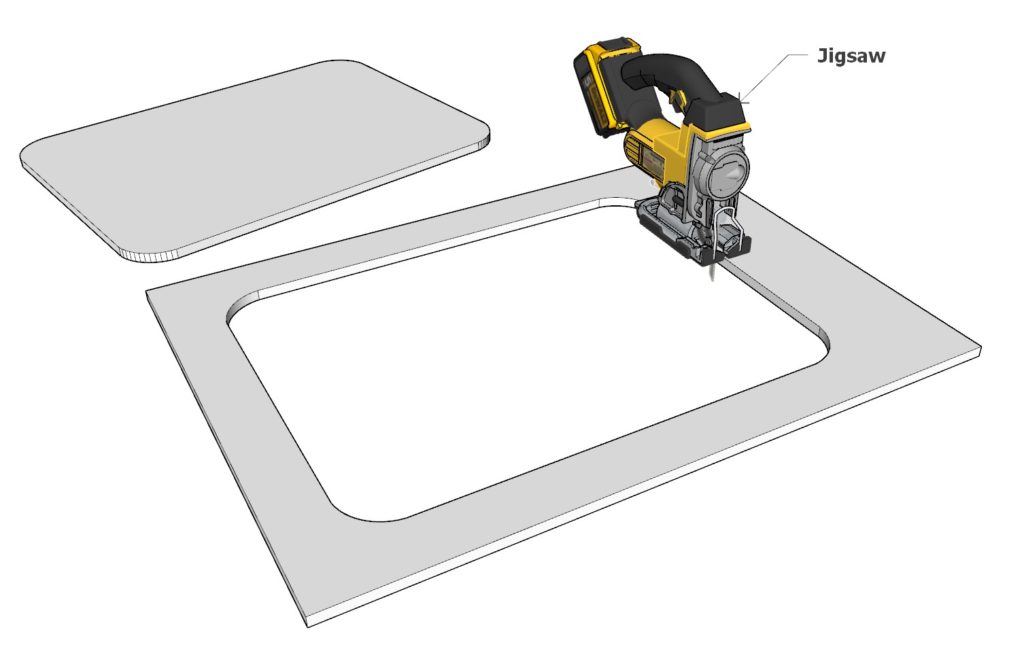
Step 1: Assembling the TV Box Frame
Step 1: Assembling the TV Box Frame
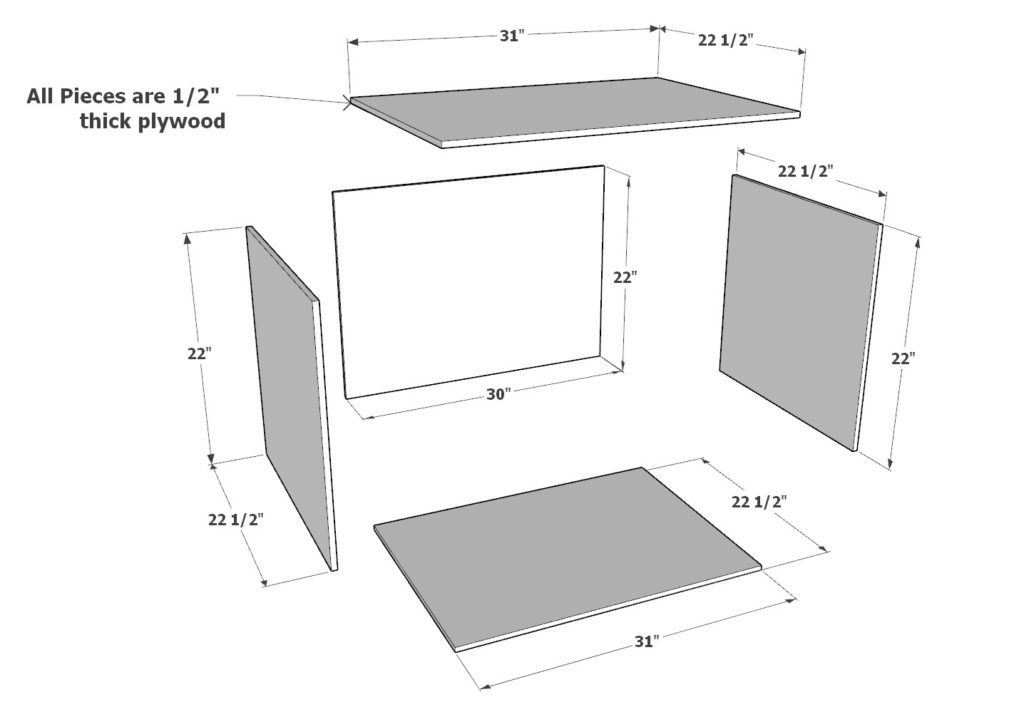
Begin by constructing the main frame of the cat house, which is the body of the vintage TV. You will use five pieces of 1/2″ thick plywood cut to specific dimensions to form the box.
- Take two pieces measuring 22-1/2″ in width by 22″ in height for the sides.
- For the top and bottom, cut two pieces to 31″ in width by 22-1/2″ in height.
- Cut one piece to 22″ in width by 30″ in height for the back panel.
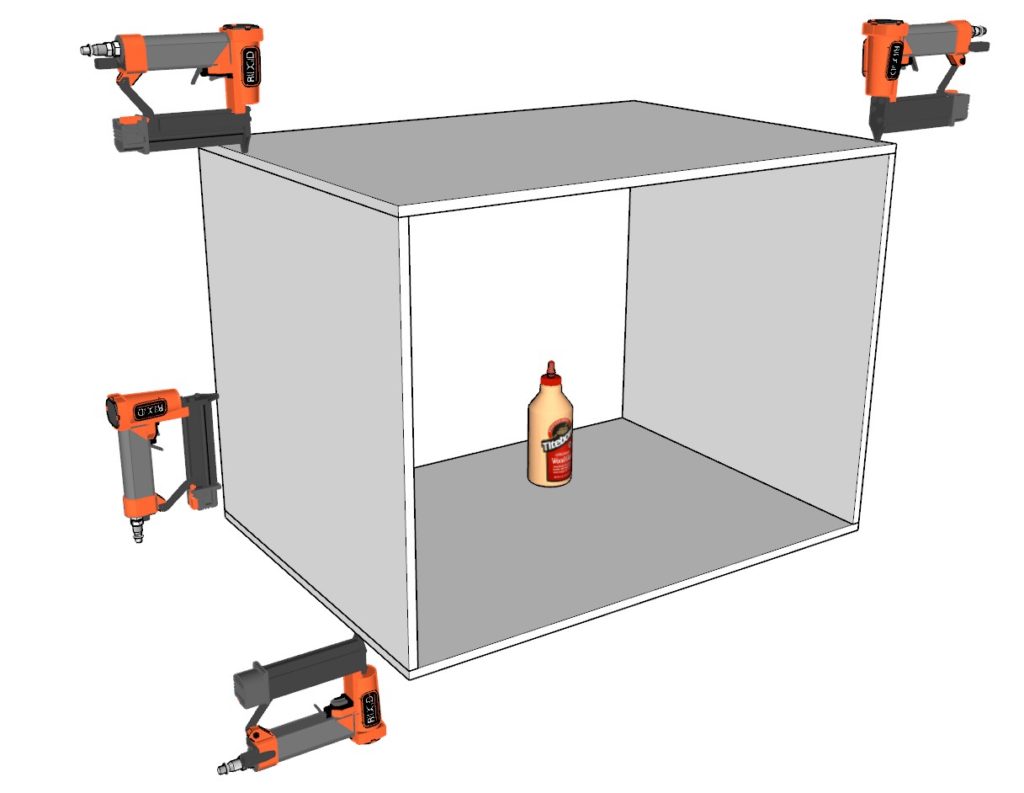
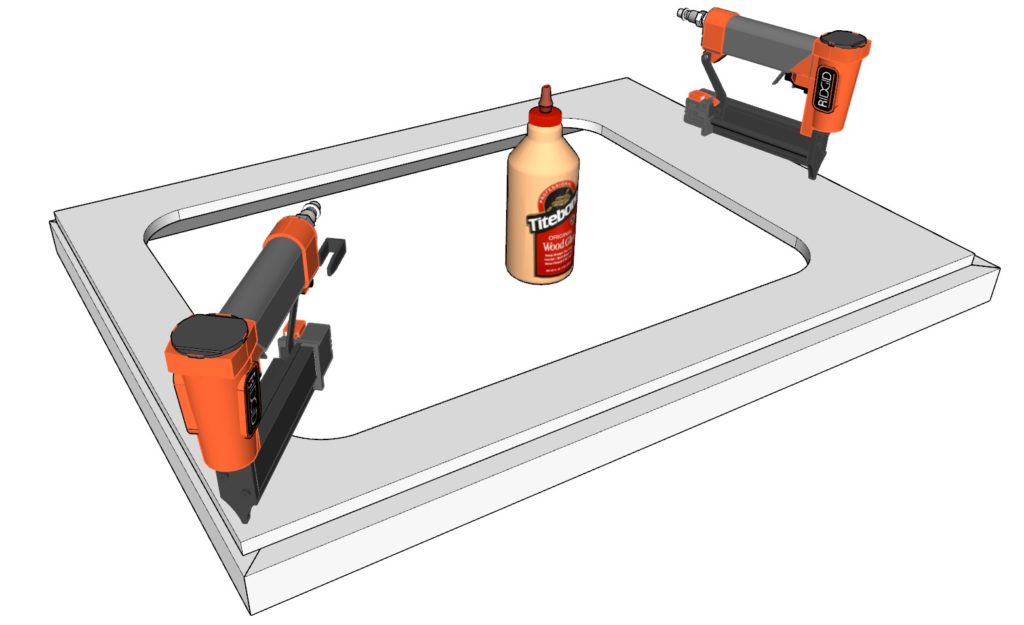
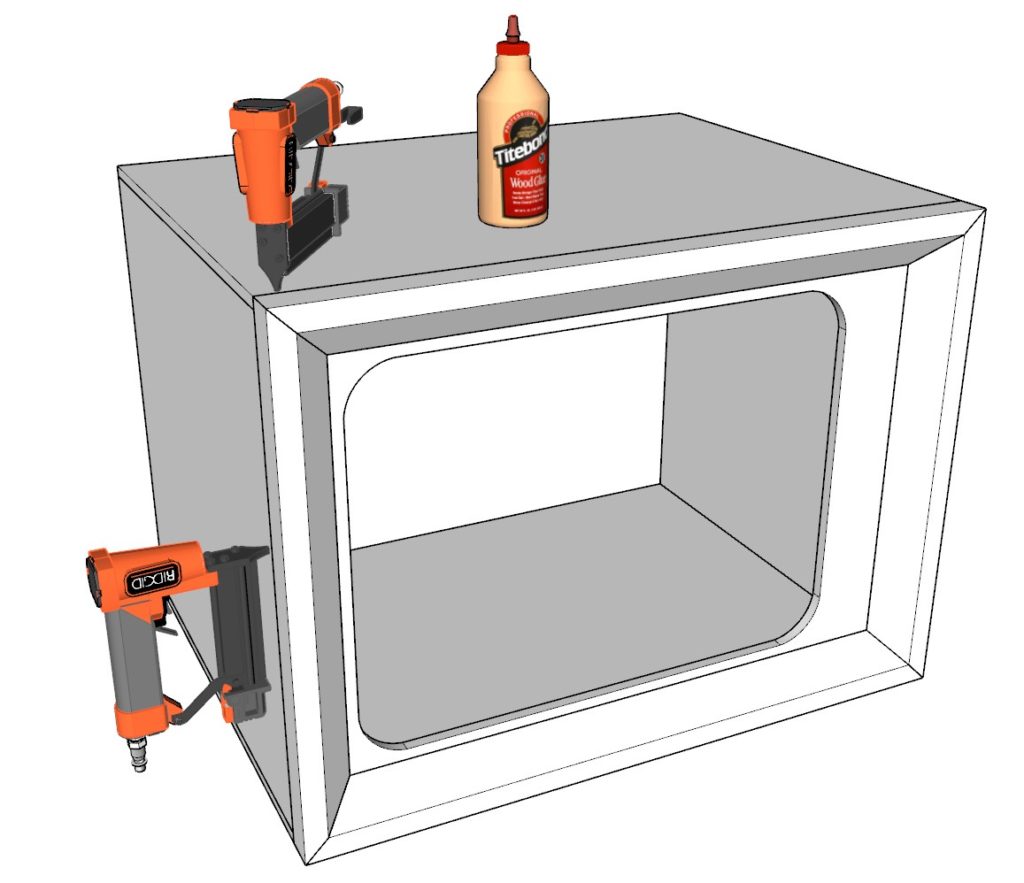
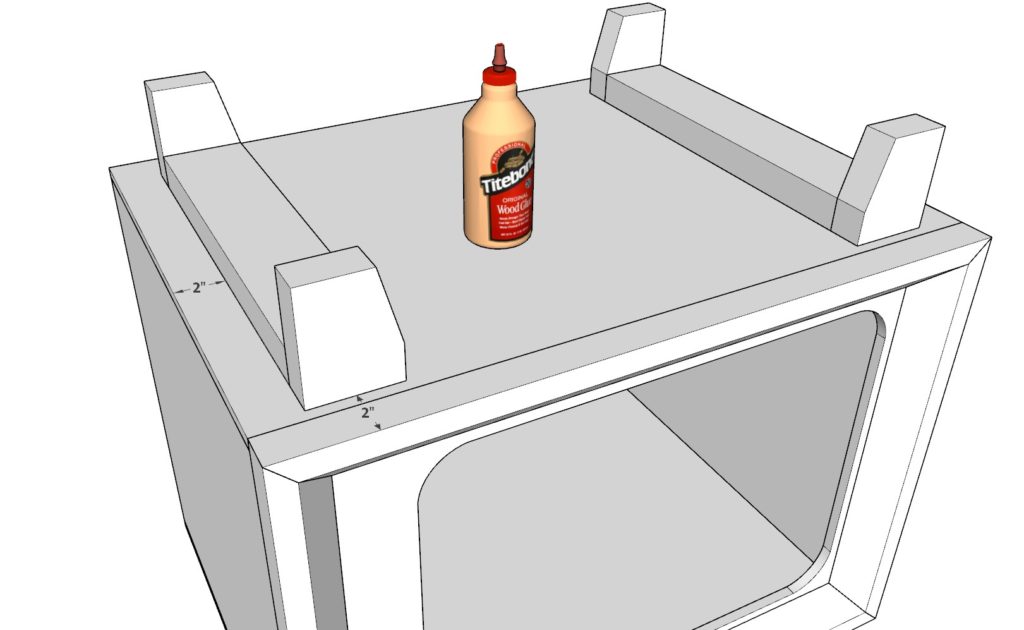
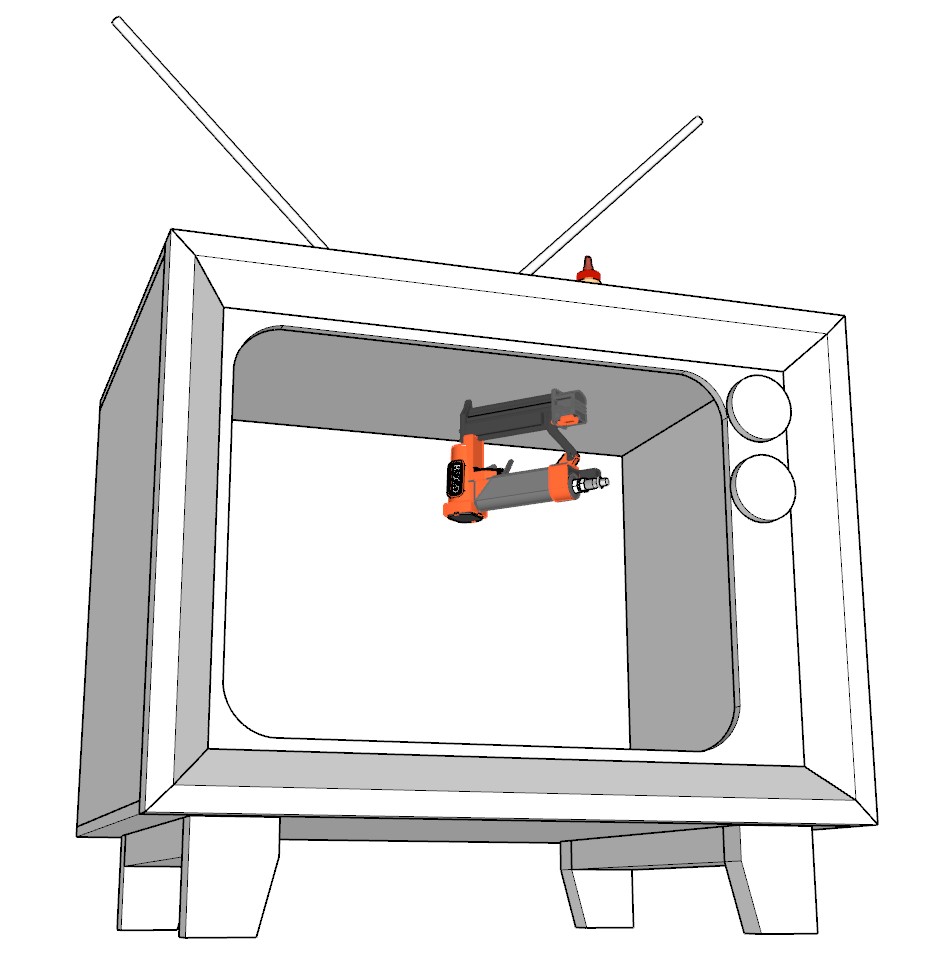
With all the pieces cut to the correct dimensions, it’s time to put them together. Apply wood glue along the edges where the plywood will join. Carefully align the sides, top, bottom, and back panel, and secure them using 1-inch pin nails to create a sturdy box. Ensure each joint is flush and square for a clean, professional appearance. This box is the foundation of your cat’s new vintage TV house, so take your time to ensure everything is well-aligned and secure.
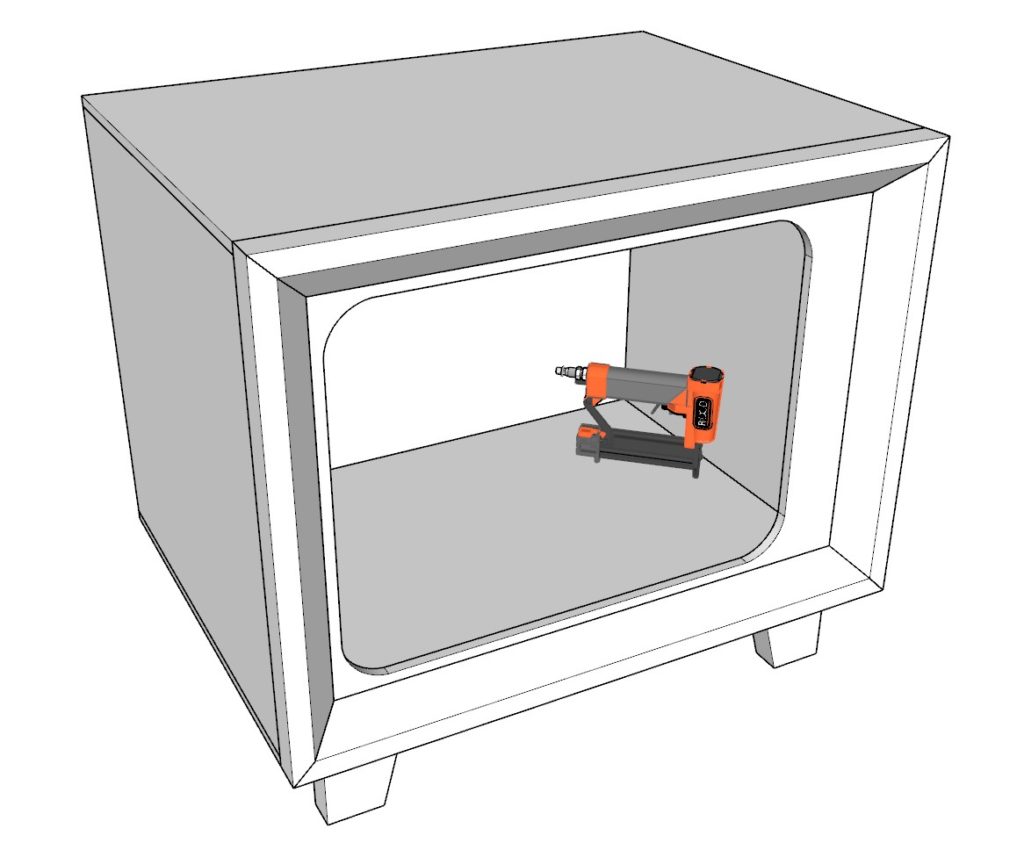
Step 2: Crafting the Vintage TV Face and Dials
Now, focus on creating the front panel of the cat house, which will serve as the face of the vintage television.
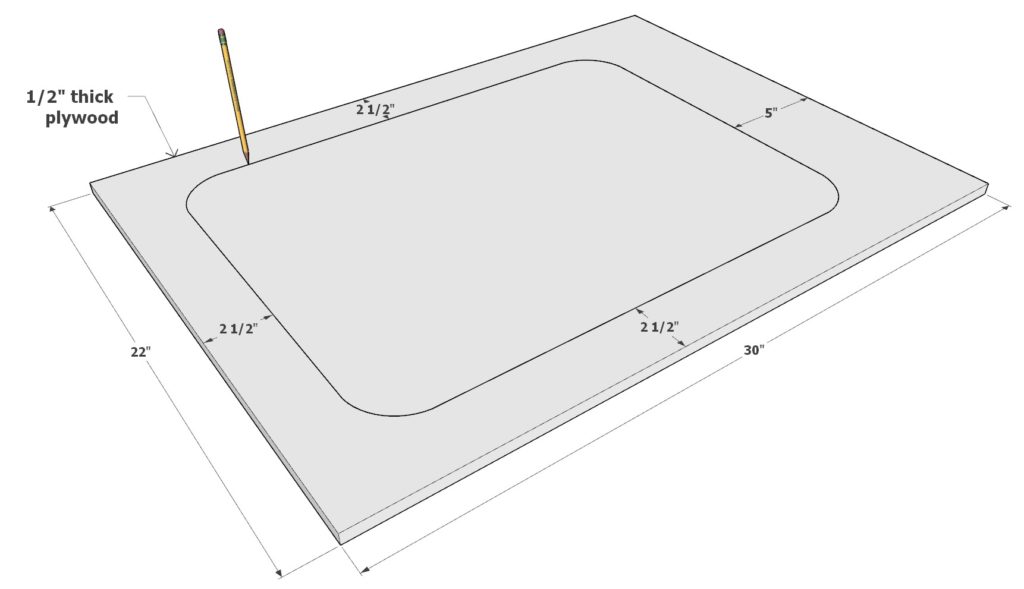
- Start with a 1/2″ thick plywood piece measuring 30″ in width by 22″ in height.
- According to the first diagram provided in this step, trace a rectangular shape onto the plywood. This rectangle will be the “screen” of your TV, so round off the corners to achieve the classic vintage television look.
- To cut out the traced rectangle, begin by drilling a pilot hole large enough to accommodate the blade of a jigsaw.
- Insert the jigsaw blade into the drilled hole and carefully follow the traced lines to cut out the rectangle. Take your time to maintain smooth, rounded corners.
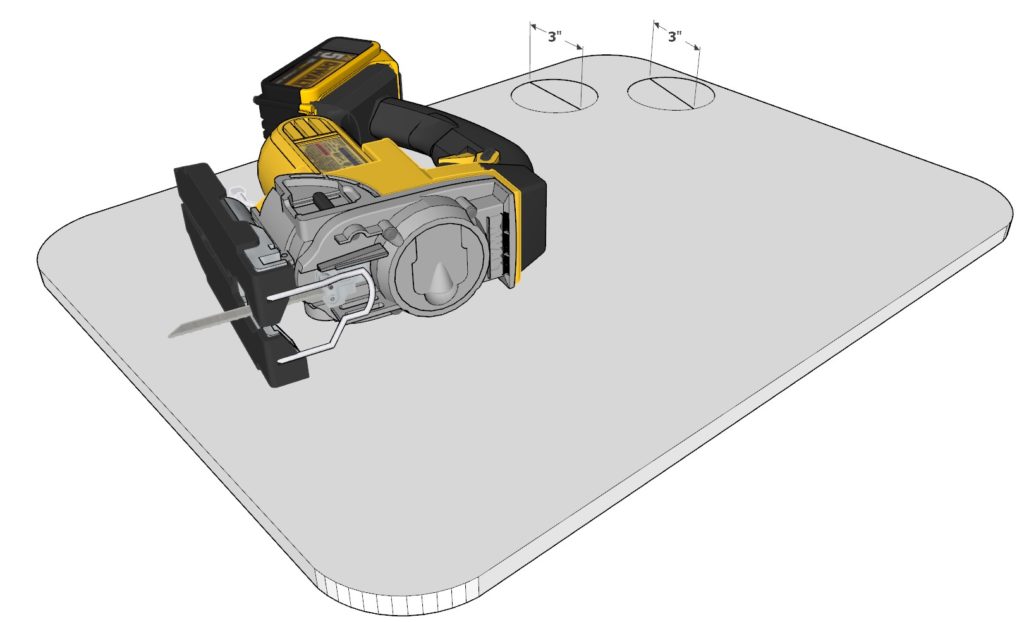
With the rectangular screen removed, you’ll use the cut-out piece to create two additional elements:
- Mark two circles, each with a 3″ diameter, on the plywood rectangle you’ve just cut out. These will become the dials of the TV.
- Cut out the circles with the jigsaw, ensuring the edges are smooth.
These circles will later be attached to the main frame as decorative dials, contributing to the authentic vintage appearance of your cat’s new abode.
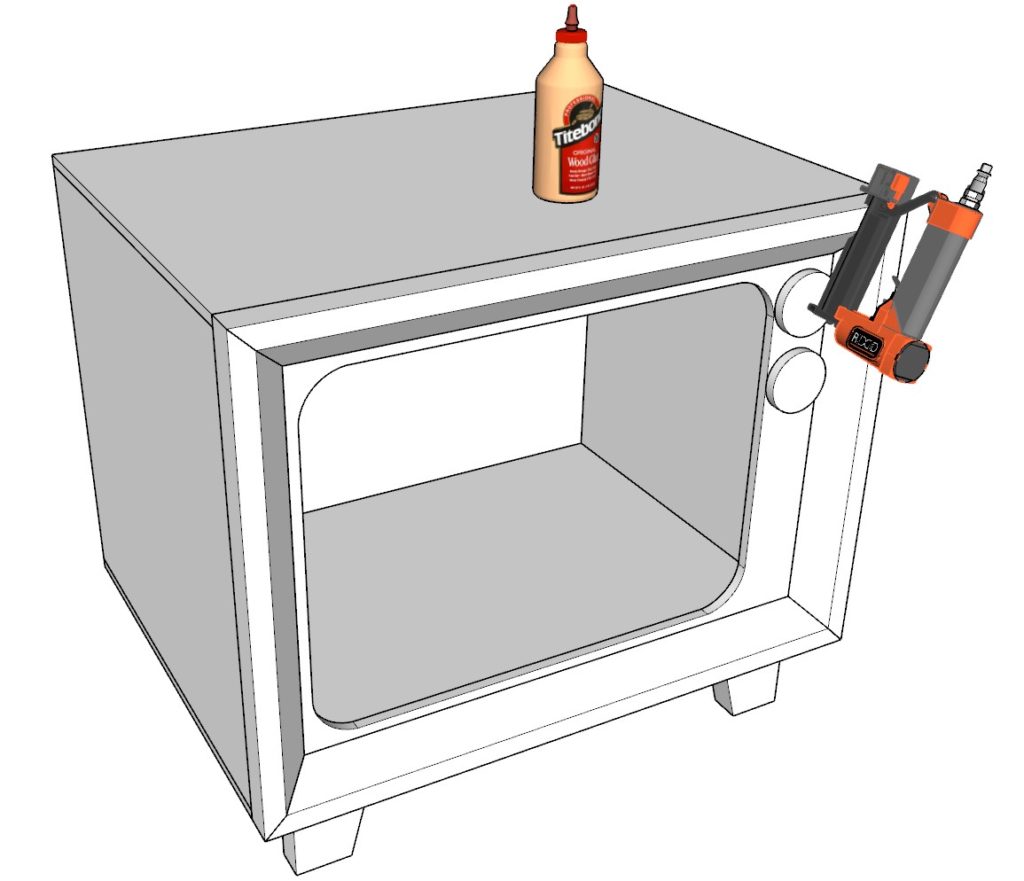
Step 3: Attaching the TV Face Trim
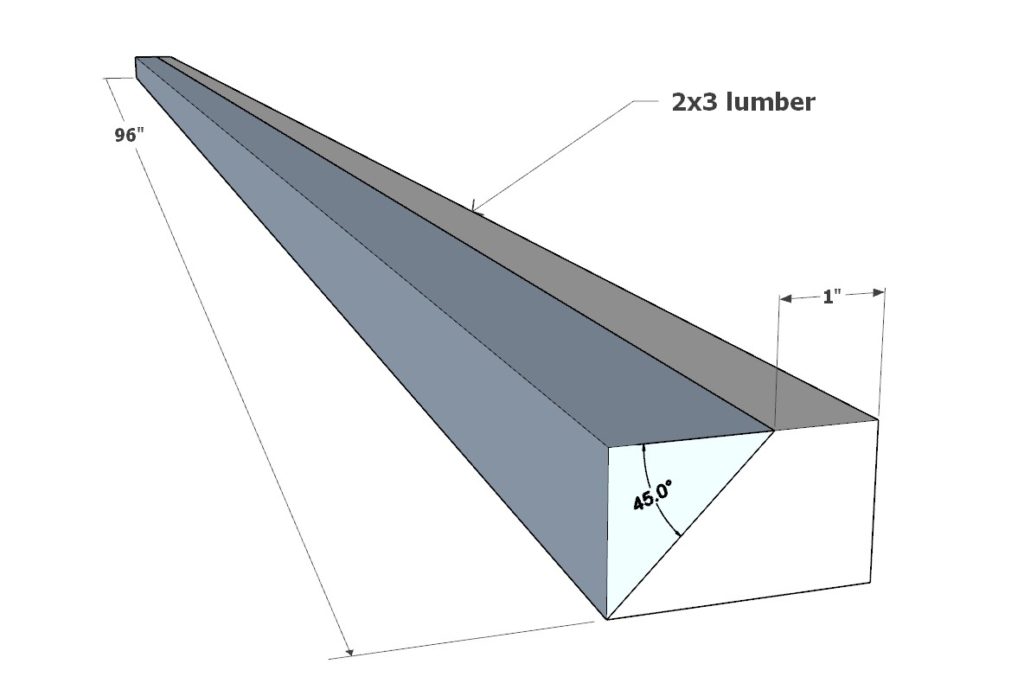
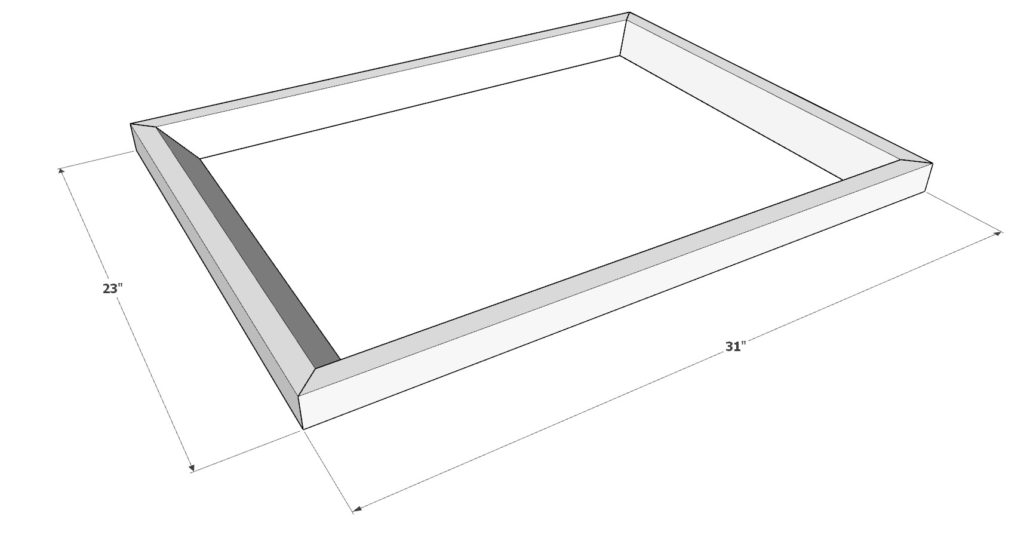
Now it’s time to add character to the cat house with a trim that mimics the frame of a vintage TV set.
- Begin with a standard 2×3 lumber piece. Set your table saw to a 45-degree angle as shown in the first diagram and cut one side of the lumber along its length to create a beveled edge.
- From this beveled 2×3, cut two lengths at 31 inches and two at 23 inches for the trim. Ensure each end of these pieces is also cut at a 45-degree angle so they can fit together neatly into a rectangle.
- A full-length 2×3 lumber piece, along with an additional 23-inch piece, will be needed to complete the entire frame around the face of the TV.
- Apply wood glue to the beveled 2×3 pieces, and attach them around the perimeter of the 1/2″ plywood sheet from Step 2 to create the trim. Use 1-inch pin nails for added stability and strength.
- Next, attach the assembled face with its new trim to the main box structure you built in Step 1. Ensure it is flush and secure, providing the perfect vintage TV facade for your cat’s new house.
Step 4: Installing the Vintage TV Stand Legs
The next step involves crafting and attaching the legs that will elevate your cat house, giving it the distinctive stance of a vintage television.
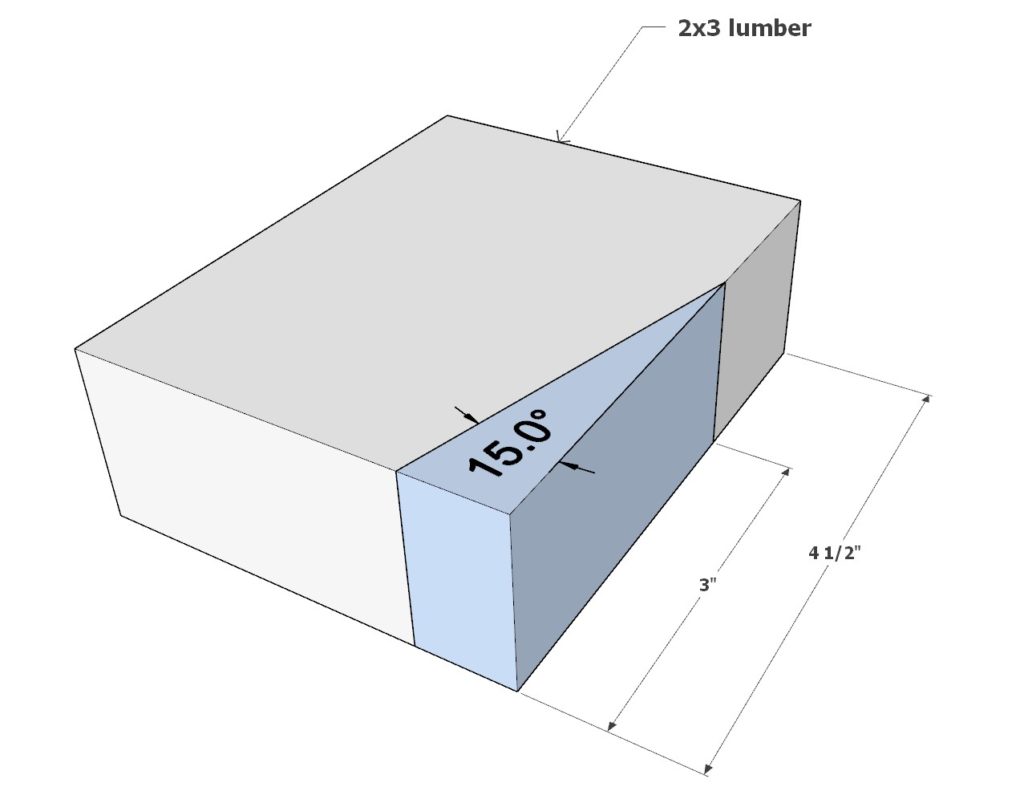
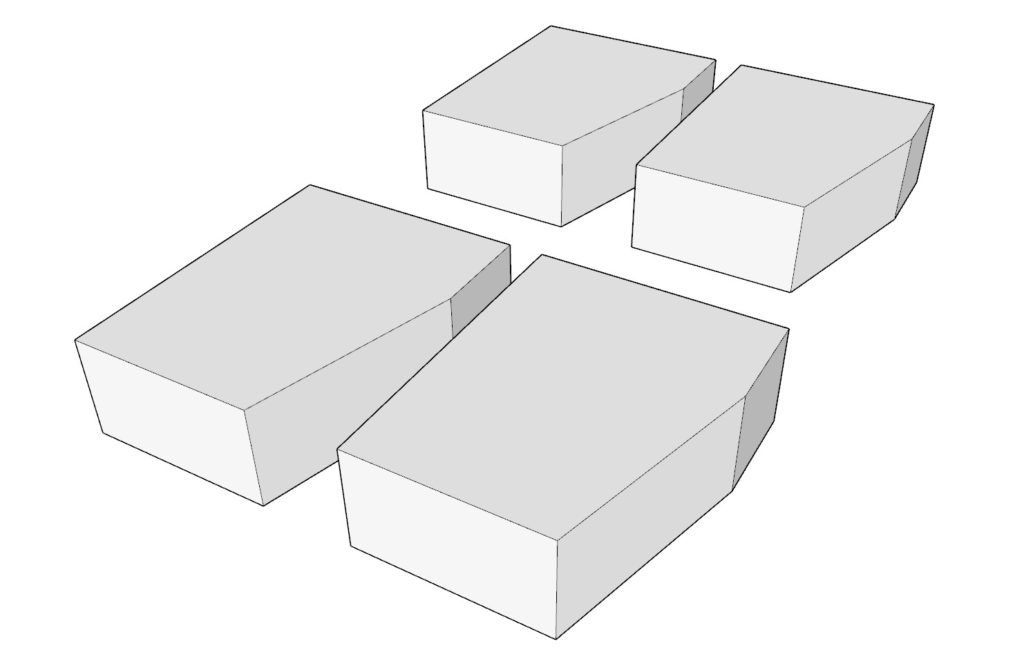
- Begin by cutting four pieces of 2×3 lumber to serve as the legs. Each leg should be 4-1/2 inches in length. Before cutting them to length, first make a 15-degree angled cut at one end of your 2×3 lumber using a miter saw. This angled cut is crucial for achieving the vintage look.
- For safety and ease, cut the 15-degree angle on the lumber first. Then measure and cut the 4-1/2 inch length. This method allows you to keep your hands at a safe distance from the blade by using the longer piece of lumber as a handle.
- Once you have your four angled legs, prepare two 17-inch long 2×3 lumber pieces that will connect the legs together.
- Attach each leg to these longer 2×3 pieces using wood glue and 2.5-inch screws to form two separate leg assemblies.
- Finally, secure these assembled leg components to the bottom of the TV cat house box. Use wood glue for a strong bond and 1-inch pin nails for additional support.
Ensure that the legs are evenly spaced and that the stand is level to prevent any wobbling. This will give your cat house a sturdy base and an authentic mid-century modern television appearance.

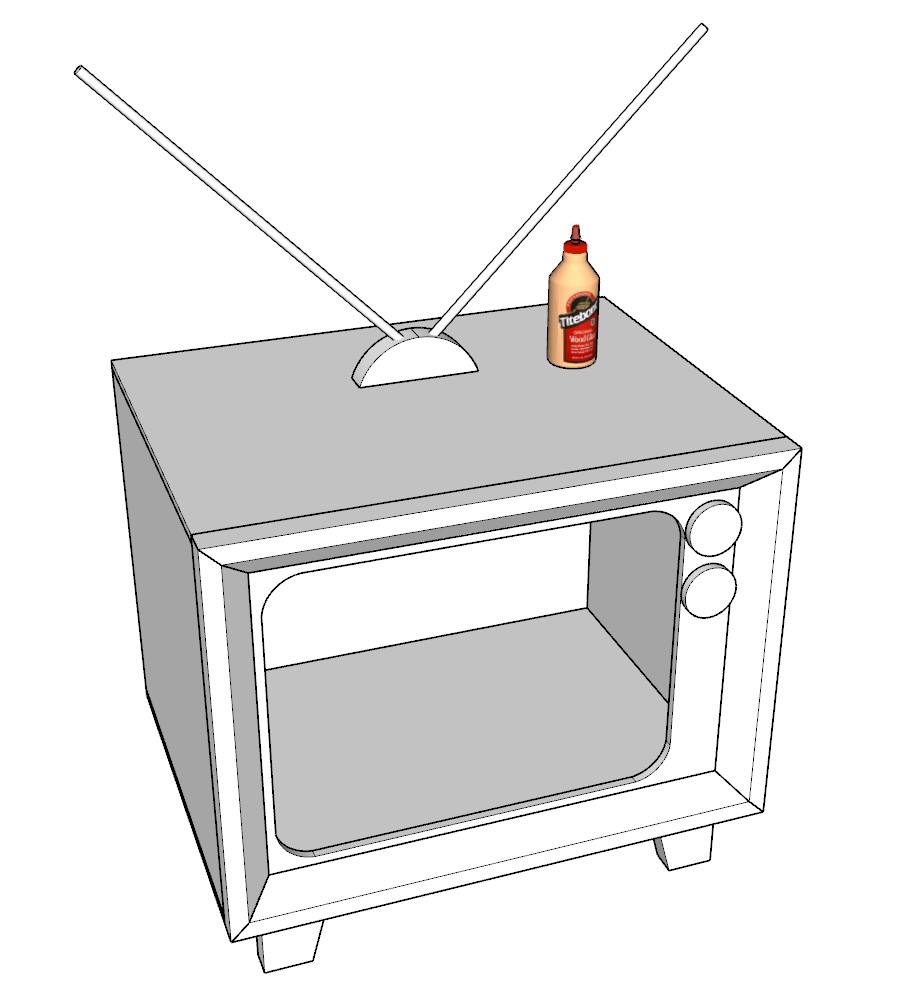
Step 5: Attaching Dials and Antenna for the Final Vintage Touch
This step will focus on adding the quintessential elements that complete the retro look of your cat house: the control dials and the antenna.
- Begin with the two 3-inch diameter circles you’ve previously cut from 1/2″ plywood. These will serve as the dials on the front of your TV cat house.
- Position the dials where you’d like them on the face of the cat house and secure them using wood glue and 1-inch pin nails for a firm hold.
Moving on to the antenna:
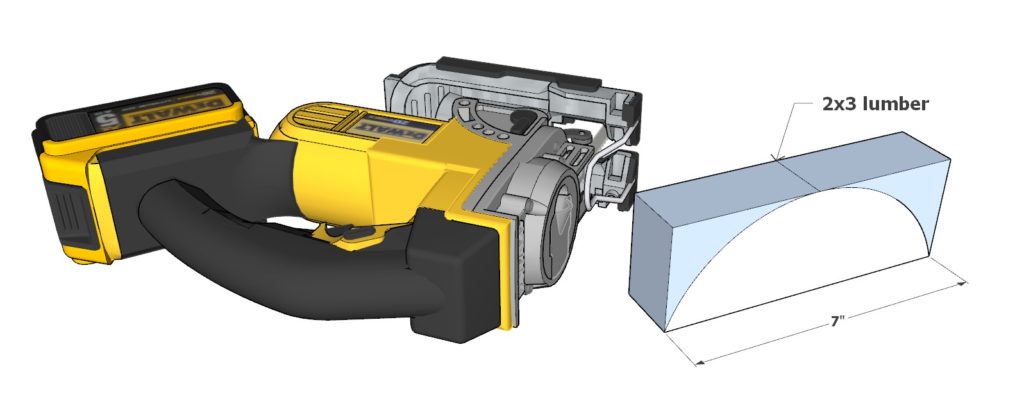
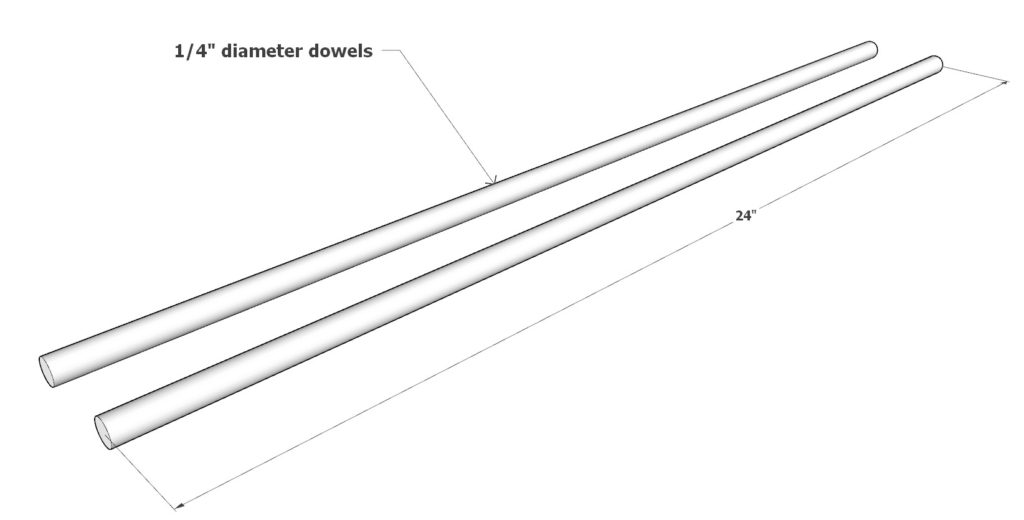
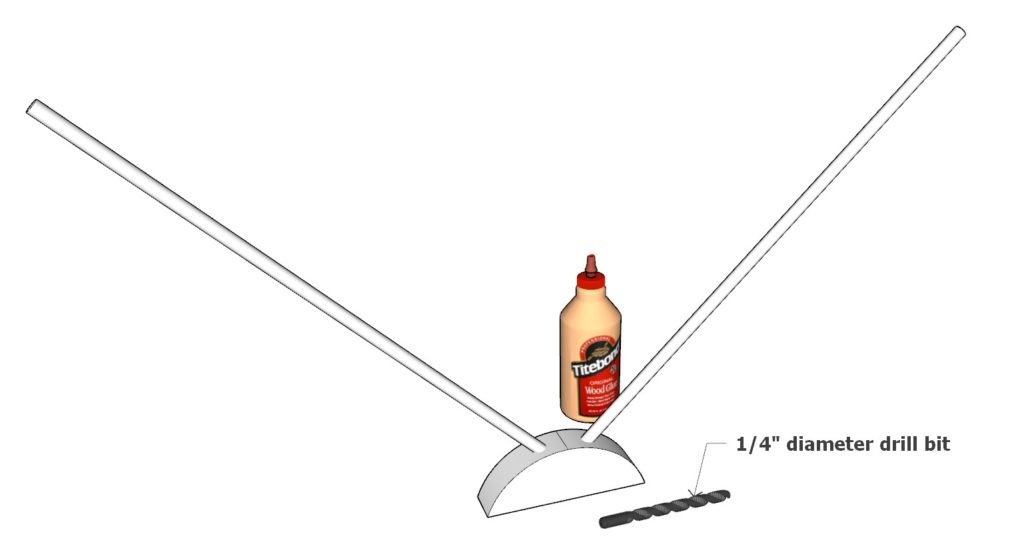
- Take a 7-inch piece of 2×3 lumber and round off the corners to create an arch-shaped base for the antenna using a jigsaw. This mimics the classic shape of vintage TV antenna bases.
- Drill two holes into the antenna base using a 1/4″ diameter drill bit. The holes should be spaced appropriately to resemble the “V” shape of traditional TV antennas.
- Insert two 24-inch long dowels, each with a 1/4″ diameter, into the drilled holes. These will act as the antenna arms. Ensure you’re using a drill bit that matches the diameter of the dowels you have chosen.
- Secure the completed antenna assembly to the top of the cat house. Use wood glue for a durable bond and 1-inch pin nails to affix it in place.
With the dials and antenna attached, your cat house now boasts all the charming details of a vintage television, ready to delight both you and your pet.
Step 6: Finishing with Style and Comfort
The final touches will ensure your cat house is not just functional, but also beautifully finished and irresistibly comfortable for your cat.
Sanding:
- Start by lightly sanding the entire cat house using fine-grit sandpaper. Be gentle to avoid stripping the thin veneer of the plywood. Aim to smooth out any rough edges or splinters without going too deep.
- When sanding, follow the grain of the wood to achieve a polished look. Pay special attention to the edges and corners where your cat will enter and exit to ensure they are soft and safe.
Staining or Painting:
- If you choose to stain the wood, select a cat-safe product. Apply the stain with a soft cloth or brush, working in sections and wiping away any excess as you go. Allow the stain to penetrate the wood for a few minutes before wiping, following the manufacturer’s instructions for the best result.
- For painting, begin with a primer designed for use on plywood to ensure an even, smooth finish. Once the primer is dry, apply a coat of your chosen paint color with a foam roller or brush. Let it dry completely before adding a second coat if necessary.
- Whether staining or painting, finish with a clear, pet-safe sealant to protect the wood and make future cleaning easier.
Styling Options:
- Consider the placement of your cat house. Near a window, it can provide a warm spot for your cat to bask in the sunlight while watching the world outside.
- Style the interior with a plush, washable cat bed or blanket for added comfort. Choose a fabric that complements your home décor and appeals to your cat’s need for a soft, cozy retreat.
Comfort and Entertainment:
- Integrate cat toys that can be attached to or hung from the cat house, such as a dangling rope or a springy toy that encourages play and exercise.
- For the ultimate feline enjoyment, place a scratching pad nearby or attach a small scratching post to one side of the house, offering an all-in-one entertainment and relaxation station.
- This cat house doubles as a secure spot for your cat to hide and a high vantage point from which they can survey their kingdom.
- The design, reminiscent of a bygone era, will pique the interest of your cat, who is naturally curious about novel spaces and shapes.
By following these steps, you’ll create a cat house that is not just a nod to the vintage era but also a luxurious, fun, and safe haven for your cat. It’s a stylish addition to any home, promising to be a favorite spot for your feline friend.