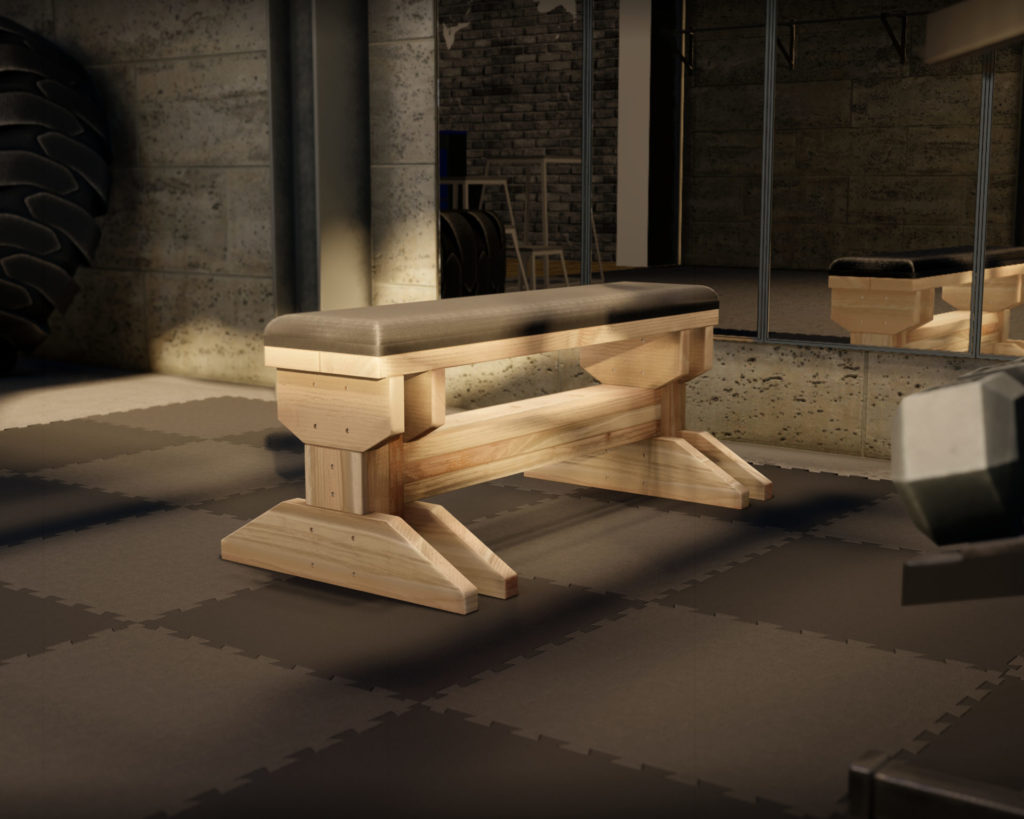
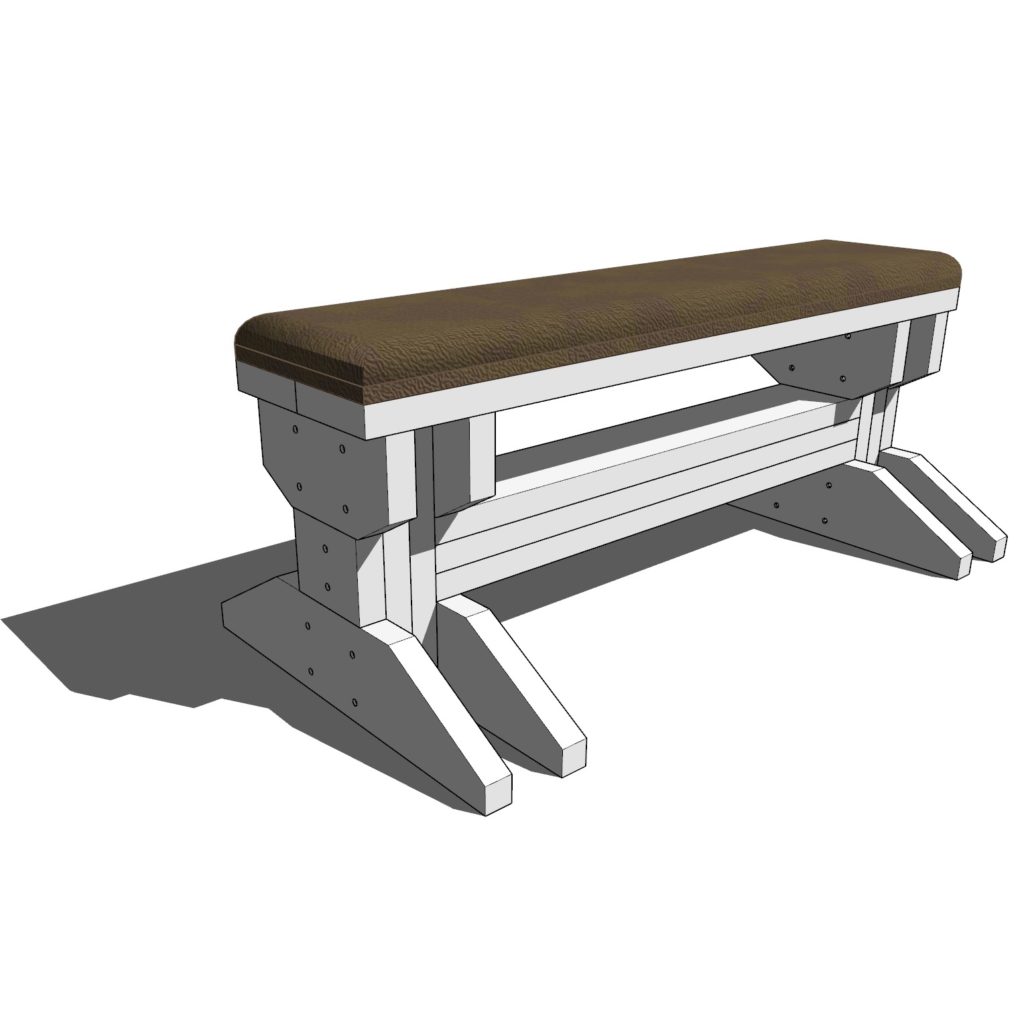
Overview of the GYM bench
Buying a weight bench can cost hundreds of dollars. If you planning to buy an entire home gym it can cost an arm and a leg. This homemade weight bench is inexpensive and only requires 2x6s, foam, and a leather covering.
Overall, this is a great build with excellent payoffs. You can save loads of money building your own home GYM, use inexpensive and durable material without compromising on style, and create a fitness zone in your garage, man cave, lady lair, or warehouse that can have so many positive physical and psychological health benefits.
GYM bench safety features
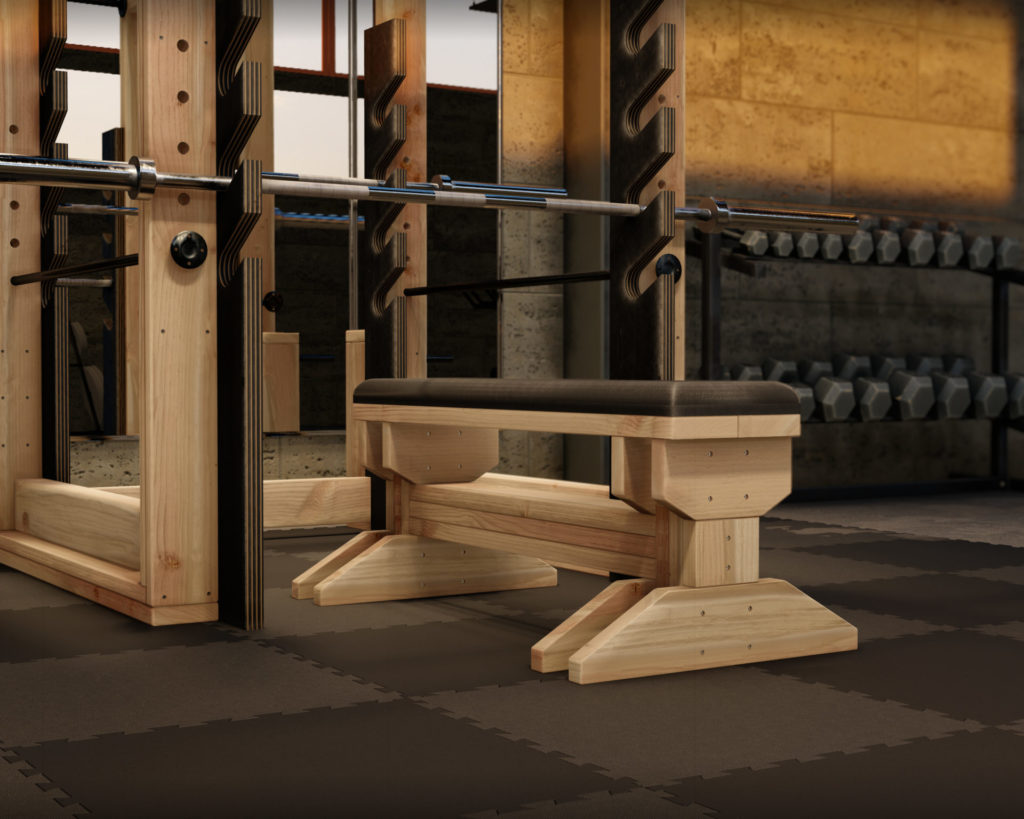
How is our bench design different? This heavy-duty fitness bench is designed to handle some real weight! The wooden GYM bench features no moving parts. Moving parts often make a wooden lifting bench more delicate and ultimately more dangerous when loaded up with heavy weight.
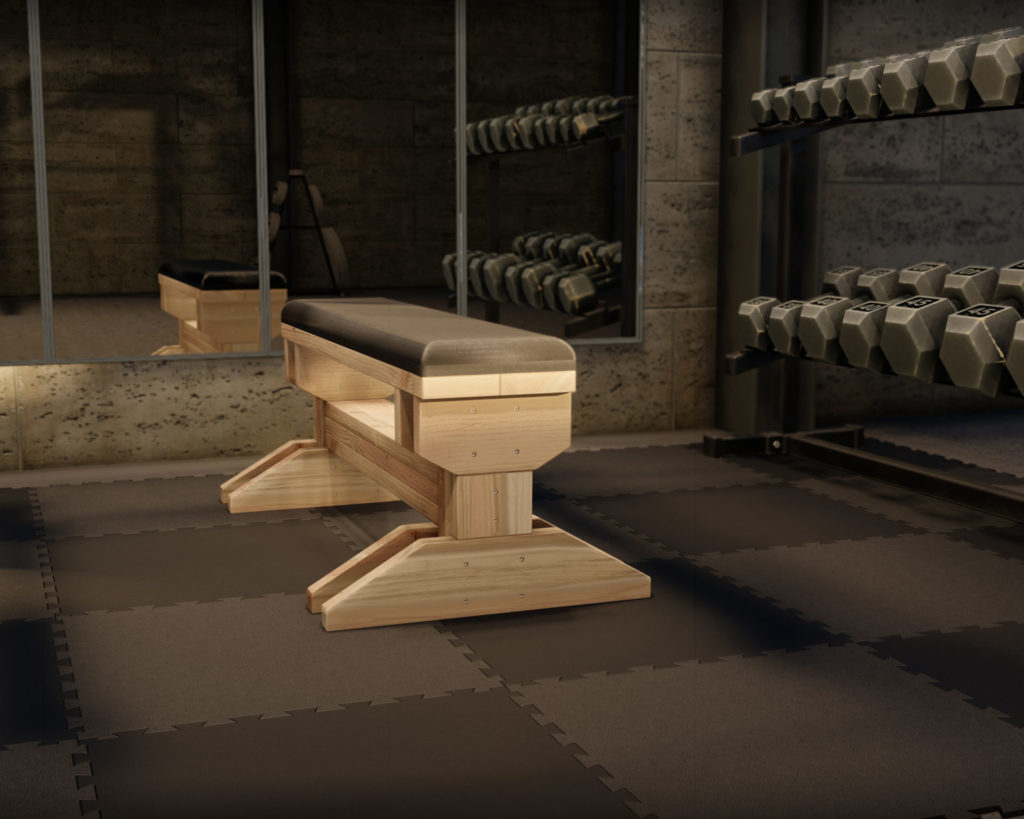
The four wide 24-inch base legs not only look sleek but also gives the fitness bench a lot of stability.
The entire construction is made from 2×6’s instead of 2x4s. Why? Because this makes the bench able to handle huge amounts of weight. Over time, wood will change shape, shrink, or expand. Lifting heavy on a flimsy 2×4 construction bench can be unstable and dangerous in the long run. This bench however is heavily reinforced with multiple layers of 2x6s and glue.
What are the specs of the GYM bench
This is a versatile piece of gym equipment that allows you to hit up most of the major muscle groups. Examples exercises include, curls, dumbbell flys, dumbbell bench press, skull crushers, dumbbell rows, hammer bench press, tricep dips, and more.
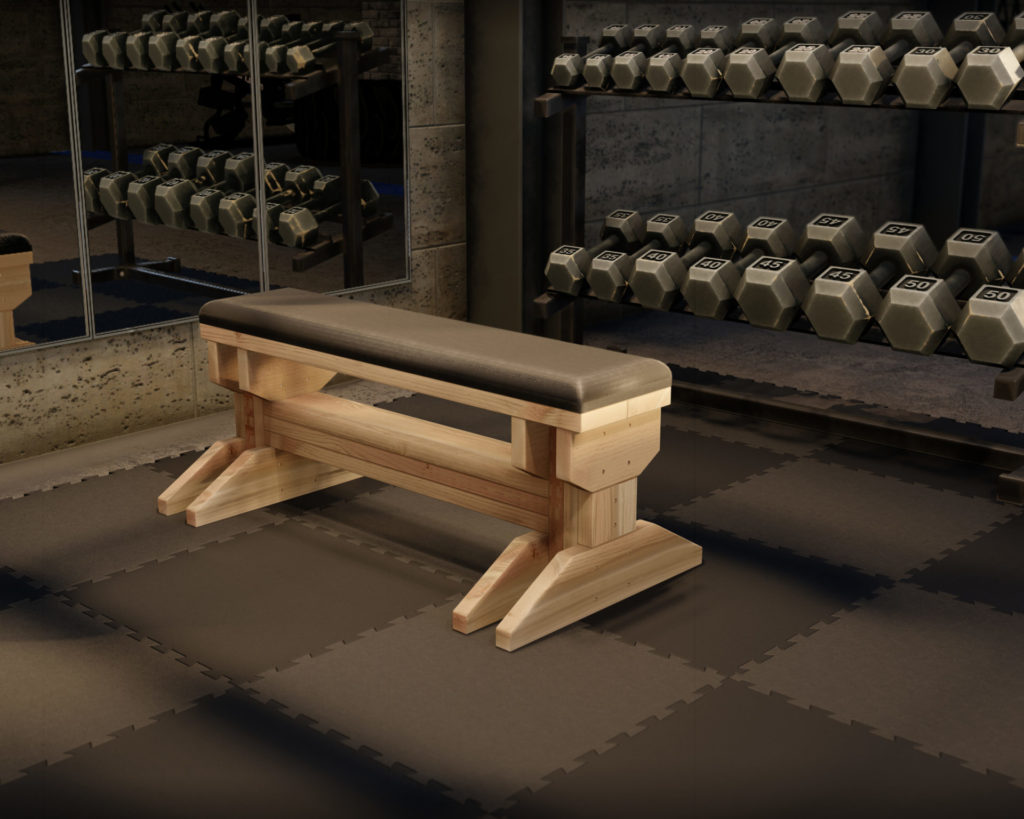
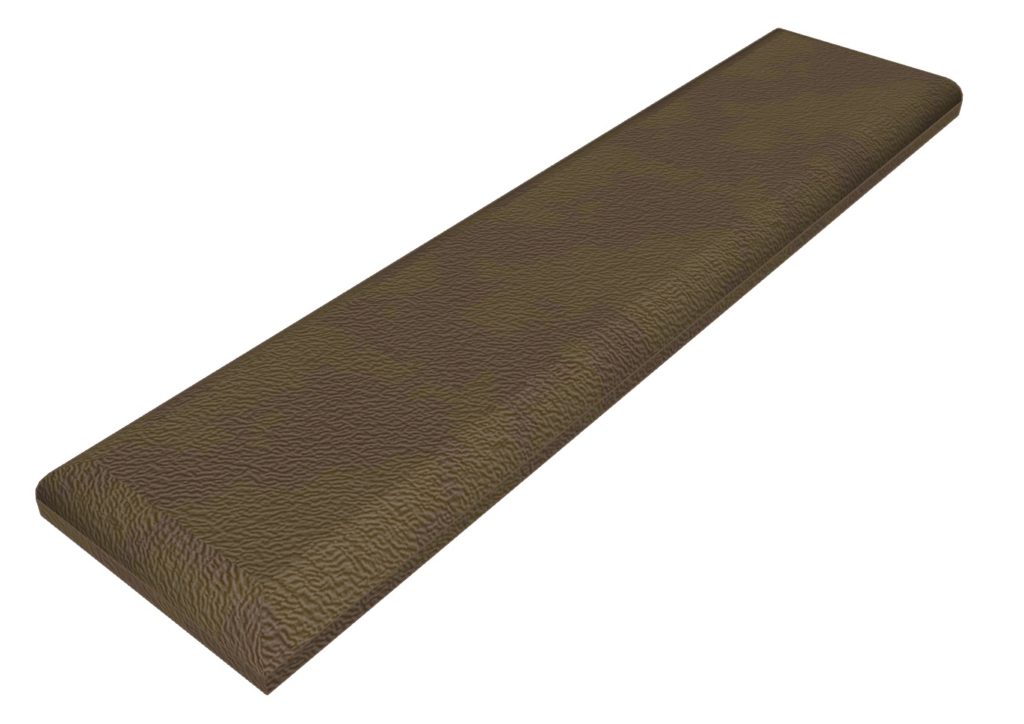
This design features a 2-inch foam piece covered with synthetic leather.
This is a great project for beginners to woodworking because its easy. In this post you will find detailed instructions on how to build your own lifting seat. Each step features detailed descriptions with plenty of pictures to guide you through the project smoothly.
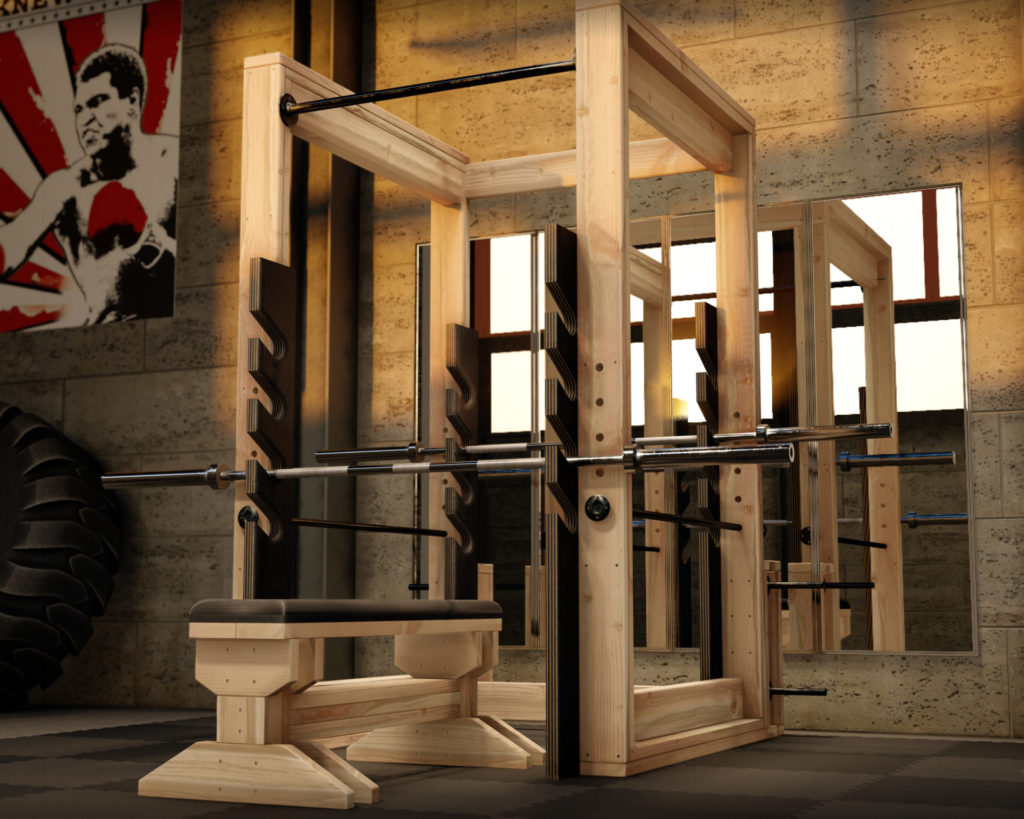
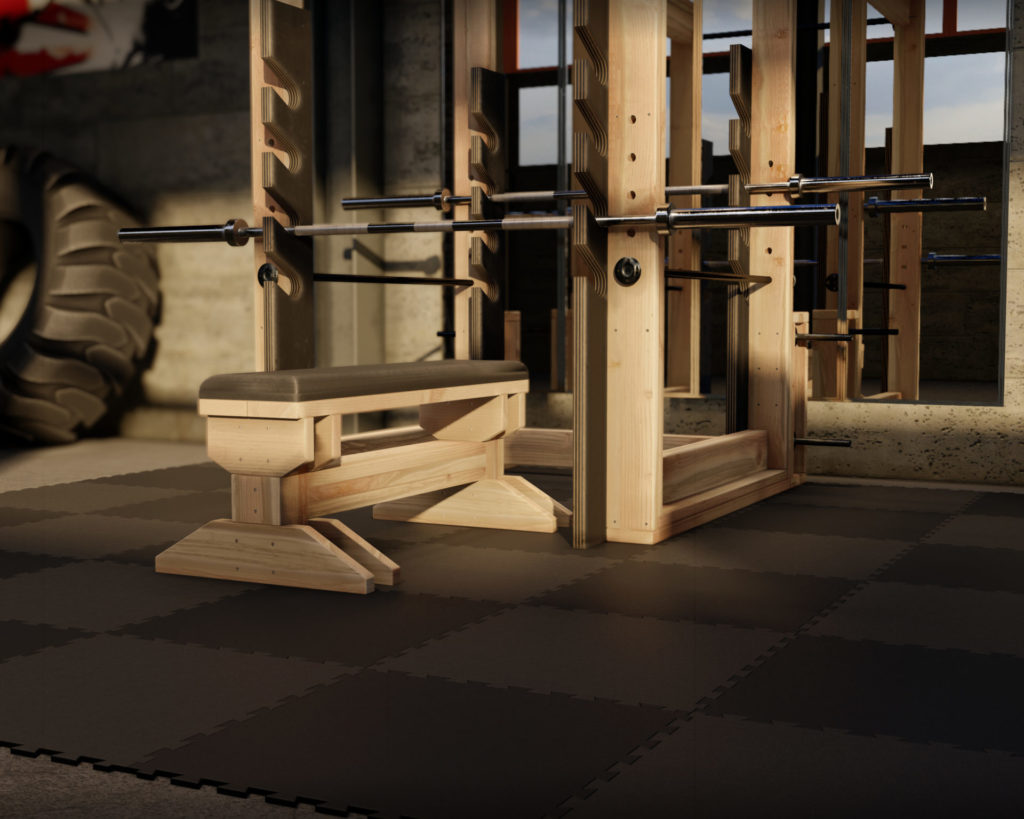
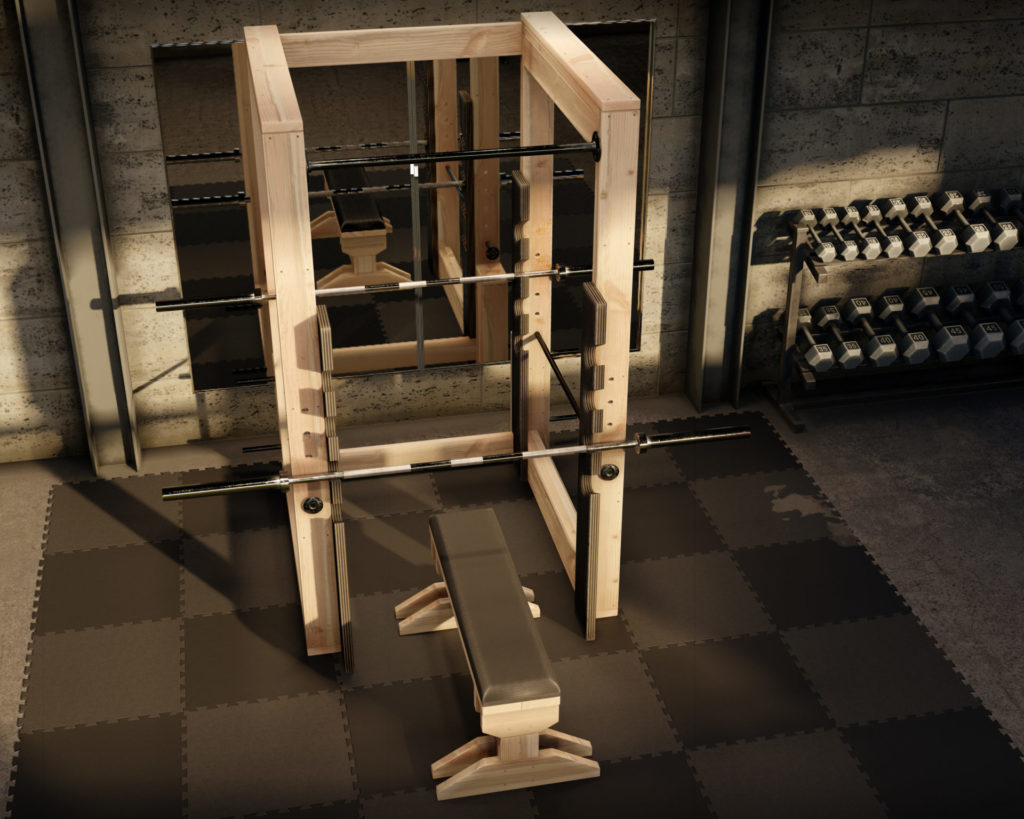
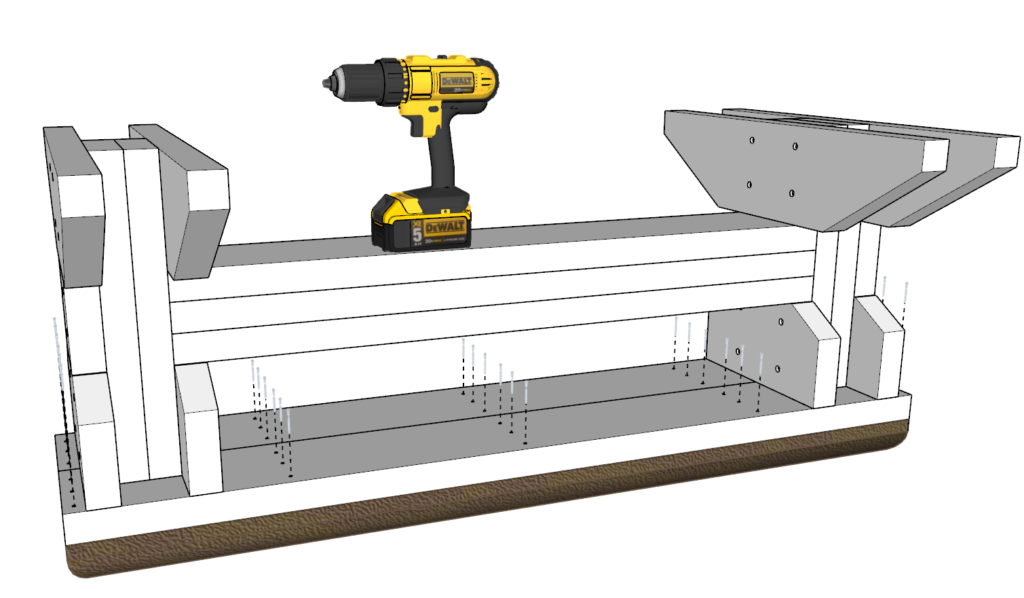
What about the power rack in the photo?
This bench press seat is part of a larger home gym set that includes the ultimate power rack. You can take your home gym build to a whole new level when you combo the power rack with the lifting bench.
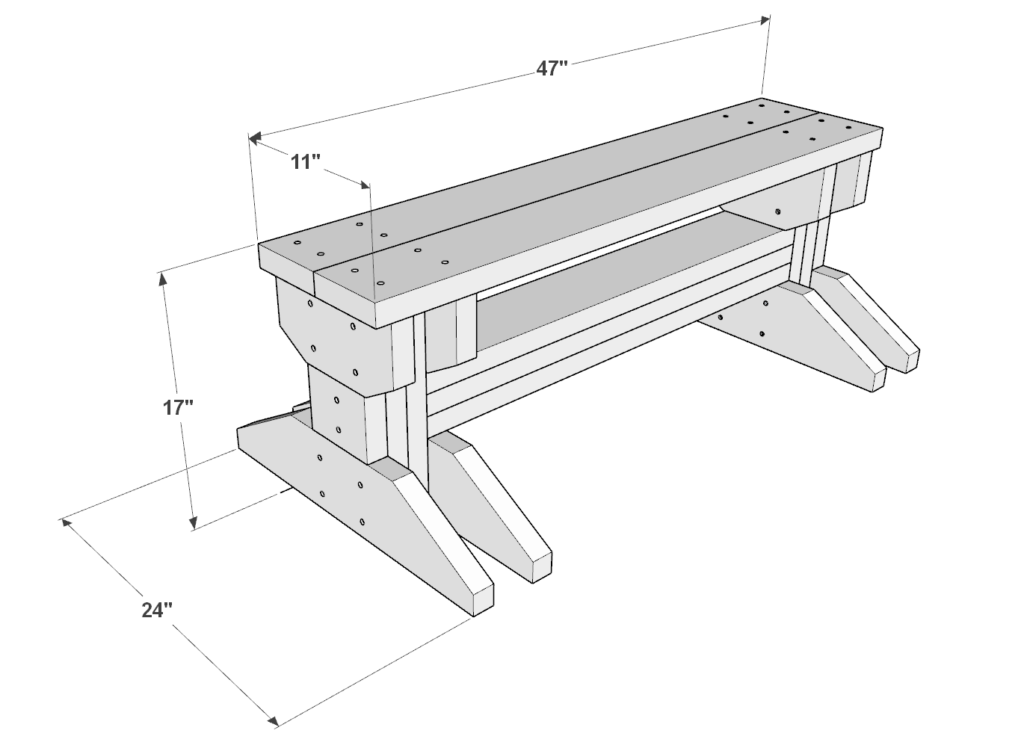
What are the dimensions of the GYM bench?
The seating area is 19.5 inches off the ground (with foam padding).
The legs are 24 inches wide for extra stability.
The workout surface is 11 inches x 47 inches.

Time to build
3 hours
Total cost of build
About $120
Skill level required
Beginner – intermediate
Download the PDF plans
Plans for how to build the DIY GYM rack.
What is included in the PDF download?
- Easy to read step by step instructions
- Material list
- Cut list
- Tools needed
- 3D illustrations
- Helpful links to tools and materials needed for the project
Recommend tools for this project
- Saw (miter saw recommended for precision cuts)
- Drill
- Impact driver with bit for screws
- Sander
- wood countersink drill bit
- T50 Heavy Duty Staple Gun
- Steel Staples
Discloser: Some links are affiliate links
Cut list and material list
Available with purchase of PDF plans.
Step 1 (DIY GYM bench cut list instructions)
In this step you will be cutting all the pieces necessary for this build.
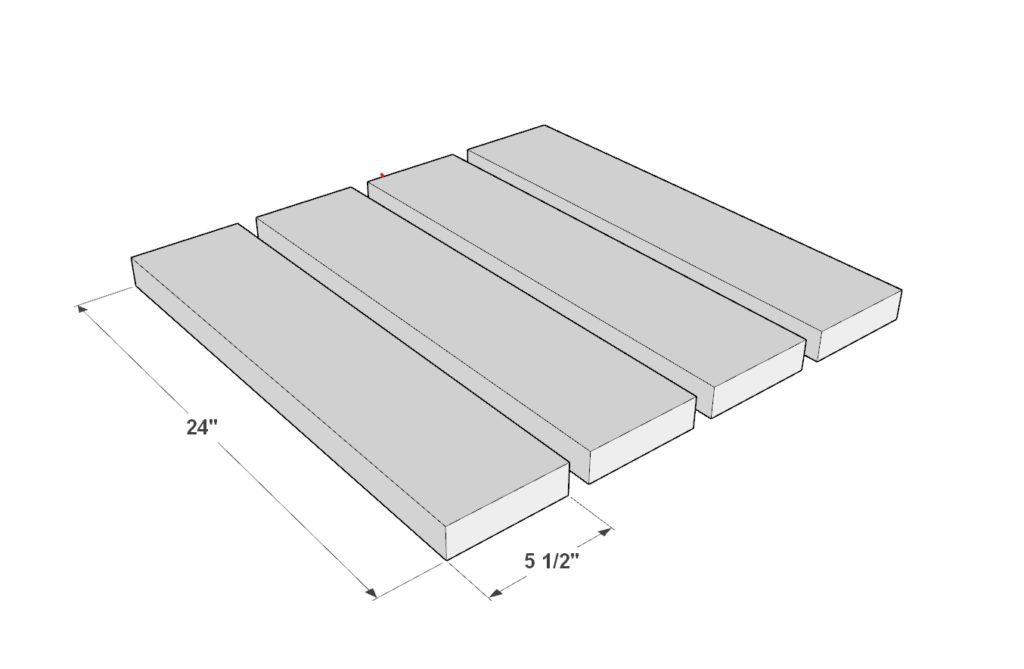
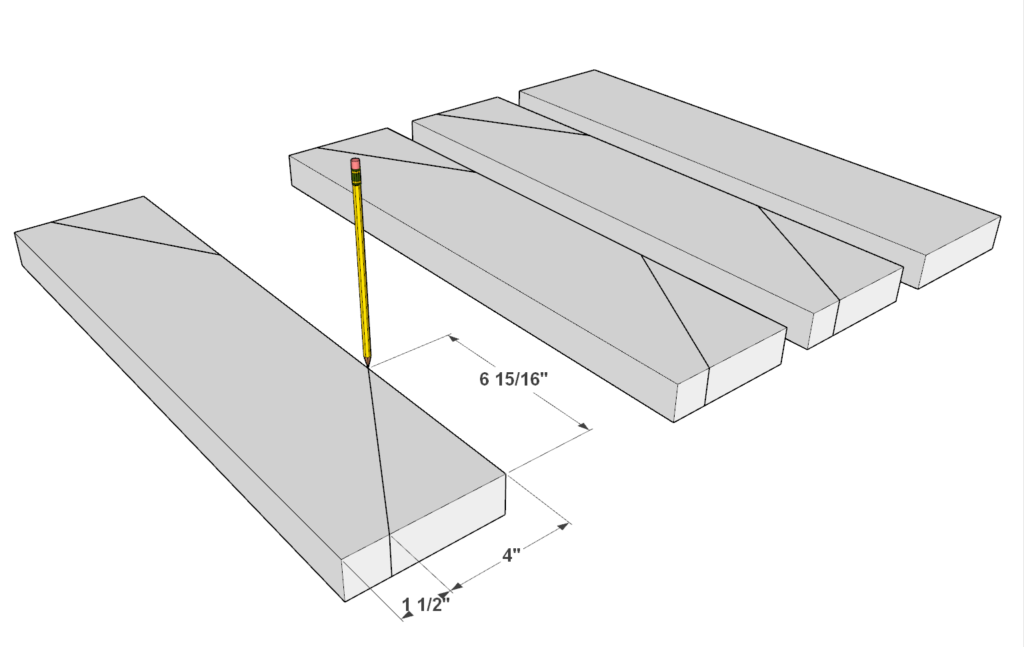
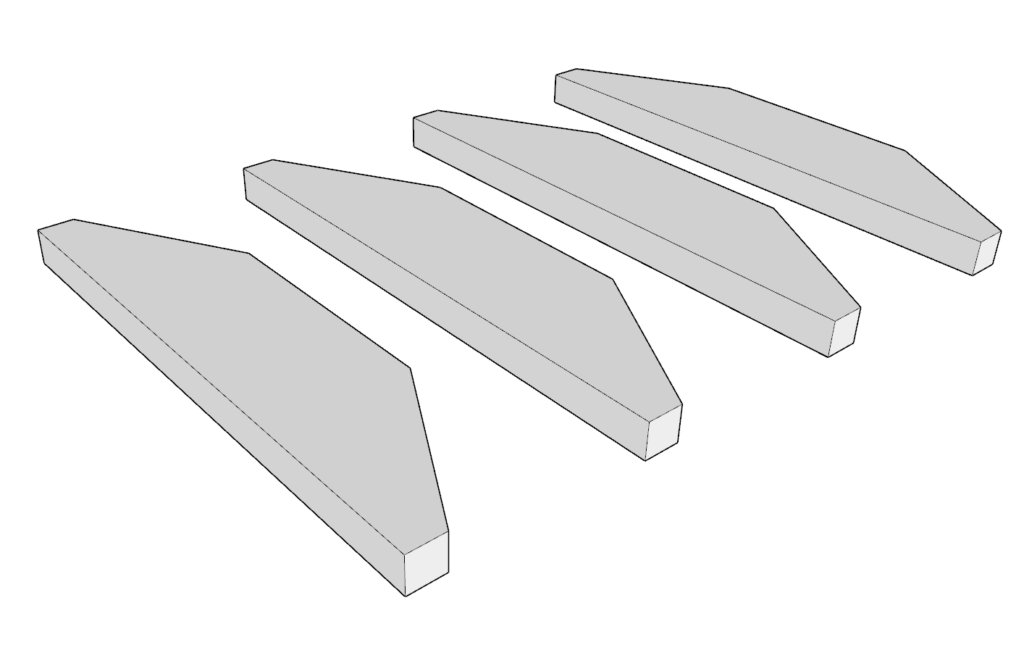
Start by cutting four 24 inch 2×6 pieces and cutting the ends off at a 60-degree angle.
Use a pencil to make the appropriate markings as shown above and cut off the ends.
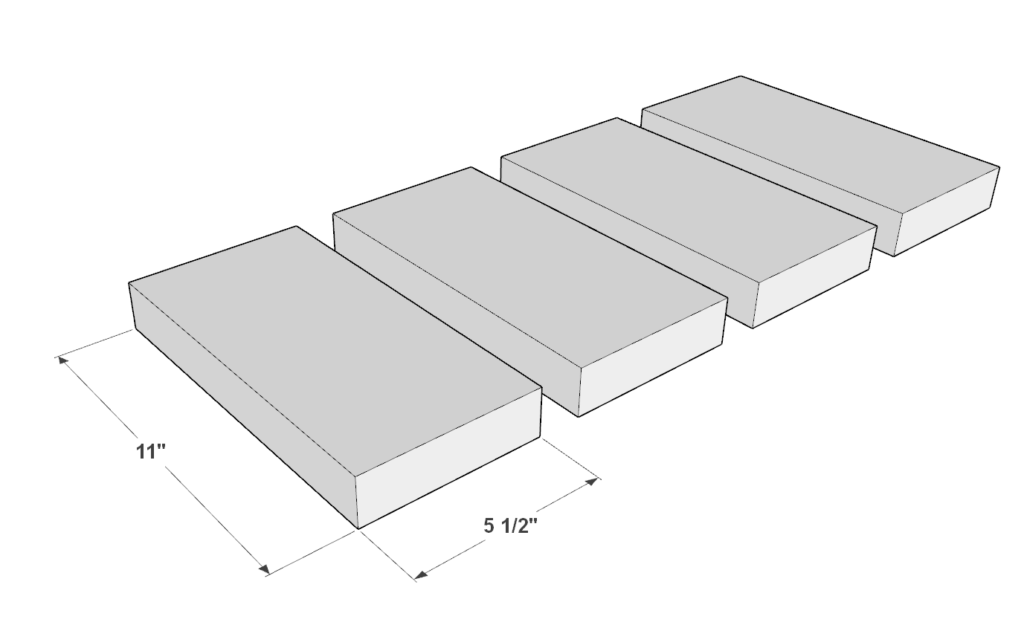
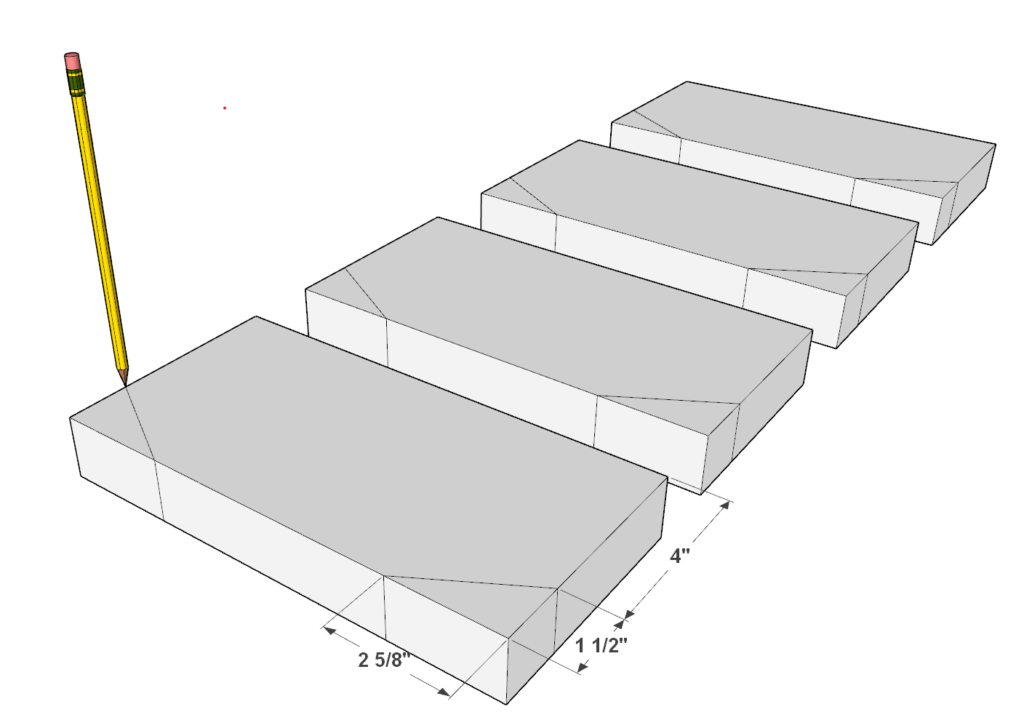
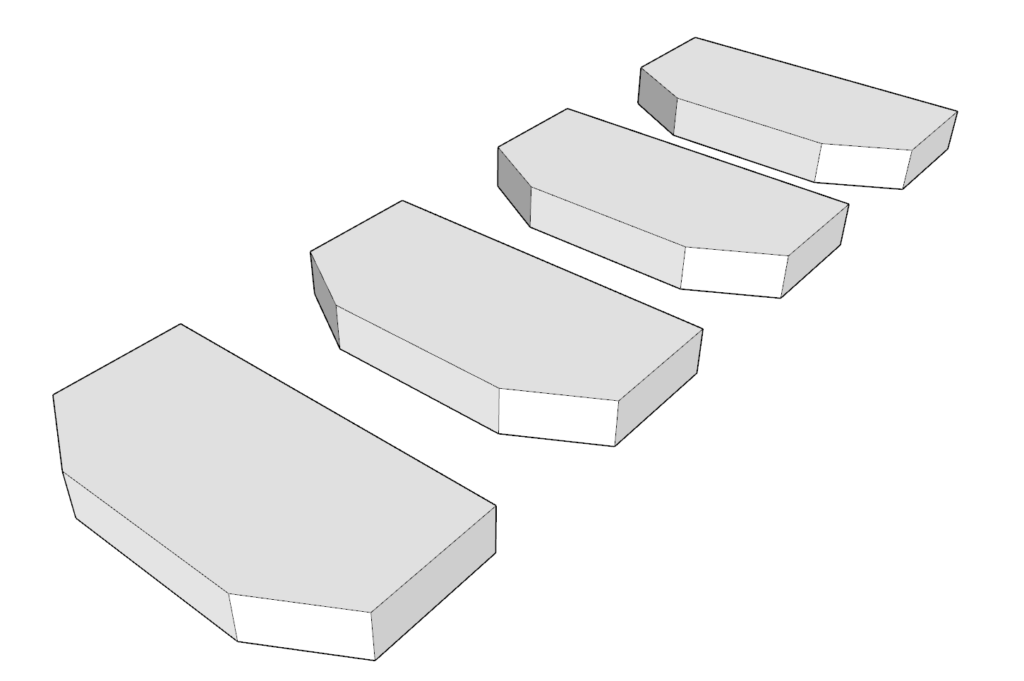
Next, cut four 11 inch 2×6 lumber pieces and similarly cut the ends off at a 60 degree angle as shown above.
Lastly, make the following cuts from 2×6 lumber studs.
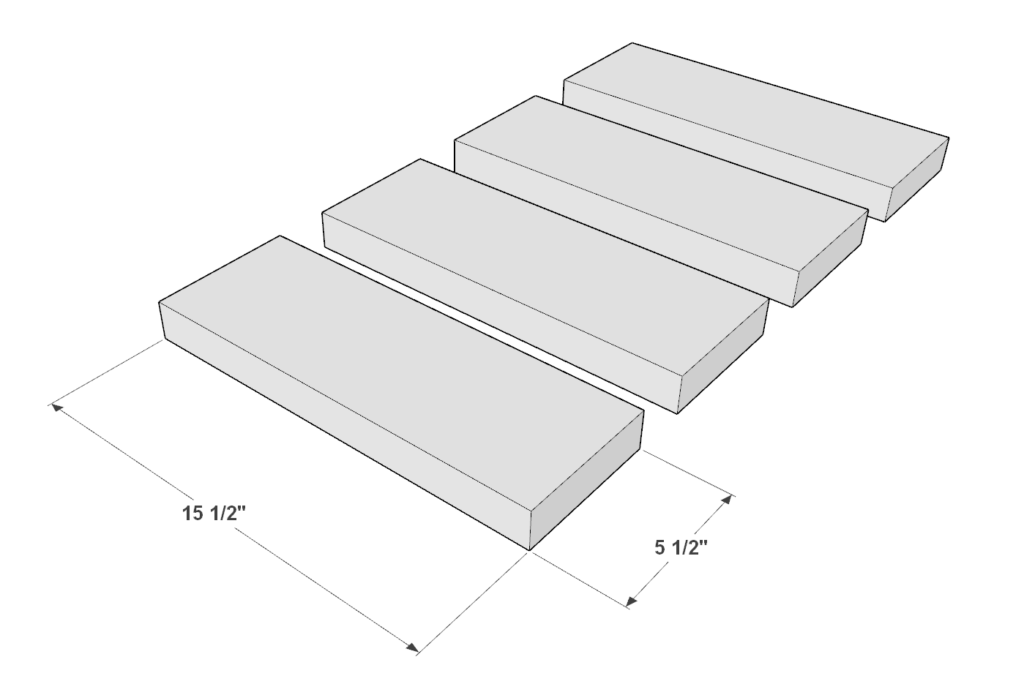
(4) 2 in x 6 in x 15.5 in
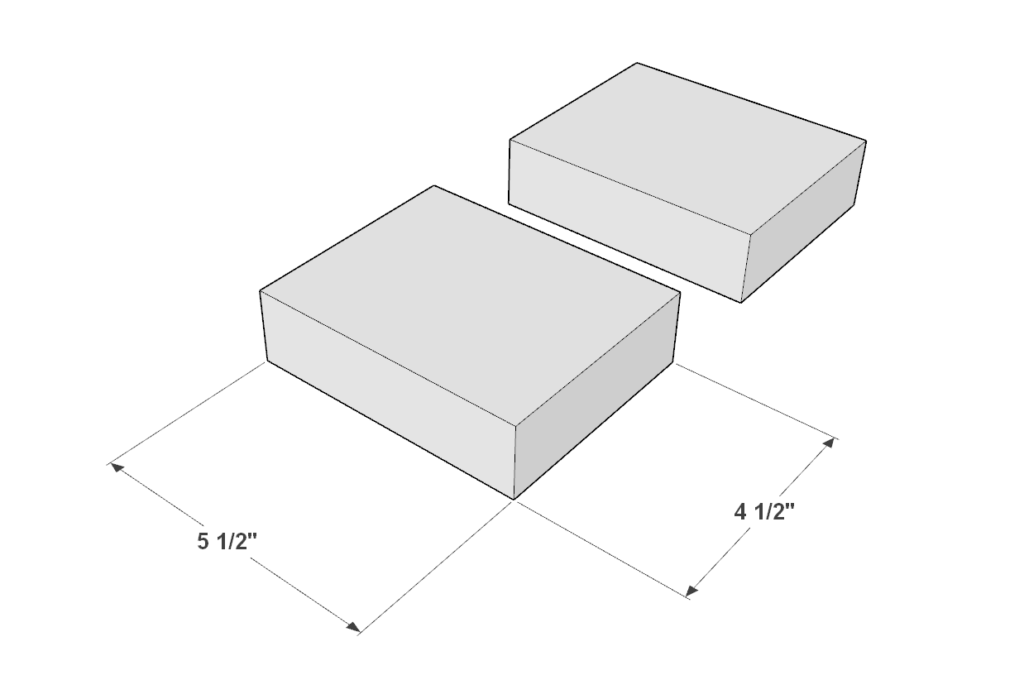
(2) 2 in x 6 in x 5.5 in
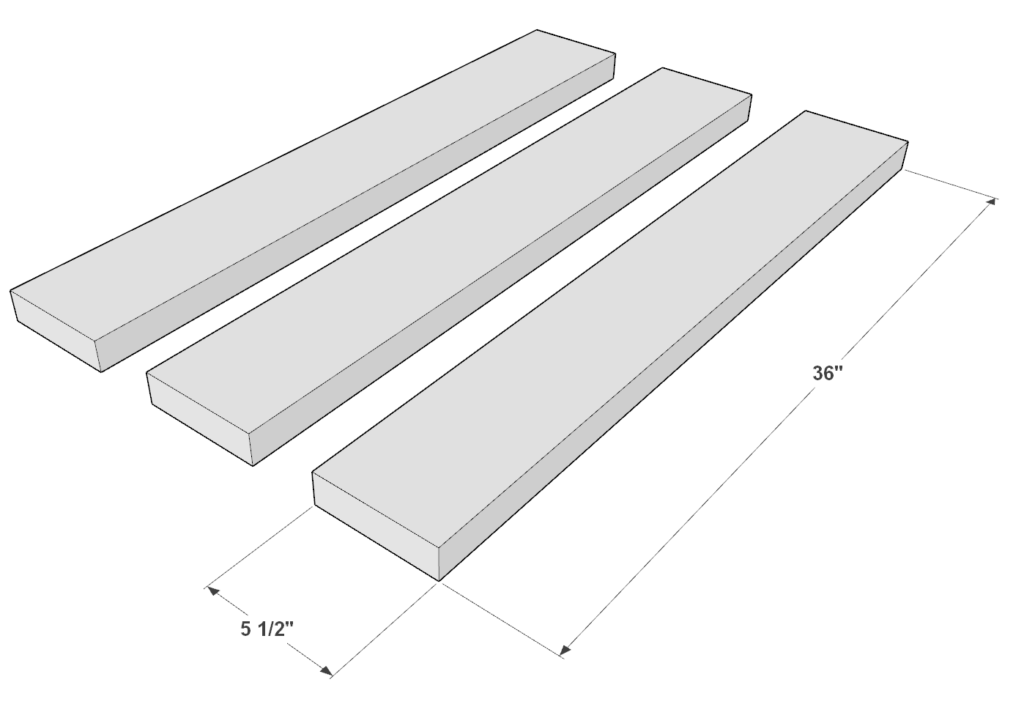
(3) 2 in x 6 in x 36 in
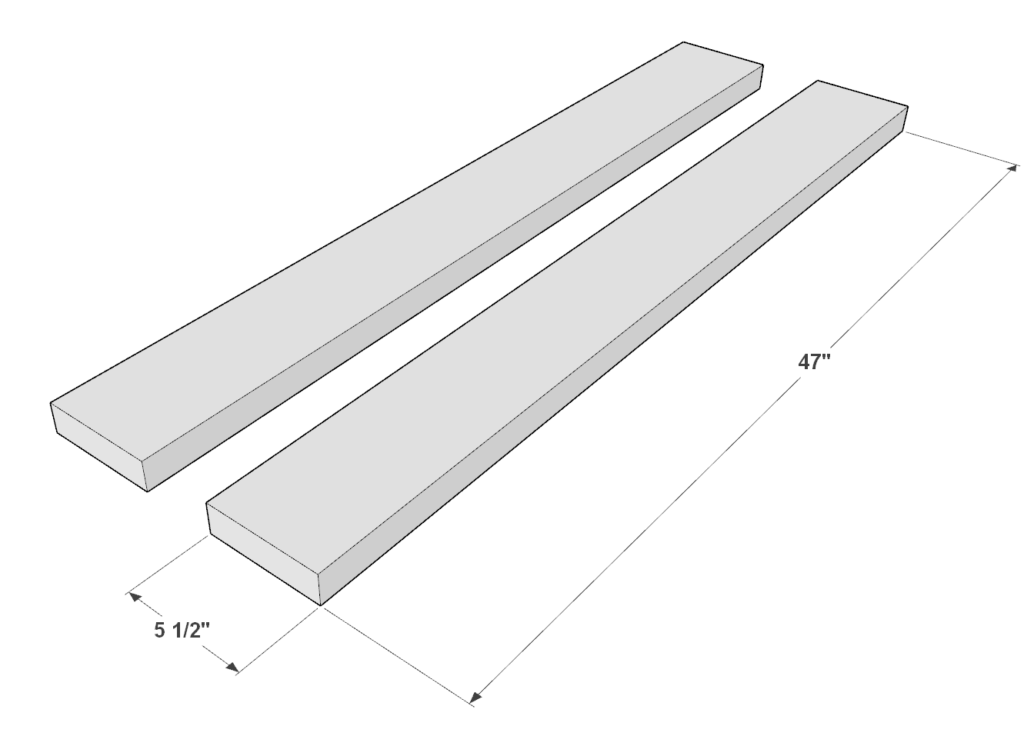
(2) 2 in x 6 in x 47 in
Step 2 (DIY GYM bench frame assembly)
In this step you will be assembling the main frame of the bench.
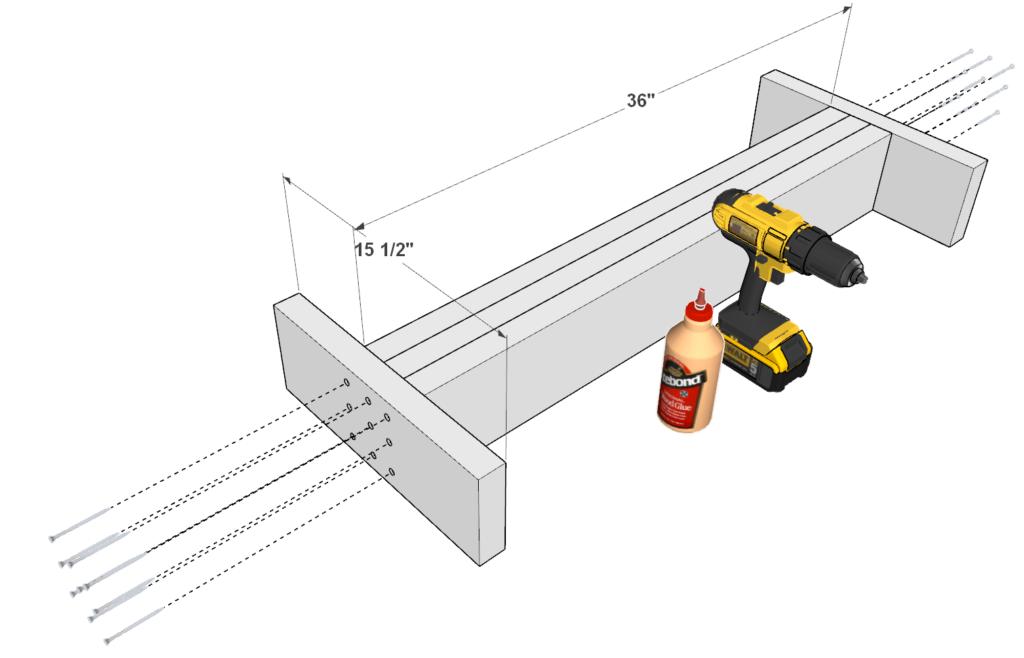
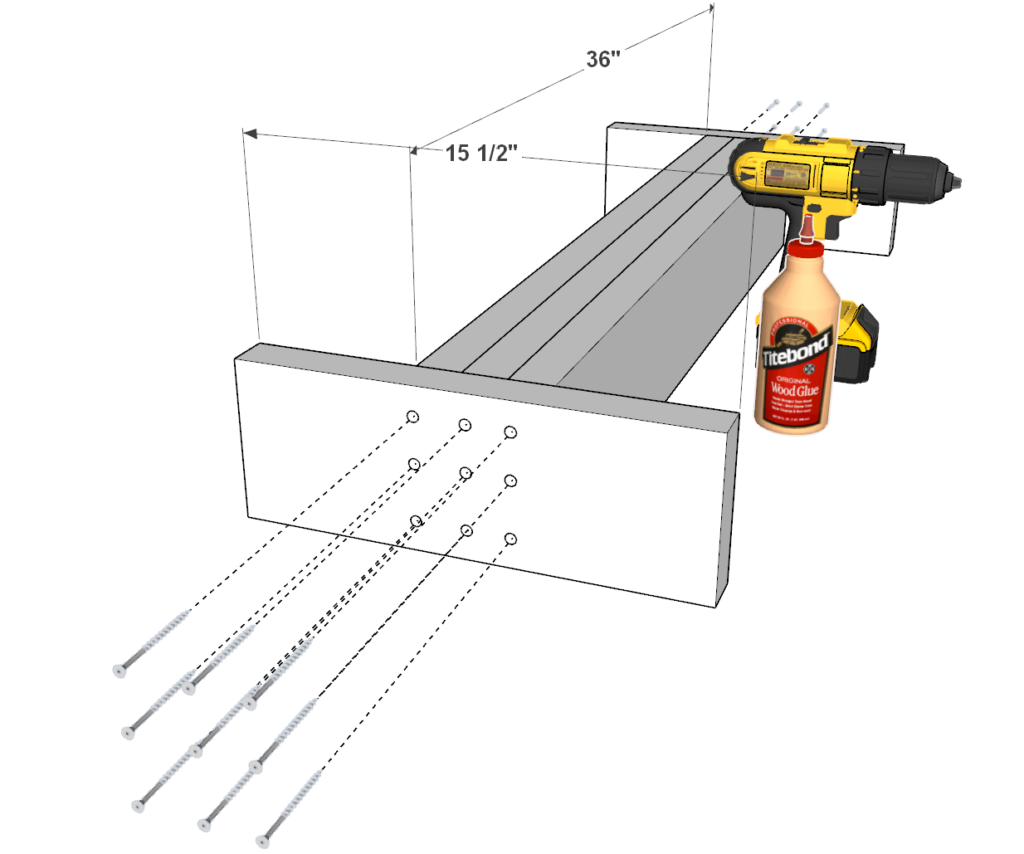
Start by taking three 36 inch 2×6 lumber pieces and two 15.5 inch 2×6 lumber pieces and arranging them as shown above.
These will be joined with glue and 3.5 inch screws.
Apply generous amounts of glue to all areas of the joint that will be making contact.
Next, predrill holes to prevent wood from splitting.
Lastly add 3.5 inch screws.
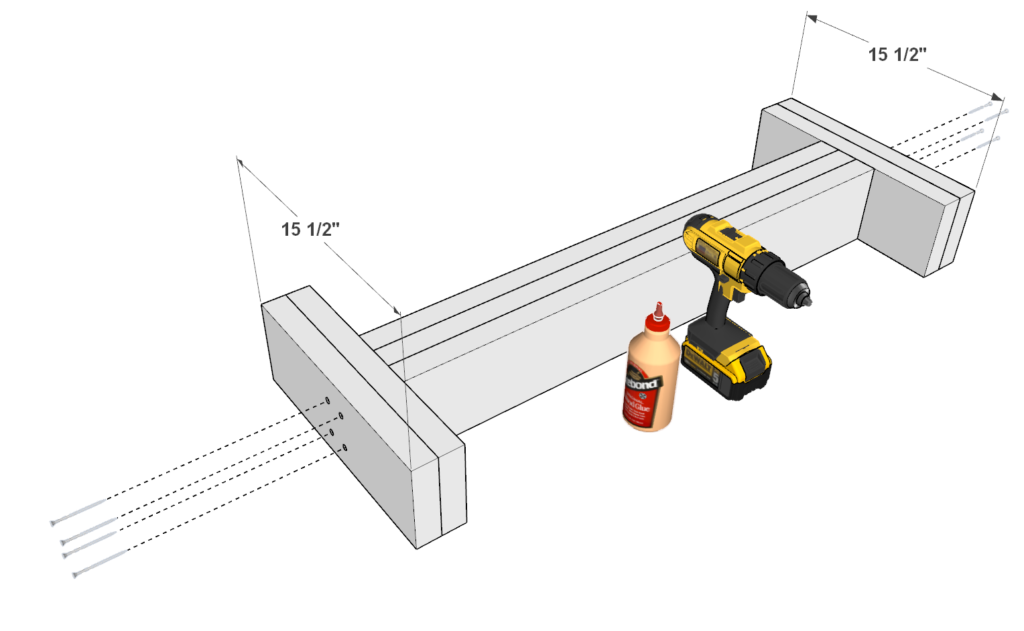
Next, take two additional 15.5 inch 2×6 lumber pieces and add them to the ends of the frame as shown above. Predrill, add glue, and add screws.
Step 3 (DIY GYM bench leg assembly)
In this step you will be attaching the legs to the bench.
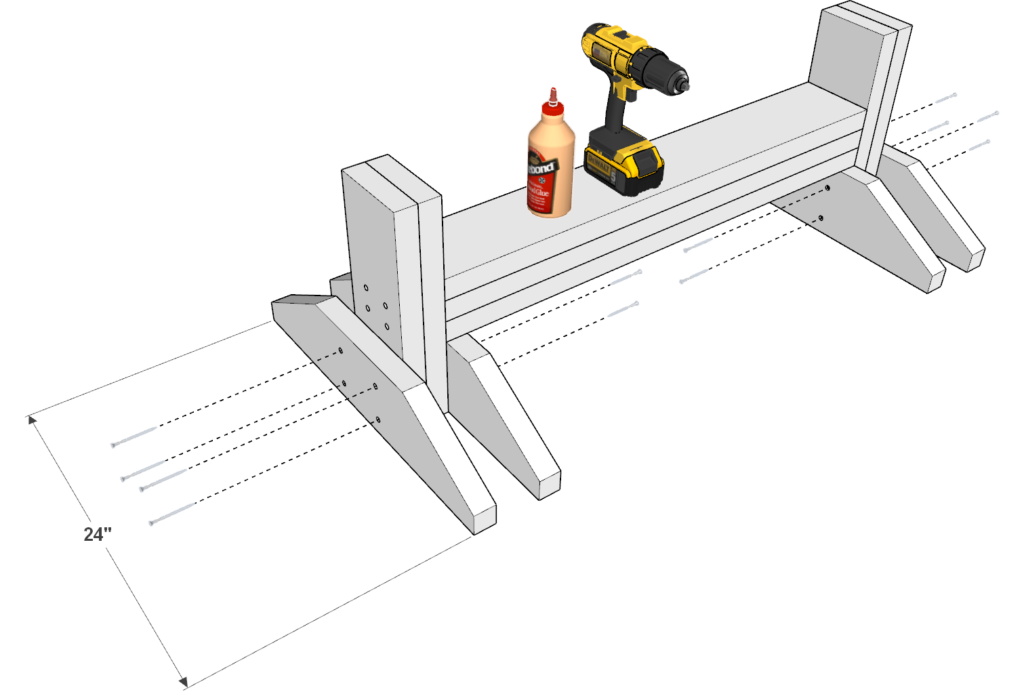
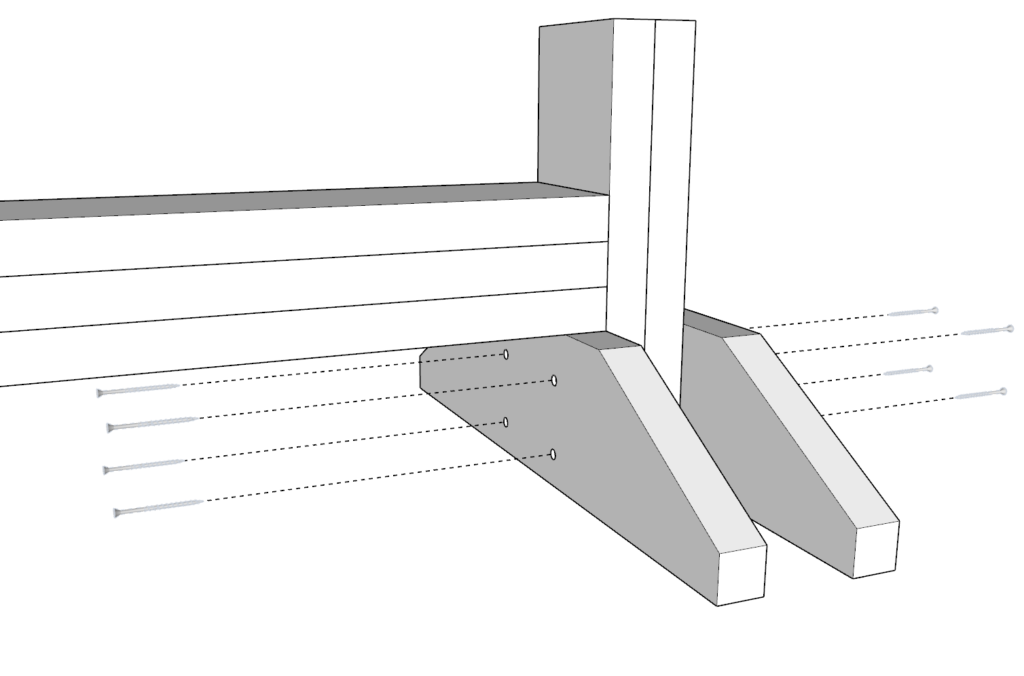
Start by adding four of the 24-inch 2×6 lumber pieces as shown above.
As before, add glue, predrill, and add screws.
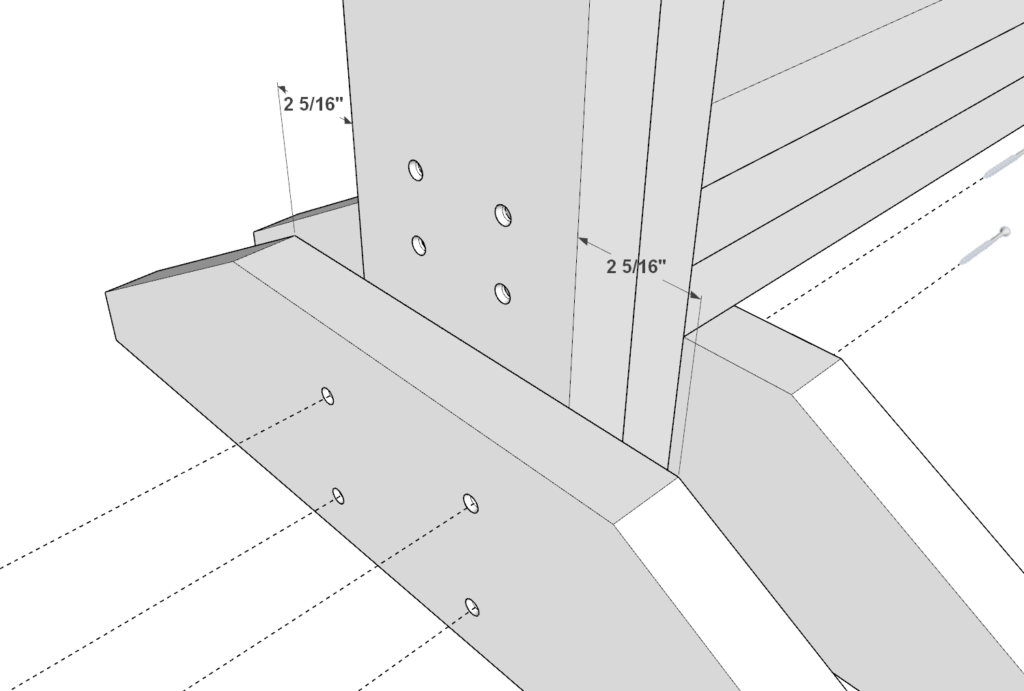
Make sure that the legs are properly aligned. 2-5/16 should be the approximate space on either top end of the 24 inch 2×6 lumber pieces.
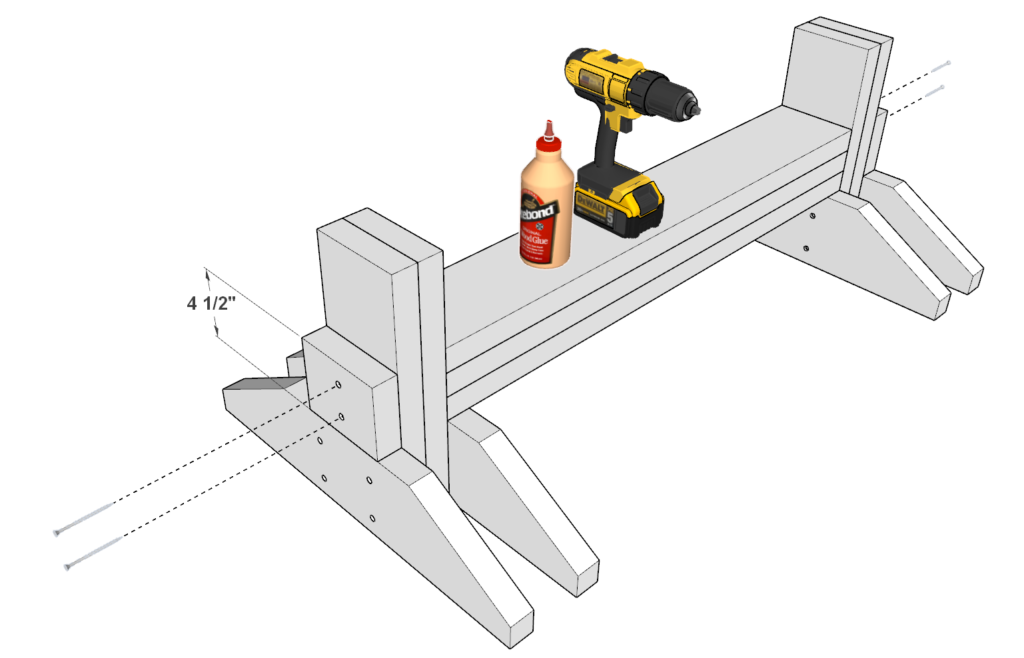
Next, add the 4.5 inch 2×6 lumber pieces to both sides of the bench.
As before, add glue, and add screws.

Lastly, add the 11-inch 2×6 lumber pieces to the top of the bench legs.
Again, glue, predrill, and add screws.
Step 4 (DIY GYM bench top assembly)

Add two 47-inch 2×6 lumber pieces to the top and secure the joint with glue, predrilling, and 3.5 inch screws.
Step 5 (DIY GYM bench foam and leather assembly and attachment )
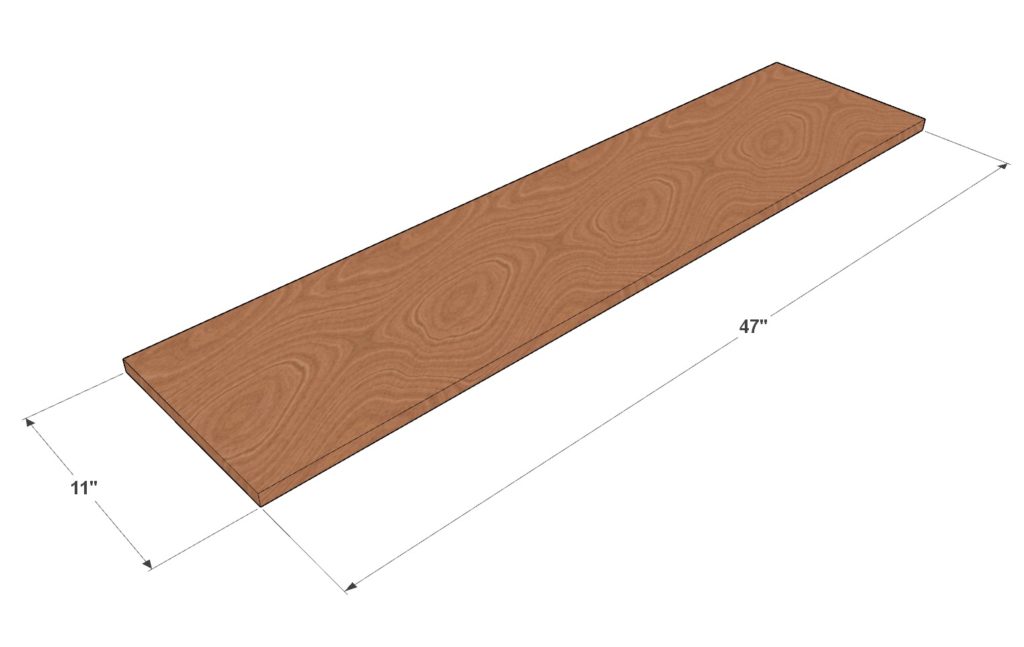
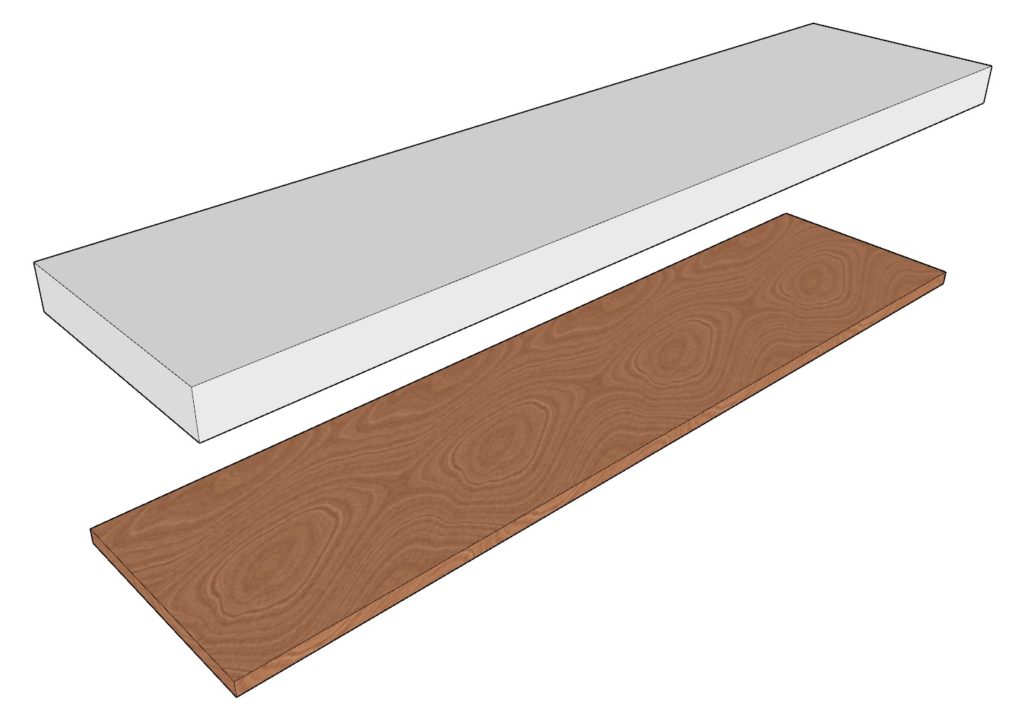
First, cut a 11-in x 47-in plywood sheet and a matching foam piece.
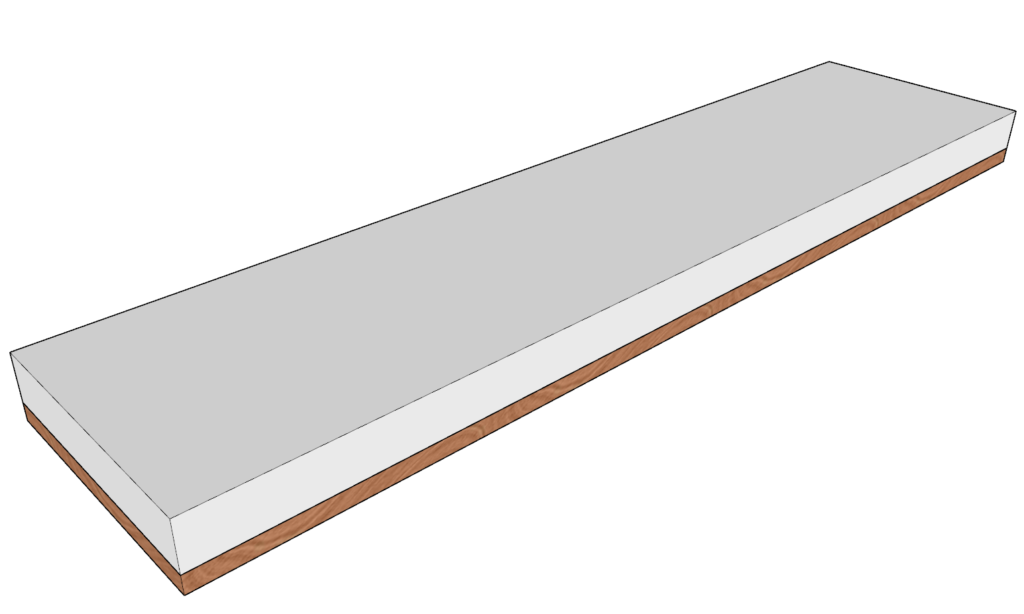
Spray generous amount s of adhesive to the board and to the foam.
Joint the foam to the board.
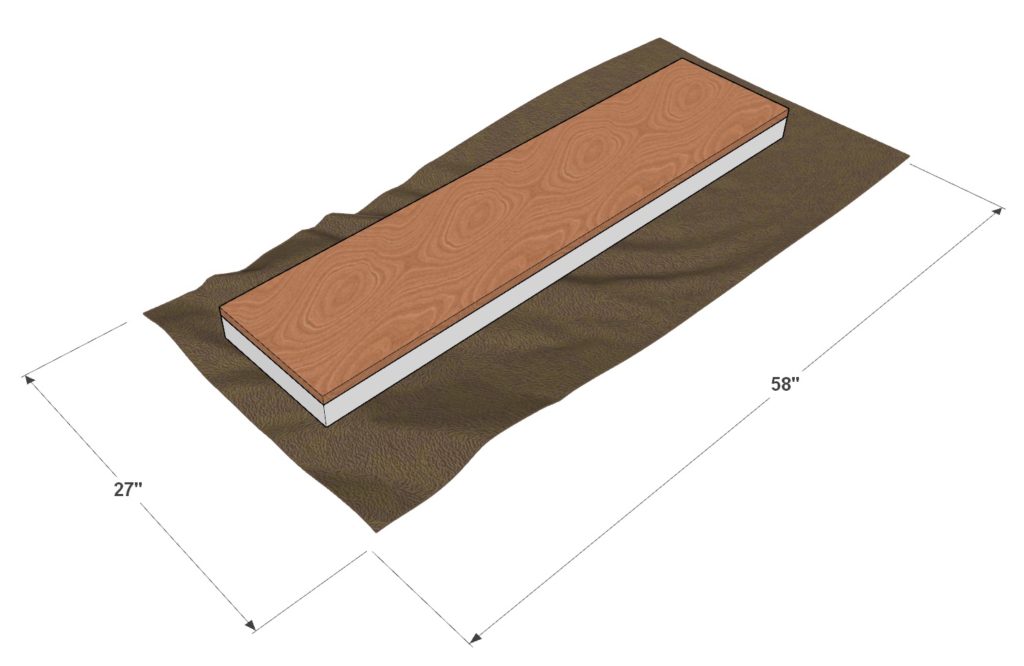
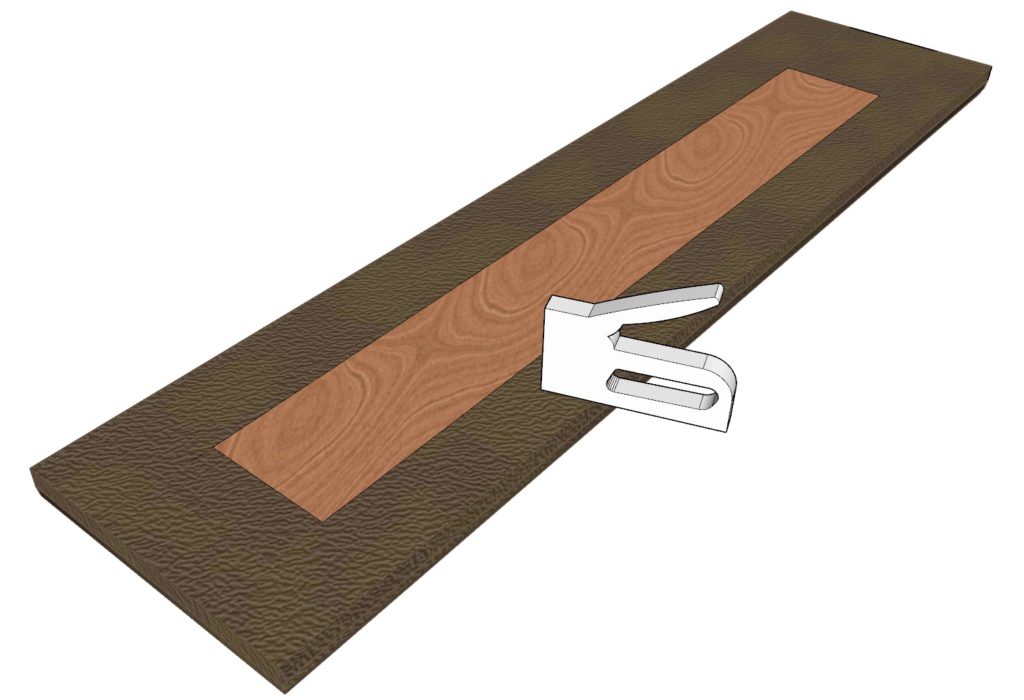
Next, cut a 27-in x 58-in fabric pieces to cover up the foam.
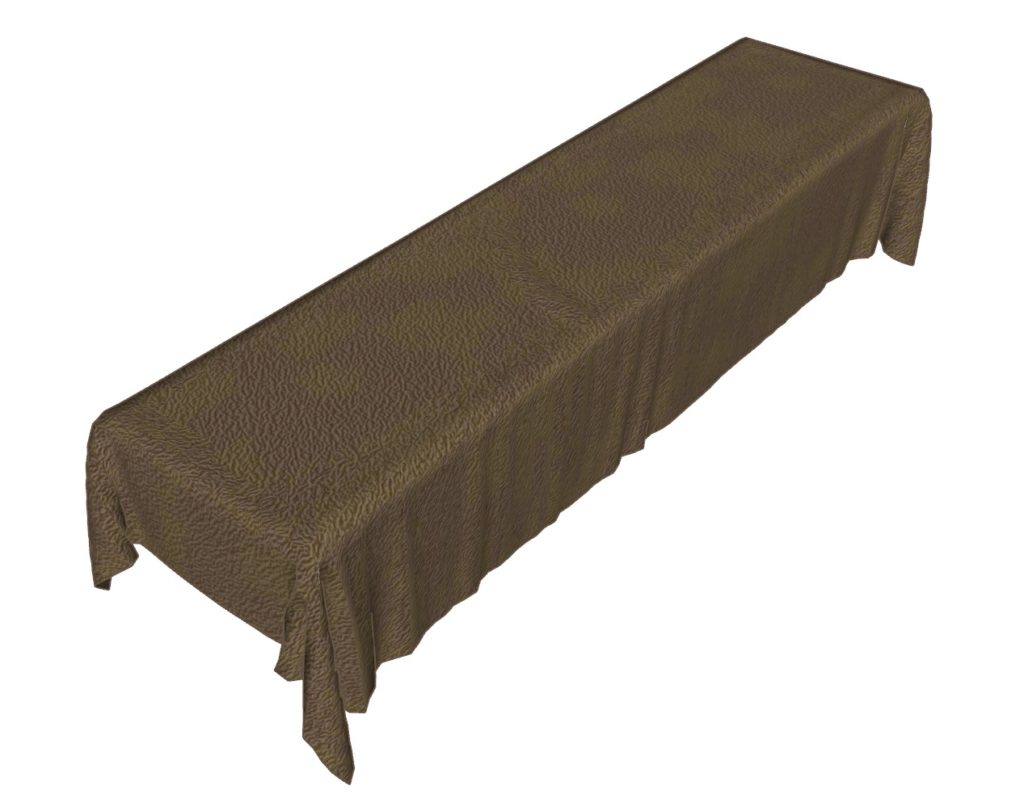
Drape the fabric over the foam and board.
Use a staple gun to attach the fabric to the board.
Use scissors to cut off any extra fabric. Make sure the fabric is not bunched up in any part of the board.
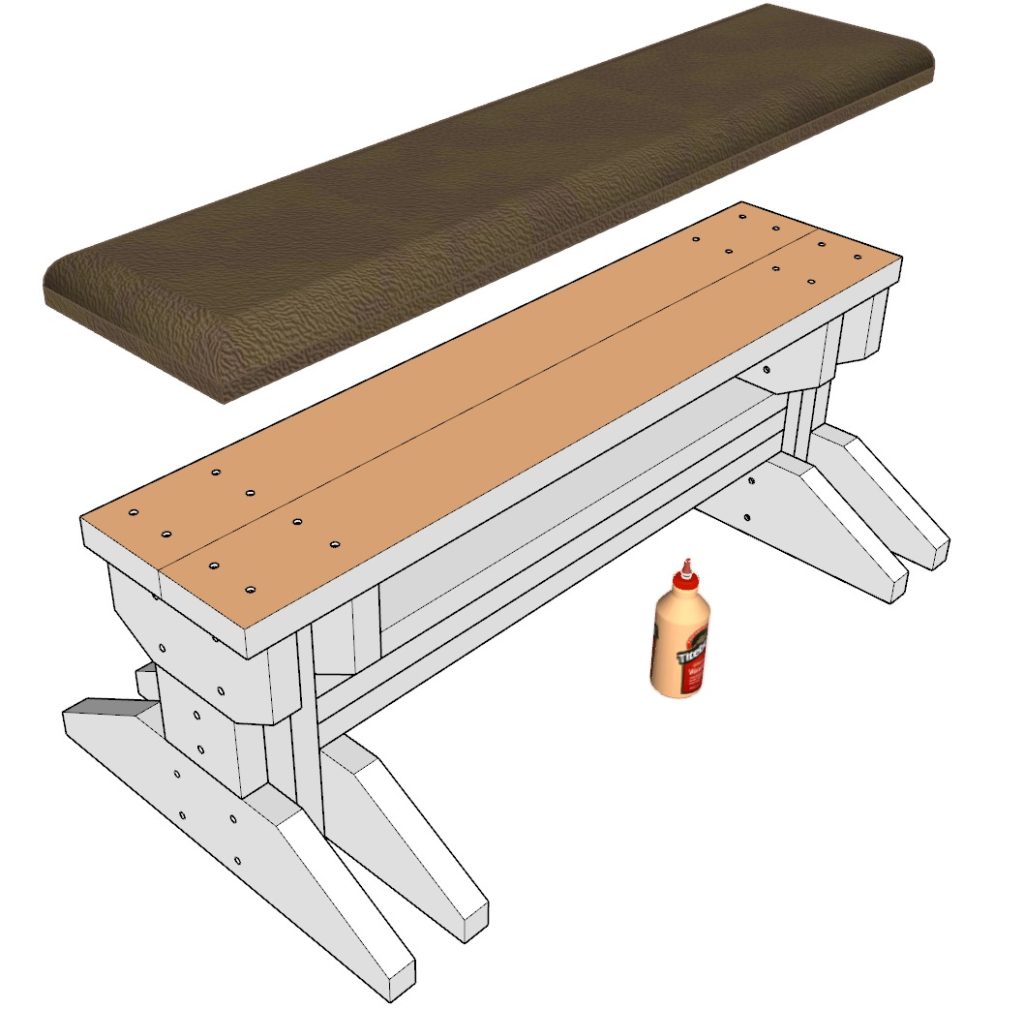
Next, Take the plywood top board and attach it to the frame of the GYM bench.
Apply glue to both the plywood and the 2x6s for added strength.
Make sure that the plywood part sits snugly on top of the 2x6s.
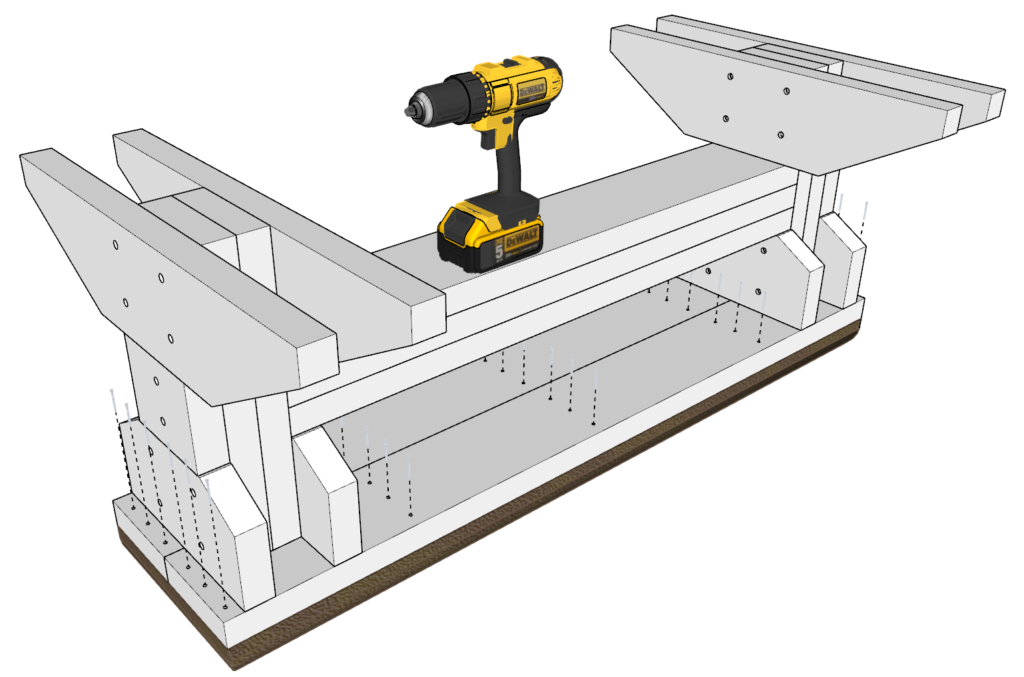
Flip the bench upside down and add 2 inch screws.
When adding the screws, make sure to apply a lot of pressure on the bench to ensure a tight seal.
Add 2 inch screws to secure the plywood board into place. Make sure not to drill too deep so that the screws don’t stick out of the plywood.
Leave the bench upside-down, under pressure, until the glue solidifies.
Lastly sand down the whole bench for a smooth surface.