Introduction: Embark on a DIY Adventure
Welcome, fellow crafters and DIY enthusiasts! Today, we’re rolling up our sleeves to create something both functional and fabulous. We’re transforming a simple wooden crate into an elegant rustic wheelbarrow that’s perfect for indoor use. Whether you’re a seasoned DIYer or just getting started, this project is for you. Let’s dive in!
The Concept: A Wheelbarrow Indoors? Let’s Do It!
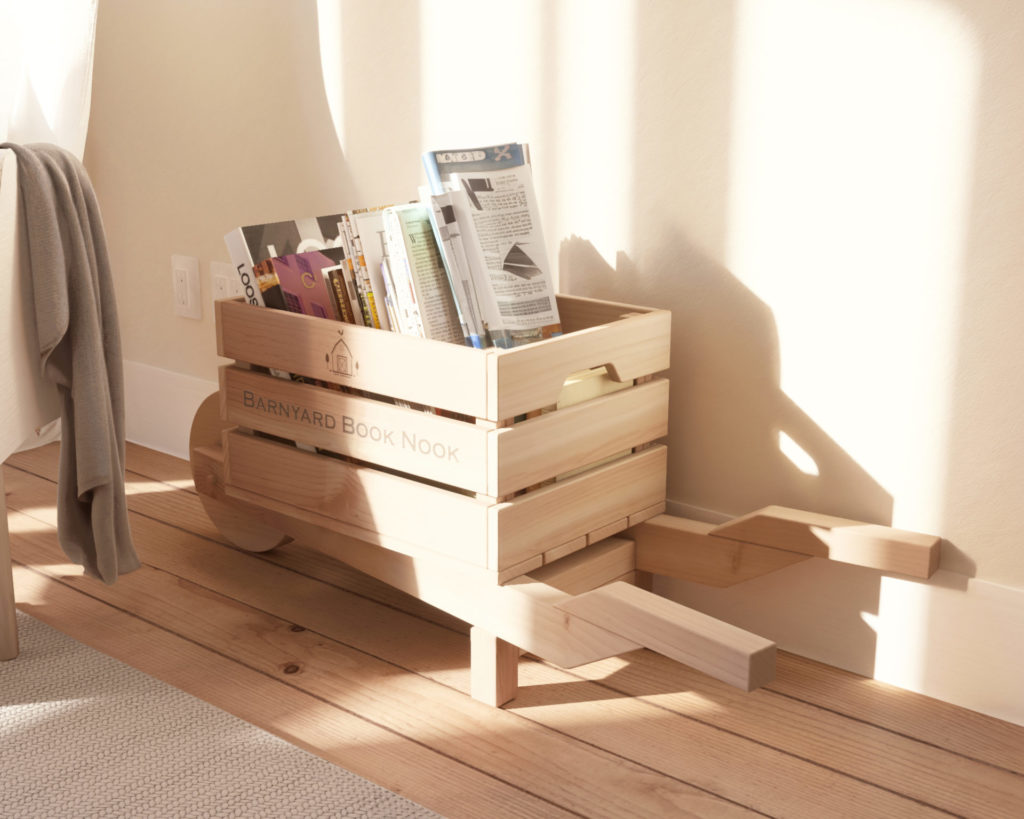
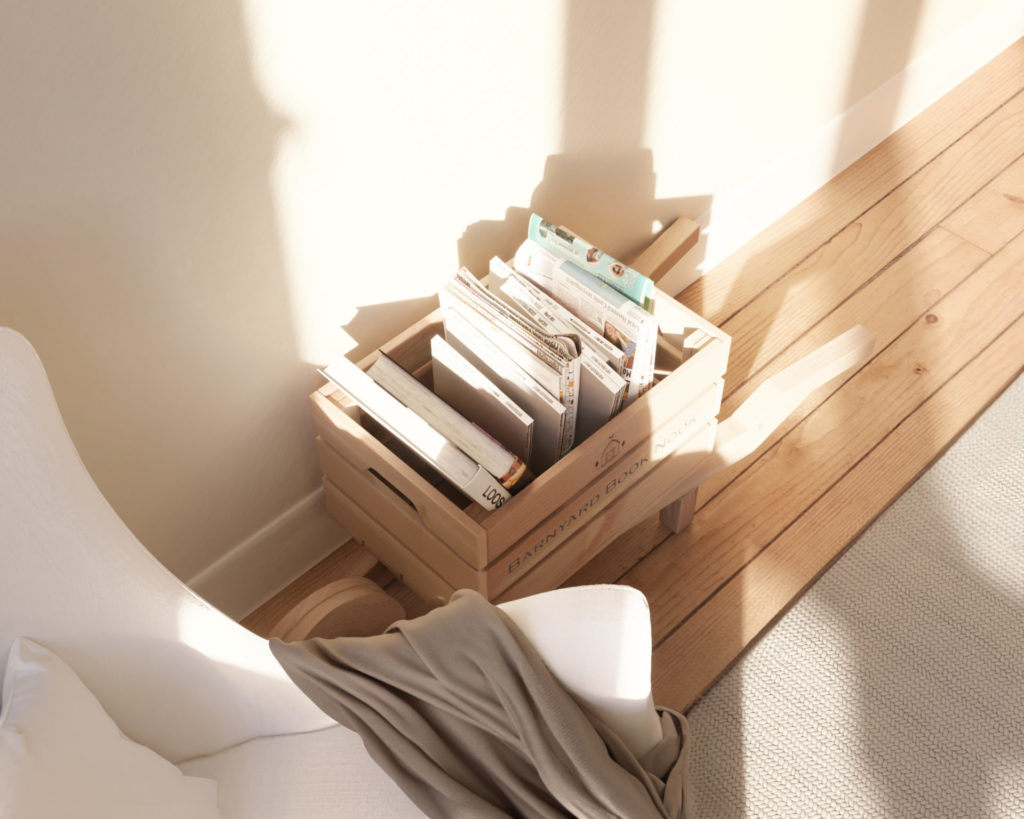
Imagine a rustic wheelbarrow in your living room, stylishly holding magazines or in the bathroom, neatly stacked with toilet paper. Picture your kids using it to transport and store their toys. This wheelbarrow is not just a decorative piece; it’s a versatile and practical addition to your home.
Gathering Materials: The Building Blocks
To bring this project to life, you’ll need a wooden pine box, small wheels, screws, wood stain, and a handle. Equip yourself with a screwdriver, a saw, a drill, and paintbrushes. Remember, the beauty of DIY lies in the details and customization.
20 Practical Uses for Your Indoor Wheelbarrow
- Magazine Holder
- Toilet Paper Storage
- Kids’ Toy Carrier
- Indoor Plant Holder
- Craft Supplies Organizer
- Blanket Storage
- Remote Control Holder
- Shoe Storage
- Bathroom Towel Holder
- Book Storage
- Kitchen Fruit Basket
- Laundry Holder
- Pet Toy Storage
- Indoor Herb Garden
- Mail Organizer
- Board Game Storage
- Knitting Supplies Holder
- Seasonal Decor Display
- Home Office Organizer
- Fireplace Wood Holder
Wrapping Up: The Satisfaction of Creation
This rustic wheelbarrow is a testament to the joy and satisfaction that comes from creating something with your own hands. It’s functional, stylish, and a conversation starter. Whether you use it as a magazine holder, a storage space, or an indoor garden, it’s a valuable addition to your home.
So, gather your materials and embrace the DIY spirit. The possibilities are endless, and the results are rewarding. Happy crafting!
Time to build
About 1 hour
Cost of fence build
$40 (Much more efficient to build multiple at a time)
Skill level required
Beginner
Download the PDF plans
IKEA KNAGGLIG wheelbarrow DIY PDF
In the PDF download, you can find:
– Clearly written, step-by-step instructions
– A comprehensive list of materials required
– A detailed cut list for each piece
– A list of essential tools for the project
– Visual diagrams to guide you through the process
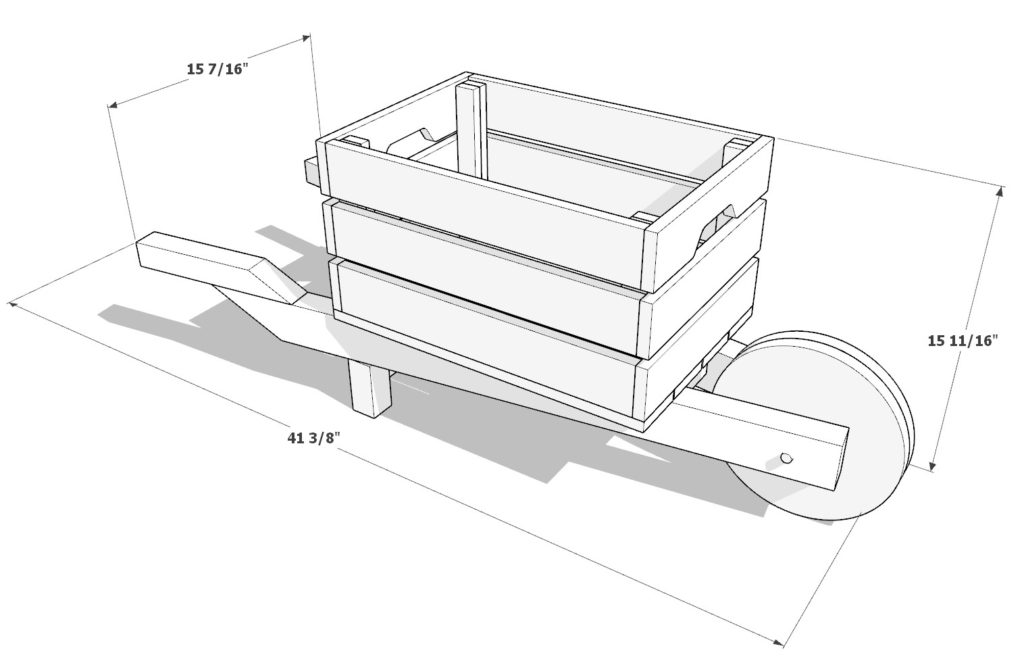
DIY Modern Farmhouse Table Dimensions
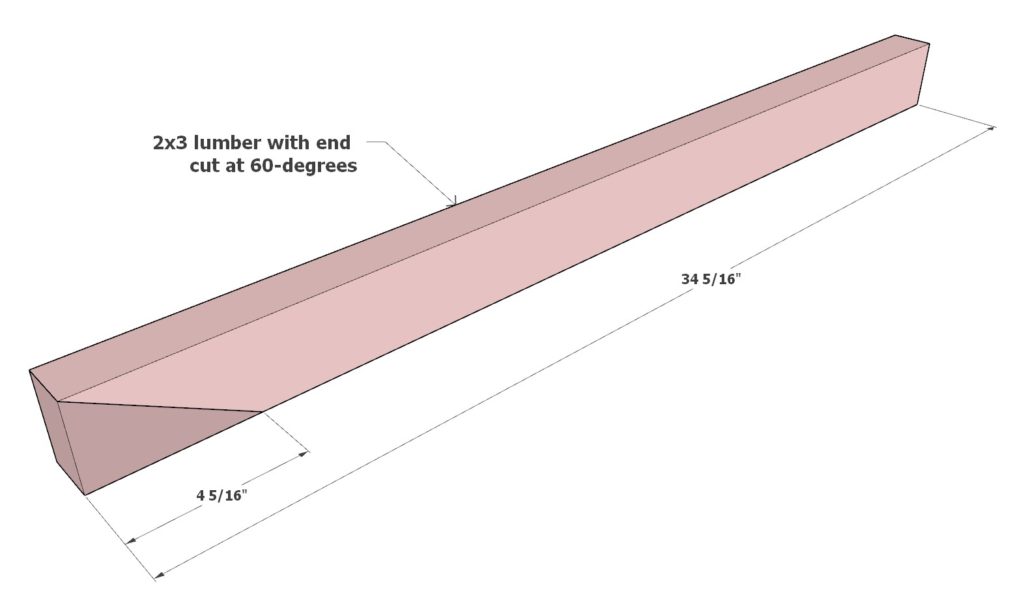
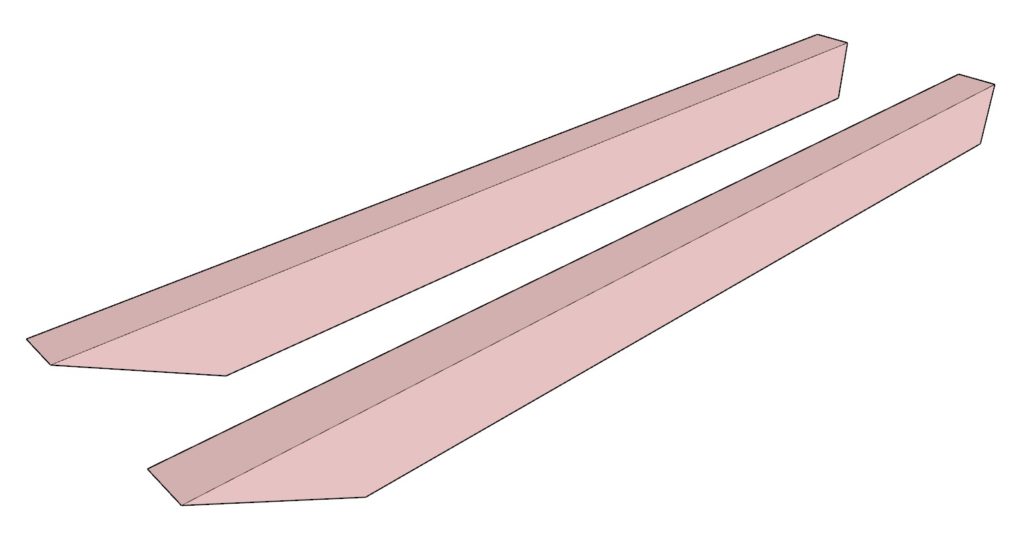
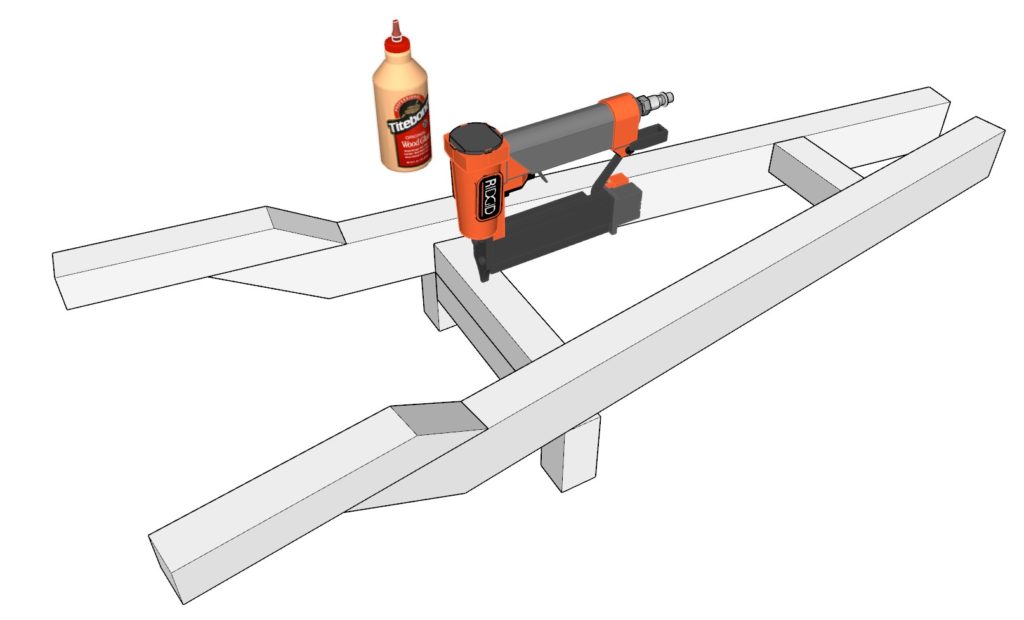
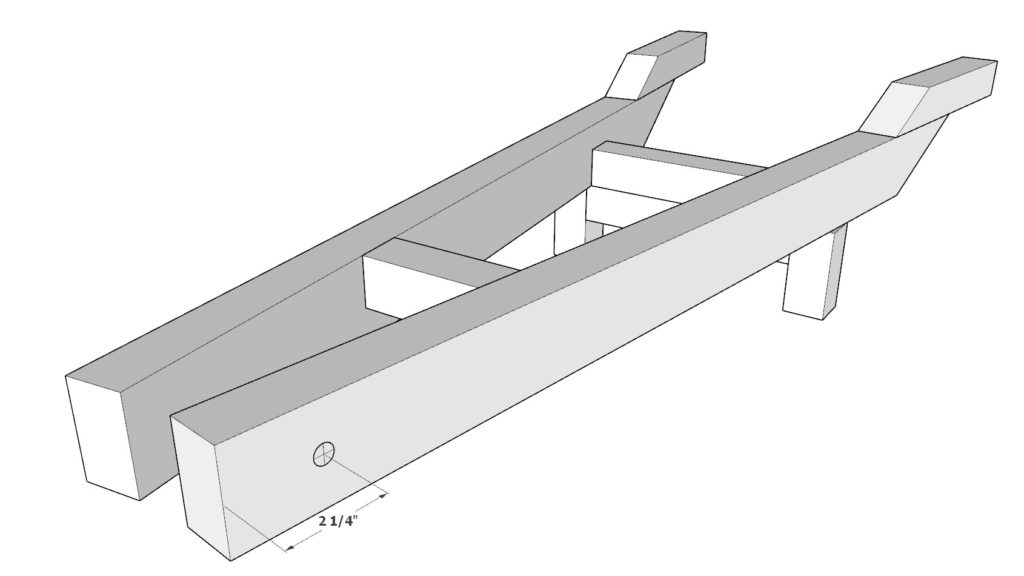
Step 1: Shape the Framework
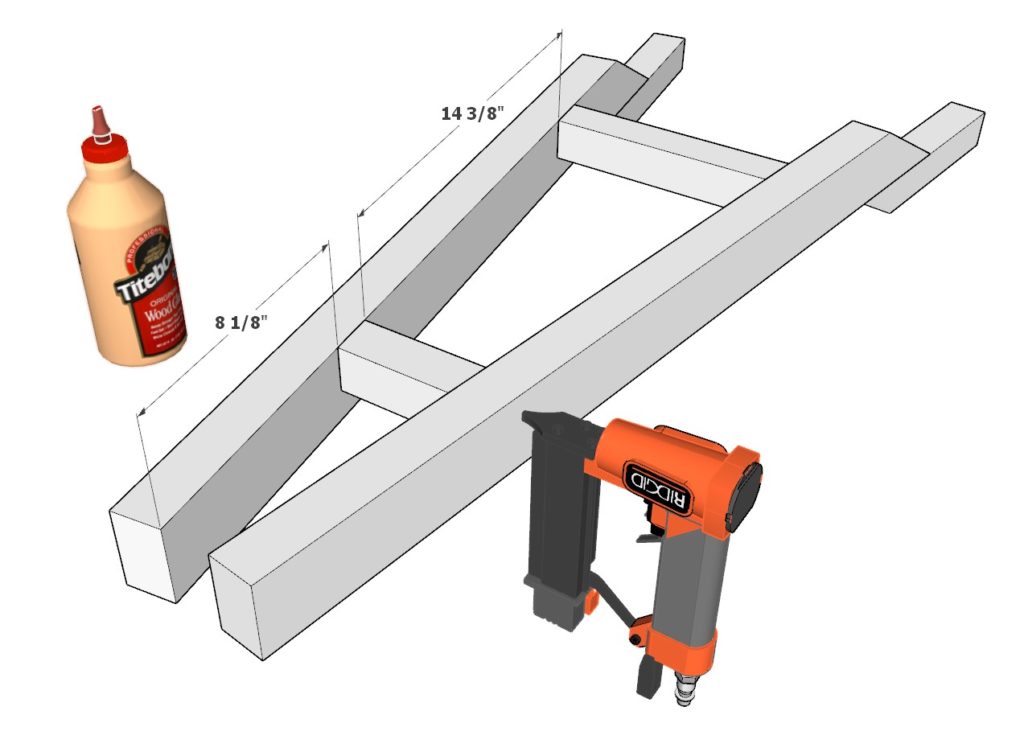
Let’s start by shaping the backbone of our wheelbarrow – the frame. You’ll need two pieces of 2×3 lumber, each about 34-5/16 inches long. Take your saw and shape the tips at 60-degree angles as shown in the diagram.
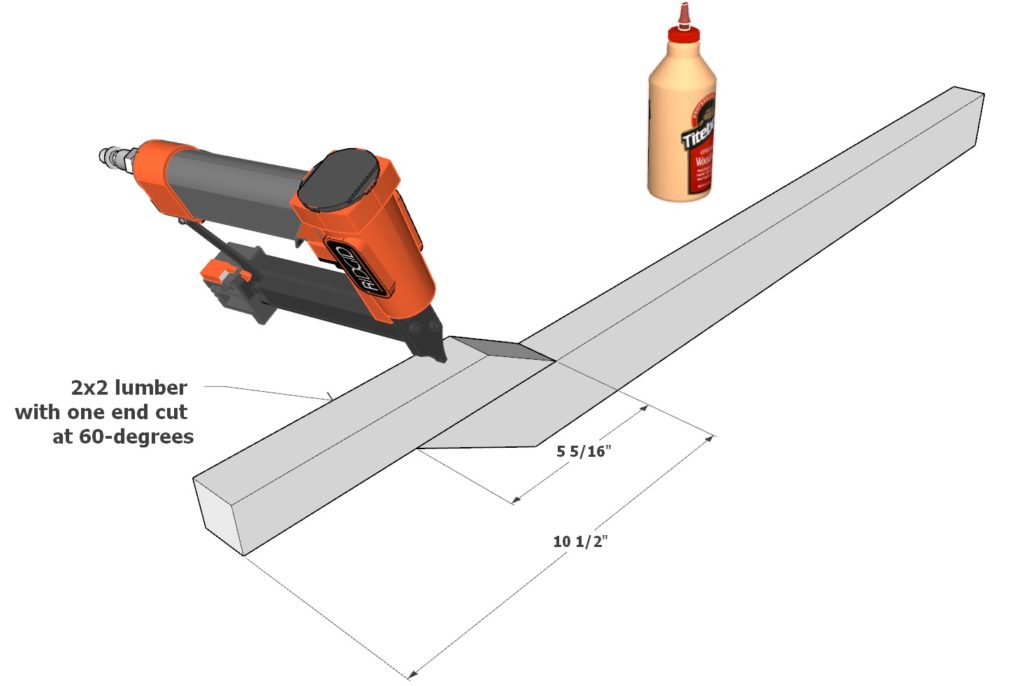
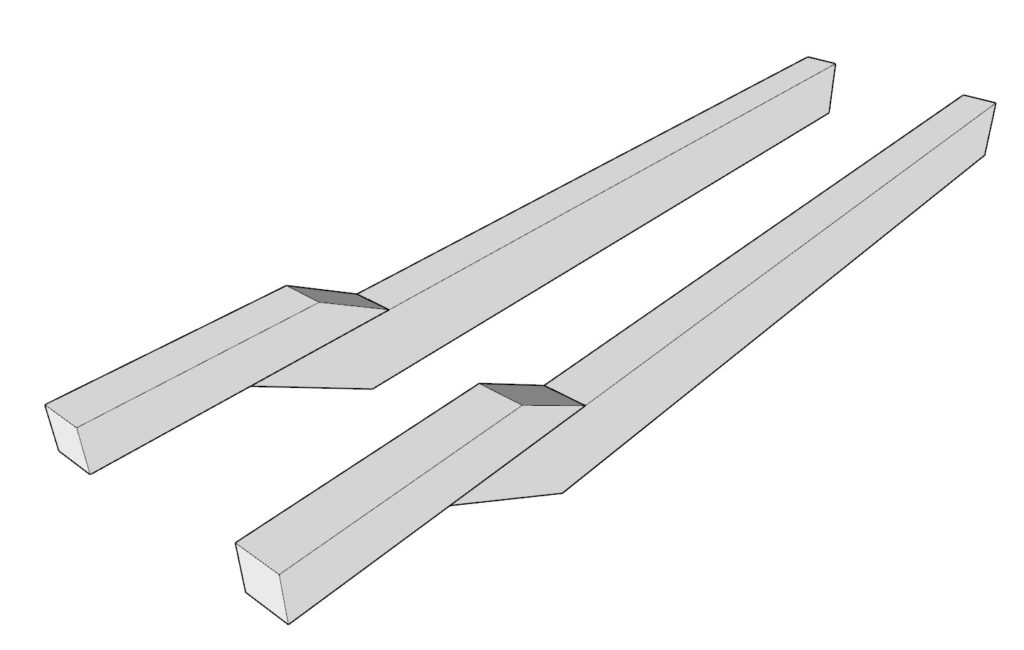
Next, grab two 10-1/2″ long 2×2 lumbers. Take each piece and trim one end at a similar 60-degree angle. Attach these to your 2×3 pieces using a bit of wood glue and 2-inch nails. Use thin nails to prevent the wood from splitting.
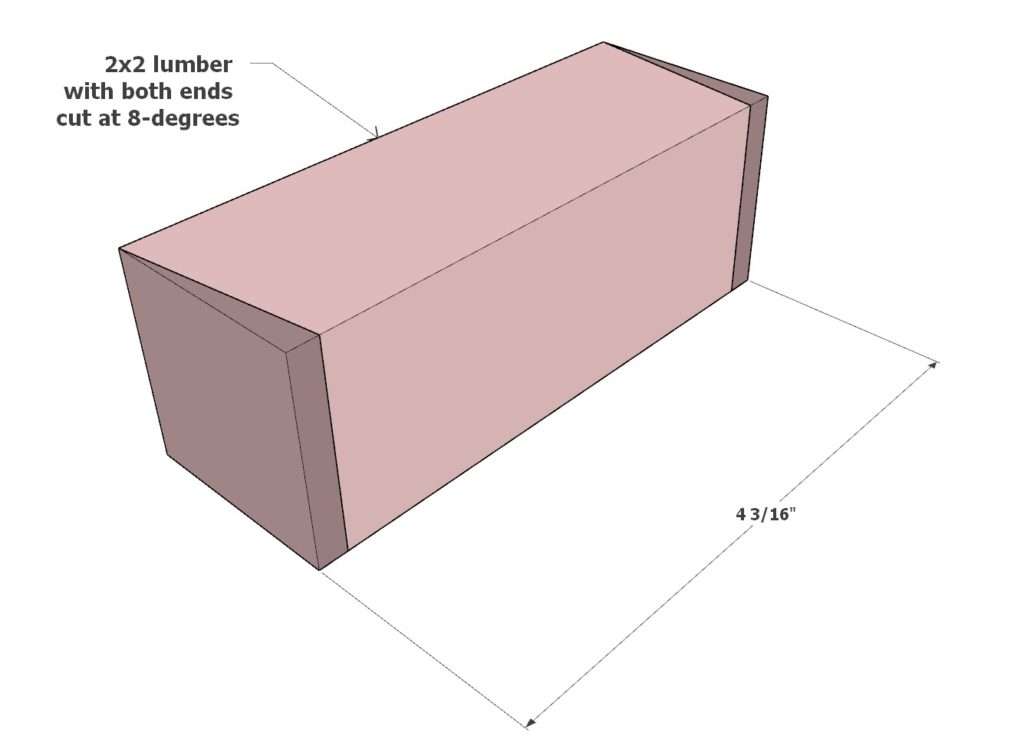
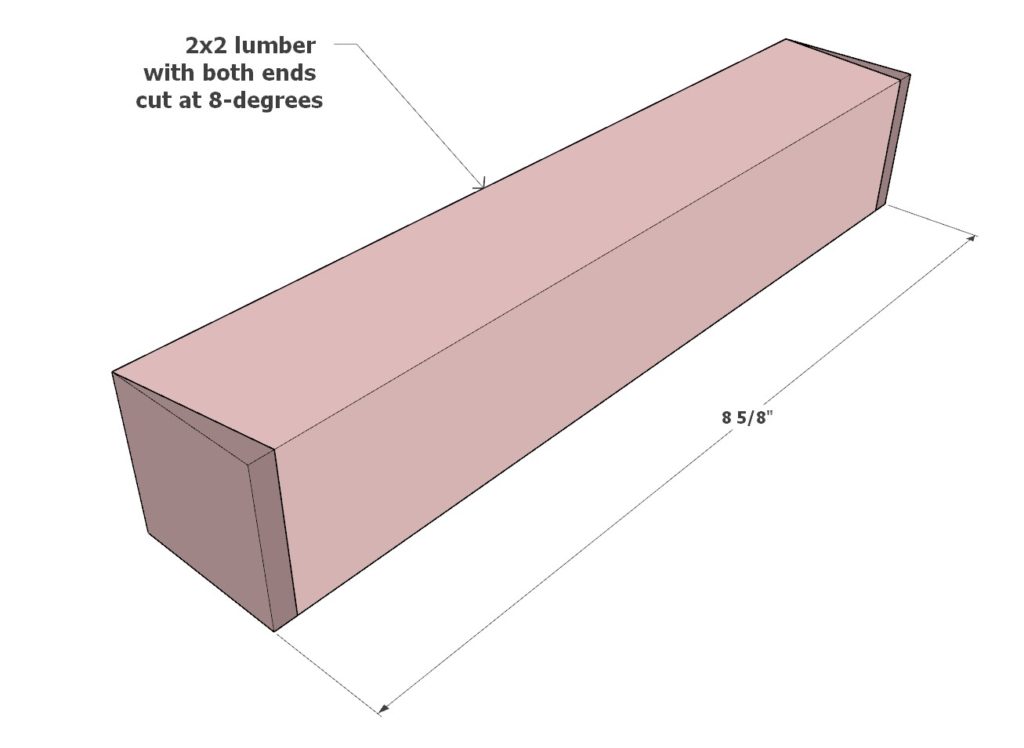
Now, for extra support, let’s introduce two more lumber pieces to our frame. You’ll need one 4-3/16″ piece and one 8-5/8″ piece of 2×2 lumber. Trim both ends of each piece at an 8-degree angle.
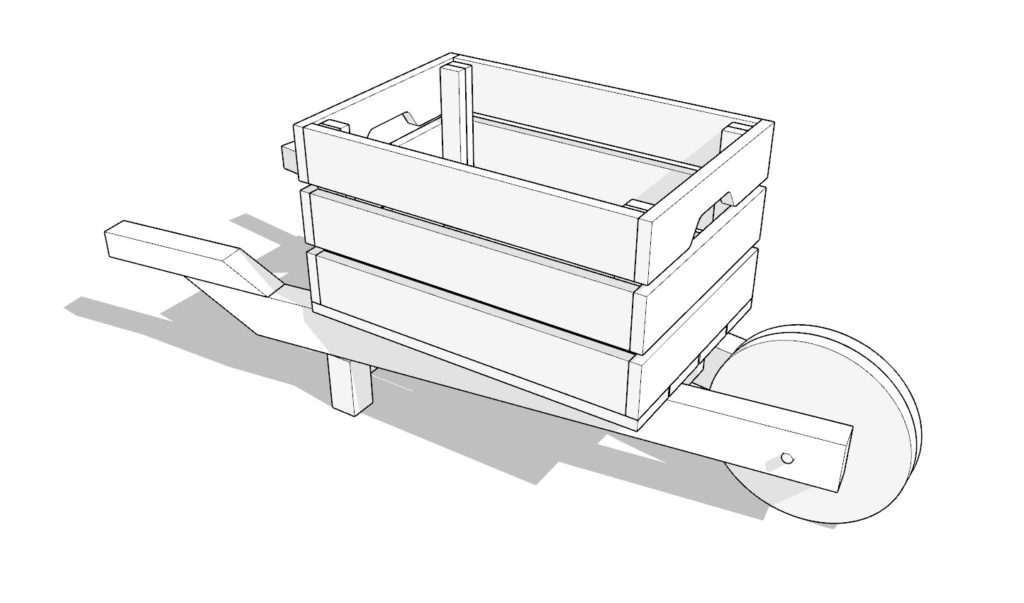
Once your pieces are ready, it’s time to bring them together. Use your diagram as a guide to arrange the parts, stick them together with wood glue and secure with your nail gun.
Tip: While measuring and cutting, it’s ok if things are not absolutely perfect. As you nail the pieces together, they will often align naturally. And remember, a little flexibility relaxes the wood and makes it less likely to crack.

Step 2: Constructing the Leg Stands
Title: Laying the Foundation – Creating the Leg Stands
Step 2: Constructing the Leg Stands
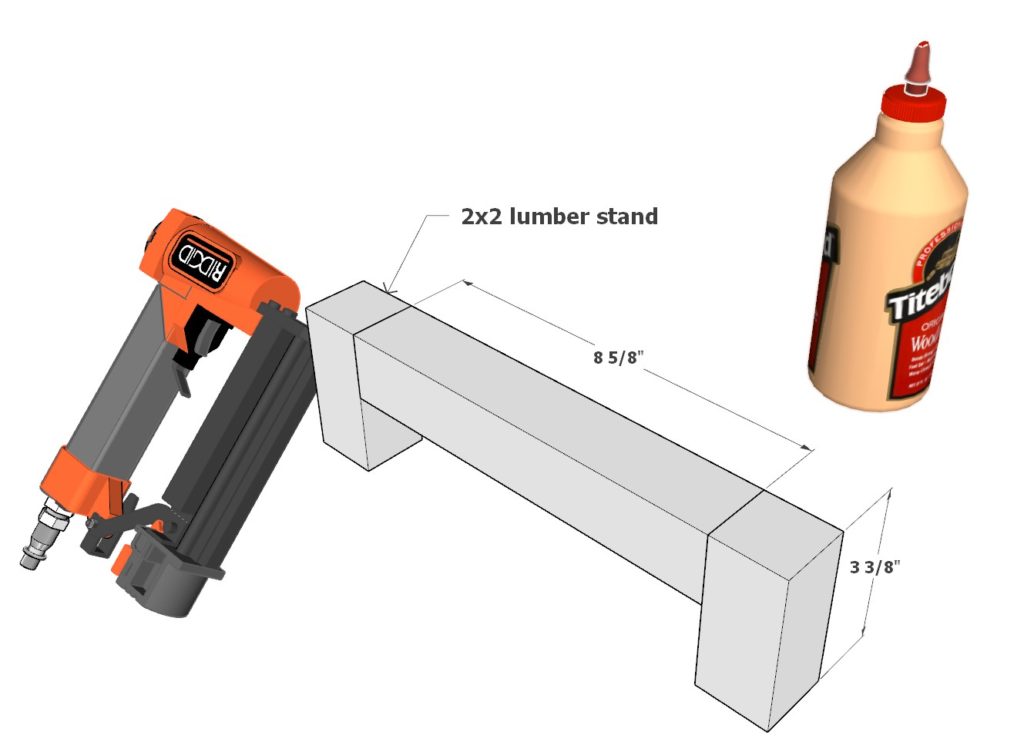
For a robust and steady base, let’s move on to the leg stands. You’ll need two 3-3/8″ 2×2 lumbers and one 8-5/8″ 2×2 lumber. Simply combine them using your trusty wood glue secure them with 2-inch nails from your nail gun.
Now, it’s time to marry these stands with the wheelbarrow frame you’ve just created. Align as indicated in the diagram below and affix them in place. Et voila! The skeleton of your wheelbarrow is ready.
Tip: Make sure the stands are equally level to ensure your wheelbarrow sits steady ‘on its feet.’ A carpenter’s level can be a handy tool in this process.
Step 3: Designing and Installing the Wheel
The wheel greatly adds to the charm of this DIY wheelbarrow. Depending on how you intend to use your wheelbarrow, we’ve got two ways of crafting the wheel.
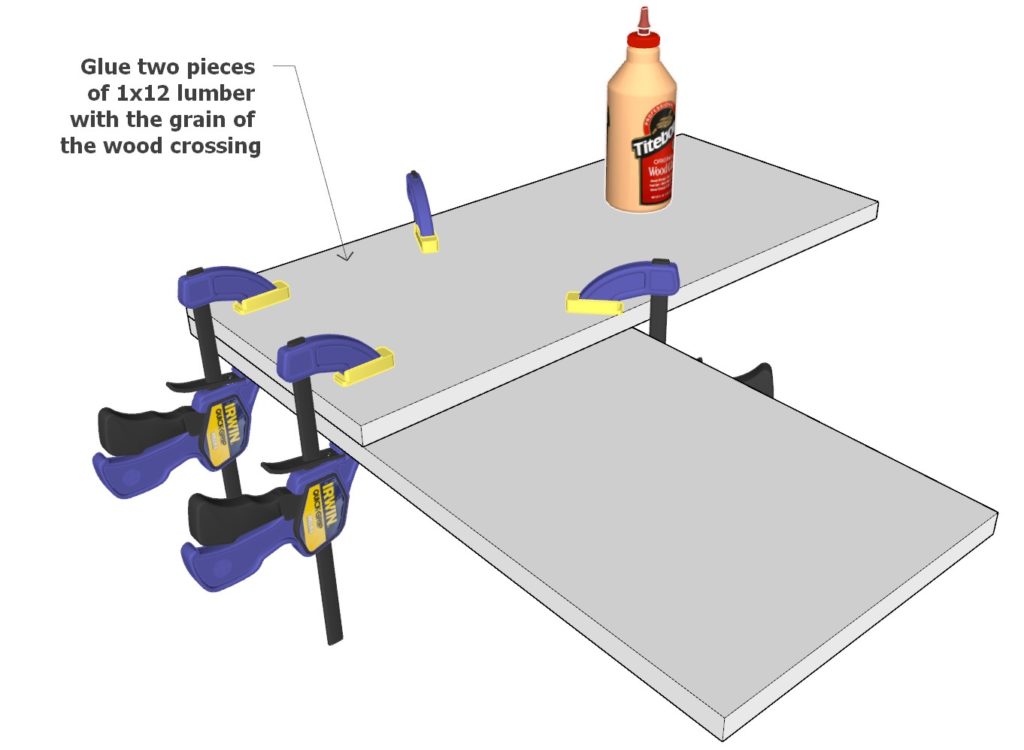
If you’re planning for a working wheelbarrow, let’s make a sturdy wheel. Take two pieces of 1×12 lumber and arrange them with the grains intersecting. Use a generous amount of glue, let it dry before proceeding. This cross-hatching technique gives strength, much like in plywood.
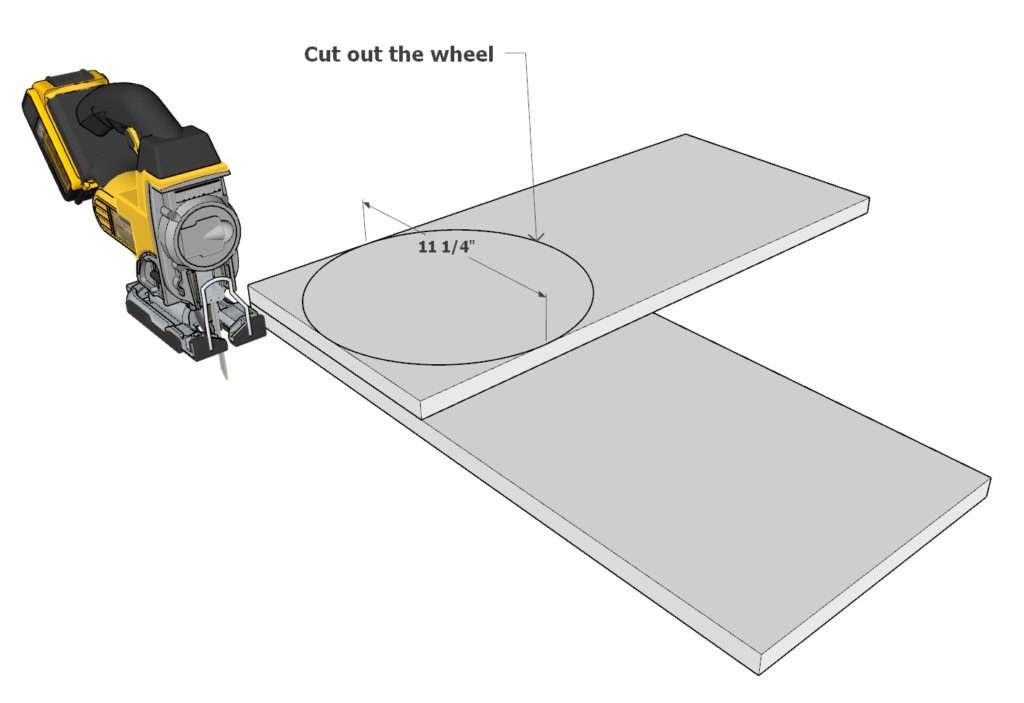
If you’re envisioning your wheelbarrow as a decorative piece, a single piece of 2×12 lumber will do the job. Simply trace out your wheel and cut it.
In both cases, the wheel diameter is 11-1/4″. We suggest a jigsaw for a smooth cut, but feel free to use a tool you’re comfortable with.
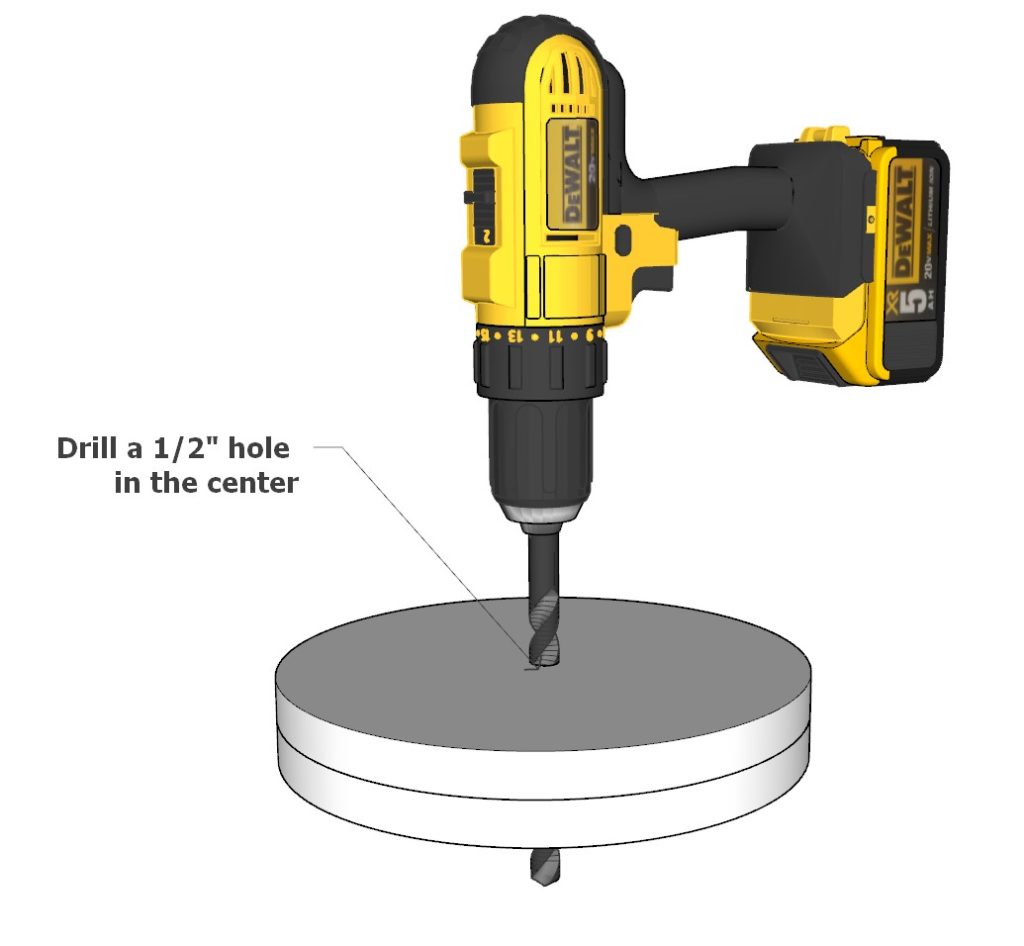
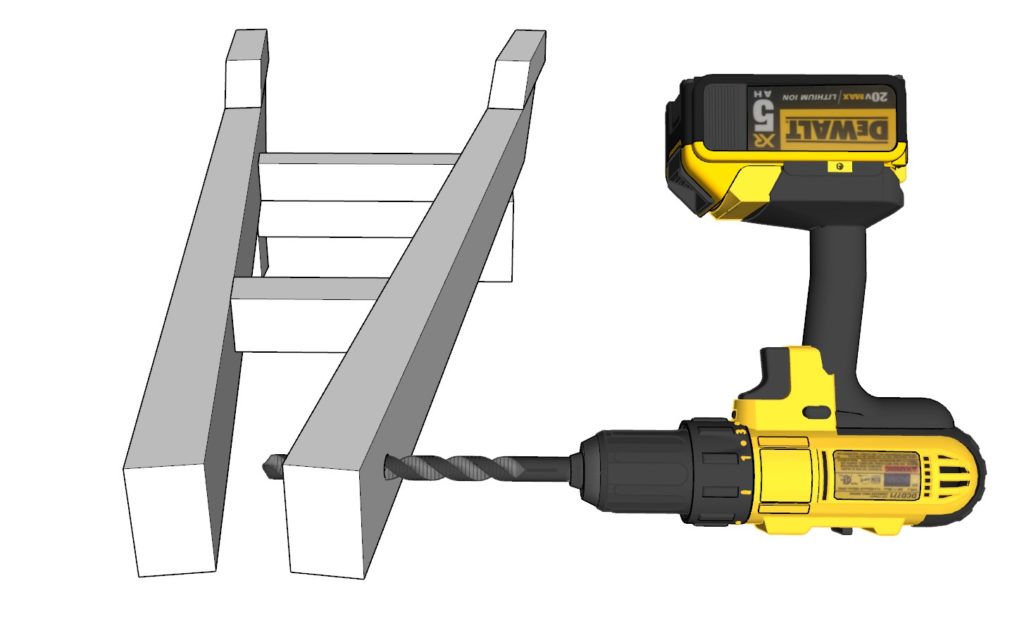
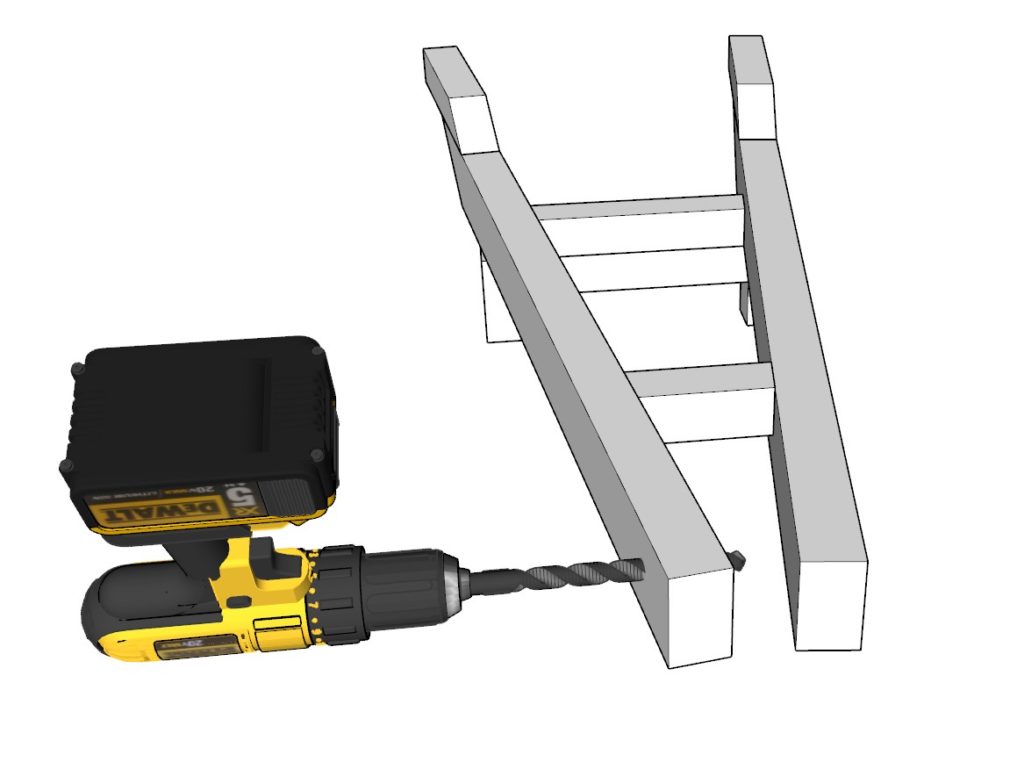
Next, drill a 1/2 inch diameter hole in the wheel’s center – this is for the axle. Similarly, drill holes into the wheelbarrow frame as indicated in the diagram. Remember, it’s best to drill each hole separately for striking the right alignment.
To install the wheel, introduce a 1/2″ thick dowel through the drilled holes, snugging the wheel in between. Secure it into place with some glue and a few taps of a hammer if necessary. If the wheel doesn’t turn easily at first, don’t worry, a bit of spin practice will soon make it rotate effortlessly.
Tip: If you’re building the stronger wheel, make sure your glue is dry before you start the cutting process.

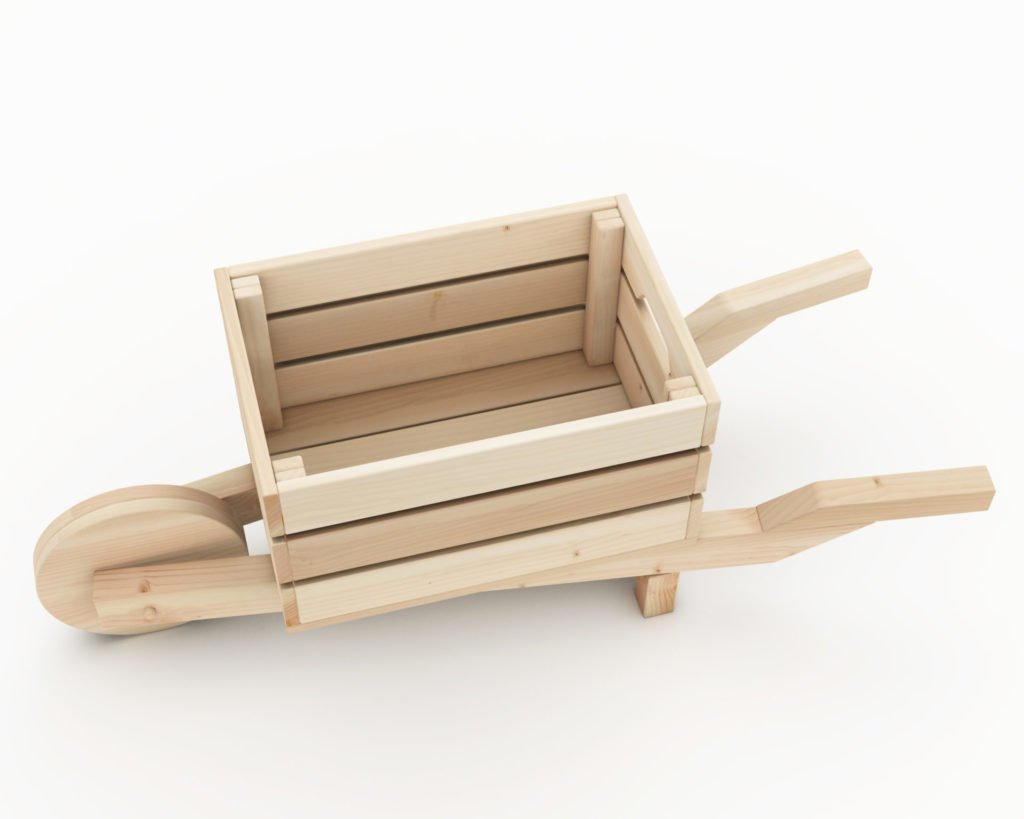
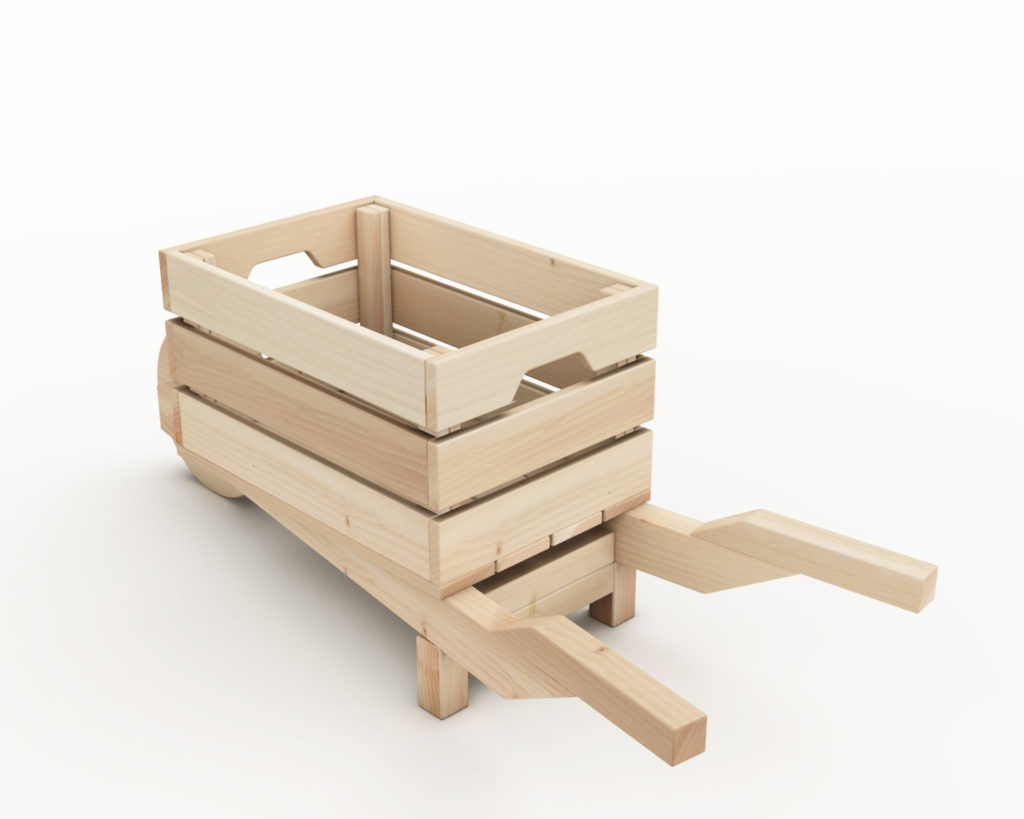
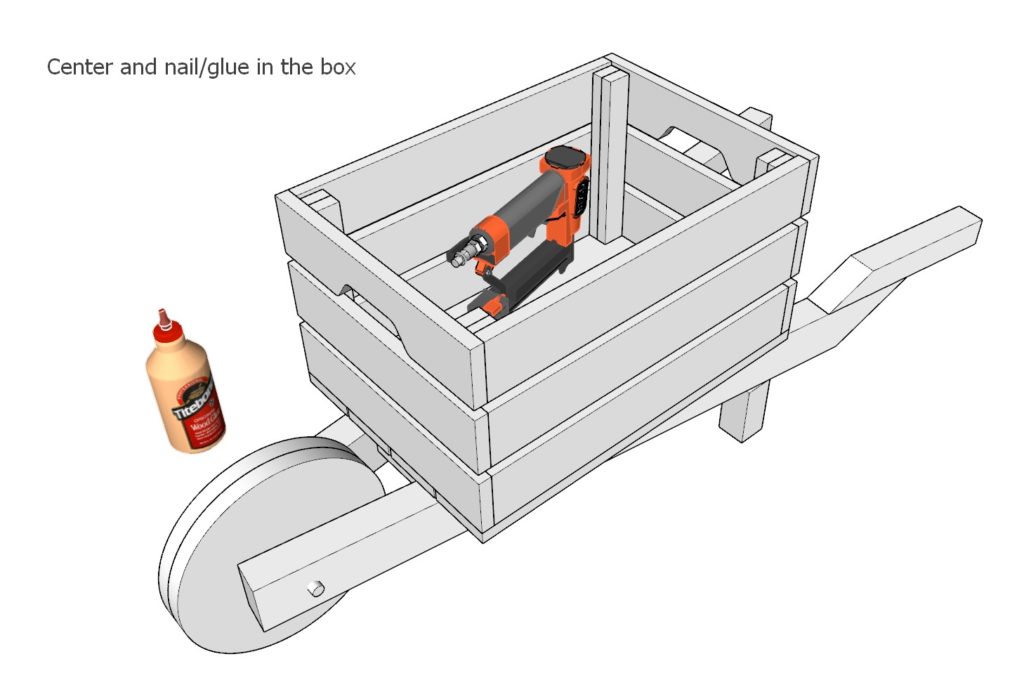
Step 4: Affixing the Crate
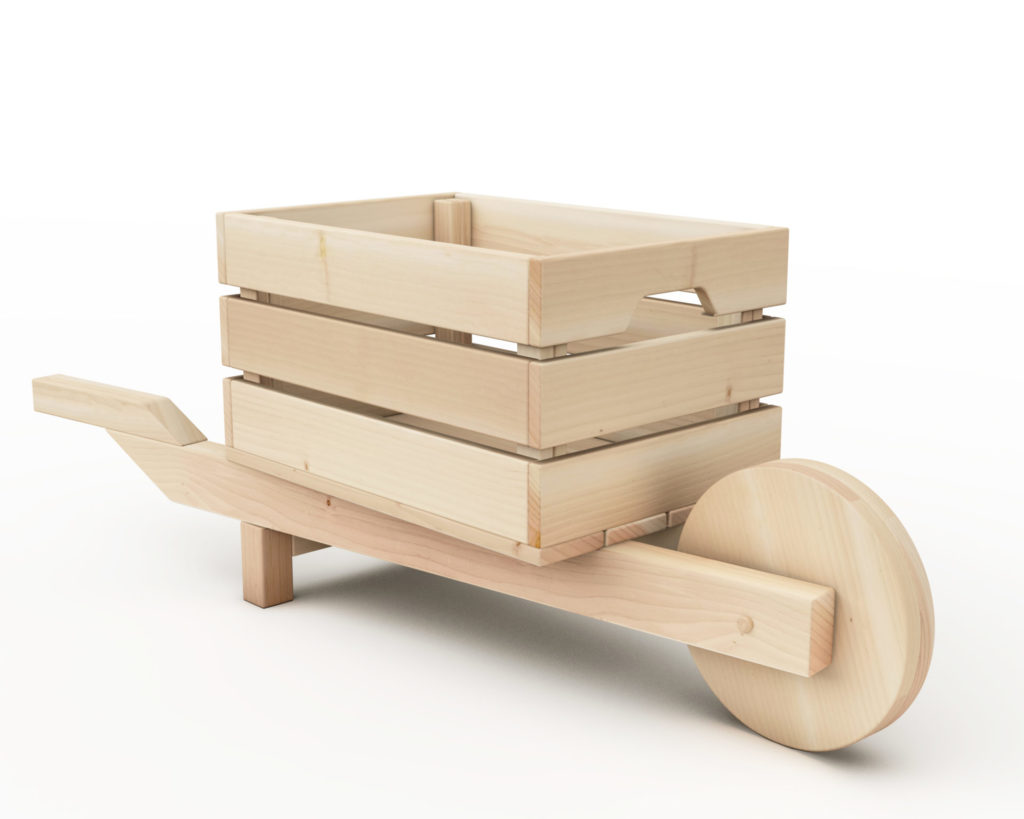
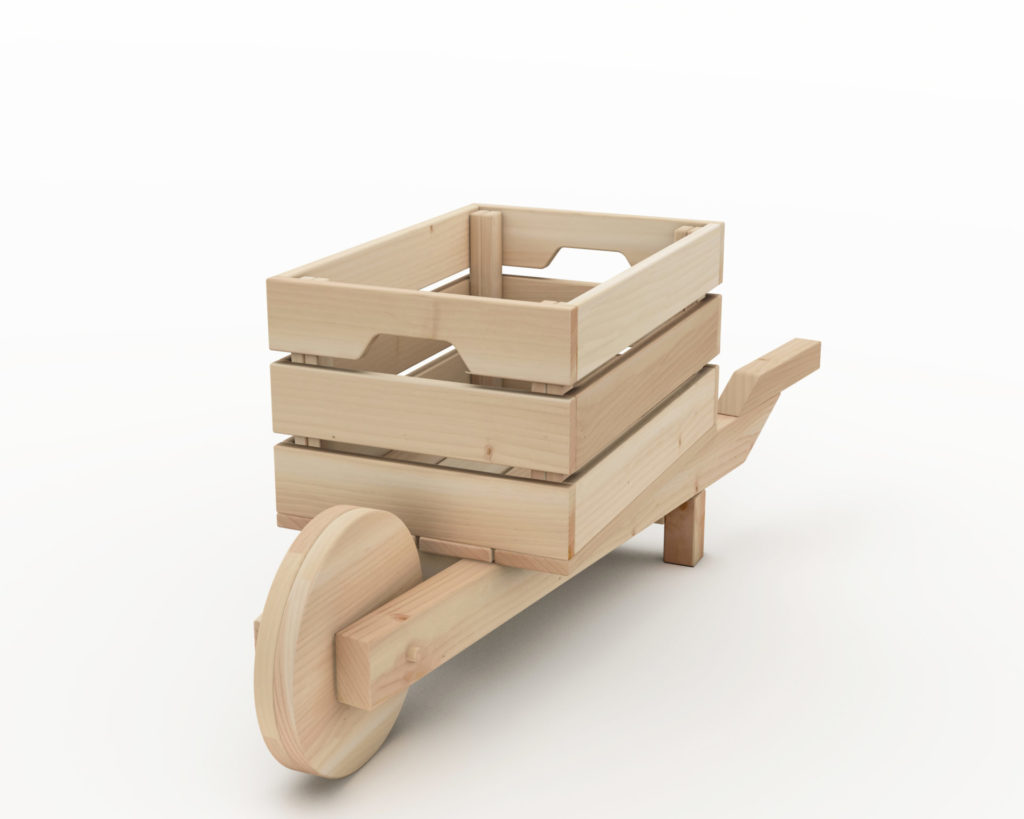
Here comes the fun part – attaching the crate! IKEA’s KNAGGLIG box is an excellent choice due to its fitting measurement of 18×12 ¼x9 ¾”. However, feel free to explore other options as the wheelbarrow frame is designed to accommodate a variety of crate sizes around the aforementioned measurements.
Once you’ve made your choice, it’s time to secure the crate to the wheelbarrow. A combination of wood glue and nails will keep it steadfast. Now, sit back and admire your stylish, handcrafted wheelbarrow.
Tip: Make sure you position the crate nicely centred on the wheelbarrow frame to maintain a good balance. A well-balanced wheelbarrow is not just more practical, but it also looks more aesthetically pleasing.
Step 5: Detailing and Decoration
With the wheelbarrow structure all set, we now move on to giving it a characteristic rustic finish. This isn’t just about aesthetics; it’s also about ensuring a smooth and safe texture, particularly if children will interact with it. Begin with a round of sanding to smooth out any rough edges or splinters.
Now, onto the decor adventure. One can never go wrong with a natural, rustic finish. Achieve this by applying a light coat of wood stain. The stain pulls out the wood’s grain, offering an elegant aged appearance. Remember to apply the stain with the grain, not against it. Let the stain soak in before wiping off the excess, and allow it to dry completely. This not only increases the wheelbarrow’s appeal but also helps protect the wood from weather elements.
For those wanting a pop of color, consider painting the wheelbarrow. Distressed chalk paint can lend a country vintage vibe while still maintaining the rustic edge. Simply apply a few coats of your selected chalk paint, let dry, then gently sand at areas where natural wear would occur.
Another option is the white-washed look, providing a slightly faded but clean appearance that works particularly well with coastal, farmhouse or Scandinavian decor styles. Mix equal parts of white latex paint and water, and brush it on the wheelbarrow. Wipe down with a rag to rub the paint into the wood and remove the excess.
Lastly, stencil work can add a personalized touch. Whether it’s a simple design, a favorite quote, or your family name, it can be that extra charming detail that sets your wheelbarrow apart.
Always remember, DIY projects are an expression of your personality and style, so feel free to experiment and make this wheelbarrow uniquely yours.
Tip: Applying a clear protective sealer after the paint or stain dries will further protect your wheelbarrow from the elements, and provide a beautiful finishing touch.
