DIY Mudroom Overview:
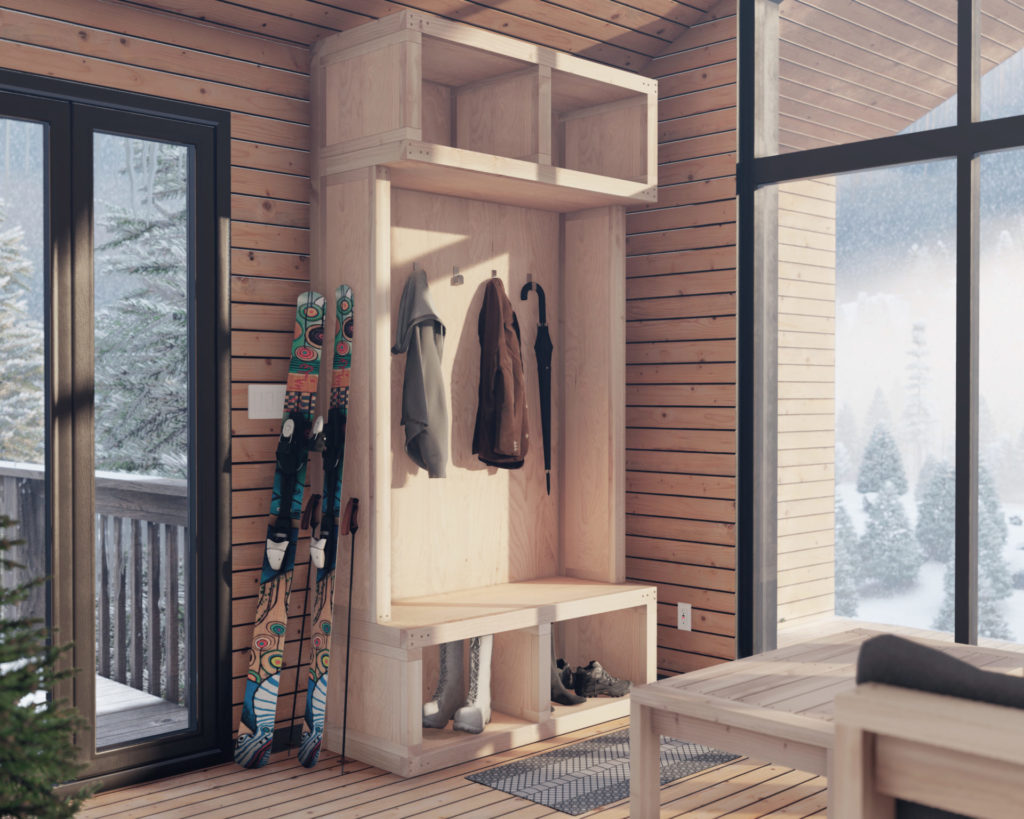
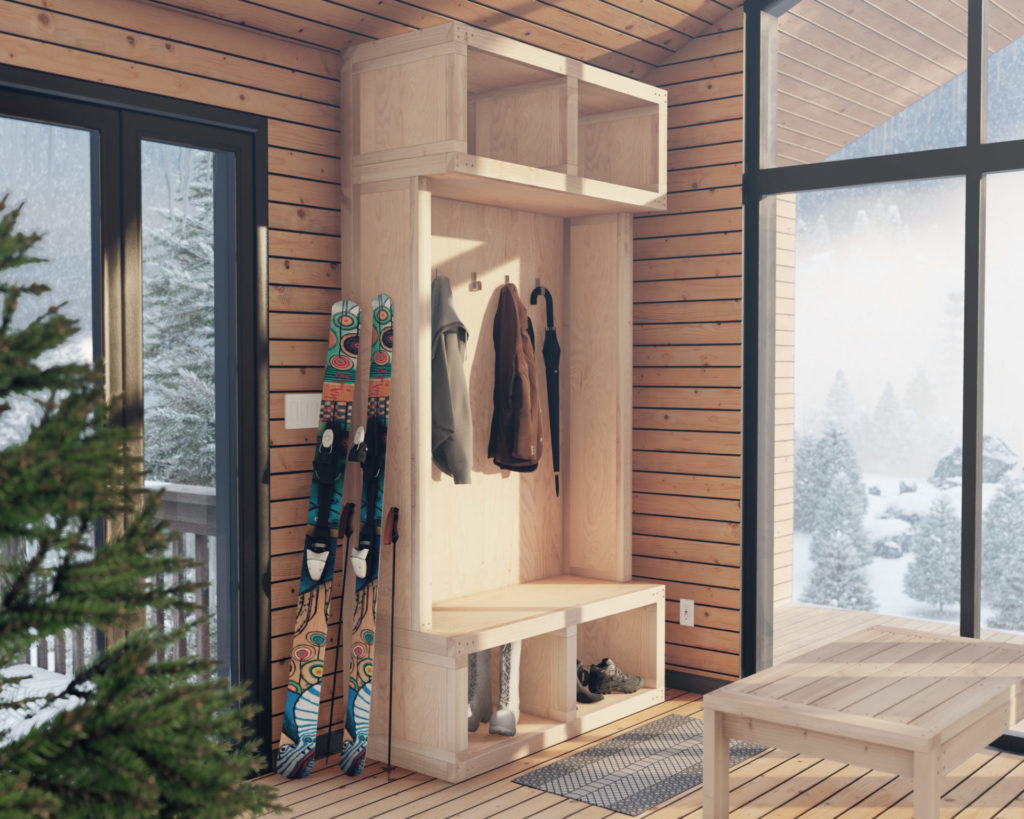
This beautiful mudroom can be placed near the entrance of a home, to serve to store and organize items such as coats, hats, gloves, and shoes, and also provide a space for people to remove dirty or wet shoes before entering the rest of the house.
There are several benefits to having a mudroom in your home. One of the main benefits is the increased storage it provides. By having designated spaces for items such as coats and shoes, you can keep your home more organized and clutter-free. This can be especially helpful for families with children who tend to leave their outdoor gear scattered throughout the house.
Another benefit of a mudroom is the improved organization it can bring to your home. By having designated areas for different items, it becomes much easier to find what you need when you need it. This can save time and frustration, especially during busy mornings when everyone is trying to get out the door.
In addition to providing increased storage and improved organization, a mudroom can also help to keep the rest of your home clean and dry. By having a designated area for people to remove dirty or wet shoes, you can prevent mud and water from being tracked throughout the house. This can be especially important for homeowners who live in areas with inclement weather, as it can help to protect your floors and carpets from damage.
Overall, a mudroom can be a useful and practical addition to any home. Whether you have a small space near your entrance or a larger room that you can dedicate to this purpose, a mudroom can provide numerous benefits and help to keep your home more organized and clean.
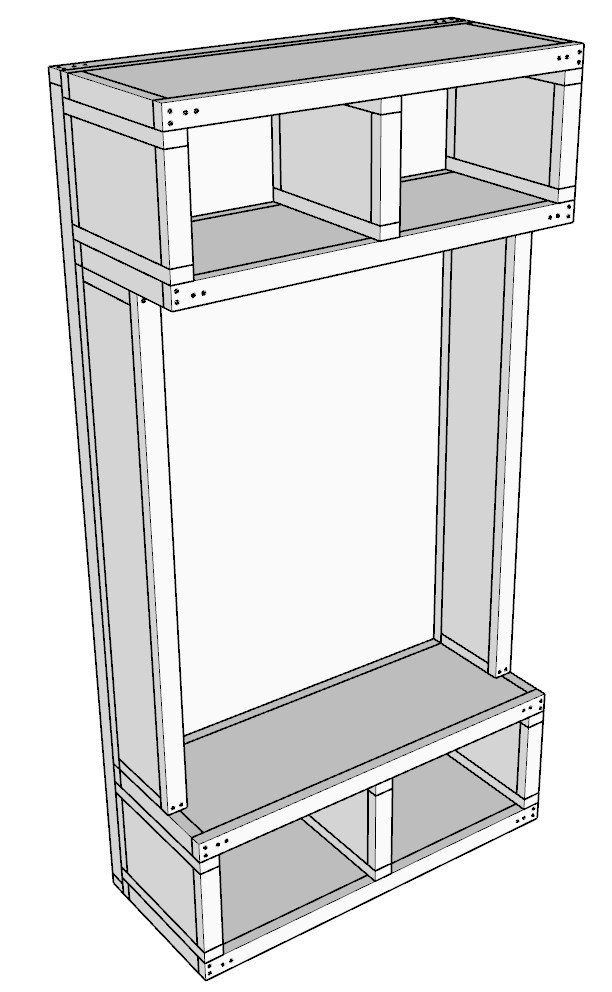
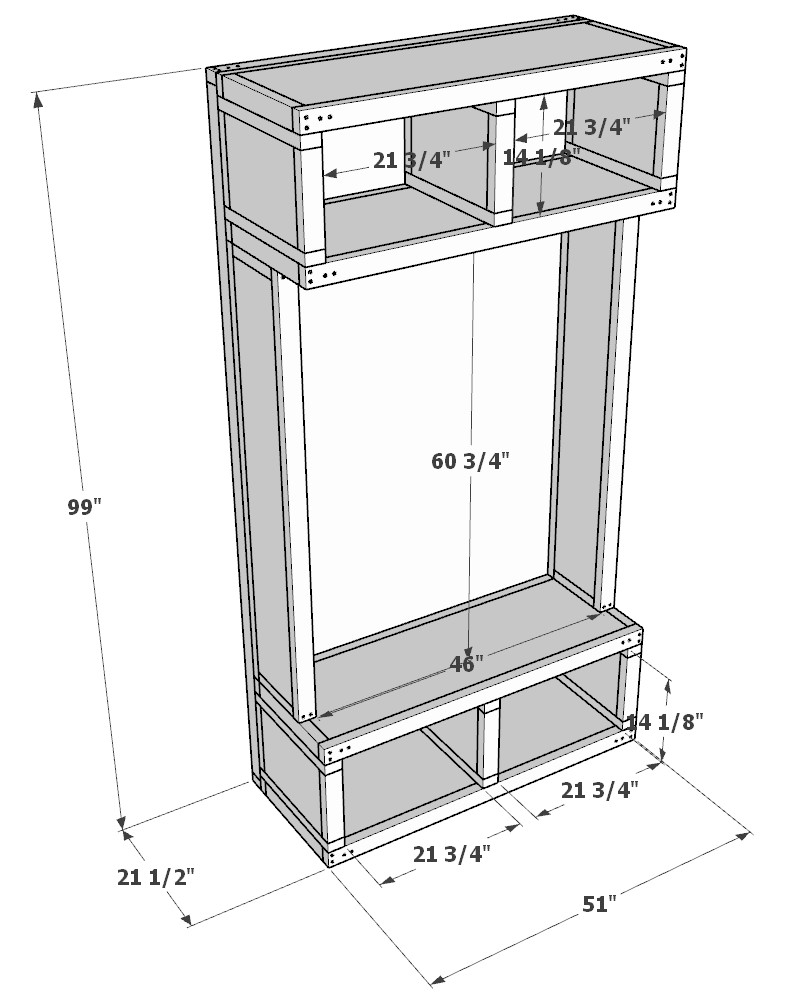
The DIY Mudroom Specifications:
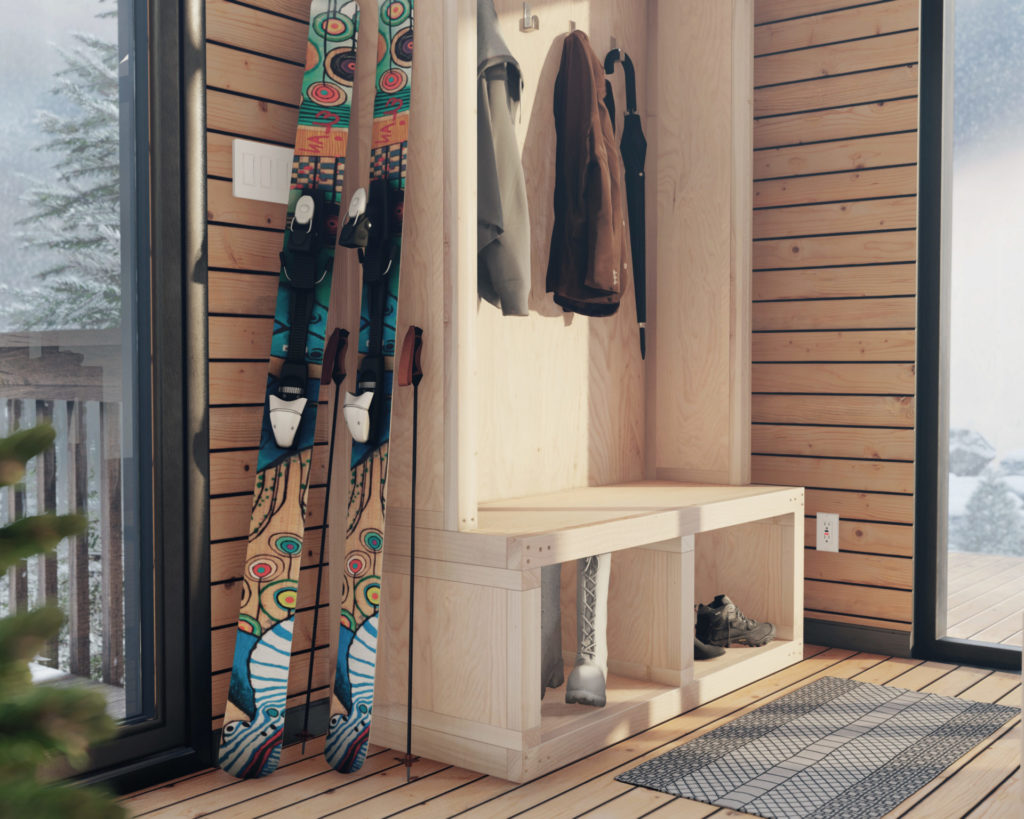
The design includes a storage unit with compartments below where shoes can be stored. This is a practical feature as it allows for all shoes to be stored in a designated area, helping to keep the mudroom organized and clutter-free.
Additionally, the design features a seating mudroom bench. This is a useful feature as it provides a place for people to sit and put on or take off their shoes. The bench can be can be padded for comfort.
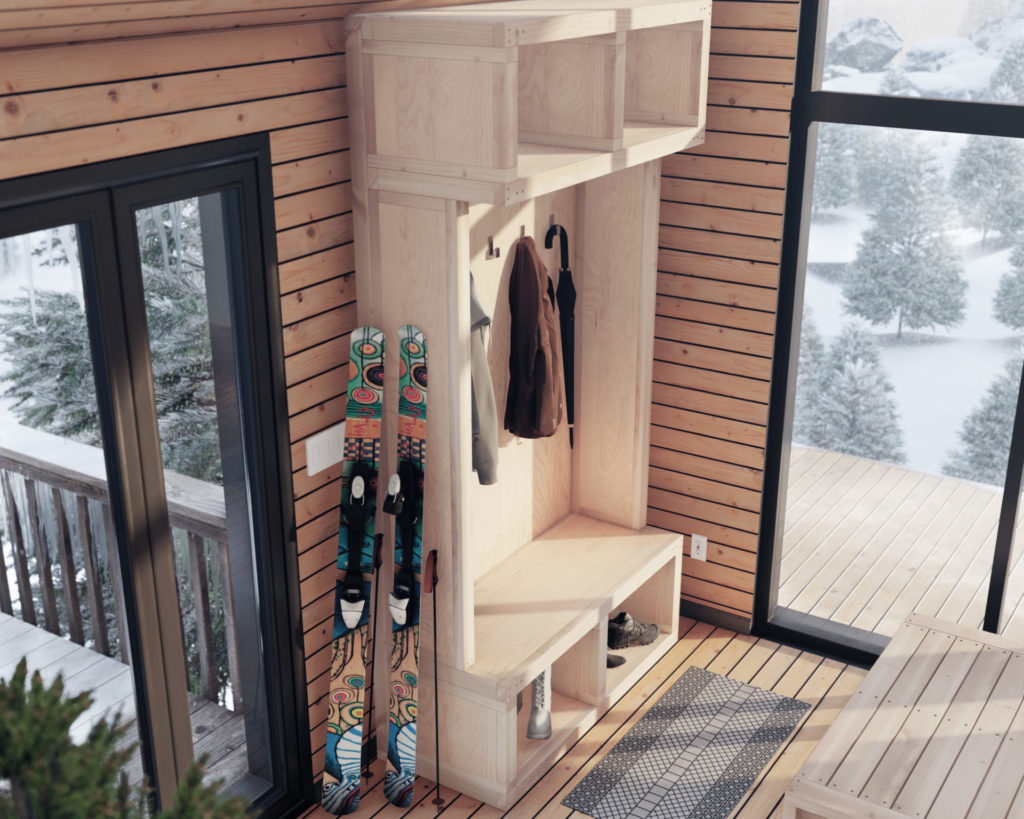
The design also includes space to add hangers to hang coats and jackets. This is a convenient feature as it allows for outerwear to be hung up in a designated area, rather than being left on the floor or scattered around the room.
Finally, the design includes storage cubbies above the hangers at the top. This is a practical feature as it provides additional storage space for items such as hats, scarves, and gloves.
This DIY mudroom design is functional and efficient, providing a range of storage and organization options to help keep the space tidy and organized.
Perfect project for beginners to woodworking
This mudroom is easy to assemble with the step-by-step instructions provided in this post. I believe this essential piece of furniture would be a great project for beginners to woodworking and anyone with minimal woodworking experience. The DIY plans offered in this post include helpful descriptions, images, diagrams, helpful links, and more to ensure that the DIY build is smooth, efficient, and easy.


Time to build
About 6 hours
Total cost of build
About $300
Skill level required
Beginner
Download the PDF plans
DIY mudroom PDF plans
What is included in the PDF download?
Easy to read step by step instructions
Material list
Tools needed
3D illustrations
Recommended tools/materials
Available with the purchase of the DIY plan PDF. Thank you for your support and for making this website possible!
Shopping list and cut list
Available with the purchase of the DIY plan PDF. Thank you for your support and for making this website possible!
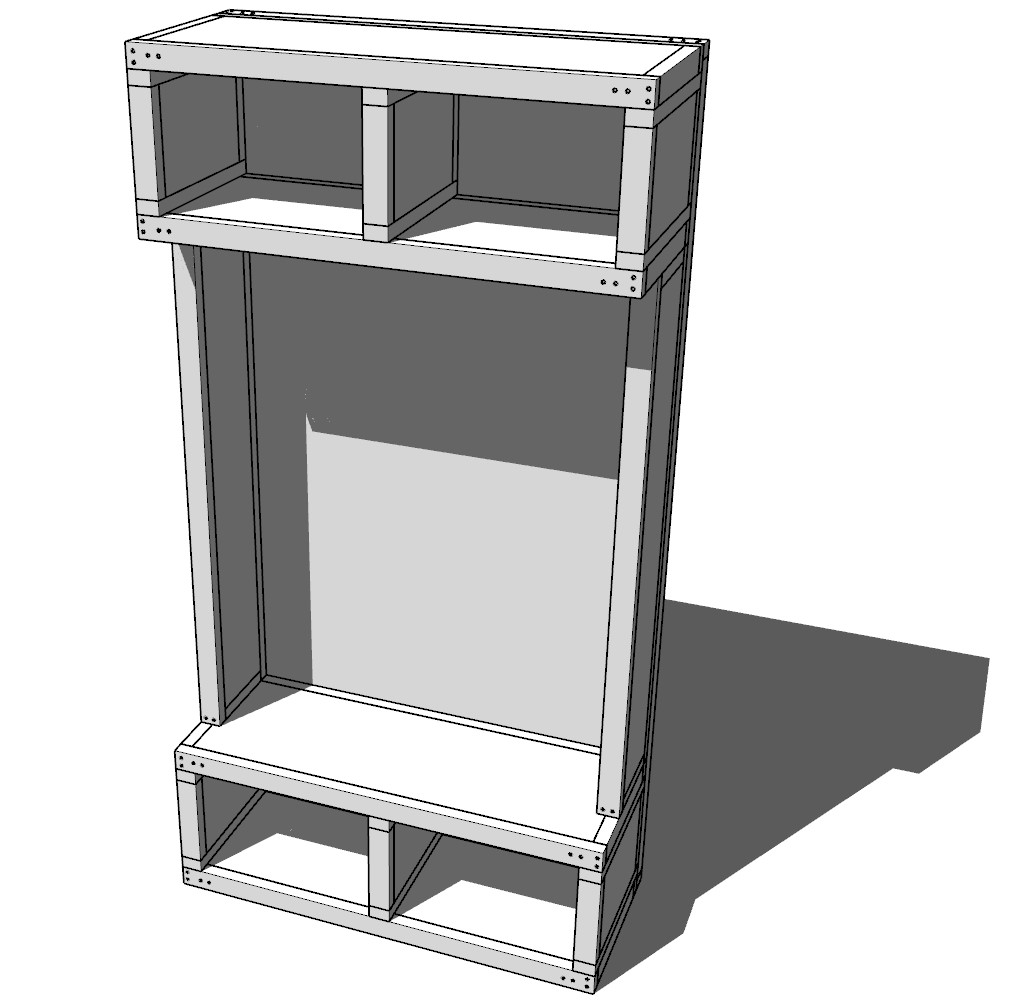
Step 1 (DIY mudroom back wall assembly)
Assemble the back wall of the DIY mudroom.
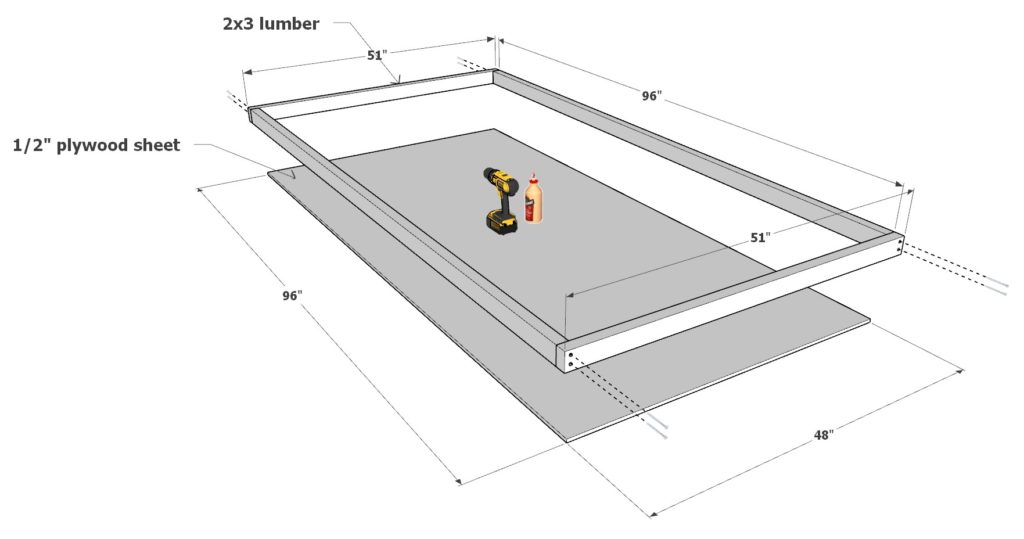
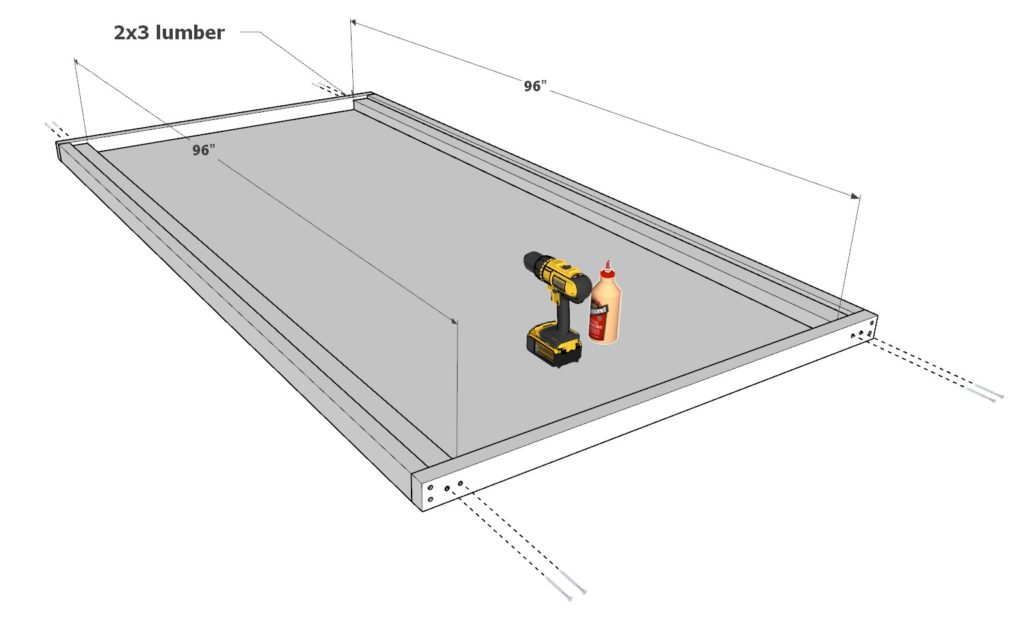
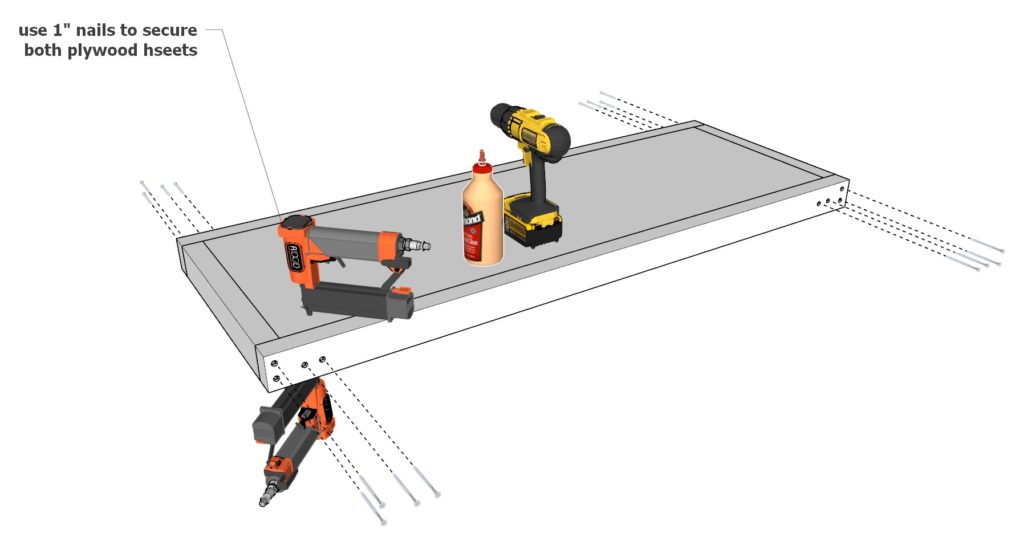
First, take two 96 inch 2×3 lumber pieces and two 51 inch 2×3 lumber pieces and one 96 inch x 48 inch plywood sheet and arrange them as shown below. Attach the 2×3 lumber pieces by adding glue, predrilling (to prevent wood from splitting), and adding 3 inch screws. Use the full plywood sheet as a guide for building the 2×3 frame around it.
Next, add two 96 inch 2×3 lumber pieces. Secure them in place with glue, predrilling, and 3 inch screws.
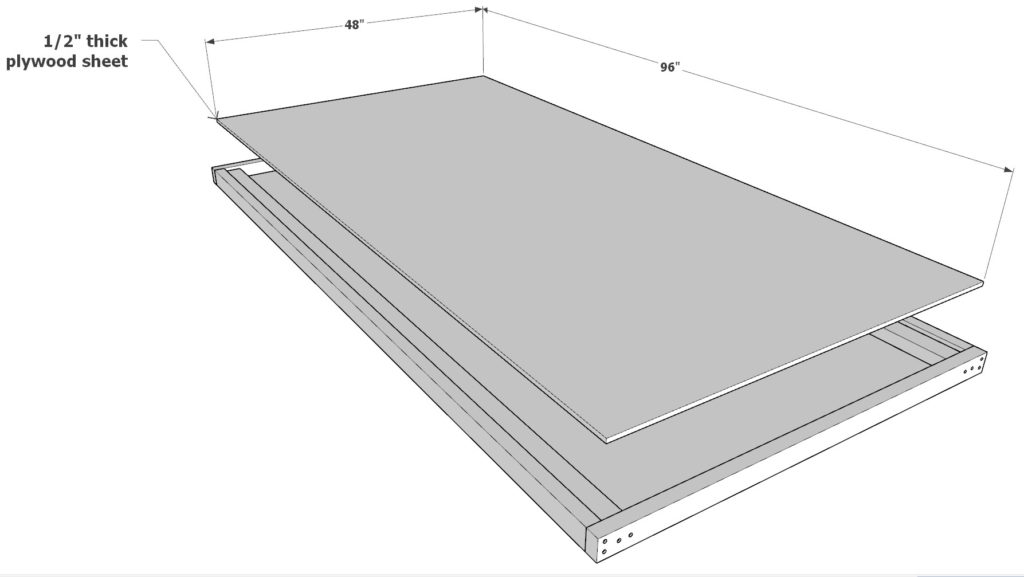
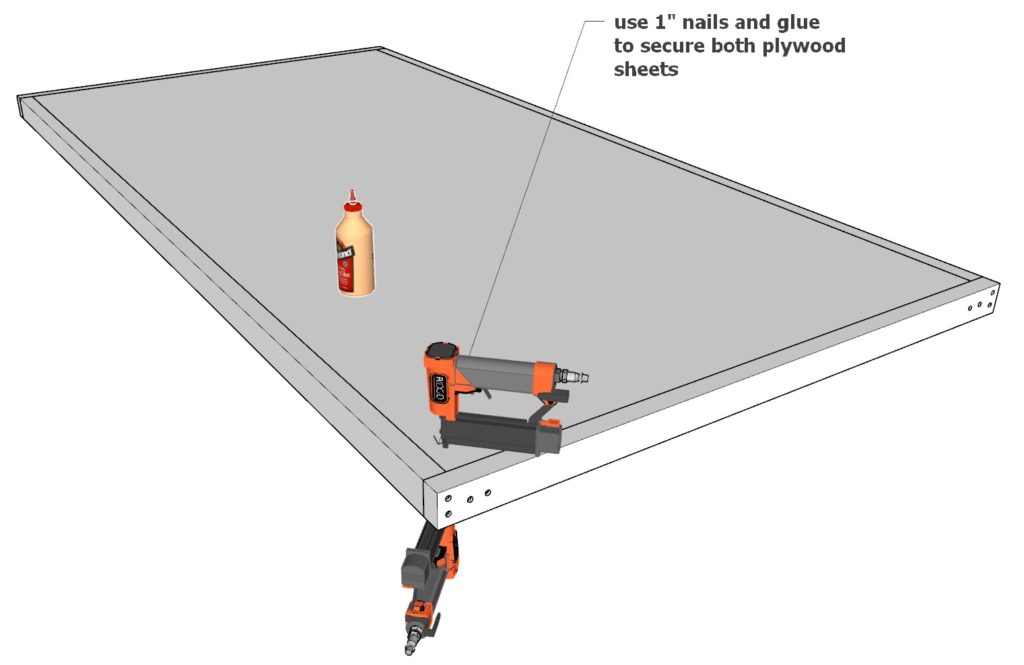
Next, add and secure a 48 inch x 96 inch plywood sheet using glue and 1″ nails from a nail gun.
Next, secure the bottom sheet in the same way.
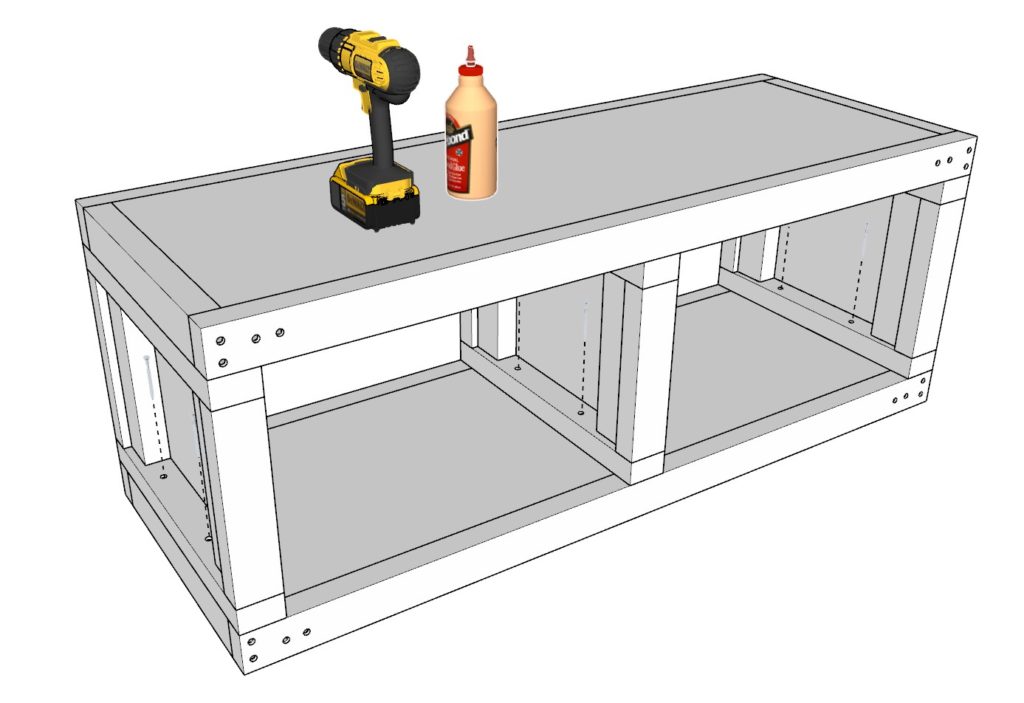
Step 2 (DIY mudroom seating/storage platform assembly)
Next, assembly the mudroom seating/storage platform components.
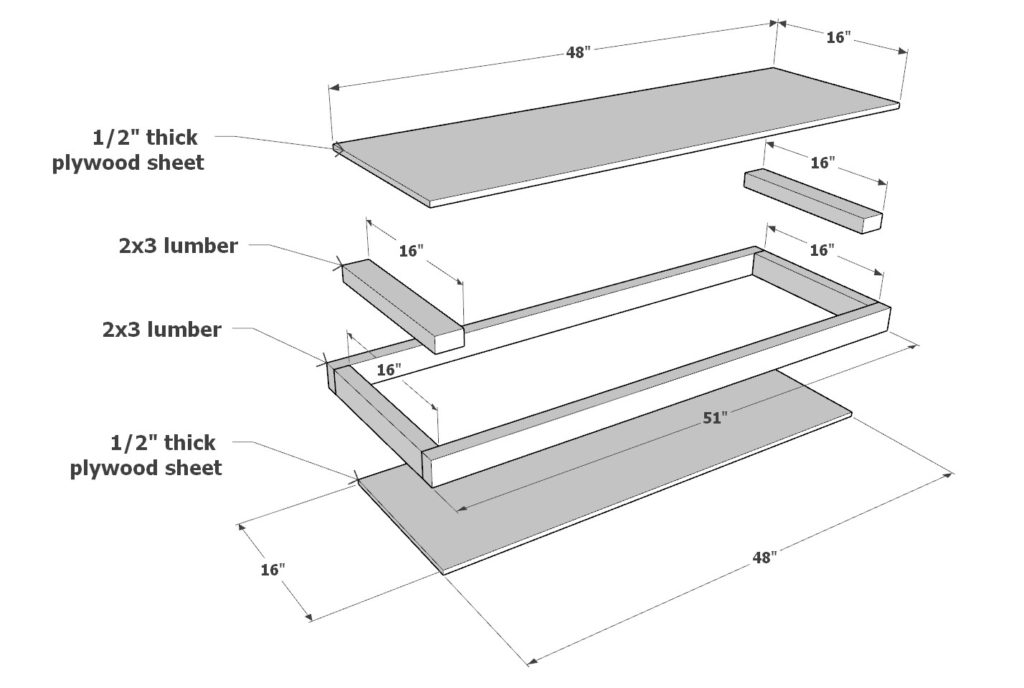
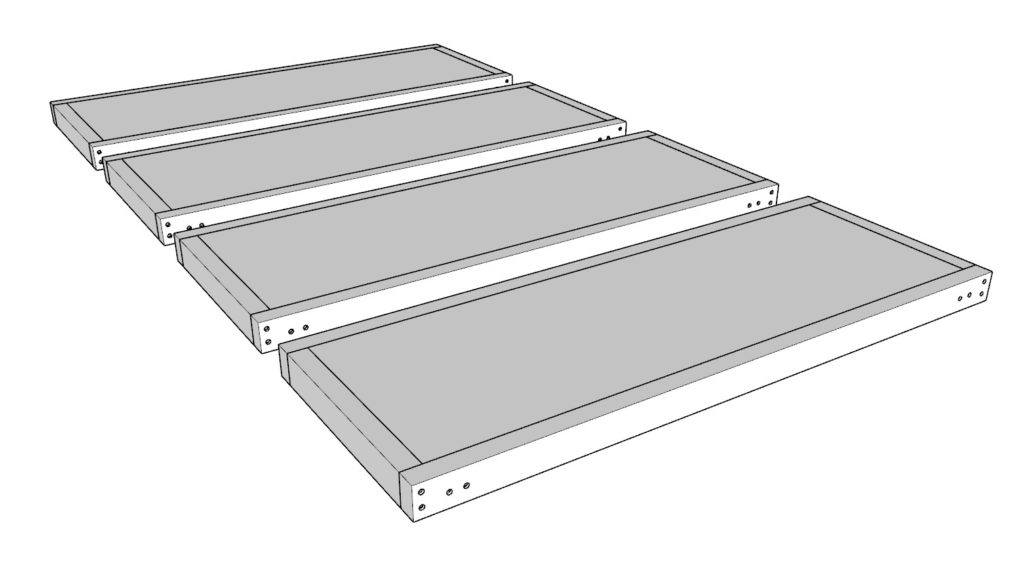
Take two 48 inch x 16 inch plywood sheet cuts, four 16 inch 2×3 lumber pieces, and two 51 inch 2×3 lumber pieces and arrange them as shown below.
Assemble these in the same manner as the back wall in the previous step. Use 3 inch nails, predrill, add glue, and add 1″ nails to to secure the plywood sheet.
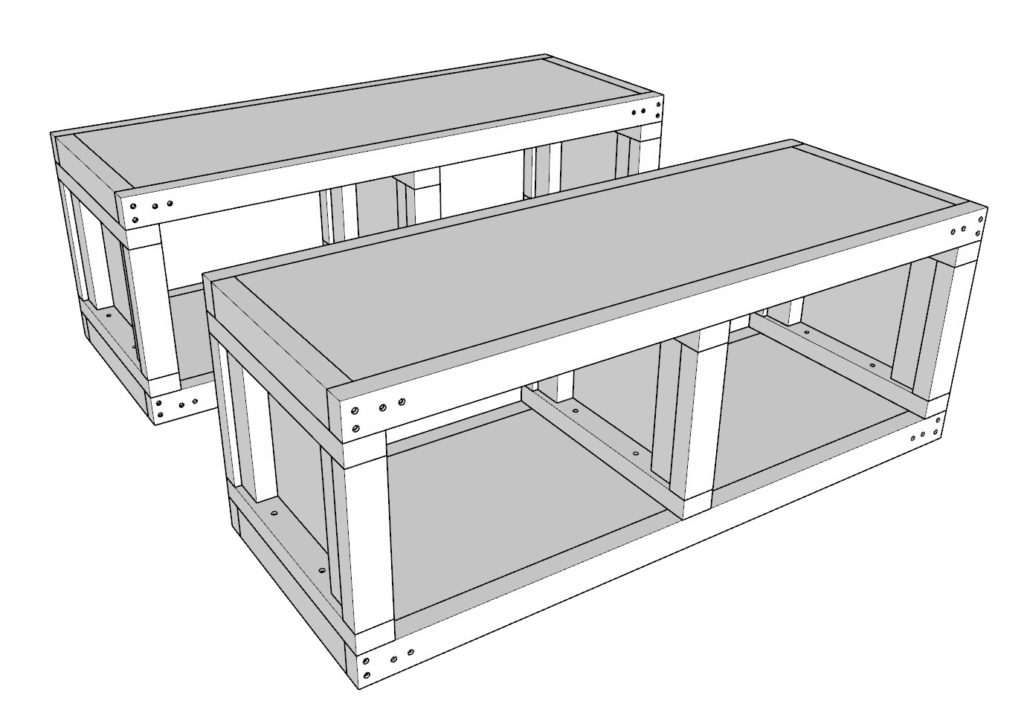
Make four identical pieces.
Step 3 (Mudroom dividers assembly)
Next, assemble the mudroom cubie dividers.
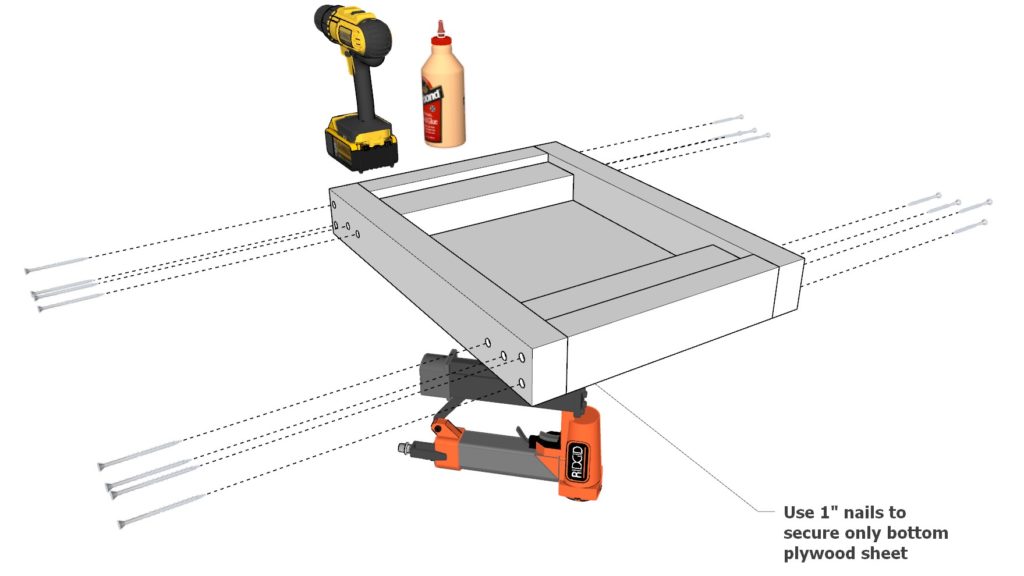
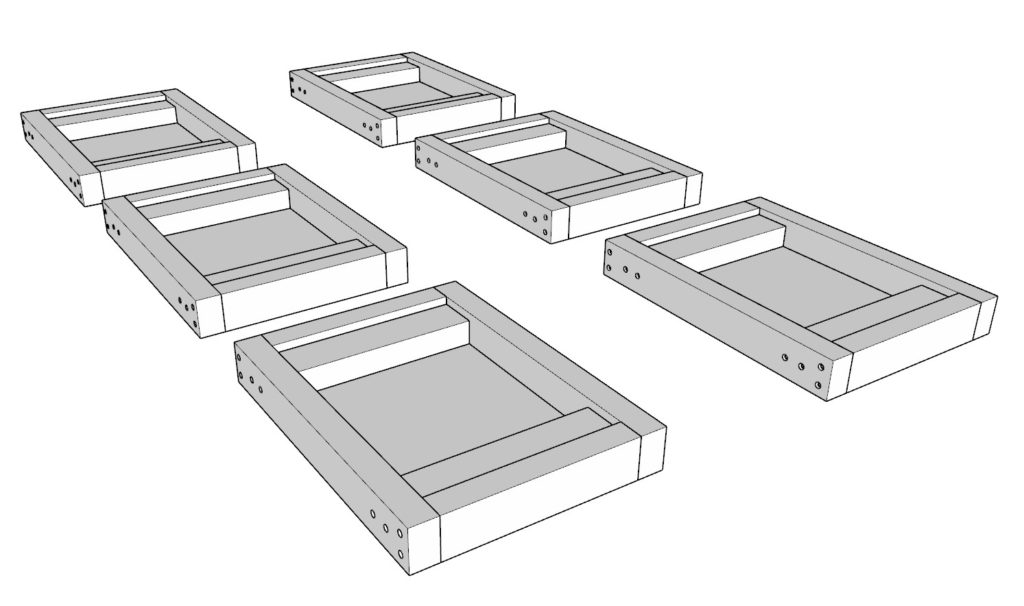
Take one 16 inch x 11 inch plywood sheet cut, four 11 inch 2×3 lumber pieces, and two 19 inch 2×3 lumber pieces. Arrange them as shown below and attach them in the same way as the previous step EXCEPT ONLY ADD ONE PLYWOOD SHEET.
Make six identical pieces.

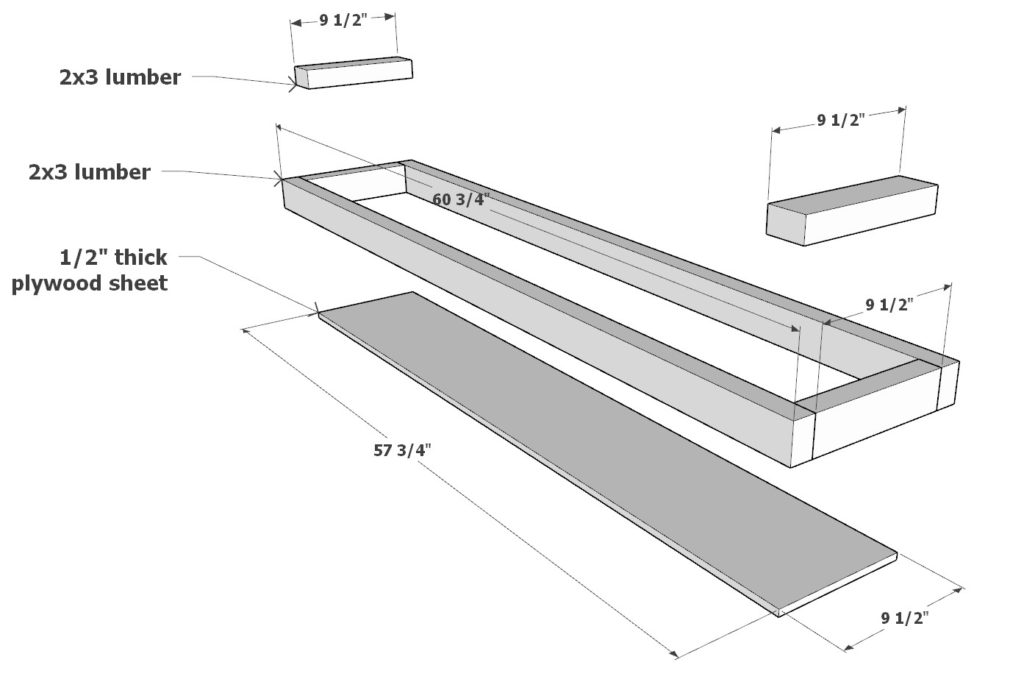
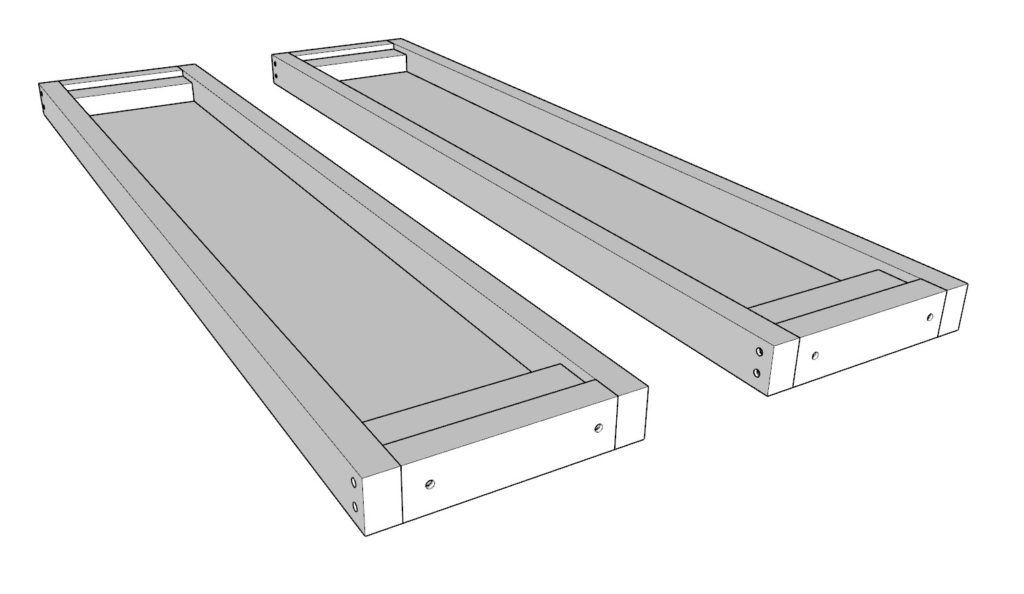
Step 4 (Mudroom side wall assembly)
Next, assemble the DIY mudroom side walls.
Take one 57-3/4 inch x 9-1/2 inch plywood sheet cut, four 9-1/2 inch 2×3 lumber pieces, and two 60-3/4 inch 2×3 lumber pieces and arrange them as shown below. Attach these in the same way as the previous step.
Make two identical pieces.
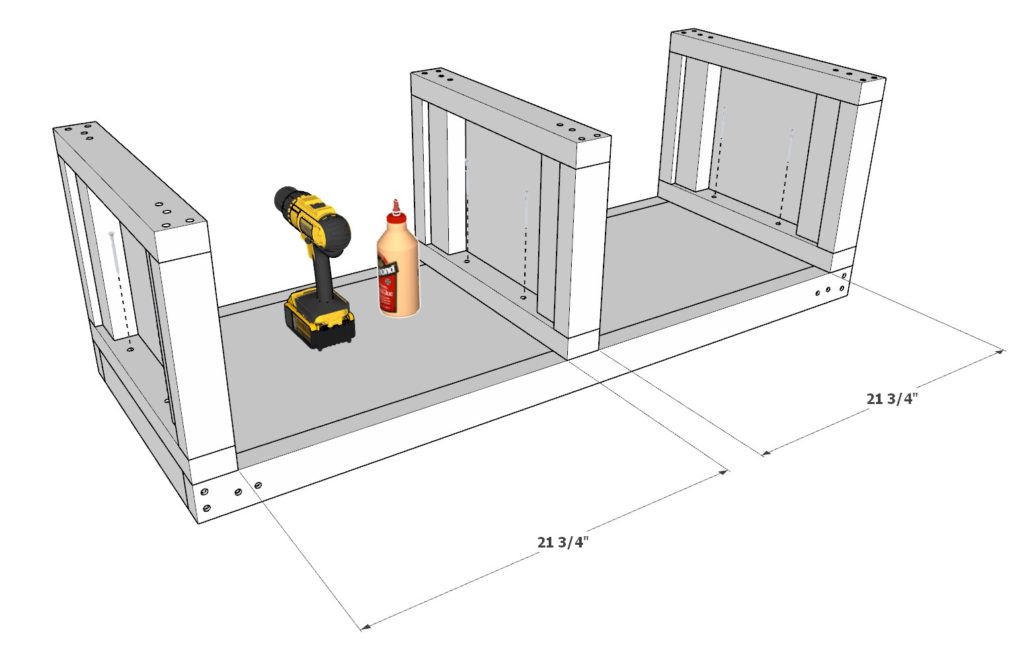
Step 5 (Putting together the storage/seating cubbies)
Next, put together the storage/seating cubbies together.
Take three of the cubby dividers and one of the cubby platforms and arrange them as shown below. Add glue, predrill, and add 3 inch screws. Flip the cubby over and add the second cubby platform.
put together both of the storage/seating mudroom cubbies.
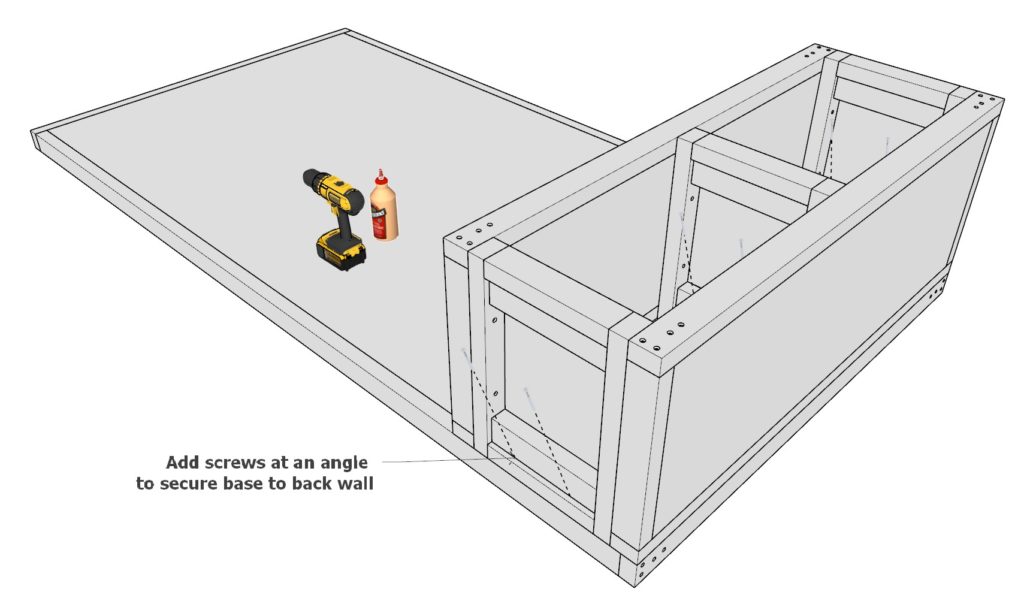
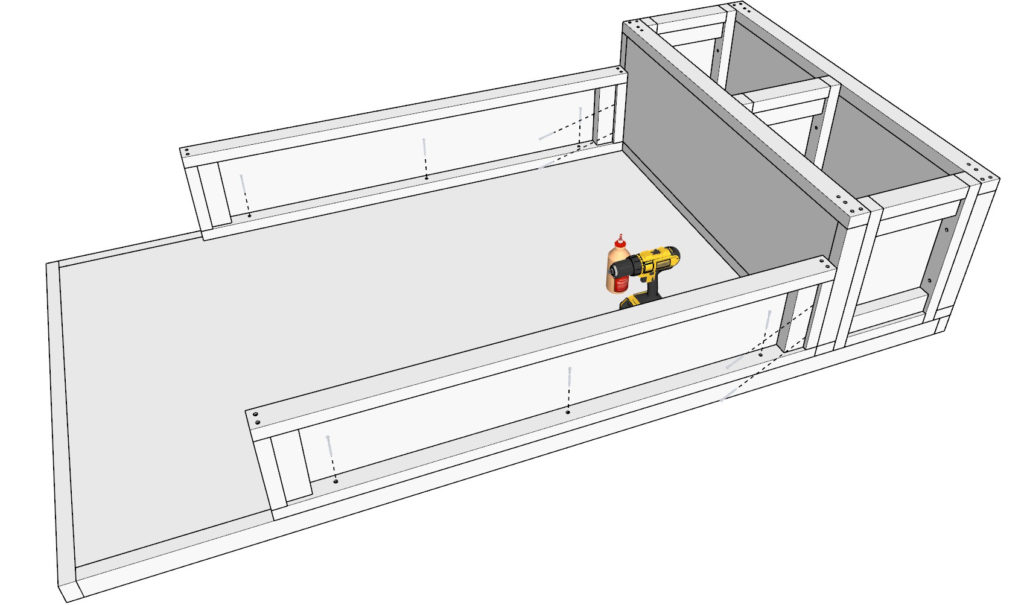
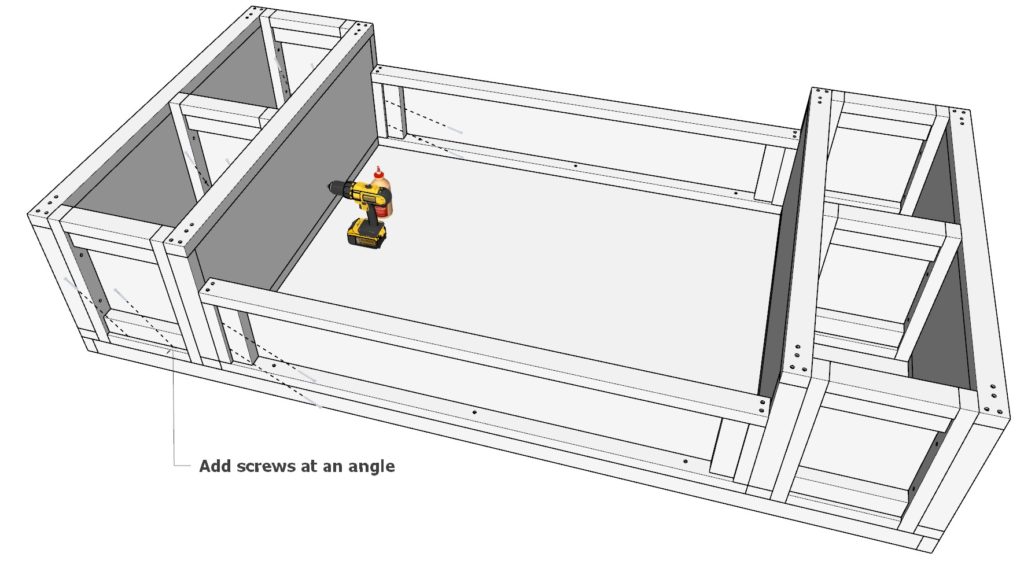
Step 6 (Attaching the mudroom components to back wall)
Next, attach all the mudroom components to the back wall.
Take the cubbies and side walls and attach them to the back wall using 3 inch screws. Add glue, predrill, and add 3 inch screws (at an angle where needed).
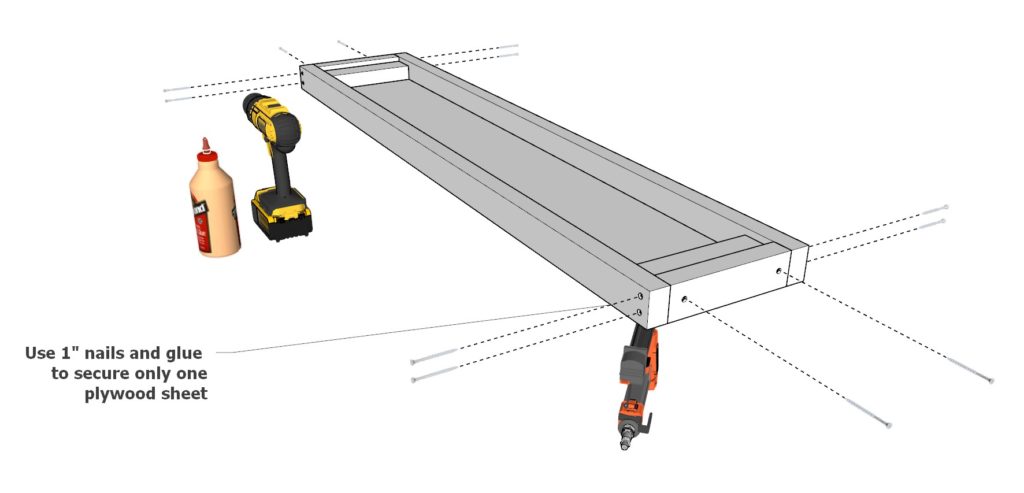
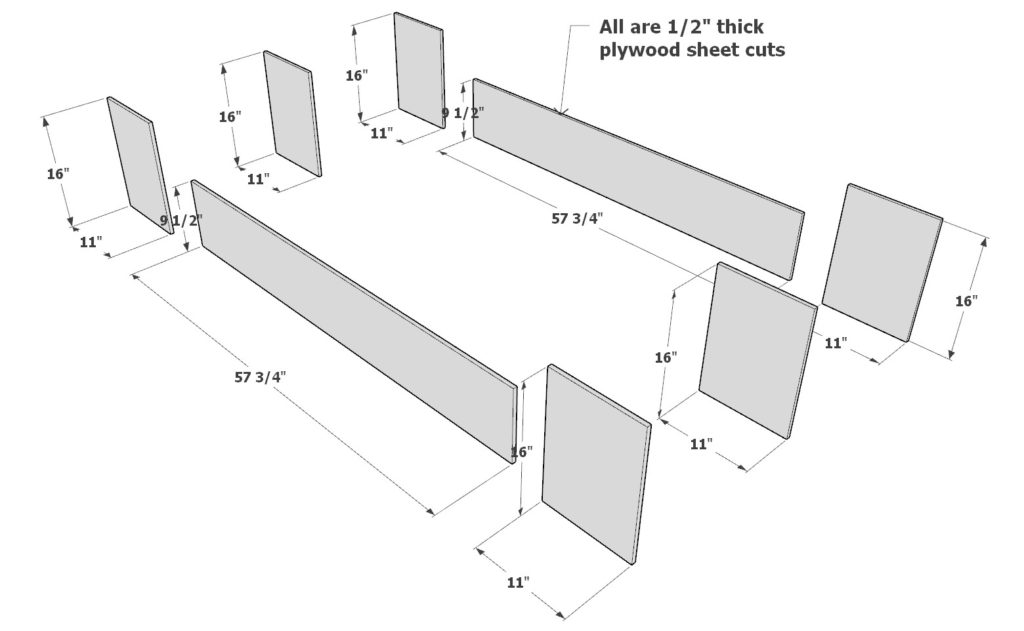
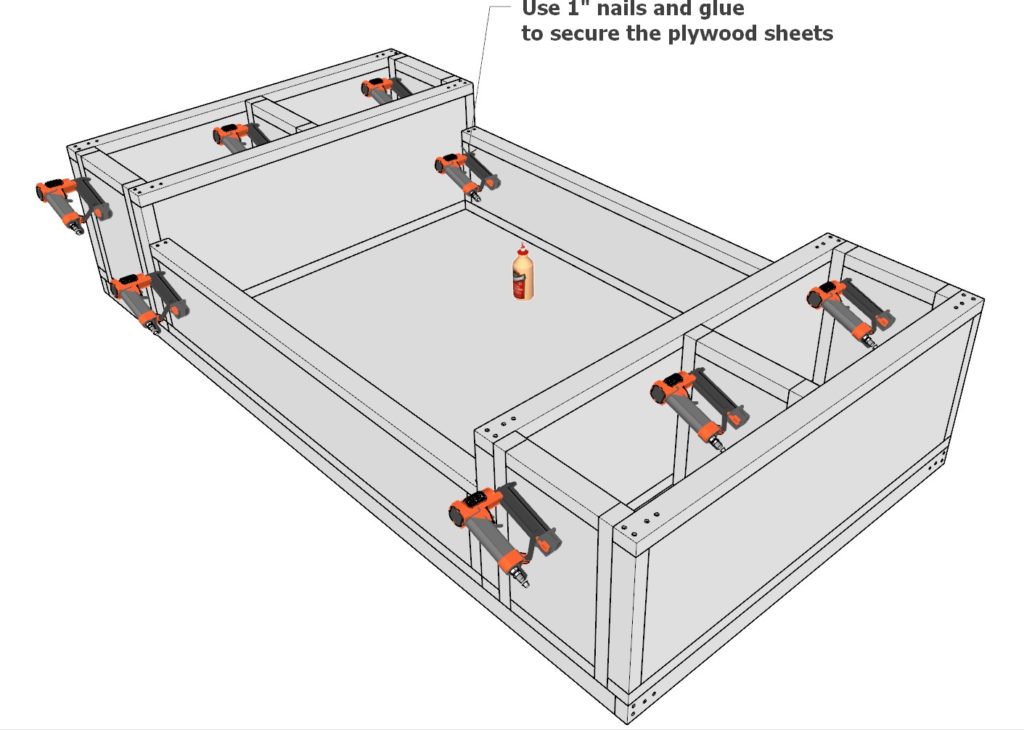
Step 7 (Adding finishing plywood sheets)
Next, add all the remaining plywood sheets to the DIY mudroom. These would include six 16 inch x 11 inch plywood sheet cuts and two 57-3/4 inch x 9-1/2 inch plywood sheet cuts.
Using glue and 1″ nails and a nail gun, add the remaining plywood sheets to close in the remaining openings.
Step 8 (Mudroom finishing touches)
Next, prepare the mudroom for staining or painting.
Step 1: Sanding
Before staining or painting your DIY mudroom, it is important to sand the surface to ensure that it is smooth and even. This will also help the paint or stain to adhere properly. Use a medium grit sandpaper (around 120-150) to lightly sand the surface of the mudroom. Pay special attention to any rough or uneven areas, and sand until the surface is smooth.
Step 2: Cleaning
After sanding, it is important to thoroughly clean the surface of the mudroom to remove any dust or debris. This can be done using a dry cloth or a vacuum.
Step 3: Filling Holes
If you have any screw holes or other imperfections in the wood, it is important to fill them before staining or painting. You can use wood filler, putty, or even a mixture of sawdust and glue to fill the holes. Simply apply the filler to the hole, smooth it out with a putty knife or scraper, and allow it to dry completely. Once the filler is dry, sand it smooth with a fine grit sandpaper (around 220).
Step 4: Priming
If you are painting your mudroom, it is important to prime the surface before applying the paint. This will help the paint to adhere better and give you a more even finish. You can use a brush, roller, or sprayer to apply the primer. If you are using a brush or roller, be sure to use long, even strokes and avoid overloading the brush or roller with too much primer. If you are using a sprayer, make sure to hold it a consistent distance from the surface and overlap your passes to ensure even coverage.
Step 5: Staining or Painting
Once the primer is dry, you can begin staining or painting your mudroom. If you are staining, be sure to follow the manufacturer’s instructions for application and drying times. If you are painting, use a brush, roller, or sprayer to apply the paint in the same manner as the primer. Be sure to work in thin, even coats and allow each coat to dry completely before applying the next one.