DIY Wood Triangle Wedding Arbor: A Beautiful and Unique Addition to Any Wedding
A wood triangle wedding arbor is a beautiful and unique addition to any wedding. It is an incredibly versatile piece that can be used for a variety of purposes, from decoration to providing a stunning backdrop for photos.
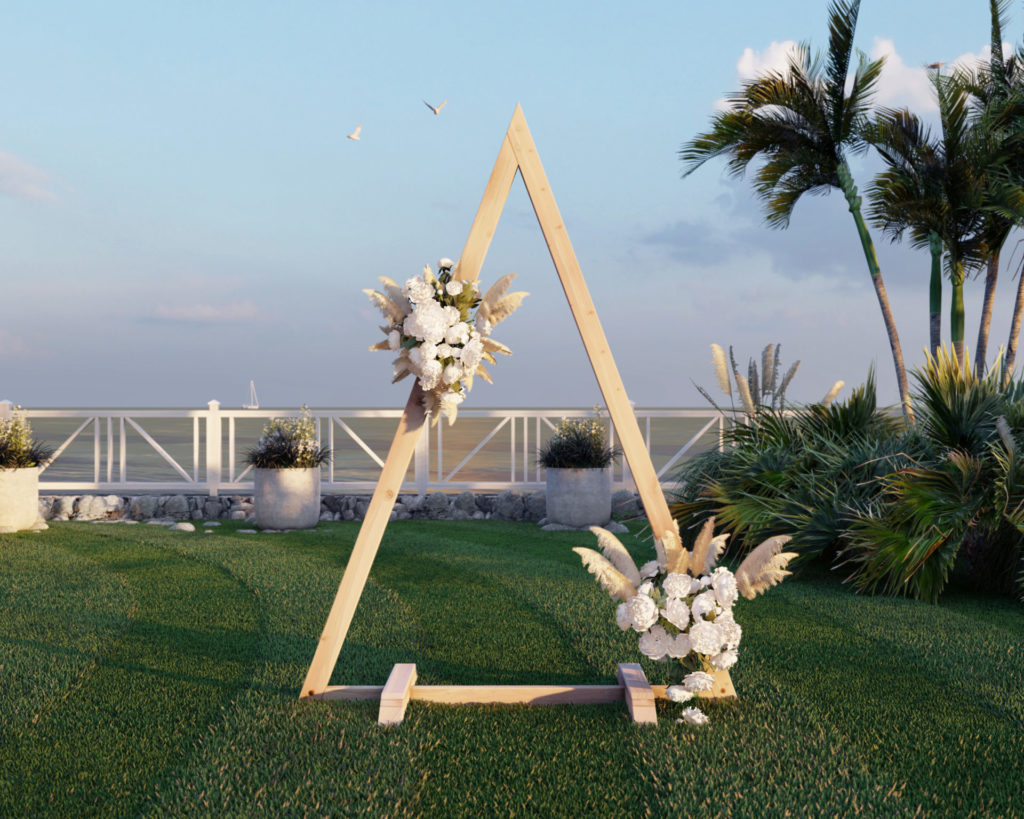
A wood triangle wedding arbor is a perfect way to add a touch of elegance to your wedding. It is a beautiful piece that can be used to frame the bride and groom as they exchange vows, or to provide a stunning backdrop for photos. Triangle wedding arbors are also a great way to add décor to your wedding. They can be used to line the aisle, or to create a stunning focal point in the reception area.
There are many ways to attach flowers and other decorations to a triangle wedding arbor, and the current trends are to use a variety of different colors and textures to create a one-of-a-kind look.
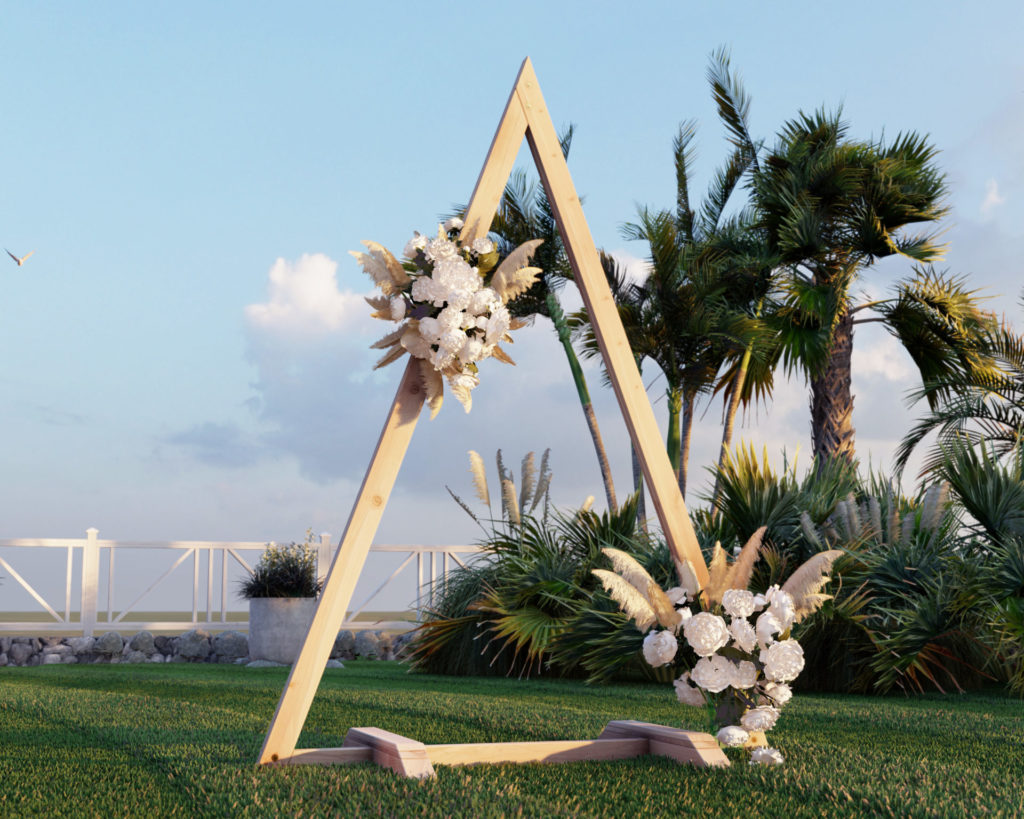
To attach flowers to a Triangle wedding arbor, you can create a symmetrical design or a more organic, free-flowing look. To attach the flowers, you can use wire, string, or zip-ties. In addition to flowers, there are a variety of other items that can be used to decorate a triangle wedding arbor. Lanterns, garlands, and ribbons are all popular choices. You can attach these items using the same methods as you would use to attach flowers.
When it comes to trends, anything goes when it comes to decorating a triangle wedding arbor. You can use a mix of different colors and textures to create a unique look. If you want a more traditional look, you can use all white flowers and decorations. For a more modern look, you can experiment with bolder colors and patterns.
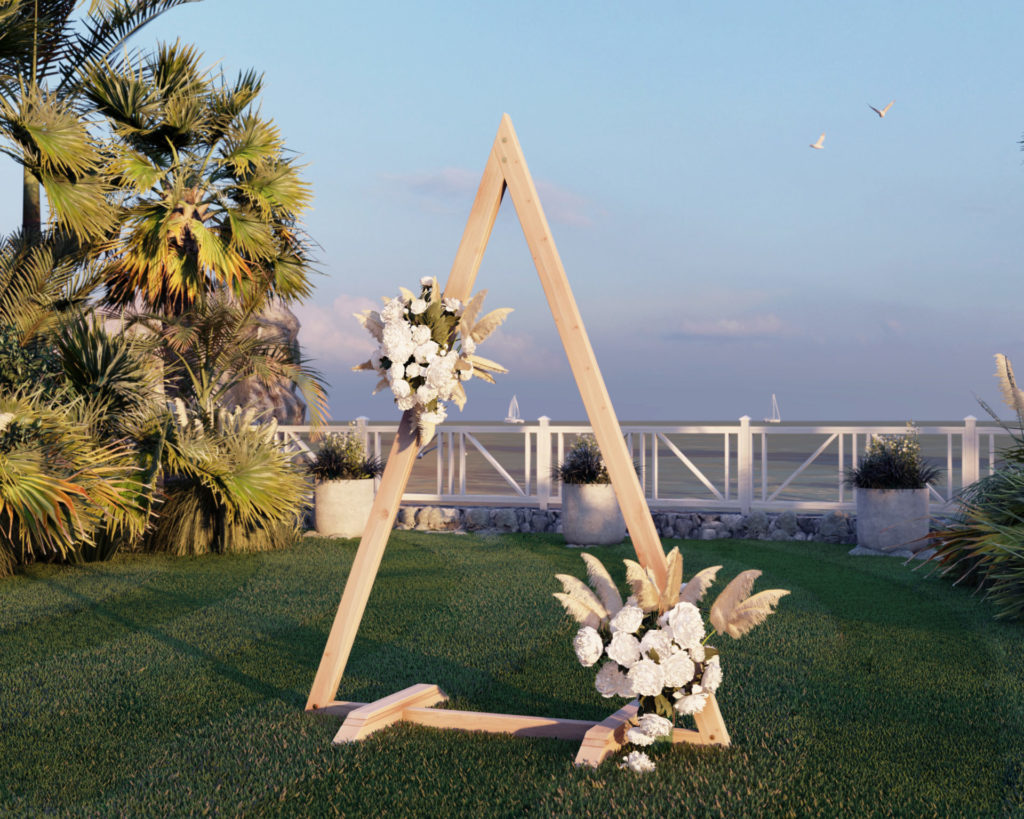
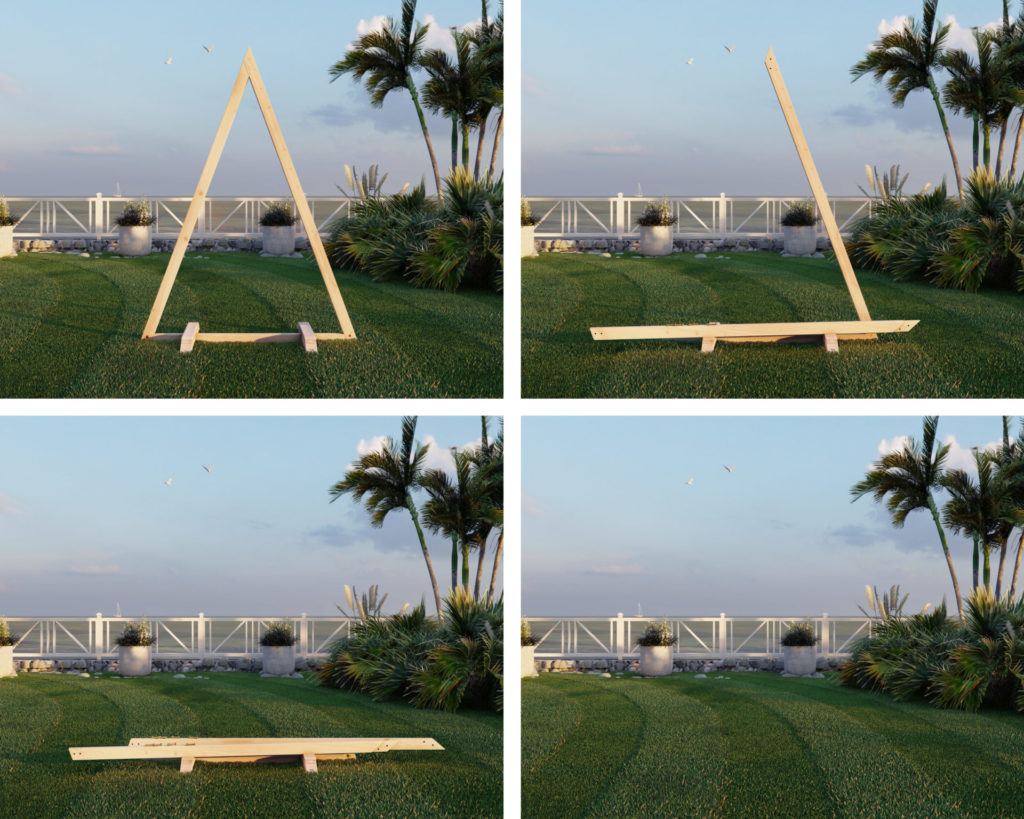
The portable and collapsible DIY wedding triangle arch.
Some reasons that a portable and collapsible DIY wooden wedding triangle is great include the ability to transport the triangle in smaller vehicles, not having to worry about the triangle breaking apart on your big day, quick set up and break down, and being able to reuse and possibly rent out the triangle . The ability for the triangle to break down is very important especially if you are planning a destination wedding or if you need to transport your triangle to another location for your ceremony or reception.
Who can build this DIY event triangle?
The DIY friendly event triangle is easy to assemble with the step-by-step instructions provided in this post.
I believe this event triangle would be a great project for beginners to woodworking and anyone with minimal woodworking experience.
The DIY plans offered in this post include helpful description, images, diagrams, helpful links, and more to ensure that the DIY fence build is smooth, efficient, and easy.
Time to build
1-2 Hours
Total cost of build
About $90 per panel
Skill level required
Beginner
Download the PDF plans
Portable Triangle Wedding Arbor DIY Plans PDF
What is included in the PDF download?
- Easy to read step by step instructions
- Material list
- Tools needed
- Helpful links to materials and tools needed
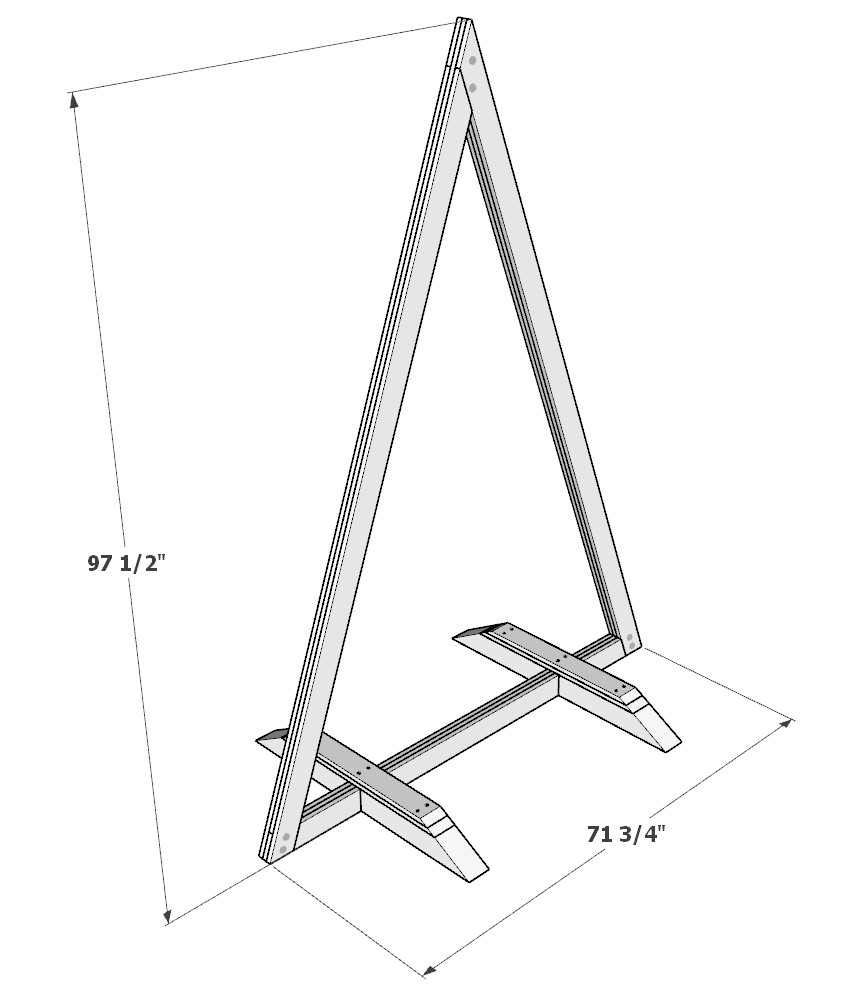
Portable Triangle Wedding Arbor dimensions
Recommend tools and materials
- Saw (miter saw recommended for precision cuts)
- Drill
- Impact driver with bit for screws
- wood countersink drill bit
- (12) 3.5 inch long screws
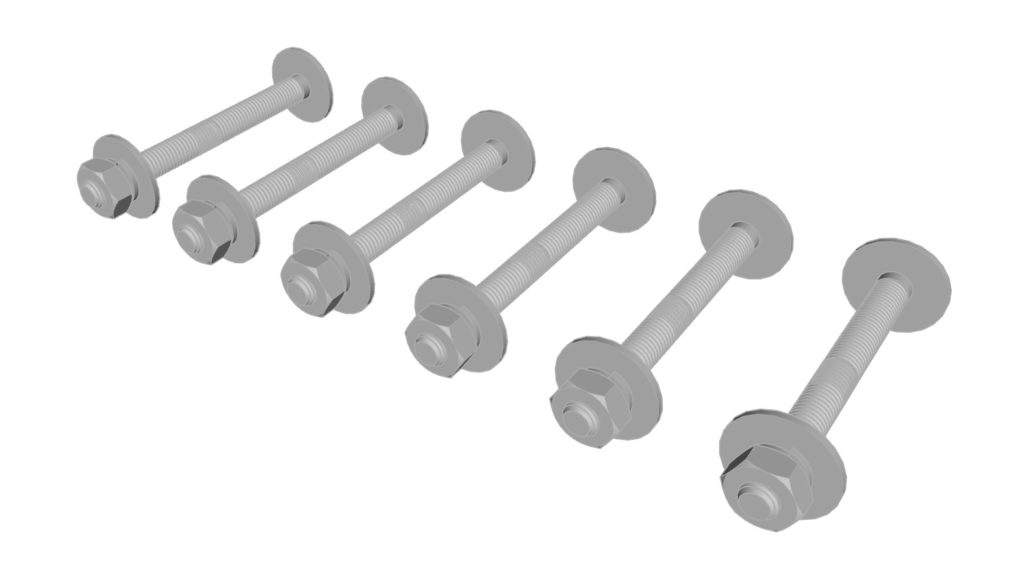
- (6) split locks, (6) washers, (6) nuts, and (6) bolts and a drill bit that fits the diameter of the bolts you choose.
- Sander
- Wood glue
Lumber shopping and cut list
Available with purchase of DIY PDF. Thank you for your support and making this website possible!
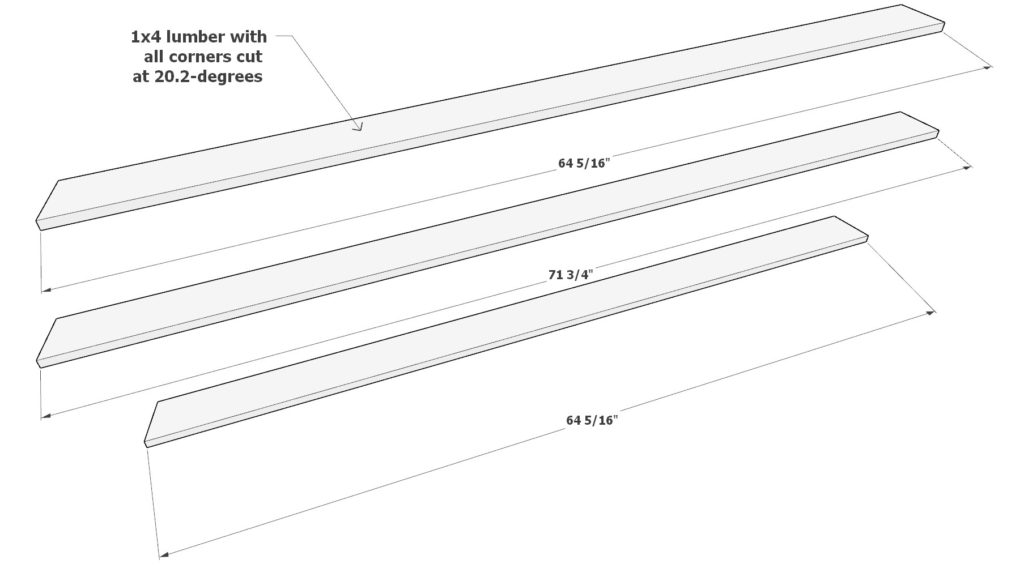
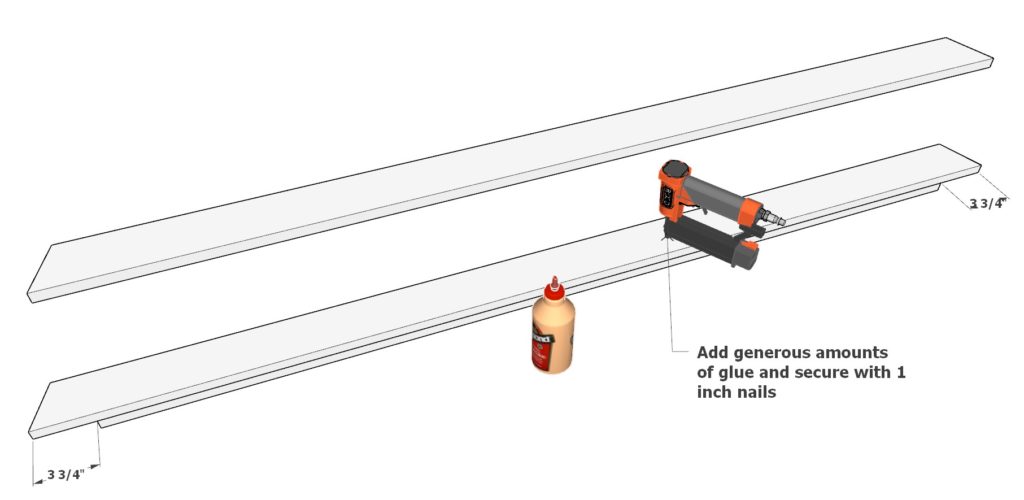
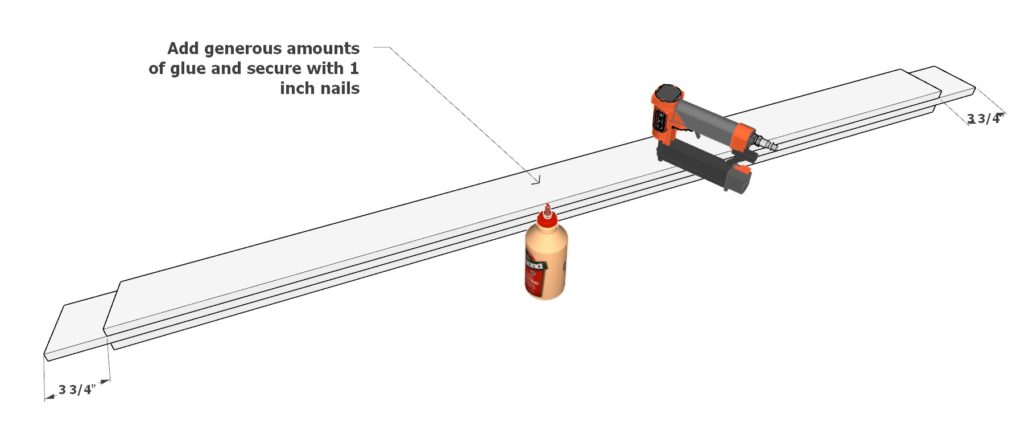
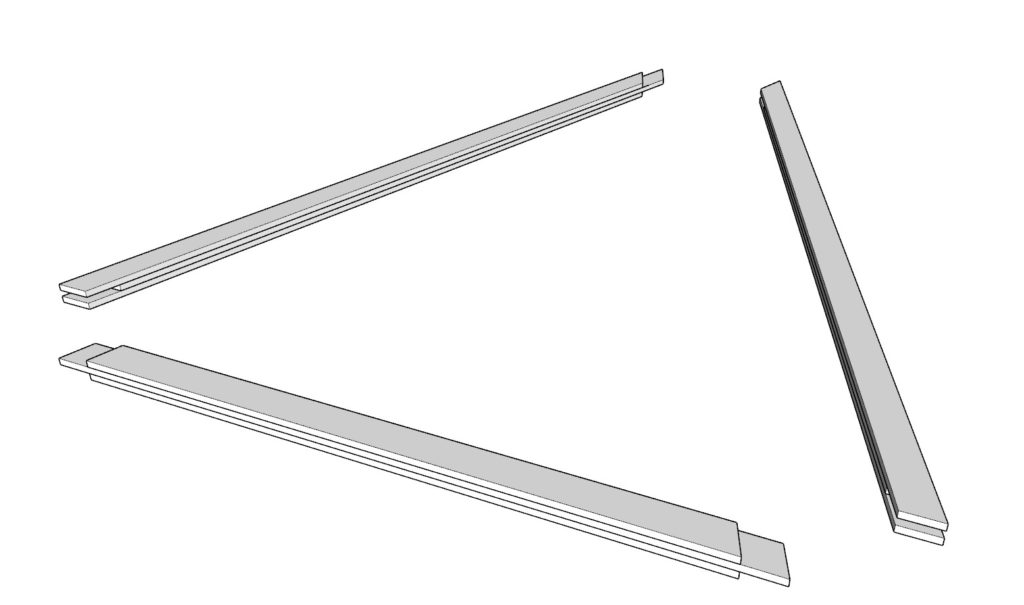
Step 1 (Construction of side A for the portable triangle wedding arbor)
First, build side A for the portable triangle wedding arbor.
Take two 64-5/16 inch 1×4 lumber pieces and one 71-3/4 inch lumber pieces and arrange them as shown below.
Each board will be cut at 20.2-degrees on both ends. Ensure that the spacing is correct. The middle board is going to be spaced out 3-3/4 inches from the ends as shown below.
Add generous amounts of glue and use 1 inch nails and nail gun to secure the boards together.
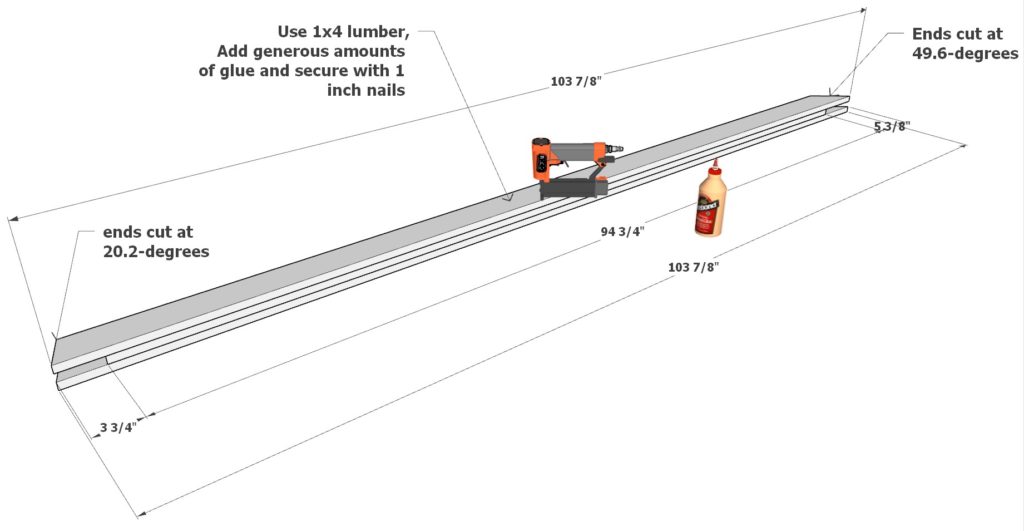
Step 2 (Construction of side B for the portable triangle wedding arbor)
Next, build side B for the portable triangle wedding arbor.
Take two 103-7/8 inch 1×4 lumber pieces and one 94-3/4 inch lumber pieces and arrange them as shown below.
Each board will be cut at 20.2-degrees on one end and at 49-6-degrees on the other end. Ensure that the spacing is correct. the “49-6-degree” side has the middle board spaced out at 5-3/8 inches and the “20.2-degree side” has the middle board spaced out at 3-3/4 inches.
Add generous amounts of glue and use 1 inch nails and nail gun to secure the boards together.
Step 3 (Construction of side C for the portable triangle wedding arbor)
Next, build side C for the portable triangle wedding arbor.
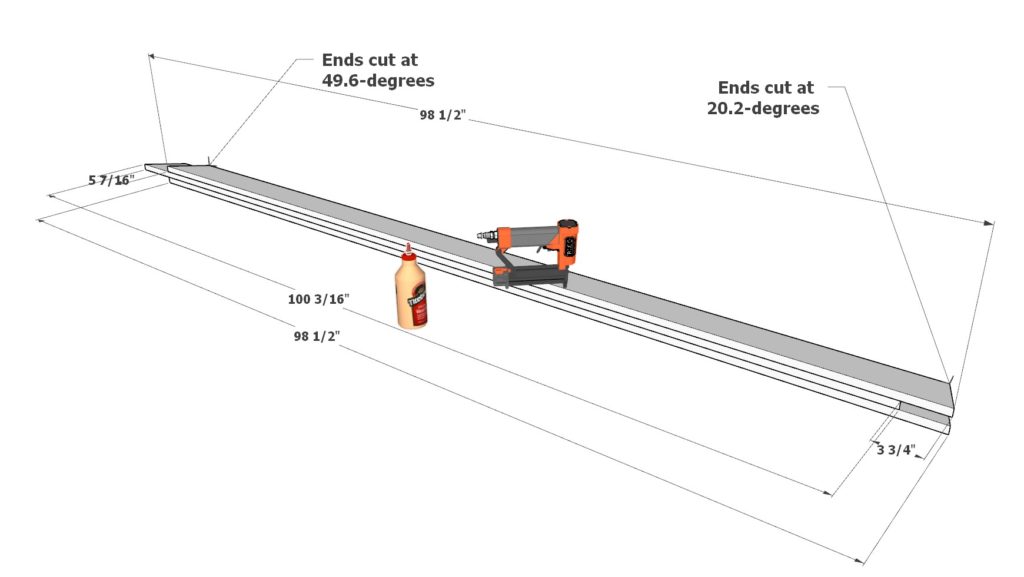
Take two 98-1/2 inch 1×4 lumber pieces and one 100-3/16 inch lumber pieces and arrange them as shown below.
Each board will be cut at 20.2-degrees on one end and at 49-6-degrees on the other end. Ensure that the spacing is correct. the “49-6-degree” side has the middle board spaced out at 5-7/16 inches and the “20.2-degree side” has the middle board spaced out at 3-3/4 inches.
Add generous amounts of glue and use 1 inch nails and nail gun to secure the boards together.
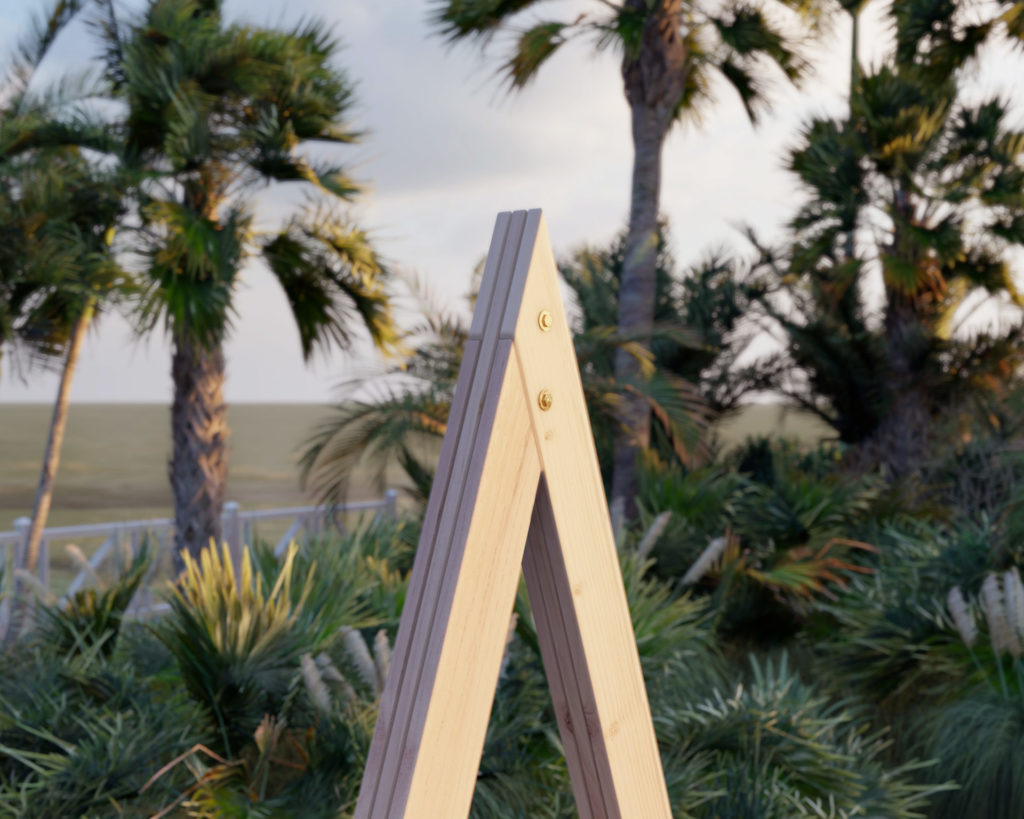
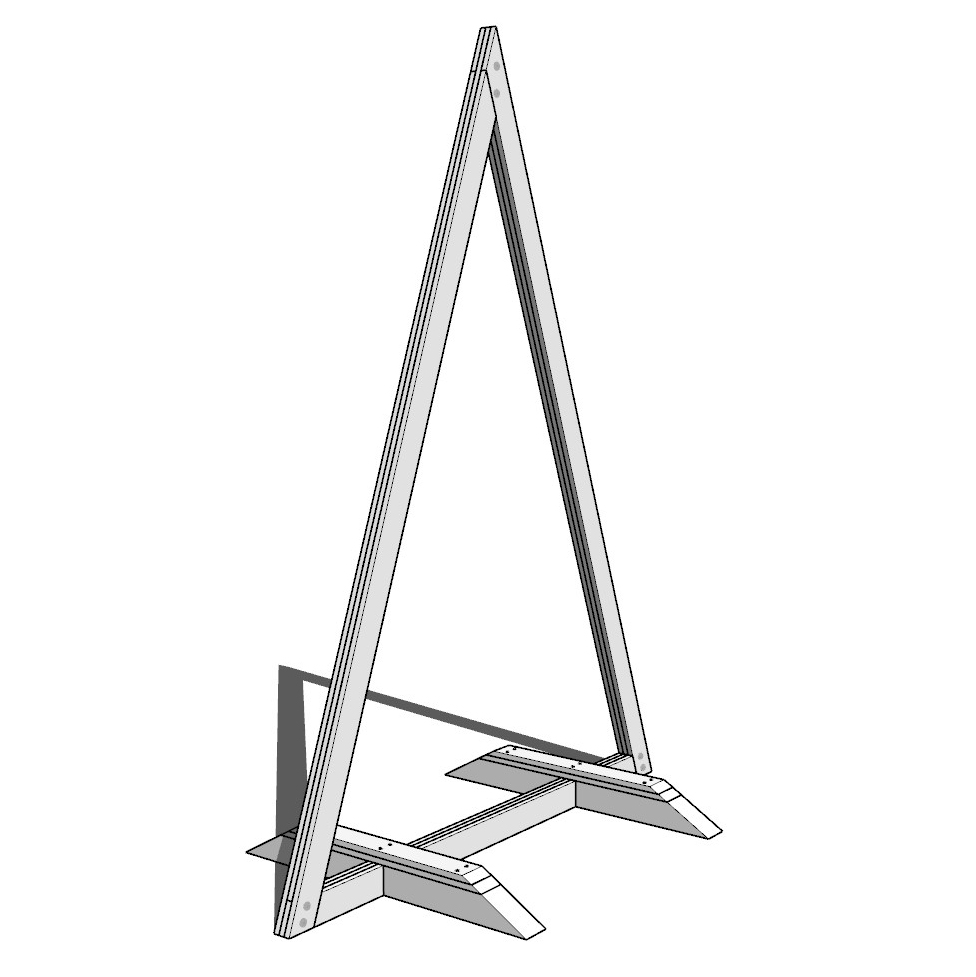
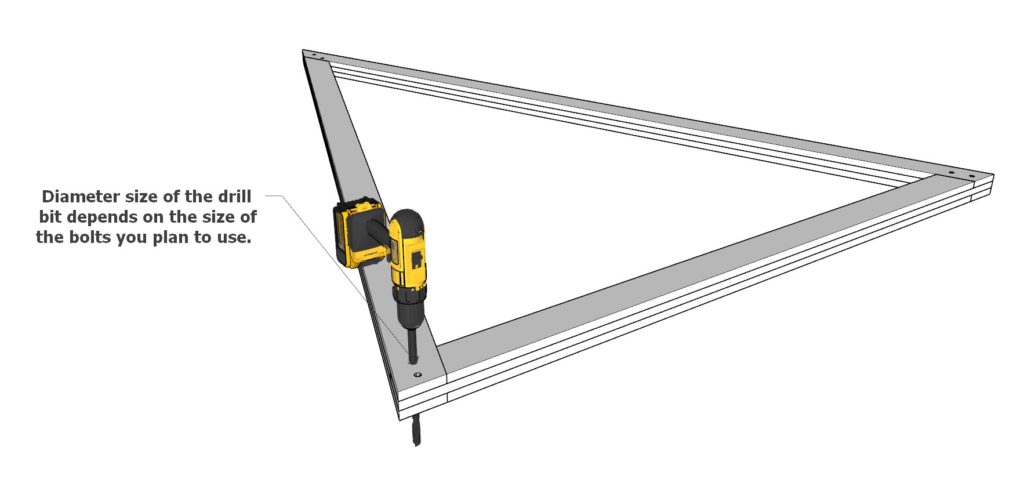
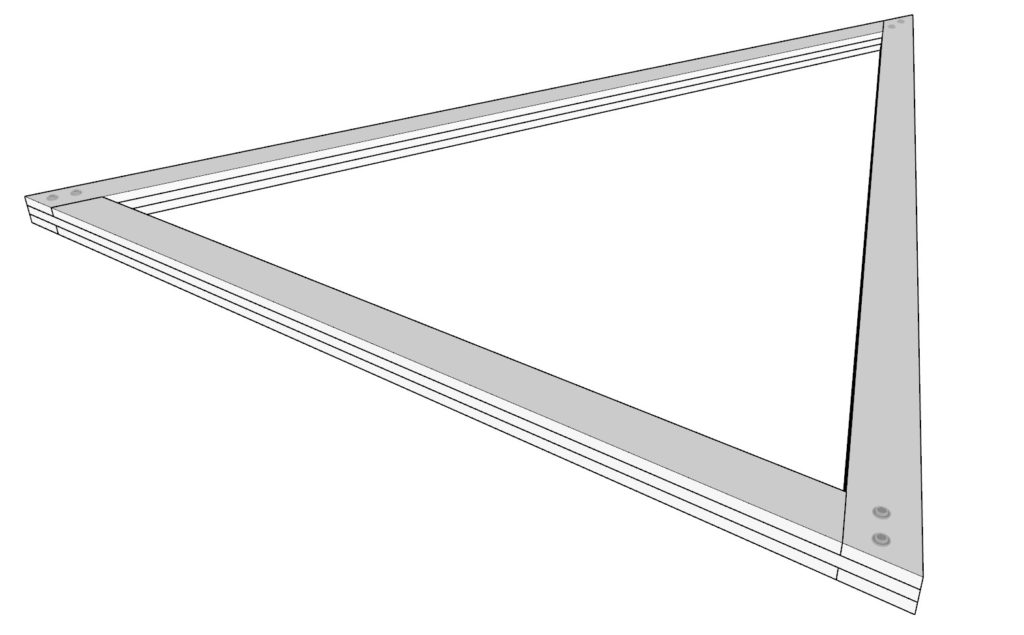
Step 4 (DIY wedding triangle arbor assembly)
Next, put together side A+B+C of the DIY wedding triangle arbor.
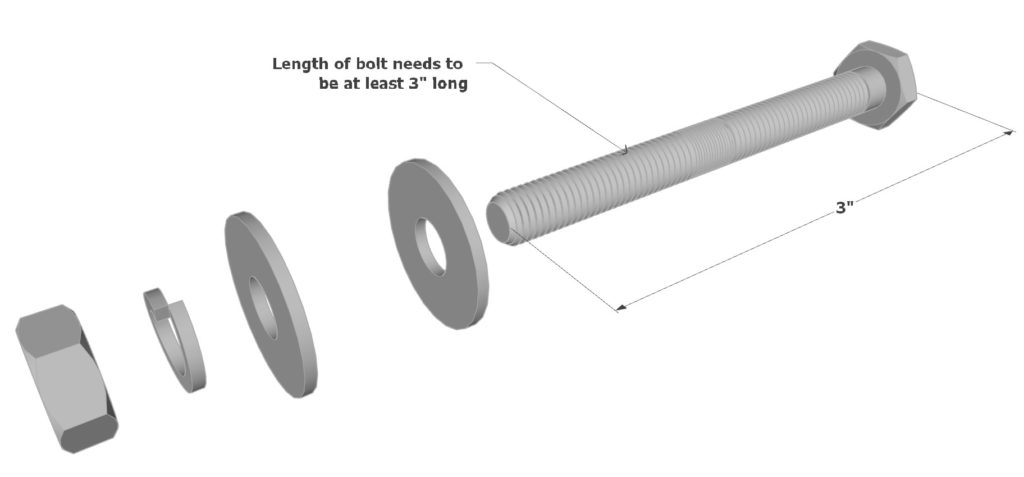
To secure the pieces together, join the full triangle together and drill two holes per edge. These holes need to be the diameter of the bolt that you have chosen to use (use an appropriate size drill bit).
A recommended bolt size is at least 3 inches long. The diameter can be any size (same size as the drill bit). Make sure to use a split lock, a washer, a nut, and the bolt. You will need a total of 6 sets of bolt assemblies.
Add the bolts and secure the triangle tightly together.
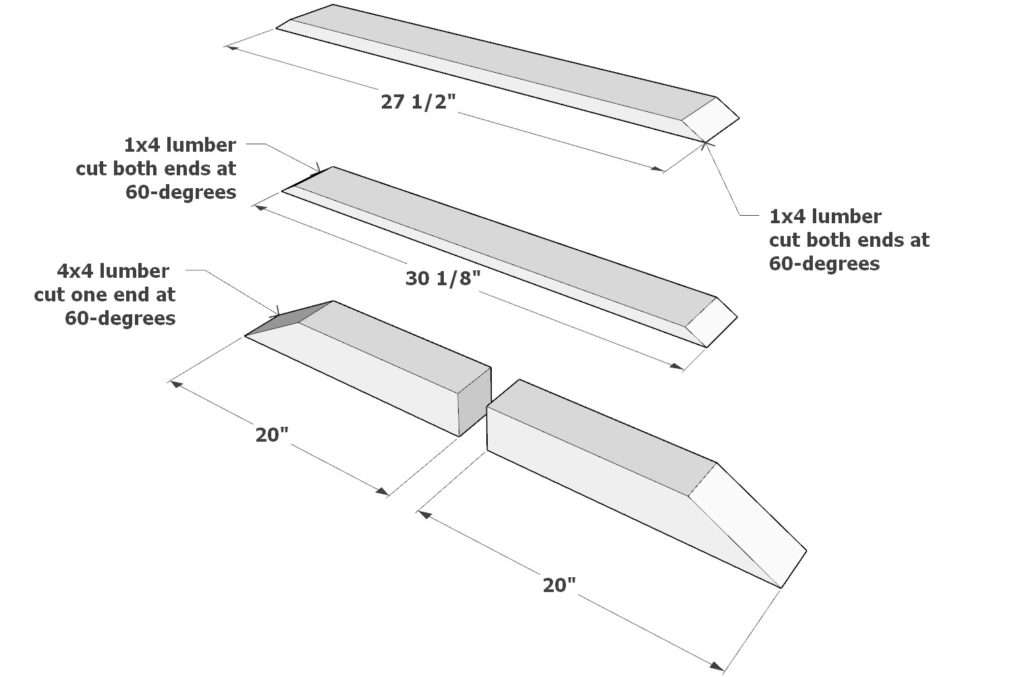
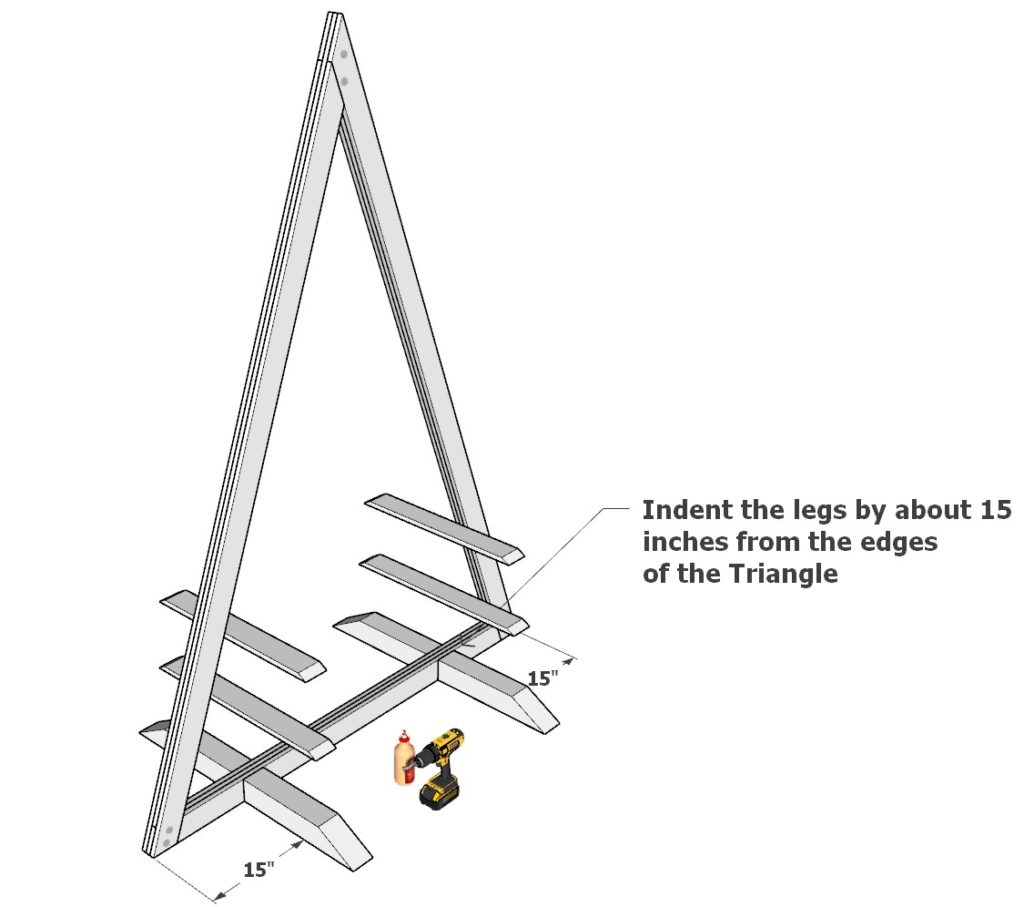
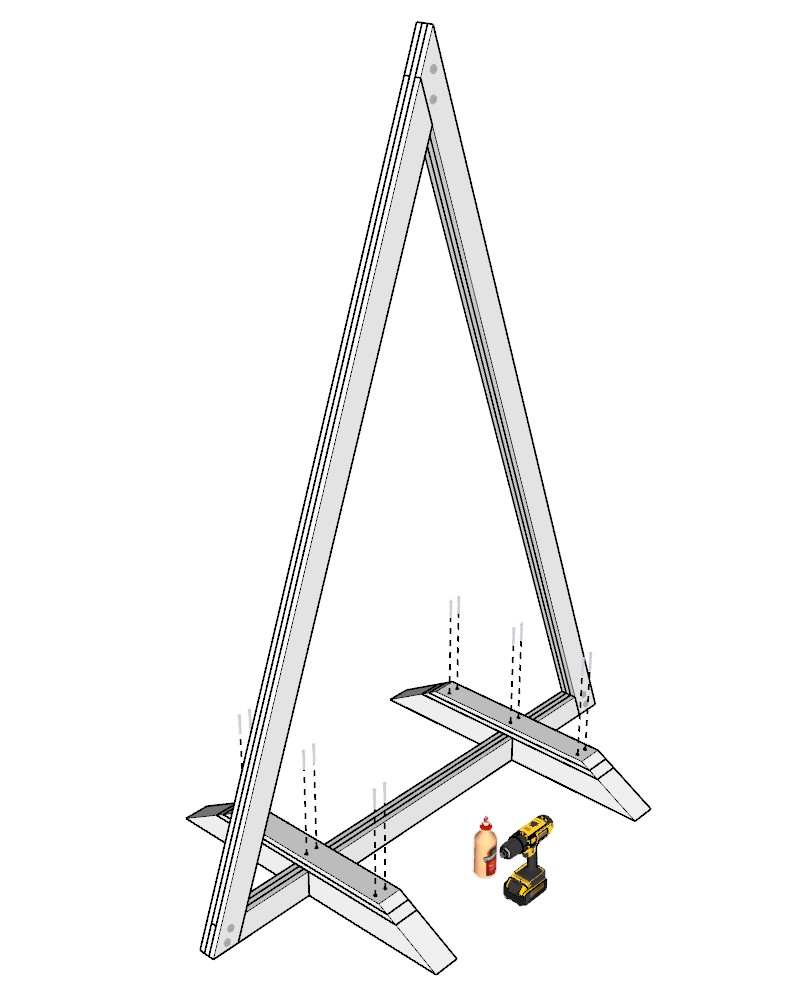
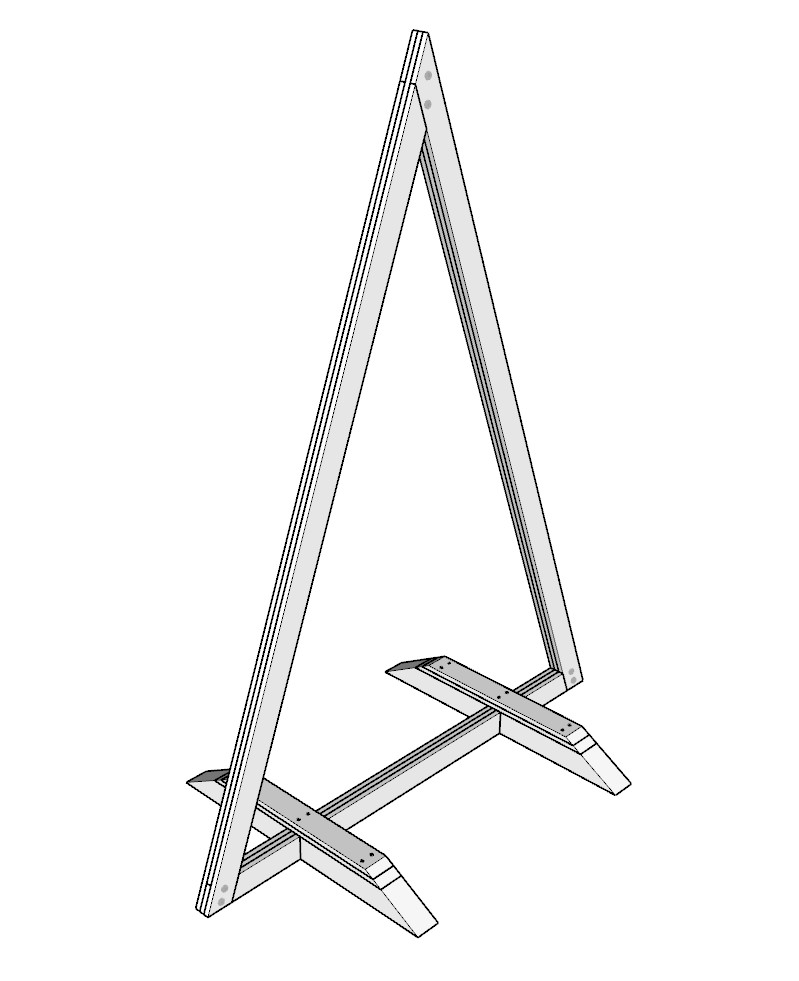
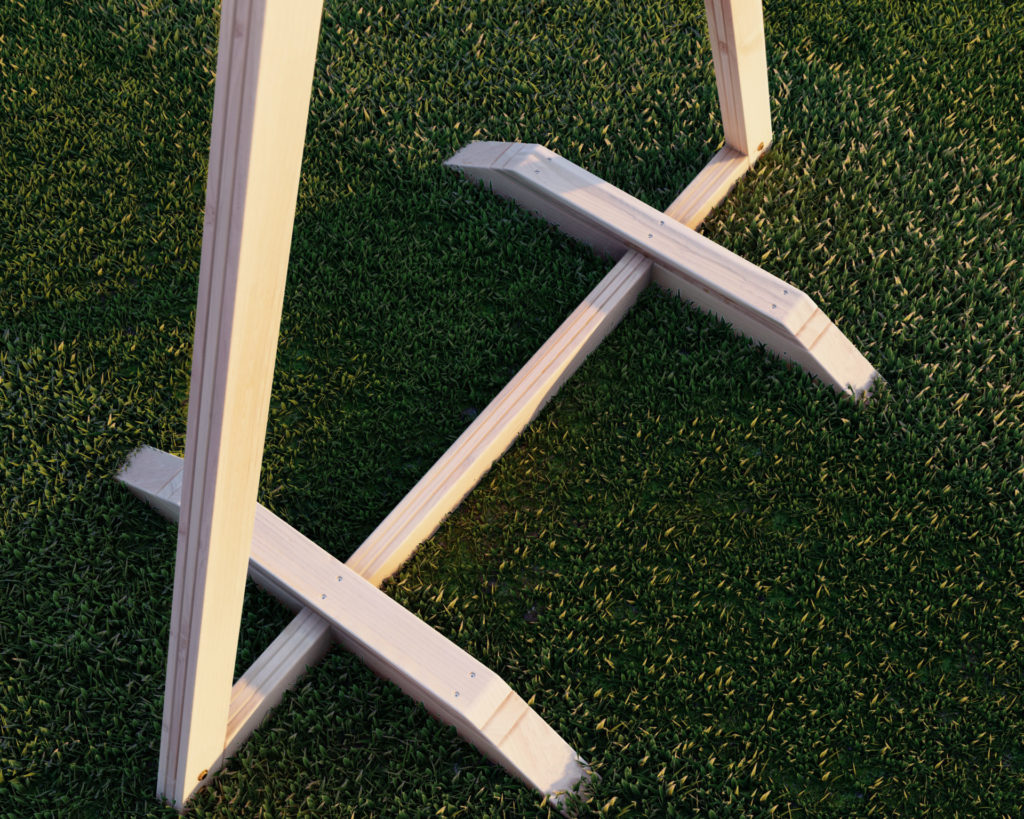
Step 5 (DIY wedding triangle arbor base assembly)
Next, assemble the legs and base of the DIY triangle arbor.
Take four 20 inch 4×4 lumber pieces that are cut at a 60-degree angle on one end, two 30-1/8 inch 1×4 lumber pieces cut at a 60-degree angle on both ends, and two 27-1/2 inch 1×4 lumber pieces cut at a 60-degree angle on both ends.
Arrange them as shown below. Ensure that the 4x4s are secured tightly to the triangle base.
Use plenty of glue, predrill holes, and add 3.5 inch screws to secure the base to the triangle.
Lastly, the triangle is ready to be painted, stained, or left natural.