DIY Wood Hexagon Wedding Arbor: A Beautiful and Unique Addition to Any Wedding
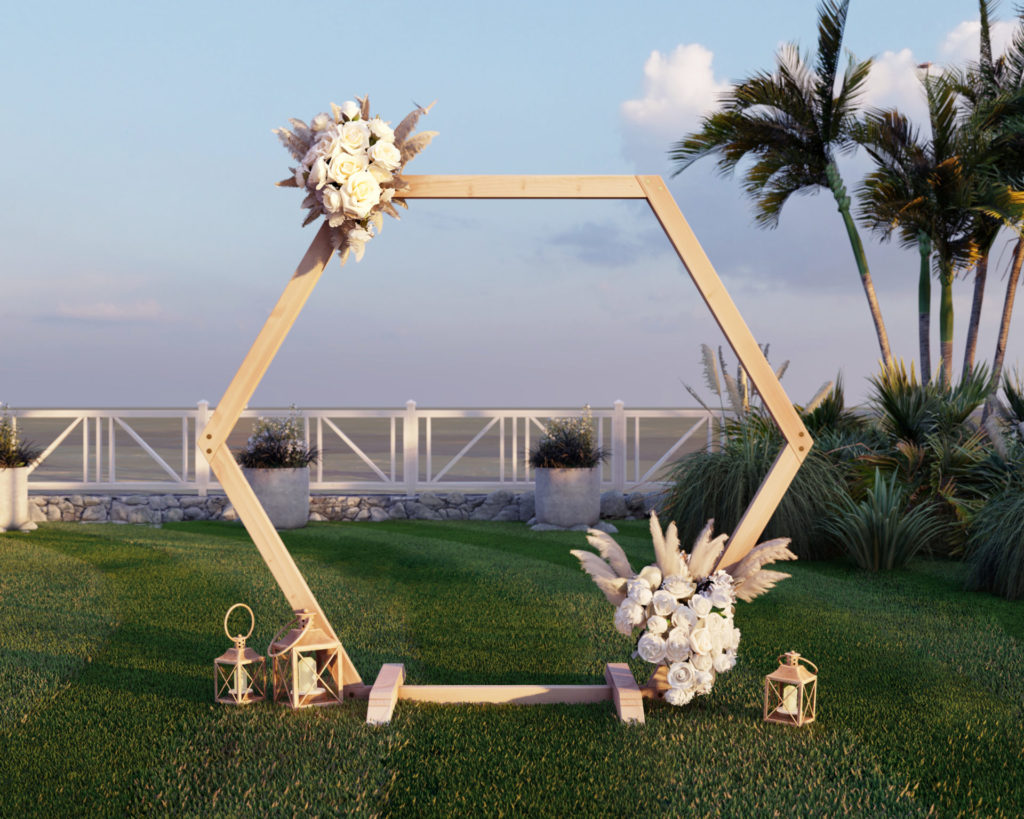
A wood hexagon wedding arbor is a beautiful and unique addition to any wedding. It is an incredibly versatile piece that can be used for a variety of purposes, from decoration to providing a stunning backdrop for photos.
A wood hexagon wedding arbor is a perfect way to add a touch of elegance to your wedding. It is a beautiful piece that can be used to frame the bride and groom as they exchange vows, or to provide a stunning backdrop for photos. Hexagon wedding arbors are also a great way to add décor to your wedding. They can be used to line the aisle, or to create a stunning focal point in the reception area.
There are many ways to attach flowers and other decorations to a Hexagon wedding arbor, and the current trends are to use a variety of different colors and textures to create a one-of-a-kind look.
To attach flowers to a Hexagon wedding arbor, you can create a symmetrical design or a more organic, free-flowing look. To attach the flowers, you can use wire, string, or zip-ties. In addition to flowers, there are a variety of other items that can be used to decorate a Hexagon wedding arbor. Lanterns, garlands, and ribbons are all popular choices. You can attach these items using the same methods as you would use to attach flowers.
When it comes to trends, anything goes when it comes to decorating a Hexagon wedding arbor. You can use a mix of different colors and textures to create a unique look. If you want a more traditional look, you can use all white flowers and decorations. For a more modern look, you can experiment with bolder colors and patterns.
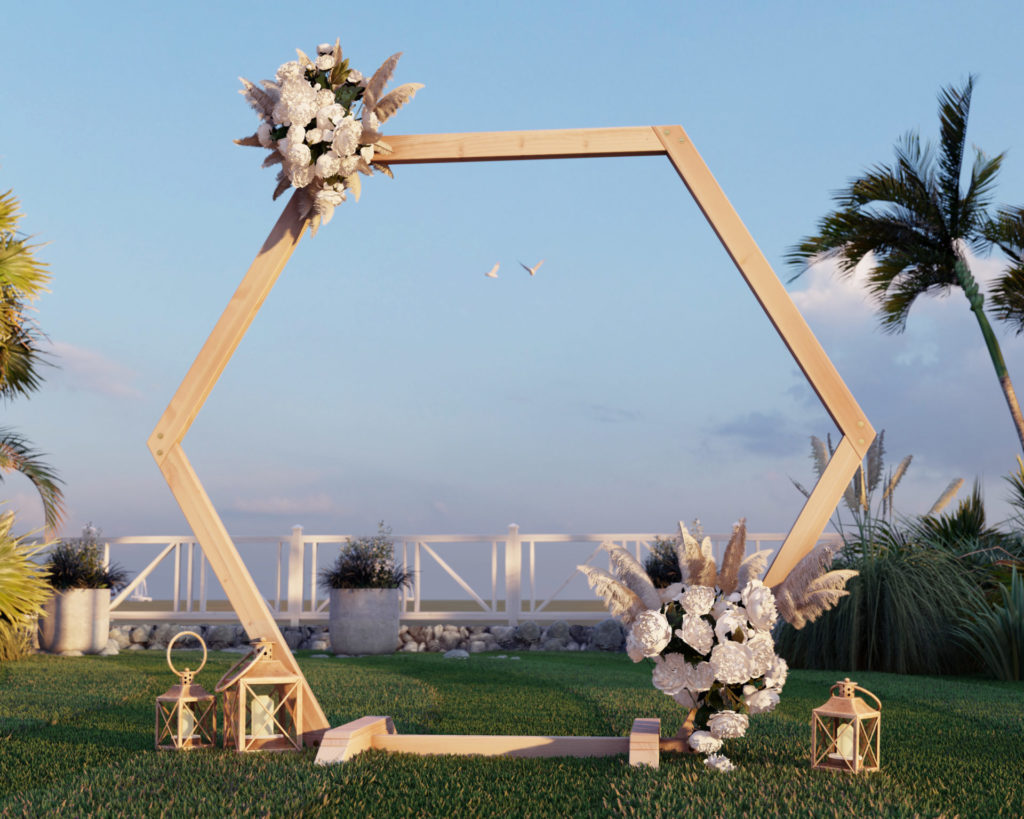
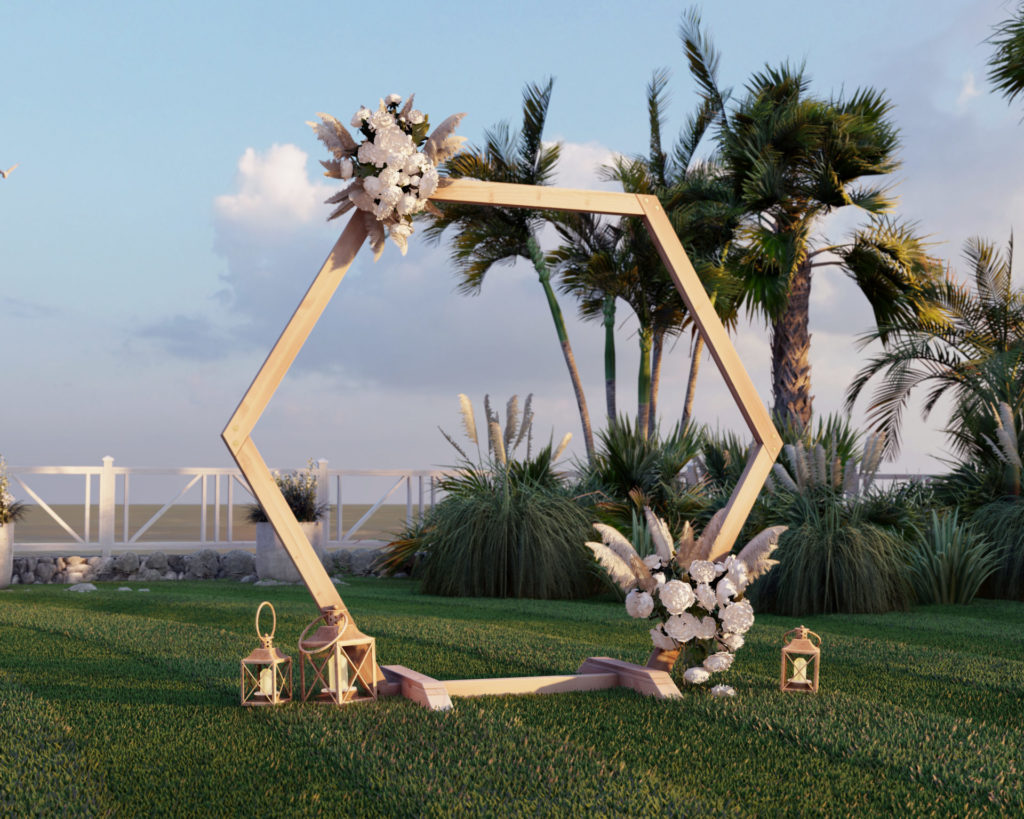
The portable and collapsible DIY wedding hexagon arch.
Some reasons that a portable and collapsible DIY wooden wedding hexagon is great include the ability to transport the hexagon in smaller vehicles, not having to worry about the hexagon breaking apart on your big day, quick set up and break down, and being able to reuse and possibly rent out the hexagon. The ability for the hexagon to break down is very important especially if you are planning a destination wedding or if you need to transport your hexagon to another location for your ceremony or reception.
Who can build this DIY event hexigon?
The DIY friendly event hexagon is easy to assemble with the step-by-step instructions provided in this post.
I believe this event hexagon would be a great project for beginners to woodworking and anyone with minimal woodworking experience.
The DIY plans offered in this post include helpful description, images, diagrams, helpful links, and more to ensure that the DIY fence build is smooth, efficient, and easy.

Time to build
1-2 Hours
Total cost of build
About $125
Skill level required
Beginner
Download the PDF plans
Portable Hexagon Wedding Arbor DIY Plans PDF
What is included in the PDF download?
- Easy to read step by step instructions
- Material list
- Tools needed
- Helpful links to materials and tools needed
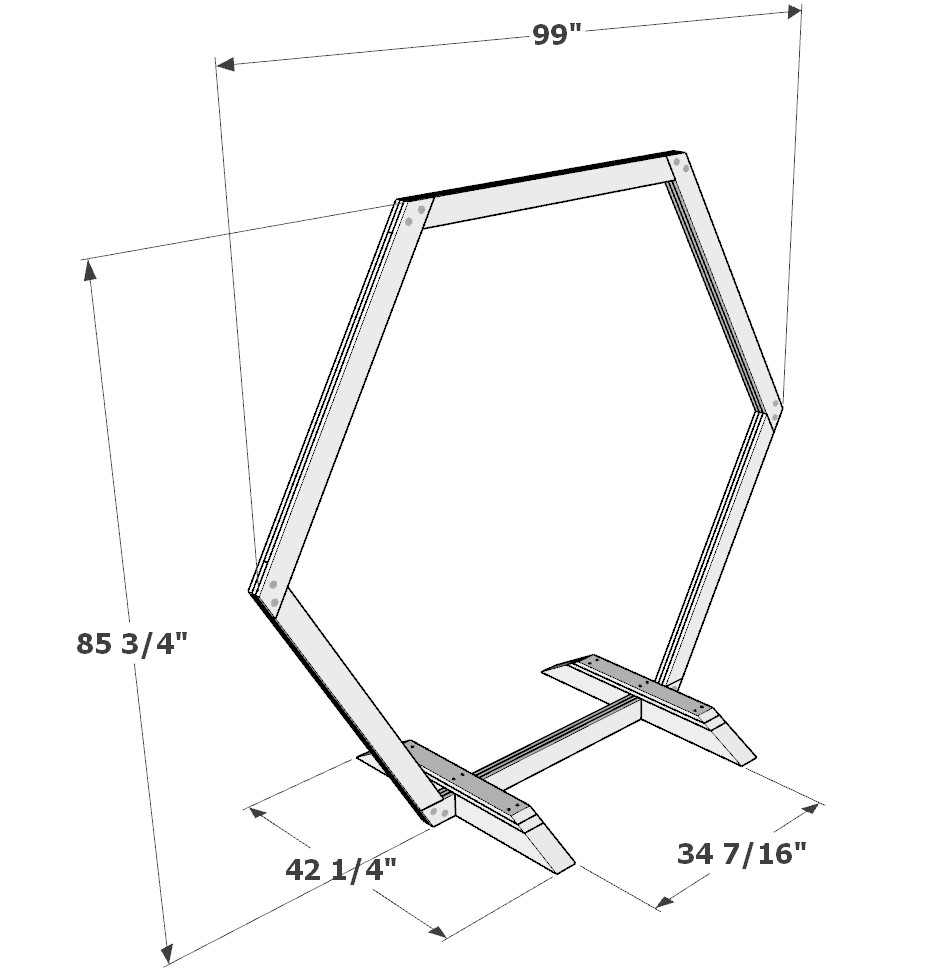
Portable Hexagon Wedding Arbor dimensions
Tools and materials list
Note: These are my personal recommendations based on experience, but feel free to use alternatives that suit your preferences.
Saw: Miter Saw (12 Inch, Double Bevel)
- Great for precision cuts. My go-to for over 10 years.
Impact Driver + Bit: DEWALT ATOMIC 20V MAX* Cordless Impact Driver
- Perfect for securing pieces. Lightweight and reliable.
Drill: DEWALT 20V MAX XR Drill/Driver
- Pair with a countersink bit for a smooth finish. A staple in many toolkits.
Countersink Drill Bit: FTG USA Set
- Essential for clean finishes.
Screws (12 of 3.5 inch long): WoodPro Fasteners
- I always use star bits for a solid grip.
Screw Driver Bit (T25 Torx Head): COMOK 10pcs Set
- T25 bits match the screws listed above.
Bolts, Nuts, and Washers (12 sets):
- Bolt Kit
- You’ll need additional washers: 5/16″ x 7/8″ Washers.
Pin Nail Gun + Pin Nails:
- DEWALT ATOMIC 23 Ga. Cordless Pin Nailer Kit
- Battery-powered for convenience.
Wood Glue: Franklin International Titebond Original (16-Ounce, 2 Pack)
Disclosure: The links provided are affiliate links. I may earn a commission if you purchase through these links, at no extra cost to you. Your support is appreciated.
Lumber shopping and cut list
Available with the purchase of the DIY plan PDF. Thank you for supporting this website and making these posts possible!
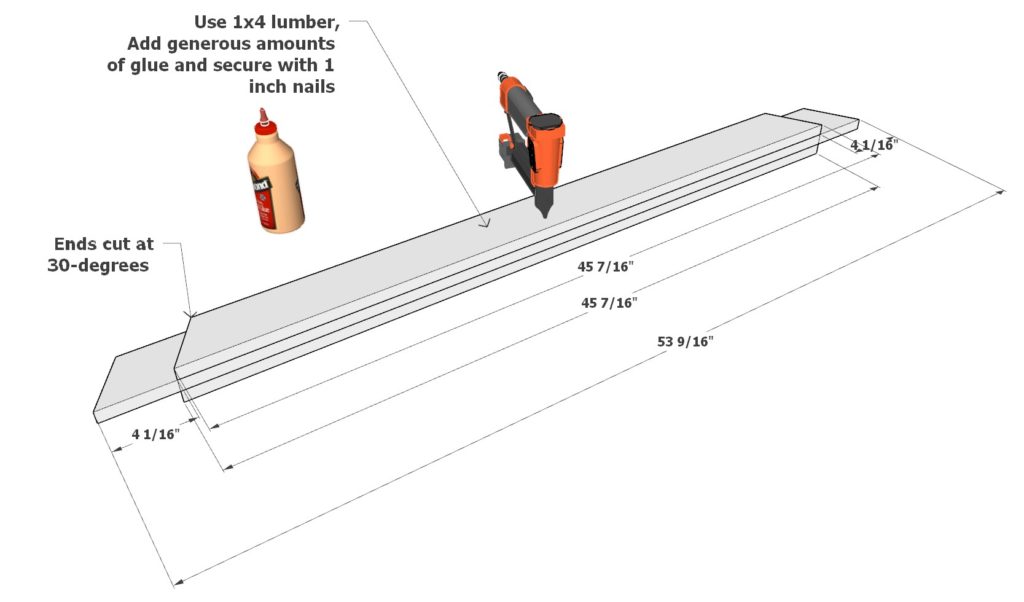
Step 1 (Construction of the female components for the portable hexagon wedding arbor)
First, build the female components for the portable hexagon wedding arbor.
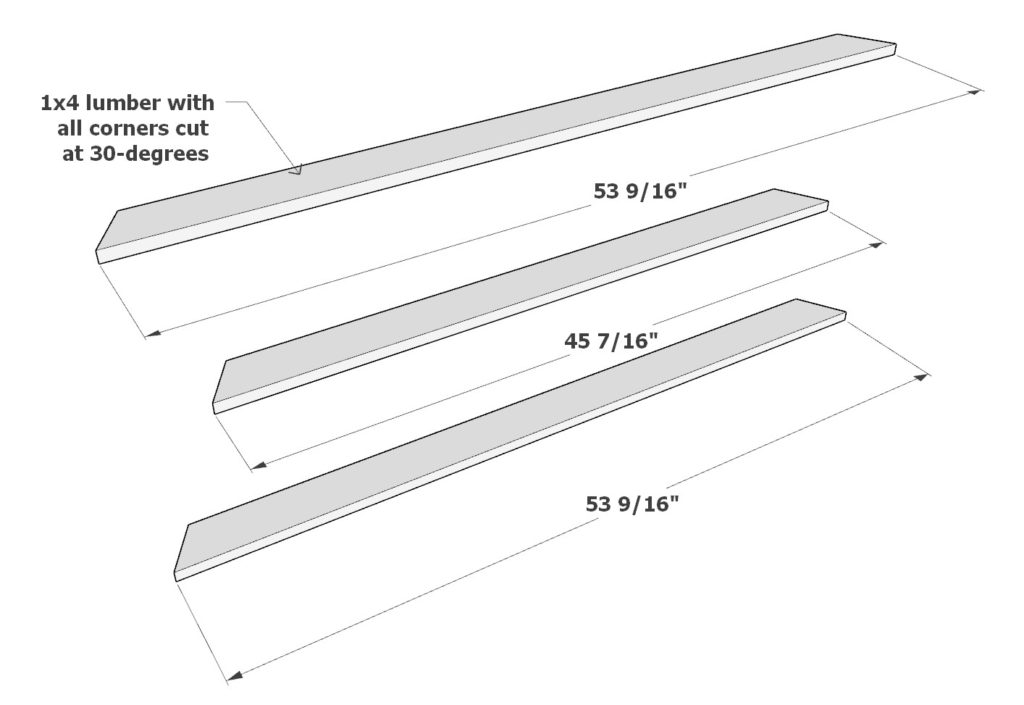
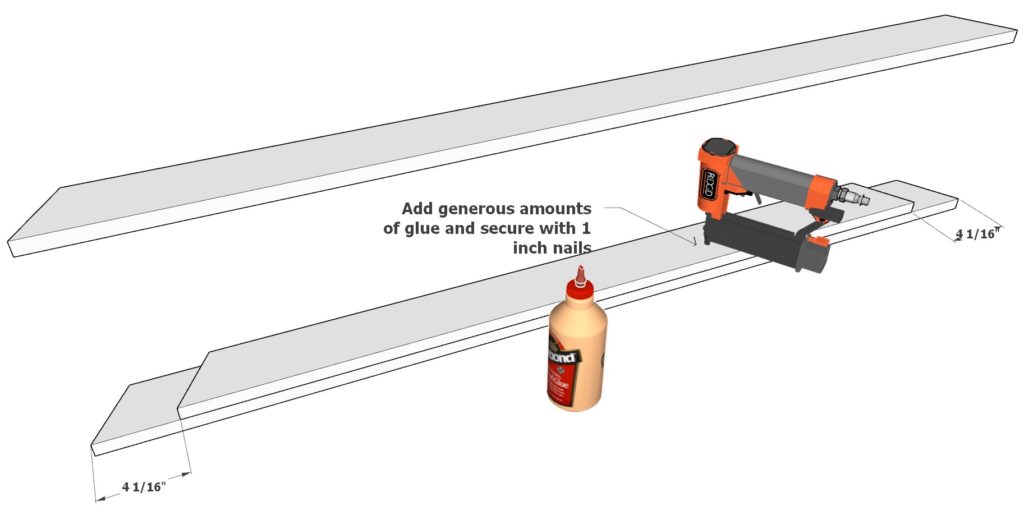
Take two 53-9/16 inch 1×4 lumber pieces (cut at 30-degrees on both ends) and one 45-7/16 inch lumber pieces (cut at 30-degrees on both ends), and arrange them as shown below. Add generous amounts of glue and use 1 inch nails and nail gun to secure the boards together.
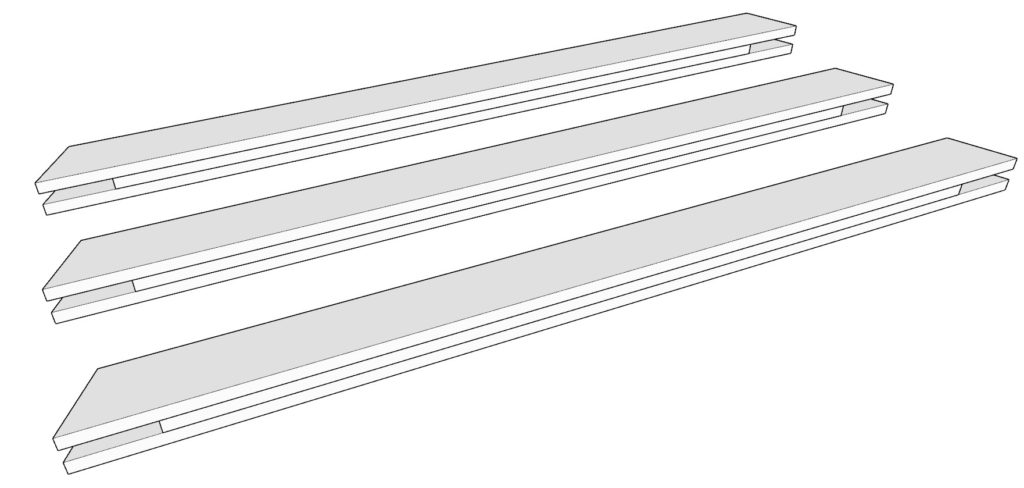
Make three identical female hexagon components.
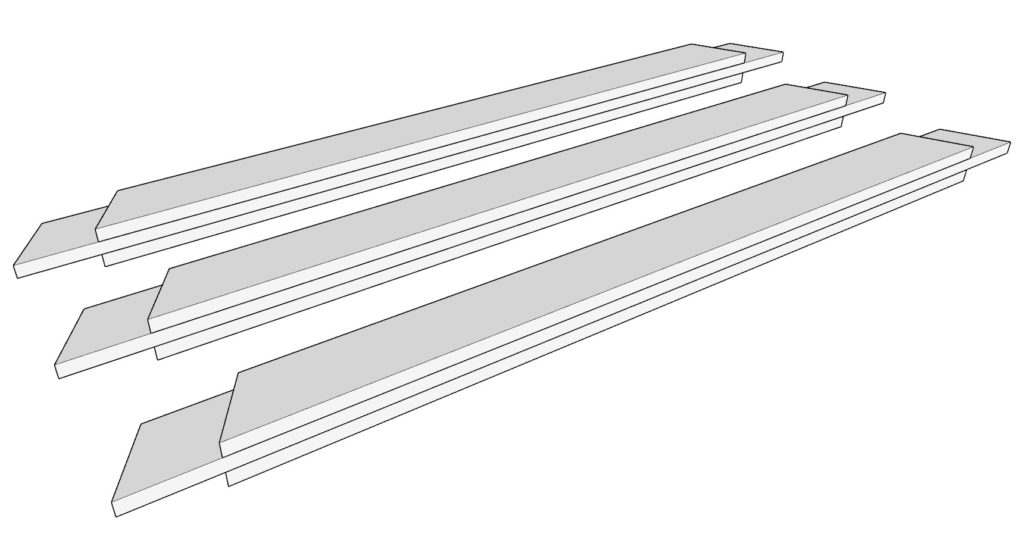
Step 2 (Construction of the male components for the portable hexagon wedding arbor)
Next, build the male components for the portable hexagon wedding arbor.
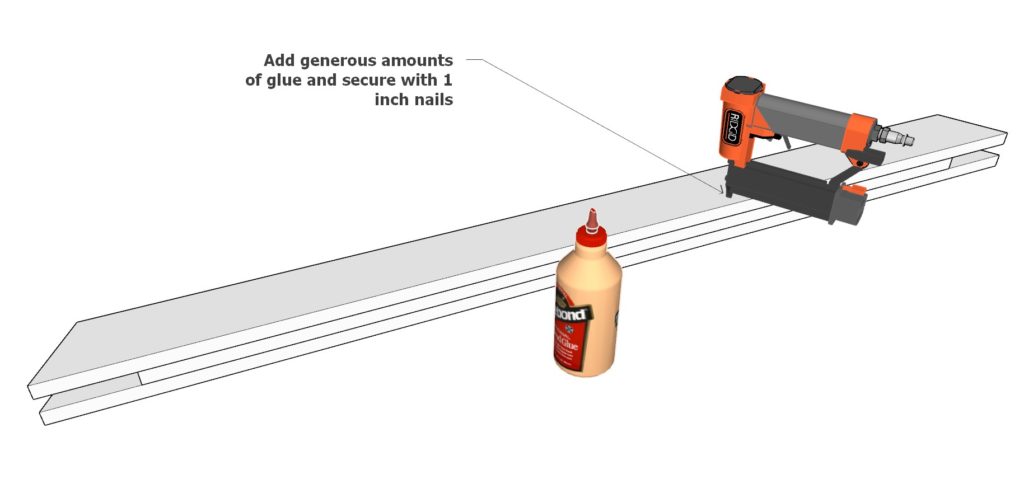
Take one 53-9/16 inch 1×4 lumber pieces (cut at 30-degrees on both ends), and two 45-7/16 inch lumber pieces (cut at 30-degrees on both ends), and arrange them as shown below. As before, add generous amounts of glue and use 1 inch nails and nail gun to secure the boards together.
Make three identical female hexagon components.
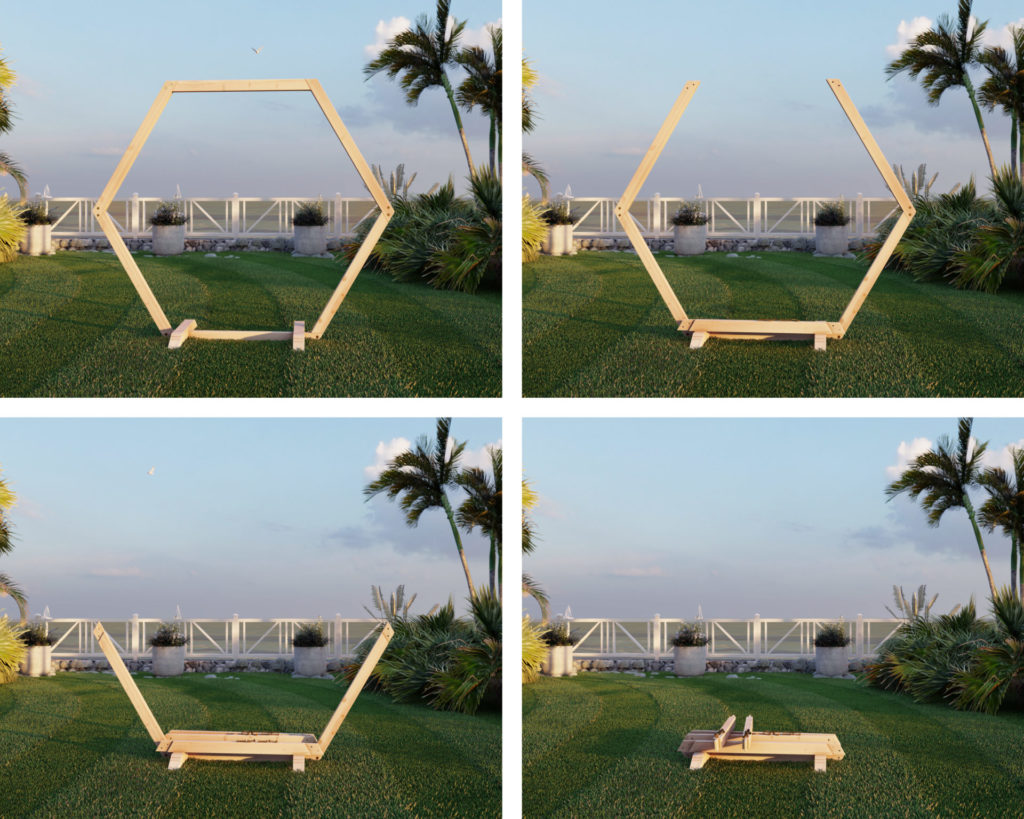
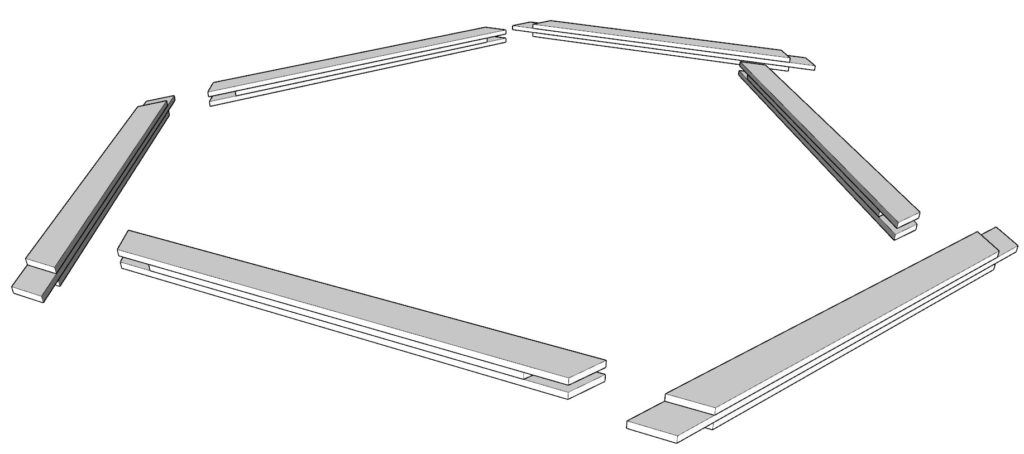
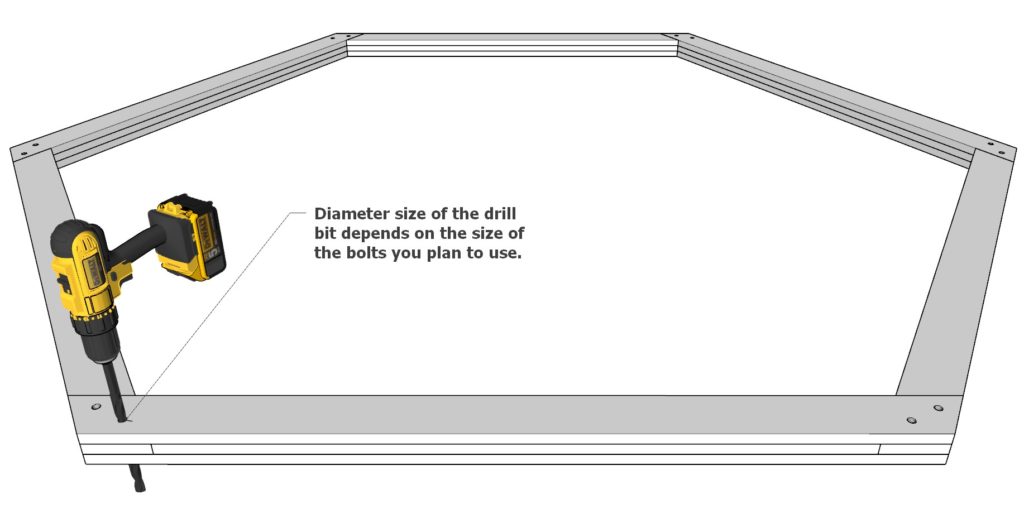
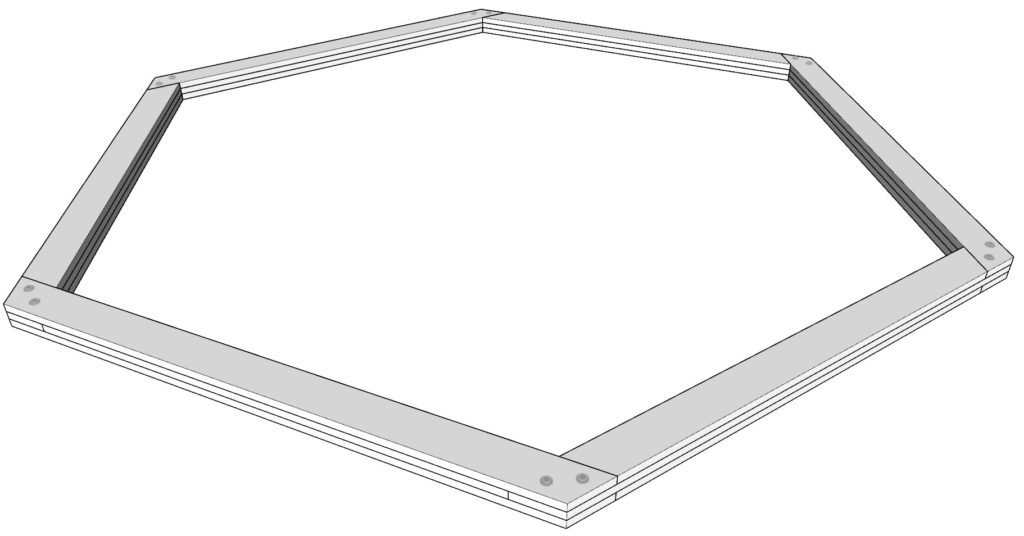
Step 3 (DIY wedding hexagon arbor assembly)
Next, put assemble the male and female pieces of the DIY wedding hexagon arbor.
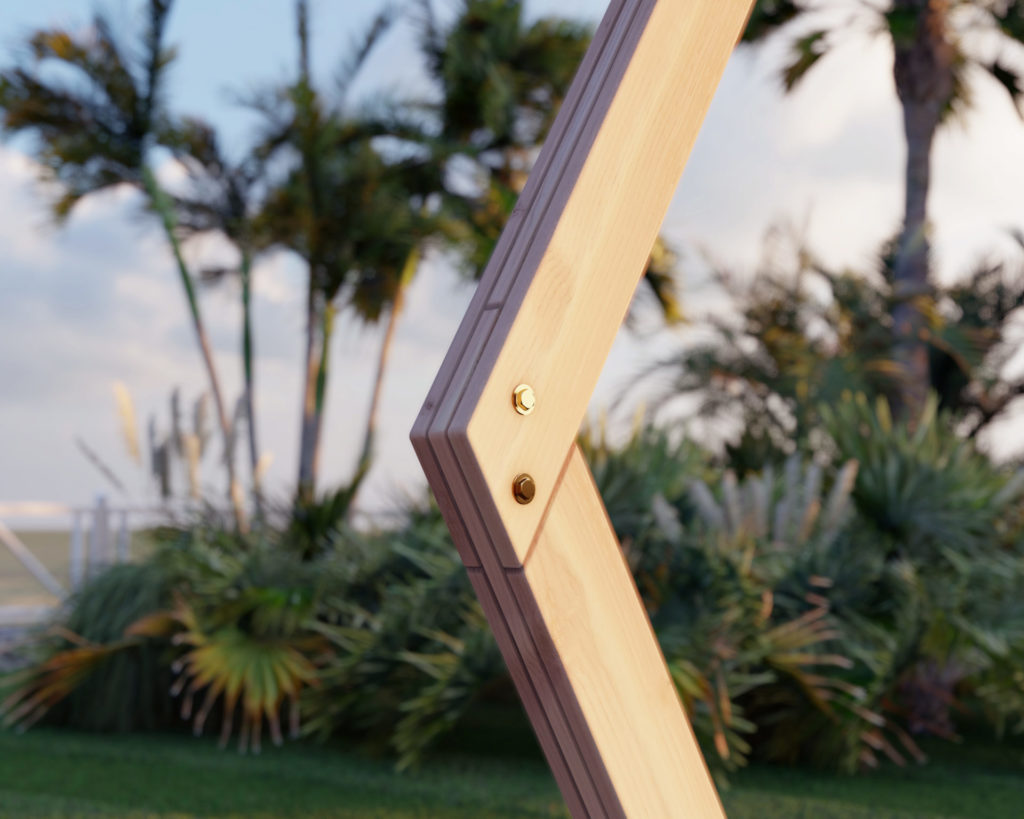
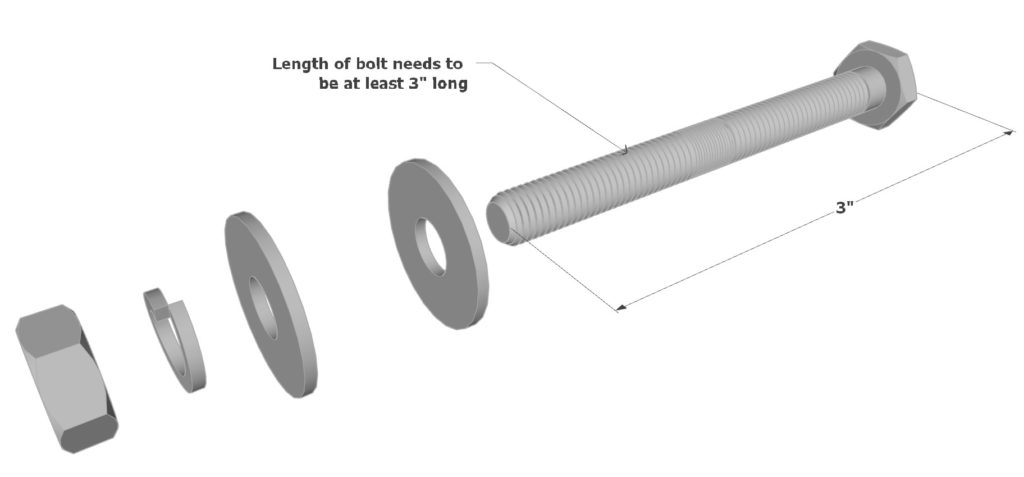
To secure the pieces together, join the full hexagon together and drill two holes per edge. These holes need to be the diameter of the bolt that you have chosen to use.
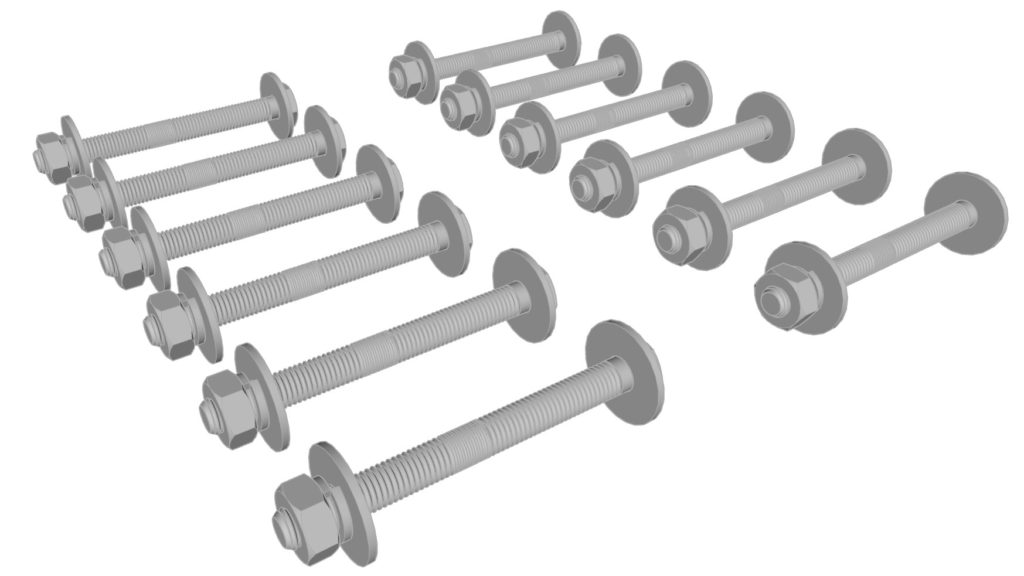
A recommended bolt size is at least 3 inches long. The diameter can be any size. Make sure to use a split lock, a washer, a nut, and the bolt. You will need a total of 12 sets of bolt assemblies.
Add the bolts and secure the hexagon tightly together.
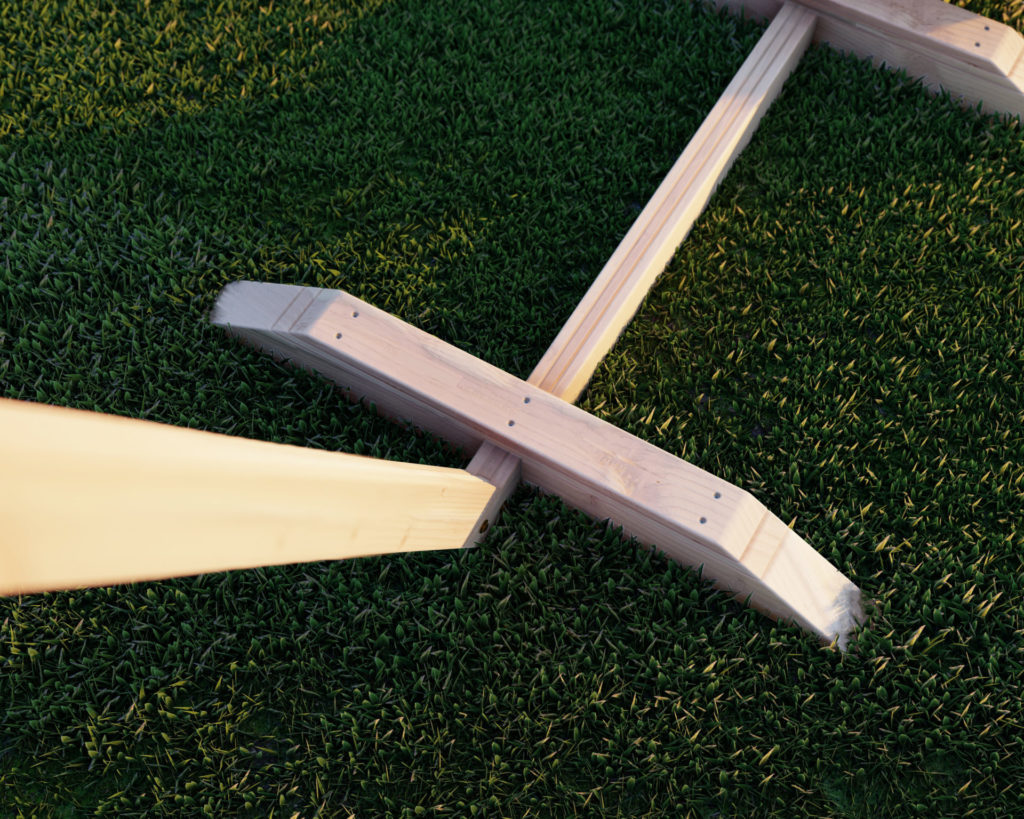
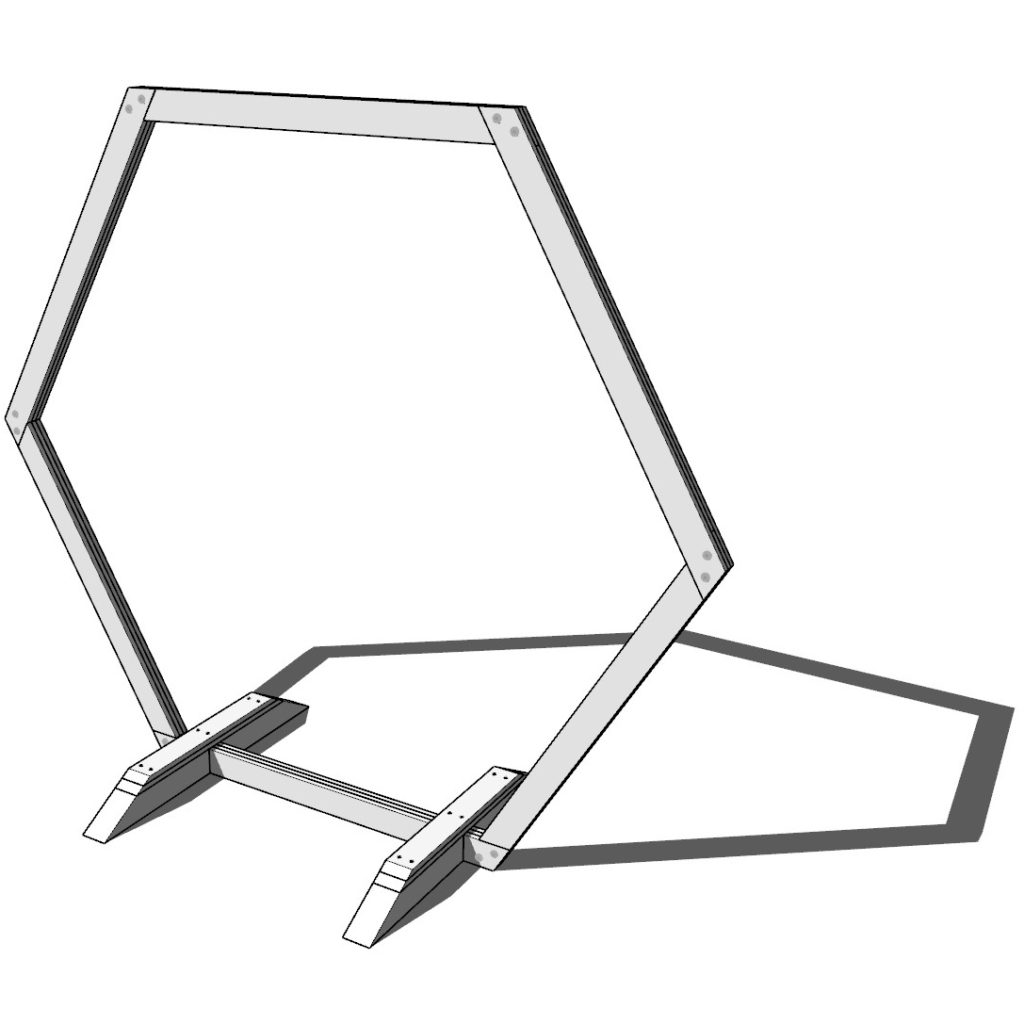
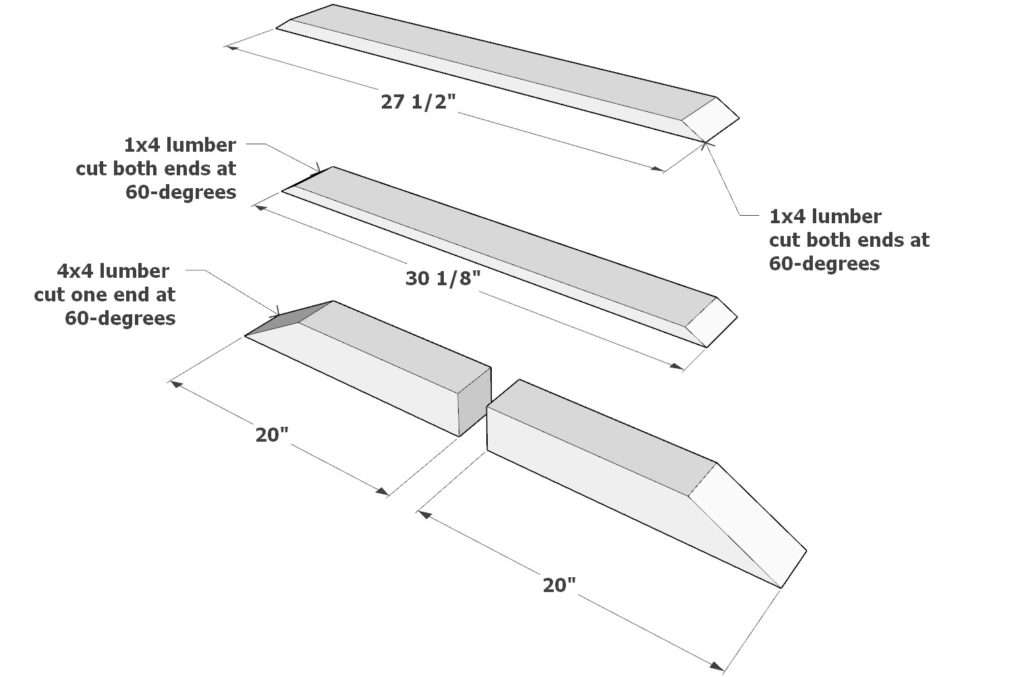
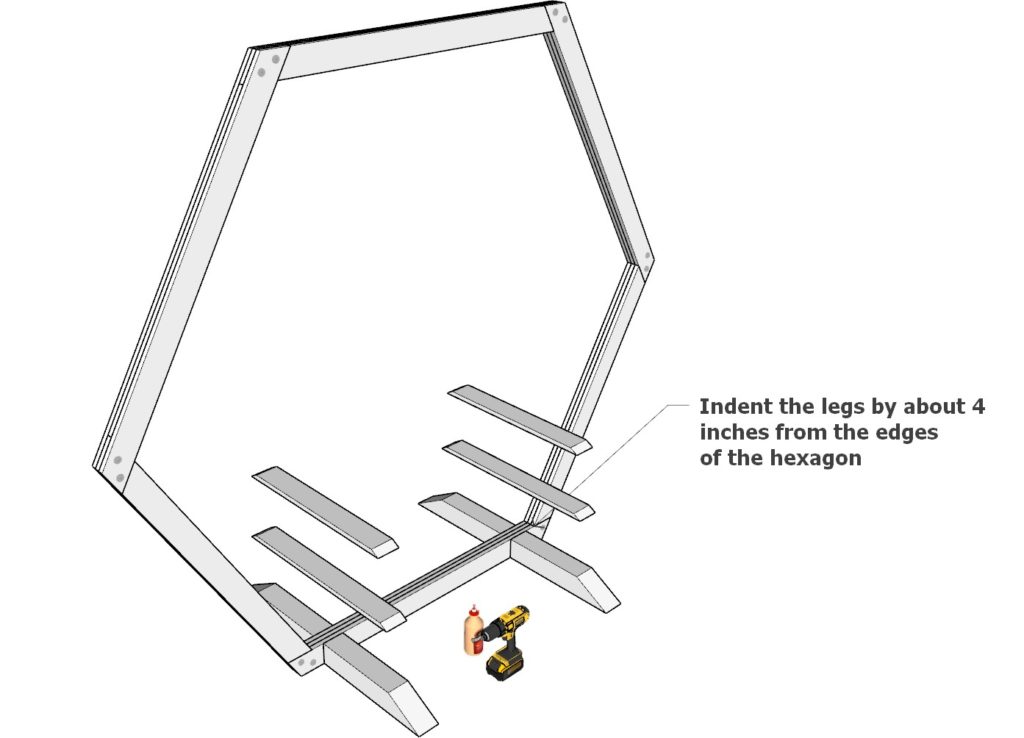
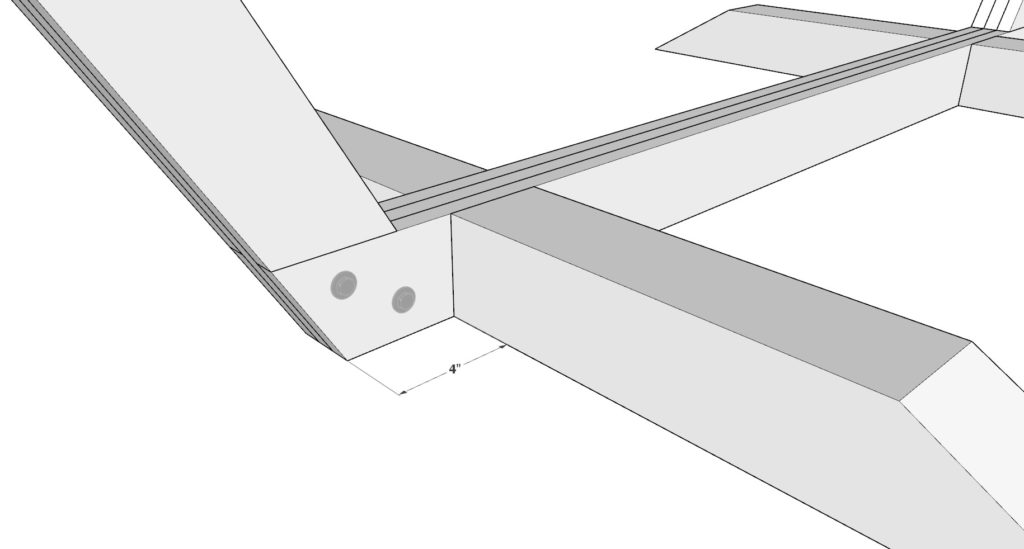
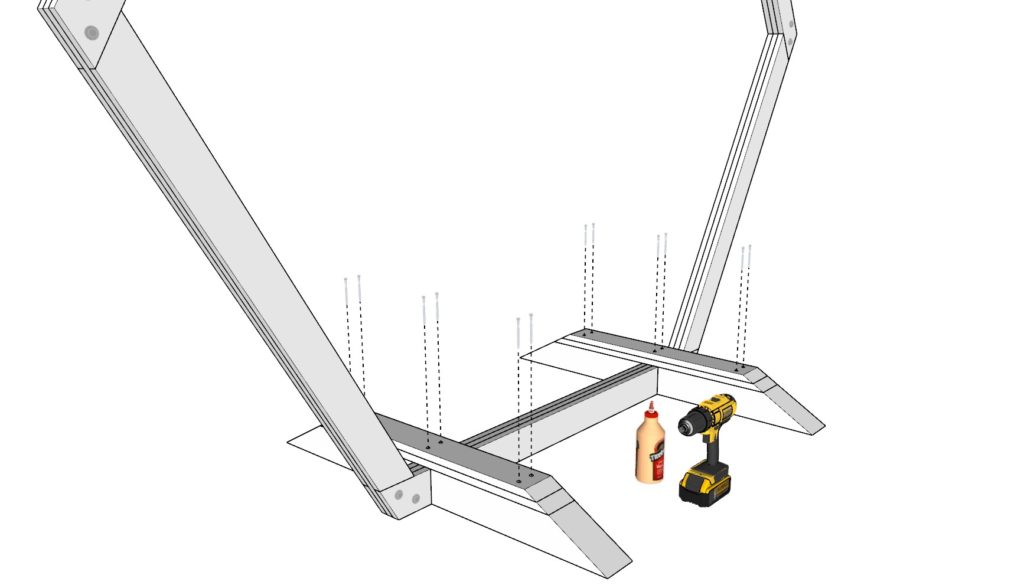
Step 4 (DIY wedding hexagon arbor base assembly)
Next, assemble the legs and base of the DIY hexagon arbor.
Take four 20 inch 4×4 lumber pieces that are cut at a 60-degree angle on one end, two 30-1/8 inch 1×4 lumber pieces cut at a 60-degree angle on both ends, and two 27-1/2 inch 1×4 lumber pieces cut at a 60-degree angle on both ends.
Arrange them as shown below. Ensure that the 4x4s are secured tightly to the hexagon base.
Use plenty of glue, predrill holes, and add 3.5 inch screws to secure the base to the hexagon.
This is a great project to build. I was asked to build it for my grandsons wedding. I am 75 years old and build farm house furniture as a hobby. A few comments after building this project:
I don’t know where they get by saying it takes 1-2 hours to build. working at a steady and relax pace it took me more than 2 hours just to cut all the pieces. it took another 30 minutes to build a jeg to put all the sides together. Another 2-3 hours to assemble the 6 sides. it took me another couple of hours to assemble the final project. I don’t know why they want the base parts to be cut at 60 degrees most diy don’t know how to cut a 60 degrees cut on a miter saw. 45 or 30 degrees would work just fine and much easier to cut.
Over all the plans and instructions were well written and easy to follow. For me it was a fun project to build. I give a thumbs up>
Hello Everette,
Firstly, thank you for taking the time to share your detailed feedback on the Portable Hexagon Wedding Arbor DIY Plans. It’s truly an honor to know that someone with your experience and skill took on this project for such a special occasion.
I genuinely appreciate your perspective on the time estimation and the miter cut degrees. It’s invaluable feedback like yours that helps improve the plans for future DIY enthusiasts. I’ll certainly consider this when updating or creating new plans.
It’s wonderful to hear that, despite the challenges, you found the project fun and the plans easy to follow. Your grandson is fortunate to have such a dedicated grandfather.
Thank you once again, and I wish all the best for your grandson’s wedding!
Warm regards,
Vitaliy