How does a DIY Montessori storage and activity shelf help make your child’s room a Montessori room?
The Montessori approach has been around for more than 100 years and is becoming more popular not only in schools, daycares, and preschools, but also at home.
But how do you implement Dr Montessori’s methods at home? How do can you give your child the tools he/she needs to maximize learning and growth? We wanted to find the answer to that question to create DIY plans for rooms that would reflect Dr Montessori’s methods of learning. From what we learned, there is no one way that can be considered the best or most correct when it comes to the choice of the furniture pieces in the room. Every home is unique, and the members of the home can put their own spin on things that make it work for their family.
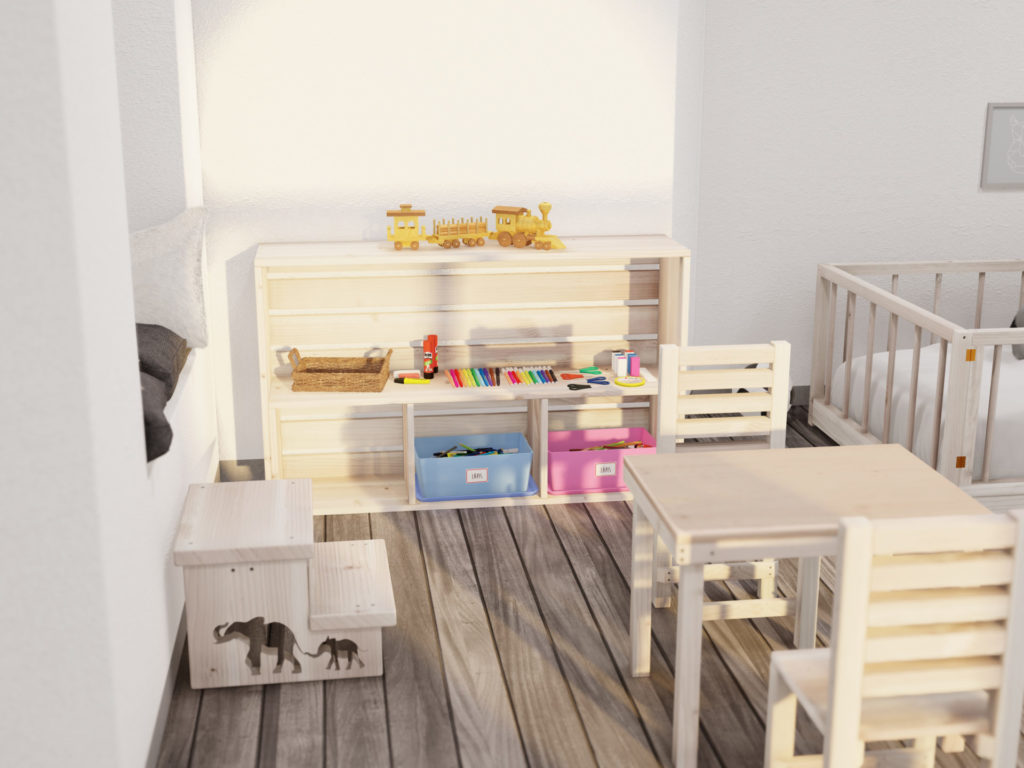
We wanted to share some of the tips we gleaned from our research on how to set up your child’s Montessori activity shelf and present our design of the DIY activity shelf and cubby system. First, you want to make sure that you are aiming for a minimalistic quantity of toys and activates on the shelves. If your child has too many toy, rotating the toys out periodically can be a great way to adhere to the minimalistic concept while still updating the toys/activities periodically as your child grows and develops. Having all the toys out on display at one time on shelves or stuffed into a box or closet can be overwhelming for the child. A cluttered visual display may make a child less likely to explore the toys and activities and not benefits from their Montessori design and purpose. having space between activates can visually separate items and create a beautiful display that will attract the child.
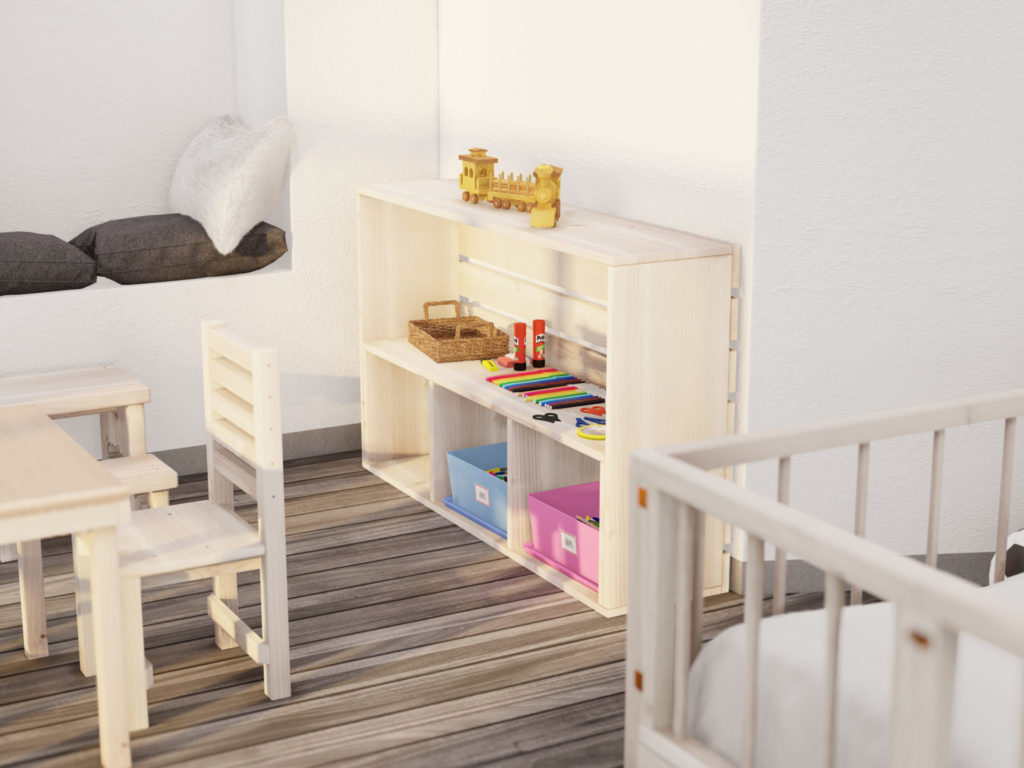
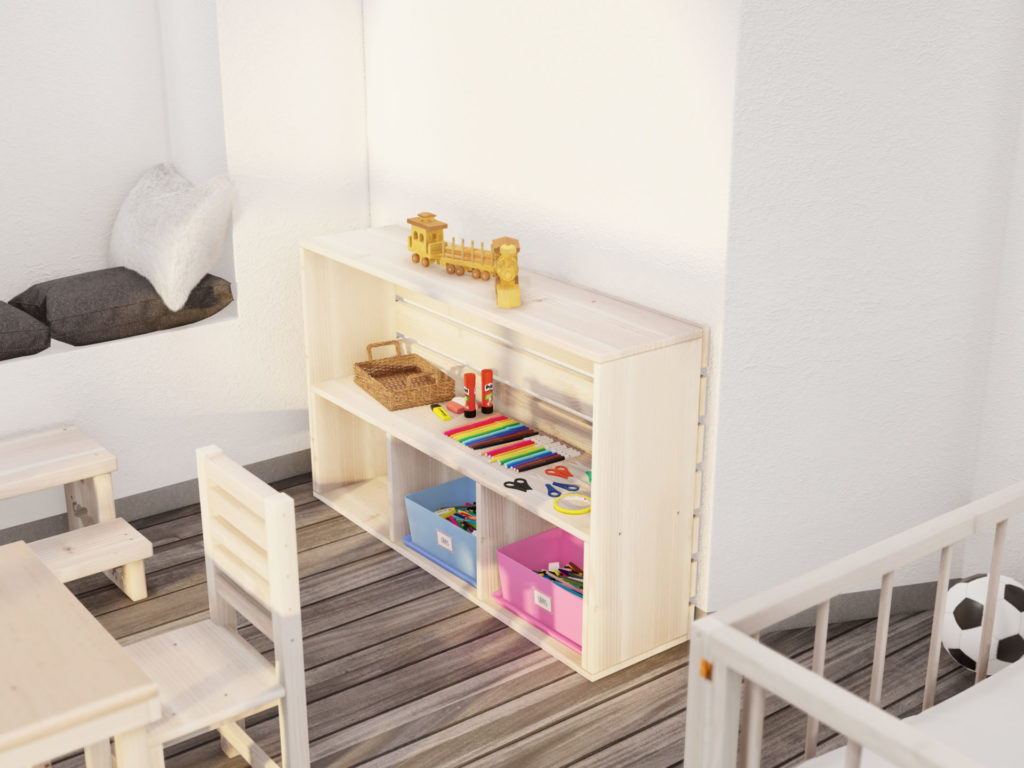
It’s important to keep the child point of view in mind. You may even want to get on your hands and knees and visualize the setup of books, activities, and toys from their vantage point. The low storage and activity DIY shelf plans are designed to be the perfect height so that you child can access what they need. Toddlers can learn to be more independent as they are able to control their averment more like adults. Children can take down items and put them back when it’s time to clean up. All the activities have a dedicated spot on the DIY storage and cubby shelf
What are the specs of this storage shelf?
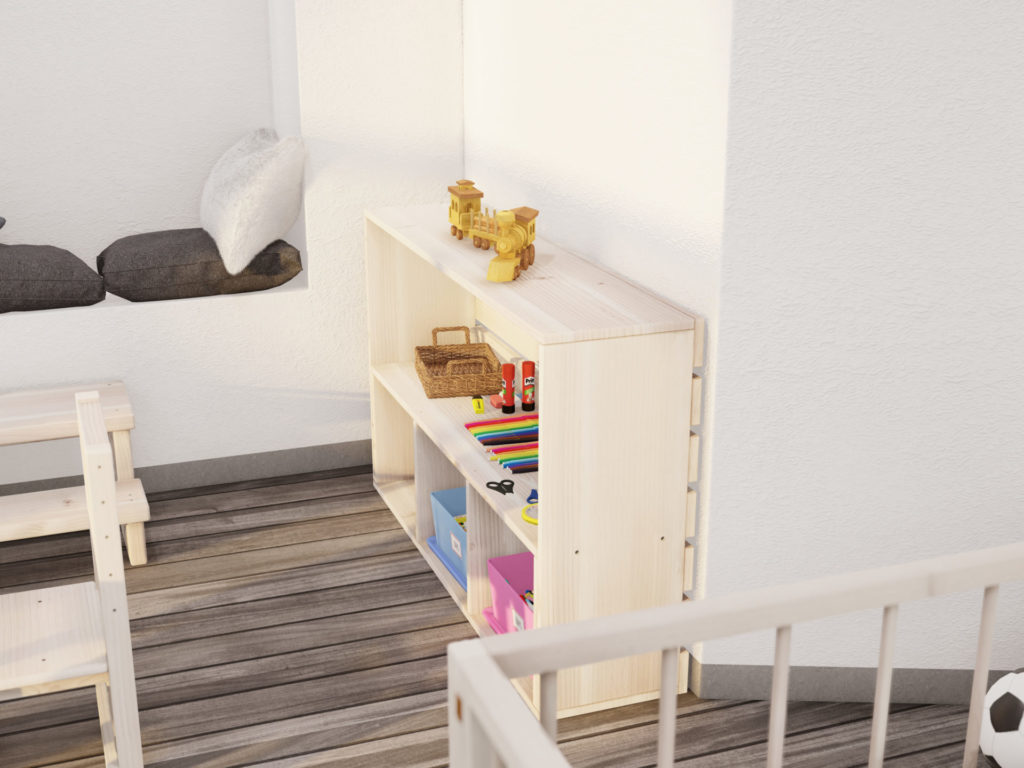
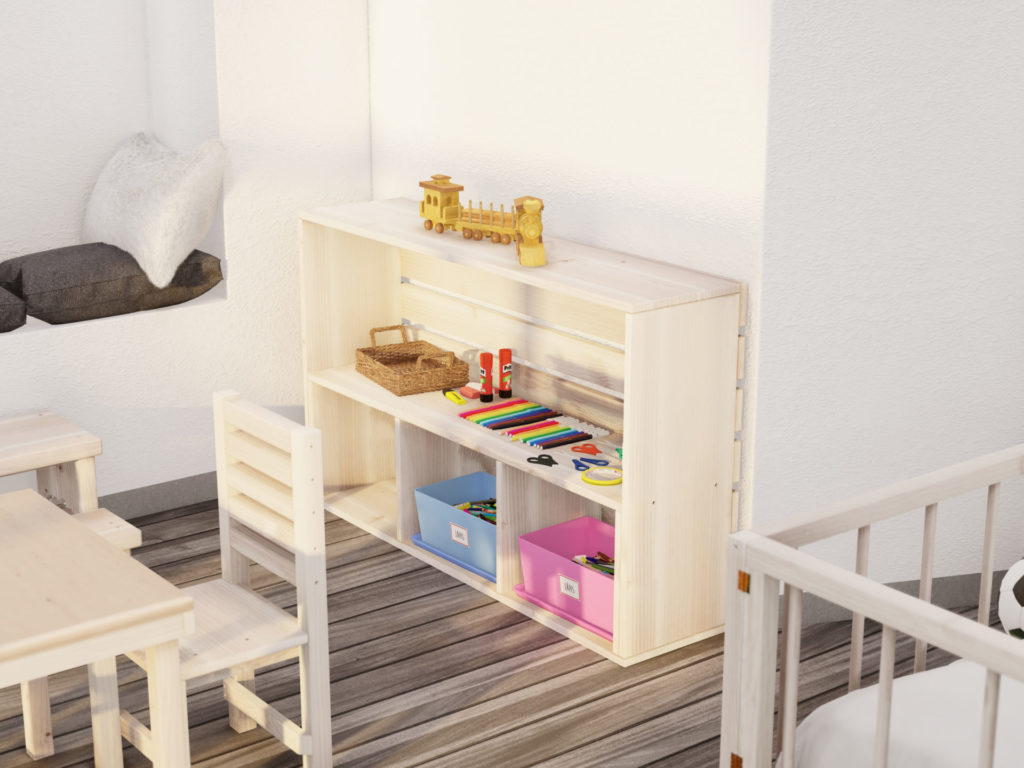
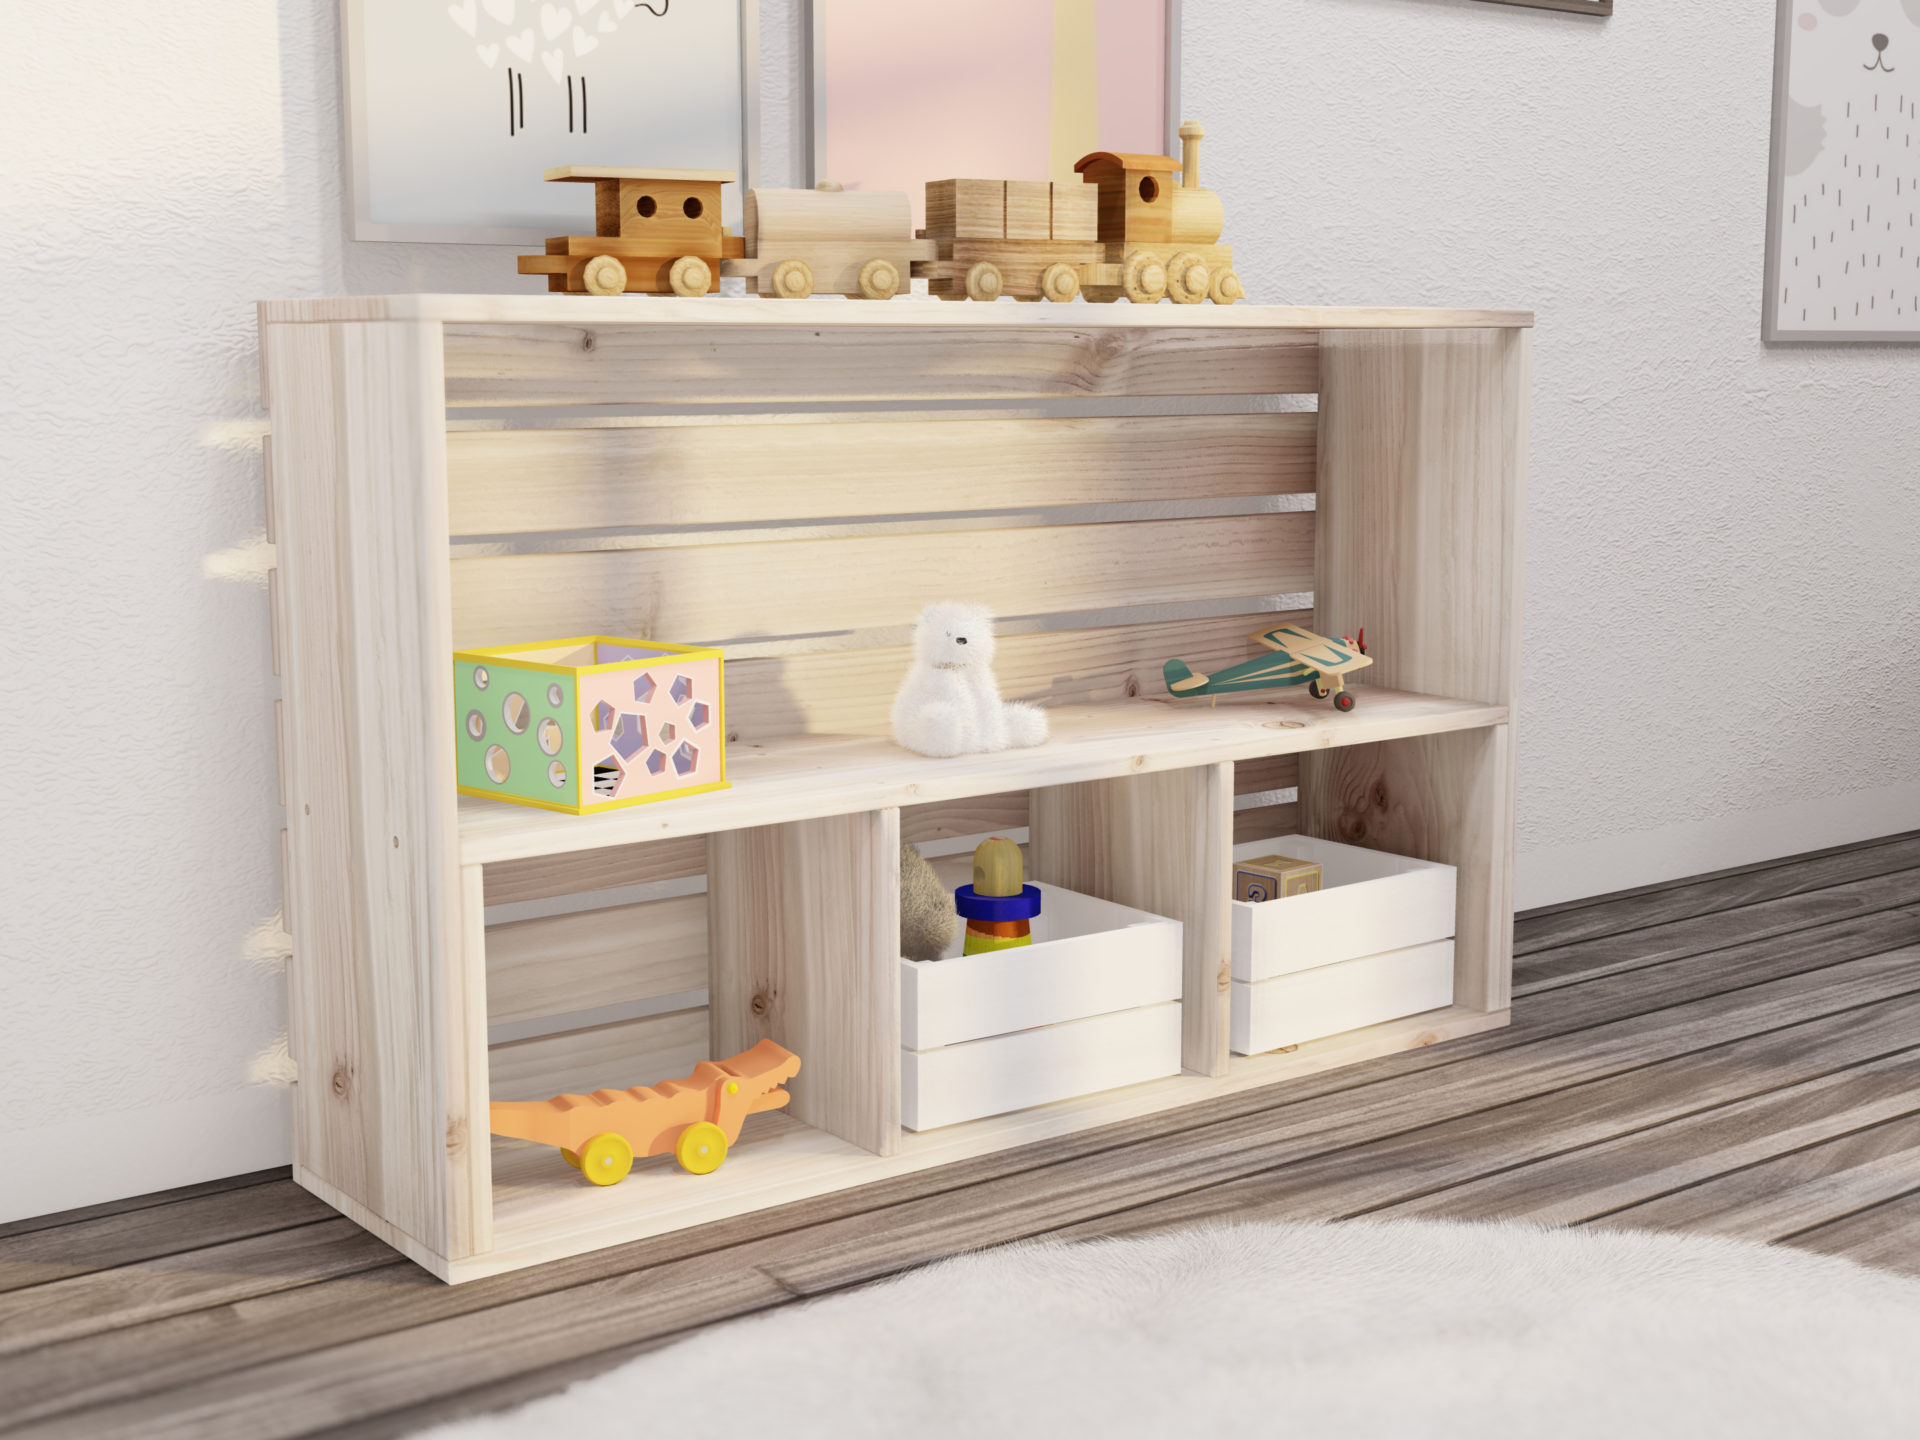
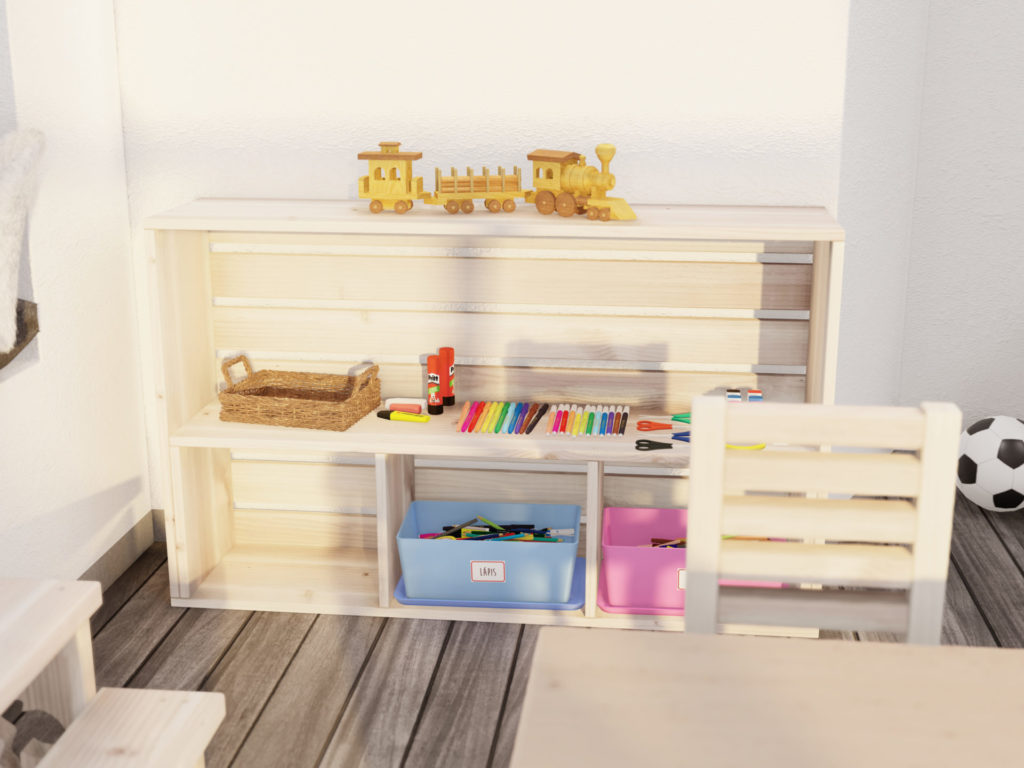
This is a multi-purpose storage cabinet that can be used for home, classroom, preschools, daycares, and offices to organize your space with different storage compartments. The DIY Montessori storage and activity shelves allows you to set up the play activates corner in an engaging way. The shelves allow for additional sliding cubbies to be inserted. You can use these cubbies to store hand-eye coordination cognitive actives, open-ended activates, any science and culture related items, musical, language, and math pieces.
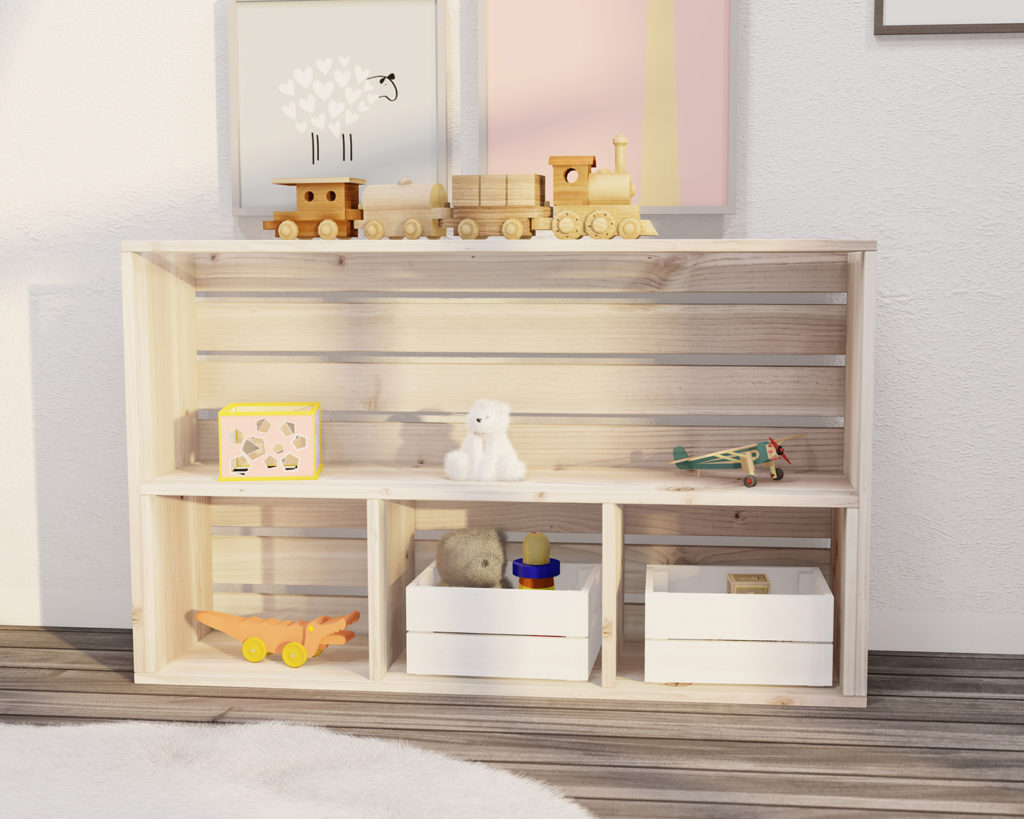
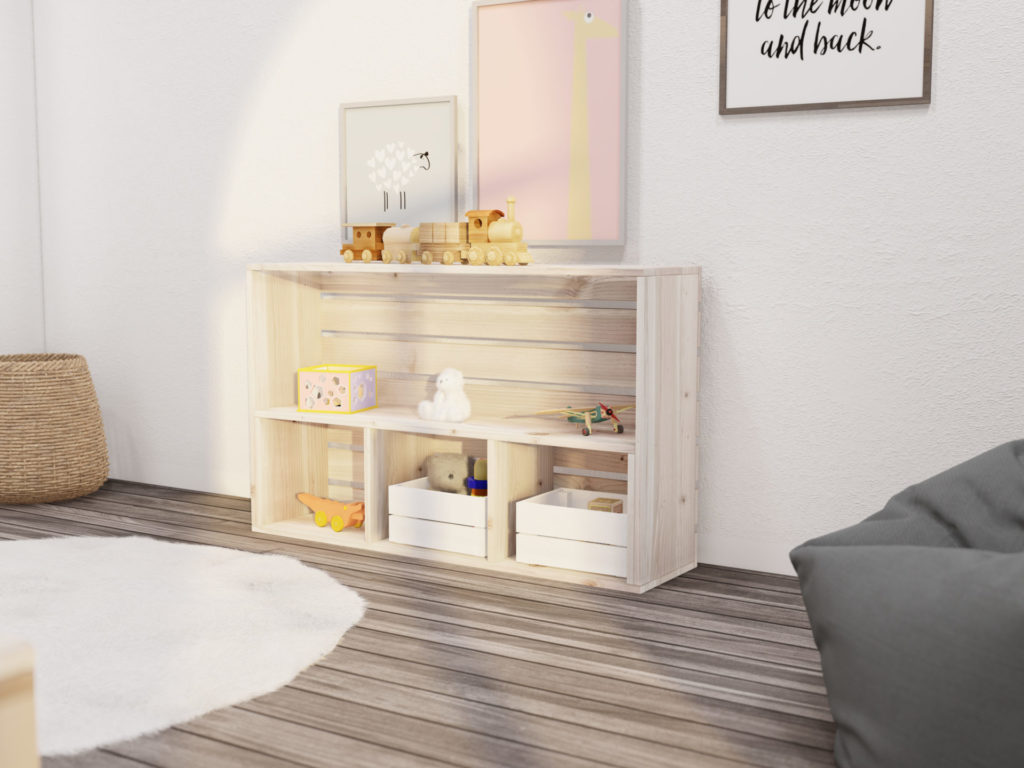
The wood cuts are made entirely from 1-inch-thick lumber boards which can be found in most hardware stores. Using wood is a great way to create a natural looking environment. Dr Montessori promoted a connection with nature and exploration. We feel that furniture made from plastic or painted metals can’t give the feeling of warmth and beauty that wood can. The pictures display a beautiful untreated, unpainted wood option. Plastics may be toxic and have toxic paint that your young child may ingest or interact with.
The assembly and joints are easy to do and require little skill. This build is great for beginners to woodworking and requires minimal tools.
The height of the shelf and storage empowers children to be able to reach and take what they need for play and learning. The Cubbies are appropriately sized for toy, puzzles, games, supplies, books, and activity storage and access. The height encourages accessibility and freedom in children.
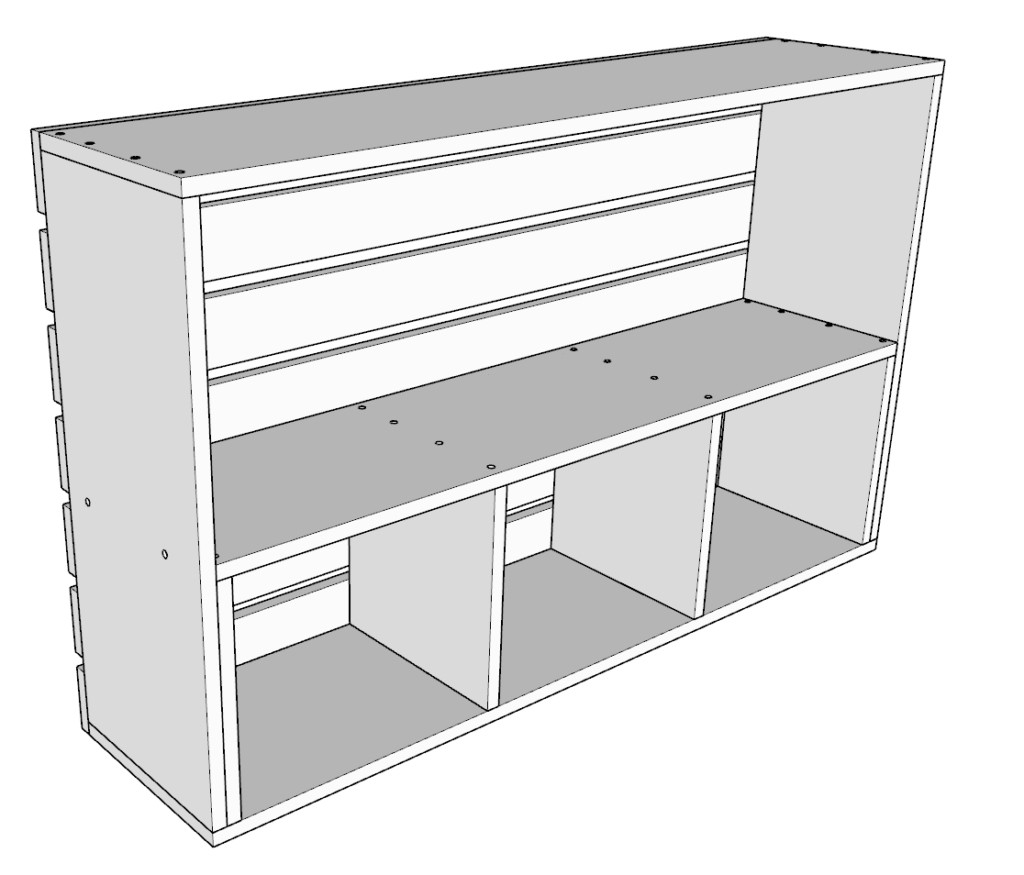
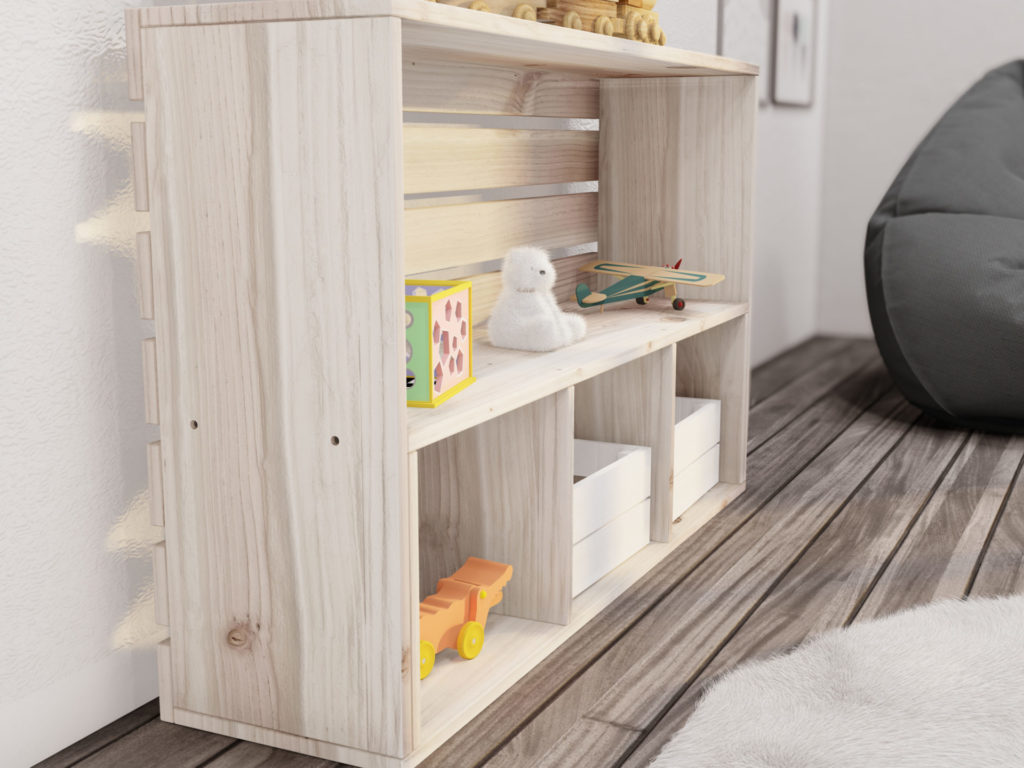
The back of the DIY shelf has horizontal wood planks in place to provide extra structural support and to prevent items from falling through to the back. The slat width matches the other furniture pieces seen in the photos and video to create an overall uniform look and to tie in the entire room in an aesthetic way.
The 14.5 inch x 12 inch cubbies are great for bins, baskets, and inserts.
When finished, sanded down properly, and attached to the wall the storage cabinet is safe solution for organization.
Overall dimensions?
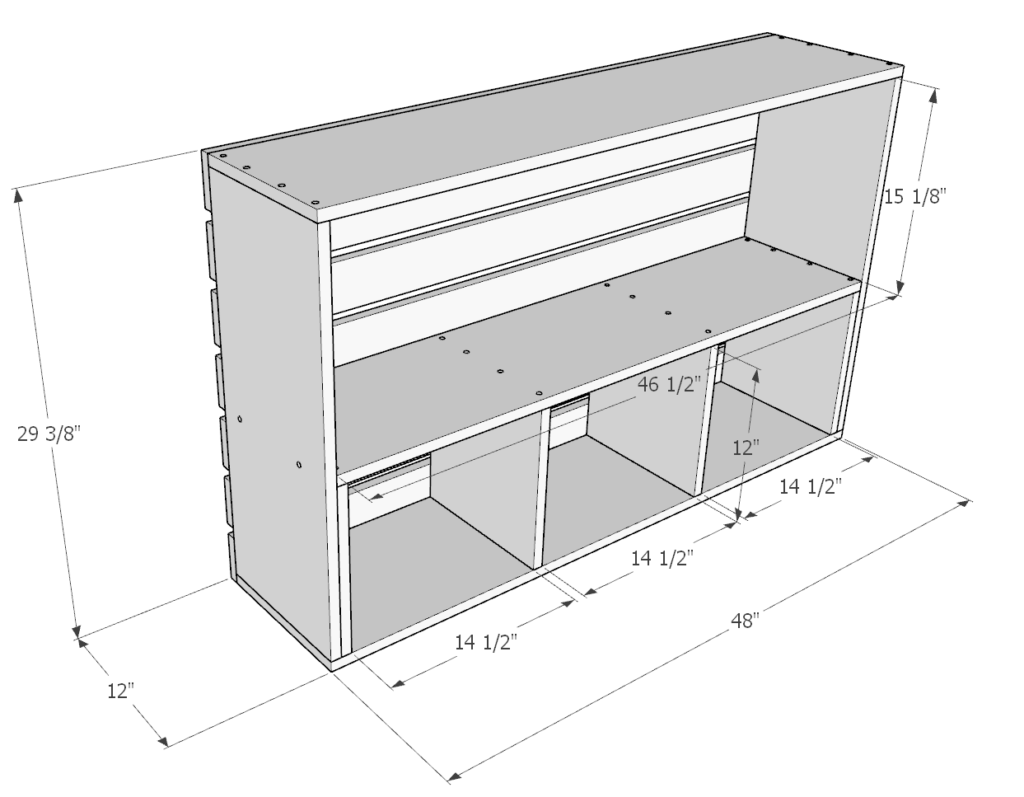
29 3/8 inch high, 12 inches wide, 48 inches long.
Top storage area is 15 1/8 inches tall and 46 1/2 inches wide and 11.25 inches deep.
The bottom cubbies are all 14 1/2 inches wide and 12 inches tall.
What other Montessori room pieces are a part of this room set-up?
Lego play and storage system plans can be found here.
Floor shelf plans can be found here.
Wall shelf plans can be found here.
Step stool plans can be found here.
Chair plans can be found here.
Activity and weaning table plans can be found here.
Twin size floor bed plans can be found here.
Children’s wardrobe plans can be found here.
Storage and activity shelf plans can be found here.

Time to build
2 hours
Total cost of build
$45
Skill level required
Beginner
Download the PDF plans
Plans for how to build the DIY Montessori storage/activities shelf.
What is included in the PDF download?
- Easy to read step by step instructions
- Material list
- Cut list
- Tools needed
- 3D illustrations
- Helpful links to tools and materials needed for the project
Recommend tools for this project
- Saw (miter saw recommended for precision cuts)
- Drill
- Impact driver with bit for screws
- Sander
- wood countersink drill bit
Cut list and material list
Available with purchase of PDF plans.
Step 1 (Montessori storage and activity shelf)
First, cut the lumber pieces into the dimensions into the following dimensions.
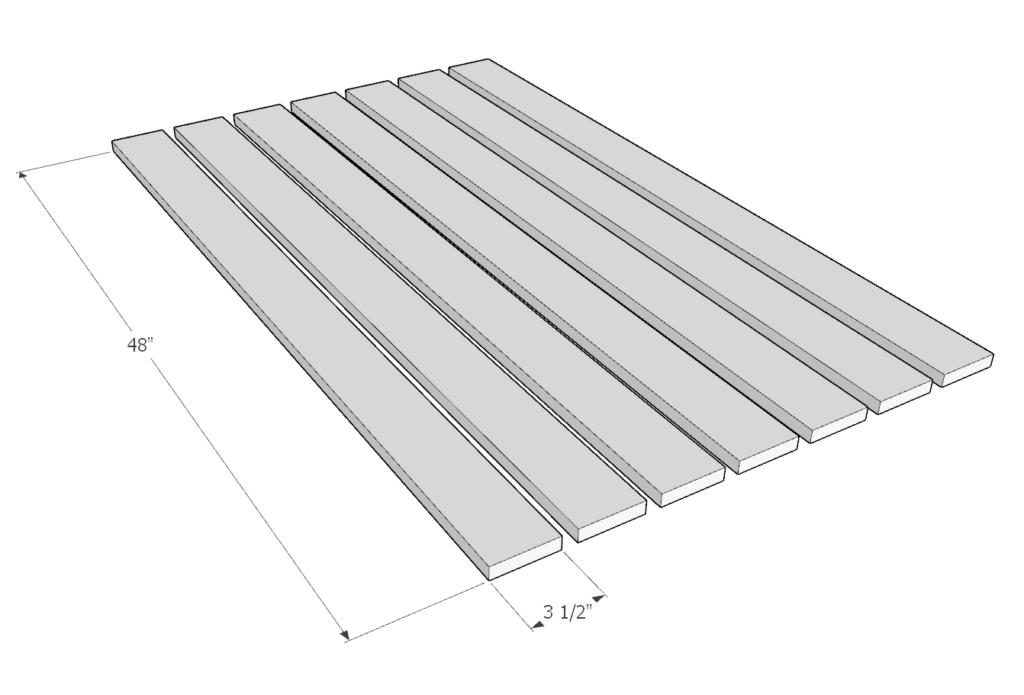
- (7) 1in x 4in x 48 in
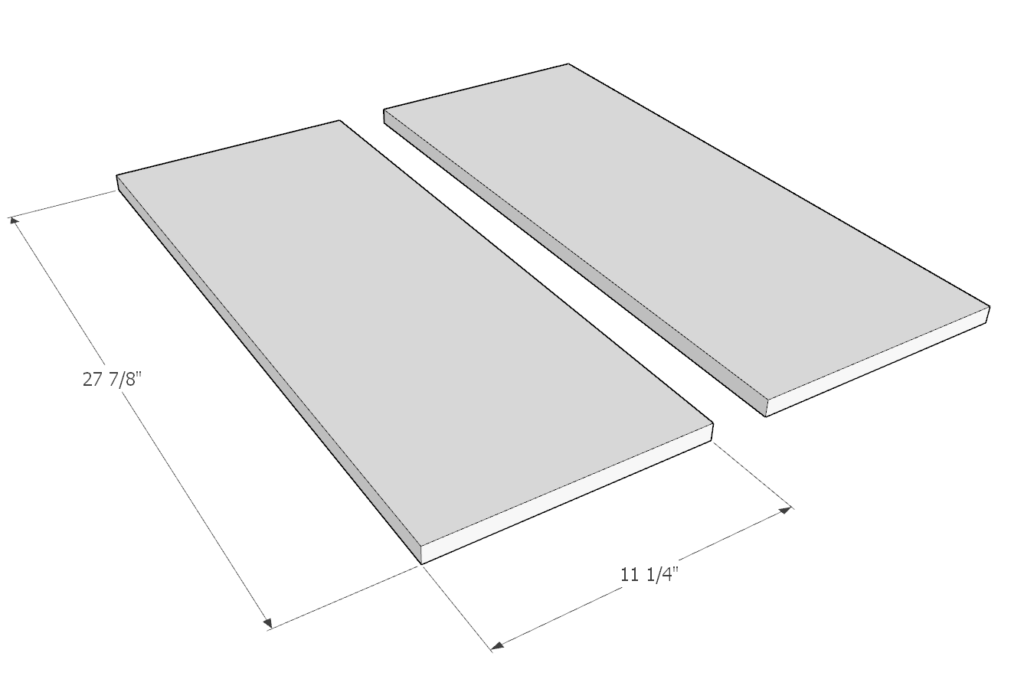
- (2) 1in x 12in x 27 7/8 in
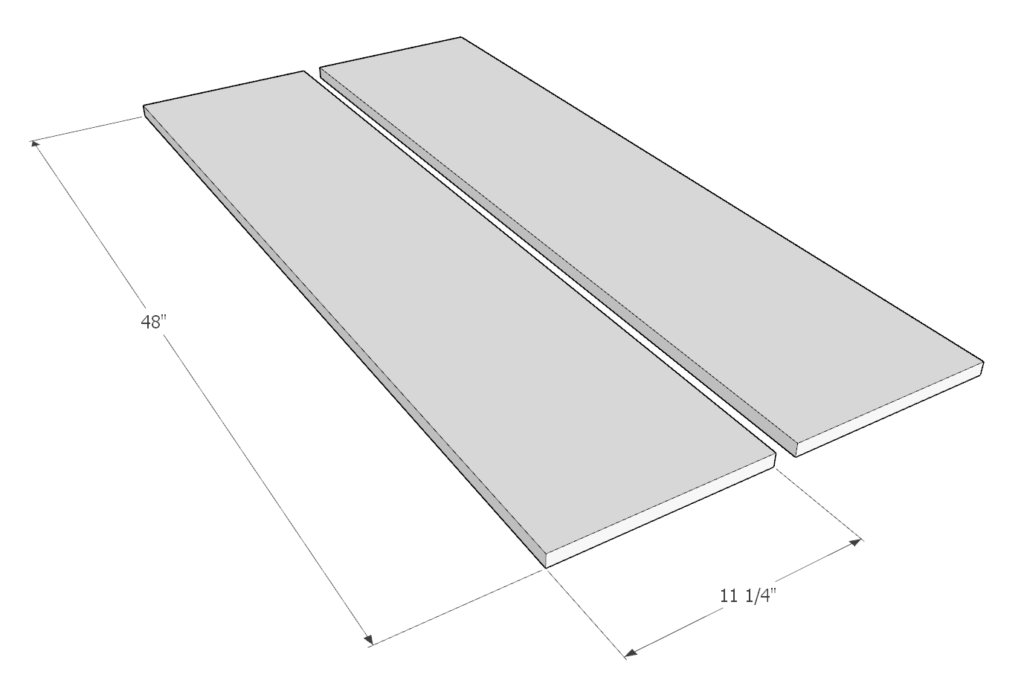
- (2) 1in x 12in x 48 in
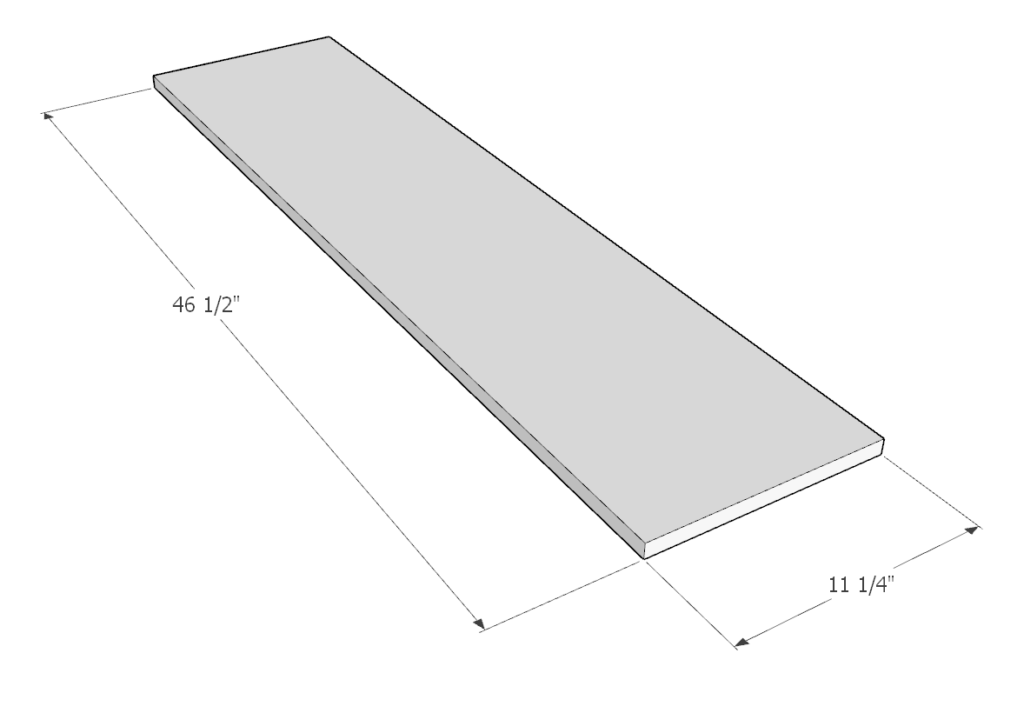
- (1) 1in x 12in x 46.5 in
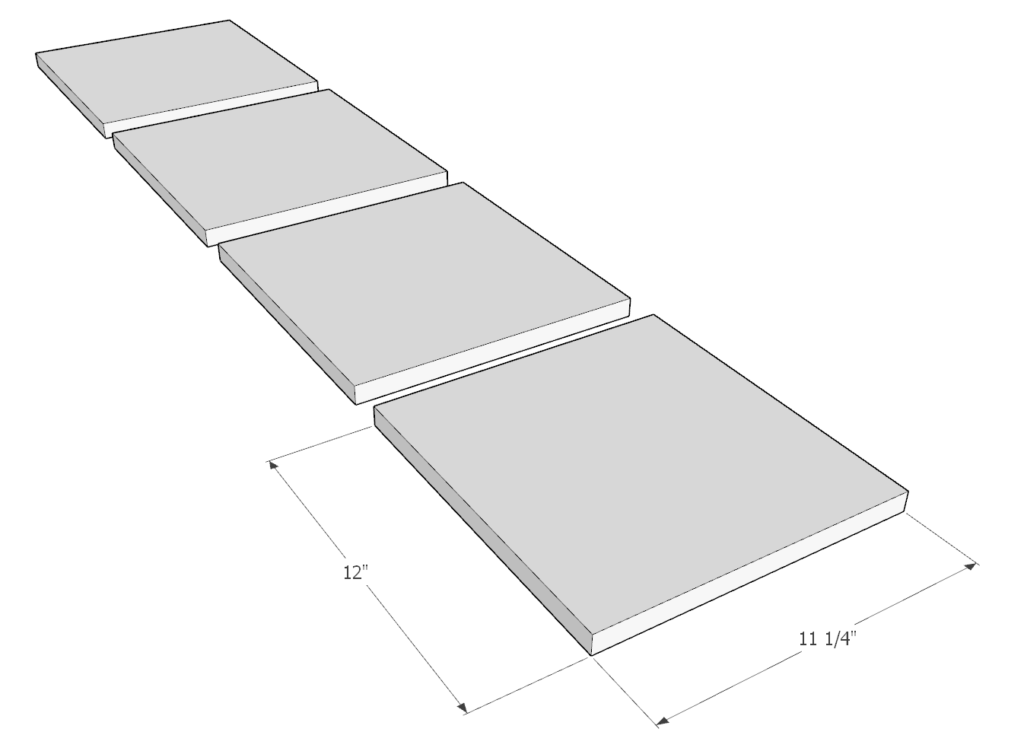
- (4) 1in x 12in x 12 in
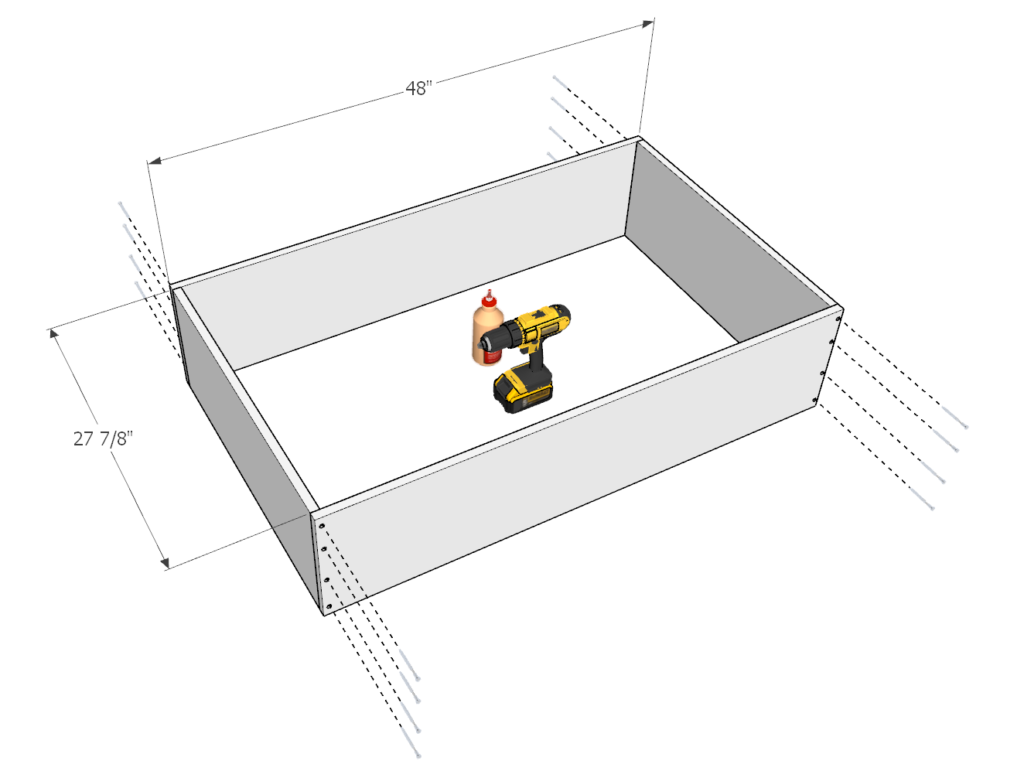
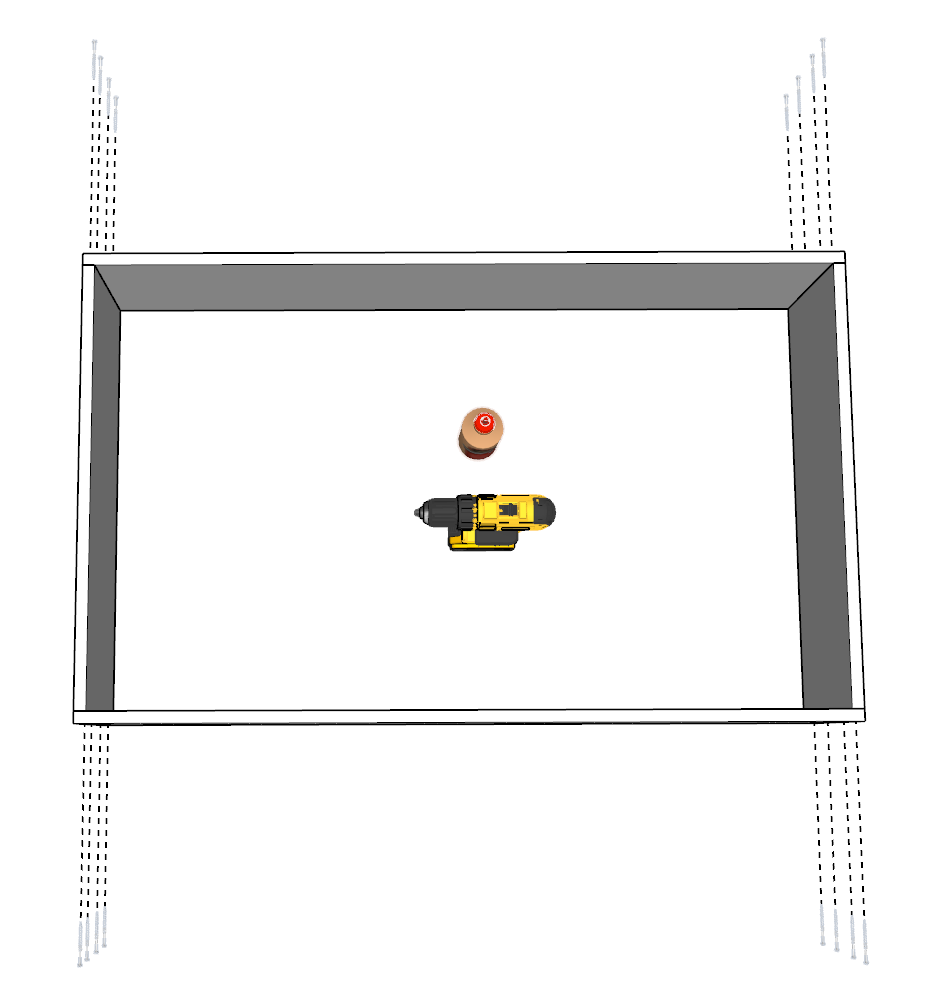
Step 2 (Montessori storage and activity shelf)
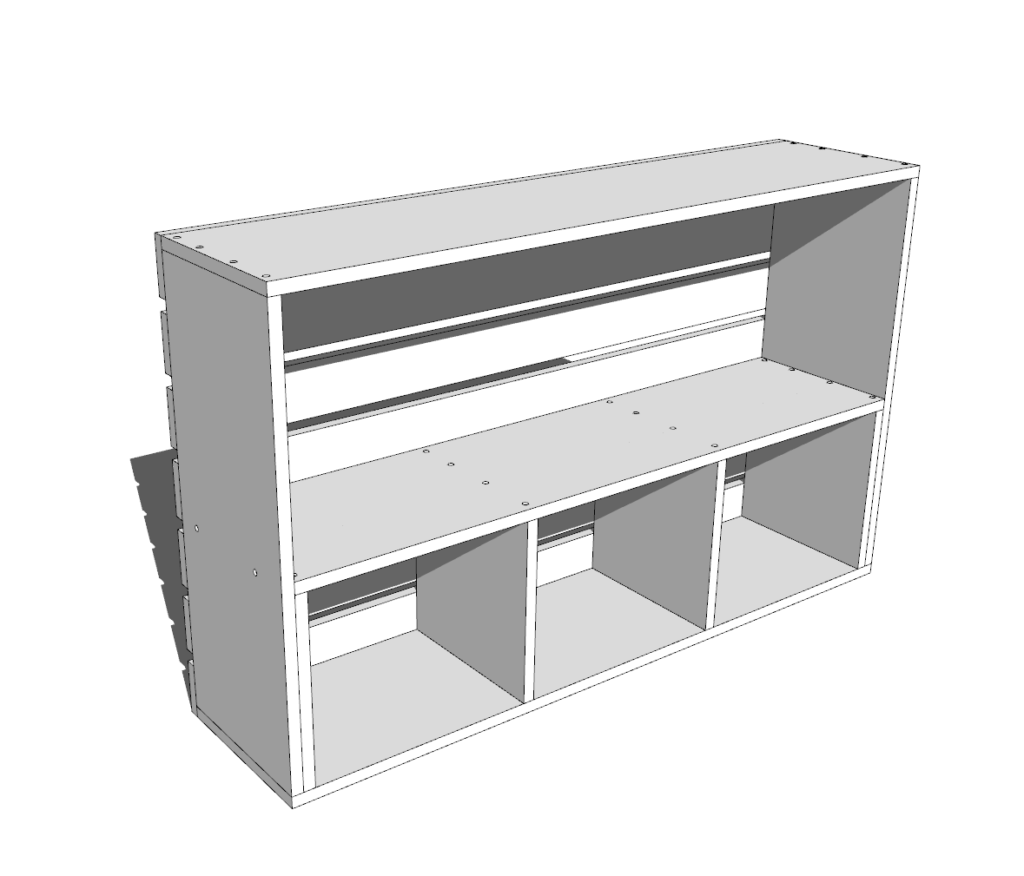
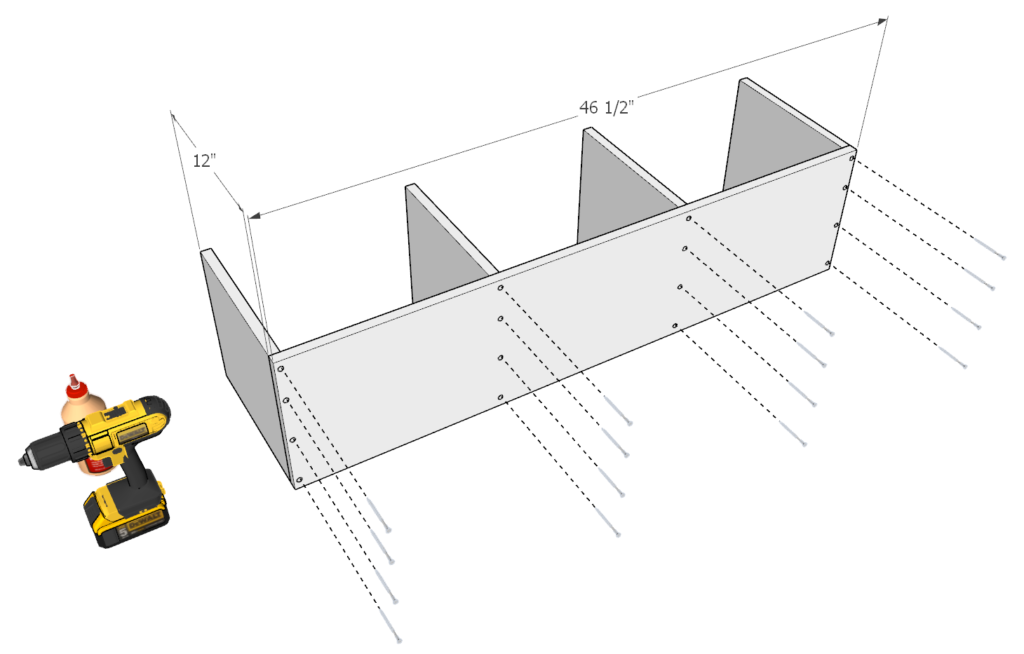
Next assemble the frame using two of the 27 7/8 in 1×12 lumber pieces and two 48 in 1×12 lumber pieces as shown in the diagram below.
Apply glue to all the areas that will be joined together. Predrill holes for the screws and add the 2.5 inch screws.
Step 3 (Montessori storage and activity shelf)
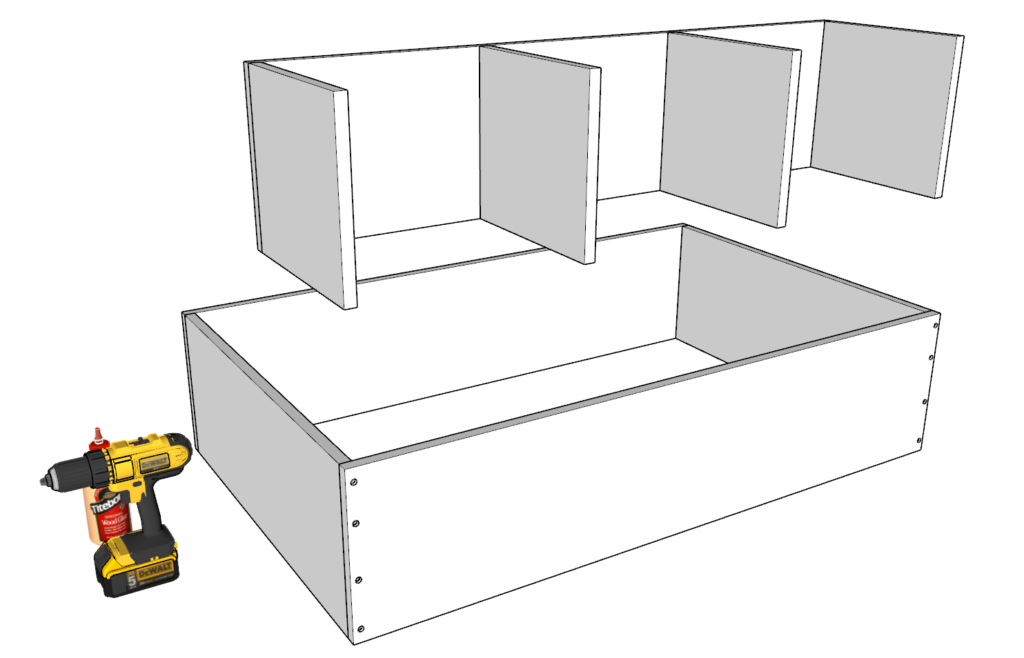
Next, create the base of the cubbies by joining together four of the 12-inch 1×12 pieces with one of the 26.5 in 1×12 pieces as shown below. Again, apply glue, predrill, and add screws.
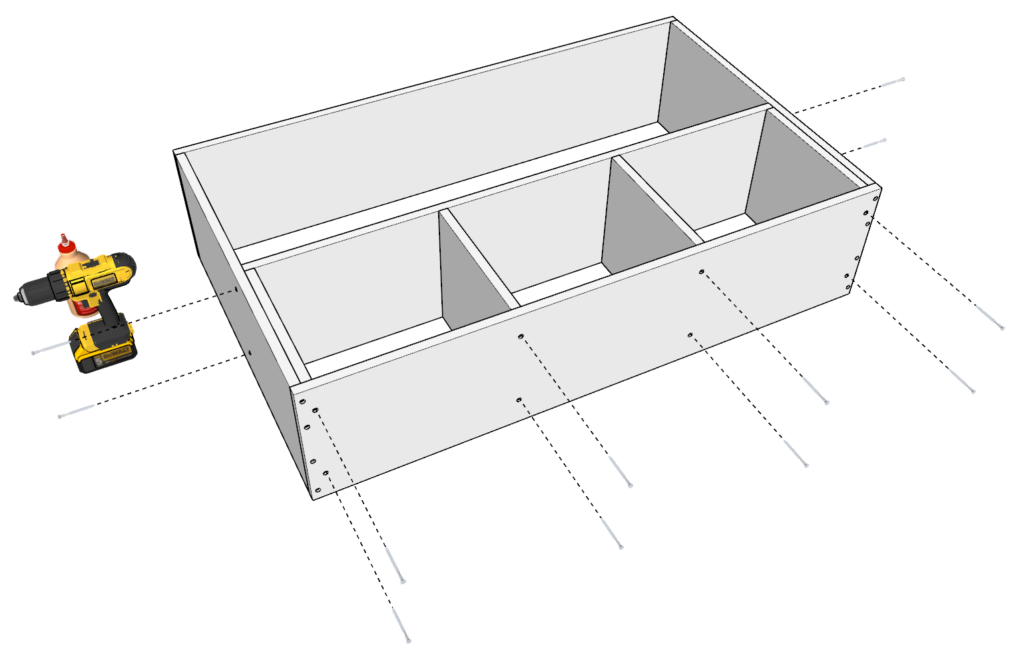
Next, take the cubby assembled piece and insert it into the frame built in the previous step. Before you do that, make sure you apply glue to all the areas that will be joined together.
Predrill holes and add screws.
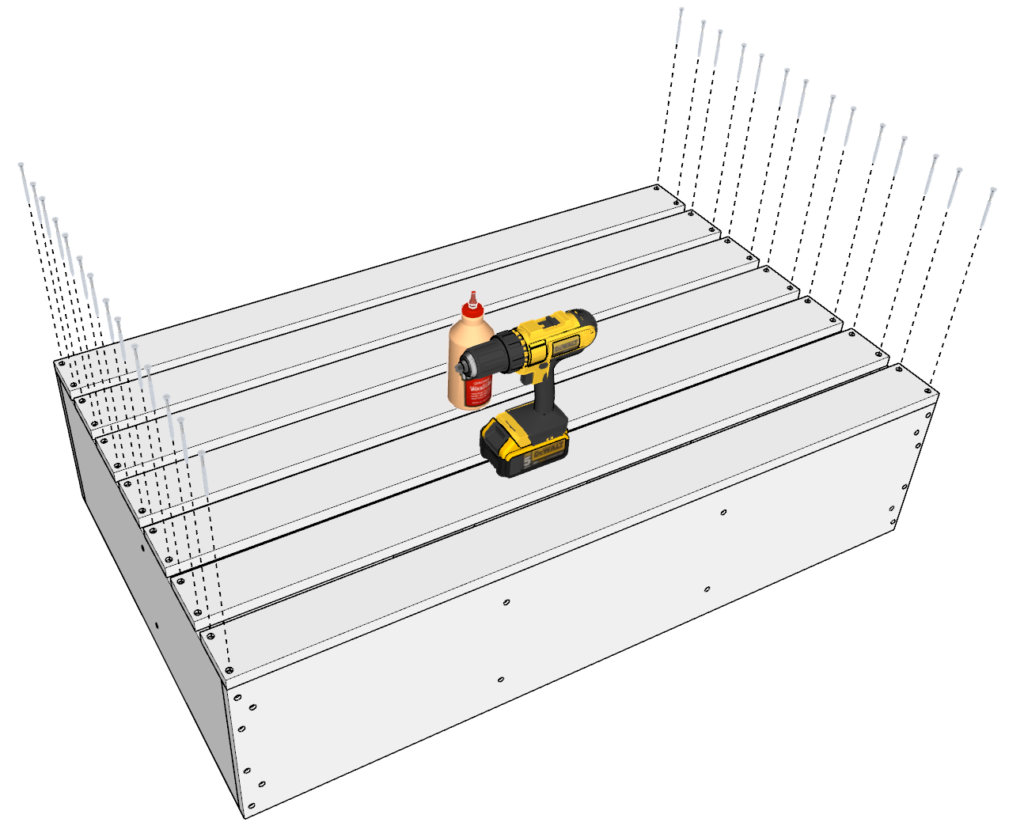
Step 4 (Montessori storage and activity shelf)
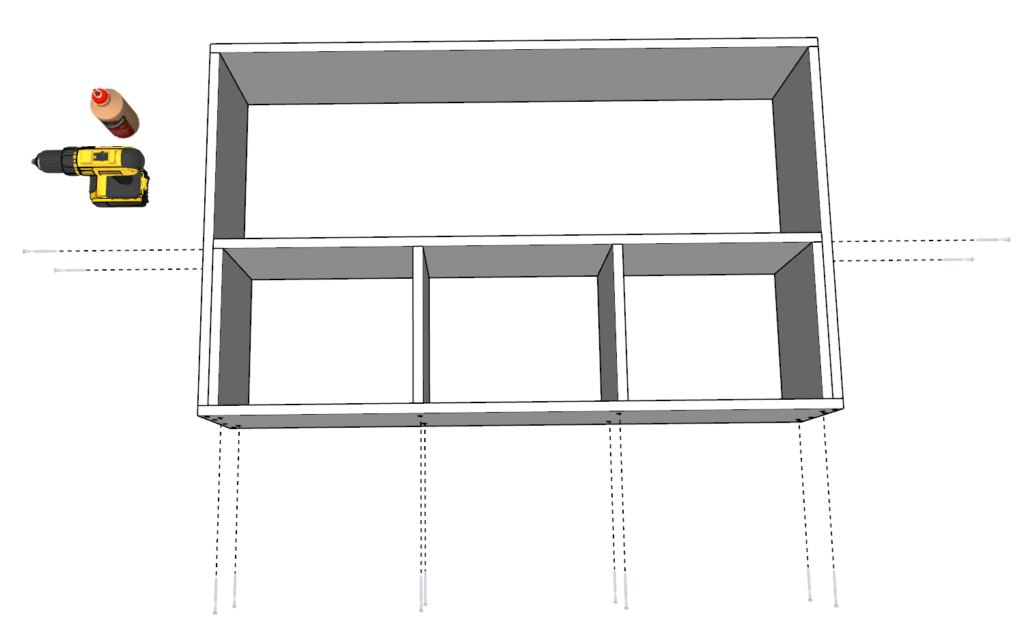
Next, add the back supporting boards as shown in the diagram. Space them out 13/16 inch apart. you can create a simple spacer from scrap lumber. This spacing is also used in most of the Montessori furniture pieces used in this set. Spacing it out correctly will give a beautiful uniform look for all furniture pieces.
Add glue, predrill, and add screws.

Step 5 (Montessori storage and activity shelf)
The final step is to sand down the multi-purpose DIY Montessori storage and activity shelf.
I start sanding with a rough grit sandpaper. Usually about 80-grit. Then, for the final touch I use a fine grit. Usually, a 220-grit.
It is important to round the corners to prevent injury in case your child bumps their head into an edge.
MAKE SURE TO STRAP OR TIE DOWN THE SHELF TO THE WALL TO PREVENT INJURY.