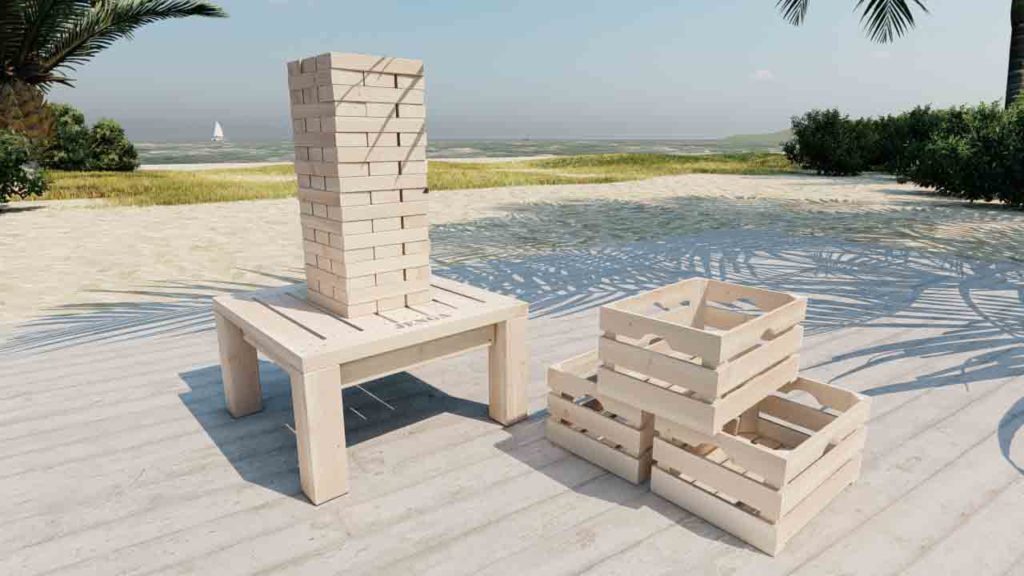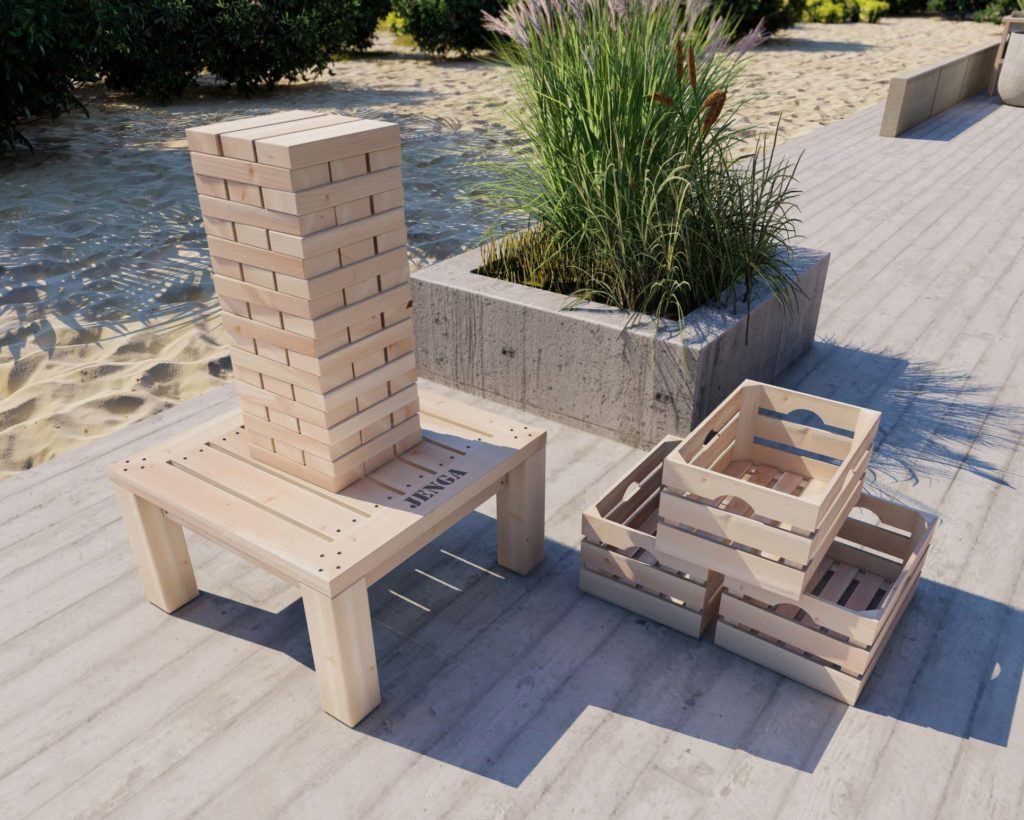
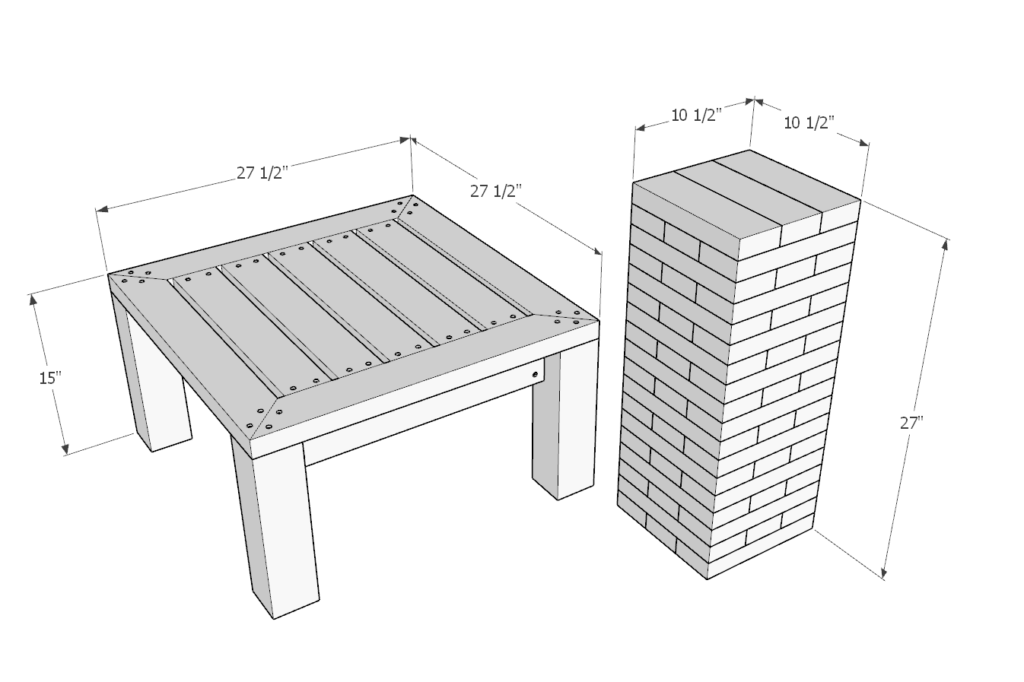
In this post you will learn how to make a giant Jenga game table and blocks. It is a great game that engages many people at once and is a good way to bring people together.
This game is ideal for weddings, quinceaneras, back yard fun, and birthday parties. This lawn game is easy to transport. The blocks can fit easily into crates that can be carried and stored away easily.
This block set can be built from recycled 2x4s left over from other projects as well!
Total cost for the table and block is only about $45. The wooden crates can be purchased separately from stores like Home Depot, Amazon, or Ikea.
Time to build
4 hours
Total cost of build
$40
Skill level required
Intermediate
Download the PDF plans
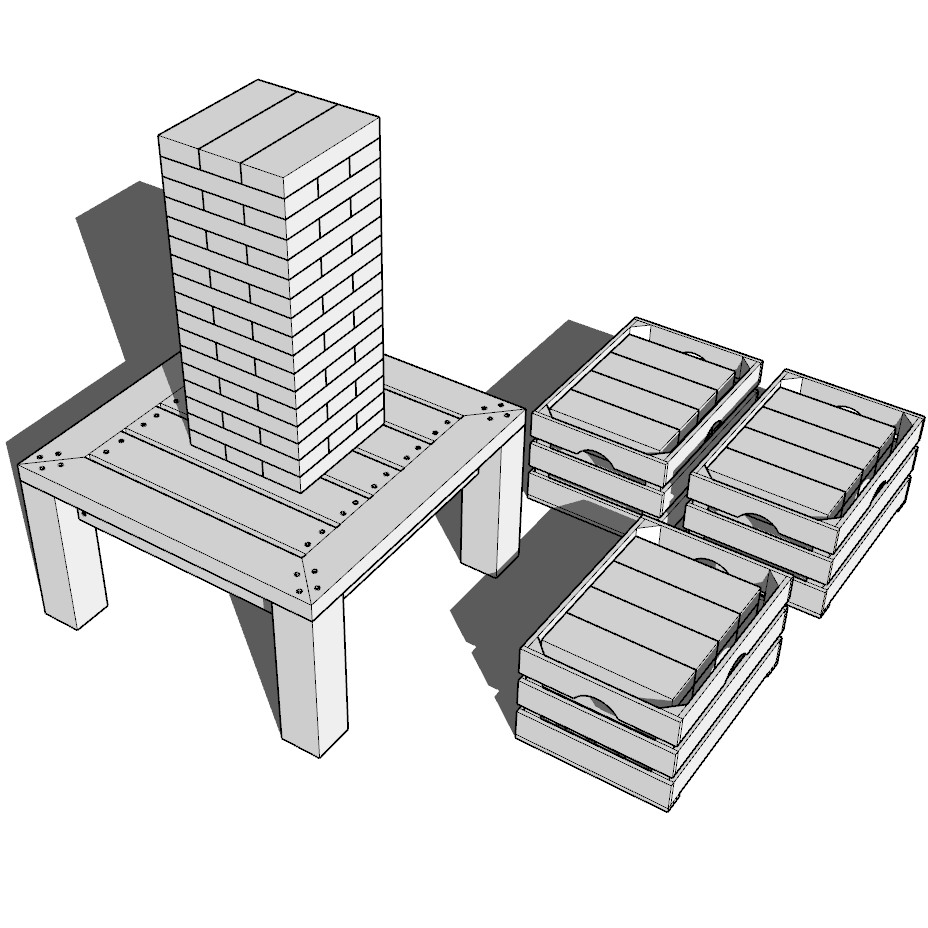
Plans for how to build a giant DIY Jenga table and wood blocks
What is included in the PDF download?
Easy to read step by step instructions
Material list
Cut list
Tools needed
3D illustrations
Recommend tools for this project
- Saw (miter saw recommended for precision cuts)
- Drill
- Ratchet Strap
- Impact driver with bit for screws
- GRIP Clamps
- Sander
- wood countersink drill bit
Cut list and material list
Available with purchase of PDF plans.
Step 1
Precut all your wood pieces into the following dimensions:
- (11) 2in x 4in x 20.5in
- (2) 2in x 4in x 17.5in
- (4) 4in x 4in x 13.5in
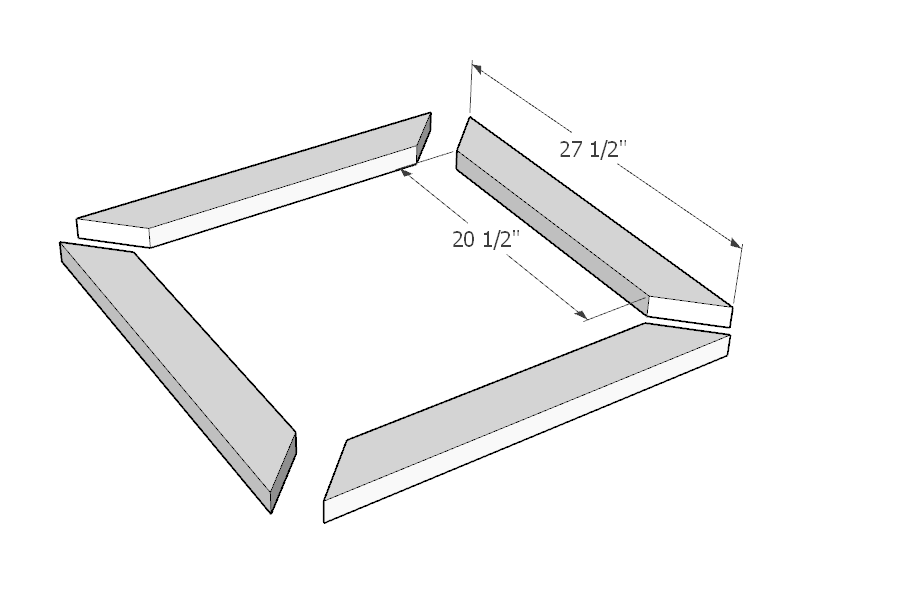
- (4) 2in x 4in x 27.5in (long side). (cut at a 45 degree angle. See image below for reference)
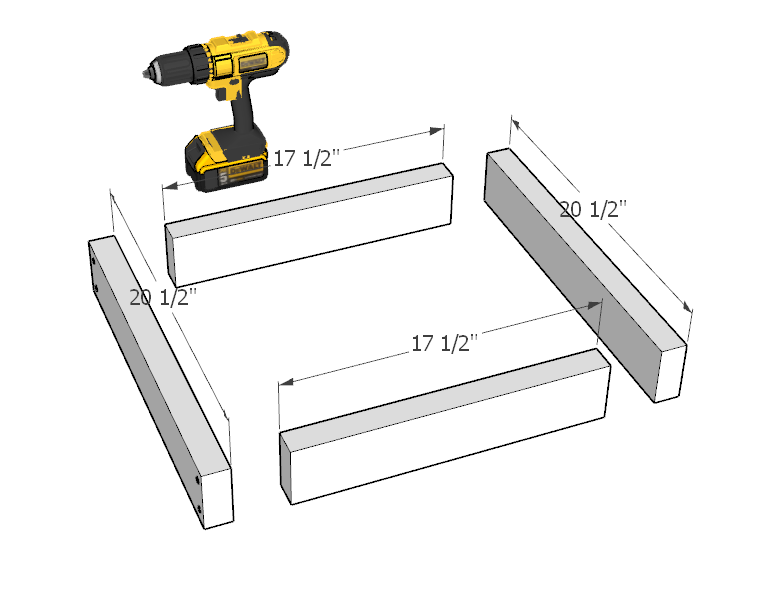
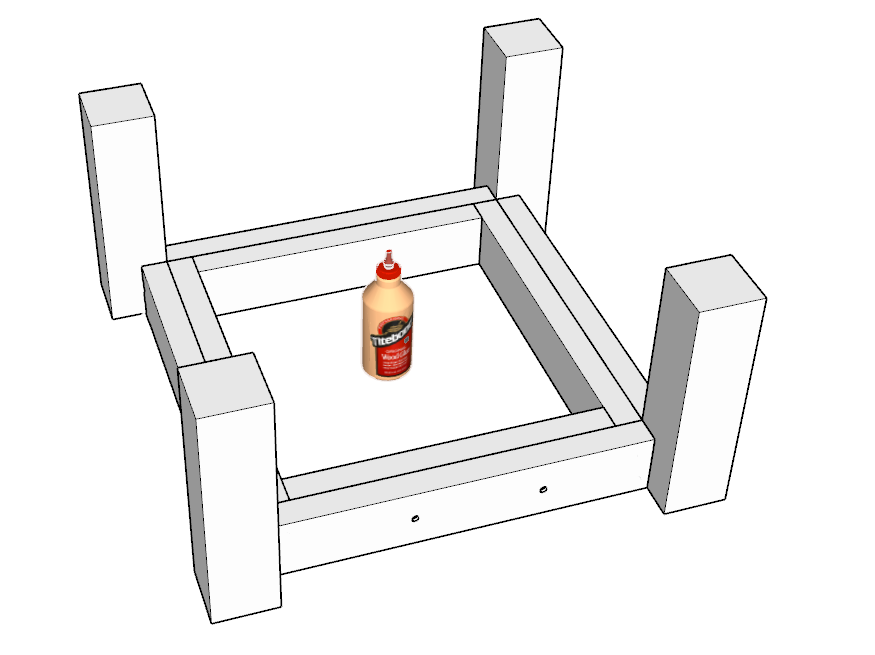
Step 2
Start by arranging two of the 17.5-in cuts and two of the 20.5-in cuts as shown in the diagram.
Predrill the holes so that the wood doesn’t split using a countersink bit for the cleanest look.
Step 3
Next add glue to all the areas where the joints will be. Make sure to apply enough glue to make sure the joint is strong but not so much that the glue drips.
Once glue dries it is very difficult to sand out. Its good practice to have something on hand to wipe off the extra glue.

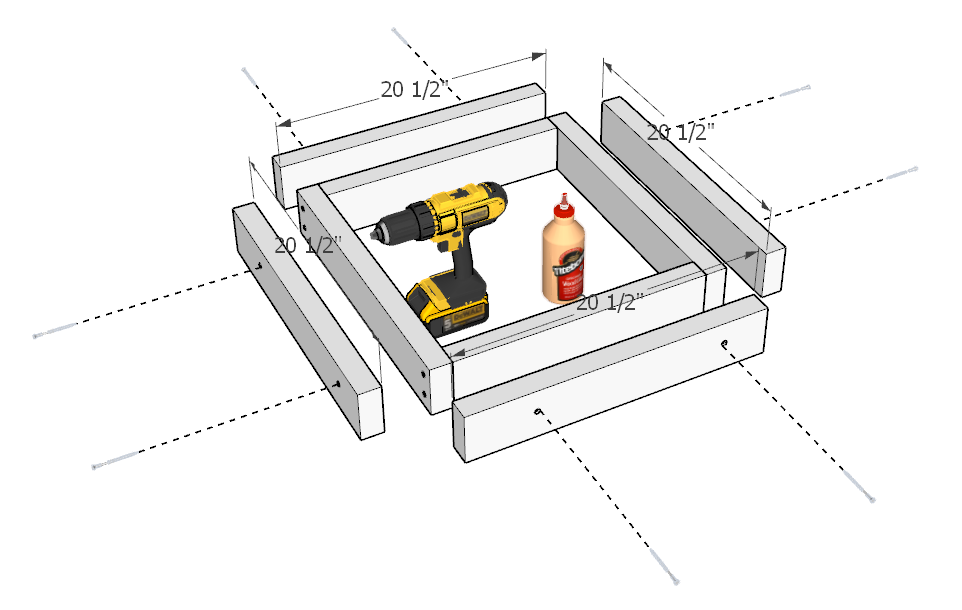
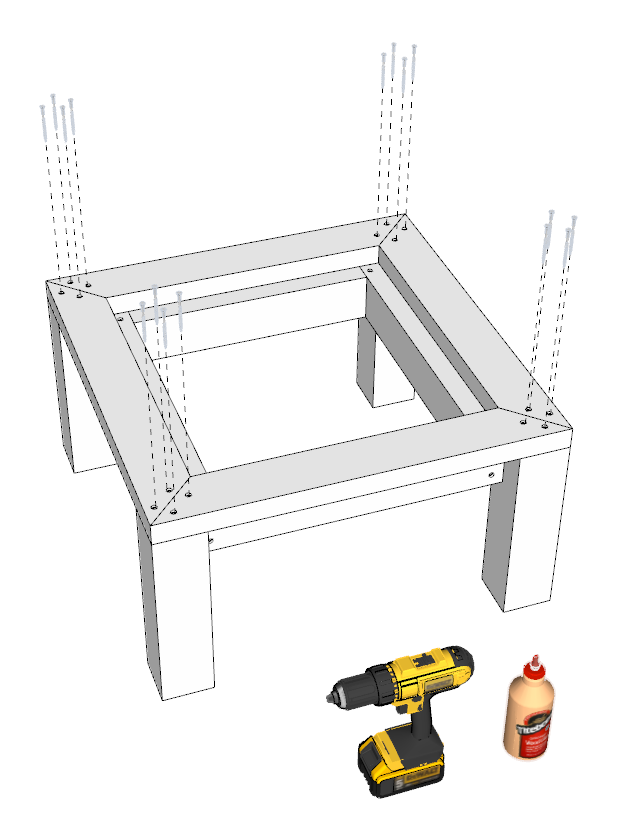
Step 4
In this step, add the 20.5-in pieces that will be attached to the frame.
Predrill and add glue. Add screws and secure the pieces to the frame.
Step 5
Next take 4 of the 13.5-in pieces. These will be attached to the frame with glue and screws.
Make sure the surface you are working on is leveled. This will ensure that the tabletop is even.

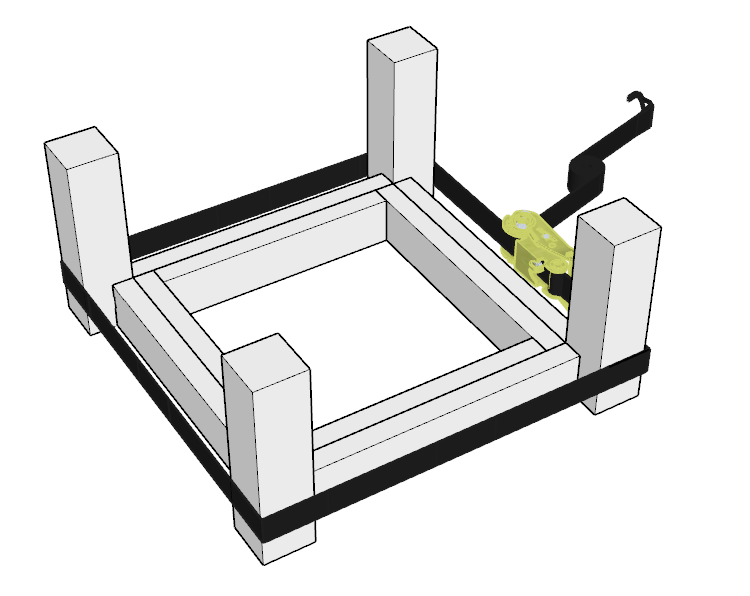
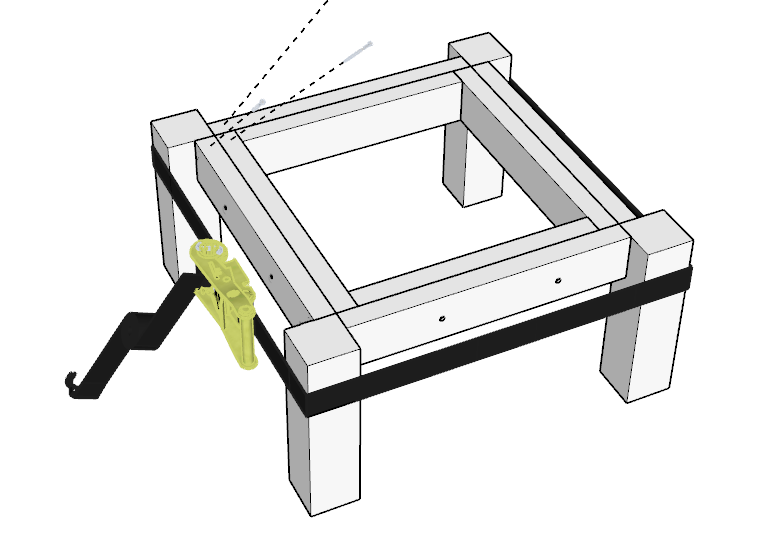
Step 6
Next add glue and bring all the leg pieces together.
Put a ratchet strap around the outside perimeter and begin to bring all the pieces together.
Make sure the strap is very tight and has a fair amount of tension. This will ensure that when adding screws, nothing will move.
You can lift the table and make sure that all the surfaces are flush and even. If they are uneven then the tabletop will also be uneven.
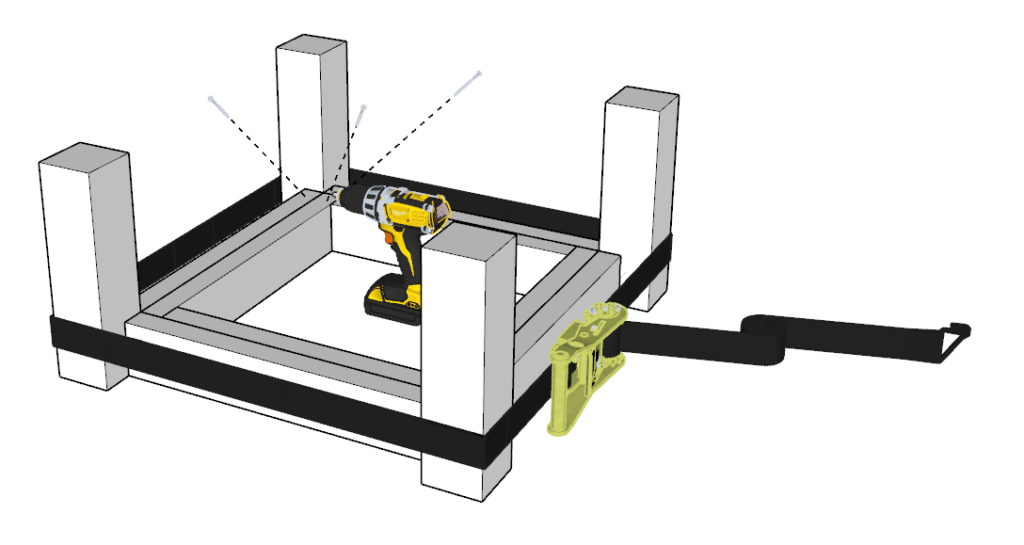
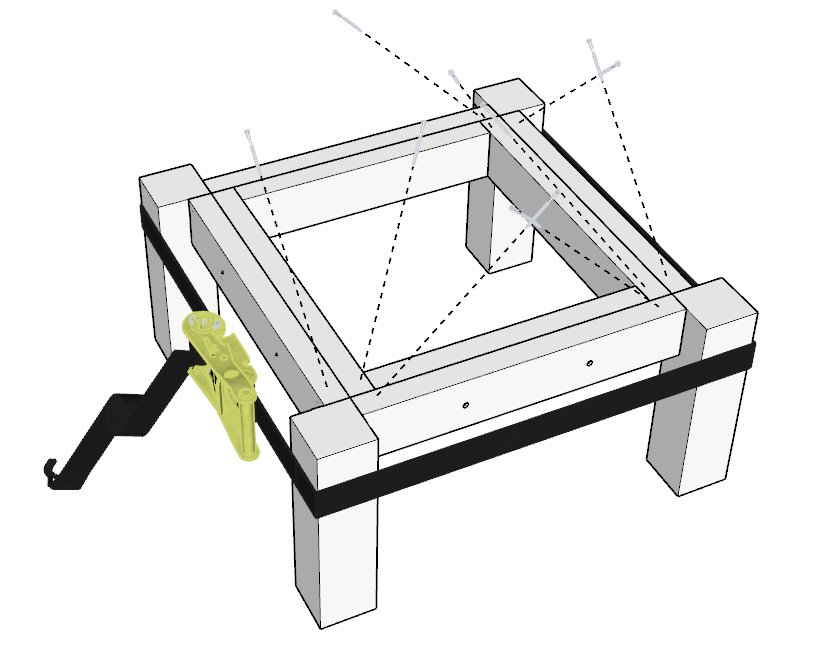
Step 7
In this step add three screws. You can predrill here as well but make sure you don’t hit any of the screws that are already in the wood.
I usually use an old drill bit here in case it does hit a screw.
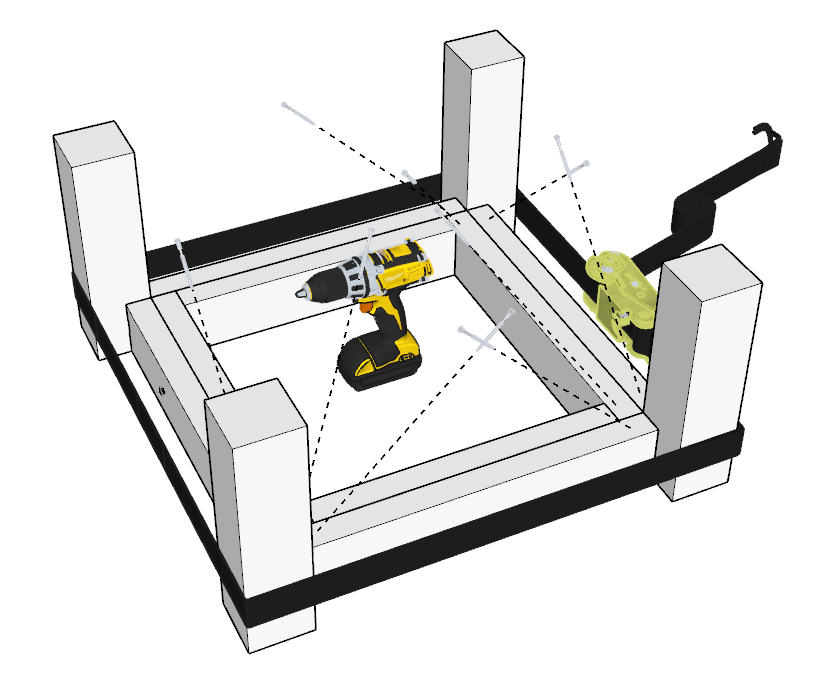
Step 8
Next add 9 more screws in the same manner as before.
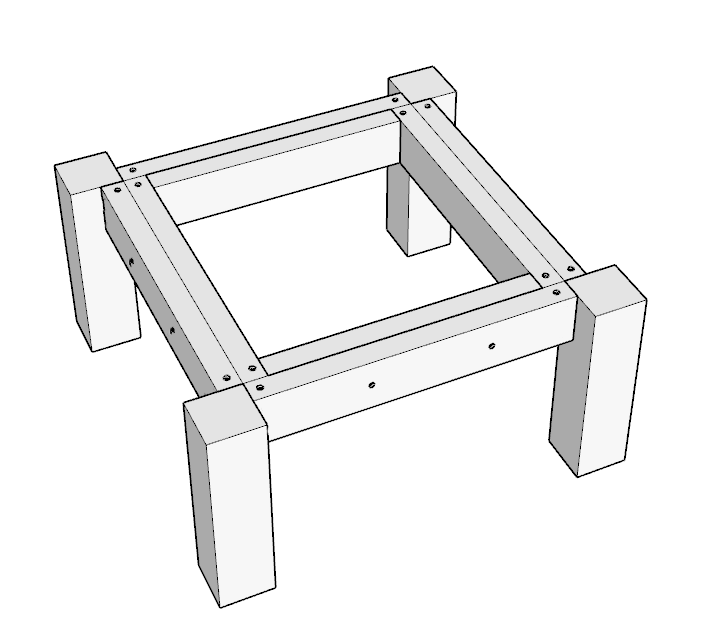
Step 9
Next, flip the table. Do not release the straps. Predrill holes again in the same way as on the bottom and add the 12 screws.
Once you add all the screws, remove the straps.
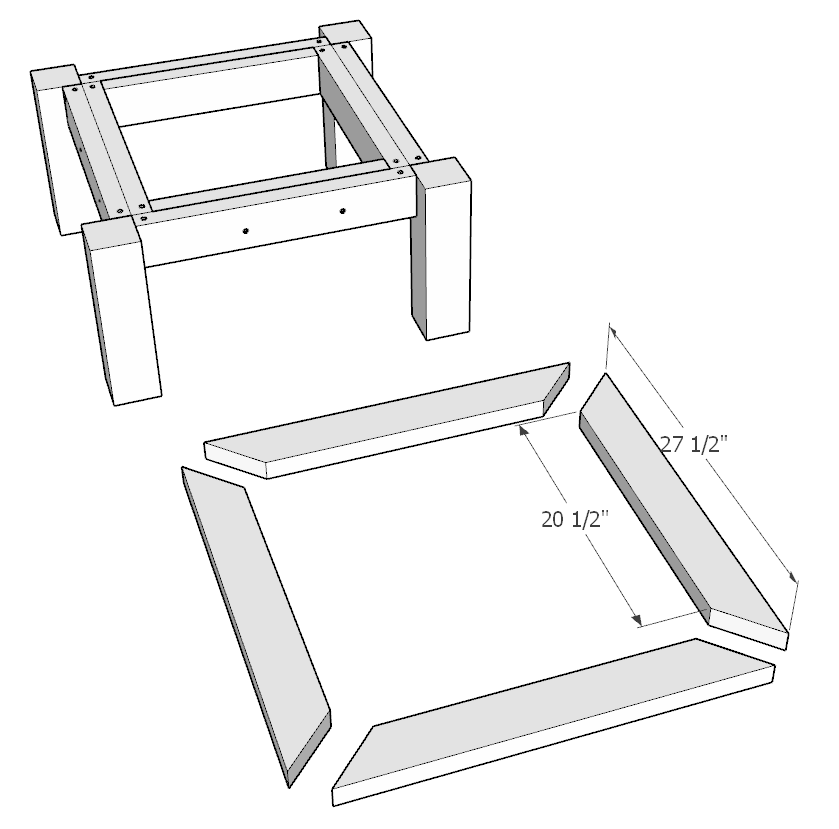
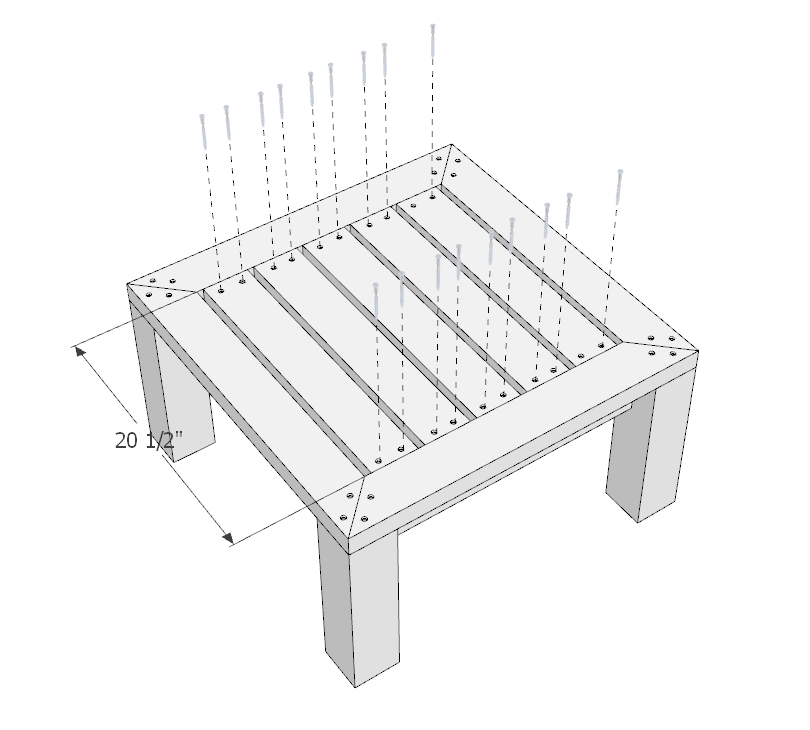
Step 10
Next, take the 27.5-in pieces and add them to the top of the table. If the top of the table is rough and uneven then sand it down and make it even before adding the 27.5-in pieces to the top.
Step 11
Next, add glue to all the areas where the 27.5-in pieces will be making contacts, including at the 45-degree corners.
Predrill holes and attach to the table frame with screws.
Step 12
Next, add glue to all the areas where the 27.5-in pieces will be making contacts, including at the 45-degree corners.
Predrill holes and attach to the table frame with screws.
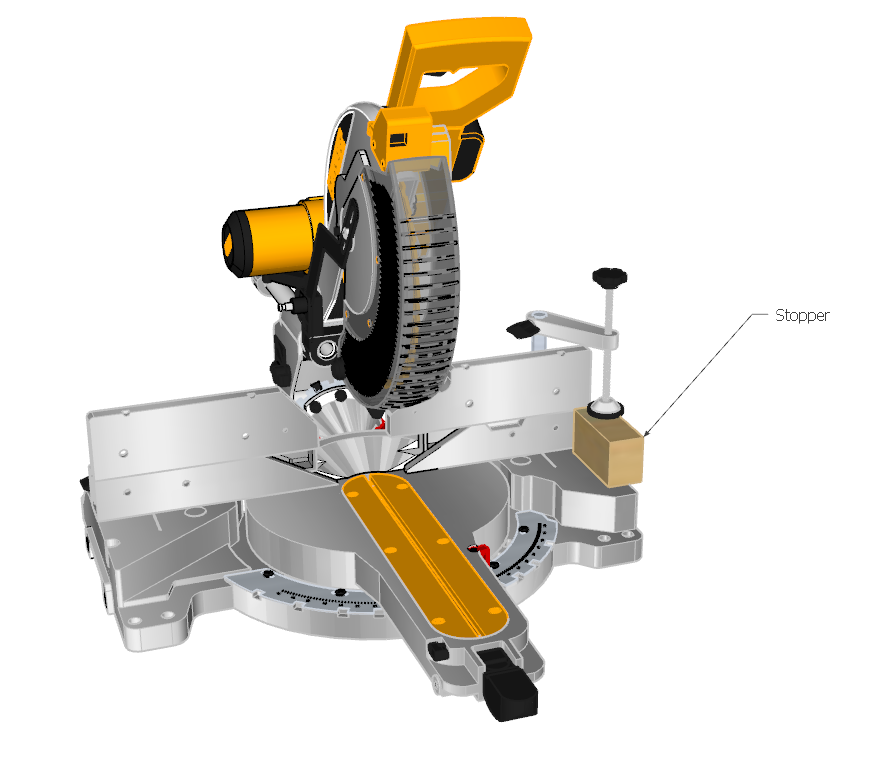
Step 13
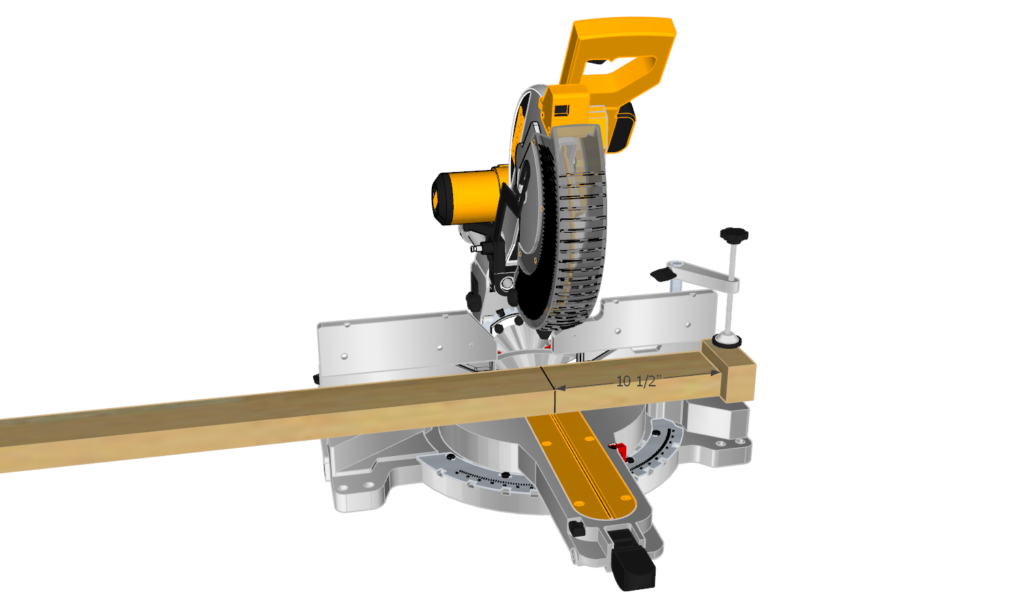
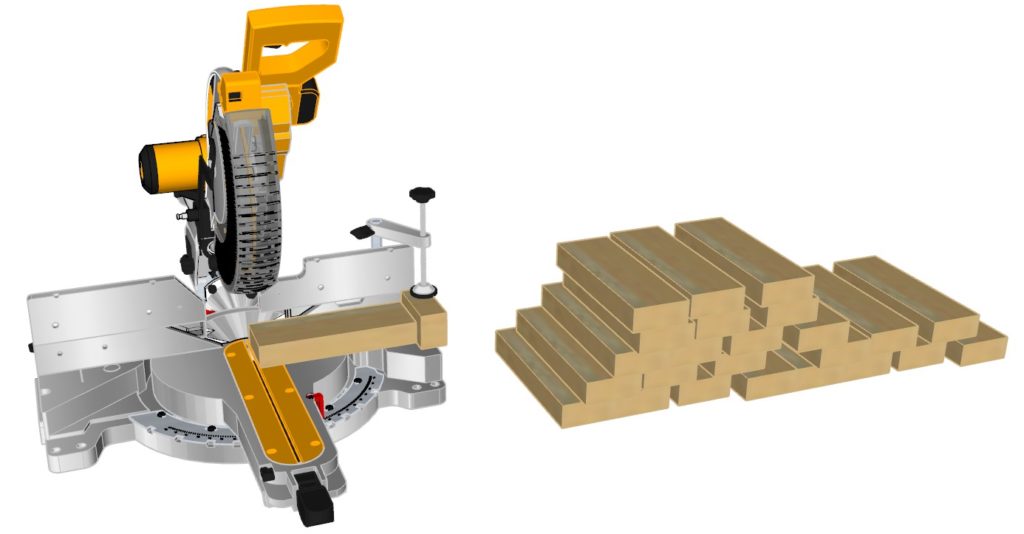
When cutting the blocks, take the 2-in x 4-in x 8-ft lumber pieces and cut them into 10.5-in pieces.
I find that a use of a stopper in is a great way to speed up cutting these 10.5- in blocks.
This project is also a great way to use up left-over material from previous projects and recycle them.
You will need a total of 54 pieces.
Step 14
The final step is to sand down the table and all the blocks.
I start sanding with a rough grit sandpaper. Usually about 80-grit. Then, for the final touch I use a fine grit. Usually, a 220-grit.
The table is now ready to be stained or painted. This is optional. If the table is only brought out for special events then it can remain in storage without the need for extra protection for the wood.

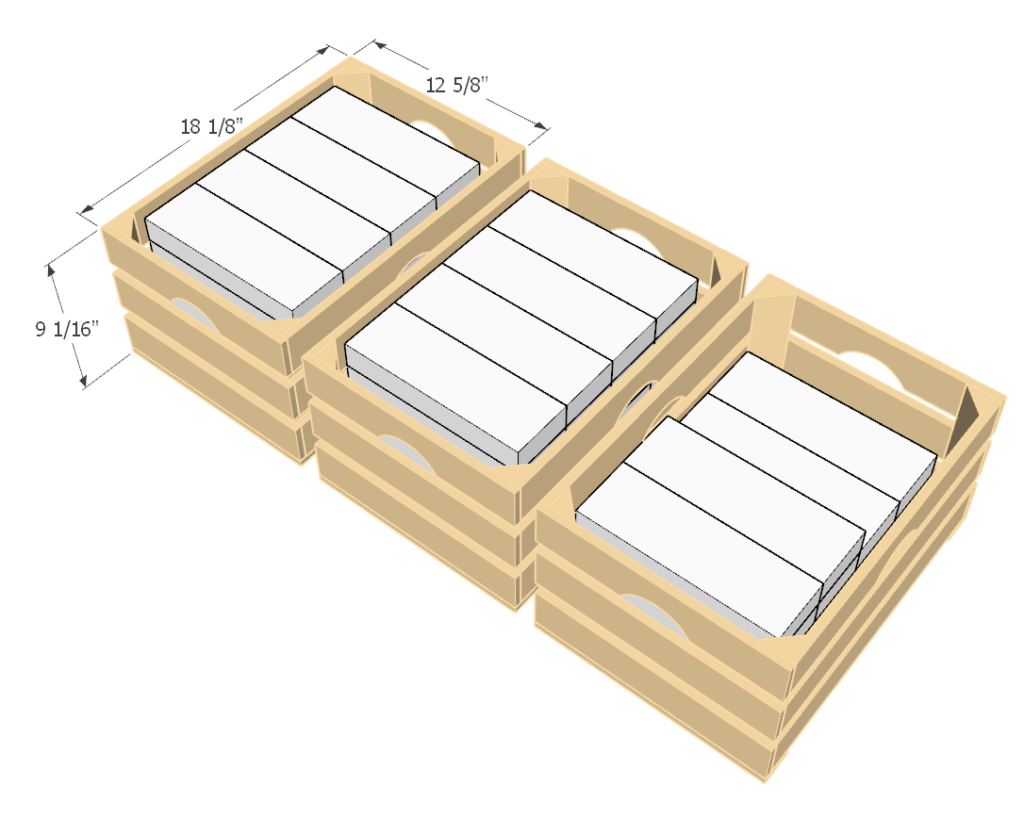
Storage and crates
For the storage of the play blocks, you can purchase crates.
These can be purchased from Home Depot, Amazon, Ikea. or any other place that sells crates.
The dimensions of the crates can very. The block will fit loosely in the crates, so it is possible to use crates that are not exactly the dimensions that are displayed in the diagram.
I find that the crates are usually about $10-$12 each.
Having crates is a great way to store the block and to transport them as well. This is especially important if this play set is used as a rental or if its being carried from location to location.