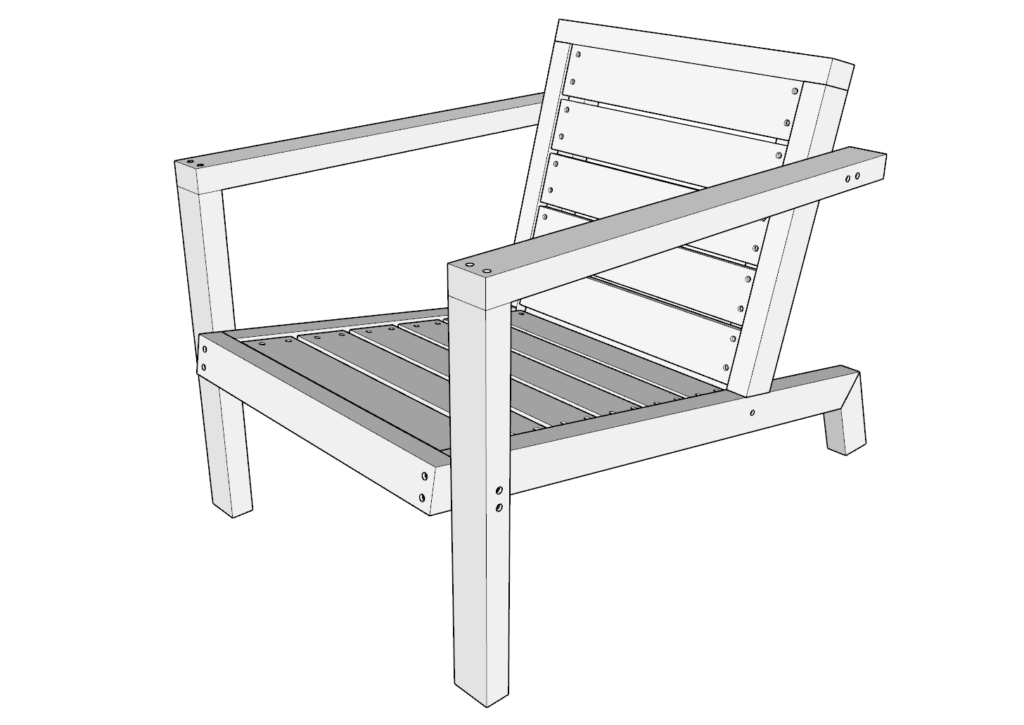
If you’re looking for DIY outdoor chair, garden chairs, or adirondack chair ideas then you have come to the right place. In this post you will find DIY plans for making a modern outdoor wooden chair with incline. The seating platform of the DIY chair is at 10 degrees incline and the back rest is at an additional 5 degrees incline. This makes this chair super comfortable.
These DIY chairs are made from only three types of lumber (2×3’s, 2×2’s, and 1×4’s) that is commonly available at any home improvement stores.
Although the plans are offered freely, consider supporting this website to make more great plans available for the future by purchasing the PDF version of the plans.
Why choose our design for the DIY Adirondack chair?
One of the reasons why so many people love Adirondack chairs is because they are so comfortable. I am excited to share with you my modern DIY version of this timeless chair!
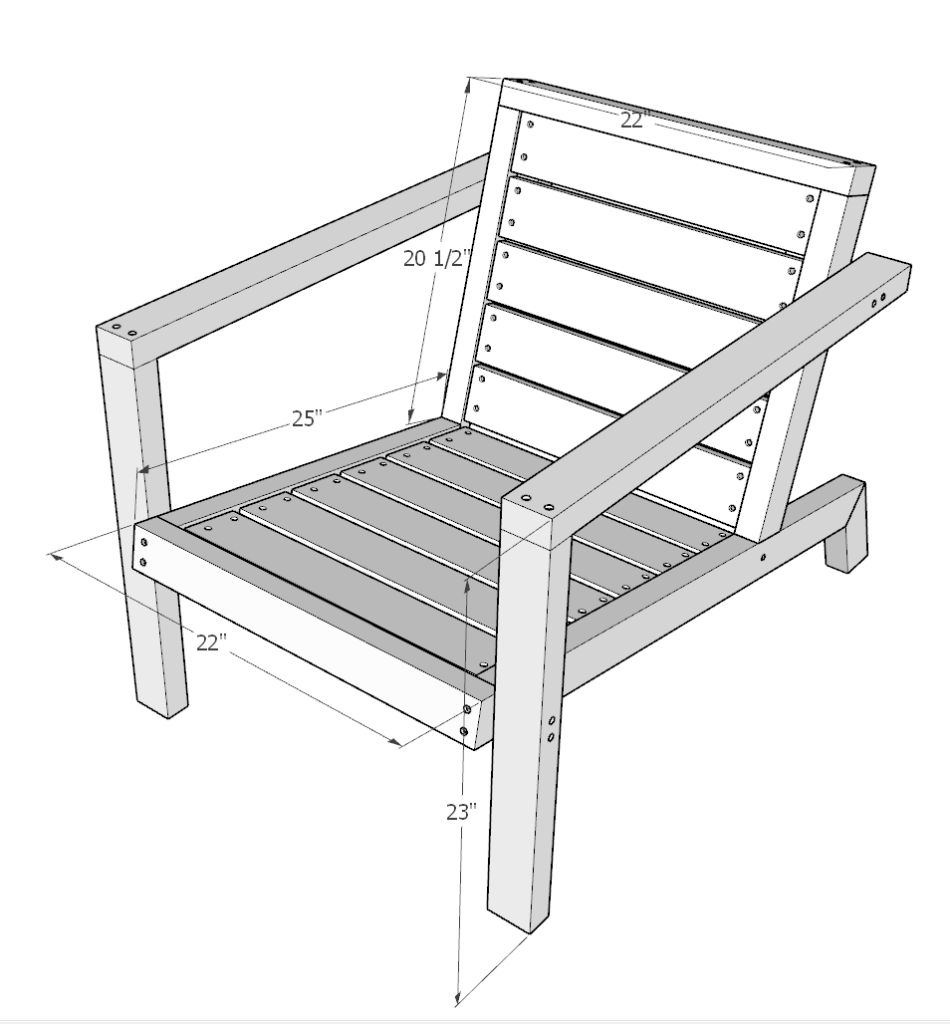
I designed This patio chair to be low to the ground with the seating platform is at a 10-degree incline and the back rest is at an additional 5-degree incline. This makes the low-slug seat super comfortable when you sink into it.
If your tired of managing cushions and pillows by having to keep them out of the sun in the summer and hiding them in the winter, then these patio chair might be a great solution for you. They don’t require cushions to be comfortable!
Who can build these patio chair?
These chairs are great for anyone who is relatively new to woodworking. The joints are simple, the cuts are easy, and the step-by-step instruction will save you time, money, and frustration with this build.
These DIY chairs are made from only three types of lumber (2×3’s, 2×2’s, and 1×4’s) that is commonly available at most home improvement stores.
What about other the patio cover in the photos?
Plans for the 8 ft x 10 ft pergola patio cover can be found here


Time to build
4 hours per chair
Total cost of build
$80 per chair
Skill level required
Intermediate
Download the PDF plans

Outdoor wood sectional patio bench PDF
What is included in the PDF download?
Easy to read step by step instructions
Material list
Tools needed
3D illustrations
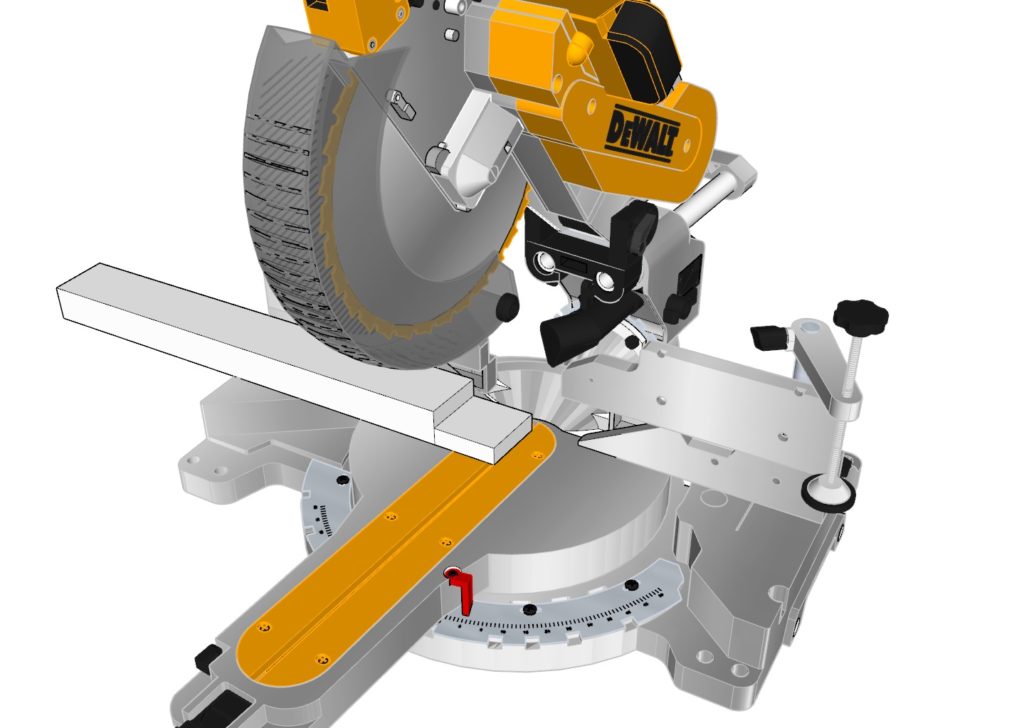
Recommend tools for this project
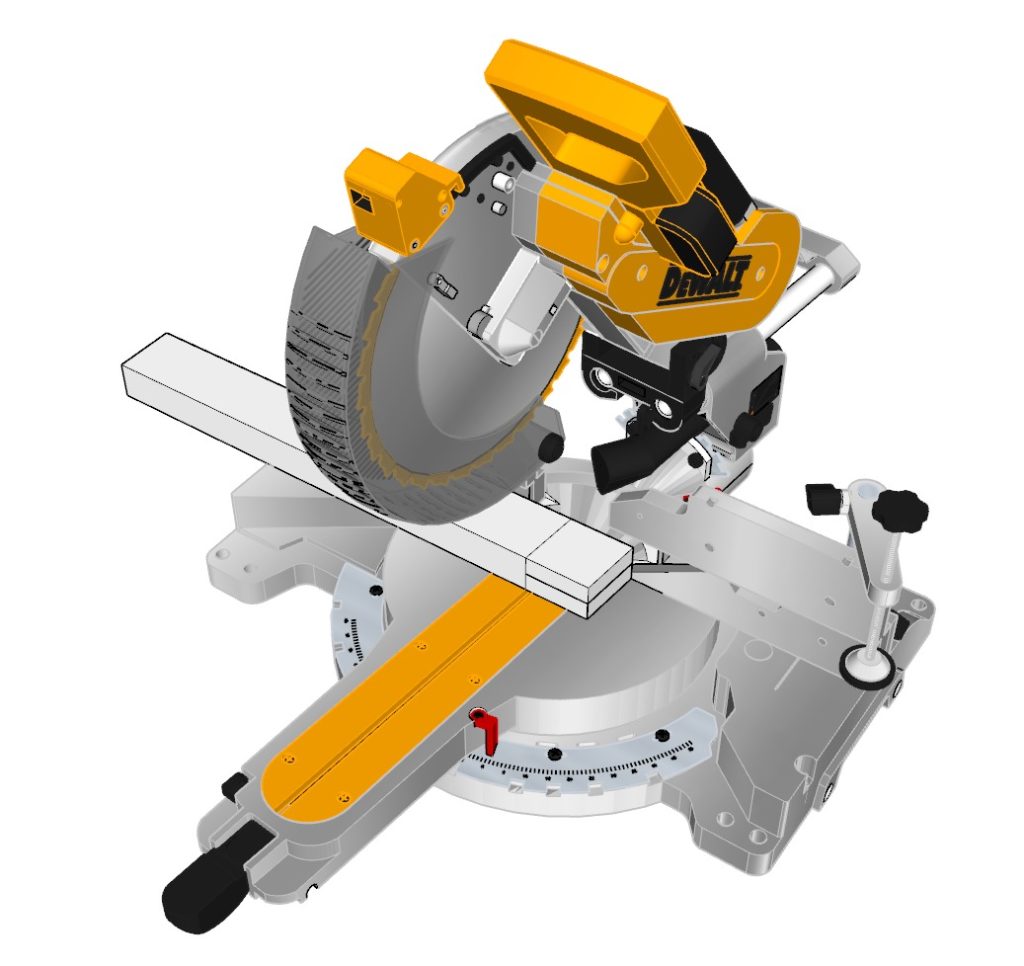
- Miter saw that has a “slide cut” feature.
- Drill
- Impact driver with bit for screws
- GRIP Clamps
- Sander
- wood countersink drill bit
- level
- will need 2.5-in screws (highly recommend T25 Star Drive screws)
- Wood Screws 1-1/2-in
- pencil
- Wood glue
- sand paper
- Angle Finder Protractor
Disclosure: Some of these links are affiliate links.
Cut list and material list
Available with purchase of PDF plans.
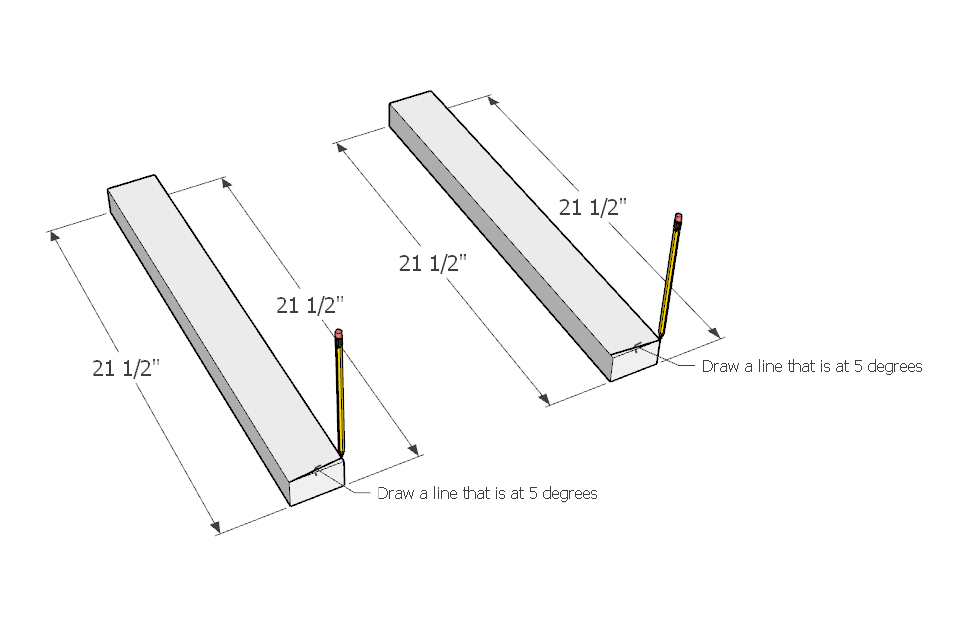
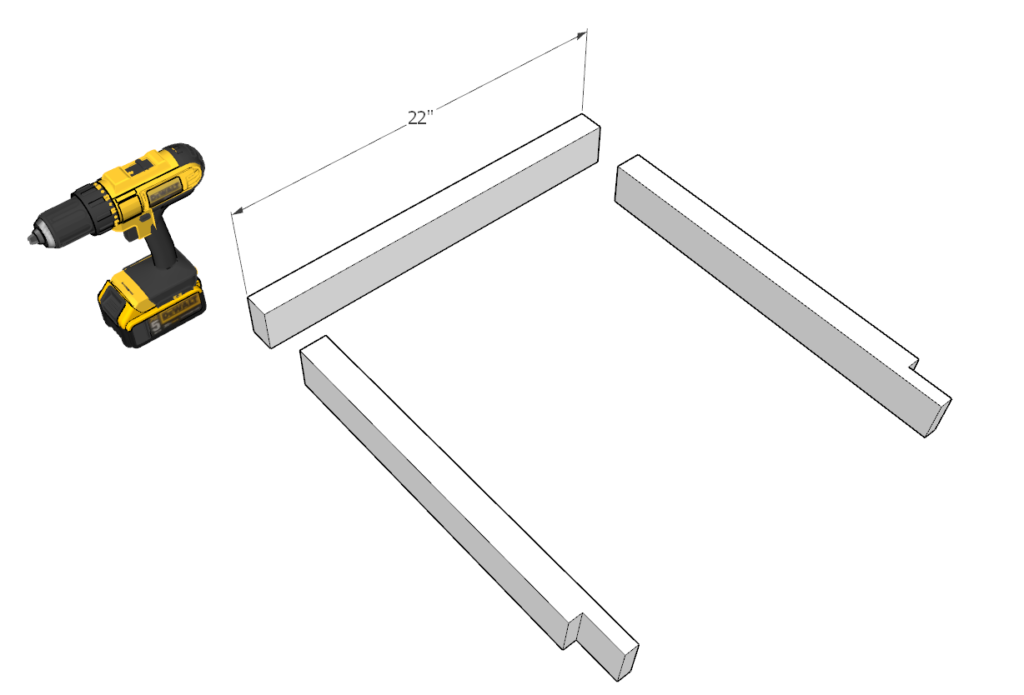
Step 1
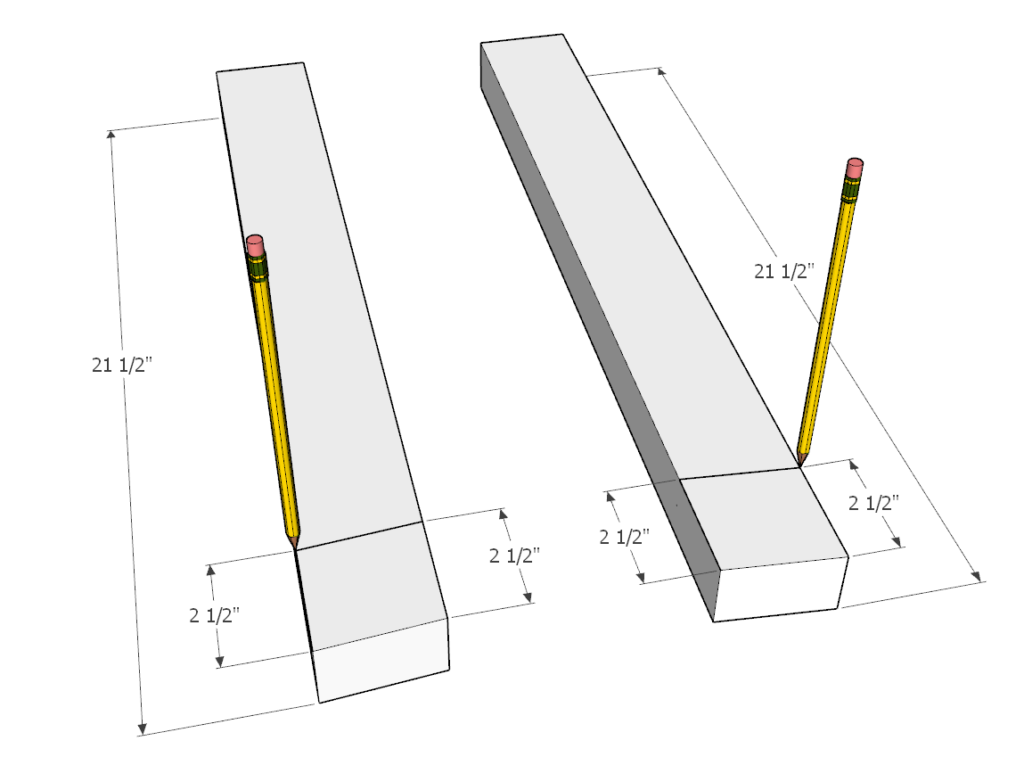
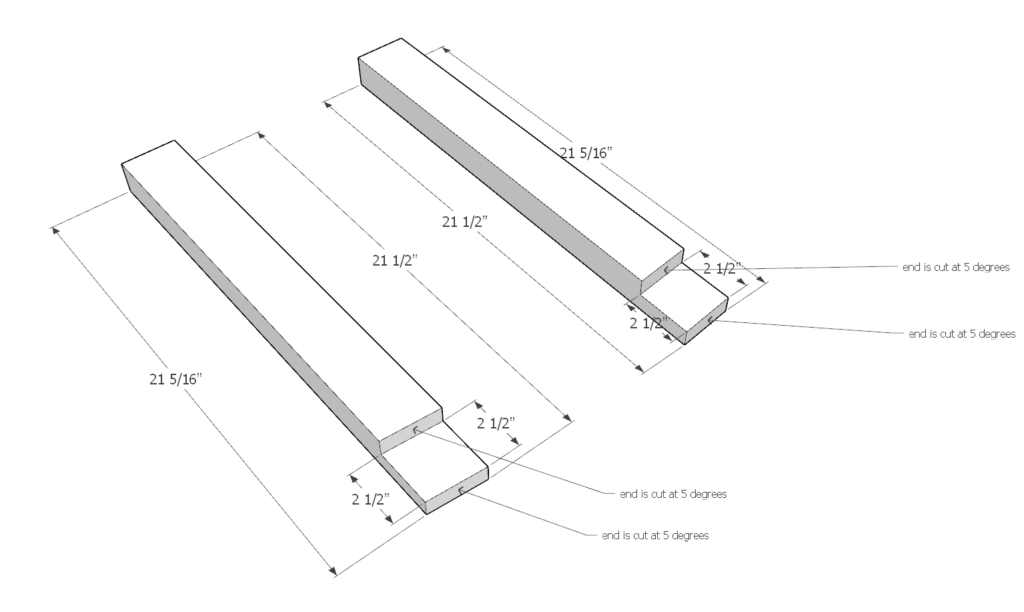
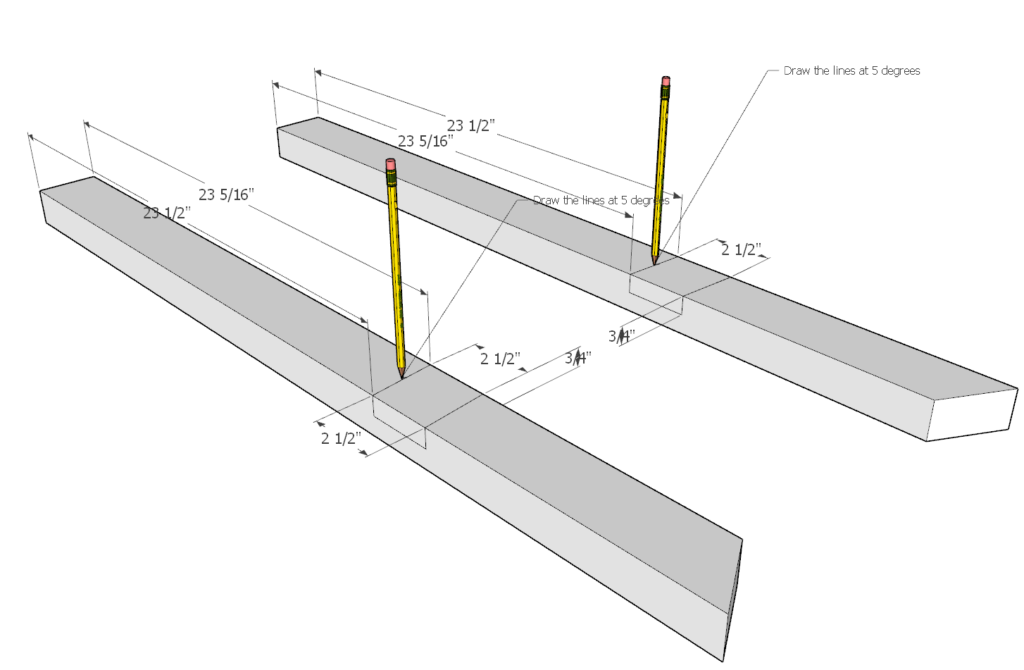
First, cut two 21.5-in pieces from 2×3 lumber.
At one of the edges, draw a 5-degree line with a pencil using a angle Finder Protractor as shown in the diagram.
Do the same for both the 21.5-in pieces and cut them along that 5-degree line.
If you have a saw that can actually cut at angles, then you can just use the saw laser or light as a guide.
Step 2
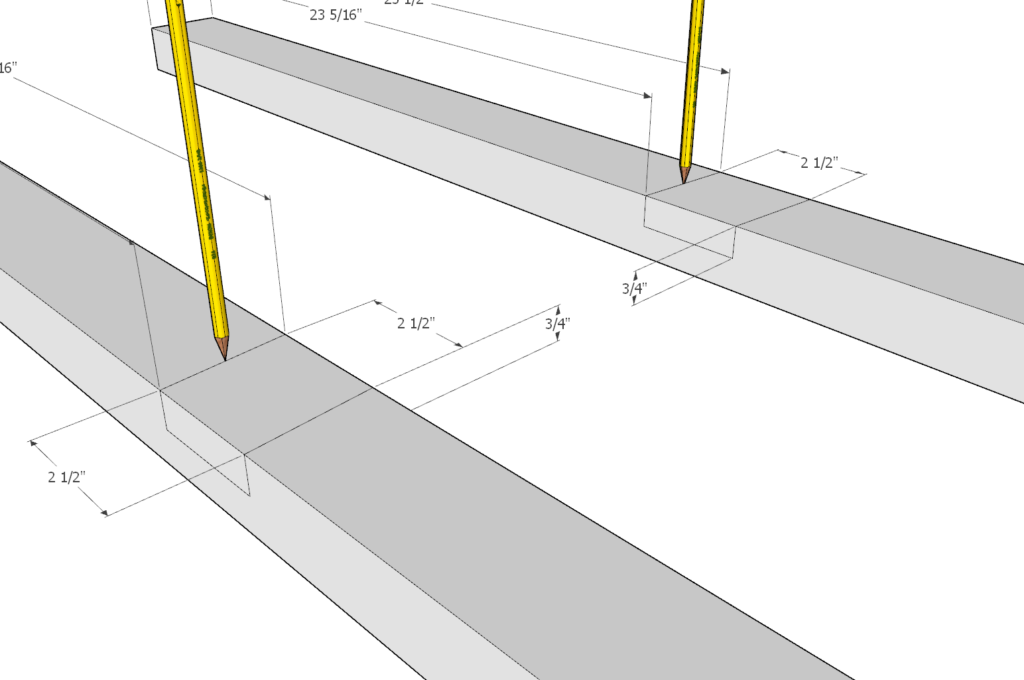
After you have cut the 21.5-in pieces, take a pencil and an angle tool, and draw a parallel line that is 2.5 inches away from the side that was cut at 5 degrees (as shown in the diagram below).
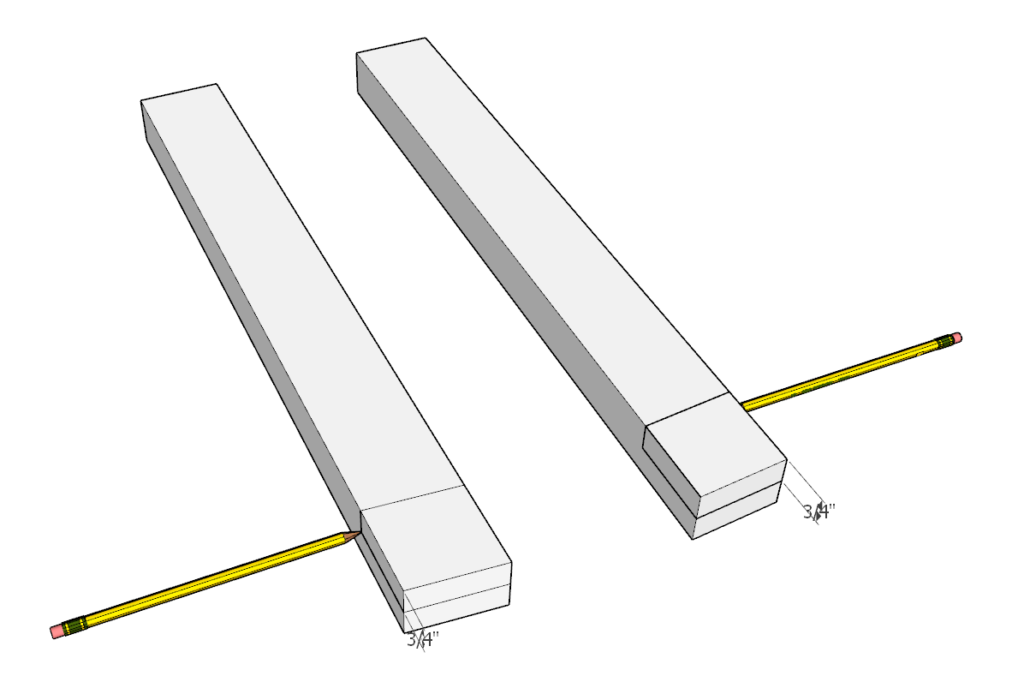
Next, draw a line to help guide the depth of the cut by drawing it at 3/4-in. See diagram below.
Step 3
Next, you will need to cut out the marked part of the wood.
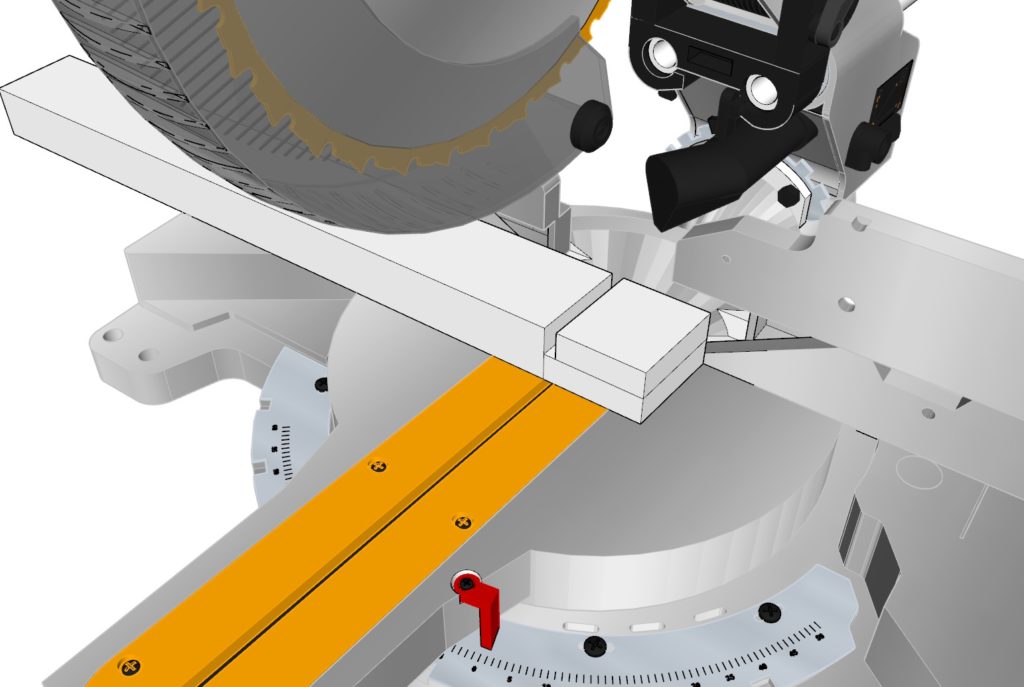
first, set the miter saw at a 5-degree angle.
Next, make sure the miter saw is set to be able to slide back and forth.
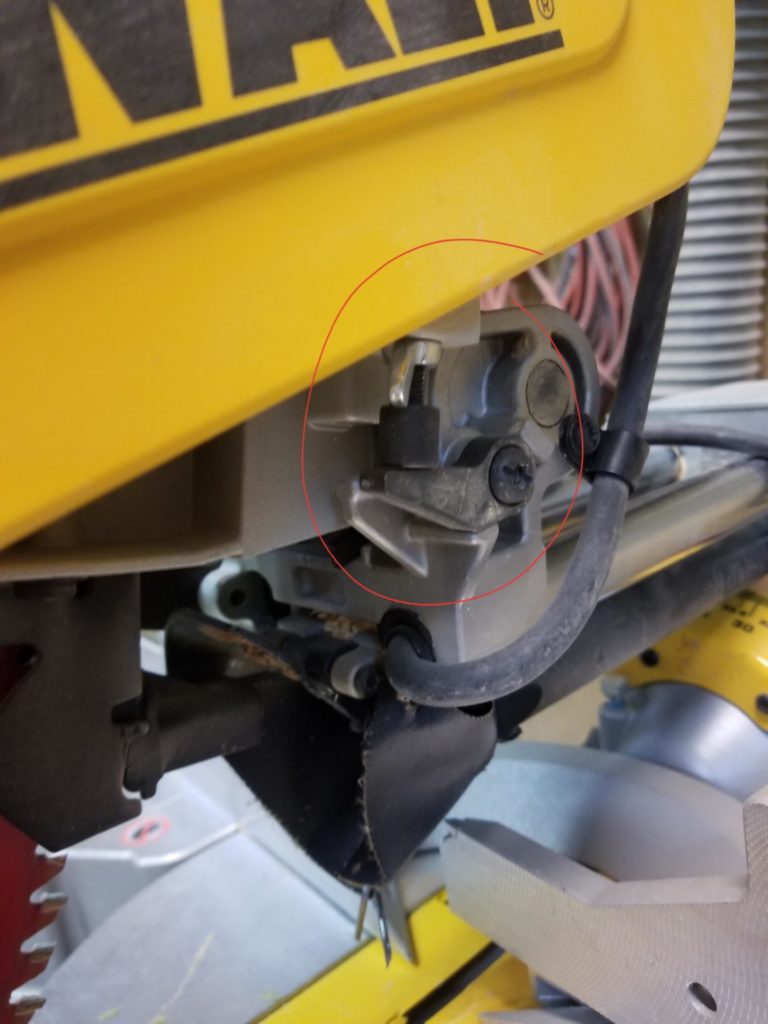
Next, use “stopper system” that is shown in the diagram (circled in red) to be able to set the limit for the depth of the cut.
Next, make sure the limit is set to 3/4-in (It’s a good idea to test it out first on scrap wood before making the final cut).
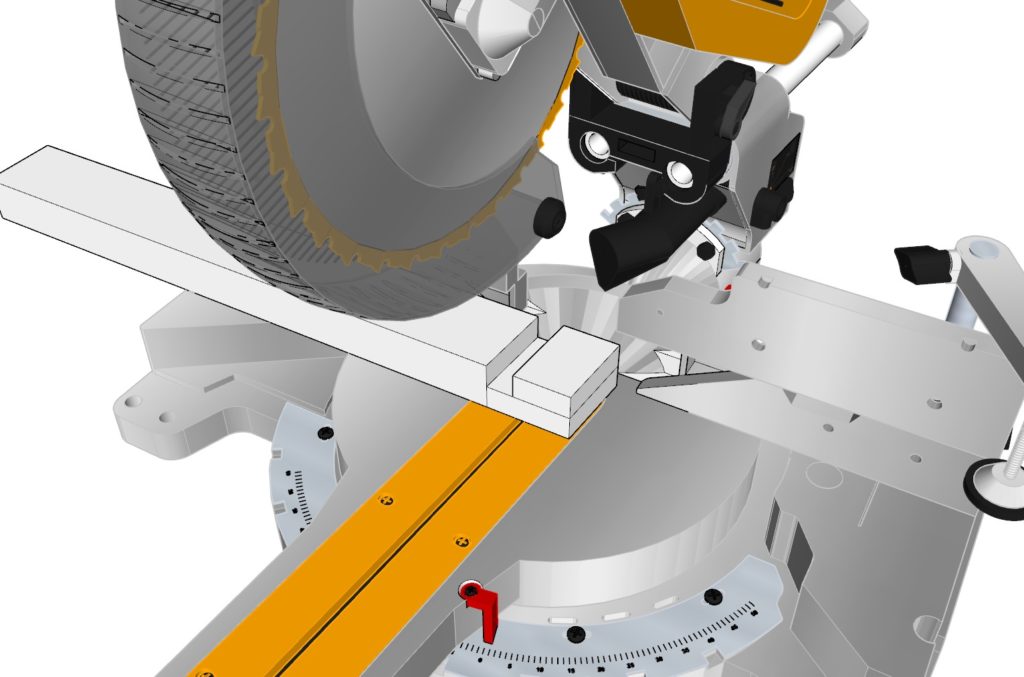
Next, cut into the wood and slide the saw back and forth. This will make an even groove across the 21.5-in piece of wood being cut.
continue to cut off the marked area until its completely gone.
Repeat the same process for the other 22.5-in piece as well.
Save the “depth setting” for a future step.
There are other ways of removing the mark area as well. I just find that this is an easy and clean way to be able to remove the marked area.

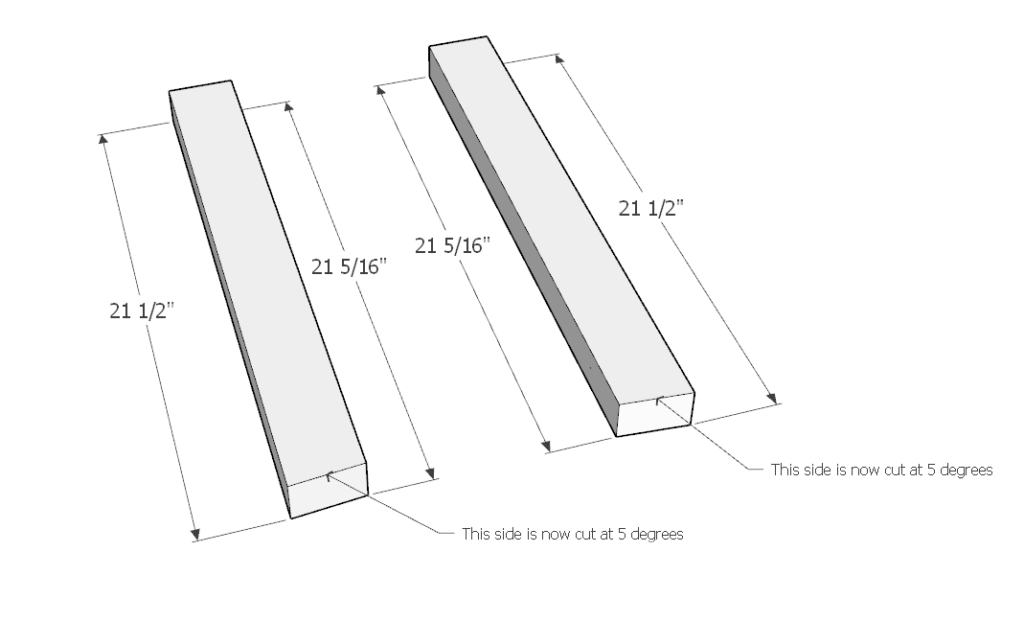
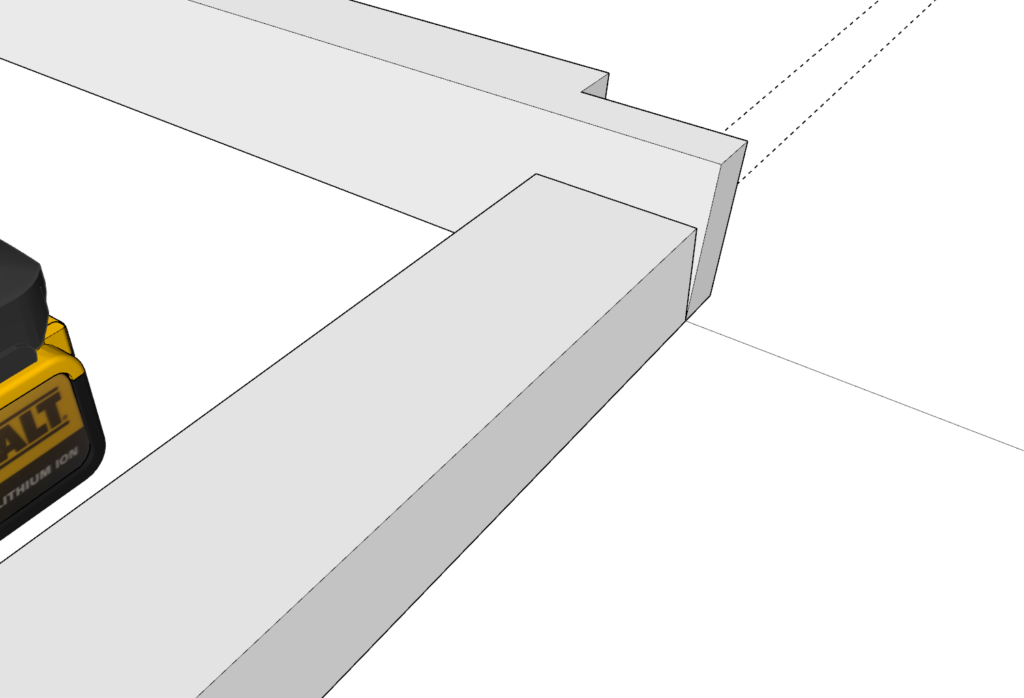
Step 4
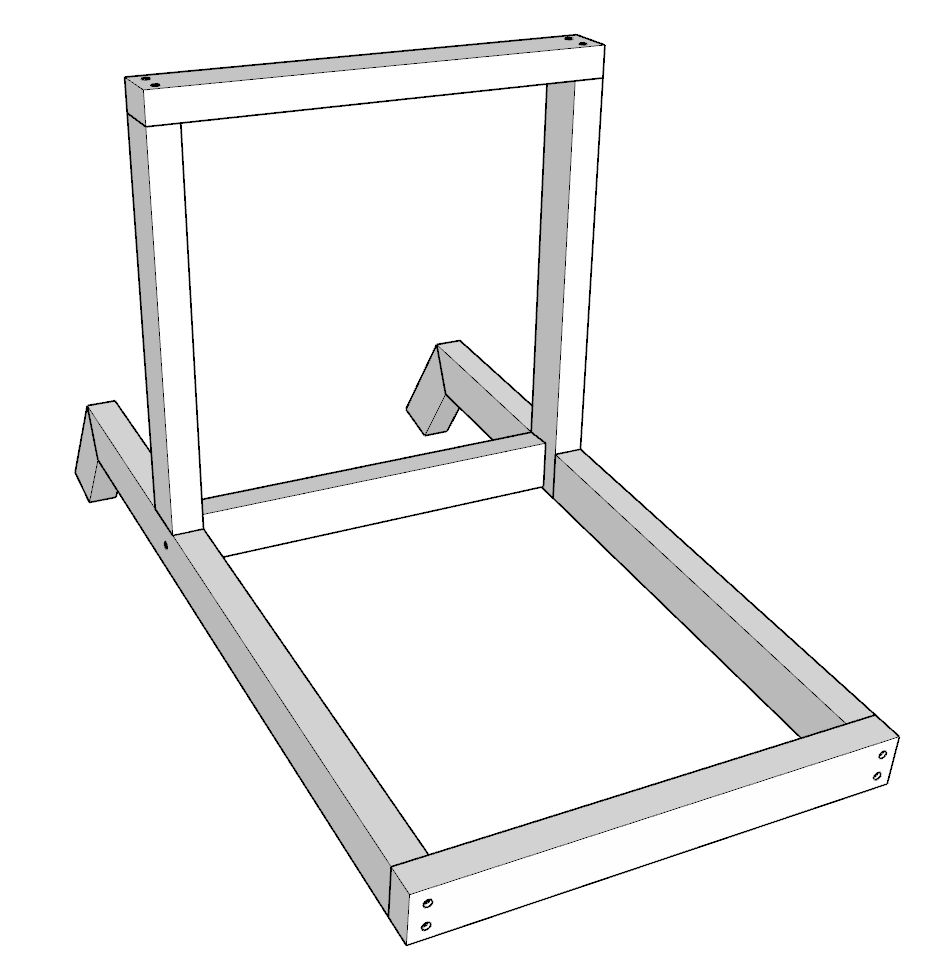
Check to make sure that the two pieces are cut appropriately. See image bellow to check.
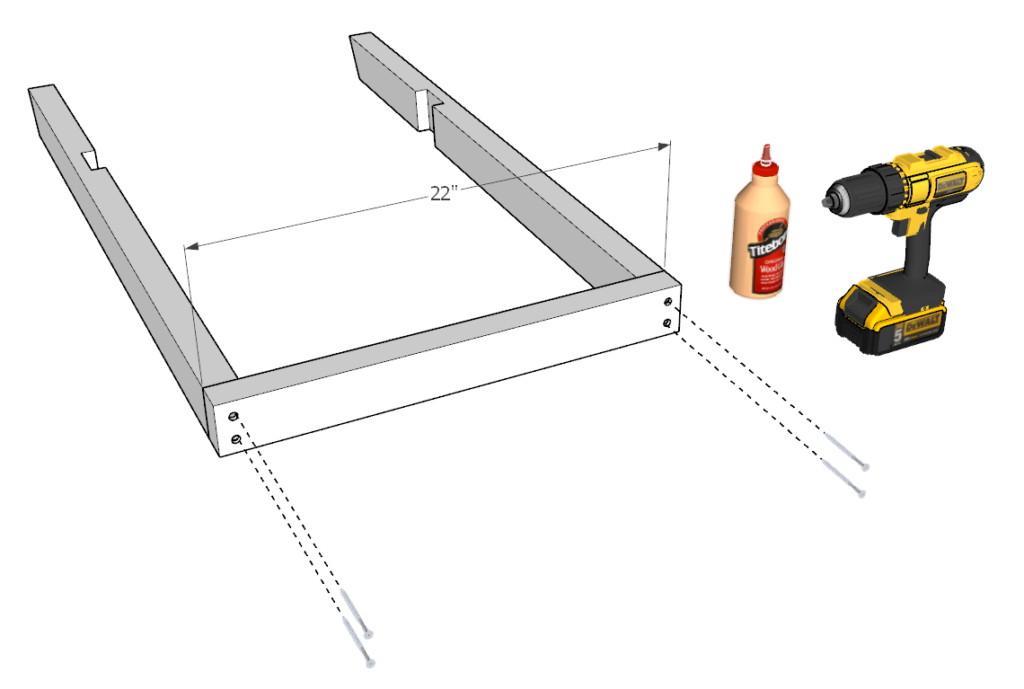
Step 5
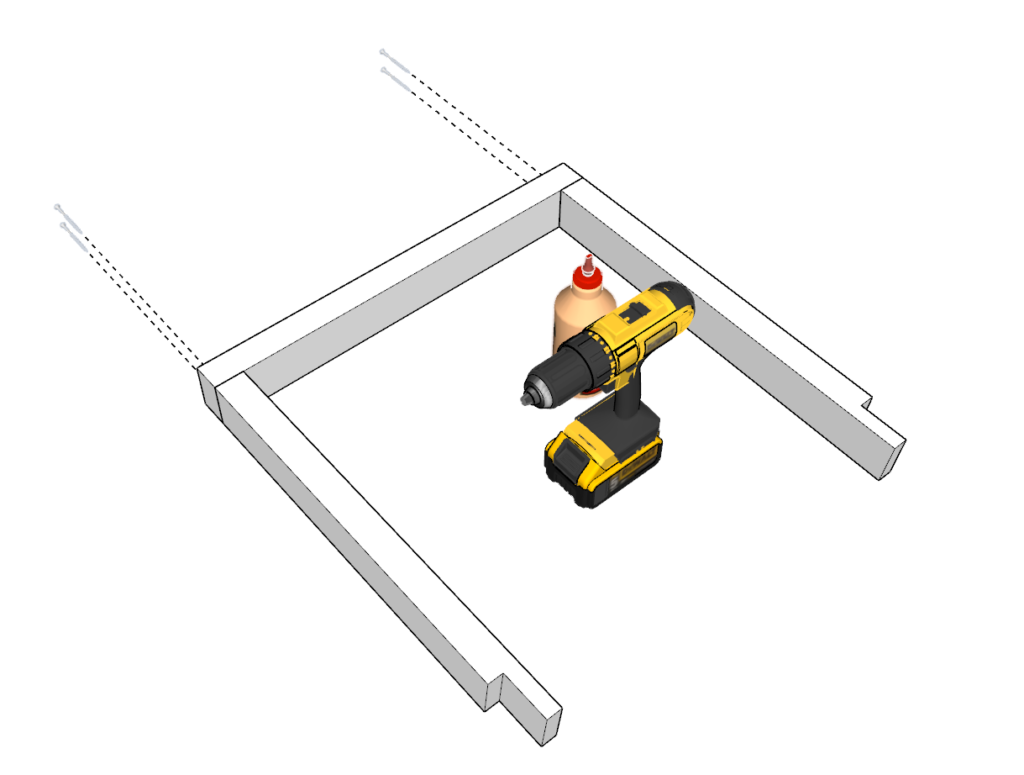
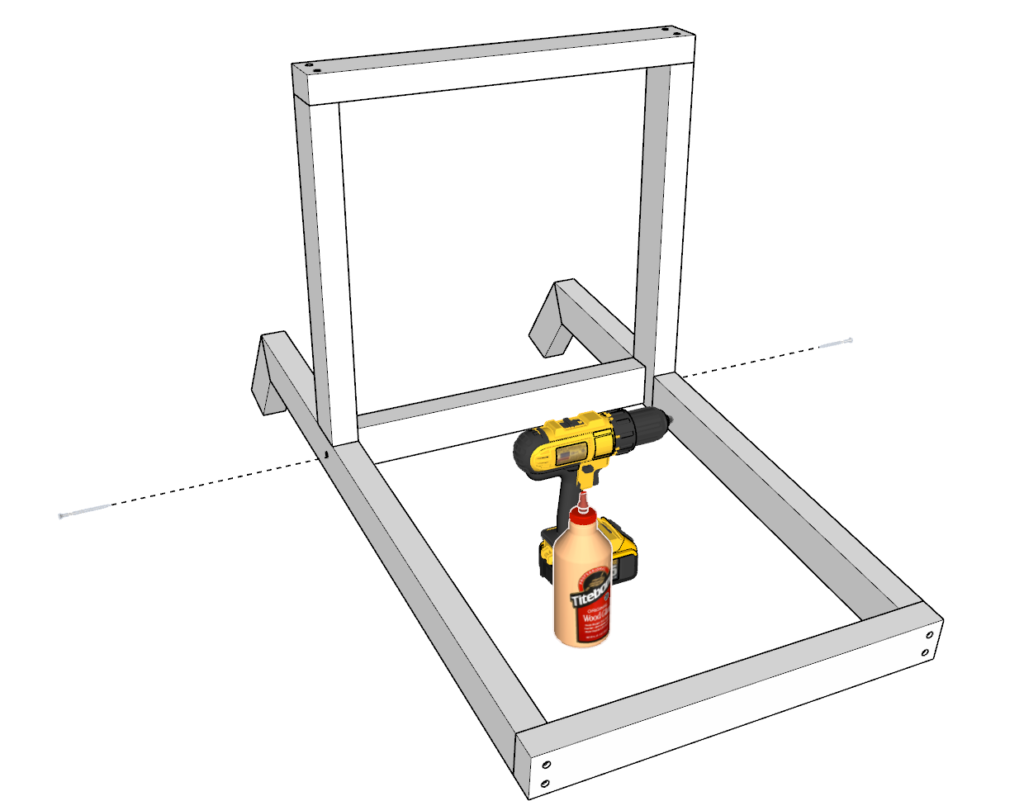
Next, cut a 22-in piece from the 2×3 lumber. Attach the piece to the 21.5-in pieces you just made.
Attach by predrilling 4 holes, applying glue to all areas that will be in contact, and adding screws.
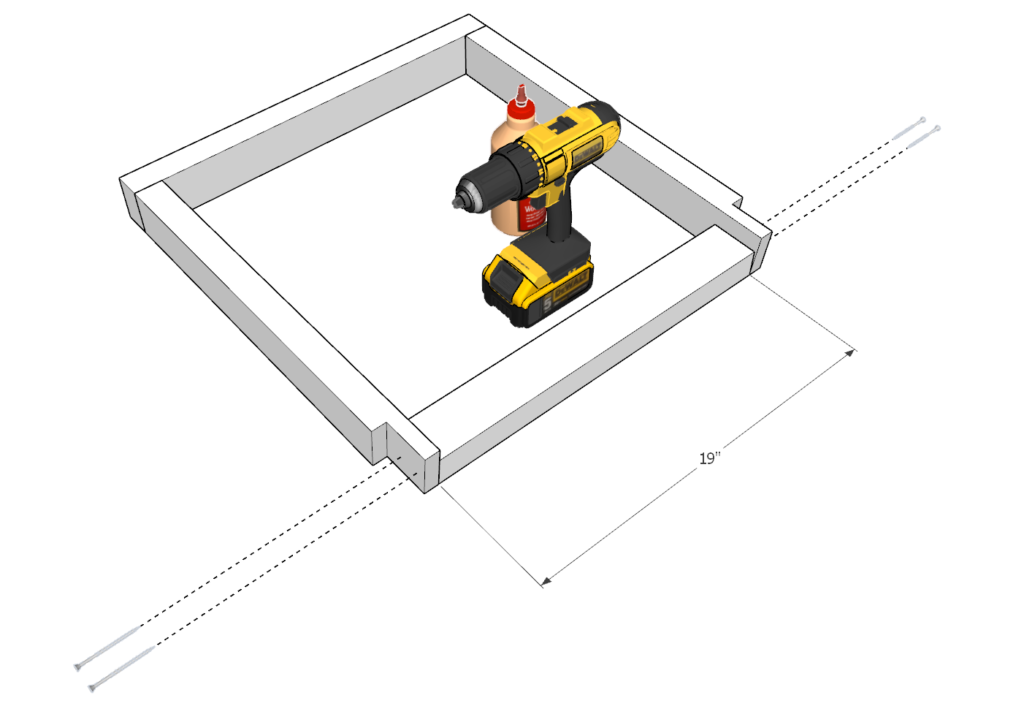
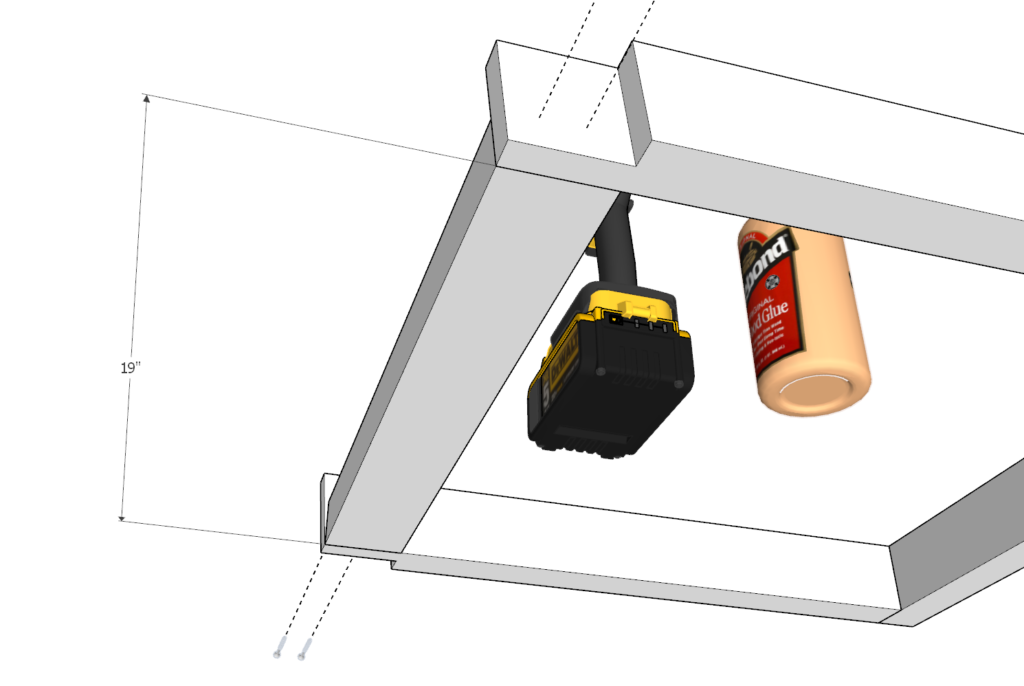
Next, cut and attach a 19-in piece. This is also cut out of 2×3 lumber.
Lay the components on a flat surface when attaching. The 19-in piece must be flat with the rest of the components as shown in the diagram.
Predrill, add glue, add screws.
Step 6
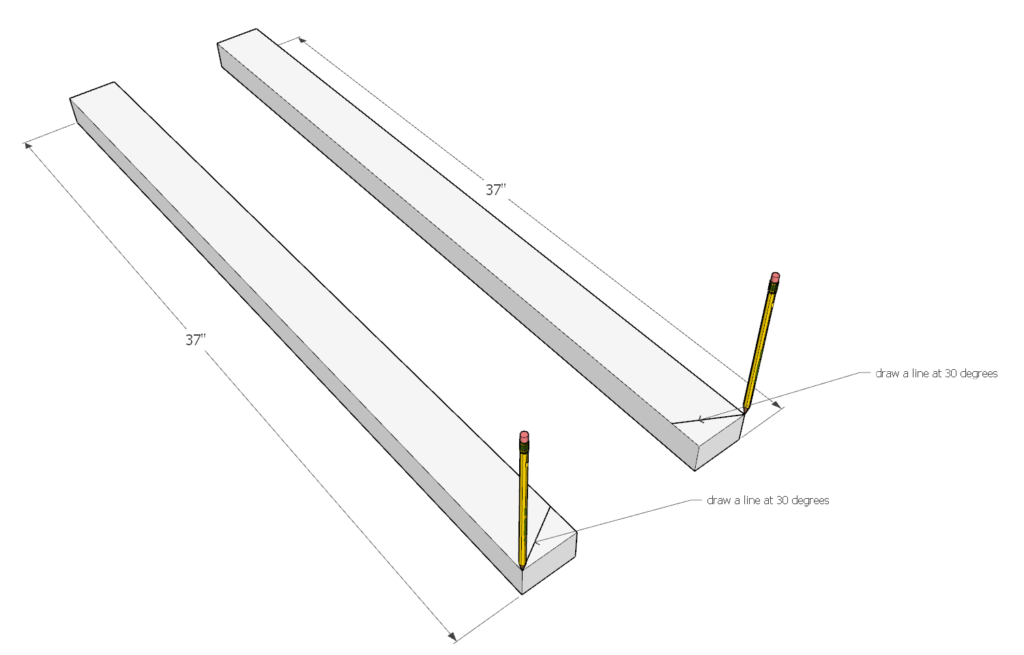
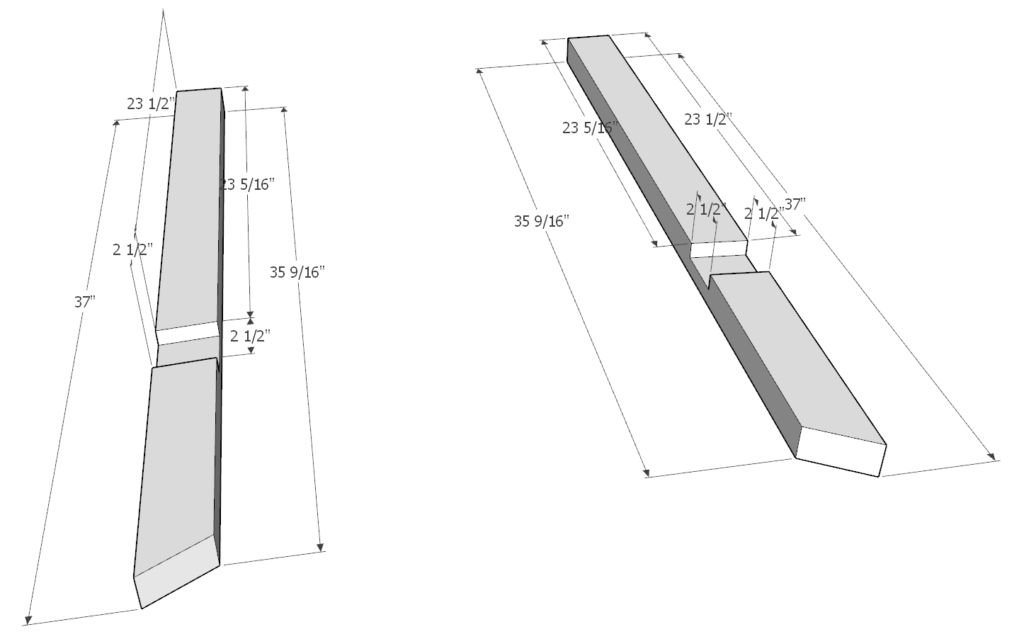
Next, cut two identical 37-in pieces out of 2×3 lumber.
Use a pencil and an angel tool to make a mark at 30-degrees as shown in the diagram.
Cut the pieces down at 30-degrees.
Step 7
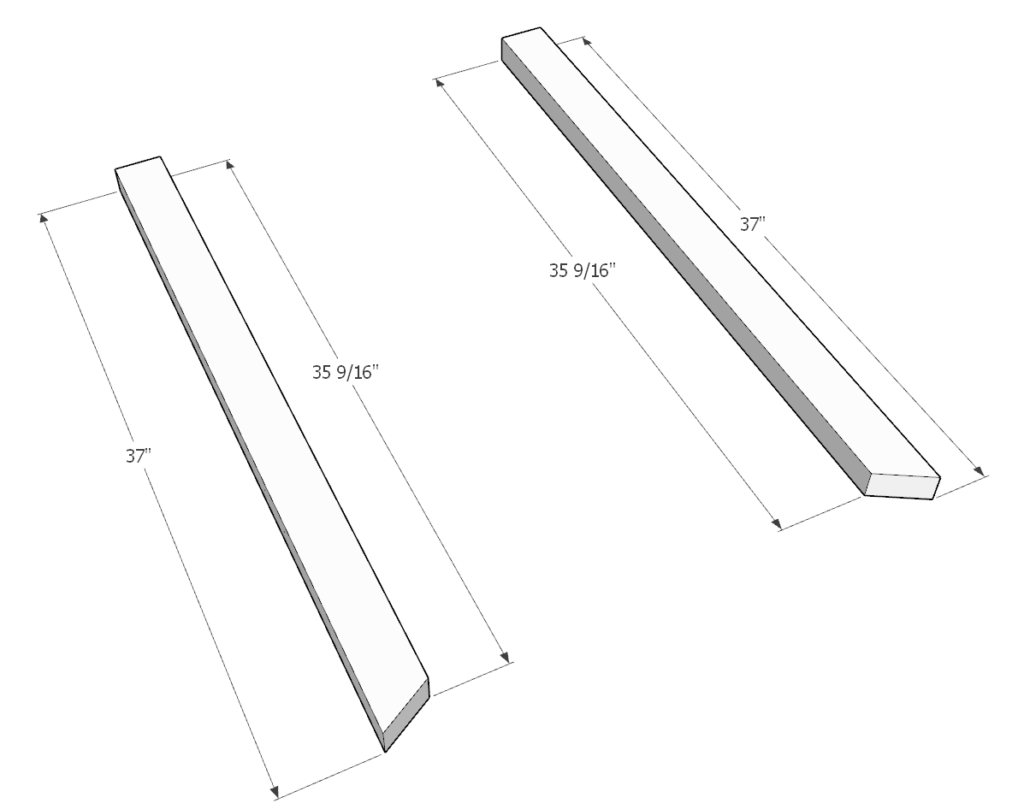
Next, you will need to draw some lines to use as guides.
This can be done using the diagram shown below and an angle finder protractor.
The lines are drawn at a 5-degree angle.
Make sure to also draw lines that will indicate depth at 3/4-in
Next, use the preset depth settings you used from the cut in step 3.
Next, cut out the marked area using the same technique as in step 3.
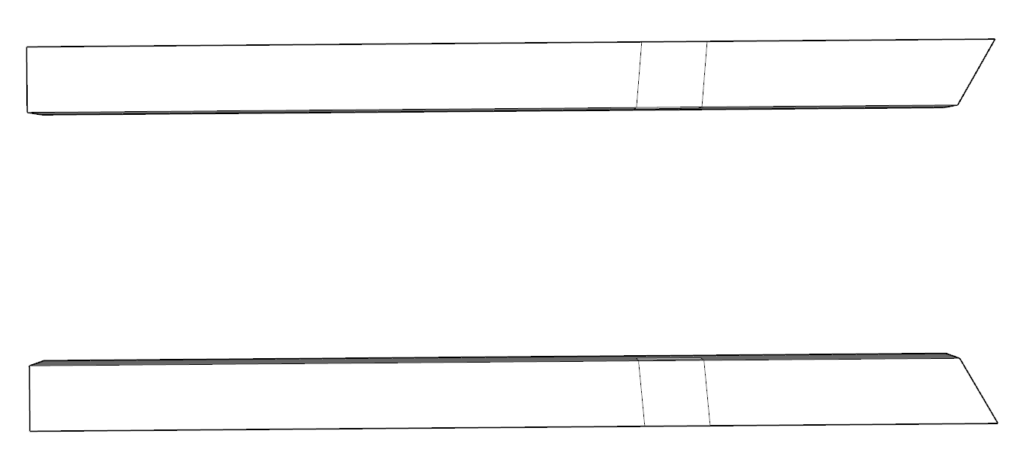
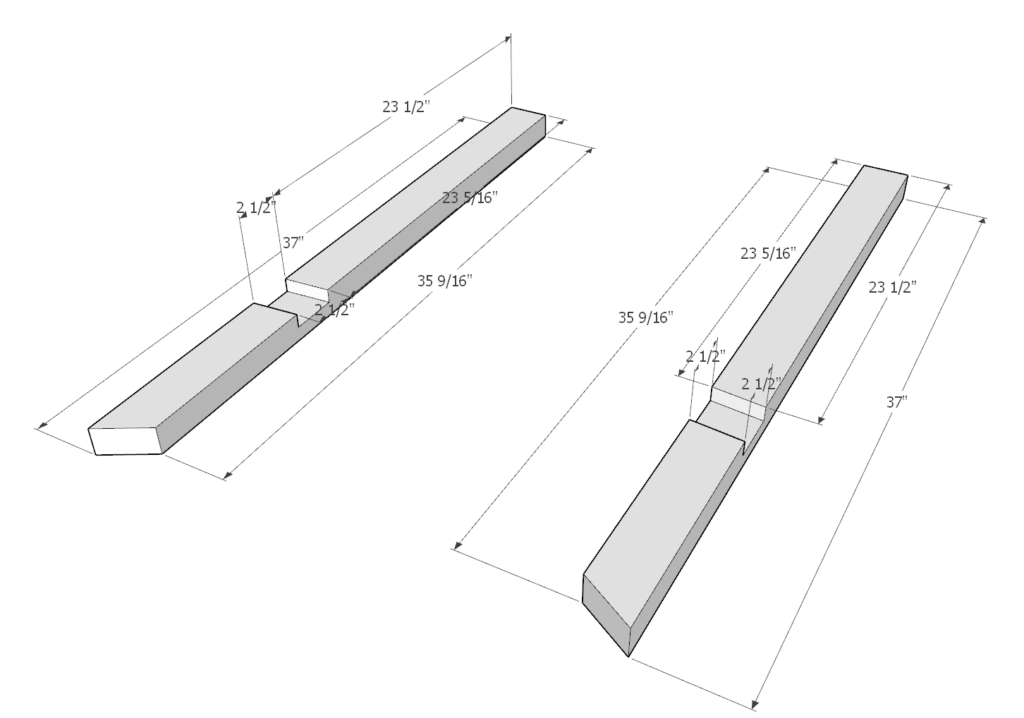
Step 8
Next, check and compare that your cuts and measurements are the same as displayed in the diagram.
Step 9
Next, take the 37-in pieces you just made and add a 22-in pieces. The 22-in pieces is to be cut from 2×3 lumber
Predrill, add glue, and add screws.
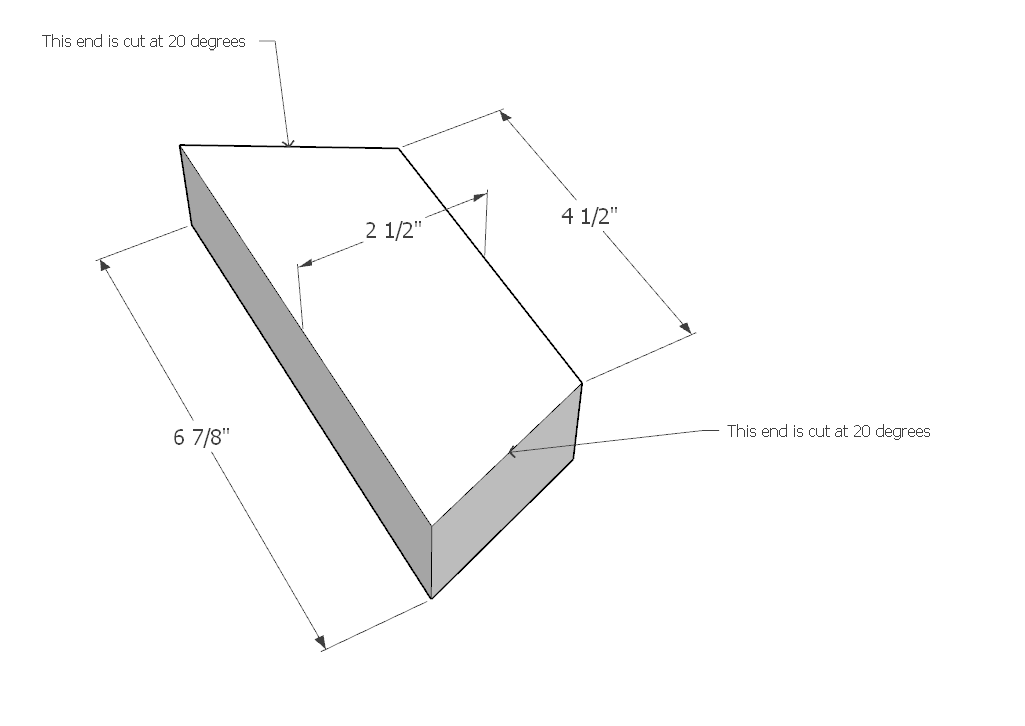
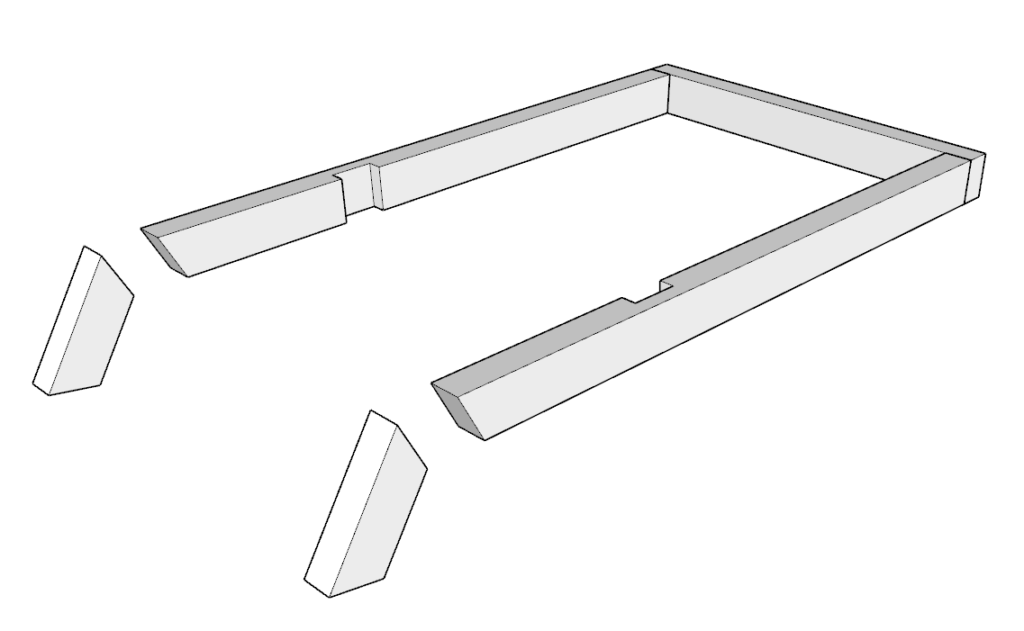
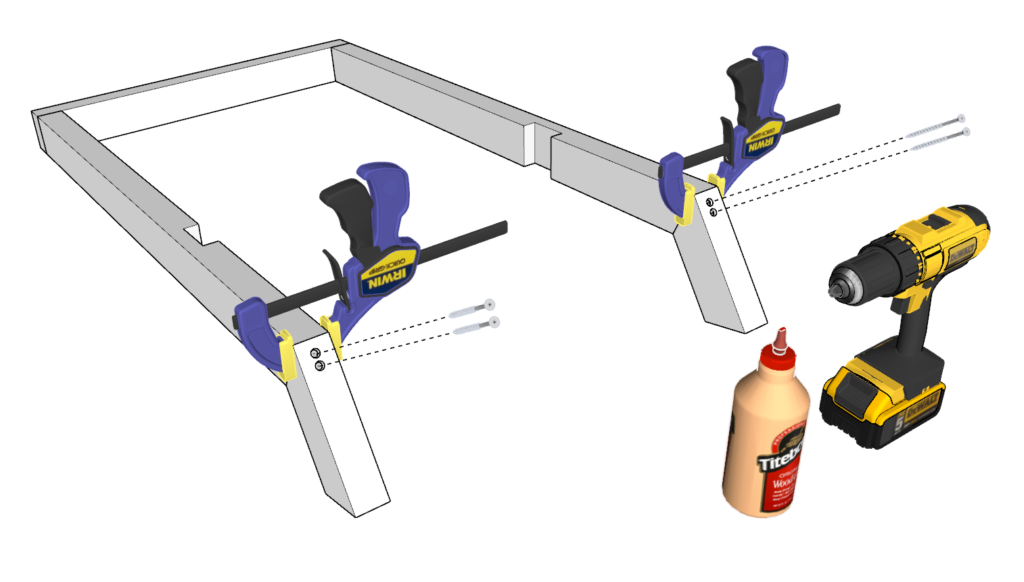
Step 10
In the next step, cut two identical pieces that will be added to the legs of the chair. The dimensions are specified in the diagram.
To add them to the frame, I use wood clamps. These are great for holding the components in place while I work.
As before, predrill, add glue, and add screws.
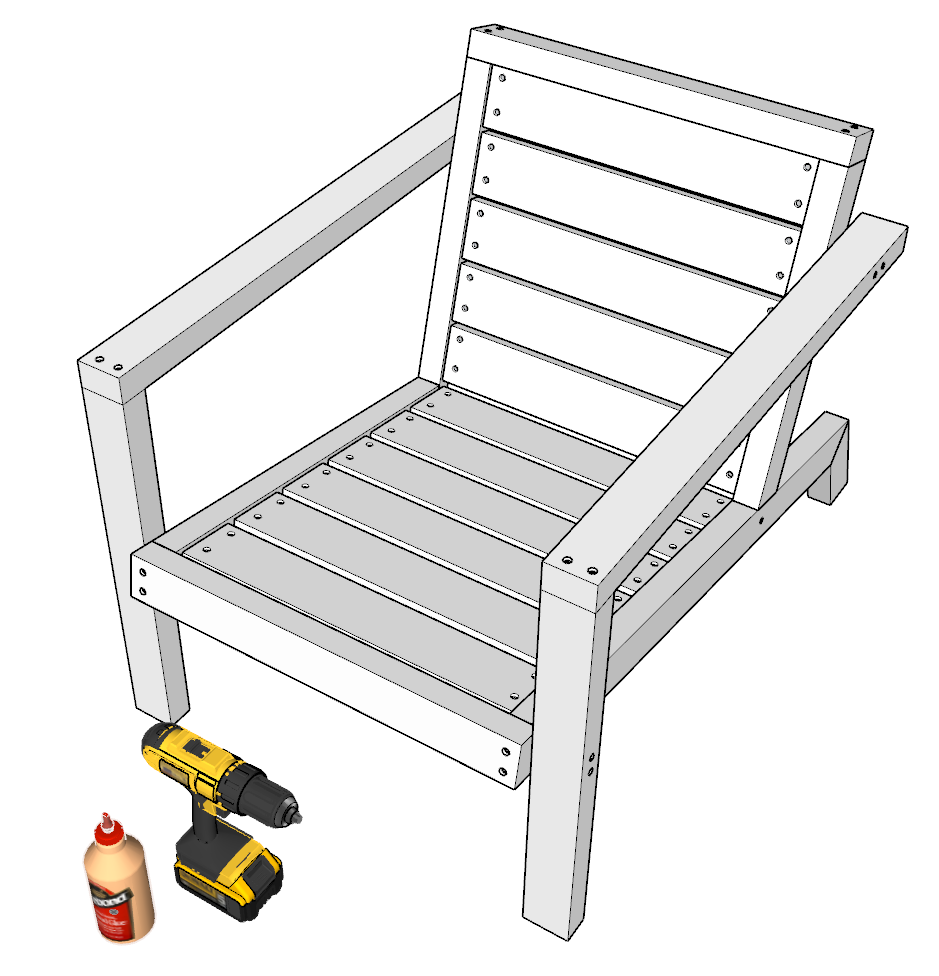
Step 11
The next step is to attach the back rest to the frame of the chair.
add glue and insert the backrest into the frame.
Secure the two components with two screws.
As before, predrill and add screws.
Step 12
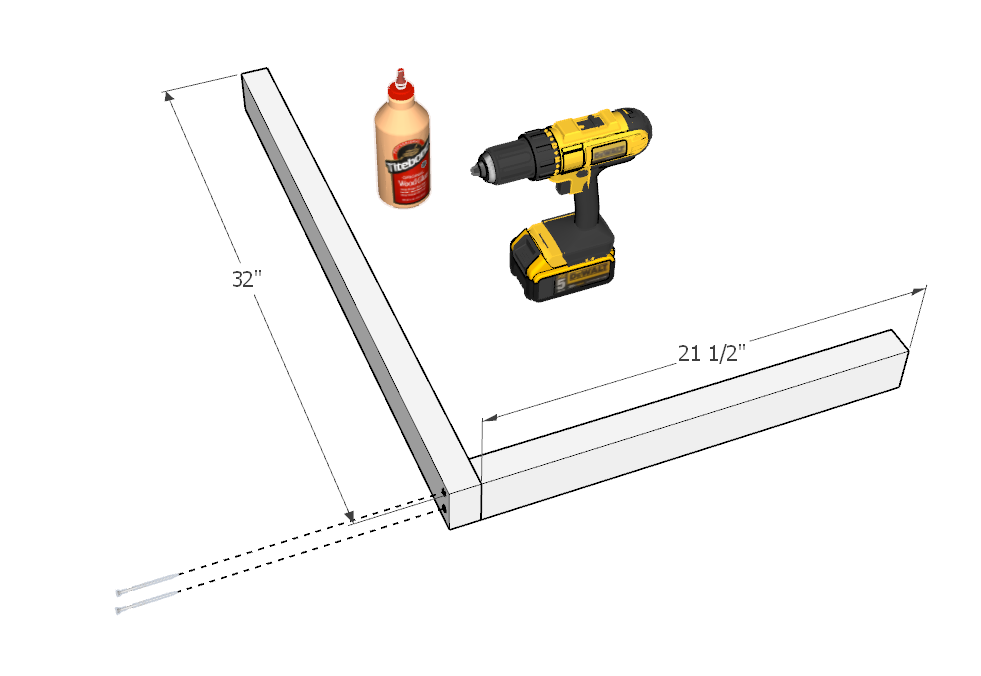
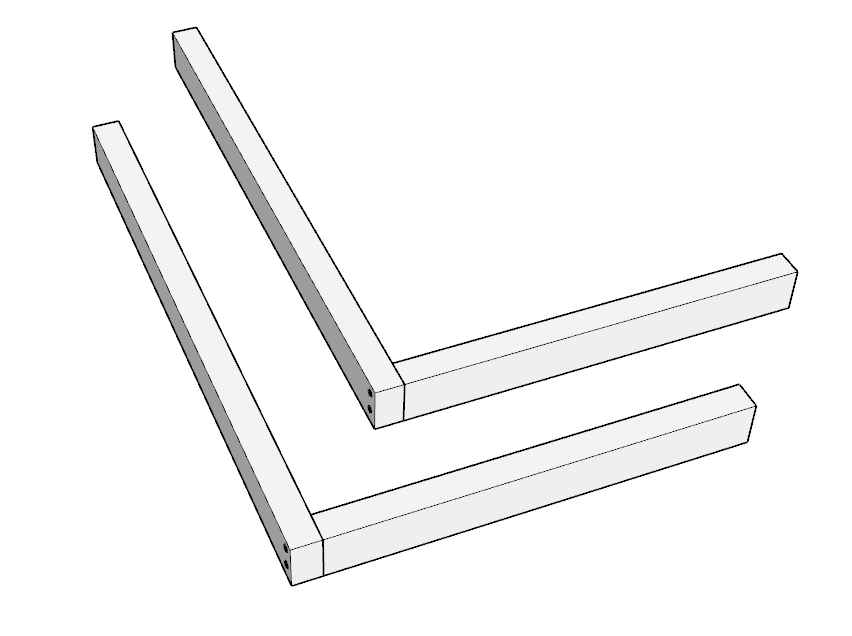
Next, cut the arm rest pieces. You will need two 32-in pieces and two 21.5-in pieces. These are cut from 2×3 lumber.
Attach them together as shown in the diagram by predrilling, gluing, and adding screws.
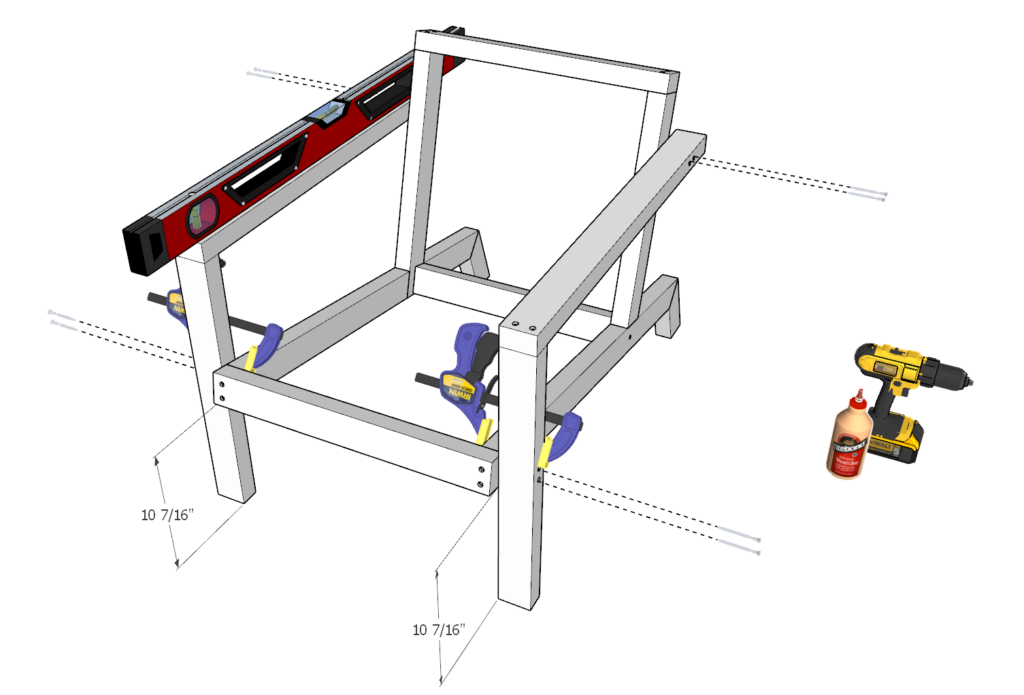
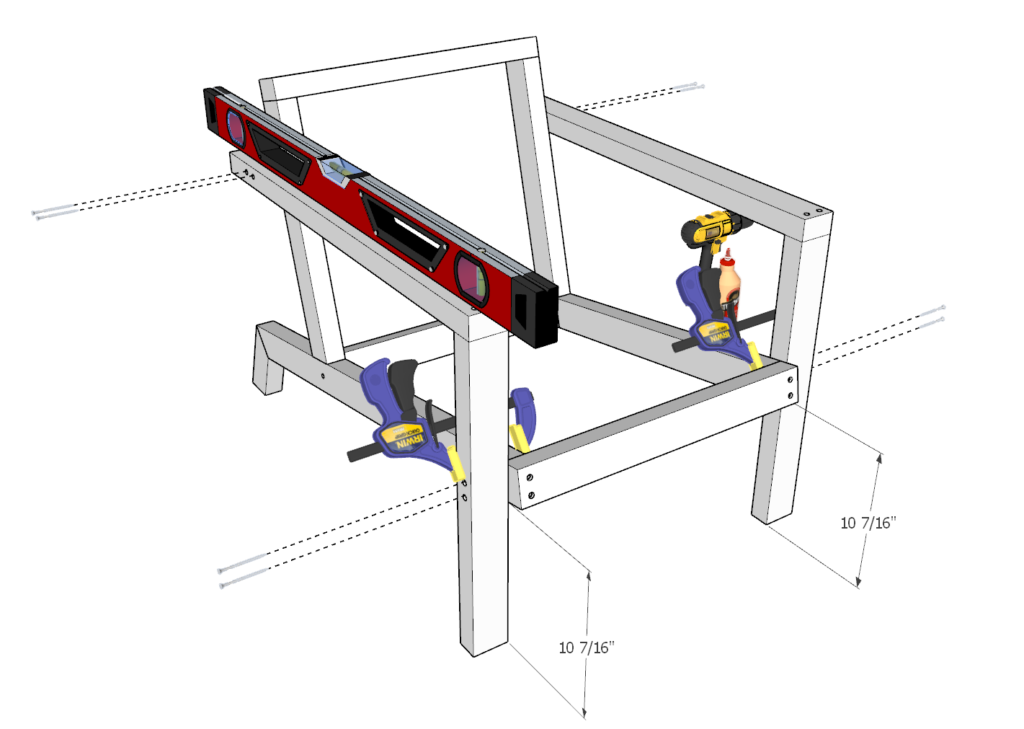
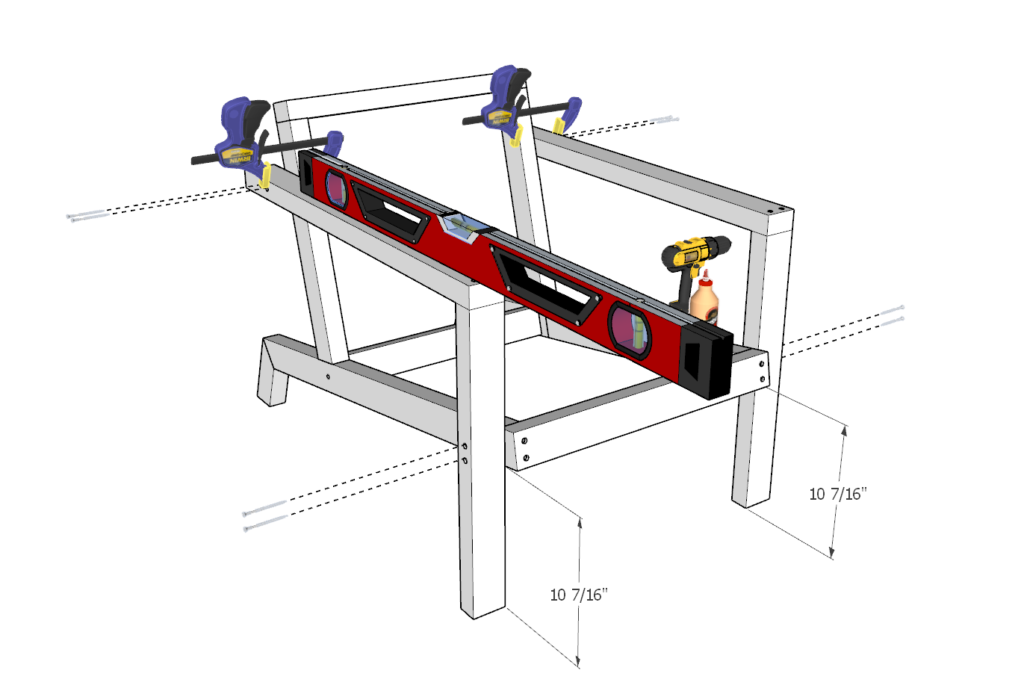
Step 13
In this step you will be attaching the armrests to the frame of the chair.
the height of the frame is going to be 10 7/16-in from the ground.
You can make a marking on the armrests at 10 7/16-in from the ground to know where to attach the frame.
I use wood clamps to help hold things in place. The more clamps the easier this is.
Make sure to use a level to make sure the armrests are leveled in relationship to the ground.
As before, predrill, add glue, and add screws.
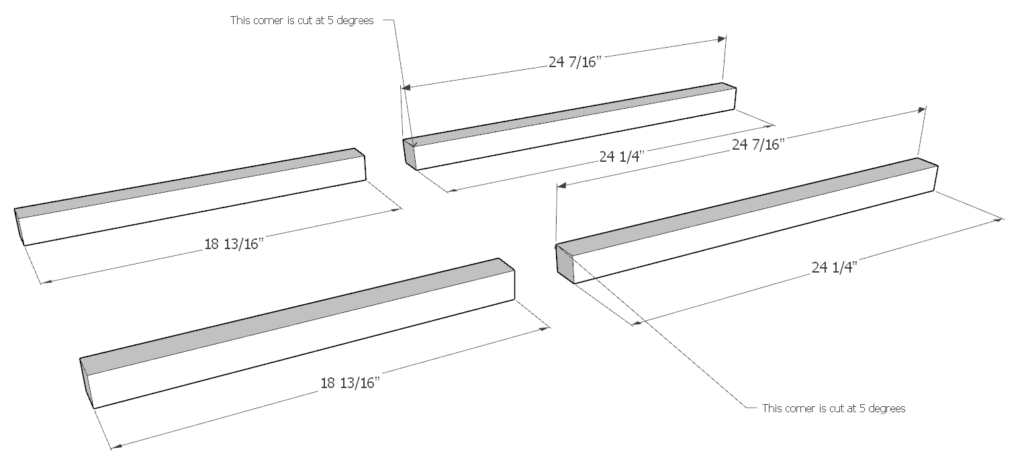
Step 14
Next step is to cut the correct sized 2x2s to add to the frame.
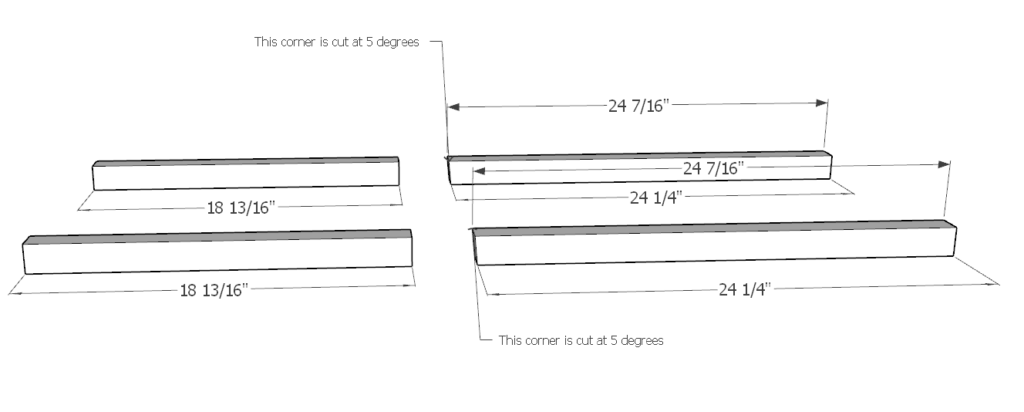
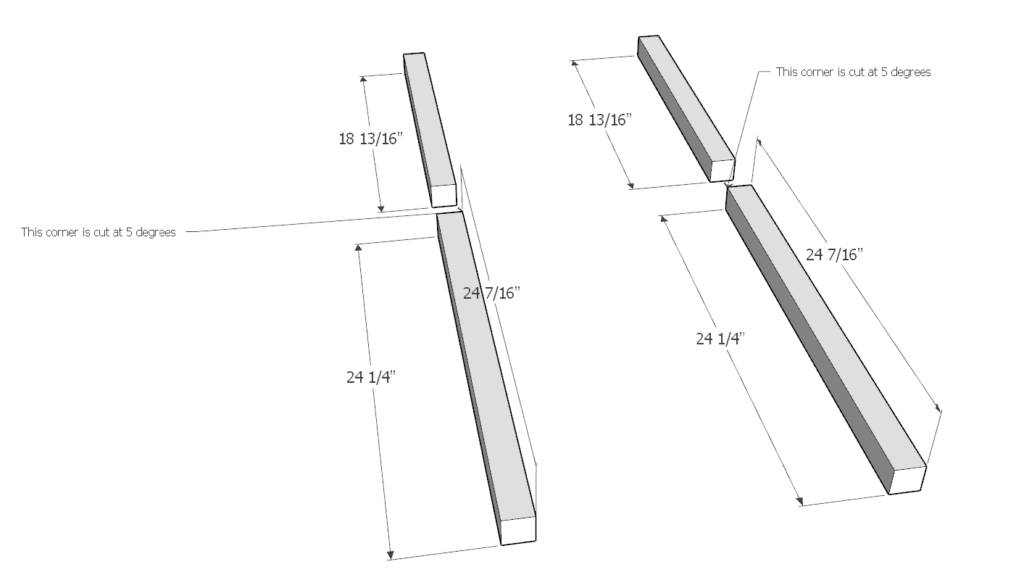
From your 2×2 lumber, cut two identical pieces measuring at 18 13/16-in. Don’t worry about being 100% exact. These will only serve as pieces upon which the backboard pieces will be attached.
Next, cut two identical pieces from your 2×2 lumber that measure 24 7/16-in. These you will need to further cut down at a 5-degree angle as shown in the diagram. The direction of the cut doesn’t matter, as these are 2x2s.
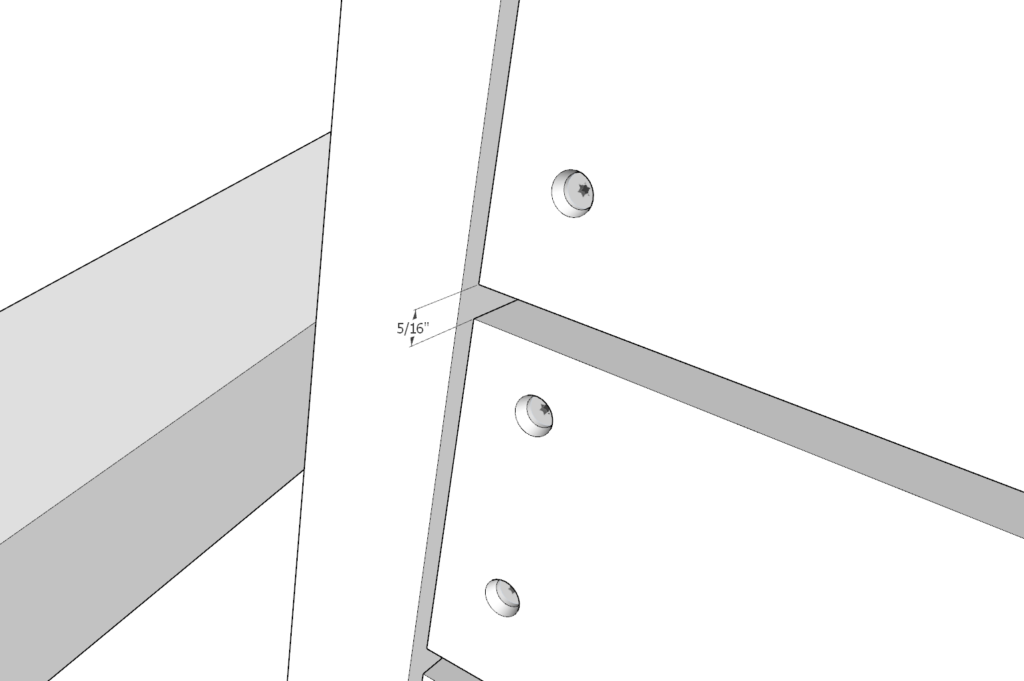
Step 15
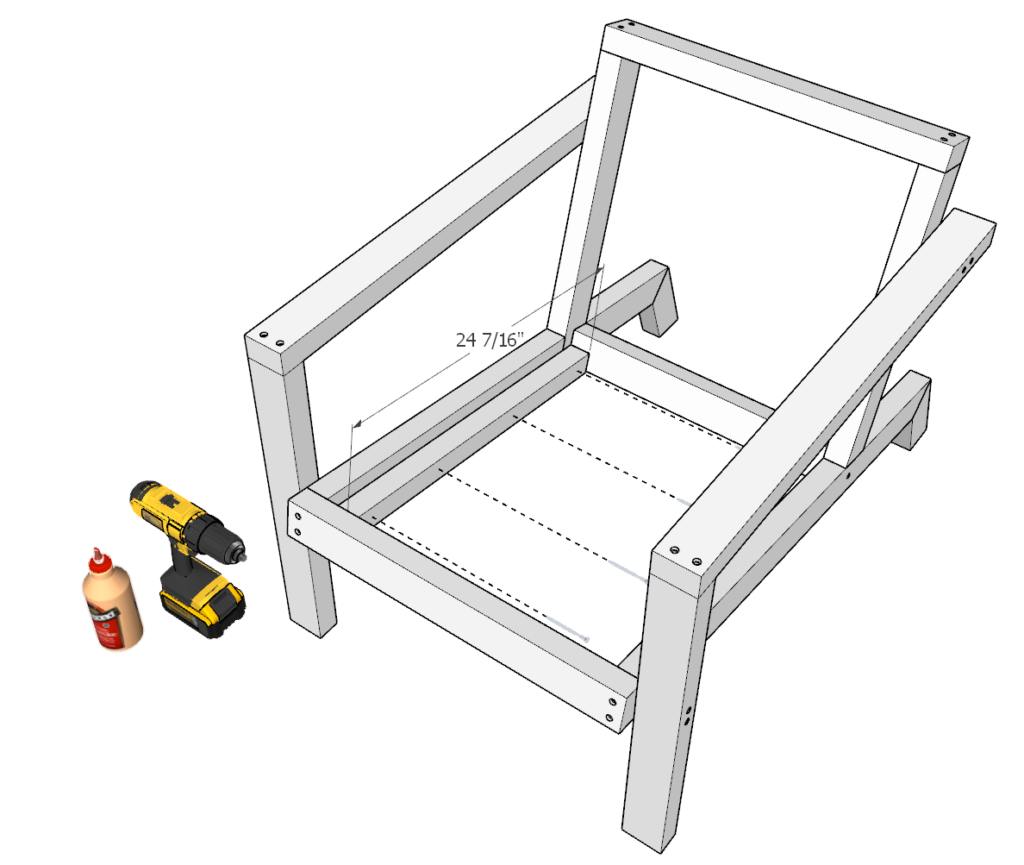
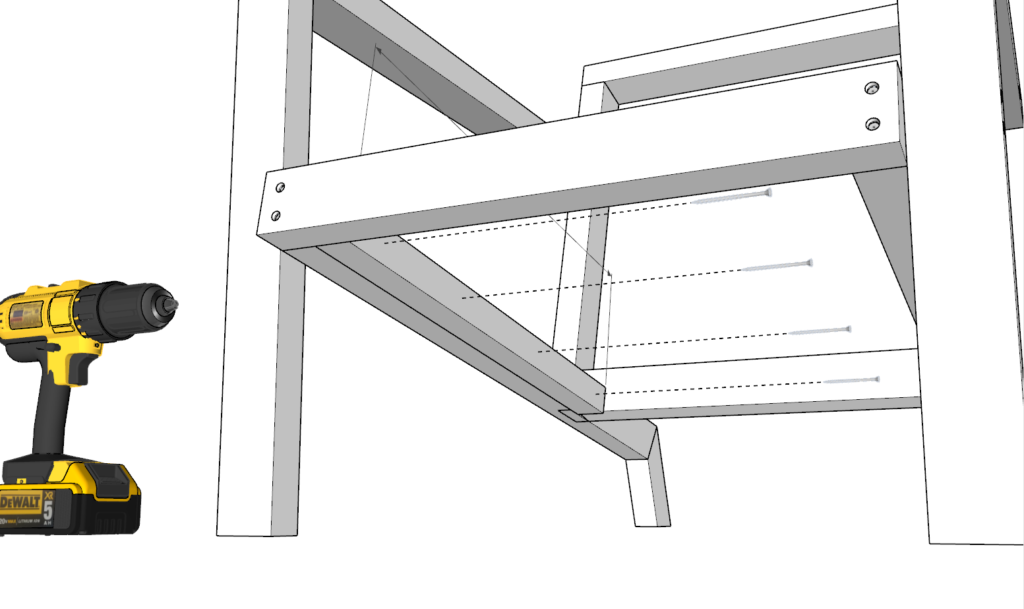
Next, add the pieces cut in step 14 to the frame.
When adding the pieces, make sure that they lay flush with the frame as shown in the diagram. This is to ensure that there is a groove or space that is formed where you will attach your seating and back boards.
As before, predrill, glue, and add screws.
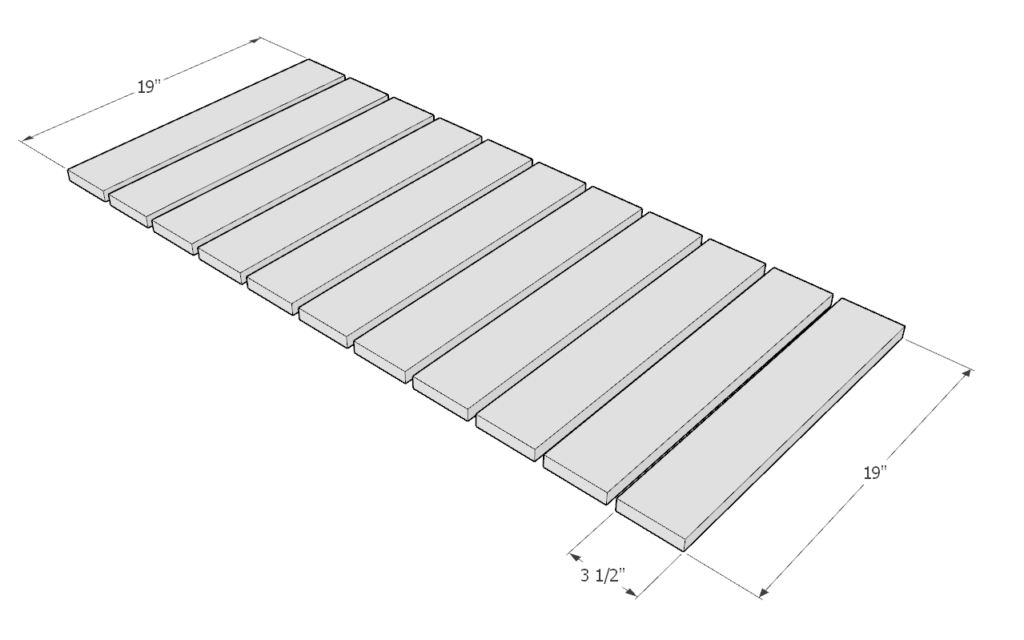
Step 16
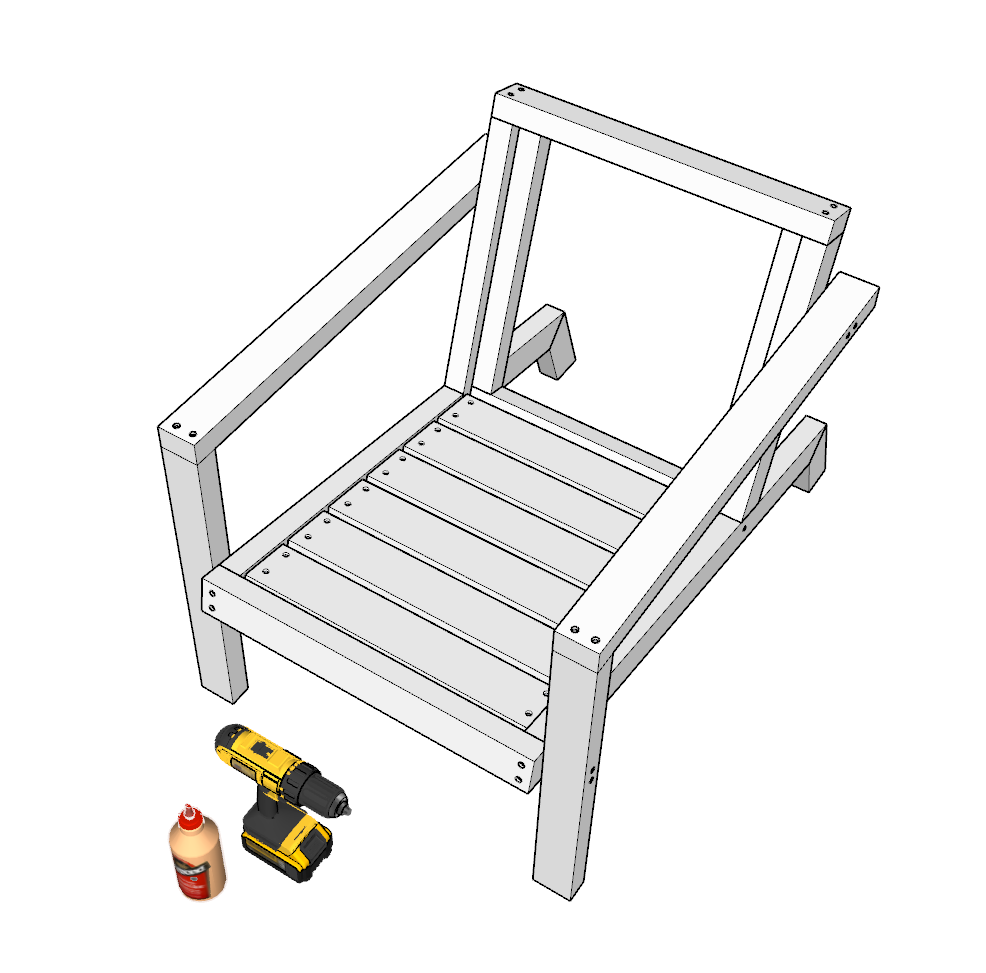
Next, cut 11 identical pieces from your 1×4 lumber. They need to measure at 19-in long.
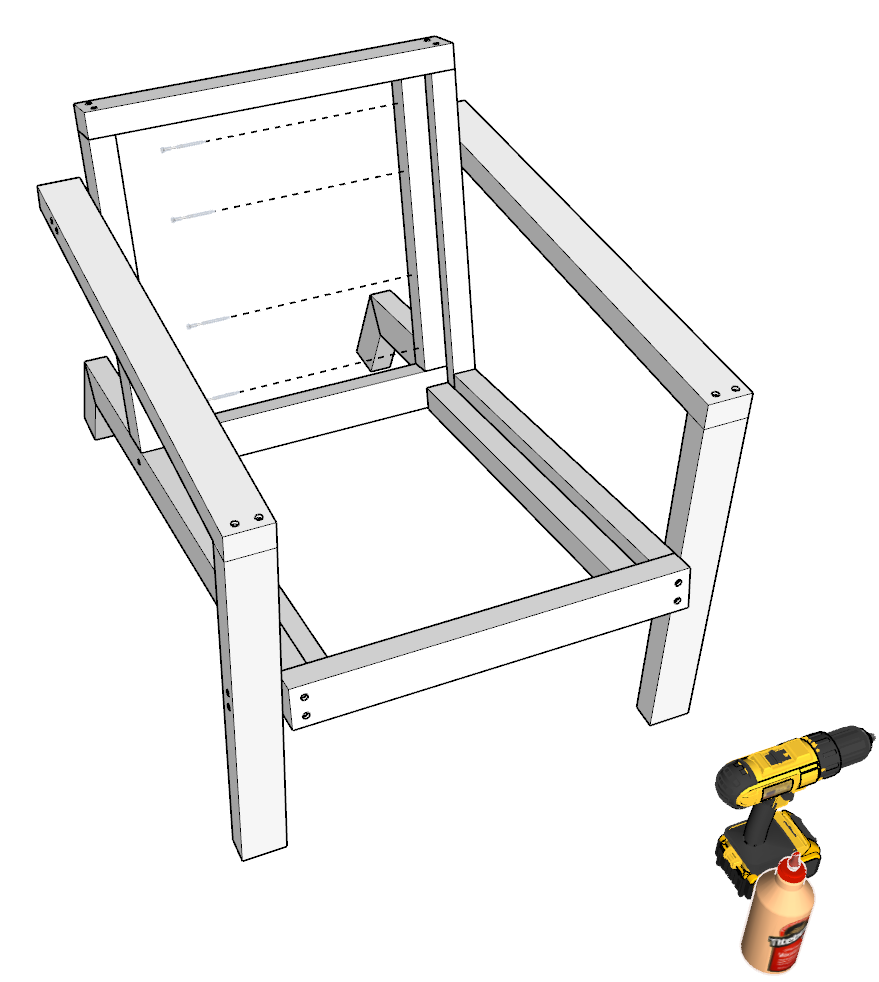
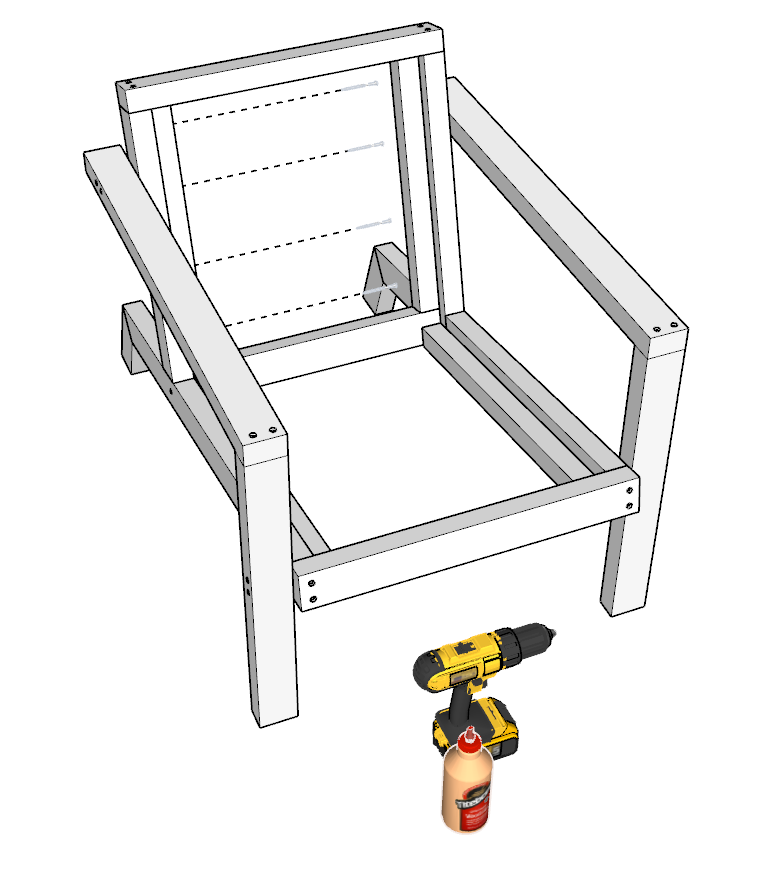
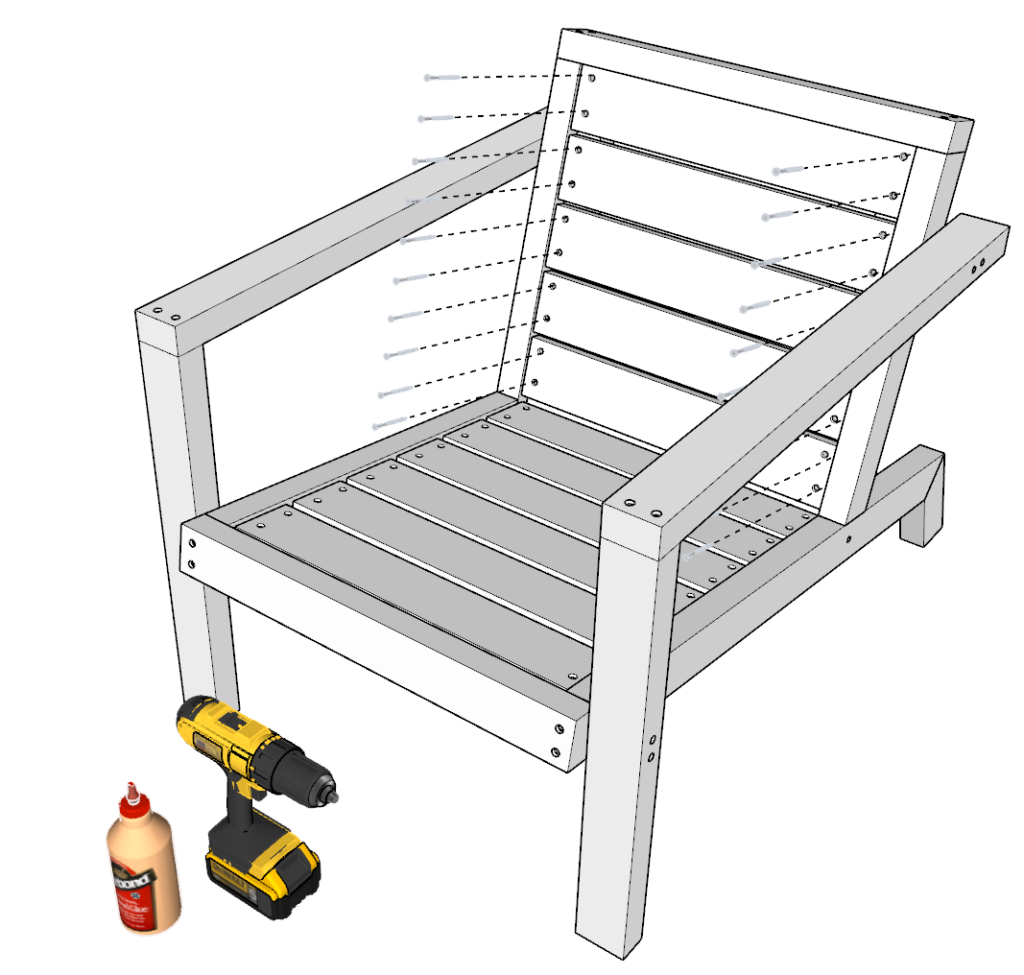
Step 17
next, you need to attach the 19-in board to the frame to create a seating platform.
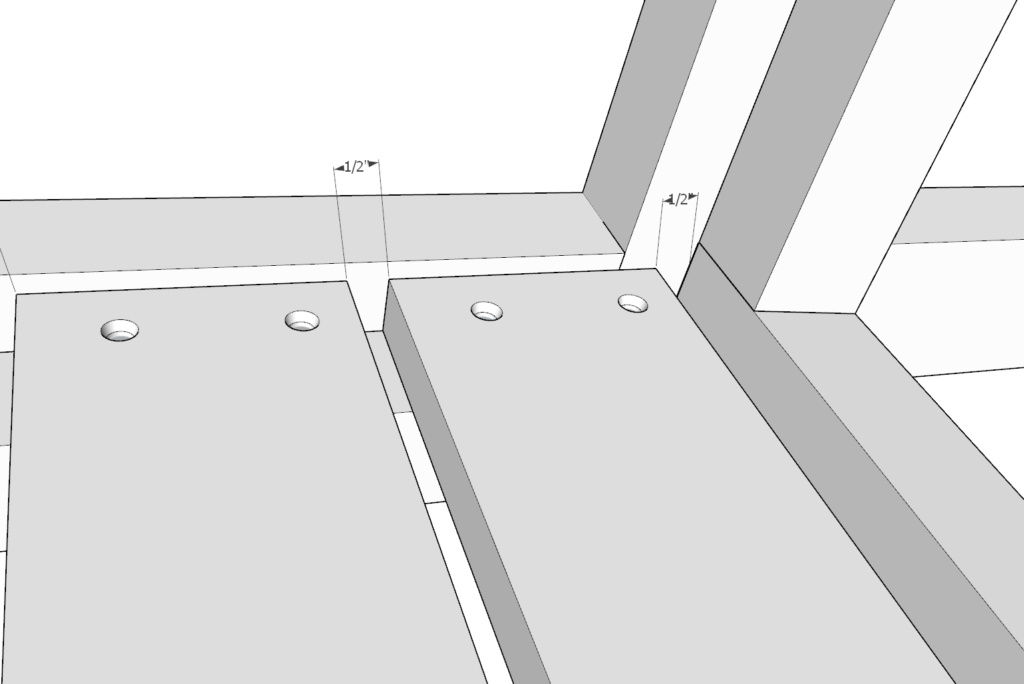
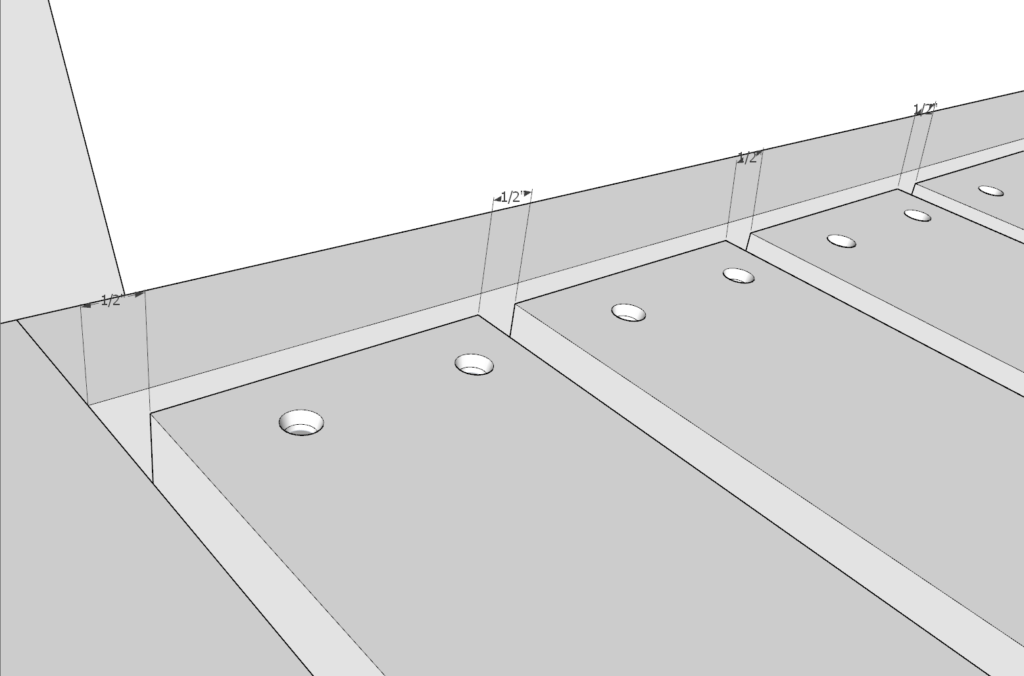
Space out the boards evenly. They will be about 1/2-in apart.
in this step you will need screws that are shorter so that they do not stick out on the bottom. Use the 1 1/2-in screws.
As before, glue, predrill, and add screws.
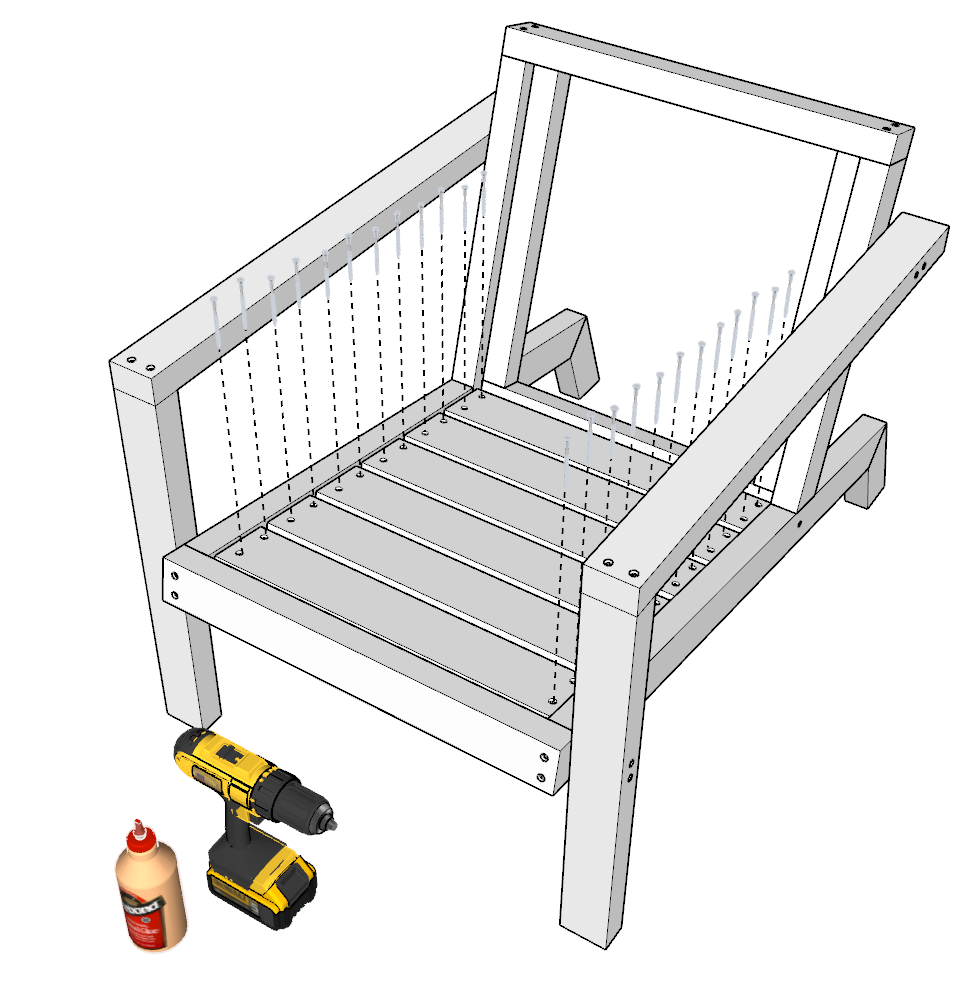
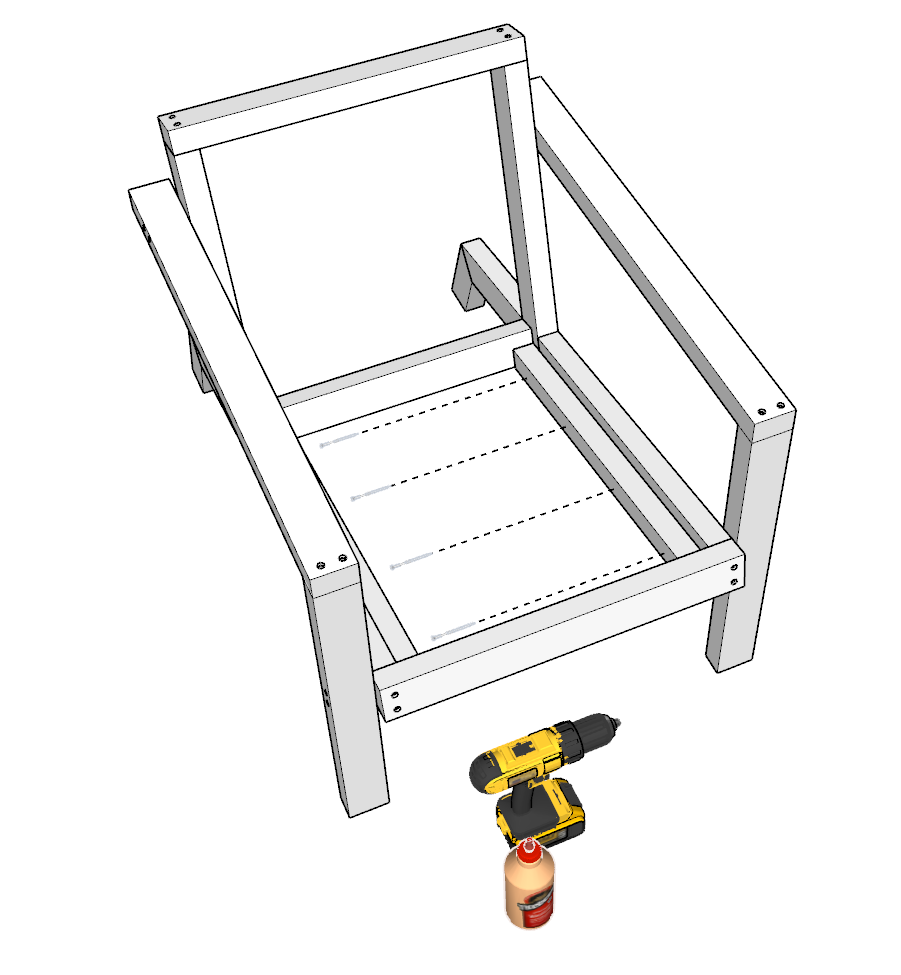
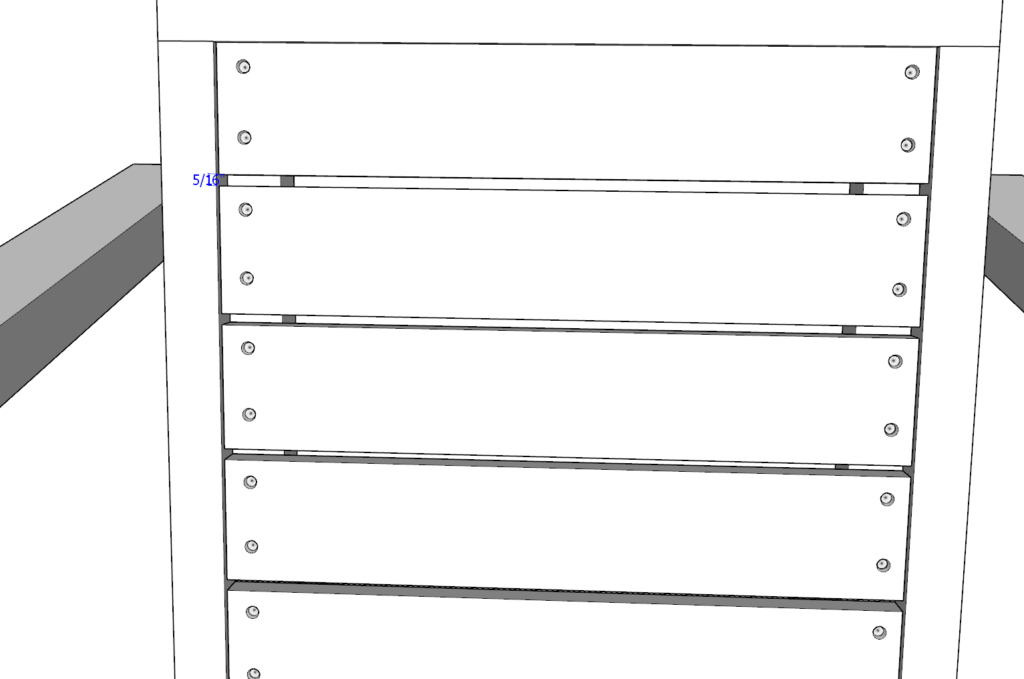
Step 18
In this step you will need to add the 19-in boards to the backrest frame.
In the same way as before, make sure the spaces between the 19-in boards are even throughout the back rest. The first board needs to be flush up against the 22-in top piece.
As before, predrill, add glue, and add screws. Use the 1.5-in screws.
Step 19
Next, sand down the whole chair. This can be time consuming. I use an orbital sander to speed up the process.
I use a rough 80 grit paper first and then finish it with a 220 grit paper.
Filling in the holes is optional.
At this point it is ready to be stained or painted!