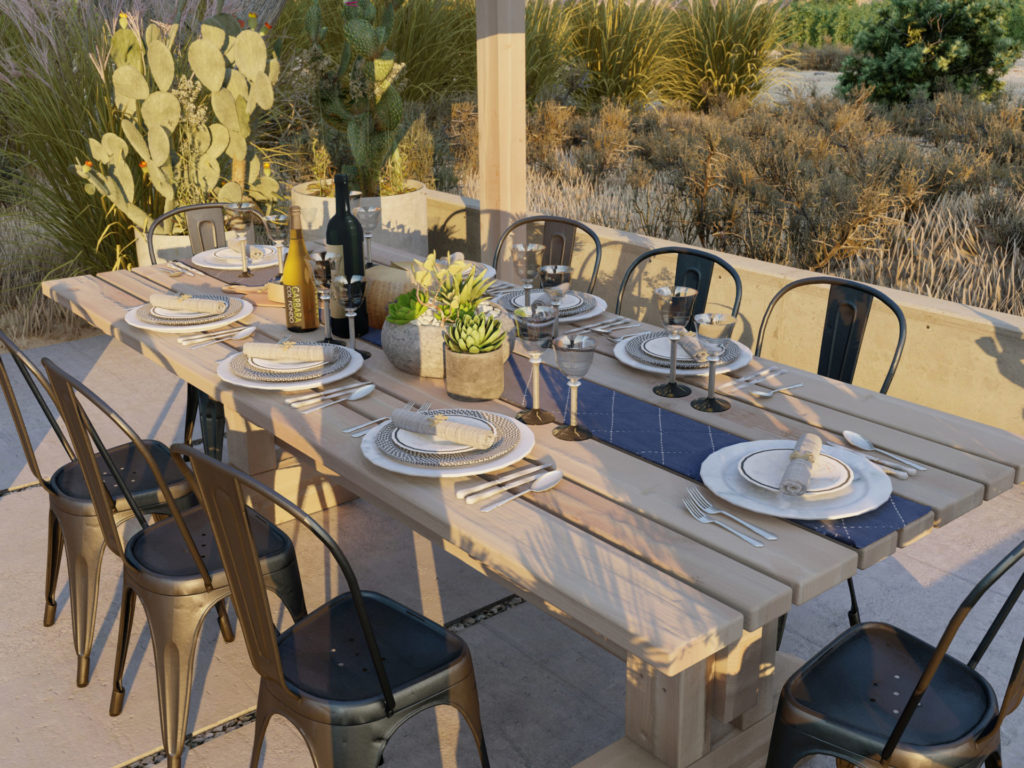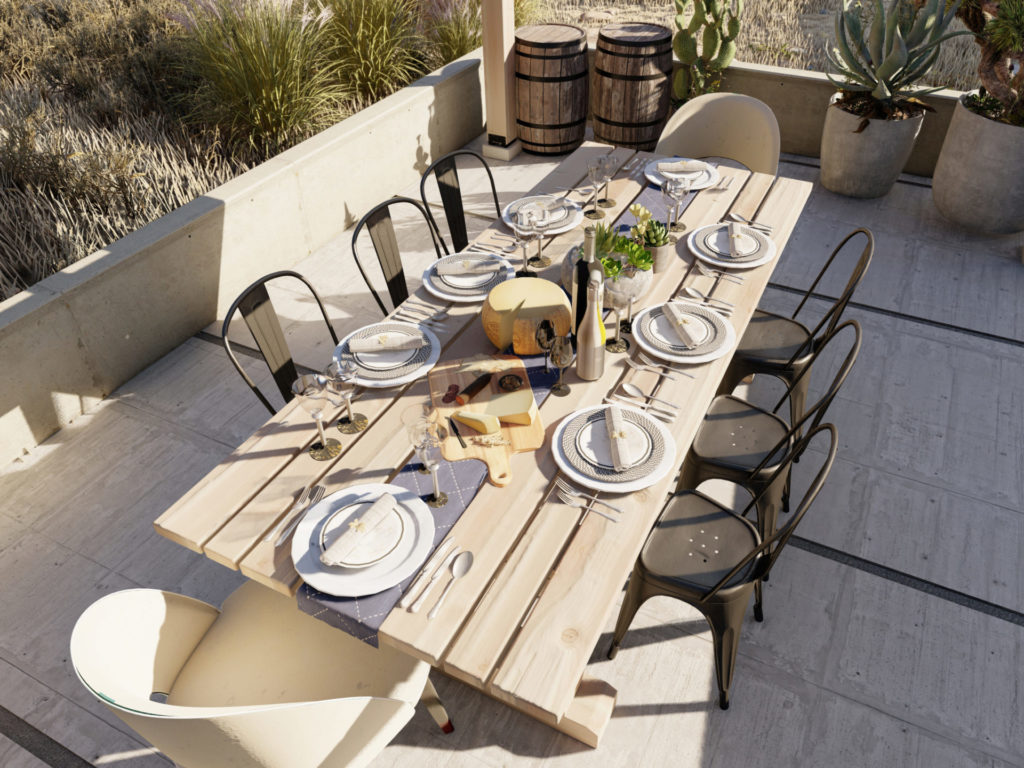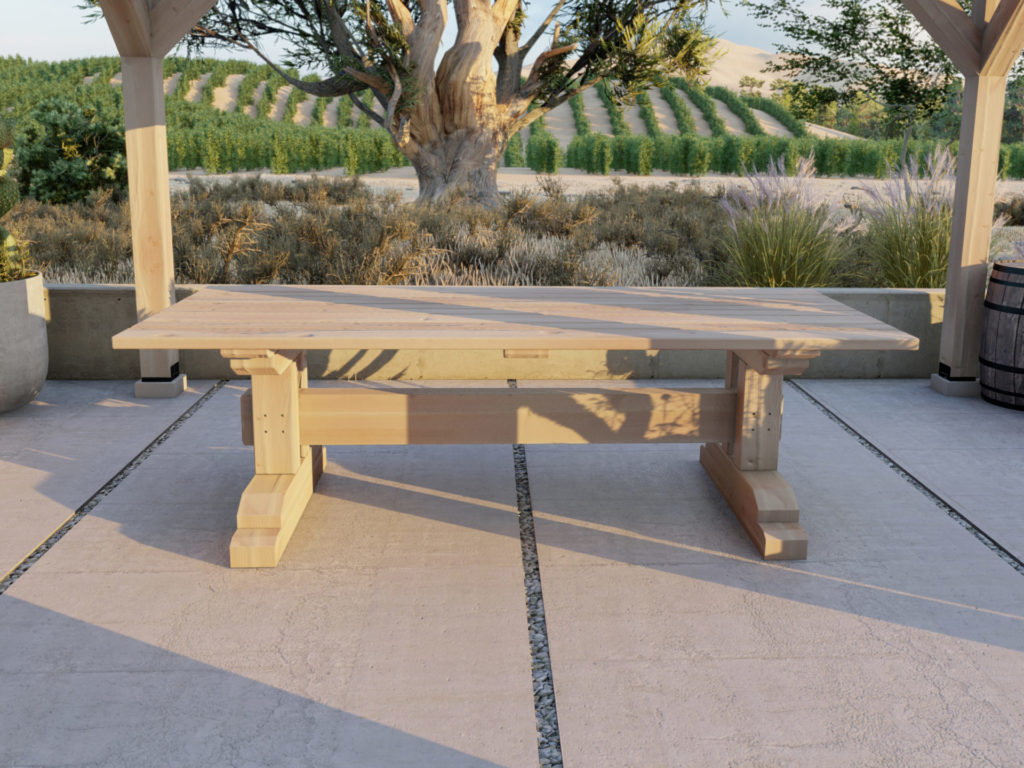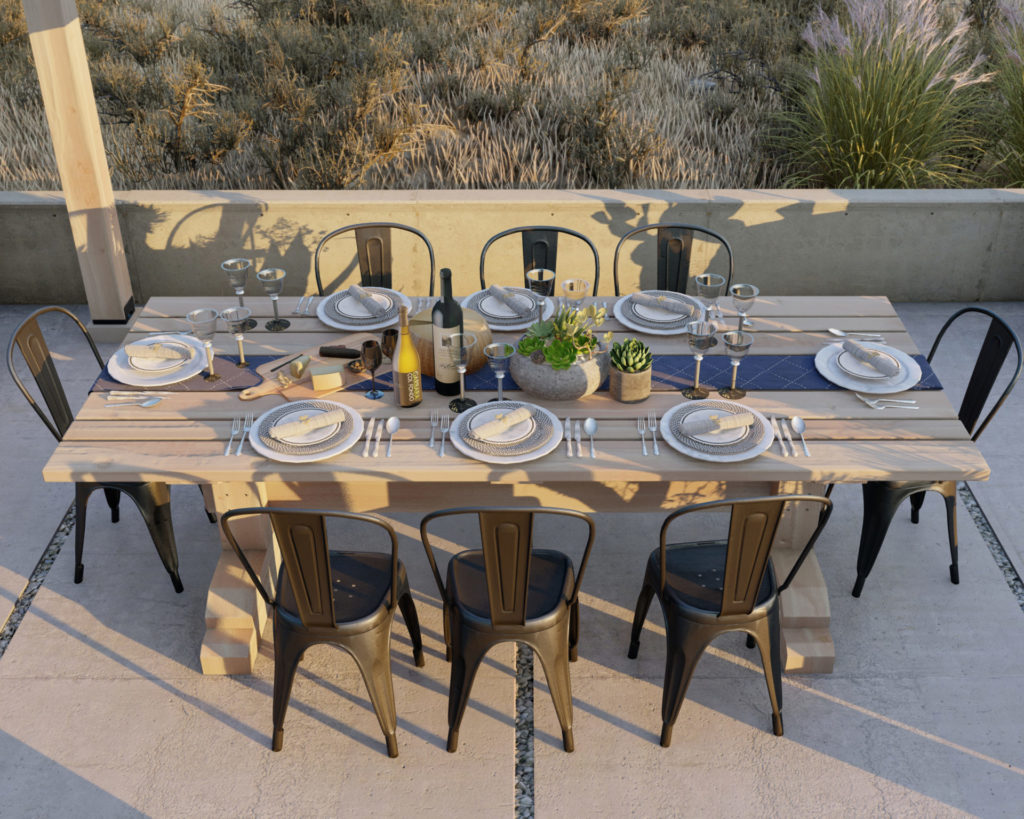
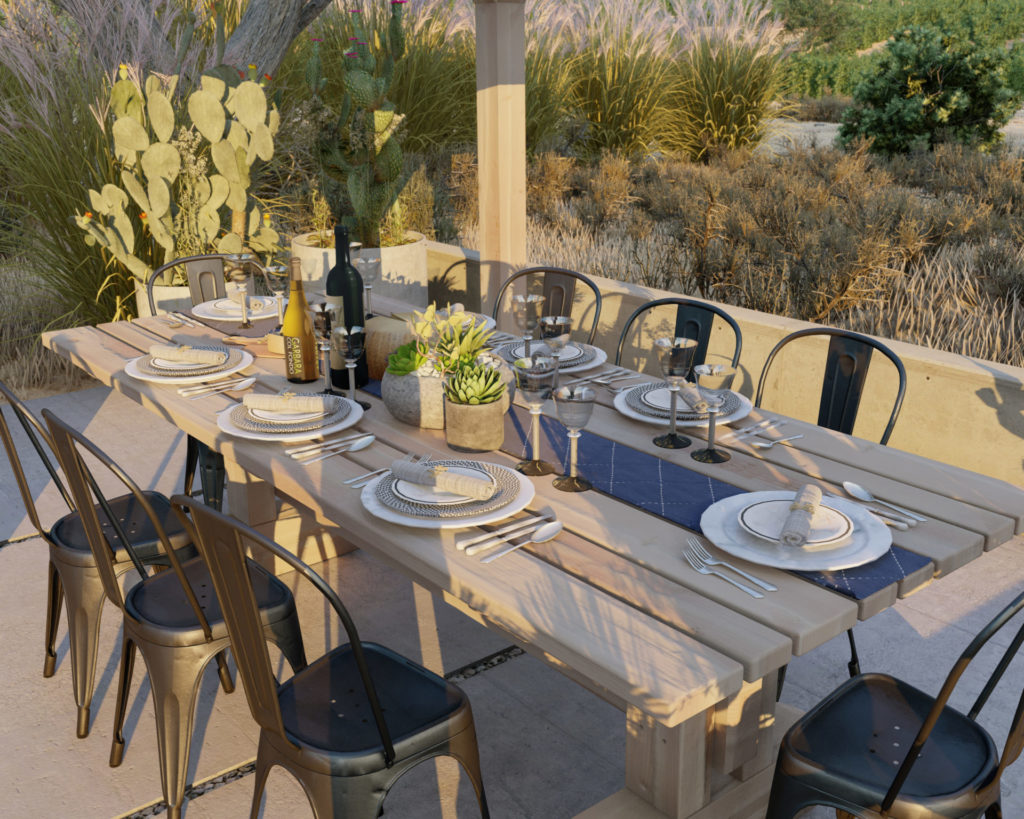
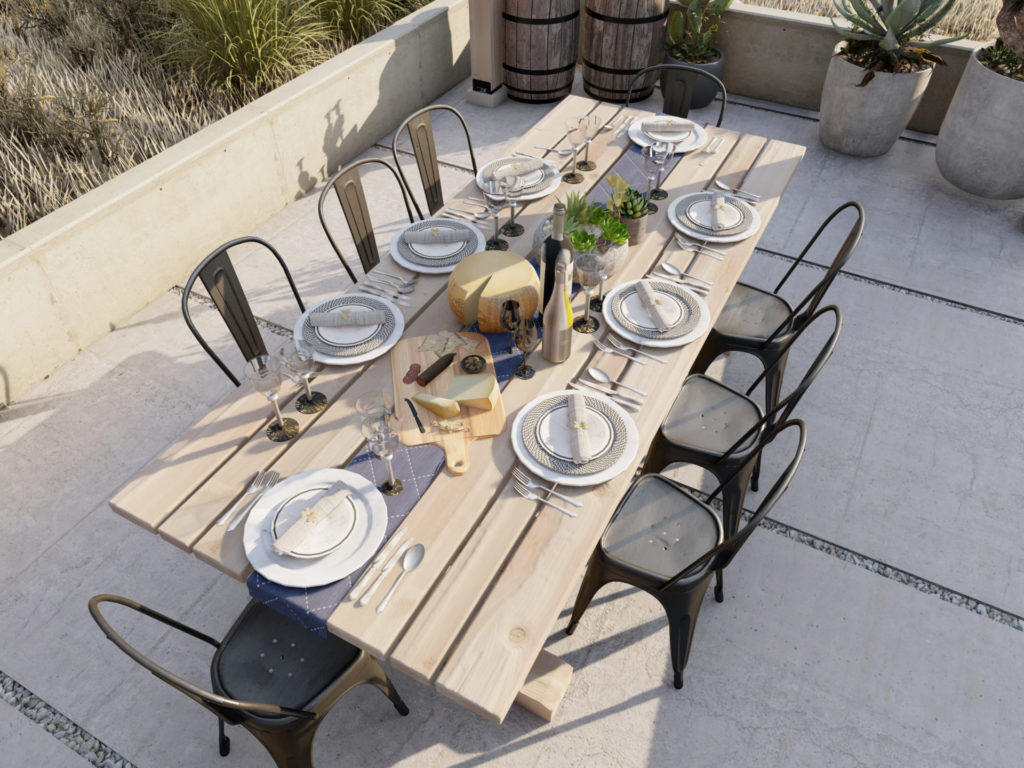
In this post you will find step by step instructions and plans on how to make a DIY outdoor wood dinning table. This design is not only beautiful but also is very durable and suitable for the outdoors.
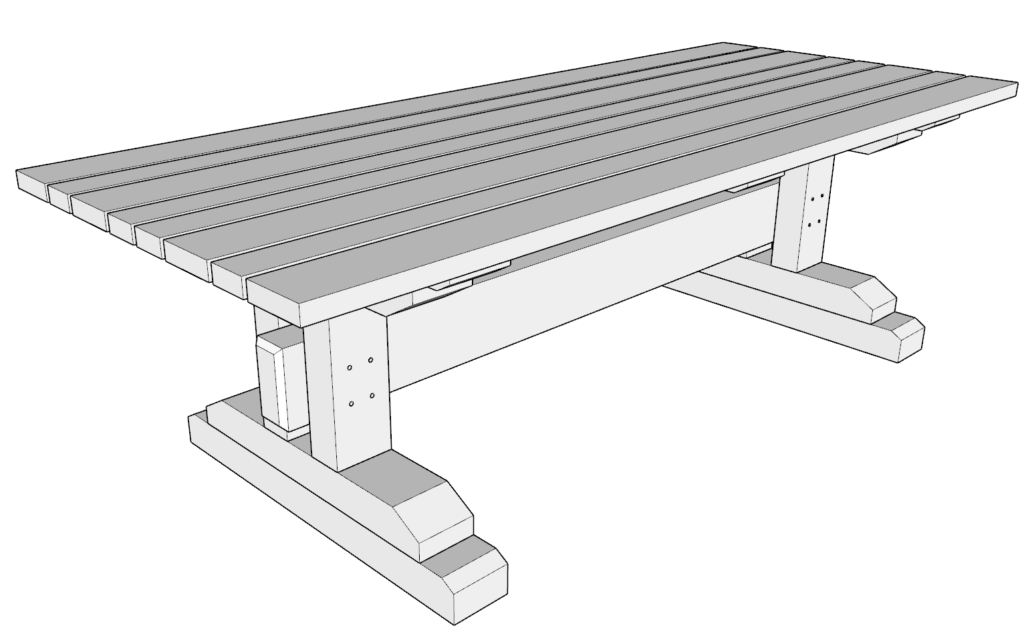
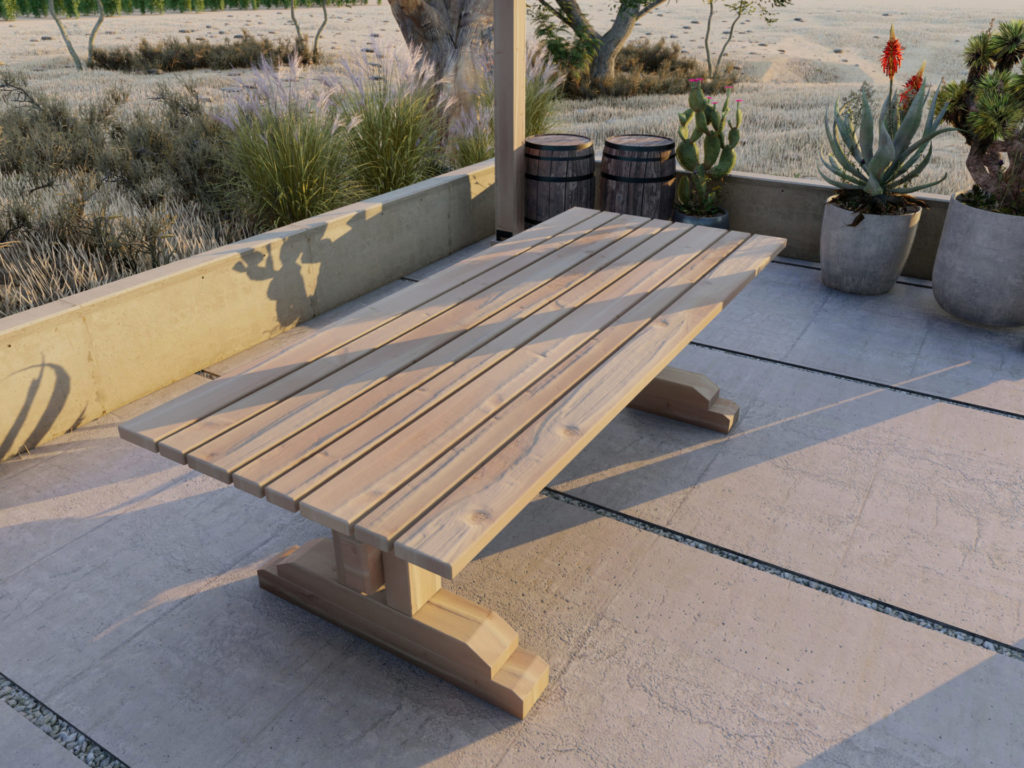
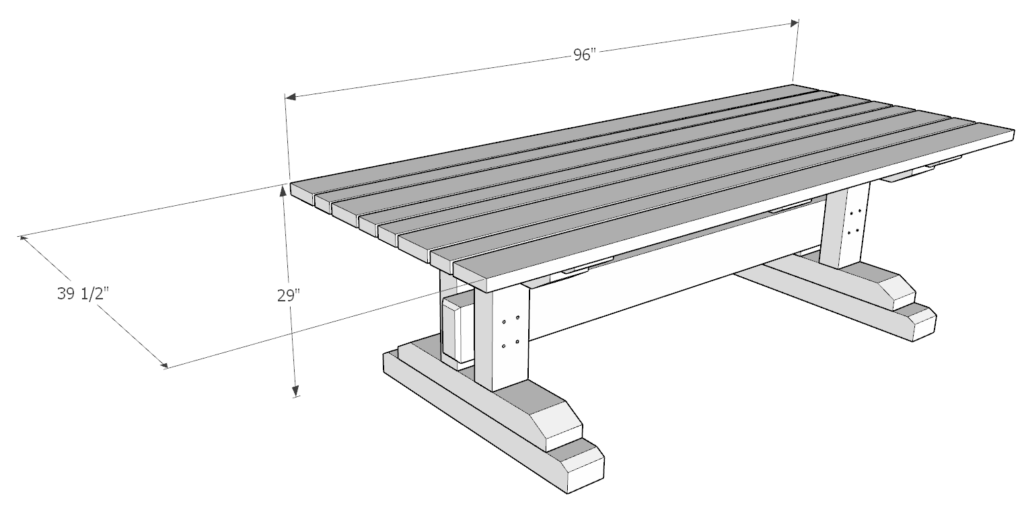
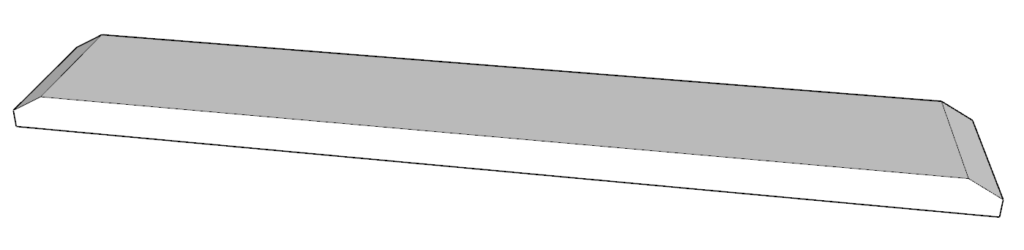
This farmhouse style dinning table has a tabletop with slats that allow for water to pass through them as well as allowing for the wood to contract and expand during different seasons.
This Dinning table can be made with common lumber found at most hardware stores.
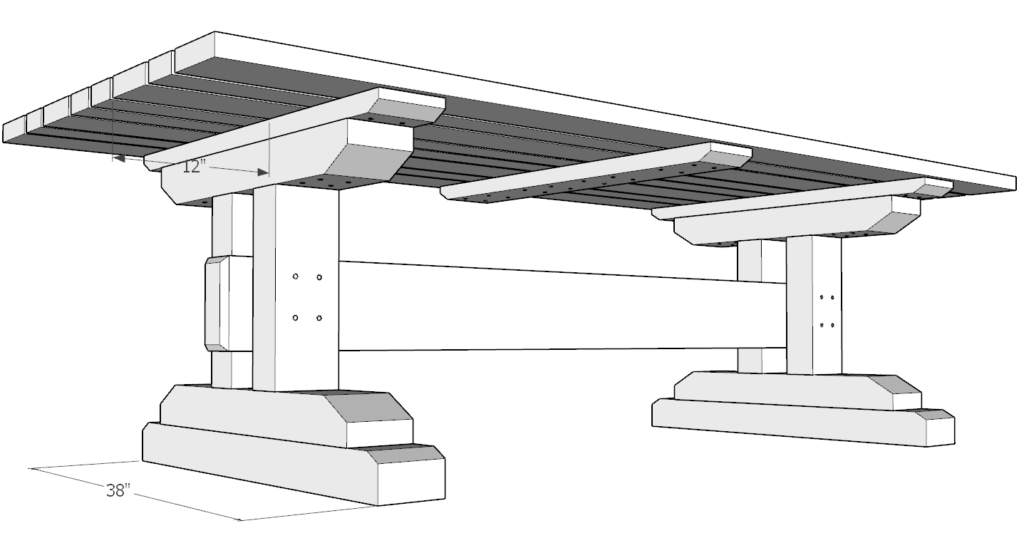
The tabletop is 8 feet long and 39.5 inches wide. The ends of the base are 12 inches away from the edge of the tabletop. This allows for chairs to be scooted in when the table is not in use.
This beautiful farmhouse dining table can serve as a centerpiece for outdoor gatherings such as baby showers, weddings, or any friends and family gathering.
Time to build
20 hours
Total cost of build
$250
Skill level required
Beginner-Intermediate
Download the PDF plans

Outdoor wood dinning table PDF plans
What is included in the PDF download?
Easy to read step by step instructions
Material list
Tools needed
3D illustrations
Recommend tools for this project
- Miter saw
- Drill
- Impact driver with bit for screws
- GRIP Clamps
- Sander
- wood countersink drill bit
- will need 10 lb of 2.5-in screws (highly recommend T25 Star Drive screws)
- 5 lb 3-1/2 screws (highly recommend T-25 #10 x 3-1/2 screws)
- pencil
- Wood glue
- sand paper
- 1/4-in x 12-in drill bit and 1/4-in dowels. The size or dowels and drill bit can vary (more detail in further steps). You will need at least four 48-in long dowels.
- Hammer
- hand held saw
- Long 6-in Driver Bit
Disclosure: Some of these links are affiliate links.
Cut list and material list
Available with purchase of PDF plans.
Step 1
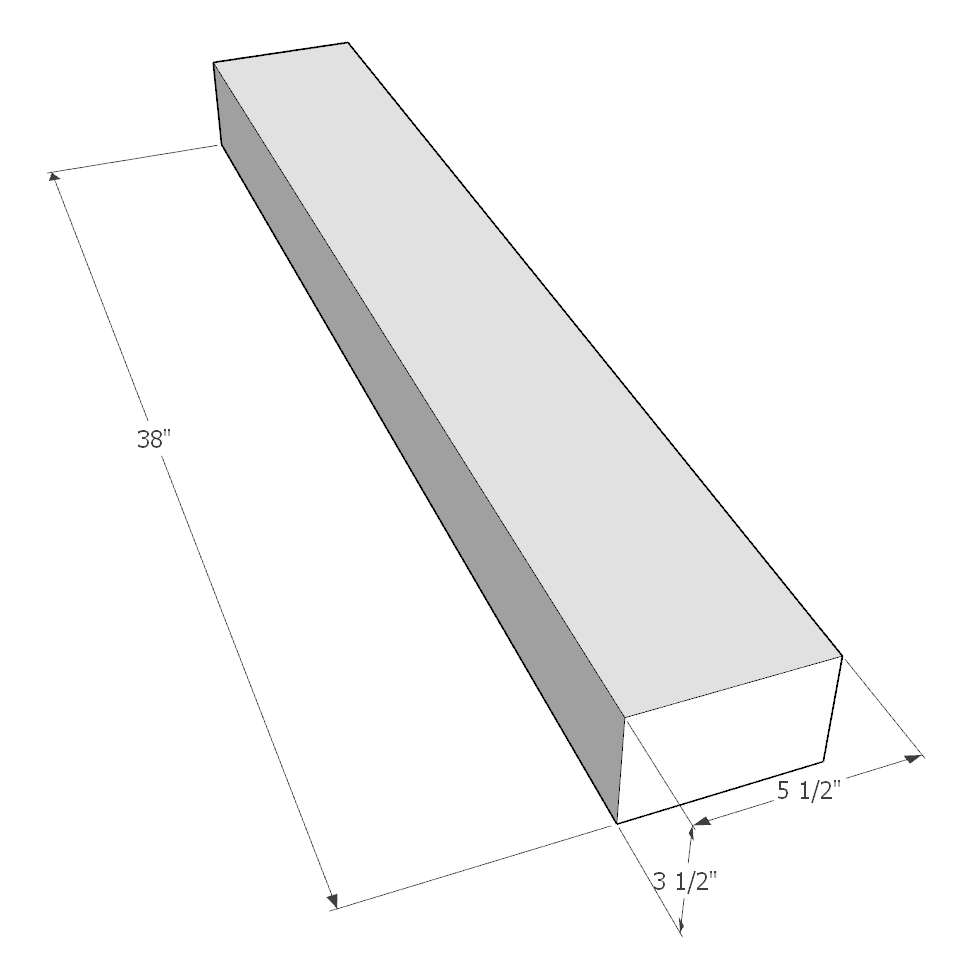
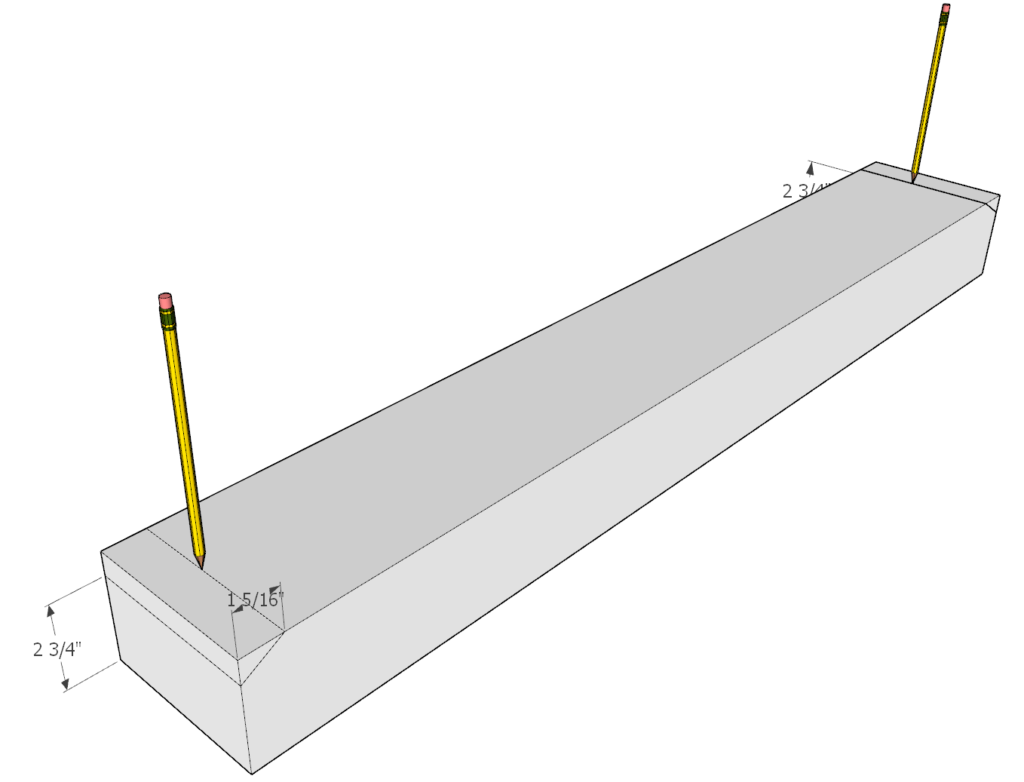
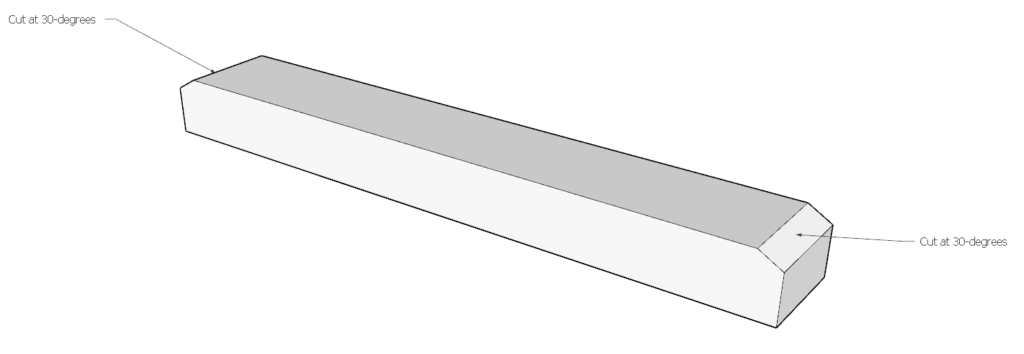
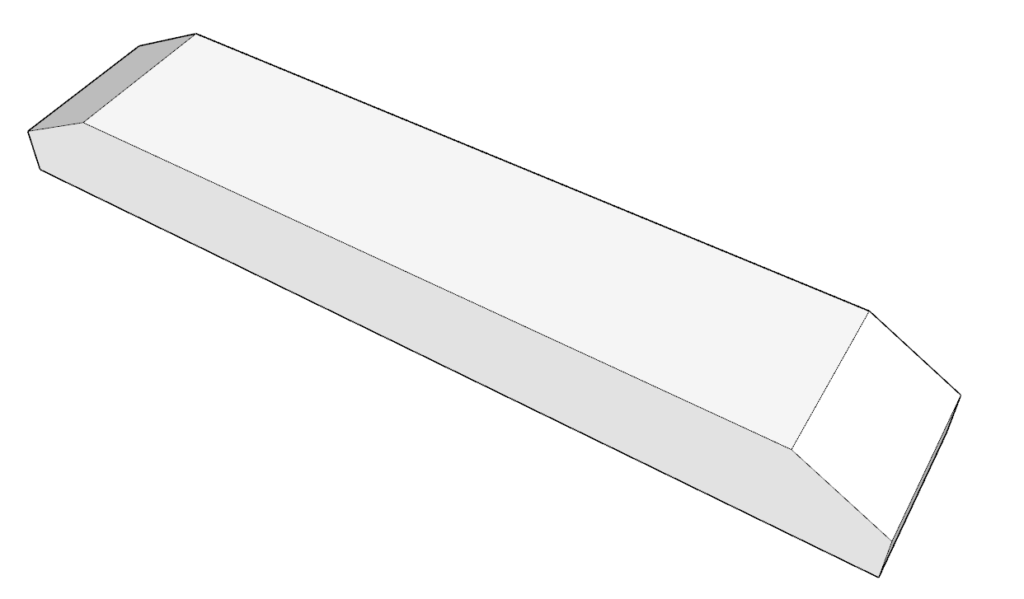
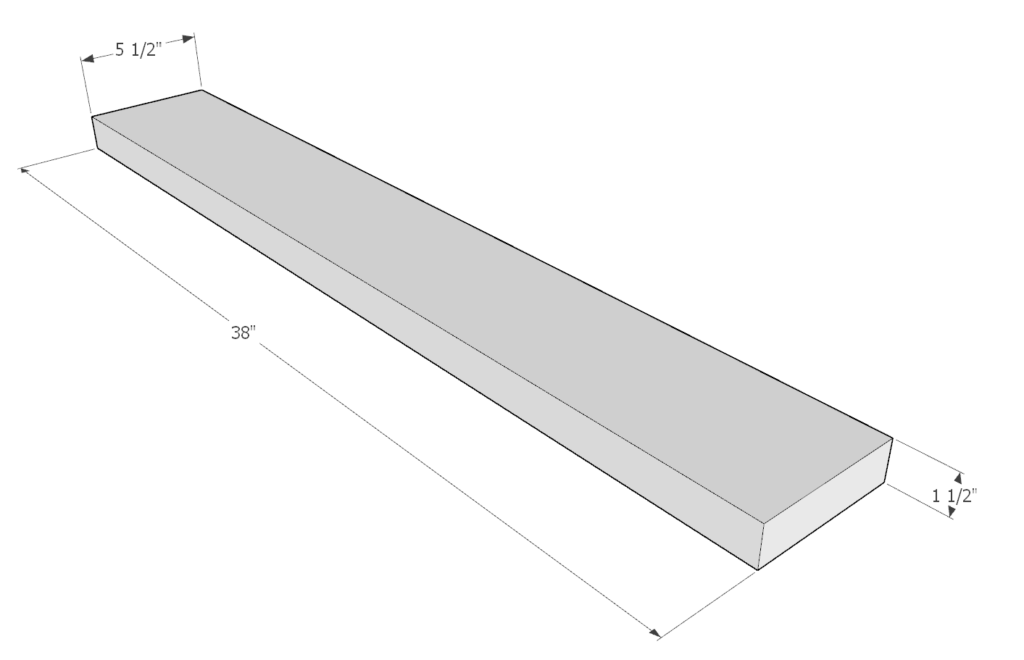
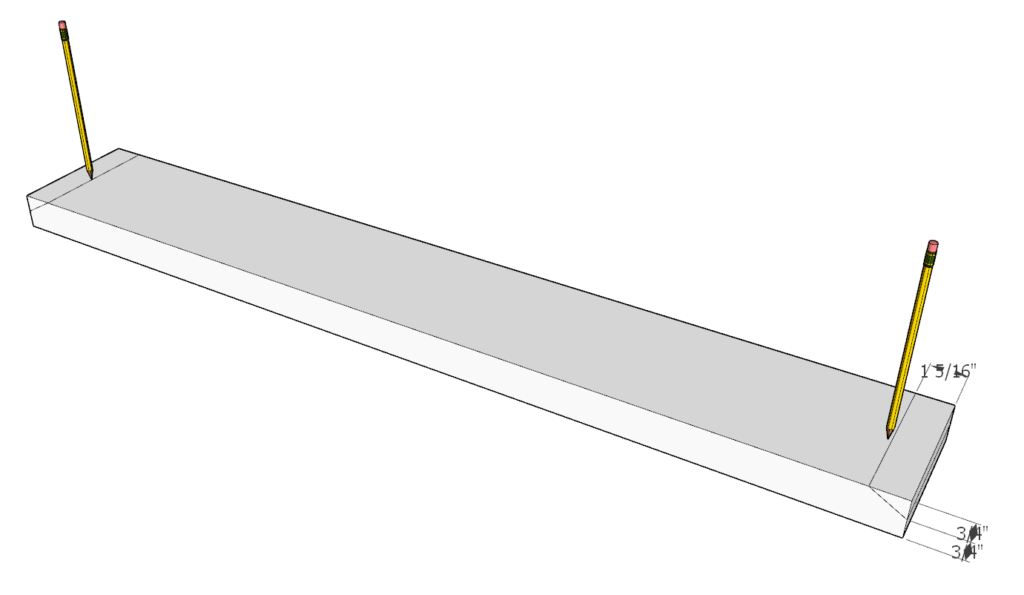
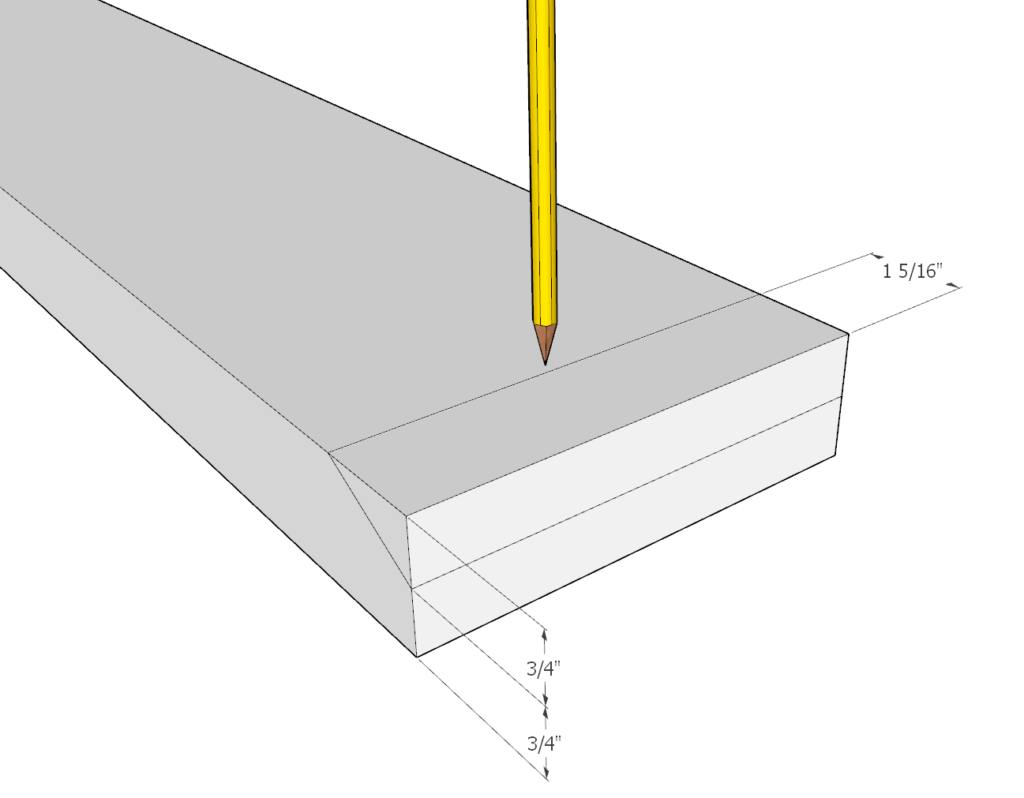
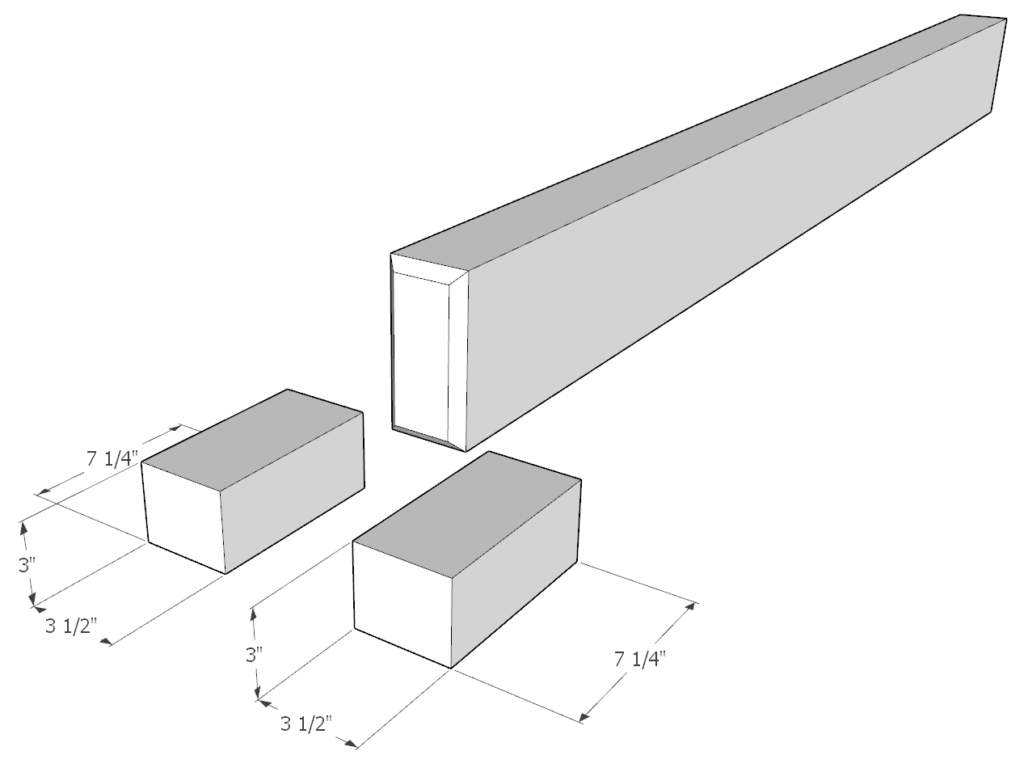
First, cut a 38-in piece from the 4×6 lumber.
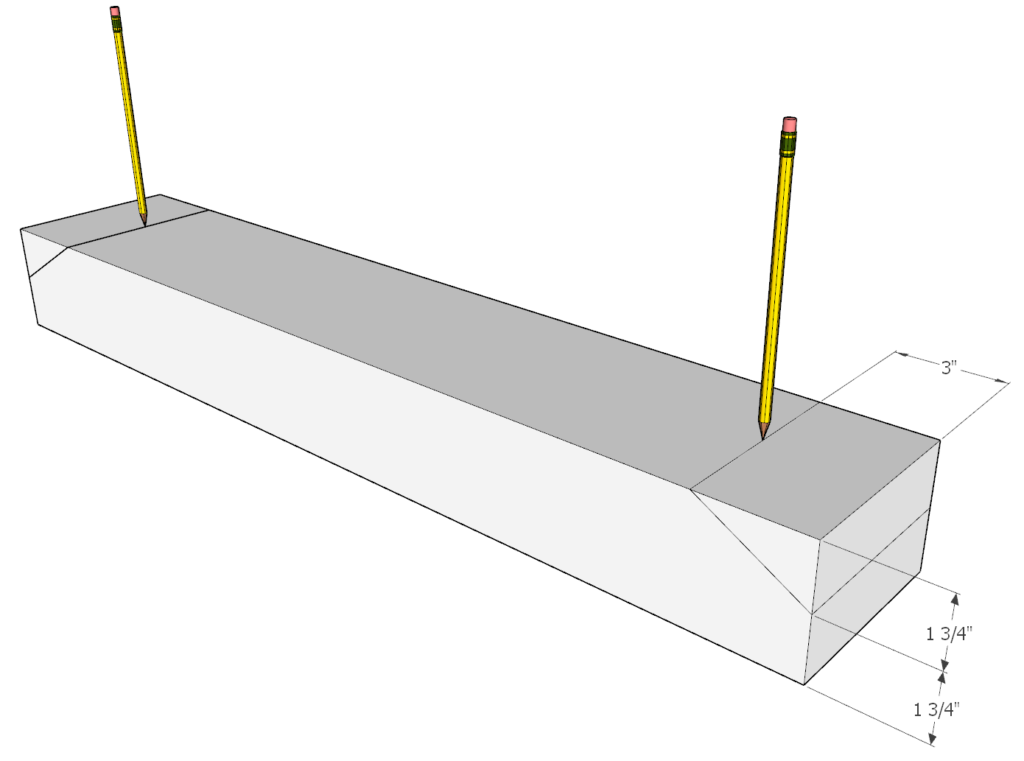
Next, draw lines on both ends of the 38-in piece with a pencil to indicate where to cut off the edges at 30-degrees (see diagram).
Next, cut the edges at 30 degrees.
repeat this set 2x

Step 2
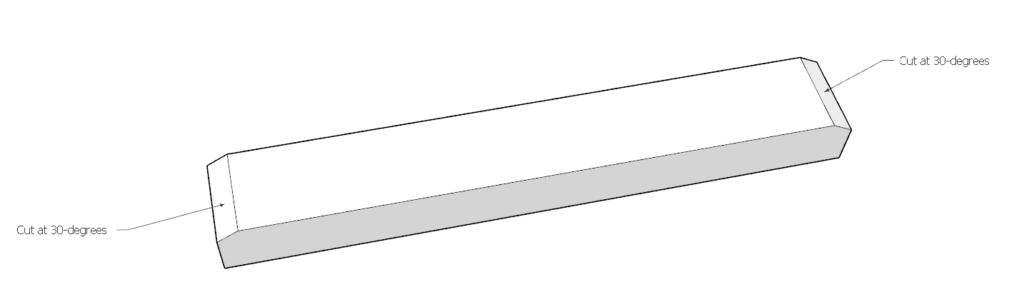
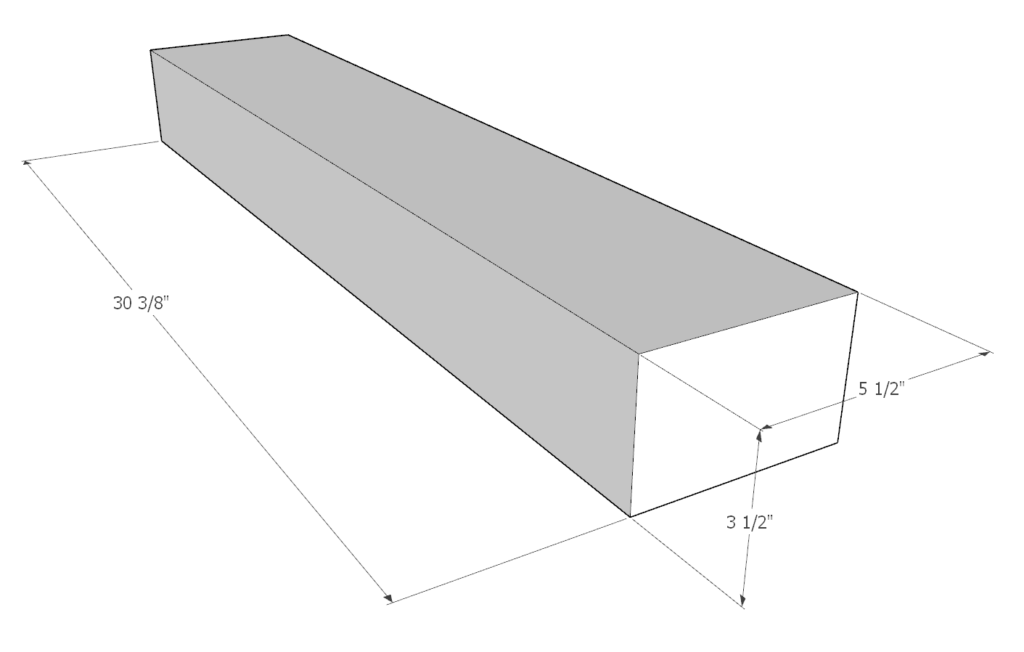
Next, cut a 30 3/8-in piece from the 4×6 lumber.
Next, draw lines on both ends of the 30 3/8-in piece with a pencil to indicate where to cut off the edges at 30-degrees (see diagram).
Next, cut the edges at 30 degrees.
repeat this set 4x
Step 3
Next, cut a 38-in piece from the 2×6 lumber.
Next, draw lines on both ends of the 38-in piece with a pencil to indicate where to cut off the edges at 30-degrees (see diagram).
Next, cut the edges at 30 degrees.
repeat this set 3x
Step 4
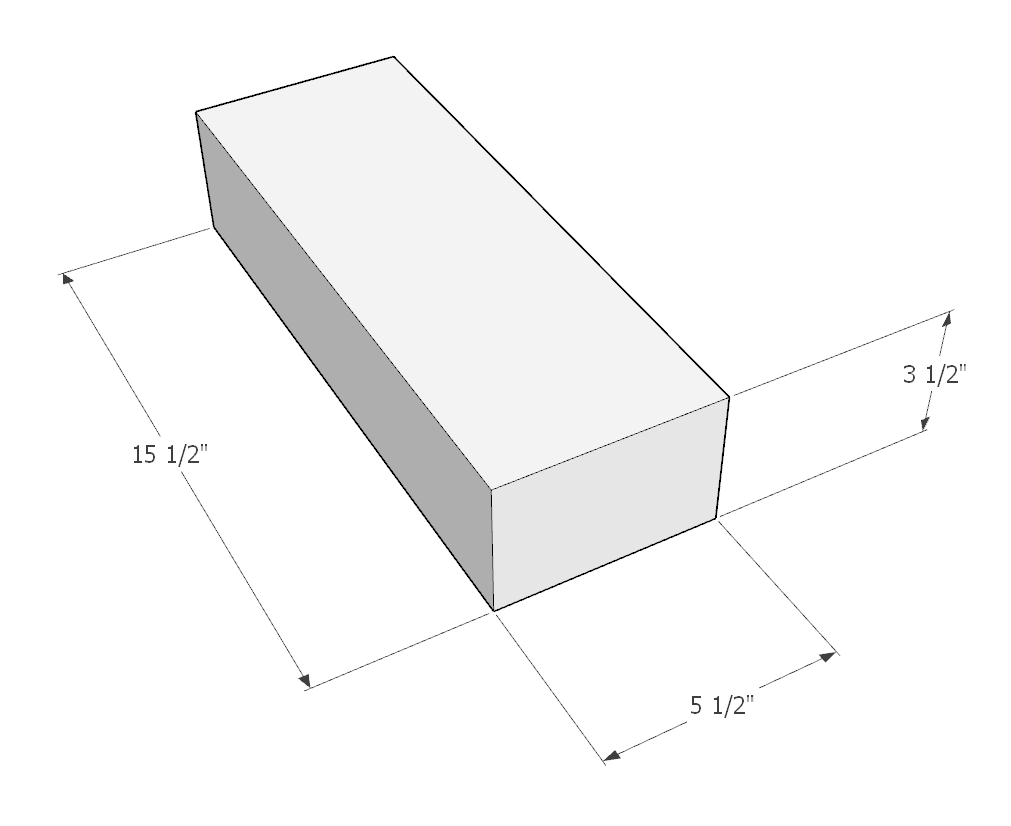
Next, cut a 15.5-in piece from the 4×6 lumber.
Repeat this set 4x
Step 5
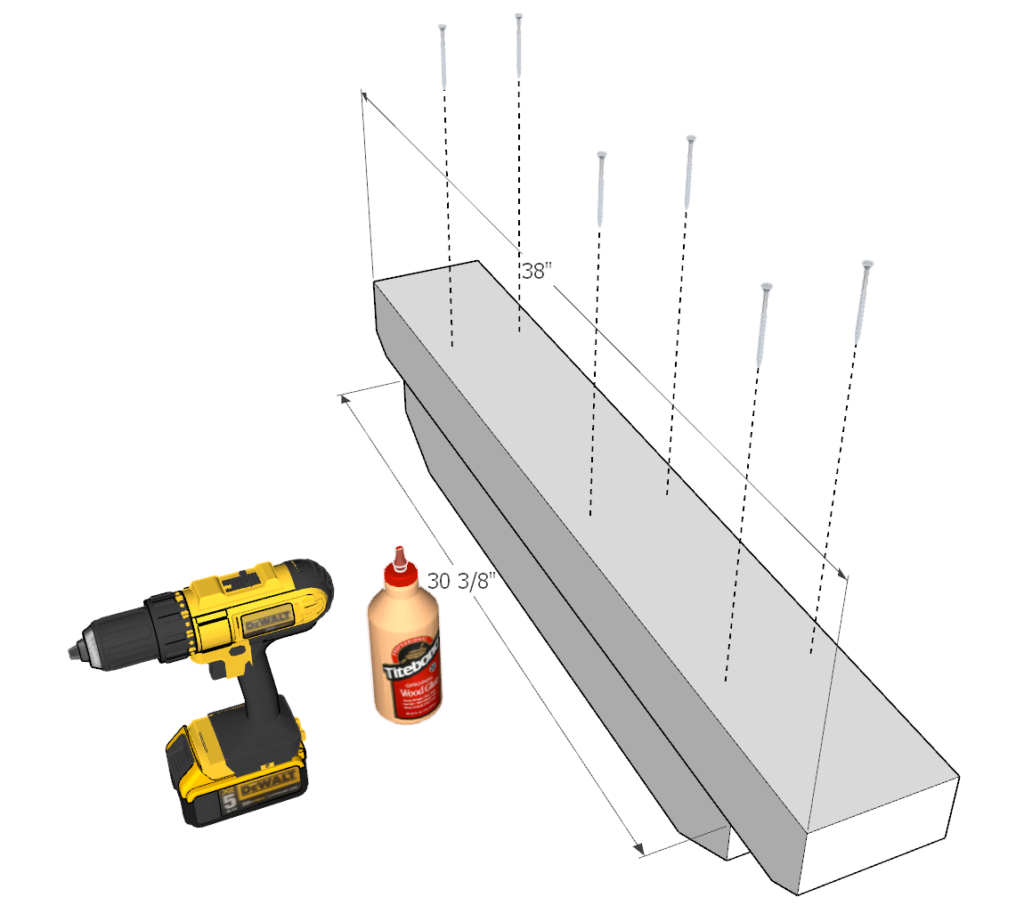
Next, take one of the 30 3/8-in pieces and one of the 38-in pieces (from the 4×6 lumber) and center them over each other as shown in the diagram.
Apply glue in all the areas where the lumber pieces will be contacting each other.
Predrill 6 holes as shown in the diagram and add the 3.5-in screws.
When adding screws, make sure they go deep enough to be able to penetrate both thick lumber pieces.
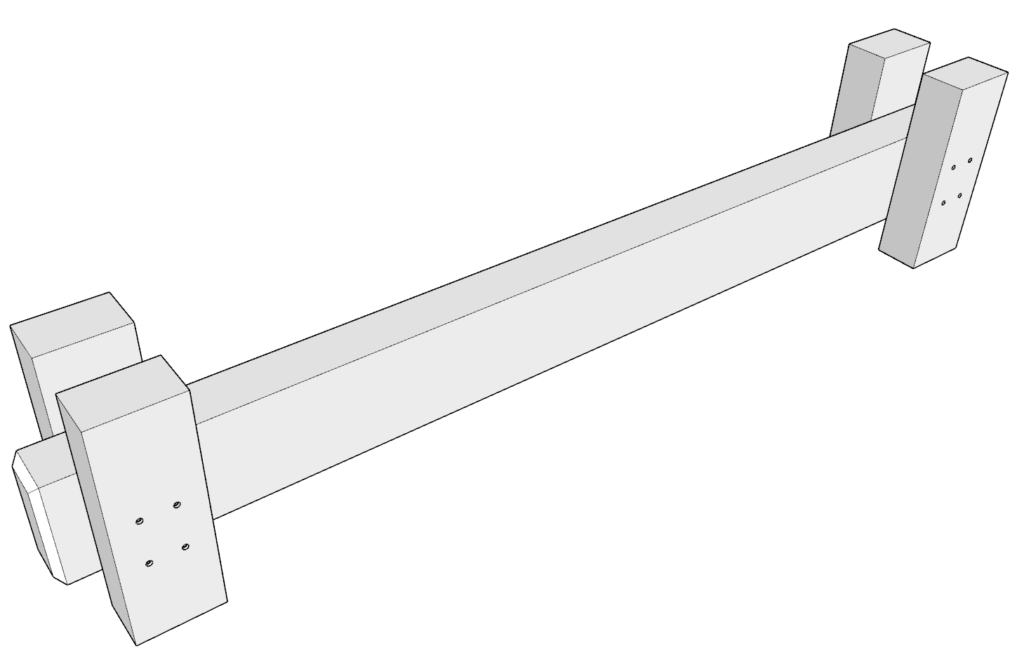
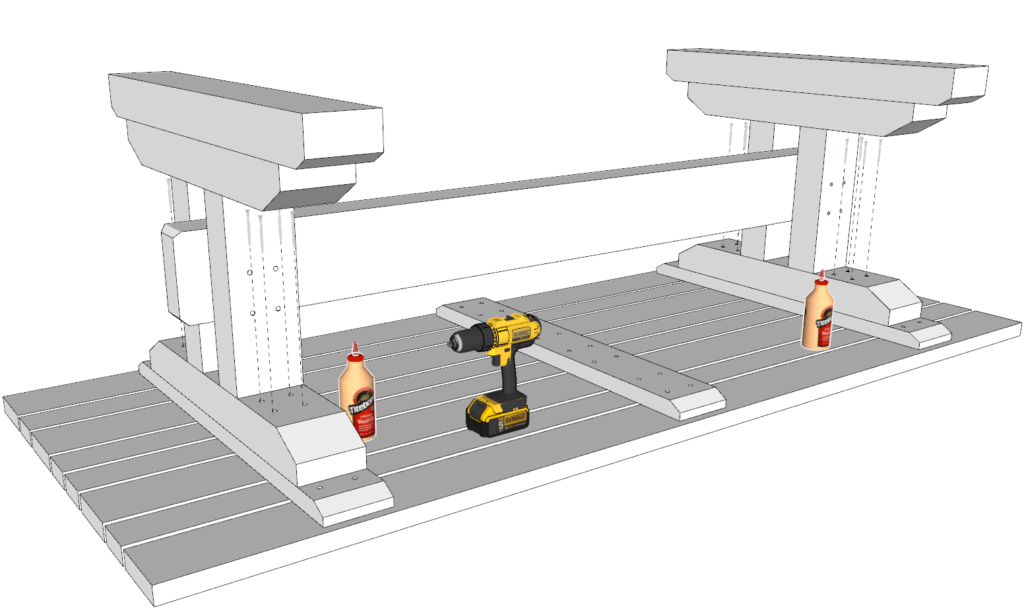
Step 6
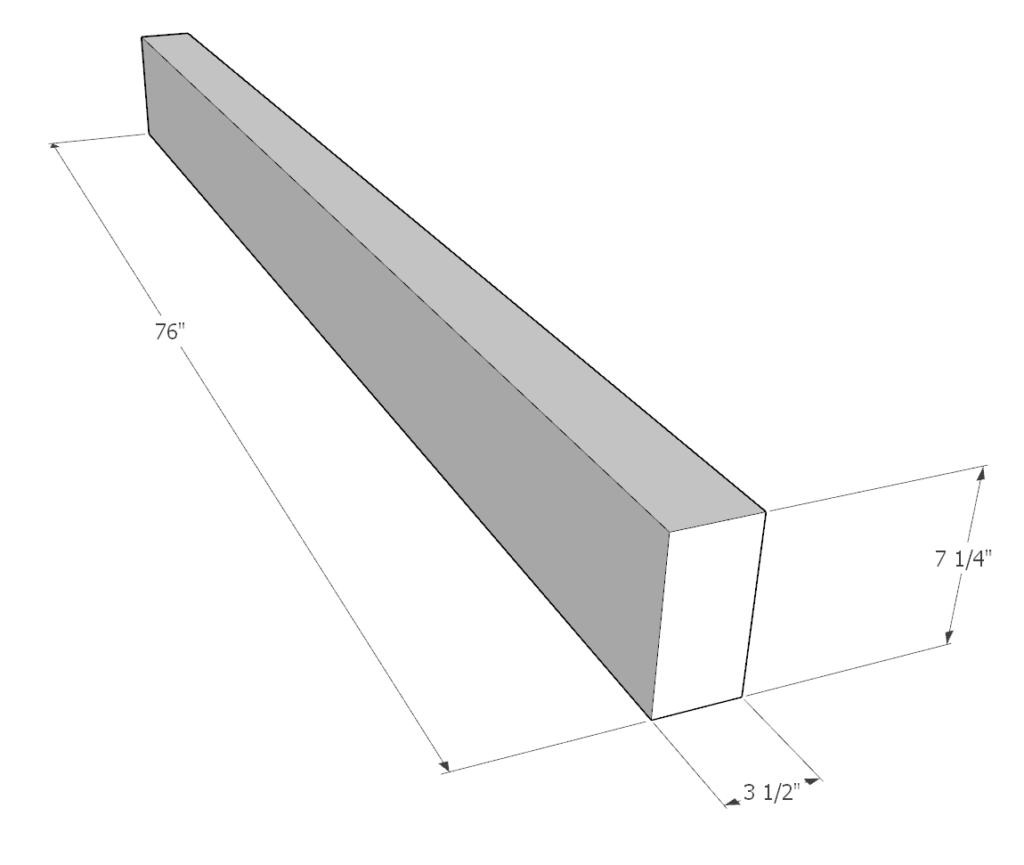
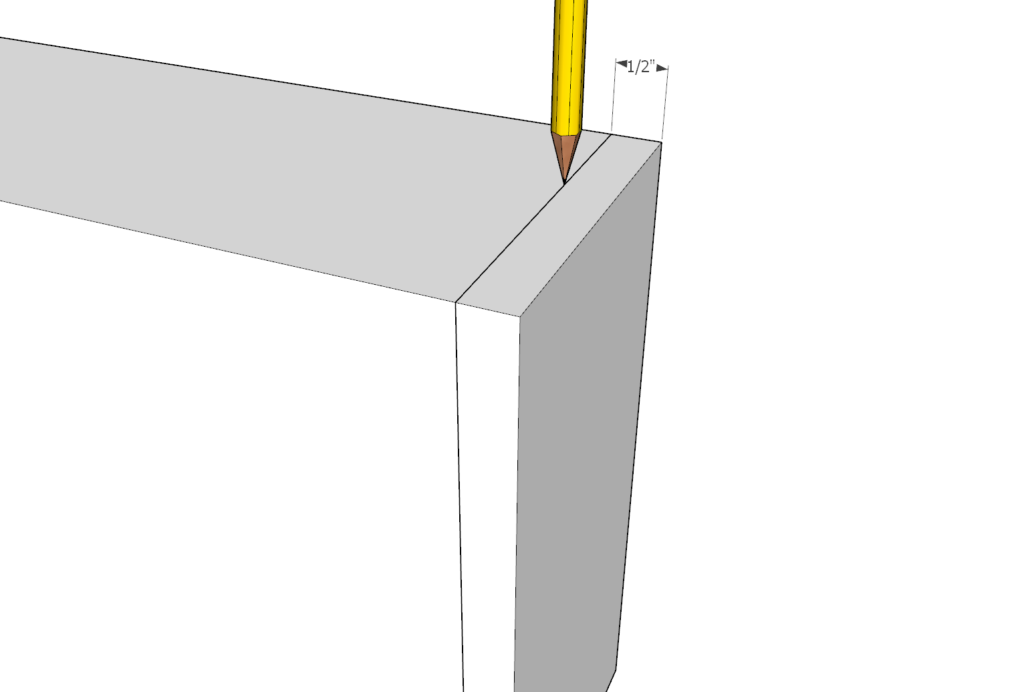
Next, cut a 76-in pieces from the 4×8 lumber.
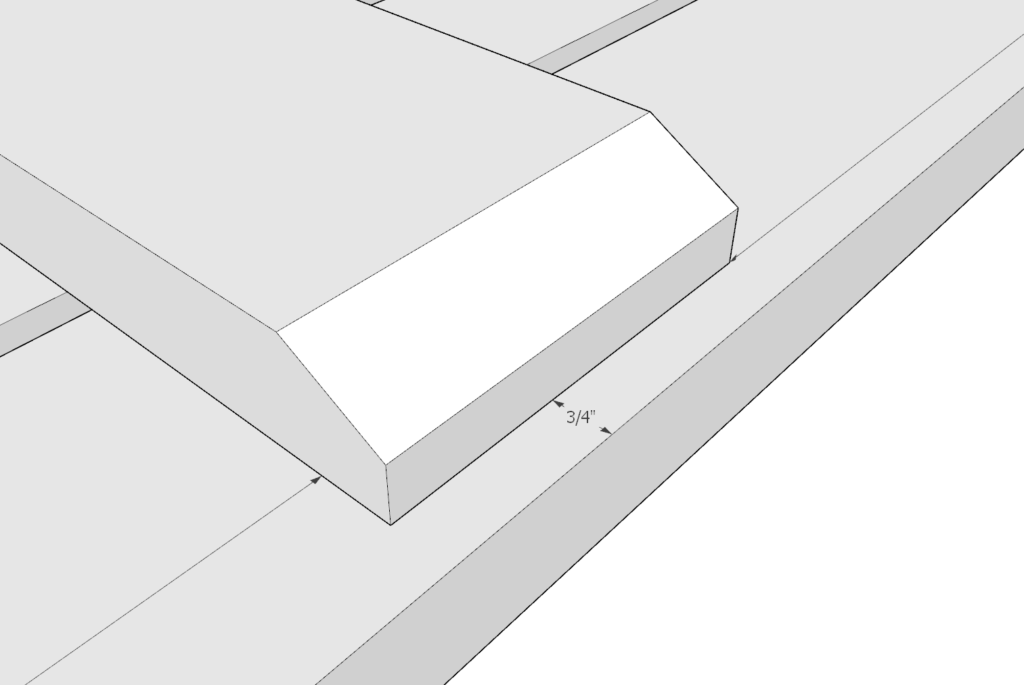
Draw a line all around the edges at 1/2-in to indicate where you will need to make a 45-degree cut.
Trim all the edges at 45 degrees as shown below.


Step 7
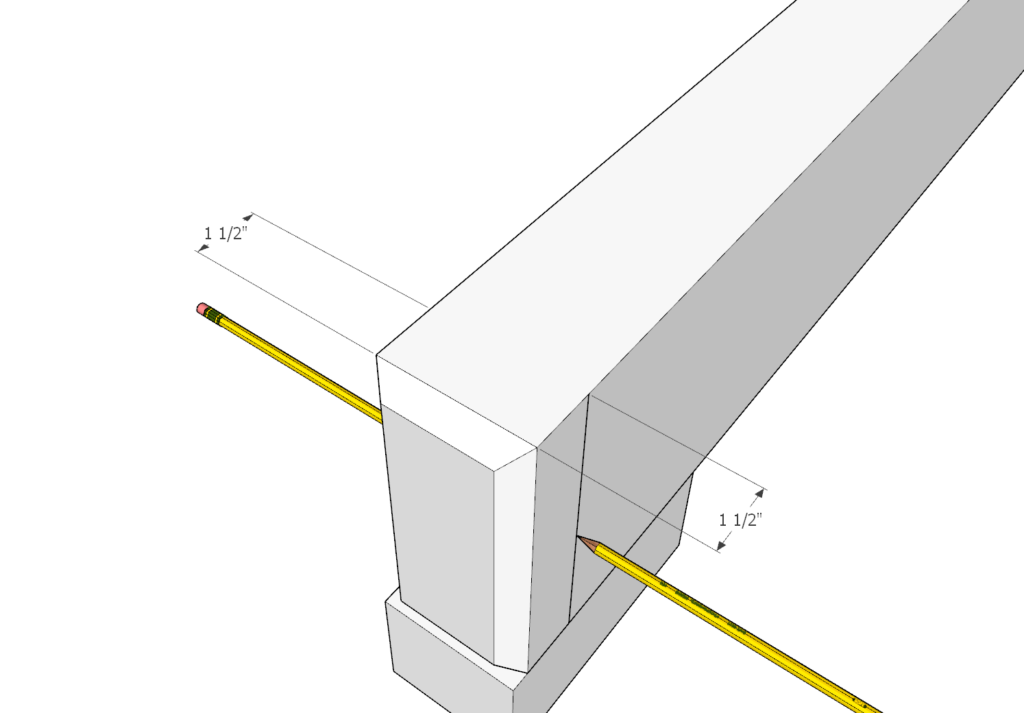
Next, cut two spacers at 3-in from the scrap 4×8 lumber. These spacers will allow the central beam to rest on them you assemble the table base.
Rest the 76-in lumber pieces on top of the spacers as shown below.
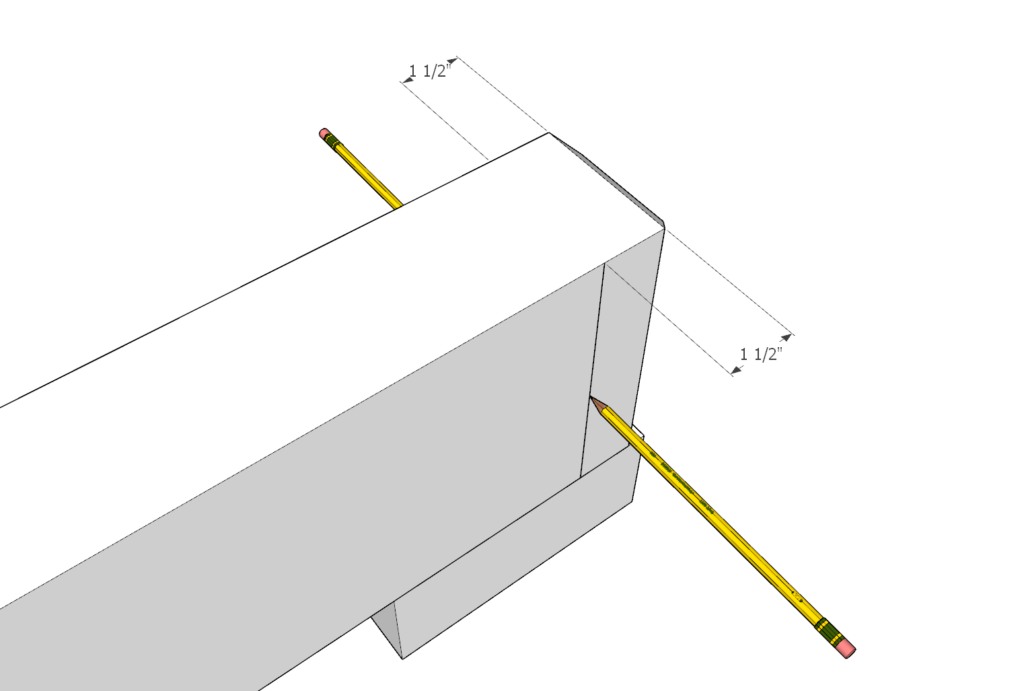
Next, draw a line on both end of the 76-in 3×8 lumber piece. It should be 1.5-in away from the angles edge (see diagram).
Step 8
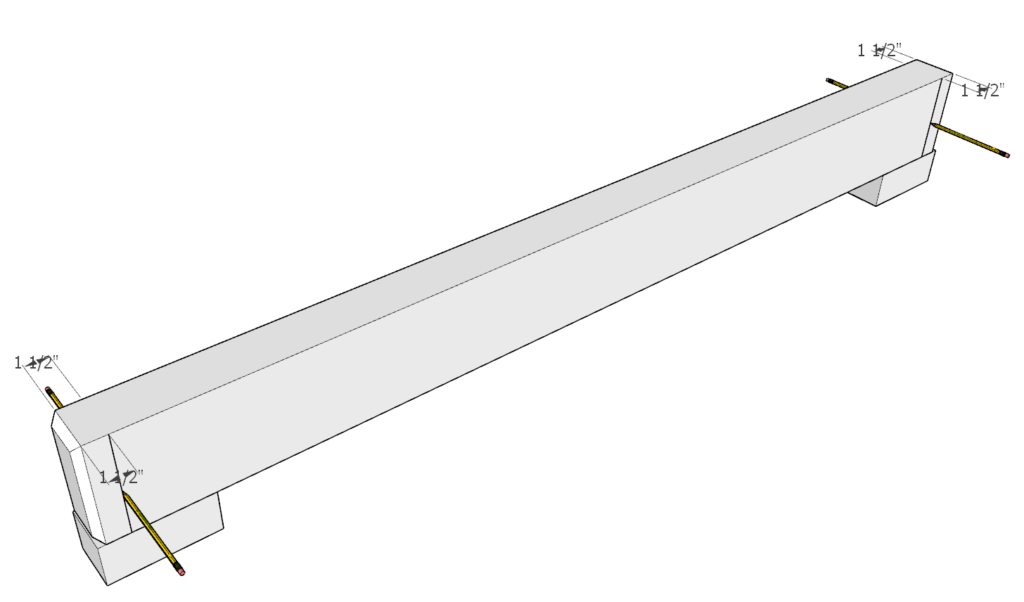
Next, add all four of the 15.5-in pieces to the 76-in central beam as shown in the diagram.
use the lines you drew in the previous step to place the 15.5-in pieces correctly and in alignment with each other.
It is important that this step is performed on a level surface.
Add glue, predrill, and add four screws to each of the 15.5-in pieces to secure them in place.
I use wood working clamps to hold the entire set up as I work. This is very helpful to ensure proper alignment.
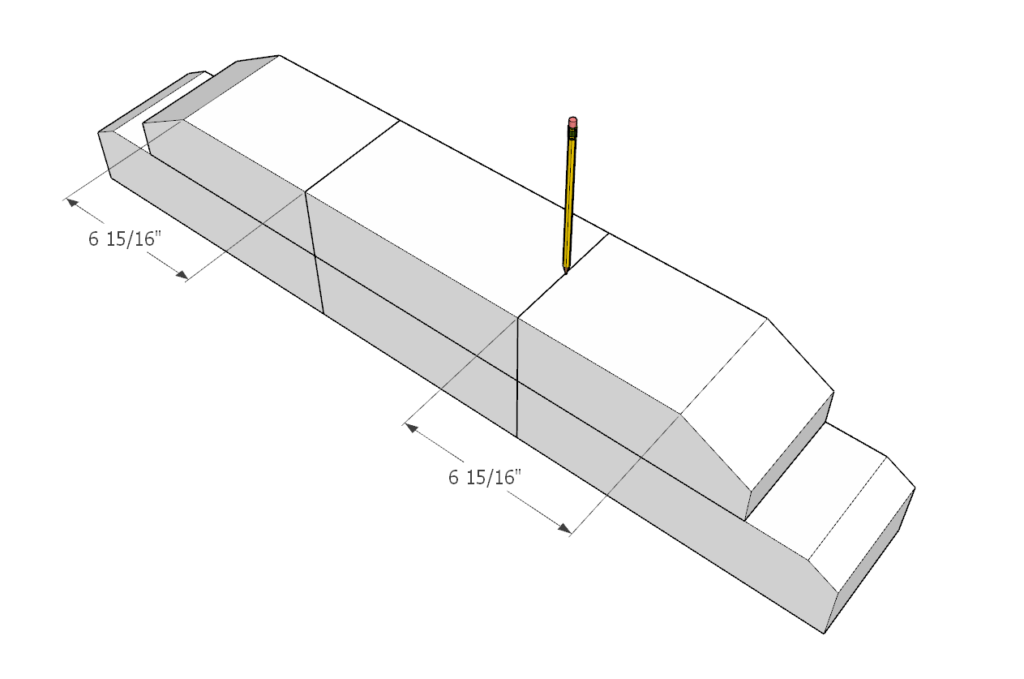
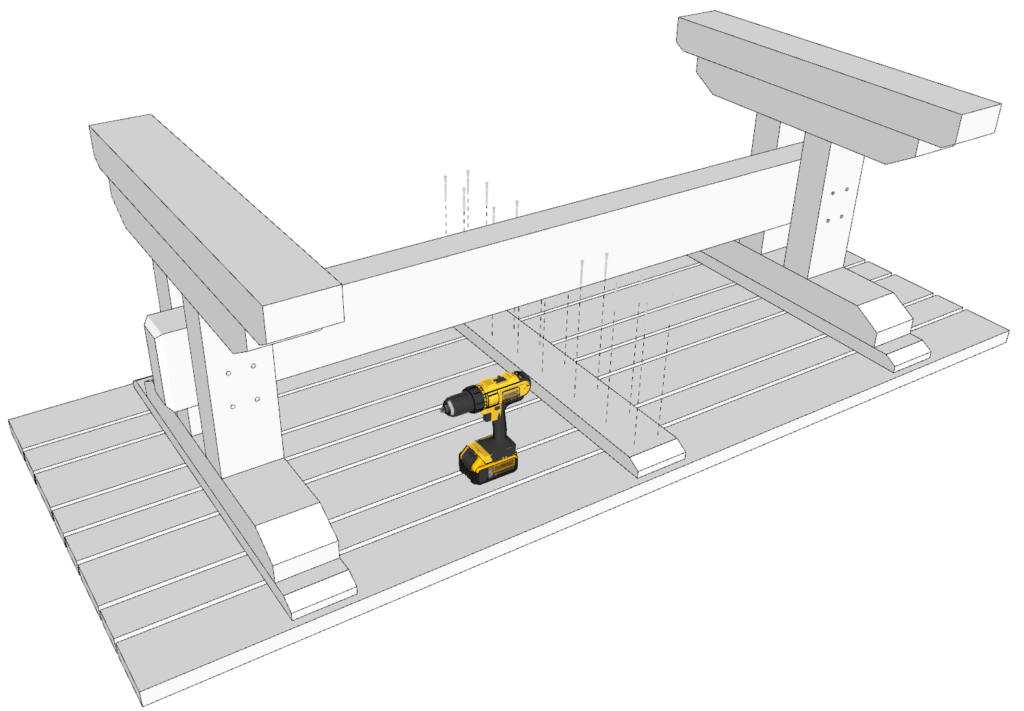
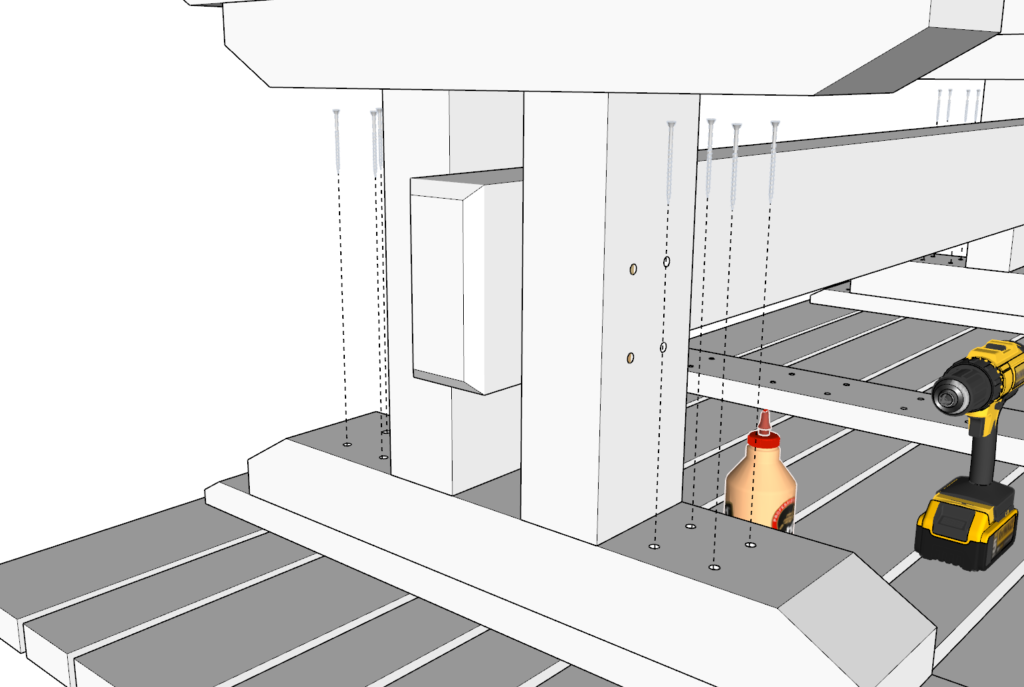
Step 9
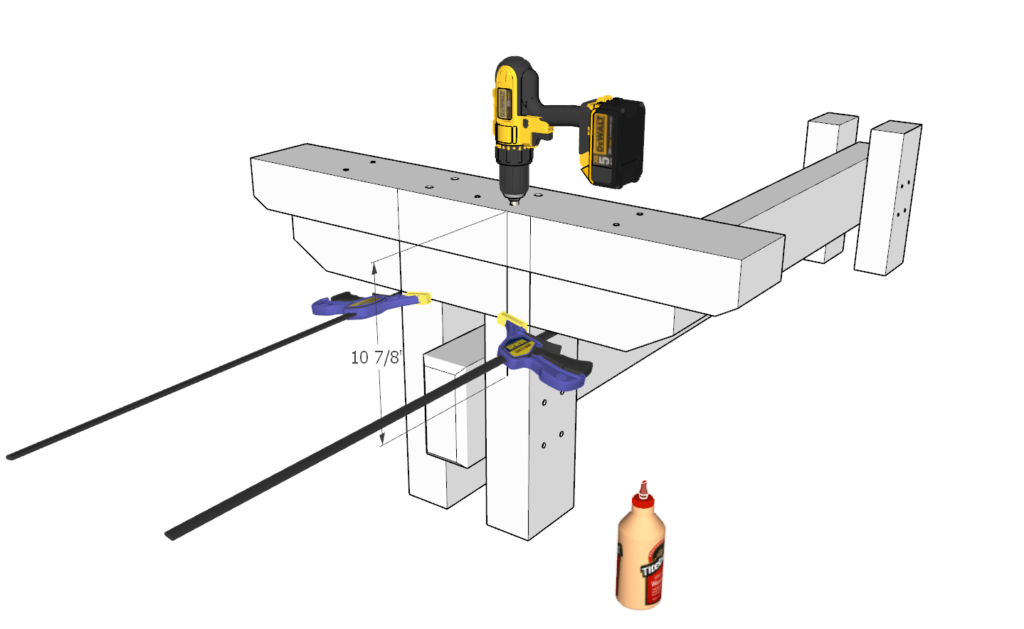
Next, using a pencil, draw two lines at 6 15/16-in as shown in the diagram on the assembled base pieces from step 5.
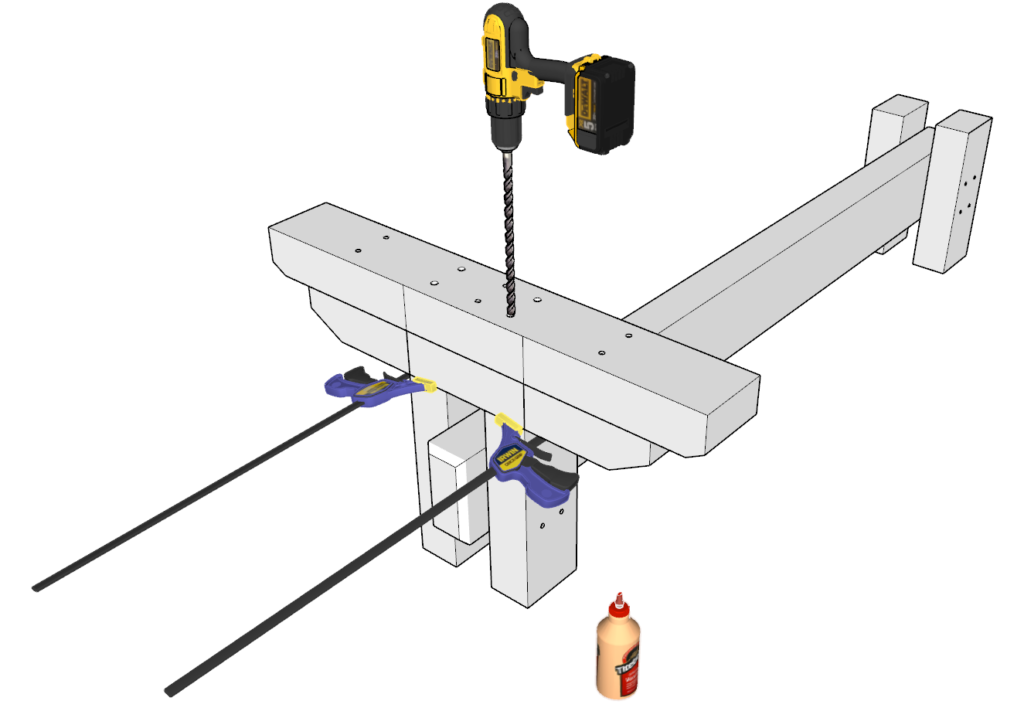
Step 10
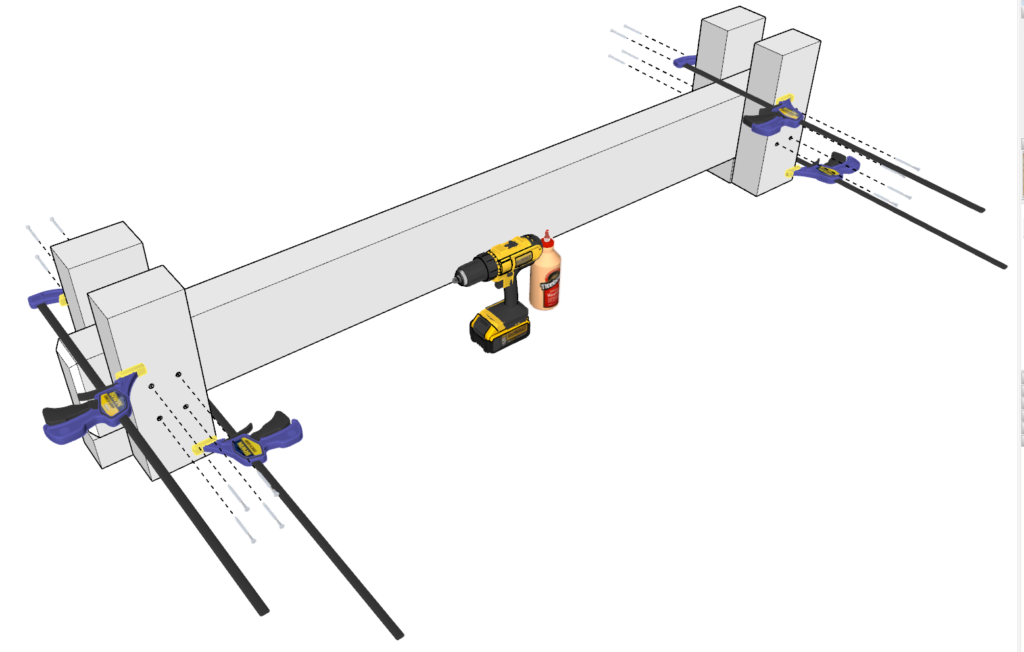
Next, take the assembled base pieces from step 9 and place them on top of the pieces from step 8 as shown in the diagram.
Add glue to all areas that will be making contact.
I use wood clamps to hold the two structures in place while I attach them together.
Next, using a 1/4-in or 1/2-in, long (at least 12-in) drill bit, drill four holes directly through the 38-in and 30 3/8-in pieces and deep into the 15.5 in pieces as shown in the diagram.
The size of the drill bit needs to be the same size as the dowels you will use in the next step.
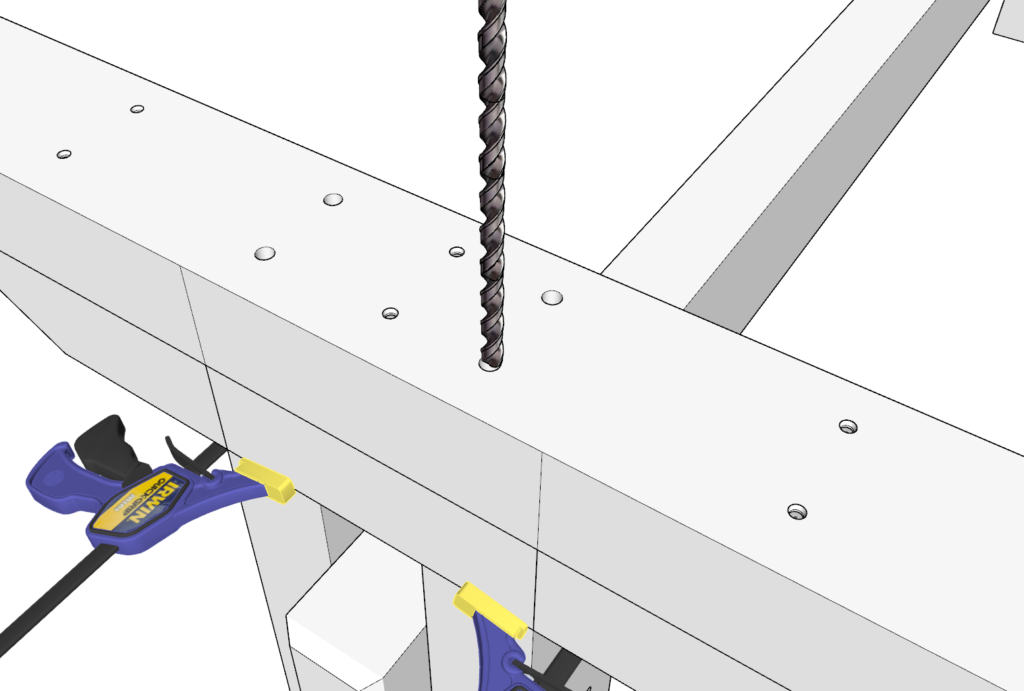
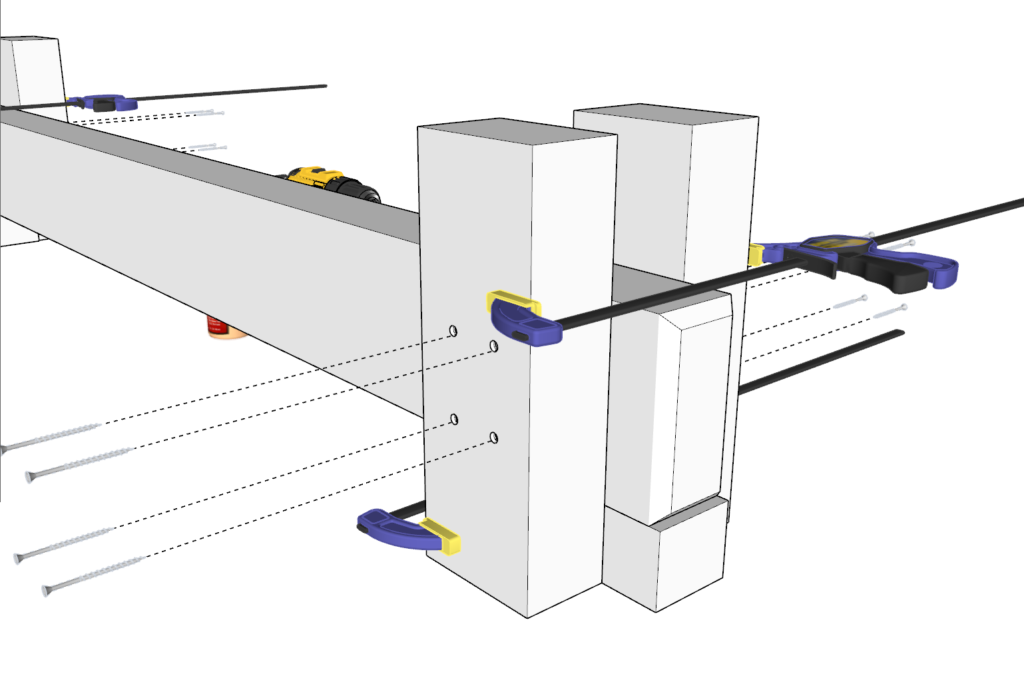
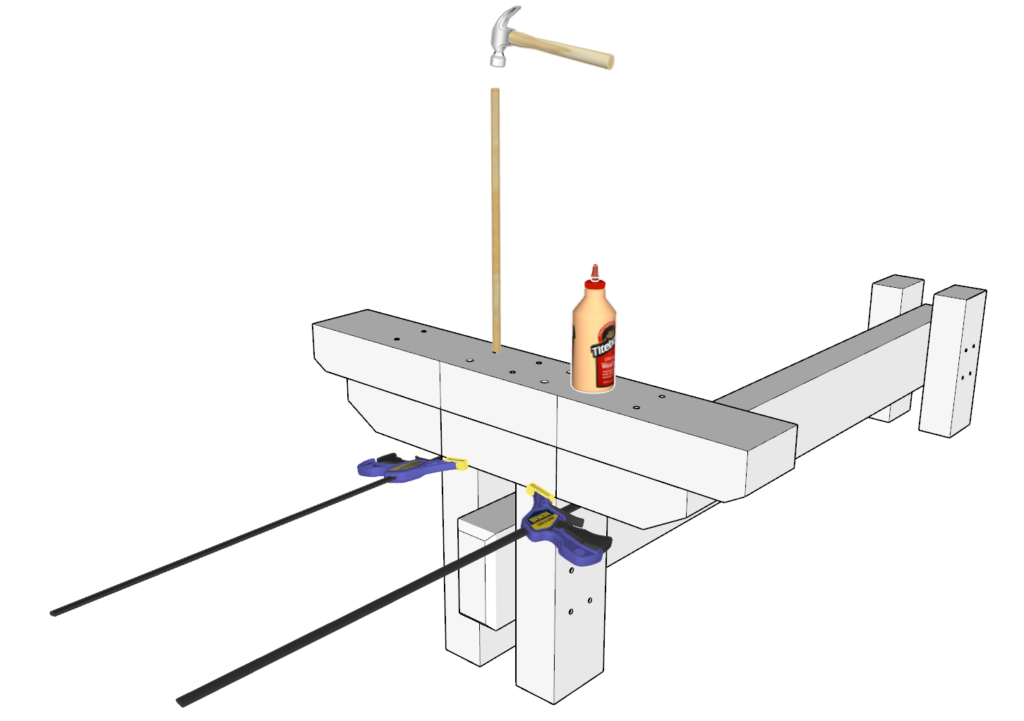
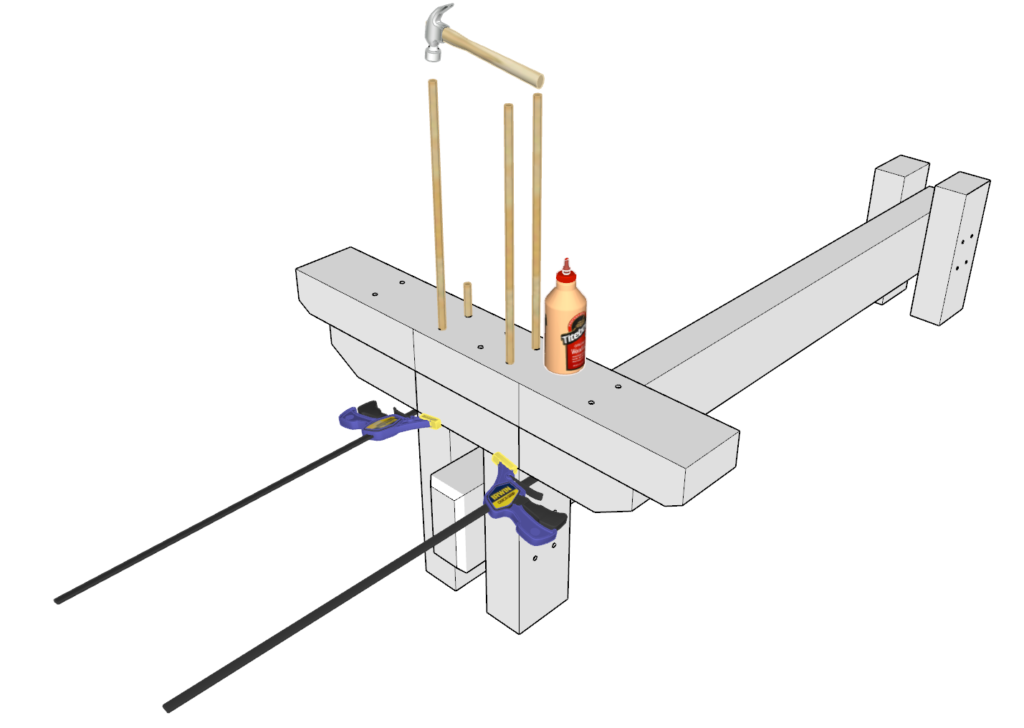
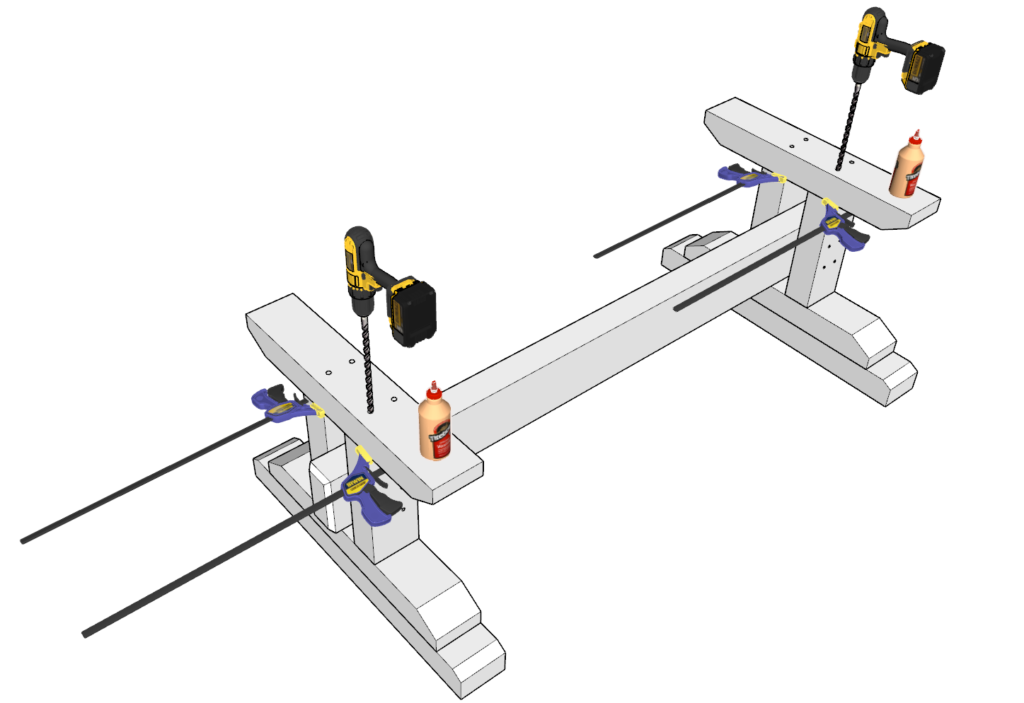
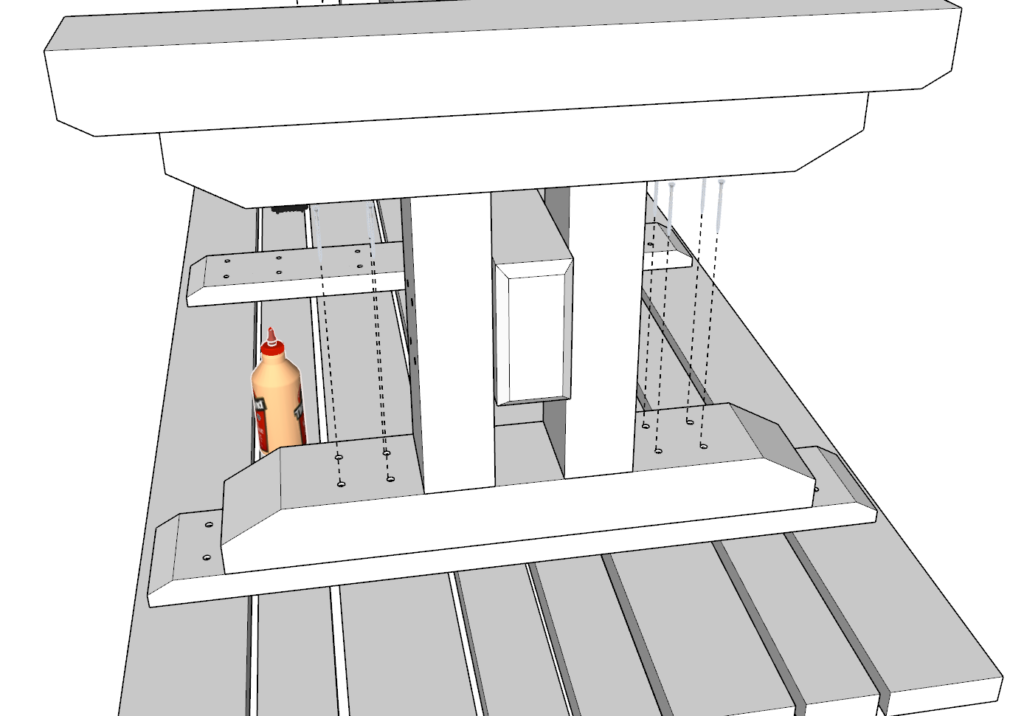
Step 11
Next, you will be adding dowels to the holes you drilled in the previous step.
I like to pour glue directly into the hole and I apply glue to the dowel sides as well. I make sure that there is a lot of glue to ensure a strong table for this step.
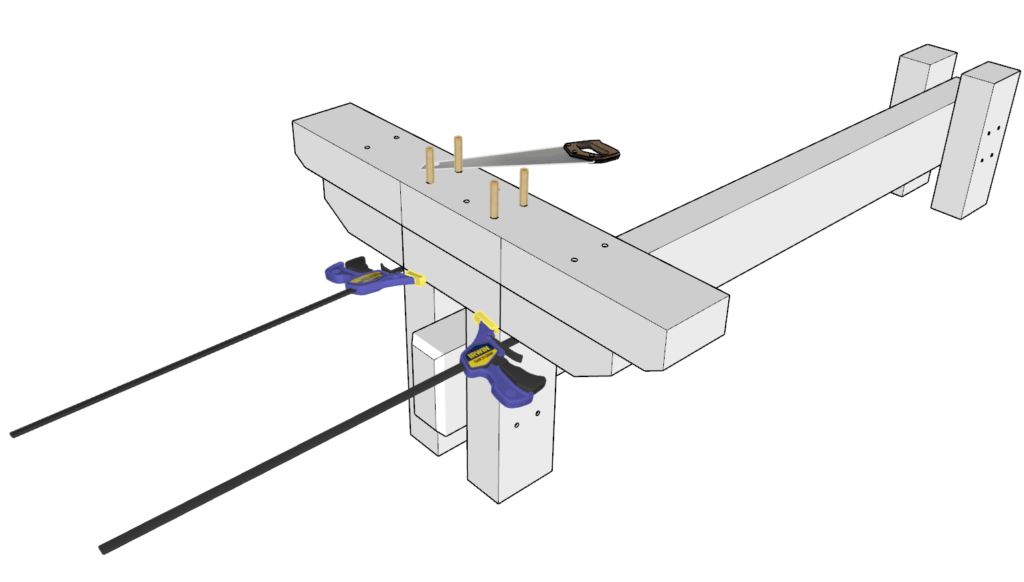
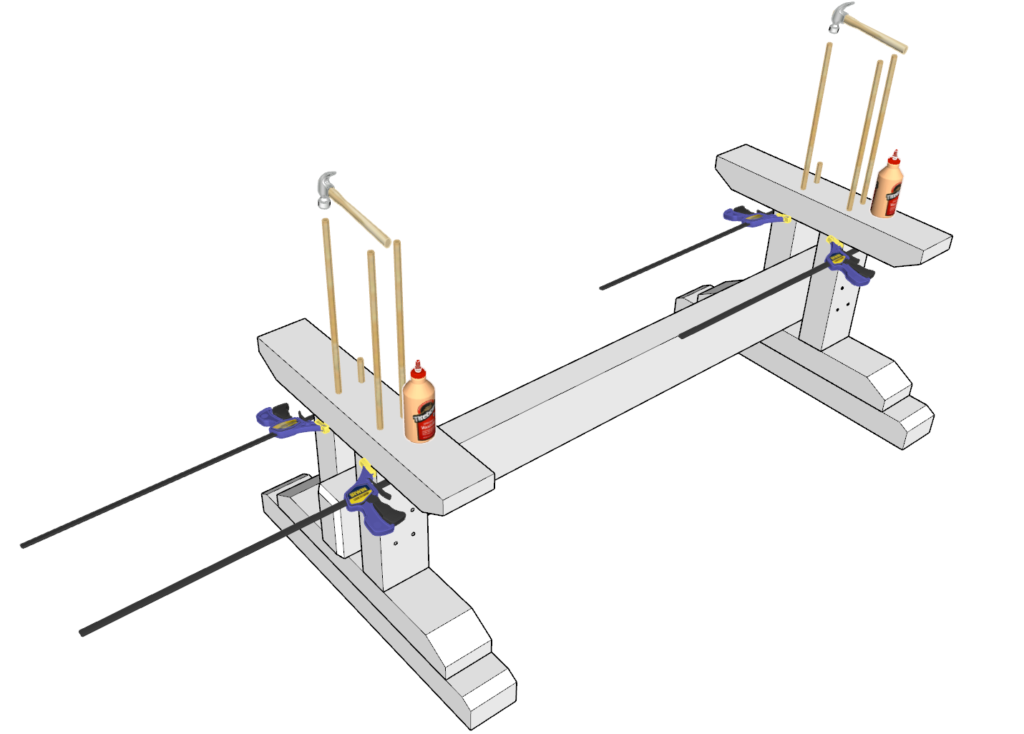
Cut dowels that are at least 12-in and hammer them into the holes.
Cut the parts of the dowels that are sticking out with a saw.
Next, predrill several deep holes to add 3.5-in screws to secure the structure together.
The depth of these screws needs to be at least 5.5 inches. You can use a the long screw driver bit to achieve this depth.
Repeat this step for the other side as well.

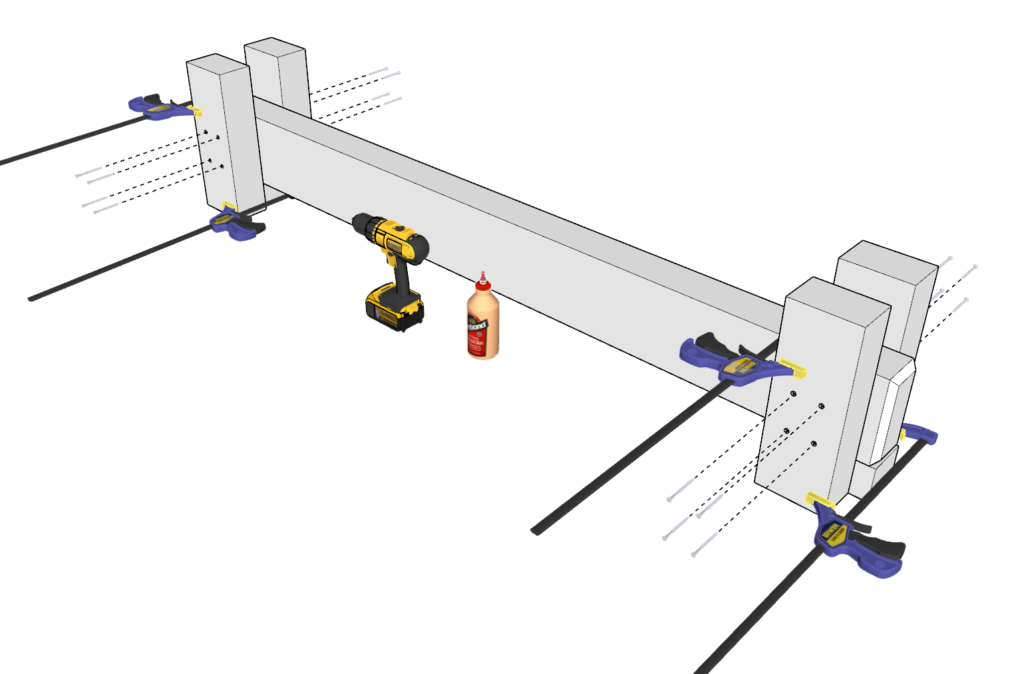
Step 12
Next, flip the table base to lay on the upright direction.
Next, you will need to attach the two remaining 30 3/8 pieces you cut in step 2 to the table base.
The steps to attaching these parts are similar to the previous step with the exception of depth. The depth of the holes does not need to be as deep, and the dowels can be shorter too.
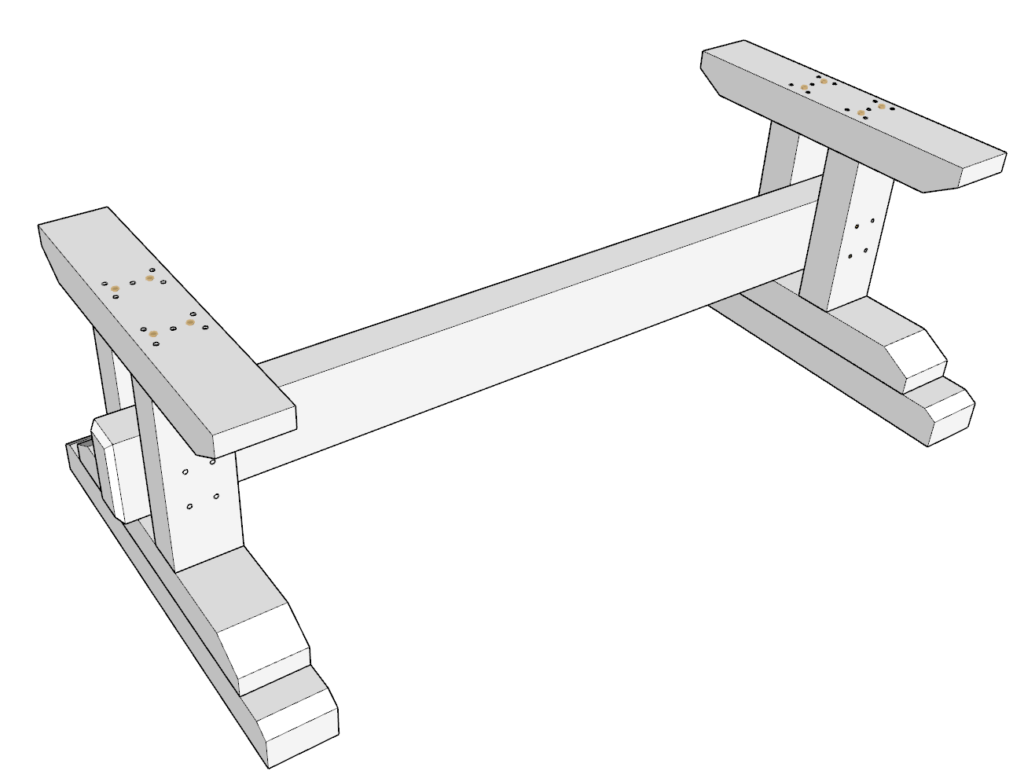
Step 13
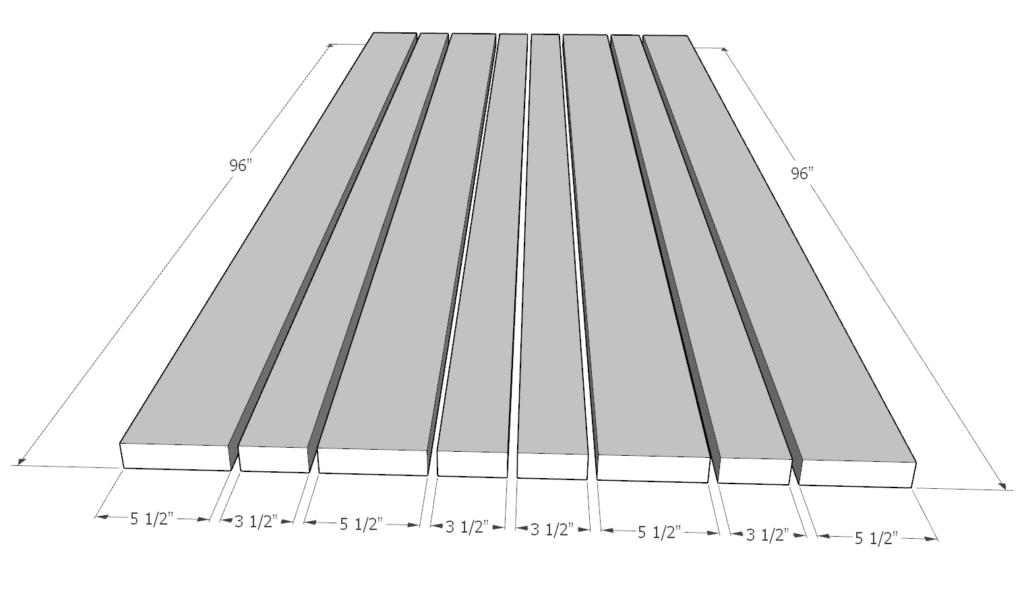
In this step you will be assembling the tabletop.
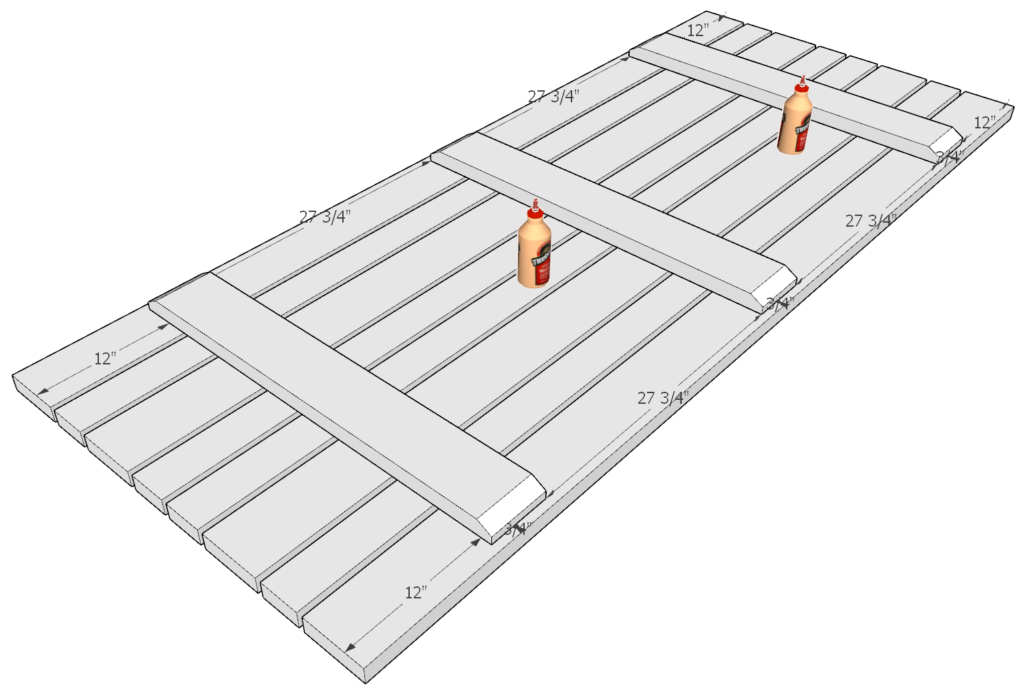
First, lay out four of the 1x6x8 lumber pieces and four of the 2x4x8 lumber pieces as shown in the diagram.
If they are slightly uneven in length, trim the edges to make them match.
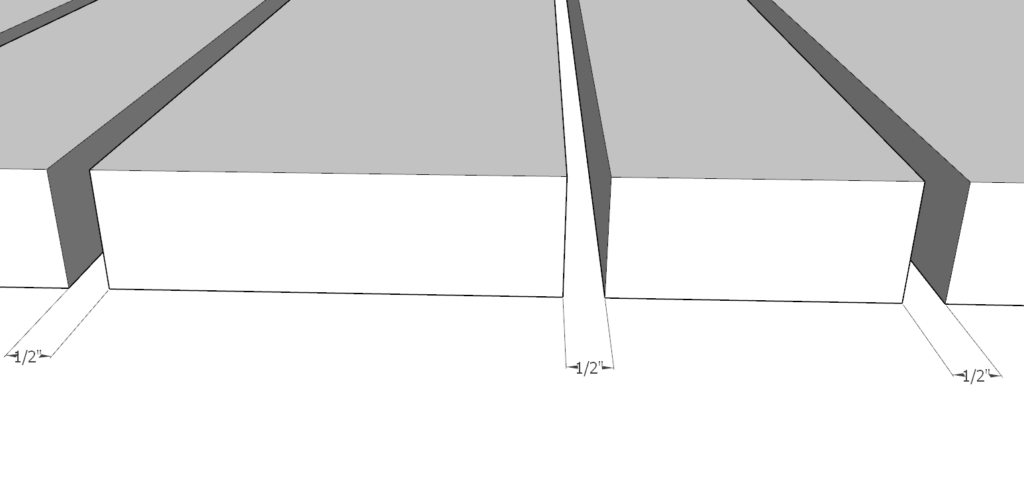
The spacing between them should be about 1/2-in
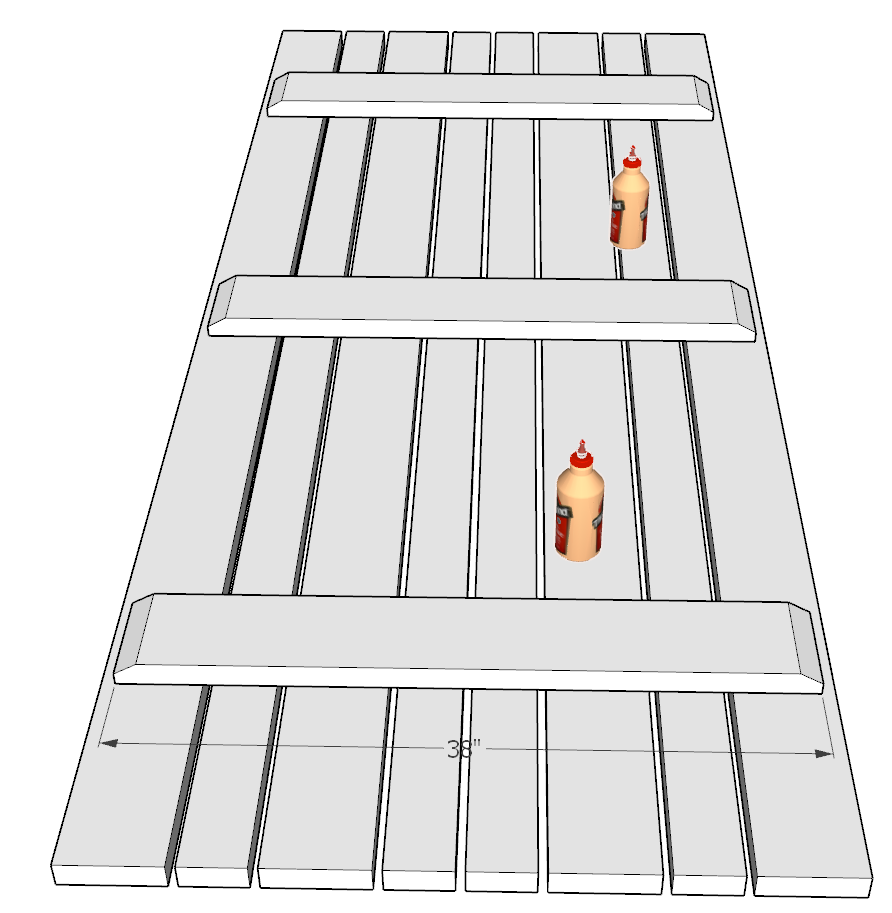
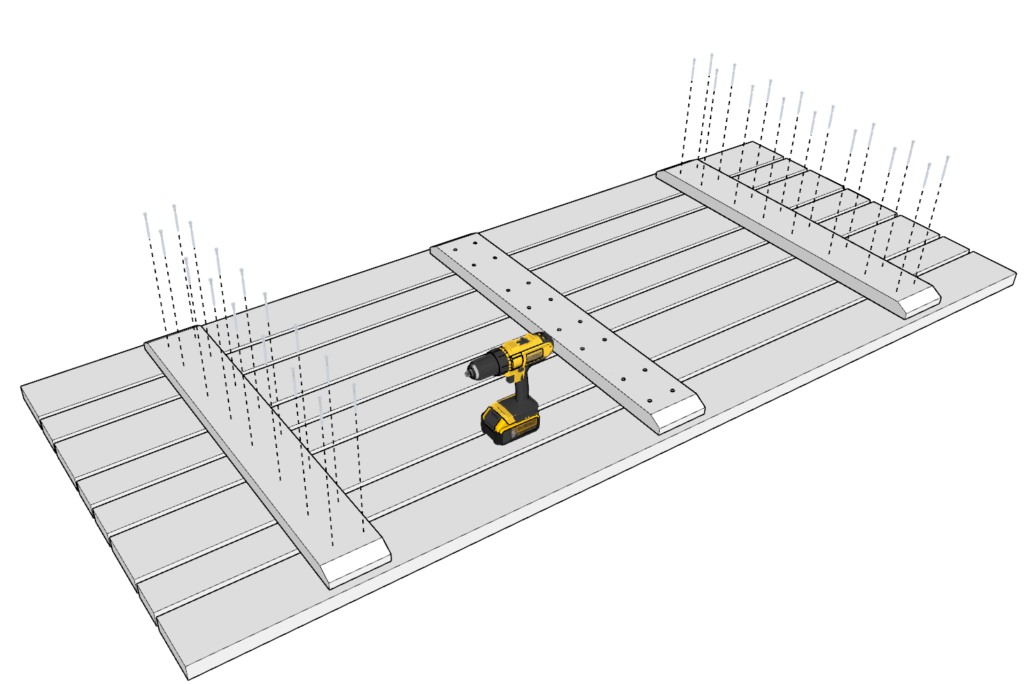
Next, lay the remaining 38-in pieces across the tabletop pieces as shown in the diagram.
The spacing on these 38-in prices is illustrated bellow.
Step 14
Next, I like to place the table base directly on top of the unassembled table top to ensure proper alignment.
The table top also serves as a weight to hold down all the table boards. You can also draw lines around the 38-in pieces to make sure the placement remains correct.
Next, add glue and 2.5-in screws to the central 38-in pieces.
Next, remove the table base and add glue and 2.5-in screws to the remaining two 38-in pieces.
It is VERY important to ensure that the screws do not stick out into the table top.
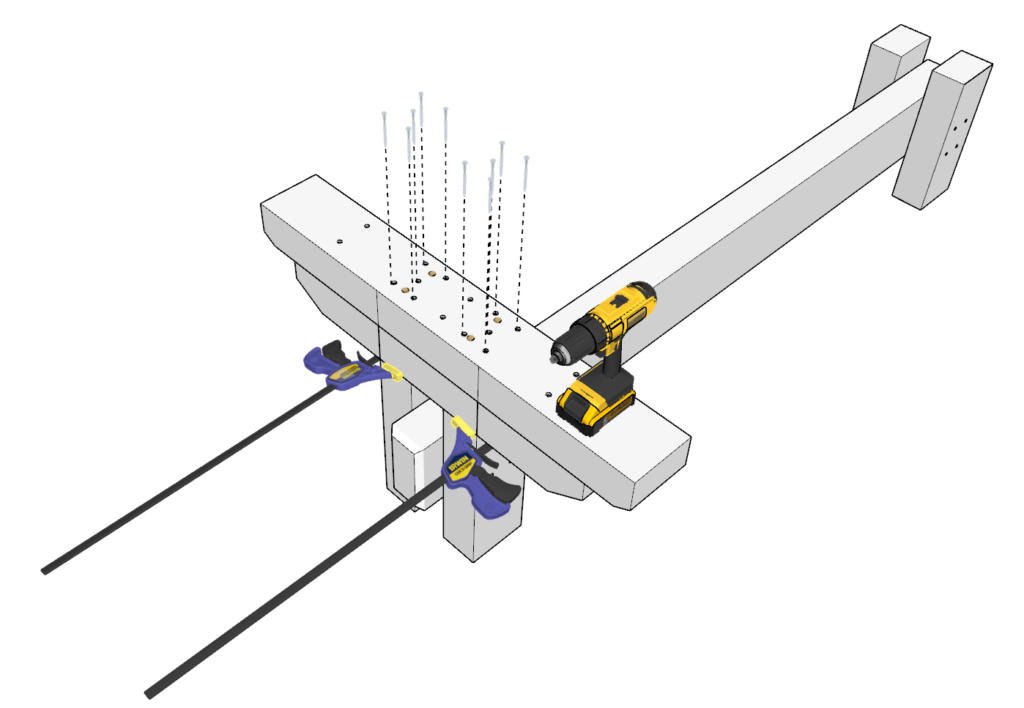
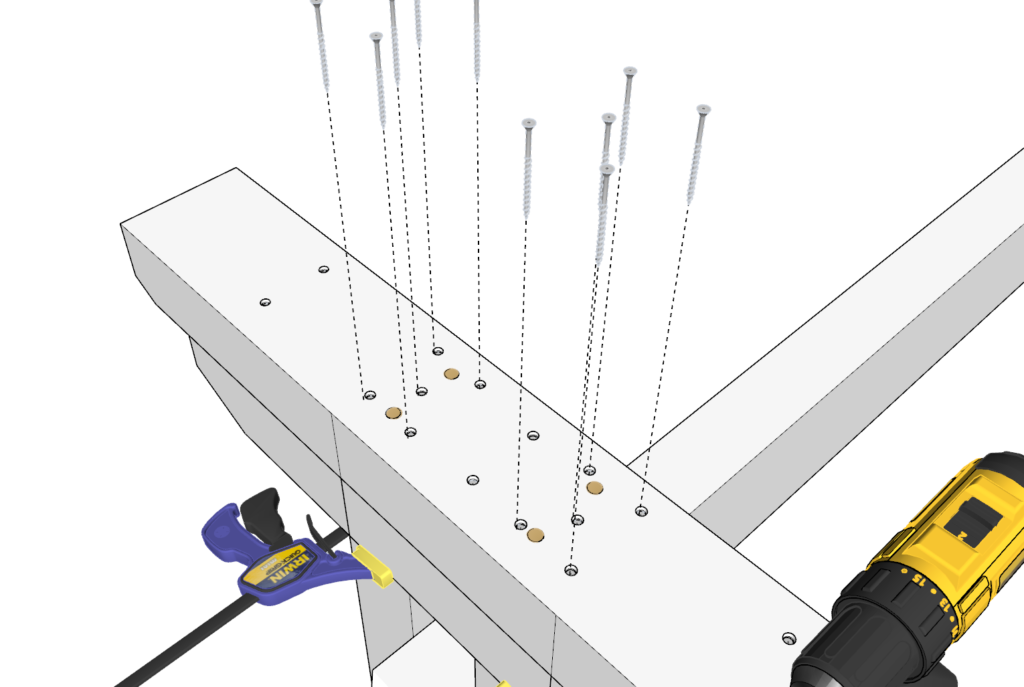
Step 15
Next, you will be attaching the tabletop to the table base.
First, apply glue to the 30 3/8 pieces of the table base.
Next, lay the table base on top of the table top as shown in the diagram.
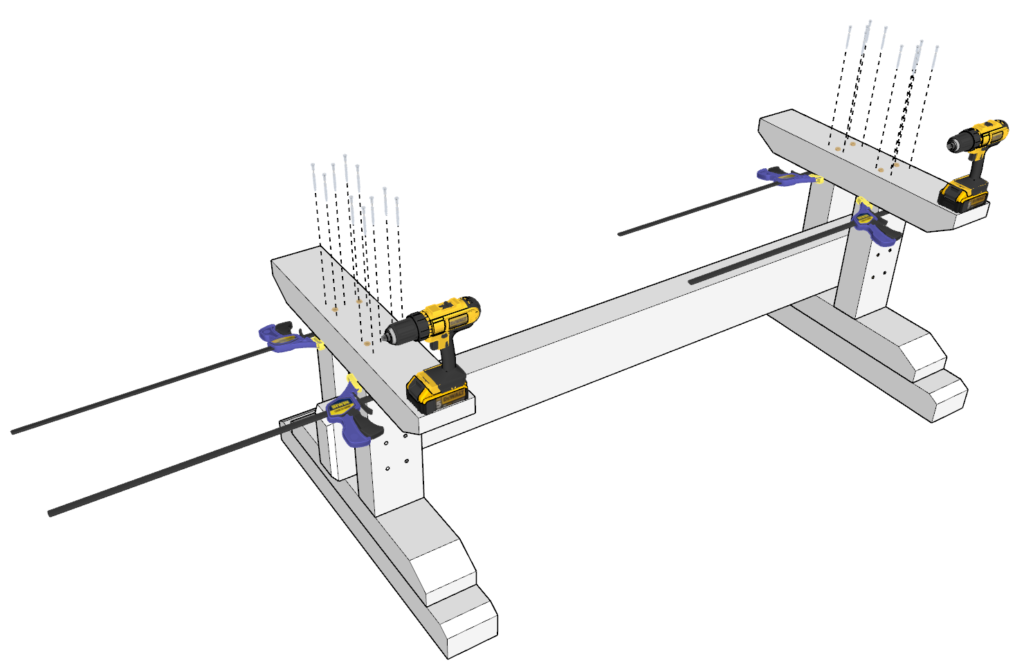
Next, predrill holes four holes on either side of the 30 3/8-in pieces as shown in the diagram and add screws.
The tabletop should now be secured to the table base.
Step 16
Lastly you need to sand down the whole table.
I use a 80-grit sand paper and an orbital sander to achieve this. After the 80-grit paper I use a 220-git sandpaper.
I also like to go over the perimeter edges of the tabletop with either a sander or a router to round off the edges. This is important so that when people are sitting at the table, they can comfortably rest their hands and arm on the table.
Once you sand down the table, its ready to be stained and sealed.