Introduction: Embrace a Clutter-Free Garage with Vertical Storage Solutions
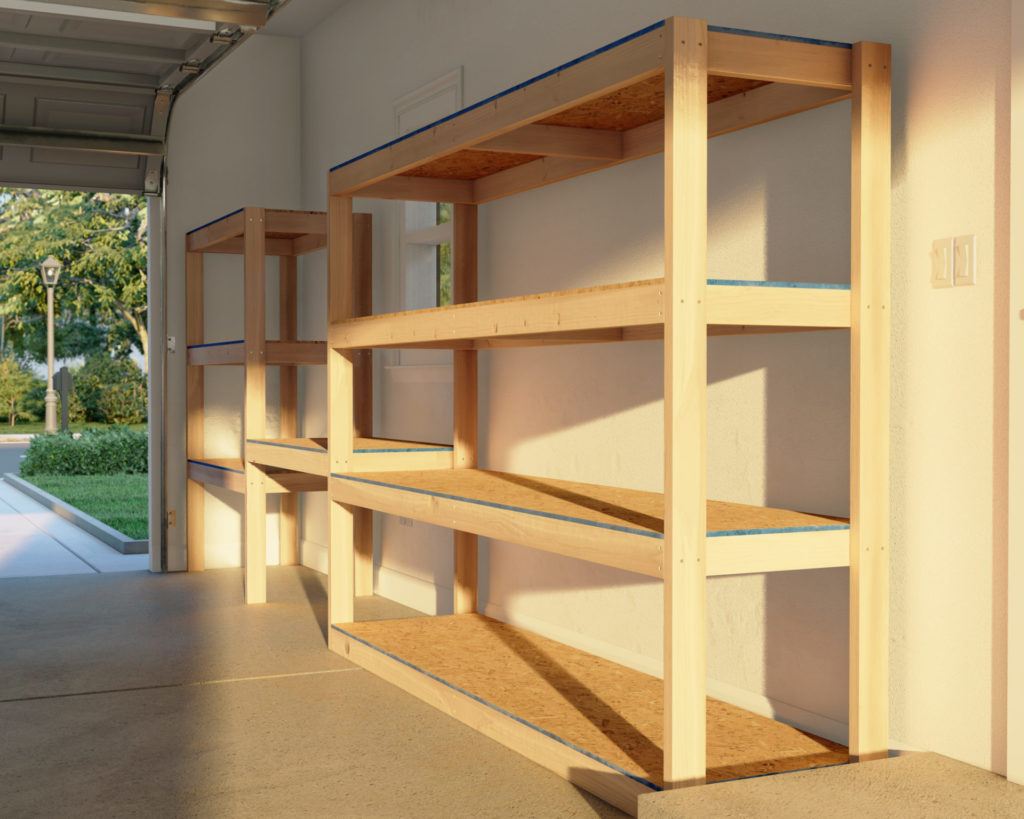
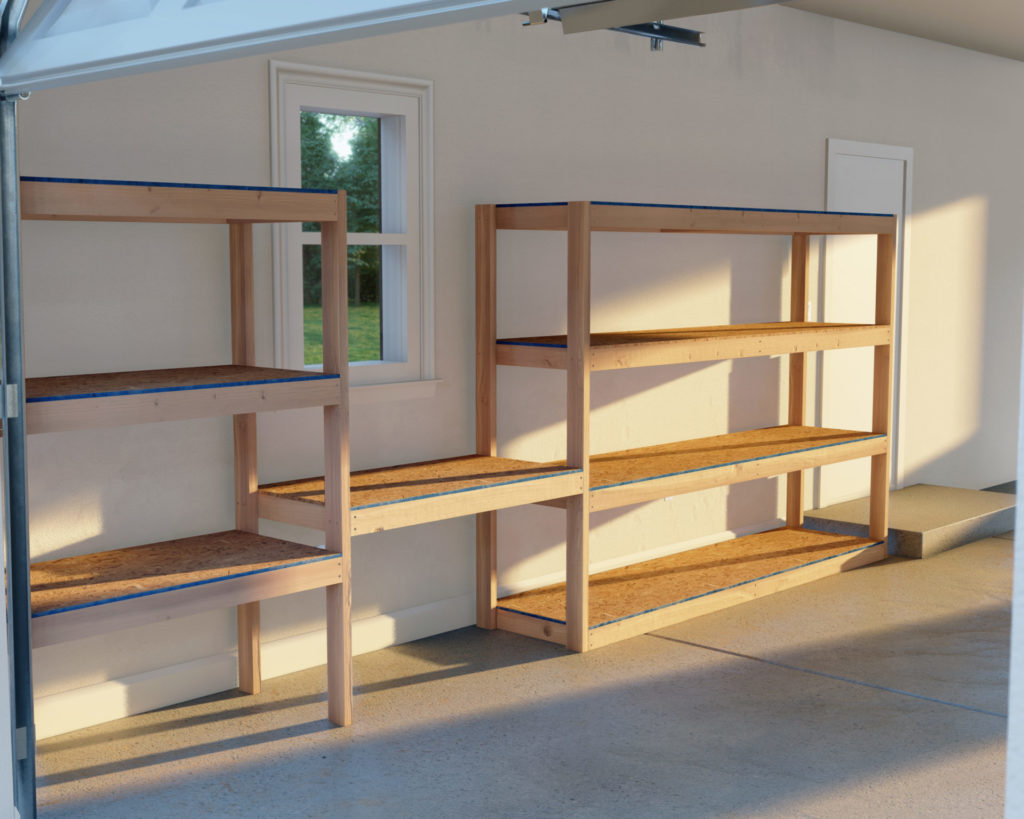
Imagine stepping into your garage and seeing everything in its place—tools neatly hung, work materials organized, and ample space to move around. Our DIY garage shelf plans offer just that, plus a bonus work desk to take advantage of vertical space. Say goodbye to clutter and hello to a streamlined garage where every item has its home.

Specifications
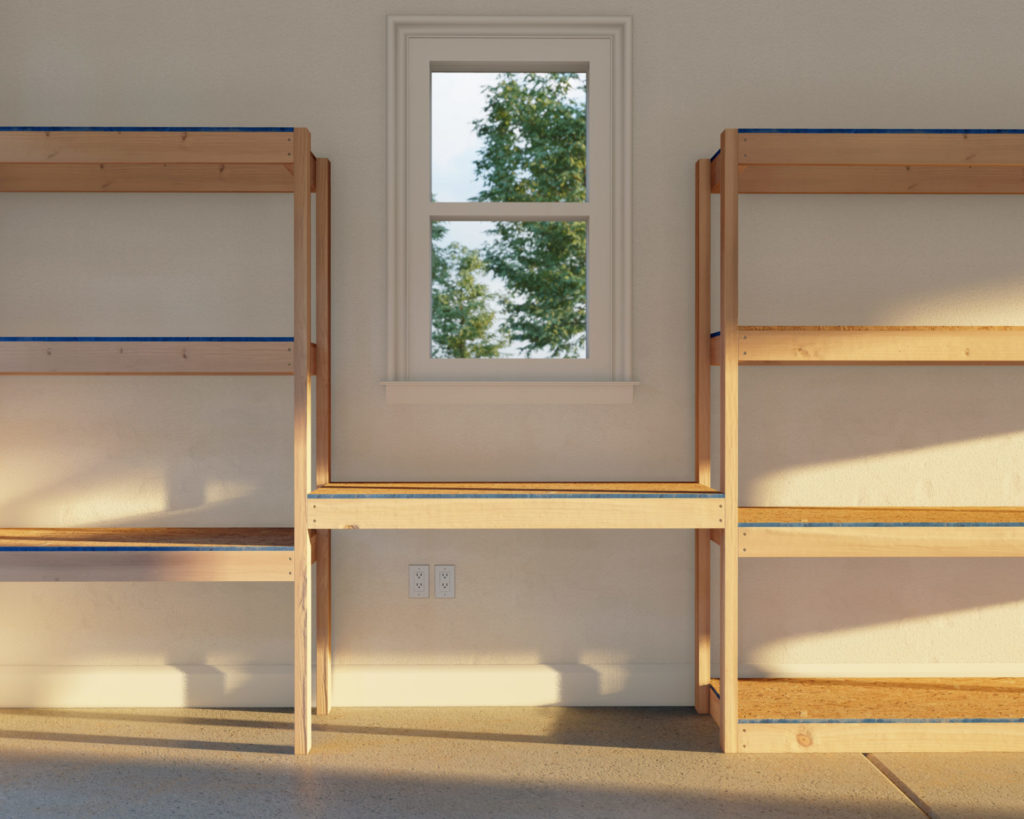
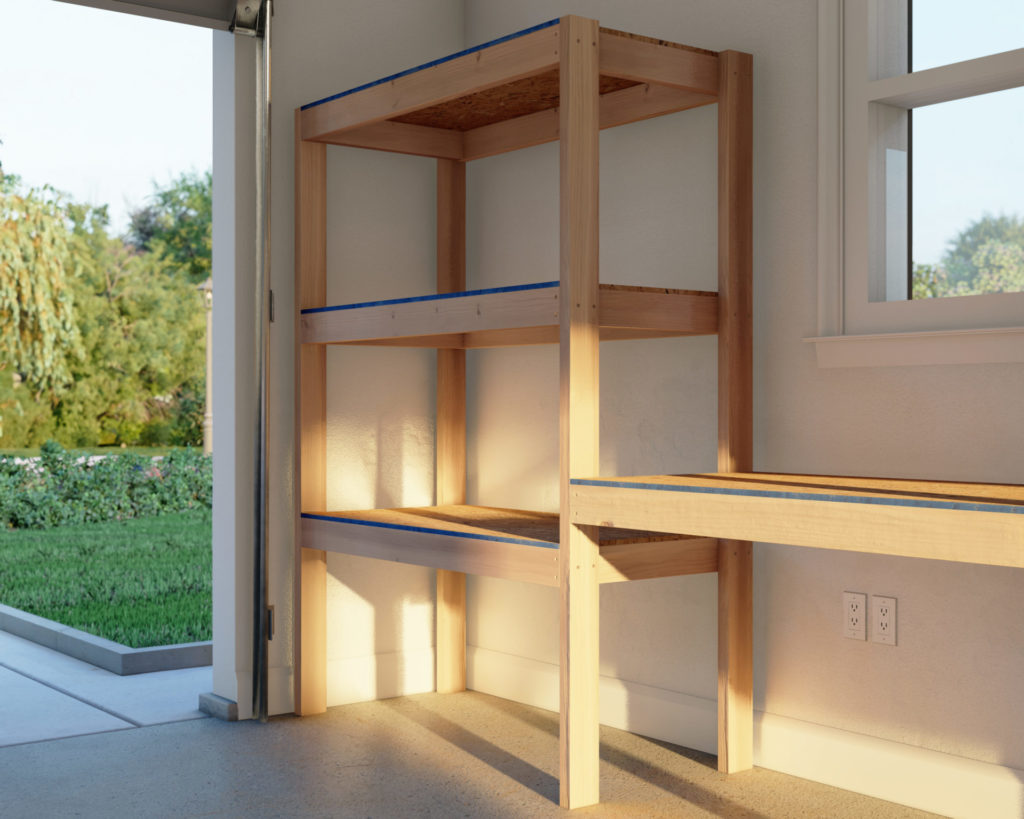
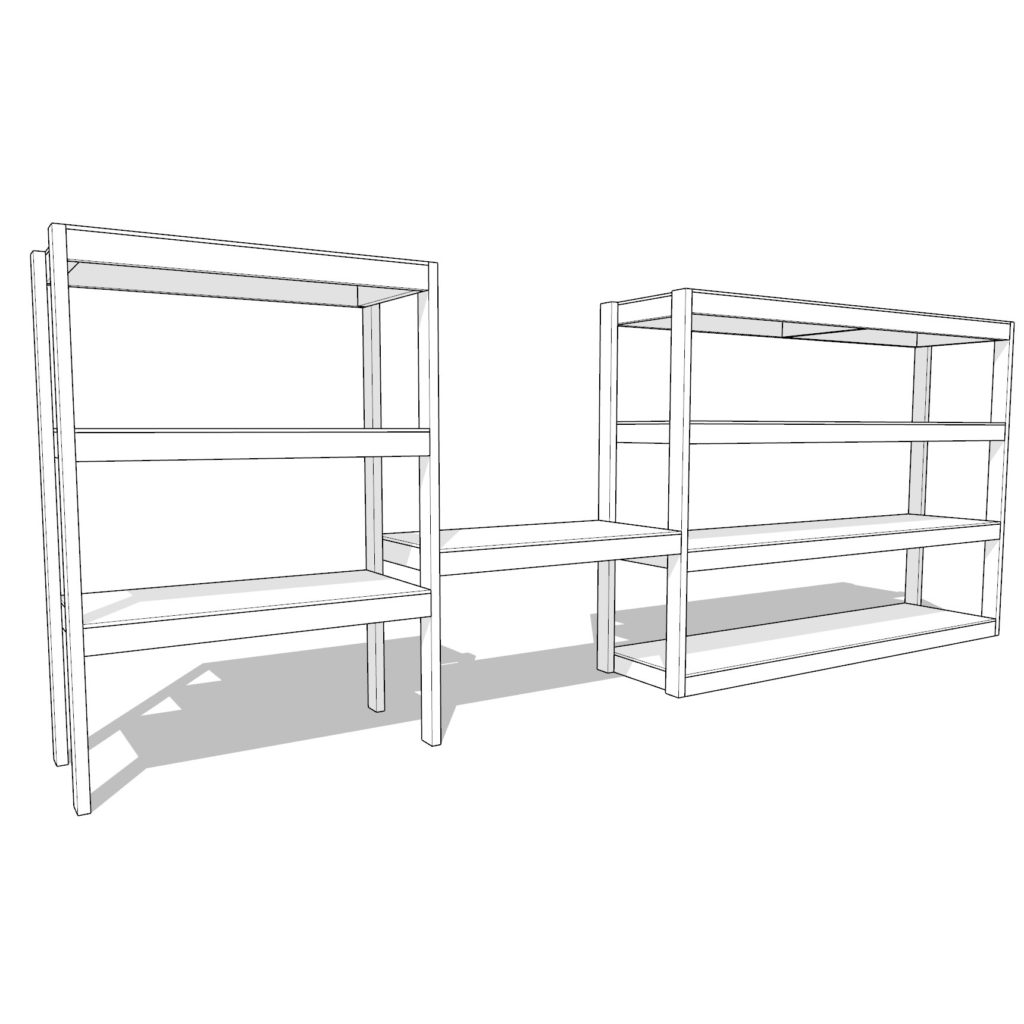
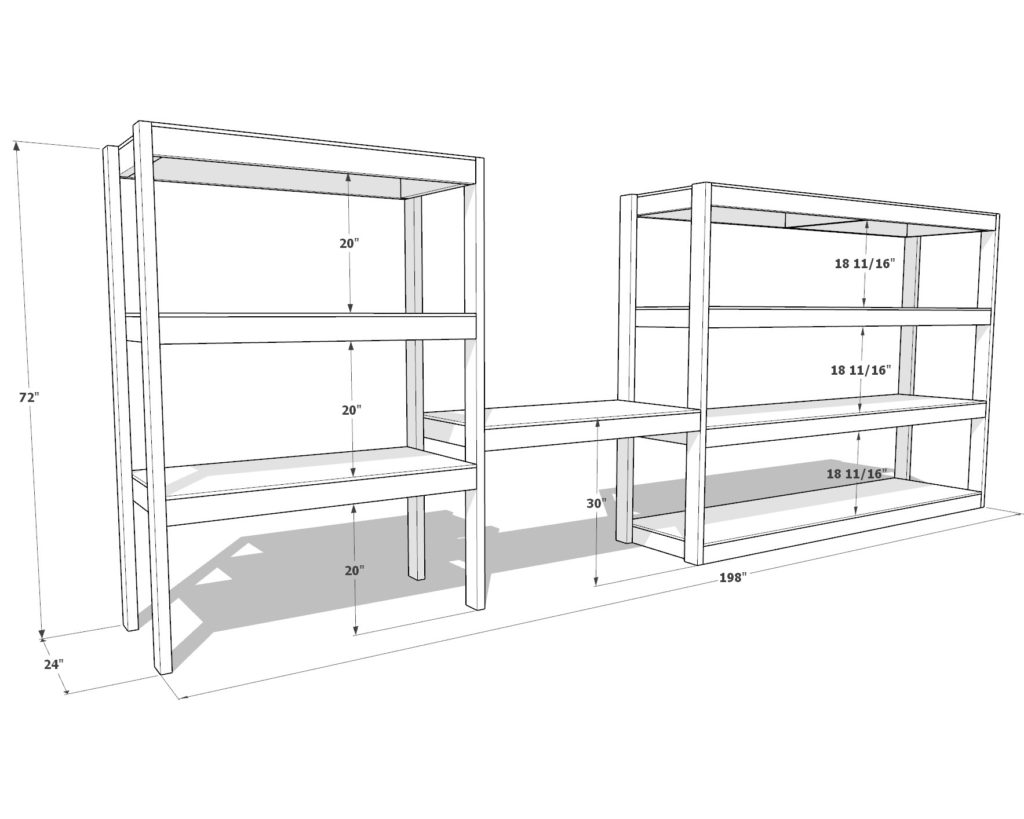
Our robust garage shelves span 198 inches in length and 24 inches in width, crafted to utilize your space efficiently. Built from three independently constructed sections that seamlessly screw together, this design includes 96-inch main storage shelves, a versatile work desk, and extra storage options. The shelving unit stands at an impressive 72 inches, with additional top shelving for oversized items, ensuring that you can store irregular-sized objects with ease.
Beginner-Friendly Project: No Complex Skills Required
Dive into this project with confidence, even as a novice. Our plans avoid complicated joints and intricate cuts. With straightforward cuts—many of which can be done for you at stores like Home Depot—you’ll have pre-sized pieces ready to assemble. All you need is plywood, 2x4s, and the will to transform your space. We guide you through every 90-degree cut and nail, making it a breeze to create a professional-looking shelf.
Customization Options: Tailor It to Your Needs
Not only is this project easy for beginners, but it’s also fully customizable. Adjust the desk height for standing or seated work, modify shelf orientations, and space them according to your storage needs. Whether you’re a weekend warrior or a pro DIYer, our plans provide the flexibility to create a space that works just for you.
Your Project Awaits
Ready to transform your garage with a DIY shelf that promises both organization and efficiency? Our detailed PDF plans are just a click away. Get instant access to a cleaner garage and a more productive workspace today. Purchase your plans, pick up your materials, and enjoy the satisfaction of building something great with your own hands.
Time
2 hours (varies with experience)
Cost
$150 (Costs may vary based on location and supplier.)
Skill level required
Beginner
DIY Garage Shelf PDF Plan
What is included in the PDF download?
- Easy to read step by step instructions
- Material list
- Tools needed
- Helpful links to materials and tools needed
DIY Garage Shelf Dimensions
Tools Needed for This Project:
Available with the purchase of the DIY plan PDF.
Lumber Shopping & Cut List
Available with the purchase of the DIY plan PDF.
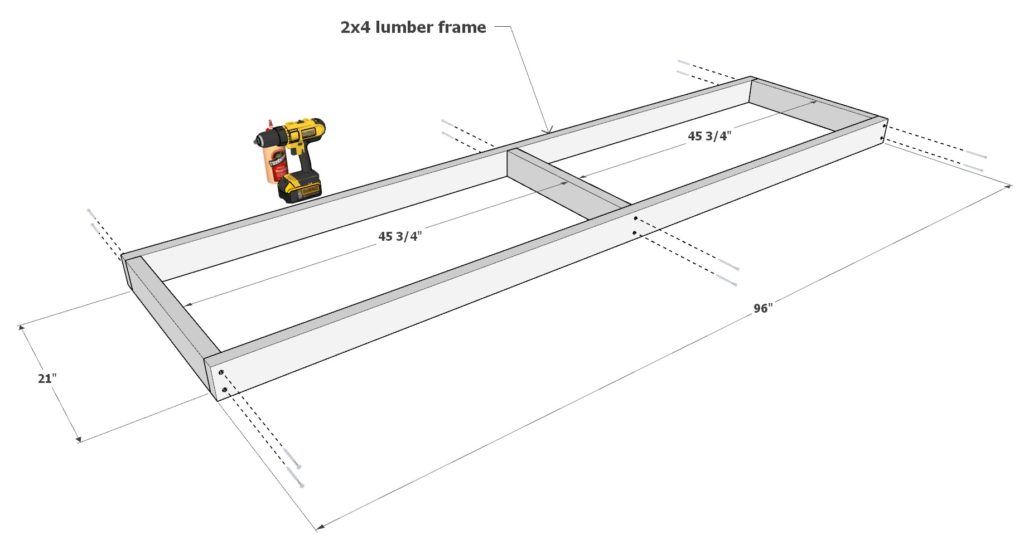
Step 1: Constructing the Main Shelving Unit
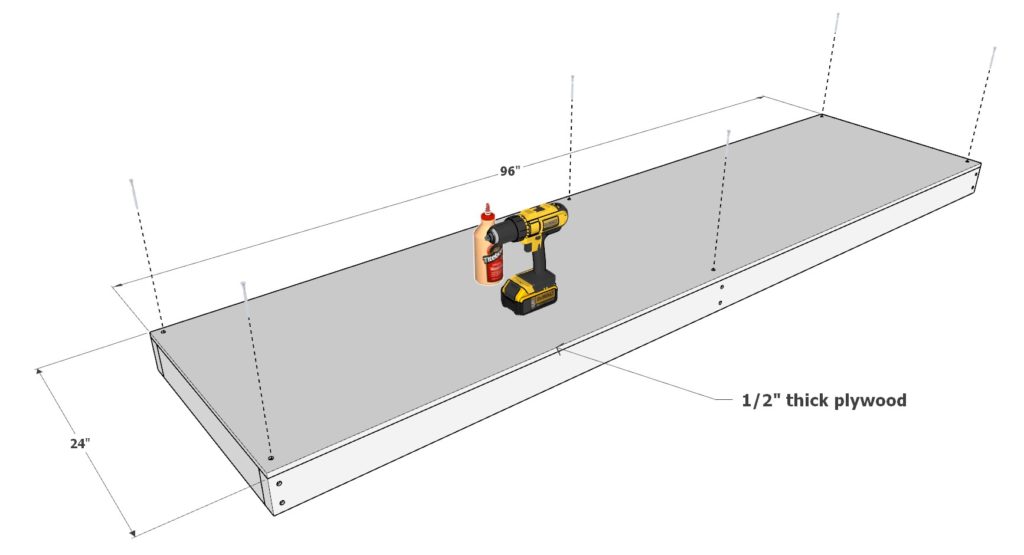
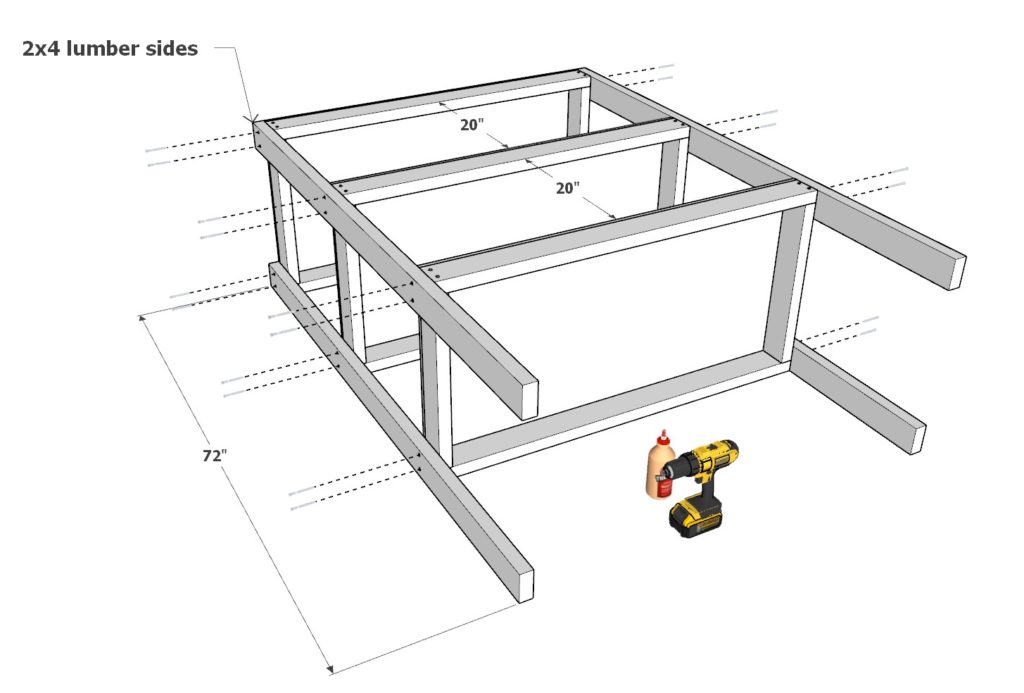
Layout for Base Structure: Begin by laying out two 96-inch 2x4s parallel to each other. Then, take three 21-inch 2x4s and place them perpendicularly between the longer 2x4s, spaced equally apart, as indicated in the first diagram.
Joining the Base: Affix the 21-inch 2x4s to the 96-inch 2x4s using 3.5-inch screws and wood glue for a secure bond.
Attaching the Shelf: Position a 96-inch x 24-inch plywood sheet on top of the base structure to serve as the shelf. Fix it in place with wood glue and 3.5-inch screws for a solid construction.
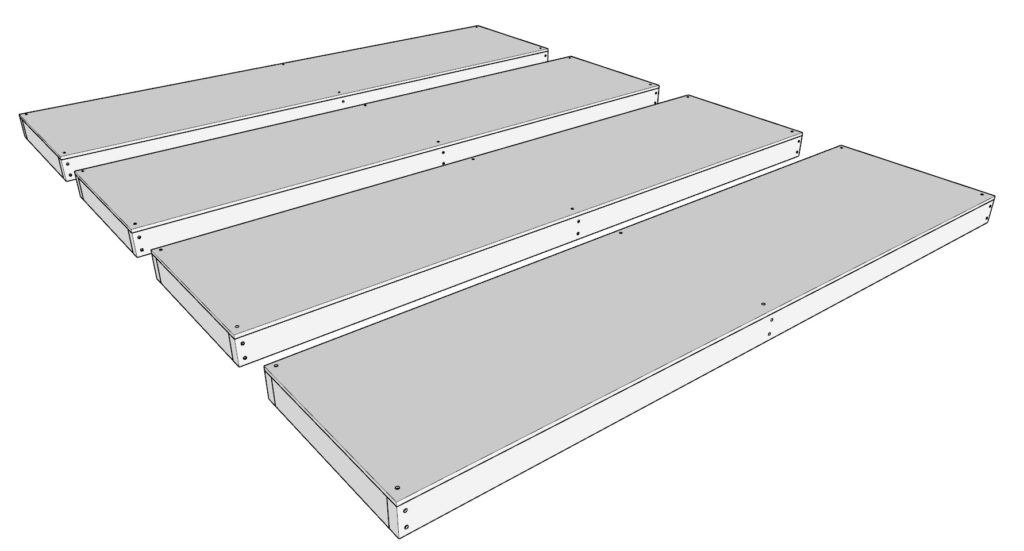
Assemble Additional Shelves: Repeat the above steps to make a total of four identical shelves.
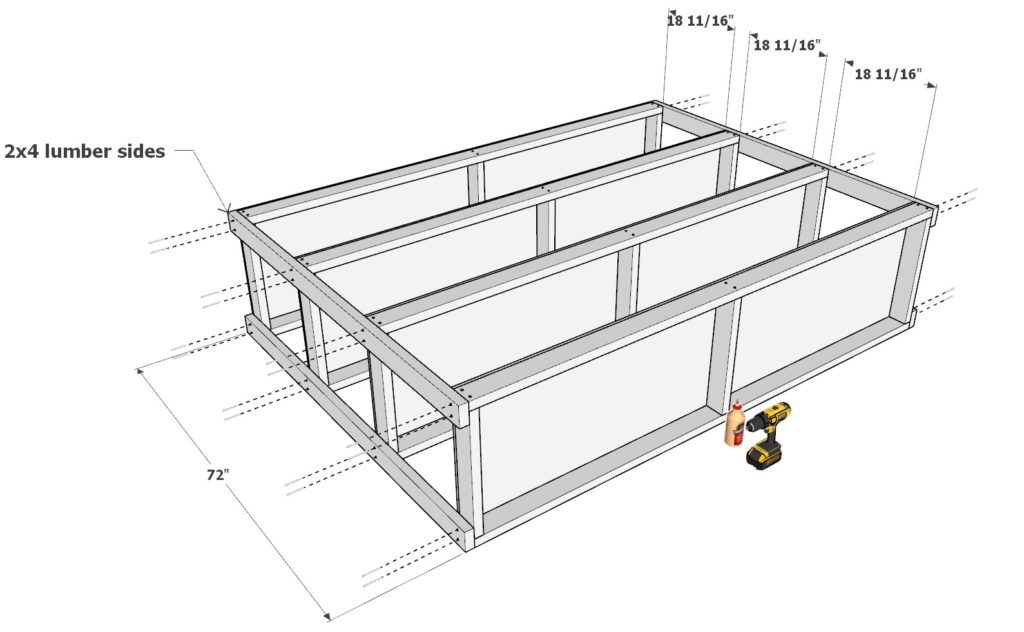
Setting up the Frame: Add four 72-inch 2x4s to stand as the legs and framework of the shelving unit. Connect these using 2.5-inch screws so the tips don’t protrude through the other side.
Tips for a Stronger, Professional Look:
- Prevent Splitting: Use a countersink drill bit when inserting screws to prevent the wood from splitting and to ensure a stronger hold.
- Aesthetic Finish: For a professional look, sanding, staining, or painting the wood before final assembly is recommended. This step will significantly improve the appearance of your shelves.
Step 2: Building the Secondary Shelving Unit
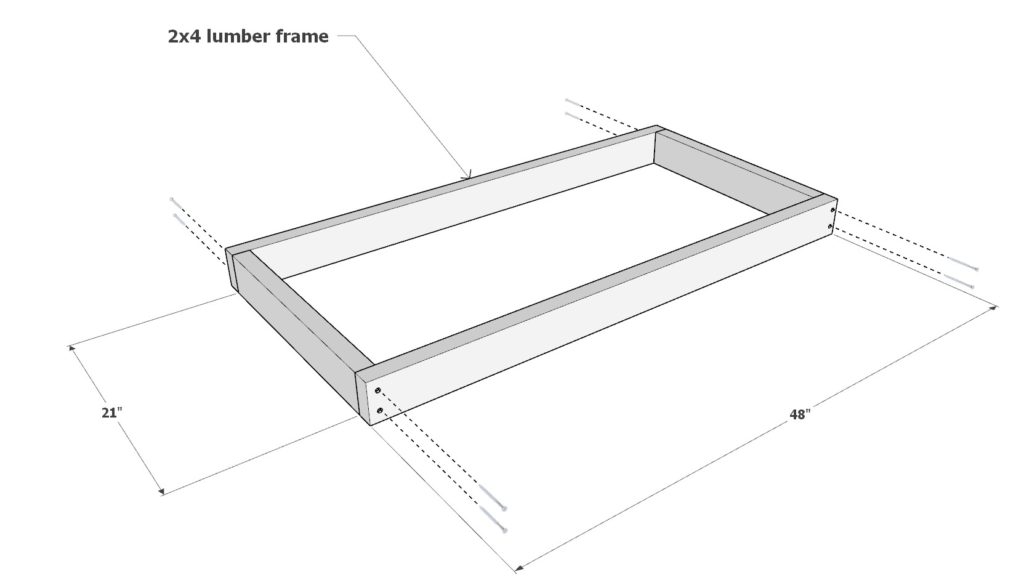
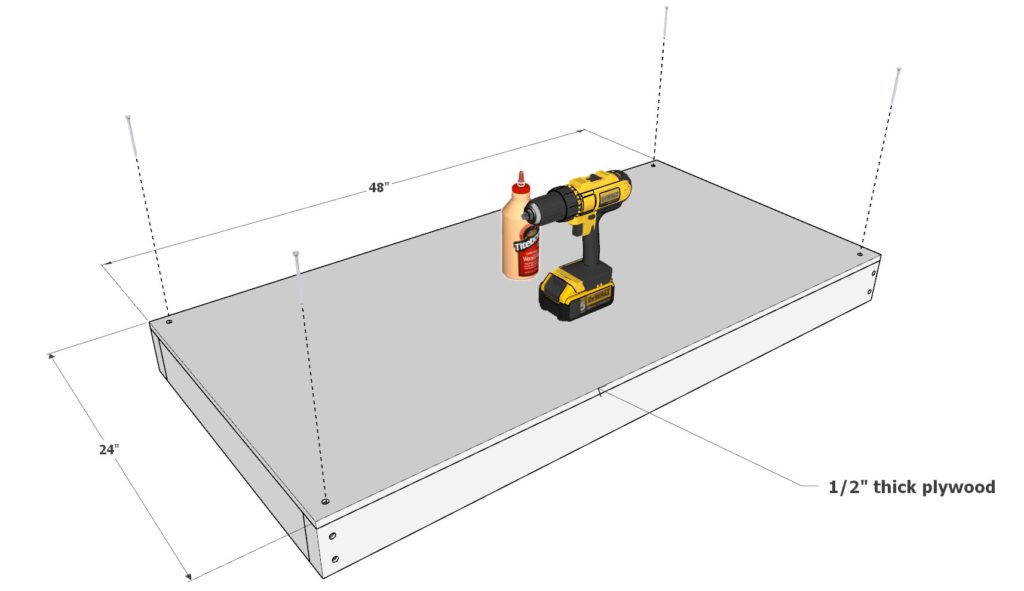
Arrange the Frame: Take two 48-inch 2×4 lumber pieces for the length and two 21-inch 2x4s for the depth. Lay them out to form a rectangle as depicted in the first diagram of this step.
Secure the Frame: Fasten the 2x4s together at each corner with 3.5-inch screws and reinforce with wood glue for stability.
Attach the Shelf Top: Place a 48-inch x 24-inch plywood sheet on the frame to create the top of the shelf. Ensure it is centered and flush with the edges of the frame, then secure with wood glue and 3.5-inch screws.
Replicate for More Shelves: Construct three more shelves following the same steps to total four identical units.
Install the Legs: Add the four 72-inch 2x4s as vertical supports at each corner of the shelves. Attach them with 2.5-inch screws, making sure the screws do not go completely through the wood.

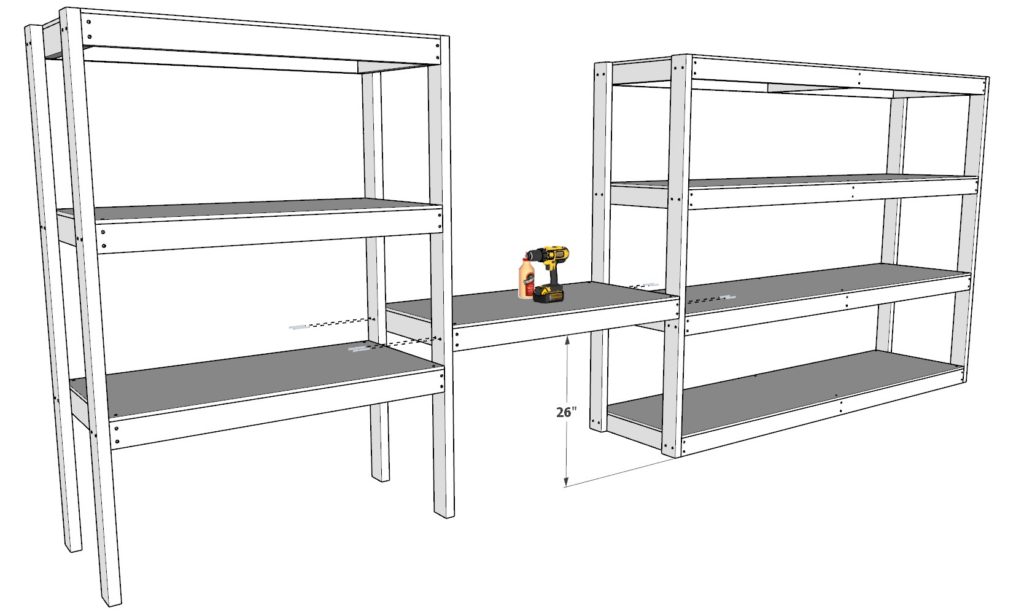
Step 3: Securing the Units and Finishing Touches
Combine the Units: Follow the diagram to correctly align and secure all components of the shelving unit together.
Adjust Work Desk Height: Before finalizing the position of the work desk, decide on the preferred height. To accommodate standing work, position the desk higher; for seated tasks, lower it to a comfortable level.
Wall Attachment: To ensure safety and stability, securely anchor the shelving unit to the wall studs of your garage. This can be done by driving a 3.5-inch screw directly through the frame of the shelves into the studs. Alternatively, use metal braces and brackets for additional support. This step is crucial as it ensures the shelves can safely hold weight without risk of tipping.
Finishing: Once the shelving unit is secured, proceed with any final touches. This includes sanding any rough edges, applying paint or stain for a polished look, and allowing any finishes to dry completely before use.
Important Safety Note: Before loading the shelves with items, double-check all connections and the wall attachment to make sure everything is solid and secure. Proper installation is key to ensuring that the shelves can safely bear the intended weight.