Introduction
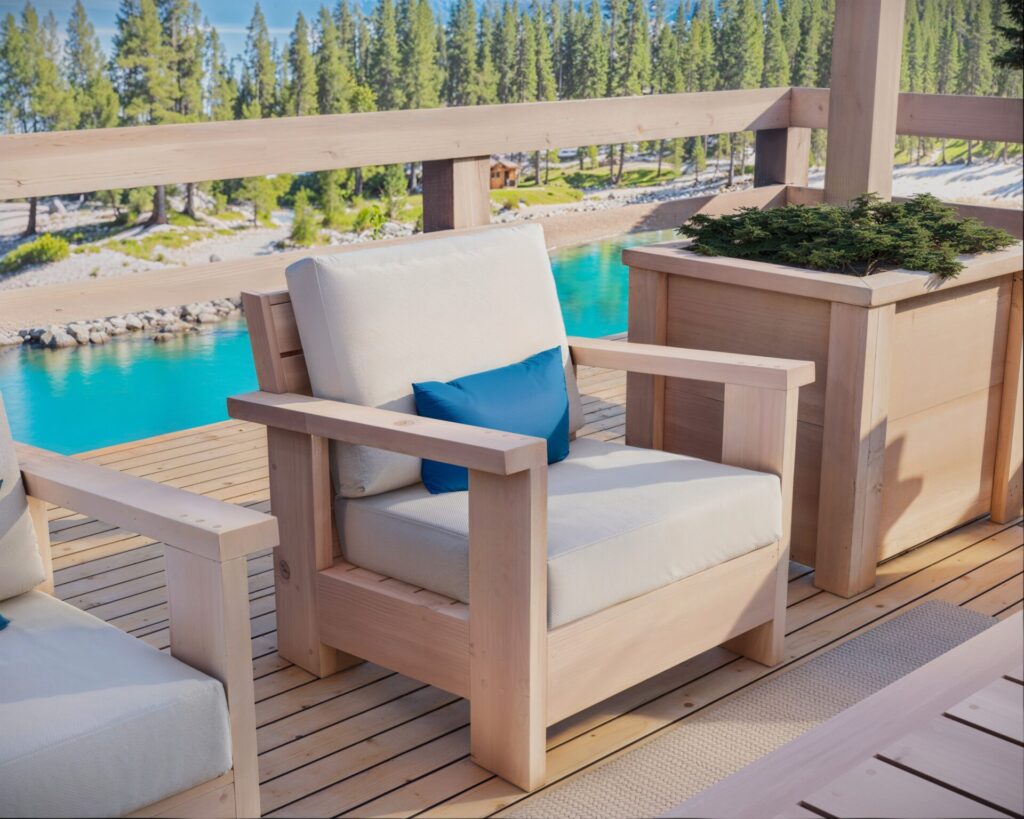
Enjoy the comfort of your backyard with a patio chair you’ve constructed yourself. It’s a rewarding project that not only adds to your outdoor decor but also provides the satisfaction of DIY achievement. This chair is designed to be both functional and a conversation piece, reflecting your handiwork.

Specifications
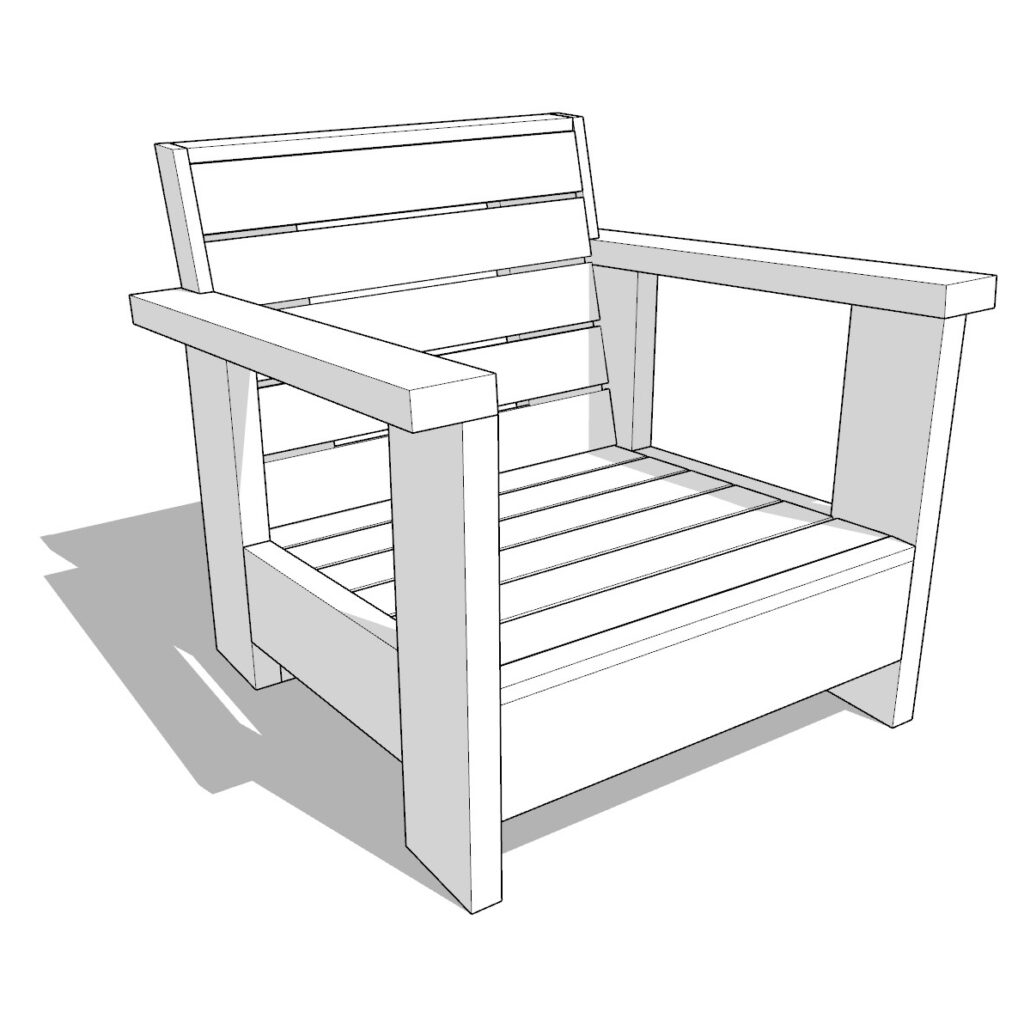
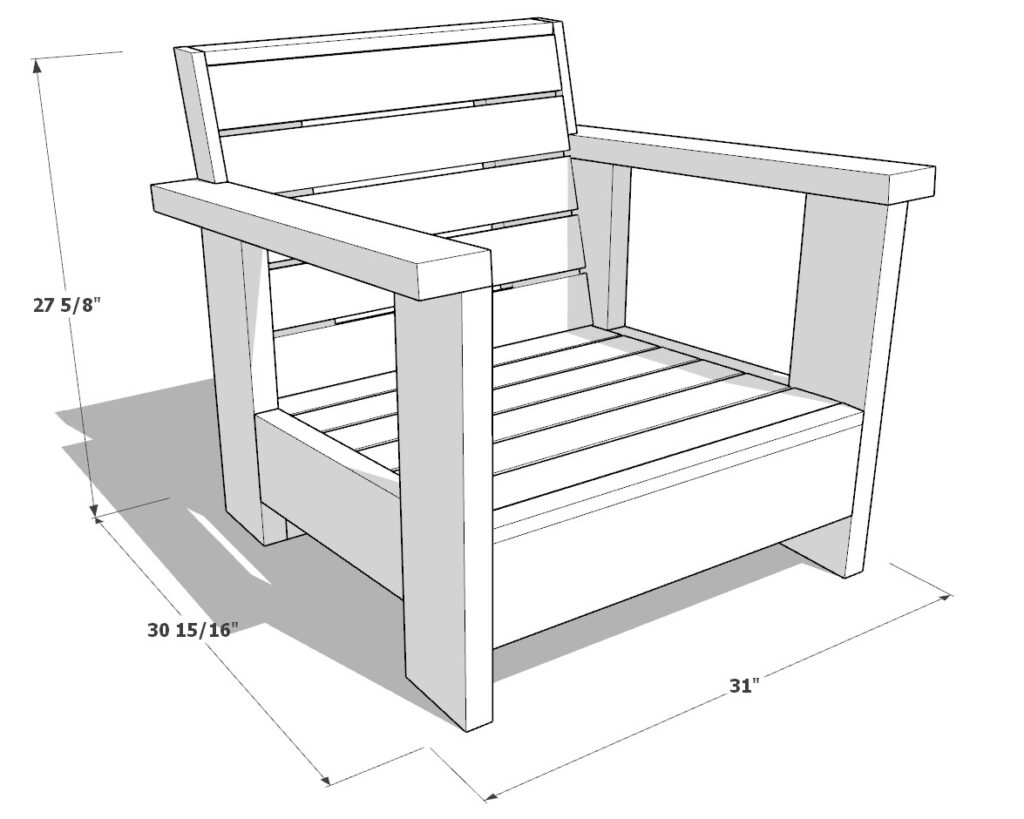
This patio chair is designed with comfort in mind, measuring 30 15/16 inches in width, 31 inches in depth, and 27 5/8 inches in height. The proportions ensure a relaxing seat that fits well into any outdoor space. The ergonomic angle of the backrest and the seat’s contour make it a cozy spot for lounging.
DIY Plans: Clear and Simple
Our DIY plans are beginner-friendly and take you through each stage of construction. You’ll get a detailed cut list, a shopping guide for materials, and a list of tools you’ll need. The instructions are straightforward, with diagrams and step-by-step guidance to make the process as simple as possible.
Materials: Easy to Find
The cushions required are a standard 24×24 inch, which you can find at most home goods stores. The wood needed includes common sizes like 2×6 and 2×4 lumber, readily available at local hardware stores. This project is designed to be hassle-free from start to finish.
Conclusion
These plans are more than just a set of instructions; they’re your first step to enhancing your backyard with a handmade addition. Building this patio chair is about creating a durable and comfortable space where you can relax and take pride in your DIY skills. Get the plans, gather your materials, and enjoy the process of making a chair that’s uniquely yours.
Time
(varies with experience)
Cost
Estimated Built Cost: $50 (Note: Costs can vary by location and supplier. This estimate excludes cost of cushions.)
Skill level required
Beginner
DIY Patio Chair PDF Plan
What is included in the PDF download?
- Easy to read step by step instructions
- Material list
- Tools needed
- Helpful links to materials and tools needed
DIY Chair Dimensions
Tools and Materials:
Available with the purchase of the DIY plan PDF.
Lumber Shopping & Cut List:
Available with the purchase of the DIY plan PDF.
Step 1: Constructing the Main Frame of the Patio Bench
Build the Seating Platform Frame
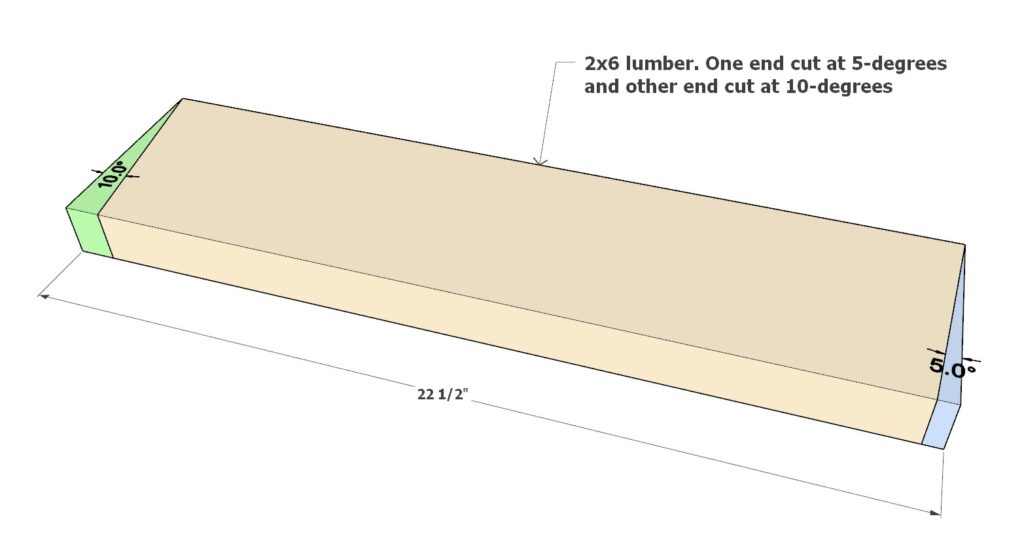
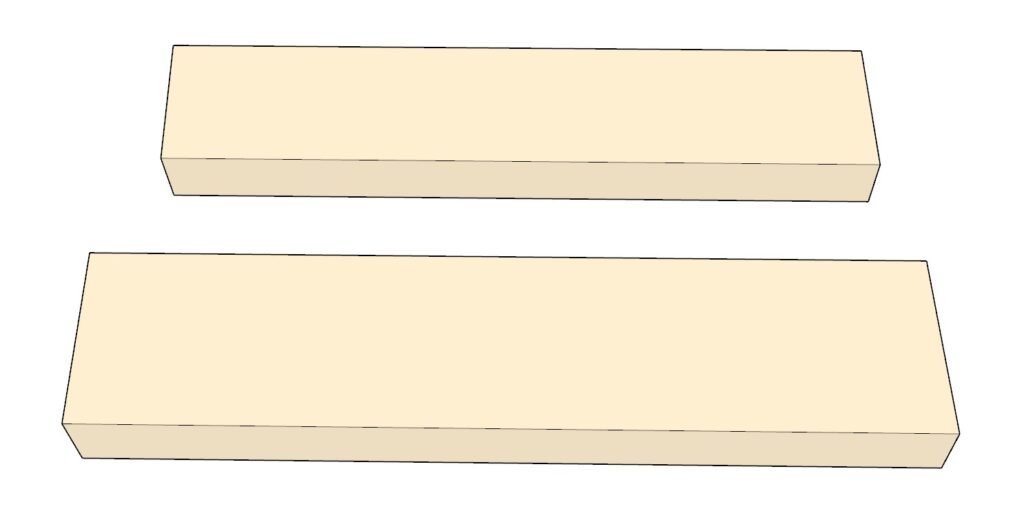
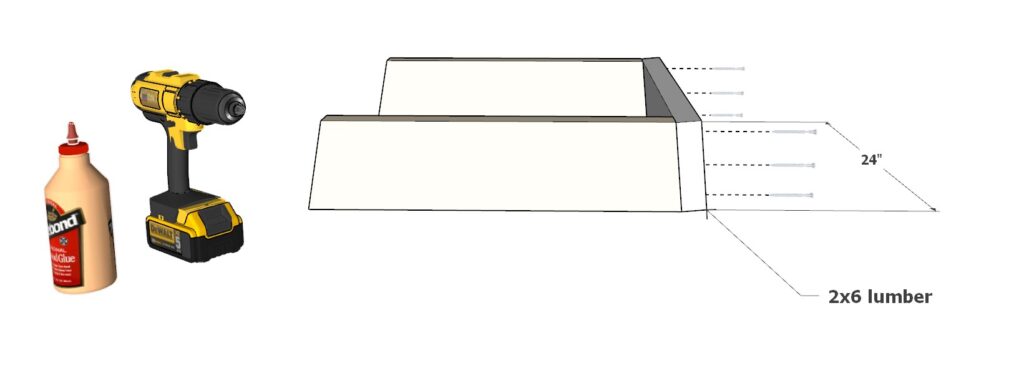
- Prepare the Wood Pieces: Start by taking two pieces of 2×6 lumber, each measuring 22-1/2 inches in length. Each piece is color-coded in pale peach for easy identification.
- Cut the Angles: On one end of each pale peach board, cut a 5-degree angle, and on the opposite end, cut a 10-degree angle. These cuts will allow the boards to fit together at the right angles for comfort.
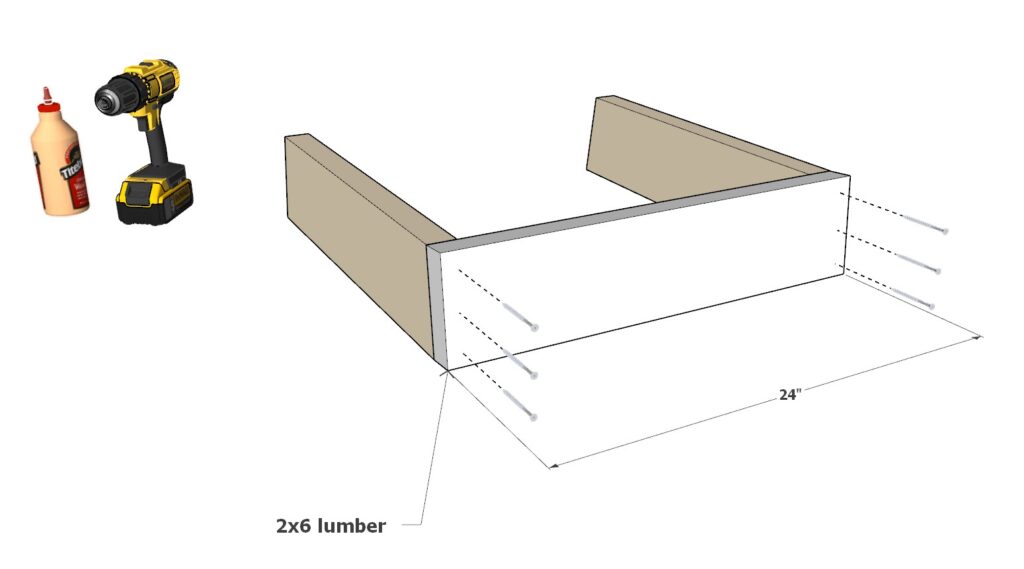
- Assemble the Frame: Attach these two pale peach boards to a 24-inch 2×6 lumber board, following the layout shown in the diagram. Use 3.5-inch screws and wood glue to secure them together.
Attach the Front Legs
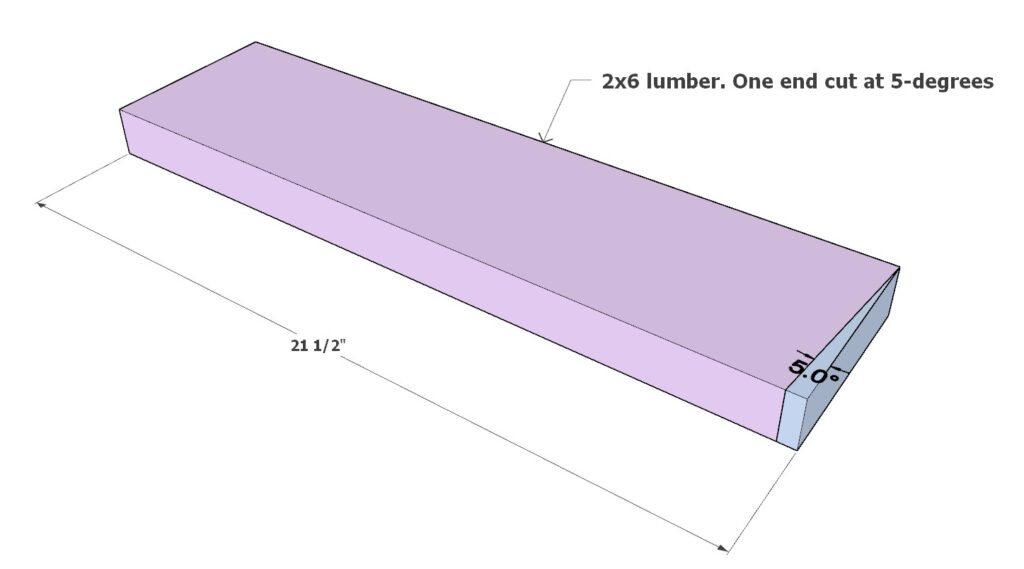
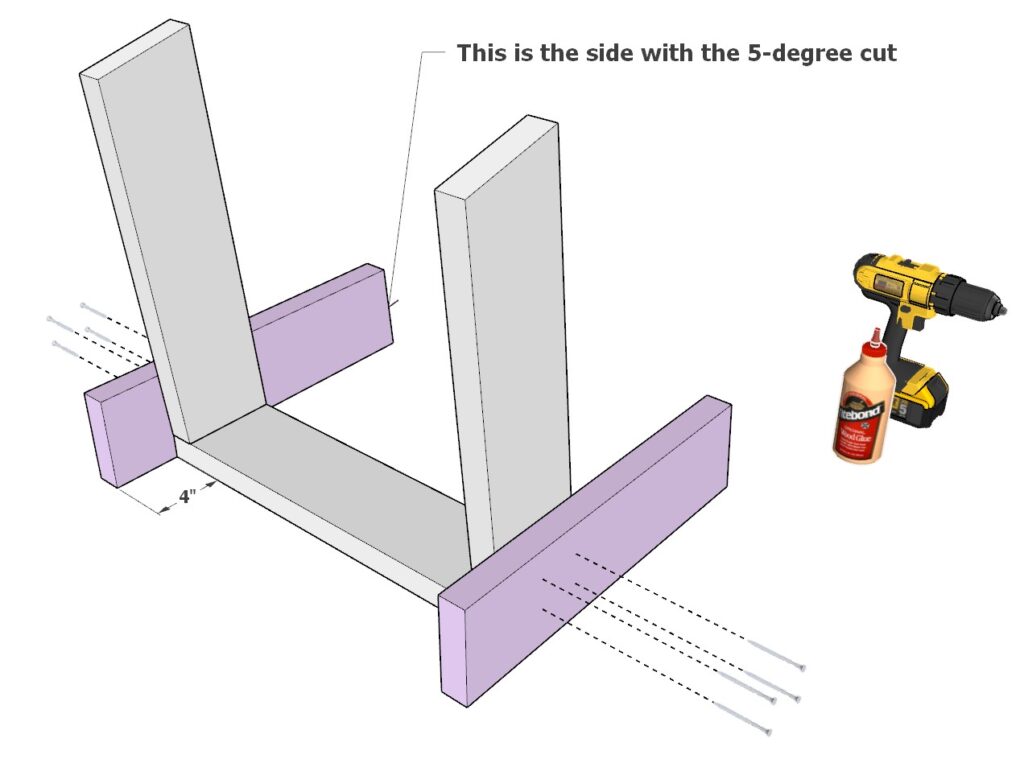
- Prepare the Front Legs: Get two pieces of 2×6 lumber, each 21-1/2 inches long, color-coded lavender.
- Cut the Front Legs: Cut one end of each lavender board at a 5-degree angle.
- Secure the Legs: Fasten these two lavender boards to the seating platform frame you just built. Make sure to use 2.5-inch screws, which are the right length to hold firmly without sticking out the other side. Apply wood glue for additional strength.
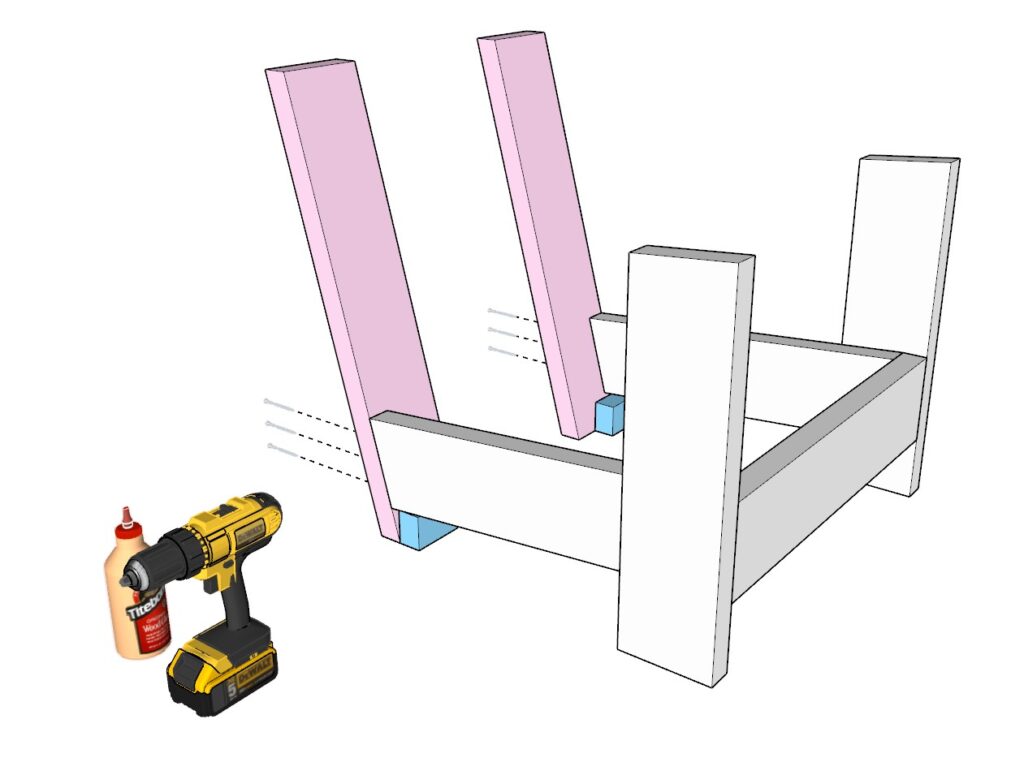
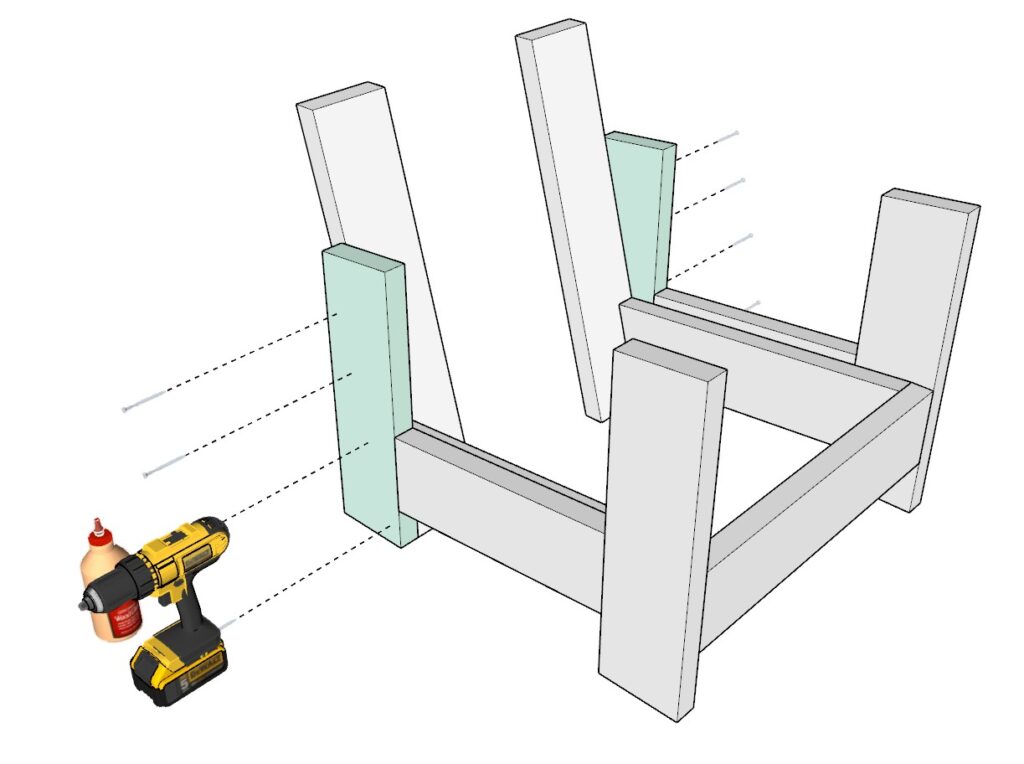
Install the Back Legs
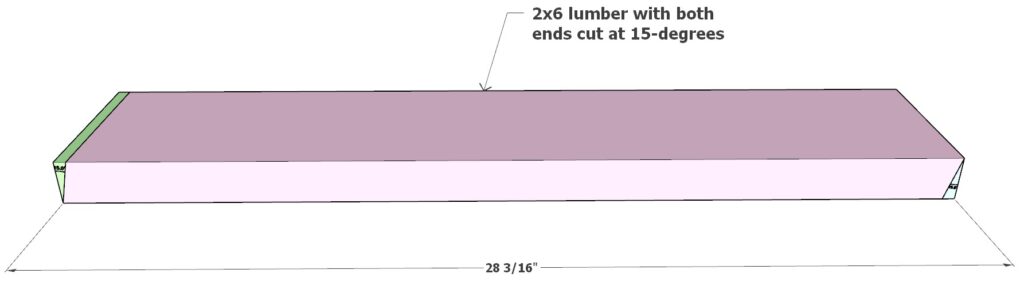
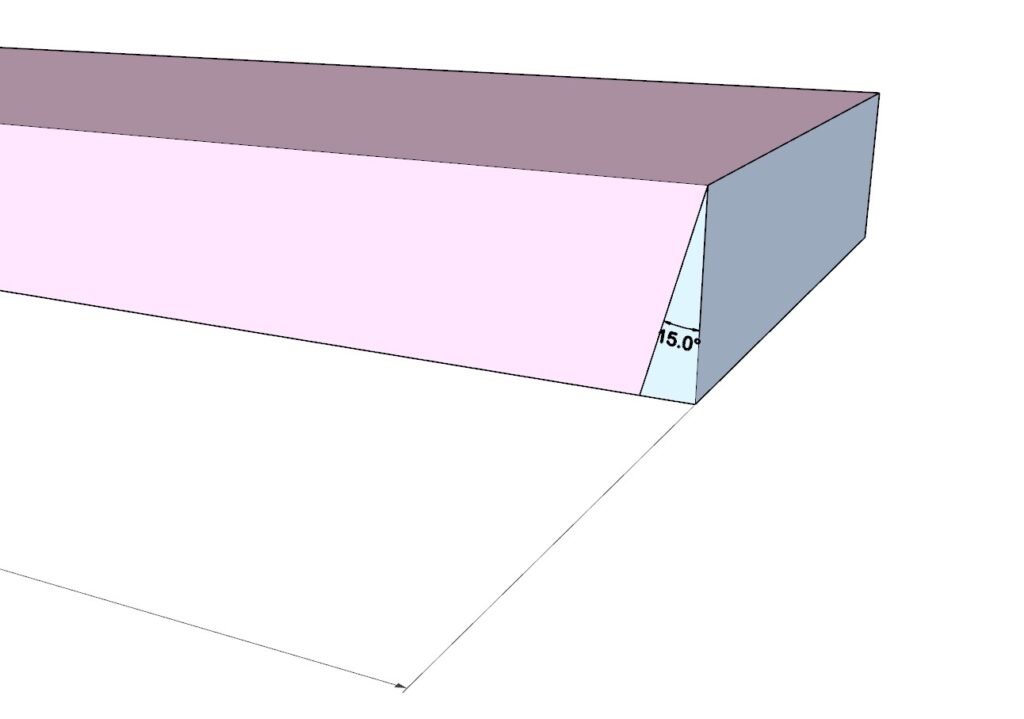
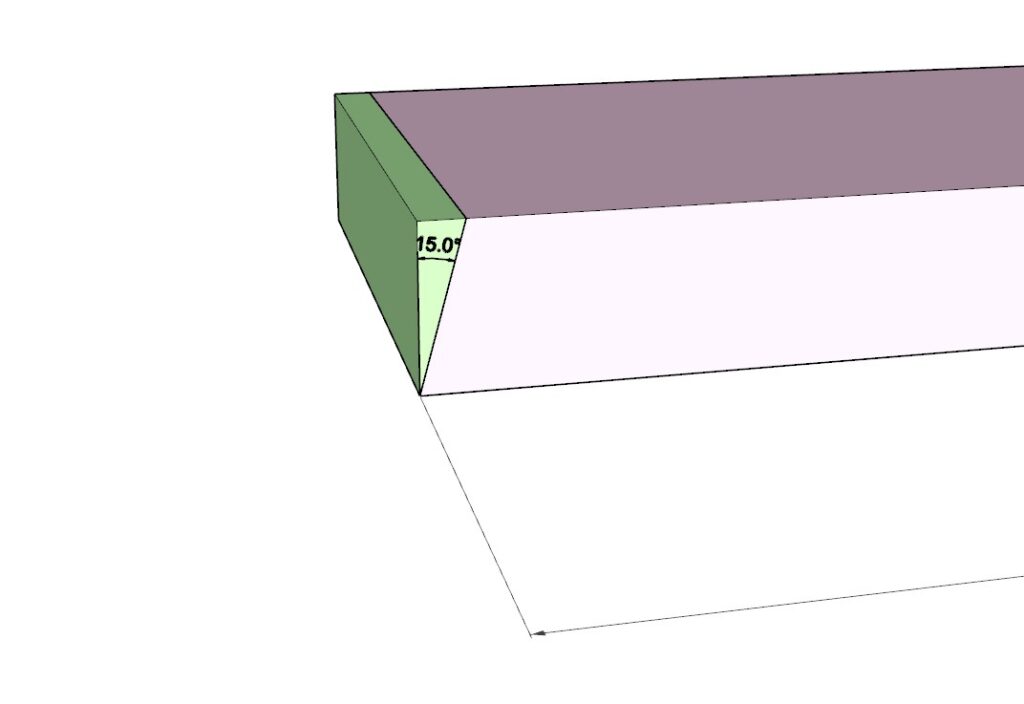
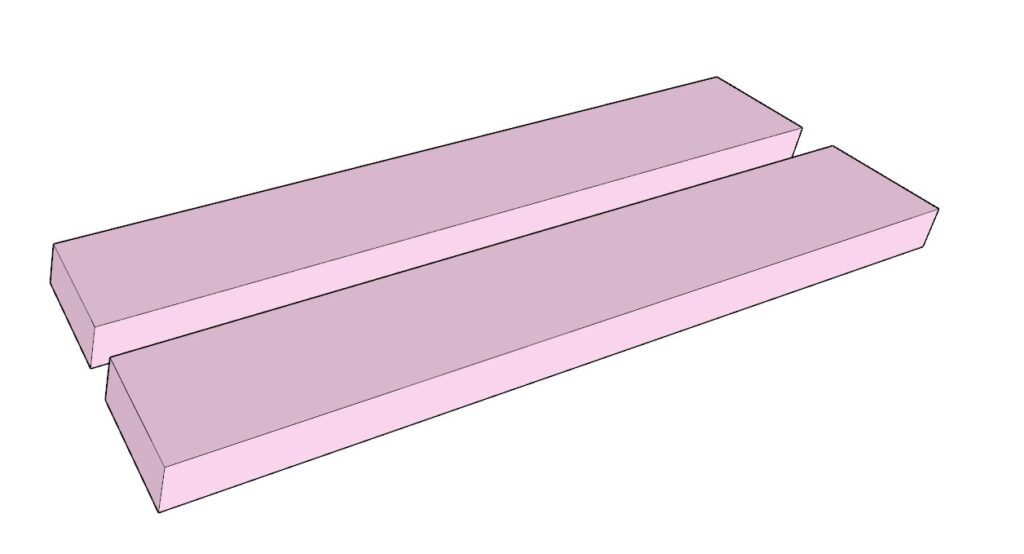
- Prepare the Back Legs: Take two 2×6 lumber boards, each 28-3/16 inches long, color-coded pink.
- Cut the Back Legs: Cut both ends of each pink board at a 15-degree angle.
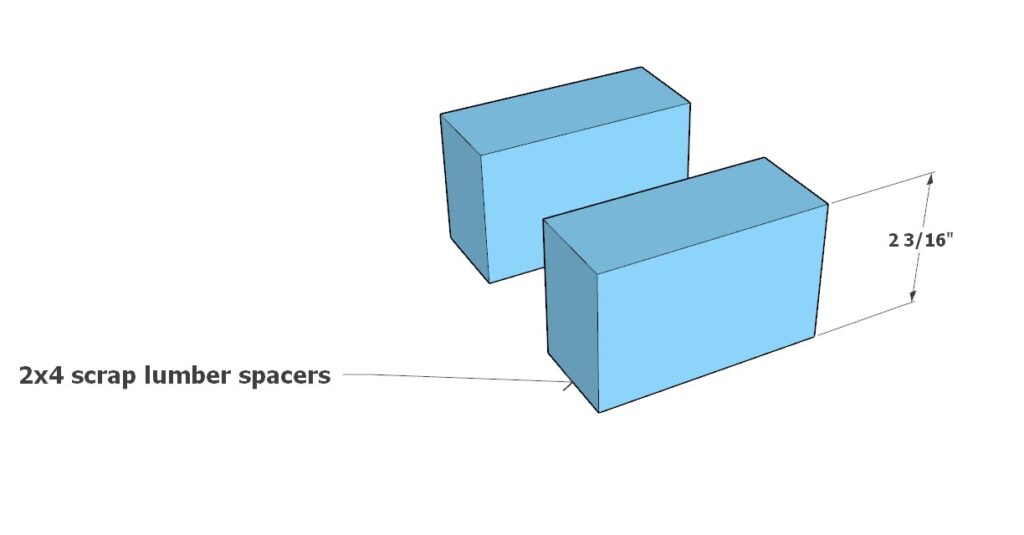
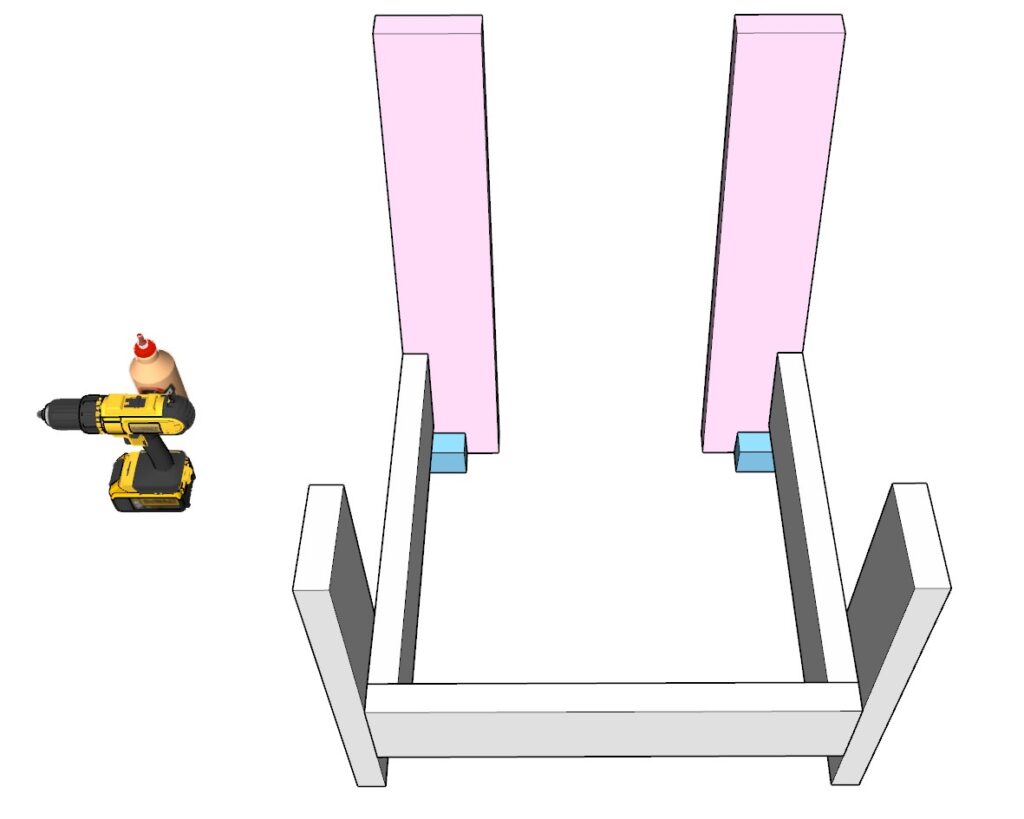
- Make and Use Spacers: Cut two spacers from any scrap lumber, each 2-3/16 inches tall, color-coded blue. These spacers will help you attach the pink boards at the correct height on the seating platform.
- Attach the Back Legs: Place the blue spacers as illustrated in the diagram, and then attach the pink boards to the seating platform frame with 3.5-inch screws.
Handy Tips:
- Pre-Drill for a Clean Finish: To prevent the wood from splitting, pre-drill the holes with a countersink drill bit. If you plan to fill the screw holes with dowels for a smooth look, as shown in the model photos, pre-drill the holes to the size needed for the dowels.
- Smooth the Surface: Plane and sand all the wood pieces before assembly. This will make sure they are smooth and clean, saving you the trouble of sanding in hard-to-reach places later on.
Step 2: Adding Support and Arm Rests to the Frame
Strengthen the Arm Rests and Legs
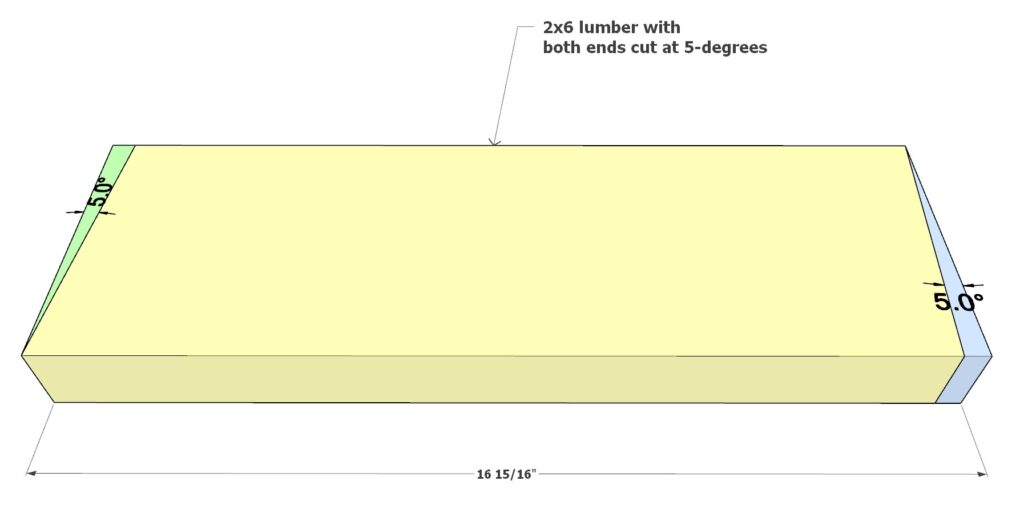
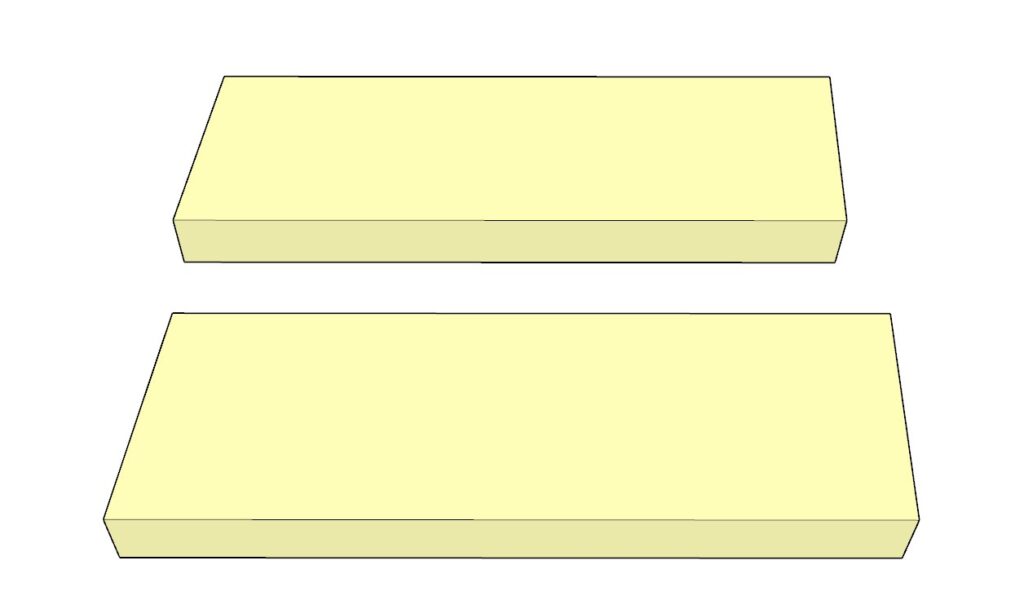
- Prepare the Support Pieces: Take two pieces of 2×6 lumber, each 16-15/16 inches long. Color-coded yellow for easy identification.
- Cut the Angles: Cut both ends of each yellow board at a 5-degree angle. These cuts will allow the boards to fit snugly against the armrest and leg components.
- Attach the Supports: Position the yellow boards where the armrests will be and secure them to the seating platform. Use wood glue and 2.5-inch screws for a solid connection.
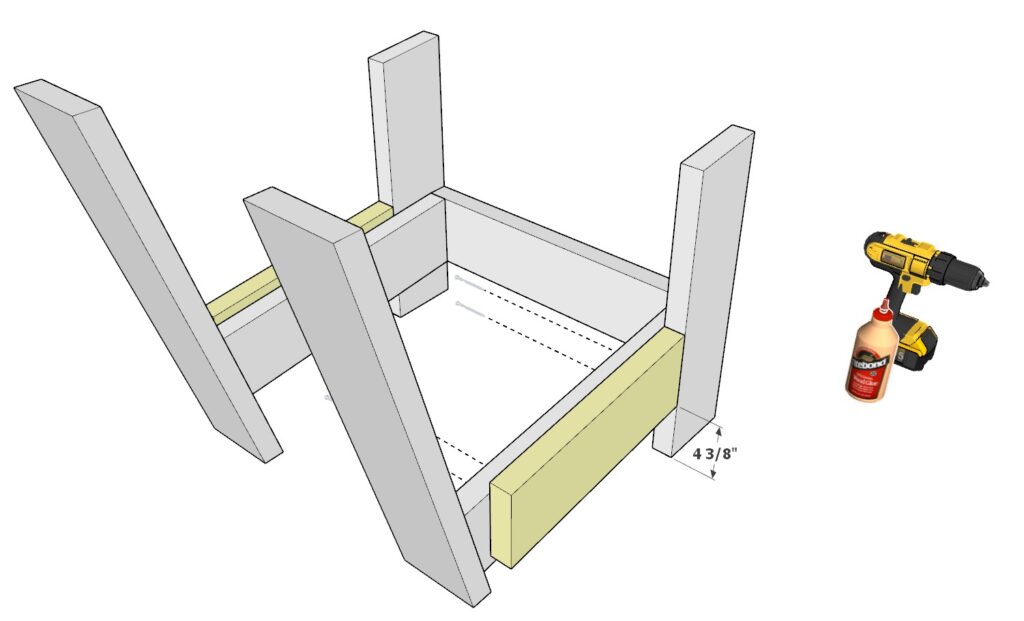
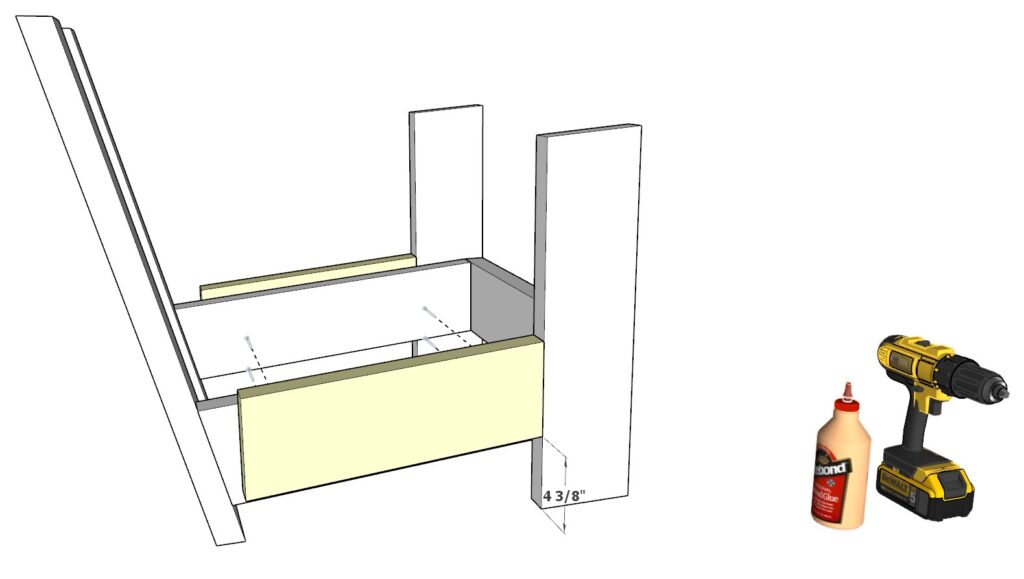
Reinforce the Back Legs
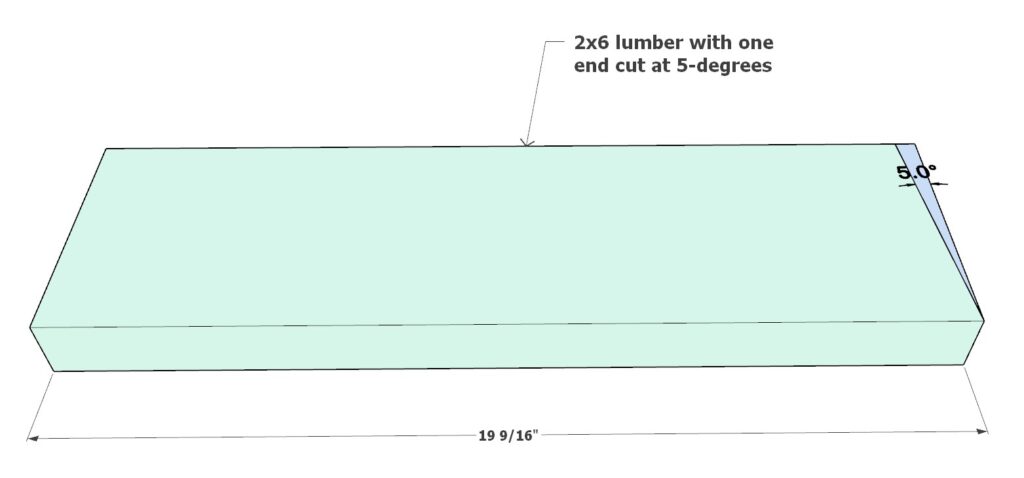
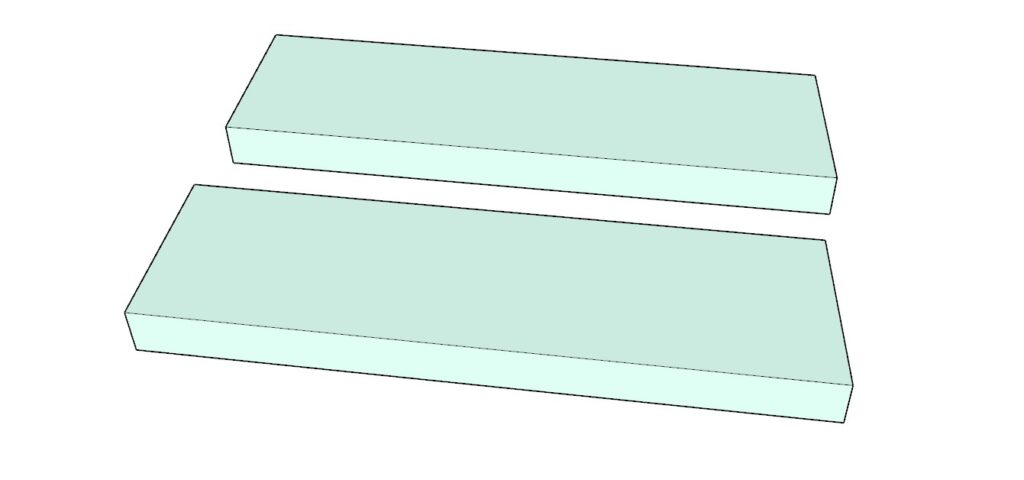
- Prepare the Reinforcement Pieces: Get two pieces of 2×6 lumber, each 19-9/16 inches long. Color-coded in teal.
- Cut the Back Leg Supports: Cut one end of each teal board at a 5-degree angle. This angle will match the incline of the back legs.
- Secure the Back Leg Supports: Apply wood glue to the teal boards, align them with the back legs, and fasten them using 3.5-inch screws. This step adds extra stability to the back legs.
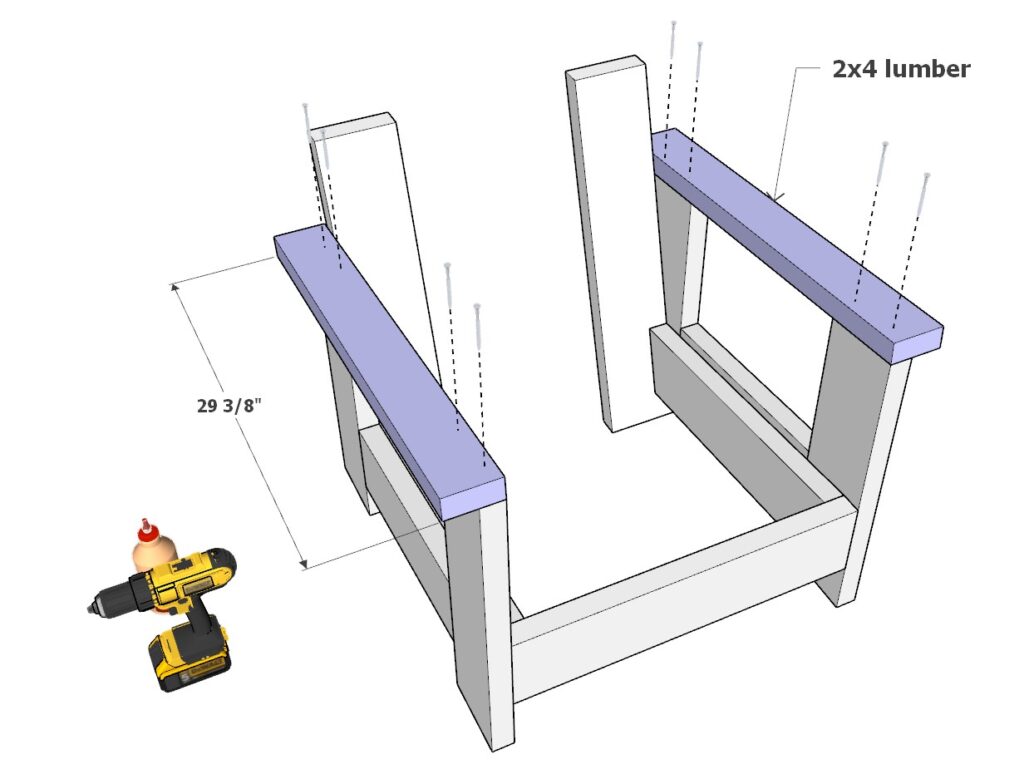
Install the Arm Rests
- Prepare the Arm Rests: Find two pieces of 2×4 lumber, each 29-3/8 inches long, and color-coded purple.
- Attach the Arm Rests: Place the purple boards on top of the armrest supports you’ve just installed. Make sure they’re aligned properly before securing them with 3.5-inch screws and wood glue.
Step 3: Decking the Bench Frame
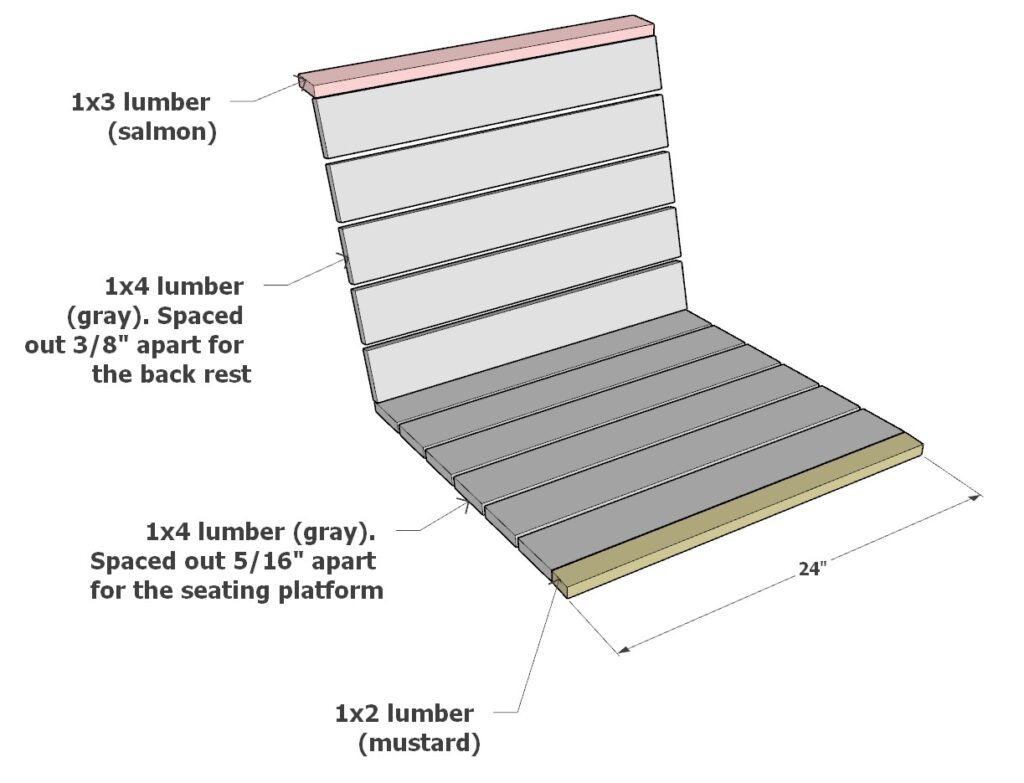
Attaching the Back Rest Decking
- Prepare the Decking Pieces: Gather five 24-inch 1×4 lumber pieces for the back rest. Color-coded gray.
- Position the Decking: Lay the gray decking pieces across the back rest frame, ensuring they are spaced 3/8-inch apart for a consistent look.
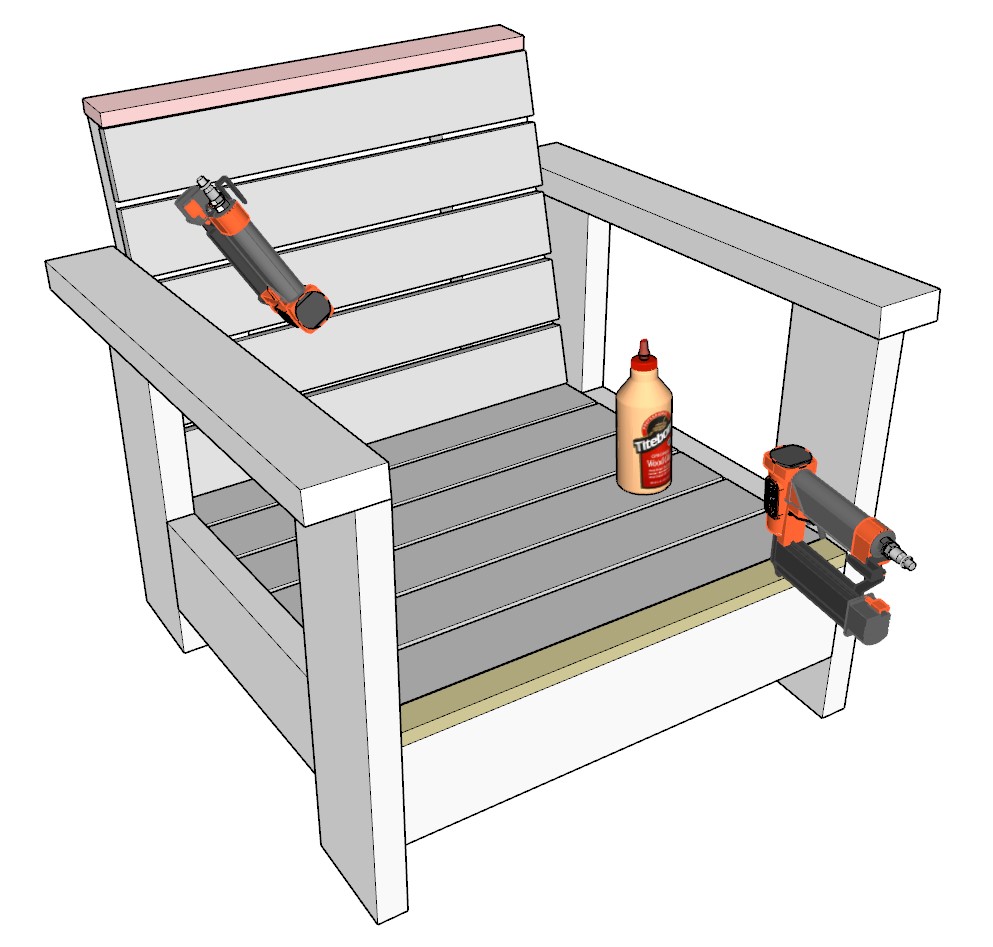
- Secure the Decking: Affix each decking piece with wood glue and 1.5-inch long pin nails for a secure and neat finish.
Decking the Seating Platform
- Prepare the Seat Decking Pieces: Collect six 24-inch 1×4 lumber pieces for the seating platform, also color-coded in gray.
- Space the Decking Evenly: Place these pieces onto the seating platform frame, spacing them 5/16 inches apart to allow for wood movement and drainage.
- Fasten the Decking: Attach the decking to the frame using wood glue and pin nails, ensuring each board is firmly in place.
Adding the Front Lip and Back Topper
- Prepare the Front Lip and Back Topper: Take one 24-inch 1×2 lumber piece for the front lip (color-coded mustard) and one 24-inch 1×3 lumber piece for the top of the back rest (color-coded salmon).
- Install the Front Lip: Attach the mustard-colored piece to the front edge of the seating platform, using pin nails and wood glue.
- Install the Back Topper: Secure the salmon-colored piece to the top of the back rest, providing a polished finish to the edge.
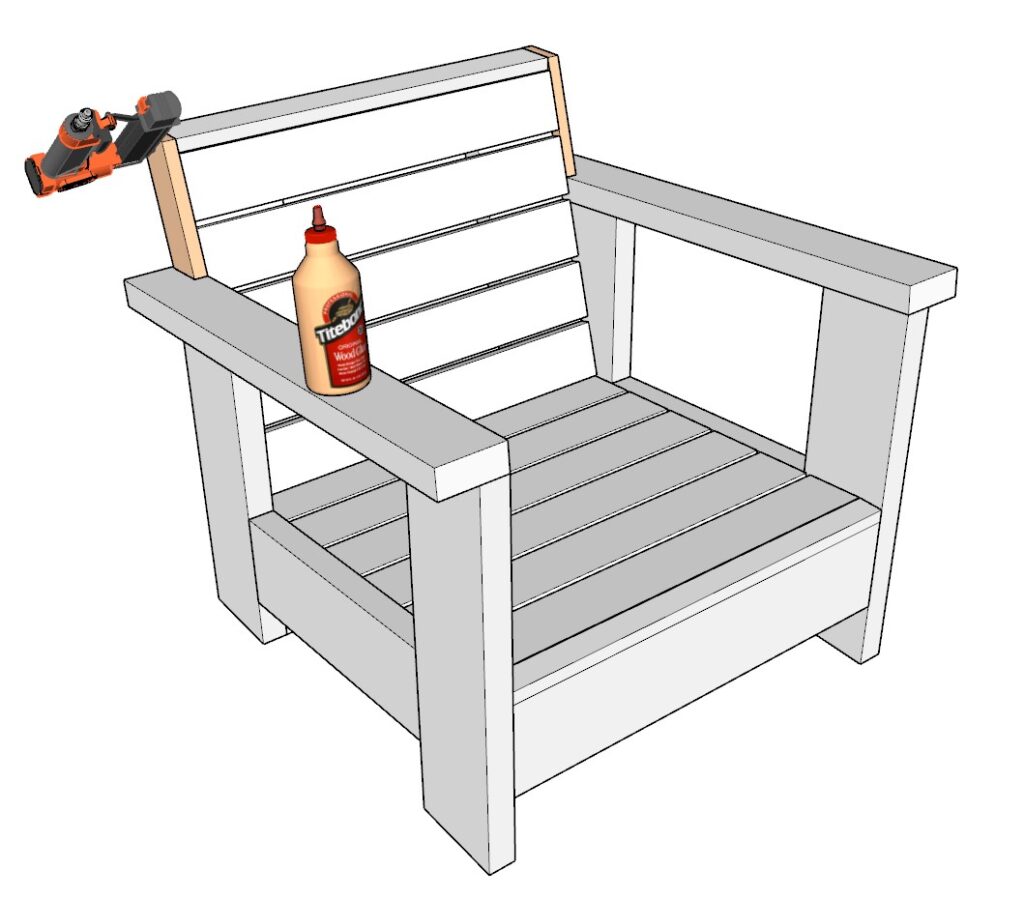
Installing the Side Decorative Pieces
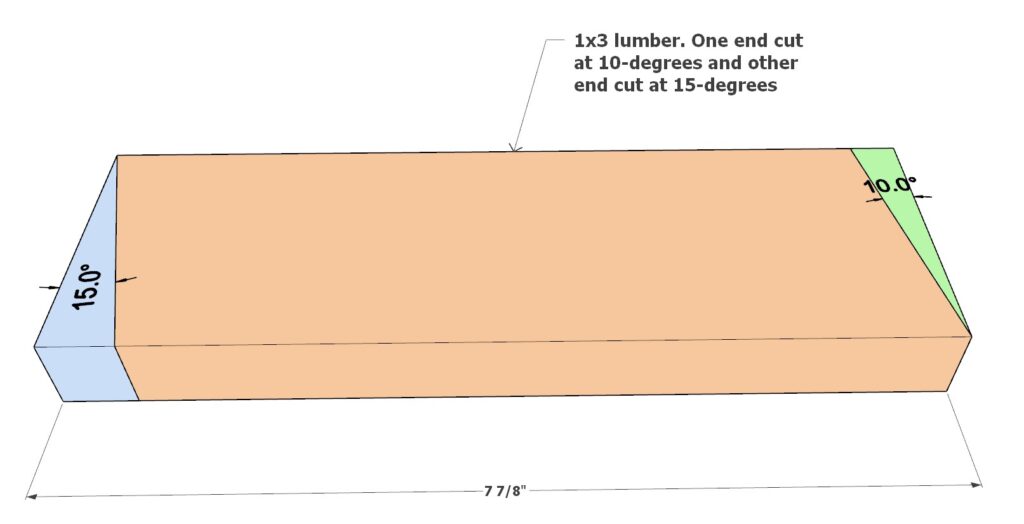
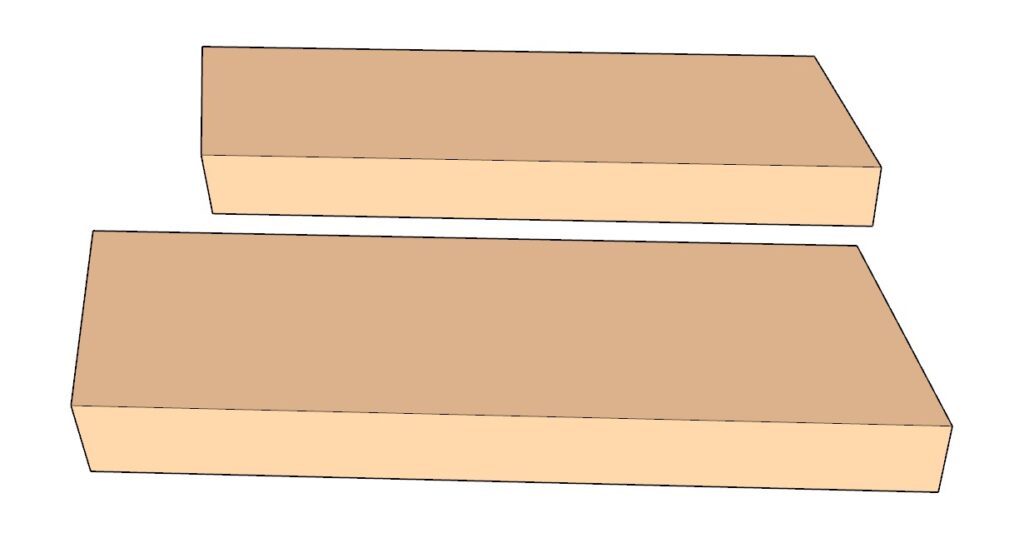
- Prepare the Decorative Pieces: Find two 7-7/8-inch long 1×3 lumber pieces (color-coded orange) for the sides.
- Cut the Angles: Cut one end of each orange piece at a 15-degree angle and the other end at a 10-degree angle to fit snugly against the back rest.
- Attach the Decorative Pieces: Position these pieces on the sides where the back rest decking ends. Secure them with pin nails and wood glue for a seamless look.
Step 4: Preparing and Finishing Your Bench for Staining or Painting
Preparing for Dowels and Finishing
Inserting Dowels: If you’ve predrilled holes for dowels during the building process, now’s the time to glue them in. Apply a small amount of wood glue to the inside of each hole and to the dowel. Gently tap the dowel into the hole with a hammer until it sits flush with the wood surface. Wipe away any excess glue immediately.
Sanding the Dowels: Once the glue is dry, sand the dowel flush with the wood surface. Begin with a coarse grit sandpaper and finish with a fine grit to ensure a smooth, even surface.
Why Not Wood Putty?: Wood putty is often used to fill screw holes and imperfections. However, it doesn’t stain as well as the surrounding wood and may stand out on the finished bench, making it less ideal unless you’re aiming for a more rustic, natural look.
Staining Your Bench
Choosing Your Stain: Select a wood stain that complements your outdoor space and personal style. Consider using a stain with built-in weather protection for outdoor furniture.
Sanding Before Staining: Sand the entire bench with fine-grit sandpaper to prep the surface. This will help the stain absorb evenly.
Applying the Stain: Use a natural bristle brush or a clean rag to apply the stain. Work in sections, following the wood grain. Apply the stain liberally, and then wipe away any excess after a few minutes, as per the stain’s instructions.
Drying Time: Allow the stain to dry completely, following the manufacturer’s recommended drying time. This may vary based on climate and humidity.
Painting Your Bench
Priming the Wood: If you decide to paint your bench, start with a coat of high-quality outdoor primer. This will help the paint adhere better and last longer.
Sanding Between Coats: After the primer dries, sand lightly with fine-grit sandpaper for a smooth base before painting.
Applying Paint: Choose an exterior paint suitable for wood and your climate. Apply using a brush or roller, working in thin, even coats. Allow the paint to dry between coats.
Top Coat for Protection: For additional protection, especially in harsh weather, apply a clear polyurethane topcoat after the paint has dried.
Maintaining Your Bench
Protection from Elements: Cover your bench during the winter and rainy seasons to protect it from water damage and freezing temperatures.
Shading: If possible, place your bench in a shaded area to prevent excessive sun exposure, which can fade and damage the wood and finish over time.
Re-staining: To re-stain your bench, you’ll need to strip the old stain with a wood stripper, sand the wood, and then apply a new coat of stain.
Re-painting: For repainting, sand the bench to remove the old paint, prime it, and then apply a new coat of paint as you did the first time.
Regular Maintenance: Clean your bench regularly and apply a fresh coat of polyurethane once a year to keep it looking new and to prolong its lifespan.