DIY bunk bed overview:
I am so excited to share my latest version of the DIY twin-over-twin bunk bed! Here are some reasons how this bunk bed will help improve your bedroom and home.
The bunk bed leaves more floor space in a room – perfect for small rooms!
If you have a smaller bedroom, you know that every square inch counts. That‘s why a bunk bed is the perfect solution when you need to save space. A bunk bed takes up less floor space than two individual beds and can be a great way to keep two people in the same room.
The bunk bed is two separate beds – perfect for siblings sharing a room and growing together!
Bunk beds are great for siblings because they allow each child to have their own space. This can help to reduce fighting between siblings and can also help each child to feel more independent. Bunk beds can also help to create a sense of togetherness between siblings as they can share a room and a bed. Some of the best memories and bonding happen between siblings as they grow up and share a room. This is because siblings are able to share their lives with each other and learn to support each other. They can also share secrets and experiences that they may not be able to share with anyone else.
The bunk bed is perfect
for sleepovers – guests can sleep in the bunk bed!
Sleepovers are a time–honored tradition for kids of all ages. They‘re a great way to spend time with friends, stay up late, and have some fun. A bunk bed provides the perfect sleepover solution because it can accommodate multiple guests
The bunk bed is super affordable! – a great value for the price!
Building a bunk bed yourself is a great way to save money. Store bought bunk beds can cost thousands of dollars, but you can easily build one yourself for a fraction of the cost. This build requires common lumber and plywood that can be found in most hardware stores. Building a bunk bed is also a great way to customize the look and feel of the bed to match your child’s bedroom decor. You can paint or stain the wood to match the existing furniture, or you can choose to build a more unique-looking bunk bed by using different colors or materials.
This bed comes in handy during family visits – can accommodate more people in one room!
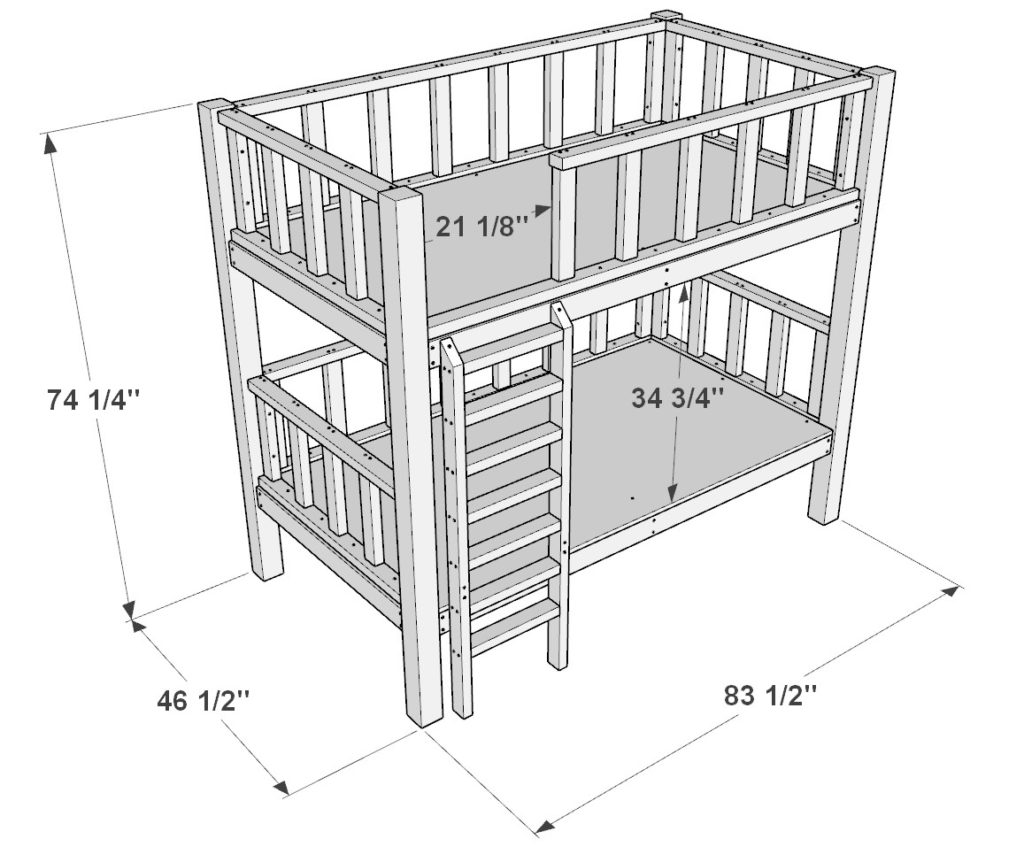
DIY bunk bed specifications:
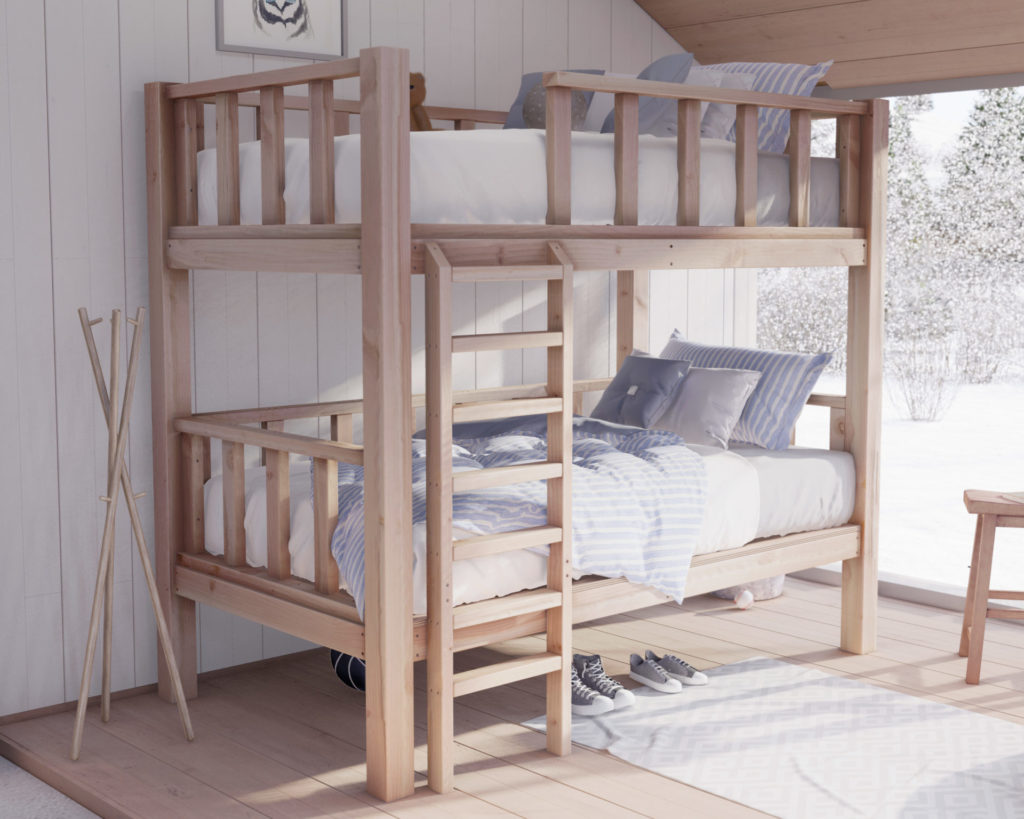
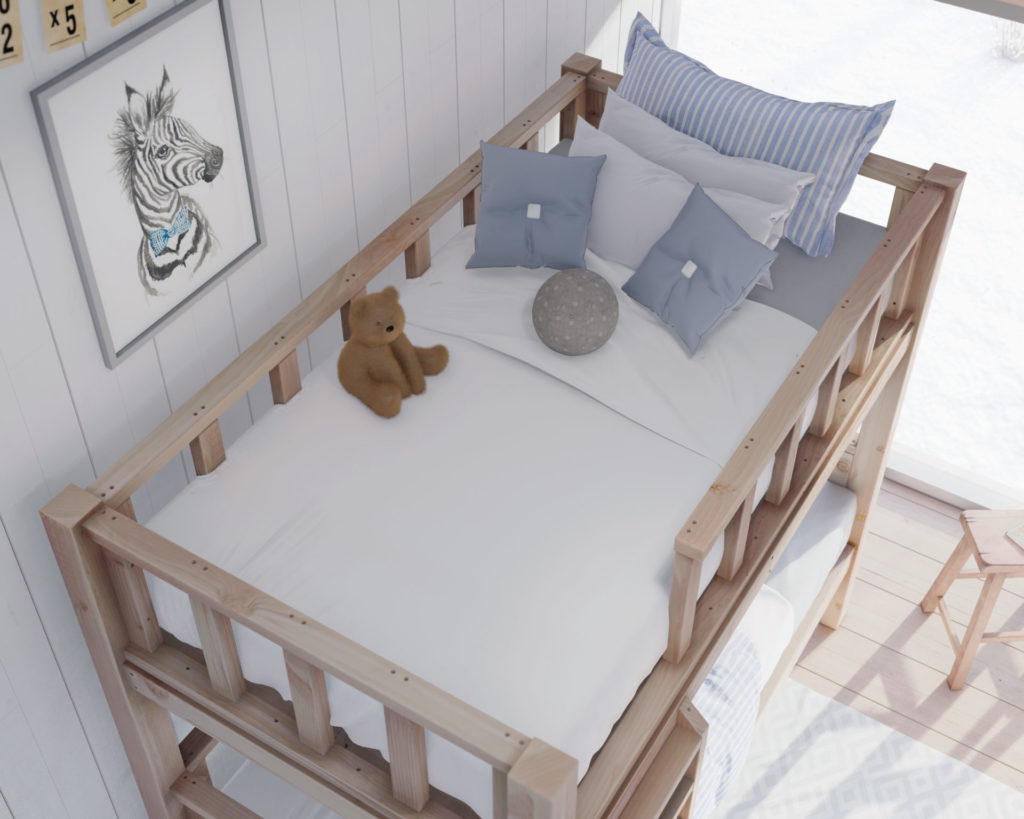
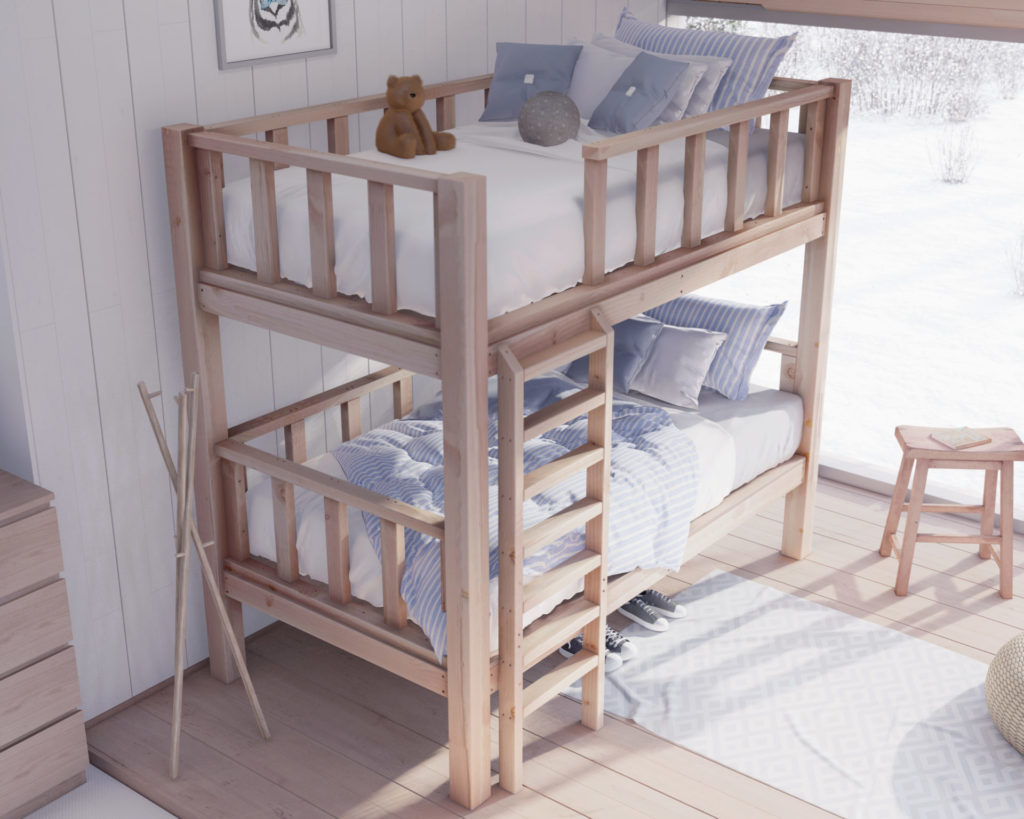
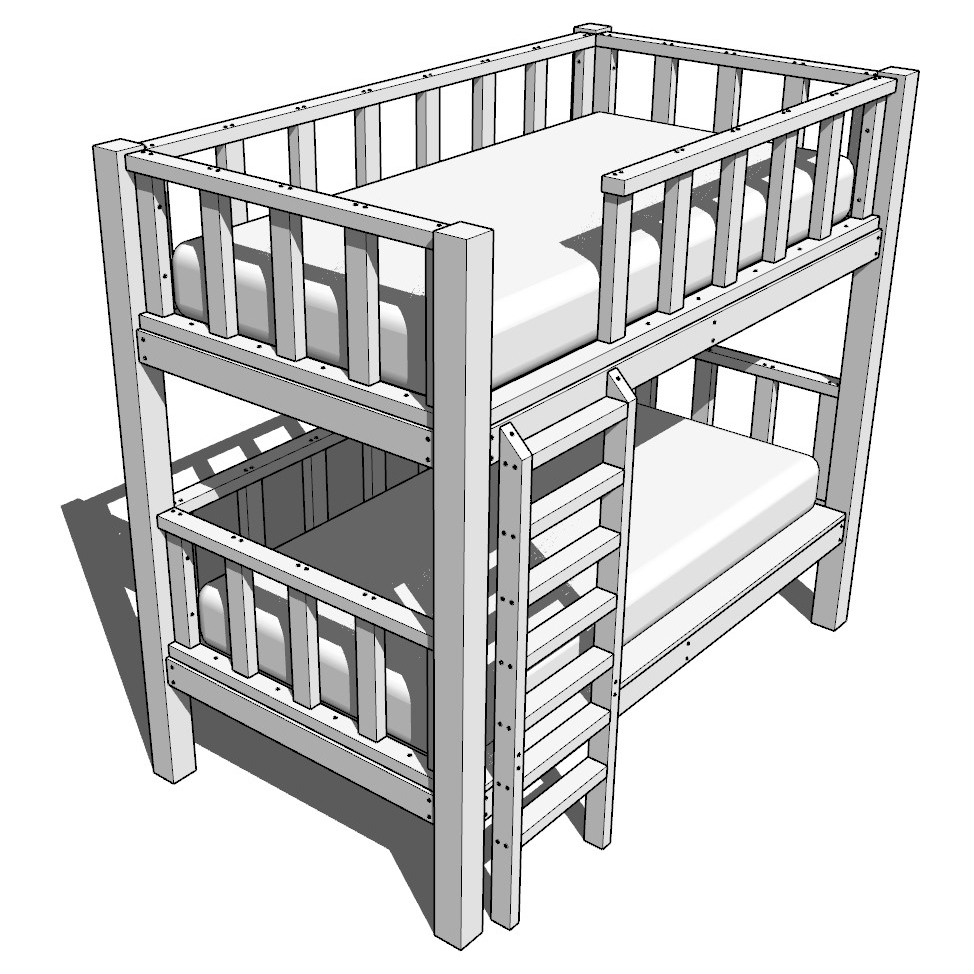
This bunk bed features four 4×4 posts that support two identical frames that are enclosed with railing for safety and to prevent a child/adult from falling out of bed.
The top bunk is accessed with a ladder that is attatched to both of the bunk frames for additional safety.
The railing that wraps around the bed are mostly identical and are simple to put together.
Who can build this DIY bunk bed?
I have research many bunk bed ideas and have found that the simple designs have the cleanest look and are the most easy to build.
This bunk bed design is perfect to anyone who is new to woodworking. The joints are simple, the design does not call for any fancy cuts of difficult techniques.
The step by step instructions provided in the PDF will enable you to save time, save on materials, build with more confidence, build faster, and built with less frustration.
Time to build
5 hours
Total cost of build
About $350
Skill level required
Beginner
Download the PDF plans
Plans for how to build the DIY bunk bed.
What is included in the PDF download?
- Easy to read step by step instructions
- Material list
- Cut list
- Tools needed
- 3D illustrations
- Helpful links to tools and materials needed for the project
Recommend tools for this project
- Saw (miter saw recommended for precision cuts)
- Drill
- Impact driver with bit for screws
- Sander
- wood countersink drill bit
- measuring tape
- Ratchet straps (2 pairs)
- about 15lbs of 3.5 in long screws
- Wood glue
- Sand paper
Wood purchase list and cut list
Available with purchase of PDF plan. Thank you for your support!
Step 1 (DIY bunk bed frame construction)
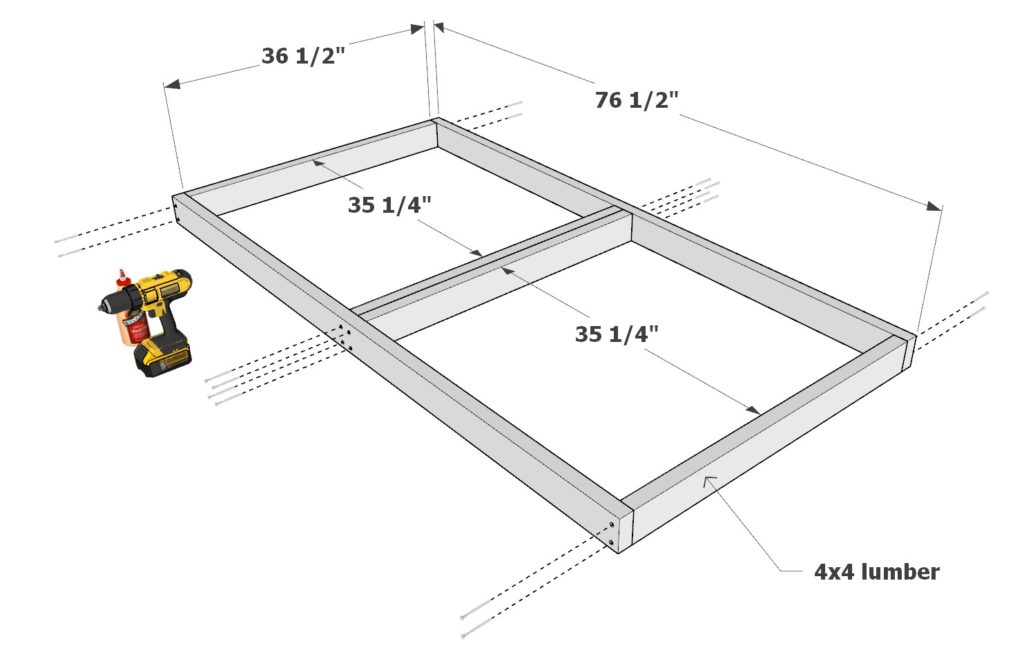
First, build up the frame of the bunk bed.
Take two 76-1/2 inch 2×4 lumber pieces and four 36-1/2 inch 2×4 lumber pieces and arrange them as shown in the first image below.
Join the lumber pieces by adding glue to all areas that are making contact, predrill the holes for the screws to prevent wood from splitting, and add 3.5 inch screws.
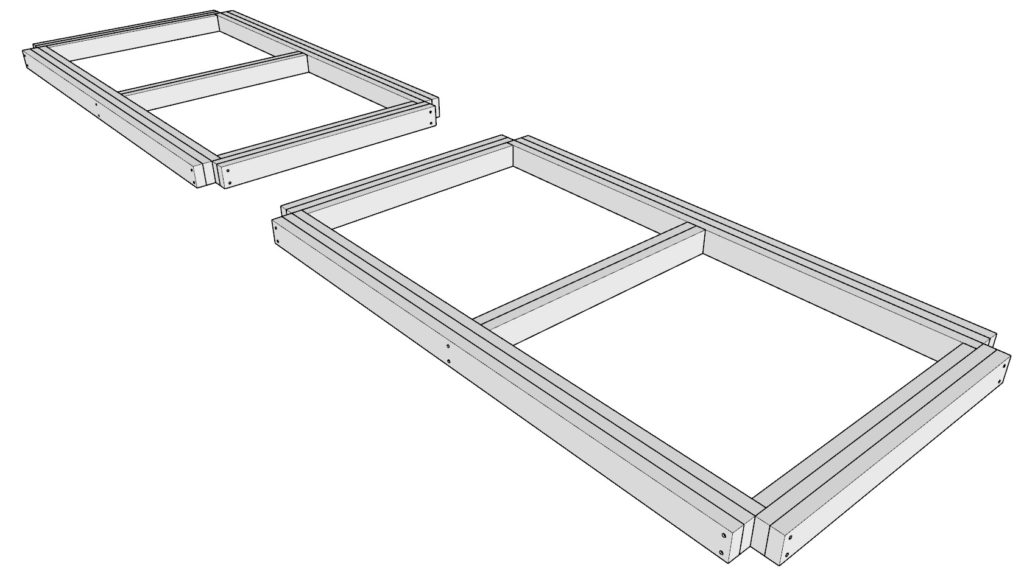
Next, build up the second layer of the frame. Take two 39-1/2 inch 2×4 lumber pieces and two 76-1/2 inch 2×4 lumber pieces and arrange them as shown in the second image below.
Join these in the same way as before but don’t forget to add glue to ALL areas that will be making contact. This means gluing the entire sides of the 2×4 faces that are touching.
Next build the final layer of the frame. Take two 39-1/2 inch 2×4 lumber pieces and two 76-1/2 inch 2×4 lumber pieces and arrange them as shown in the second image below. Join these in the same way as before.
Make two identical frames.


Step 2 (Adding the dunk bed frames to the 4x4 posts)
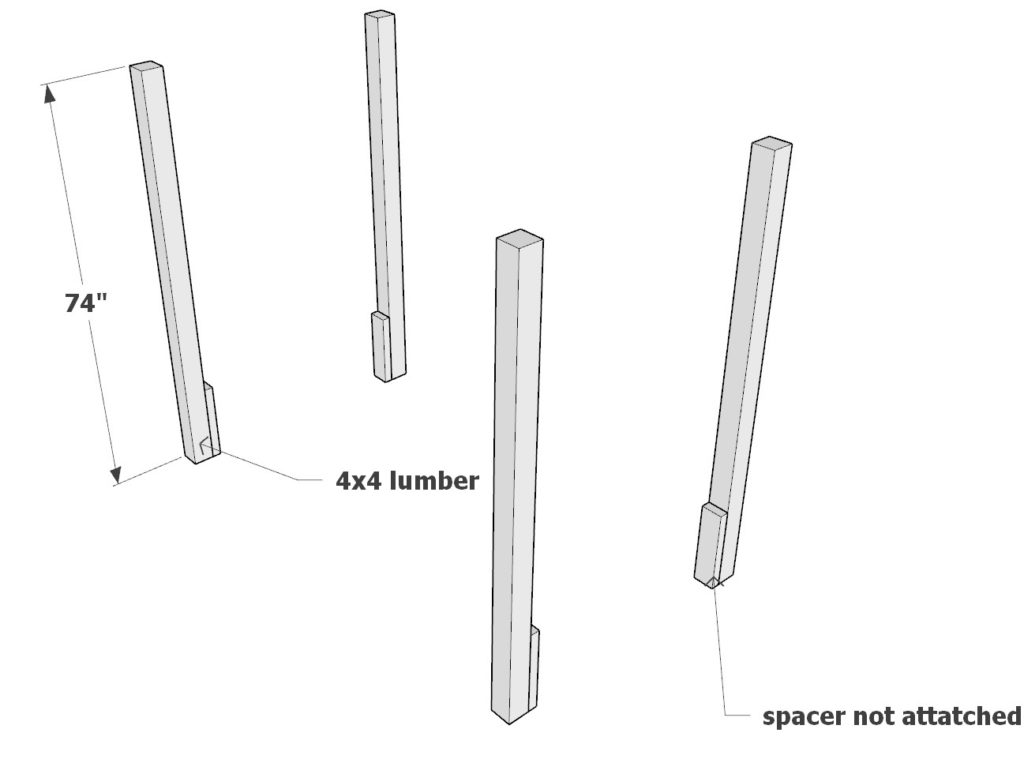
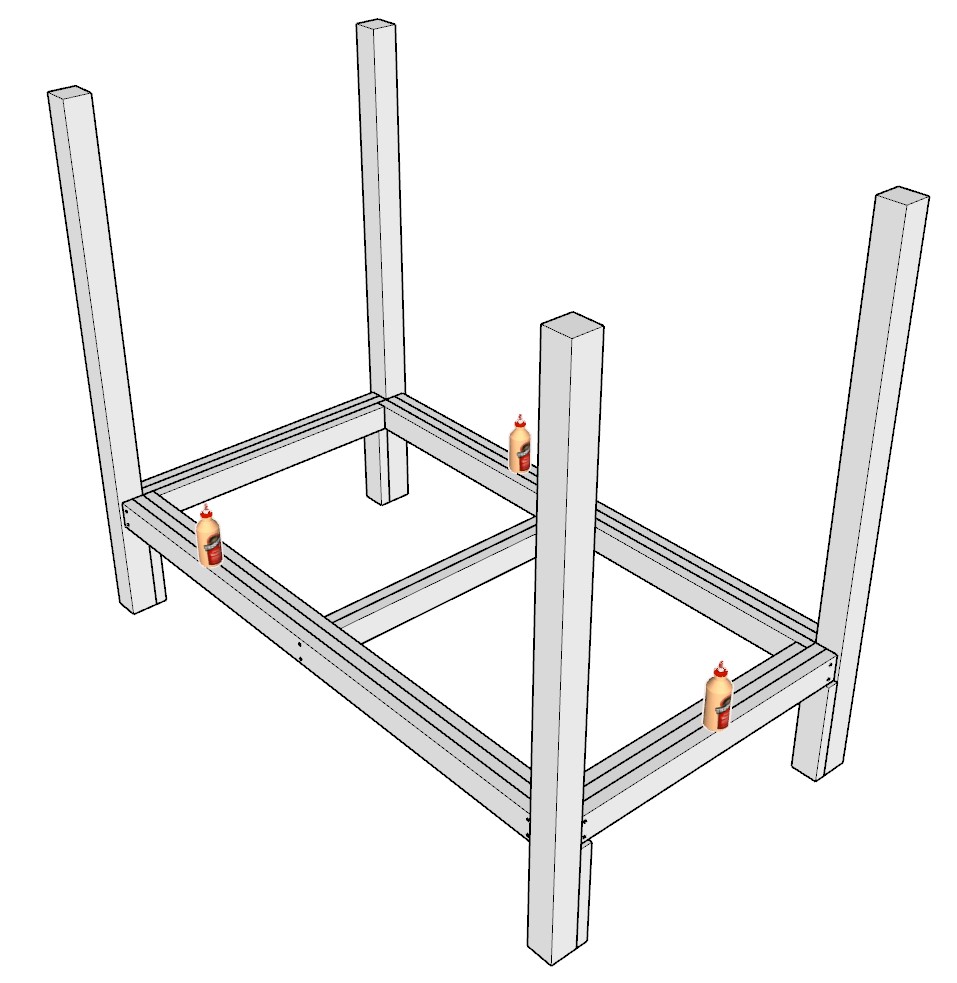
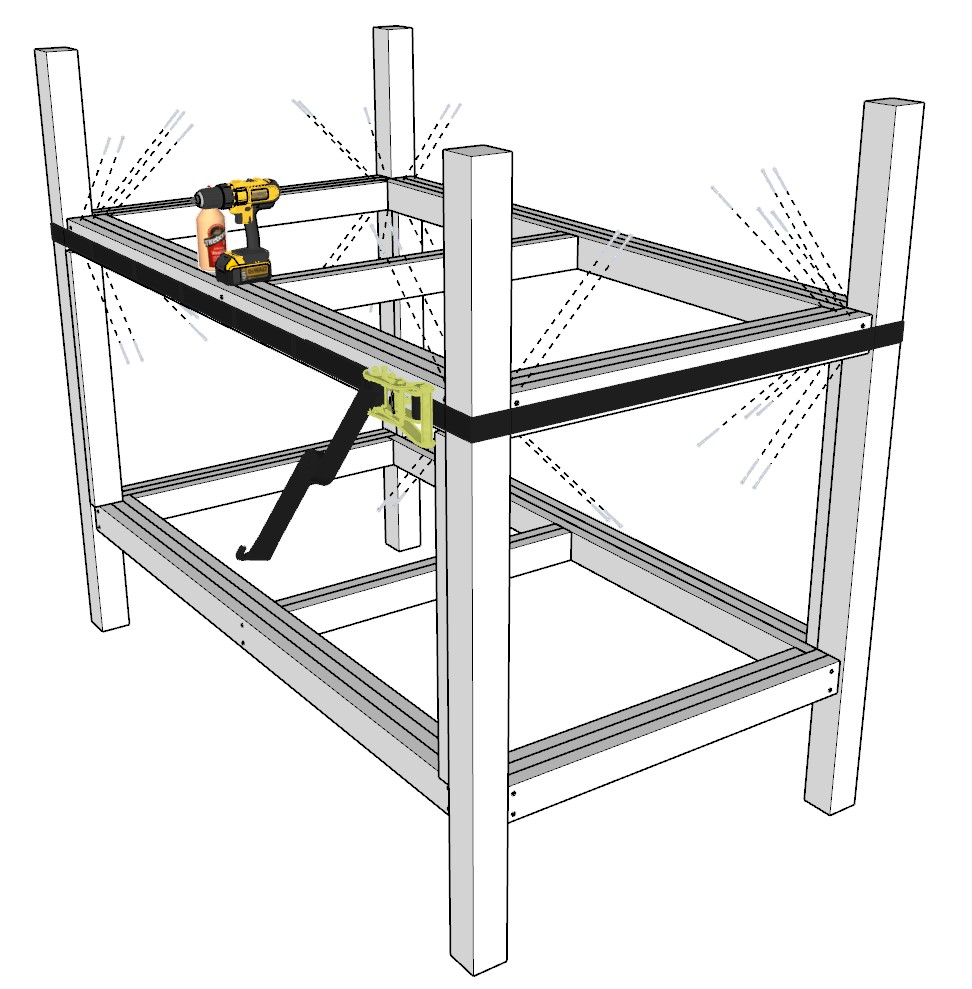
Next, add the bunk bed frame pieces to the 4×4 posts.
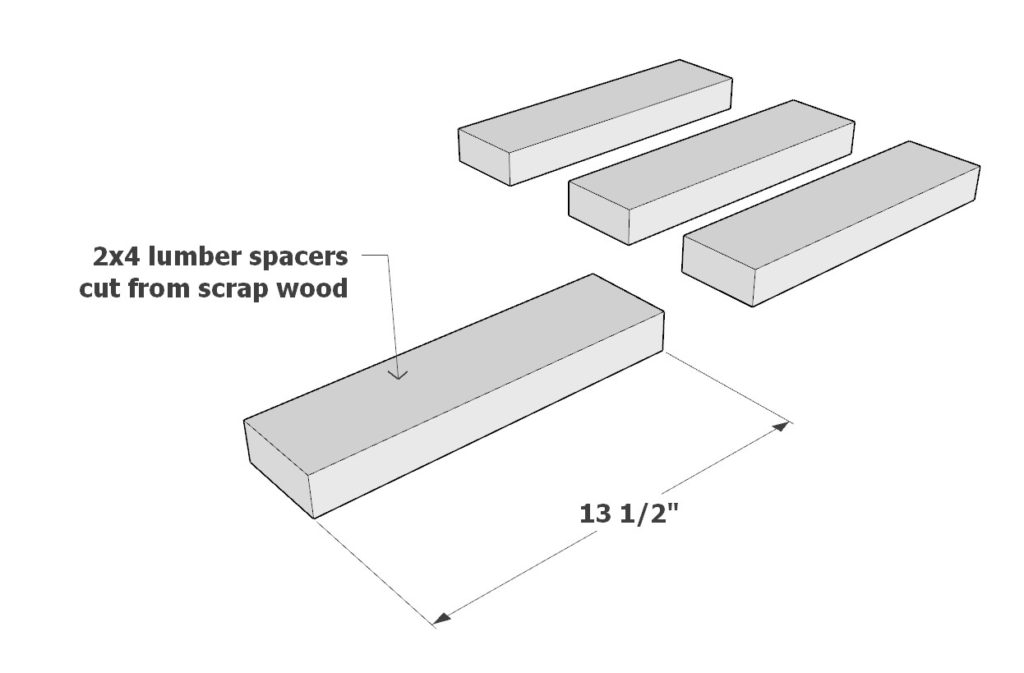
First, take four 74in 4×4 lumber pieces and arrange them as shown below. You will need help with holding up the posts. Add the 2×4 lumber spacers as shown below.
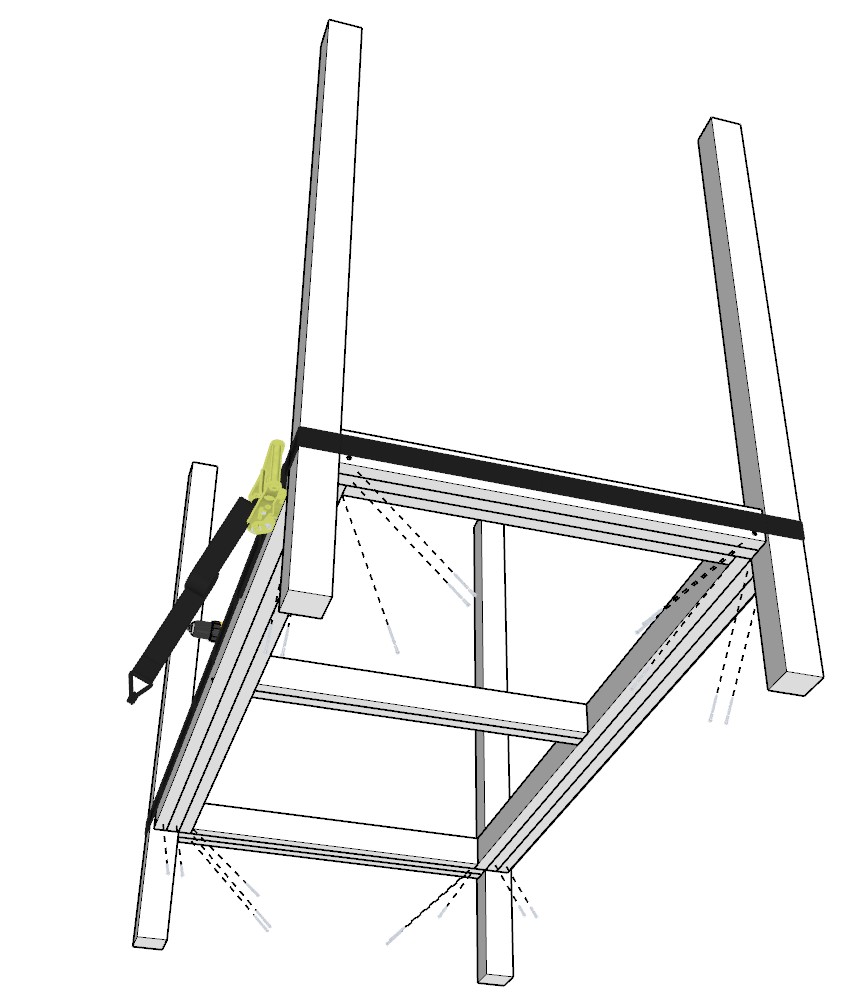
Next, add one of the frames and add a generous amount of glue to the areas that will be joined. Make sure the 4×4 posts are on level ground and in the grooves of the bed frame.
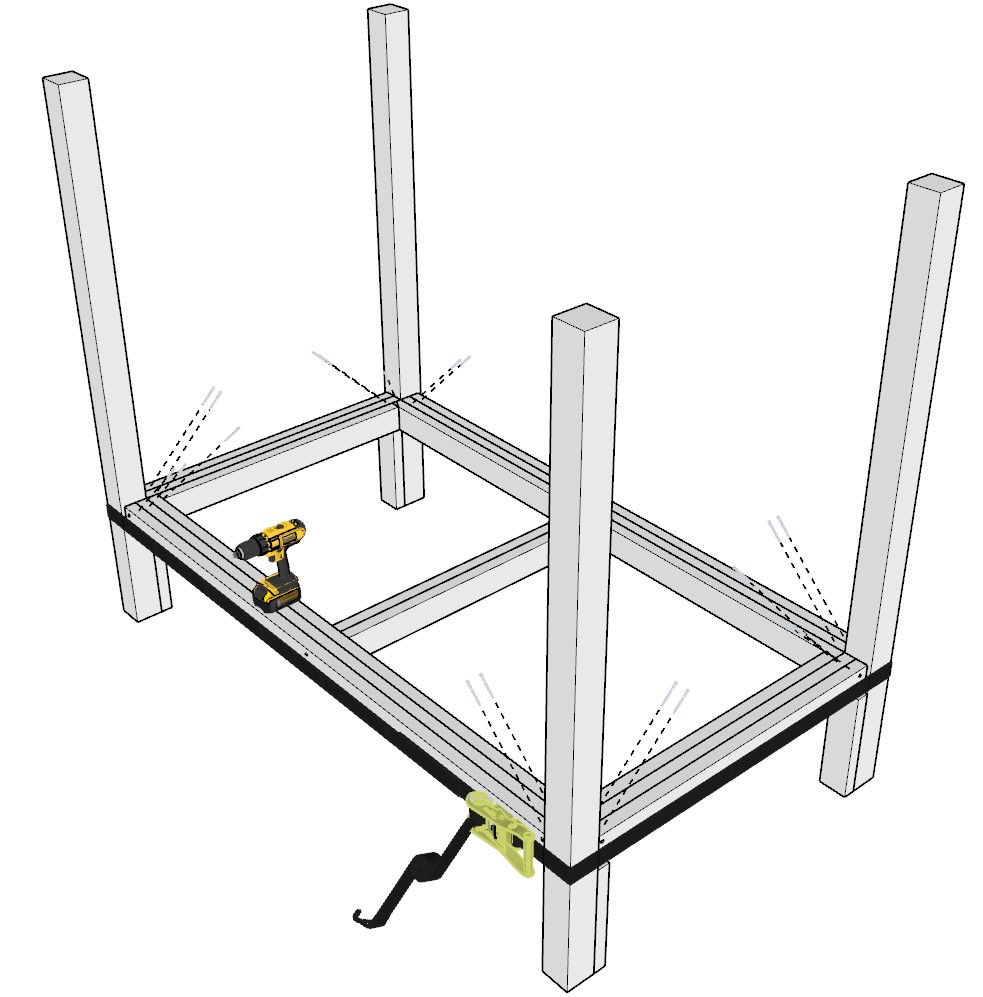
Next, take a ratchet strap (or two if you have a shorter strap) and wrap it around the perimeter of the posts and bed frame. Tighten the straps tightly, but not too tight. At this point, “hammer” into the place” any parts of the frame that might be warped or slightly out of place. Once the bed frame is in the ideal place, tighten the straps until they are very tight.
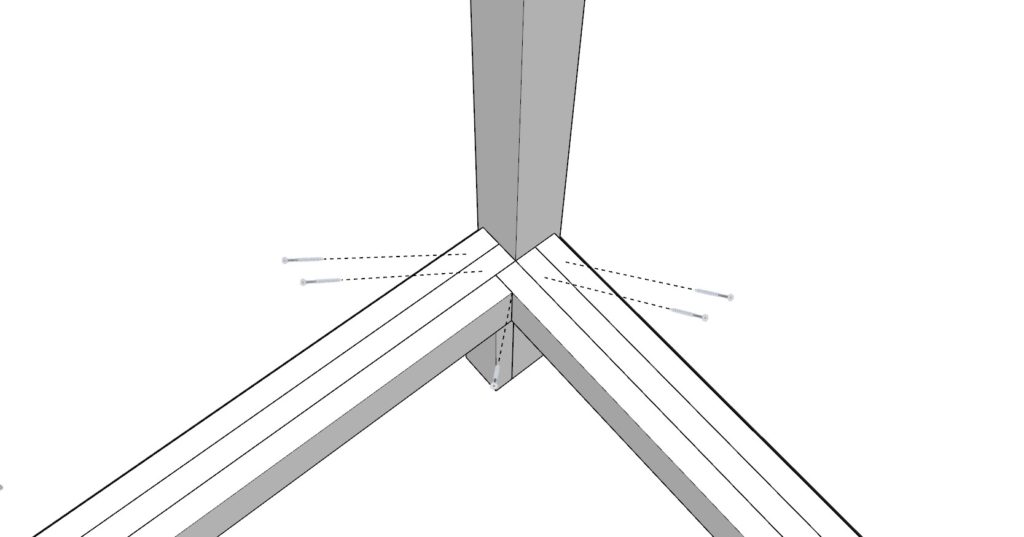
Next, add 3.5 inch screws as shown below. Drive the screws deep into the wood to make contact with the 4×4 posts. Repeat this from the bottom as well.
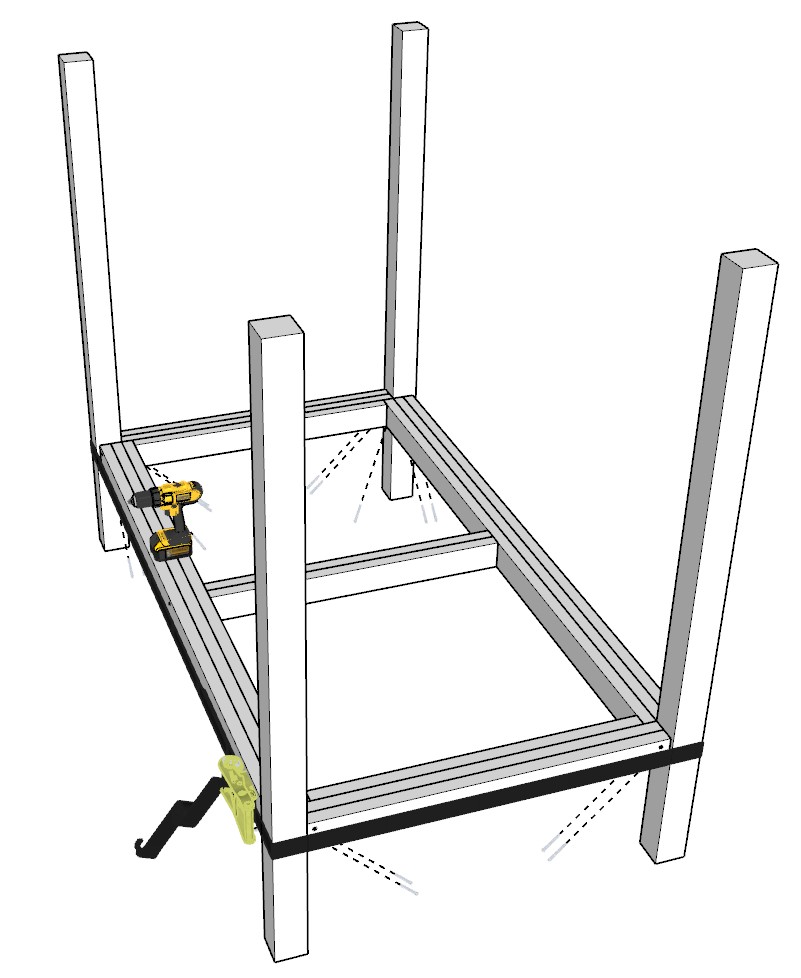
Lastly, add the second bed frame piece. In this second case, use 35-1/2 inch long 4×4 lumber spacers. Join the second frame in the same way you did the first.


Step 3 (Adding the plywood sheets to the bunk bed frame)
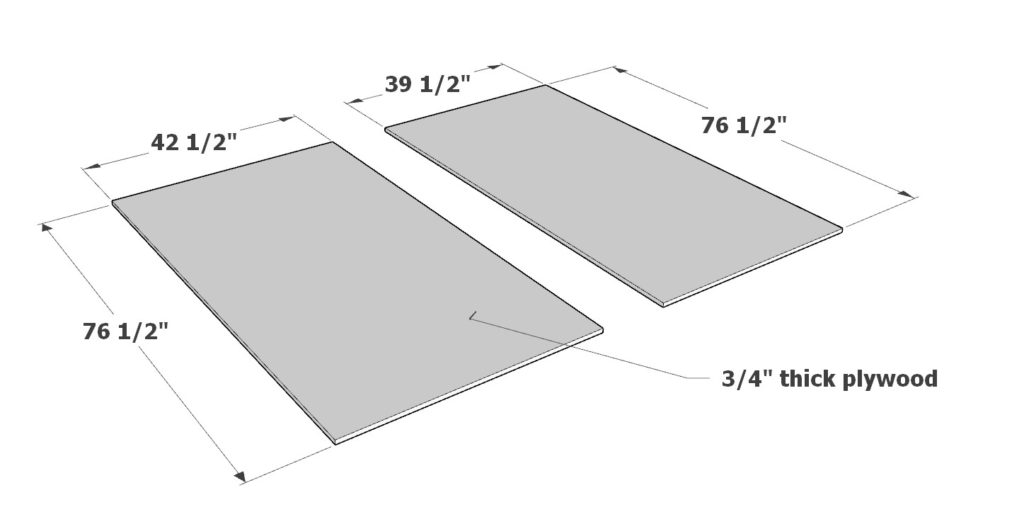
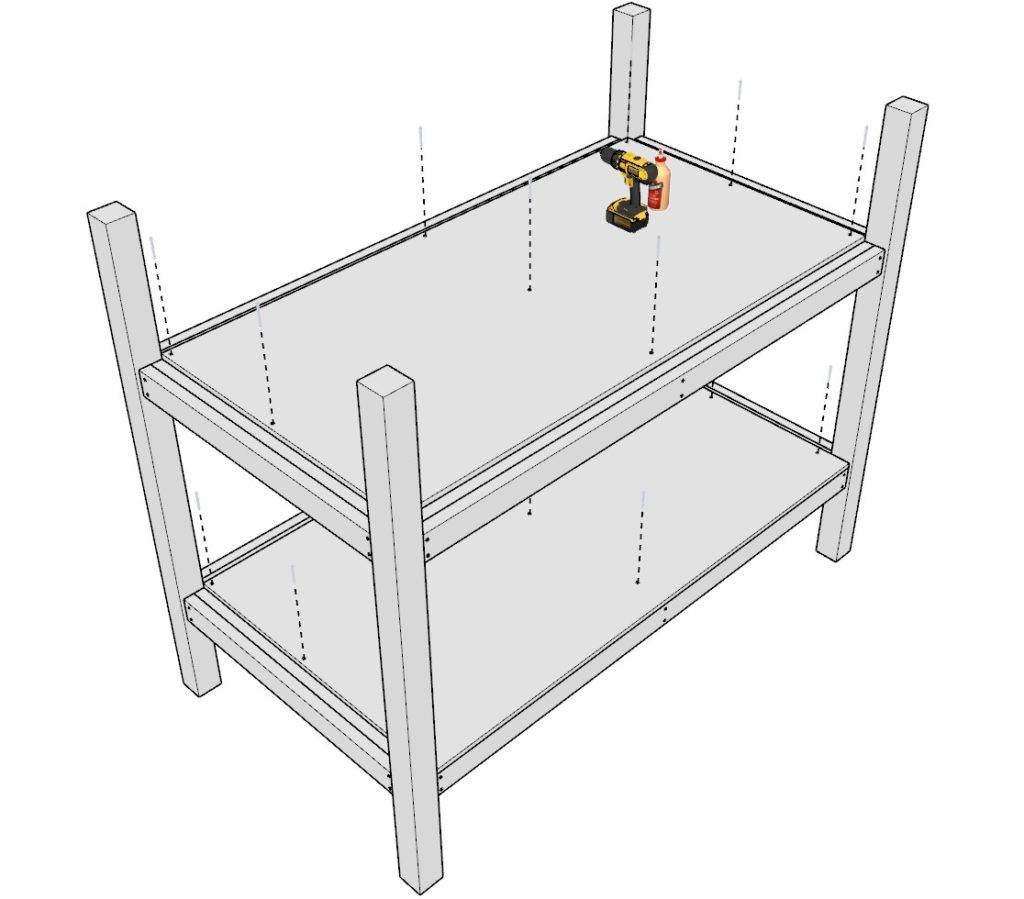
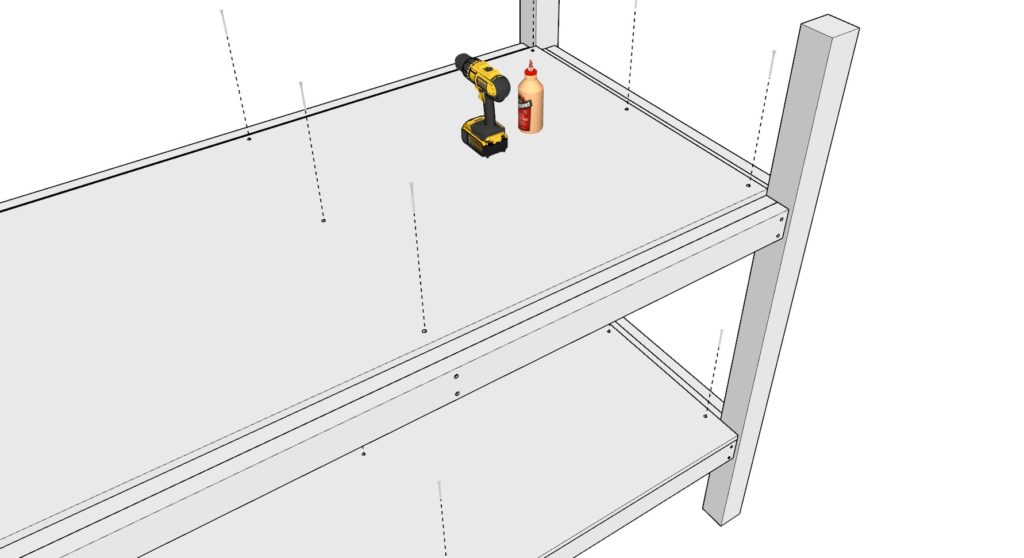
Next, add the 3/4″ thick plywood sheets to the bed frame.
Take two plywood sheets. One 42-1/2 inch x 76-1/2 inch long and another that is 39-1/2 inch x 76-1/2 long and add them to the frame of the bed as shown below.
Predrill, use glue, and join the sheets with 3.5 inch screws.
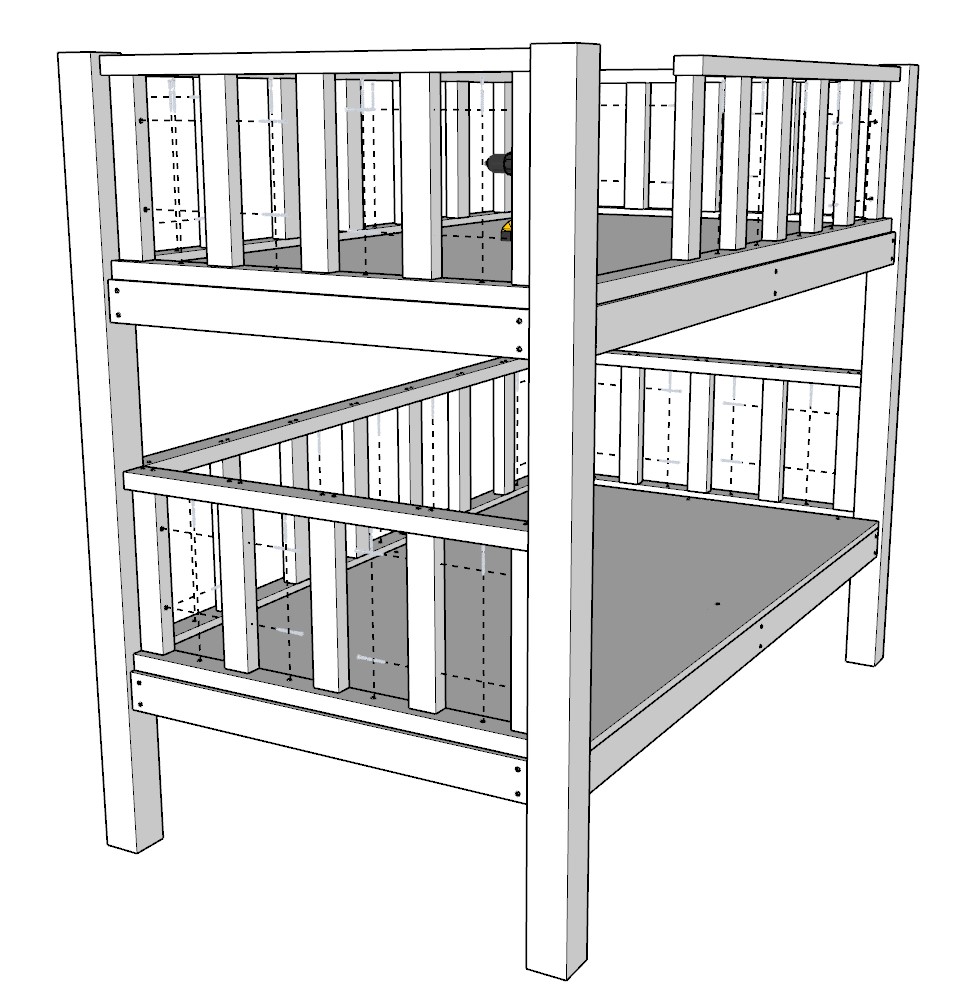
Step 4 (DIY bunk bed railing construction and installation)
Next, build and install the railing for the bunk bed.
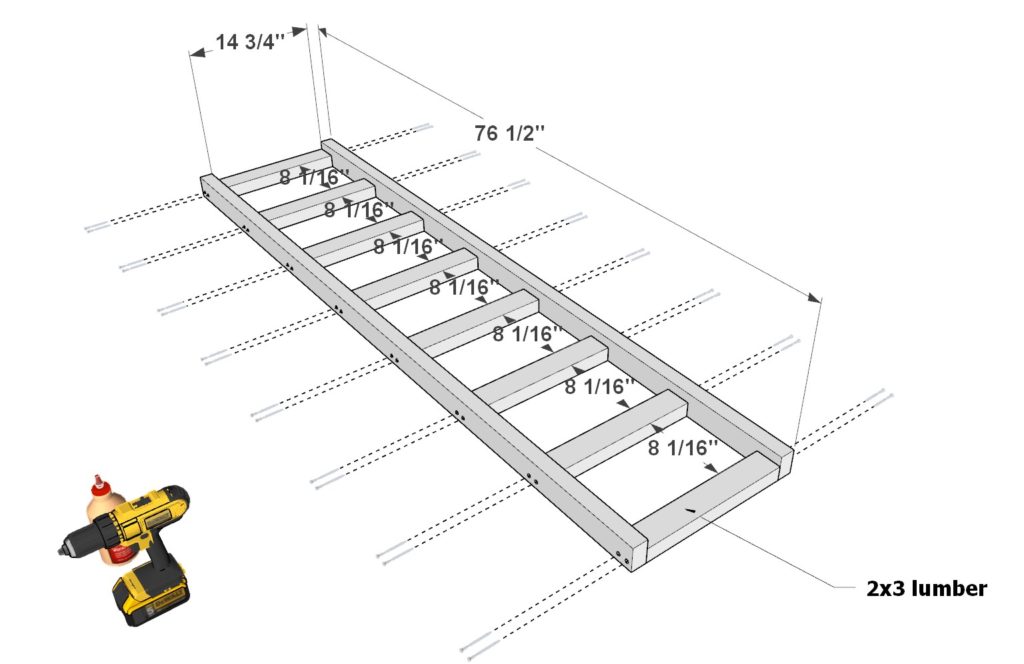
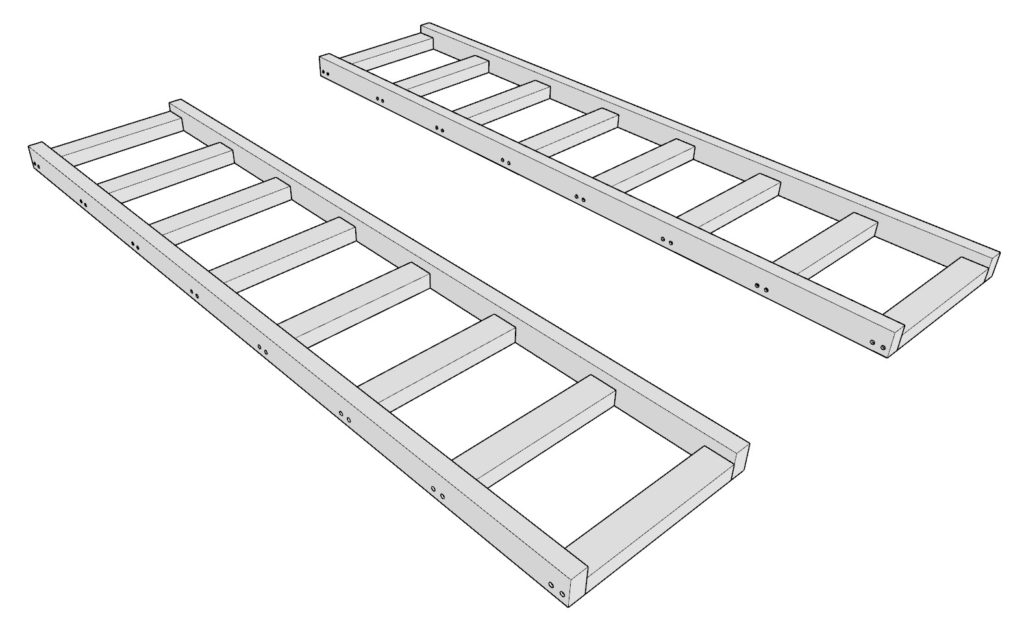
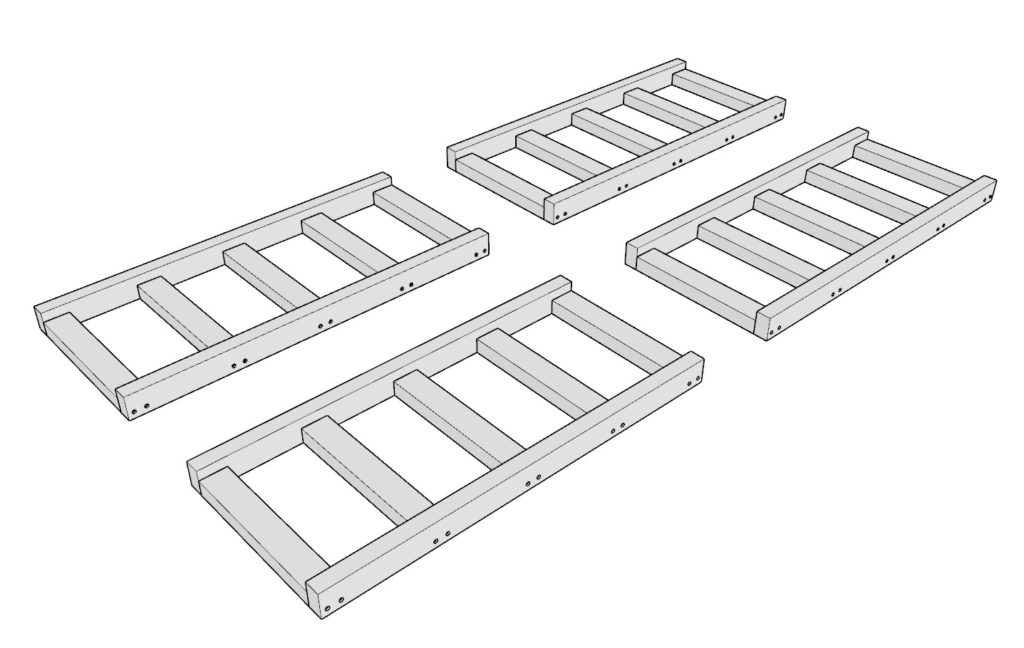
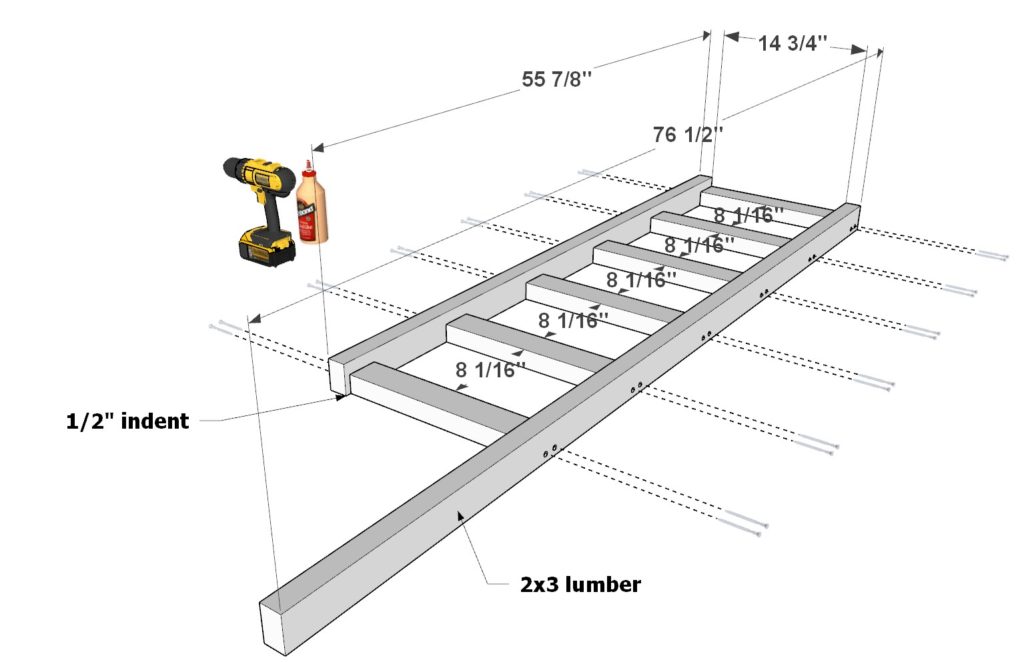
First, take two 76-1/2 inch 2×3 lumber pieces and eight 14-3/4 inch long 2×3 lumber pieces and arrange them as shown below. Join these pieces using 3.5 inch screws, glue, and predrilling. Make two identical railing pieces.
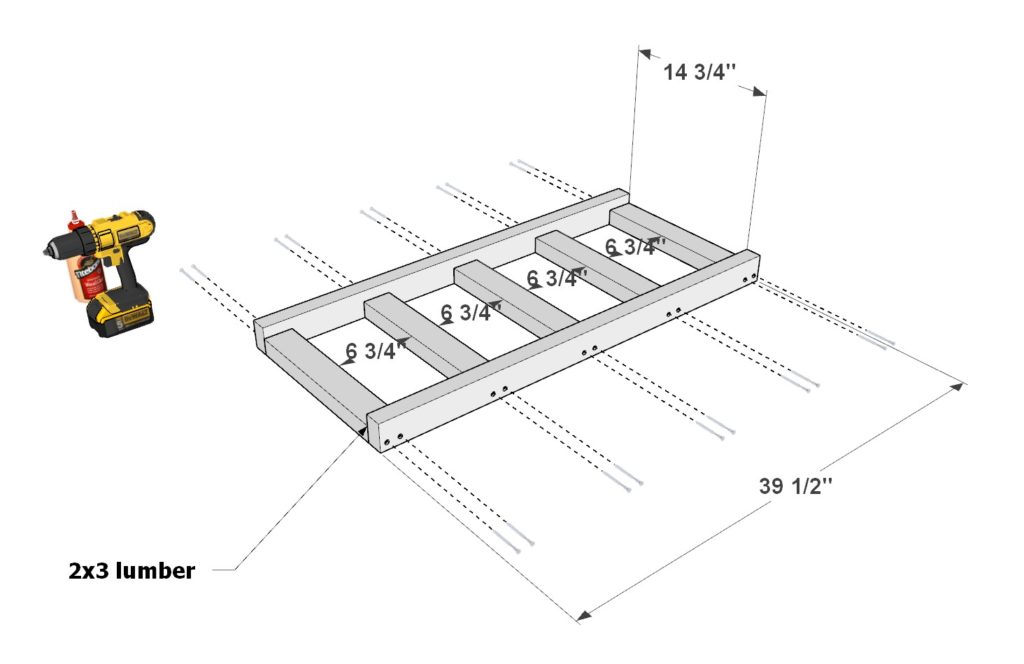
Next, take two 39-1/2 inch 2×3 lumber pieces and five 14-3/4 inch 2×3 lumber pieces and arrange them as shown below. Join these in the same way as the long railing pieces. Make four identical shorter railing pieces.
Next, take one 76-1/2 inch 2×3 lumber piece and one 55-7/8 inch 2×3 lumber piece and six 14-3/4 inch 2×3 lumber pieces and arrange them as shown below. Join these in the same way as before.
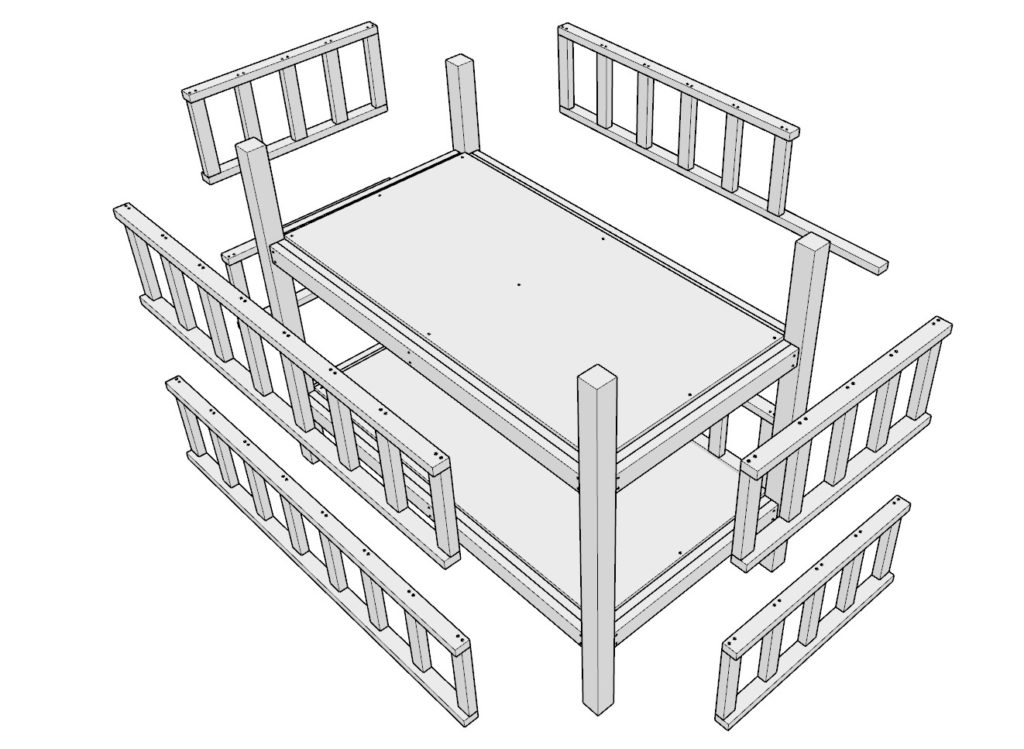
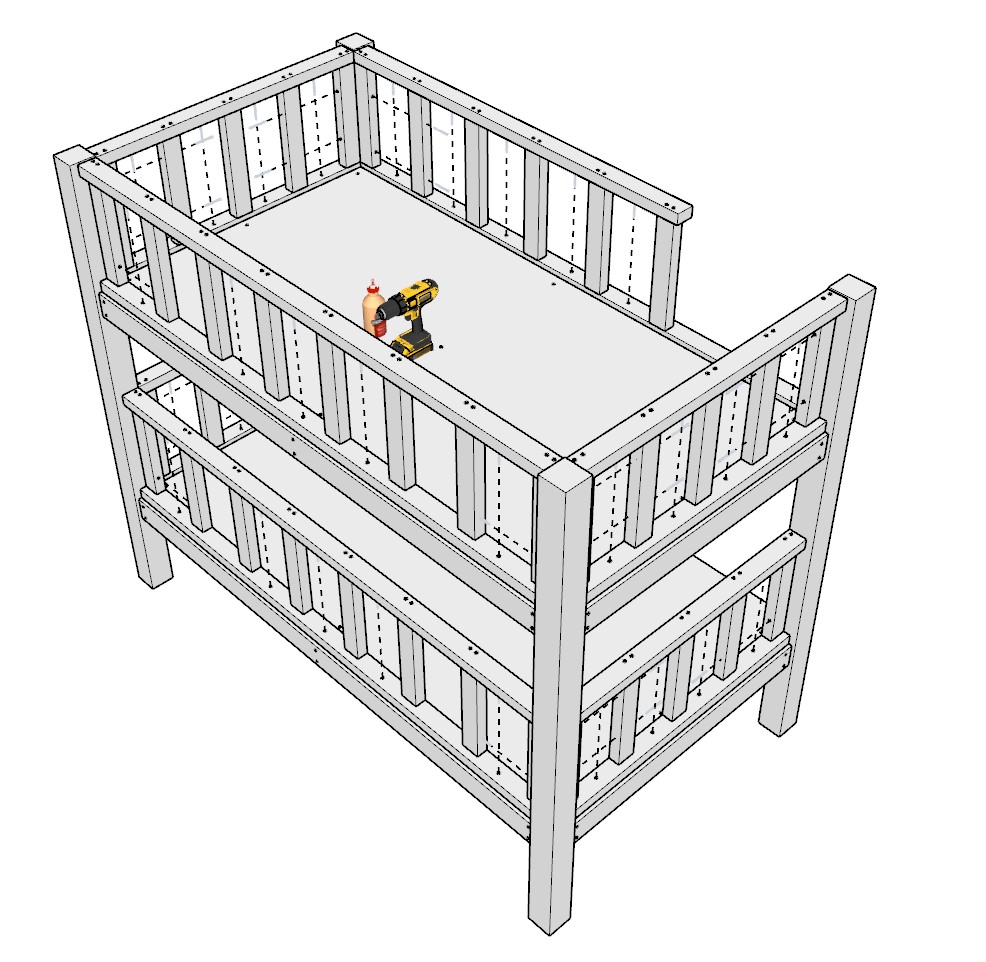
Next, take these railing pieces and add them to the main frame of the bunk bed as shown below. Use 3.5 inch screws to secure the railing to the posts and bed frame. Add glue and predrill.
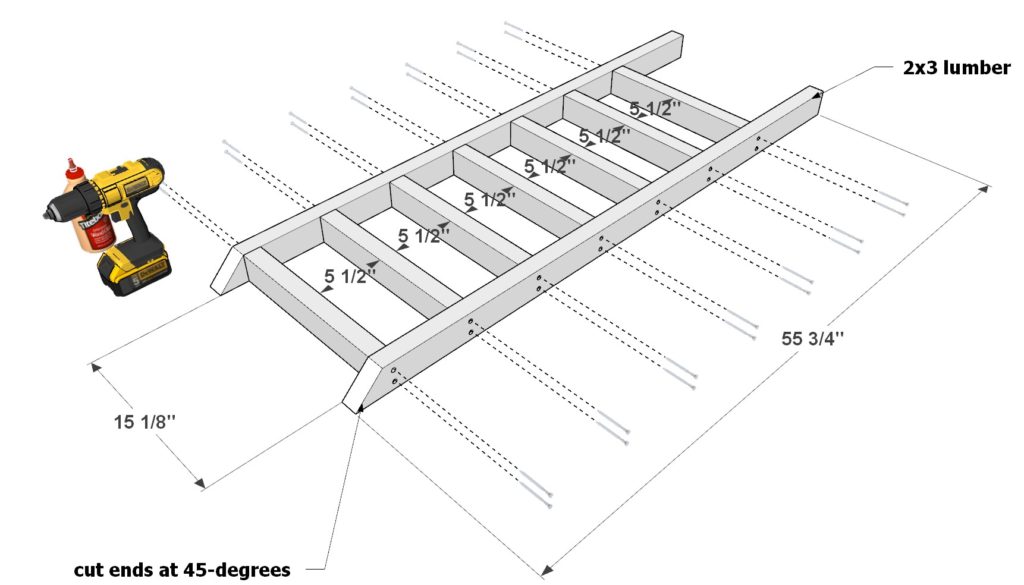
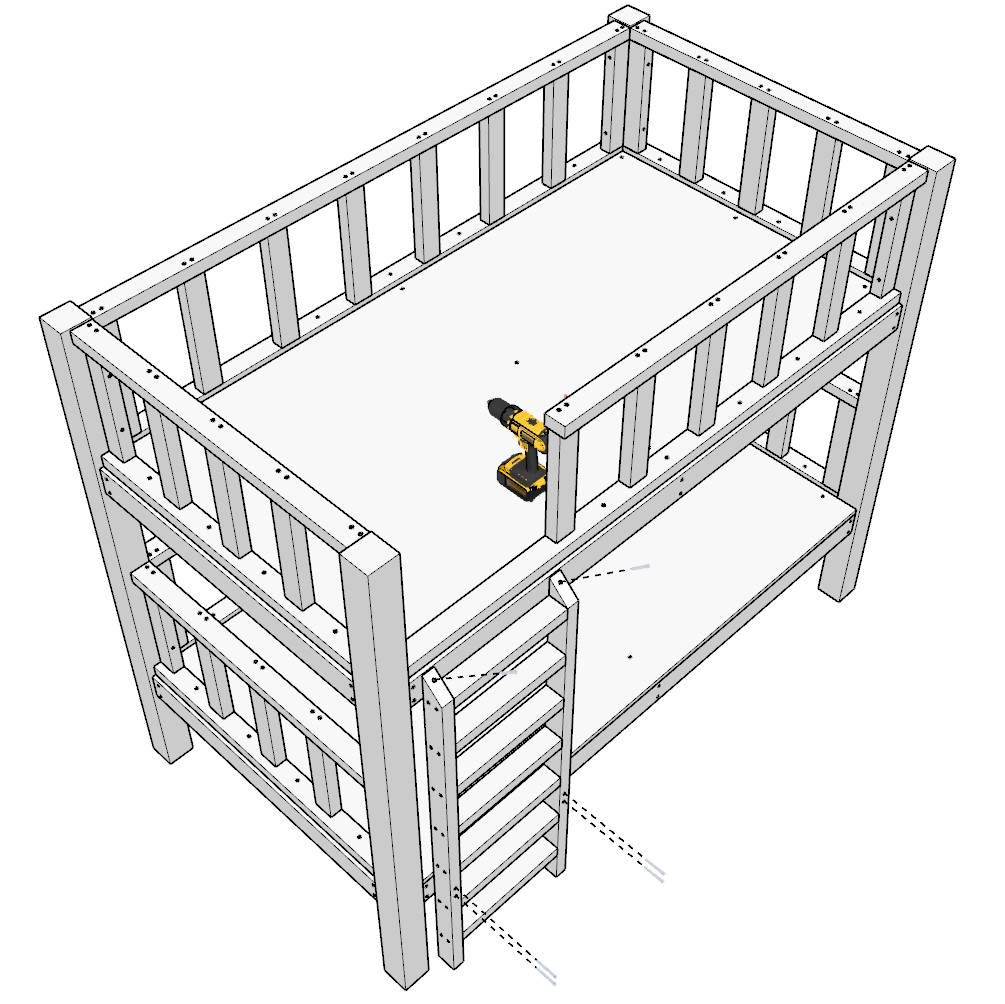
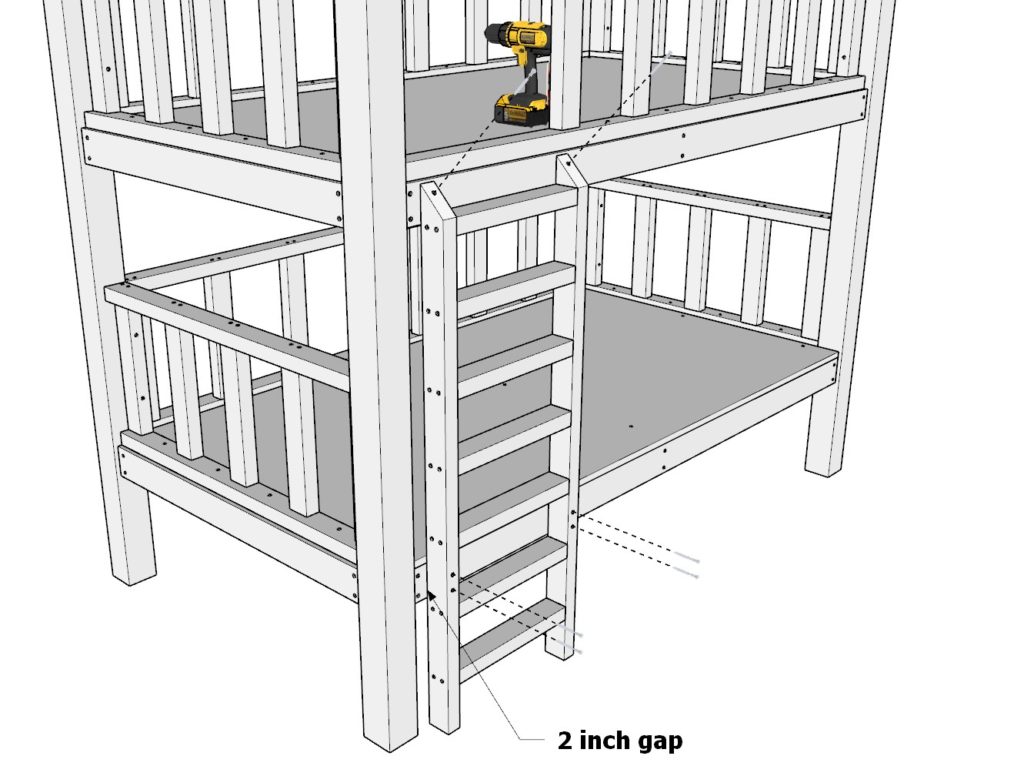
Step 5 (Bunk bed ladder installation and construction)
Build and install the ladder for the bunk bed.
Take two 55-3/4 inch long 2×3 lumber pieces (cut at 45-degrees on one end for aesthetics) and 15-1/8 inch 2×3 lumber pieces and arrange them as shown below. Join these 2×3 pieces by predrilling, gluing, and adding 3.5 inch screws.
Join the ladder to the main frame of the bed by using 3.5 inch screws.
Lastly sand down the bunk bed and paint or stain it.
Thanks for this. It was really helpful!