Introduction
Hello, fellow creators and crafters! If you’ve been on the hunt for a workbench plan that marries simplicity with efficiency, your search ends here. We’re talking about a DIY solution that fits your garage like a glove, offering a no-nonsense approach to building a space where ideas can flourish and projects come to life.


Features
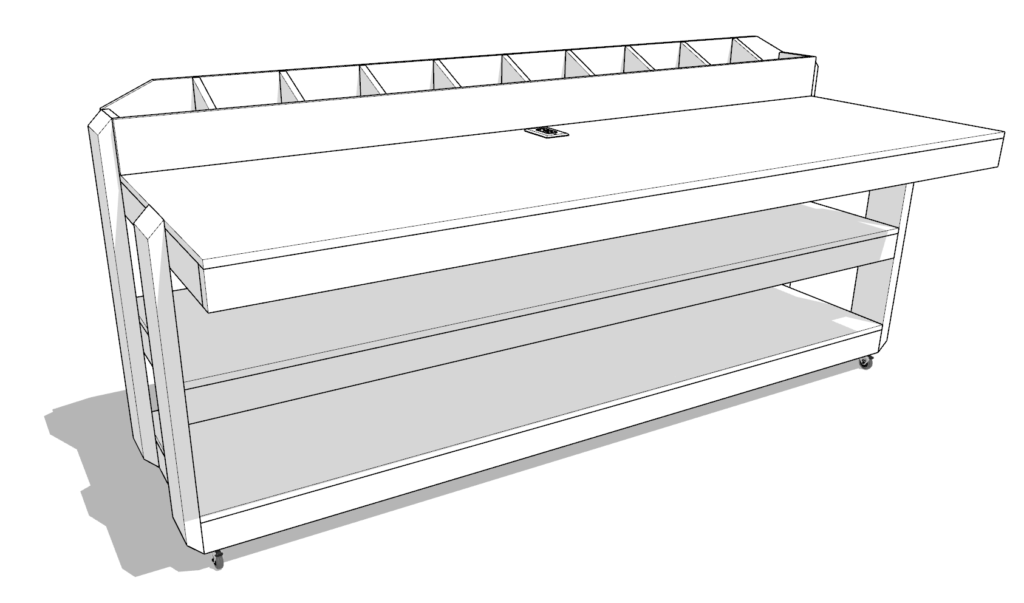
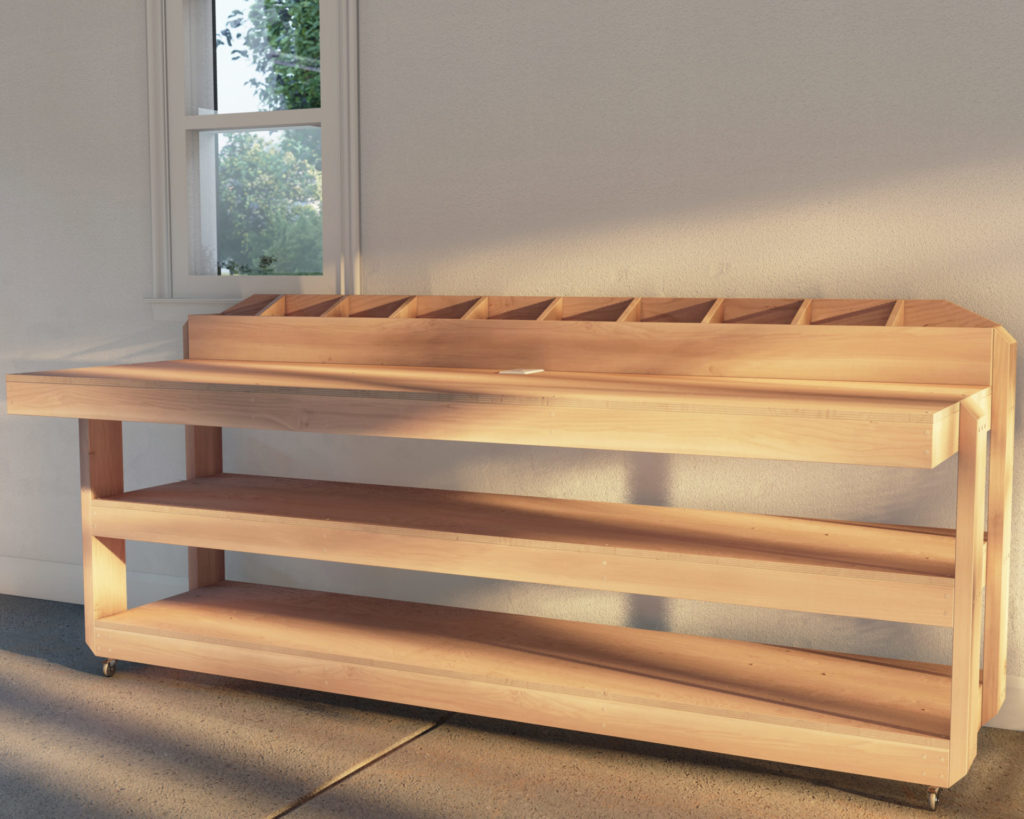
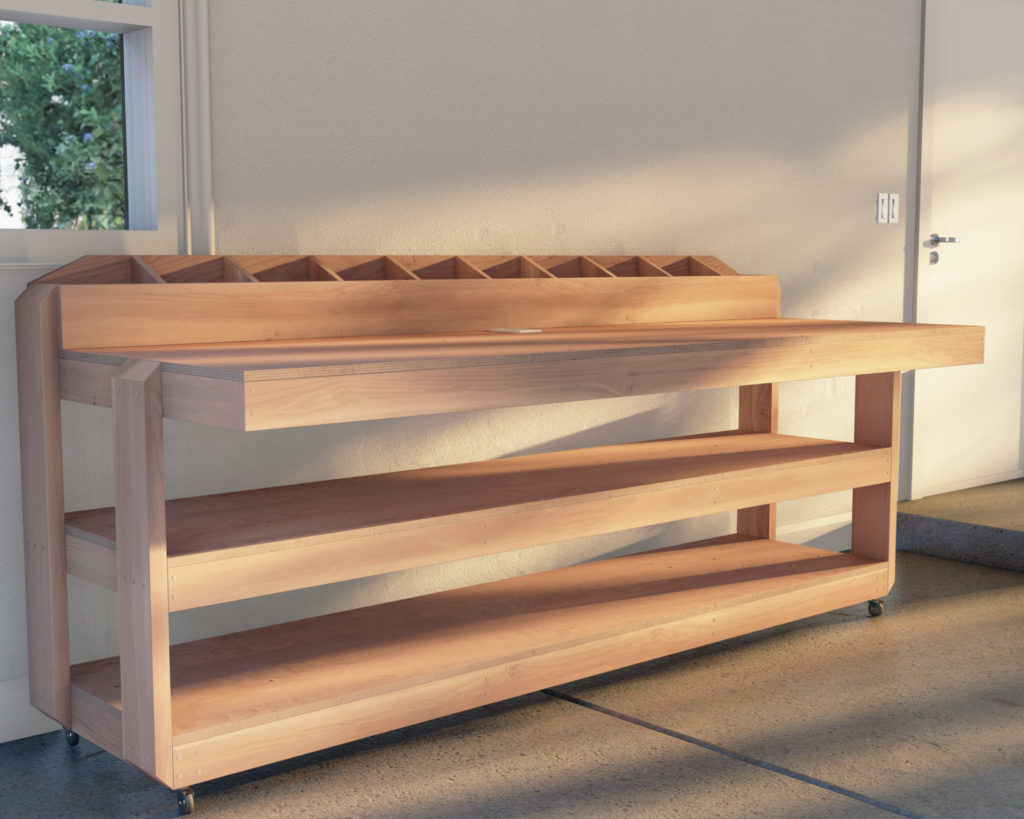
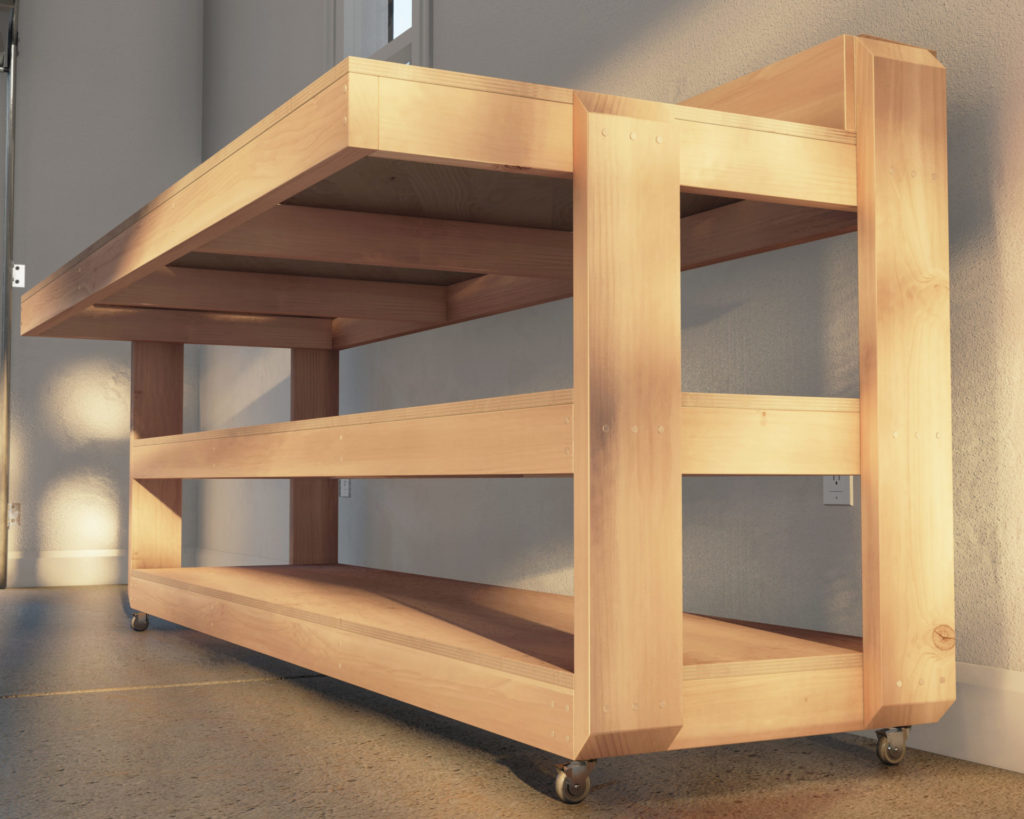
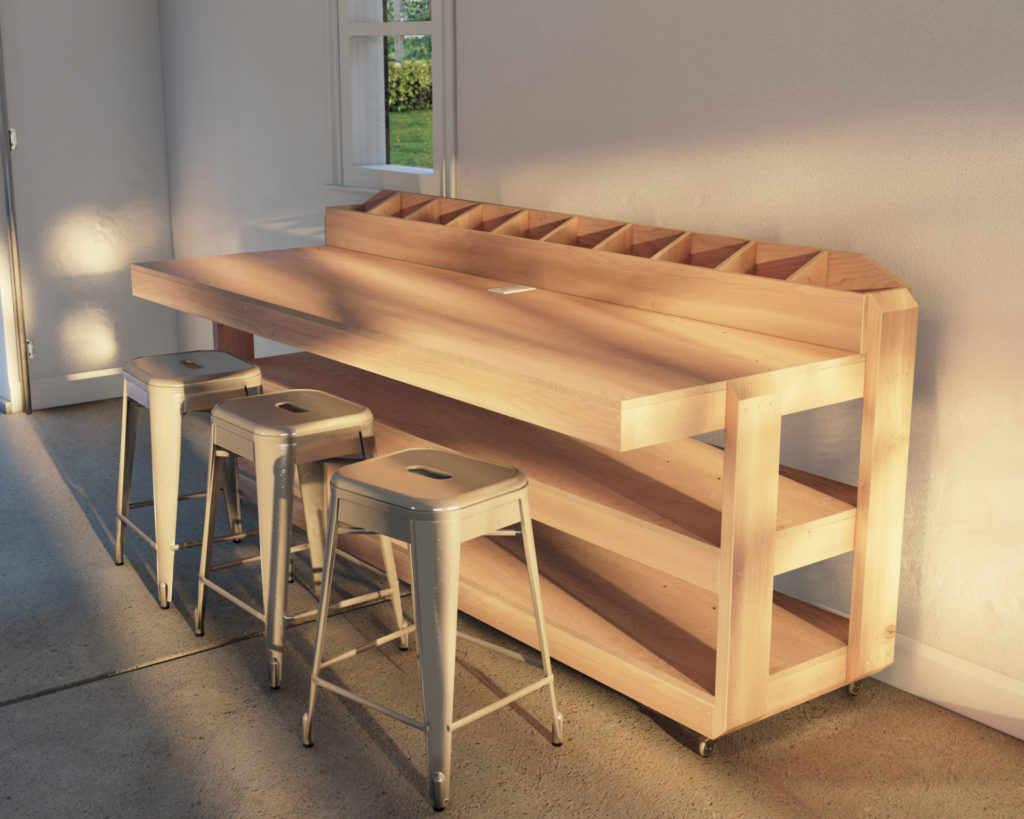
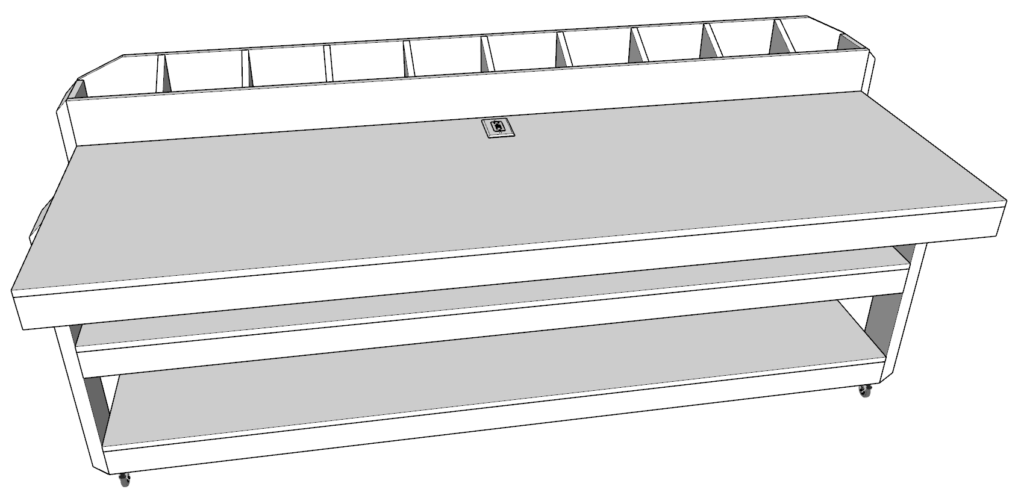
This workbench is your sturdy companion, hailing from the aisles of your favorite hardware store with common lumber that’s both resilient and reliable. We’ve added wheels for that go-anywhere vibe because we know the best workshops are dynamic, just like your creativity. The generous shelving and cubby storage are the organizational allies you never knew you needed, keeping everything you need within arm’s reach.
Tailored for Beginners
No gatekeeping here; this workbench welcomes all skill levels with open arms. With an emphasis on straightforward assembly, we’re skipping the complex joinery in favor of a clear-cut path to success. It’s the perfect project for beginners looking to step up their DIY game or for seasoned pros who appreciate a fuss-free setup.
Flexible Functionality
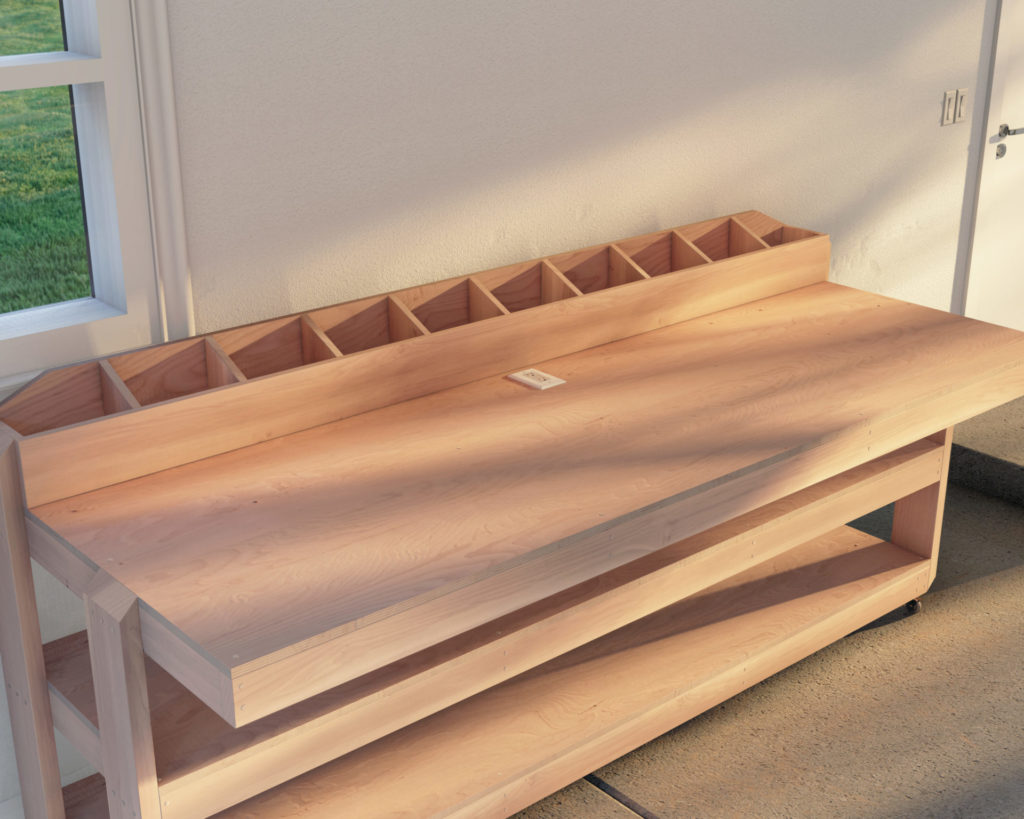
This is more than a workbench—it’s a multipurpose stage for all your masterpieces. Standing proudly at an ergonomic 36 inches, it’s designed for comfort whether you choose to sit or stand, making those marathon crafting sessions a breeze. And with enough space for a team, collaboration has never been easier. The built-in outlet is the cherry on top, ensuring your tools are always ready to spring into action.
Conclusion
This plan is your blueprint to a workspace that evolves with you, from your first uncertain saw cuts to your confident master strokes. It’s about maximum value, minimum fluff, and a dedication to the craft that binds us all. So let’s roll up those sleeves and bring this bench to life—it’s time to make, create, and inspire.
Time
(varies with experience)
Cost
$220 Costs may vary based on location and supplier.)
Skill level required
Beginner
DIY Workbench PDF Plan
What is included in the PDF download?
- Easy to read step by step instructions
- Material list
- Tools needed
- Helpful links to materials and tools needed
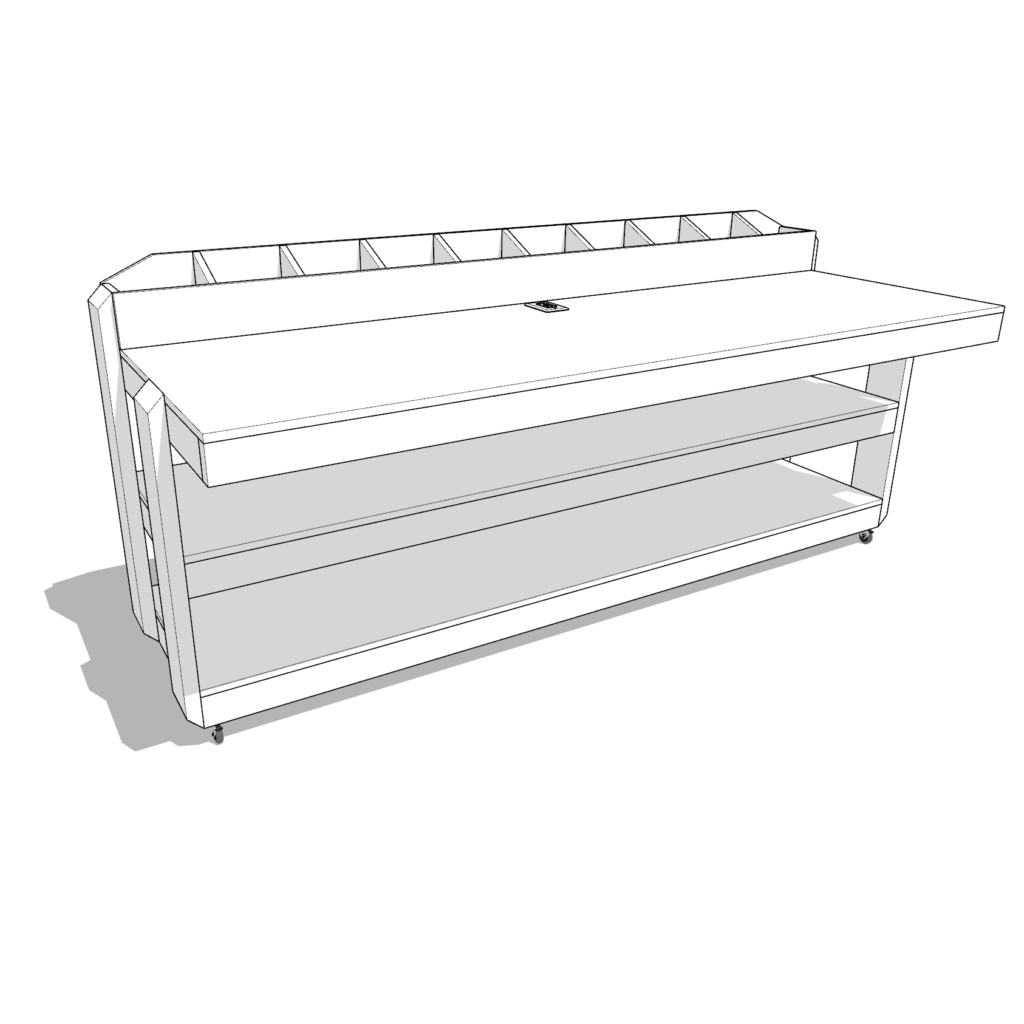
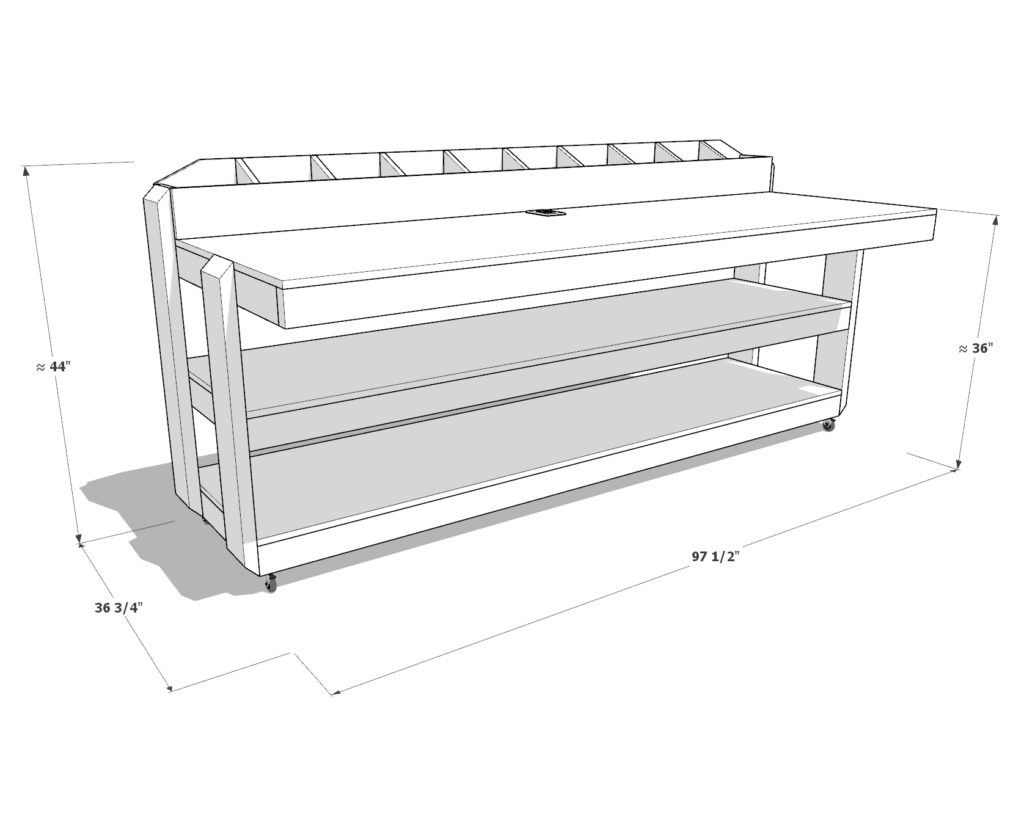
DIY Workbench Dimensions
Tools and Materials:
DIY plan available with the purchase of the DIY plan PDF.
Lumber Shopping & Cut List:
DIY plan available with the purchase of the DIY plan PDF.
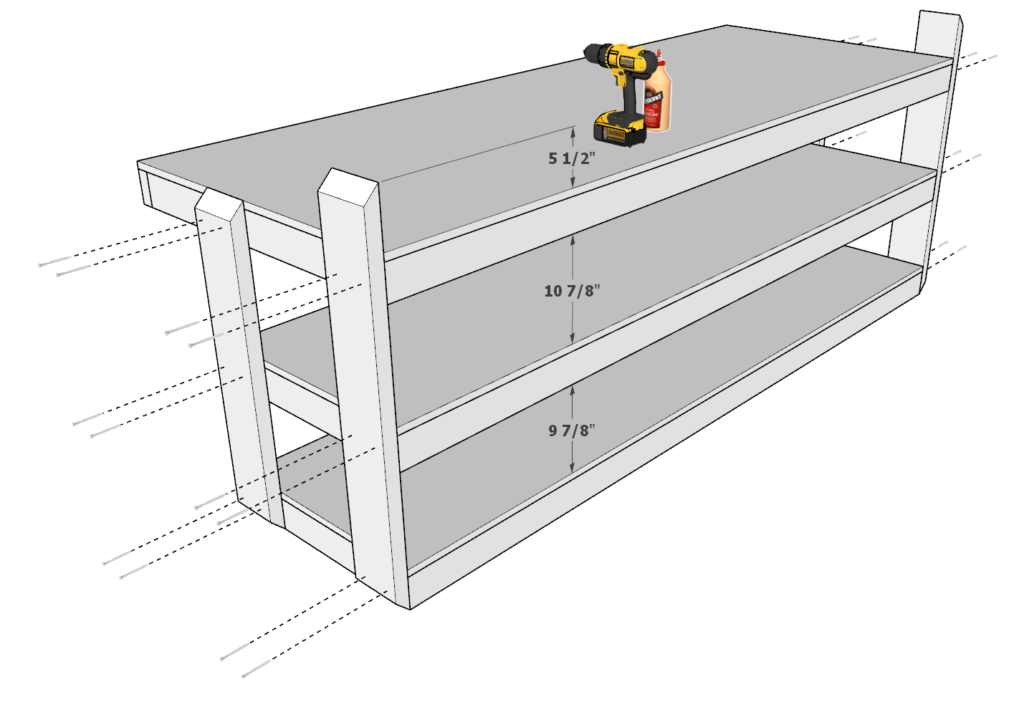
Step 1: Assembling the Workbench Frame and Shelves
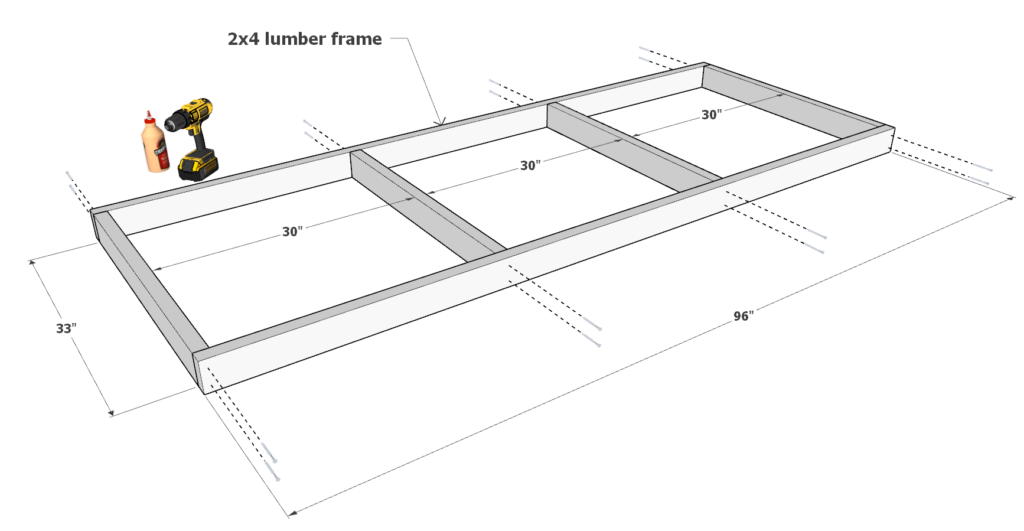
Desk Top Frame Construction
- Take two 96-inch 2x4s and four 33-inch 2x4s.
- Lay them out as shown in the diagram.
- Use 3.5-inch screws and wood glue to join the pieces securely.
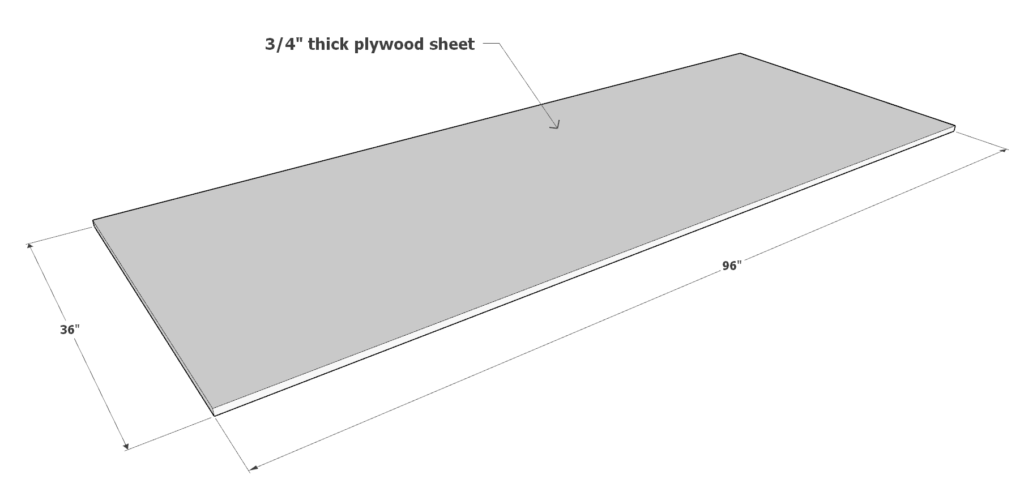
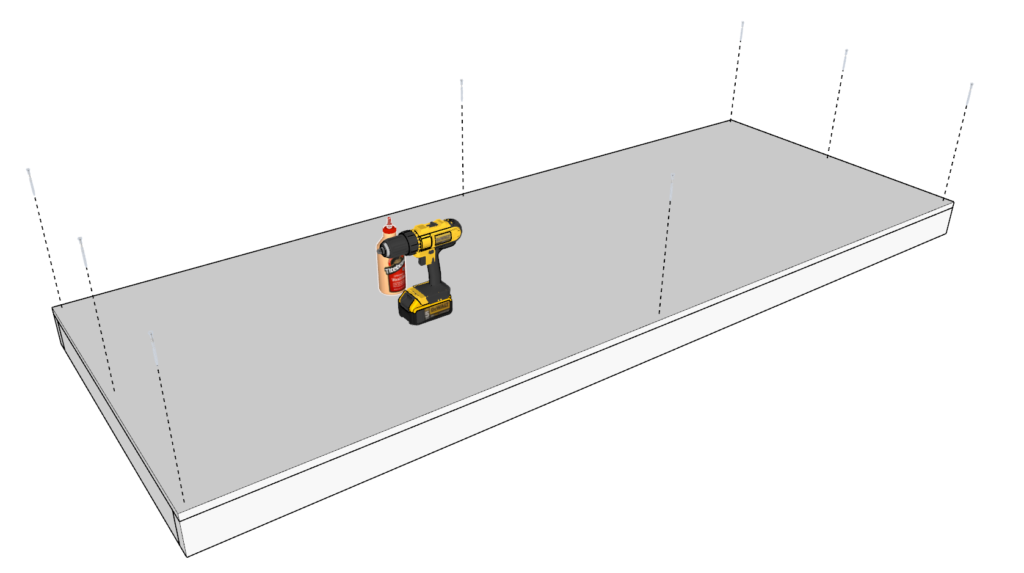
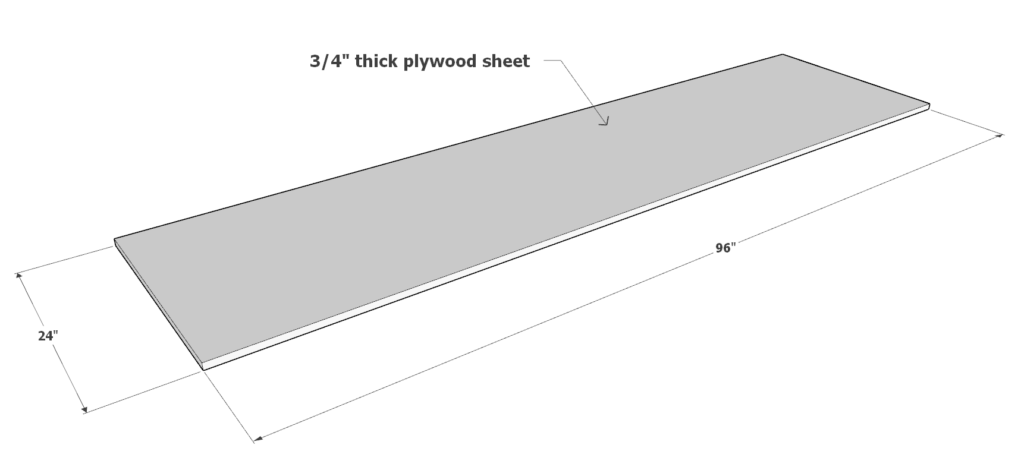
Attaching the Plywood to the Frame
- Place a 96-inch x 36-inch plywood sheet, 3/4″ thick, on top of the frame.
- Fasten with 3.5-inch screws and wood glue.
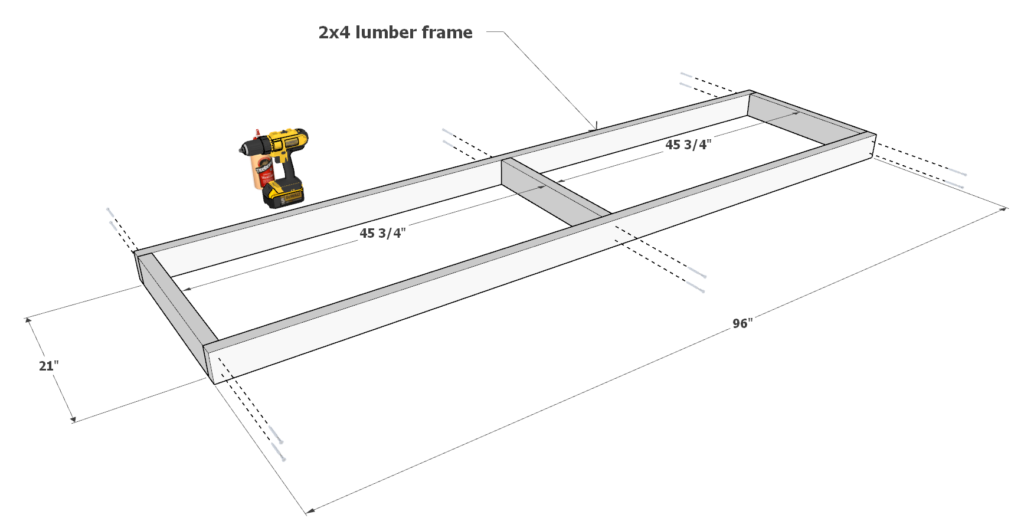
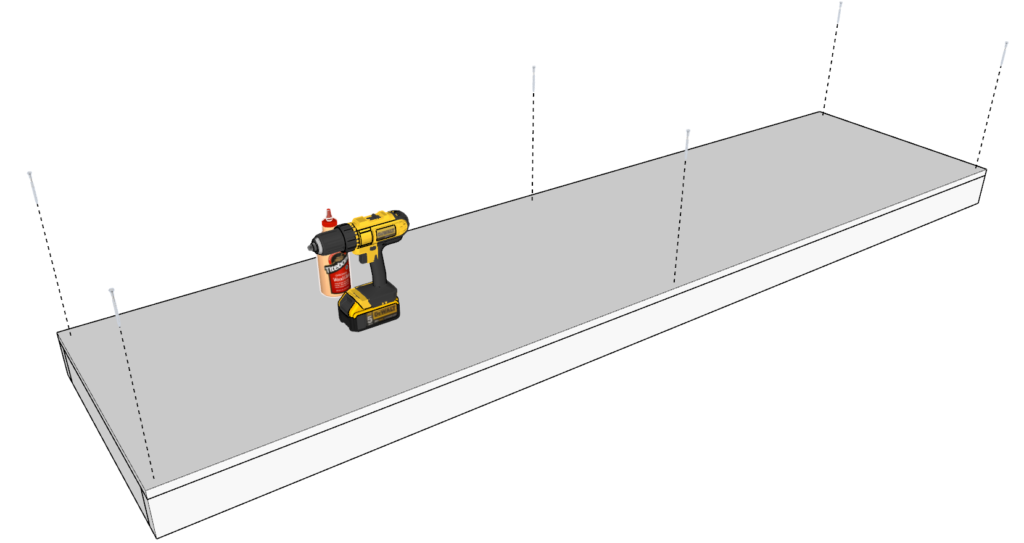
Shelf Assembly
- Take two 96-inch 2x4s and three 21-inch 2x4s for each shelf.
- Arrange them as detailed in the instructions.
- Secure them with 3.5-inch screws and wood glue.
- Add a 96-inch x 24-inch plywood sheet on top for each shelf.
- Attach with wood glue and 3.5-inch screws.
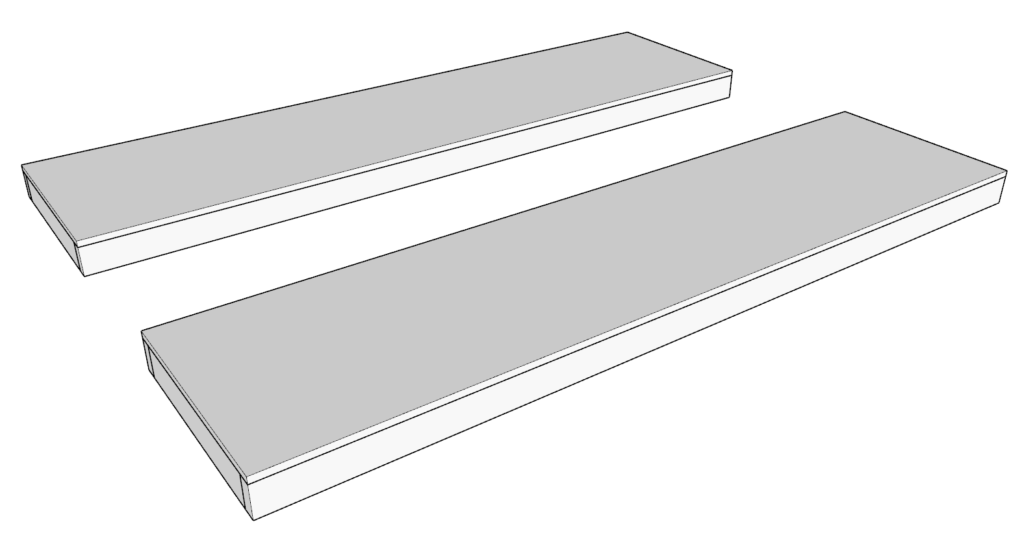
- Construct two identical shelves.
Tips for Assembly
- Use a countersink drill bit to prevent wood splitting and to ensure screws sit flush against the lumber.
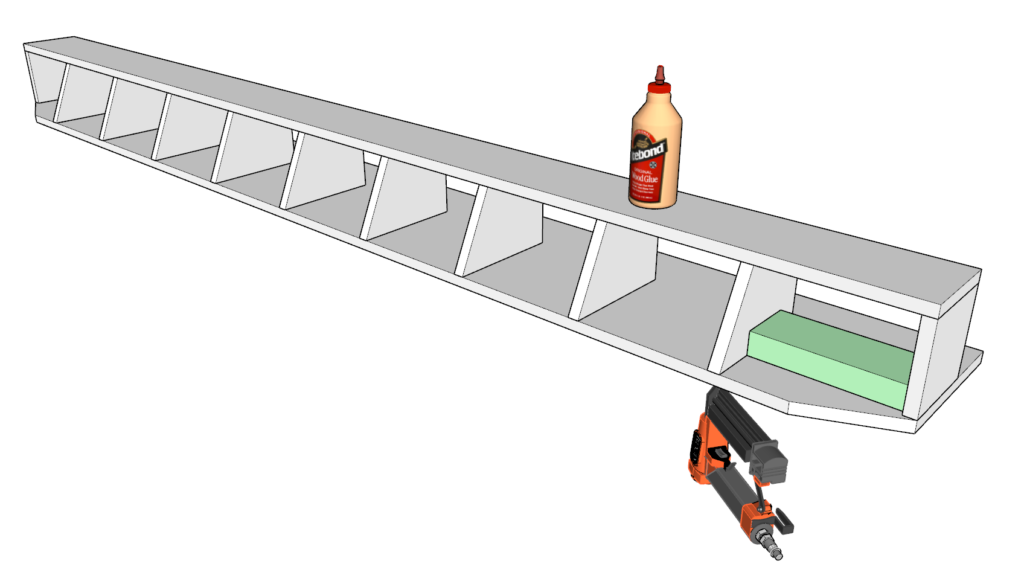
Step 2: Building and Assembling the Cubbies
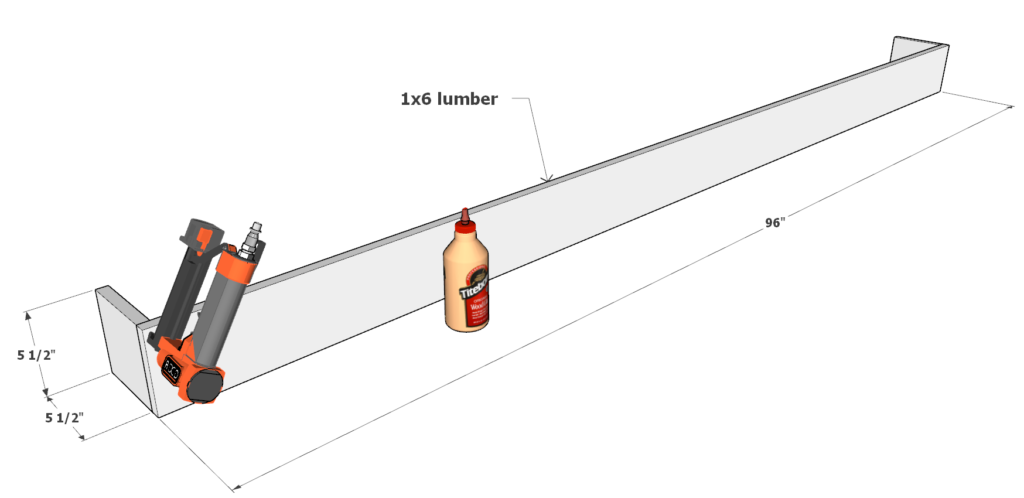
Constructing the Cubby Base
- Take one 96-inch 1×6 lumber board and two 5-1/2 inch 1×6 lumber pieces.
- Join them using wood glue and 1.5-inch pin nails.
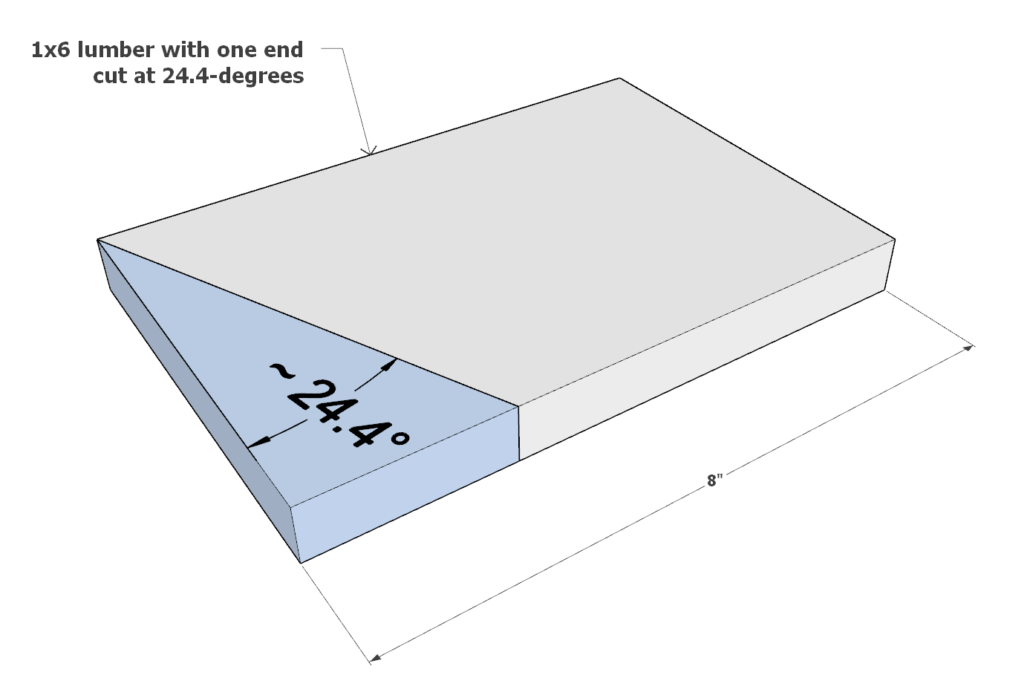
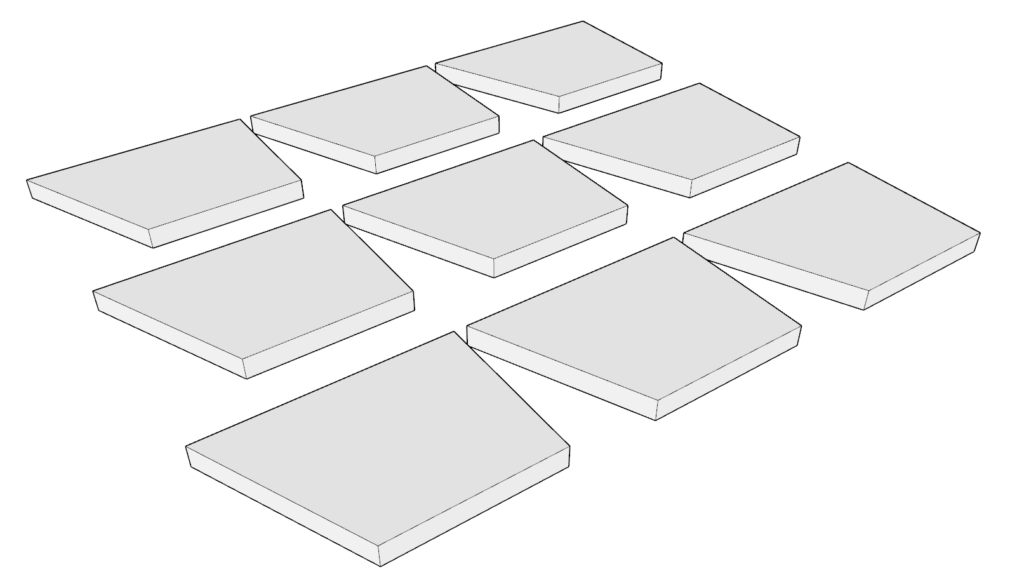
Creating Cubby Dividers
- Cut a 1×6 board into a 8-inch length with one end at a 24.4-degree angle, as shown in the diagram.
- Trim away the marked blue portion.
- Make a total of 9 cubby dividers in this manner.
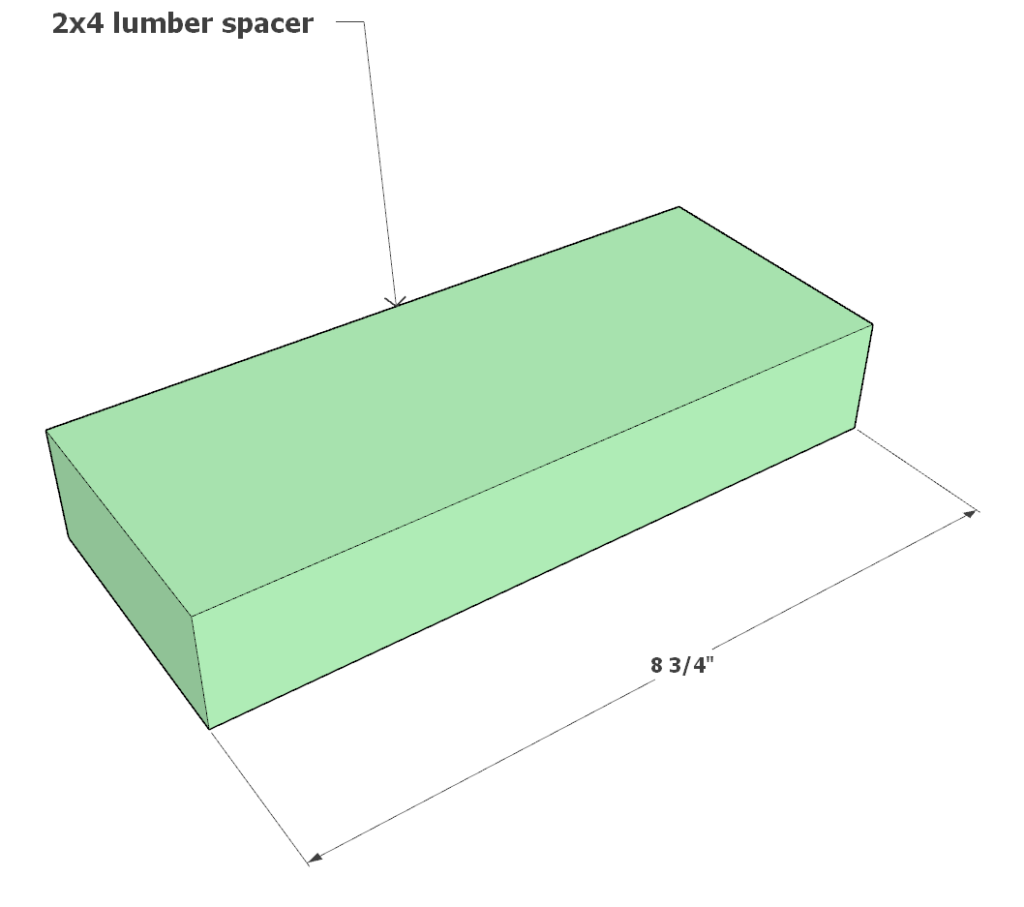
Preparing a Spacer
- Cut a spacer that is 8-3/4 inches long to assist in cubby assembly.
Attaching the Dividers
- Use the spacer to evenly and symmetrically attach the dividers to the cubby assembly.
- Start from the ends and work towards the center.
- Use wood glue and 1.5-inch pin nails for attachment.
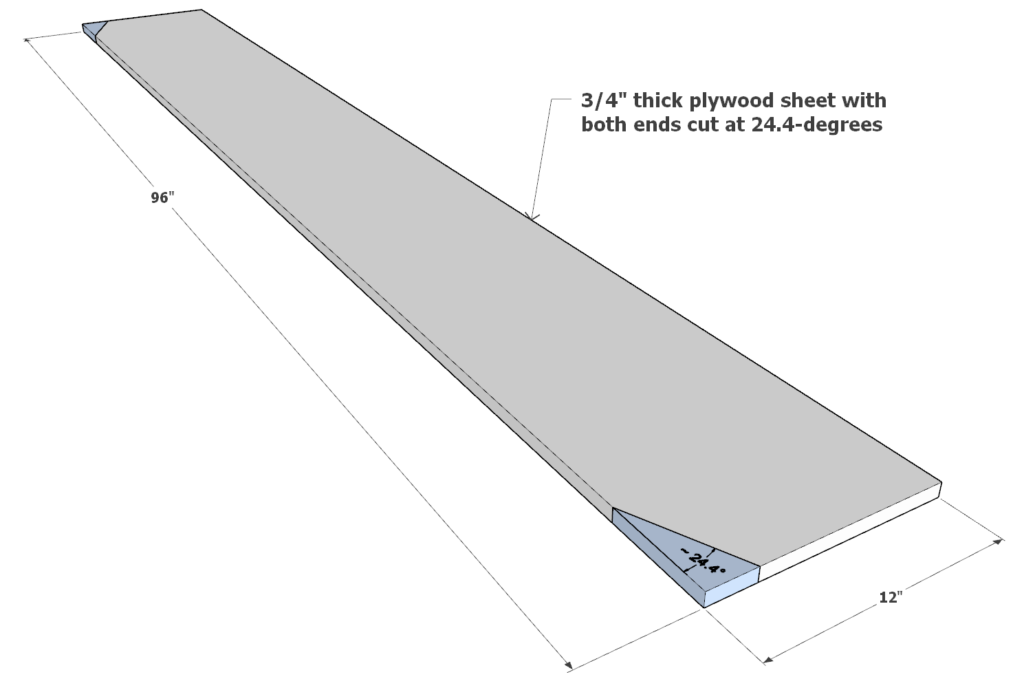
Cutting the Back Board
- Take a 96-inch x 12-inch 3/4″ plywood sheet.
- Cut off portions of the ends at a 24.4-degree angle, as indicated in the diagram (blue portion).
- This piece will serve as the back board of the cubbies.
Securing the Back Board
- Attach the back board to the main cubby assembly using the spacer, 1.5-inch pin nails, and wood glue.
Personalizing Cubby Sizes
- Consider adjusting cubby spaces to fit common tools.
- A useful tip is to layout the tools and measure the needed space for each cubby to accommodate them.

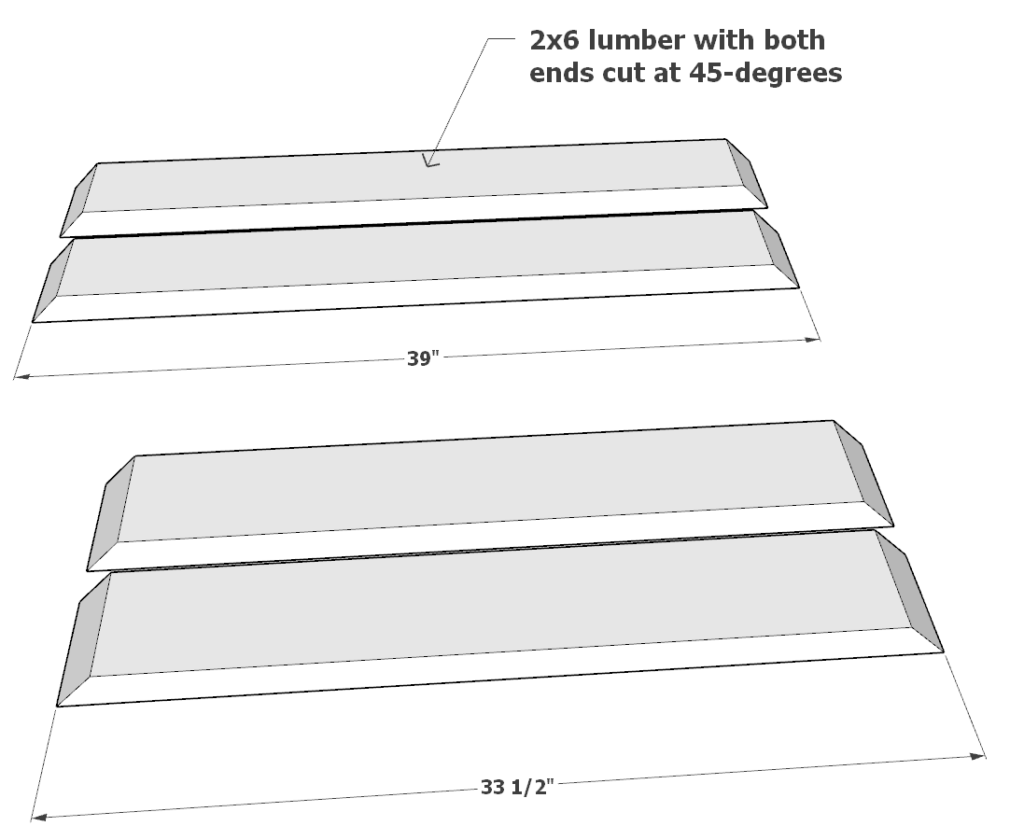
Step 3: Attaching Legs, Adding Cubbies, and Installing Casters and Outlet
Cutting the Leg Pieces
- Cut two 39-inch 2×6 lumber pieces at 45-degree angles on both ends.
- Cut two 33-1/2 inch 2×6 lumber pieces also at 45-degrees on both ends.
- These pieces will serve as the workbench legs.
Attaching Legs to Shelves and Top
- Secure the leg pieces to the shelves and worktop assembled in Step 1.
- Use 2.5-inch screws and wood glue for attachment (avoid 3.5-inch screws to prevent them from protruding).
- Adjust the spacing between shelves as needed for your tools or equipment.
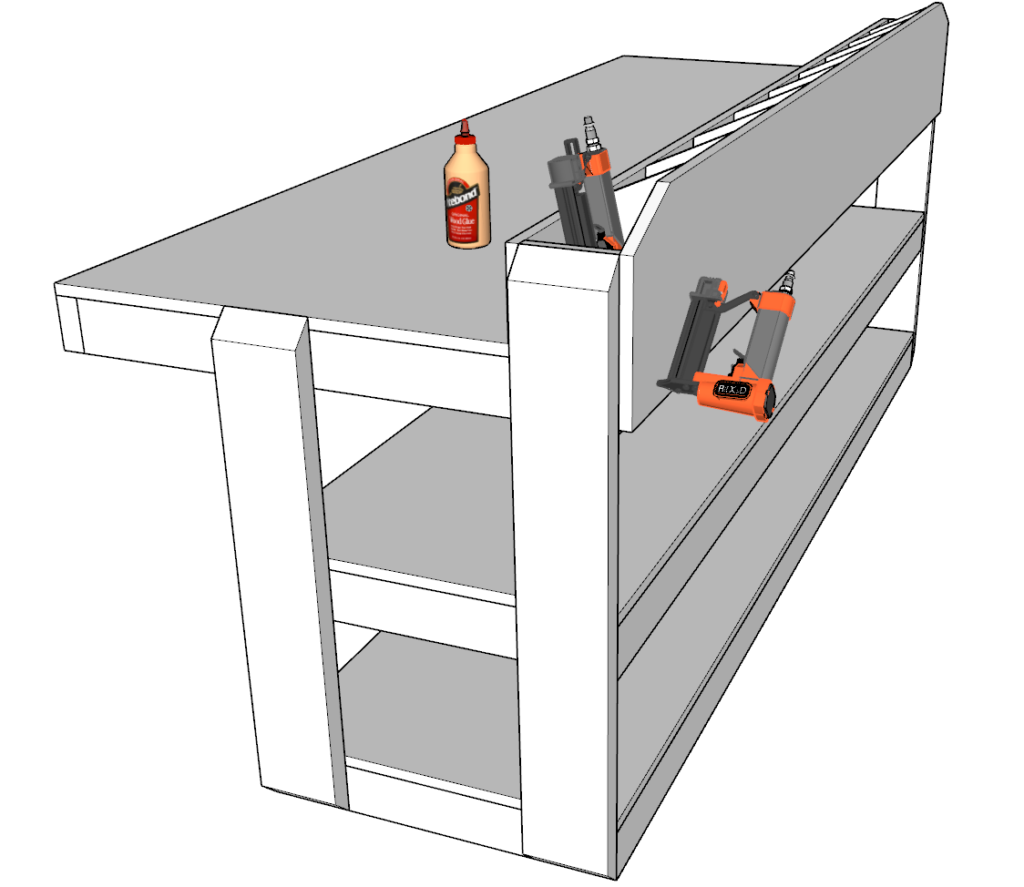
Adding the Cubbies to the Worktop
- Secure the storage cubby unit to the workbench top.
- Use wood glue and 1.5-inch pin nails for securing.
Installing Casters
- Attach Heavy Duty Casters with Brakes to the bottom of the workbench.
- This ensures mobility while also providing stability when the brakes are engaged.
Creating an Outlet Opening
- Cut a 3.8-inch by 1.69-inch opening for the outlet housing.
- Trace the desired location, drill out the four corners with a thick drill bit.
- Use a jigsaw or a thin saw to connect the holes, or use chisels to carve out the opening.
Installing the Outlet
- Install the outlet into the prepared opening.
- Use adhesive cable clips (to manage the cord) to secure the cord along the 2×4 lumber.
- Plug in the workbench to activate the outlet.


Step 4: Preparing the Workbench for Staining or Painting
Surface Preparation
- Sand the entire workbench thoroughly, starting with coarse-grit sandpaper (around 80-grit) and gradually moving to finer grits (up to 220-grit).
- Focus on smoothing out all surfaces and edges, removing any splinters or rough spots.
- Wipe down the workbench with a tack cloth or a damp rag to remove all sanding dust.
Applying Wood Conditioner (for Staining)
- If staining, apply a pre-stain wood conditioner to ensure even absorption of the stain. Follow the manufacturer’s instructions for application.
Guide to Staining the Workbench
Choosing Your Stain
- Select a wood stain of your choice. Oil-based stains provide longer working time, while water-based stains dry faster.
Applying the Stain
- Use a clean brush or rag to apply the stain evenly across the wood.
- Work in sections, applying the stain with the grain of the wood.
- Allow the stain to penetrate the wood for the time recommended by the manufacturer.
- Wipe off any excess stain with a clean rag, again following the grain.
Drying and Additional Coats
- Let the first coat dry as per the stain manufacturer’s instructions.
- If a darker color is desired, apply additional coats, allowing for adequate drying time between each.
Guide to Painting the Workbench
Primer Application
- Apply a coat of quality wood primer to the workbench.
- Let the primer dry completely, as per the manufacturer’s instructions.
Painting
- Choose a durable paint suitable for wood, preferably an enamel paint for its hard-wearing properties.
- Apply the first coat of paint using a brush or roller, working in the direction of the wood grain.
- Allow the first coat to dry completely.
Adding Additional Coats
- Lightly sand the surface with fine-grit sandpaper (about 320-grit) to ensure a smooth finish.
- Wipe away the dust, then apply a second coat of paint.
- Additional coats can be added for a more vibrant color or increased durability, with adequate drying time between coats.
Final Touches for Both Staining and Painting
Sealing (Optional)
- For added protection, apply a clear polyurethane sealer over the stain or paint.
- Use a brush or a clean rag to apply the sealer, following the wood grain.
- Allow the sealer to dry completely, following the manufacturer’s guidelines.
- Lightly sand with fine-grit sandpaper between coats for a smoother finish.
Final Cleanup
- After the final coat of sealer (if used) has dried, inspect the workbench for any drips or uneven areas.
- Perform any touch-ups as needed and clean up your workspace.