Introduction
The holiday season is upon us, and every nook and cranny of our homes yearns for that special touch. Amidst the ornaments and twinkling lights, stands a centerpiece that captures attention: the DIY display stand. A versatile piece, it’s perfect for showcasing everything from large platters to cake and fruit displays.
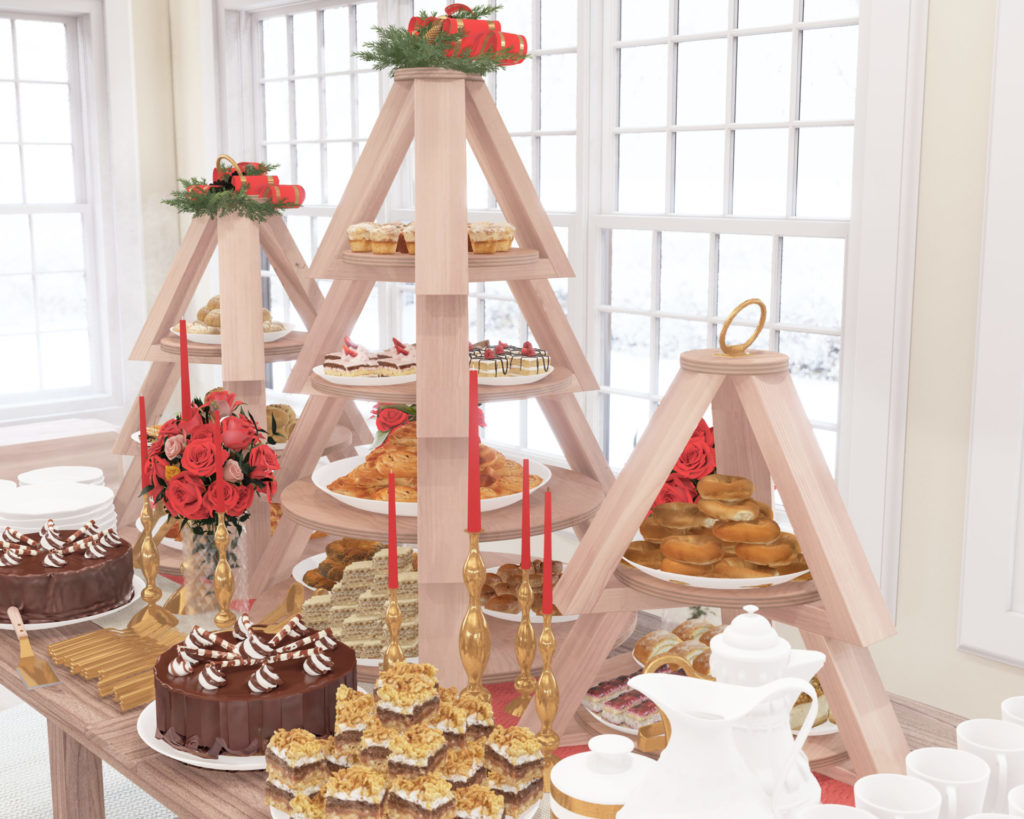
Imagine This Centerpiece in Your Festive Decor
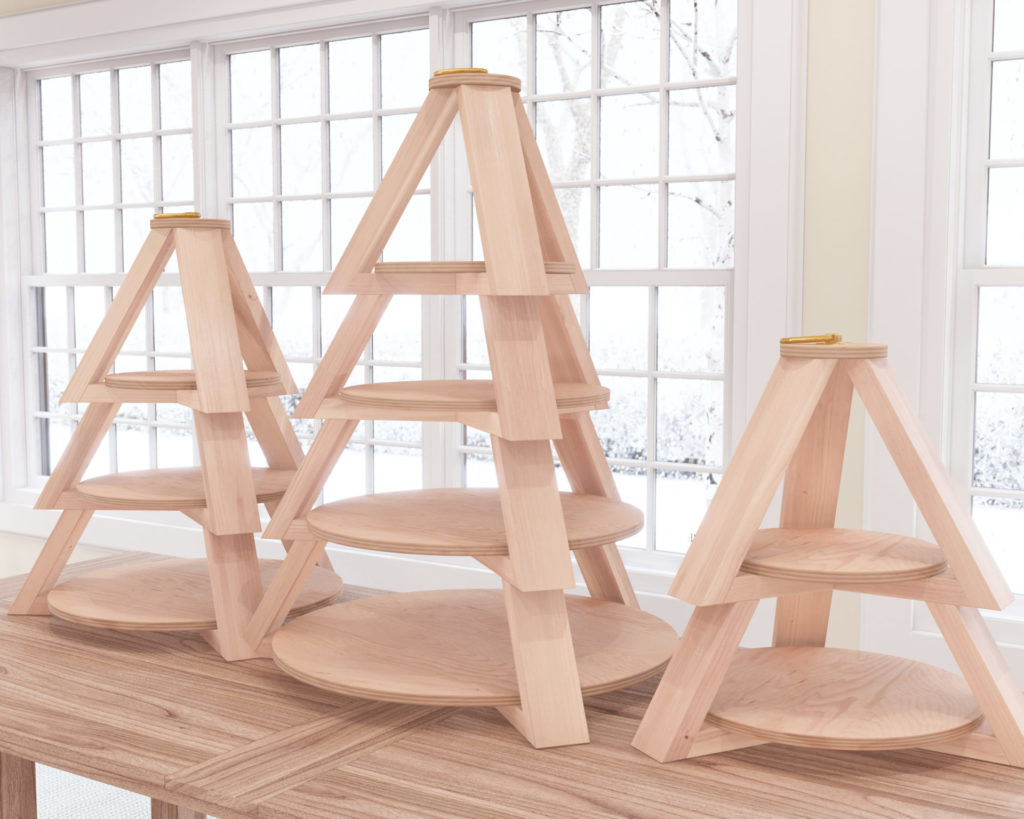
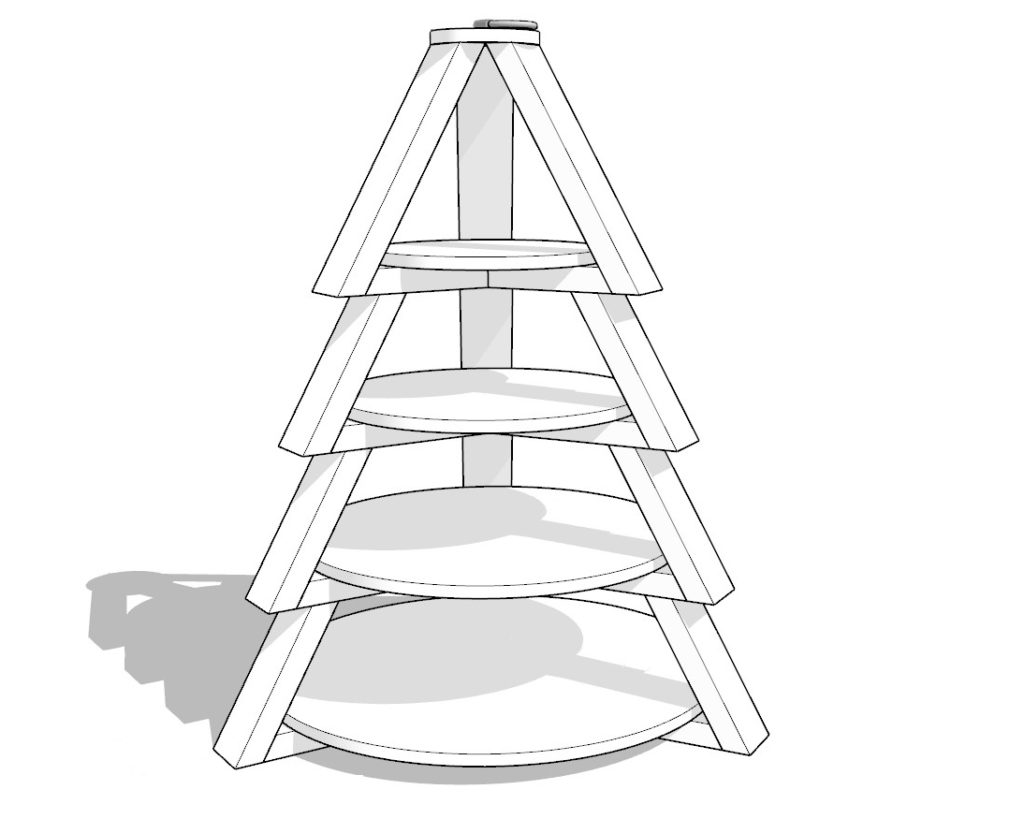
Envision your living space bathed in the soft glow of fairy lights. Snowflakes dance outside, friends and family gather around, and right in the heart of your setup, the DIY display stand elegantly showcases an assortment of treats or decorations. Whether it’s a grand display fruit platter, a cake display platter, or a collection of cherished trinkets, the stand adapts, making it a fitting addition to diverse decor themes.
Crafting with Inspiration
Inspired by the designs of Anna White, this DIY display stand promises simplicity in creation with an outcome that speaks of elegance and durability. Forget complex designs or the need for specialized tools; this project is accessible to everyone. Not only is it cost-effective, but its reusable nature ensures it remains a beloved piece in your festive decor collection for years.
Why Opt for the DIY Plan?
Embarking on a DIY journey without a guide can be daunting. The DIY plan for this display stand is your trusted companion. Detailed step-by-step instructions, accompanied by vivid images, ensure clarity at every stage. From a precise shopping list to nuanced staining and painting tips, the plan has got you covered. Crafting this piece isn’t just about the end result; it’s about the joy and satisfaction derived from the process.
In Conclusion
Adding a personal touch to holiday decor enriches the festive experience. The DIY display stand is more than just a decorative piece; it’s a reflection of your creativity and effort. So, gear up for a delightful crafting experience and let this centerpiece be the talk of your holiday gatherings.
Time
2 hours (varies with experience)
Cost
$40 (Costs may vary based on location and supplier.)
Skill level required
Beginner
DIY Christmas Tree Tiered Stand Display PDF Plan
What is included in the PDF download?
- Easy to read step by step instructions
- Material list
- Tools needed
- Helpful links to materials and tools needed
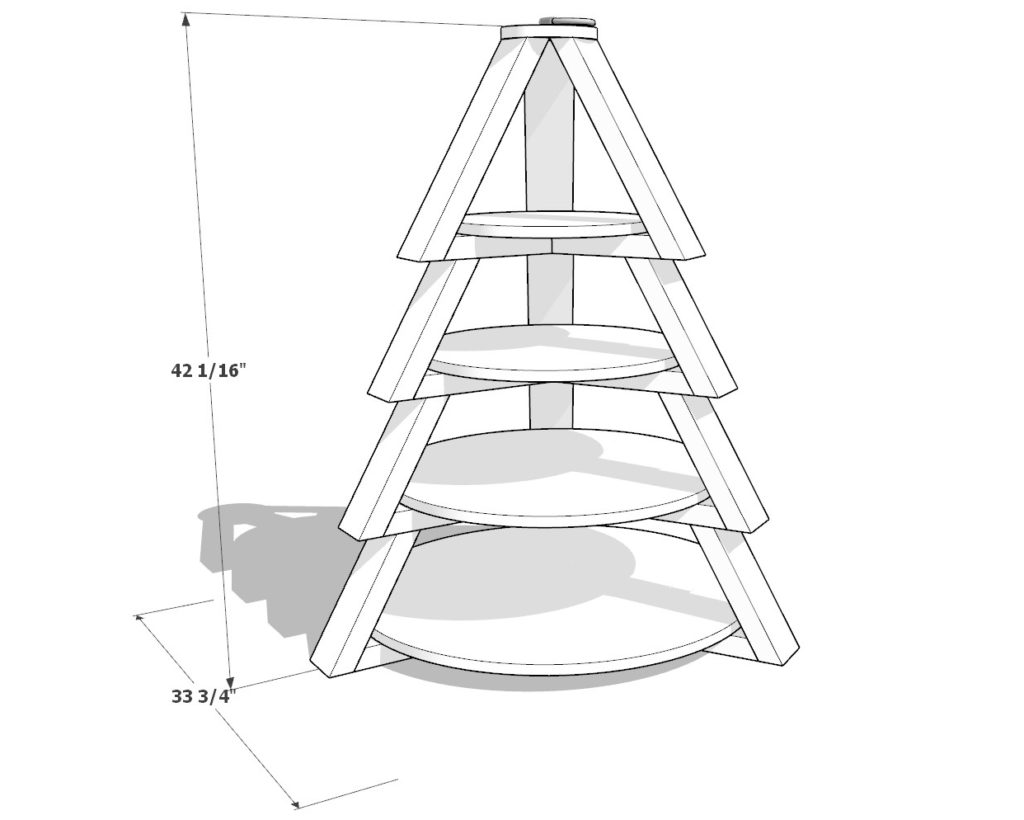
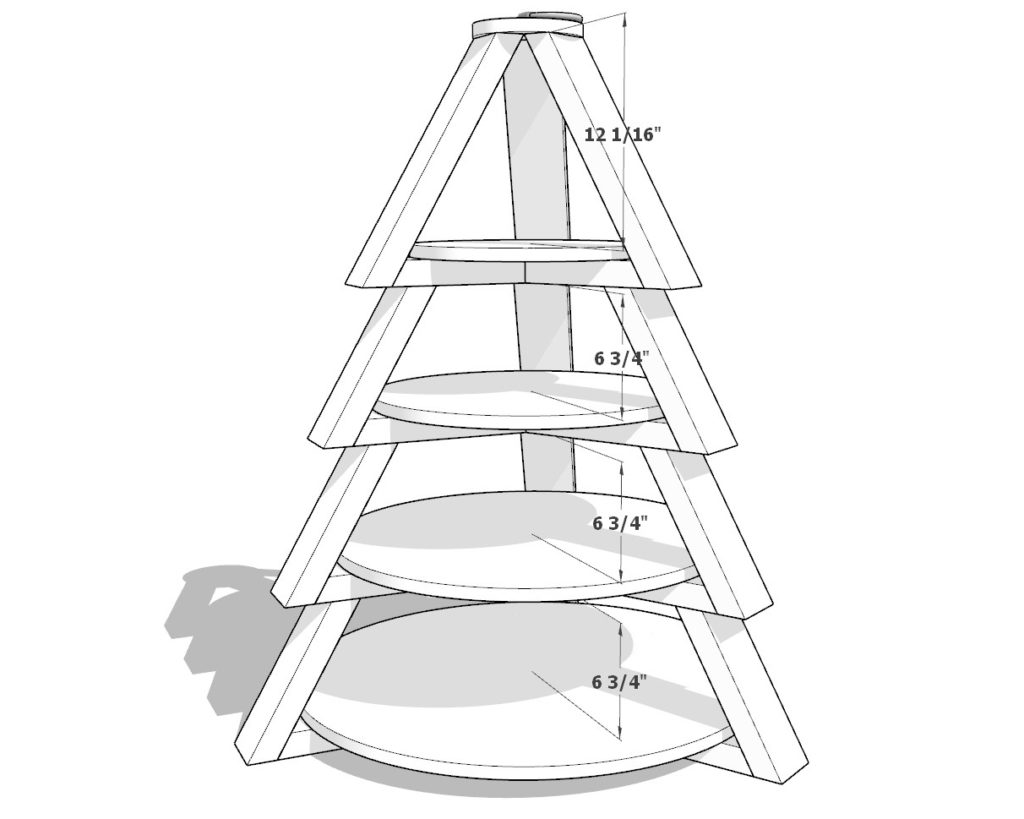
DIY Christmas Tree Tiered Stand Display Dimensions
Tools Needed for This Project:
Available with the purchase of the DIY plan PDF.
Lumber Shopping & Cut List
Available with the purchase of the DIY plan PDF.
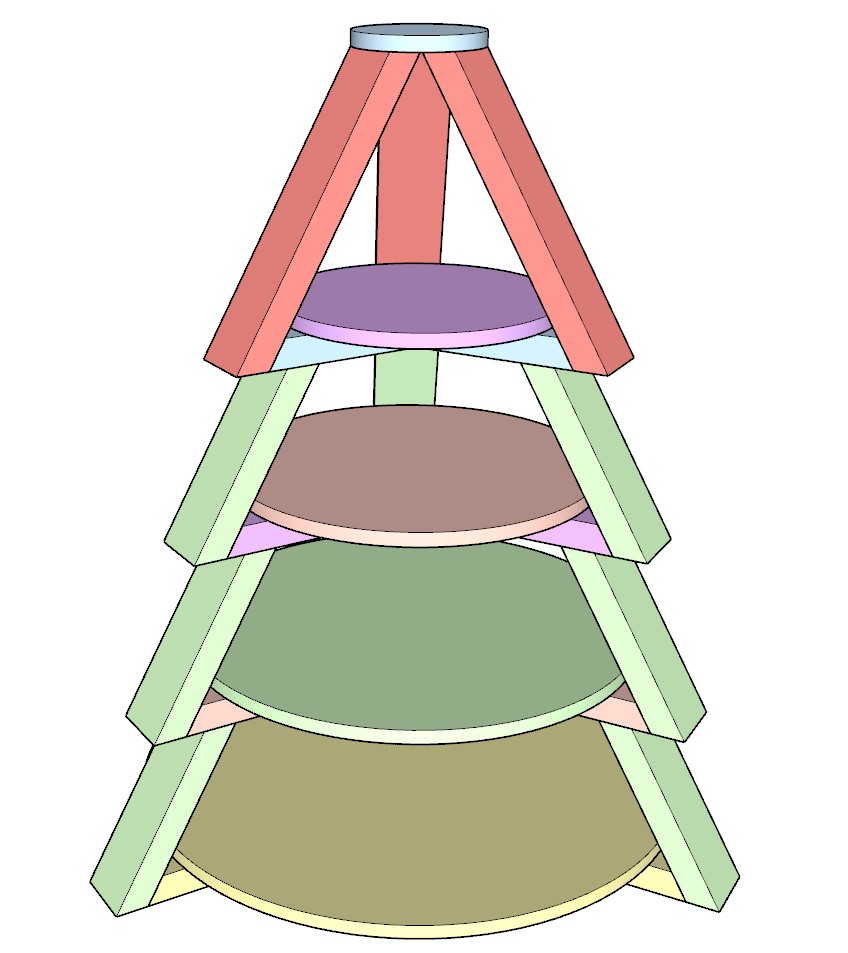
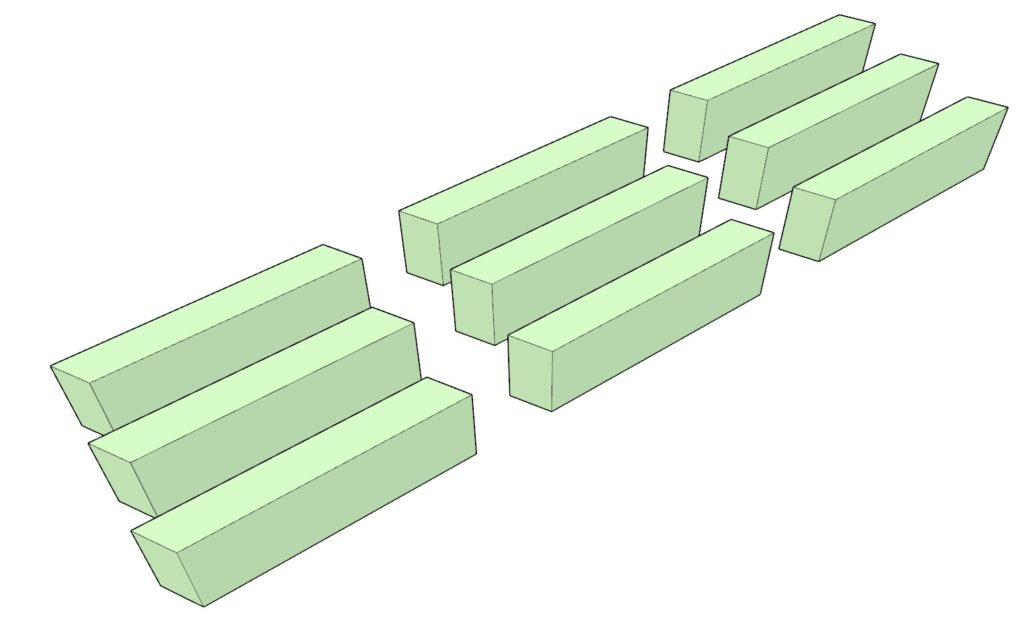
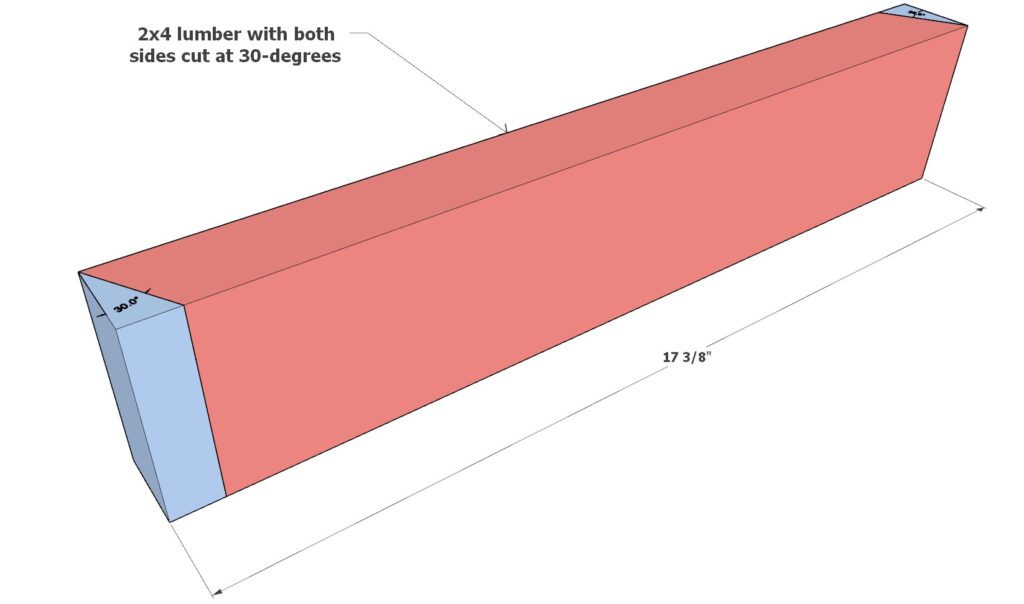
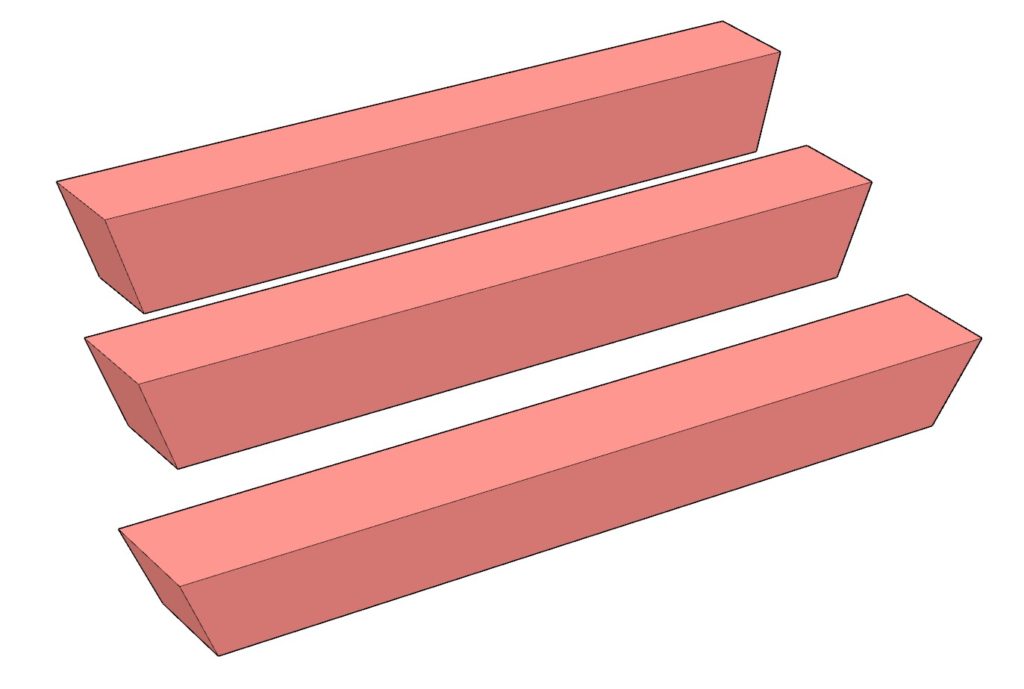
Step 1: Cutting the Lumber for the Tiered Stand
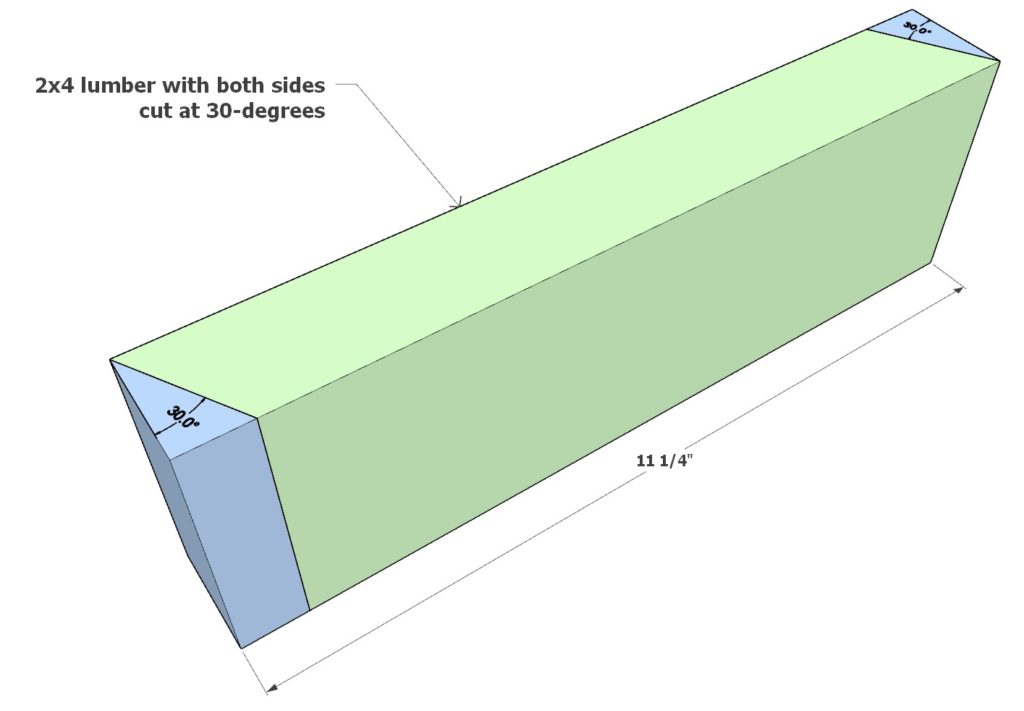
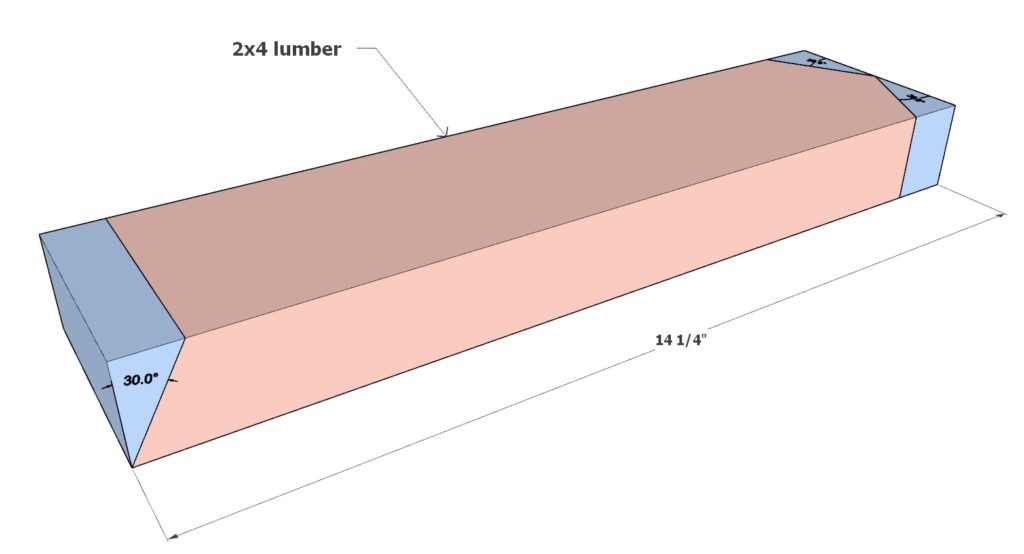
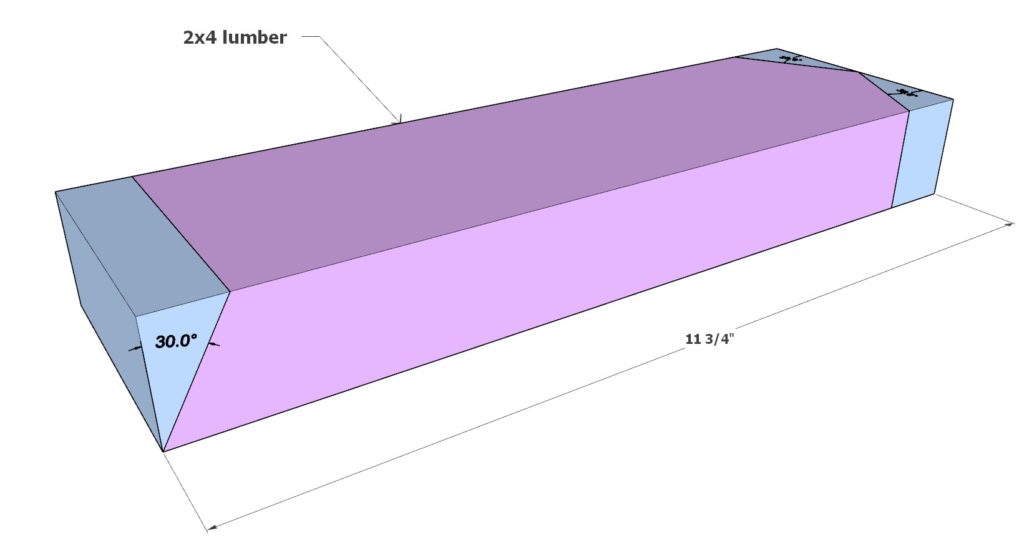
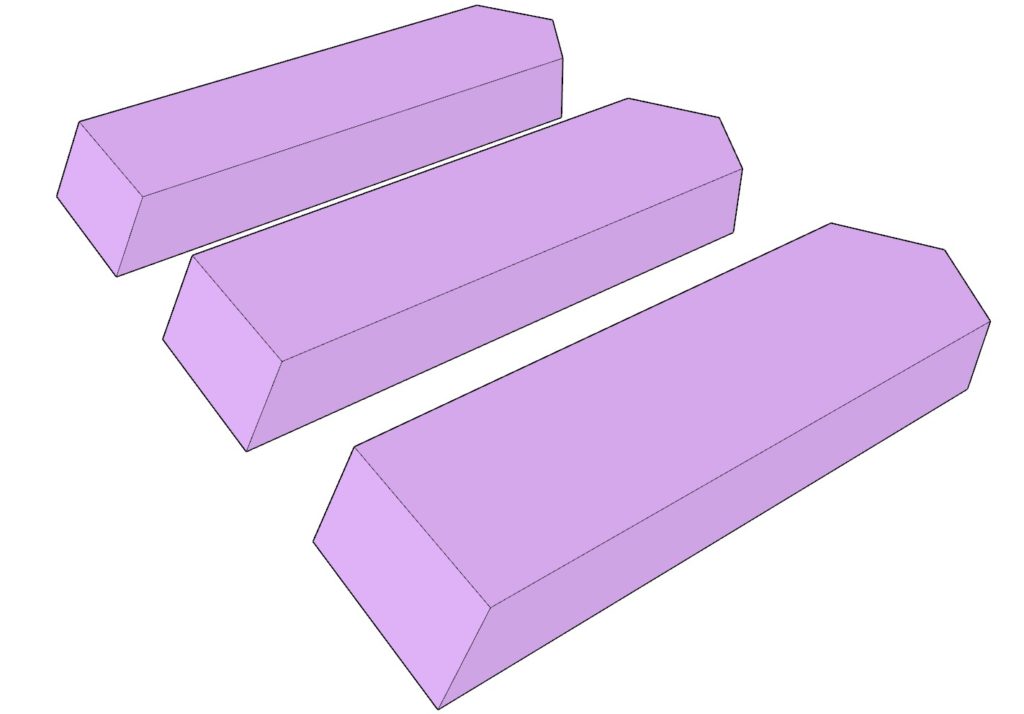
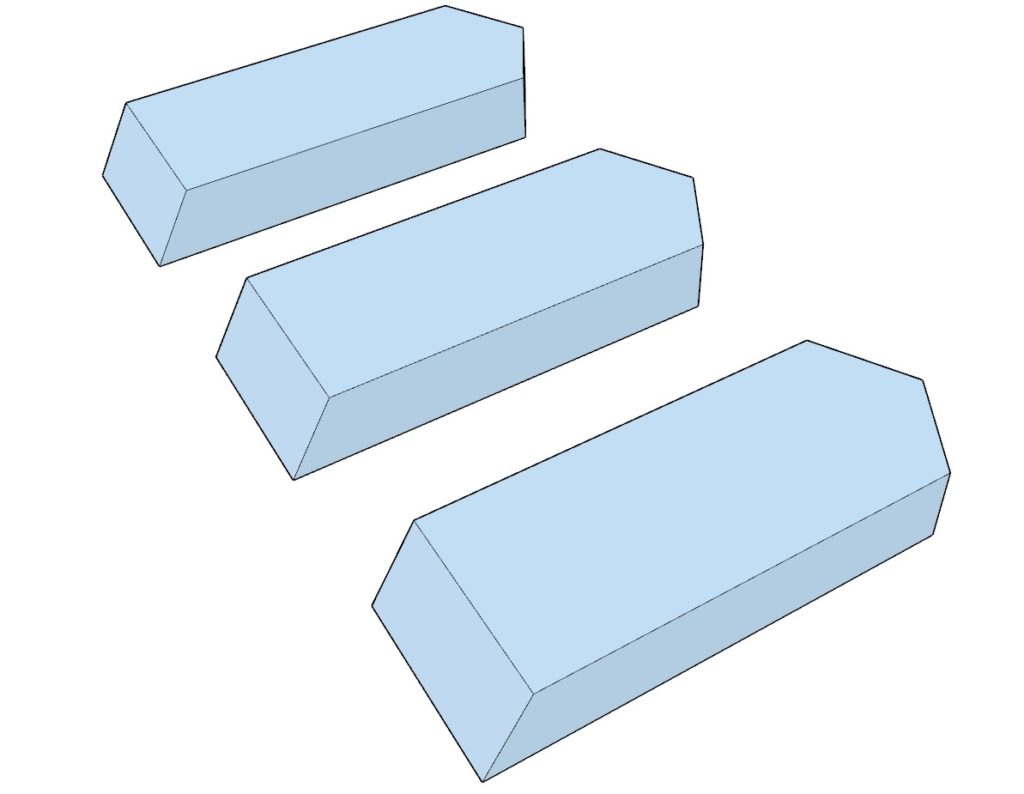
Prepare your 2×4 lumber pieces, color-coded for easier assembly:
Green – Cut nine 11-1/4″ lengths, both ends at 30-degrees.
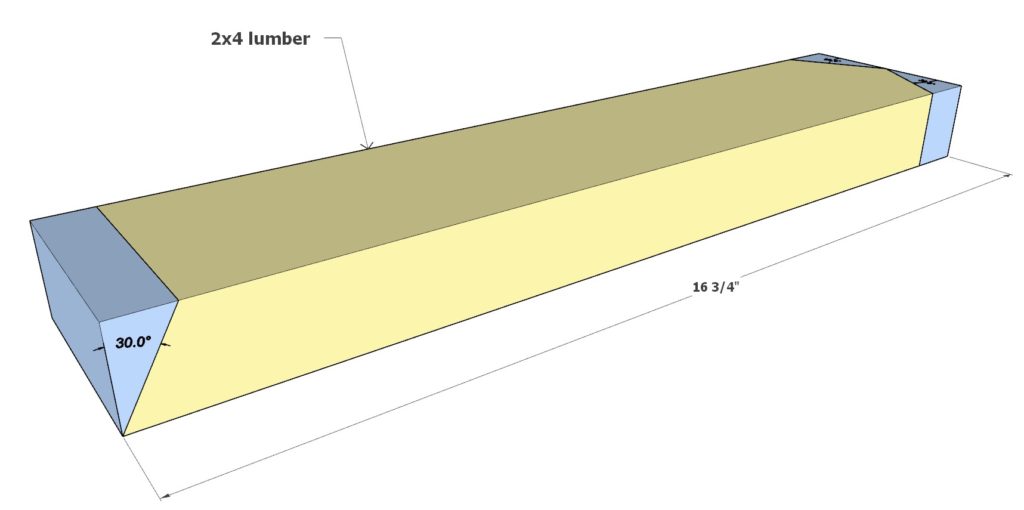
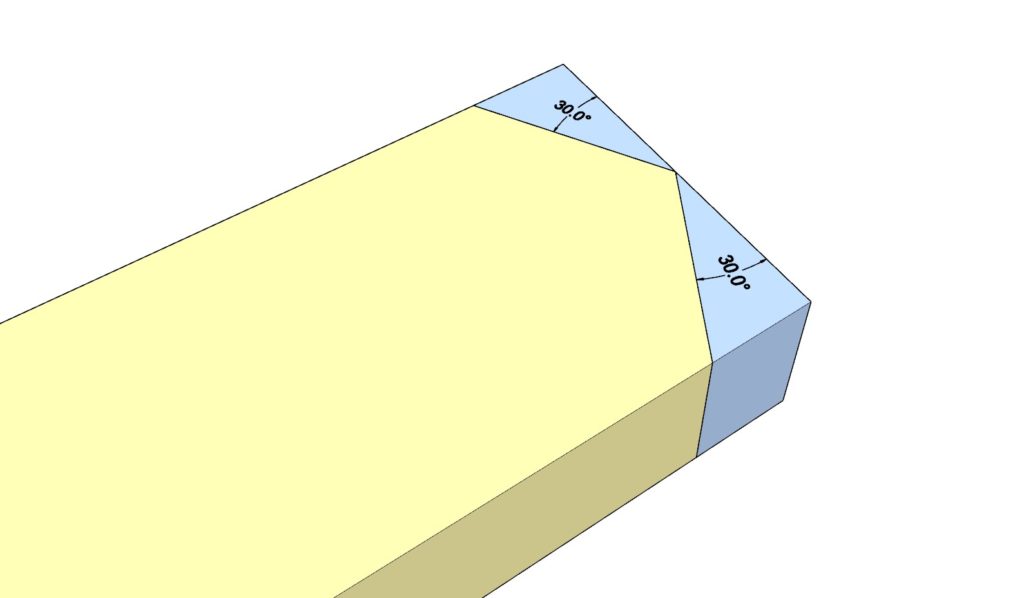
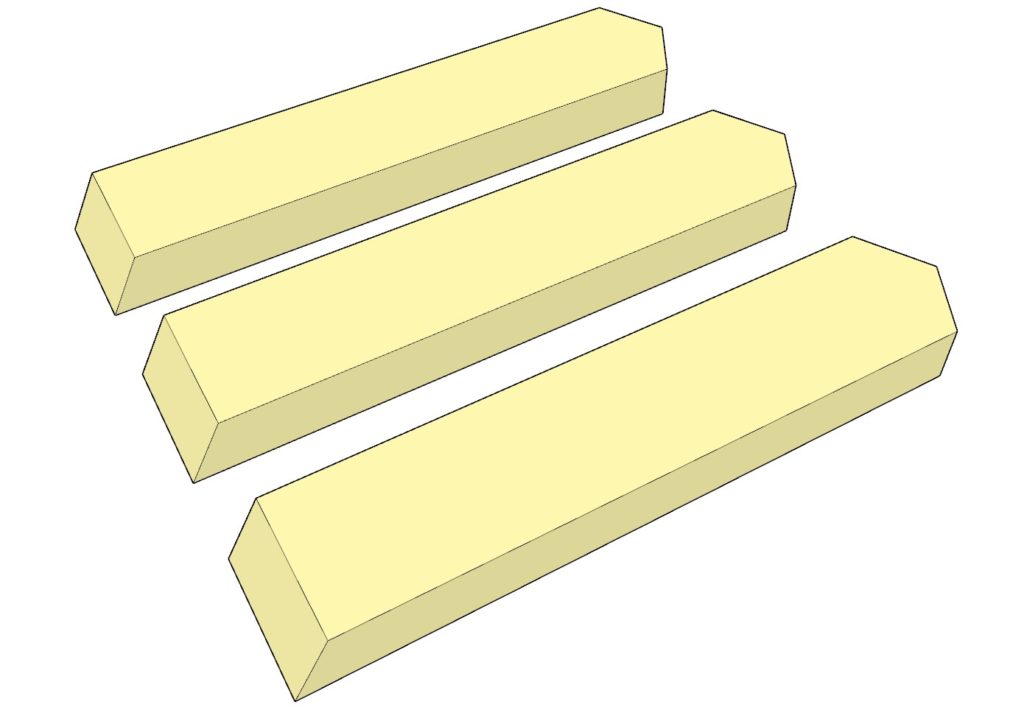
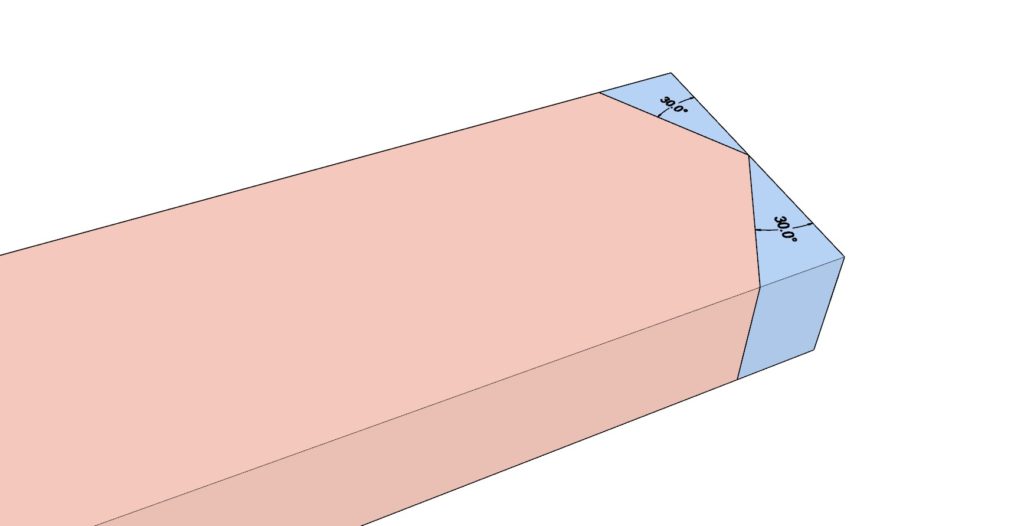
Yellow – Cut three 16-3/4″ lengths; one end at 30-degrees, the other pointed with two 30-degree cuts.
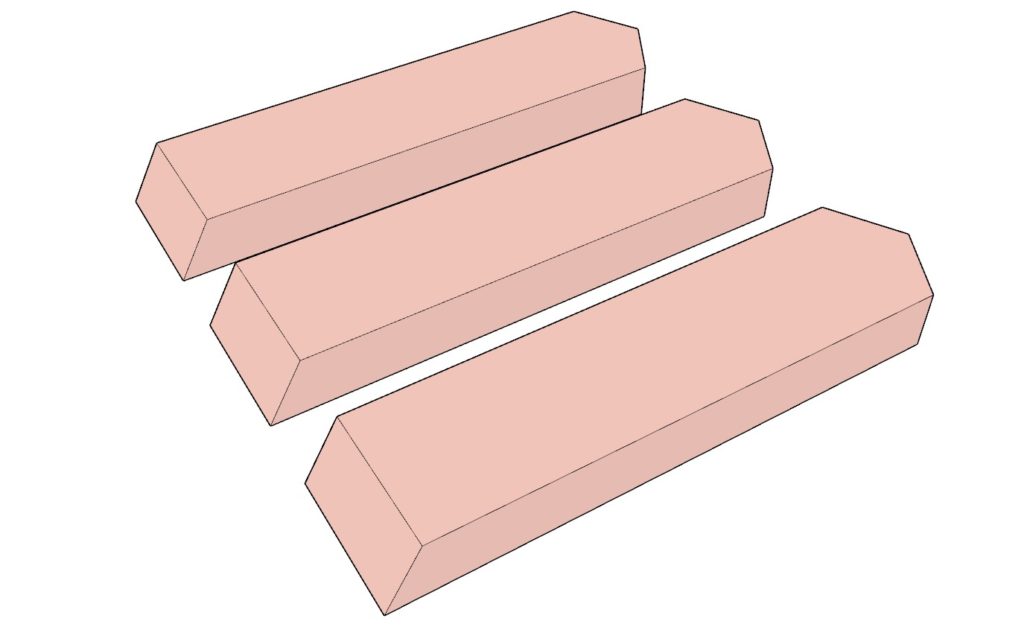
Pink – Cut three 14-1/4″ lengths; one end at 30-degrees, the other pointed with two 30-degree cuts.
Purple – Cut three 11-3/4″ lengths; one end at 30-degrees, the other pointed with two 30-degree cuts.
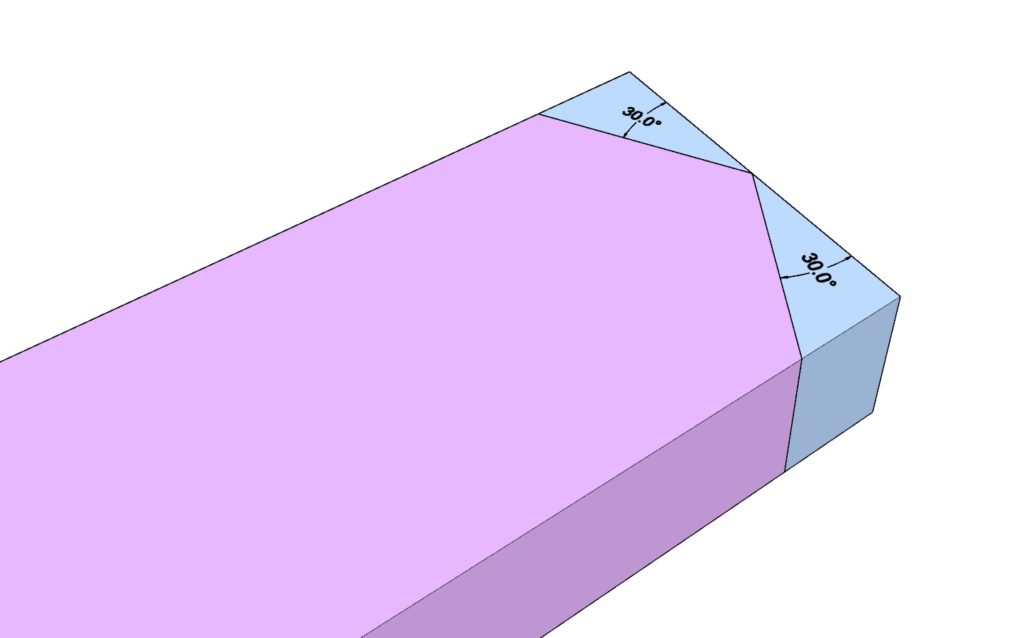
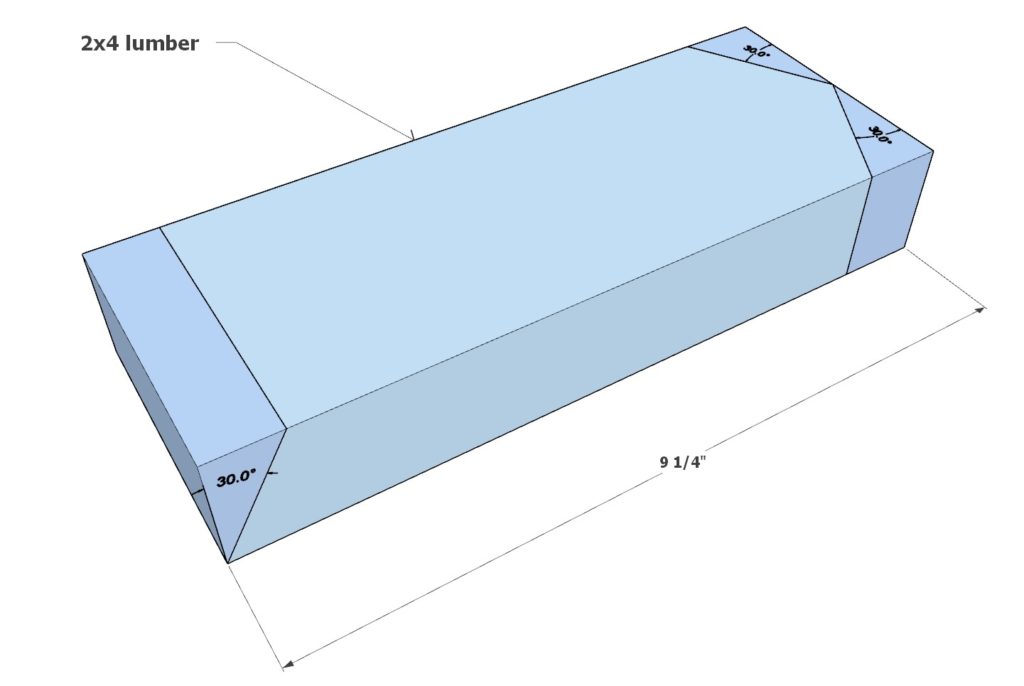
Blue – Cut three 9-1/4″ lengths; one end at 30-degrees, the other pointed with two 30-degree cuts.
Salmon – Cut three 17-3/8″ lengths, both ends at 30-degrees.
Pro Tips:
- A miter saw with 30-degree capability ensures precision.
- Consider sanding and finishing pieces pre-assembly for ease.
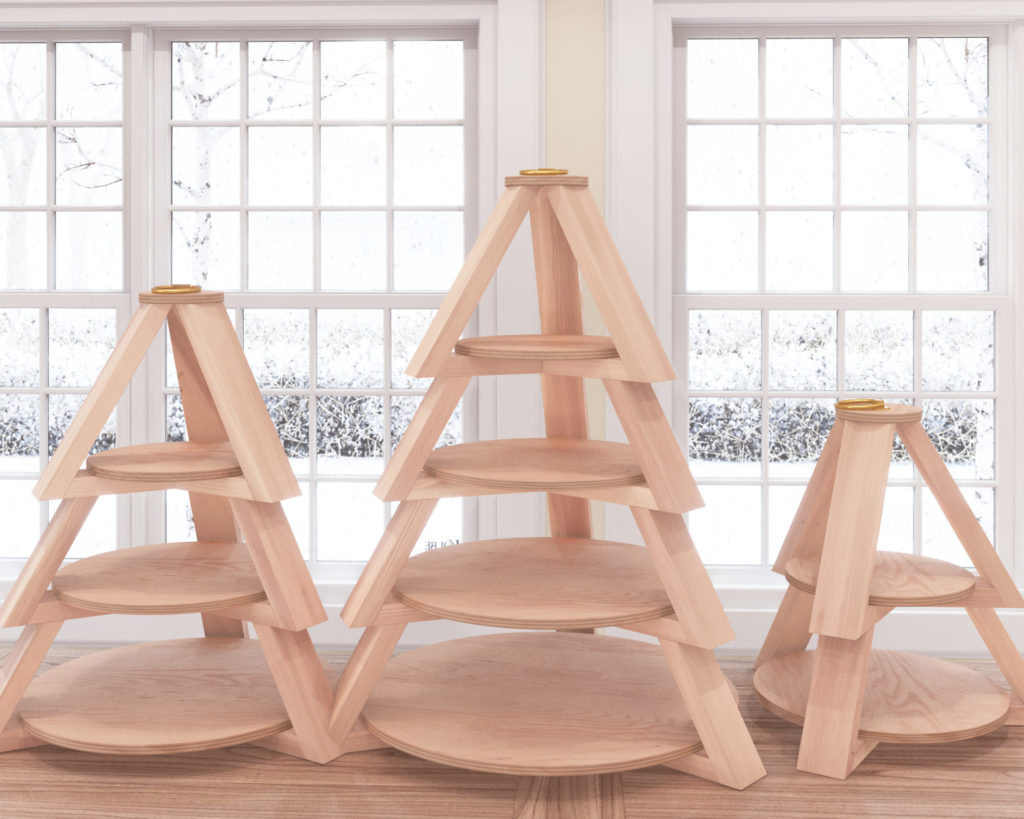
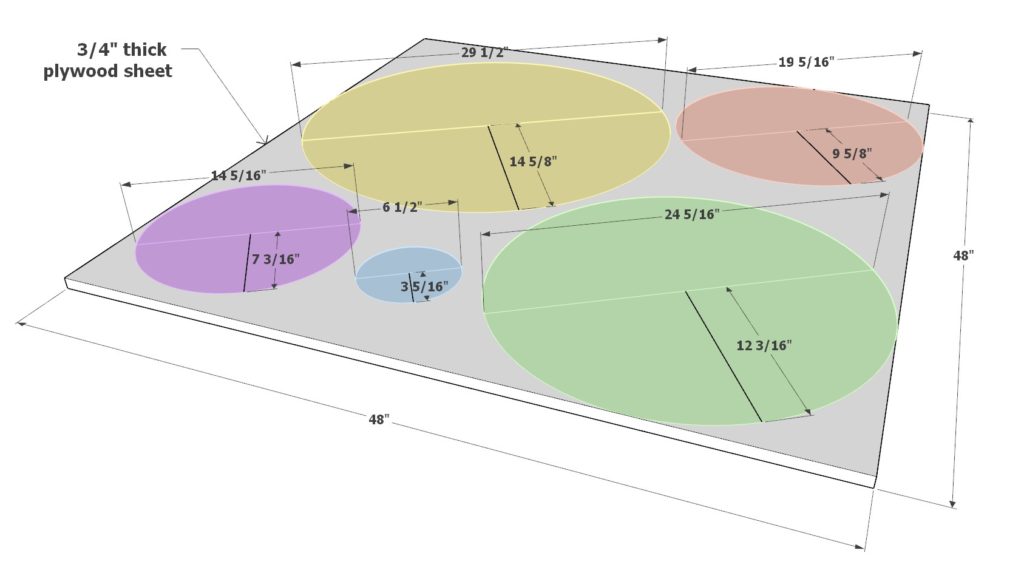
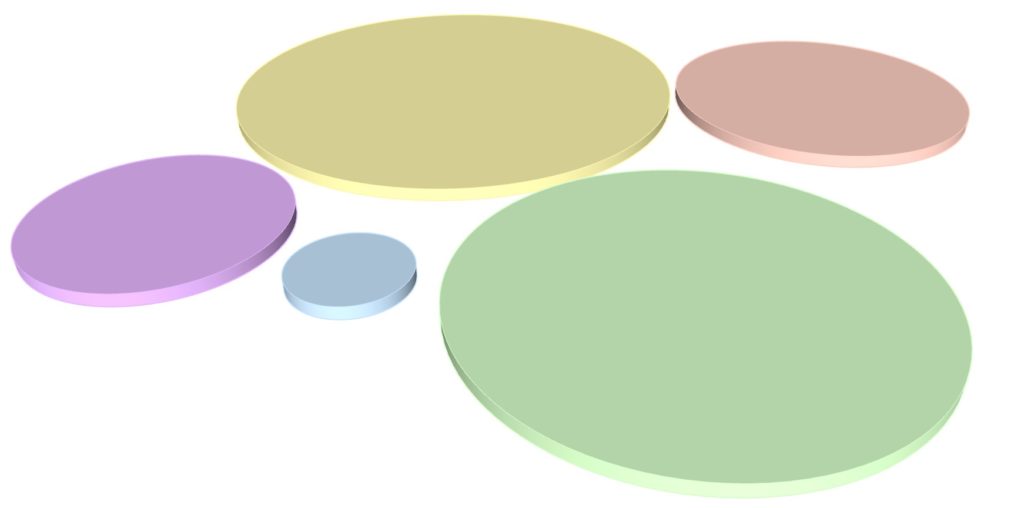
Step 2: Crafting the Plywood Circles for the 4-Tiered Stand
For a 4-tiered stand, cut five circles from half a full sheet of plywood. The plywood can be 3/4″, 1/2″, or even thinner, according to preference and budget.
Circles:
- Radius of 14-5/8″.
- Radius of 12-3/16″.
- Radius of 9-5/8″.
- Radius of 7-3/16″.
- Radius of 3-5/16″.
Pro Tips:
- Sketch your circles before cutting.
- Circles can be slightly smaller or bigger; the design is forgiving.
- Pre-stain and finish circles for a polished appearance.
- Use a jigsaw for cutting.
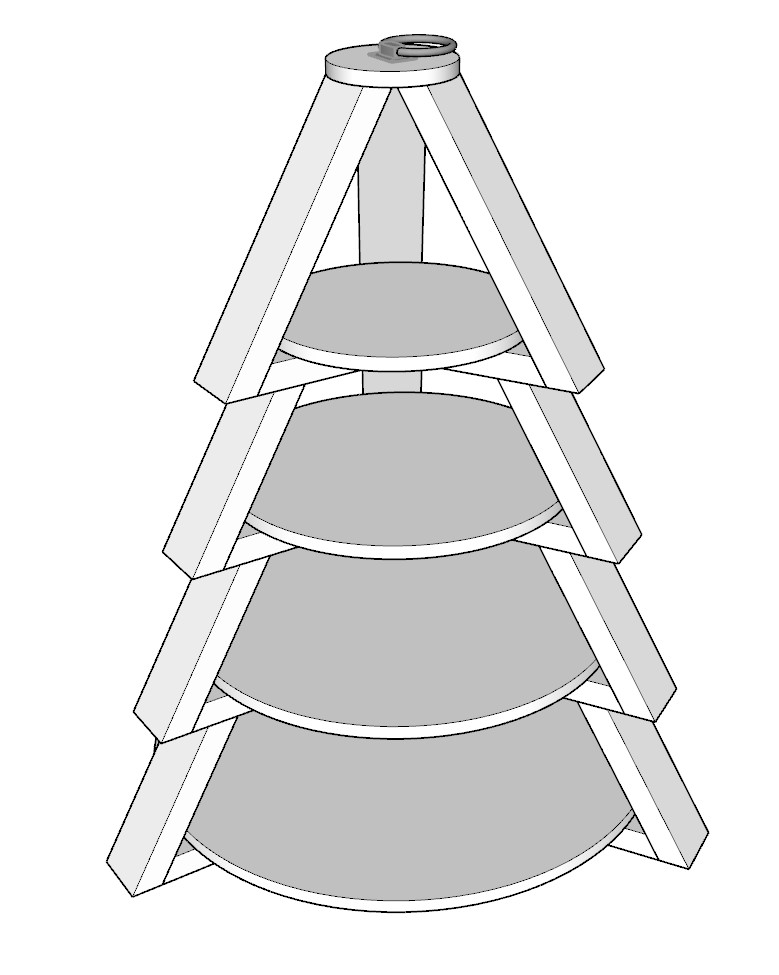
Step 3: Assembling Your Tiered Stand
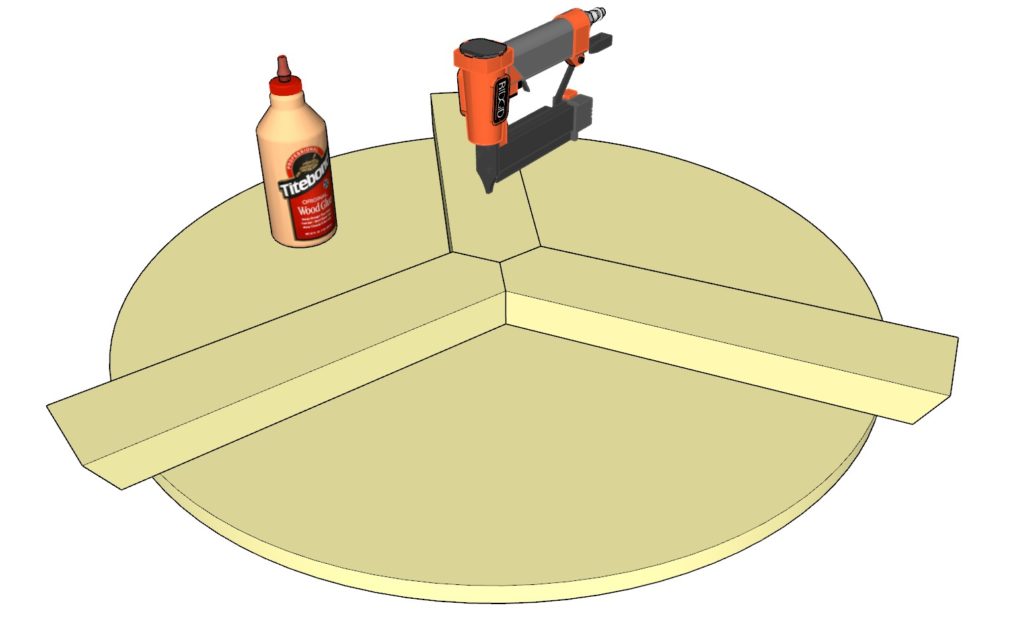
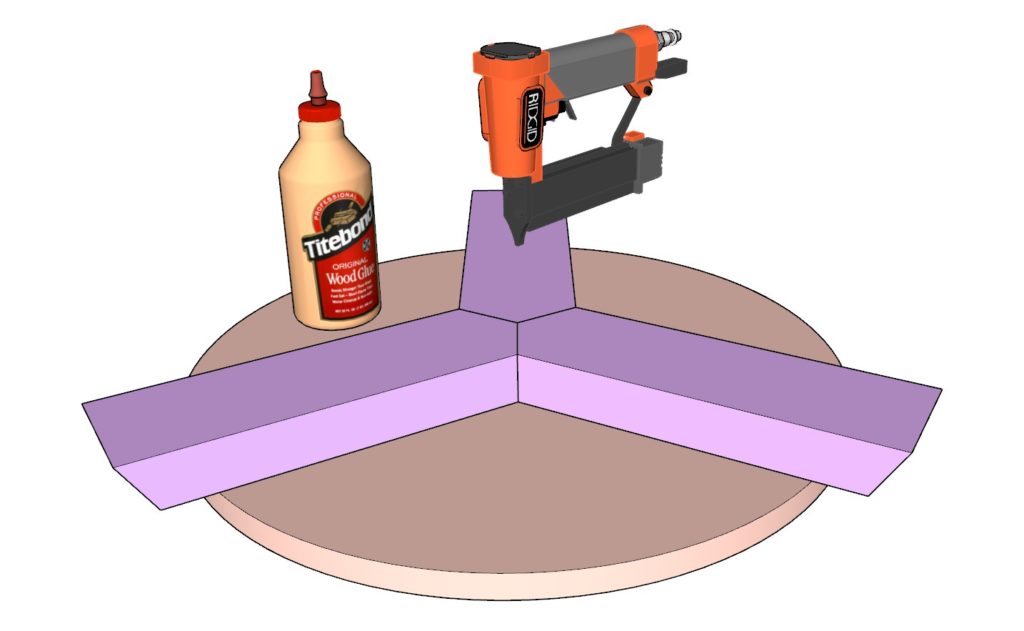
Begin with the Yellow Components:
- Attach the yellow 2×4 pieces to the yellow circle using 2-inch pin nails and wood glue.
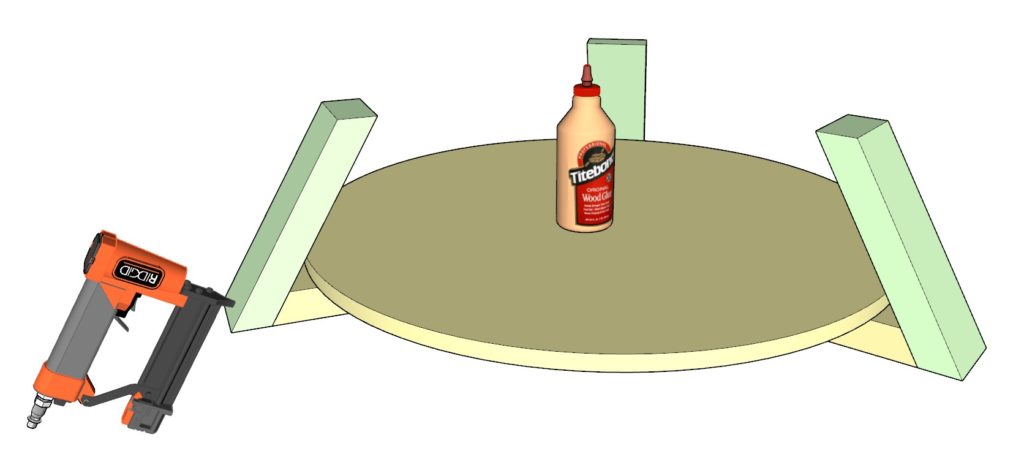
- Flip your assembly and integrate the green 2×4 lumber to give the Christmas tree appearance, securing again with 2-inch pin nails and glue.
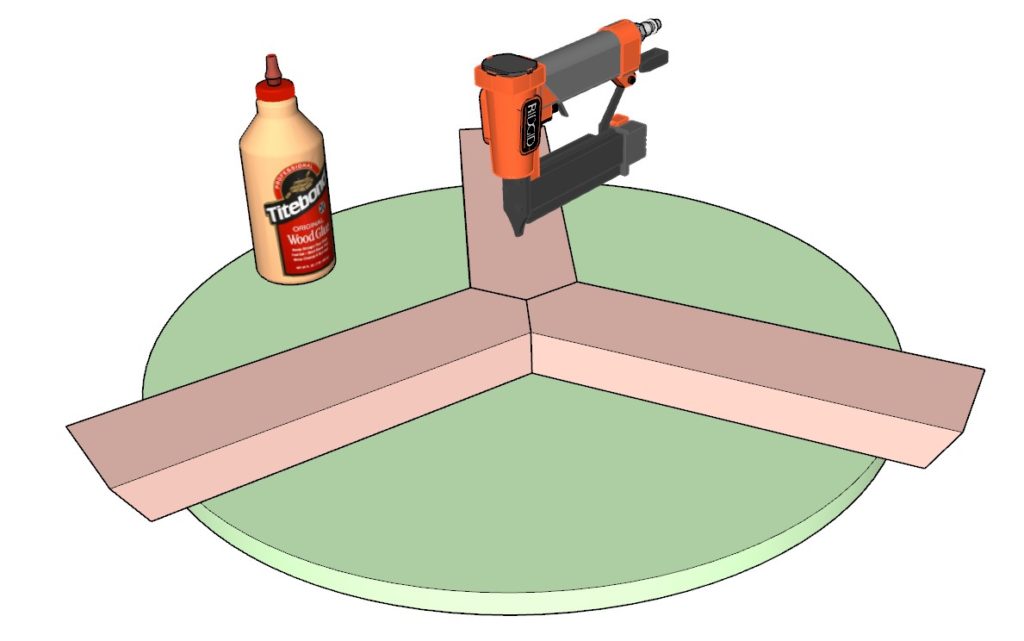
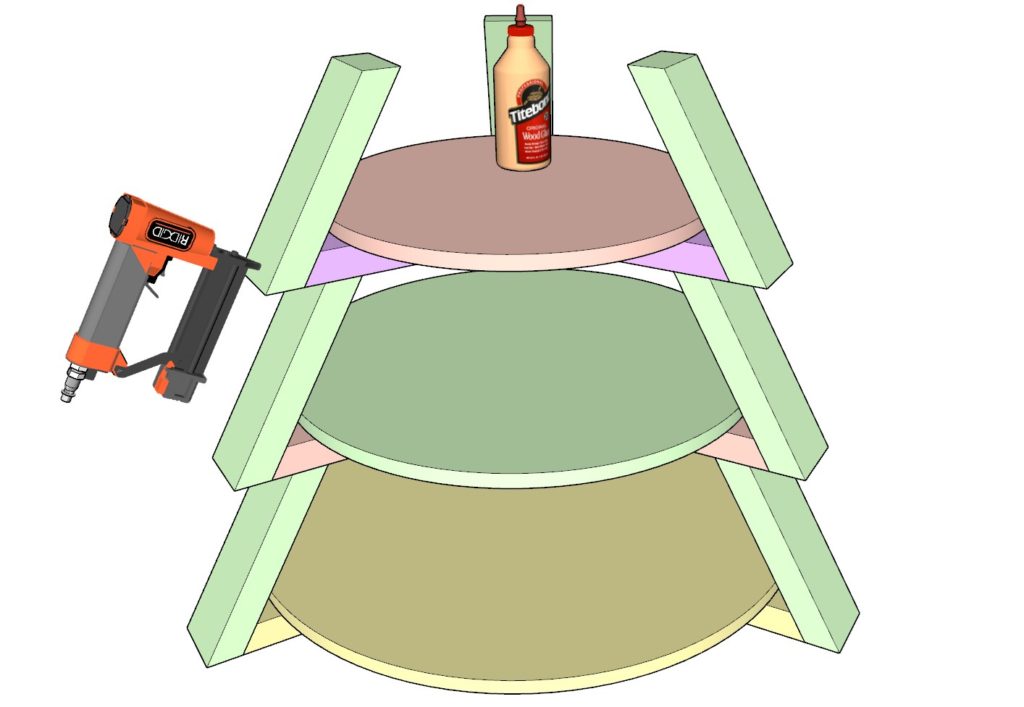
Continue this process with the following circle colors as indicated in the diagram:
- Green components.
- Pink components.
- Purple components.
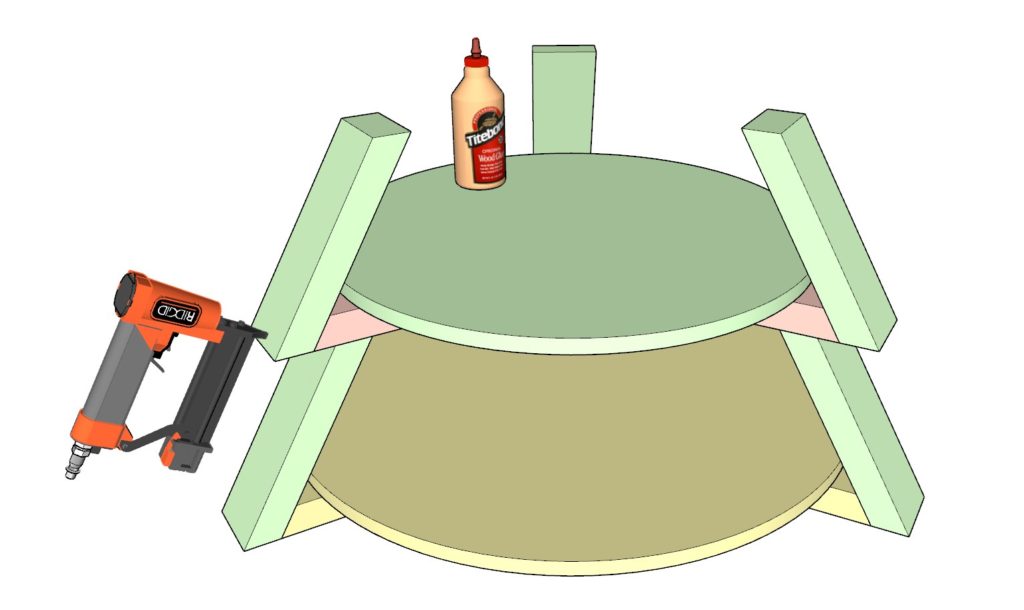
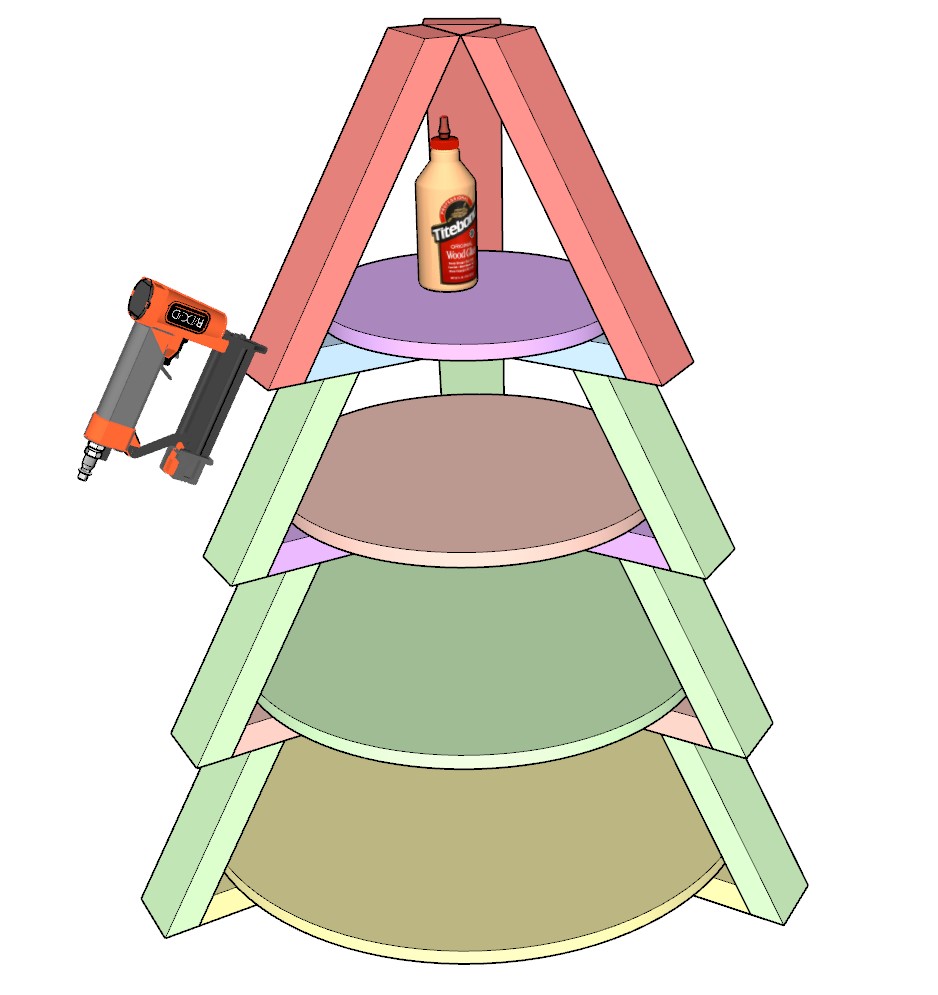
For the last tier:
- Add the salmon-colored 2×4 pieces, using pin nails and wood glue.
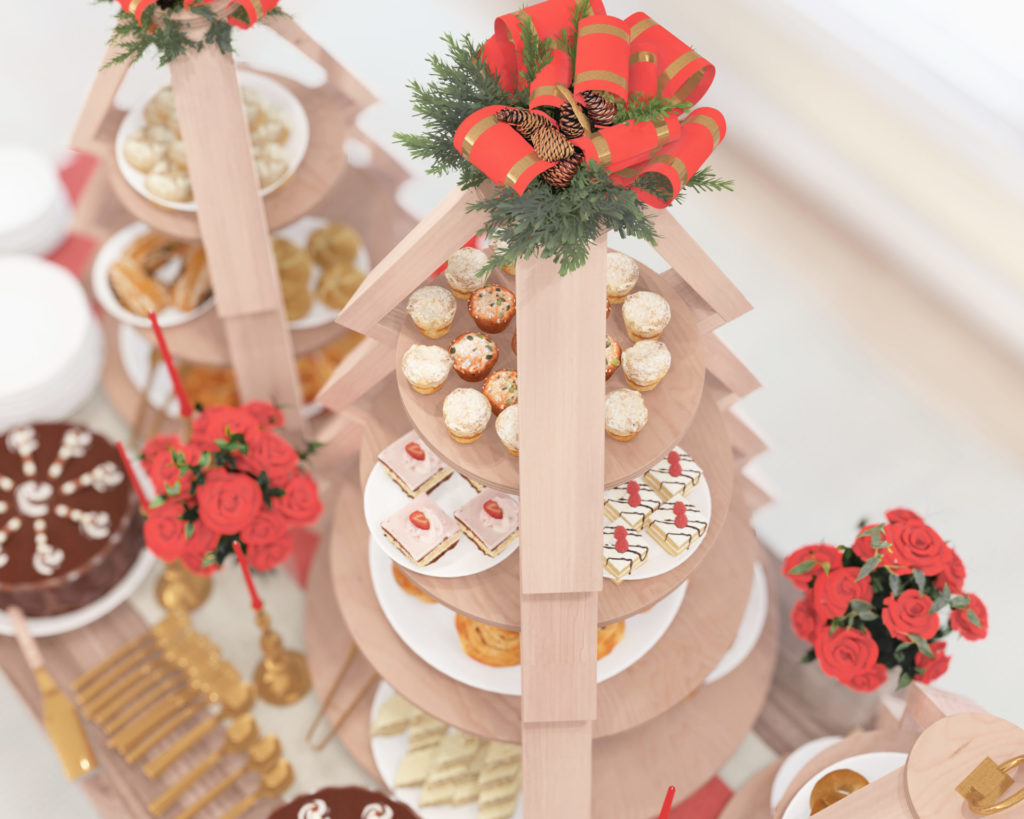
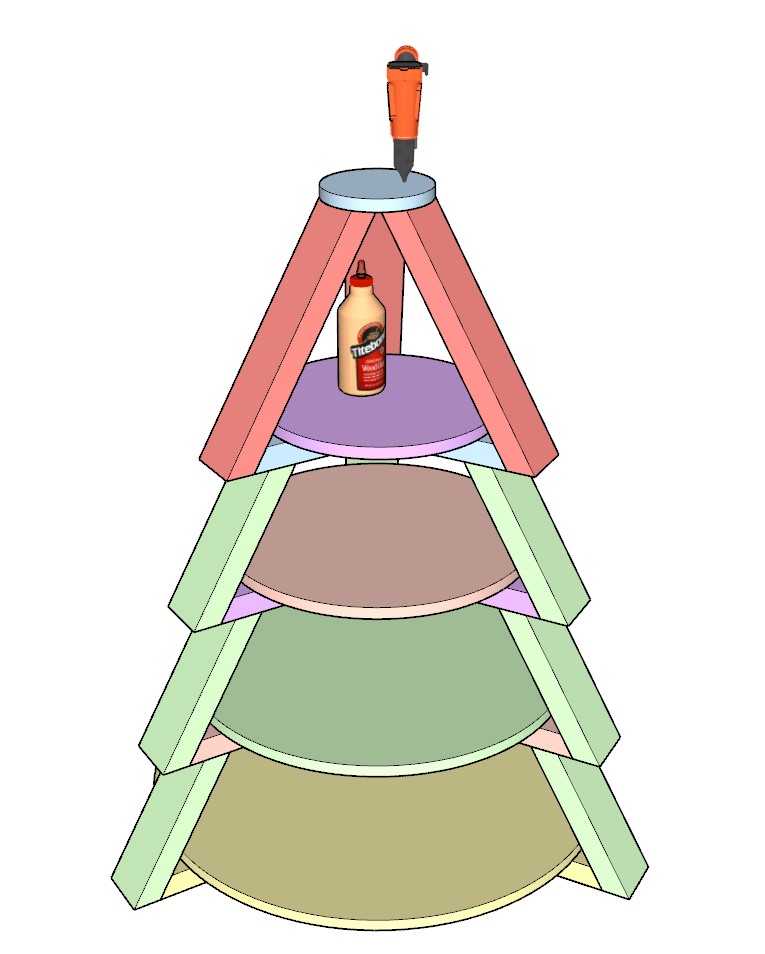
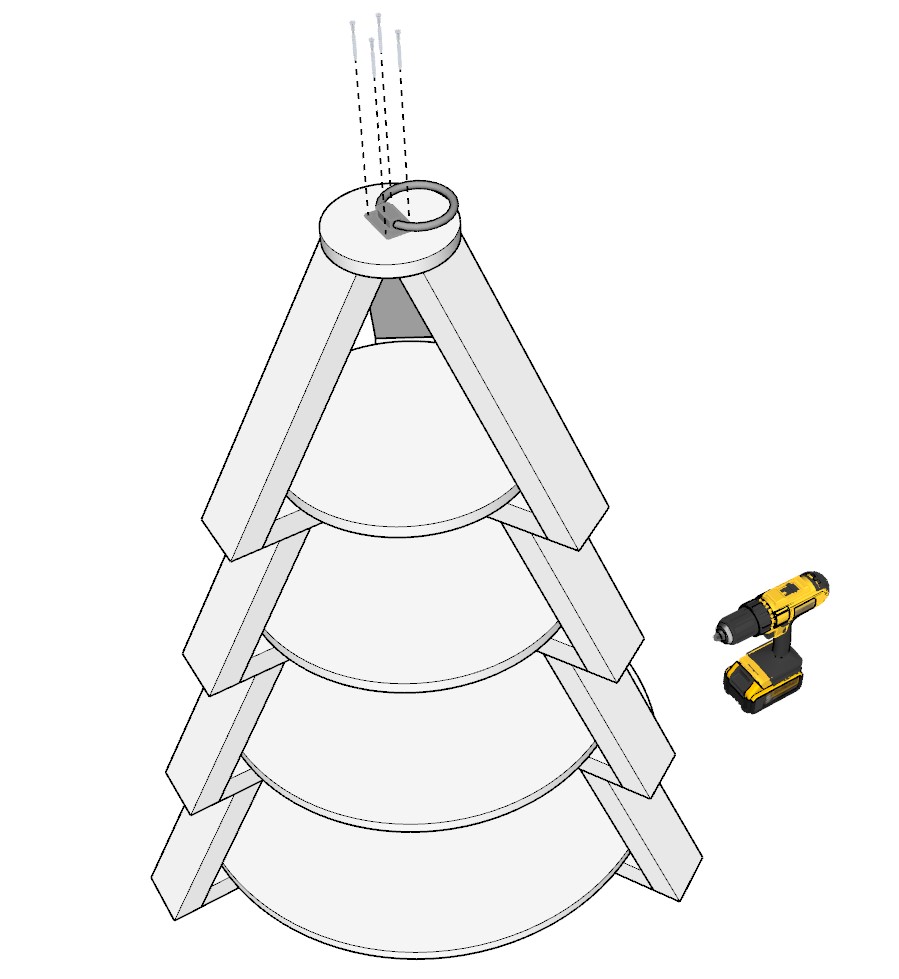
Final Touches:
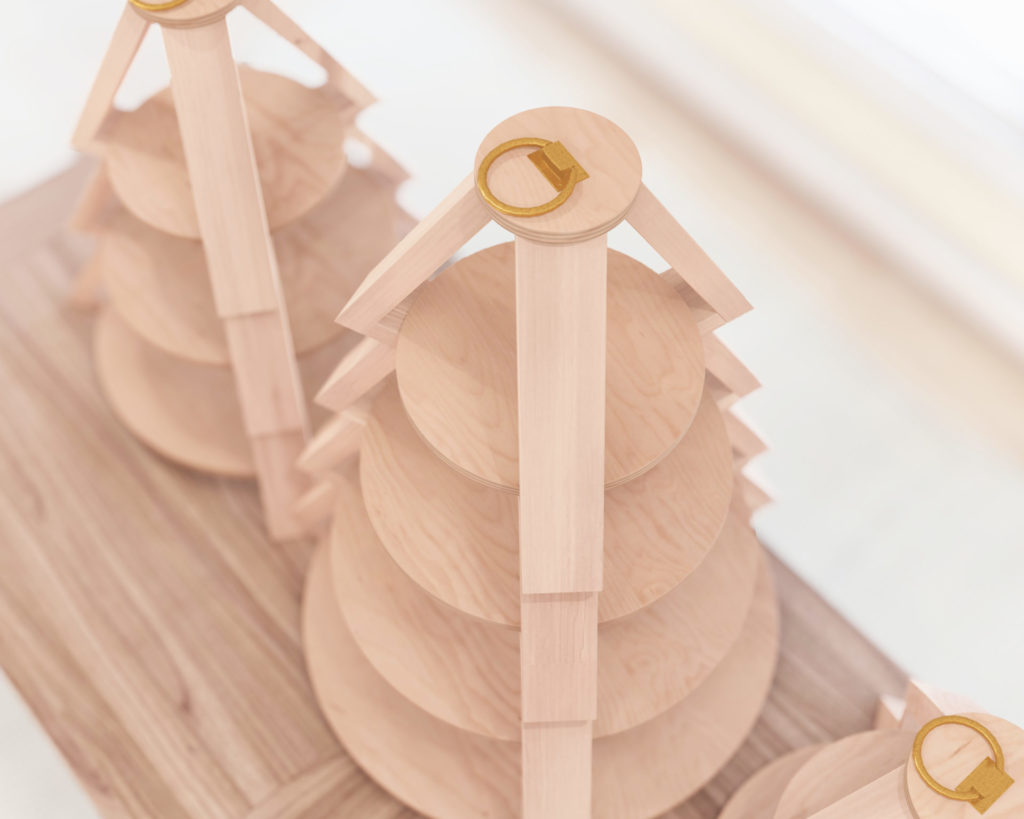
- Crown your construction with the blue circle topper, and secure it with glue and 2-inch pin nails.
- Embellish with a handle of your choice, be it metal, rope, or any other creative option.

Step 4: Finishing Touches: Sanding, Staining, and Painting
Sanding and Prepping the Wood:
- Start with a coarser grit sandpaper, such as 80 or 100 grit, to level any uneven surfaces.
- Work your way up to a medium grit (150) and then a fine grit (220) to achieve a smooth finish. Always sand in the direction of the wood grain to avoid scratches.
- After sanding, wipe down the wood with a damp cloth to remove any dust or particles. Allow the wood to dry completely before proceeding.
Staining Your Tiered Stand:
- Always wear gloves and work in a well-ventilated area.
- Stir the stain well before applying. Using a clean cloth or brush, apply the stain in the direction of the wood grain.
- Allow the stain to penetrate the wood for 5-15 minutes, then wipe off any excess with a clean cloth.
- Remember, some stains are not food-safe. If you plan to use your stand for food, seal the stained wood with a food-safe wax or topcoat. This acts as a barrier and makes the stand safe for food contact.
Painting Your Stand:
- Consider using food-grade paint if the stand will be in contact with food.
- Begin by applying a primer suitable for wood, which will ensure even paint application.
- Once the primer is dry, apply the paint using a brush or roller. Typically, two coats are recommended for a solid finish.
- Allow each coat to dry thoroughly before applying the next.
Maintenance and Care:
- Always wait until paint or stain is completely dry before using the stand.
- For painted surfaces, clean with a soft cloth and mild soapy water. Avoid using harsh chemicals.
- For stained surfaces sealed with wax, reapply wax as needed to maintain the protective barrier.
- Keep your stand in a dry place to avoid warping or damage from moisture.
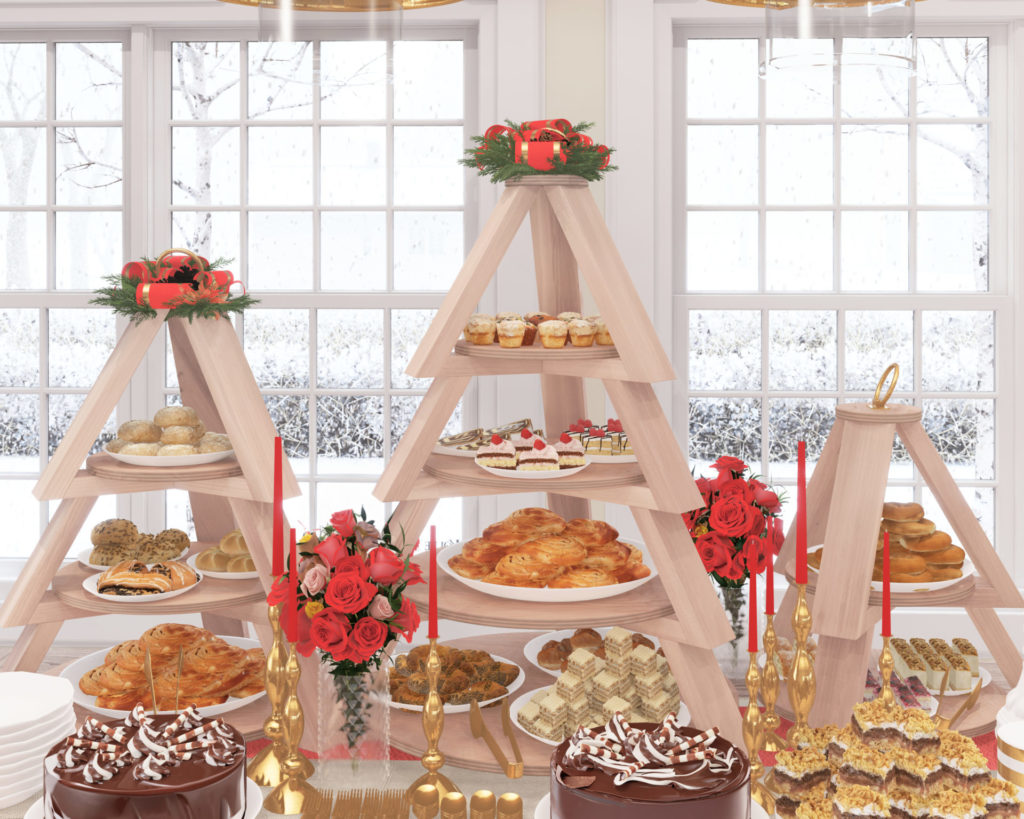
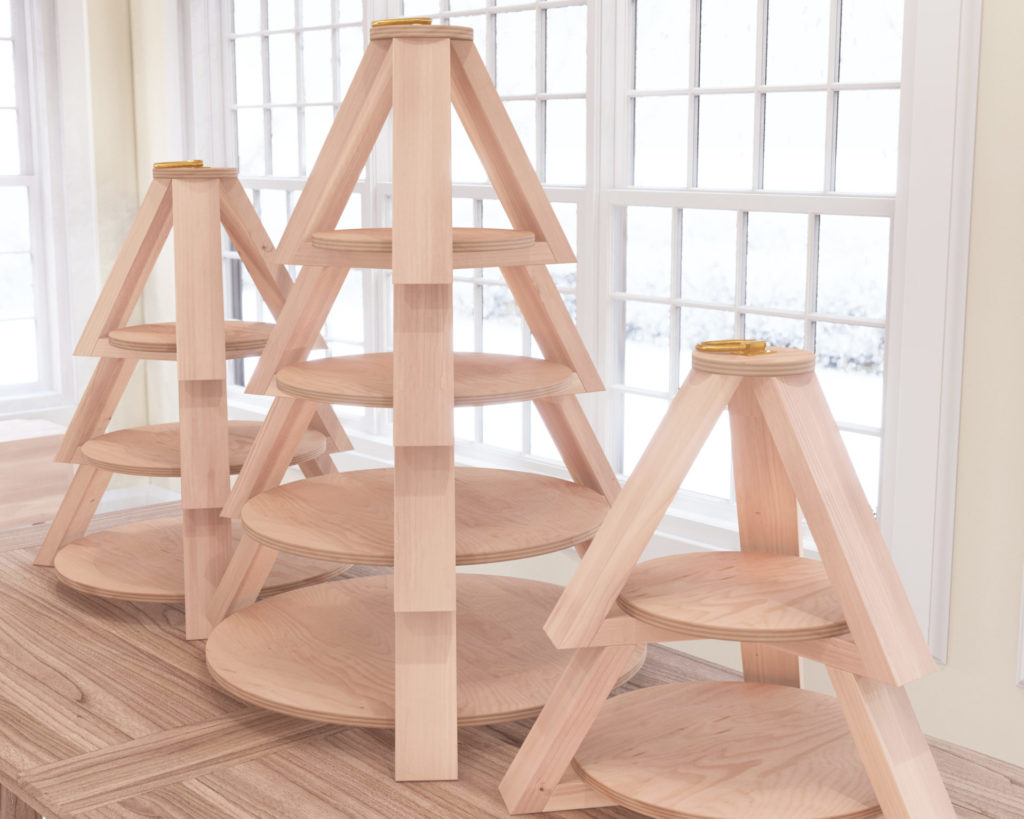
Step 5: Adapting the Design for 2 or 3 Tiers
Building a versatile tiered stand means you have the flexibility to adjust its height based on your needs. If you’re looking to create a shorter version, here’s how you can modify the original 4-tier design:
For a 3-Tiered Stand:
- From Step 1, omit the three green 2×4 pieces.
- Also from Step 1, omit the three yellow 2×4 pieces.
- Eliminate the largest circle (yellow) when cutting circles in Step 2.
For a 2-Tiered Stand:
- In addition to the above, from Step 1, omit the three pink 2×4 pieces.
- Also omit the three more green 2×4 pieces.
- Also eliminate the second largest circle (green) when cutting circles in Step 2.
Remember, when assembling, always start with the largest remaining circle at the base and work your way up to the smallest circle on top. Adjustments in design also mean you’ll use fewer materials, which may reduce costs and build time.