Introduction: Elevate Your Greenery with a Vertical Garden
Welcome to the future of gardening—where space is no longer a constraint but an opportunity for creativity. Our DIY vertical planter is the ideal solution for urban dwellers, balcony enthusiasts, or anyone looking to add a flourish of green to their living space. With a design that’s both sleek and functional, this vertical garden is an enduring addition to your home, bringing the joy of growing herbs and flowers year-round without sprawling acreage.

Specifications: The Blueprint of Your Garden Space-Saver
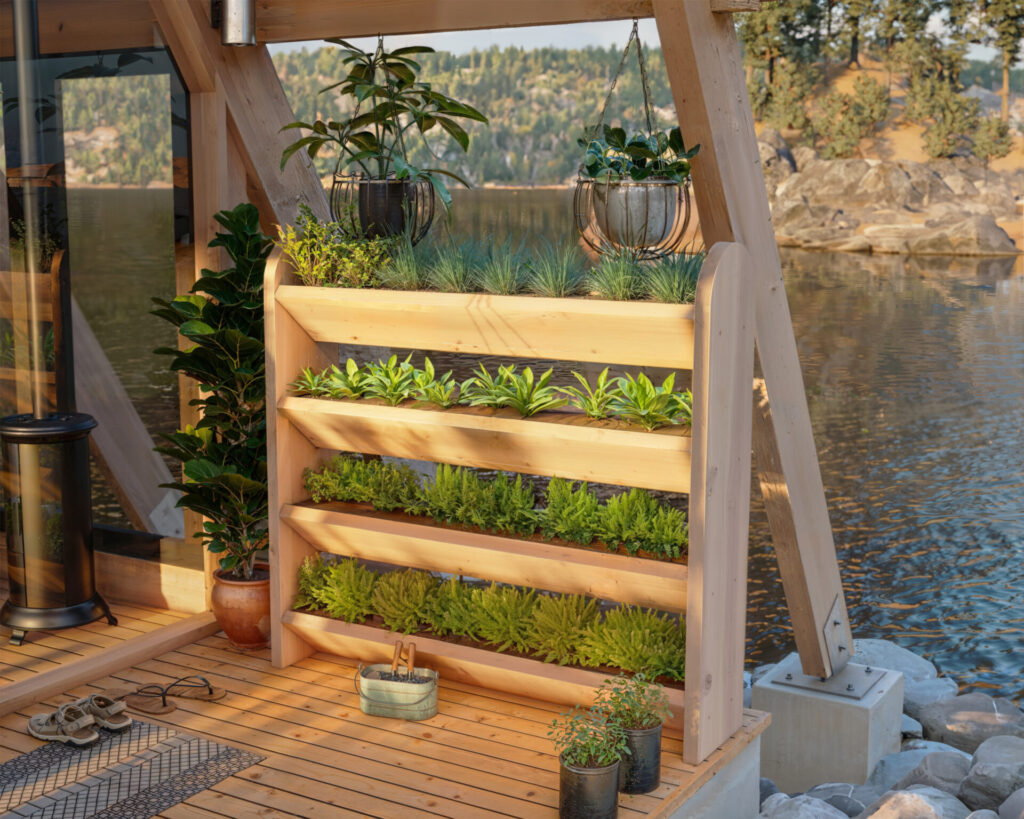
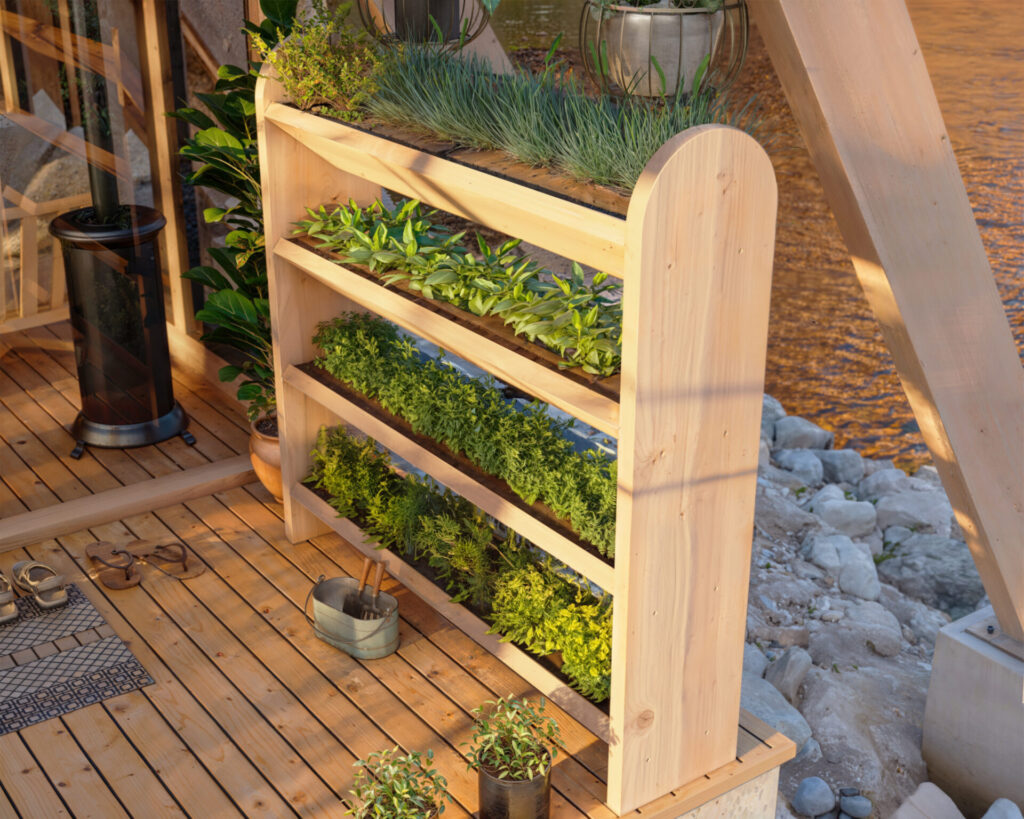
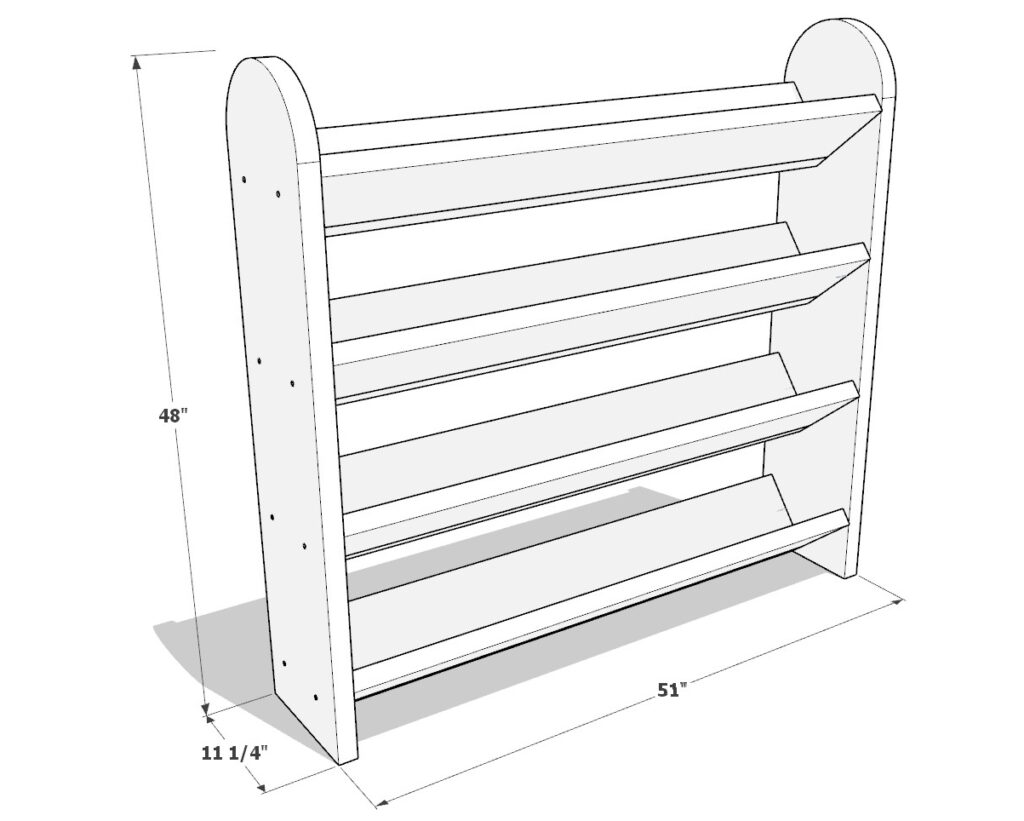
Here’s the scoop: our vertical planter stretches 48 inches high and extends 51 inches wide, with a compact depth of 11.25 inches. Made entirely from solid lumber—specifically 2×12 and 2×8 boards—it’s a testament to durability and ease. The design is straightforward, avoiding complex carpentry for a more accessible building experience.
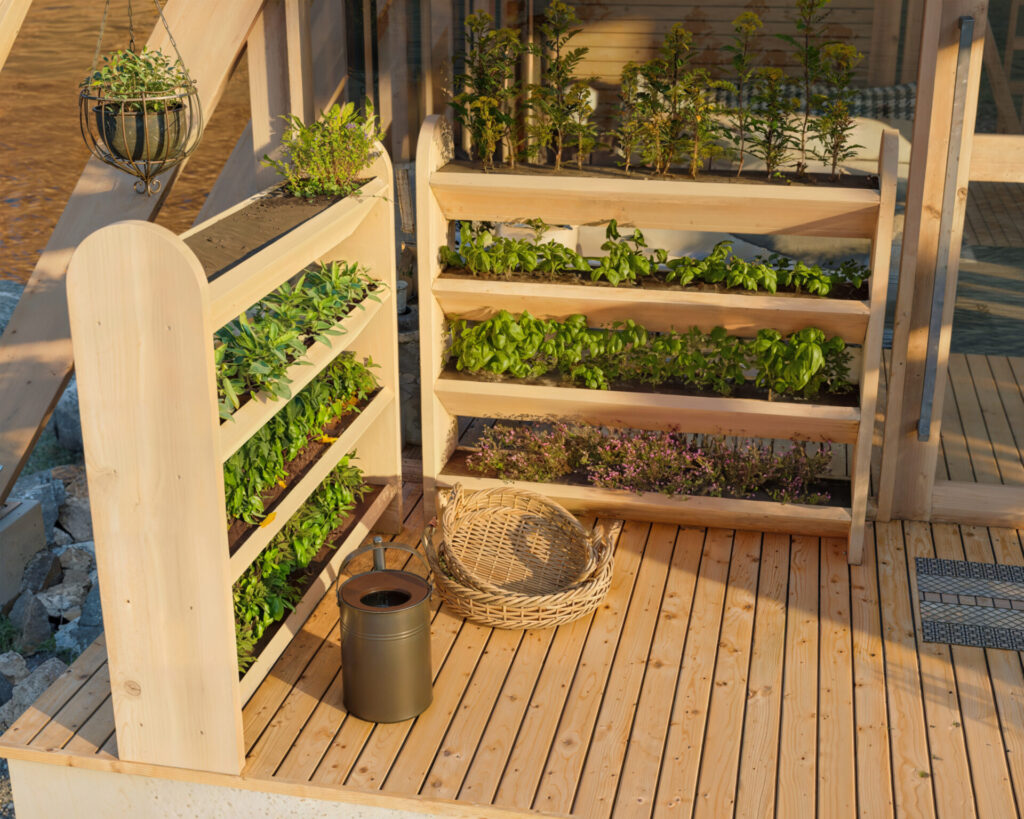
It’s spacious enough to host a variety of plants; from culinary staples like rosemary and thyme to a vibrant array of annuals such as lobelias and snapdragons. And with its robust construction, this isn’t a seasonal fling—expect to enjoy your vertical oasis for many seasons to come.
Conclusion: Your Green Thumb Guide
Wrapping up, this isn’t just a DIY plan—it’s a passport to an elevated gardening experience. With your purchase, you’ll receive an extensive toolkit list, a shopping guide for materials, and precise cutting directions. The clear, step-by-step instructions are accompanied by diagrams to ensure you can build with confidence.
So, whether you’re looking to harvest your own fresh herbs or create a living wall of blooms, our DIY vertical planter garden is your next step. It’s more than just a project; it’s an investment in your home, your well-being, and the planet. Ready to build your own lush, vertical retreat? Let’s grow there together.
Time
(varies with experience)
Cost
$50 (Costs may vary based on location and supplier.)
Skill level required
Beginner
DIY Vertical Garden PDF Plan
What is included in the PDF download?
- Easy to read step by step instructions
- Material list
- Tools needed
- Helpful links to materials and tools needed
DIY Vertical Garden Dimensions
Tools Needed for This Project:
Tools:
- Saw: A miter saw is recommended for precision cuts, especially for the straight edges of the planter.
- Driver & Driver Bit: Necessary for driving screws securely to assemble the planter.
- Drill & Countersink Bit: The drill creates pilot holes, and the countersink bit allows screws to sit flush with the wood surface.
- Jig Saw, Band Saw, or Scroll Saw: If you opt to add decorative semi-circle cuts on the side panels, these saws are ideal for intricate cuts.
- Pencil: For marking measurements accurately before cutting or drilling.
- Measuring Tape: Essential for precise measurements to ensure all parts fit together correctly.
- Level: An optional but useful tool to ensure your troughs are perfectly horizontal during installation.
Materials:
- (30) 2.5-inch Long Screws: These will be used to attach the lumber pieces together to form the troughs and attach them to the side panels.
Affiliate Link Message: Please note, I only recommend tools and materials that I personally use and trust. For your convenience, I’ve included affiliate links to quality products. Your support helps me continue to bring you detailed DIY guides. Thank you for trusting my recommendations!
Lumber Shopping & Cut List
Lumber Shopping List:
For the Side Panels and Decorative Elements:
(1) 2×12 board, 8 feet in length
For the Troughs and Structural Support:
(4) 2×4 boards, 8 feet in length
Lumber Cut List:
For the Planter Troughs:
(8) 2×8 boards cut to 48 inches in length
For the Side Panels:
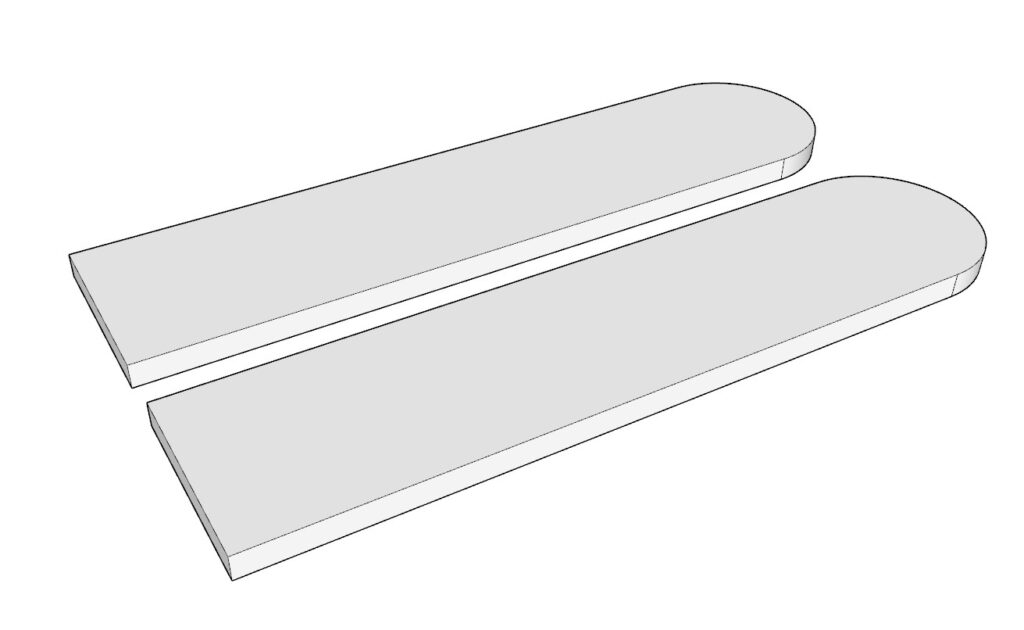
(2) 2×12 boards cut to 48 inches in length (with optional semi-circle decorative top)
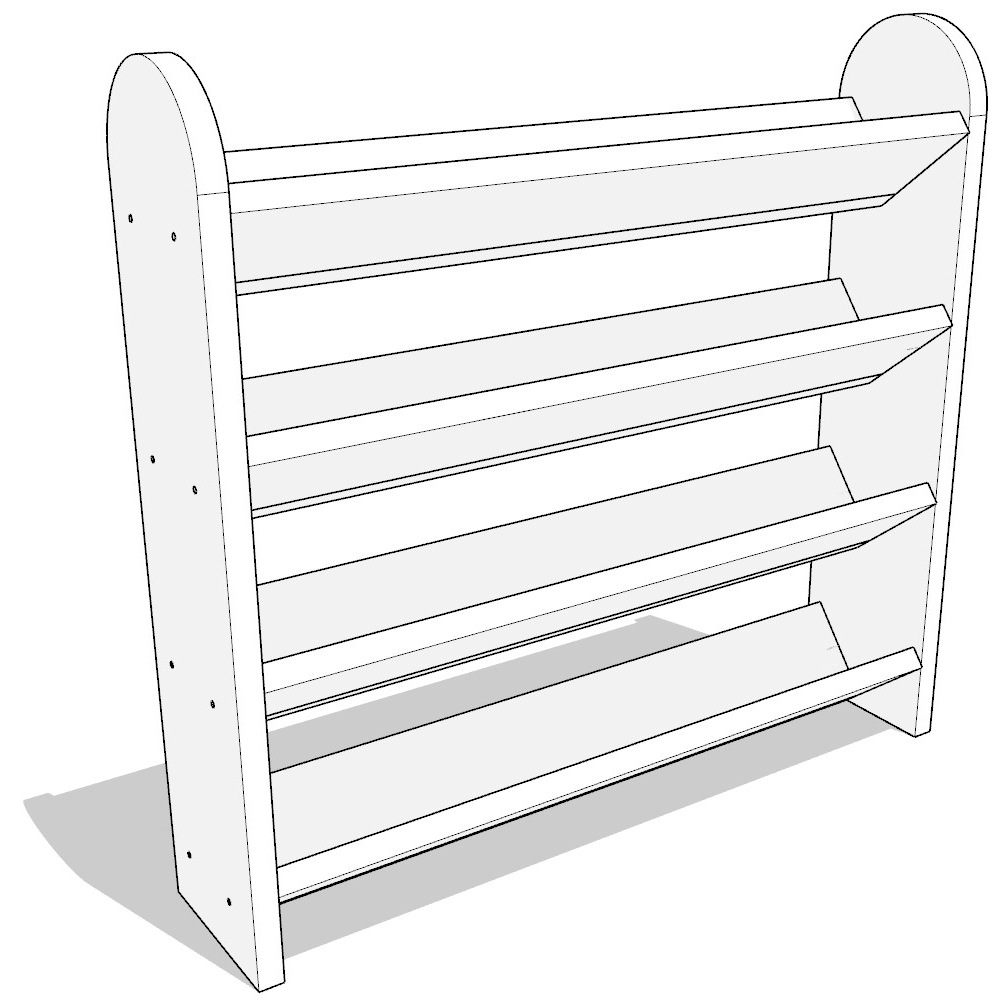
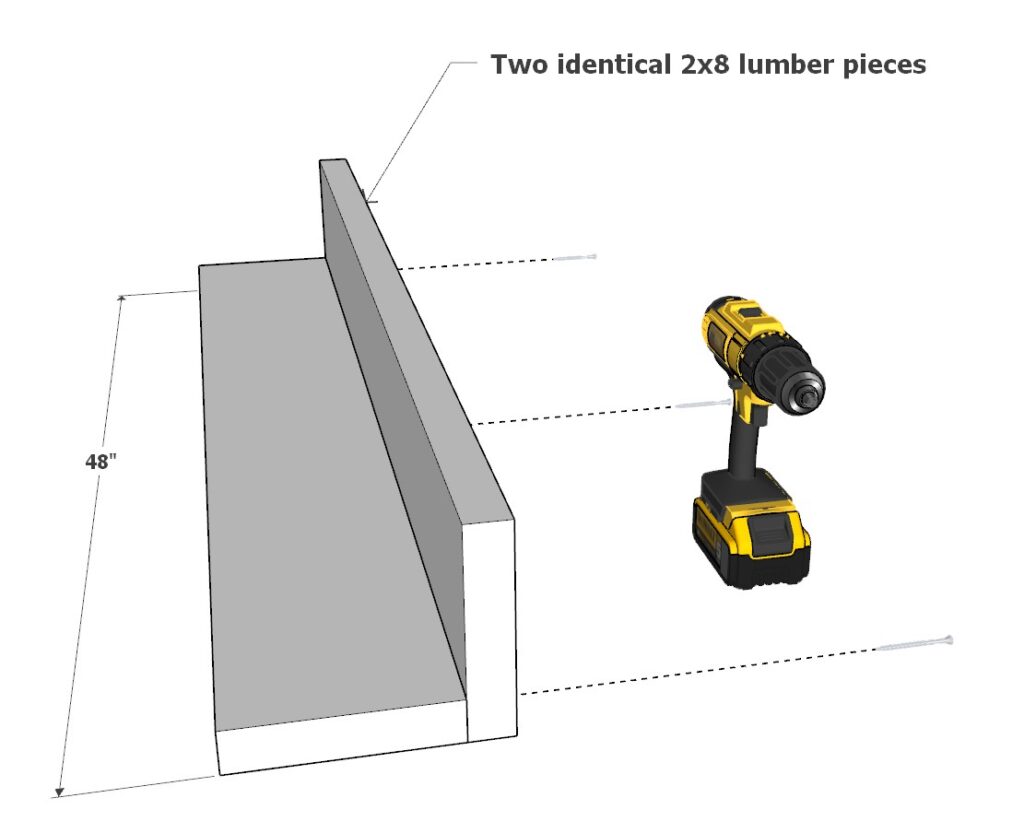
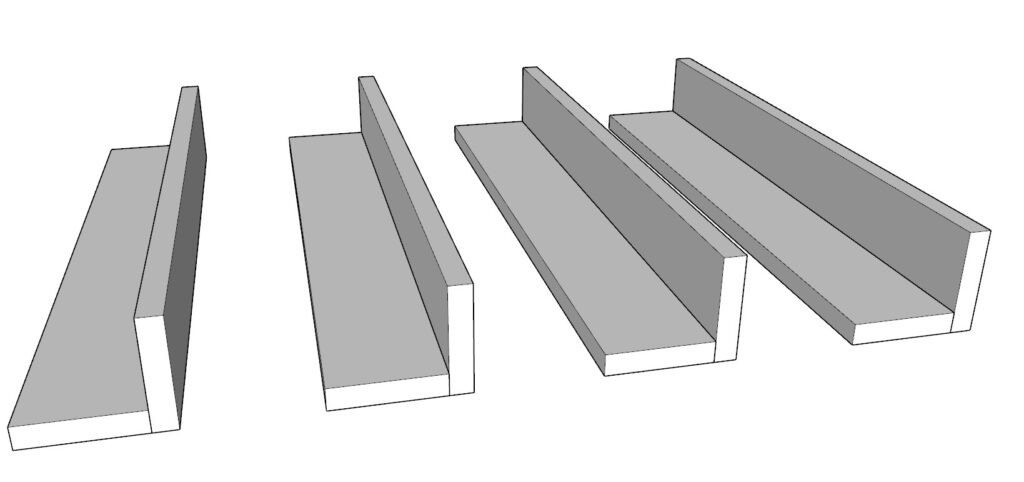
Step 1: Constructing the Planter Troughs
First up, we’re going to build the planter troughs—the heart of your vertical garden where the magic of growth happens.
- Prepare the Boards: Begin with two 48-inch 2×8 lumber pieces for each trough.
- Align and Secure: Place them edge to edge and fasten them together with 2.5-inch wood screws as the diagram illustrates.
Repeat this process until you have a total of four troughs ready for action.
Pro Tips:
- Pre-drill Holes: To prevent the wood from splitting, pre-drill holes before driving in the screws.
- Countersink for a Smooth Finish: Use a countersink bit so the screws sit flush with the wood, giving your troughs a cleaner look.
Step 2: Crafting the Side Panels
Now, let’s shape the side panels that will frame your vertical garden.
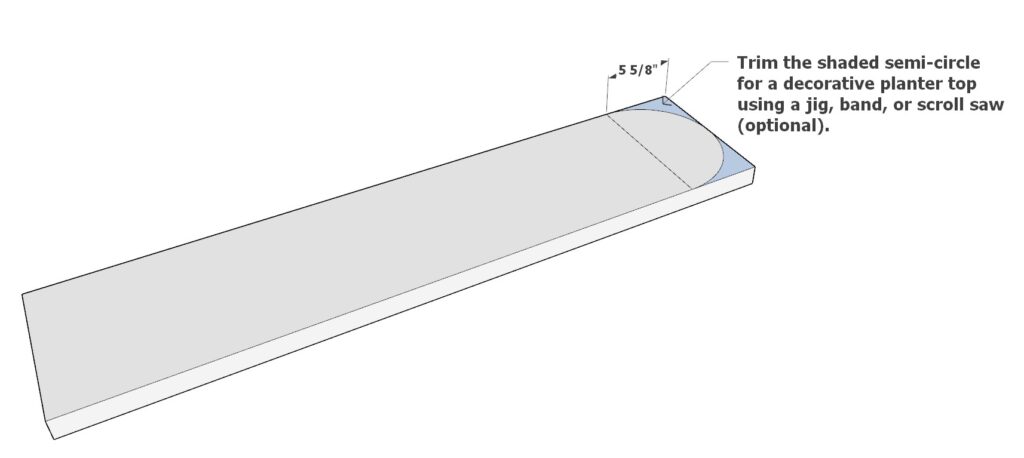
- Measure and Mark: Take a 48-inch 2×12 lumber board for the side panel.
- Cutting for Aesthetics (Optional): For added flair, you can trim a semi-circle at the top of the board. Mark out a semi-circle with a radius of 5 5/8 inches from the center of the board’s width on one end.
- Make the Cut: Using a jig saw, band saw, or scroll saw, follow your mark to cut out the semi-circle.
You will need to craft two of these side panels in total.

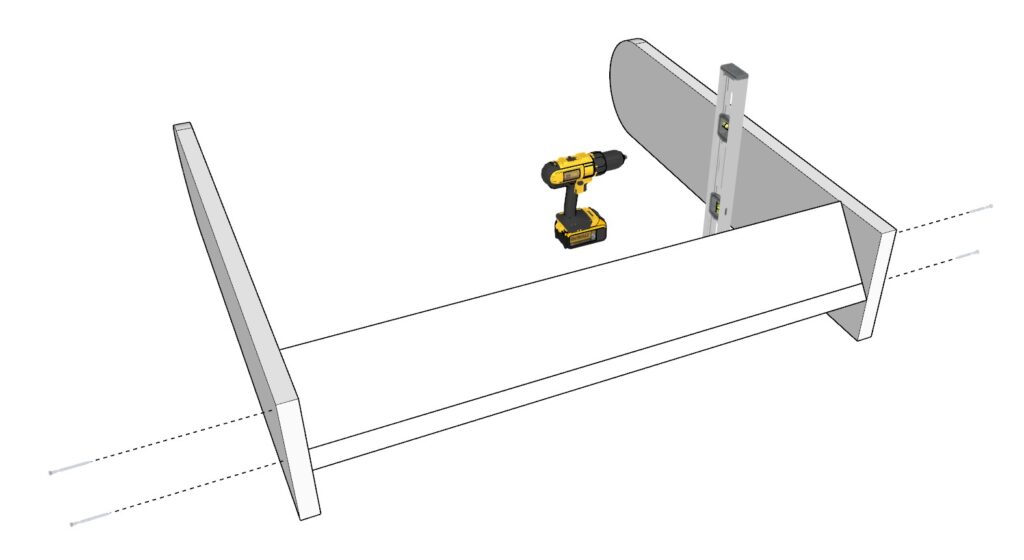
Step 3: Attaching the Troughs to the Side Panels
It’s time to bring together the troughs and the side panels to form your vertical garden’s main structure.
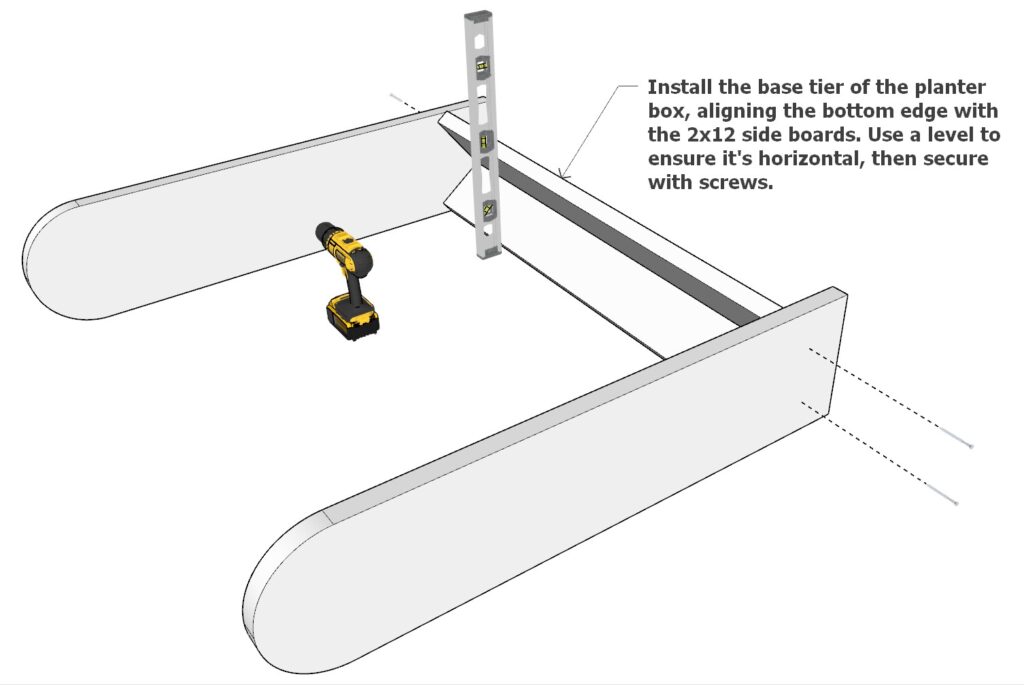
Position the Base Trough: Start with the base tier trough. Align its bottom edge with the bottom of the 2×12 lumber side panels. Make sure to use a level to ensure it’s perfectly horizontal.
Secure in Place: Once it’s level, secure the trough with screws to the side panels.
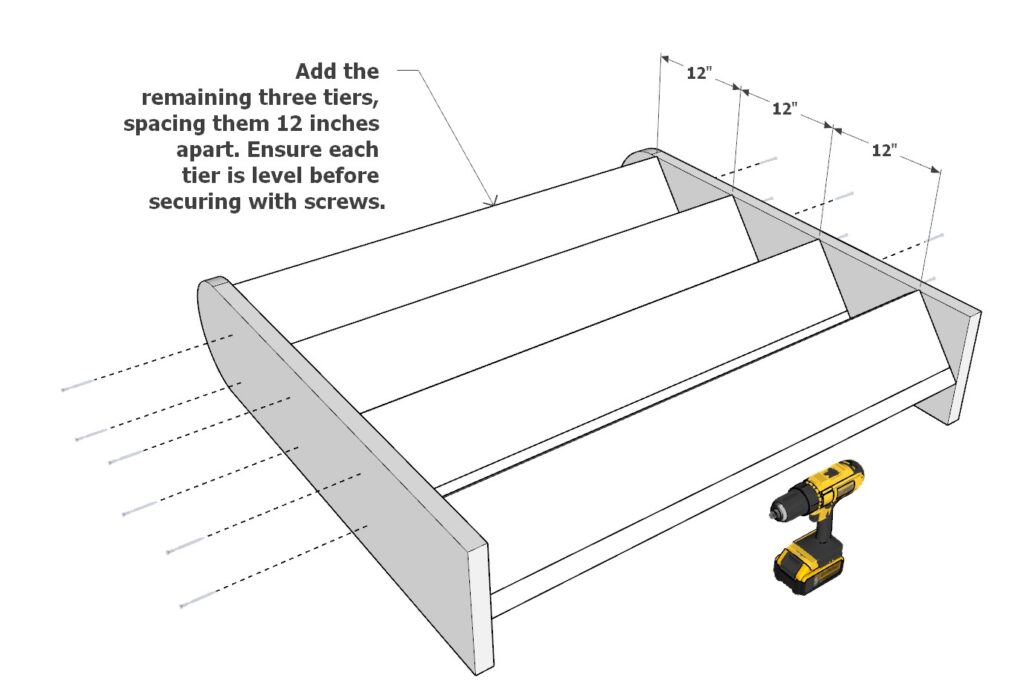
Install Additional Troughs: Follow the same steps to attach the remaining troughs, spacing them 12 inches apart from center to center. Double-check with a level before securing each one to ensure your soil stays put when the planter is upright.
Step 4: Finalizing Your Vertical Garden
Now that your vertical garden is taking shape, let’s focus on some essential details to ensure a safe and thriving environment for your plants.
1. Safeguarding Your Plants:
- When it comes to lining the troughs, we steer clear of staining the inside of the boards. This prevents any chemicals from leaching into the soil and reaching your plants. Your herbs and edibles will grow in a pure, uncontaminated space, ensuring they’re healthy and safe for consumption.
2. Choosing the Right Plants:
- Given the 4.5-inch depth of the troughs, not all plants will be suitable. However, there’s a variety of herbs that will flourish in this space. Here’s a breakdown of some common choices:
- Basil: Loves the sun and needs moist, well-drained soil.
- Cilantro: Requires full sun or light shade in southern zones. Prefers moist soil.
- Thyme: Enjoys full sun and well-drained, dry soil.
- Oregano: Thrives in full sun and well-drained soil; is drought-tolerant.
- Chives: Prefers full sun but will tolerate partial shade. Needs well-drained soil.
- Mint: Best in full sun to partial shade and requires consistently moist soil.
Avoid “soil shock” by choosing a quality potting mix that will hold moisture and nutrients at this depth, ensuring your herbs have all they need to thrive.
3. Caring for Your Herbs:
- Watering frequency will depend on the herbs you select and your climate. Generally, water when the top inch of soil feels dry to the touch. Most herbs need a minimum of four to six hours of sunlight per day.
This design has a built-in drainage system where the boards meet, allowing excess water to escape without the need for additional holes. This natural drainage helps prevent root rot and maintains the right moisture balance.
4. Material Matters:
- We avoid using pressure-treated lumber since it can contain chemicals that might leach into the soil. Instead, opt for natural, untreated wood to keep your garden organic and your plants happy.
5. Keeping Up Appearances:
- Maintenance is a breeze. Check your plants regularly for pests and diseases. Clean out dead leaves and debris to prevent rot and mold. At the end of the season, empty the soil and store your planter in a sheltered area to extend its life. With these simple steps, your vertical garden will stay beautiful and productive year after year.