Introduction
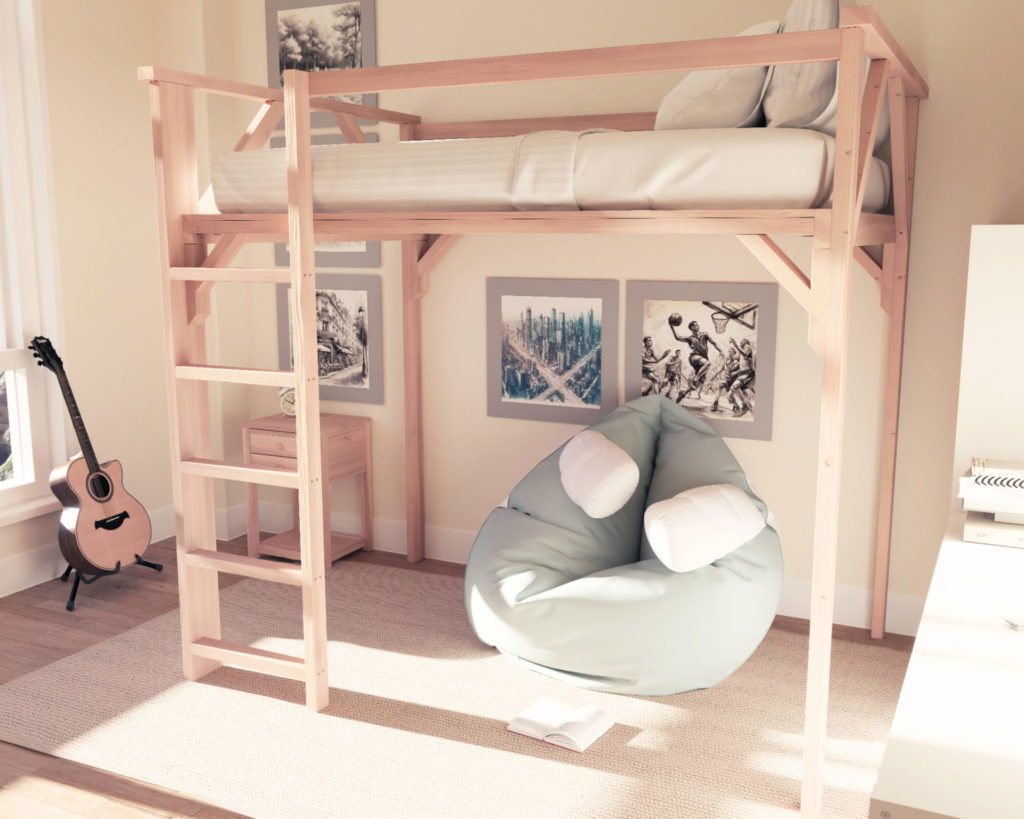
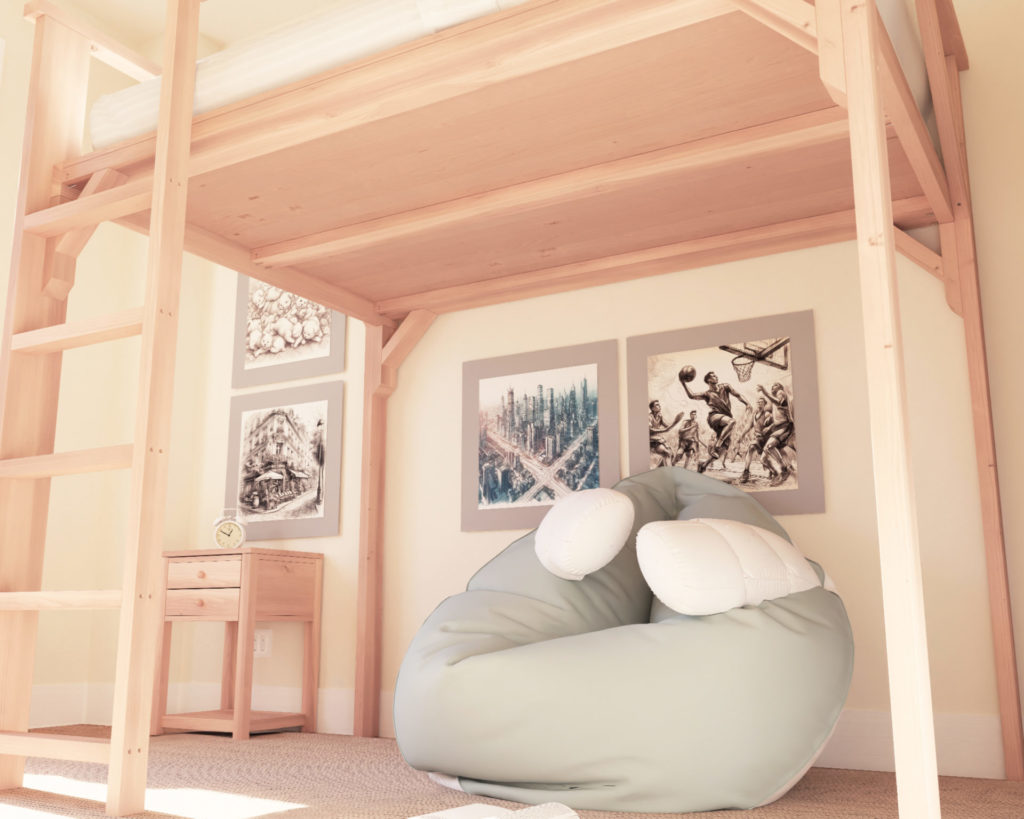
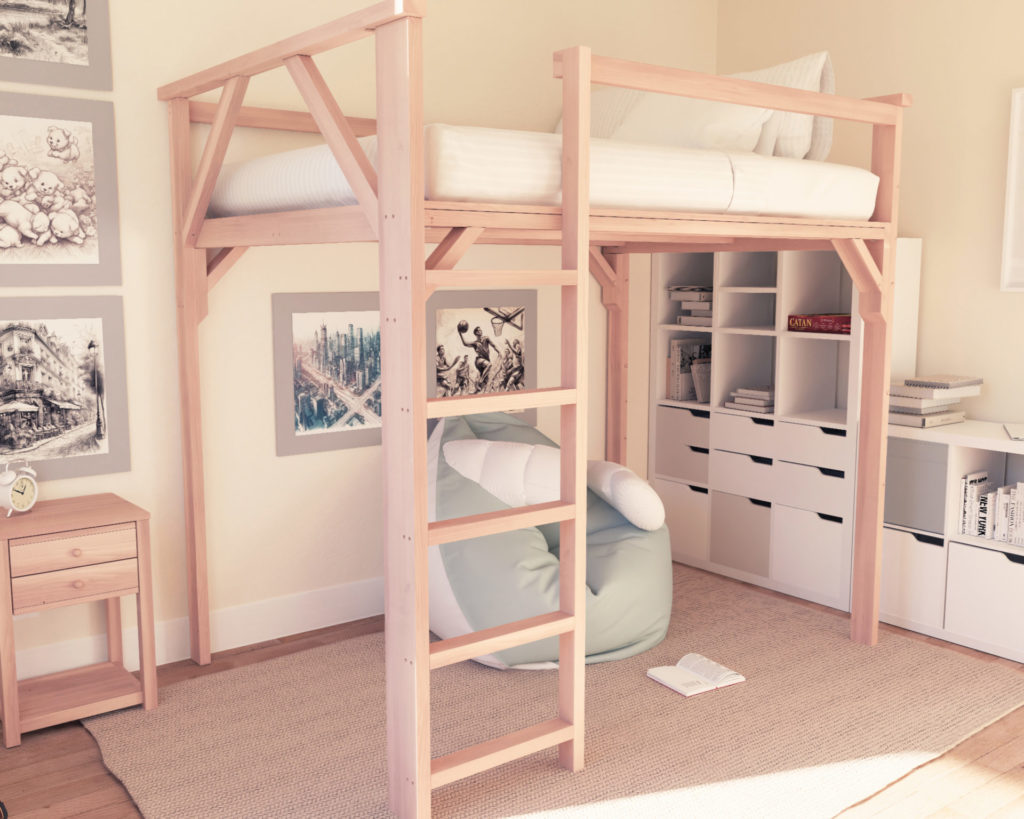
Times are tough, and every square foot counts when you’re working with limited space. Our minimalistic loft bed design is not just a space-saver but a wallet-saver too. With a budget of under $100, you can transform your room, giving it a fresh, organized look. This isn’t just a bed; it’s an invitation to start your DIY journey, and who knows, maybe find a new hobby along the way.

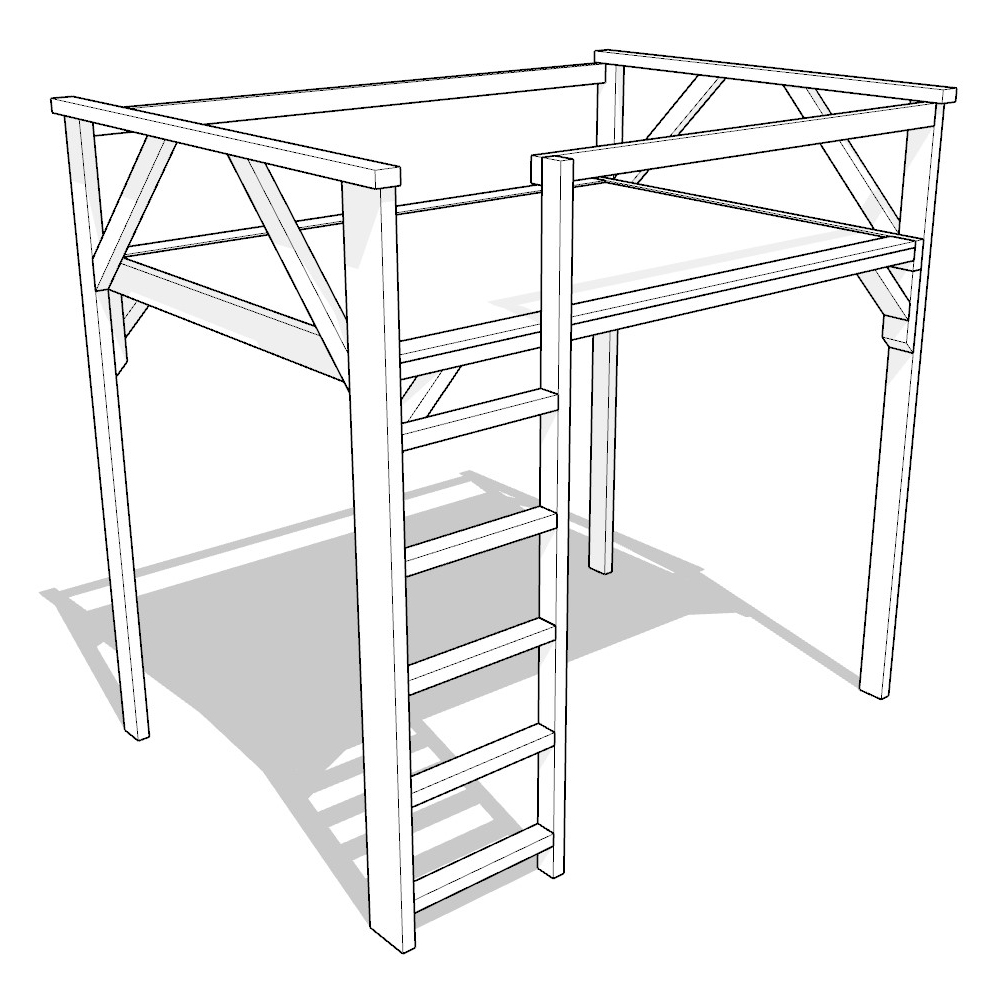
Discover the Design:
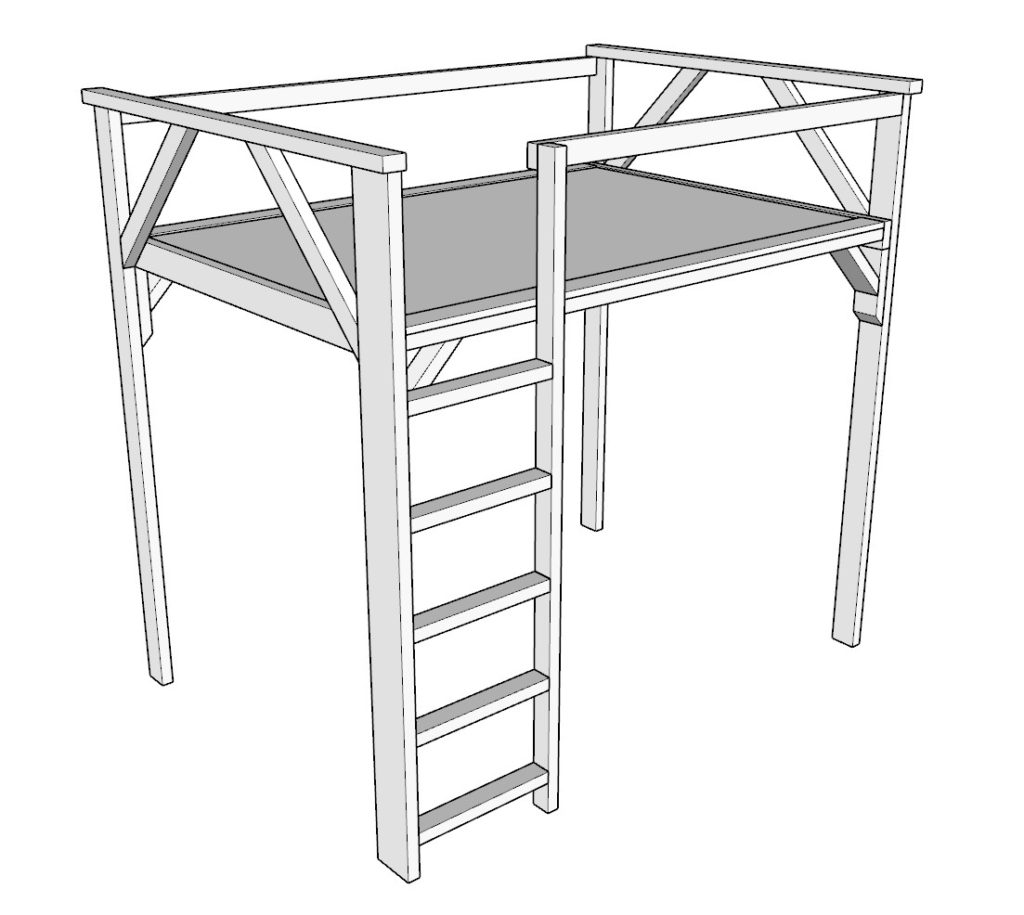
Our loft bed is designed for a full-size mattress. It’s straightforward – no frills, no unnecessary embellishments. Just a solid, reliable structure with a neat finish that can blend with any room decor. The materials? Common construction lumber you can pick up from stores like Home Depot or Lowes. The cost stays under $100, making this a real budget-friendly project during these economic downturn times.
Safety First:
When we talk about loft beds, safety is a priority. We’ve spent hours refining the design, ensuring the lofted area is reinforced and cross-braced in 8 different places. It’s built to be sturdy, giving you peace of mind along with a cozy sleeping spot.
Perfect for Small Spaces:
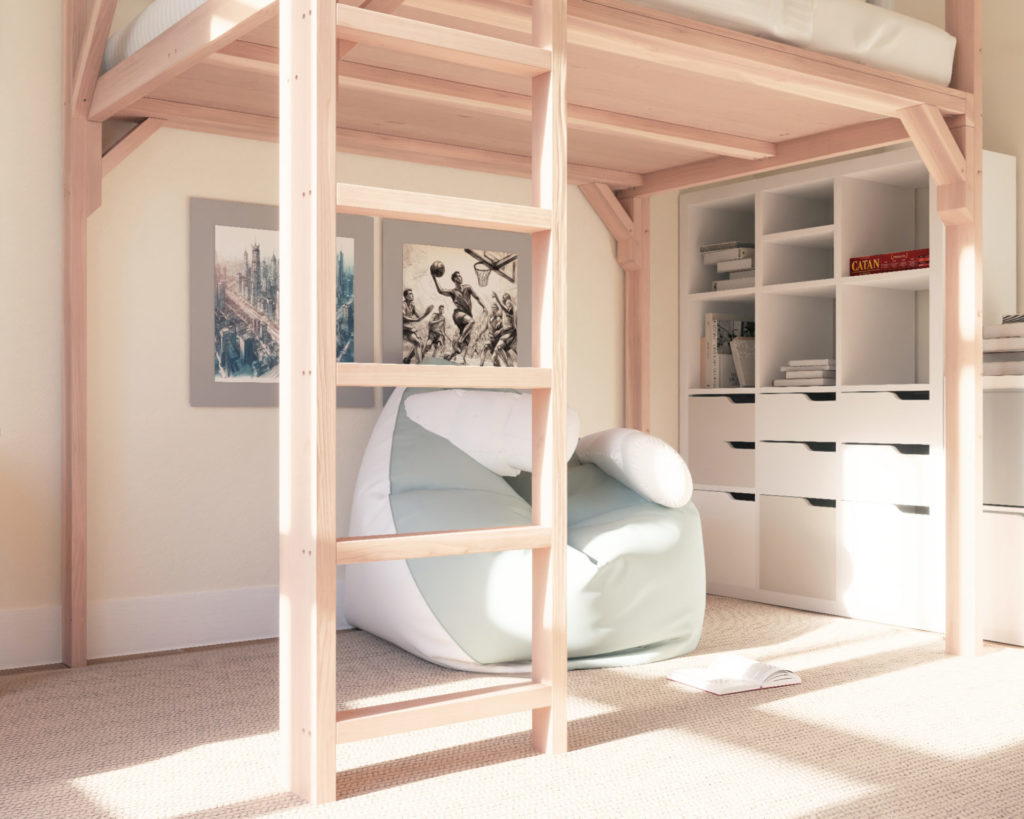
Got a cramped room? This loft bed design is your space-saving buddy. The area beneath the loft is a blank canvas. Set up a comfy reading nook, a compact workstation, or storage shelves; the choice is yours. It’s all about making the most out of what you have, especially when space is a premium.
Step by Step Guidance:
With the DIY plan PDF, you’re not left in the dark. You get step-by-step directions, clear diagrams, and even a shopping and cut list to make the process as smooth as possible. We’ve laid out where each screw goes, making this a perfect starter project for any DIY newbie. No fancy tools required, no complex joints or cuts, just a straightforward assembly process.
Your Path to DIY Mastery:
Dive into the DIY world with a project that’s easy on your pocket and great for learning the ropes. The sense of achievement when you step back and look at the finished loft bed you built is unbeatable. Ready to start? Grab the DIY plan PDF and begin your journey towards becoming a DIY aficionado.
Outro:
Times are hard, but that doesn’t mean you can’t spruce up your space. Our minimalistic loft bed design is a testament to what a little creativity, a small budget, and a willingness to try can achieve. Get the DIY plan PDF and make the best out of your space and budget.
Time
8 hours
Cost
$100 (cost may vary)
Skill level required
Beginner
DIY Loft Bed PDF Plan
What is included in the PDF download?
- Easy to read step by step instructions
- Material list
- Tools needed
- Helpful links to materials and tools needed
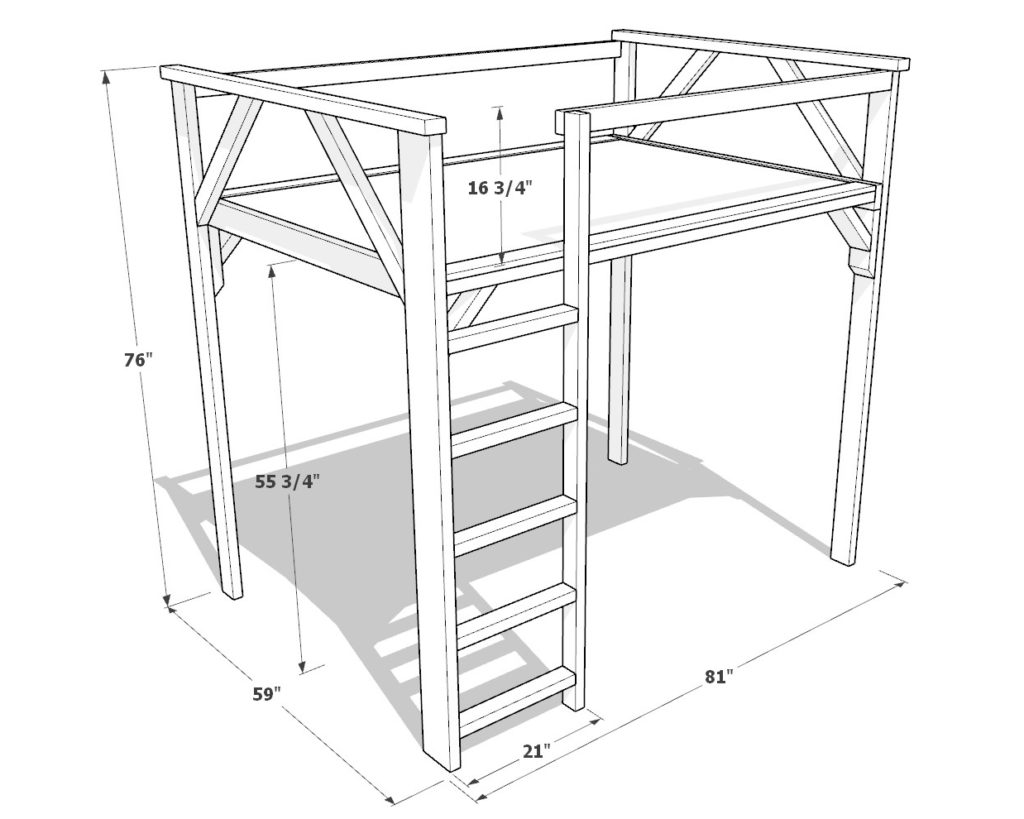
DIY Loft Bed Dimensions
Tools Needed for This Project:
Available with the purchase of the DIY plan PDF.
Lumber Shopping & Cut List
Available with the purchase of the DIY plan PDF.
Step 1: Constructing the Loft Bed Frame
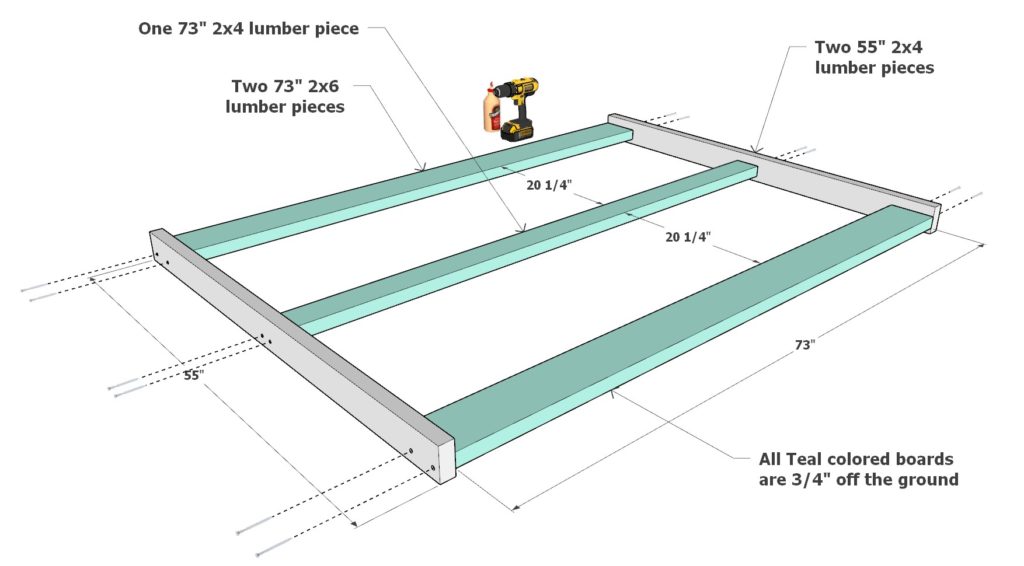
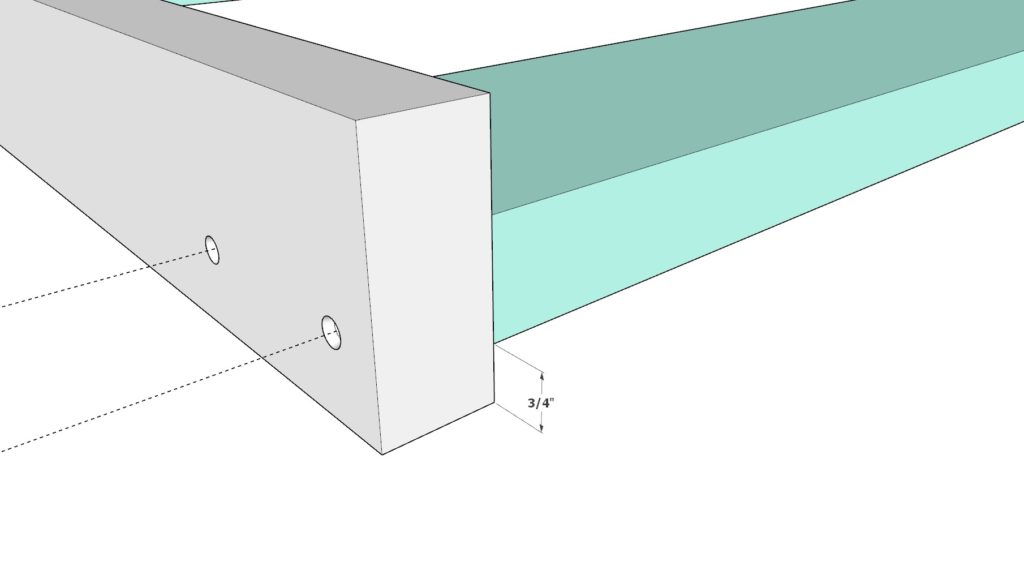
Begin by gathering two 73-inch 2×6 lumber pieces, one 73-inch long 2×4 lumber piece, and two 55-inch 2×4 lumber pieces. Arrange them as illustrated in Diagram 1. Make sure the teal-colored pieces are elevated 3/4″ off the ground as shown in Diagram 2. Apply glue at the joints, pre-drill holes, and secure them using 3.5-inch screws.
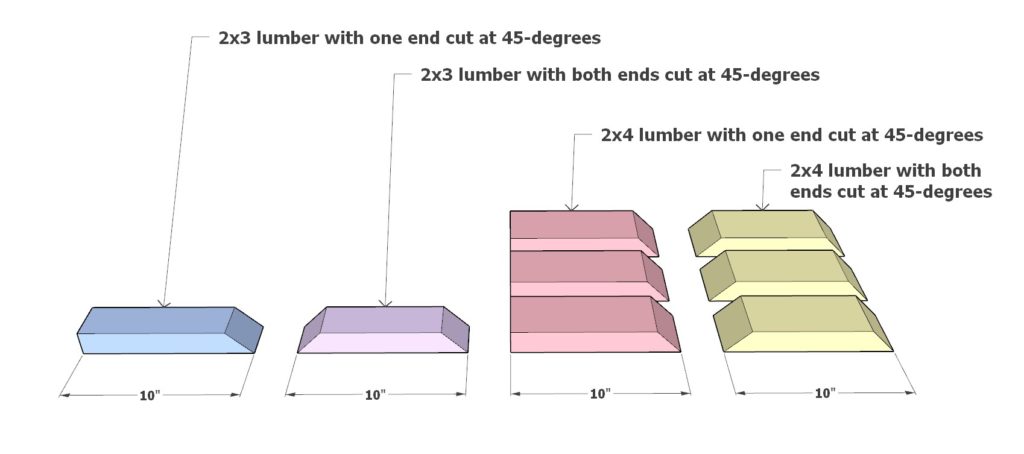
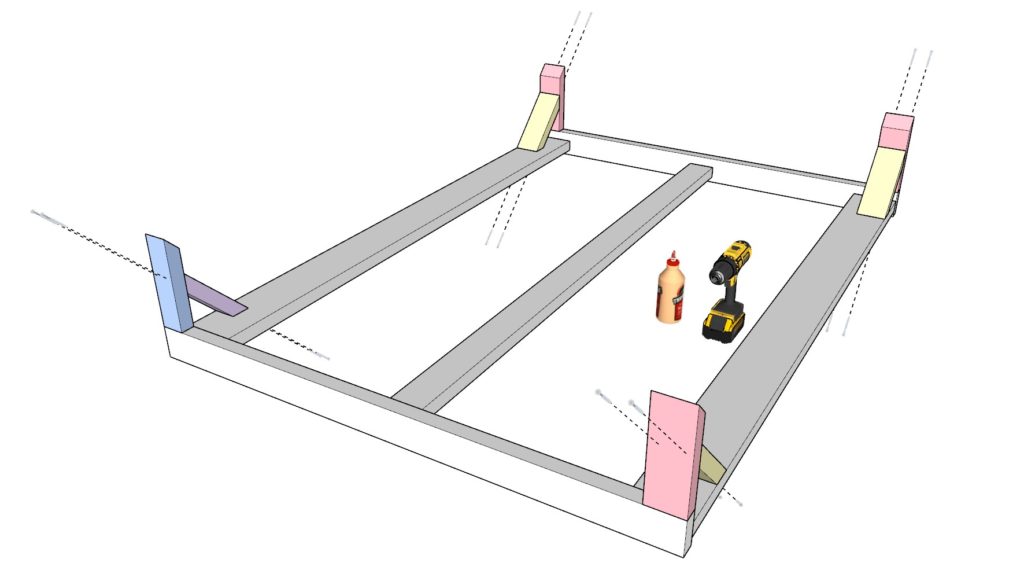
Now, it’s time to add reinforcement braces to your frame. You’ll see these represented in yellow, pink, lavender, and blue in the diagrams. Trim them to the specified dimensions as shown and attach them to the frame using 2.5-inch screws and wood glue. Specifically, you’ll need:
- Three 10-inch 2×4 lumber pieces with both ends cut at 45-degrees,
- Three 10-inch 2×4 lumber pieces with one end cut at 45-degrees,
- One 10-inch 2×3 lumber piece with both ends cut at 45-degrees,
- One 10-inch 2×3 lumber piece with one end cut at 45-degrees.
Next, take two identical 73-inch 1×4 lumber pieces and attach them to the frame as shown in Diagram 5, using 2-inch screws and wood glue.
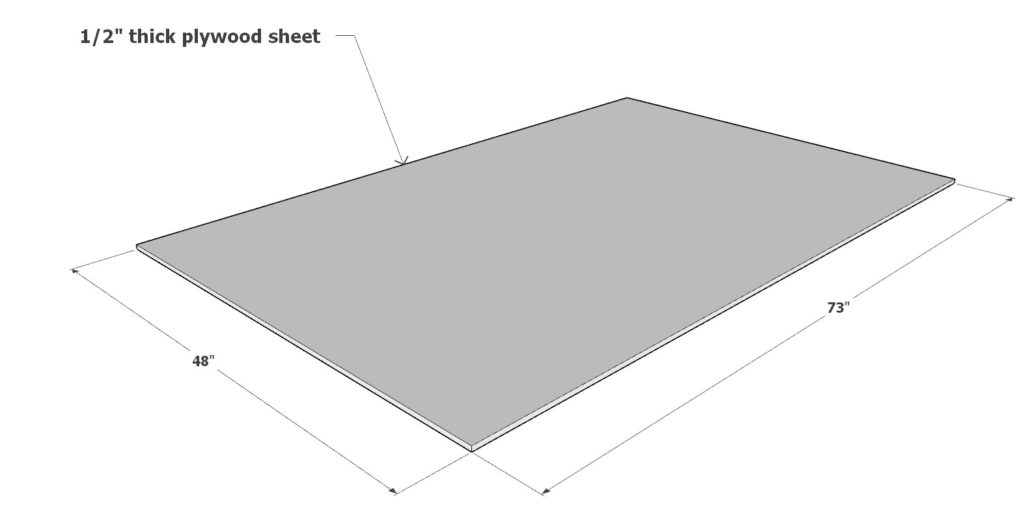
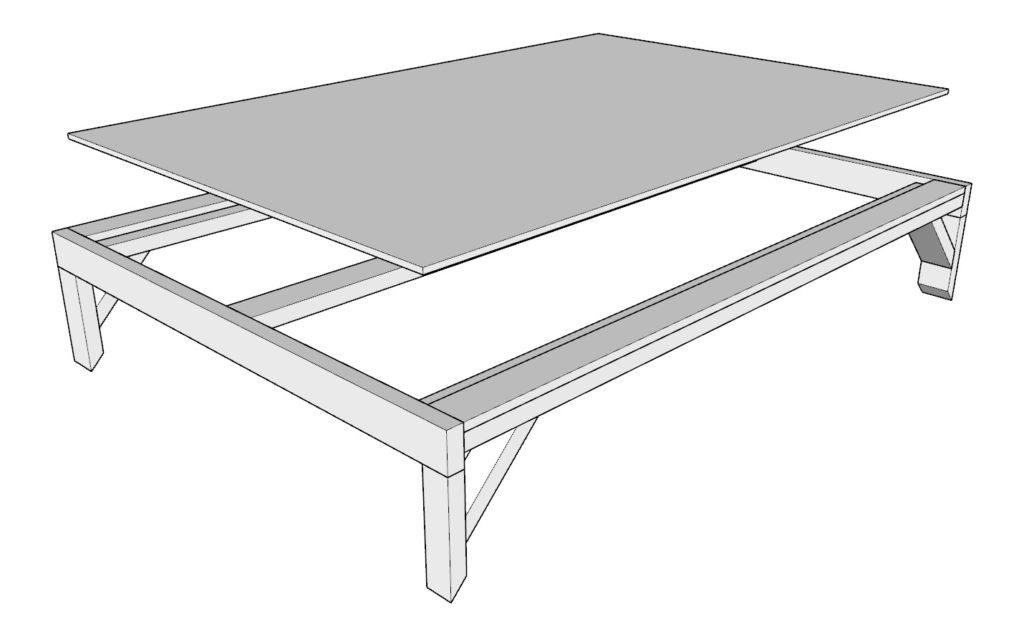
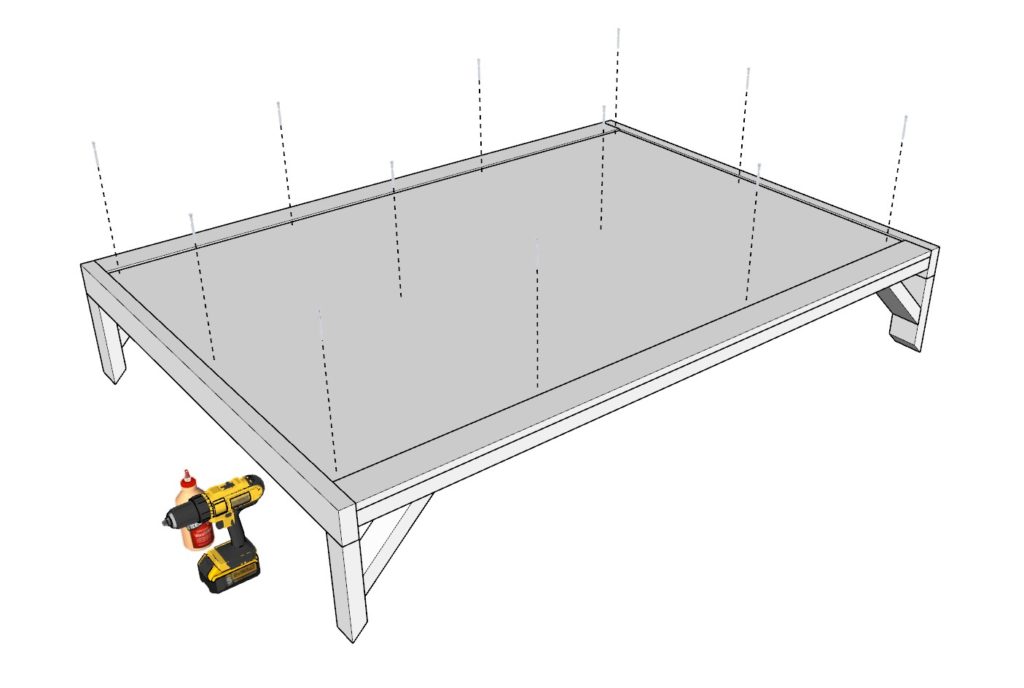
Now, place a plywood sheet measuring 48 inches x 73 inches onto the loft bed frame. Secure it with wood glue and 2-inch screws. Be cautious while drilling to ensure the screws sit flush with the plywood and don’t protrude.
Pro Tips:
- Consider sanding each piece of wood before installation to achieve a smooth and consistent finish. It’s challenging to sand down areas after the loft bed is assembled due to tight corners.
- Always pre-drill holes to prevent the wood from splitting, ensuring a clean, professional look and sturdy construction.

Step 2: Installing Legs and Ladder to the Loft Bed
Kickstart this step by adding legs to your loft bed frame. It’s advisable to carry out this step in the room where the bed will be placed, as the assembled frame might not fit through doorways.
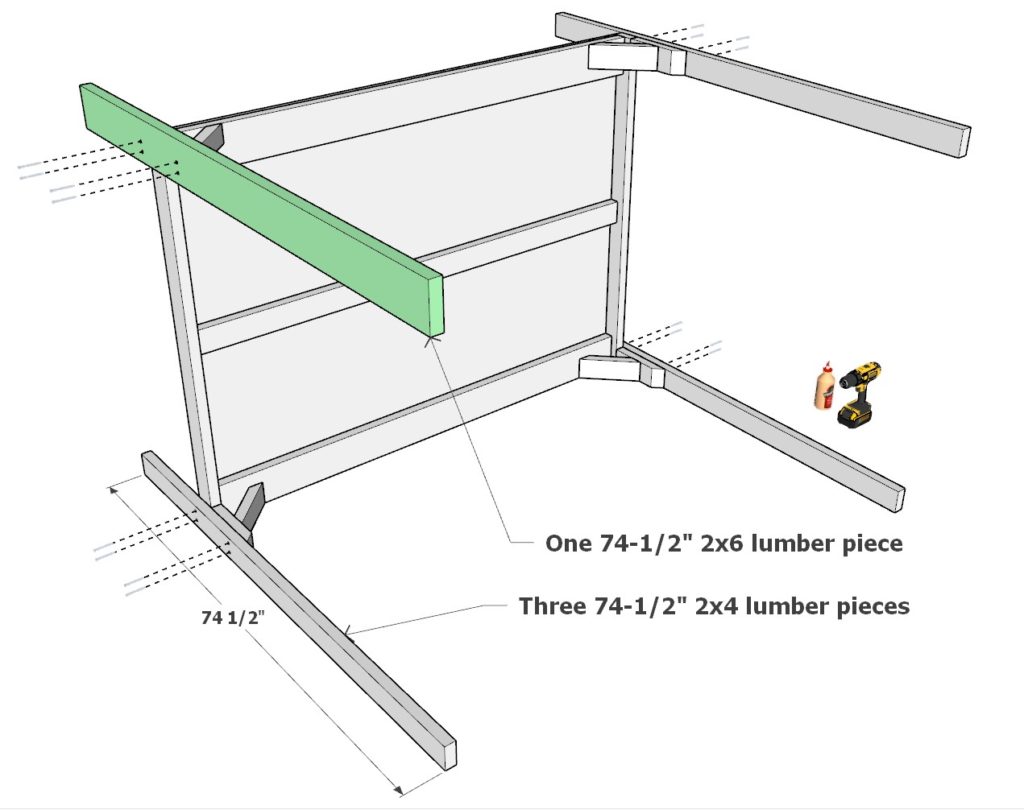
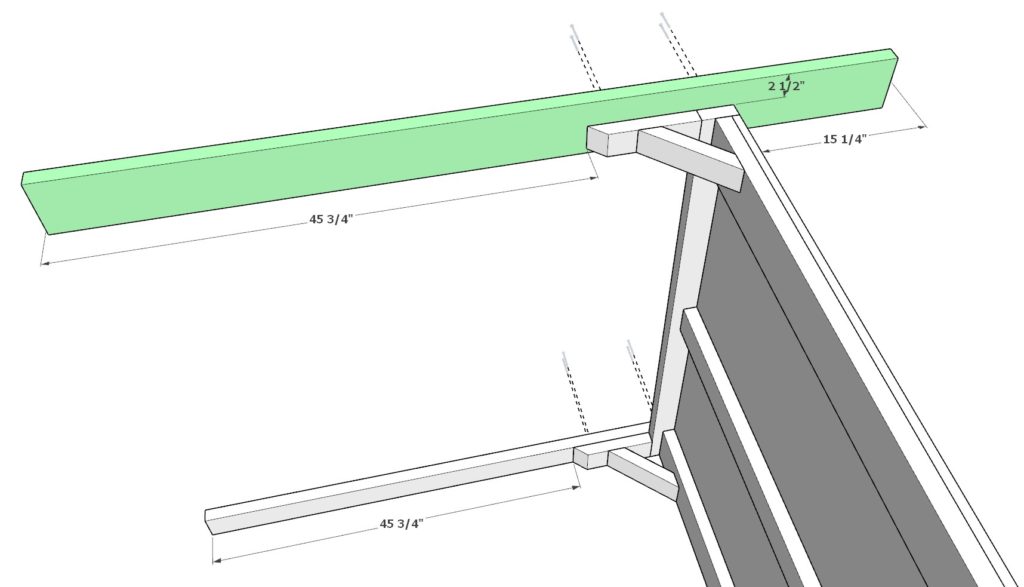
Grab three identical 74-1/2 inch 2×4 lumber pieces and one 74-1/2 inch 2×6 lumber piece. Attach these pieces to the loft bed frame ensuring they are positioned correctly as per Diagram 1 and 2 (pay attention to the green colored pieces, the 2×6 lumber piece is positioned differently than the 2x4s). Utilize 2.5-inch screws and wood glue to secure them in place.
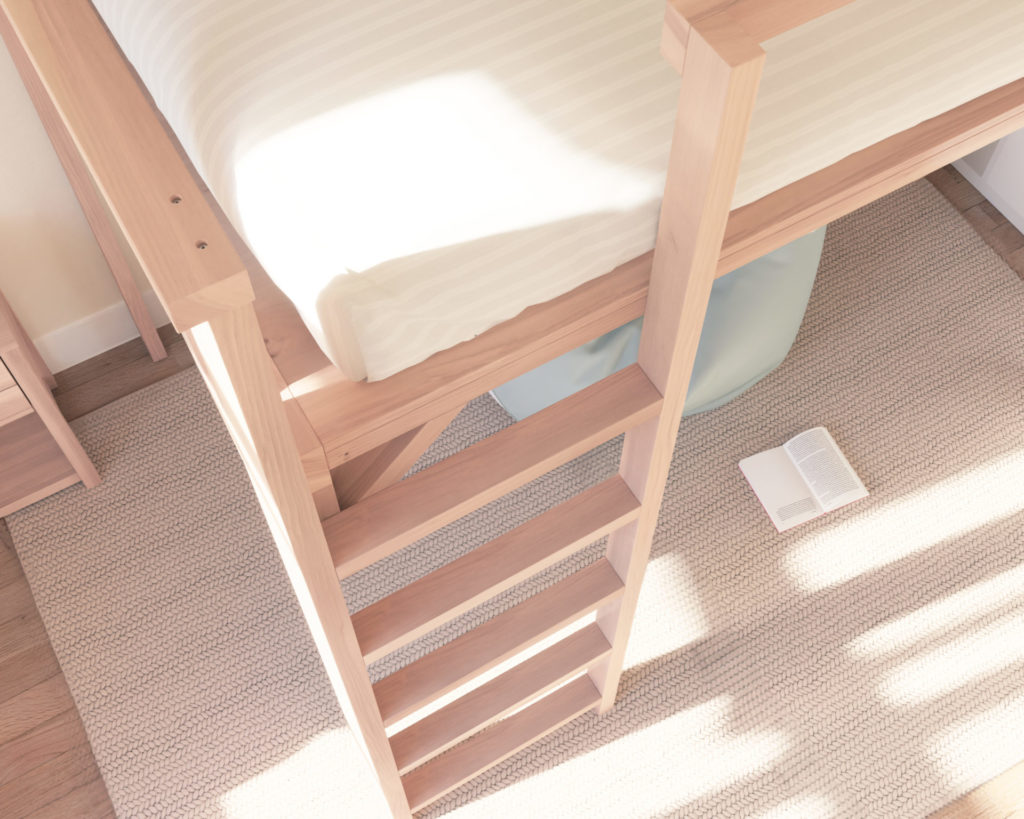
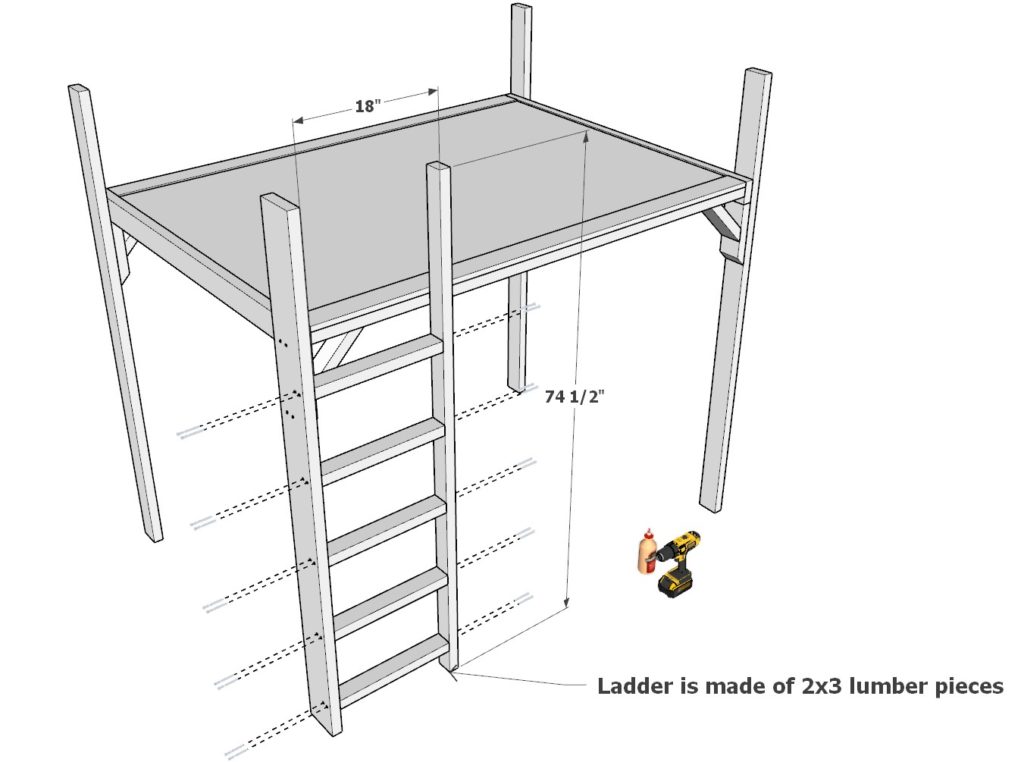
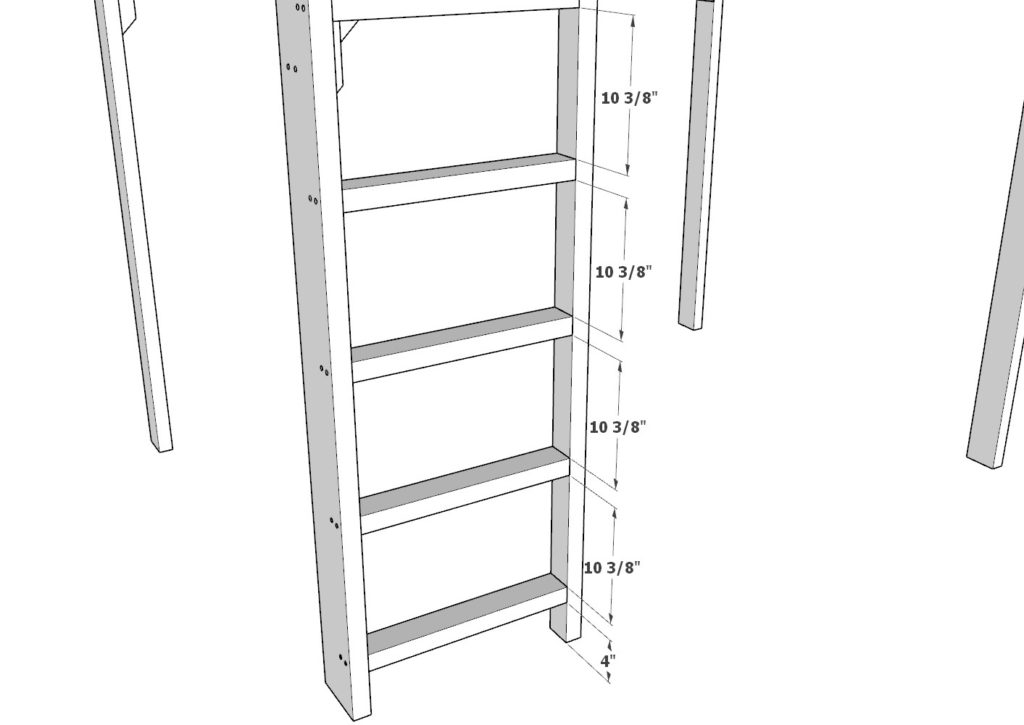
Now, let’s move on to the ladder. The ladder will be attached to the 2×6 lumber piece of the loft bed leg. For the ladder, you’ll need five 18-inch long 2×3 lumber pieces and one 74-1/2 inch 2×3 lumber piece. Arrange them as illustrated in the last diagram of this step, ensuring even spacing. Apply glue at the joints, pre-drill the holes to avoid wood splitting, and fasten them securely using 3.5-inch screws.
This step is crucial as it sets up the main structure of your loft bed, ensuring stability and easy access. Remember, accurate placement and secure fastening are key to a safe and sturdy loft bed construction.
Step 3: Attaching Railing to the Loft Bed
Now let’s move on to adding safety rails to your loft bed, a key feature to ensure a safe sleeping area.
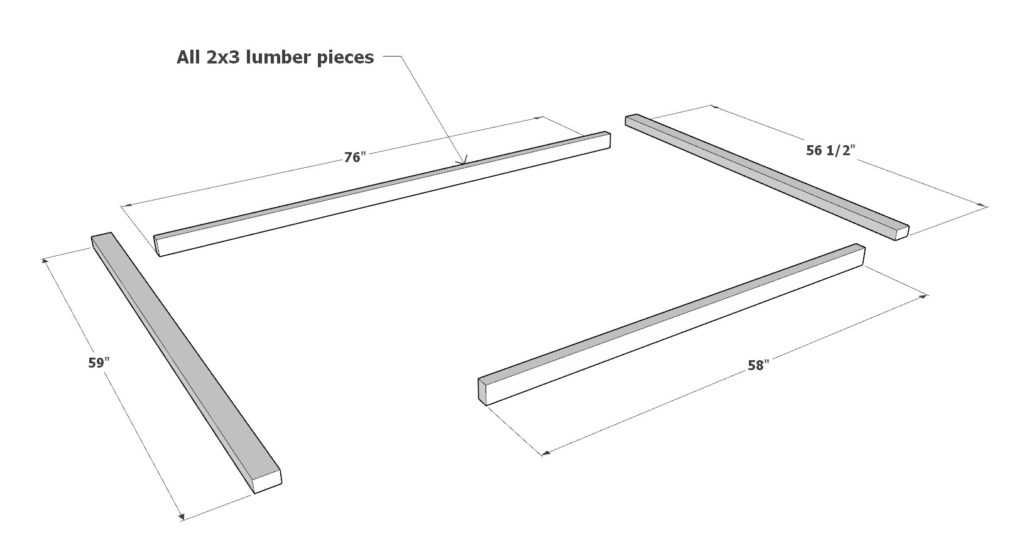
Gather the following lumber pieces:
- One 76-inch 2×3 lumber piece,
- One 59-inch 2×3 lumber piece,
- One 56-1/2 inch 2×3 lumber piece,
- One 58-inch 2×3 lumber piece.
Arrange these pieces as depicted in the 2nd diagram, ensuring they align correctly. Apply wood glue at the joints for added stability, pre-drill the holes to prevent the wood from splitting, and then secure them firmly using 2.5-inch screws.
This step brings in a significant safety feature to your loft bed, forming a sturdy railing that helps prevent falls.
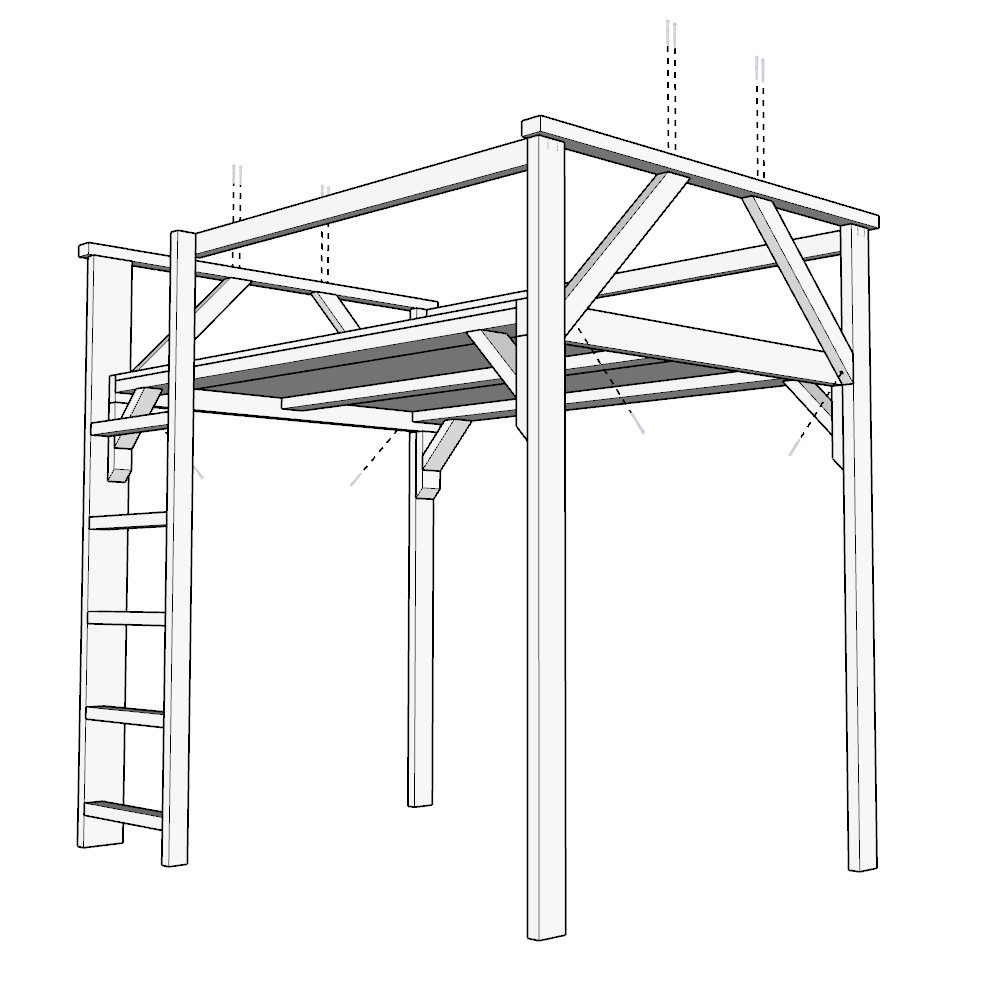
Step 4: Installing Cross Braces for Stability
Now, it’s time to enhance the stability of your loft bed by adding cross braces. This step ensures your bed stays steady, without any swivel from side to side.
Procure four 26-1/2 inch long 2×3 lumber pieces and cut both ends at 45-degrees. Position these braces as shown in the 2nd diagram, attaching them to both the railing and the legs of the loft bed. Ensure they are aligned correctly, then secure them firmly in place.


Step 5: Preparing, Painting, Staining, and Securing Your Loft Bed
Getting your loft bed ready for a makeover involves a meticulous preparation, painting, and staining process, followed by securing it to the wall for added stability.
Preparation:
- Start with sanding using a coarse sandpaper (80-grit) to smooth out rough areas, progressing to a medium grit (120 or 150), and finishing with a fine grit (220).
- Clean the bed with a tack cloth to remove dust, followed by a wipe down with a damp cloth, and allow it to dry completely.
Painting:
- Apply a coat of wood primer, allowing it to dry as per the instructions on the can.
- Stir your chosen paint well, apply it in long, even strokes using a brush or roller, let it dry, and apply a second coat if needed for a smoother finish.
Staining:
- Stir the stain well, apply it with a brush or rag working along the grain, and wipe away any excess with a clean rag.
- Once dry, apply a clear wood sealer to protect the wood and enhance the finish, allowing it to dry completely.
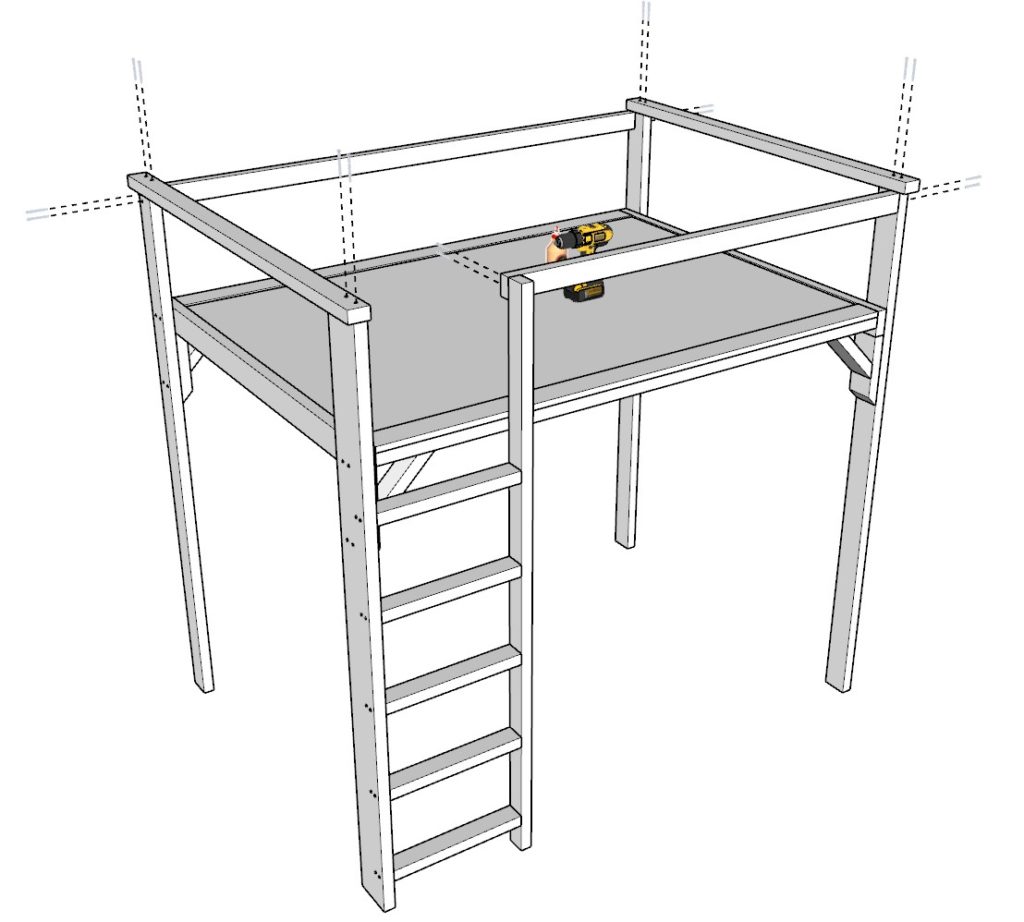
Securing to the Wall:
- Locate the studs in the wall using a stud finder where you plan to anchor the loft bed.
- Mark the drilling points ensuring alignment with the studs and the loft bed frame.
- Pre-drill holes into the marked points on both the loft bed frame and the wall.
- Align the loft bed with the pre-drilled holes, and use heavy-duty screws or anchors to securely fasten the loft bed to the wall studs.
This comprehensive step ensures your loft bed is not only aesthetically pleasing but also securely anchored to the wall, ensuring safety and stability for a good night’s sleep.