DIY Wood Garage Shelves from 2x4s and Plywood are the Best Option.
If you‘re looking for a way to organize your garage and get rid of the clutter, then DIY wood garage shelves are the perfect solution. Building your own shelves from 2x4s and plywood is a great way to save money and get the job done quickly. Plus, you can customize the shelves to fit your specific needs.
When it comes to choosing the right material for your DIY wood garage shelves, 2x4s and plywood are the best options. 2x4s are strong and durable, and they‘re easy to work with. Plywood is also a good choice because it‘s inexpensive and it can be cut to any size you need.
Building shelves from 2x4s and plywood is a quick and easy project that anyone can do. You don‘t need any special tools or skills, and the shelves can be built in just a couple of hours. Plus, they’re a great way to get your garage organized and make the space more functional.Overview of the DIY garage shelves.
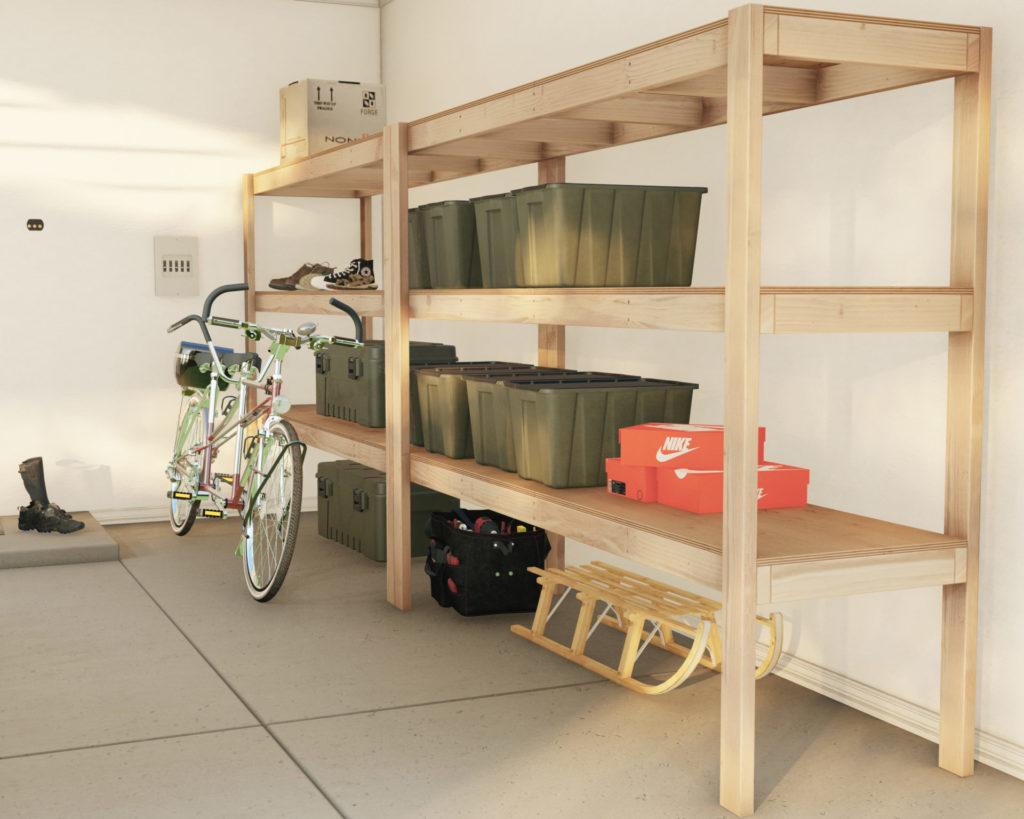
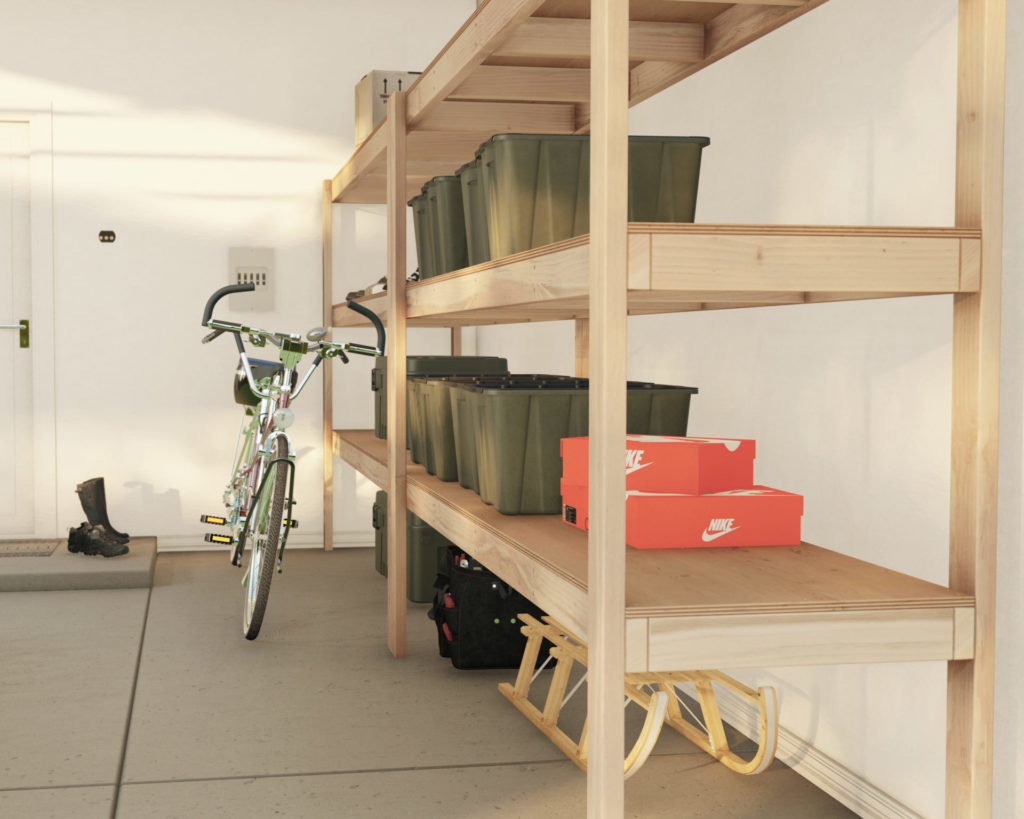
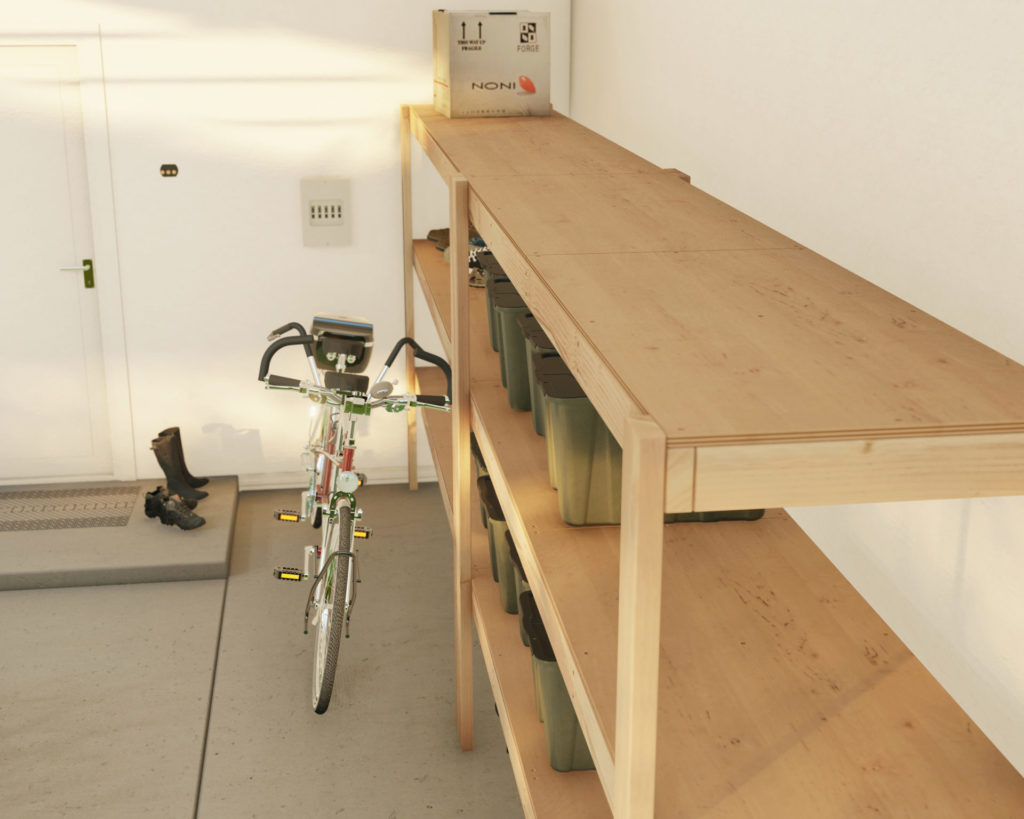
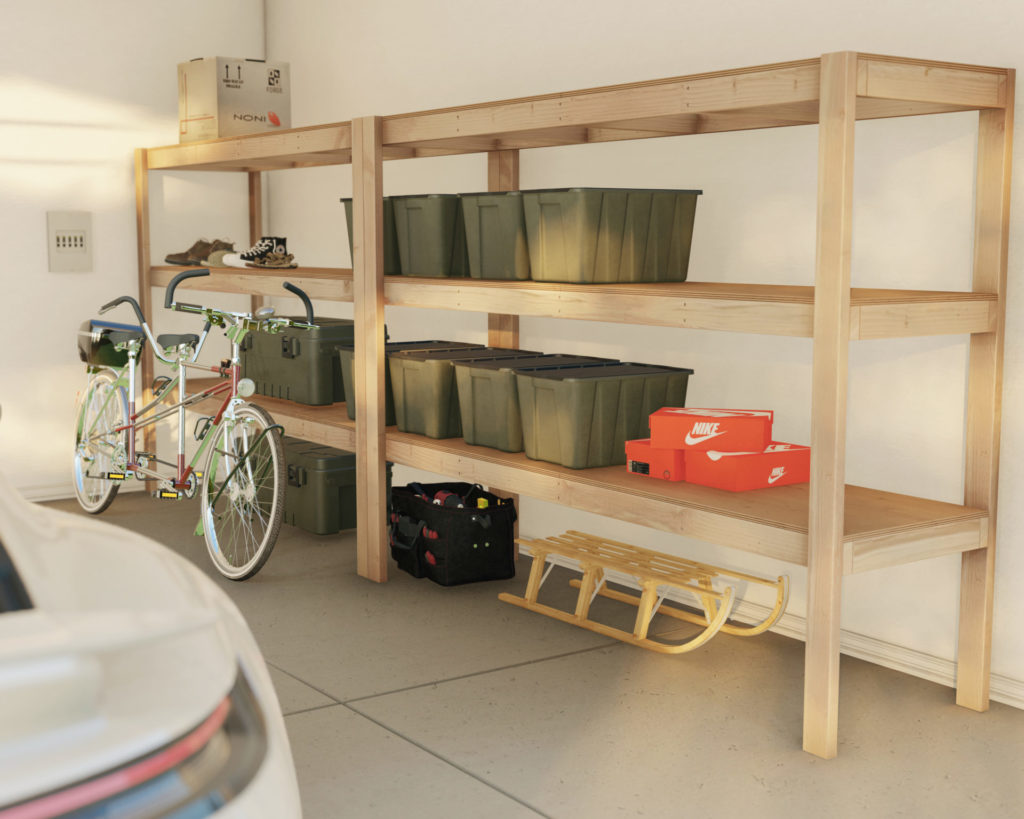
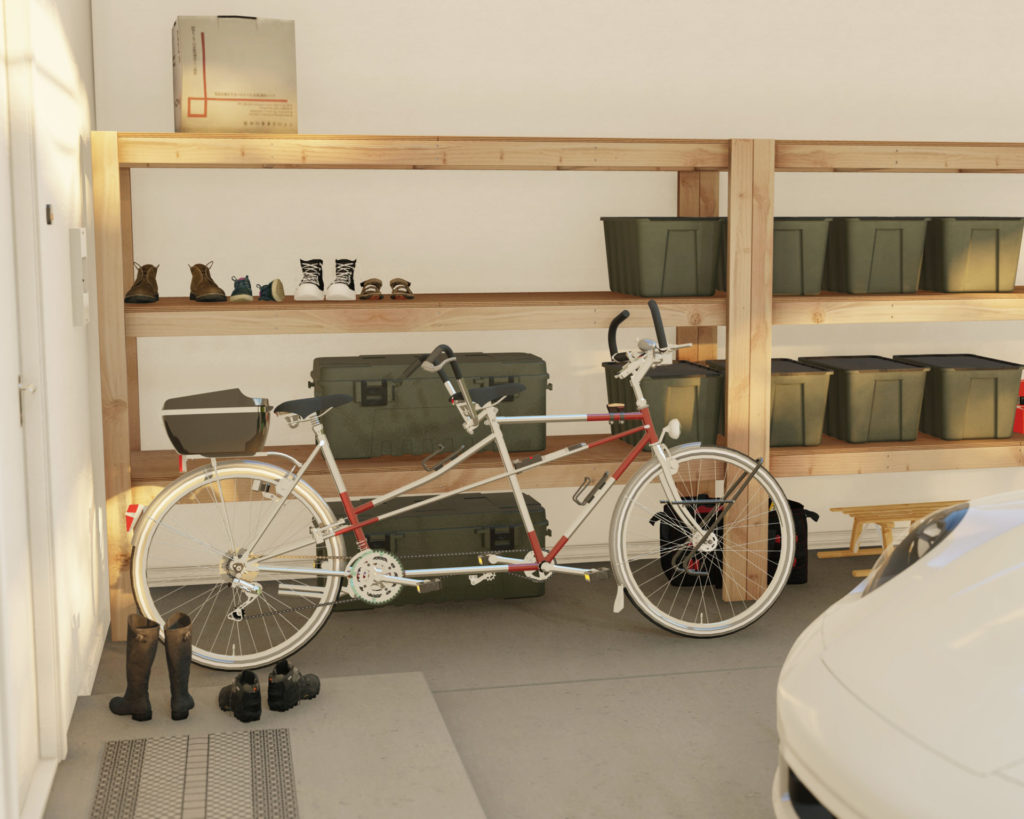
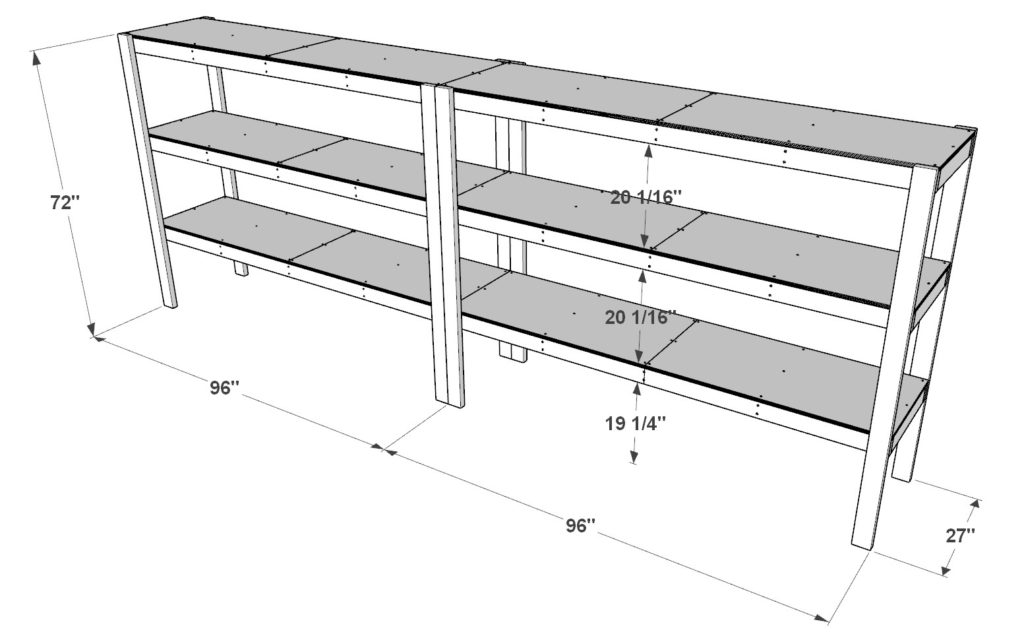
These sturdy and easy to build shelves are designed for easy access. The height is 72 inches, making them the perfect storage solution for most garages. The shelves feature three levels of storage and a storage space at the bottom for frequently used items that need to be tucked away. The 72-inch height also ensure that the shelves are not too close to the ceiling. This allows for ample storage at the top as well.
How much does it cost to build these shelves?
These shelves can be built for around $180 with minimal lumber waste. This is a significant savings, especially if the person is looking to store a lot of items. The shelves are also very sturdy and easy to build, making them a great option for those who are looking for an easy storage solution.
Who can build these DIY garage shelves?
These shelves are easy to assemble with the step-by-step instructions provided in this post.
I believe these shelves would be a great project for beginners to woodworking and anyone with minimal woodworking experience.
The DIY plans offered in this post include helpful description, images, diagrams, helpful links, and more to ensure that the DIY shelve build is smooth, efficient, and easy.
Time to build
1-2 hours
Total cost of build
$180
Skill level required
Beginner
Download the PDF plans
DIY wood garage storage shelve PDF plans
What is included in the PDF download?
- Easy to read step by step instructions
- Material list
- Tools needed
- Helpful links to materials and tools needed
Step-by-step instruction on building the DIY storage shelves.
Recommend tools
- Saw (miter saw recommended for precision cuts)
- Drill
- Impact driver with bit for screws
- wood countersink drill bit
- measuring tape
- 3lbs of 3.5 inch long screws per panel
- 1lb of 2.5 inch long screws per panel
- Table saw to cut plywood sheets (Home Depot typically offers free cuts in the store)
Cut and shopping list
Available with purchase of PDF DIY plan. Thank you so much for making this website possible with your support!
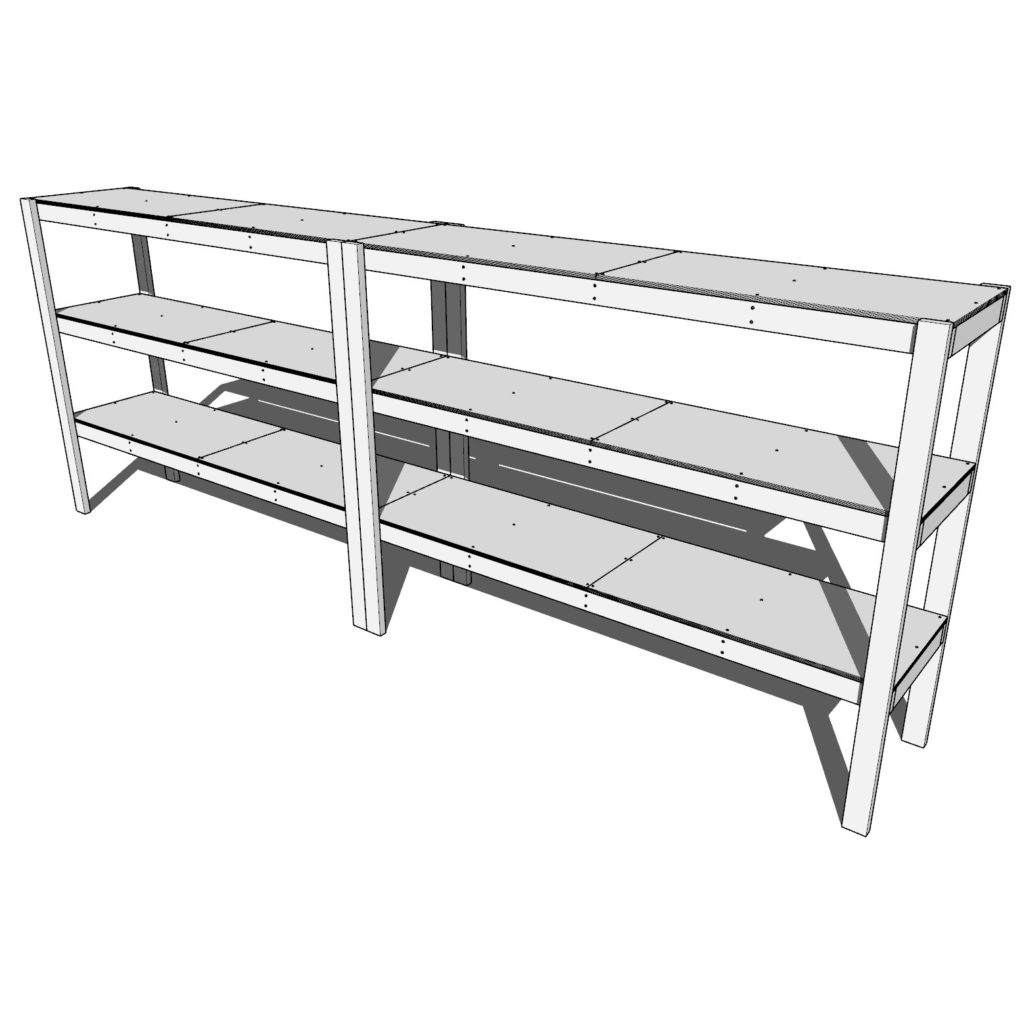
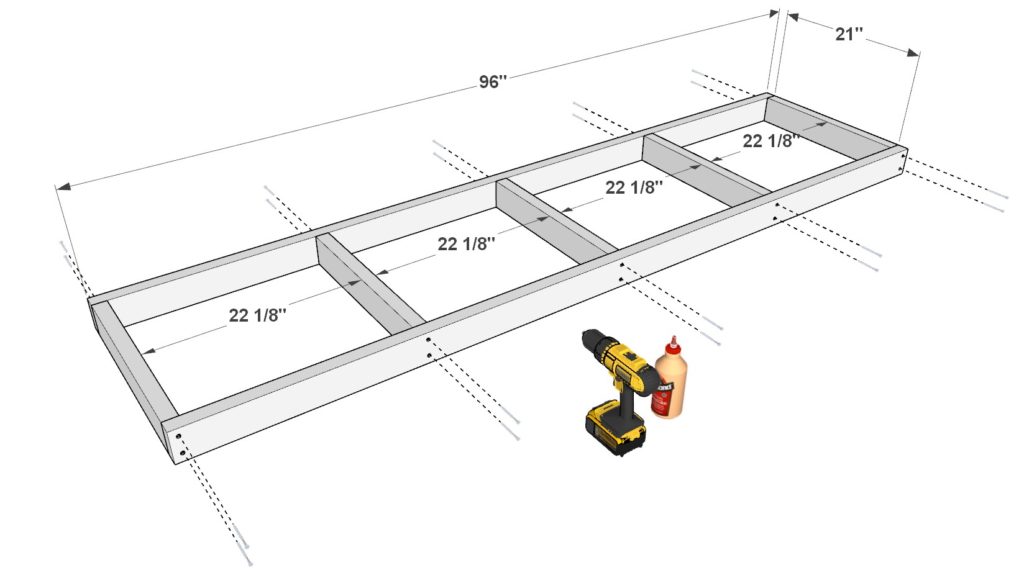
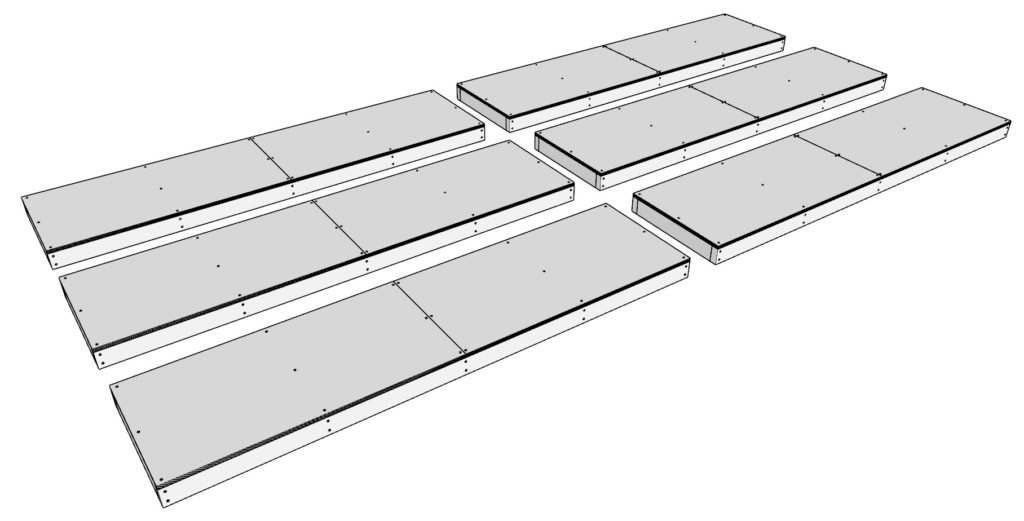
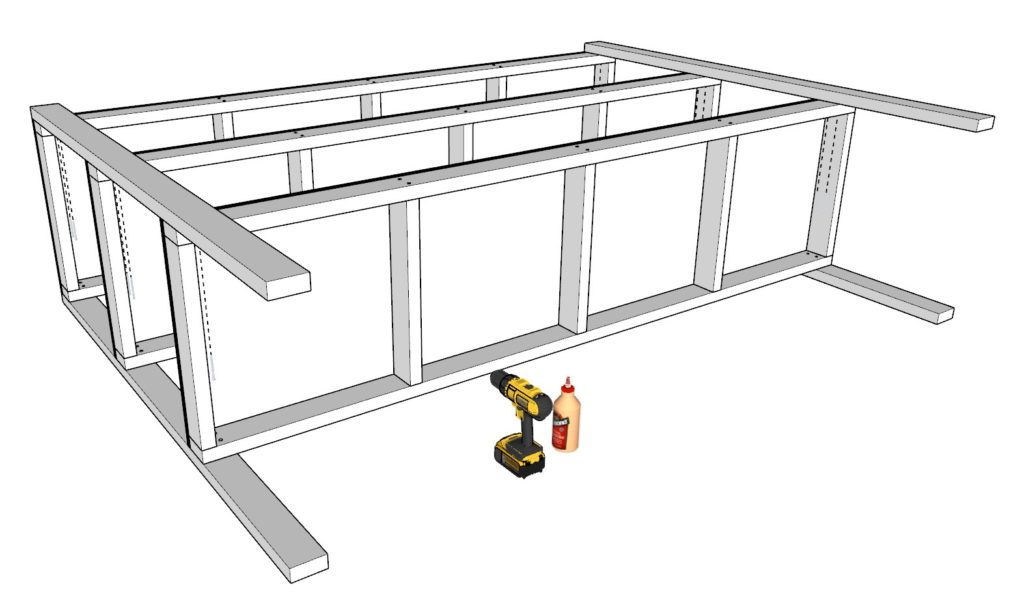
Step 1 (DIY garage shelf construction.)
First, build the six shelf frame pieces for the DIY garage shelf.
Take two 96 inch 2×4 lumber pieces and five 21 inch 2×4 lumber pieces. Arrange them as shown below. Predrill holes to prevent wood from splitting, add glue to all areas that will be joined together, and add 3.5 inch screws.
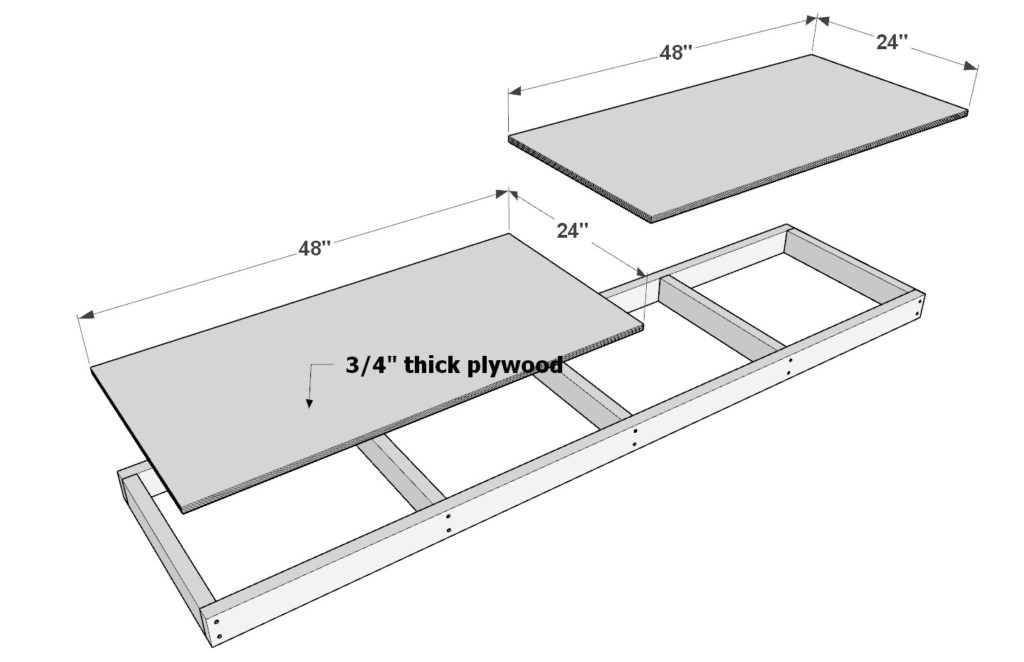
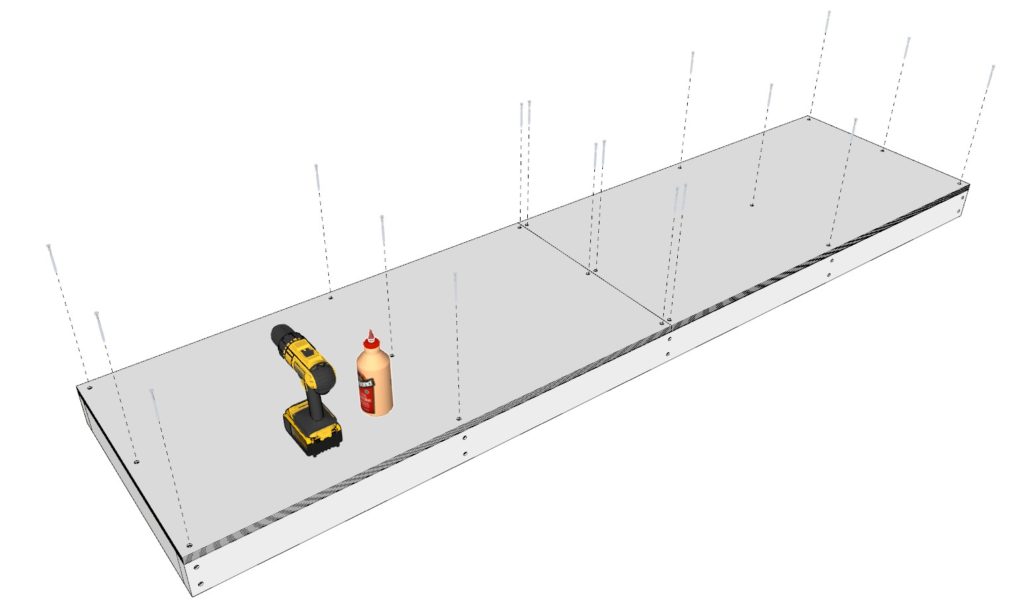
Next, add two 48 inch x 24 inch plywood sheets to create the storage shelf. Attach the sheets by predrilling, adding glue, and adding 3.5 inch screws.
Make six identical shelf pieces.
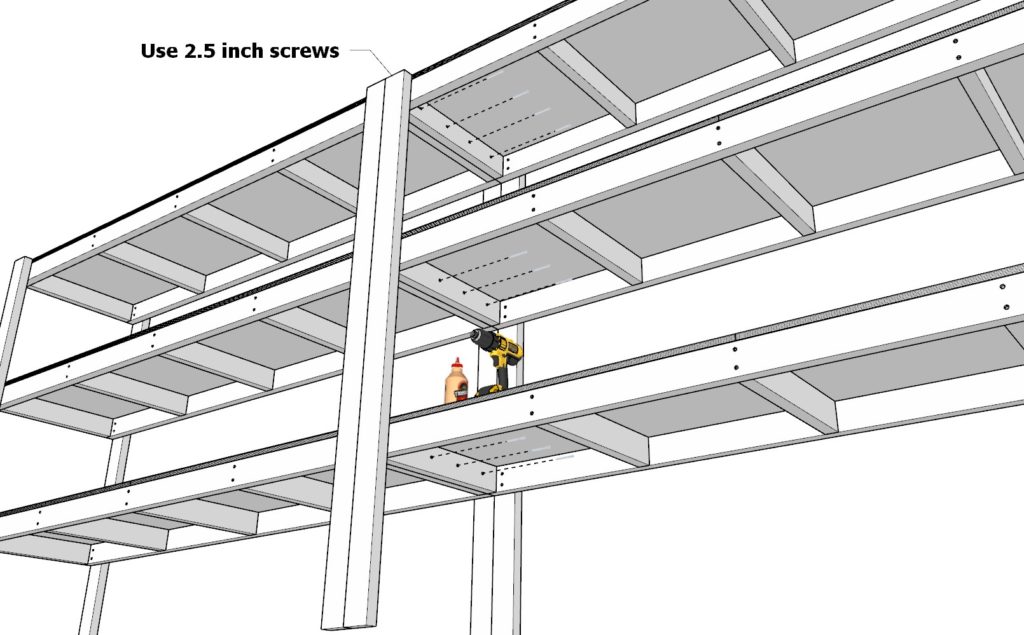
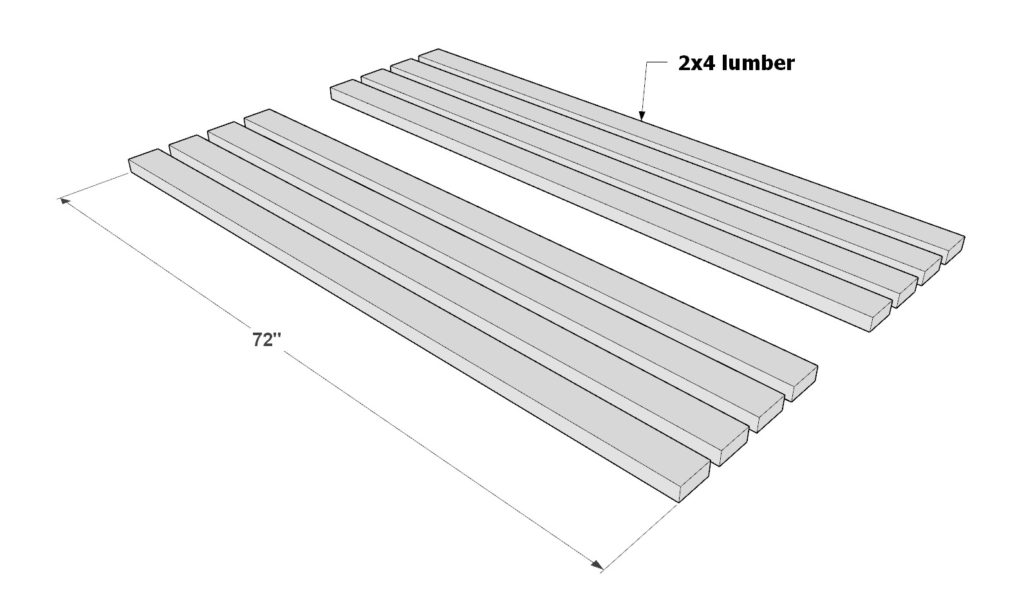
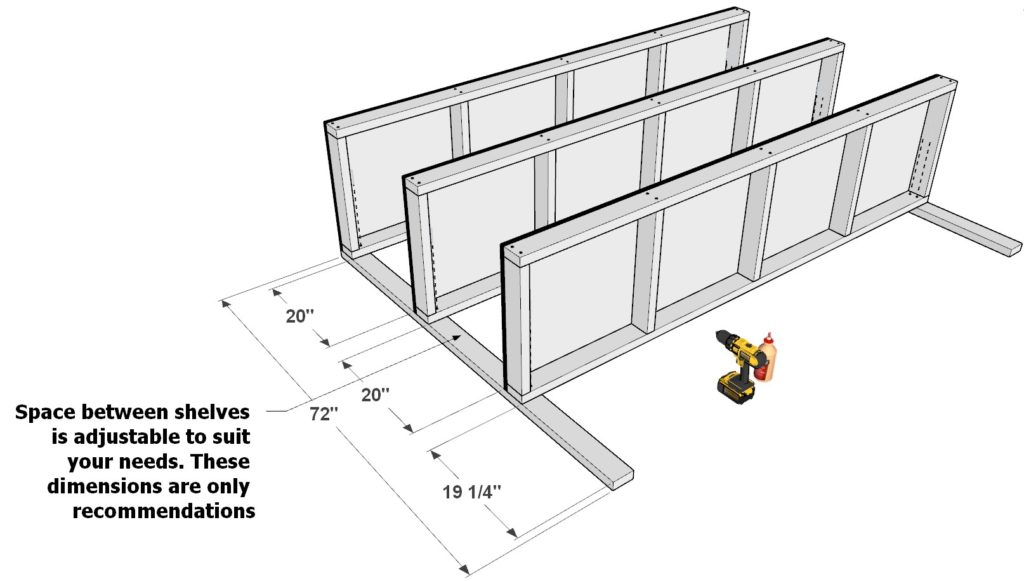
Step 2 (Adding legs to DIY shelves)
Next, add the legs to the DIY storage shelves.
First, take two 72 inch 2×4 lumber pieces and place three of the shelves you built in the previous set arrange them as shown below.
The spacing between the shelves can be modified to fit your household needs. Once the spacing has been determined, add glue, predrill, and add 2.5 inch screws. Add two more 72 inch 2×4 lumber pieces to make a total of four legs.
Repeat the same process for the second shelf unit.
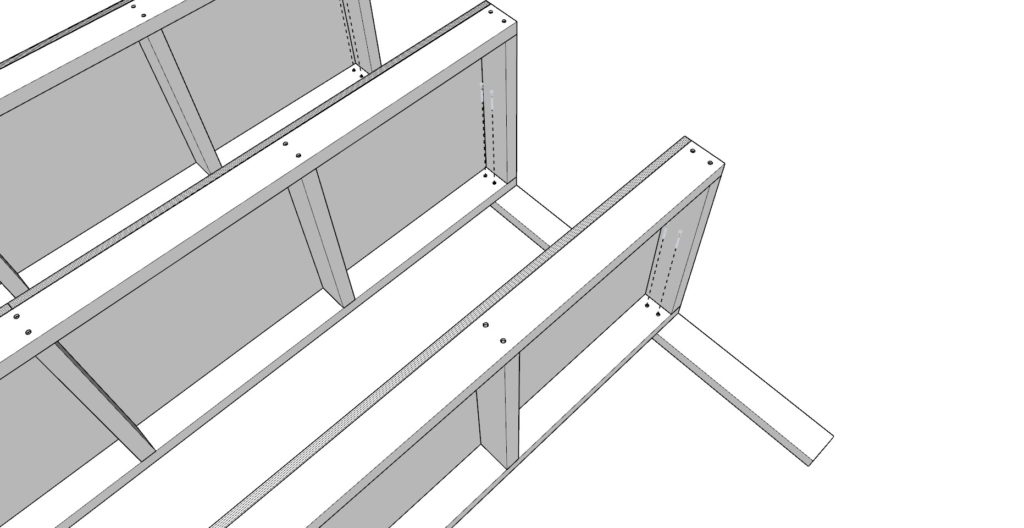

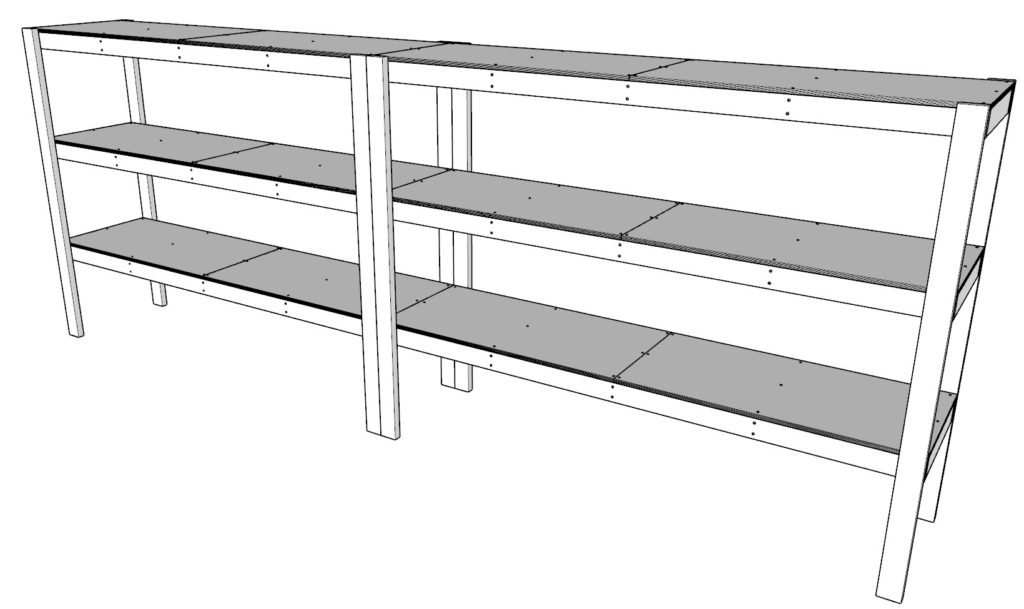
Step 3 (Joining the DIY shelves)
Next, attach the two shelves together.
Use 2.5 inch screws to secure the two shelves together. Adding glue is optional. Without glue you will be able to detach the shelves in the future if needed.
Next, ATTATCH THE SHELVES TO THE WALL for safety.
lastly, sand down the whole structure, paint/stain the lumber if desired.