Introduction
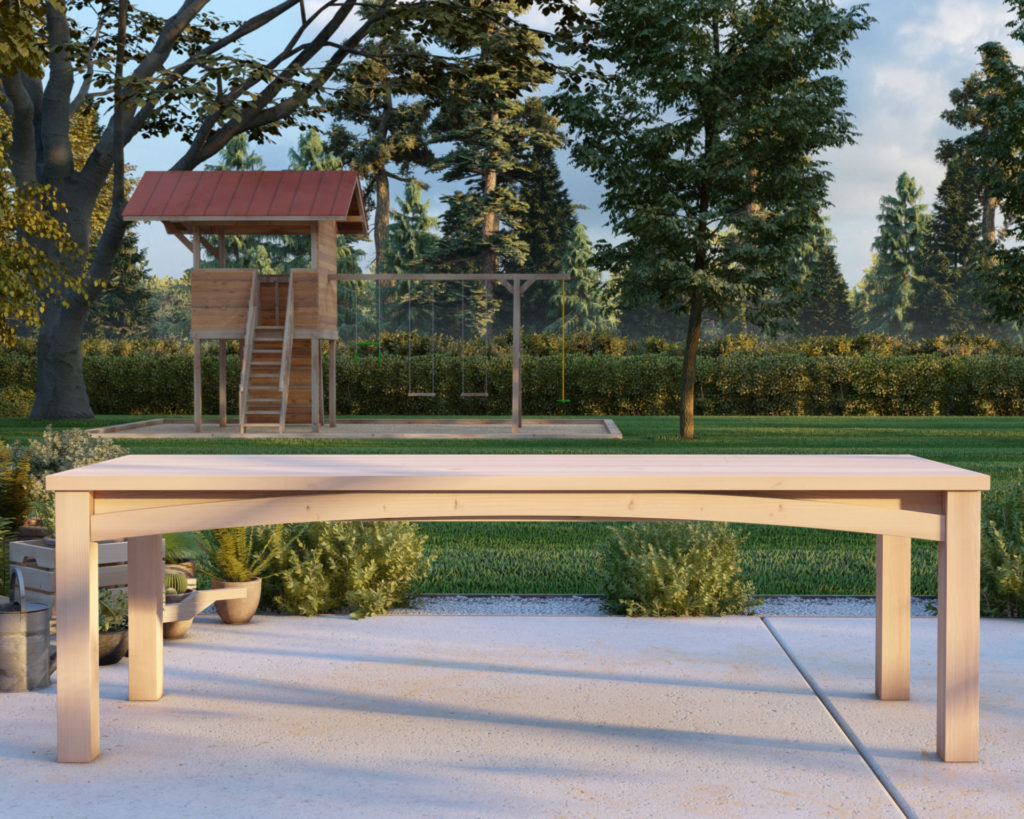
Looking for your next DIY woodworking project? We’ve got the perfect blueprint for you. Say hello to a dining table that’s as practical as it is stylish, designed with the modern homeowner in mind.
All-Wood, All-Natural
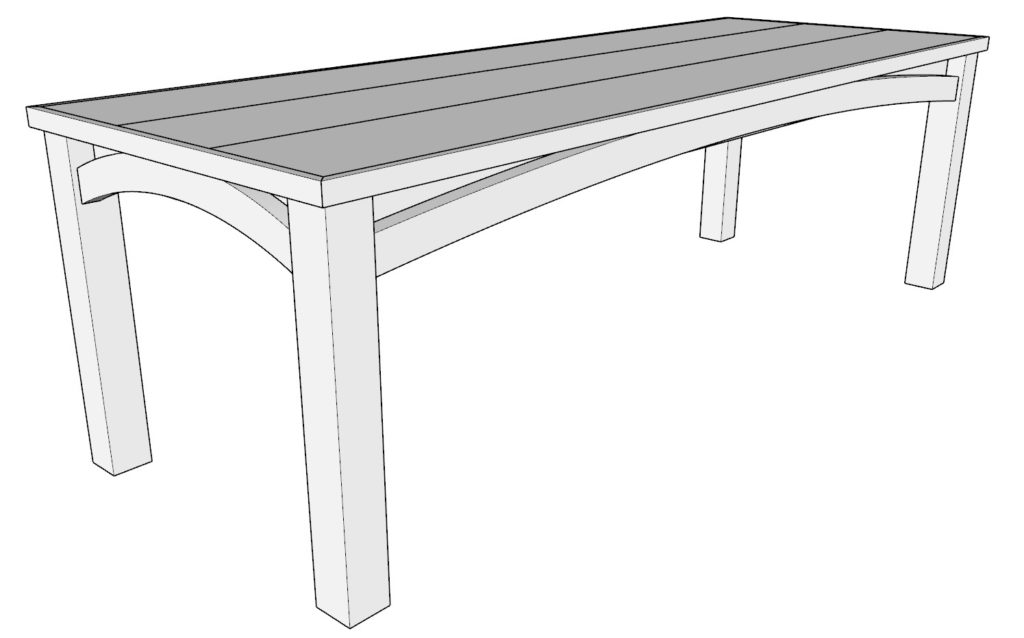
Constructed entirely from wood, this table is both robust and environmentally friendly. Its tabletop, crafted from a combination of 1×2, 1×12, and 1×6 lumbers, is built to last. Supported by sturdy 4×4 legs and a 2×4 frame, it’s a balance of form and function.
Dimensions & Design
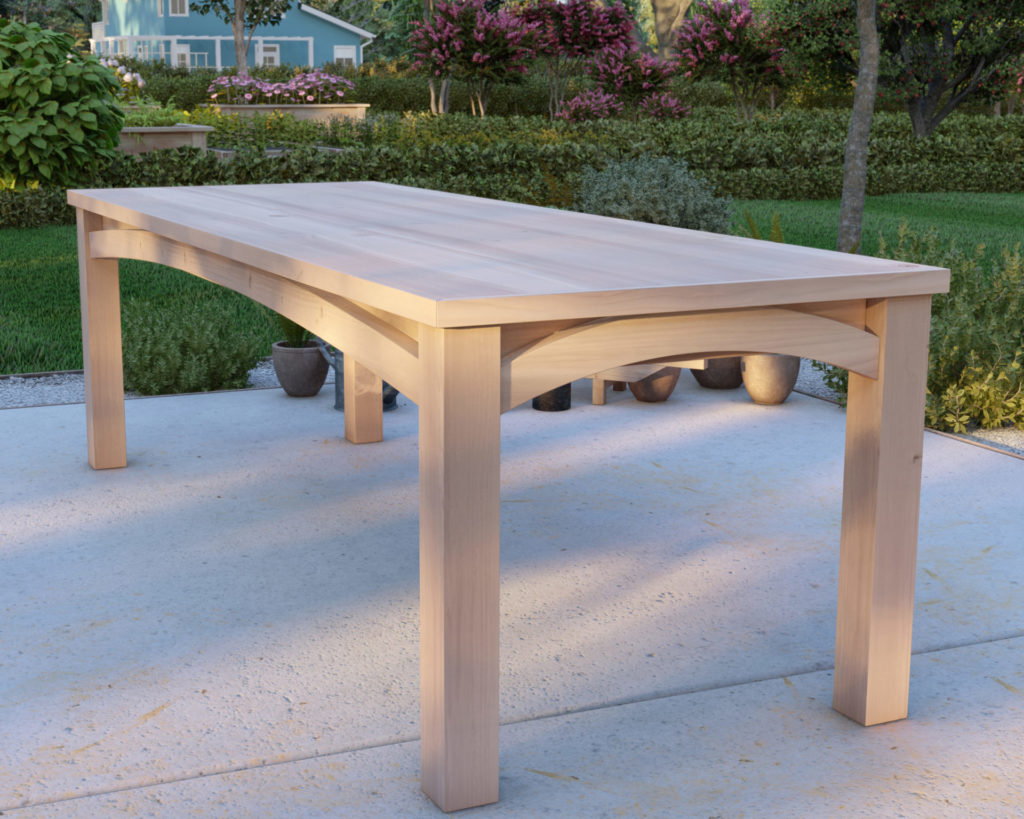
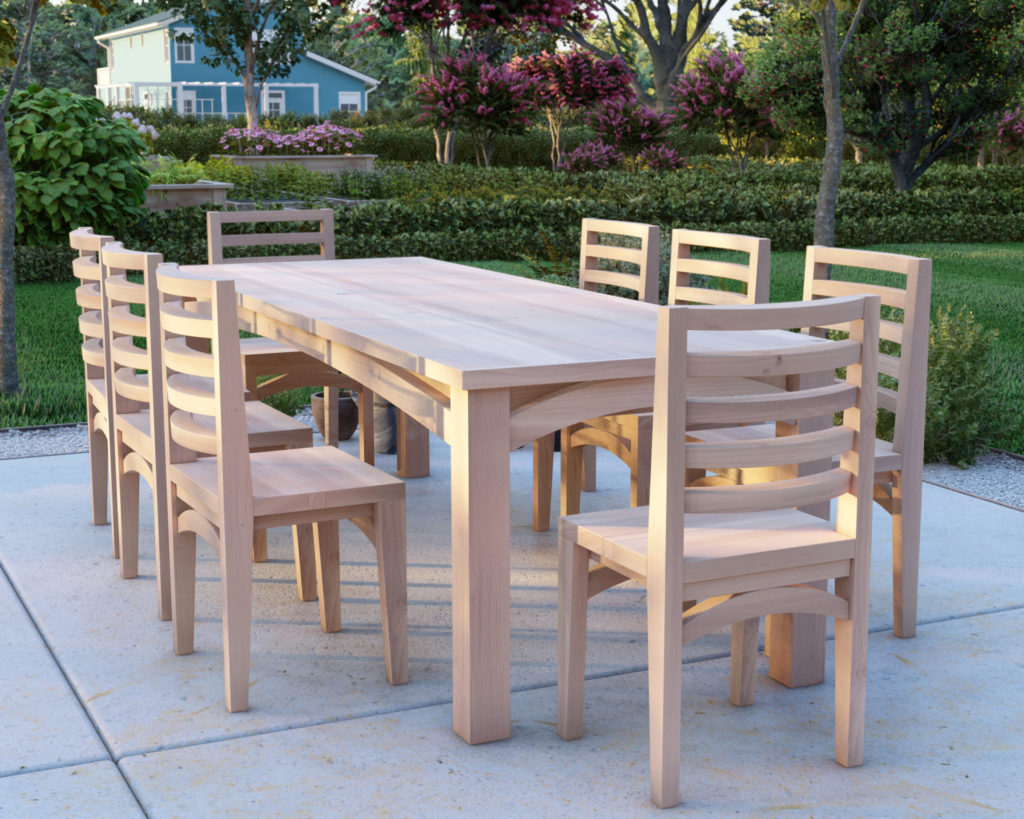
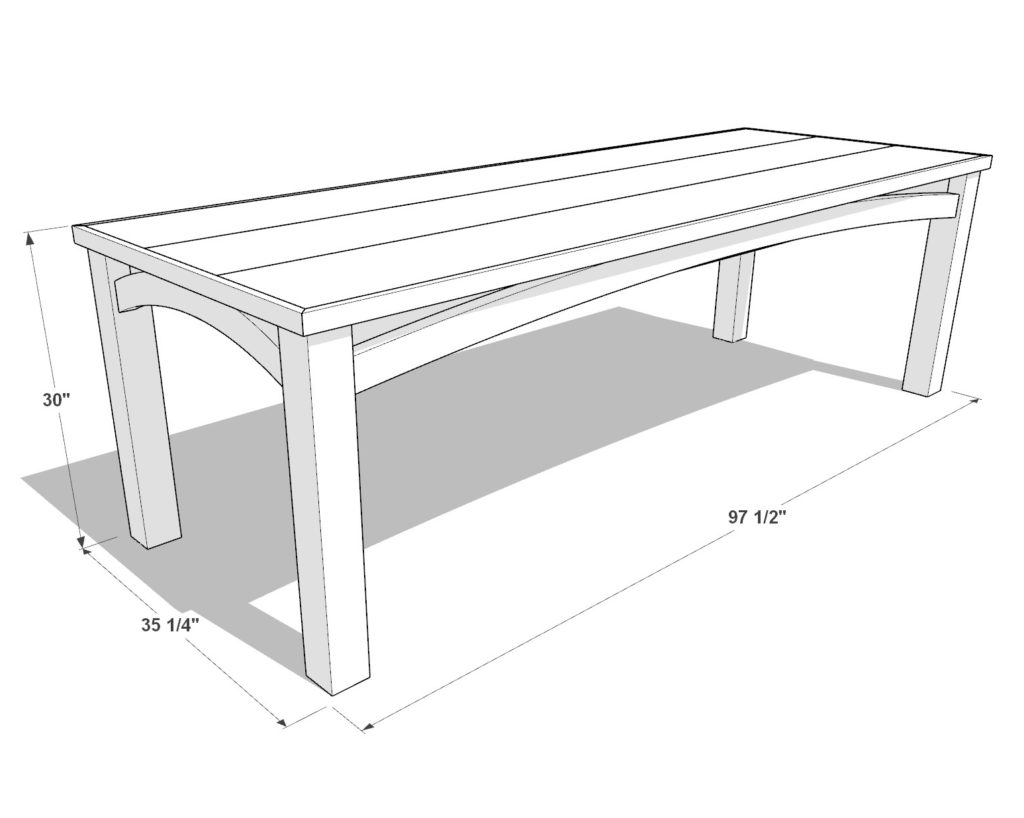
Measuring 30 inches in height, 35-1/4 inches wide, and stretching out to 97-1/2 inches in length, it’s the ideal size for most homes. Whether you’re hosting a dinner party or enjoying a quiet meal, it fits the bill. And for those looking for a cohesive design flow, this table pairs excellently with a specially designed chair, echoing a minimalistic curve aesthetic.
Beginner-Friendly Blueprint
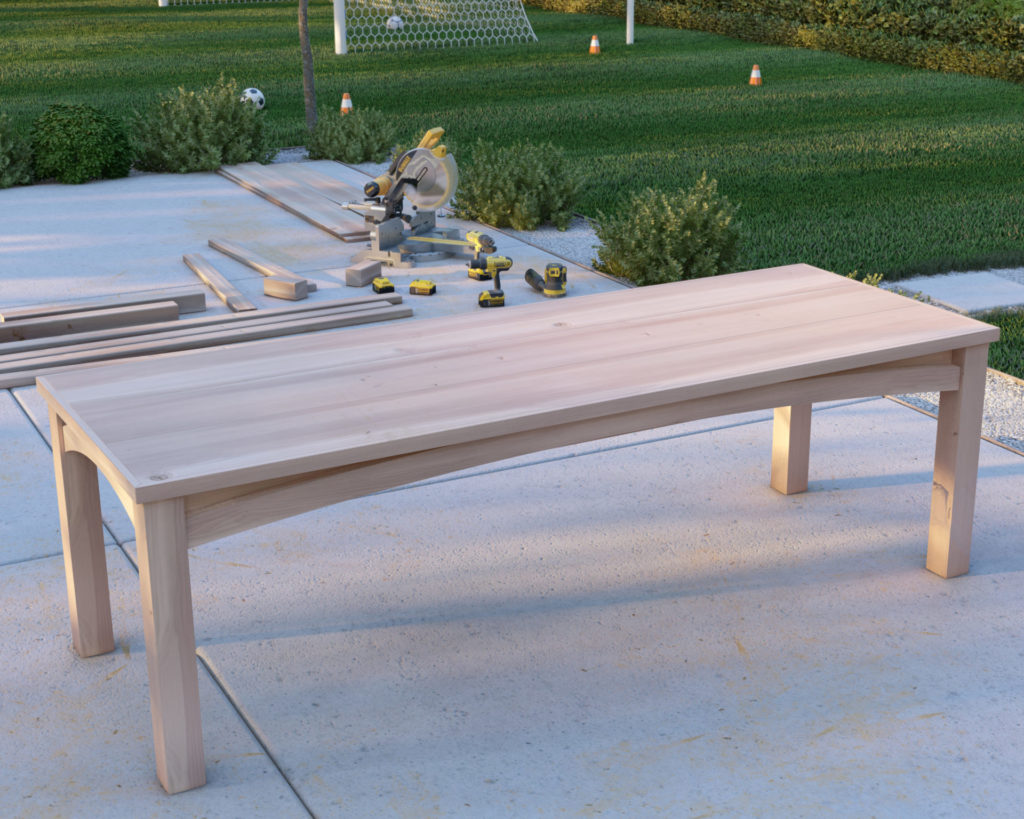
While the design may look sophisticated, especially with the subtle arches made from 2×6 lumber, it’s beginner-friendly. No tricky cuts, no elaborate joints—just straightforward craftsmanship. And whether you’ve got a jigsaw or a band saw in your workshop, you’re good to go.
Conclusion
Ready to roll up your sleeves and start a project that will not only add a beautiful piece to your home but also boost your DIY confidence? This dining table is more than just a piece of furniture—it’s a statement, an accomplishment. Download the DIY plan now and embark on a journey of creativity and self-reliance.
Where can I find the DIY plans for the chair?
Plans for the DIY chairs can be found here. Build a Comfortable Dining Chair for Just $25 each.
Time
6-8 hours (varies with experience)
Cost
$175 (Costs may vary based on location and supplier.)
Skill level required
Beginner
DIY Dinning Table PDF Plan
What is included in the PDF download?
- Easy to read step by step instructions
- Material list
- Tools needed
- Helpful links to materials and tools needed
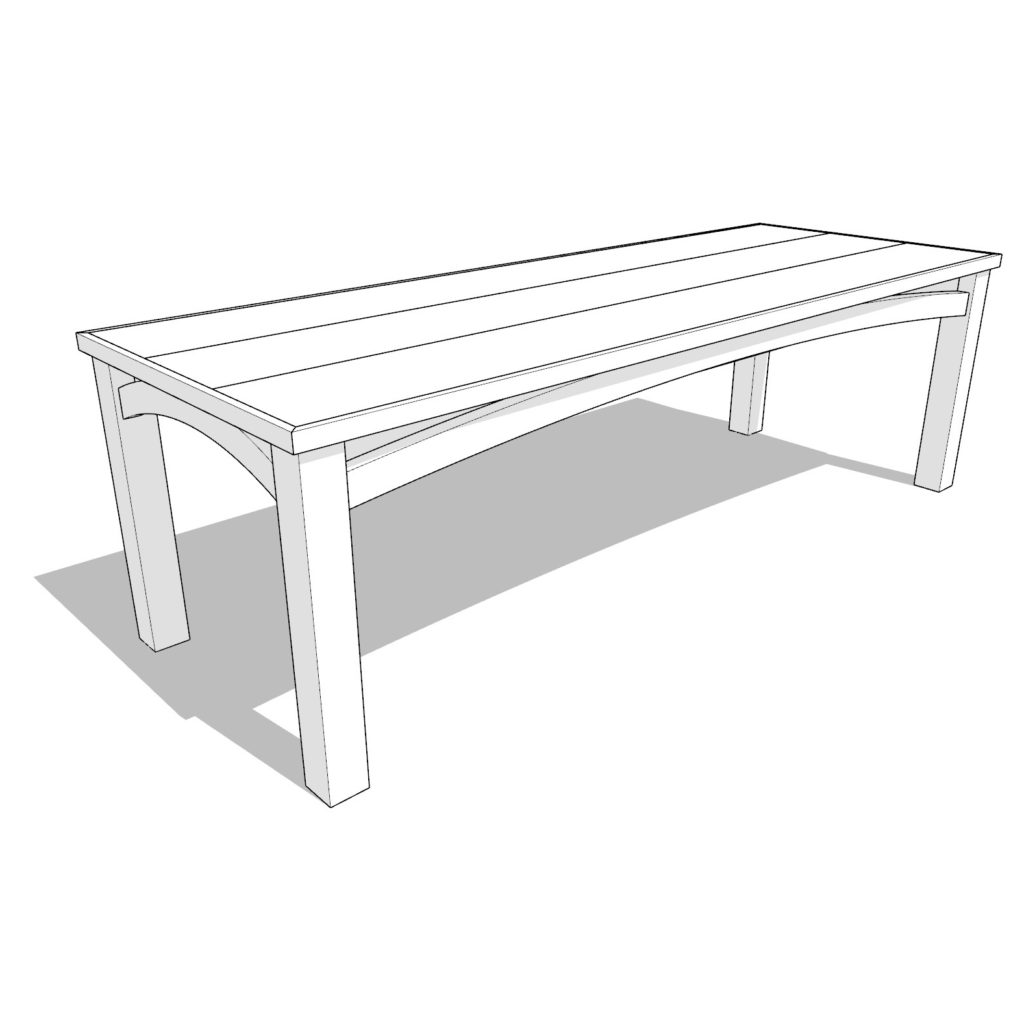
DIY Dinning Table Dimensions
Step 1: Assembling the Table Top Frame
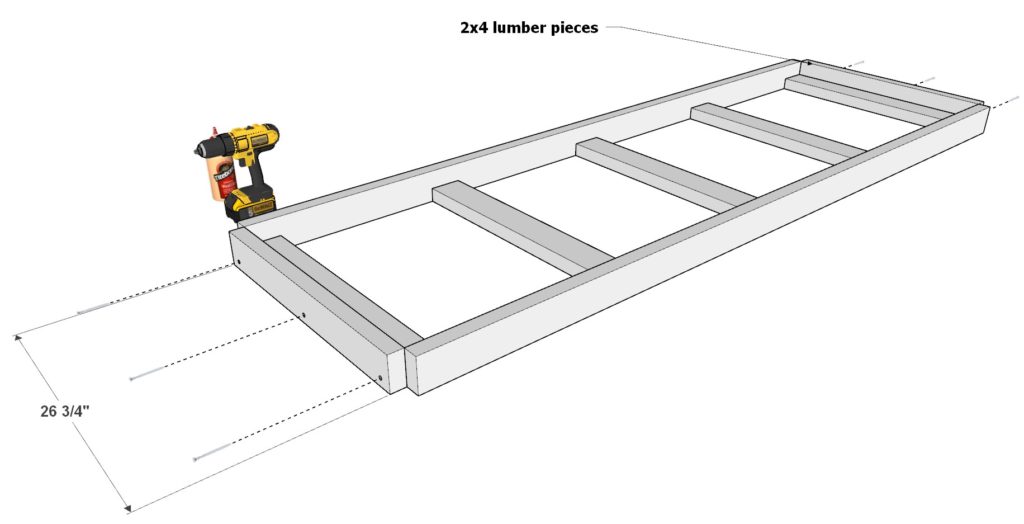
Begin by laying out the foundation for your table top.
- Take two 89-inch 2×4 lumber pieces and five 26-3/4 inch 2×4 lumber pieces. Arrange these pieces as depicted in Diagram 1.
- Using 2.5-inch screws and wood glue, join the lumber pieces together, ensuring they align properly and sit flush against each other.
- Once the basic frame is in place, add two more 26-3/4 inch 2×4 lumber pieces according to the layout in Diagram 2. Attach these using the 2.5-inch screws and wood glue.
Pro Tips:
- For a smoother and more professional finish, consider sanding and planing all the wood pieces before assembly.
- Utilize a countersink drill bit to prevent the wood from splitting. This method also allows for the addition of dowels, helping to conceal the screws and provide a cleaner look.


Step 2: Crafting the Arched Supports for Table Legs
In this step, you’ll be creating the distinctive arches from 2×6 lumber that will offer additional support to the table legs.
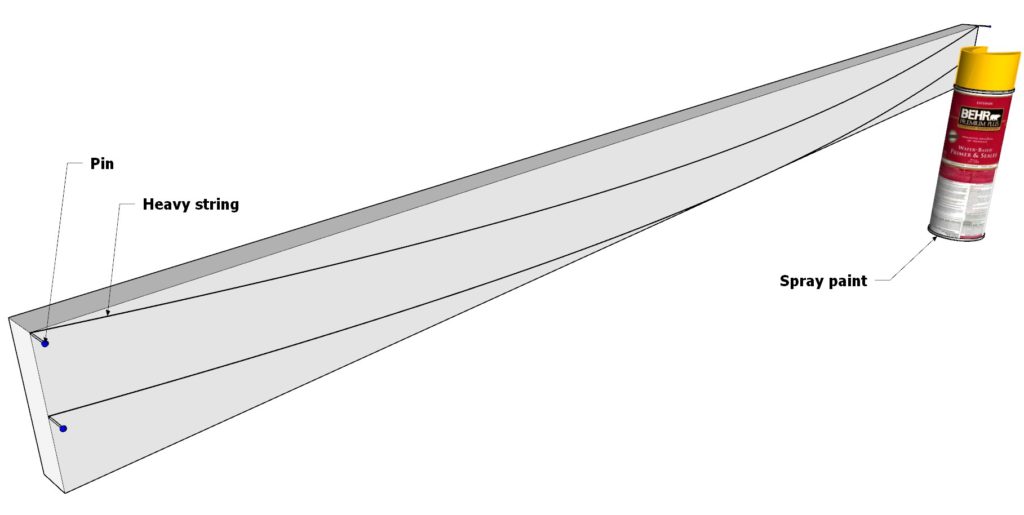
Drawing the Arches on a 89-inch 2×6 Lumber Piece:
- Begin with an 89-inch 2×6 lumber piece.
- As indicated in Diagram 3, you’ll need to mark two semi-arched lines.
- To achieve this, place pins at both ends of the 2×6 lumber. Attach a heavy string to the pins, allowing it to sag naturally between them. This sag will give you the desired semi-arch shape.
- To create a visible mark on the wood, spray a light coat of paint over the string. Once you remove the string, the paint will leave a clear negative impression of the arch.
- Repeat the process for the second arch line.
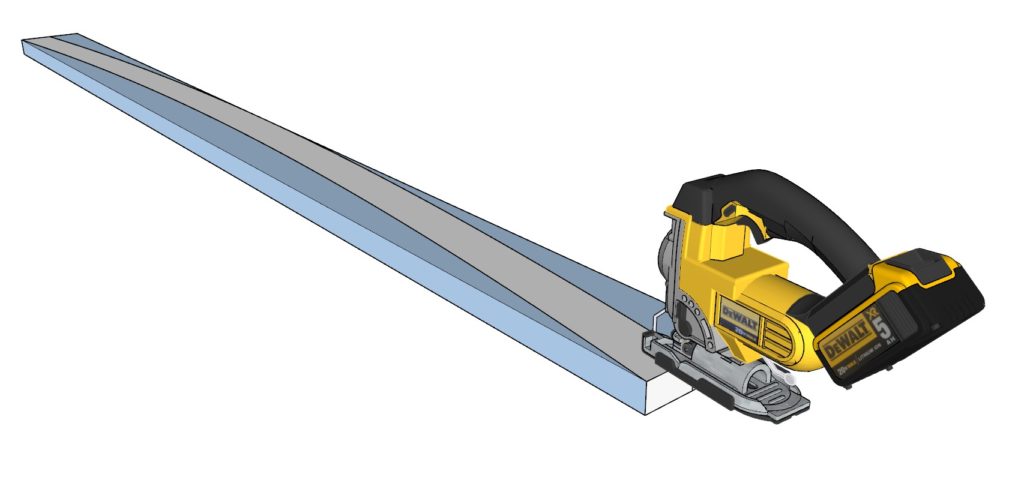
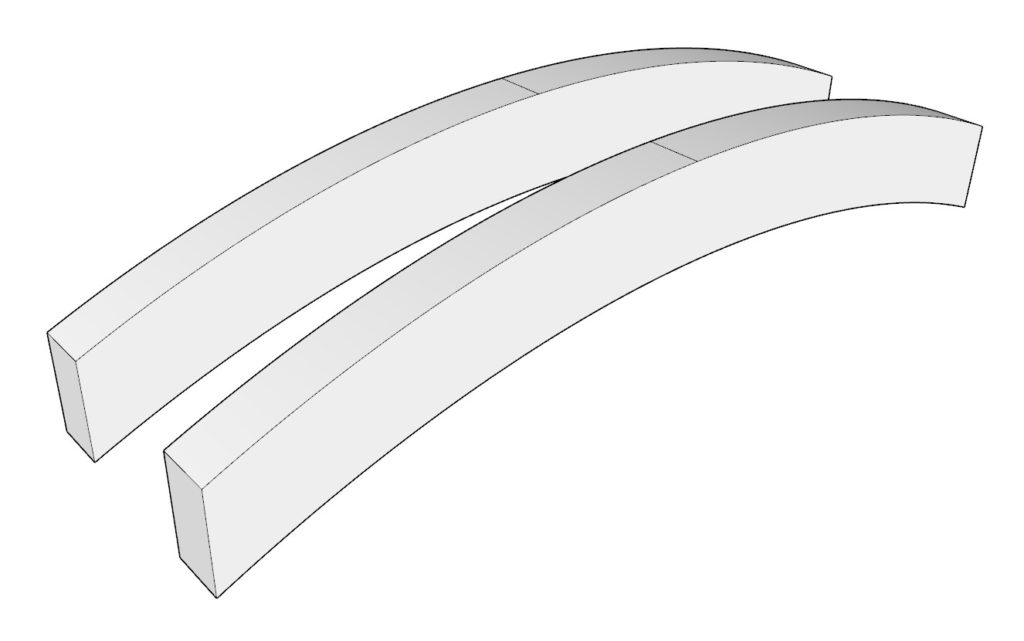
Cutting Out the Arches:
- Using a jigsaw, scroll saw, or band saw, carefully cut along the marked arches.
- For consistency, reuse the same pin and string setup or your freshly cut piece as a template to mark and cut out the arch on a second 89-inch 2×6 board.
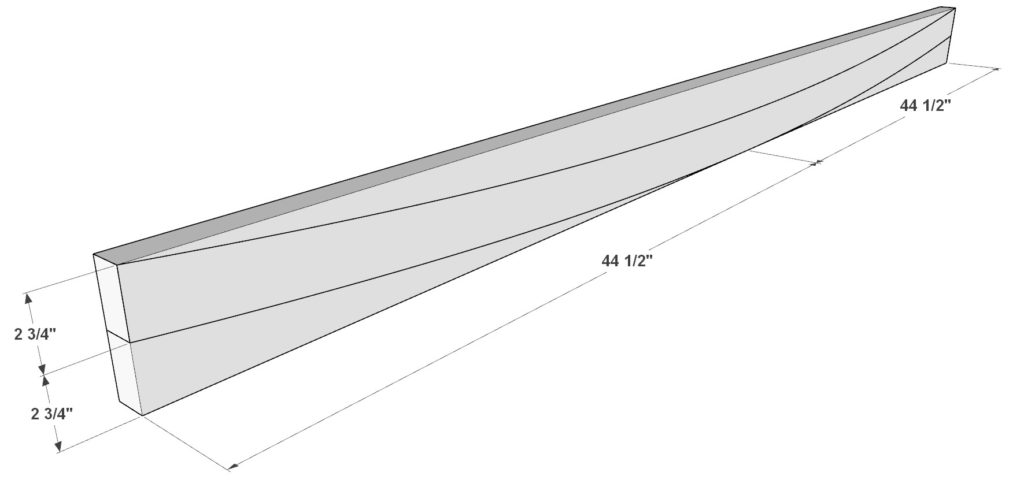
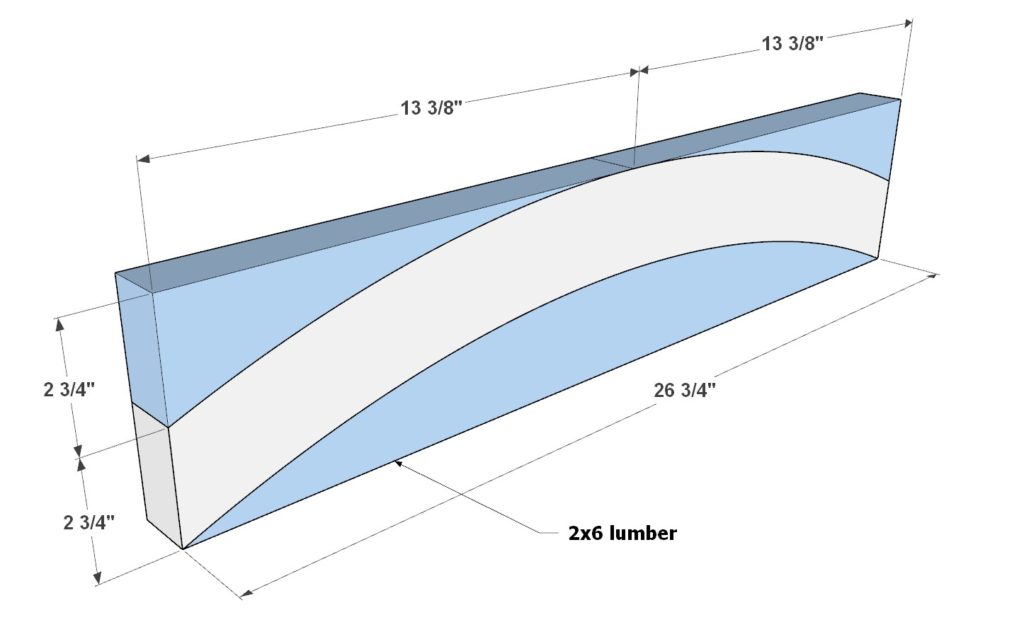
Creating Shorter Arched Supports:
- Take a 26-3/4 inch long 2×6 lumber piece. You can either use the pin and string method mentioned above
- Once marked, cut out the arch using your preferred saw.
- Repeat for a second 26-3/4 inch 2×6 board to get a pair of shorter arch supports.
Note: The choice of drawing method is flexible. Whether using the pin-string method or a template, ensure the arches are consistent for a uniform look.


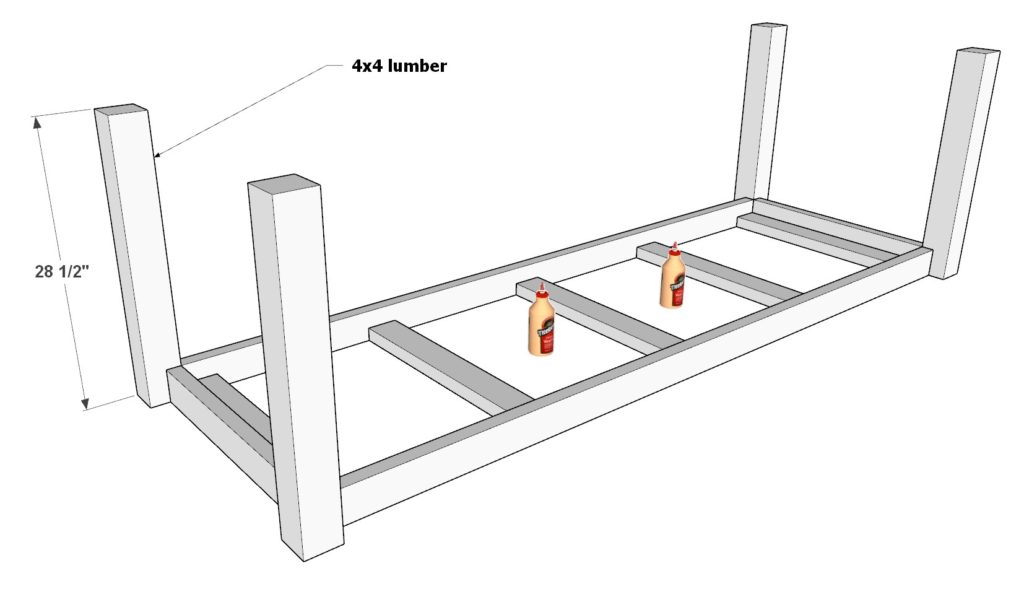
Step 3: Attaching the Table Legs to the Frame
Let’s get those legs on for a solid foundation!
Preparation:
- Acquire four 28-1/2 inch 4×4 posts. These will serve as your table legs.
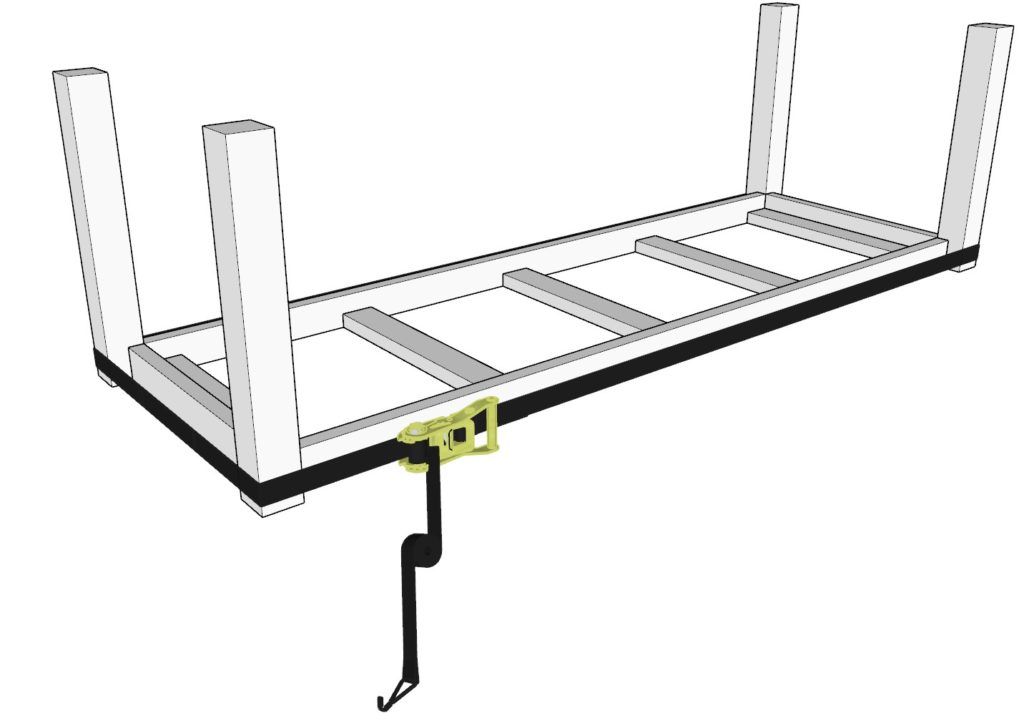
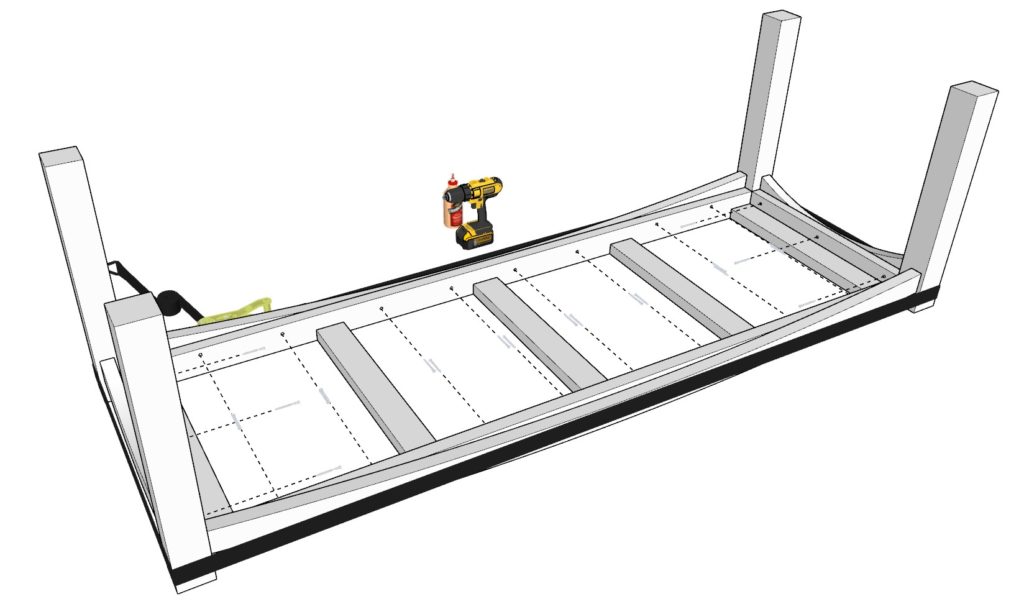
Initial Assembly:
- Position these posts onto the frame. Apply wood glue generously to all the contact points where the legs meet the frame.
Securing the Setup:
- Wrap ratchet straps (or combine two if a single one isn’t long enough) around the table legs and frame, as depicted in Diagram 2.
- Tighten the straps just enough to hold the pieces together.
- Check the alignment of all components. If adjustments are needed, use a wooden mallet to gently tap the components into their correct places.
- Once everything is positioned properly, tighten the ratchet straps further to secure the setup.
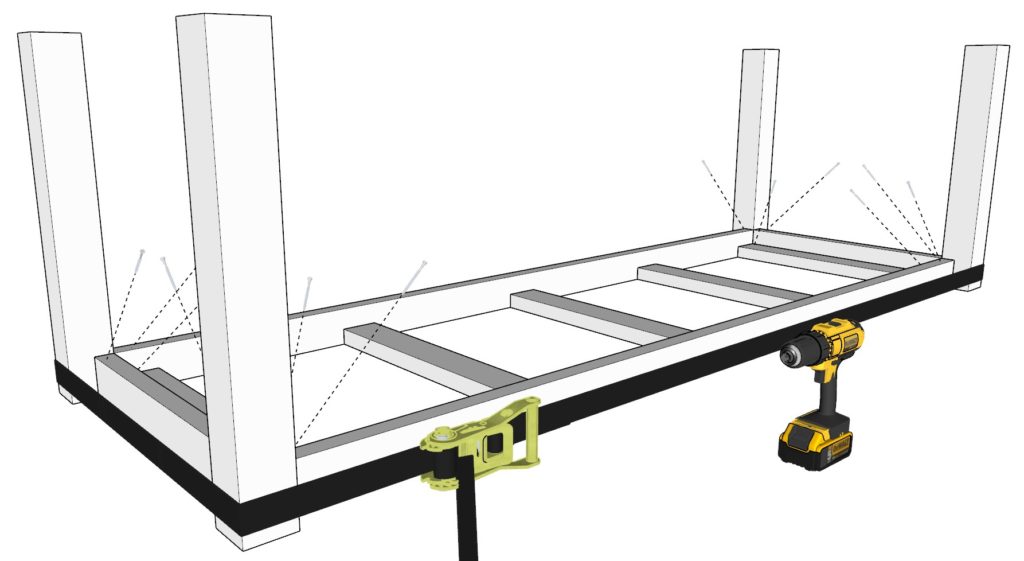
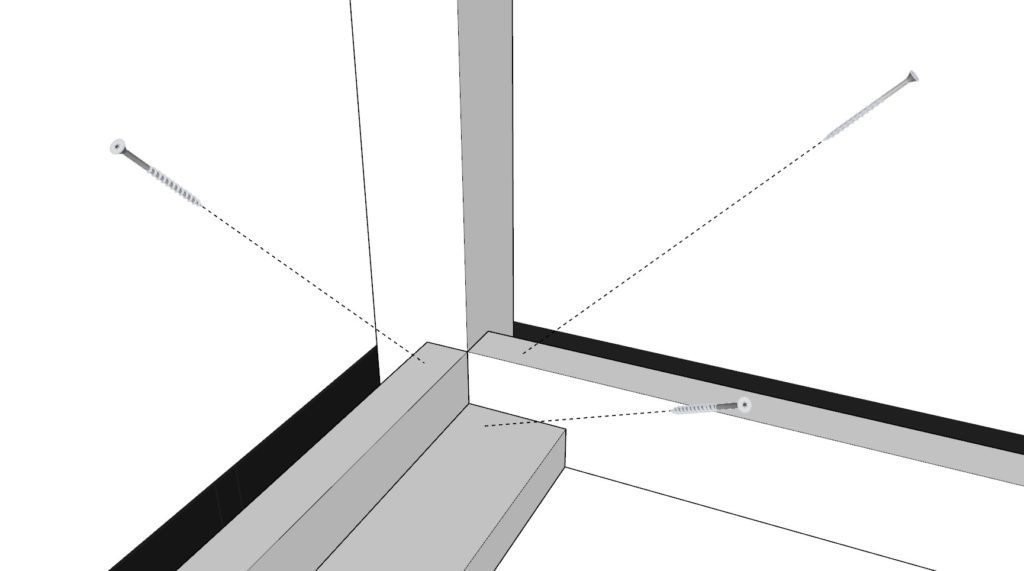
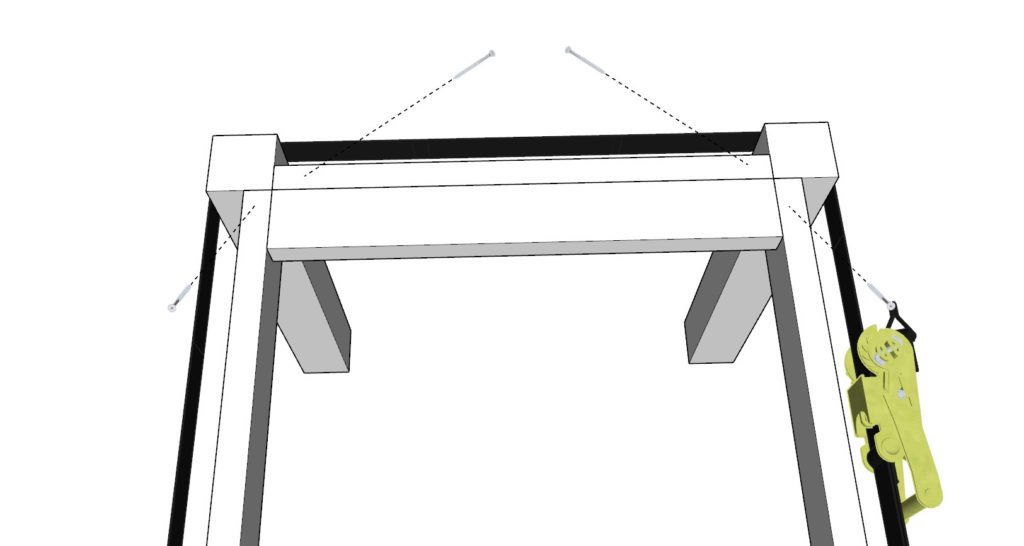
Adding Screws:
- Insert 2.5-inch wood screws diagonally into the flatter 2x4s, as illustrated in the diagram, and 3.5 inch screws into the perpendicular 2×4 lumber pieces.
- Carefully flip the table base. Remember, the glue is still wet and the structure is not fully stable. To avoid exerting pressure on the legs, enlist the help of a friend and lift the base in mid-air.
- After flipping, reinforce the setup with additional 3.5-inch screws at the points shown in the diagram.
Pro Tip: Always work on a level surface to ensure that your table stands straight and sturdy once completed.
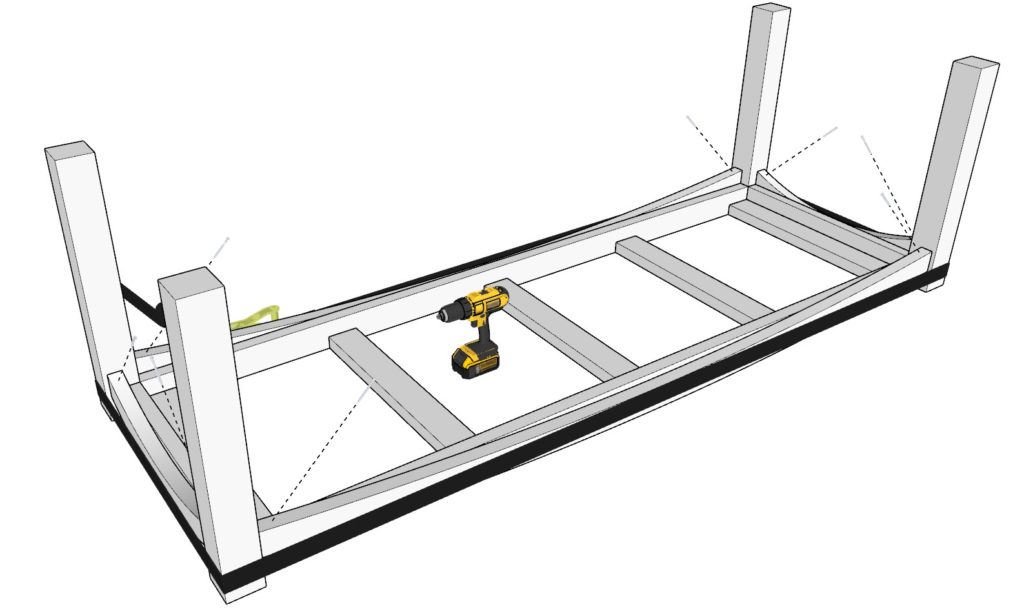
Step 4: Attaching the Curved 2x6 Arches
Secure these defining arches to enhance your table’s structural integrity and aesthetic.
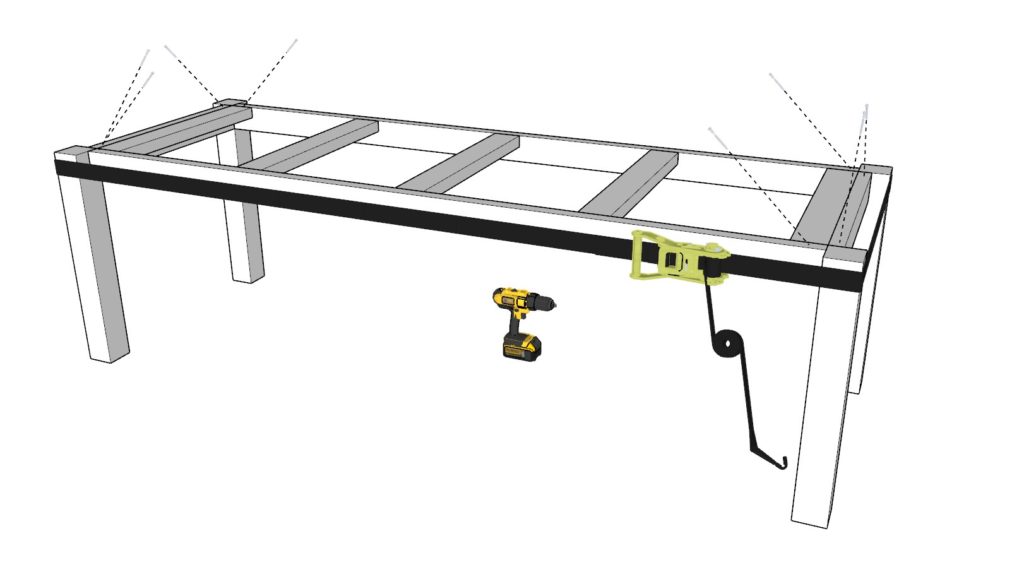
- Positioning the Table:
- With the assistance of a friend, carefully flip the table upside down. Remember not to exert undue pressure on the legs, as they’re still settling.
- Attaching Arches to the Frame:
- Align the curved 2×6 lumber arches with the main frame.
- Apply wood glue at the contact points.
- Use 2.5-inch screws to fasten the arches from the inside of the frame. This method ensures a clean exterior look without visible screw holes.
- Securing Arches to the Legs:
- Attach the arches to the table legs by inserting 3.5-inch screws diagonally, ensuring a firm and stable connection between the legs and the arches.
Pro tip: You will have to looses the ratchet straps to add the arched wood pieces in order to add glue and to ensure they fit. Once you have added glue and securely fit the arched pieces in place, tighten the straps once again.
Step 5: Constructing the Table Top and Final Assembly
Craft the table’s surface and bring together all the components for a finished look.
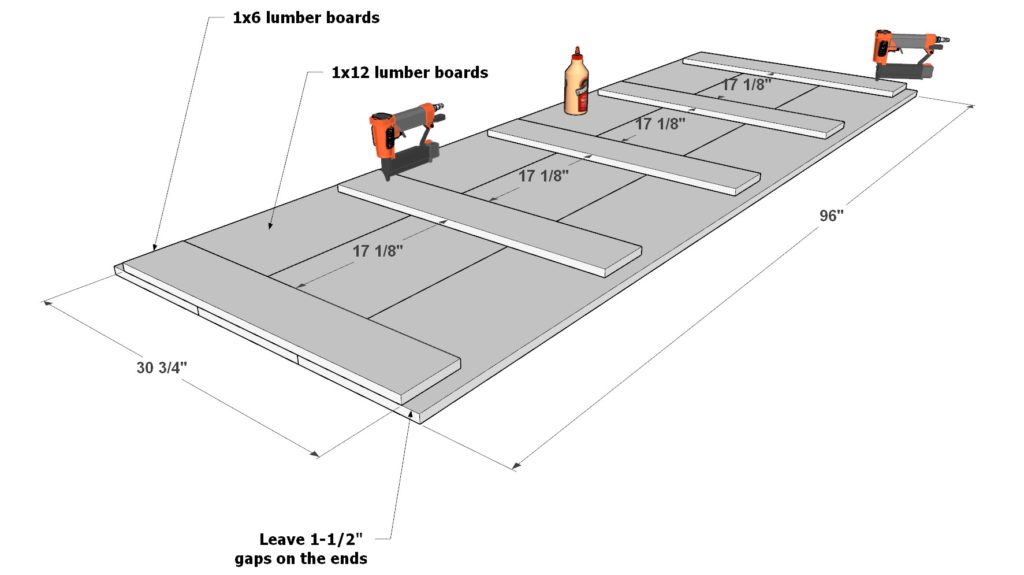
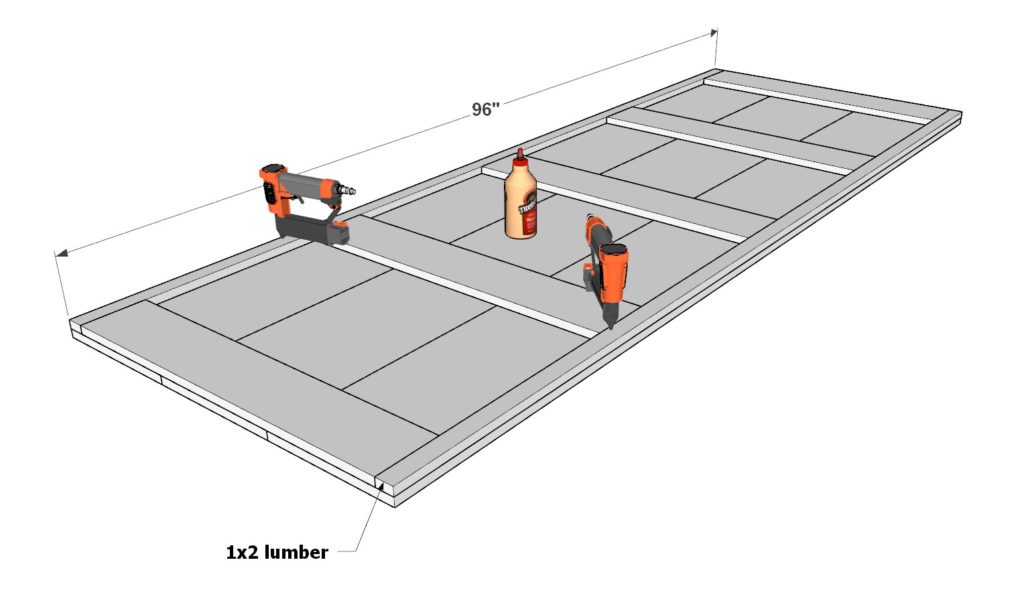
- Laying Out the Main Table Top:
- Arrange three 96-inch 1×12 lumber pieces alongside five 30-3/4 inch long 1×6 boards, as depicted in the first diagram for this step.
- Use wood glue for bonding, and further secure the boards together with 1-inch nails from a nail gun.
Tip: Wood clamps can be incredibly useful to hold boards in place during the nailing process.
Adding Side Extensions:
- Affix two 96-inch 1×2 lumber pieces to the outer edges of the table top layout. Ensure they’re aligned correctly and use wood glue followed by 1-inch pin nails for attachment.
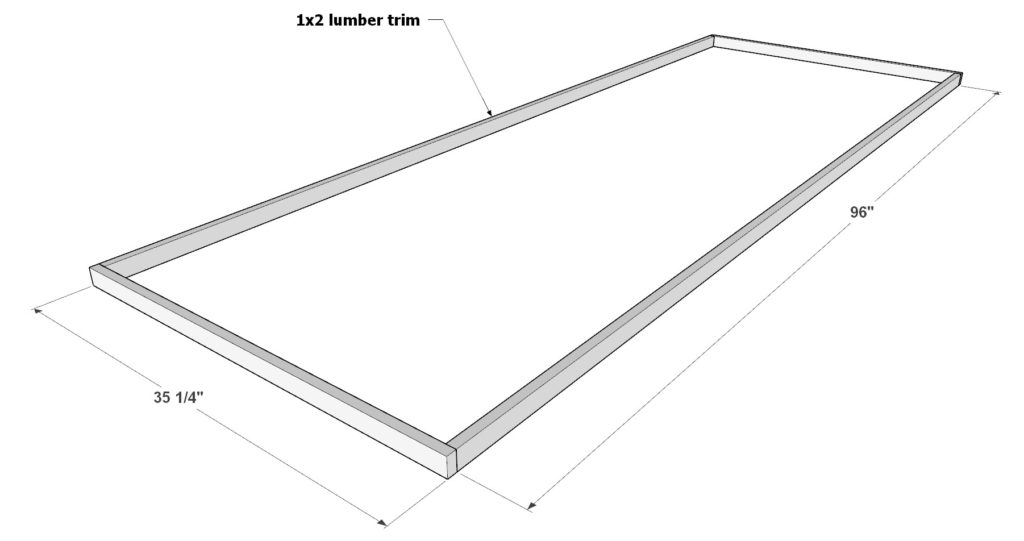
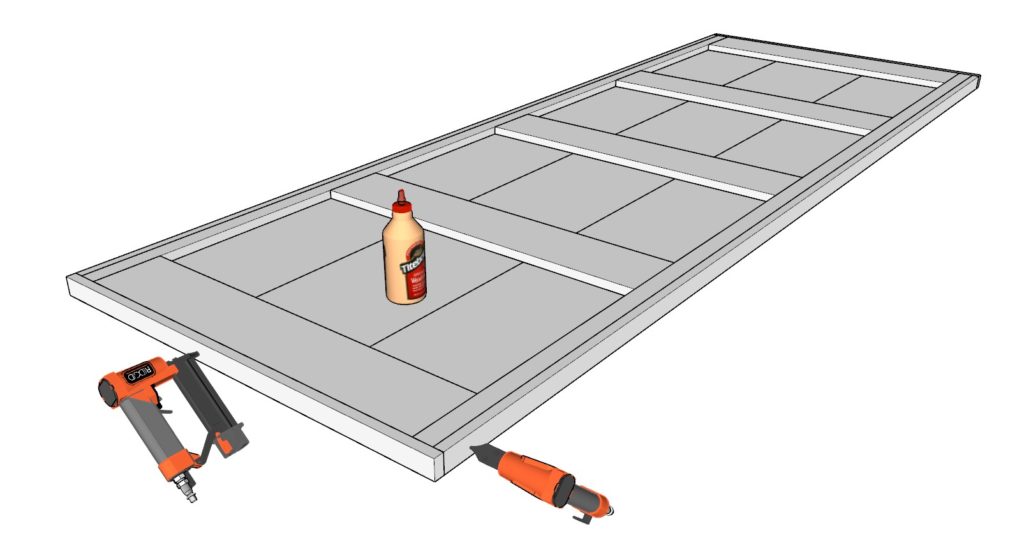
Framing with Trim:
- Create a finished edge around the table top using 1×2 lumber trim. This frame consists of two 96-inch 1×2 pieces and two 35-1/4 inch 1×2 pieces.
- Attach the trim with a combination of wood glue and pin nails, ensuring a flush fit.
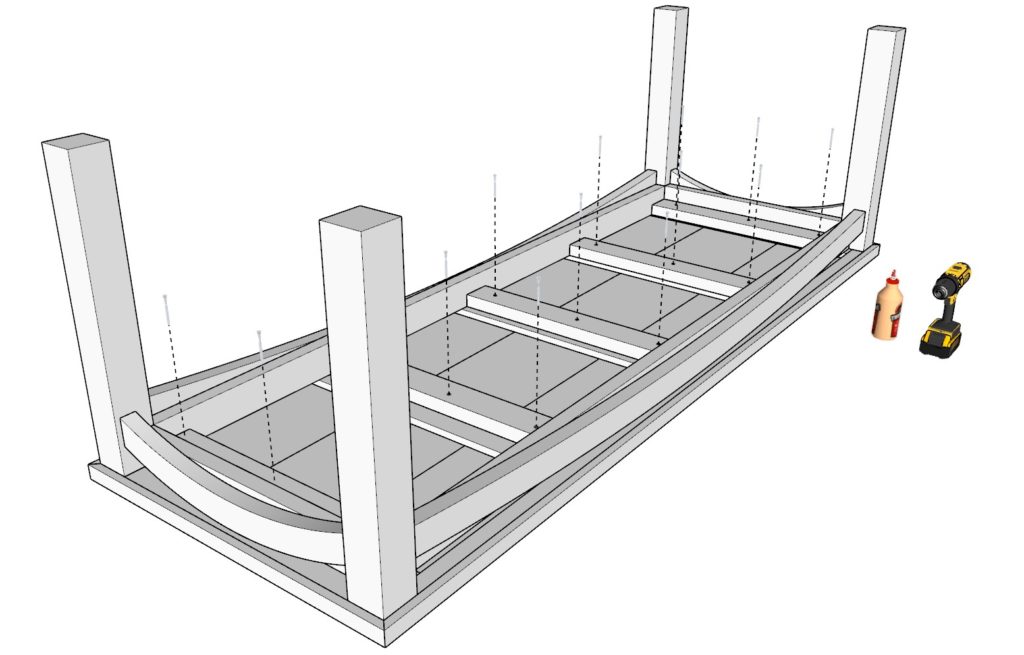
Merging the Table Top with the Base:
- Carefully position the constructed table top onto the table base, ensuring proper alignment.
- To bond these sections, apply wood glue at the contact points and reinforce with 2.5-inch screws, following the placement shown in the concluding diagram of this step.
Step 6: Preparing and Finishing Your Table with Stain and Paint
Giving your table a professional finish requires attention to detail. Here’s a comprehensive guide on how to achieve that perfect look:
Wood Preparation for Staining and Painting:
Cleaning: Start by thoroughly cleaning the entire wooden surface. Use a lint-free cloth to wipe away any dust, debris, or residues.
Sanding: Sanding helps in achieving a smooth surface and enhances stain absorption. Begin with a coarse-grit sandpaper (around 120-grit) and work your way up to a fine-grit (around 220-grit). Always sand in the direction of the wood grain to avoid scratches.
Wipe Down: After sanding, wipe down the surface with a tack cloth to remove any residual sawdust.
Staining Process:
Wood Conditioner/Pre-stain Application:
- Before staining, apply a wood conditioner or pre-stain. This fills in the wood pores, ensuring that the stain is absorbed evenly and doesn’t blotch.
- Using a brush or cloth, apply the conditioner liberally. Allow it to penetrate for about 15 minutes.
- Wipe off the excess conditioner with a clean cloth.
Applying the Stain:
- Choose your preferred wood stain color.
- Stir the stain well before use.
- Using a brush or clean cloth, apply the stain with even strokes, following the wood grain direction. Allow the stain to sit for a few minutes for richer color.
- Wipe away any excess stain using a clean cloth.
Polyurethane Application:
- Once the stain is completely dry, it’s time to protect it with polyurethane. This adds a protective coat and gives the wood a finished look.
- Using a fine-bristled brush, apply a thin, even layer of polyurethane. Allow it to dry according to the manufacturer’s instructions, typically 24 hours.
- For a smoother finish, lightly sand the surface between coats with fine-grit sandpaper.
- Apply a second coat of polyurethane.
Painting Process:
Primer Application: Before painting, apply a coat of wood primer. This ensures better paint adherence and a more vibrant color. Allow the primer to dry fully.
Painting:
- Stir your chosen paint well.
- Using a high-quality brush or foam roller, apply the first coat of paint. Allow it to dry thoroughly.
- Depending on the coverage and desired look, apply a second or even third coat, ensuring drying time between each.
Sealing: Once the paint is dry, consider sealing the table with a clear water-based sealer. This will protect the paint and make your table more durable.
Final Touches:
- Felt Pads: To protect both your table and floor, adhere felt pads to the bottom of each table leg. This prevents scratches and makes moving the table smoother.
Note: Always work in a well-ventilated space when staining or painting. And always wear protective gloves and safety goggles.