DIY wooden shelves: A Simple and Inexpensive Way to Add Extra Storage Space to Your Closet"’
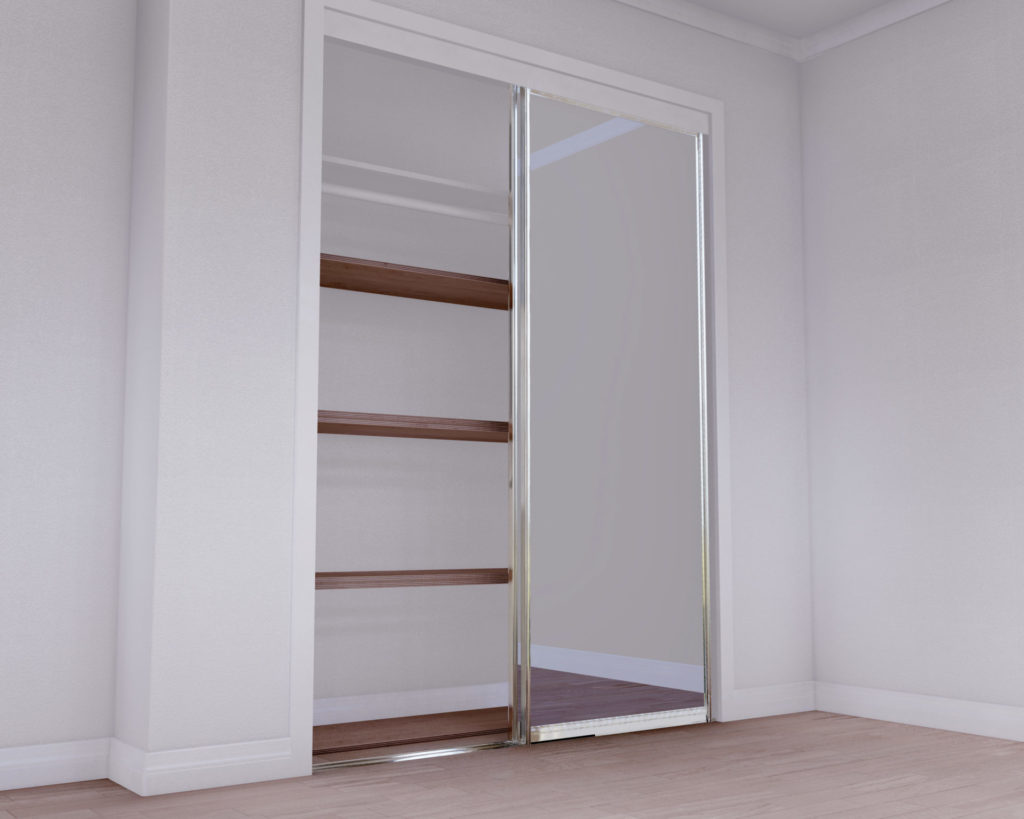
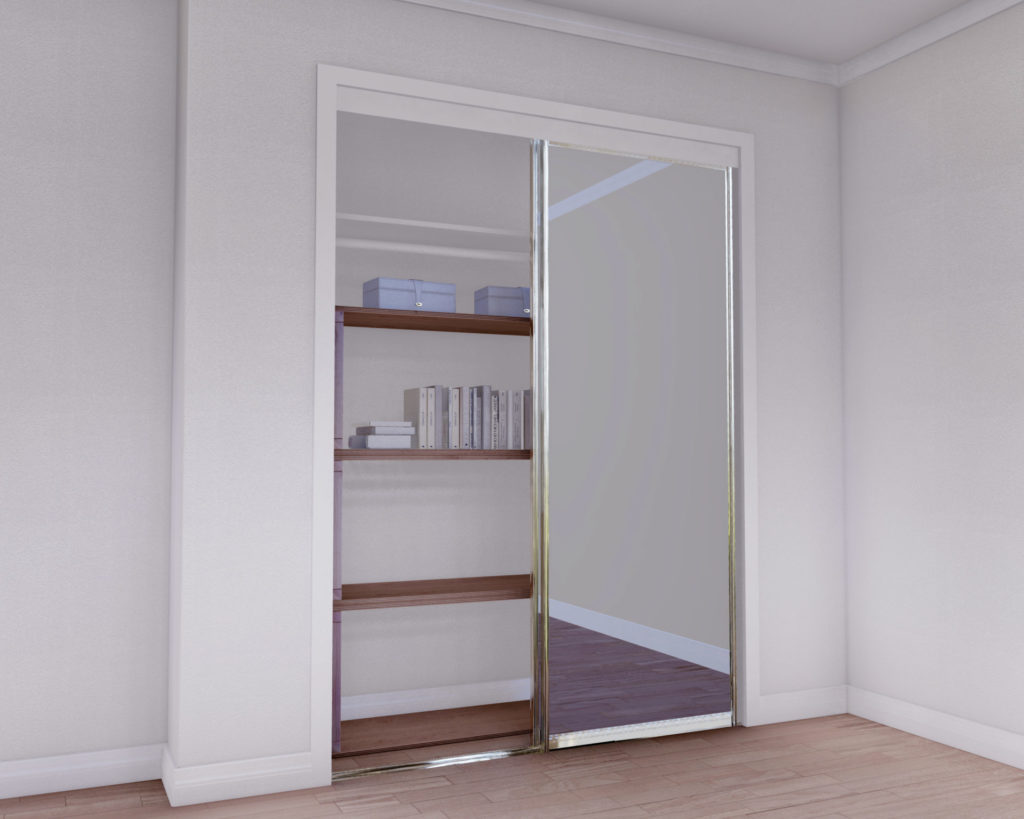
Installing shelves in a closet can be a difficult and frustrating task, especially if the closet door is too narrow to accommodate a full size shelf. The small space inside a closet can make it difficult to maneuver around and reach the shelves, making the installation process even more challenging.
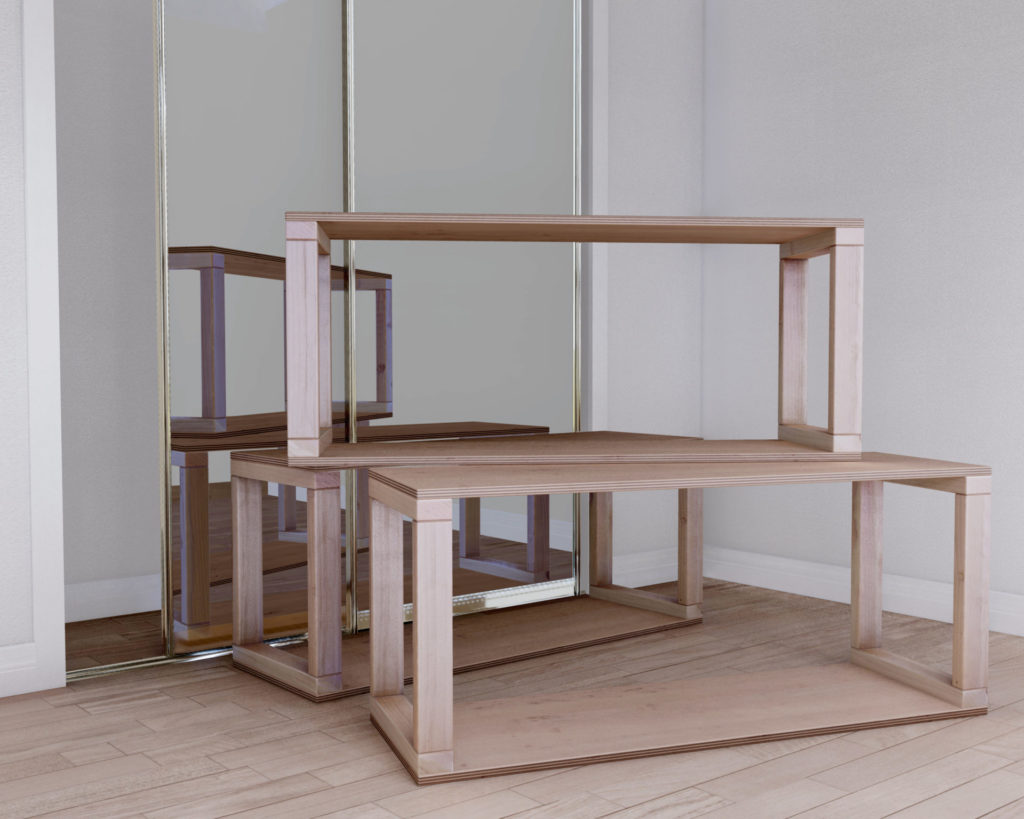
Installing a DIY wooden shelf is a quick and easy process that anyone can do in just a few minutes. The shelf comes in three pieces that stack together perfectly, making the installation process quick and simple. These pieces can be turned and maneuvered to fit virtually any closet size. There is no need to hire a professional or struggle with complex instructions, making this shelf the perfect solution for anyone looking for an easy and affordable way to add extra storage space to their home.
No wood/plywood Wasted DIY Shelves.
The design for this DIY wooded closet storage shelf is very efficient because it has no material waste. 100% of lumber and plywood is used in the design. This design is great for anyone trying to be eco-friendly and not waste any material.
How to add elegance to your closet with DIY wooden shelves
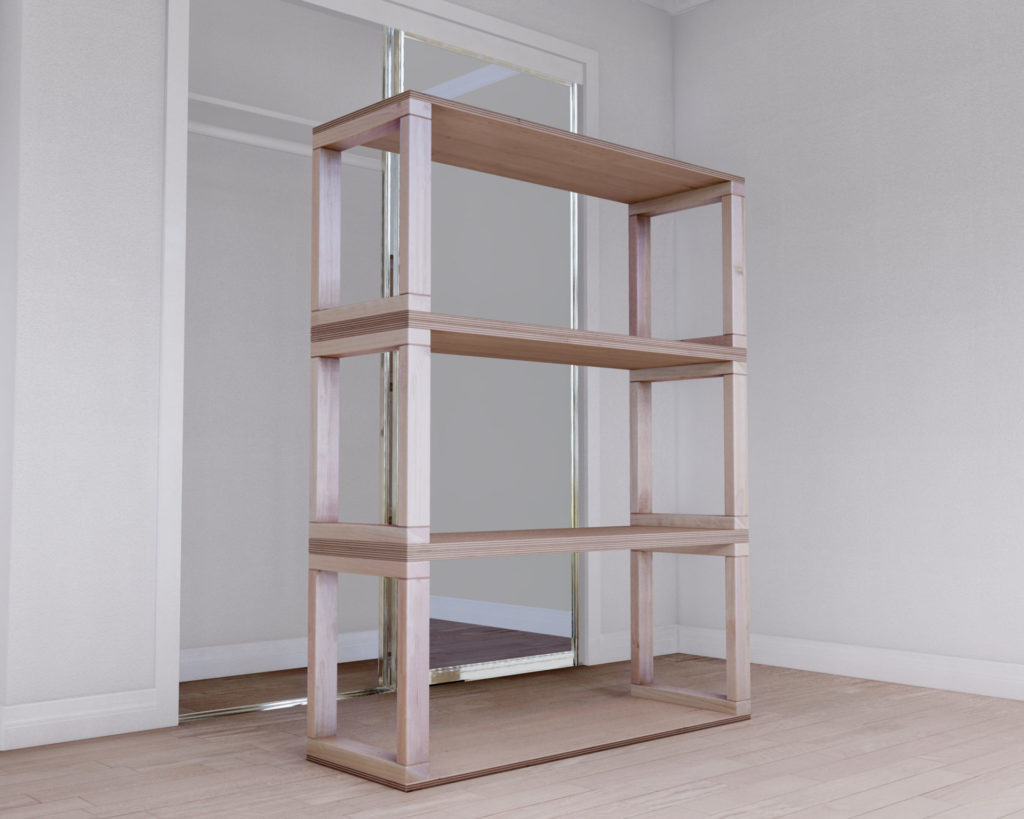
When it comes to closet shelves, many people opt for the simple and easy–to–install wire or plastic shelves. However, there is a more elegant option: wooden shelves. Not only do wooden shelves add a touch of class to any closet, but they are also sturdier and more durable than their plastic or wire counterparts.
The beauty of wooden shelves lies in the grain of the wood. Natural wood has a unique grain pattern that is beautiful and adds character to any space. When stained or painted, the grain of the wood is still visible, adding even more interest to the shelves.
DIY wooden Shelves that Won't Sag
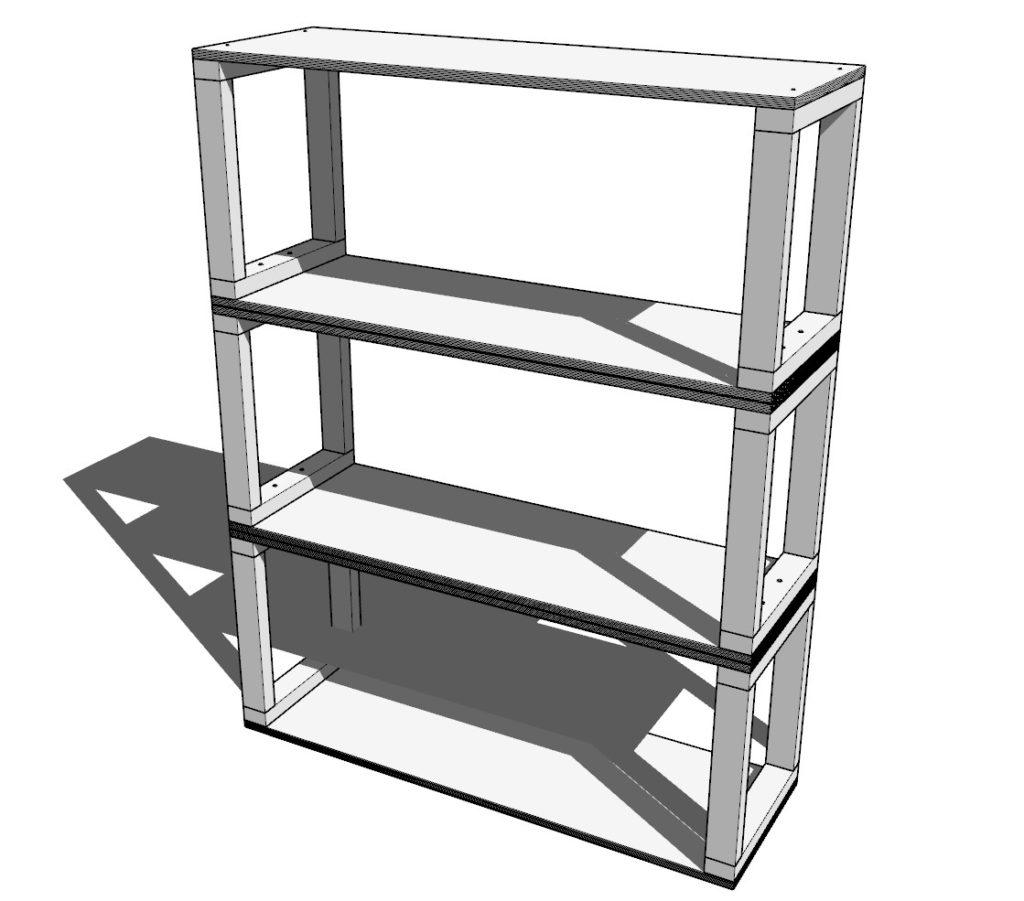
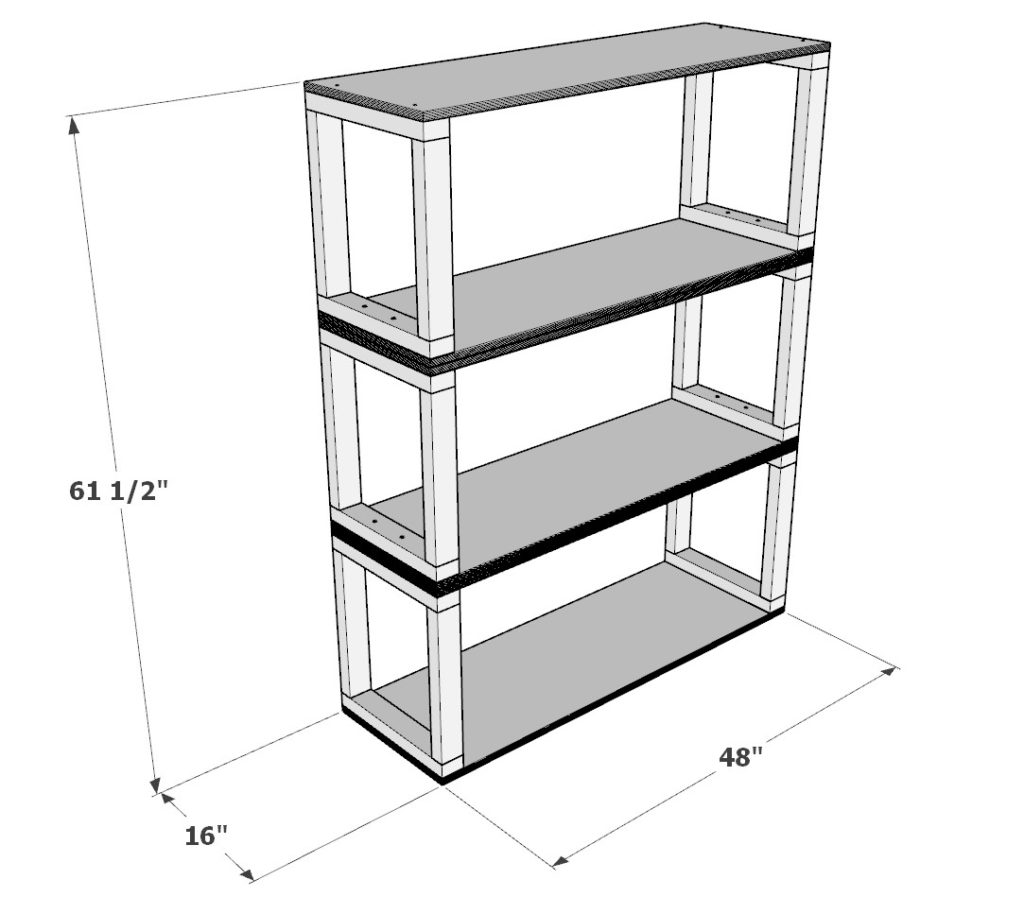
These shelves are made from thick plywood and sturdy 2x3 lumber. They can hold up to heavy loads without sagging or breaking. The double layer of plywood prevents the shelf from sagging even under heavy weight. The shelves are also only 48 inches wide, which means that the sides are close enough to support a fair amount of weight.
A DIY Wooden Closet Storage Shelf That Won't Damage Your Walls
Most landlords don‘t want renters to make holes in the walls or install anything permanent in the closets. That‘s why this DIY wooden closet storage shelf design is perfect for those who are renting homes and need extra storage, but don‘t want to damage the walls. The design is simple and easy to build, and can be installed without damaging the walls or paint.
Get the Most Out of Your Closet with a Wooden Storage Shelf
As anyone with a closet knows, storage is always at a premium. No matter how large your closet is, it always seems like there’s never enough space for everything. This is especially true if you have a small closet. If you’re looking for a way to maximize your closet space, a DIY wooden storage shelf is a great option.
A DIY wooden storage shelf is a great way to add extra storage to your closet without taking up a lot of space. You can use it to store items that you don’t use often, such as out-of-season clothes or holiday decorations. If you have a lot of small items, such as jewelry, scarves, or belts, a wooden storage shelf can help you keep them organized and easy to find.
How to Double Your Closet Storage Space with a DIY Wooden Shelf
A DIY wooden shelf is the perfect way to take advantage of the vertical space in a closet. By adding a shelf or two, you can instantly double the amount of storage space in your closet. This is especially useful for small closets, where every inch of space counts.
Who can build this wooden closet shelves?
This shelves are easy to assemble with the step-by-step instructions provided in this post. I believe this base would be a great project for beginners to woodworking and anyone with minimal woodworking experience. The DIY plans offered in this post include helpful description, images, diagrams, helpful links, and more to ensure that the DIY build is smooth, efficient, and easy.
The Advantages of Wood Shelves Over Plastic Shelves
- Wood shelves are more durable than plastic shelves and can support more weight.
- Wood shelves are more aesthetically pleasing than plastic shelves and can complement any home décor.
- Wood shelves are easier to work with than plastic shelves and can be cut, drilled, and sanded more easily.
- Wood shelves are more environmentally friendly than plastic shelves since they are made from a renewable resource.
- Wood shelves last longer than plastic shelves and are less likely to break or be damaged. 6. Wood shelves are more affordable than plastic shelves in the long run since they do not need to be replaced as often.
- Wood shelves can be customized to fit any space, whereas plastic shelves come in set sizes.
- Wood shelves add value to your home, whereas plastic shelves do not.
- Wood shelves can be stained or painted to match your existing décor, whereas plastic shelves cannot.
- Wood shelves are a better investment than plastic shelves and will provide you with years of use and enjoyment.
Time to build
About 1 hours
Total cost of build
About $50
Skill level required
Beginner
Download the PDF plans
Closet storage shelves PDF plans
What is included in the PDF download?
Easy to read step by step instructions
Material list
Tools needed
3D illustrations
Tools for building the table base
- Saw
- Drill
- Impact driver with bit for screws
- Sander
- wood countersink drill bit
- About 60 3-1/2 inch screws
- Wood glue
- sand paper
Disclosure: Some of these links are affiliate links.
Shopping list and cut list
Available with the purchase of the PDF DIY plans. Thank you for supporting us and making this website possible!
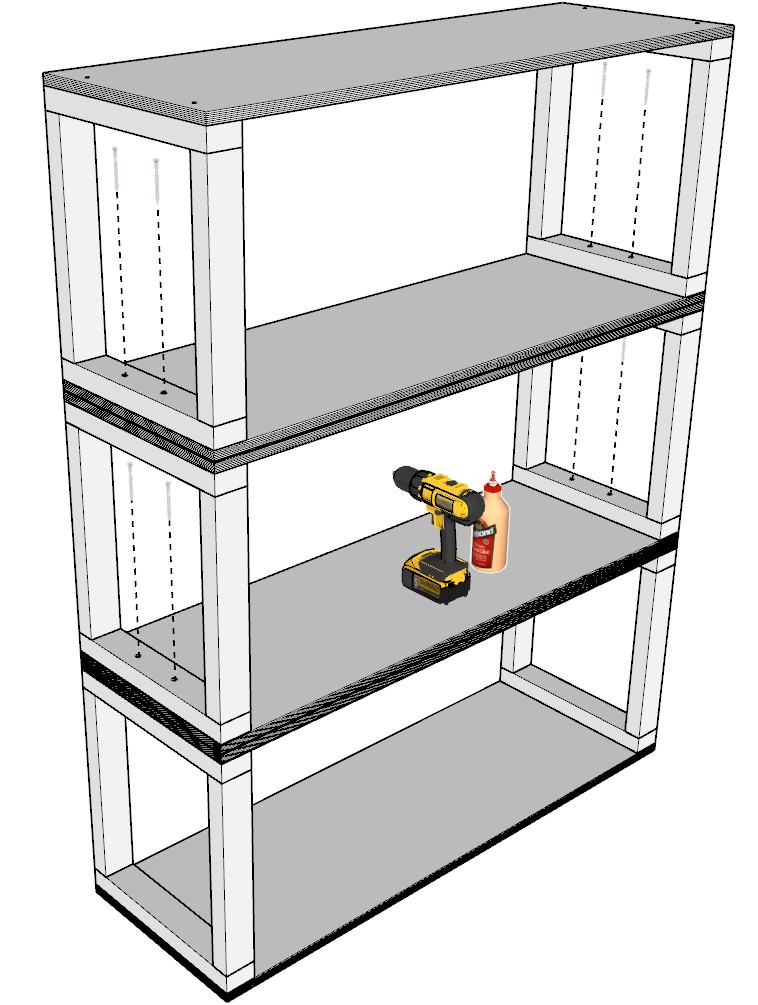
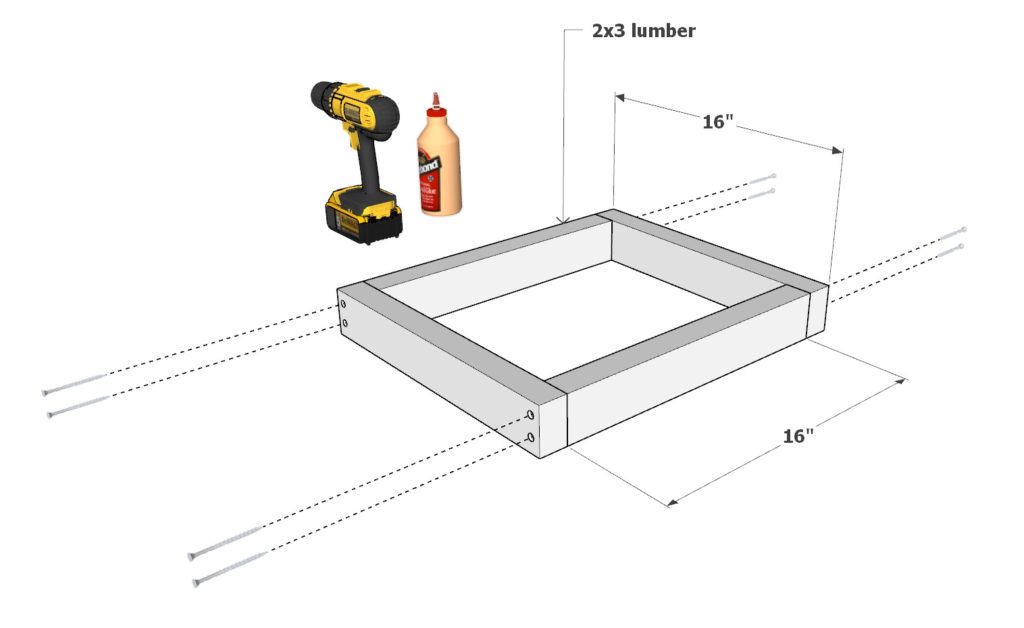
Step 1 (DIY closet storage shelf frame construction)
First, cut and arrange four 16 inch 2×3 lumber pieces as shown below. Join these pieces by predrilling to prevent the wood from splitting, adding glue to all area that will be joined, and adding 3.5 inch screws.
Make a total of six identical frame pieces.

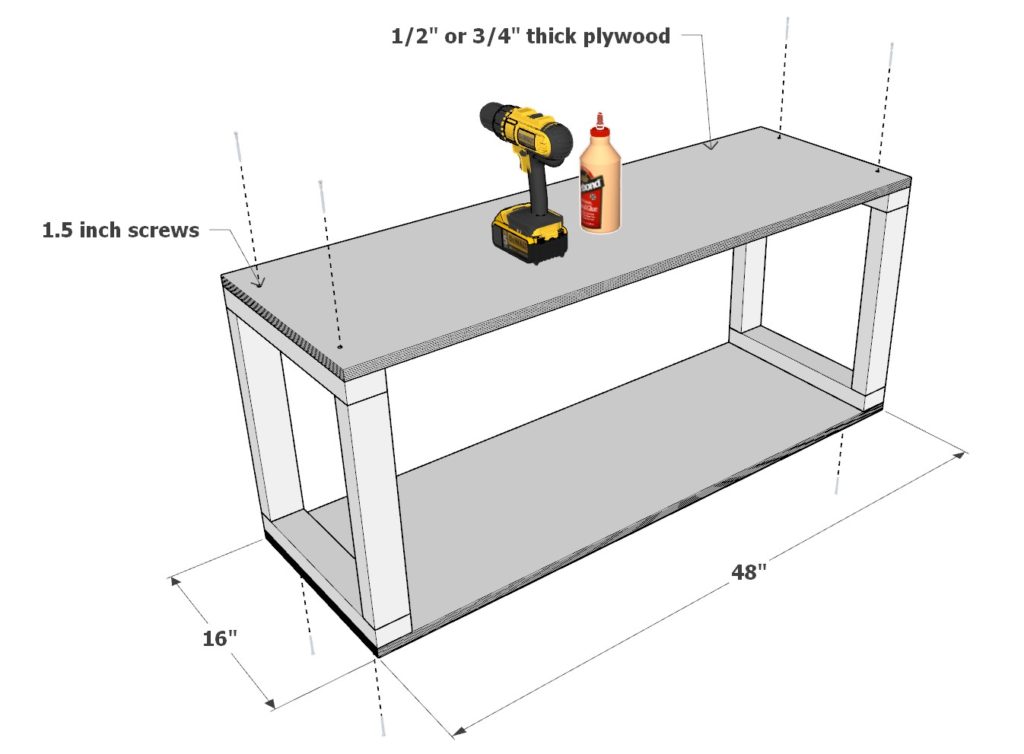
Step 2 (Adding the plywood to DIY closet storage shelf frame)
Next, add two 16 inch x 48 inch plywood sheets to two of the 2×3 lumber frames from the previous step as shown below. The plywood sheets can be either 1/2″ thick or 3/4″ thick.
Join the plywood sheets by predrilling, adding glue, and adding 3.5 inch screws.
Make a total of 3 identical closet storage shelves.
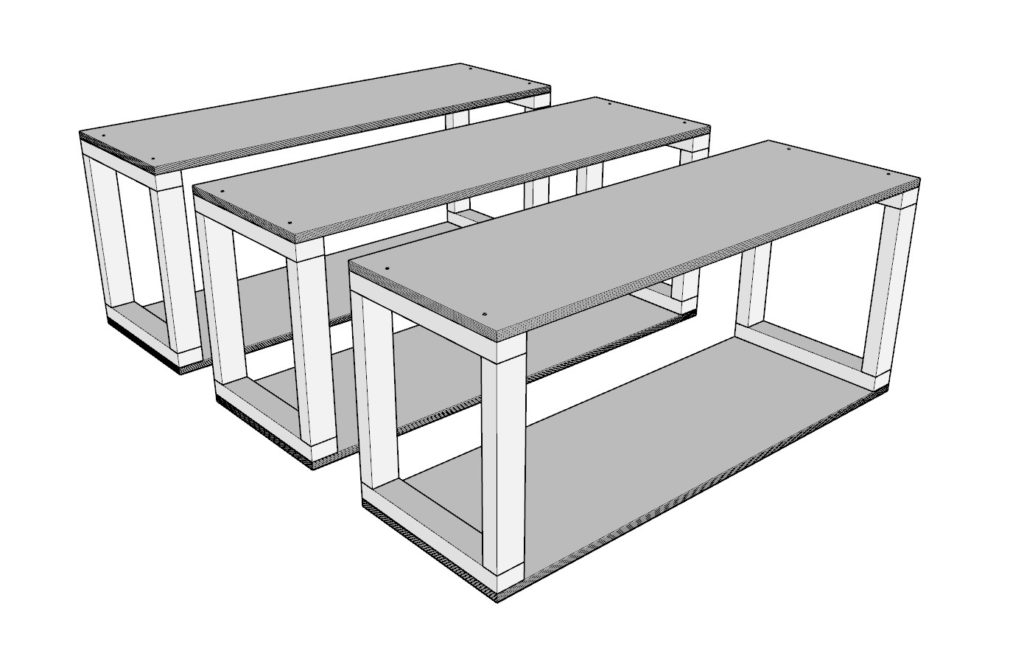
Step 3 (How to secure and join the DIY closet storage shelves)
You can either simply stack these shelves one on top of the other in the closet or you can join the shelves together with screws to add additional stability.
Keep in mind if you join the shelves or glue the shelves you need to ensure that the shelves are able to come out of the closet for the future.
Lastly, sand down the whole shelf. At this step you can pain/stain the shelves if needed.