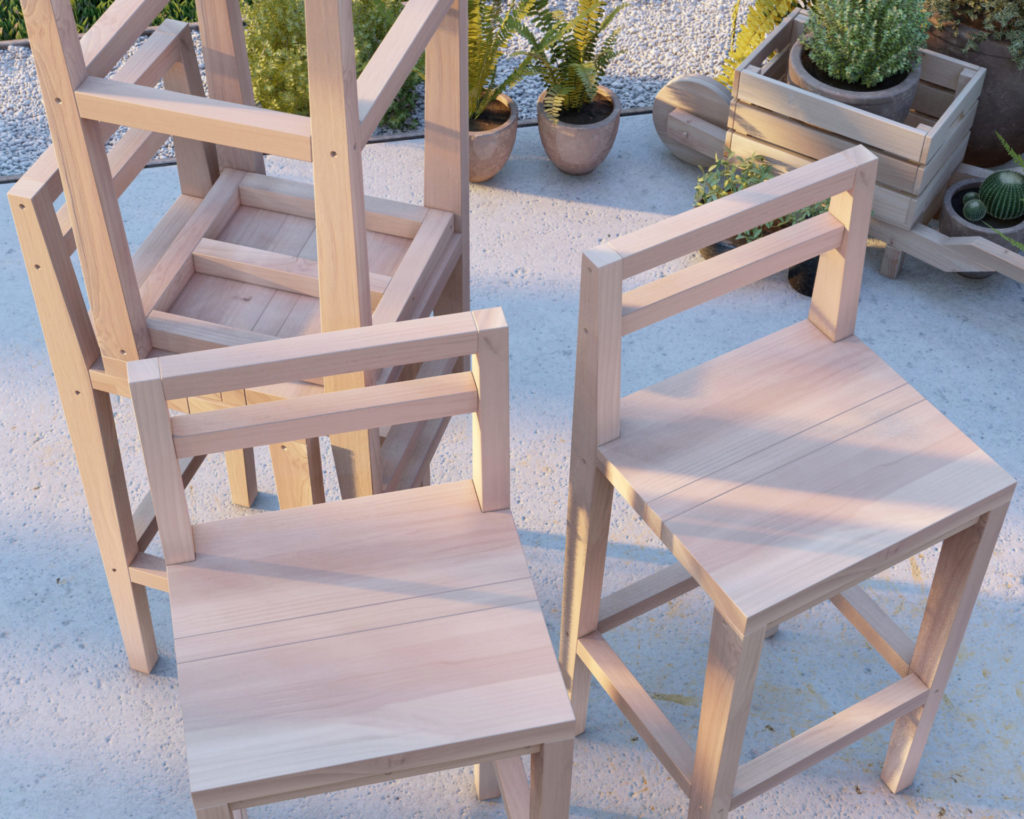
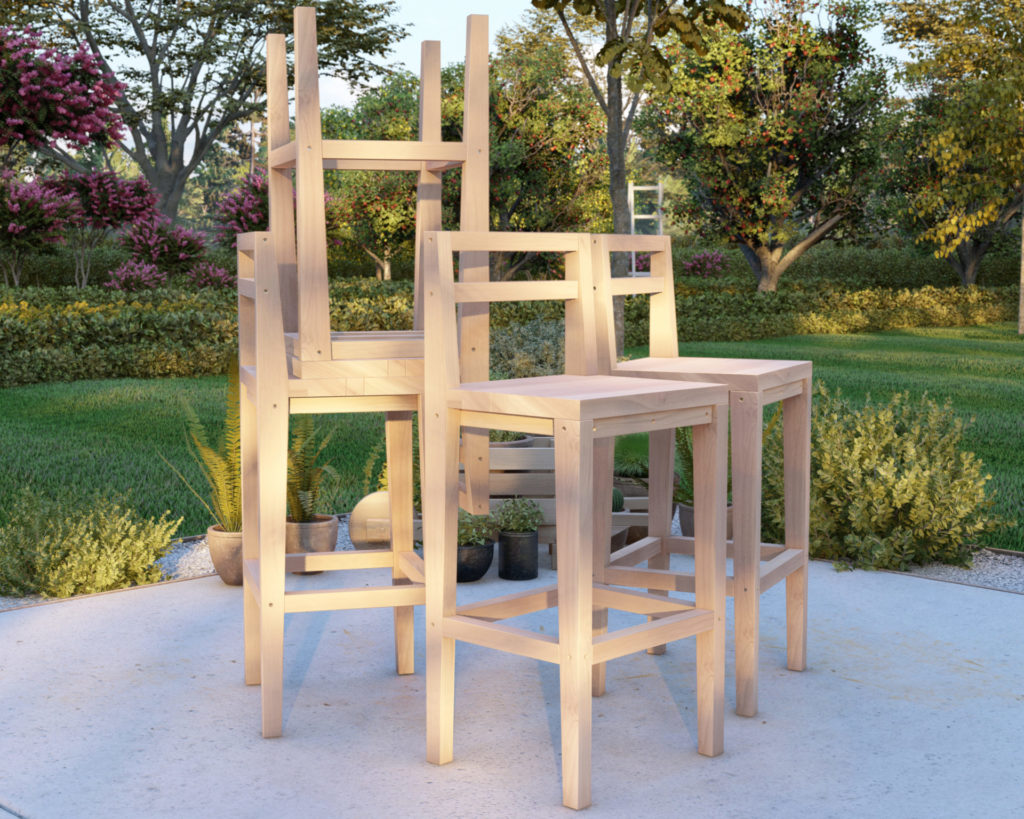
Introduction
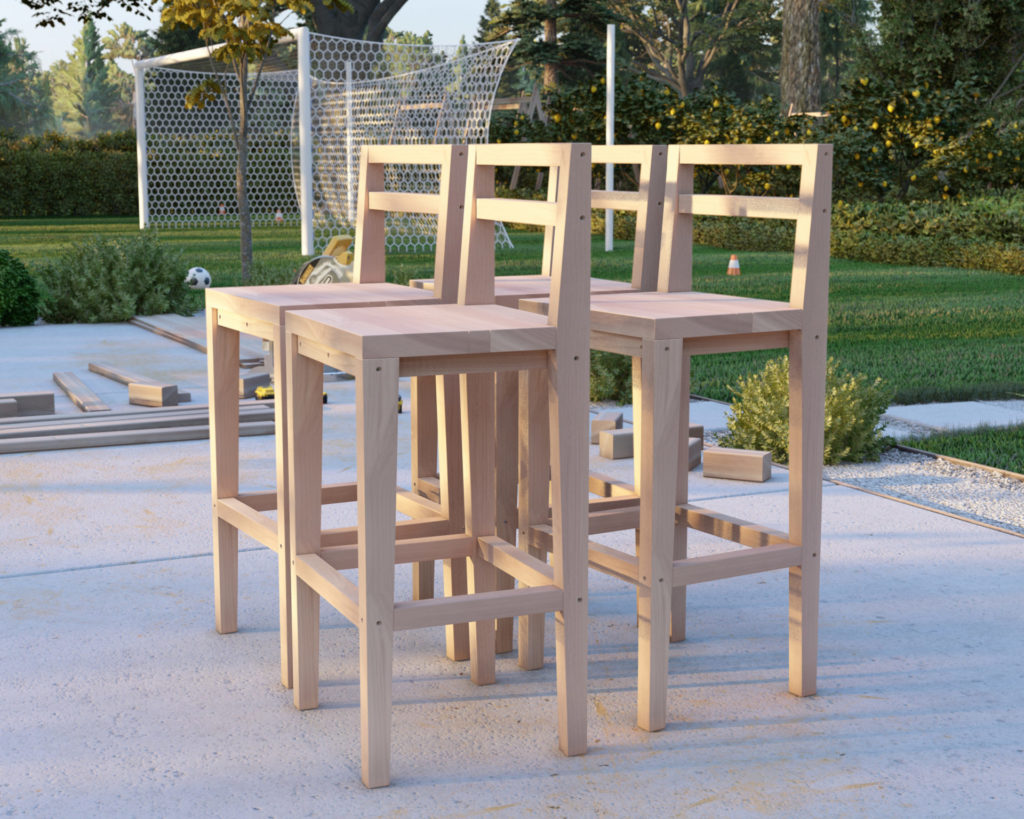
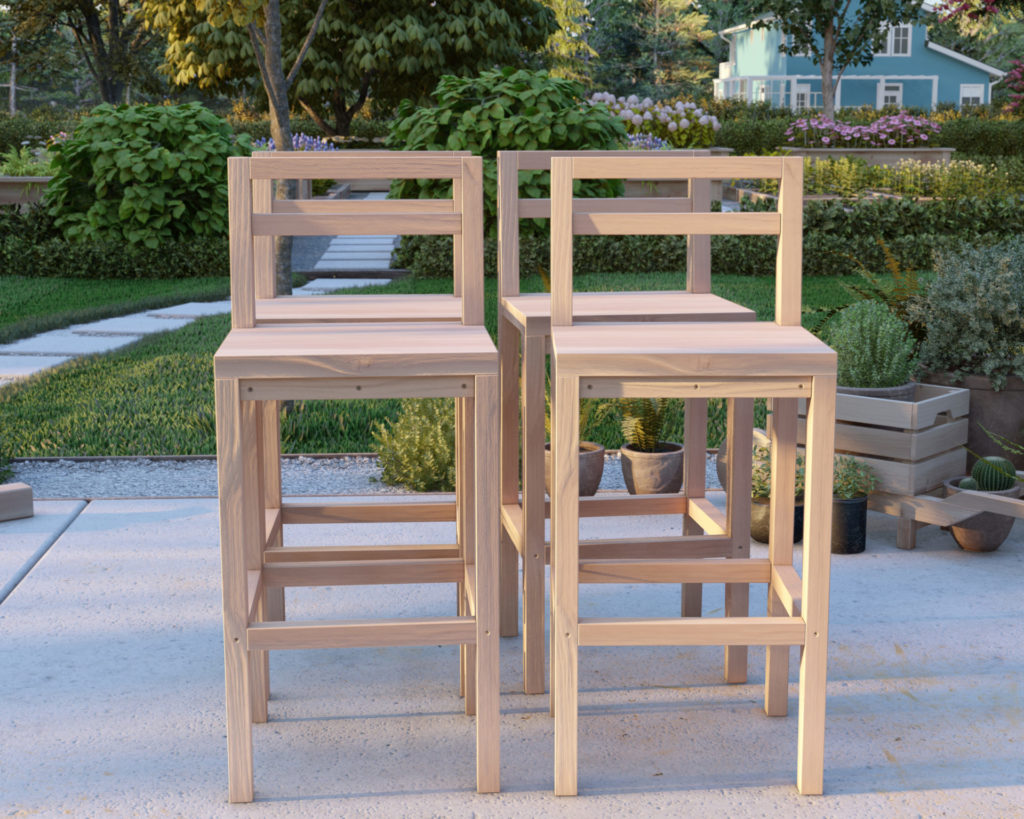
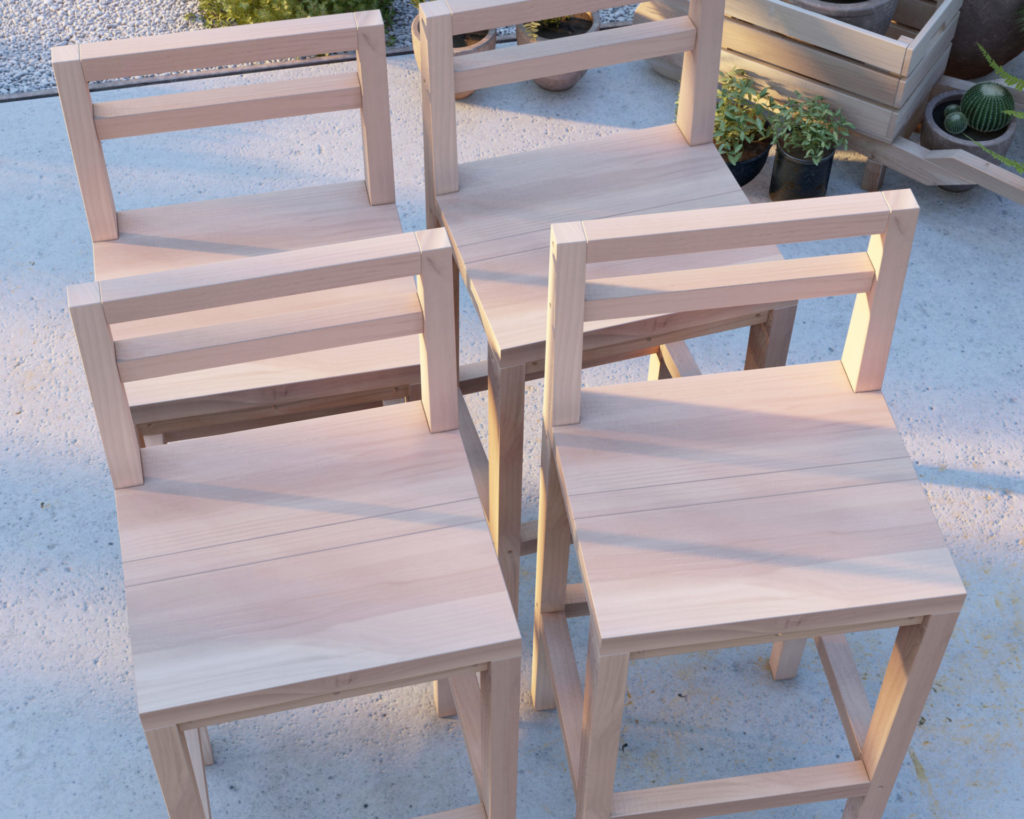
Imagine the satisfaction of lounging on a beautifully crafted wooden bar stool, the smooth, polished surface gleaming under the warm lighting of your home bar or cozy kitchen nook. Now, picture this – you created this masterpiece with your own two hands, and it didn’t break the bank! Our $25 DIY wooden bar stool project is not only a testament to budget-friendly elegance but also a gateway for woodworking enthusiasts, especially beginners, to craft something both beautiful and functional.
The Budget-Friendly Nature
In the vast world of DIY, the cost can often be a deterrent. It’s not unusual to find yourself amidst a heap of expensive materials, intricate tools, and perhaps, a sense of overwhelming complexity. However, this DIY bar stool plan stands as an epitome of affordability and accessibility. Every piece of lumber, every screw is easily obtainable from your local Home Depot, Lowes, or similar stores. We are talking about standard 2×3, 2×2, and 2×8 lumber, nothing exotic, yet the end product is something of sheer elegance and comfort.
Let’s put this into perspective. A quick market scan for bar stools, especially those boasting the charm of wood, reveals price tags that might make your wallet cringe. But here, for a mere $25, you not only get a stool but the unique experience of crafting it, of lending it the shape, size, and hue that echoes your taste.
Specification and Quality
Affordability doesn’t compromise quality in this DIY endeavor. The stool’s legs, meticulously crafted from 2×3 lumber, are tapered and angled to perfection, exuding an aesthetic appeal that’s both modern and timeless. The seating, made of robust 2×8 lumber, promises durability while offering ample space for comfort. Cross braces and footrests crafted from 2×2 lumber aren’t just structural elements; they’re subtle touches of comfort, ensuring that every moment spent on this stool is one of leisure.
Versatility and Customizability
One of the cardinal virtues of this DIY bar stool is its chameleon-like ability to adapt. Need it taller or shorter? The plans are flexible, allowing for modifications to suit bar, counter, or regular height requirements. Every home, every bar, every kitchen is different – and this stool respects those unique dimensions, effortlessly fitting in.
Aesthetic versatility is another feather in its cap. Want to match it with the mahogany hue of your bar counter or the pastel theme of your kitchen? The stool is your canvas, ready to be painted or stained to mirror your existing décor. And for those seeking the extra plush of comfort, adding upholstery is as easy as a breeze.
Why This DIY Bar Stool Plan is Perfect for You
The intersection of affordability, quality, and customizability defines this DIY bar stool plan. Every curve, every polish is a story of your creativity, unveiled in a structured, easy-to-follow guide. As you perch on this stool, a beverage in hand, the warm tones of wood echoing the ambient lights, remember – this isn’t just a piece of furniture. It’s a narrative of a journey, from pieces of lumber to a masterpiece that graces your home, crafted not just with hands, but with heart.
Conclusion
Embarking on this DIY journey doesn’t just end with a stylish, customizable wooden bar stool at the astonishing price of $25. It’s a journey of discovery, of unleashing creativity, of turning ordinary pieces of lumber into something extraordinary. It’s a call to transform spaces, to lend them a touch of personal elegance, to craft not just furniture, but stories of individual creativity.
Indulge in the experience, step into a world where elegance, affordability, and creativity converge. Where every screw turned, every piece of wood carved, is a step towards creating something uniquely yours. Your seat at the bar, kitchen, or dining space awaits – are you ready to make it truly yours?
Time
2 hours per stool (varies with experience)
Cost
$25 per stool
(Costs may vary based on location and supplier.)
Skill level required
Beginner
DIY Bar Stool PDF Plan
What is included in the PDF download?
- Easy to read step by step instructions
- Material list
- Tools needed
- Helpful links to materials and tools needed
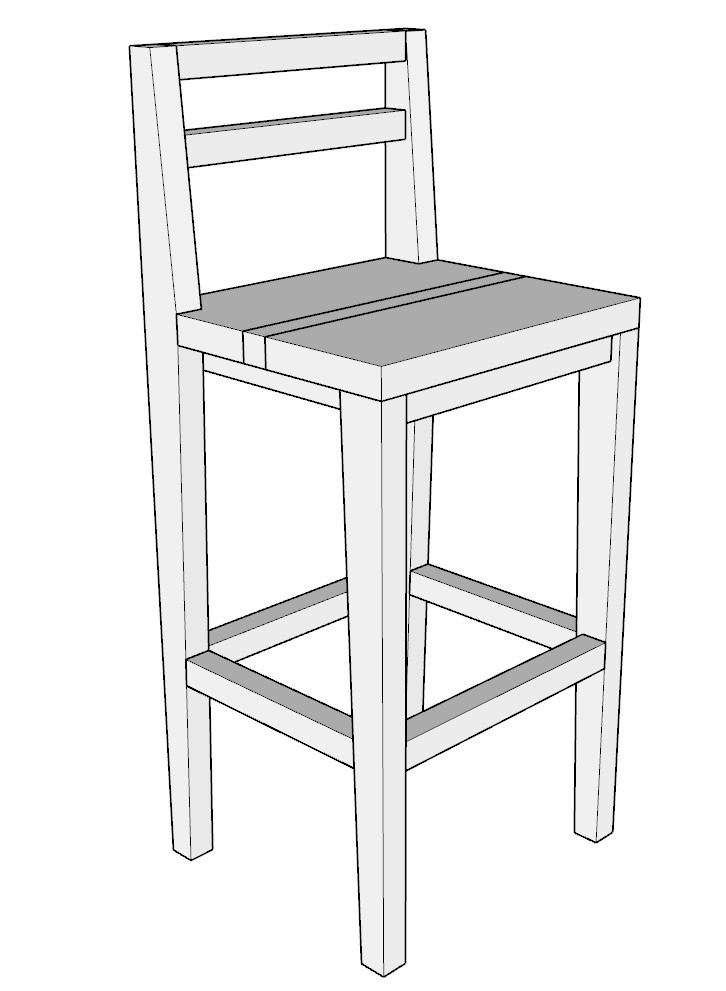
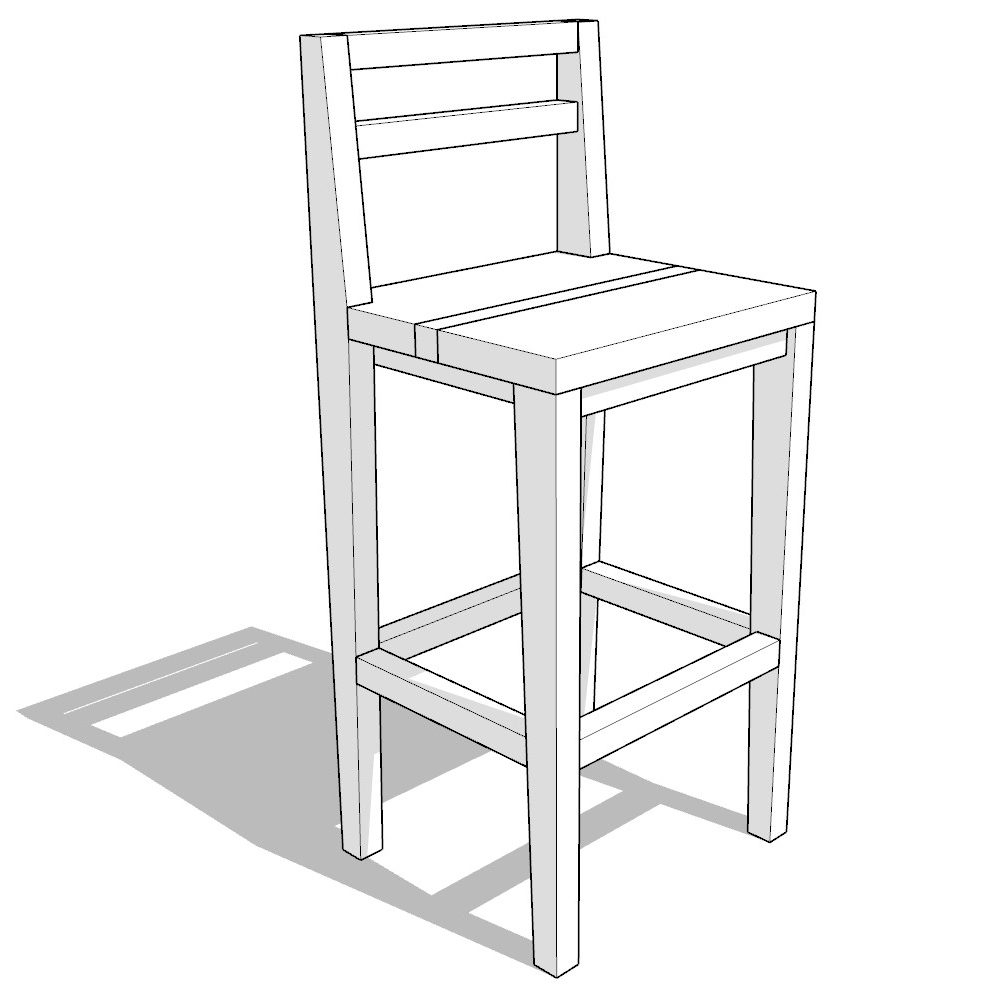
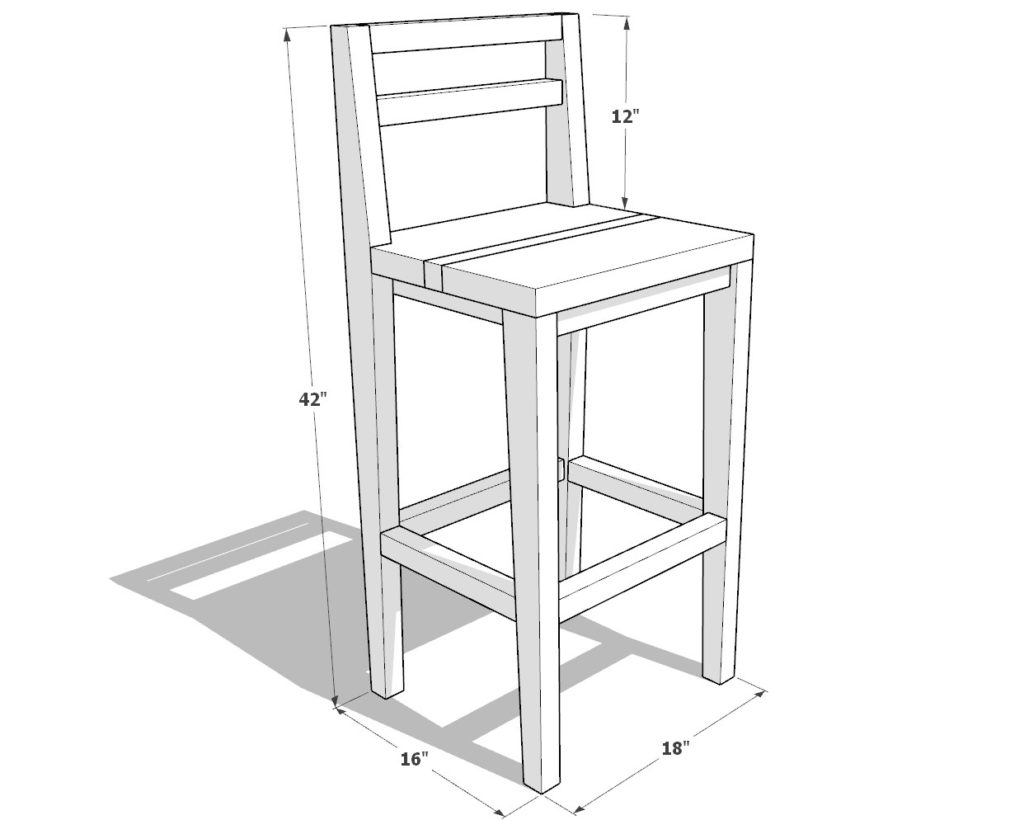
DIY Bar Stool Dimensions
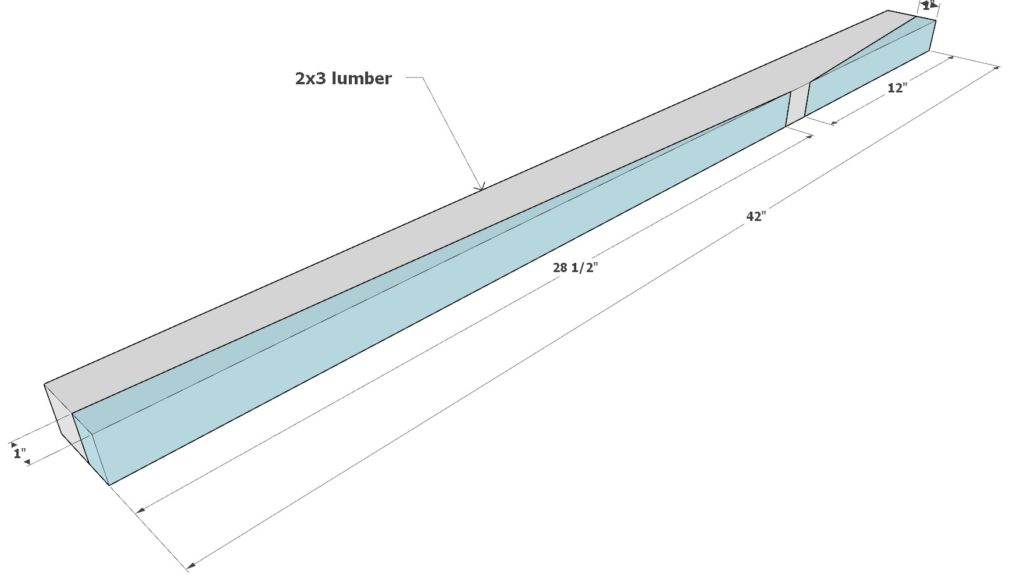
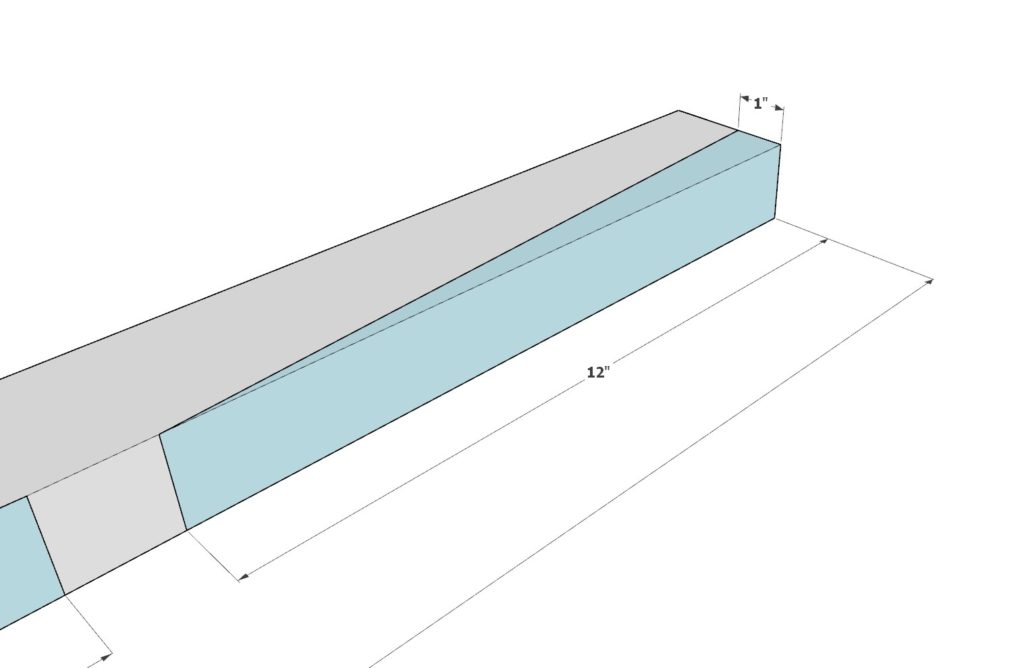
Step 1: Cutting the Wood Components
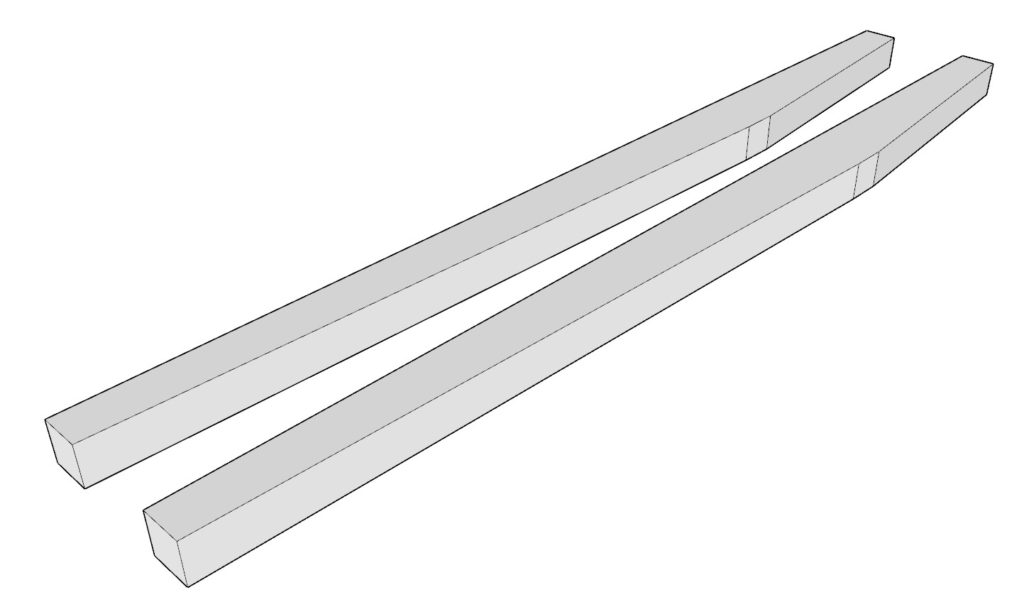
A. Back Legs:
- Take a 42-inch long 2×3 lumber piece.
- Refer to the first and second diagrams and cut away the blue parts. A jigsaw or handheld saw is recommended for precision and safety.
- Create two identical pieces for the back legs. They will be color-coded white in future steps for clarity.
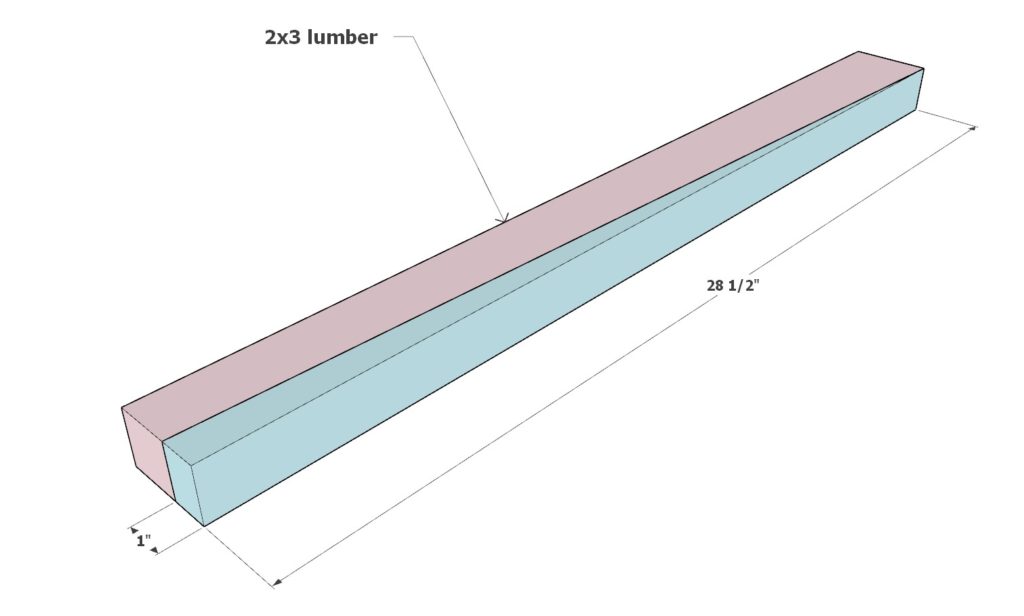
B. Front Legs:
- Use a 28-1/2 inch long 2×3 lumber piece.
- Follow the cutting guide indicated in the 4th diagram, removing the blue section.
- Ensure to make two of these front legs, which will be represented in pink in the upcoming steps.
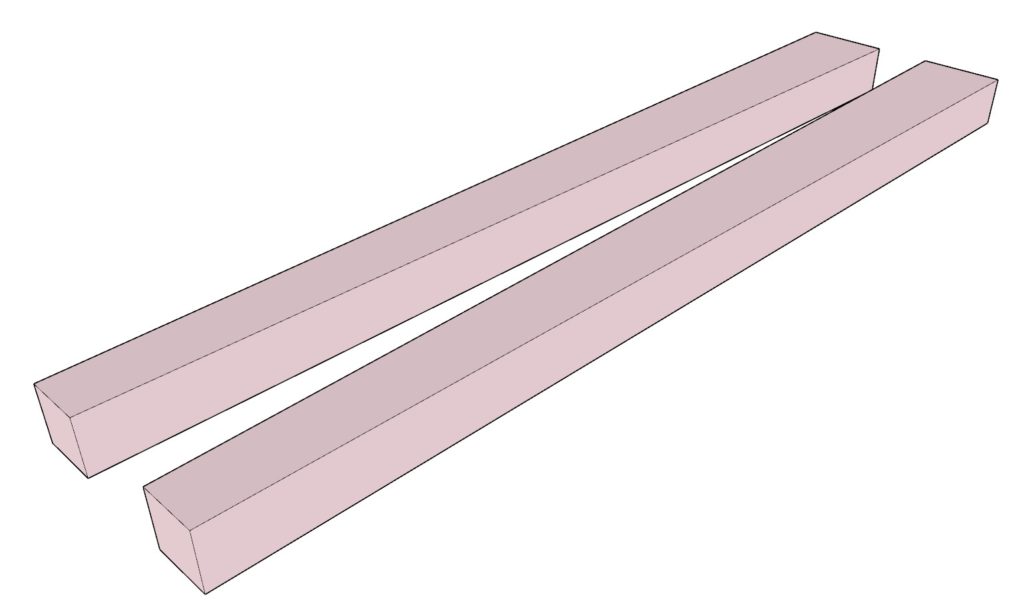
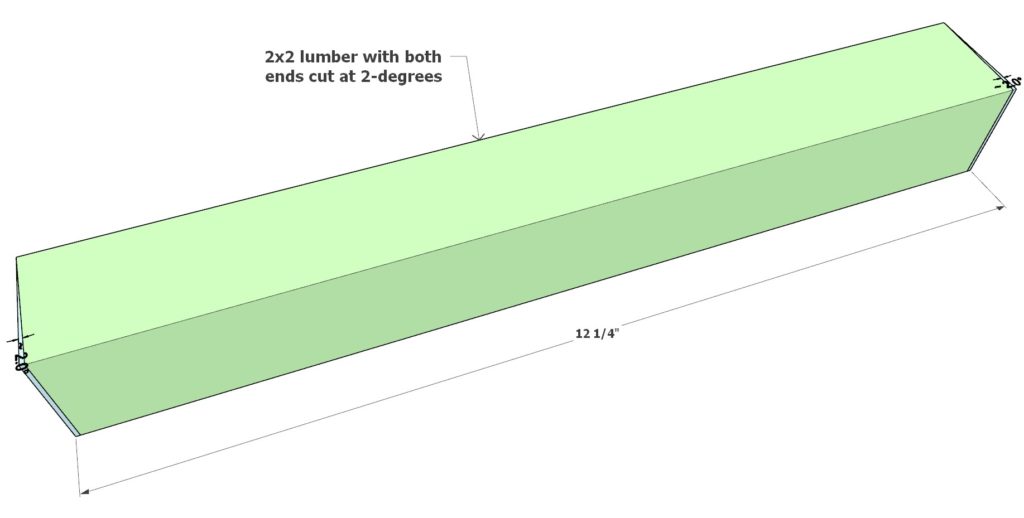
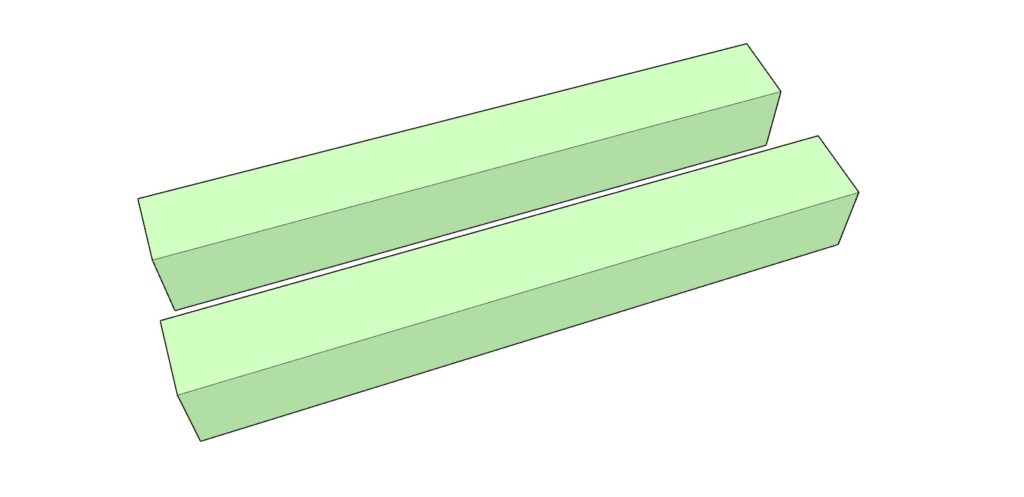
C. Reinforcement Bars:
- Begin with a 12-1/4 inch long 2×2 lumber piece.
- Trim the ends down by 2-degrees as depicted in the respective diagram.
- Prepare two of these components, to be highlighted in green in the assembly steps.
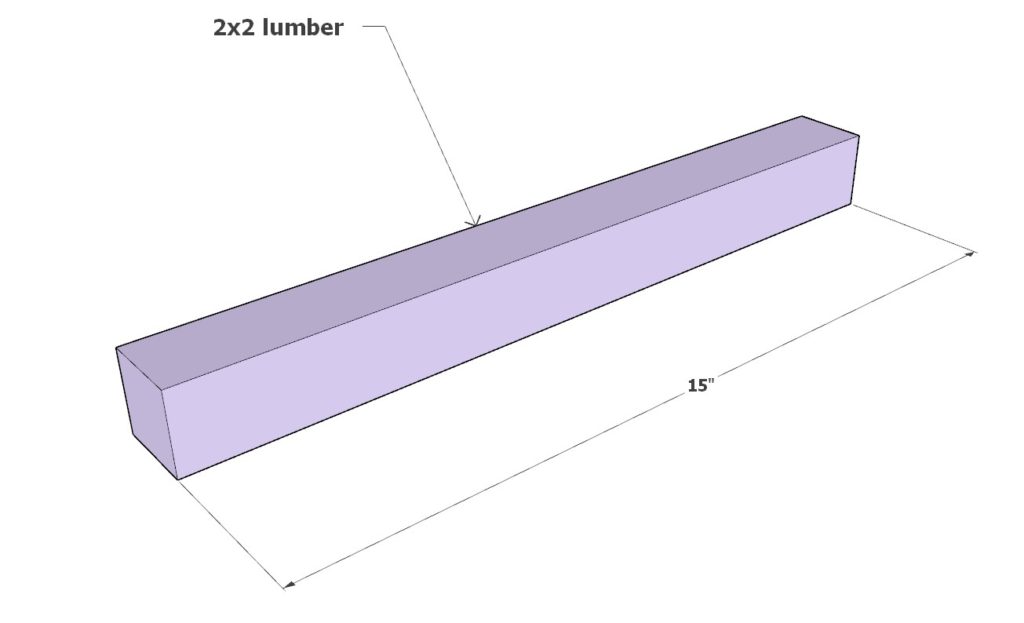
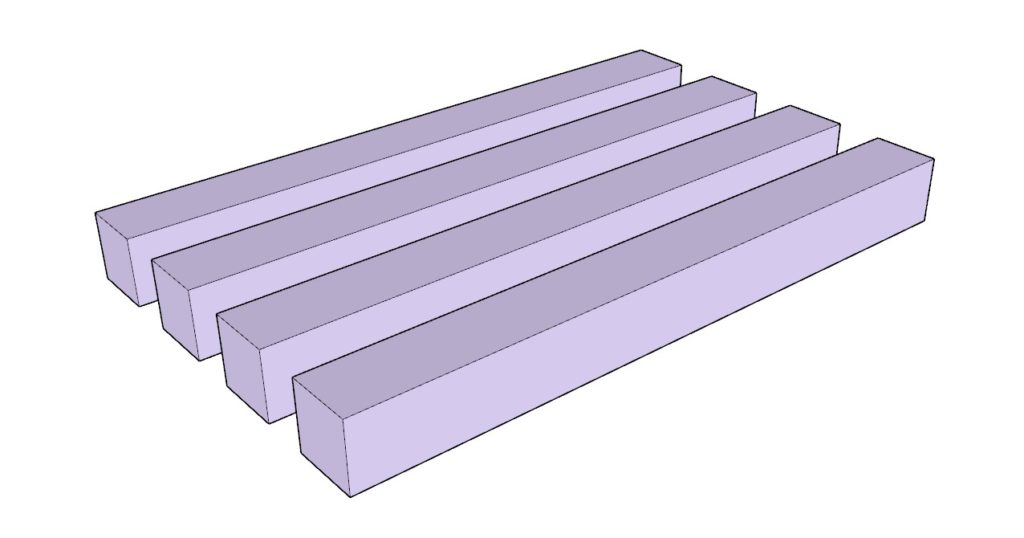
D. Foot and Back Rests:
- Obtain 15-inch long 2×2 lumber pieces.
- Four of these are required, without any specific modifications.
- These will be represented in lavender in the assembly steps.
Pro Tips:
- Consider an initial sanding of each component for a refined and smooth finish. This pre-assembly touch-up facilitates a more polished look.
- Painting or staining the individual pieces prior to assembly is also advisable for a professional, clean aesthetic.


Step 2: Assembling the Seat
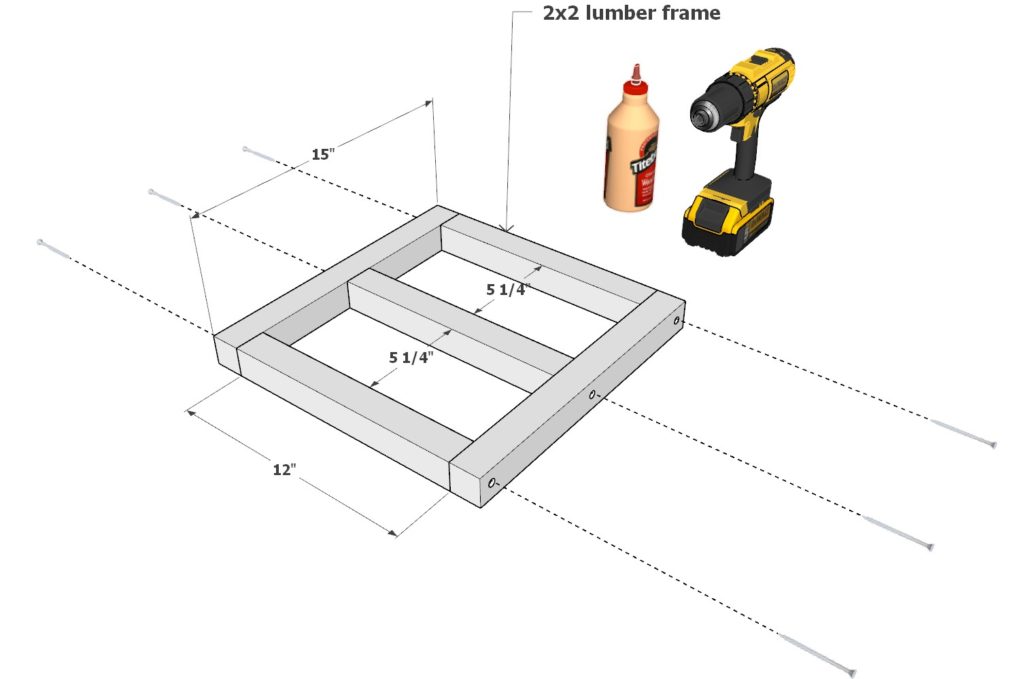
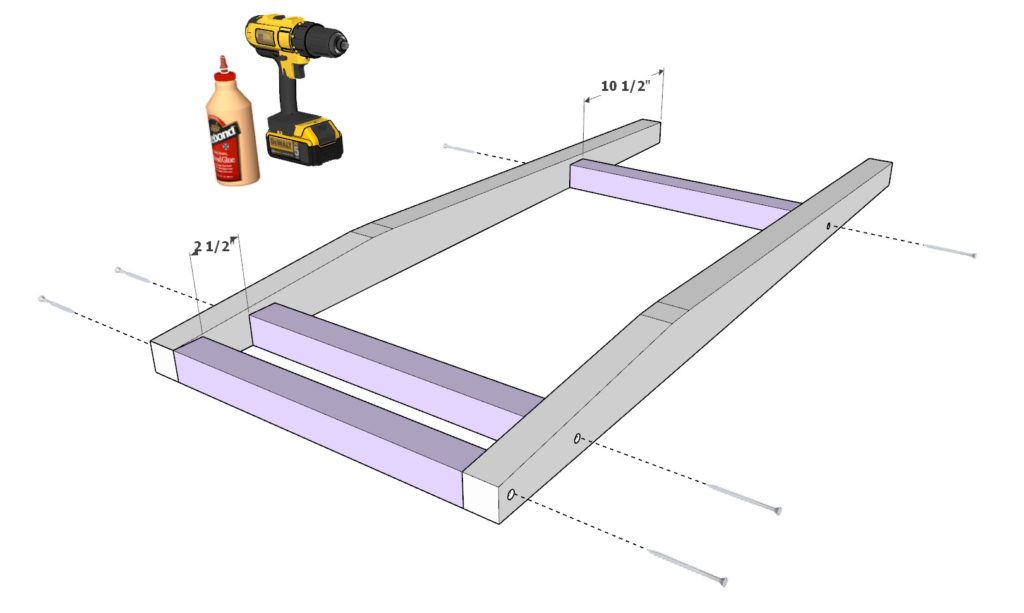
A. Preparing the Seating Platform:
- Start with two 18-inch long 2×8 lumber pieces.
- On one piece, carve out 1-1/2″ x 2-1/2″ notches, as highlighted in blue in the first diagram, to accommodate the back legs for enhanced stability.
- Leave the other 2×8 piece unmodified.
- Obtain an 18-inch long 2×2 lumber piece to be included in the seating platform.
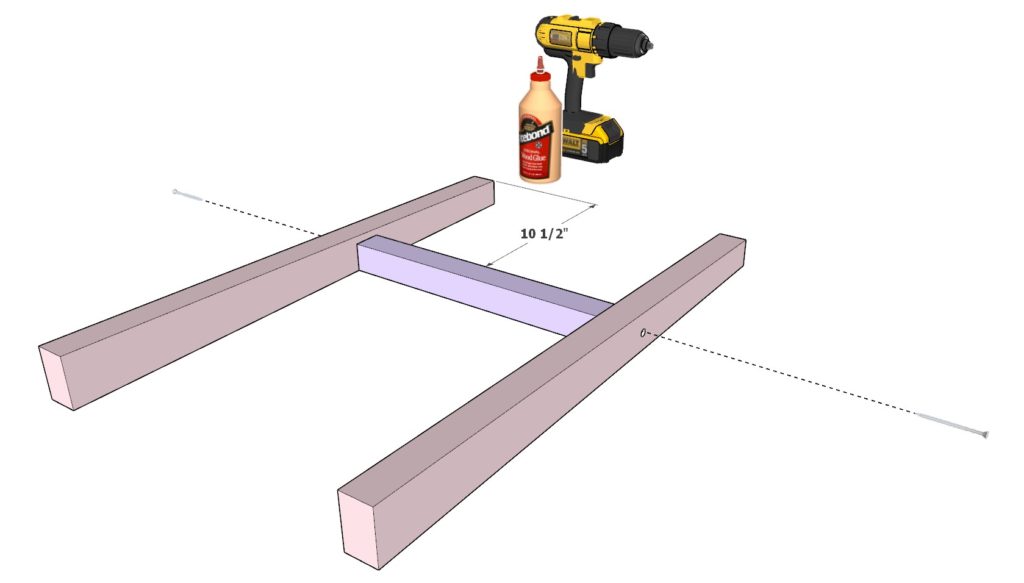
B. Constructing the Seating Frame:
- Gather two 15-inch and three 12-inch long 2×2 lumber pieces.
- Using 2.5-inch screws and wood glue, assemble the frame ensuring it’s sturdy and even.
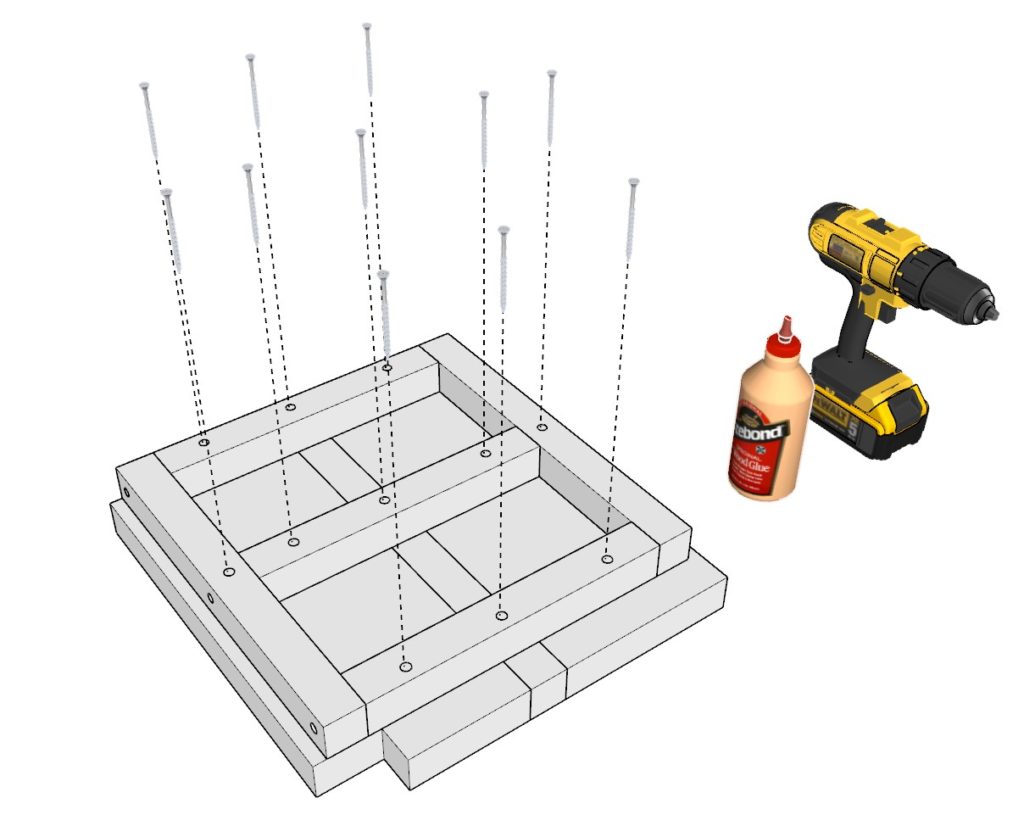
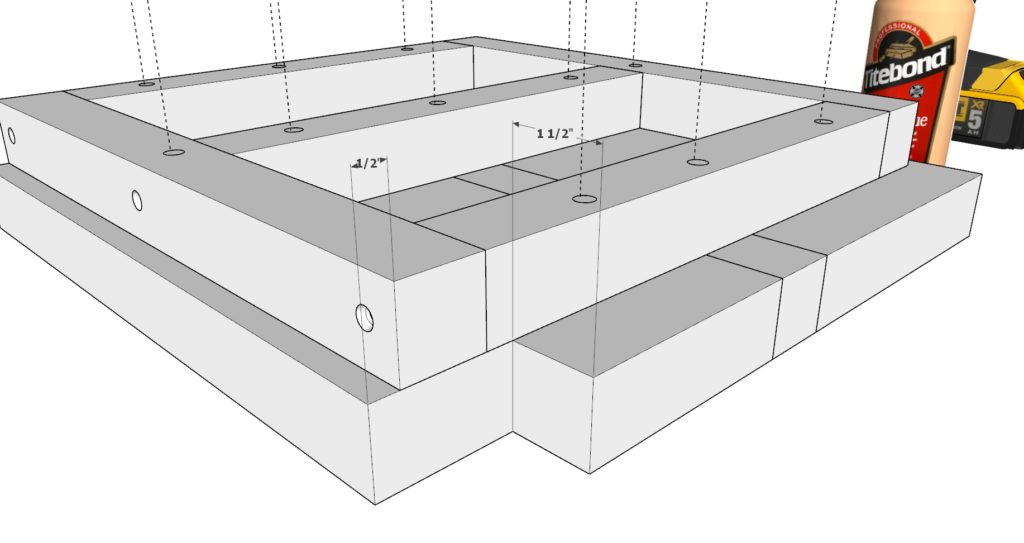
C. Attaching the Seating Platform to the Frame:
- Align the previously prepared 2×8 and 2×2 lumber pieces onto the assembled frame.
- With the assistance of wood clamps, secure them in place ensuring even distribution and alignment.
- Fasten the seating platform components to the frame using wood glue and 2.5-inch screws, ensuring a snug and secure fit.
Pro Tip:
Utilize wood clamps during assembly to hold components firmly together, ensuring precision and ease during the attachment process.

Step 3: Assembling the Back Rest, Legs, and Joining the Seat
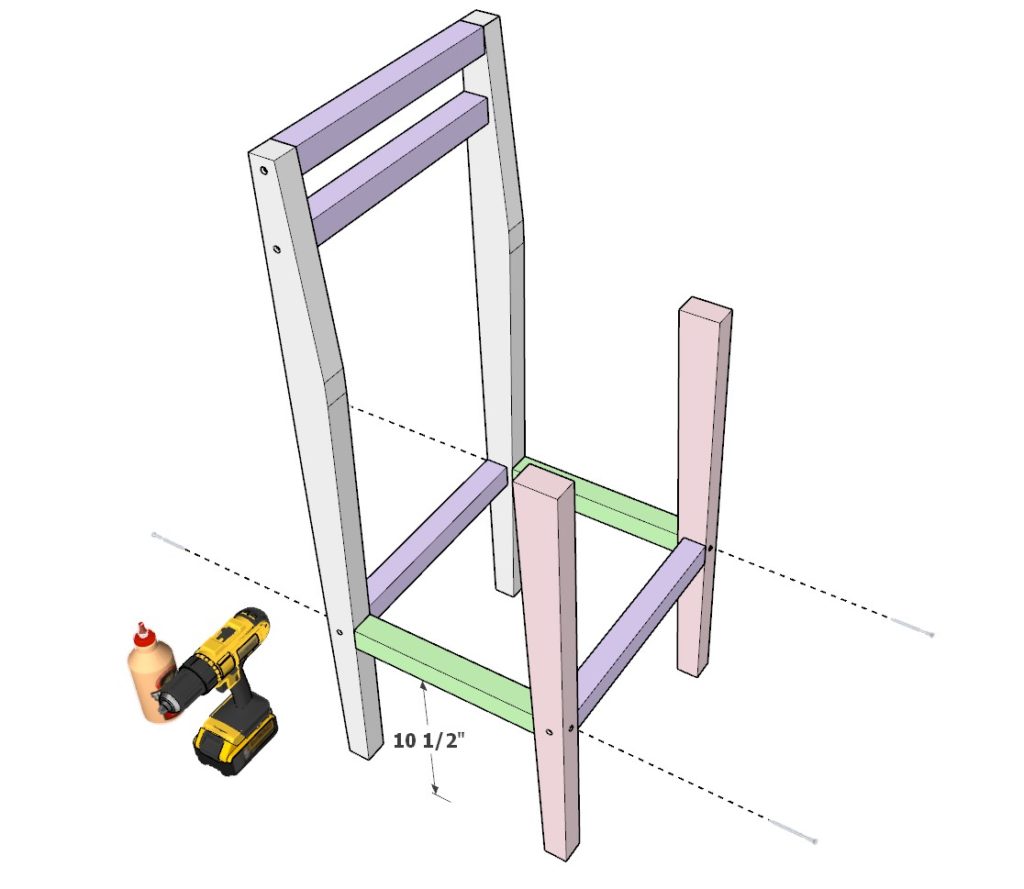
A. Building the Back Rest:
- Align three lavender 2×2 lumber pieces with the white back legs, following the spacing depicted in the 1st diagram.
- Ensure each piece fits securely, then fasten using wood glue and 2.5-inch screws, guaranteeing a solid, sturdy structure.
B. Constructing the Front Leg and Foot Rest Assembly:
- Take the two pink 2×3 lumber pieces and a lavender 2×2 lumber piece.
- Assemble them according to the instructions, ensuring the footrest is level and the structure is stable.
- Utilize 2.5-inch screws and wood glue for a solid, long-lasting assembly.
C. Joining Front and Back Assemblies:
- Connect the front and back leg assemblies using the two green 2×2 lumber pieces.
- Affix with wood glue and 2.5-inch screws, checking for stability and evenness.
D. Attaching the Seat:
- Place the previously assembled bar stool seating platform and frame atop the leg frame.
- Ensure alignment and secureness, then affix with wood glue and 2.5-inch screws.
Pro Tips:
- Employ a countersink drill bit to ensure screws sit flush within the wood, enhancing the finished look and preventing any potential wood split.
- If opting to adorn your bar stool with dowels, ensure the availability of a compatible drill bit and dowels of the matching size for a seamless fit and refined aesthetic.

Step 4: Preparing, Painting, Staining, and Finishing Touches
A. Preparing the Stool:
Sanding:
- Begin by sanding every surface of the stool using a medium-grit sandpaper to smooth out any rough edges or surfaces.
- Pay special attention to corners and edges, ensuring they are smooth to touch.
- Progress to a fine-grit sandpaper for a polished finish, preparing the wood to absorb paint or stain evenly.
Cleaning:
- Use a tack cloth or a soft, damp cloth to wipe down the stool, removing all sawdust and debris to ensure a clean surface.
- Allow the stool to dry completely before proceeding to the next step.
Choosing the Finish:
- Decide whether to paint, stain, or retain the natural wood finish. Each option requires different preparation steps, ensuring the longevity of the finish.
B. Painting the Stool:
Primer Application:
- Apply a coat of wood primer to ensure better adhesion of paint, enhancing durability and providing additional protection to the stool.
- Allow the primer to dry as per the manufacturer’s instructions.
Paint Application:
- Choose a paint that’s suitable for wood and the environment where the stool will be placed.
- Apply the first coat of paint evenly, using a brush or roller.
- Allow it to dry, then apply a second coat if necessary for an even and rich hue.
C. Staining the Stool:
Application of Wood Conditioner (optional):
- Apply a wood conditioner if you’re working with softwood to ensure even absorption of the stain.
- Allow it to penetrate the wood as per the label’s instructions.
Stain Application:
- Use a brush or cloth to apply the wood stain evenly, following the grain of the wood.
- Wipe off excess stain and allow the stool to dry. Apply additional coats as needed to achieve the desired depth of color.
D. Leaving it Natural:
- Sealing:
- Apply a clear wood sealer to protect the wood from moisture, dirt, and wear, enhancing its natural beauty and increasing durability.
- Allow the sealer to dry completely before using the stool.
E. Adding Felt Pads:
- Selection and Application:
- Choose felt pads that correspond with the size of the stool’s legs.
- Clean the bottom of each leg to ensure it’s dust-free.
- Peel the adhesive backing off the pads and firmly press them onto the bottom of the stool’s legs.