The DIY Adirondack chair overview:
This DIY Adirondack chair is a twist on the classic piece of furniture that has been around for over a hundred years. It is a comfortable and stylish chair that is perfect for any home. The Adirondack chair is a great project for anyone who enjoys woodworking or DIY projects. Building this Adirondack chair is a relatively simple project that can be completed in a just a few hours.
There are many benefits to building a DIY Adirondack chair. First, it is a great way to save money. Adirondack chairs can be quite expensive, but if you build your own you can save a lot of money. Second, it is a great way to get exactly the chair you want. When you build your own Adirondack chair, you can choose the materials and color that you want. Building an Adirondack chair is a great way to learn new woodworking skills or to brush up on your existing skills. Fourth, it is a great way to add a unique and stylish piece of furniture to your home.
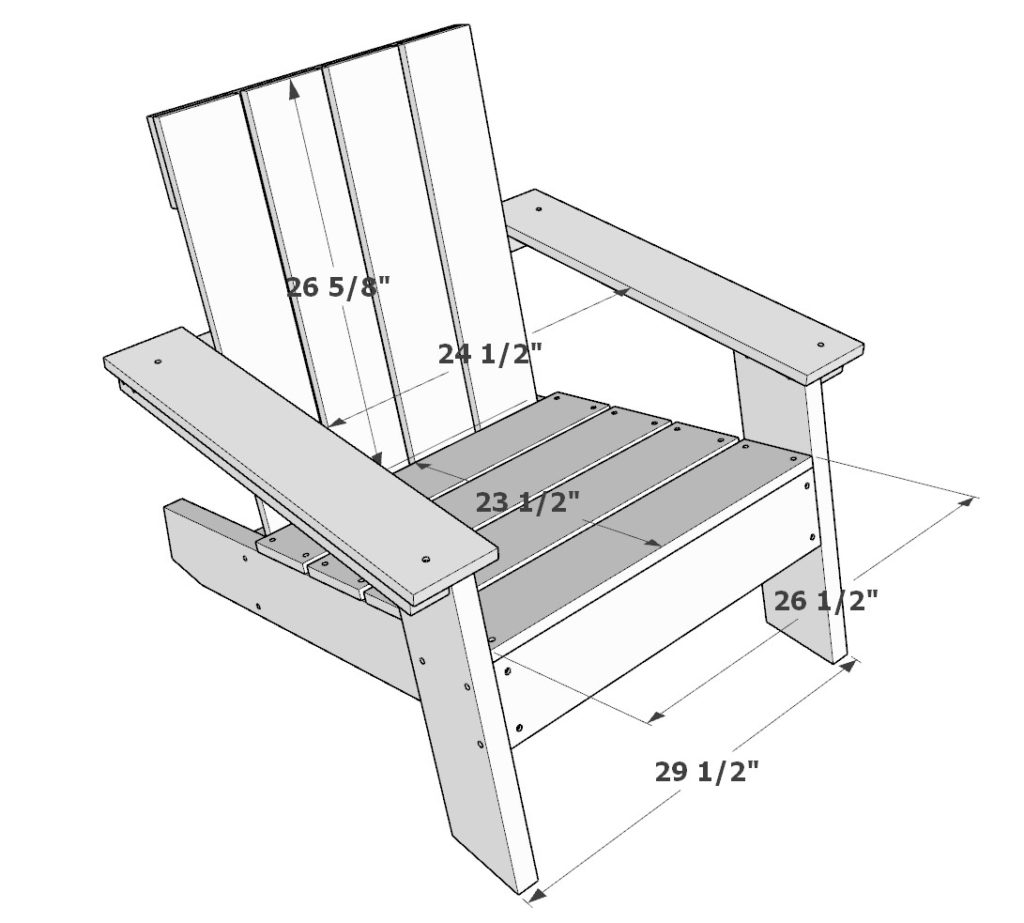
The DIY Adirondack chair specifications:
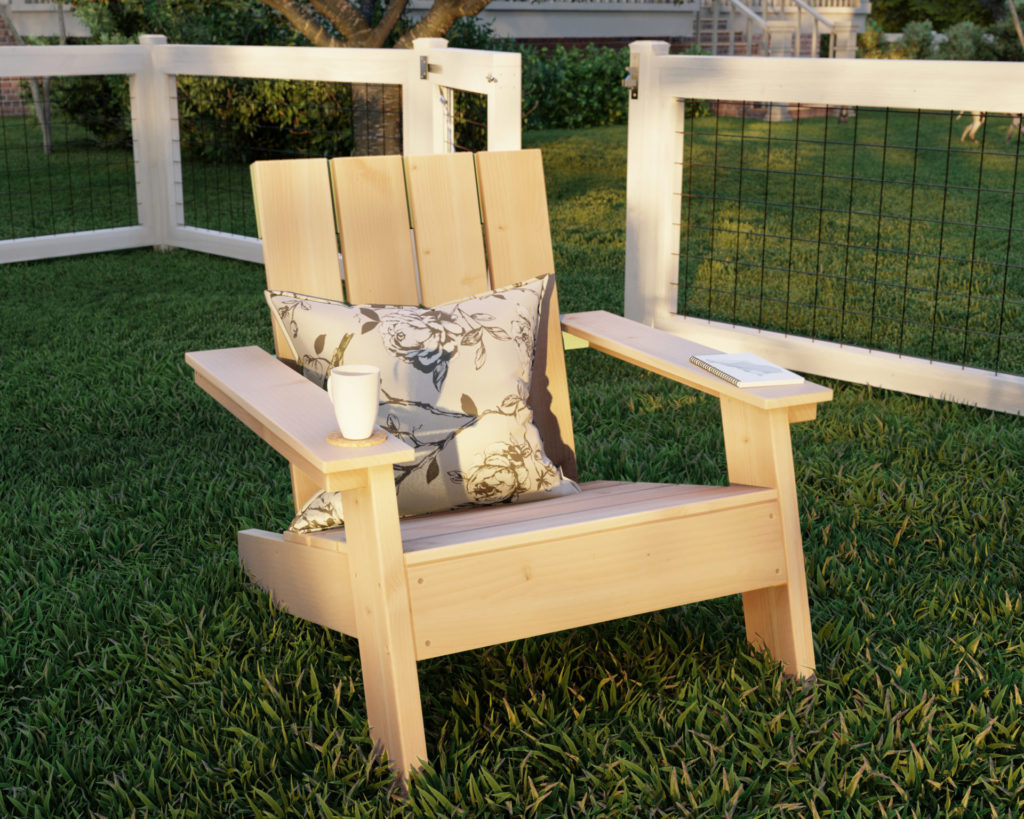
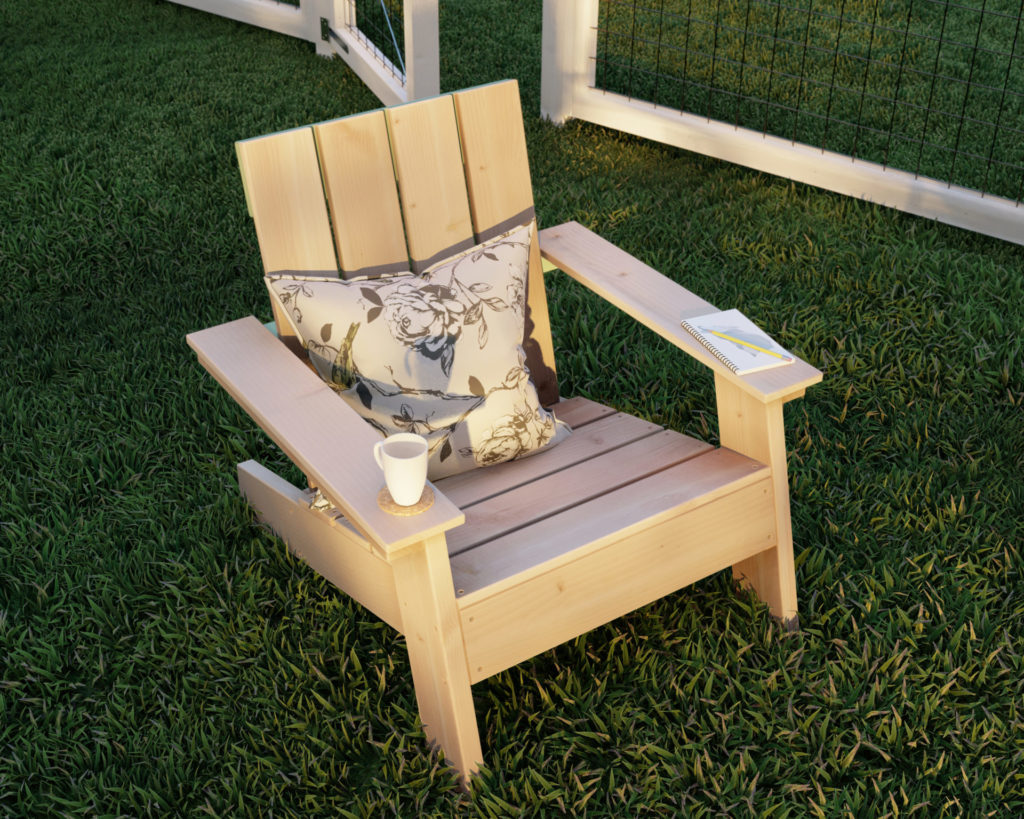
The first thing you will notice when you sit in this Adirondack chair is the wide seat and the high back. You sink into the chair and it feels like you are being hugged from behind. The chair is so comfortable that you never want to get up.
This Adirondack chair has a sloped seat and a reclined back, which makes it very comfortable to sit in.
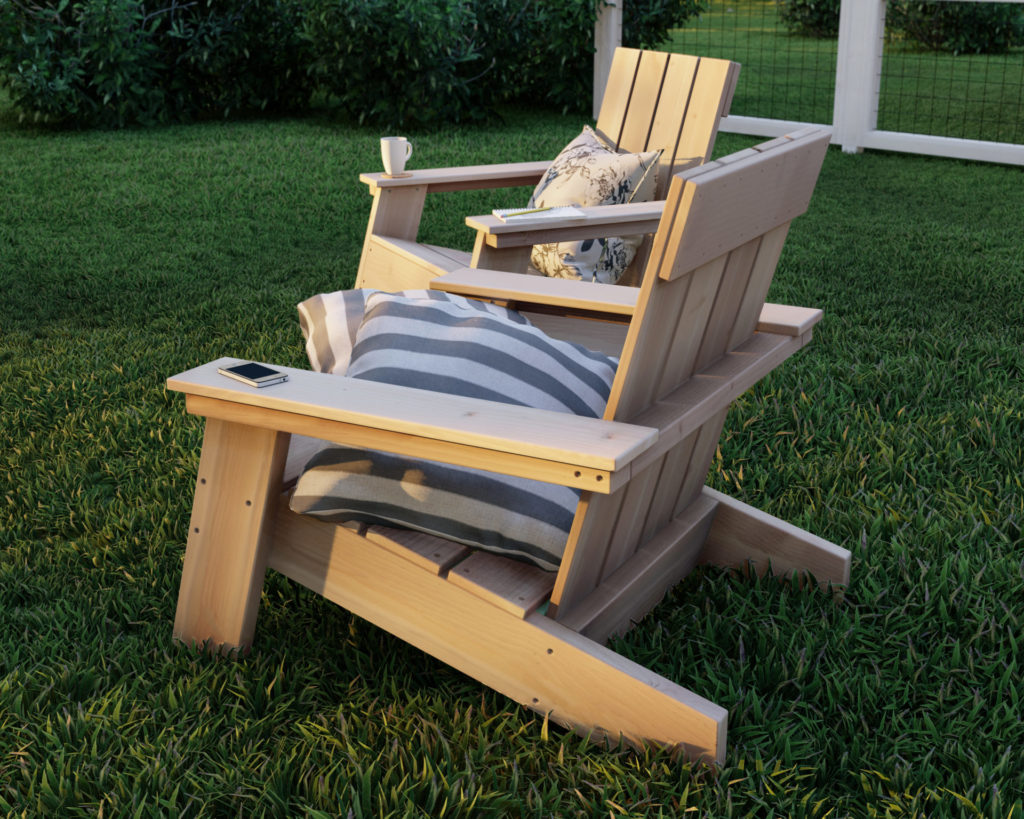
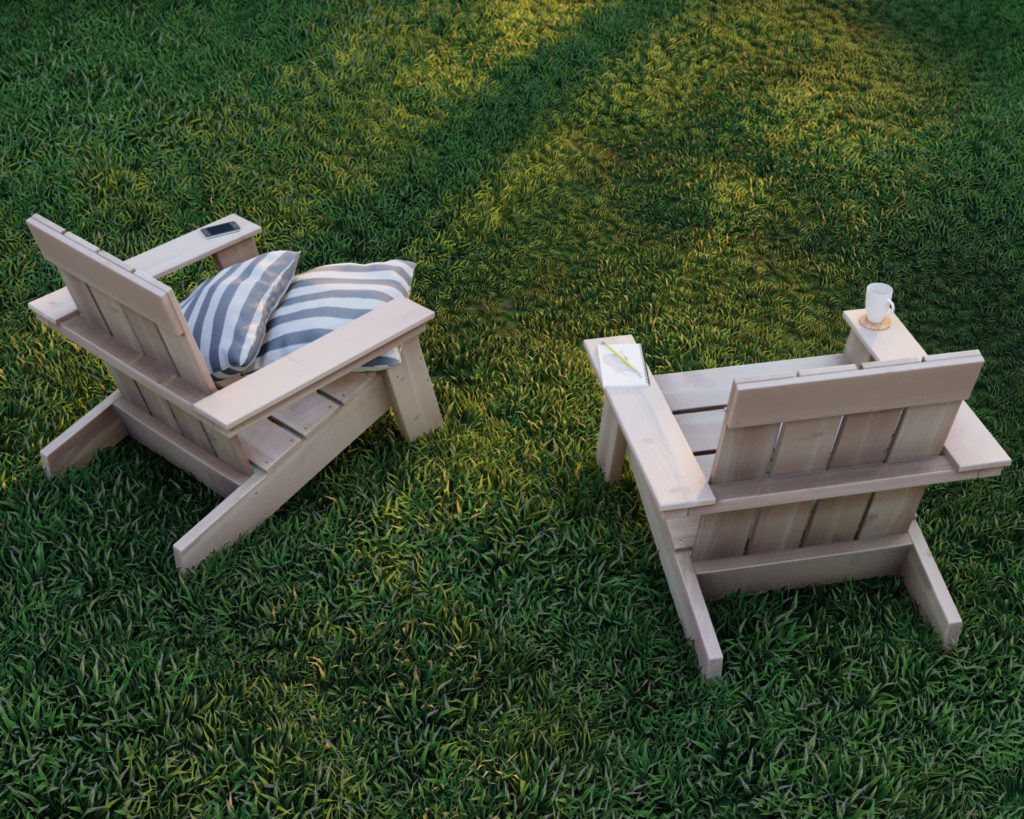
This patio chair is easy to build and features broad arm rests that can be used to hold cups, phones, notepads, and more. The sturdy construction and comfortable design make it perfect for relaxing on your patio or deck.
The DIY Adirondack chair construction material:
The Adirondack chair is made from common lumber using common dimensions that are available at most home improvement stores. The chair is comfortable and stylish, and it‘s easy to see why it‘s been a popular choice for outdoor furniture for over a hundred years.
It‘s better to use solid wood to build your Adirondack chair, rather than plywood or other alternatives. Solid wood is more durable and will last longer, its more stylish, and can be stained/painted to fit you home needs.
Who can build the DIY Adirondack chair?
This garden chair is easy to assemble with the step-by-step instructions provided in this post. I believe this essential piece of furniture would be a great project for beginners to woodworking and anyone with minimal woodworking experience. The DIY plans offered in this post include helpful description, images, diagrams, helpful links, and more to ensure that the DIY build is smooth, efficient, and easy.
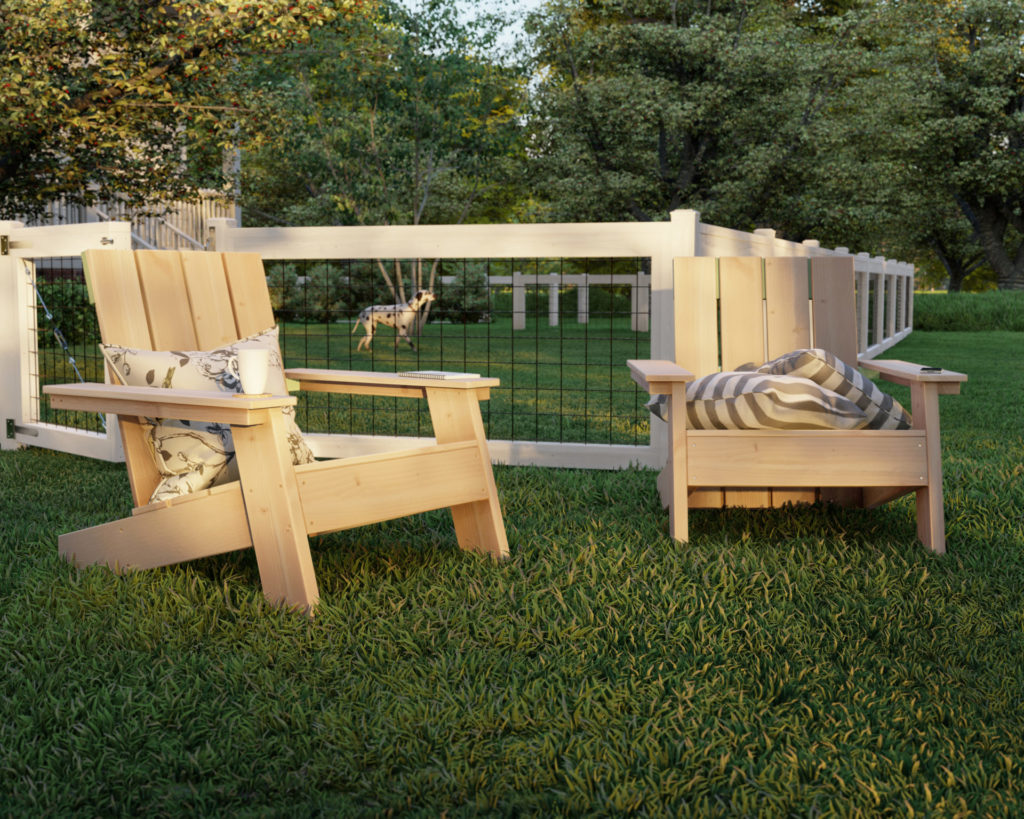
Where can I get DIY plans for the fence and gate in the background?
DIY plans can be found here.
Time to build
About 2 hours
Total cost of build
About $60
Skill level required
Beginner
Download the PDF plans
DIY Adirondack chair PDF plans
What is included in the PDF download?
Easy to read step by step instructions
Material list
Tools needed
3D illustrations
Tools for building the table base
- Miter saw
- Drill
- Impact driver with bit for screws
- Sander
- wood countersink drill bit
- 1 lb 3-1/2 inch screws
- 1/2 lb 1 inch screws
- Wood glue
- sand paper
Shopping list and cut list
Available with purchase of DIY PDF plan. Thank you for your support and making this website possible!
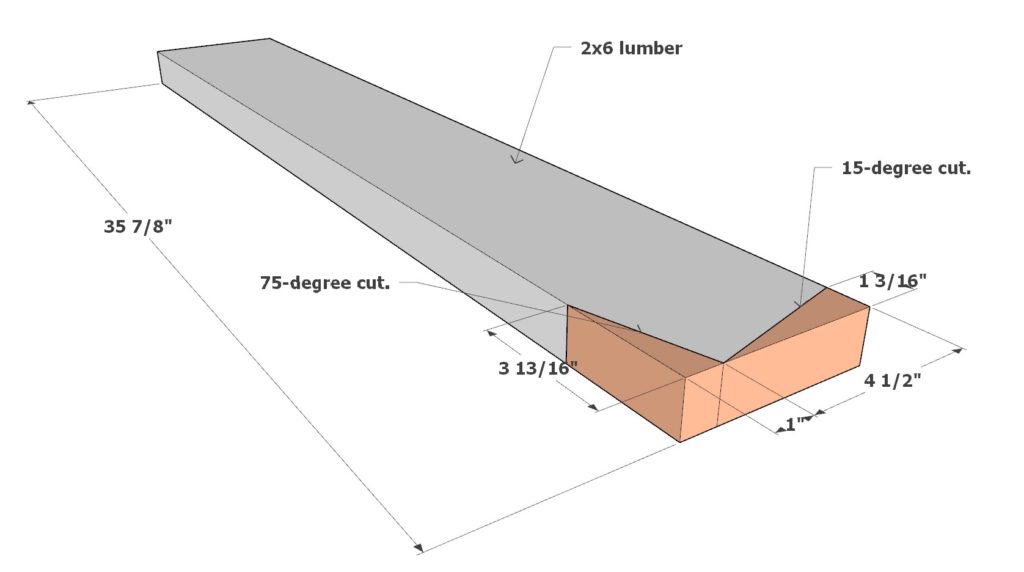
Step 1 (DIY Adirondack Chair seating frame construction)
First, build the Adirondack chair seating frame.
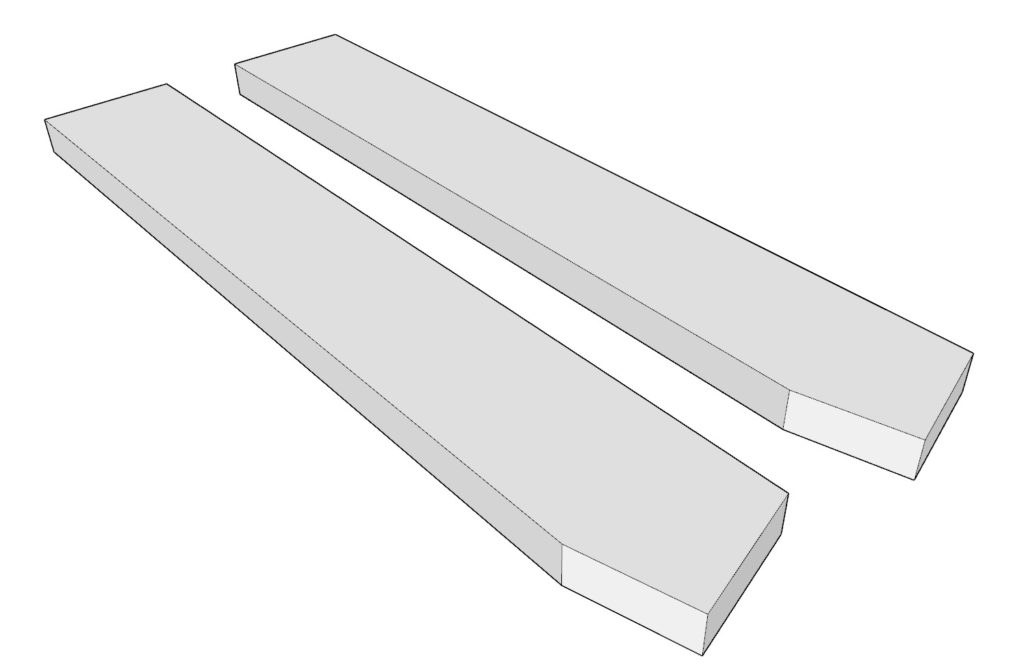
Cut two identical leg pieces that measure 35-7/8 inches long from 2×6 lumber. These leg components need to have one side tapered off as indicated below with the orange color.
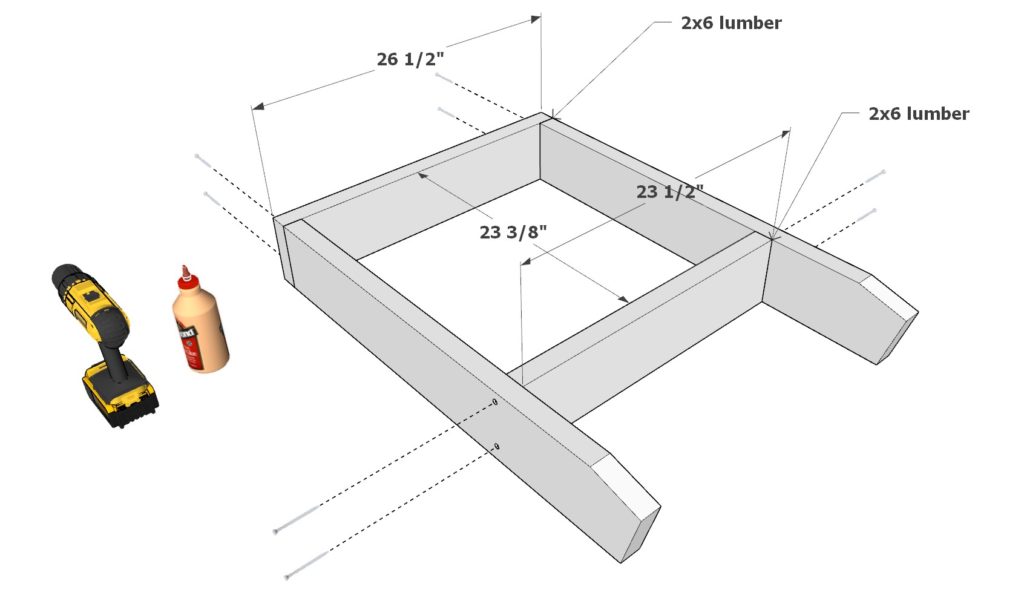
Next, add one 26-1/2 inch 2×6 lumber piece and one 23-1/2 inch 2×6 lumber pieces to the to leg pieces and arrange them as shown below. Predrill holes to prevent wood from splitting, add 3.5 inch screws, and add glue.
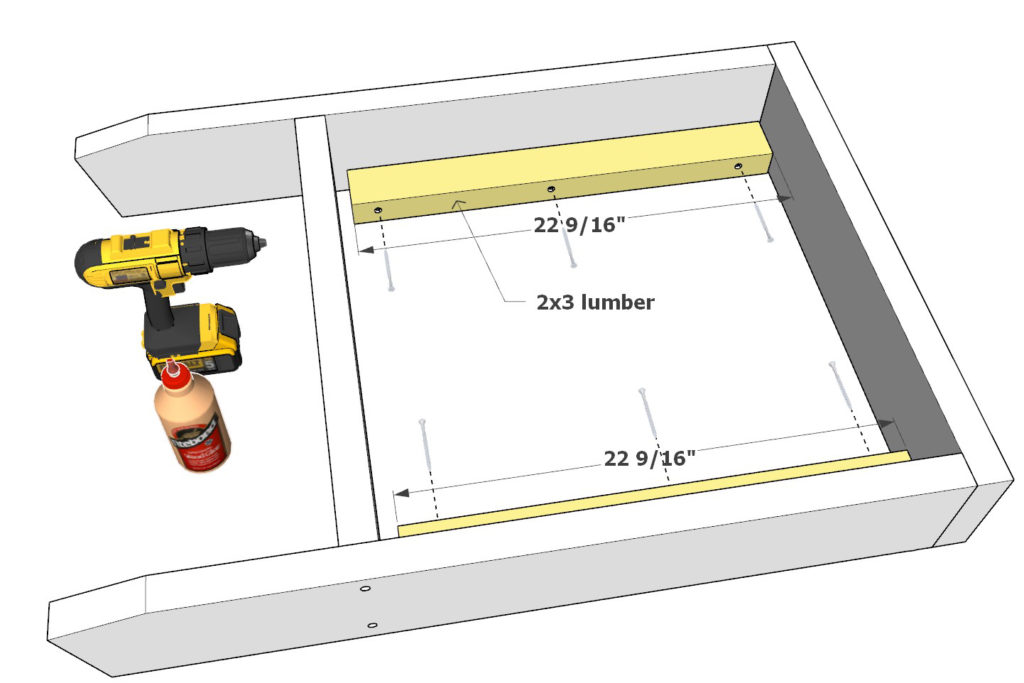
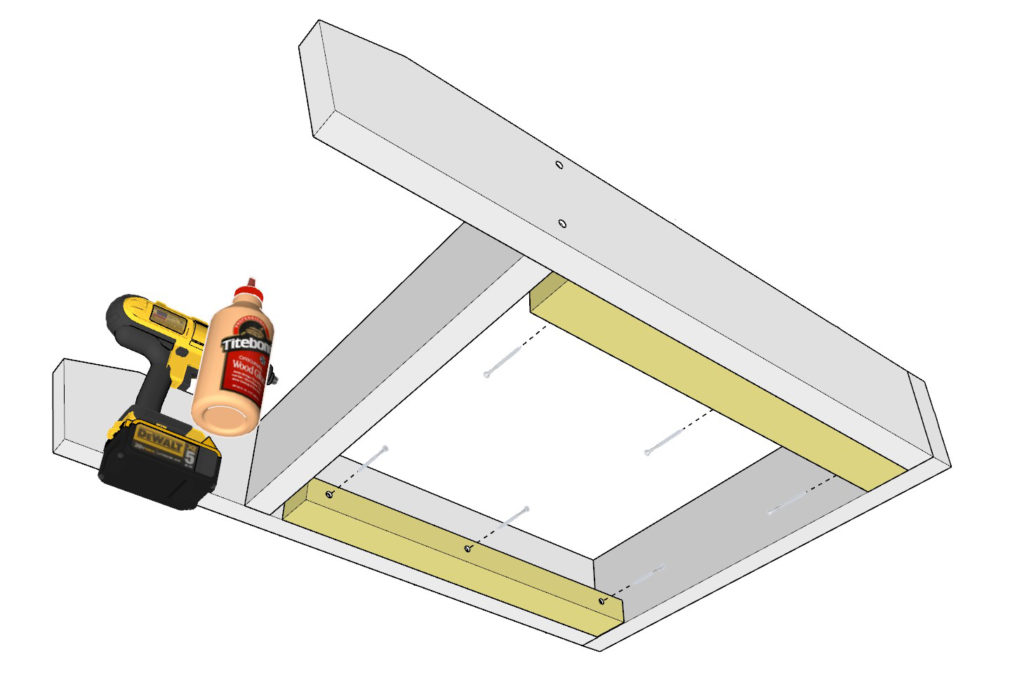
Next, add two 22-9/16 inch 2×3 lumber pieces to the interior of the seating frame. Predrill, add glue, and add 3.5 inch screws.
Step 2 (DIY Adirondack chair front leg assembly)
Next, attach the two front legs of the DIY chair.
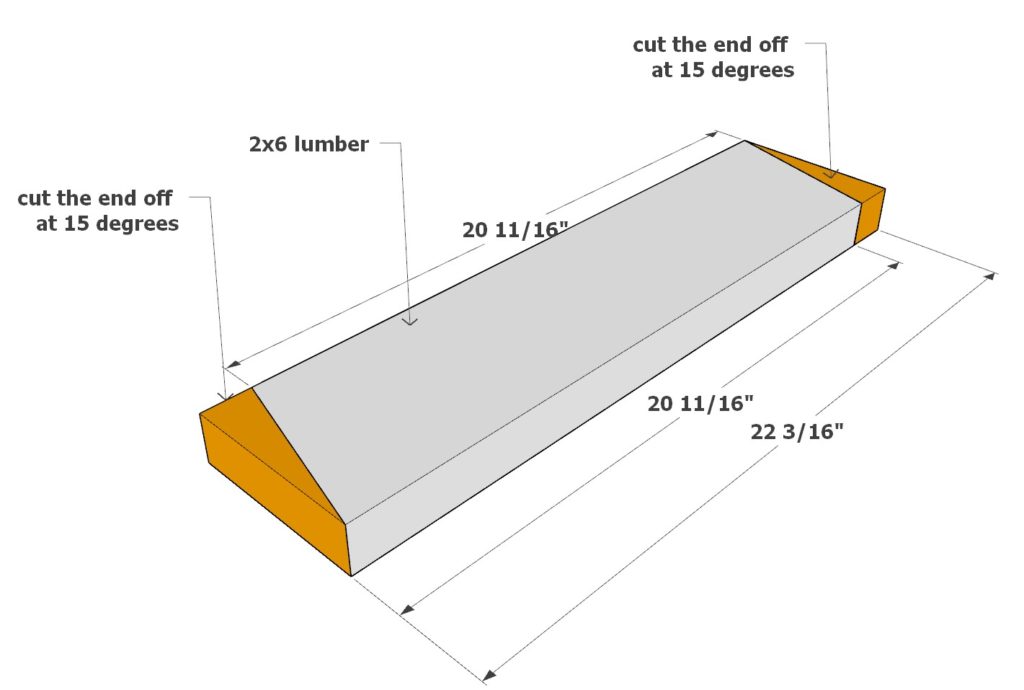
Cut two identical 22-3/16 inch long 2×6 lumber pieces that are cut at 15-degree angles on both ends as shown below. Cut away the part indicated in orange.
Next, attach the front legs at a height of 8-15/16 inches as shown below. Predrill, add 3.5 inch screws, and add glue.


Step 3 (Adding the back rest frame for the DIY Adirondack Chair)
Next, add the back rest for the DIY Adirondack Chair.
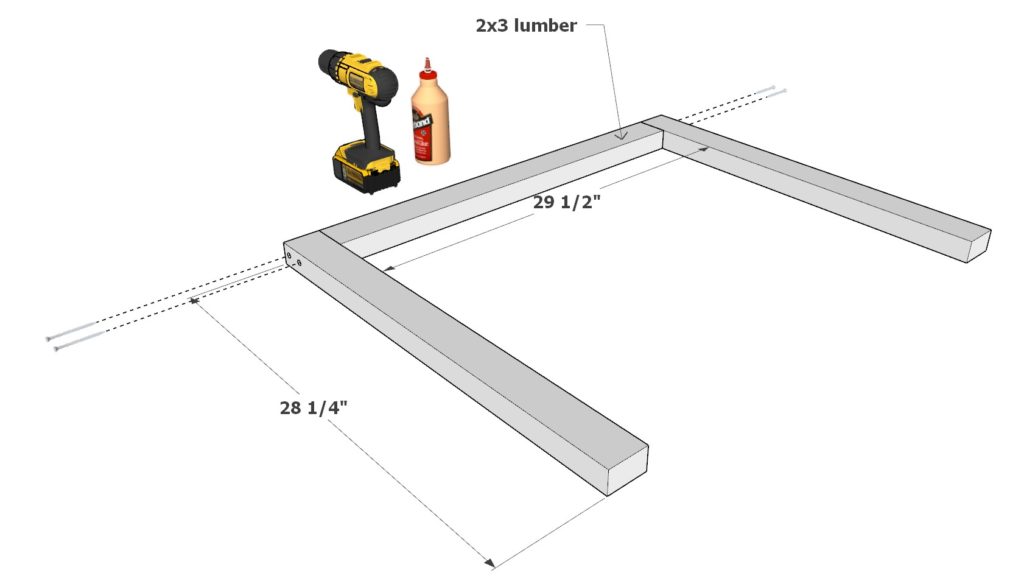
Take two 28-1/4 inch 2×3 lumber pieces and one 29-1/2 inch 2×3 lumber pieces and arrange them as shown below. Join them together with glue and 3.5 inch screws.
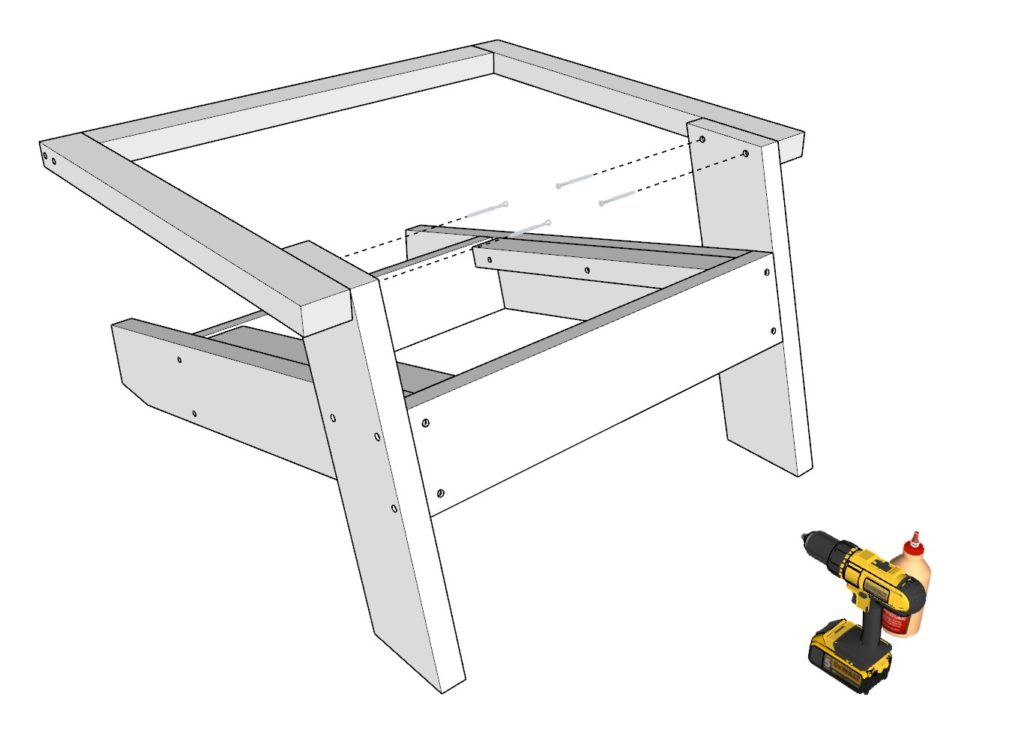
Join the back rest frame to the rest of the chair using 3.5 inch screws, glue, and predrilling.
Step 4 (DIY Adirondack Chair back rest assembly and installation )
Next, add and install the back rest of the DIY chair.
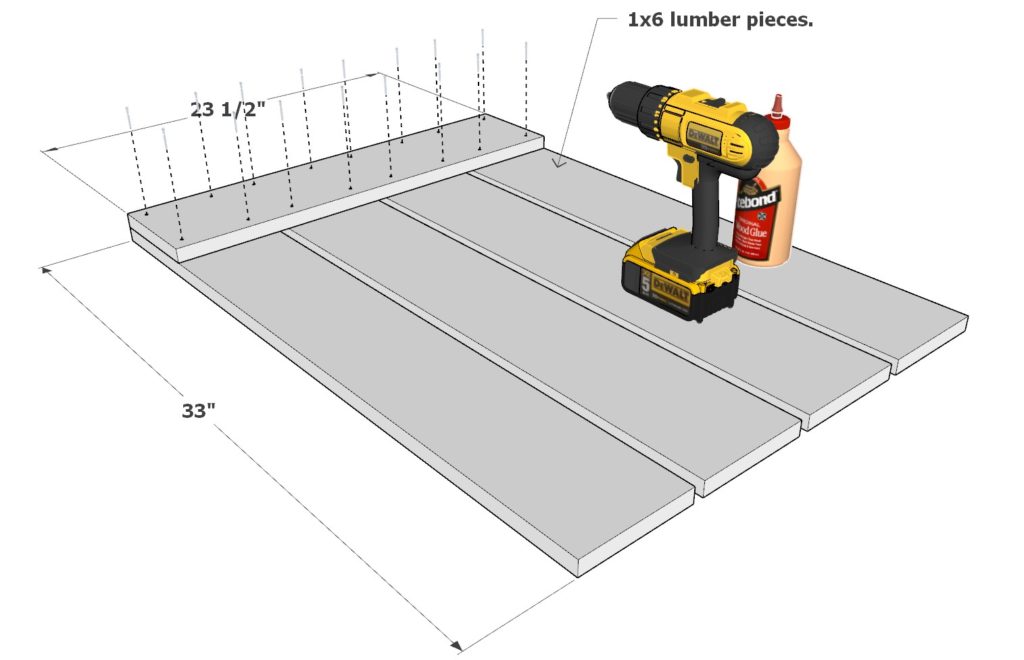
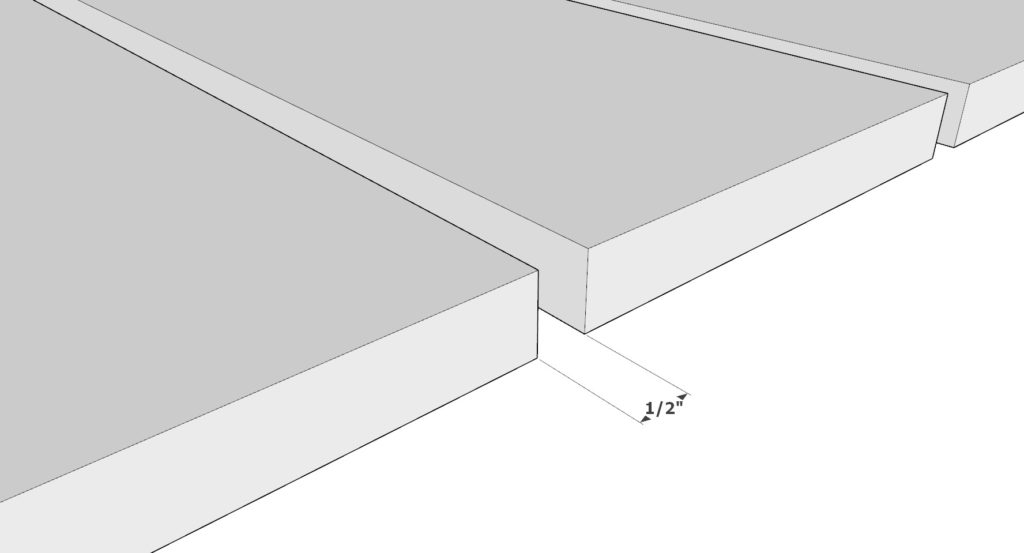
Take four 33 inch 1×6 lumber pieces and one 23-1/2 inch 1×6 lumber pieces and join them together using either small 1 inch screws or nail gun with small 1 inch nails and glue. The gaps between the 33 inch 1×6 lumber pieces needs to be 1/2 inches apart.
Next, take the back rest and attach it to the chair. Slide the back rest into the grooves as indicated below. Attach the back rest using 1 inch screws and glue.
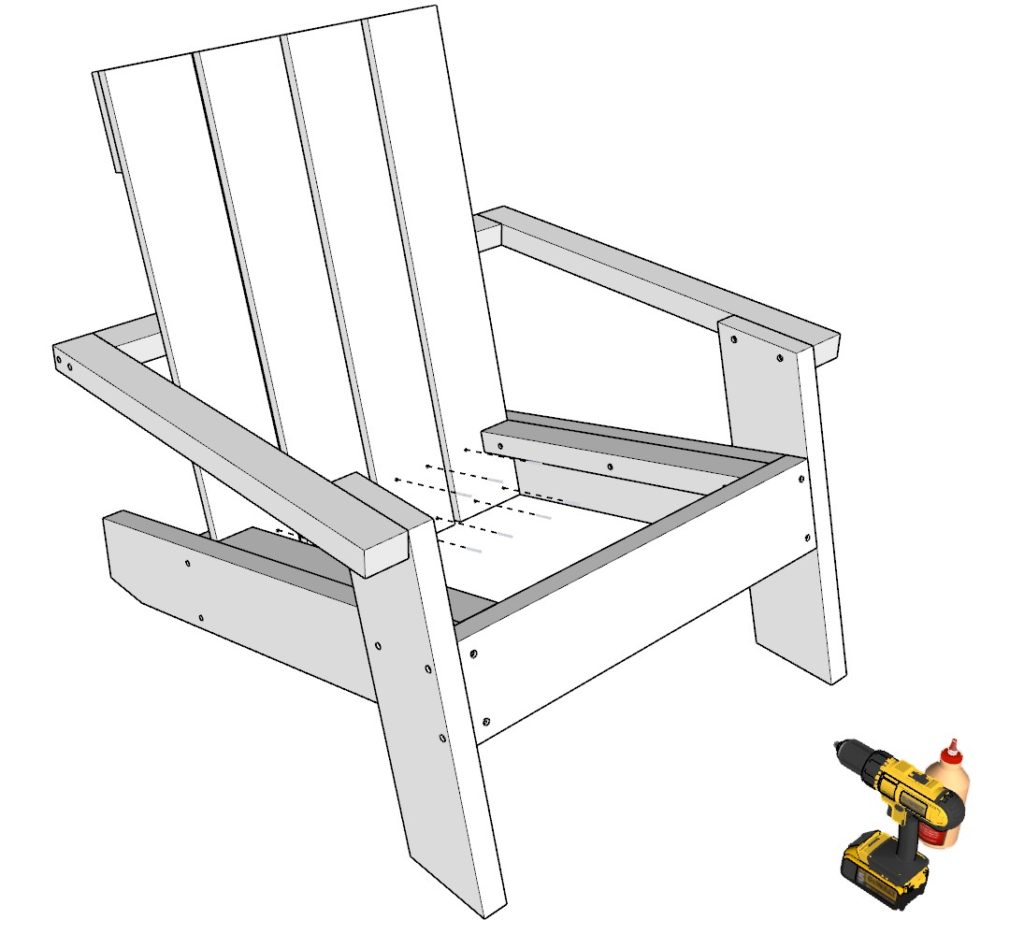
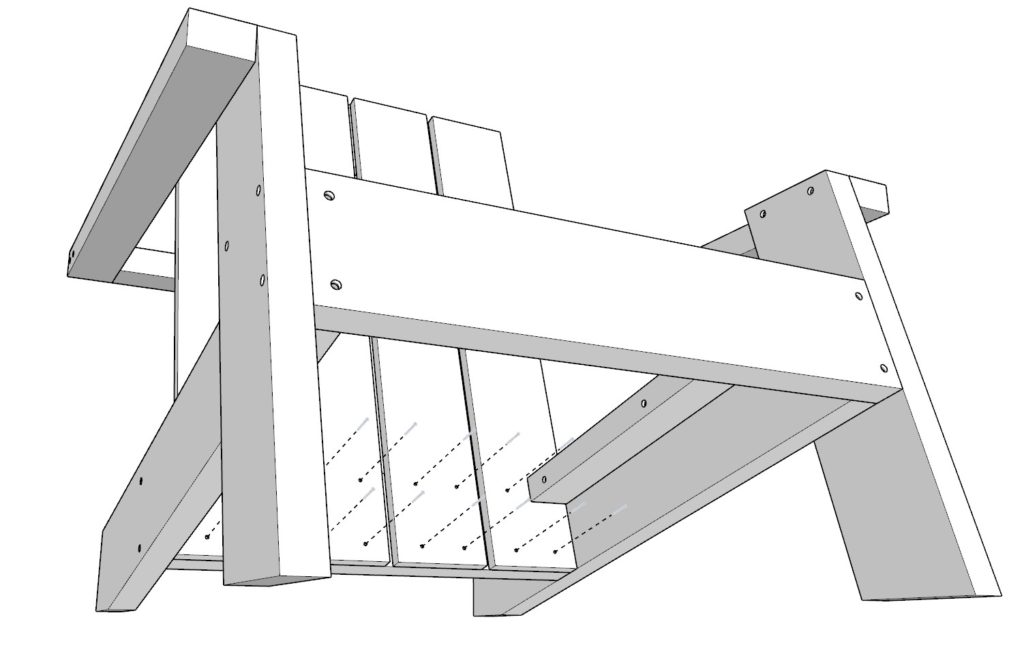
Step 5 (Adding seat decking and arm rest pieces to the DIY outdoor chair)
Next, add the decking and arm rest pieces to the chair.
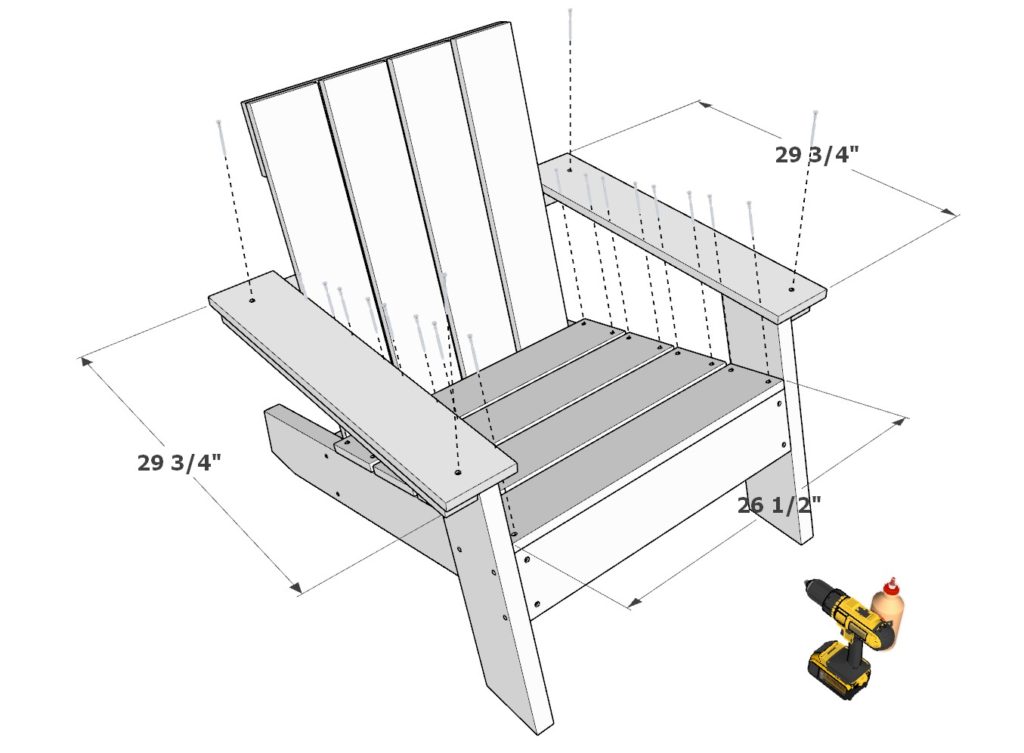
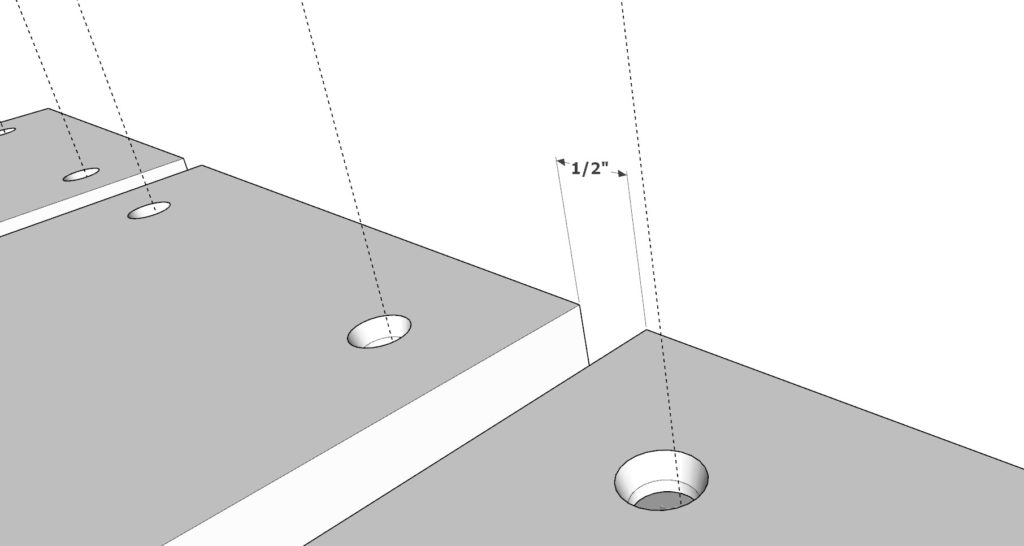
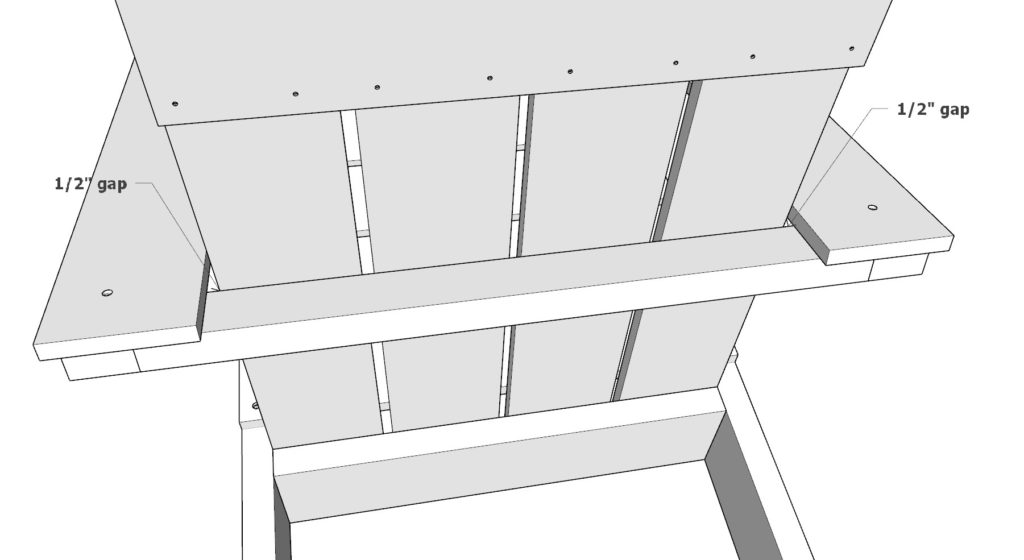
Take two 29-3/4 inch 1×6 lumber pieces and four 26-1/2 inch 1×6 lumber pieces and add them to the chair. use 1 inch long screws, predrilling, and glue to join the pieces together.
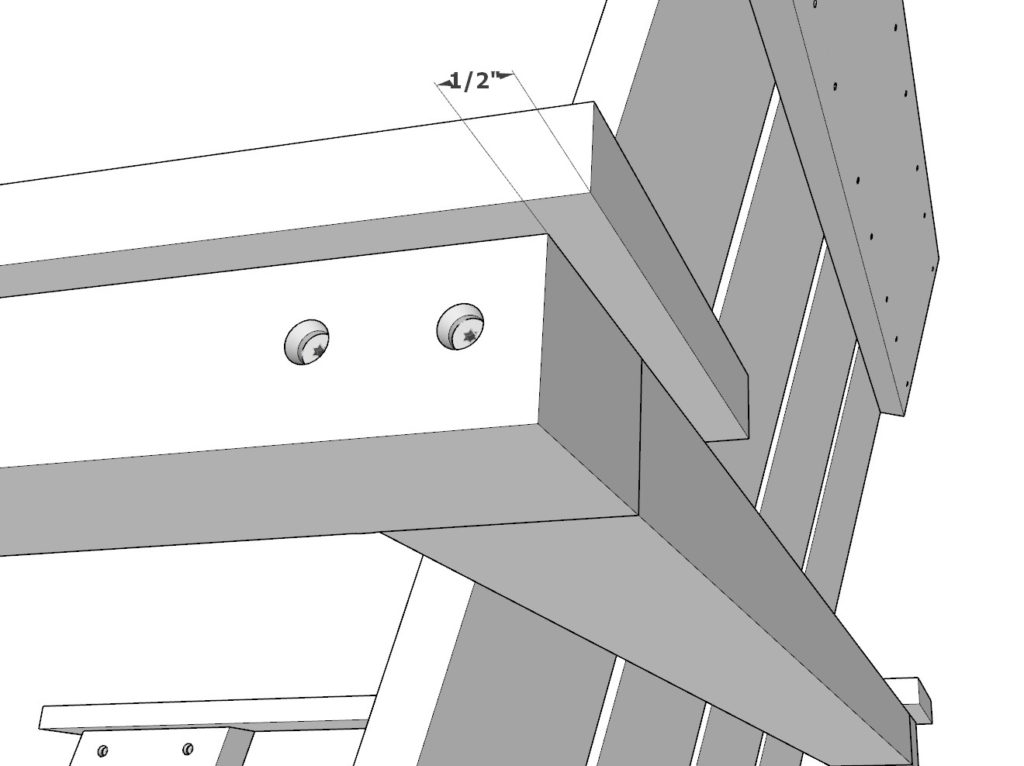
Space out the seating decking pieces 1/2 inches apart. Ensure a 1/2 inch gap between the arm rest 1×6 pieces and the back rest as indicated below. Ensure a 1/2 inch indentation for the arm rests in relationship to the back rest frame support as shown in the final photo of this step.
How to Stain the DIY Adirondack Chairs
When it comes to staining the DIY Adirondack Chairs, there are a few things you need to keep in mind in order to get the best results. First of all, make sure that you sand the wood down completely before applying any stain. This will help to ensure that the stain goes on evenly and that the final product looks professional. If you have any rough spots on the wood, sand them down as well so that the stain can penetrate evenly.
After sanding, I add a wood conditioner. A wood conditioner helps to even out the absorbency of the wood, so that the stain is applied more evenly. If you don’t use a conditioner, the stain can come out patchy and uneven.
Once the wood is sanded, it’s time to apply the stain. Make sure to wear gloves and protective clothing, as stain can be messy. Apply the stain evenly with a brush, making sure to get into all the nooks and crannies. Once the stain is applied, let it sit for a few minutes before wiping off any excess with a rag. Allow the stain to dry completely before moving on to the next step.
If you want to add a topcoat to the DIY Adirondack Chair, now is the time to do it. Apply a thin layer of topcoat evenly over the whole surface. This will help to protect the stain and make it last longer. I use a spray gun and a water based polyurethane so that the result comes out looking more professional.
How to paint the DIY Adirondack Chairs
When painting a DIY Adirondack Chair, it is important to choose a paint color that is durable and easy to clean. A high-gloss or semi-gloss paint is a good choice for a DIY Adirondack Chair since it will be easy to wipe down and will resist dirt and stains. A light color may show dirt and scuffs more easily than a dark color.
Before beginning to paint, it is important to prep the surface. This means removing any staples, nails, or screws, sanding down rough spots, and cleaning the surface with a degreaser or TSP. Once the surface is prepped, you can begin painting. Start with a primer, then paint the DIY Adirondack Chair with your chosen color. A high-quality paintbrush, paint gun, or roller will give the best results.