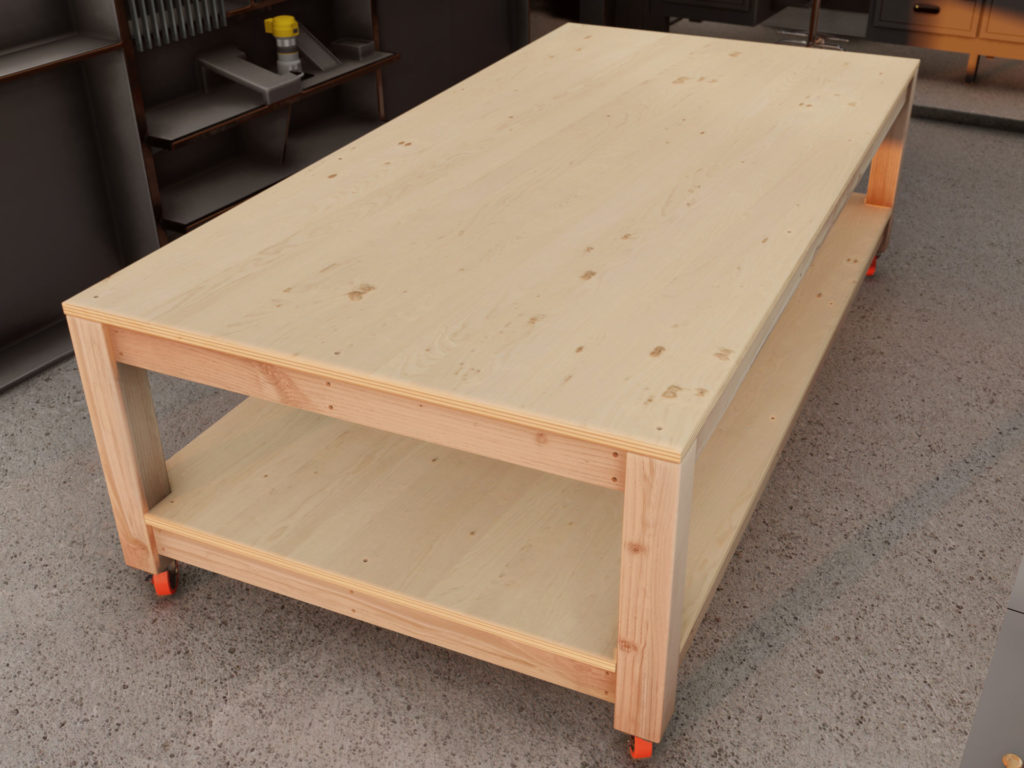
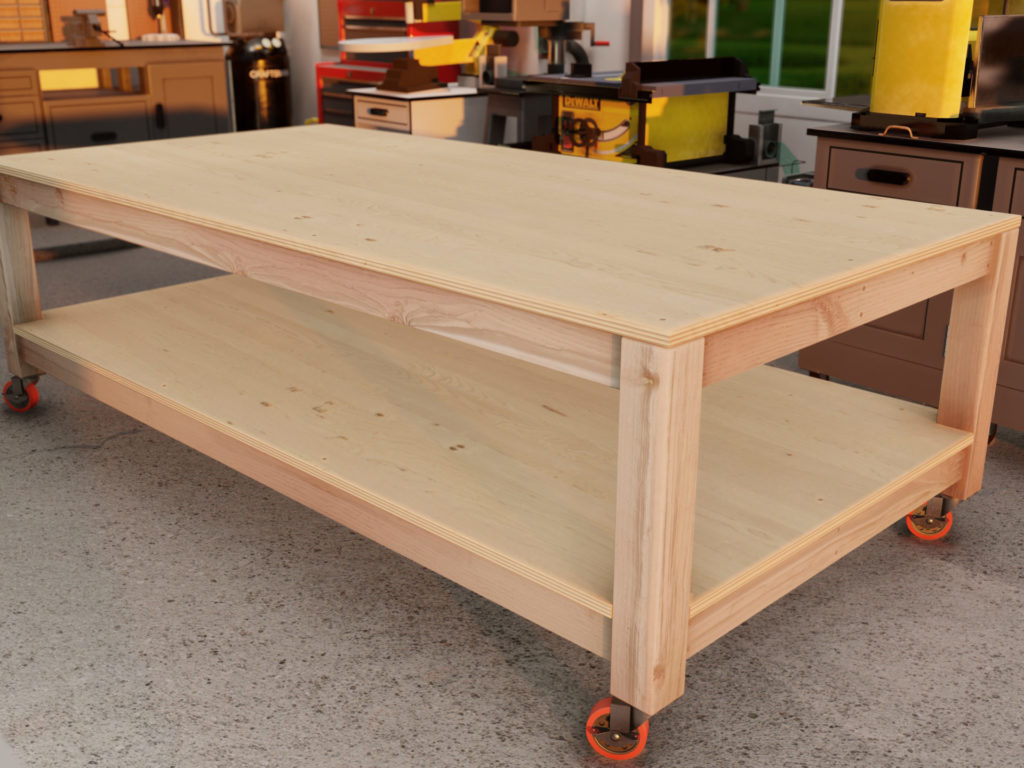
Overview of the DIY workbench.
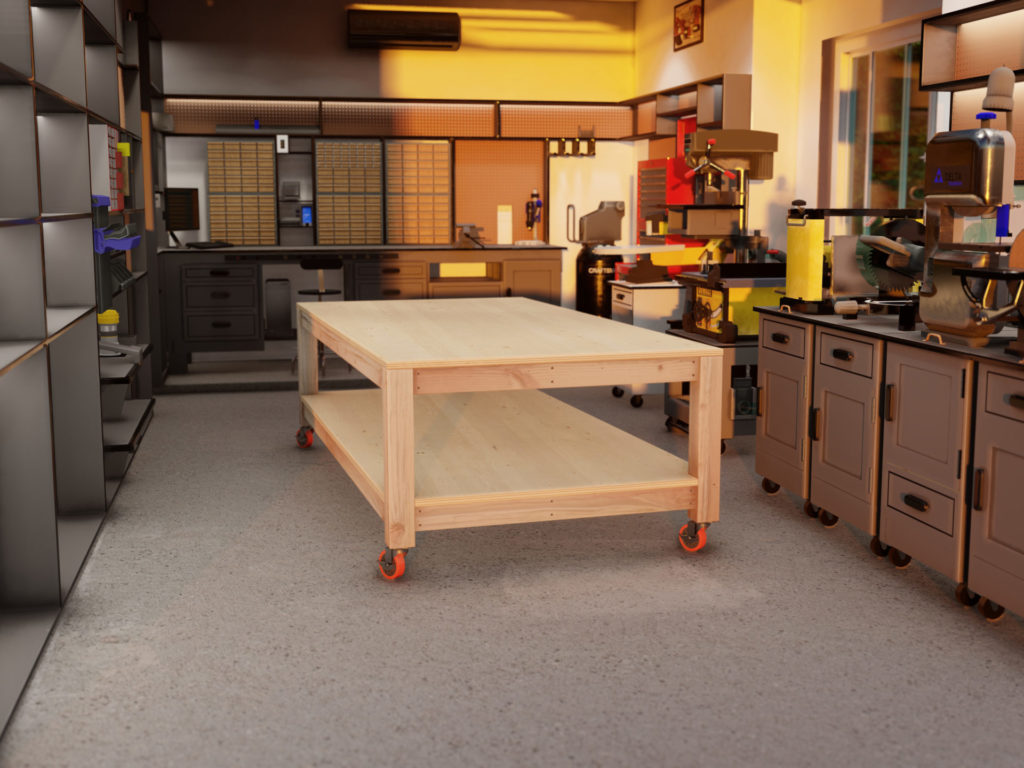
In this post you will find step by step instructions on how to build the ultimate DIY garage workbench that can absorb a real pounding. This work bench can be fully loaded with tools and raw materials and provide a large work area that can be moved around and can be easily tucked into the corner of a garage, basement, or warehouse.
Why build a DIY workbench?
Every workshop needs a quality work surface, and this design has proven itself over the years. I have personally built, stained, painted countless furniture pieces on this work bench design. One of the best parts about the design is that the top plywood sheet can easily be replaced when needed. Simply unscrews the screws holding down the plywood sheet and attach a new 4×8 ft sheet. No cutting necessary. Attach more then one sheet to give a thick beefy look.
I typically build larger pieces of furniture like patio benches, sheds, and storage solutions. The extra workspace of this work bench great for that and is ergonomic for me so that all my work can remain at waist level. This bench glides on four 4 in. orange TPU heavy-duty swivel plate caster with brakes that each have a 250 lbs weight capacity. Because the workbench rolls on wheels, I can take it wherever I need it to go. I often roll it right up to my truck bed and slide out heavy lumber pieces directly onto the bench work top. This saves my back in the long run. I use it as a handy out-feed table when I use my table saw or when I am planing lumber pieces.
I have also appreciated the fact that this design is long enough to hold raw lumber pieces. It has largely replaced the need to build an additional lumber rack in my garage. This ultimately saving me valuable space.
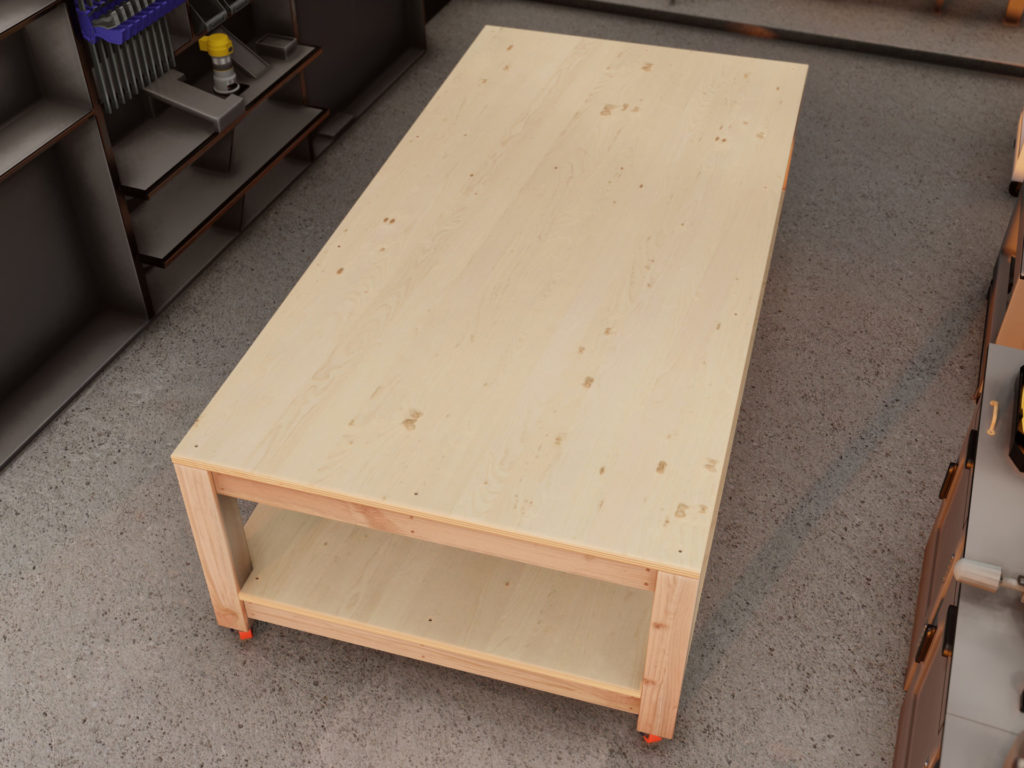
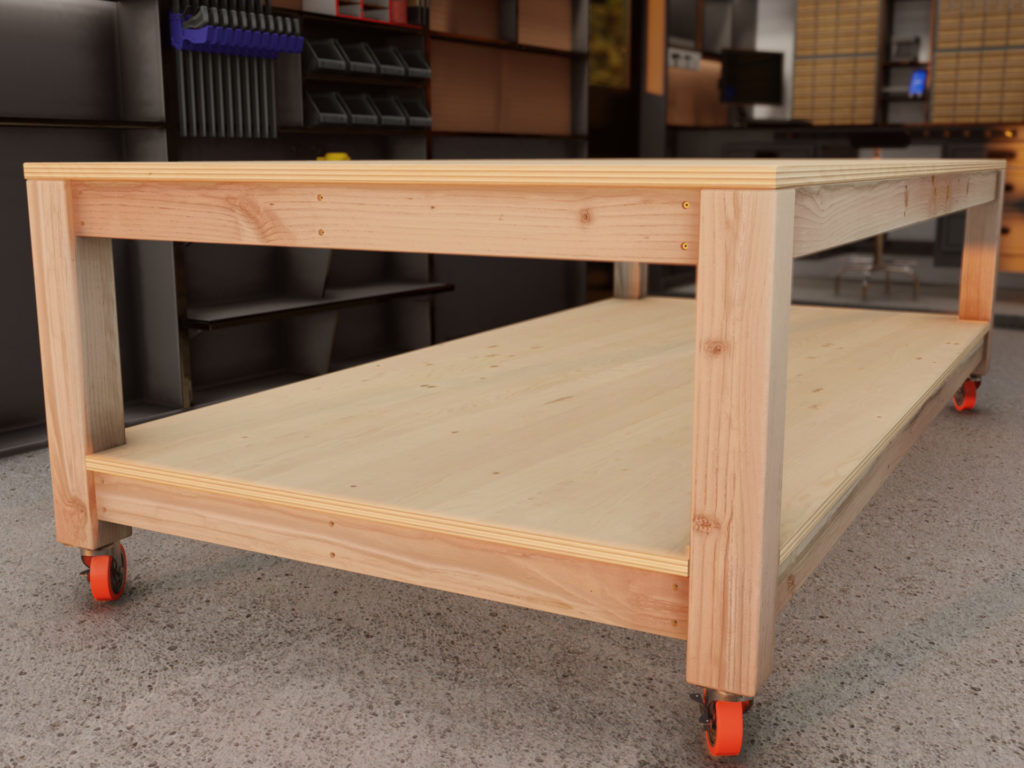
When I am finished with a project for the day, I can have everything stashed neatly away in five minutes! The extra storage space on the bottom shelf makes the workspace clean and clutter free.
Specs of the DIY workbench.
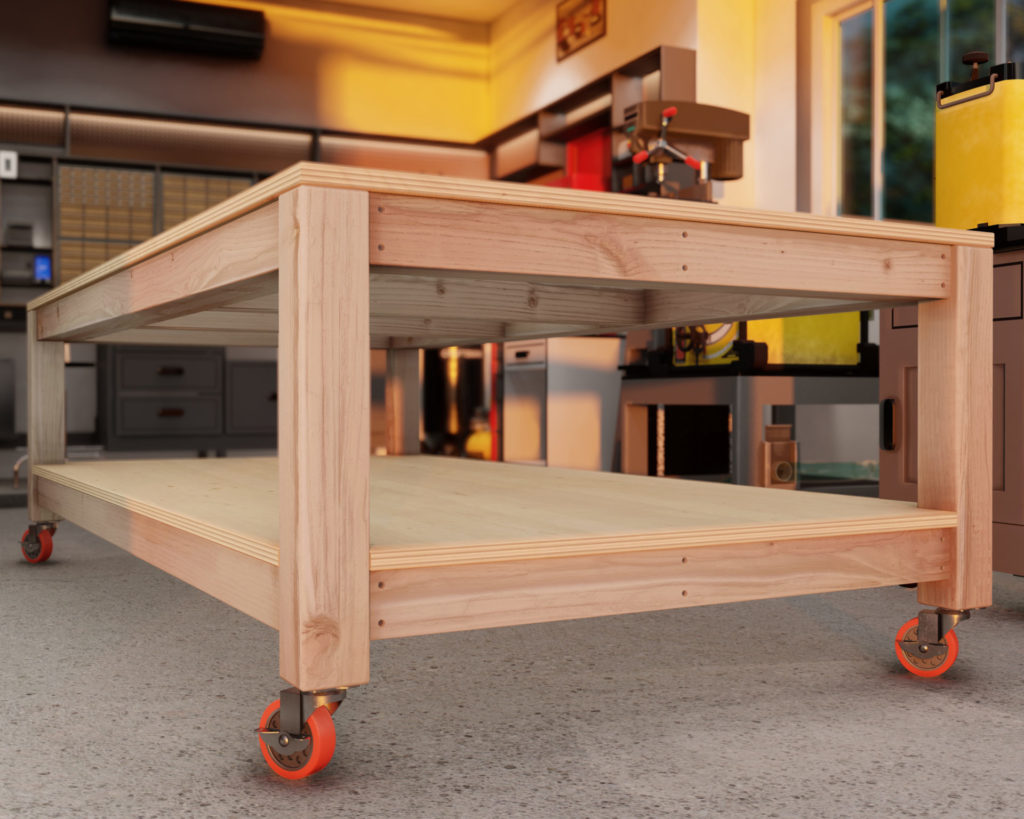
This simple and clean looking design only uses 2x4s, 4x4s, and 4ft x 8ft plywood sheets. You can customize it by adding a bench vise or pegboard. The bottom shelf can include a verity of storage boxes and shelves so that you can better organize and store power tools and other garage items.
The full-size permanent workbench has a 4ft x 8ft surface workspace that is big enough for serious woodworking and other hobby projects. With the mobile all-purpose craft table is you get a lot of room for working without sacrificing a lot of garage space. It stows away easily and can get out of the way when you’re not using it.
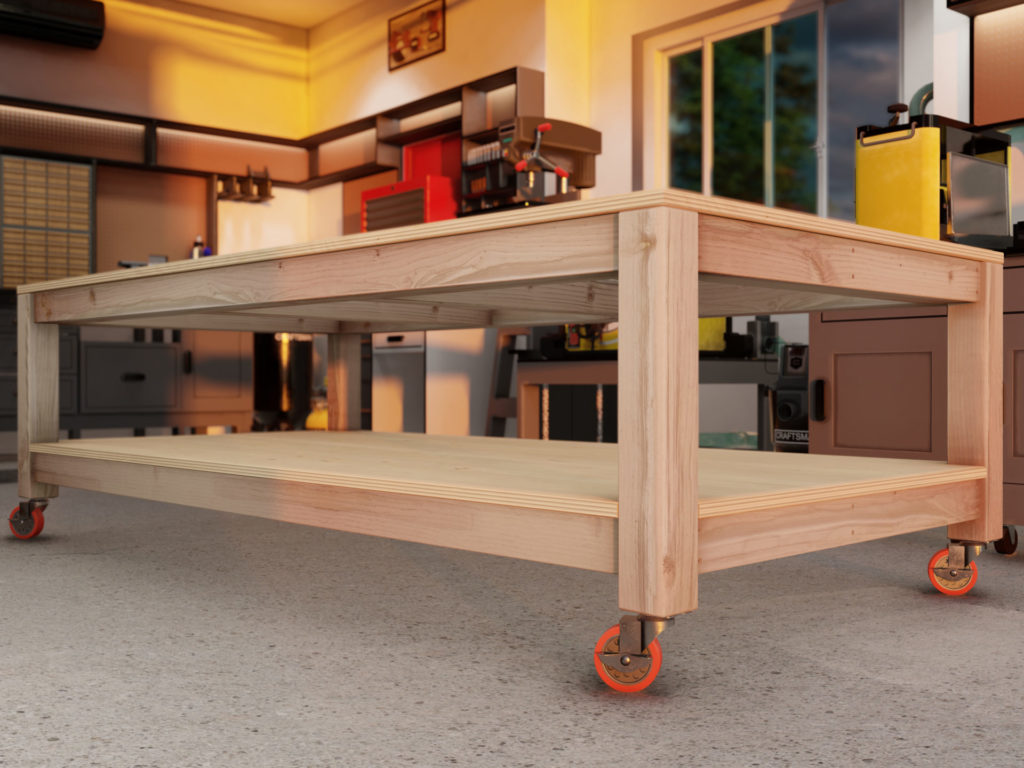
The bench is strong, practical, and super easy to build. This is a great build for anyone new to woodworking. I designed it to have simple and strong joints that don’t require any expensive and complicated tools.
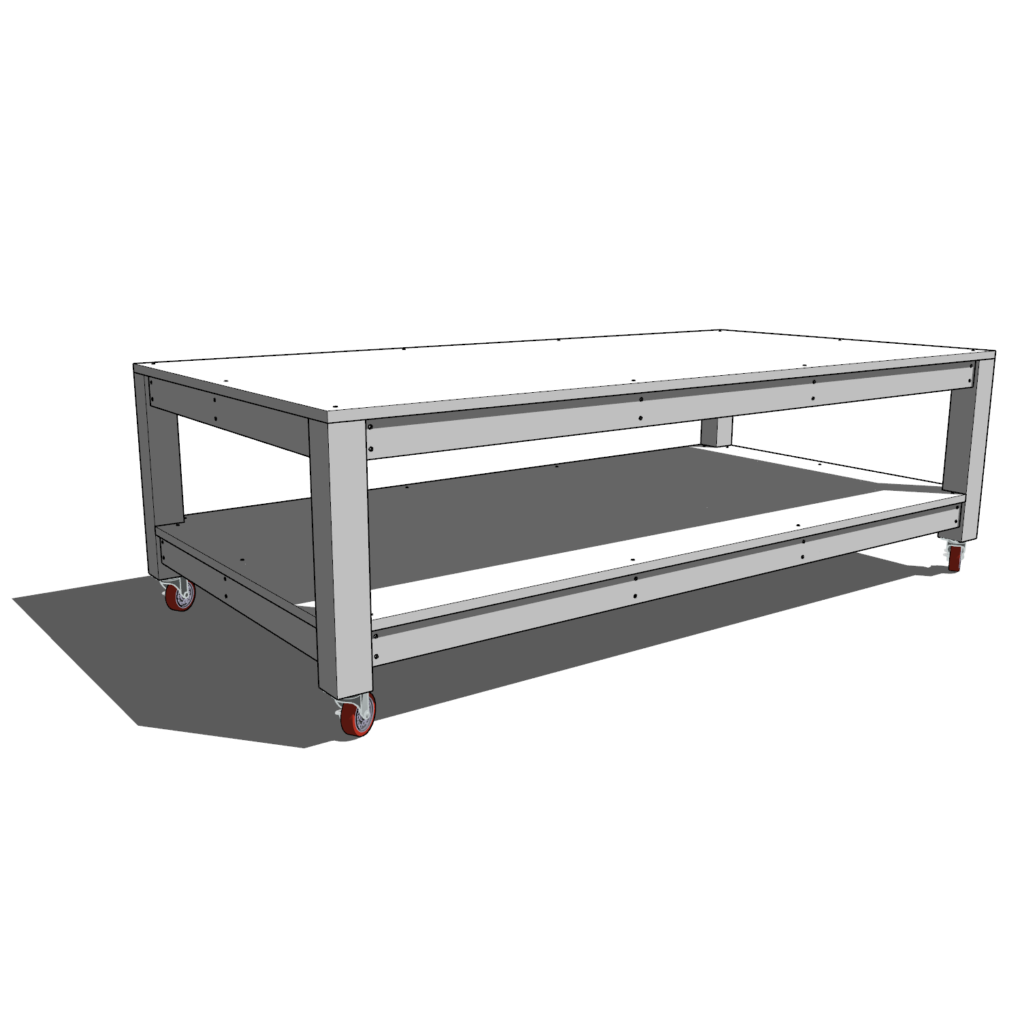
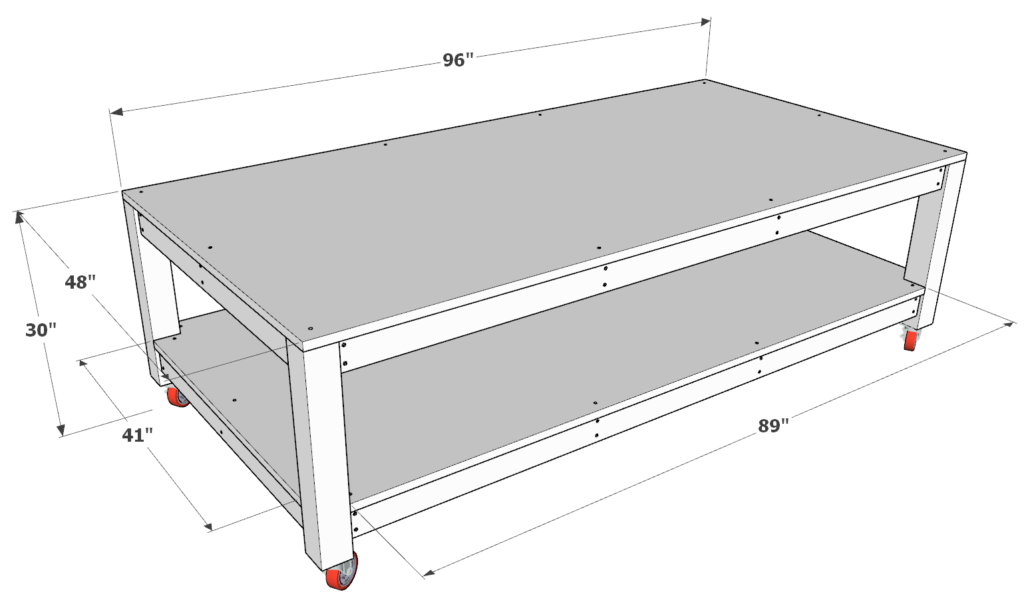
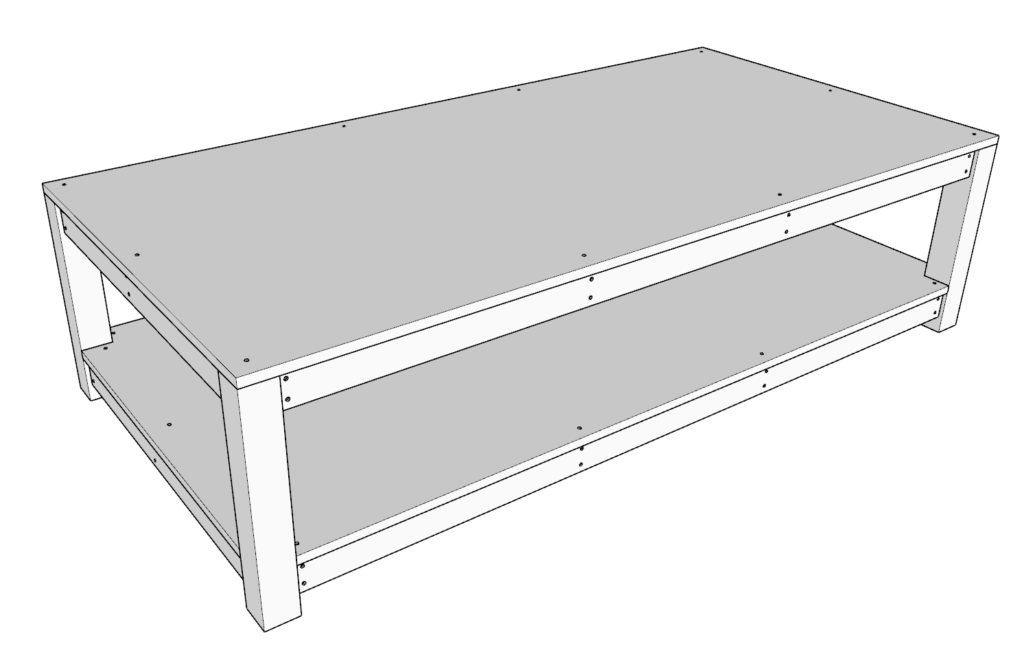
Dimensions of the DIY workbench.
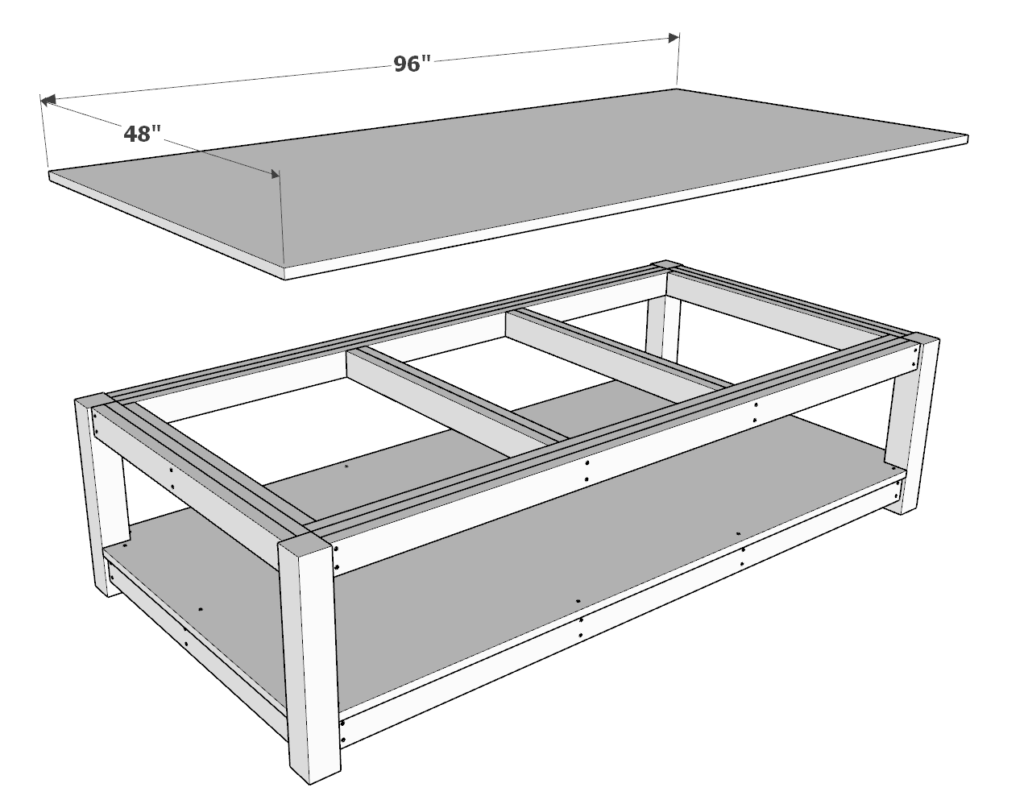
This work bench is 96 inches long, 48 inches wide, and 30 inches tall.

Time to build
3 hours
Total cost of build
About $260
Skill level required
Beginner – intermediate
Download the PDF plans
Plans for how to build the DIY workbench.
What is included in the PDF download?
- Easy to read step by step instructions
- Material list
- Cut list
- Tools needed
- 3D illustrations
- Helpful links to tools and materials needed for the project
Recommend tools for this project
- Saw (miter saw recommended for precision cuts)
- Drill
- Impact driver with bit for screws
- Sander
- Ratchet straps
- wood countersink drill bit
Discloser: Some links are affiliate links
Cut list and material list
Available with purchase of PDF plans.
Step 1 (DIY workbench)
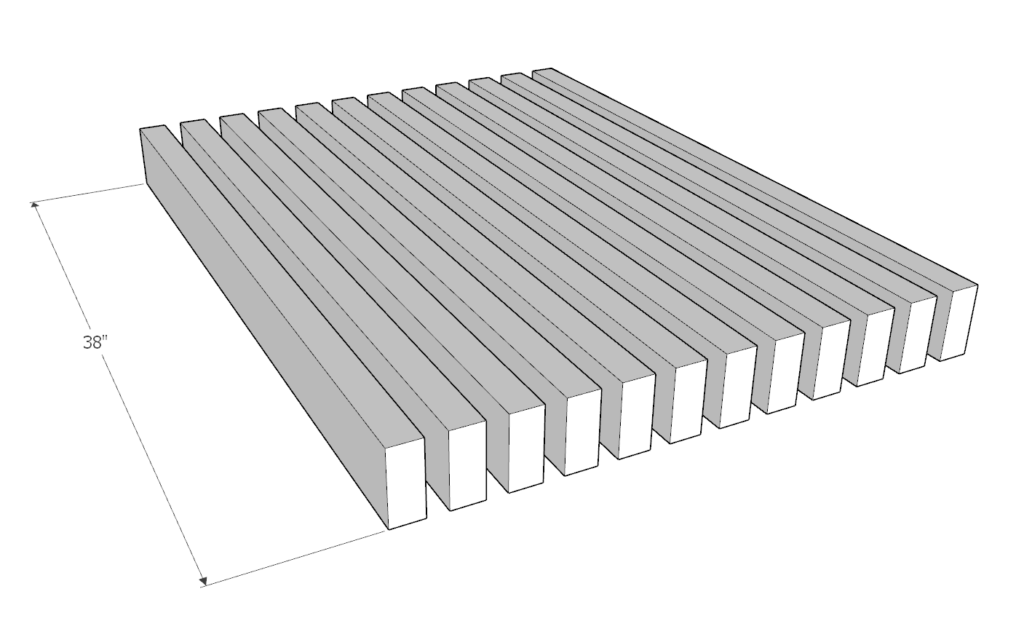
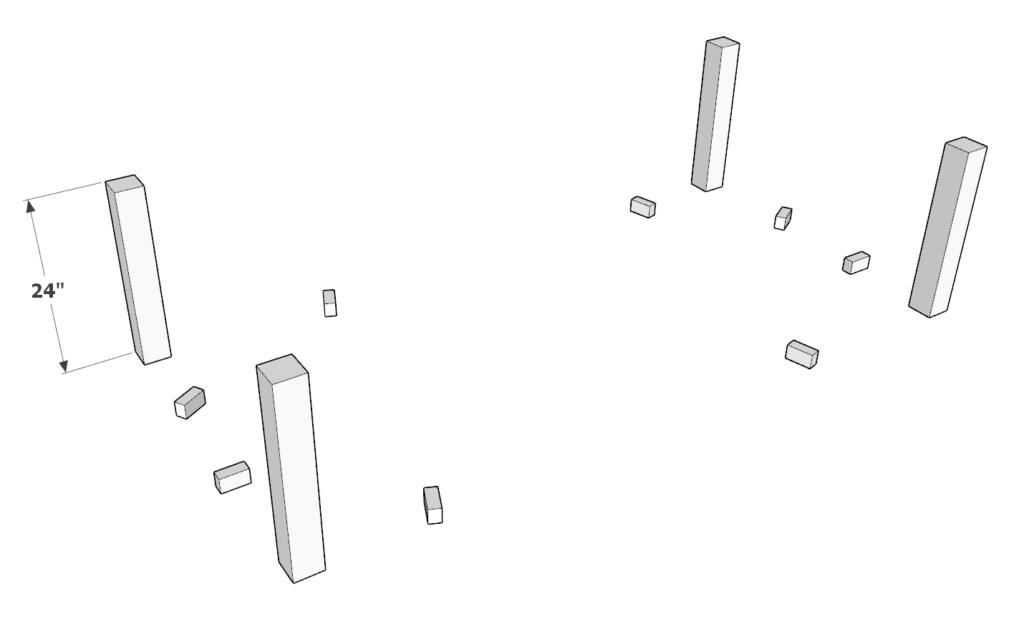
First, cut the lumber into the following dimensions:
- (12) 2 in x 4 in x 38 in
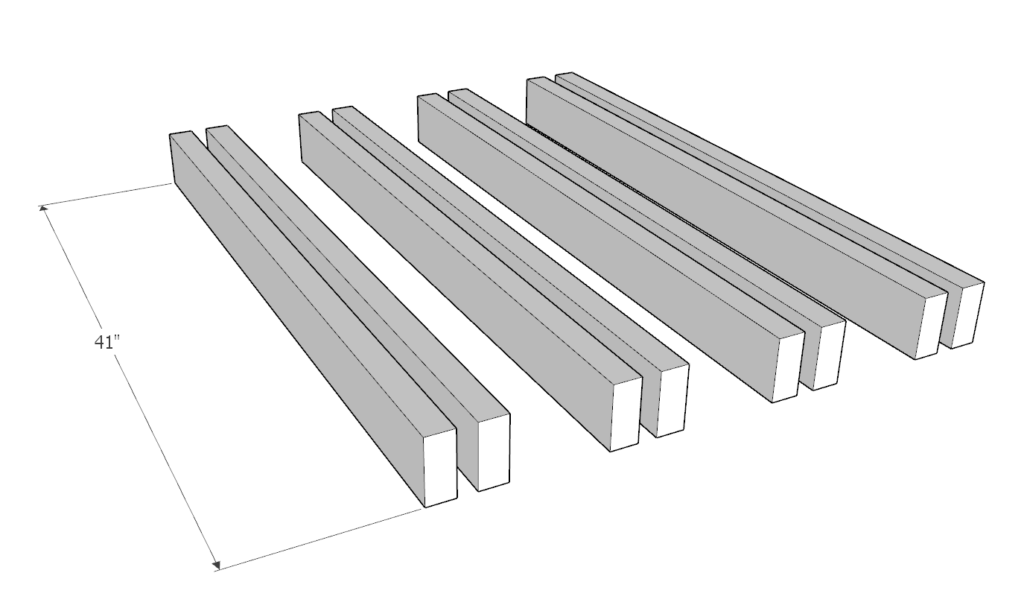
- (8) 2 in x 4 in x 41 in
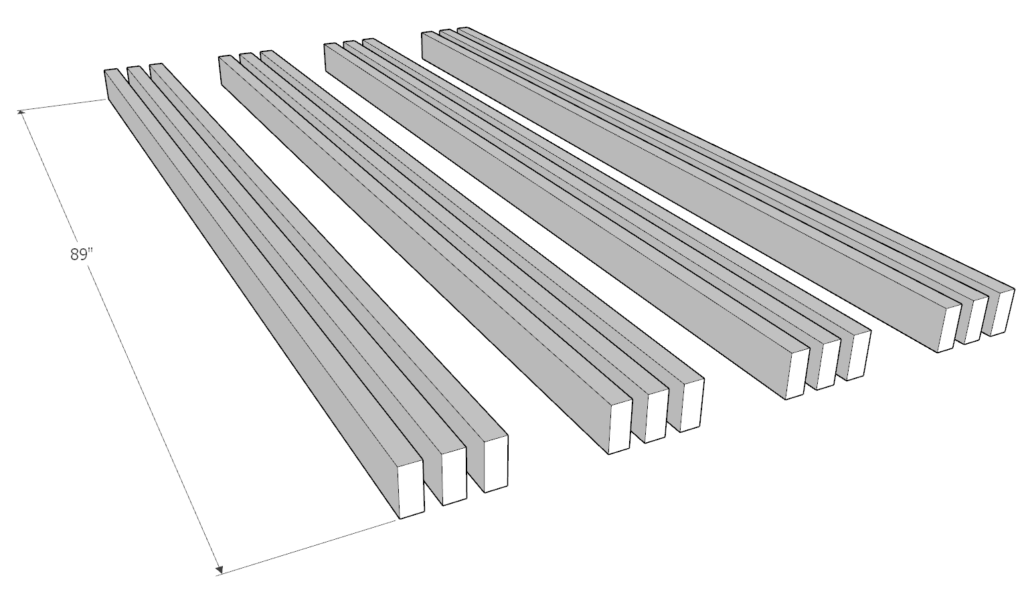
- (12) 2 in x 4 in x 89 in
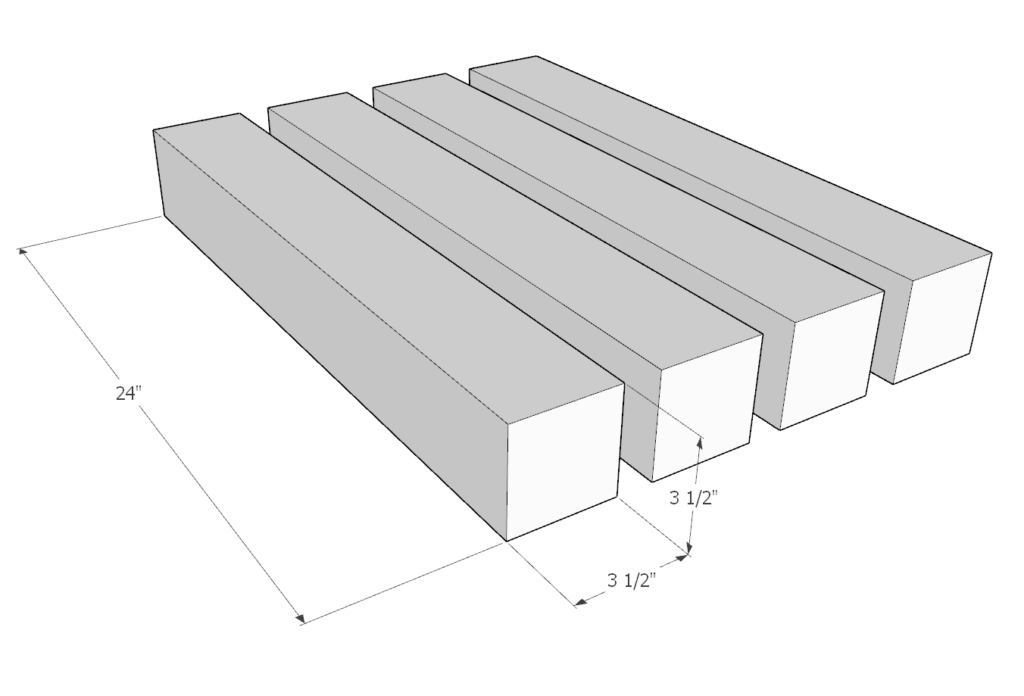
- (4) 4 in x 4 in x 24 in
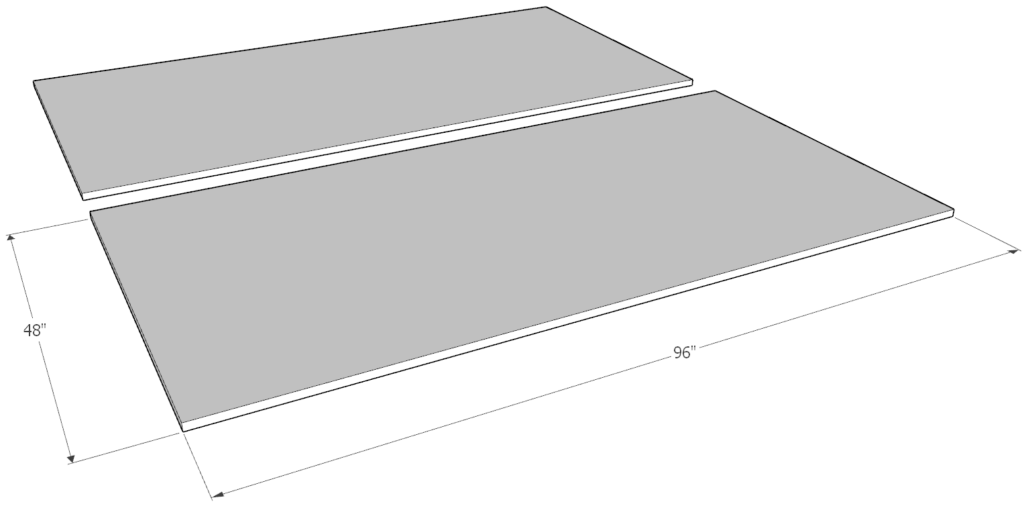
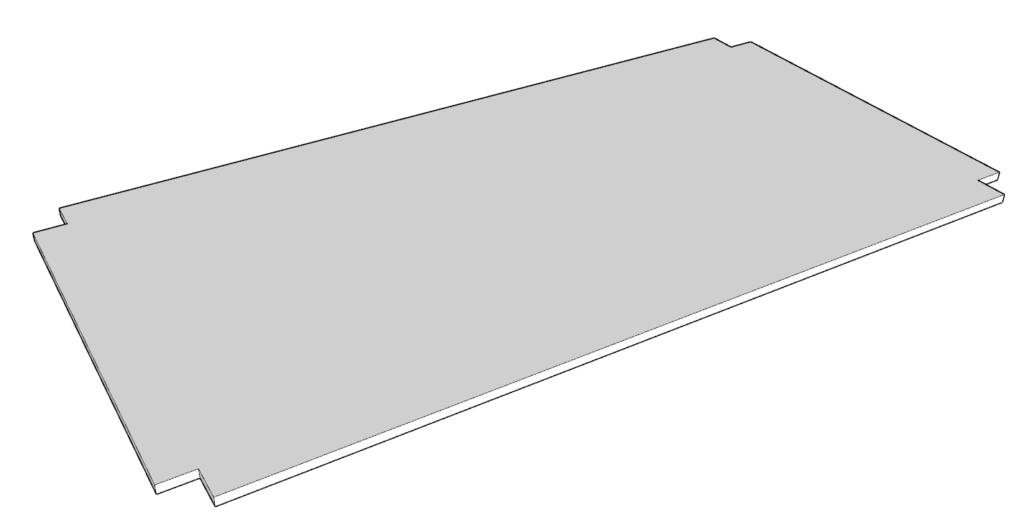
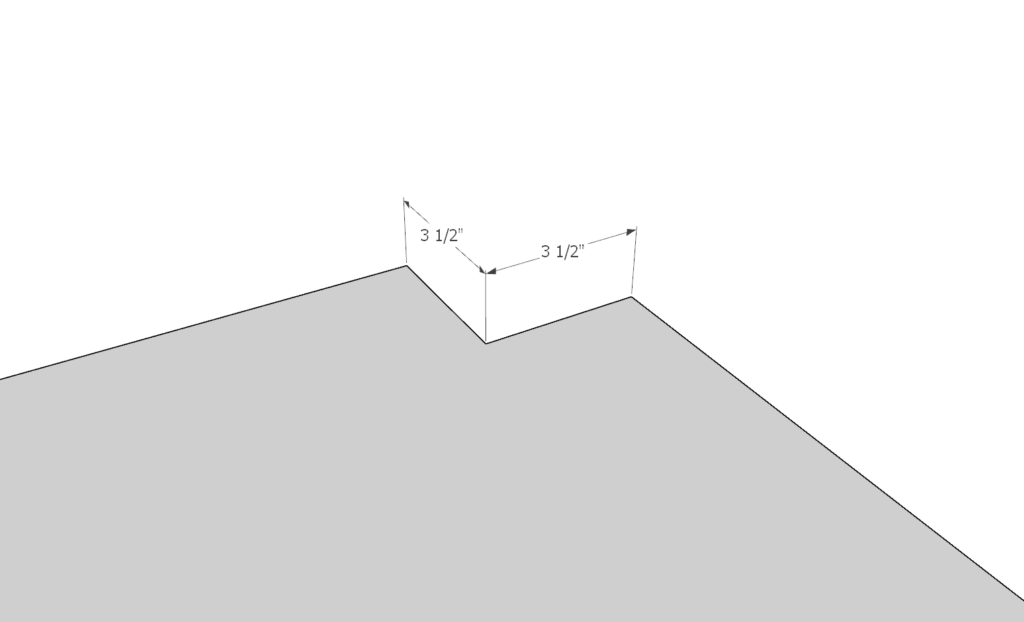
- From the plywood sheets, take ONE of the sheets and indent the corners by 3.5 inches x 3.5 inches (see diagram). The second plywood sheet should NOT be cut.
Step 2 (DIY workbench)
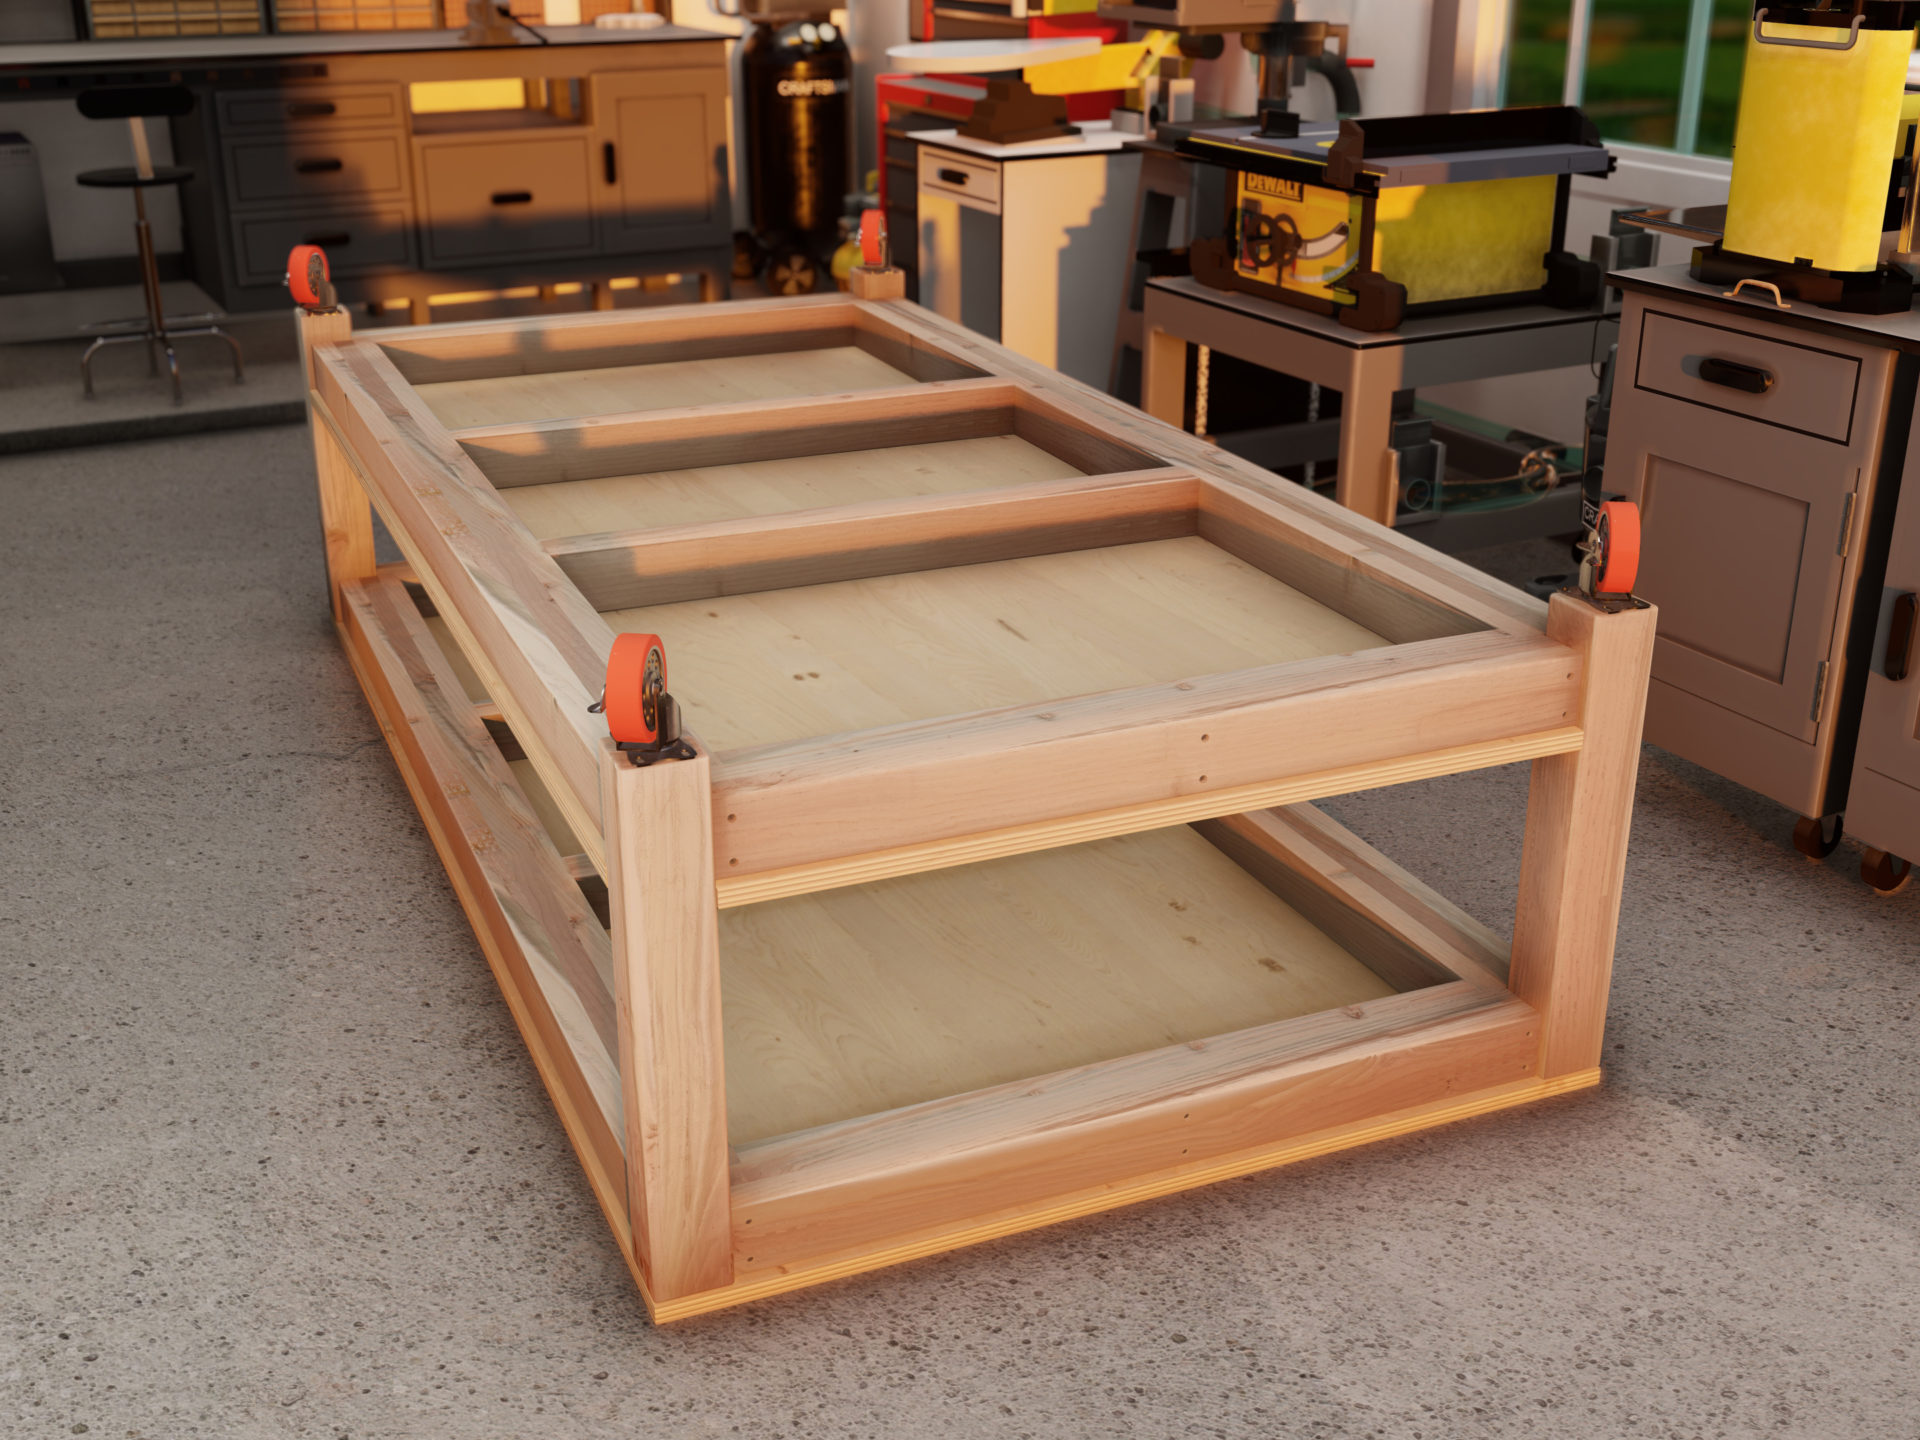
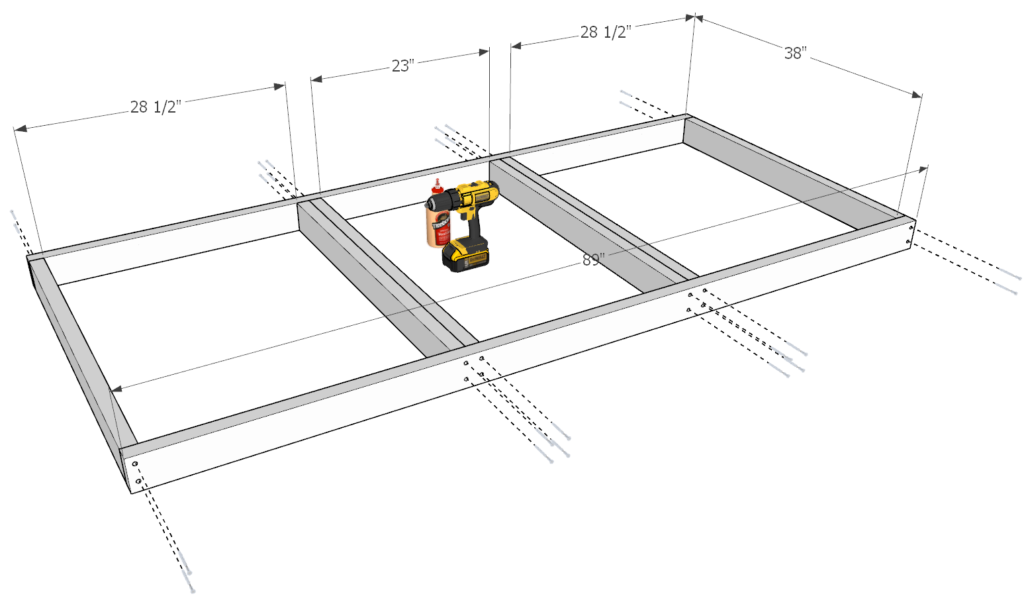
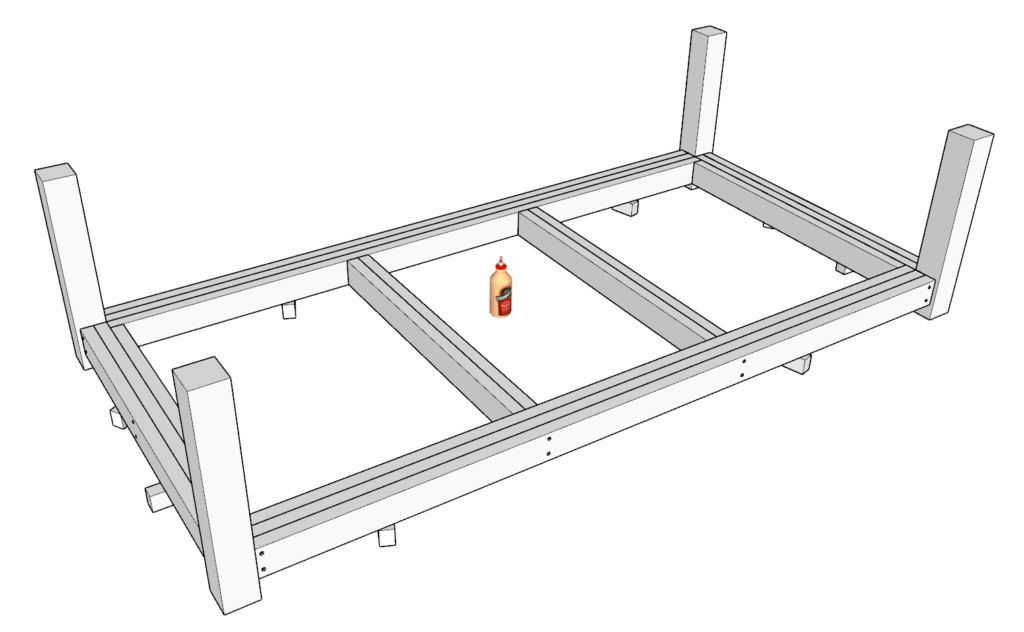
Next, take six of the 38-inch 2×4 lumber pieces and two of the 89-inch 2×4 lumber pieces and arrange them as shown below in the 1st image below.
Predrill holes, add glue, and add screws. Make sure to add enough glue so the joints are strong but not so much glue that it runs down. Glue doesn’t stain well, and it can take away from the final look if not wiped down with a damp rag.
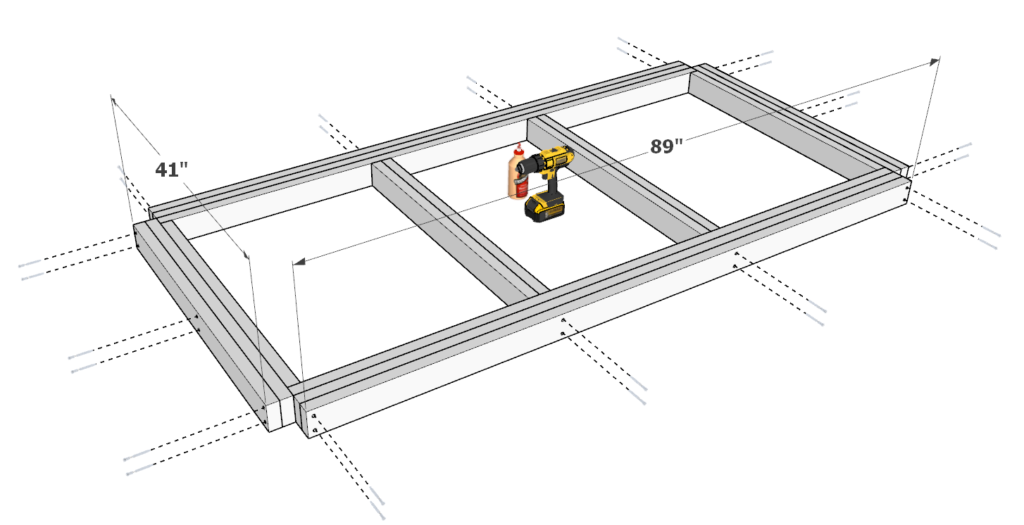
Next, add two 41 in 2×4 lumber pieces and two 89-inch lumber pieces to the ends of the frame. Add glue to all the areas that will be making contact. Predrill and add screws.
Next, add two more 41-inch 2×4 lumber pieces and two more 89-inch lumber pieces to the ends of the frame. Add glue, predrill, and add screws.
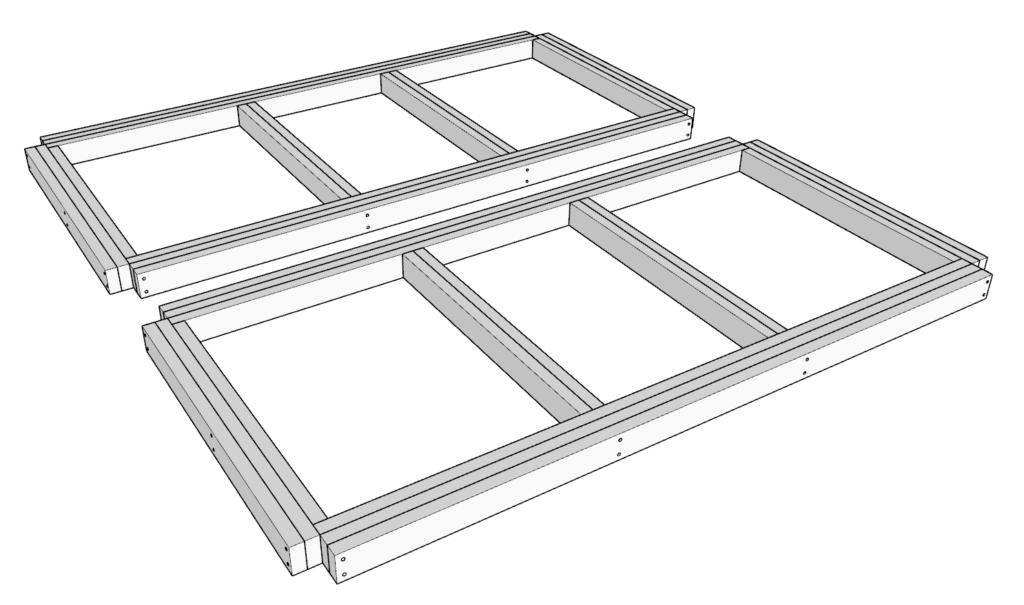
Repeat this to create a second identical frame piece. In the end you should have two identical frames.

Step 3 (DIY workbench)
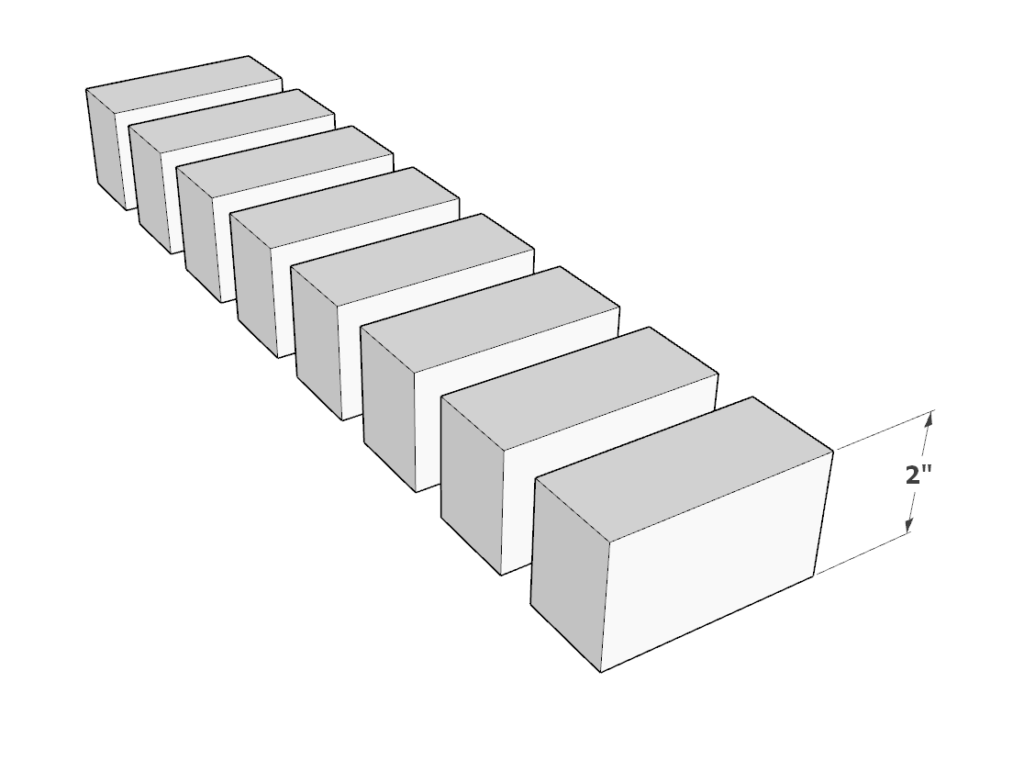
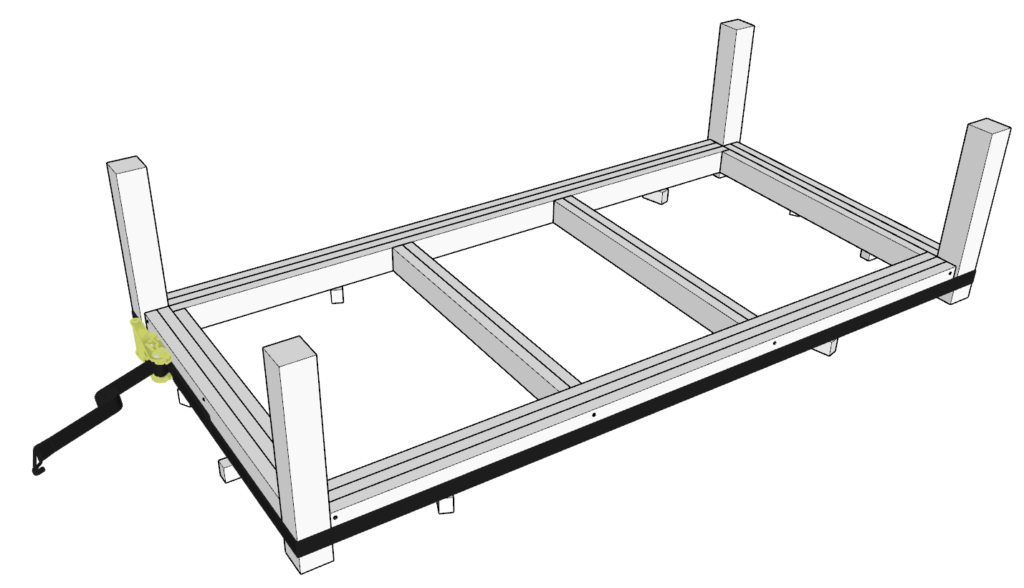
Next, cut eight 2-inch spacers. These can be cut from any scrap wood.
Next, take the spacers and four of the 24-in 4×4 lumber pieces and arrange them as shown below.
Next, lay the frame assembled in the previous step on the 2-inch spacers so that the frame is 2 inches off the ground. Move the 24-inch 4×4 pieces into the indented spaces of the frame. Apply glue to glue them into place.
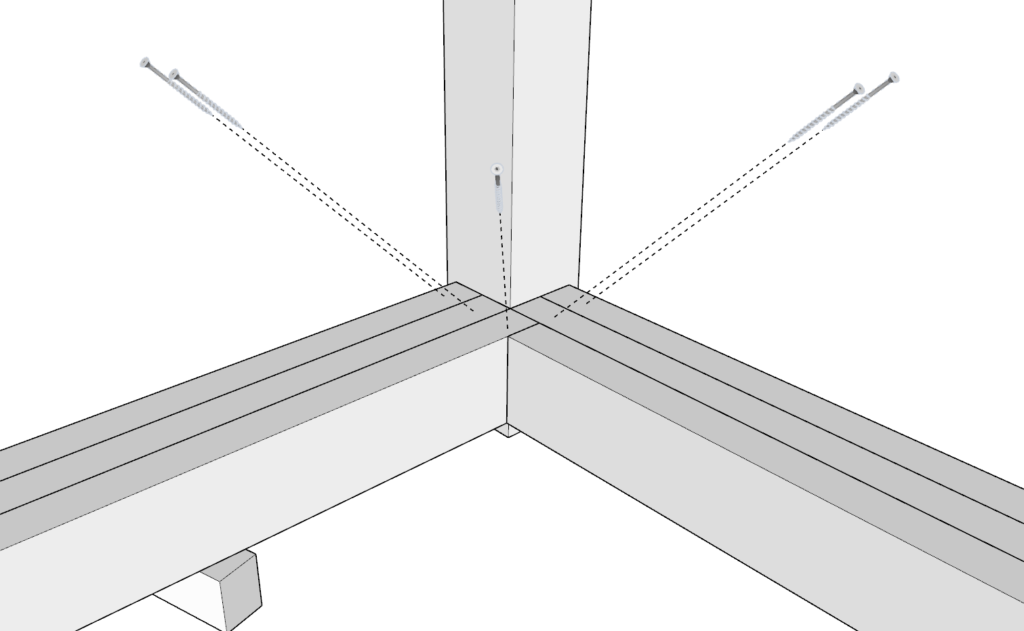
Next, take a ratchet strap and swap the structure all around as shown below. If one strap is too short, you can pair it with one more to encircle the entire structure. Next tighten the structure so that the 4×4 pieces and the frame doesn’t move freely. If needed, “hammer” into place the areas that don’t align well so that the frame and legs are all flush and leveled (use level ground).
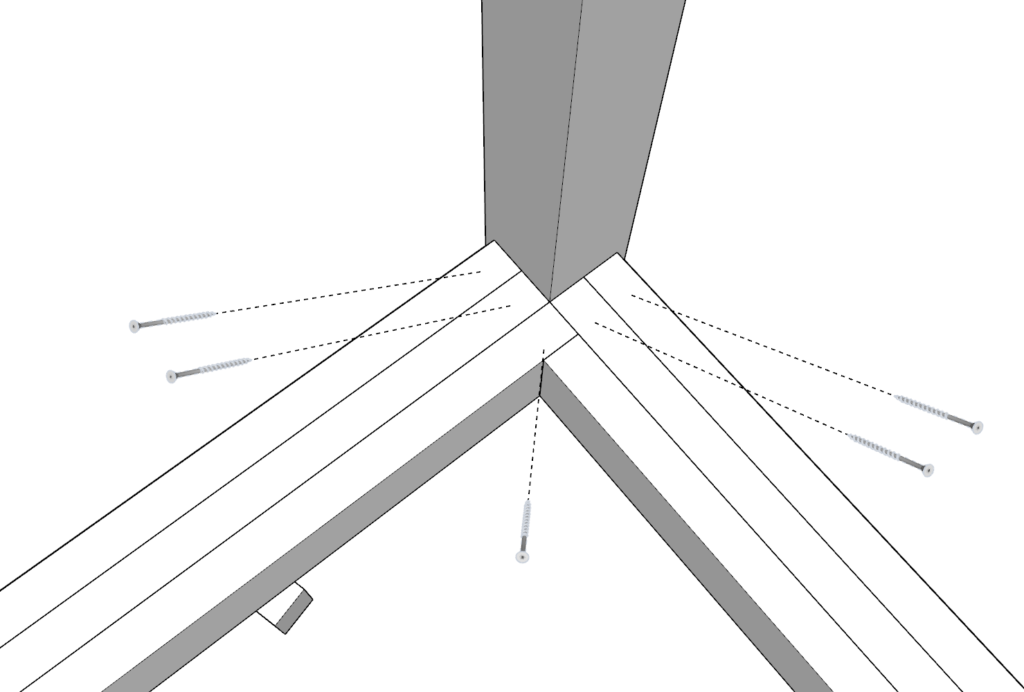
Next, take the 3.5-inch screws and drive them in diagonally as shown below. Predrill the holes to prevent the wood from splitting.
next, with assistance, flip the frame and legs to the other side and add screws as before. Make sure when your flipping, not to put pressure on the legs as they are not fully attached at this point.

Step 4 (DIY workbench)
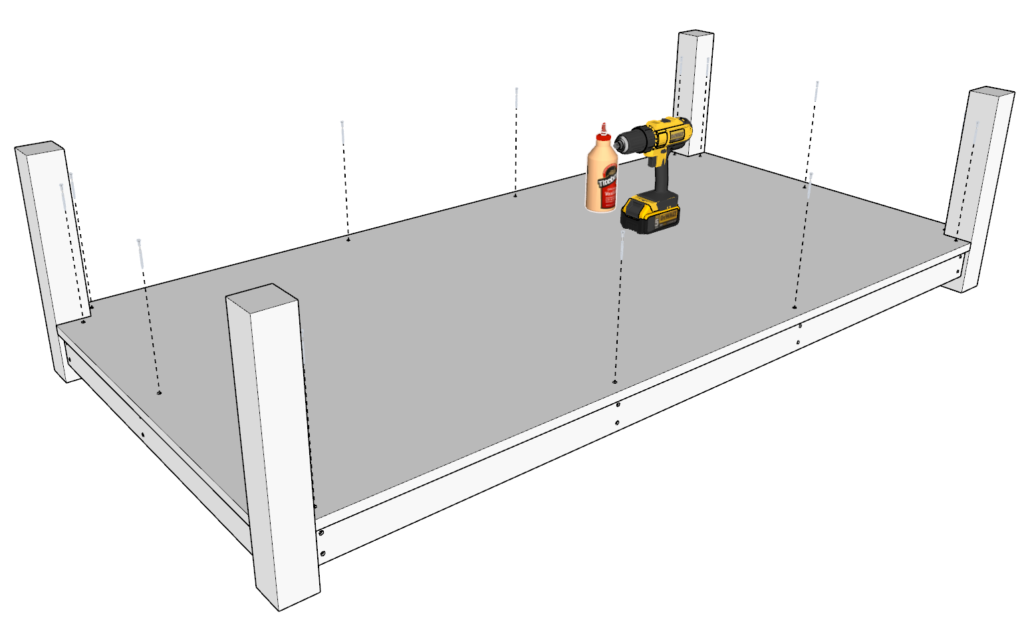
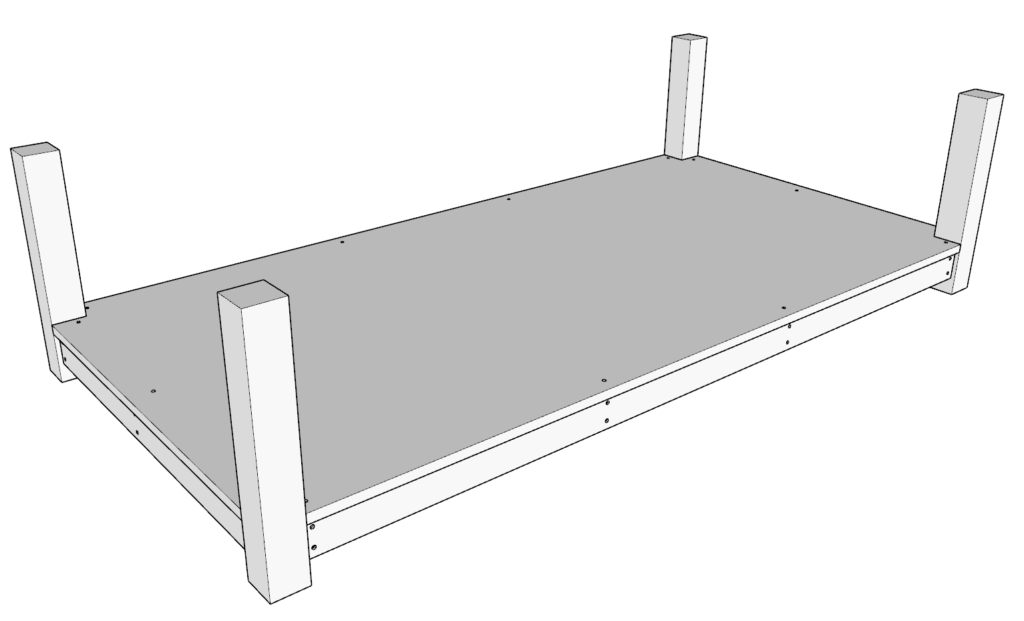
Next, take the 4ft x 8 ft plywood sheet with indented corners and add it to the frame you just assembled. Make sure to add generous amounts of glue to all the areas that will be making contact.
Predrill holes and add screws.
Step 5 (DIY workbench)
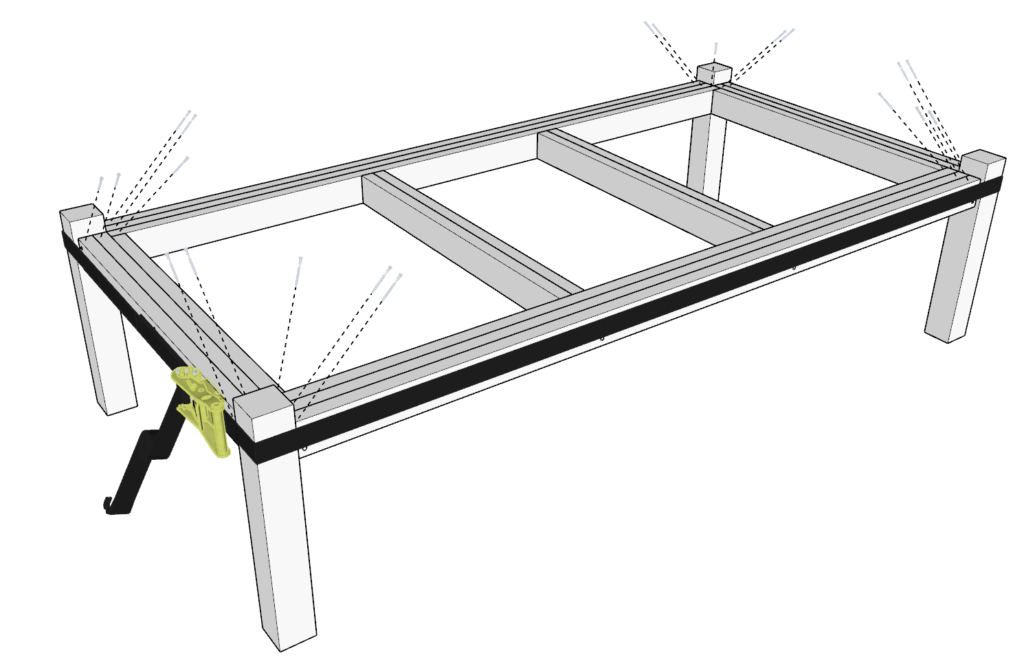
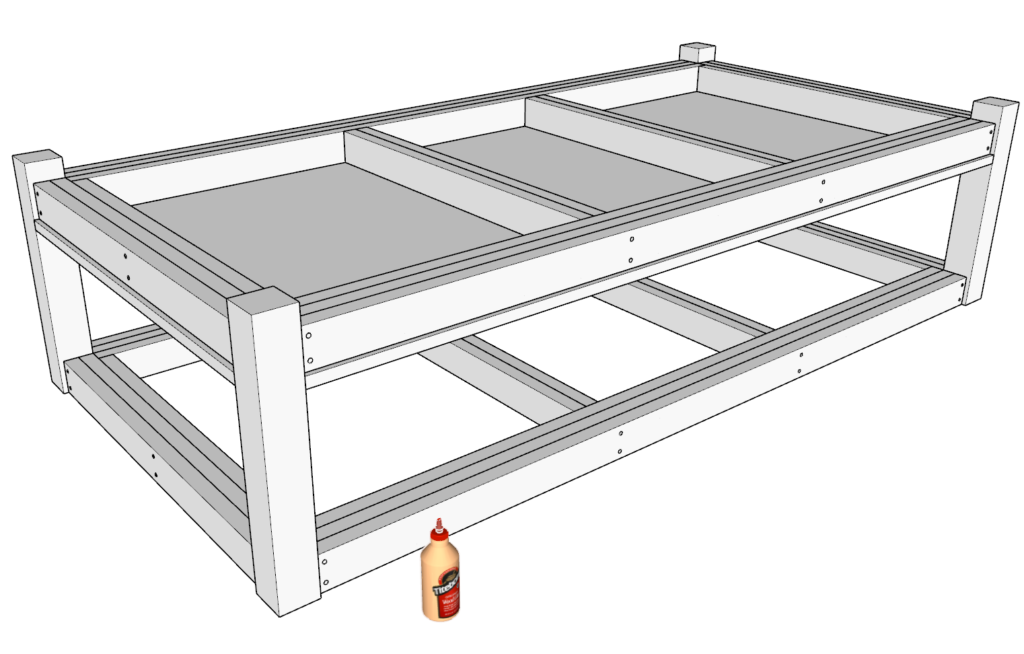
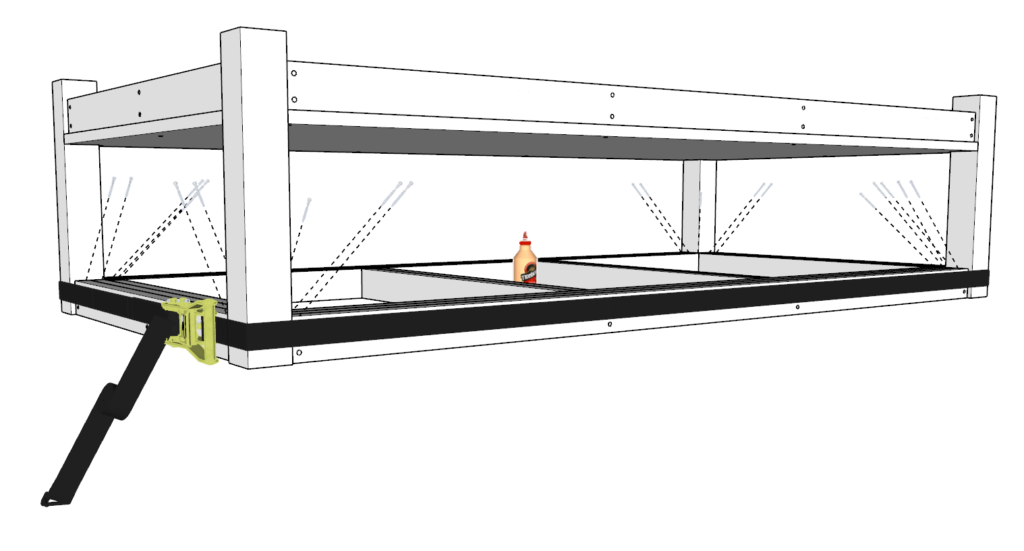
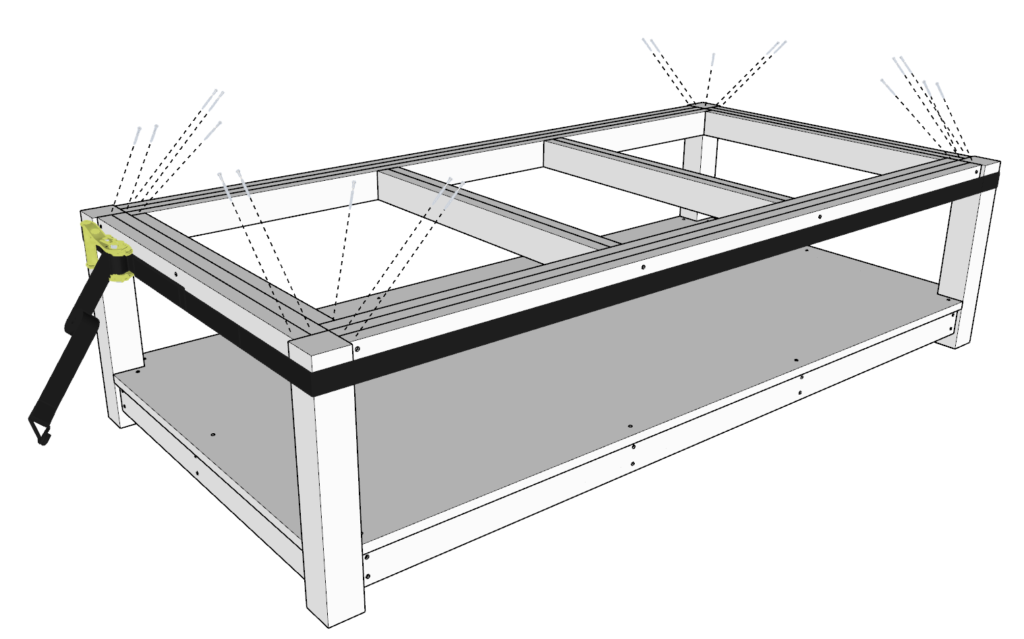
Next, flip the table over and add the second 2×4 frame you assembled in previous steps. Add glue and fit the 4×4 lumber into the indented areas on the 2×4 frame. Use level ground.
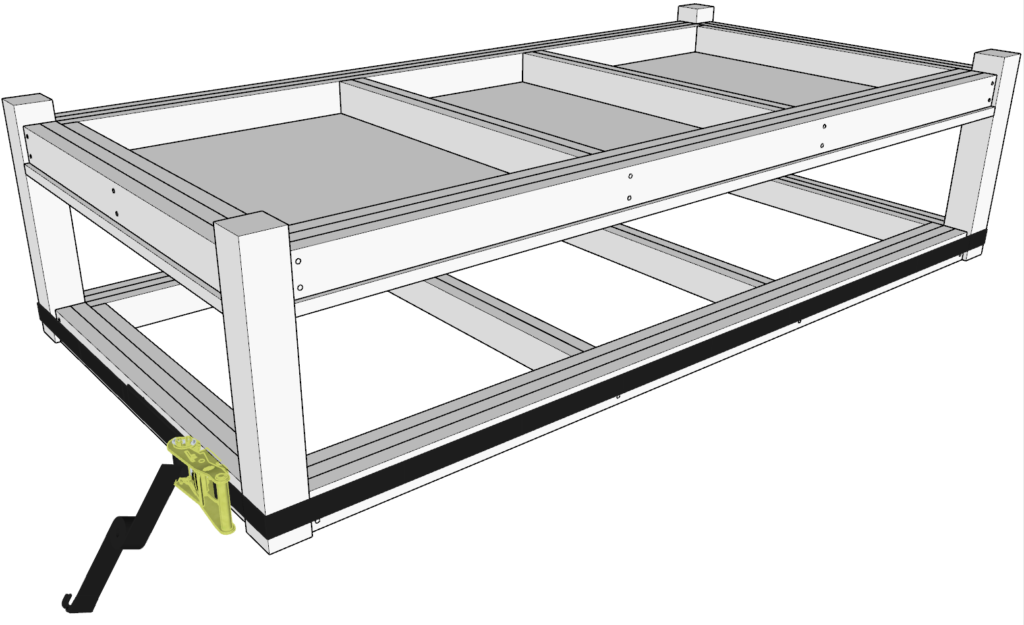
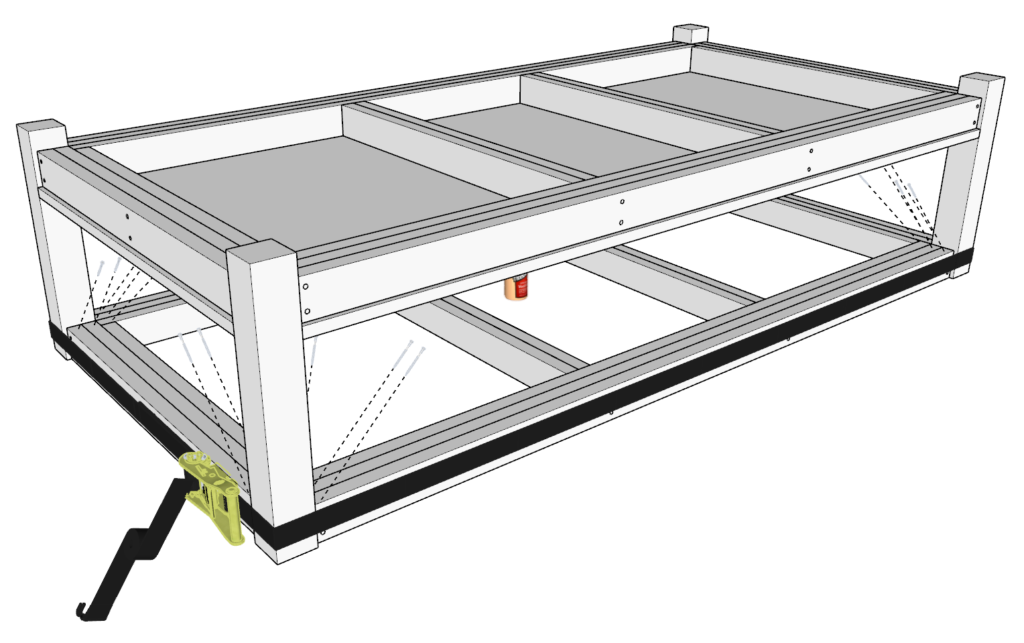
As before, add straps, hammer any irregular places into place, predrill holes, add screws in the same way as before both on the top and bottom of the frame.
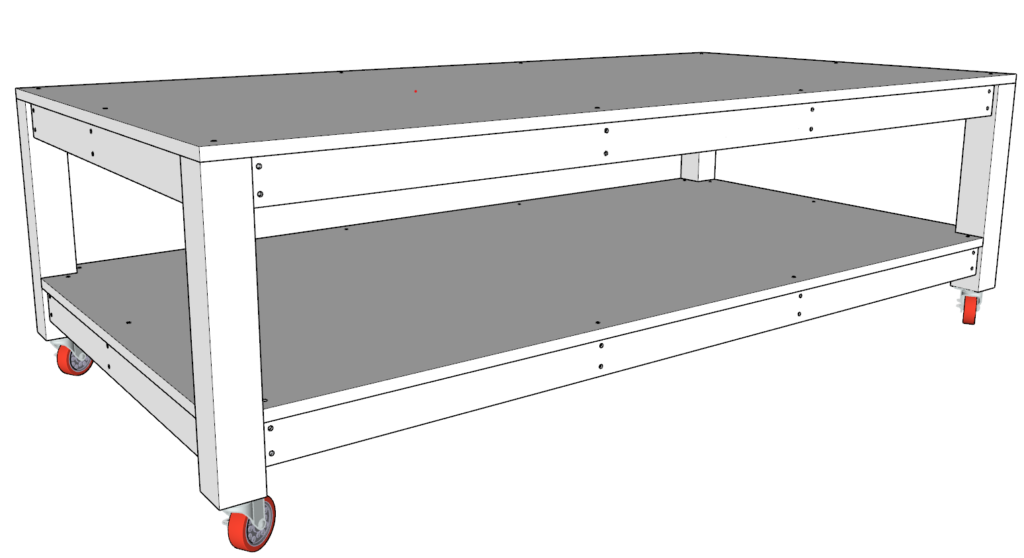
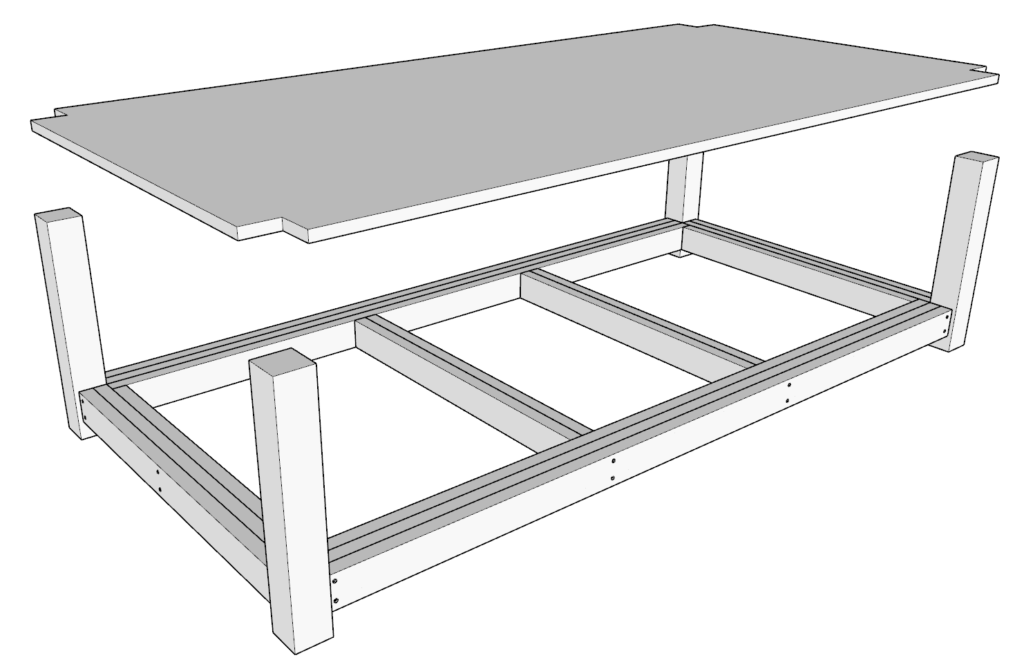
Next, attach the tabletop plywood sheet. I don’t recommend gluing it into place because you will not be able to replace it later when it undergoes wear and tear. Instead, use screws to screw it into place as shown below.

Step 6 (DIY workbench)
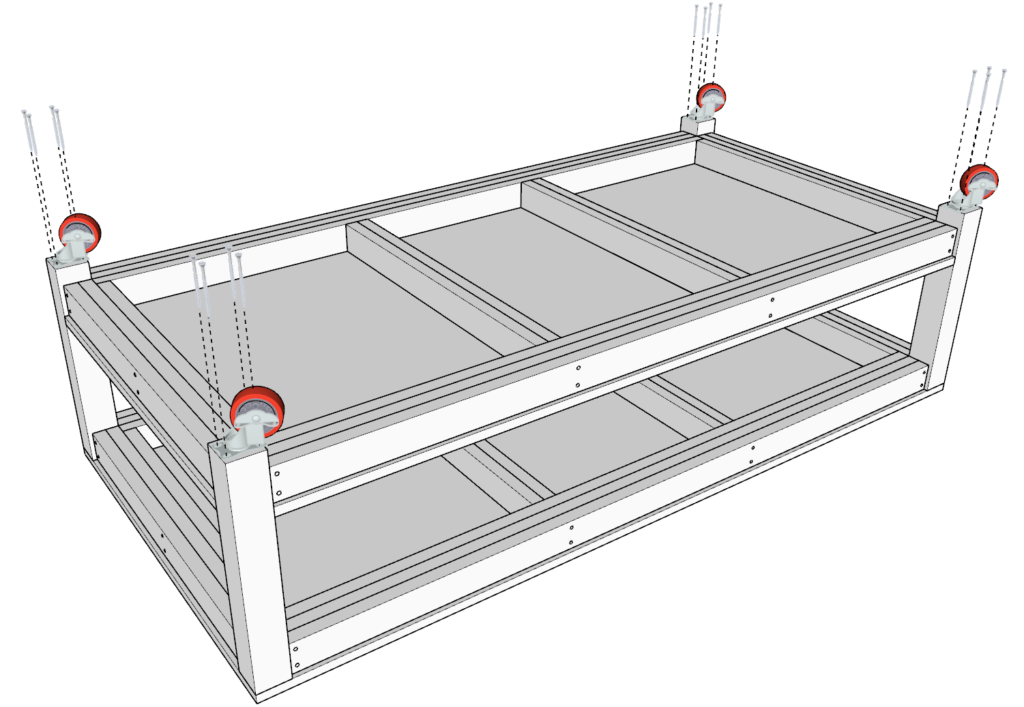
Next, install the wheels. Flip the table so that its upside down. Place a wheel into the proper spot. Use a pencil to mark the areas where the holes need to be drilled for the screws. Next, drill holes to ensure a strong joining of the wheel to the 4×4 lumber piece leg.
I use a screw that is at least 6 inches long. I predrill at least 5 inches deep. I use a drill bit that will closely match the screw I will be driving. The idea is to ensure the wood doesn’t split and make the bench unstable and unsafe.
Screw and drill bit size will vary depending on what you use.
Next, attach the wheel. Repeat for all 4 legs.
Lastly sand down the whole structure. I start with a 80-grit sand paper to take out all major imperfections, next I follow with a 220 grit sandpaper to ensure a smooth surface that is ready for staining or painting. I use an orbital sander to speed up the process of sanding.