
Introduction
The joy of Christmas doesn’t just come from the traditions we’ve always known but also from the fresh memories we create. Building your own wooden Christmas tree introduces a unique narrative to the holiday season, blending personal creativity with festive celebration. It’s more than just decor; it’s about forging a new path in your holiday memories.


Delving Into the DIY Plan:
Dimensions and Specifications:
Designed to grace any tabletop or cozy corner, the tree’s dimensions are crafted to make a subtle yet noticeable statement. Its size ensures it complements a room without dominating the space.
Materials:
Versatility is key. The design welcomes a variety of wood types, be it oak or pine, allowing for personal preference. Moreover, for the eco-conscious or those looking to repurpose, the plan wonderfully accommodates scrap wood. This not only speaks to sustainability but also makes the project cost-effective for those with leftover materials.
Here's why our plan stands out:
- Clarity in Instruction: Each step is meticulously detailed for a smooth crafting process.
- Material Versatility: Open to various wood types, from premium choices to scraps.
- Cost-Conscious: Particularly budget-friendly if you’re using scrap wood.
- Contemporary Aesthetics: A refreshing addition to holiday decor.
- Eco-Friendly: An ideal way to breathe new life into leftover wood.
- Tailored Experience: From wood selection to final touches, make it truly yours.
- Inclusive Design: Catering to both DIY beginners and seasoned crafters.
- Dedicated Support: We’re here for any questions or guidance you might need.
As the holiday season beckons, consider stepping into the realm of DIY. It’s more than just a plan; it’s an invitation to weave a fresh chapter into your festive celebrations. Ready to start the journey?
Time
30 minutes (varies with experience)
Cost
$3 (Costs may vary based on location and supplier.)
Skill level required
Beginner

DIY Christmas Décor PDF Plan
What is included in the PDF download?
- Easy to read step by step instructions
- Material list
- Tools needed
- Helpful links to materials and tools needed
DIY Christmas Décor Dimensions

Tools Needed for This Project:
Available with the purchase of the DIY plan PDF.
Lumber Shopping & Cut List
Available with the purchase of the DIY plan PDF.
Step 1: Preparing the Lumber
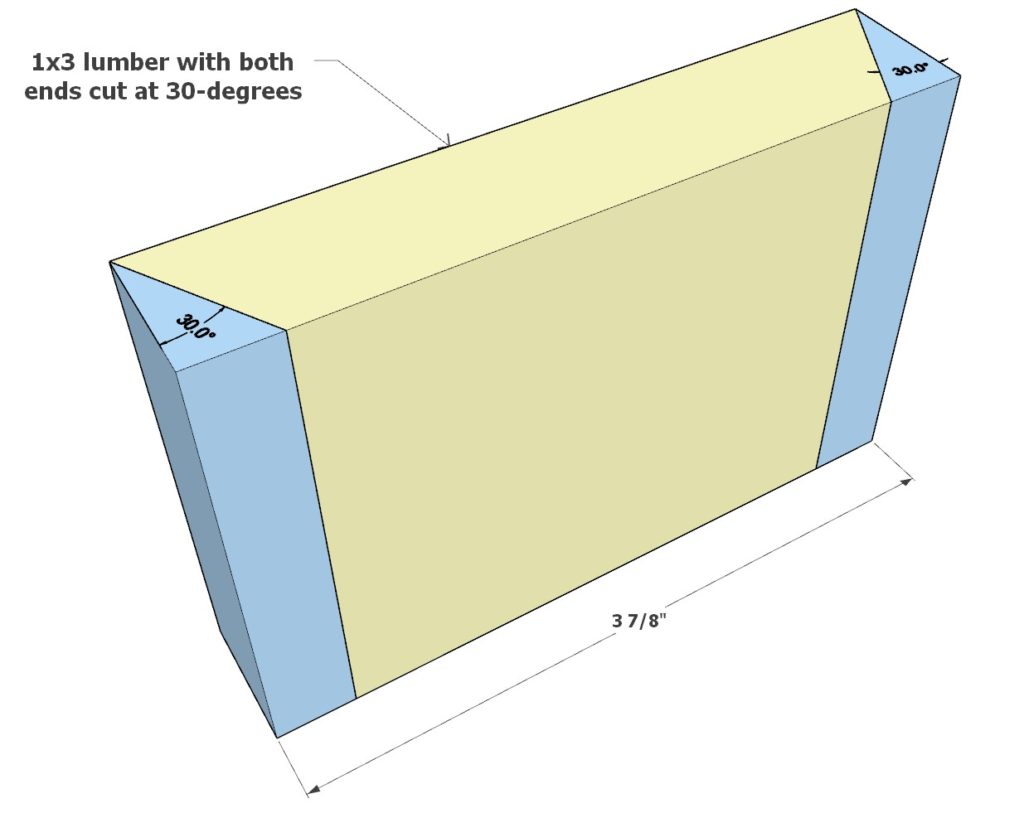
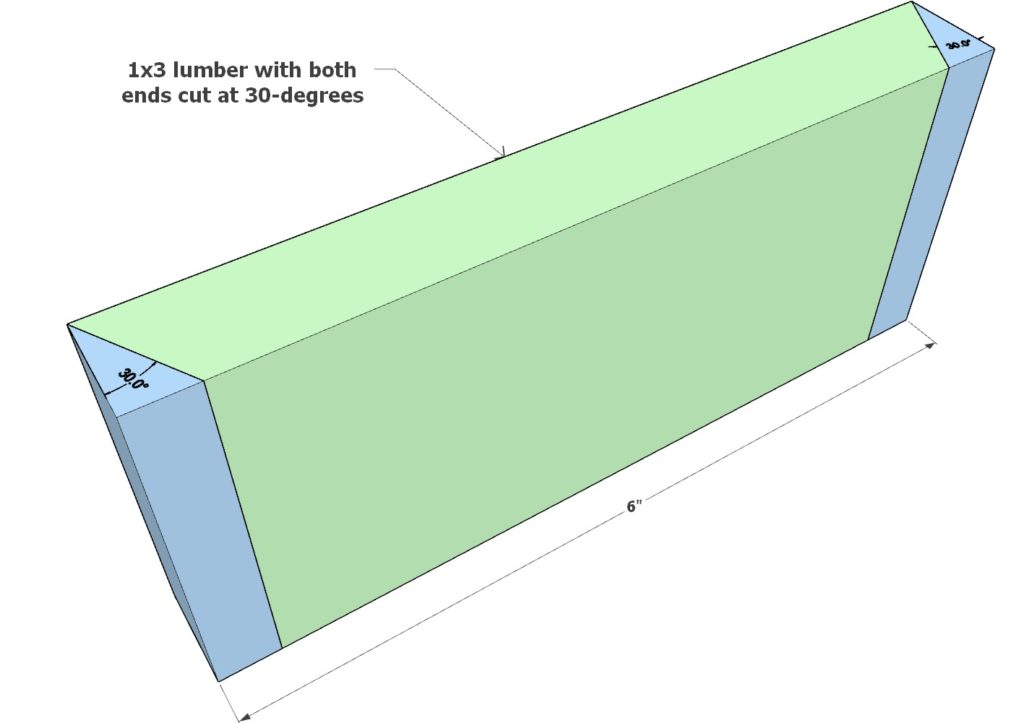
Start by gathering and cutting your lumber. For this tree, you’ll be using 1×3 lumber pieces. However, if you have different sizes at hand, they can be adapted to fit the design.
List of Lumber Cuts:
- Yellow Piece: One 3-7/8 inch long 1×3 lumber, both ends cut at 30-degrees.
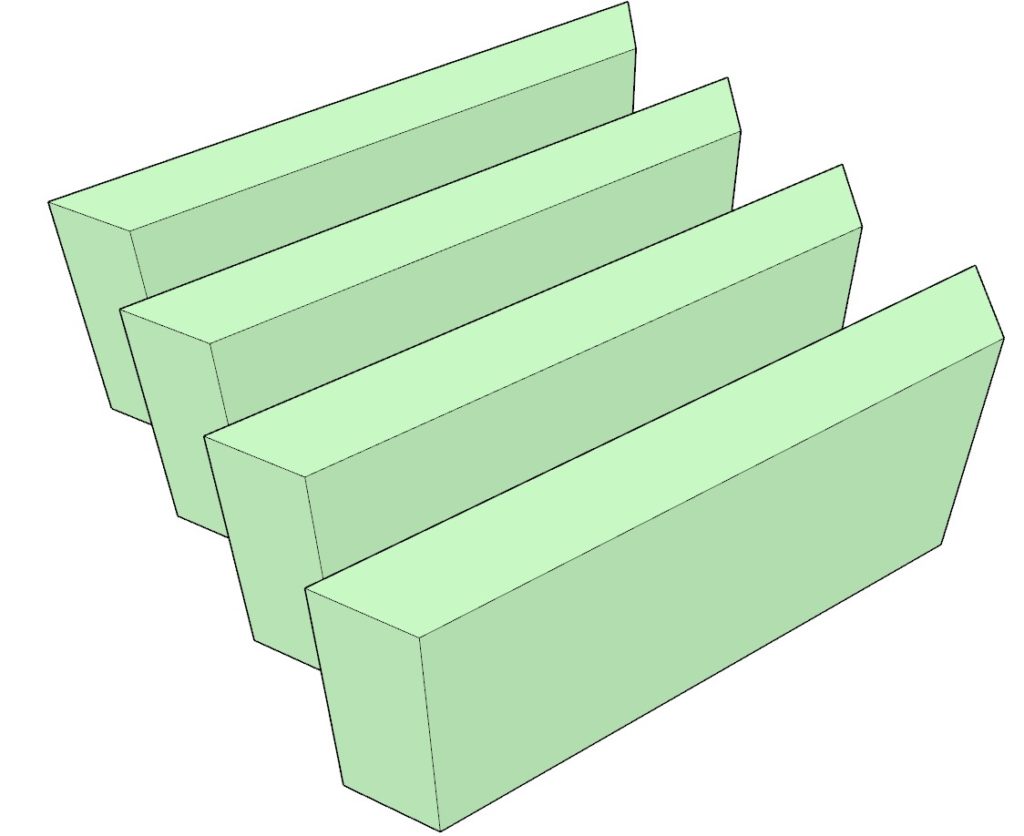
- Green Pieces: Four 6 inch long 1×3 lumbers, both ends of each piece cut at 30-degrees.
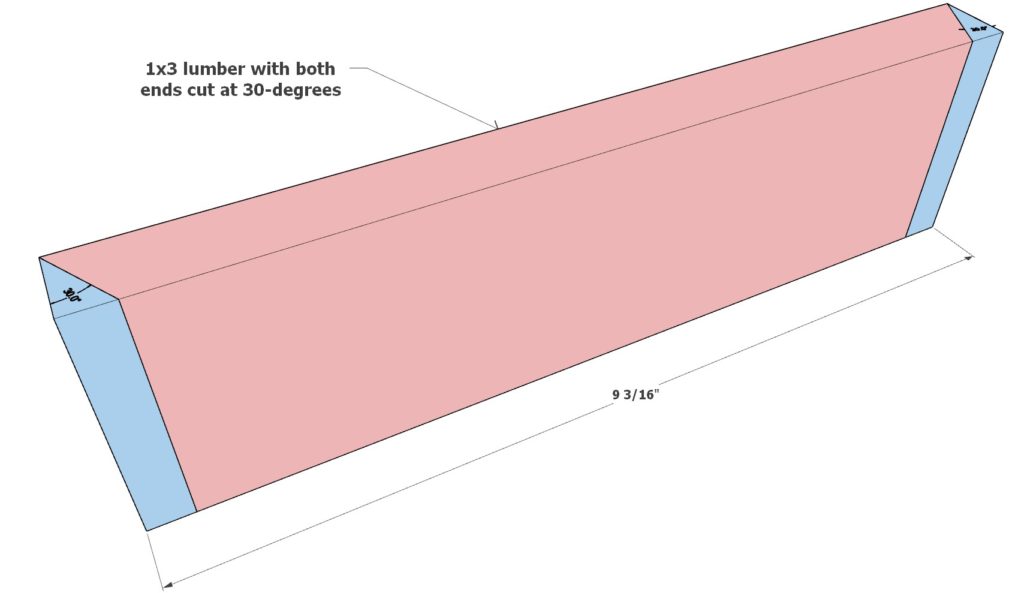
- Pink Piece: One 9-3/16 inch long 1×3 lumber, both ends cut at 30-degrees.
- Navy Blue Piece: One 8-5/16 inch long 1×3 lumber, both ends cut at 30-degrees.
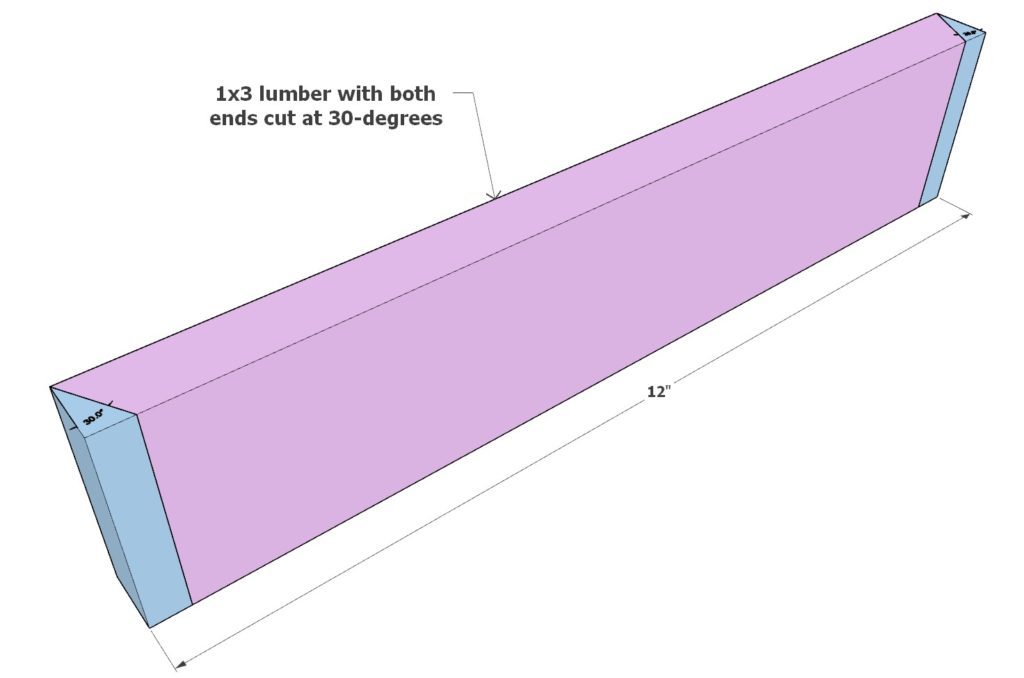
- Purple Piece: One12 inch long 1×3 lumber, both ends cut at 30-degrees.
Each lumber piece has been color-coded to simplify the assembly instructions later on.
Pro Tips:
- Sand all the lumber pieces before assembly. This will give your tree a polished appearance, and it’s much easier than sanding post-assembly.
- If you intend to paint or stain your tree, it’s best to do so before assembly. This ensures a thorough coat and minimizes post-assembly touch-ups.

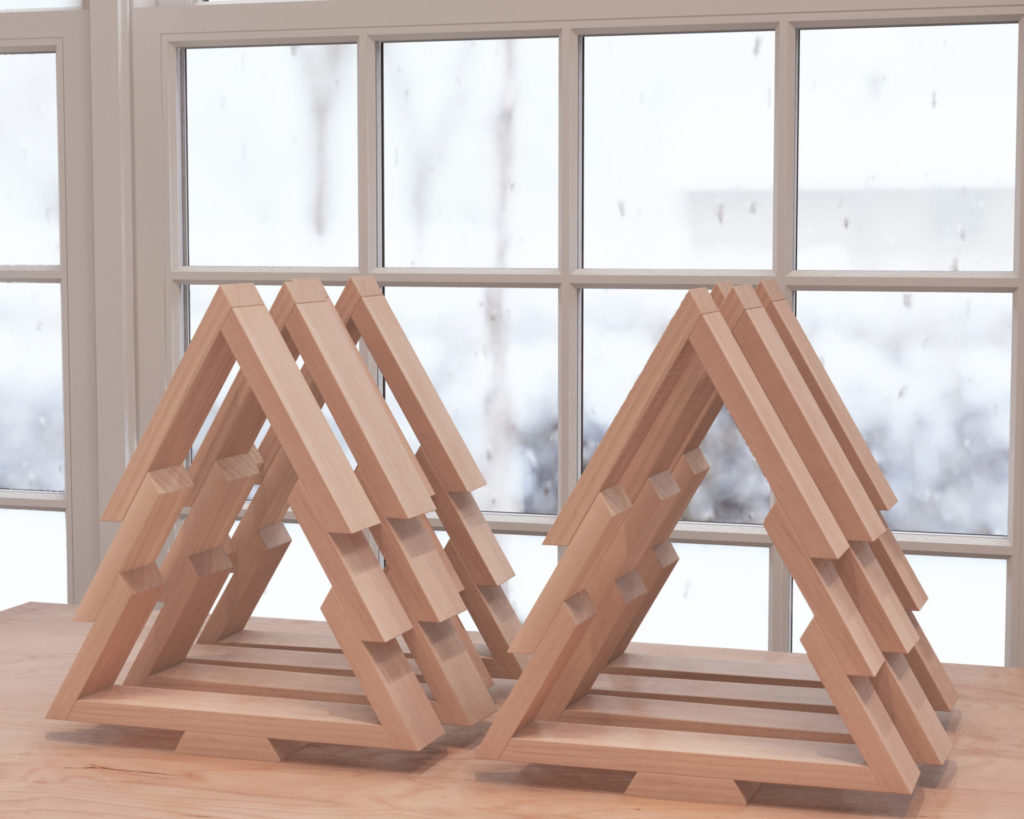
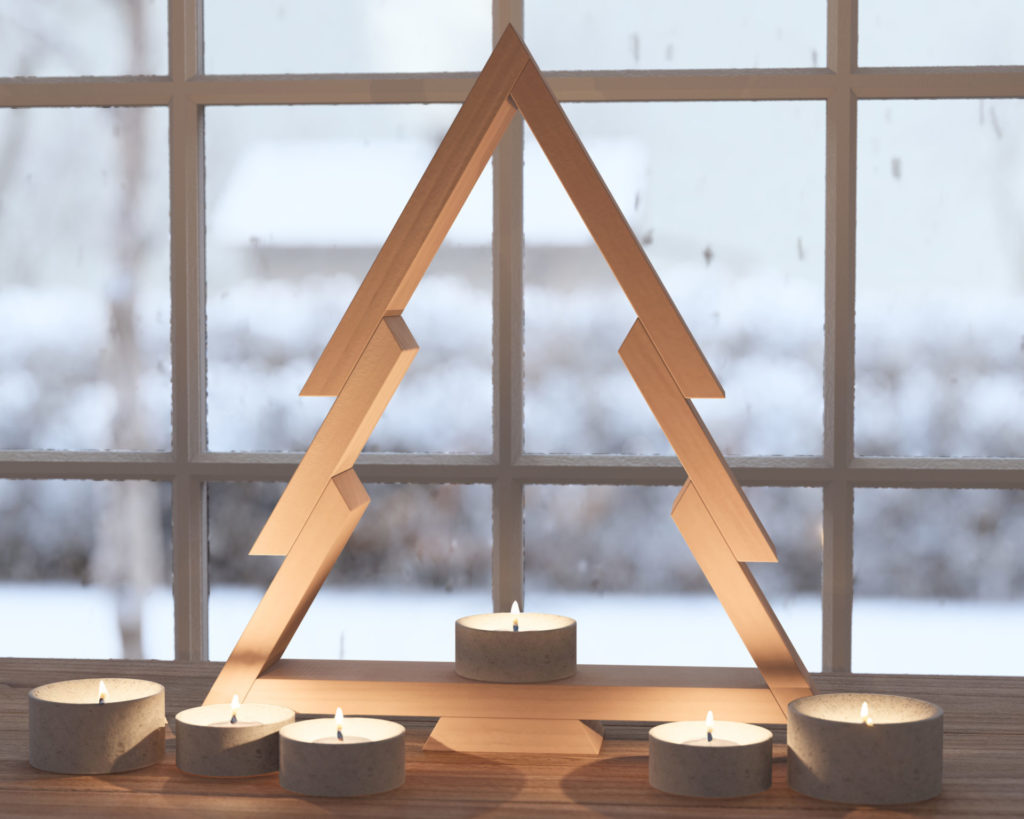
Step 2: Assembling the Christmas Tree
Begin your tree assembly by constructing the topmost part.
Top Assembly:
- Combine the navy blue and pink pieces to form the tree top. Refer to the 1st diagram for guidance.
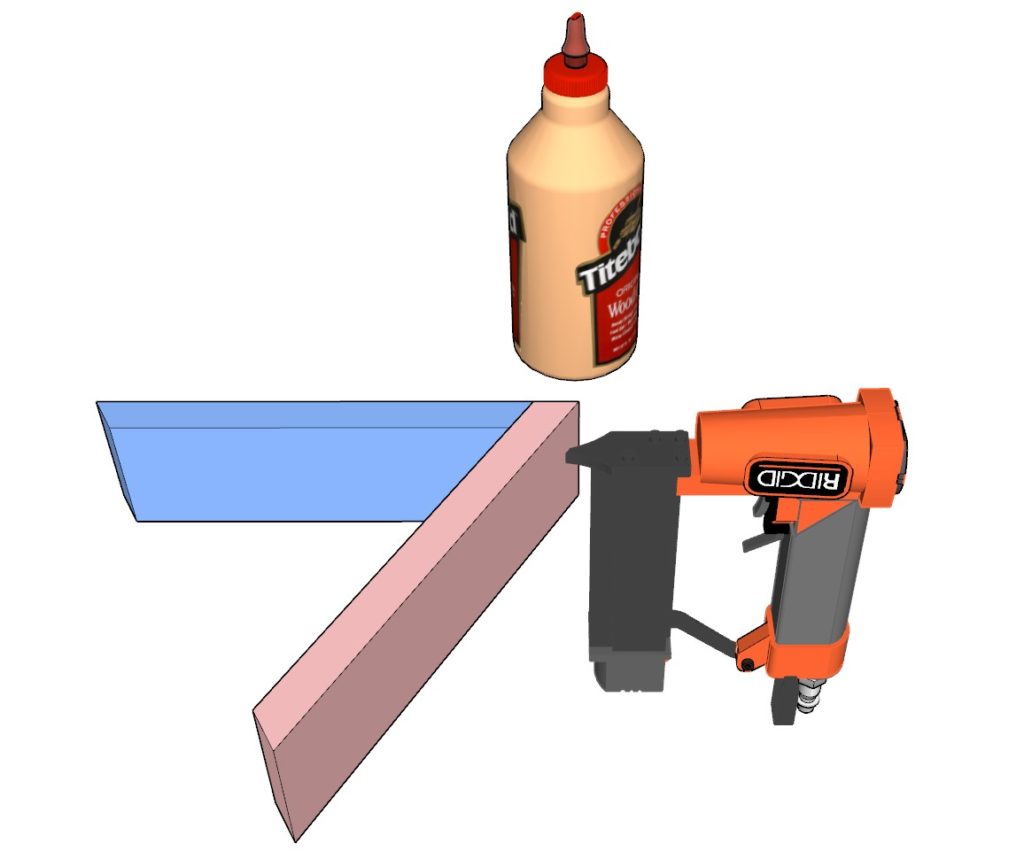
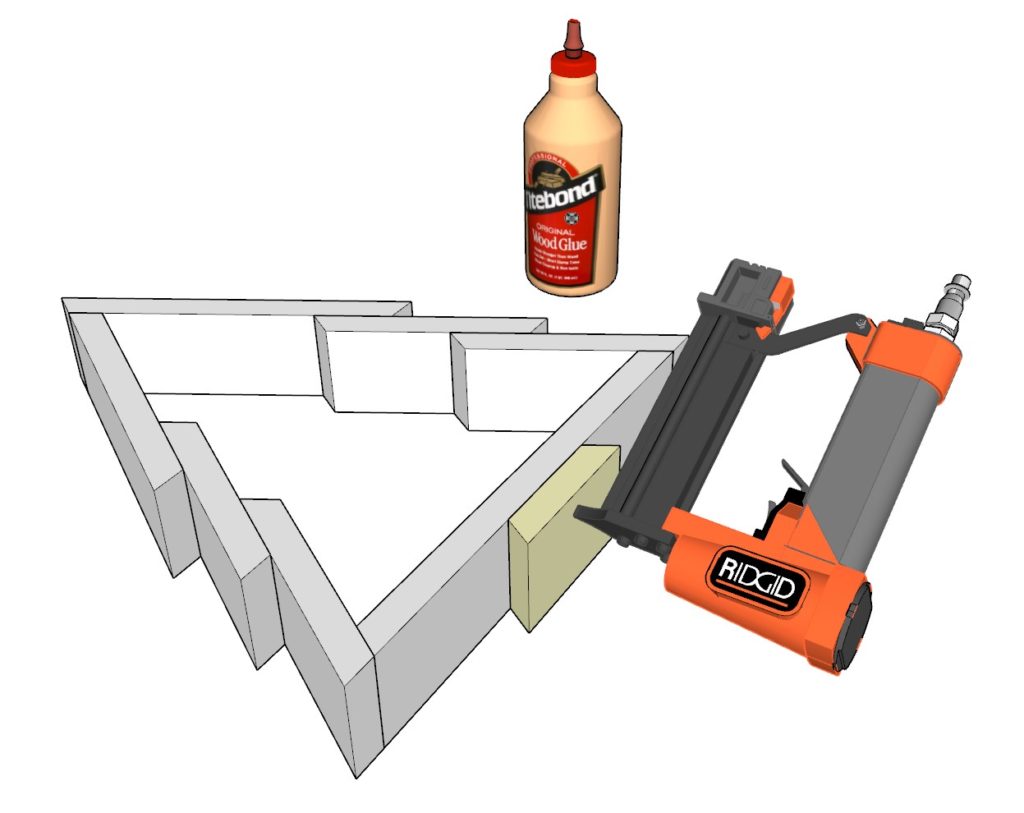
- Secure the pieces together using 1-inch pin nails and wood glue.
Middle Assembly:
- Attach the four green pieces next. Align and space them as illustrated in the 2nd diagram.
- Again, use wood glue and 1-inch pin nails to secure these parts.
Bottom Assembly:
- Position and affix the purple piece to create the base of your Christmas tree.
- As before, rely on pin nails and wood glue for a secure fit.
Finishing with the Trunk:
- Lastly, integrate the small yellow piece to form the tree trunk. Adhere using the same methods as above.
Pro Tips:
- Opt for thin pin nails. This ensures minimal damage to the wood, and they remain nearly invisible once in place.
- If you haven’t stained your pieces yet, always wipe off any excess glue with a damp cloth. Dried glue can prevent the stain from adhering properly, resulting in unsightly patches.


Step 3: Finishing Touches – Sanding, Staining, and Painting
Sanding the Christmas Tree:
- Before sanding, always wear safety goggles and a dust mask to protect your eyes and lungs.
- Choose a medium-grit sandpaper to start, and sand the entire structure in the direction of the wood grain.
- To access tight spots or intricate areas, consider using a sanding block or folded sandpaper.
- Once the initial sanding is done, repeat the process using a fine-grit sandpaper to achieve a smooth finish.
- Wipe away all the dust using a soft cloth before proceeding to staining or painting.
Staining the Christmas Tree:
- Always use gloves to protect your hands and work in a well-ventilated area.
- Prepare your wood by ensuring it’s free from dust and debris.
- Use a brush or rag to apply the stain, moving in the direction of the wood grain.
- Allow the stain to penetrate the wood; the longer you leave it on, the deeper the color will be.
- Wipe away any excess stain with a clean cloth.
- Allow the stain to dry according to the manufacturer’s recommendations.
Painting the Christmas Tree:
- Begin by priming the wood to ensure an even and lasting paint application.
- Once the primer is dry, apply your chosen paint color using a paintbrush or foam brush for a smoother finish.
- Remember to paint in the direction of the wood grain and to apply thin, even coats.
- Depending on the paint type and color choice, you may need multiple coats. Always allow sufficient drying time between coats.
- Once done, let the final coat dry thoroughly before displaying or using your Christmas tree.
Safety Tips:
- Always work in a well-lit and well-ventilated space, especially when using paints and stains which can emit fumes.
- Keep children and pets away from your workspace.
- Store paints, stains, and other chemicals out of reach and in a safe place.
