Why choose out DIY wedding arch design?
A wedding is a beautiful and intimate affair. If you’re looking for the perfect DIY wooden wedding arch to make the event extra special, then take a look at this exciting and simple design!
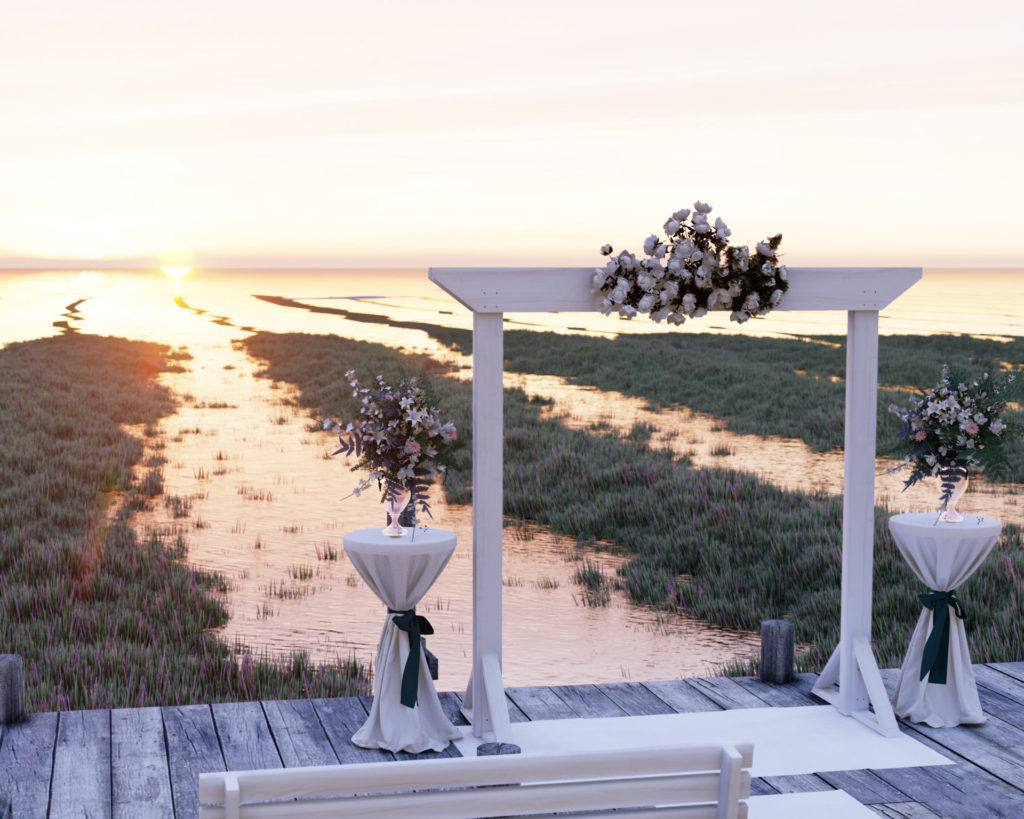
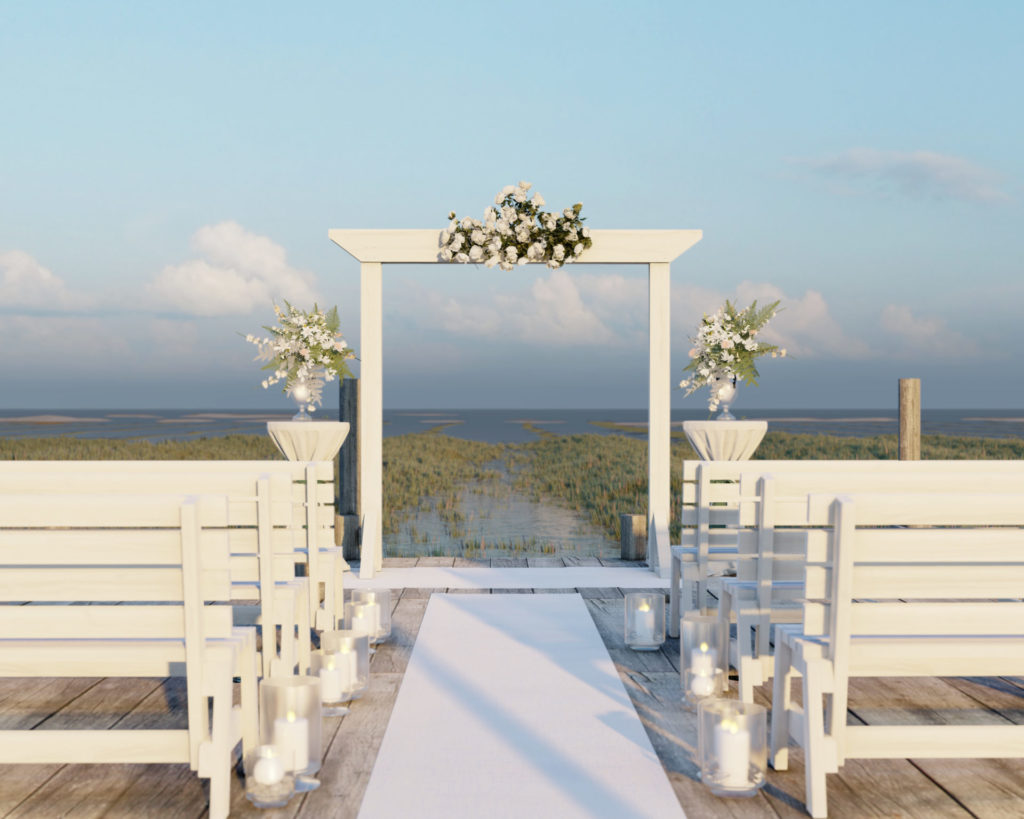
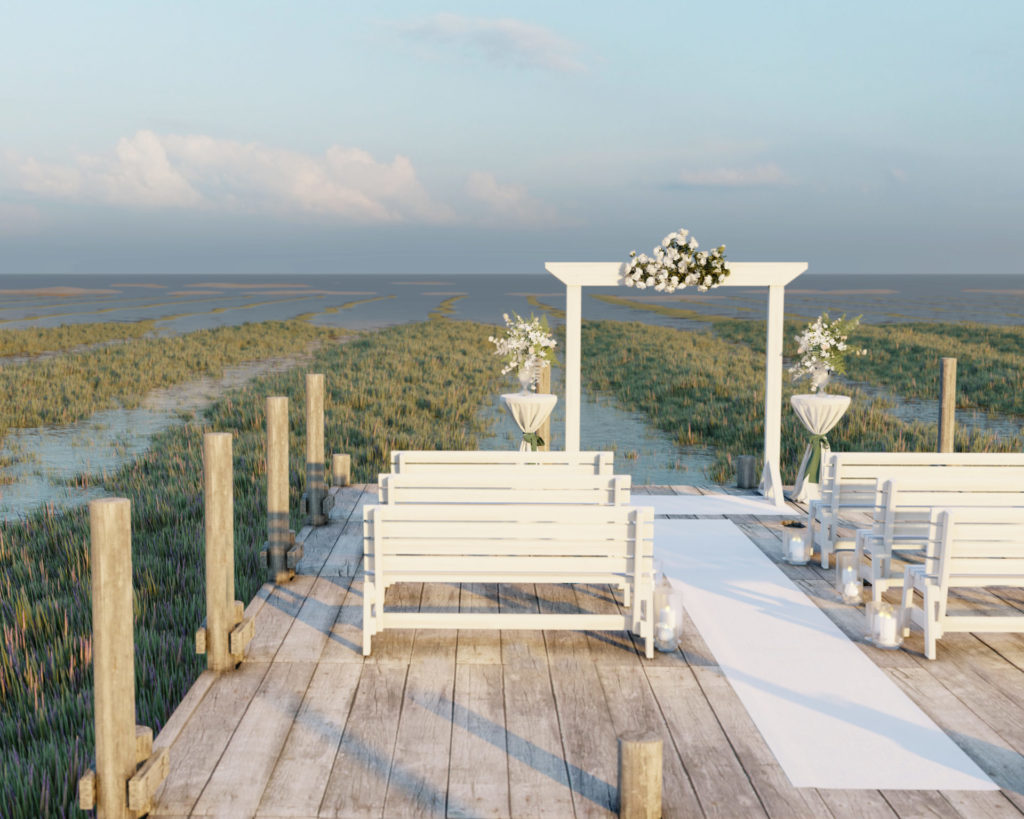
This DIY wedding arch provides the canvas for you to add many personal touches and decorations. This archway can be adorned with flowers, ribbons, or other accents to match your wedding theme. The arch can be an elegant piece of wedding decor as well as provide the special place where the happy couple will be married. These personal touches not only allow for family and friends to be involved but also creates a wedding that’s sure to be remembered.
Who can build this DIY wedding arch?
No fancy joints or cuts! This wedding event arch is a great build for anyone new to woodworking.
Building this DIY wooden wedding arch is a relatively easy process that can be completed in a few hours. The most important thing to keep in mind is to make sure the arch is stable and secure before decorating it. In this post you will find easy to read step by step instruction on building your own wooden wedding arch. The plans include diagrams, descriptions, and helpful links to help you save time, material, and frustration.
Where can I learn to make the benches in the photos?
Plans for DIY wedding benches can be found here.
Time to build
1-2 hours per bench
Total cost of build
about $60
Skill level required
Beginner
Download the PDF plans
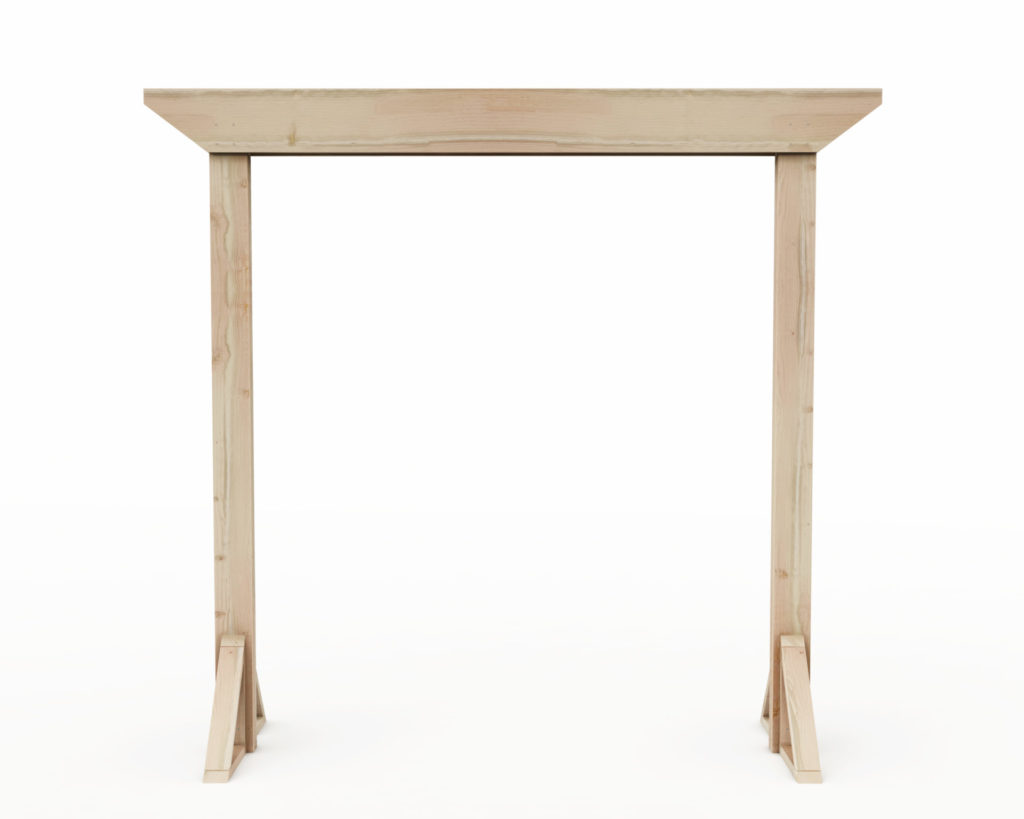
Outdoor wood wedding arch
What is included in the PDF download?
- Easy to read step by step instructions
- Material list
- Cut list
- Tools needed
- 3D illustrations
- Helpful links to tools needed for the project
Recommend tools for this project
- Miter saw
- Drill
- Impact driver with bit for screws
- Sander
- wood countersink drill bit
- will need 5 lb of 2.5-in screws per bench (highly recommend T25 Star Drive screws)
- Wood glue
- sand paper
Disclosure: Some of these links are affiliate links.
Lumber needed
Available with purchase of PDF plans.
Step 1 (DIY wedding arch)
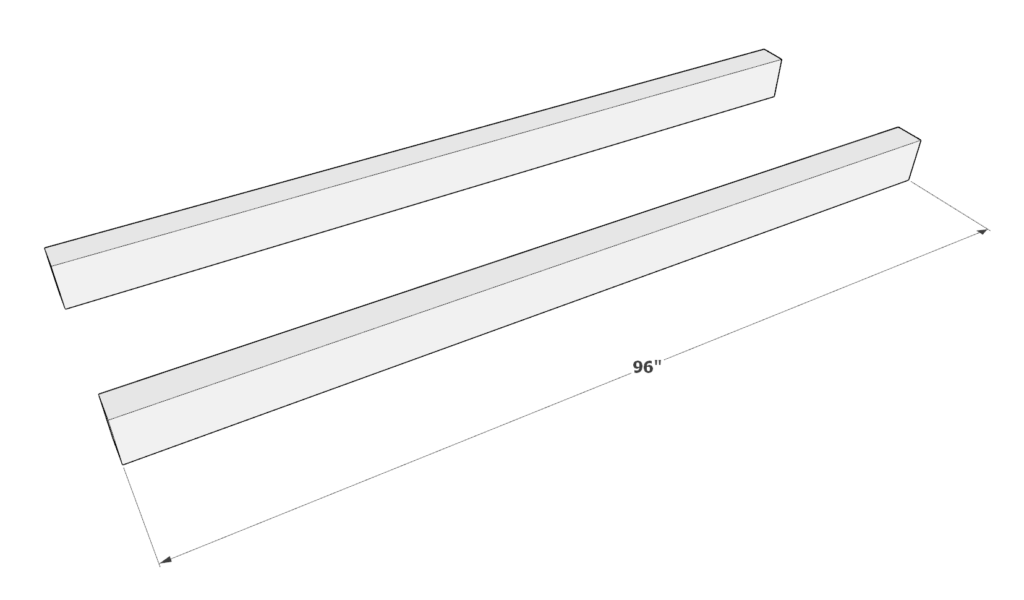
First, precut all the lumber pieces. You will need two 96 inch 4×6 lumber pieces.
You will need four 21-3/16 inch 2x4lumber pieces cut at 45-degrees on both sides.

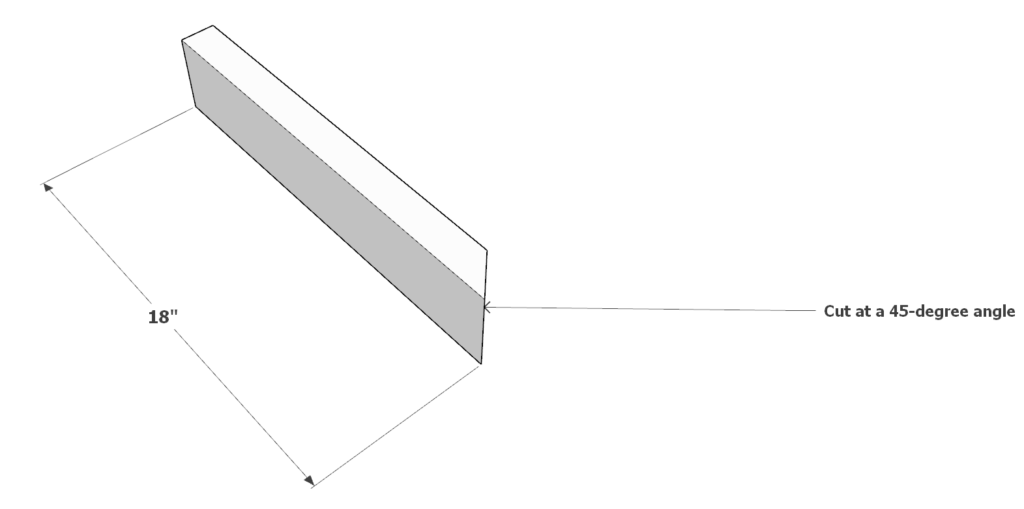
You will need four 18 inch 2x4lumber pieces cut at a 45-degree angle on one end.
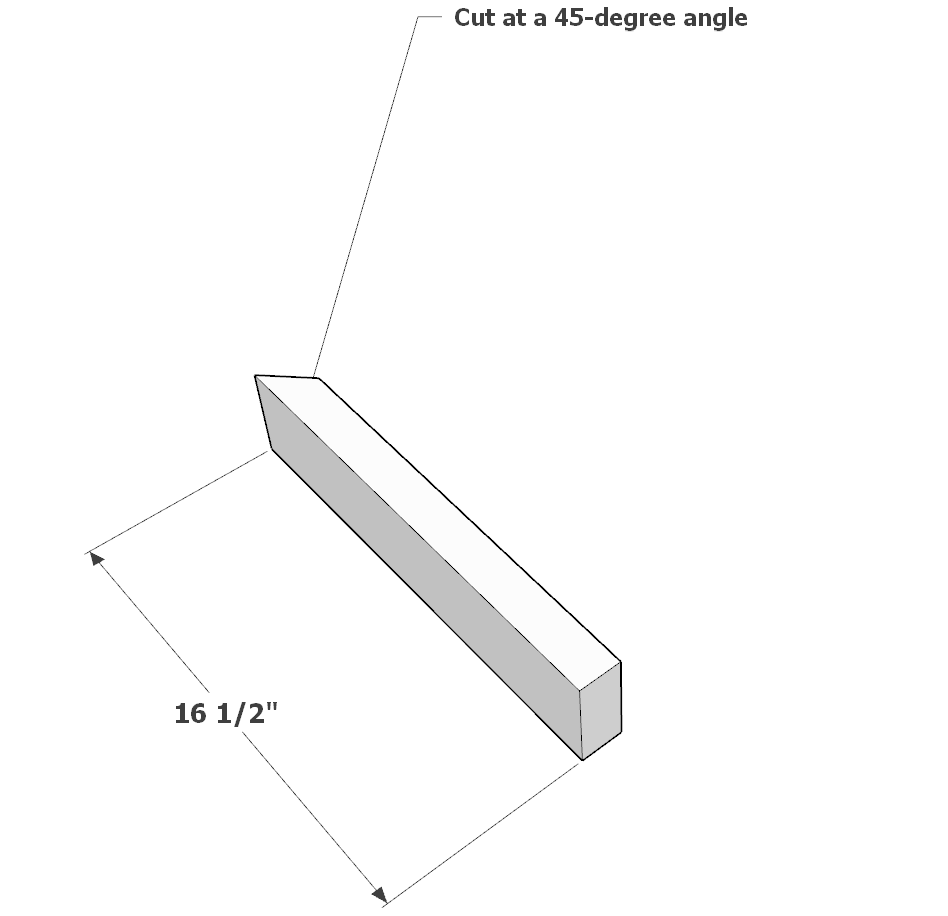
You will need four 16-1/2 inch 2×4 lumber pieces cut at 45-degrees on one end.
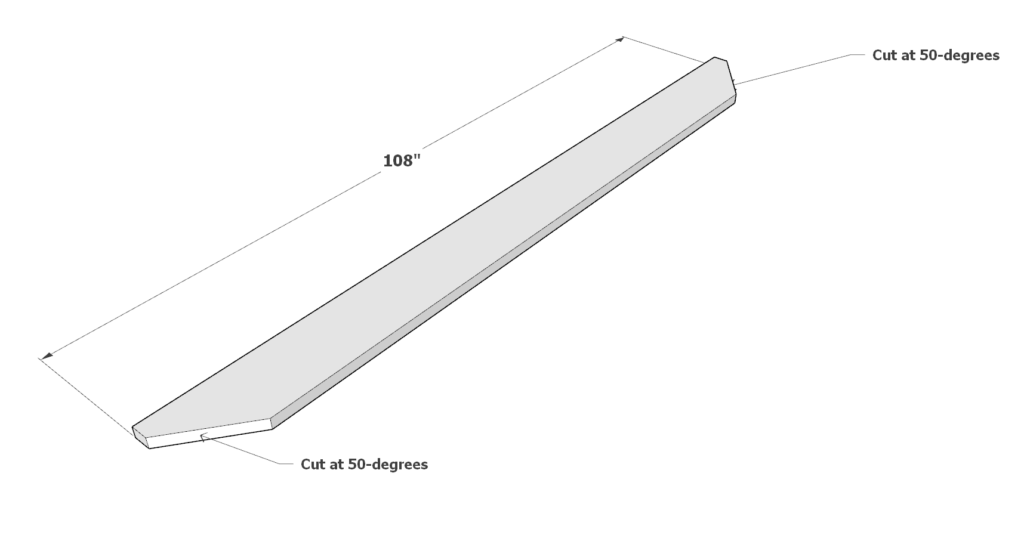
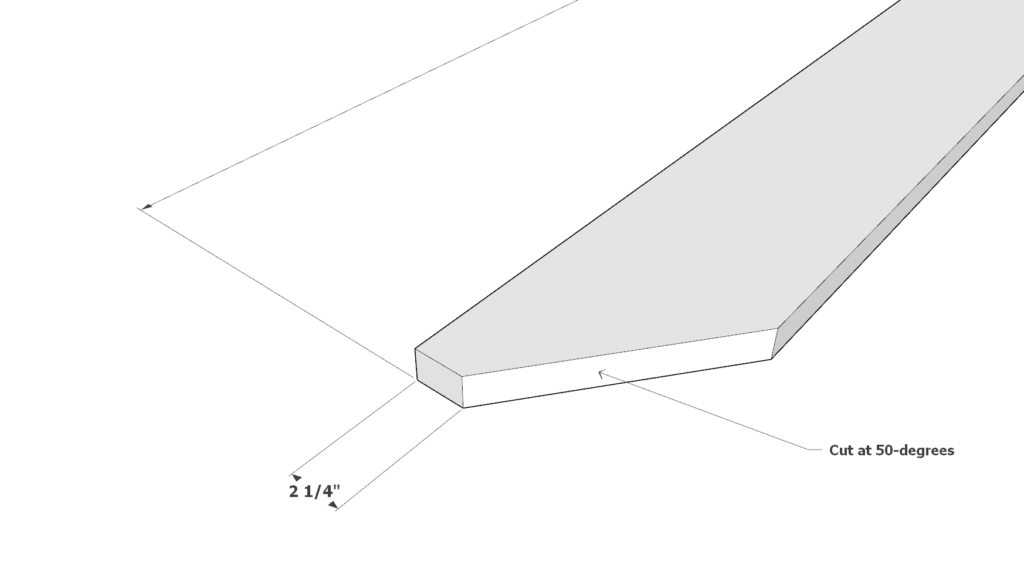
You will need two 108 inch 2x4lumber pieces. The ends need to be cut at 50-degrees. Indent the 50-degree cut by 2-1/4 inches
Step 2 (DIY wedding arch)
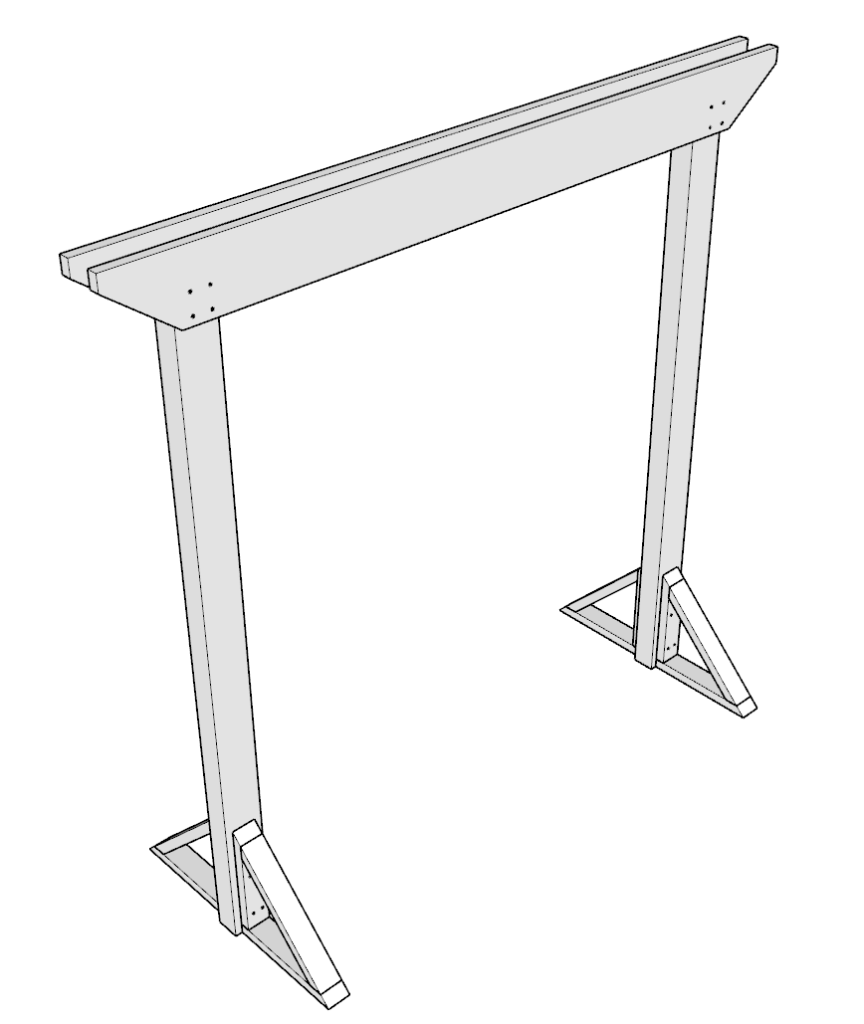
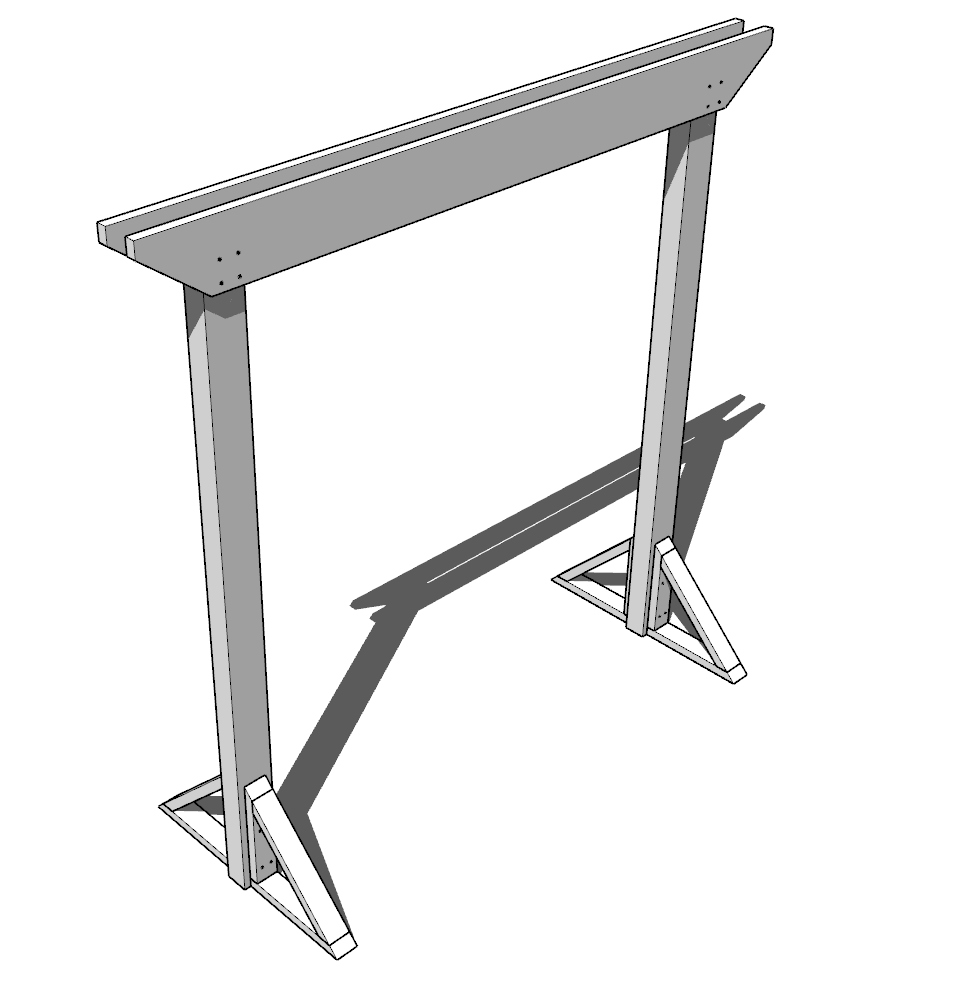
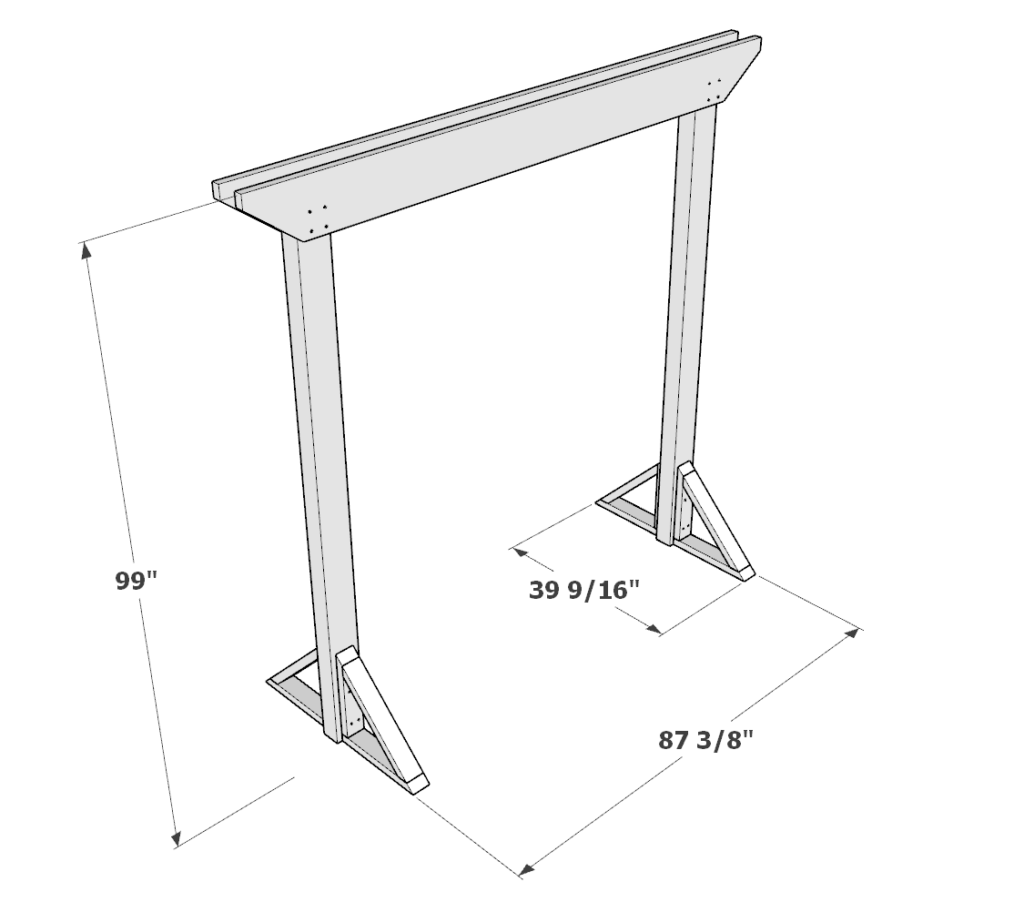
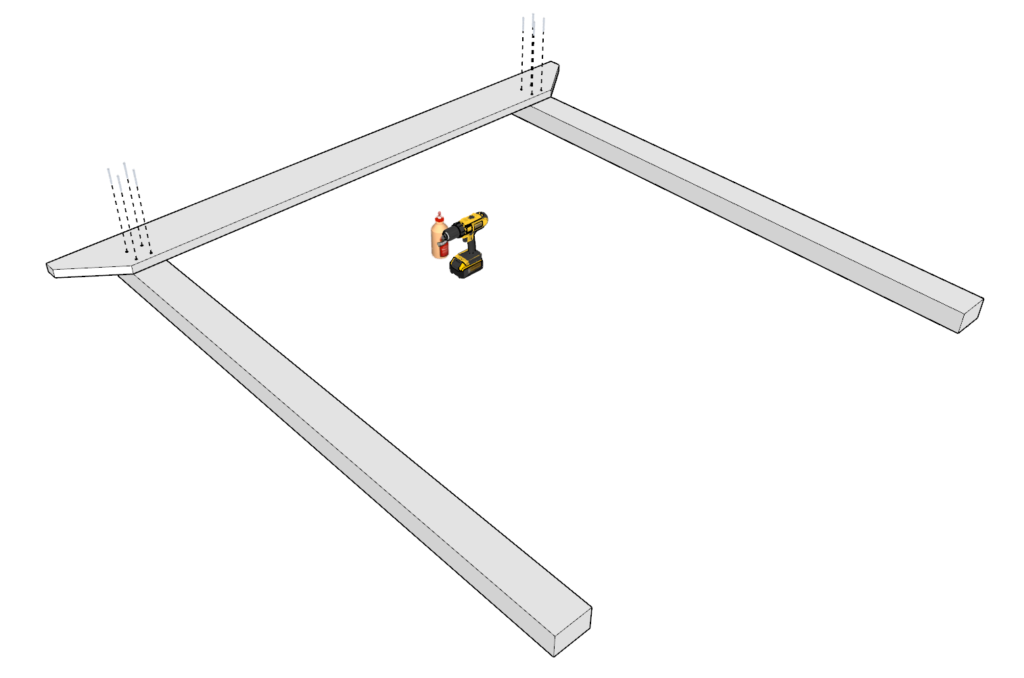
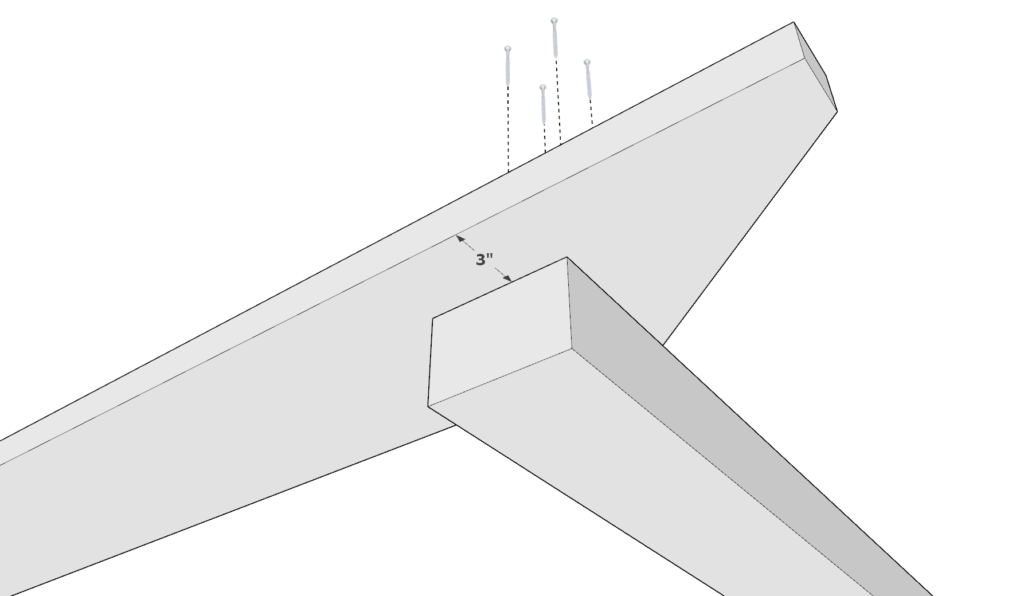
Next, take one of the 108 inch 2×10 lumber pieces and two 96 inch 4×6 lumber pieces and arrange them as shown below.
Apply glue to all areas that will be joined together, predrill holes to prevent wood from splitting, and add 3.5 inch screws.
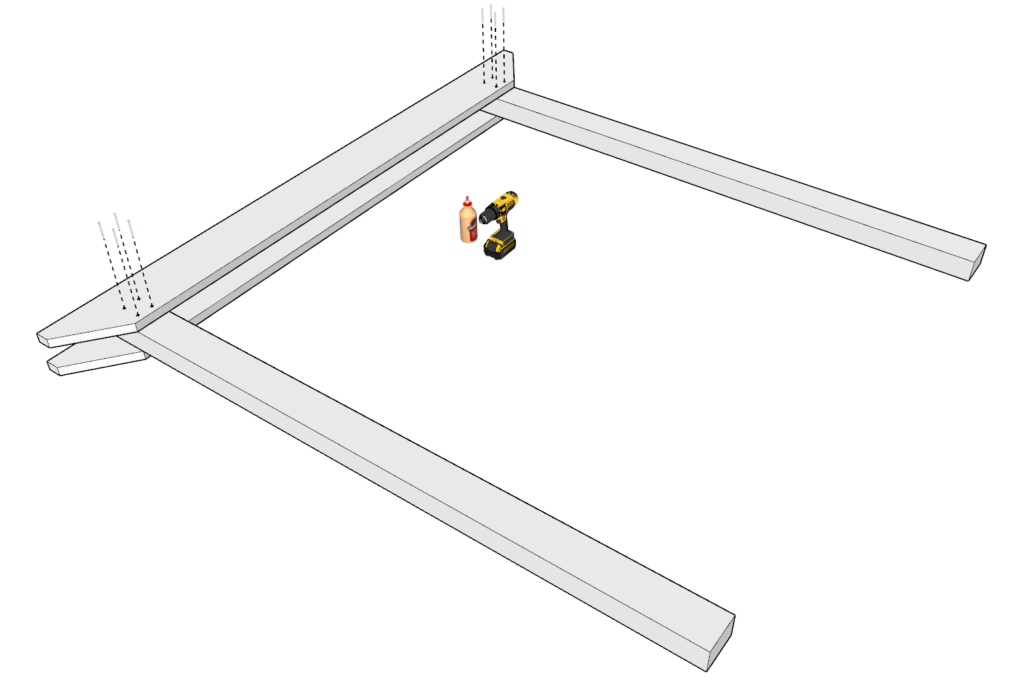
Repeat this on the other side as well so that you have both of the 108 inch 2×10 lumber pieces in place.
Make sure that when you are turning the wedding arch over that you have help so that movement does not compromise the joint.

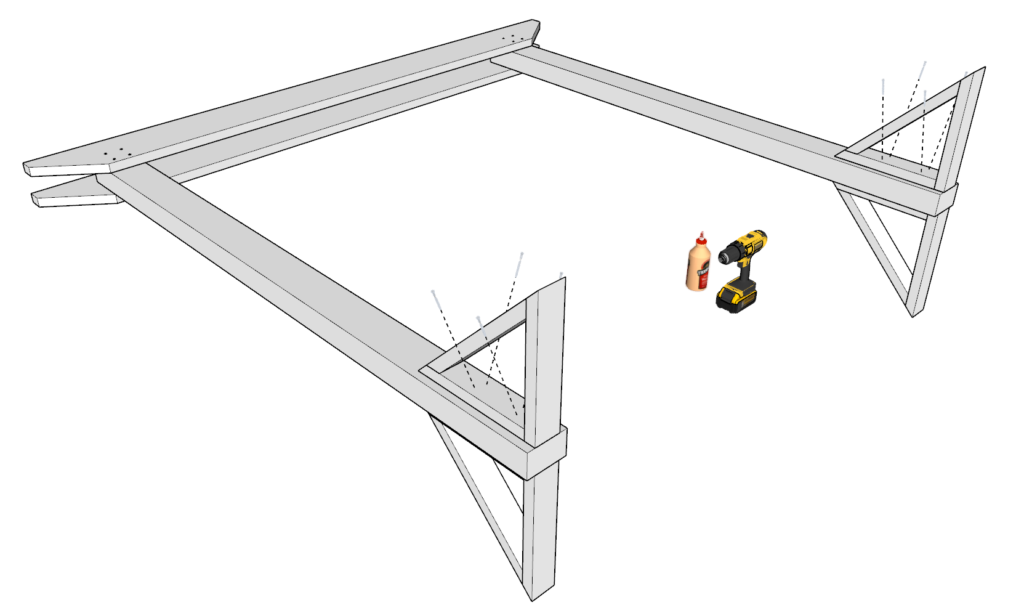
Step 3 (DIY wedding arch)
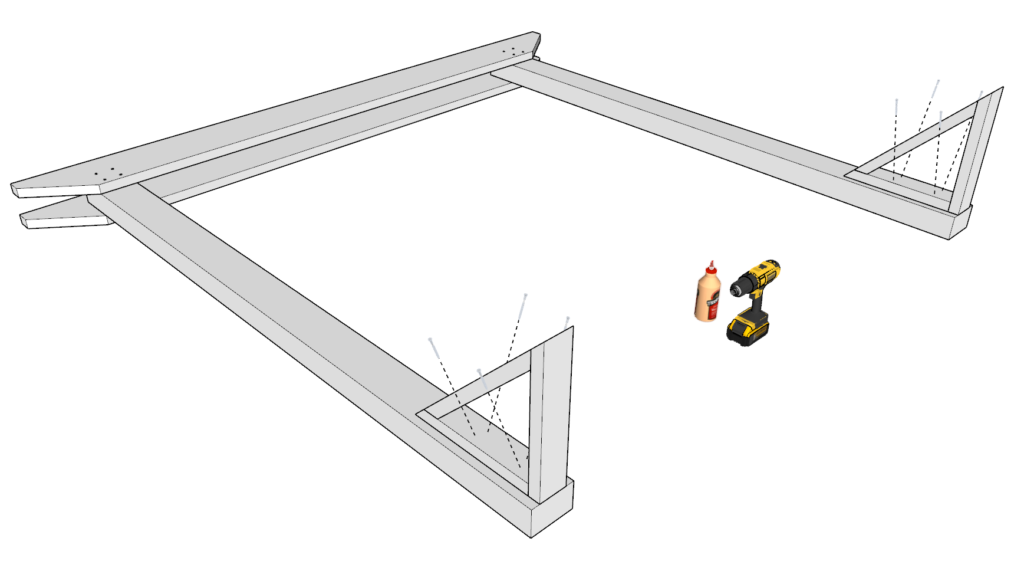
Next, construct four identical wedding arch footings.
Take one 18 inch 2×4 lumber piece, one 16-1/2 inch 2×4 lumber piece, and one 21-3/16 inch 2×4 lumber piece and arrange them as shown below.
Join the triangle together by adding glue, predrilling, and adding 3.5 inch screws.
Align and attach the four footings as shown below using 3.5 inch screws and glue.

Step 4 (DIY wedding arch)
At this point all the wedding arch needs to be sanded down.
I use a 80 grit paper for my orbital sander to help take away all major imperfections and then I follow up with a fine grit 220+ afterwards.
The arch is ready to be painted or stained.