Introduction
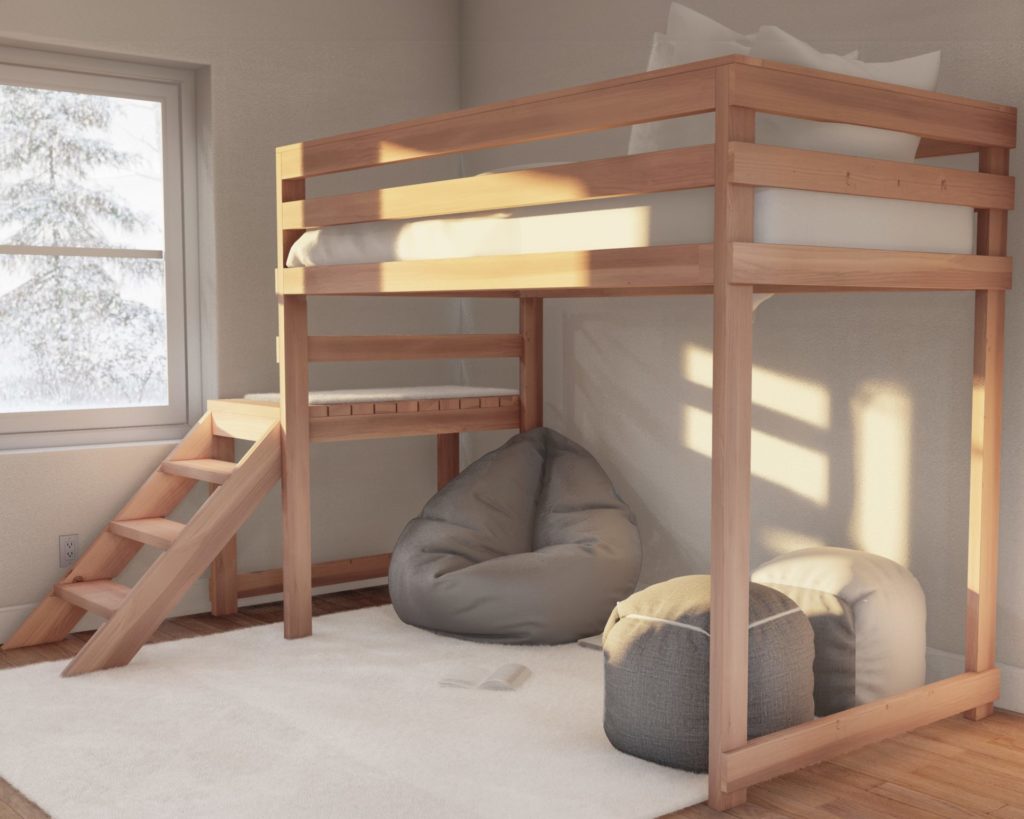
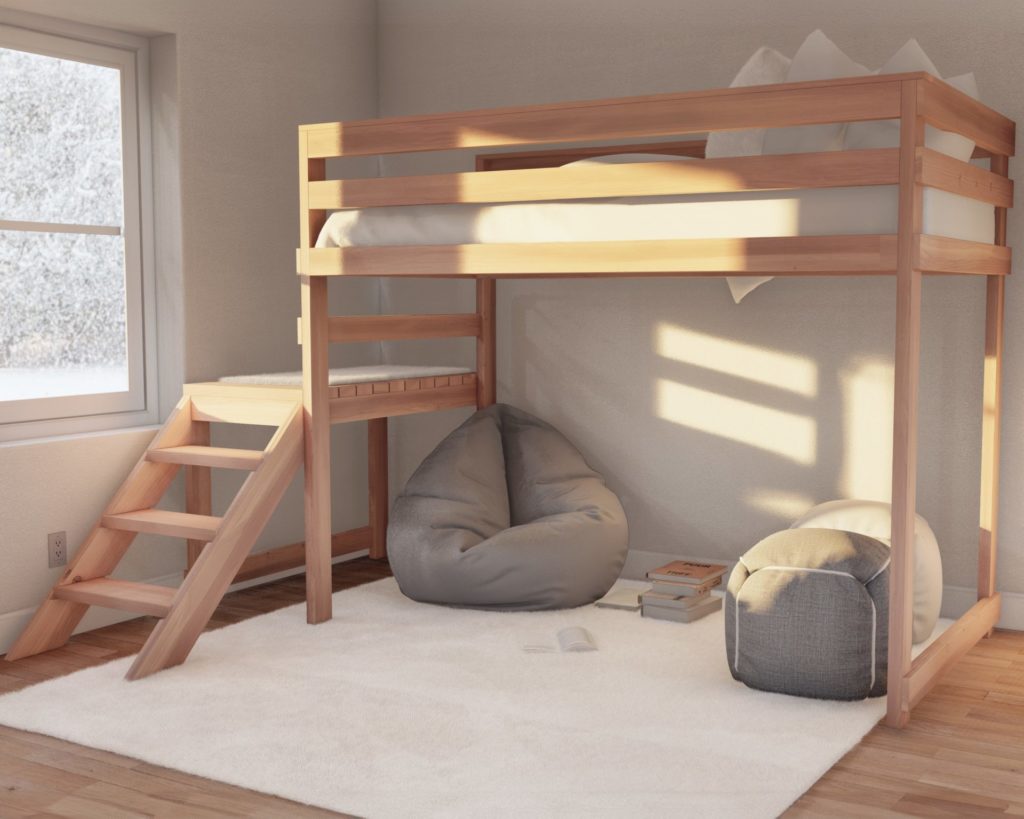
If you’re looking to maximize your space with a practical, stylish, and hands-on home project, our twin-size wooden loft bed plan is the perfect match. Designed for beginners, this plan combines the simplicity of construction with the satisfaction of DIY achievement. Let’s dive into the specifics of what makes this loft bed an ideal choice for your next project.


Specifications
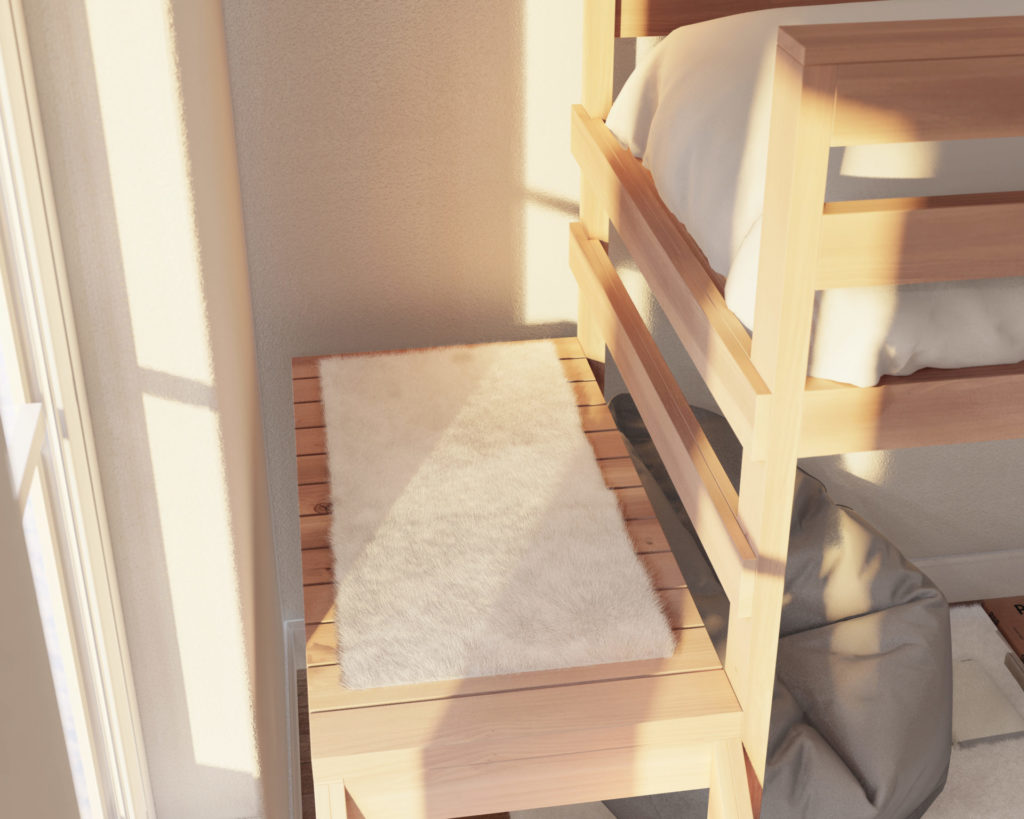
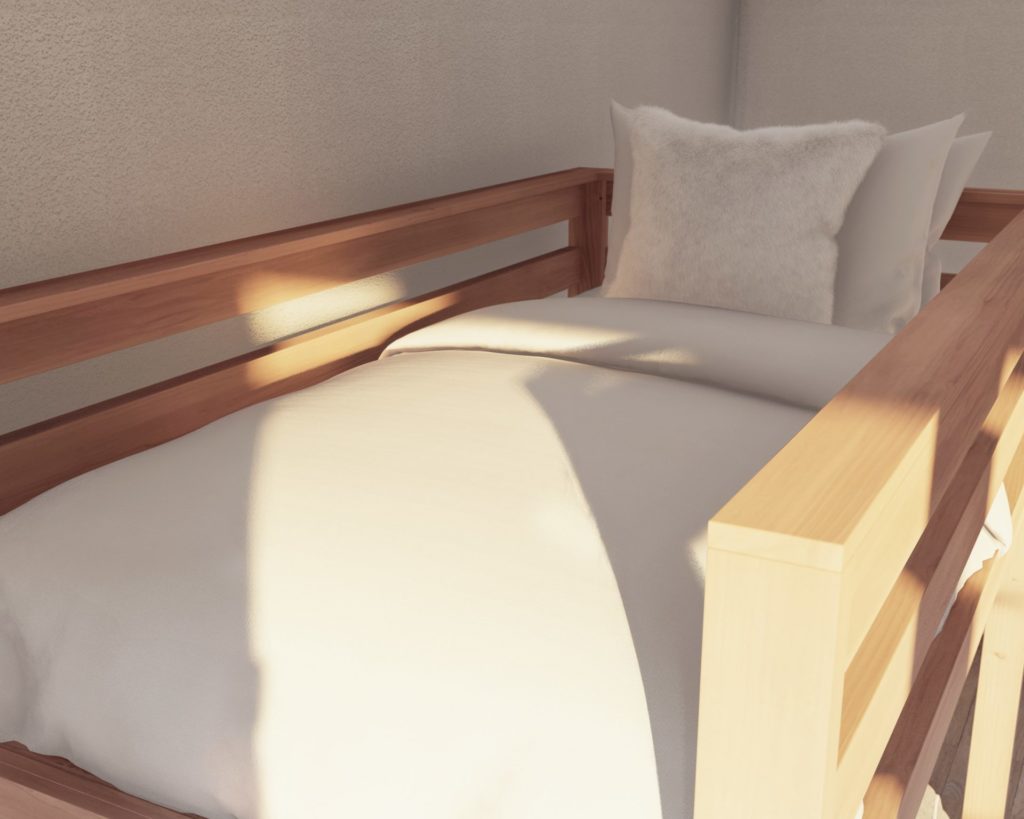
Crafted from durable wood, the twin-size loft bed stands out with its robust frame and adaptable design. The bed’s elevated structure is not only a great space saver but also a versatile piece for any room. The straightforward design, which uses standard 1×4 and 2×4 lumber, invites natural light and adds dimension to your living area, offering a sleek, functional addition to your home.
Here's why our plan stands out:
- Clear, Concise Instructions: Each step is meticulously outlined for a hassle-free and enjoyable build.
- Material Adaptability: Suitable for fresh lumber or reclaimed wood, the plan celebrates the diversity of materials.
- Budget-Friendly: Ideal for using offcuts and spare wood, making it an economical choice.
- Modern Design: The loft bed offers a sleek, space-efficient design enhancing any room.
- Sustainability: Encourages upcycling and responsible use of resources, reducing waste.
- Personalized Journey: Tailor the project to your taste with wood choice and custom finishes.
- Inclusivity: Accessible to all, from beginners to seasoned woodworkers.
- Ongoing Support: Comprehensive guidance is provided every step of the way.
This loft bed plan isn’t just a set of instructions; it’s an invitation to create, personalize, and enjoy the process of making something uniquely yours. Ready to take on the project?
Conclusion
This loft bed plan is not just about building furniture; it’s about giving you the foundation to develop your DIY skills. It’s a practical project that yields a piece of furniture you can be proud of, one that serves both form and function in your home. By choosing to build this bed, you’re taking a step towards becoming more self-sufficient and tapping into the joy of making something by hand.
Ready to build? Get your plan today and start the fulfilling journey of creating a staple piece for your home that’s built to last.
Time
5 hours (varies with experience)
Cost
$200 (Costs may vary based on location and supplier.)
Skill level required
Beginner
DIY Twin Loft Bed PDF Plan
What is included in the PDF download?
- Easy to read step by step instructions
- Material list
- Tools needed
- Helpful links to materials and tools needed
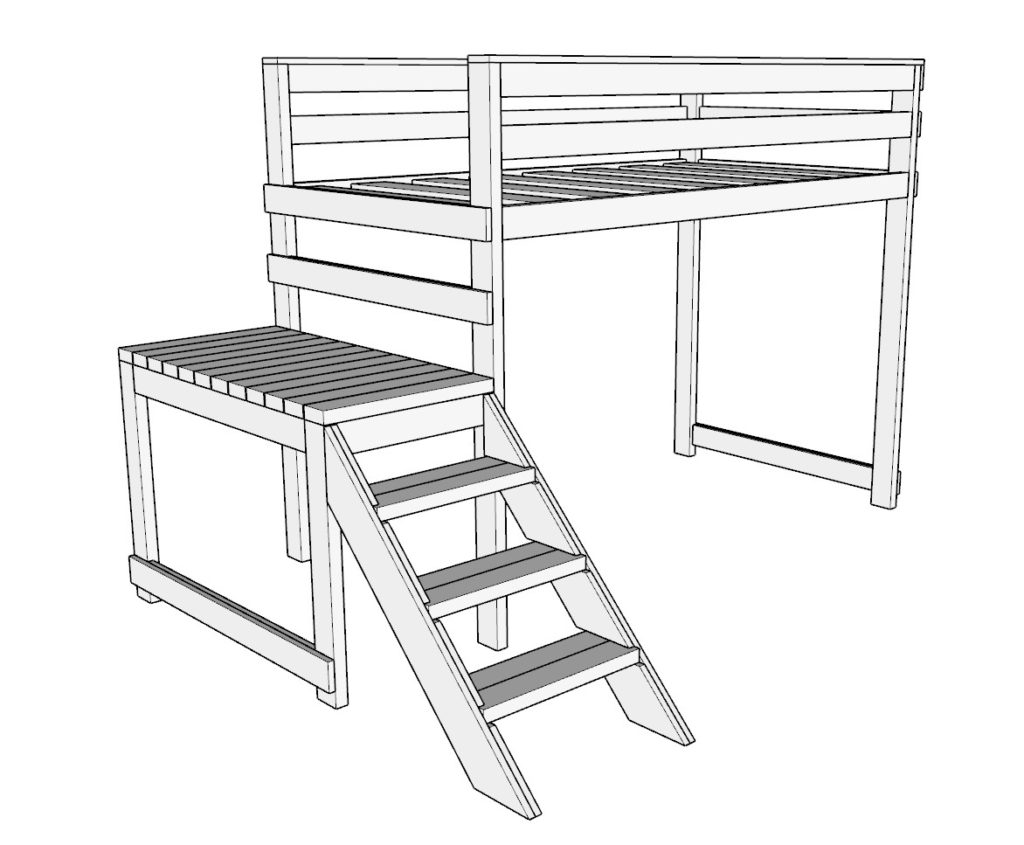
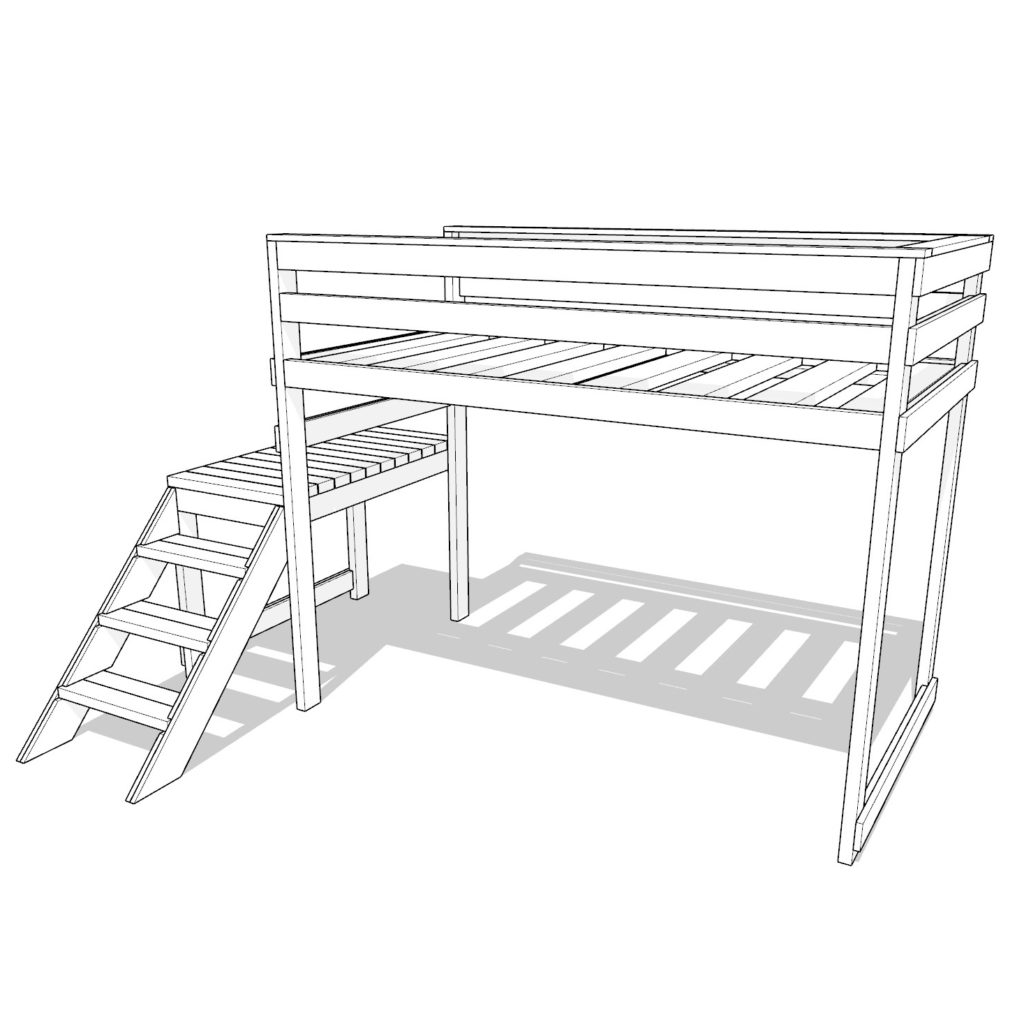
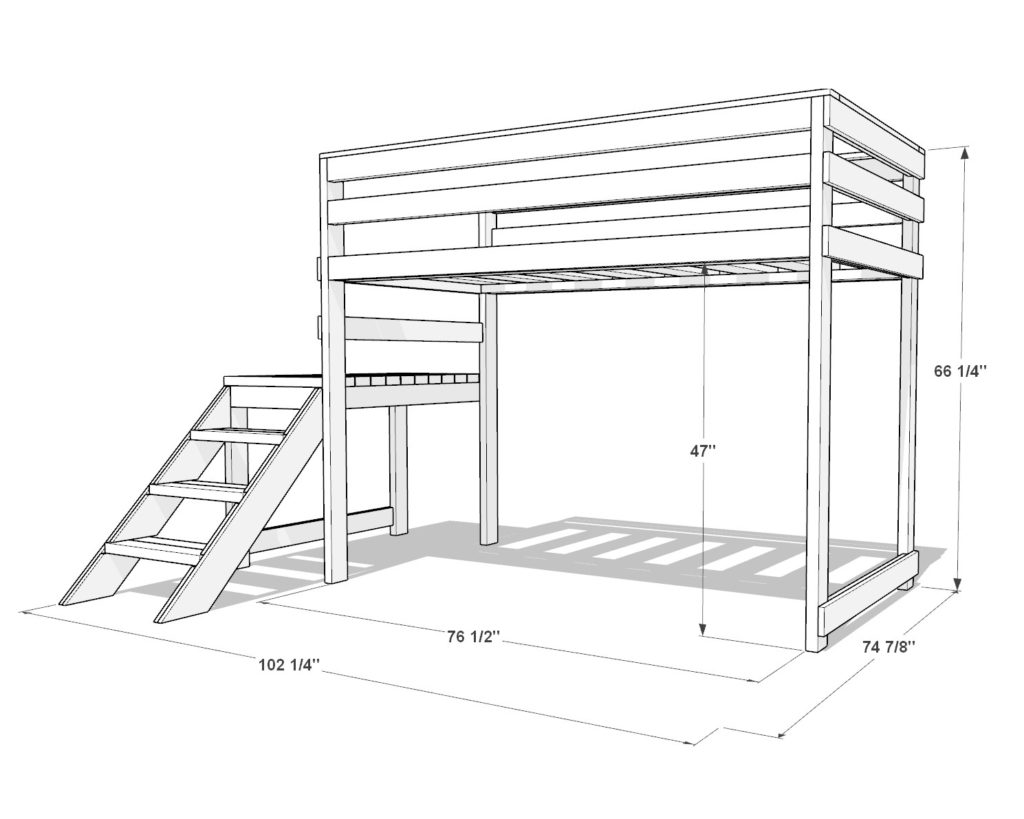
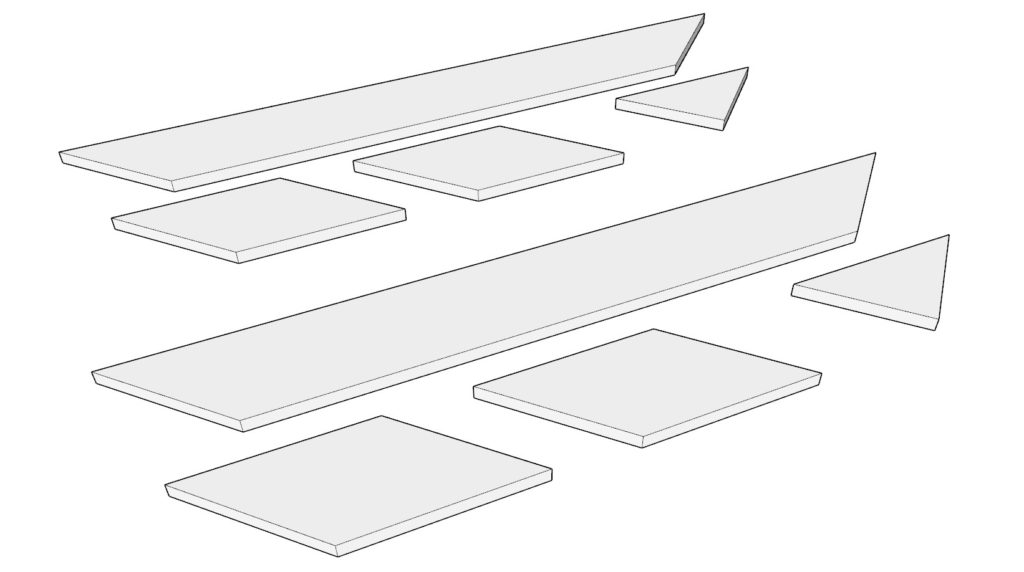
DIY Twin Loft Bed Dimensions
Tools Needed for This Project:
Available with the purchase of the DIY plan PDF.
Lumber Shopping & Cut List
Available with the purchase of the DIY plan PDF.
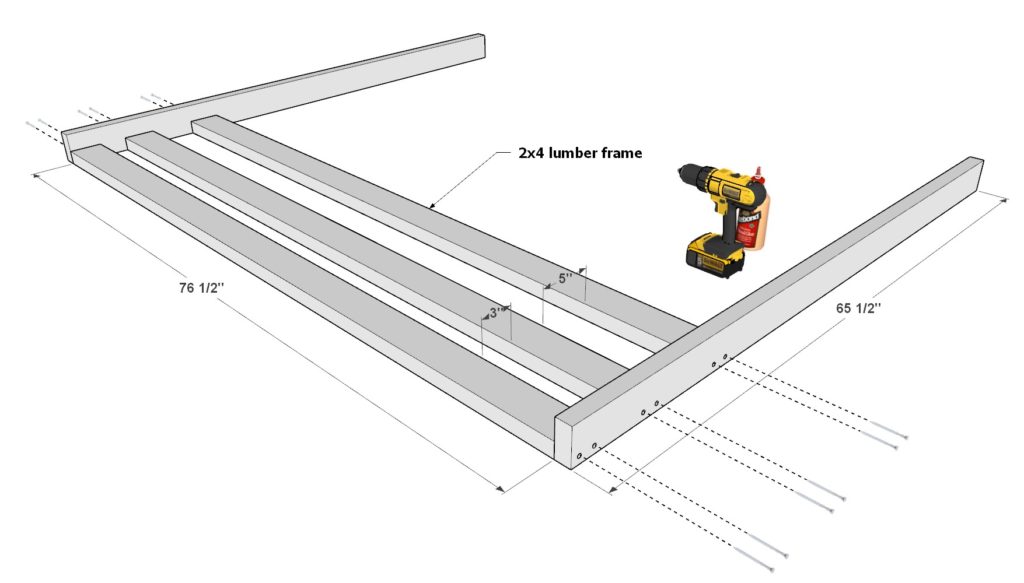
Step 1: Assembling the Bed Frame Base
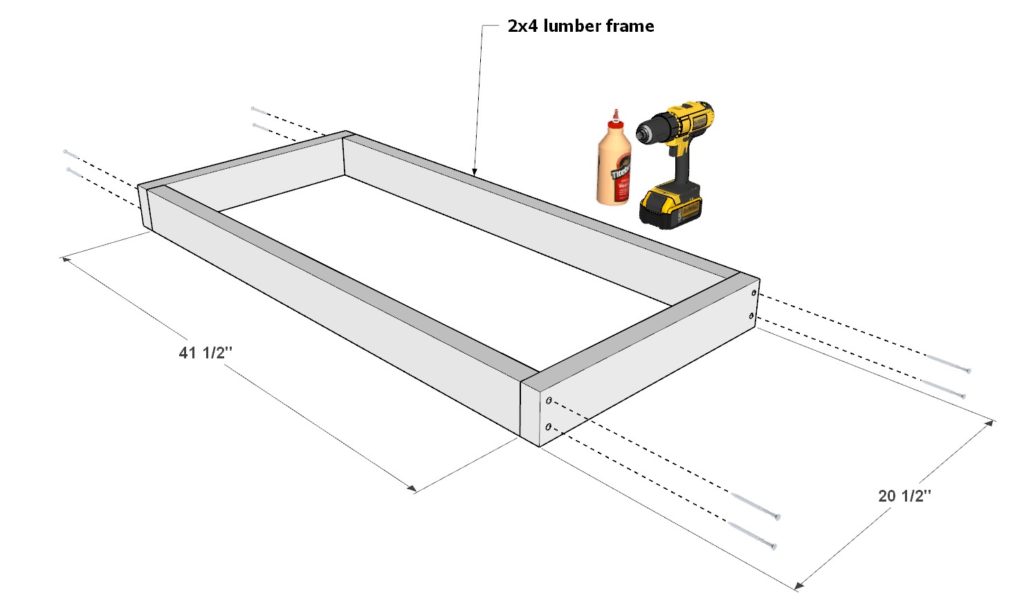
Begin by creating the base of your loft bed frame. You’ll need two pieces of 2×4 lumber, each cut to 65-1/2 inches, and three pieces cut to 76-1/2 inches. Arrange these pieces as depicted in the provided diagram.
Secure the p pieces together using wood glue and 3.5-inch screws.
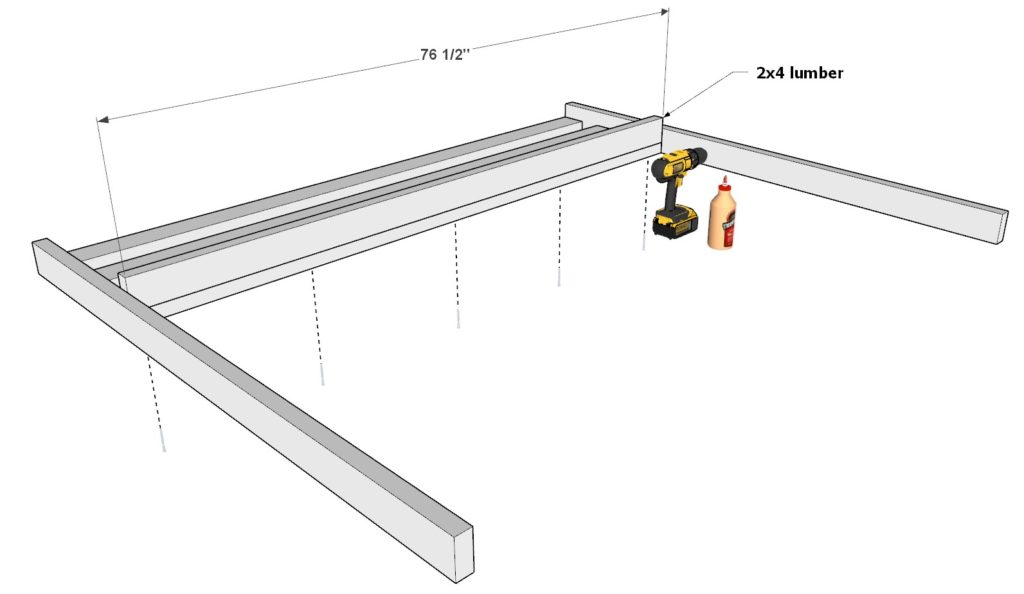
Now, add a fourth 76-1/2 inch piece as indicated in the diagram. Attach it with wood glue and screws.
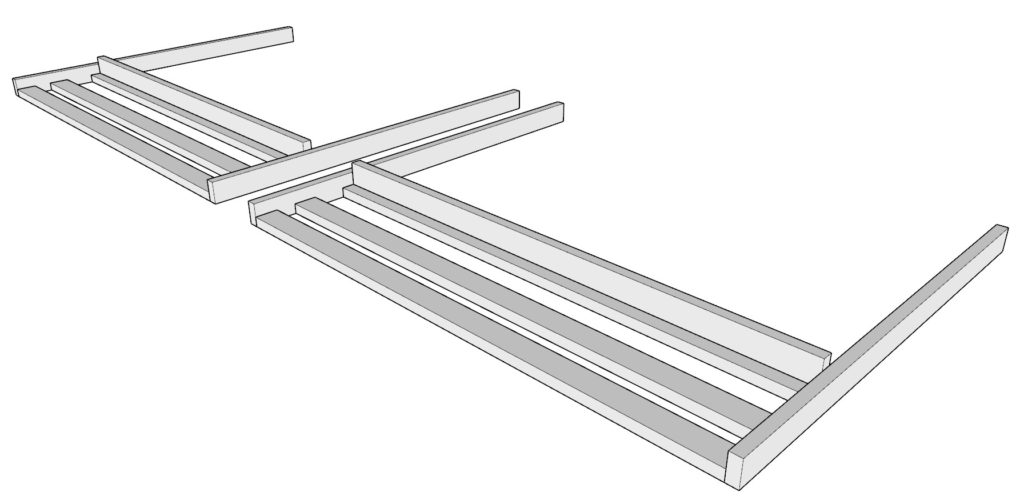
Repeat this process to make a second, identical frame piece.
Tips for a Professional Finish:
- Sanding and Planing: Smooth out all lumber pieces before assembly. This pre-sanding means you’ll only need to do touch-ups later, ensuring a professional look.
- Countersinking Screws: For a flush finish, countersink your screws. This means the screw heads will sit level with the wood surface.
- Preparing for Dowels: If you’re planning to use dowels to cover screw holes, drill the holes deep and wide enough to accommodate them.
- Pre-Stain for Cleanliness: Consider staining or painting the lumber before assembly for a neater finish and to avoid getting stain or paint on the hardware.
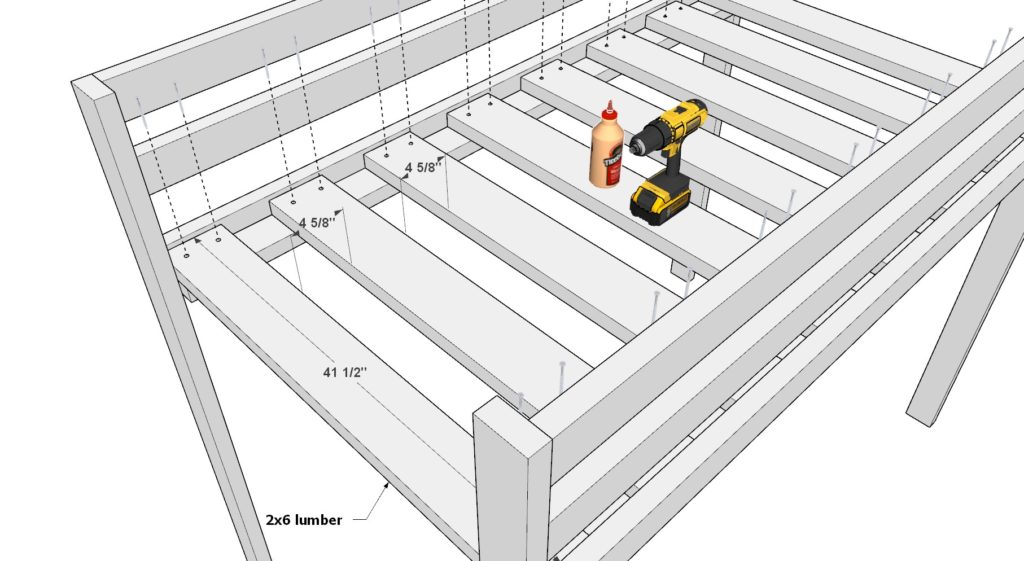
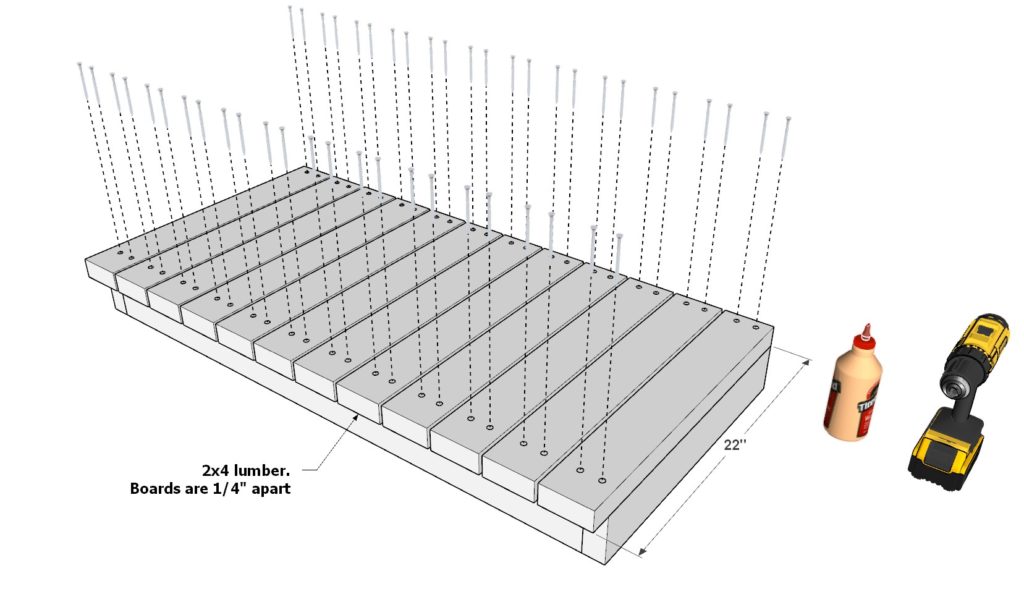
Step 2: Installing the Mattress Slats and Braces
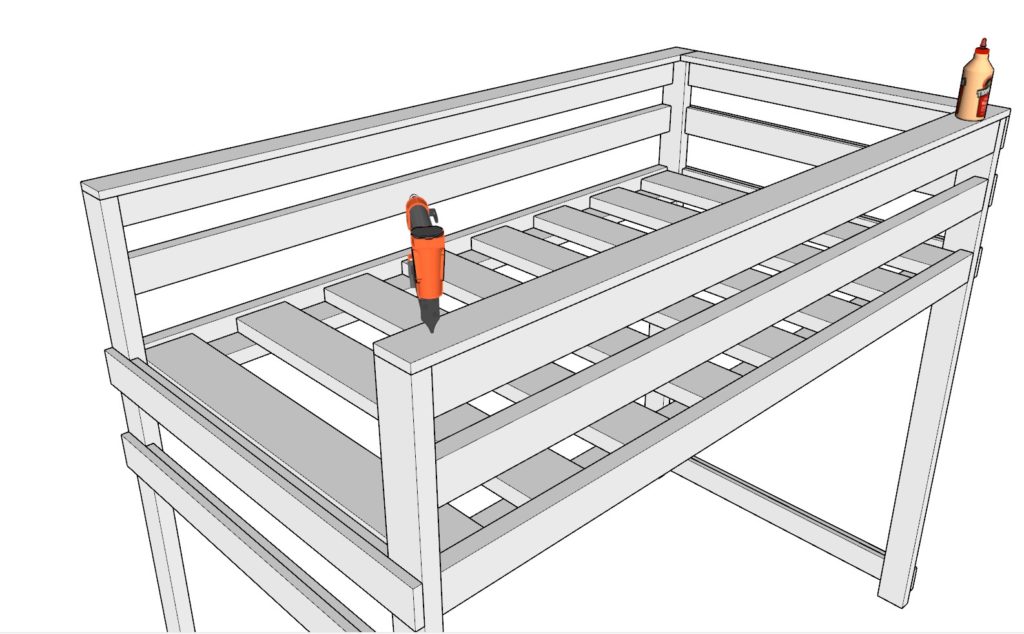
Now, focus on preparing the mattress foundation for your loft bed. You’ll need eight 2×6 lumber pieces, each measuring 41-1/2 inches in length. Lay these boards across the frame you’ve just constructed, spacing them out evenly at 4-5/8 inches apart, as illustrated in the accompanying diagram.
Affix each board to the frame using 2.5-inch screws and wood glue, ensuring that they are securely attached and evenly spaced to support the mattress properly.
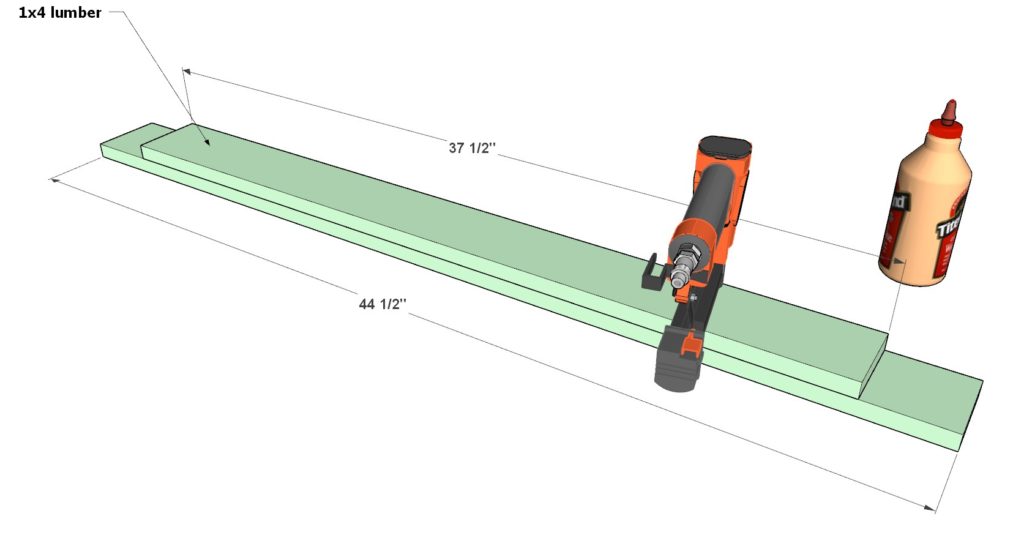
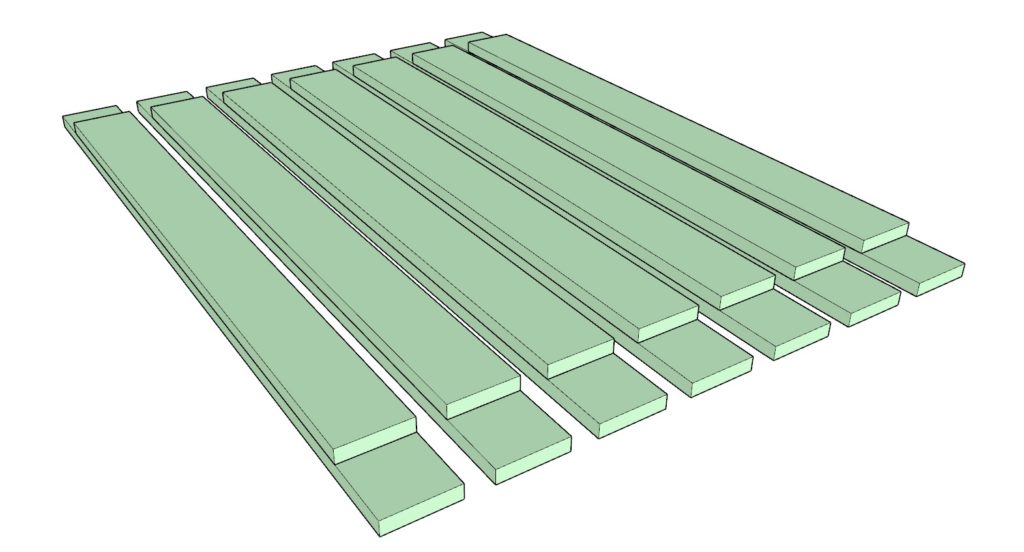
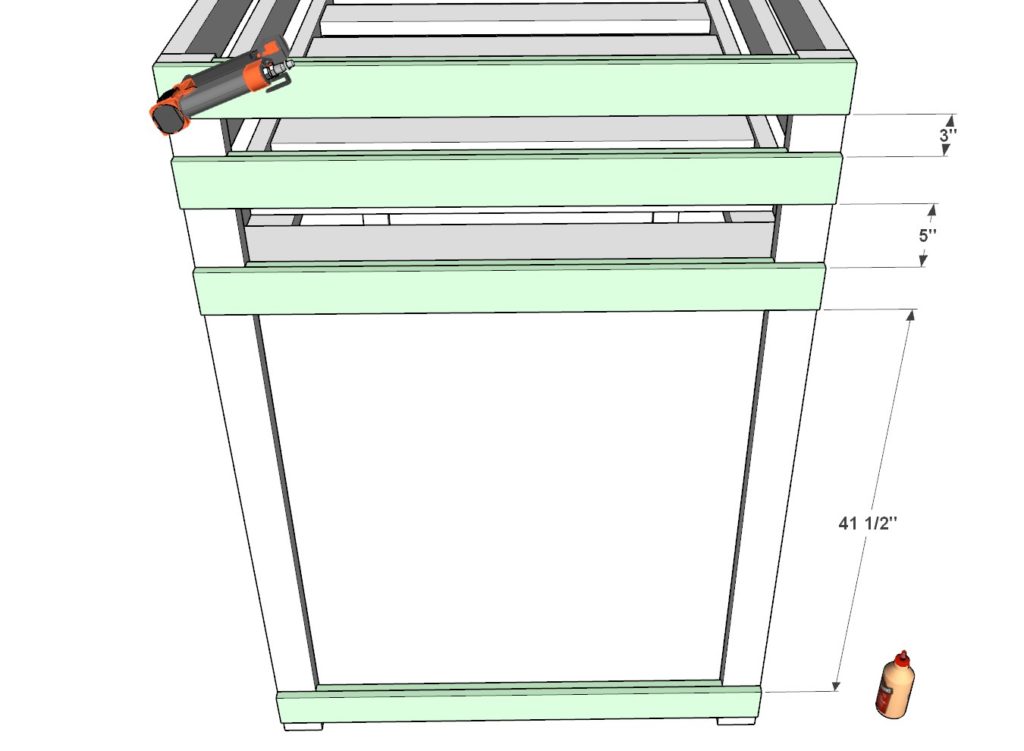
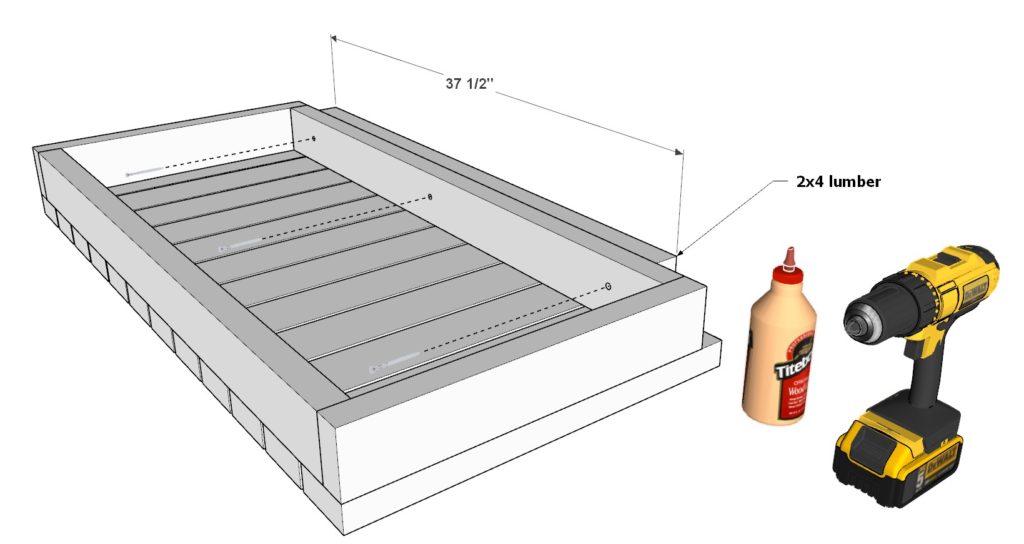
Following this, you’ll need to create seven support braces. Each brace consists of one 44-1/2 inch 1×4 lumber piece and one 37-1/2 inch 1×4 lumber piece. Assemble these braces by applying wood glue to the joining edges and then fastening them with 1.25-inch pin nails. These braces are indicated in moss green in the instructions and diagrams.
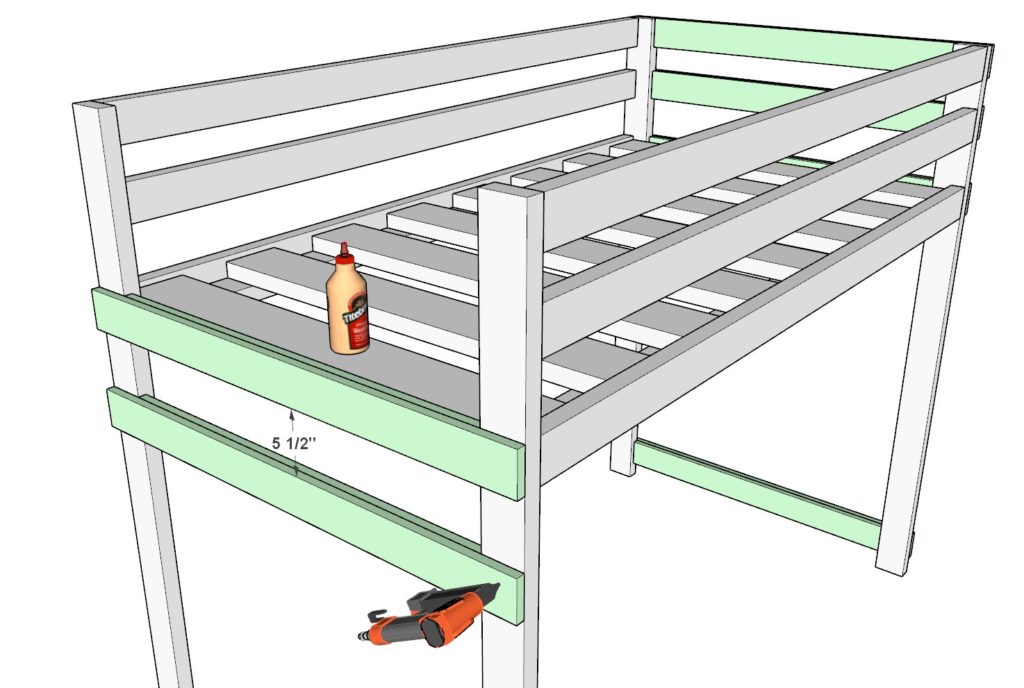
Begin fitting these braces to the designated areas on the loft bed as shown in the diagrams. They will reinforce various parts of the structure. Secure them in place with glue and pin nails for added stability.
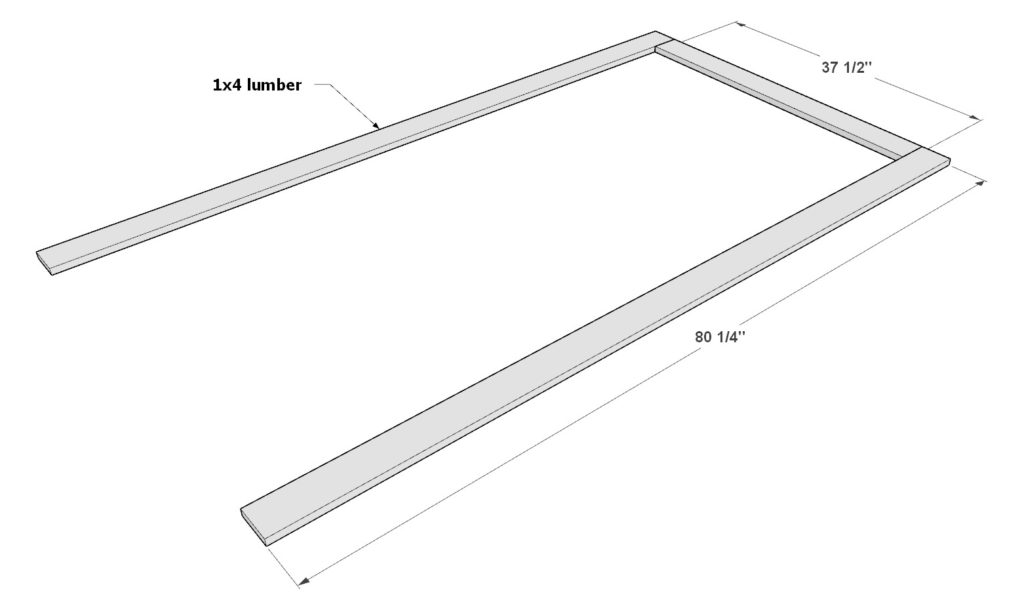
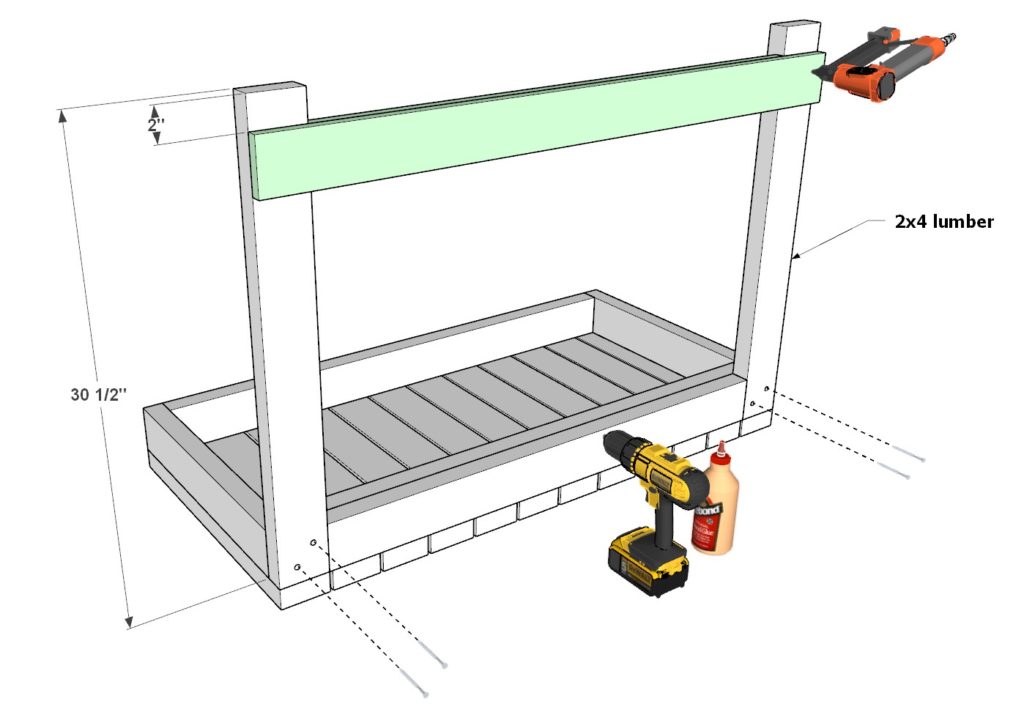
Lastly, construct the railing trim around the top perimeter of the bed frame. For this, you’ll use two 80-1/4 inch 1×4 lumber pieces along the sides and one 37-1/2 inch 1×4 piece at the foot of the bed. Fasten these trim pieces using wood glue and pin nails, ensuring they are flush with the top edge of the bed frame for a neat finish. s
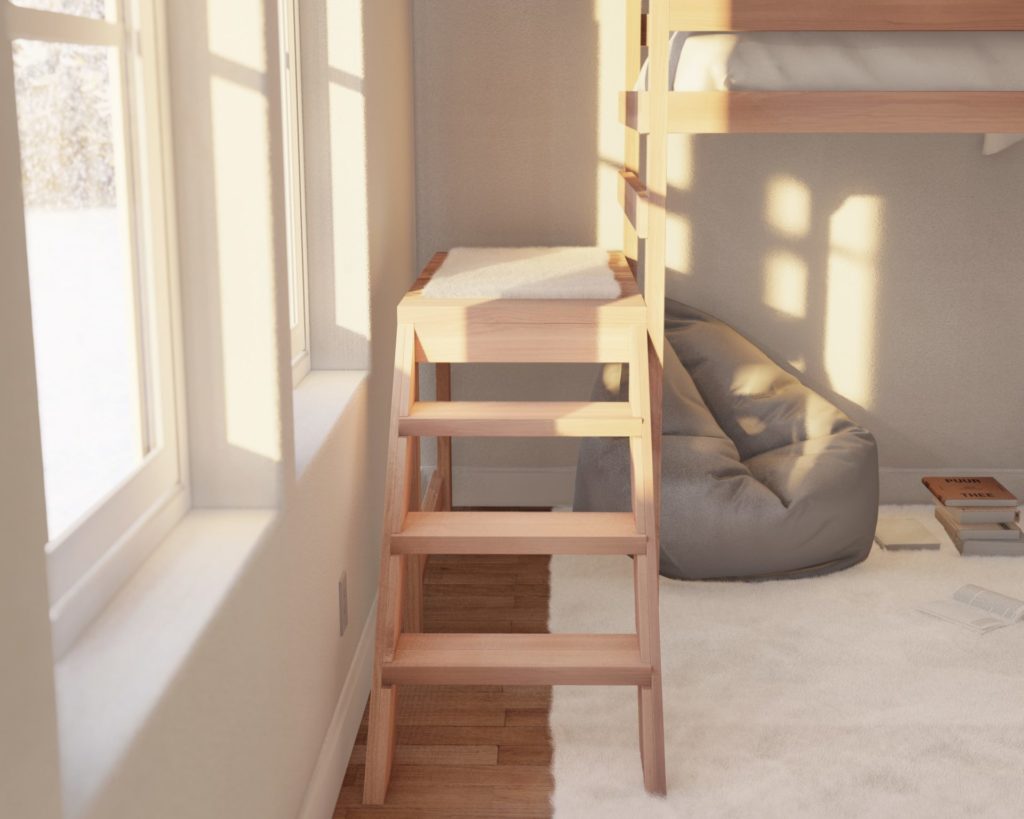
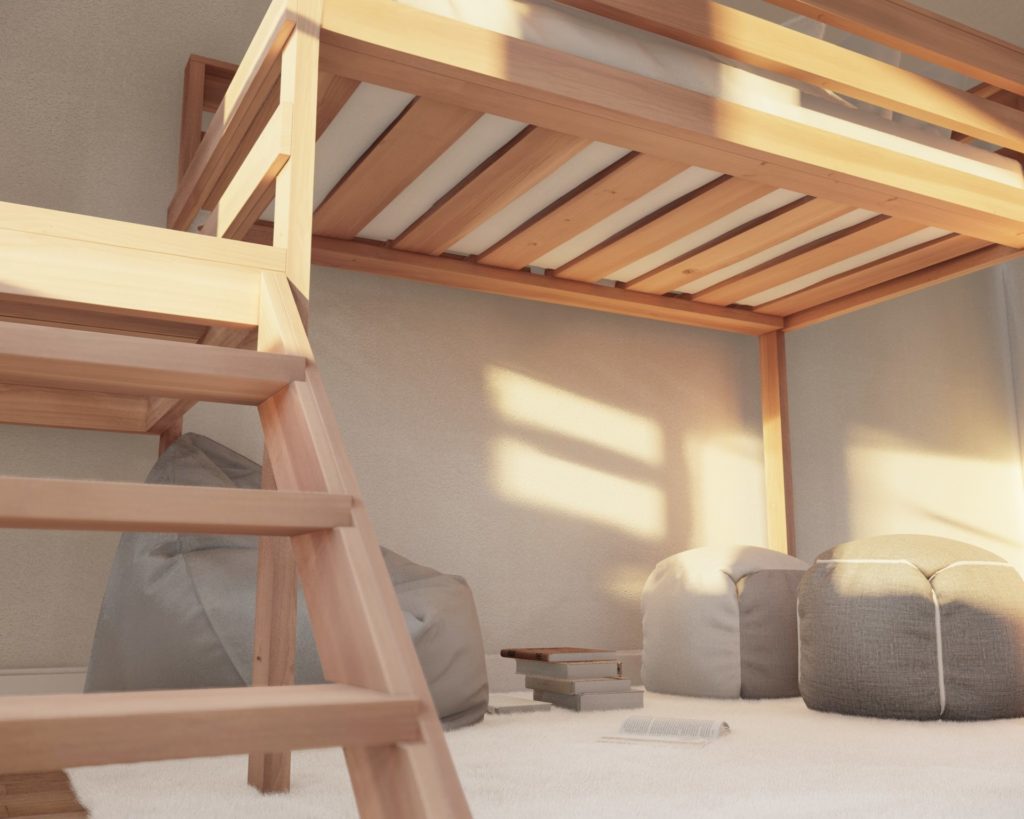
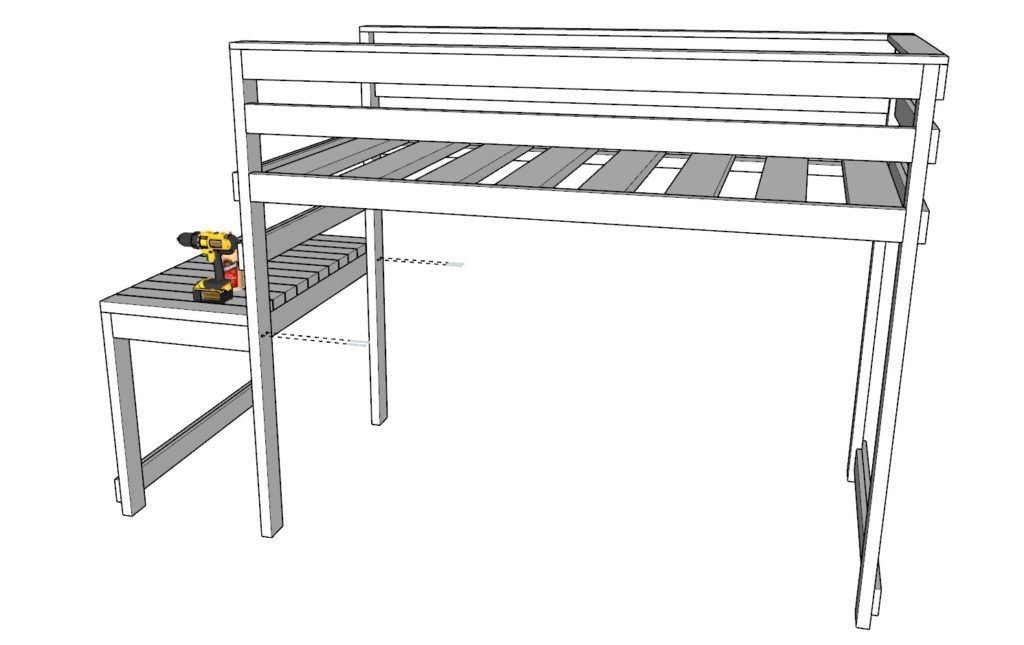
Step 3: Constructing the Step Platform
Now, you will construct the step section that provides access to the loft bed.
Start by taking two 41-1/2 inch 2×4 lumber pieces for the sides of the ladder, and two 20-1/2 inch 2×4 pieces for the top and bottom. Lay out these four pieces to form a rectangle as illustrated in the first diagram. Secure the rectangle using wood glue and 3.5-inch screws at each joint.
For the platform area, attach twelve 22-inch 2×4 lumber pieces you just created. Space these evenly and secure each one with wood glue and 3.5-inch screws.
Next, fix a 37-1/2 inch 2×4 piece as shown in the diagram for additional support. Attach this piece with wood glue and 2.5-inch screws.
Finally, construct support legs for the platform by securing two additional 30-1/2 inch 2x4s to the bottom of the platform. Secure them with 3.5-inch screws and wood glue. Add the pre-assembled green brace (from the previous step) to this structure, attaching it with glue and pin nails for reinforcement.
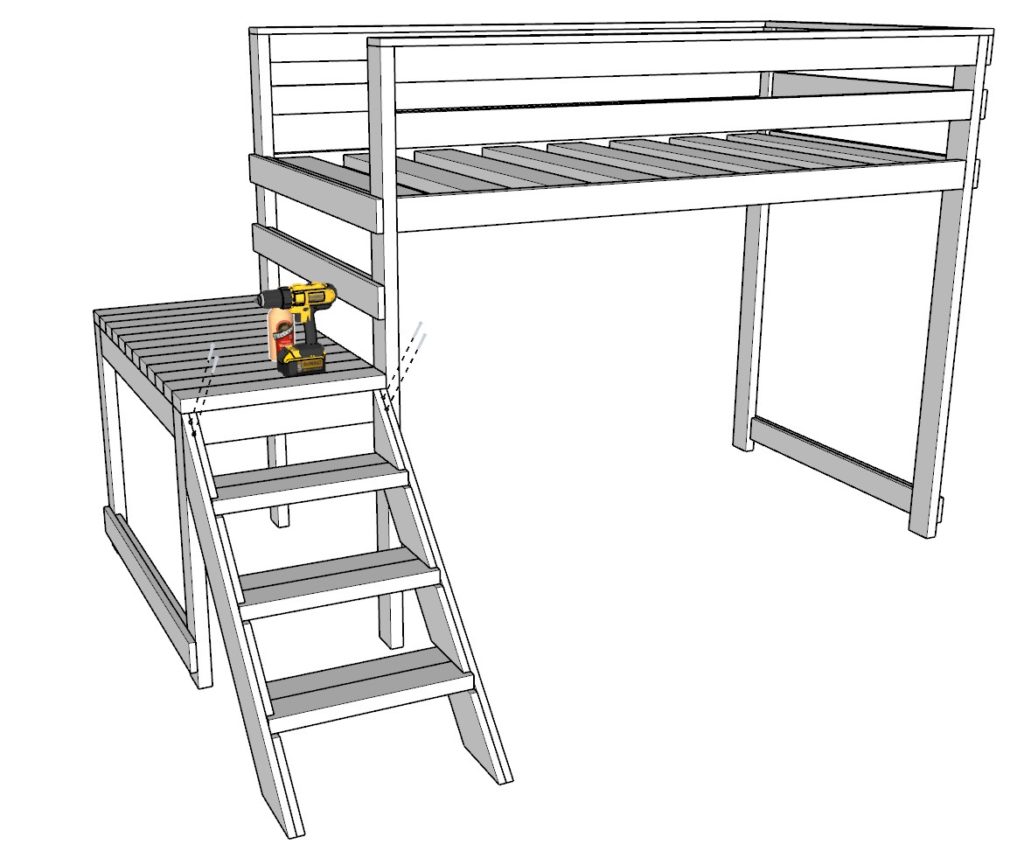
Step 4: Assembling the Staircase
For this step, you will build the actual staircase that will be used to climb up to the loft bed.
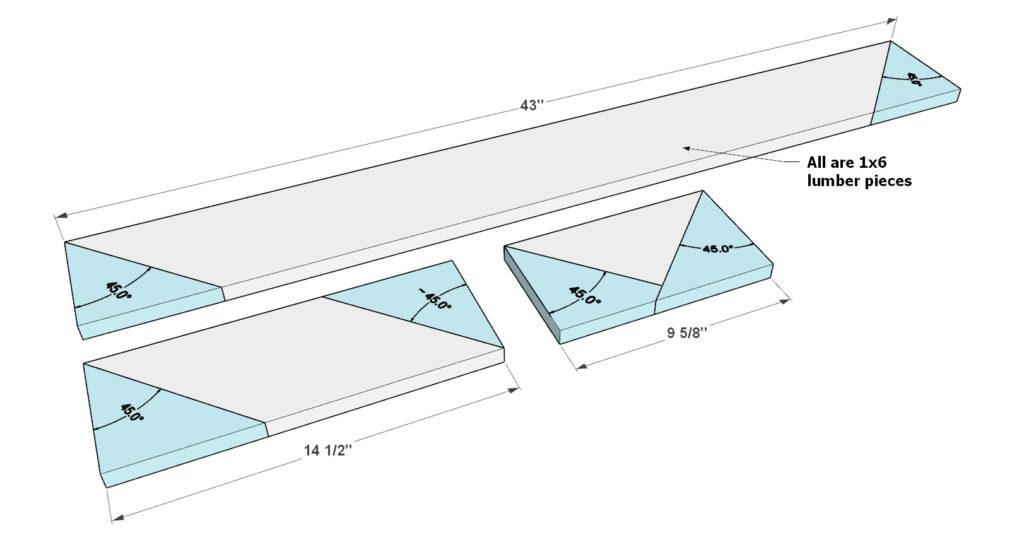
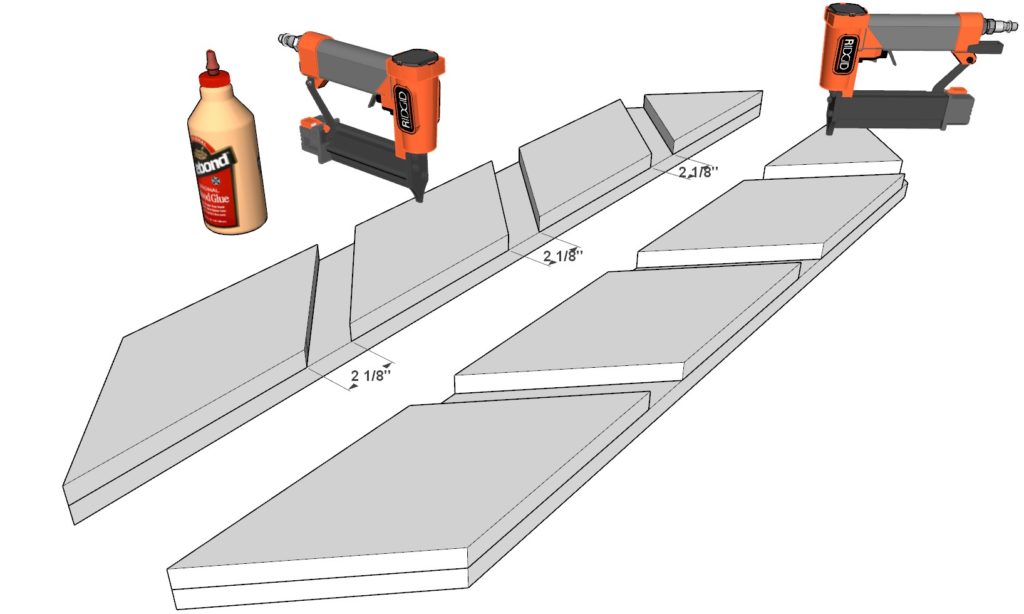
Begin by preparing your 1×6 lumber boards. Cut one board to a length of 43 inches and angle the ends at 45 degrees. Then, cut another board to 14-1/2 inches, again angling both ends at 45 degrees. Finally, cut a smaller board to 9-5/8 inches with 45-degree angles on both ends.
Create two identical sets of these angled 1×6 lumber pieces; these will form the sides of the staircase.
Using a pin nailer, 1.25-inch nails, and wood glue, assemble these pieces according to the diagram to form the structure of your stairs.
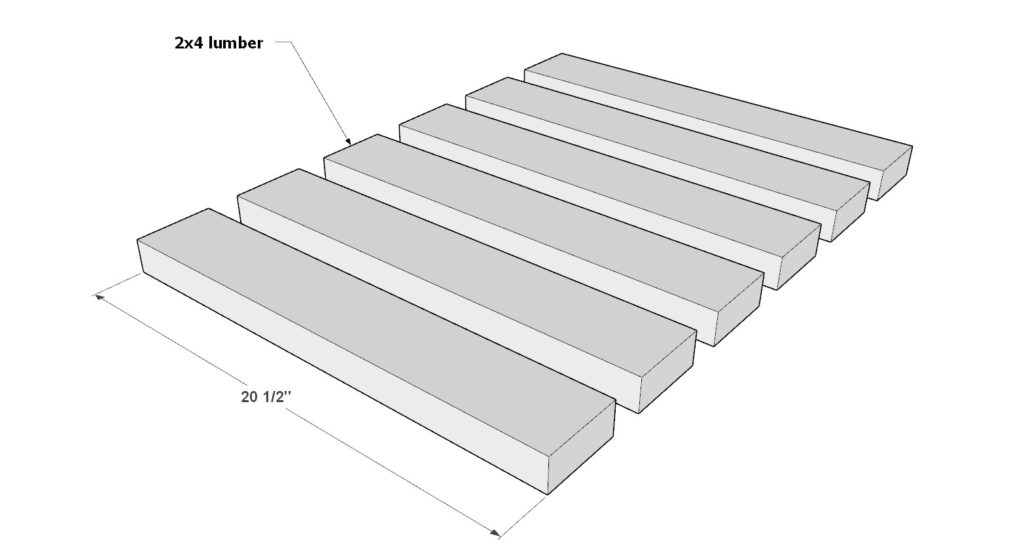
Now add six 20-1/2 inch long 2×4 lumber pieces across the width of the stairs. Affix these with pin nails and wood glue for a standard build. If you anticipate the need to support more weight, consider using screws for additional strength.
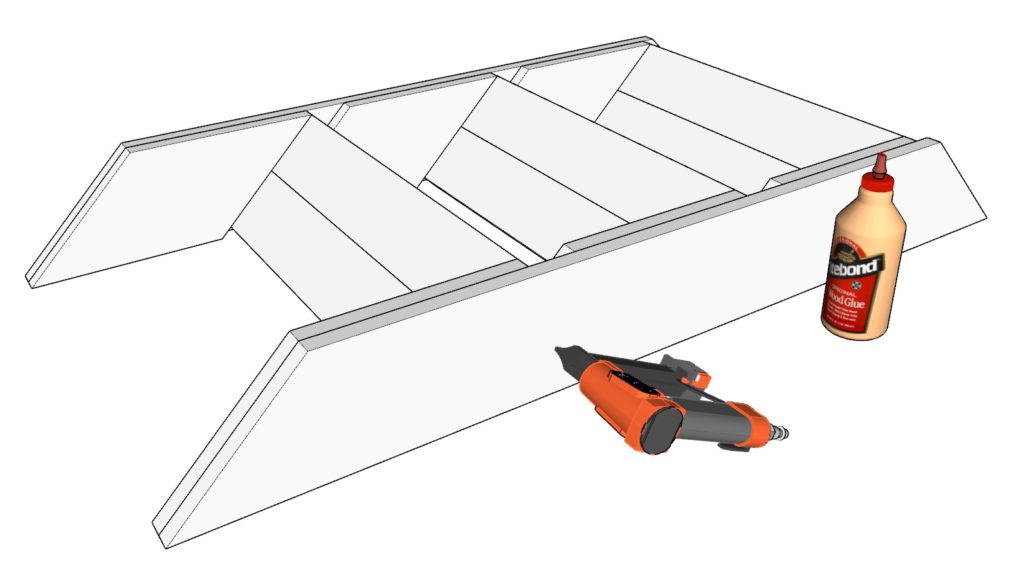
After constructing the stairs, attach the ladder section from the previous step to the loft bed frame using screws and wood glue. Then, secure the newly assembled stairs to the stepped area, ensuring everything is tightly fixed with glue and screws for a sturdy and safe staircase.
Step 5: Finalizing Your Loft Bed
Sanding & Pre-Staging
- Begin with 120-grit sandpaper for initial smoothing; follow the wood grain.
- Switch to 220-grit for final smoothing.
- Remove dust with a tack cloth.
- Apply a pre-stain wood conditioner for stain projects.
Staining
- Select a stain; apply with a brush or rag along the grain.
- Let it sit (5-15 minutes), then wipe off excess.
- Dry per instructions; apply additional coats as needed.
Painting
- Prime the wood first; let it dry.
- Paint with long, even strokes. Dry thoroughly.
- Lightly sand between coats for a smooth finish.
Safety & Cleanup
- Work in a ventilated area; wear protective gear.
- Follow all product safety instructions.
- Ensure materials are dry before use.