Why have a Montessori floor bed?
Firstly, low beds are an amazing way to encourage autonomy and freedom in the early stages of development of your child. When the bed is low to the ground the toddler can develop independence and autonomy to be able to leave the bed when they need to. As a result, toddlers are able to regulate their sleep schedule according to their bodies needs.
Furthermore, the bed can also help fosters the basic skills needed for a healthy relationship with sleep. Toddlers also develop special awareness and learning about physical boundaries all while staying safe thanks to the beds low height.
Because children are prone to accidents as they grow and develop, the frame of the bed helps to lift the mattress of the floor to prevent growth of mildew. With a Montessori Floor Bed, children are free to interact with their environment and surroundings at their own pace. This makes the home their first learning environment.
Why have railing and a door around the bed?
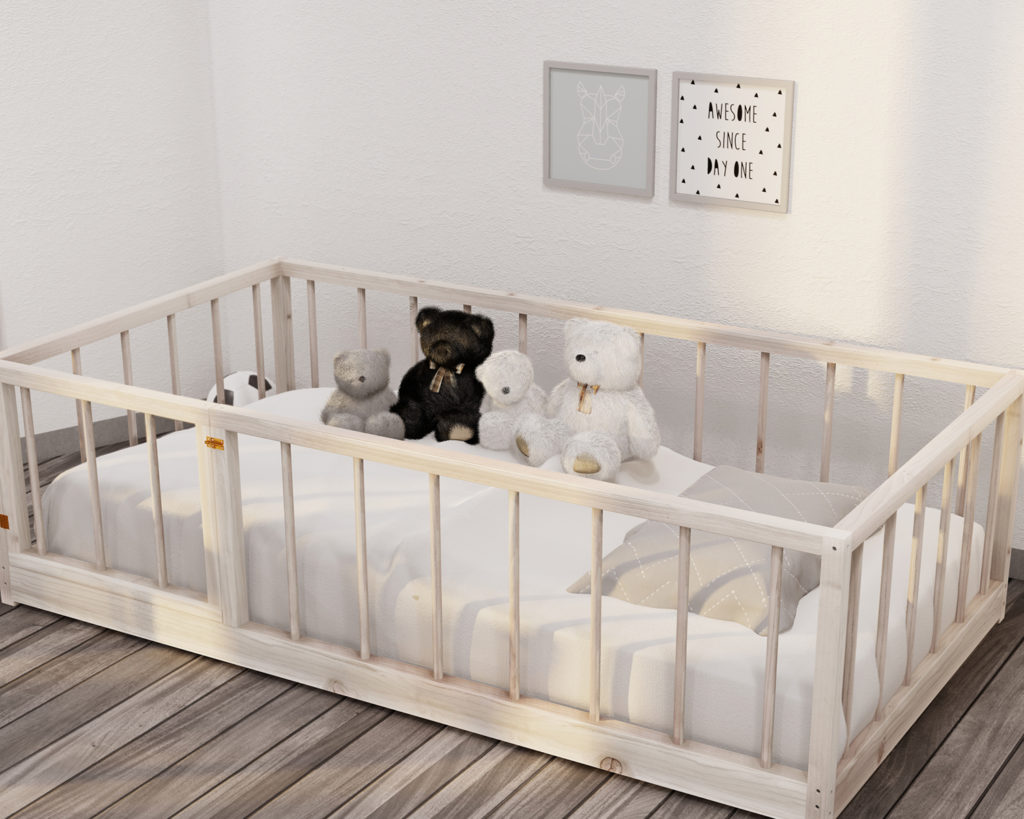
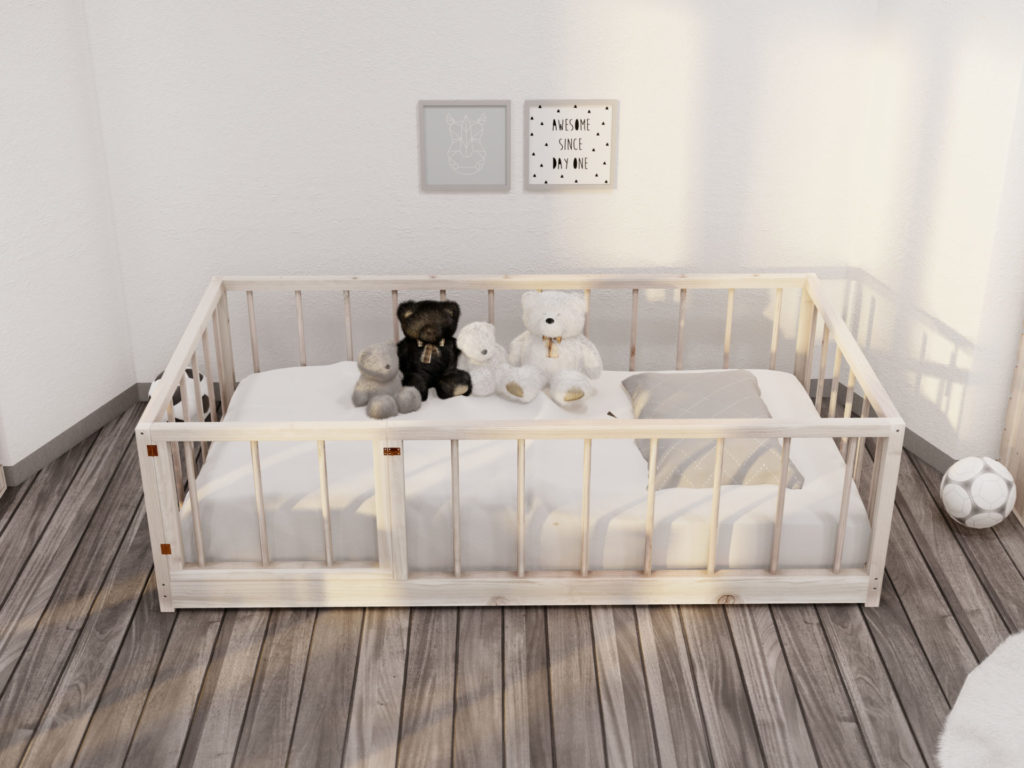
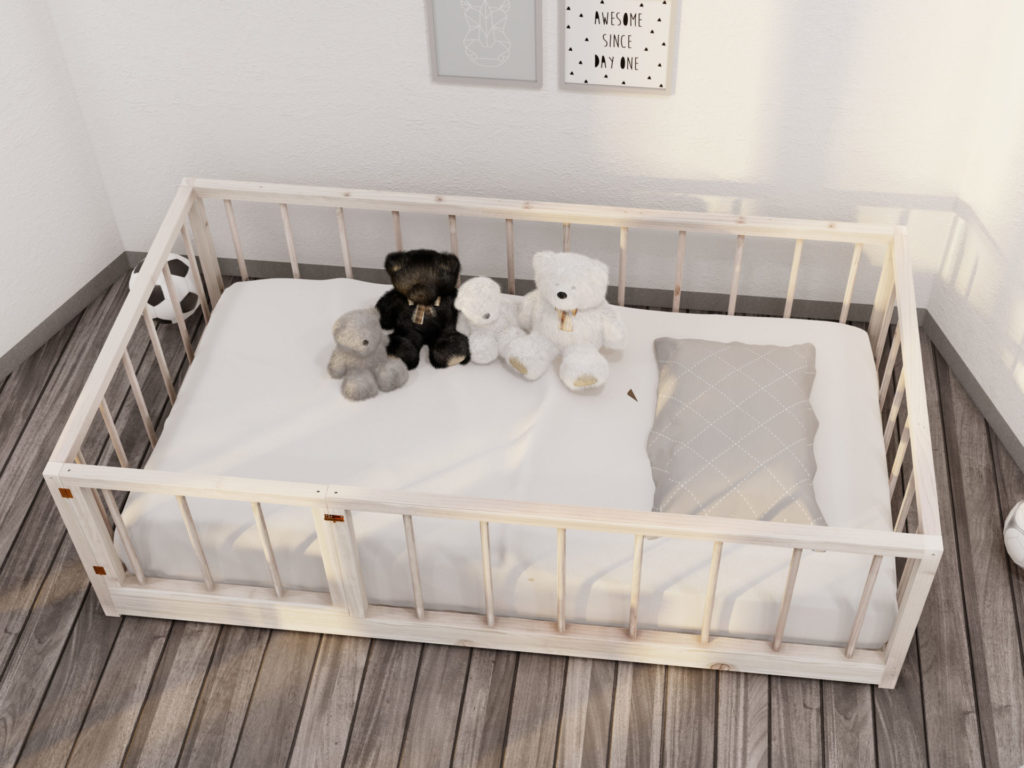
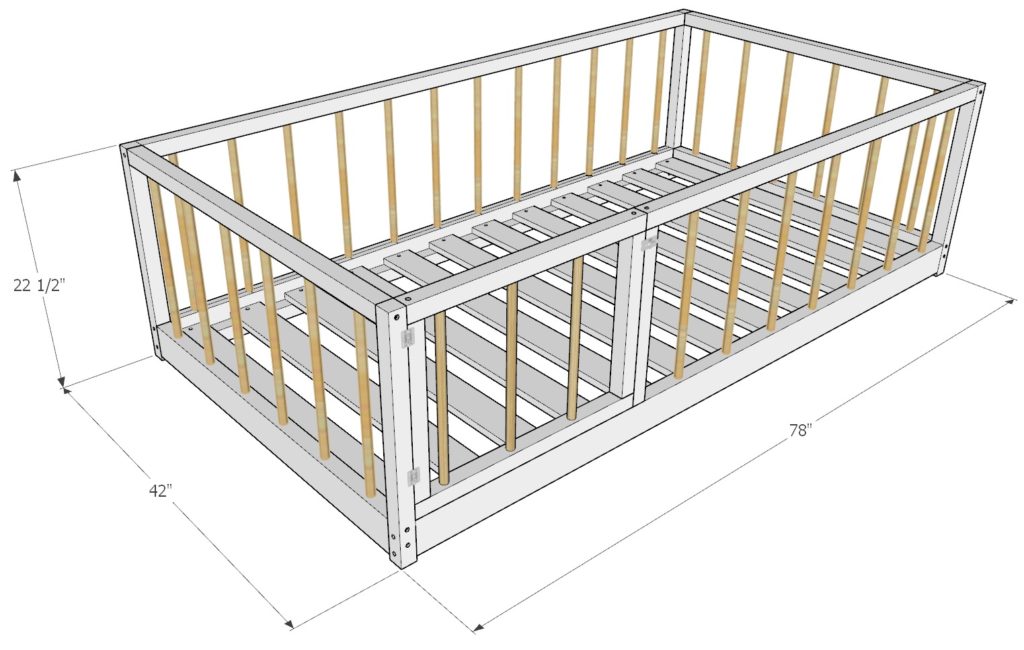
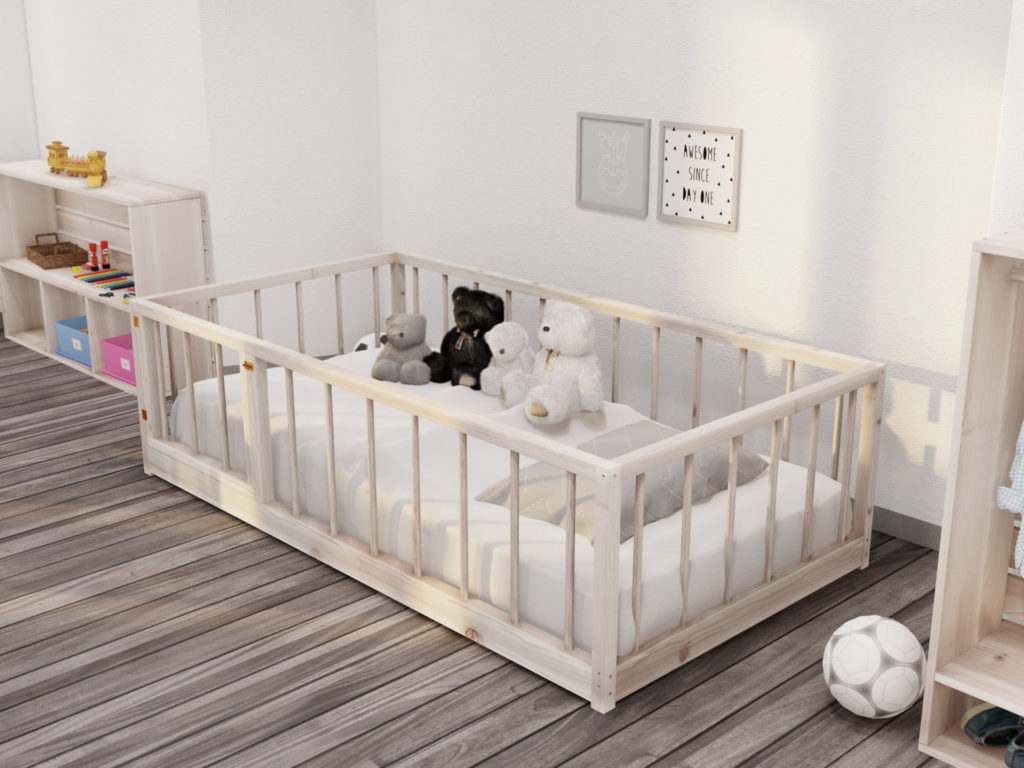
Firstly, the railing around the bed prevents babies from rolling off the bed in their sleep. The 22.5 inch bed height is low enough for toddlers to be able to climb in and out of the bed safely even when they choose not to use the side door. This allows children to have autonomy to play when they want to and to put themselves to bed when they are tired. Furthermore, the thin railing allows for the child to have an unobstructed view of the entire room. As a result, the bed design prepares them mentally to engaged and explore the environment when they are prepared to do so freely.
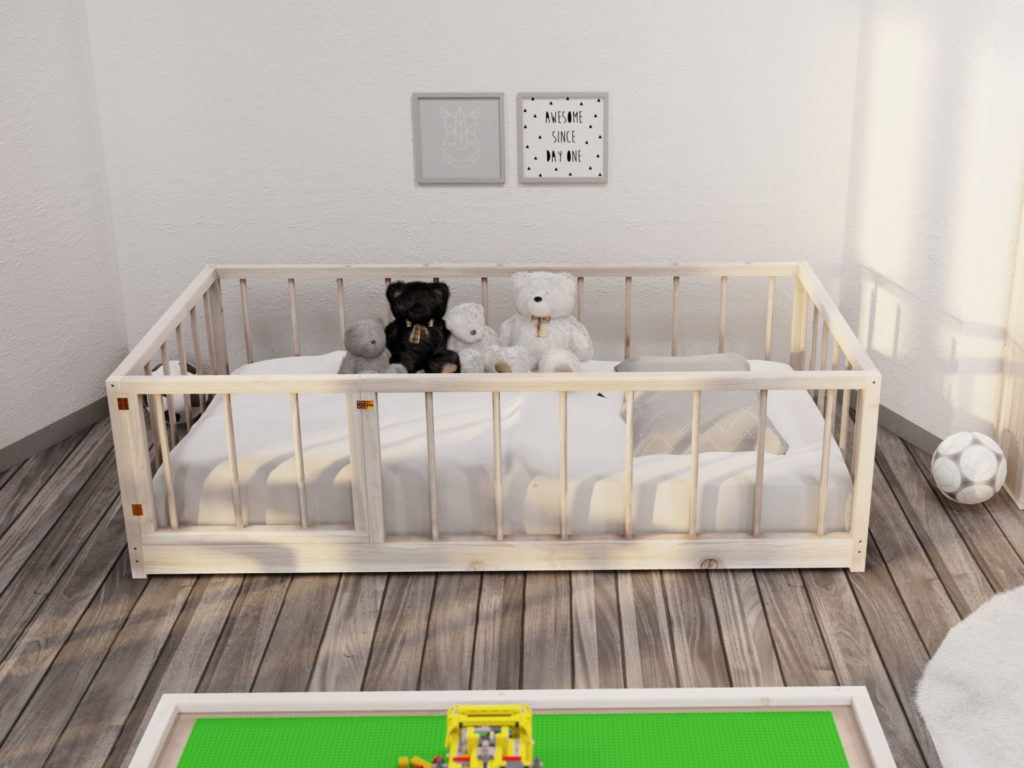
Montessori encourages visually appealing elements to be hung up in the line of site of children, while in bed to further development. Items such as mobiles, pictures, and art can be placed around the bed and not be obstructed by large bed headboards and baseboards.
You can have peace of mind knowing that you don’t have to worry that you son or daughter is chewing on the crib and getting toxic paint in their system or that they are rolling and falling out of bed at night.
How is this bed made?
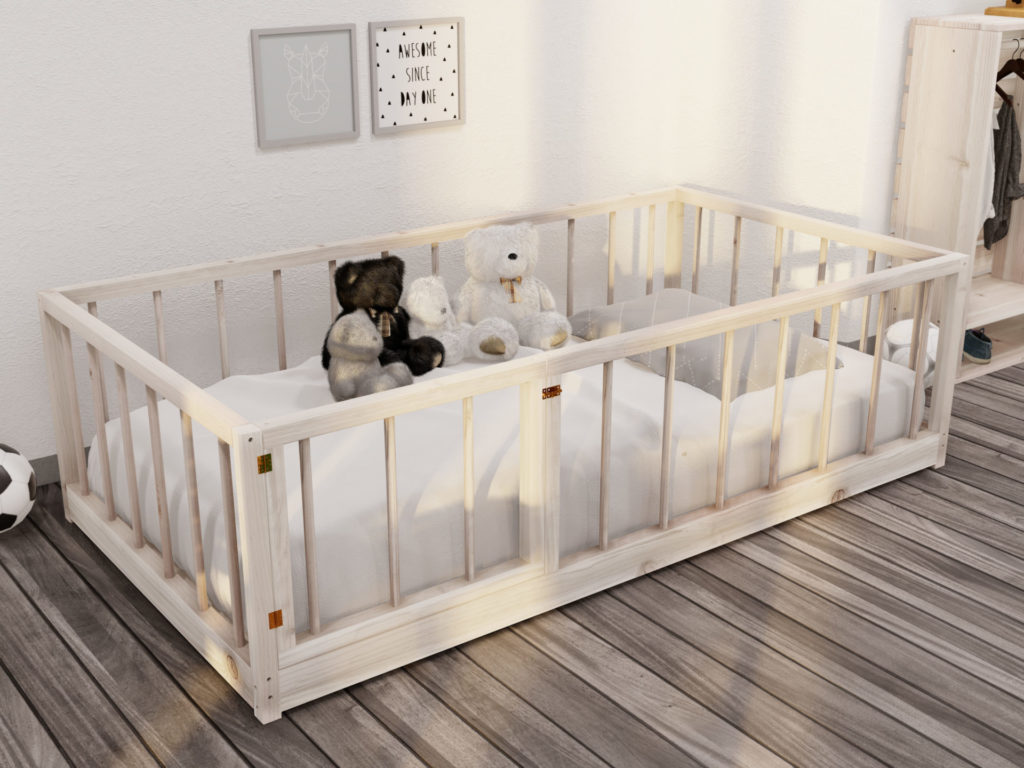
This Montessori floor bed frame is made from durable Douglas fir wood. This is a inexpensive and quality wood that can be purchased from most hardware stores. Additionally, the wood is soft enough to be safe and firm enough to support both the mattress, parent, and baby.
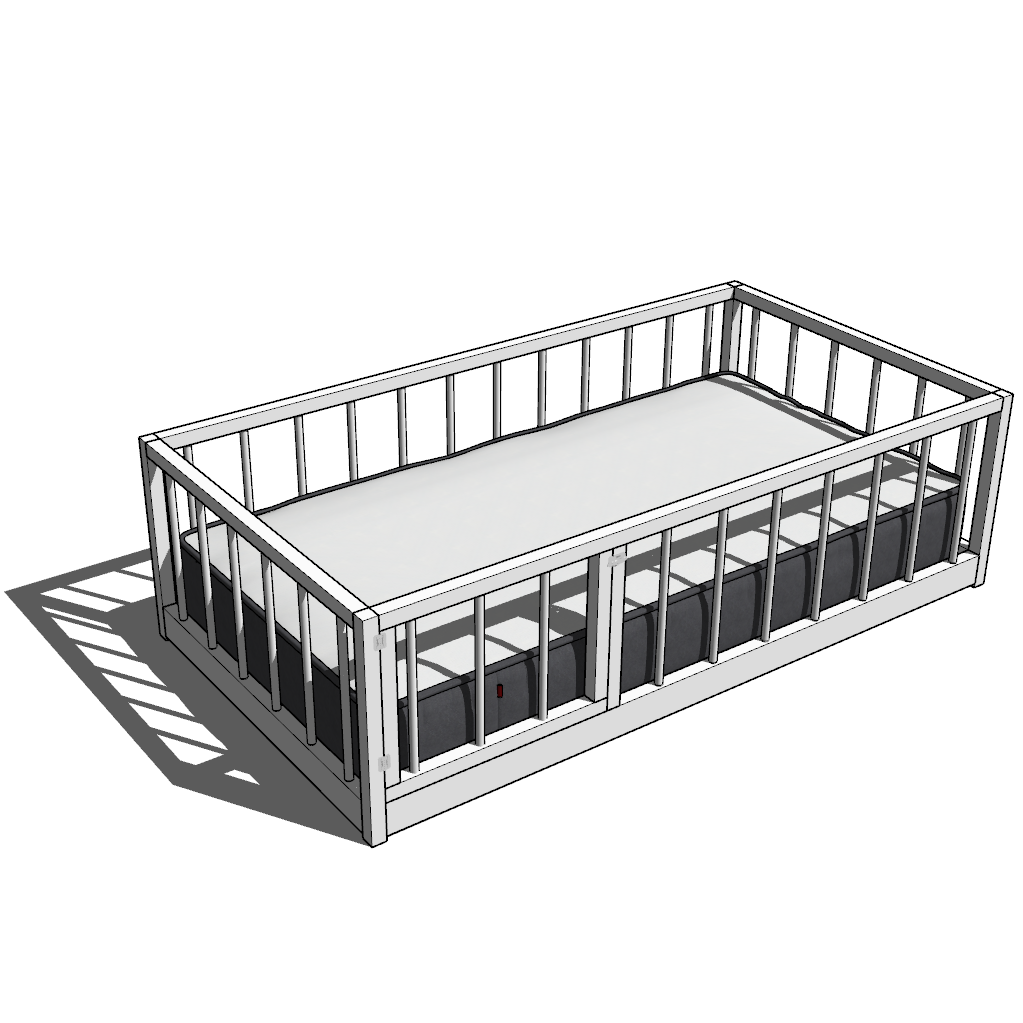
This Montessori floor bed has an entrance on the left side. The child will sleep on the right side with the feet by the entrance.
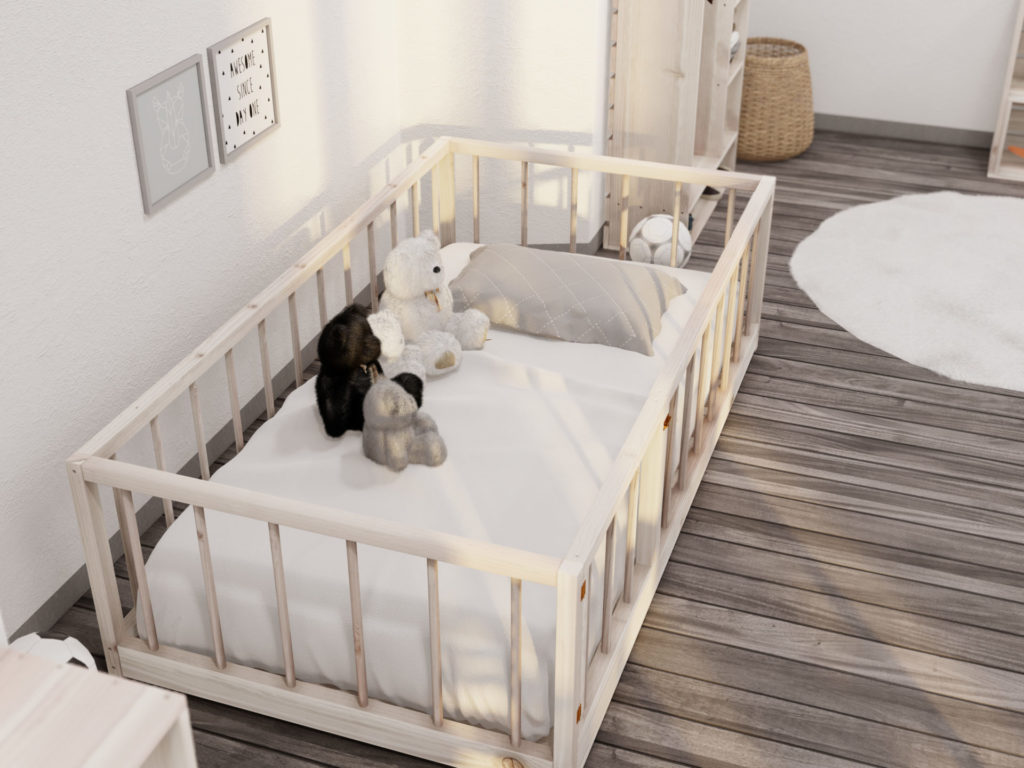
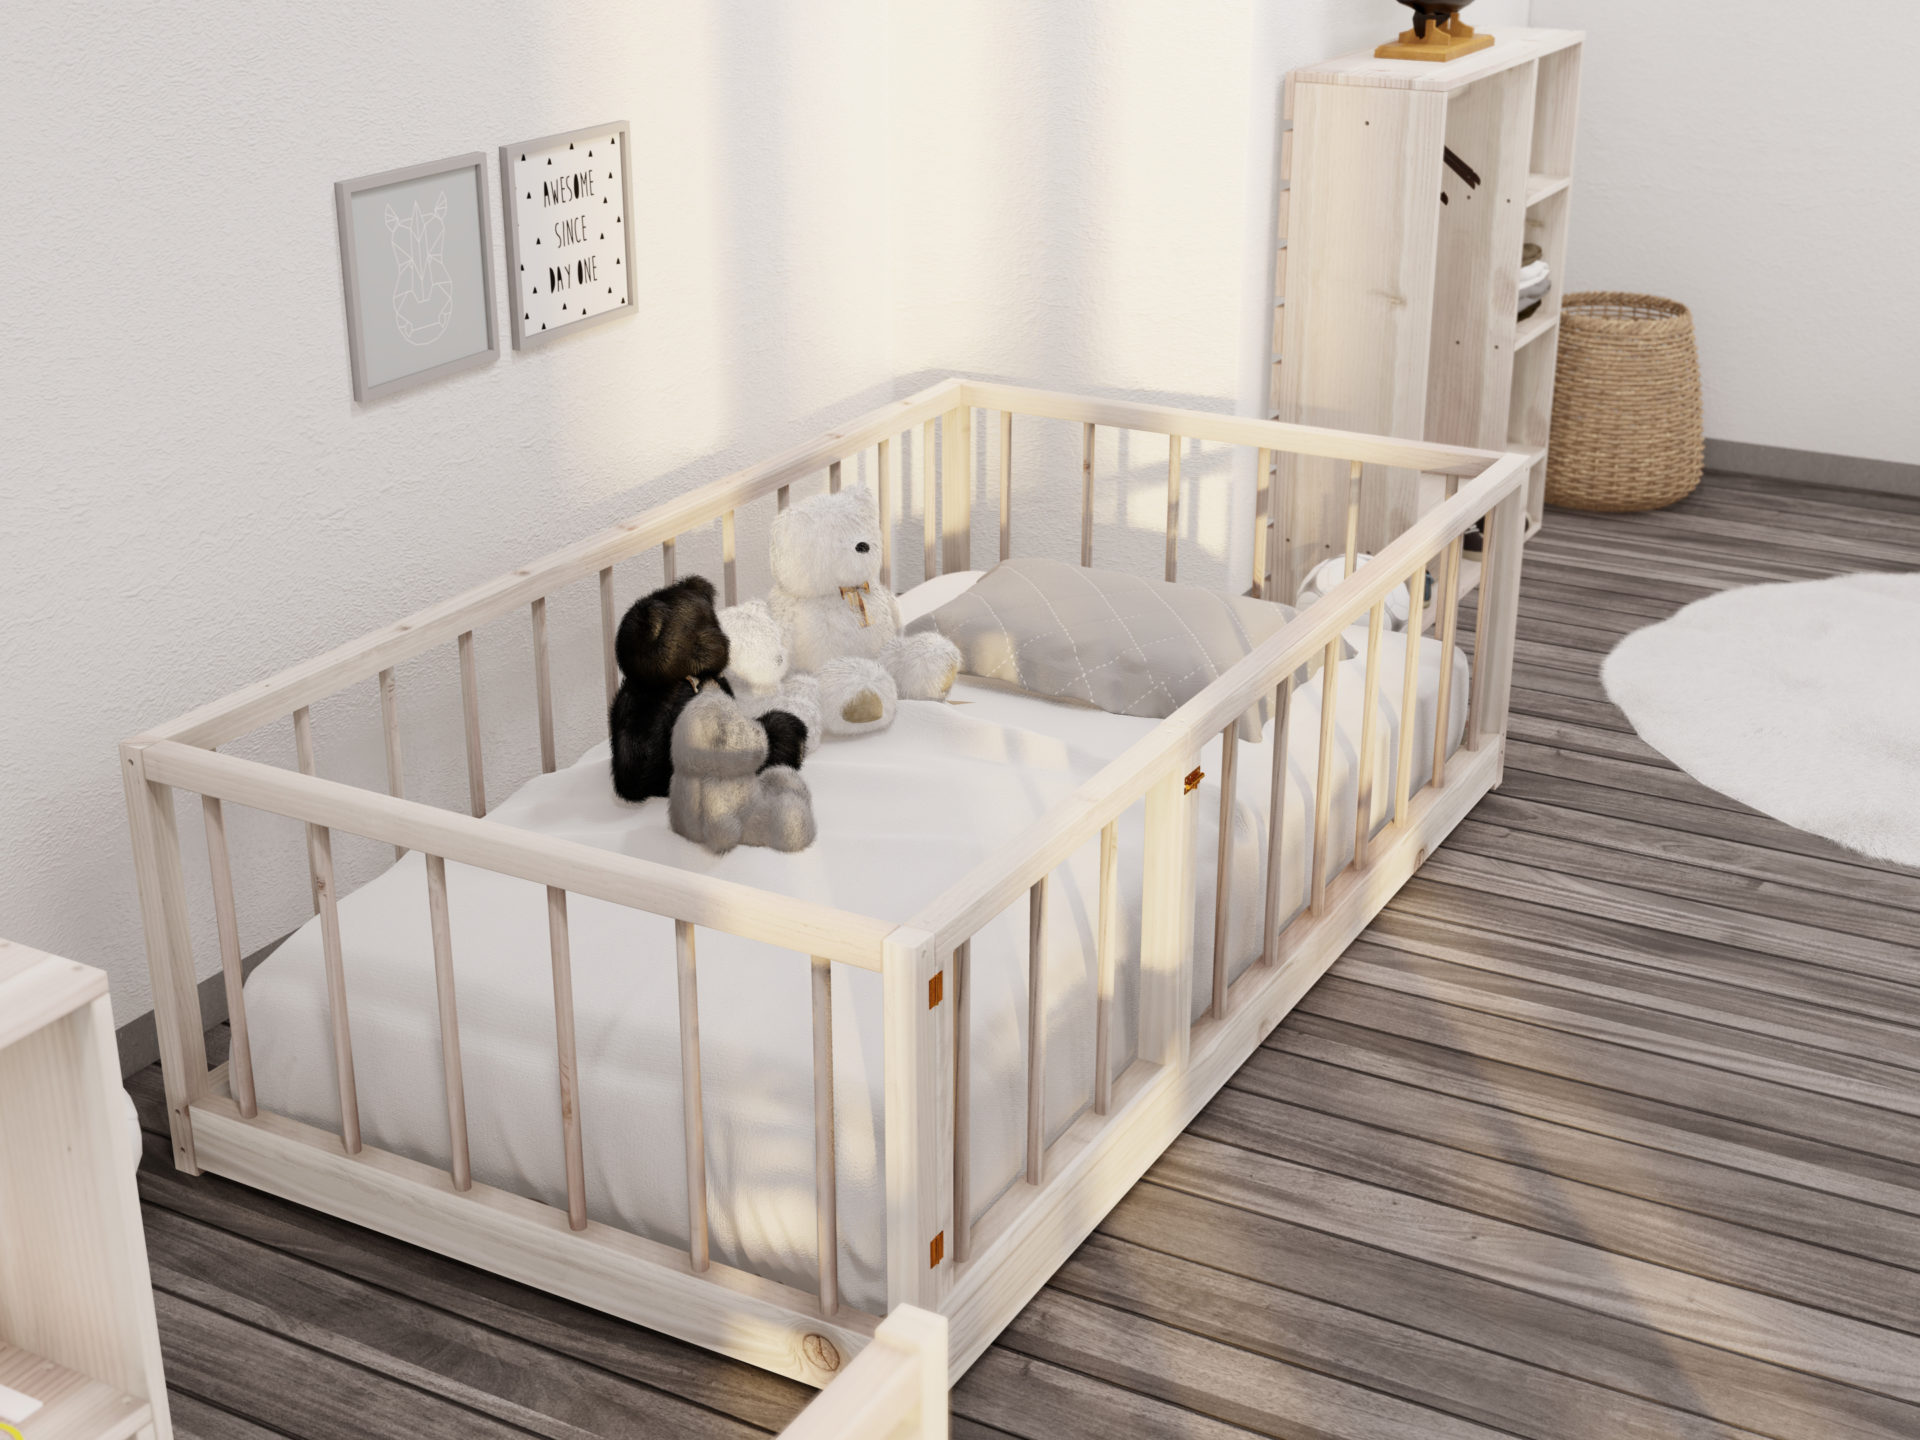
Home is the best space for children to begin developing and understanding themselves. The floor bed can help turn the child’s bedroom into a learning environment.
What other Montessori room pieces are a part of this room set-up?
Lego play and storage system plans can be found here.
Floor shelf plans can be found here.
Wall shelf plans can be found here.
Step stool plans can be found here.
Chair plans can be found here.
Activity and weaning table plans can be found here.
Twin size floor bed plans can be found here.
Children’s wardrobe plans can be found here.
Storage and activity shelf plans can be found here.
Time to build
5 hours
Total cost of build
$75
(prices for materials may vary)
Skill level required
Intermediate
Download the PDF plans
Plans for how to build the Montessori Floor Bed
What is included in the PDF download?
- Easy to read step by step instructions
- Material list
- Cut list
- Tools needed
- 3D illustrations
- Helpful links to tools and materials needed for the project
Recommend tools for this project
- Saw (miter saw recommended for precision cuts)
- Drill
- Impact driver with bit for screws
- Sander
- Sandpaper
- 2.5 inch screws 1-2 lb
- 1.5 inch screws 1-2 lb
- wood countersink drill bit
- Hammer
- Drill press
- 3/4 inch dowels
- 3/4 inch forstner bit
- glue
- Small hinges and barrel bolt lock
Discloser: Some links are affiliate links
Material list
Available with purchase of PDF plans.
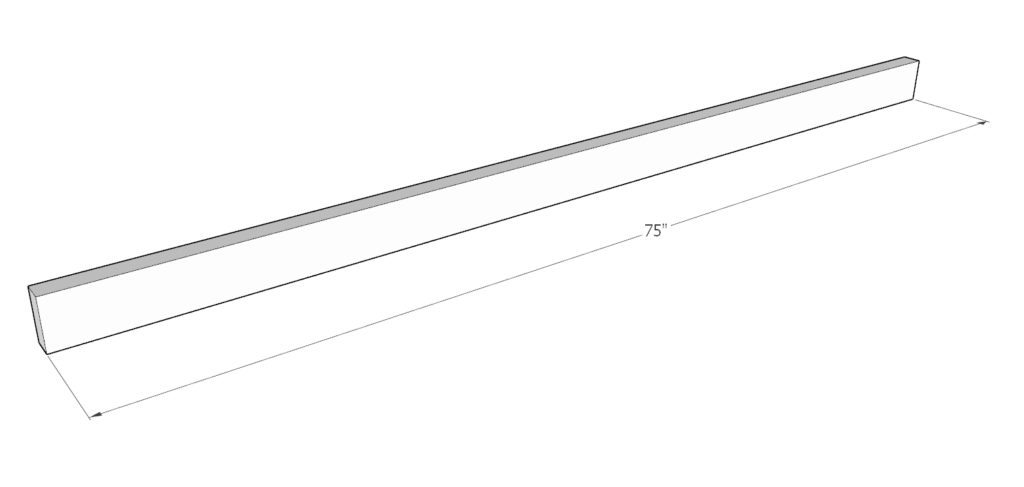
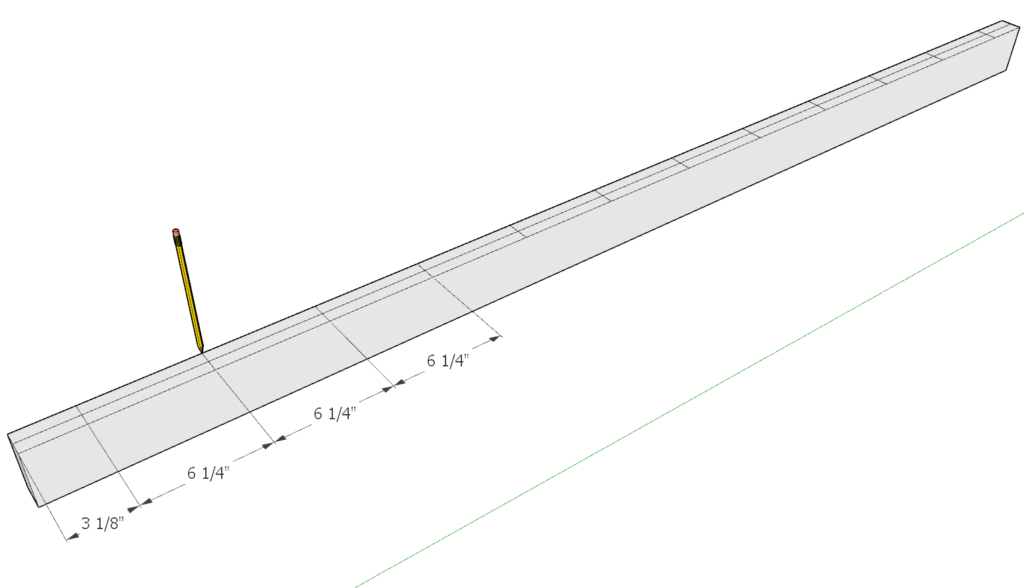
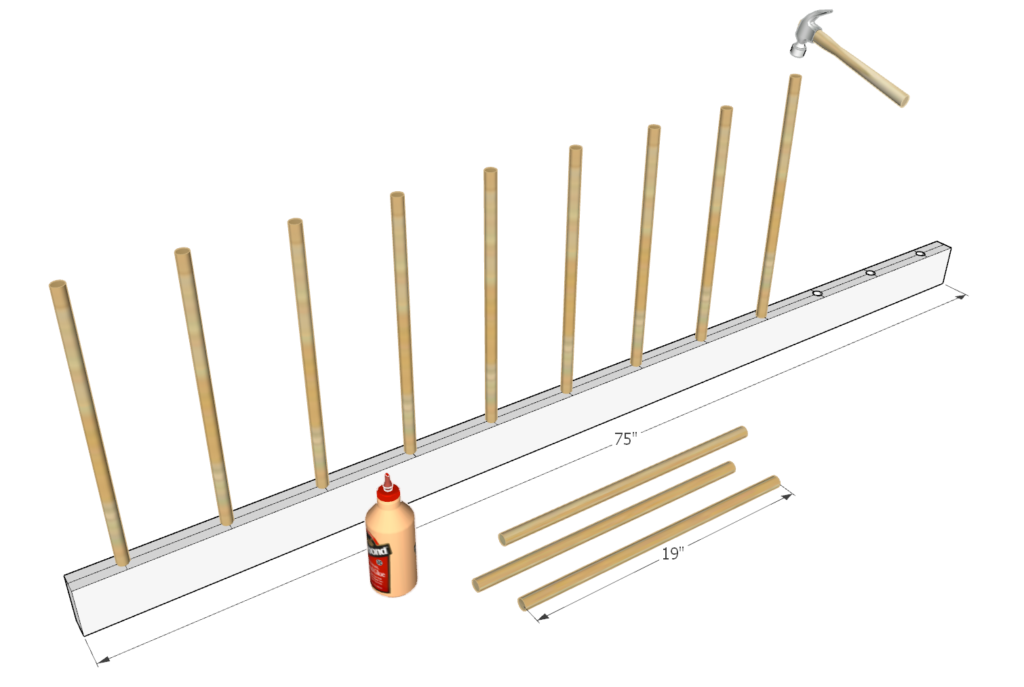
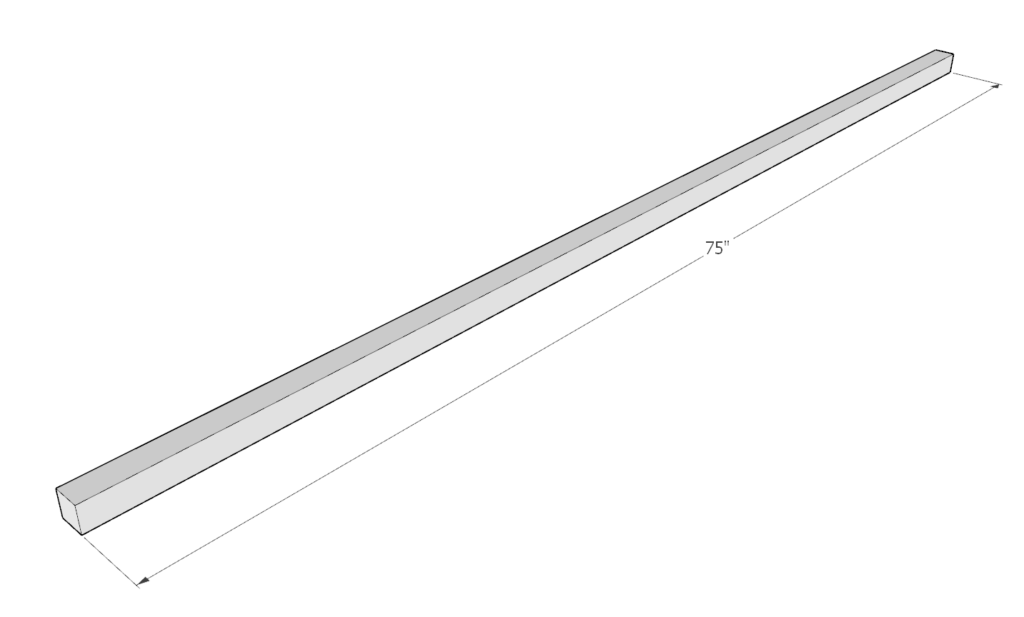
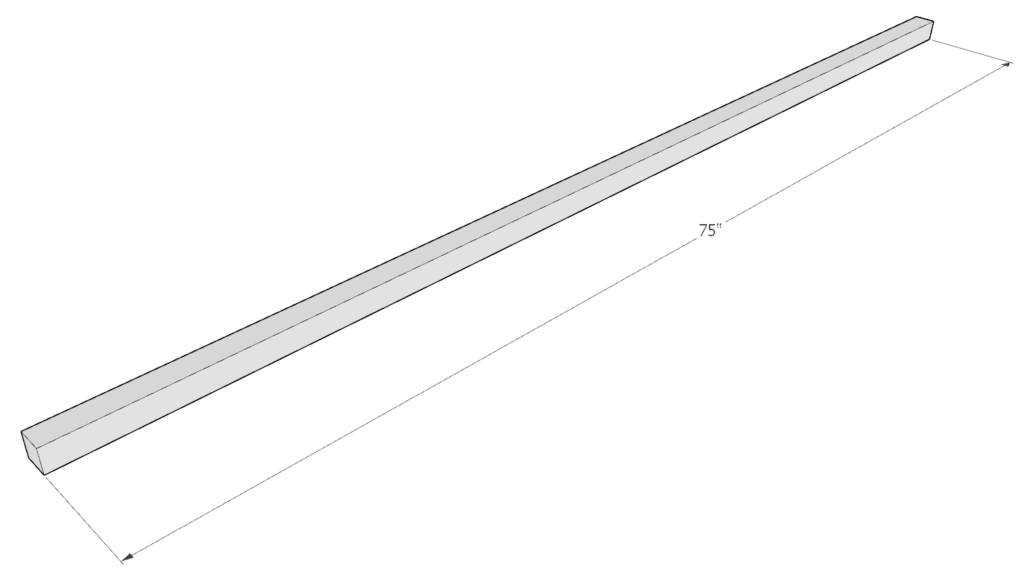
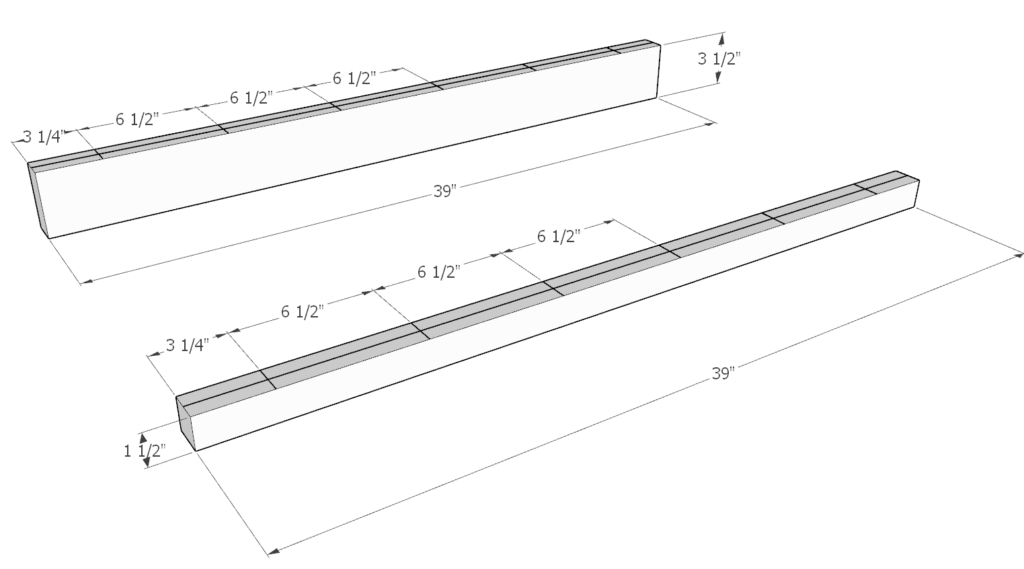
Step 1: (Montessori floor bed)
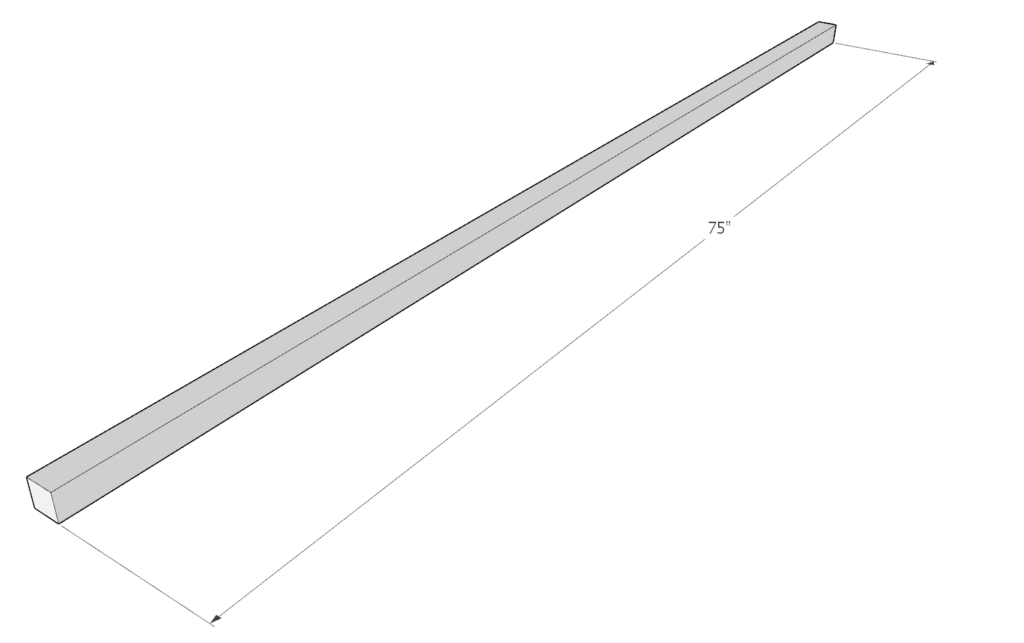
First, cut a 75 inch pieces from the 2×4 lumber.
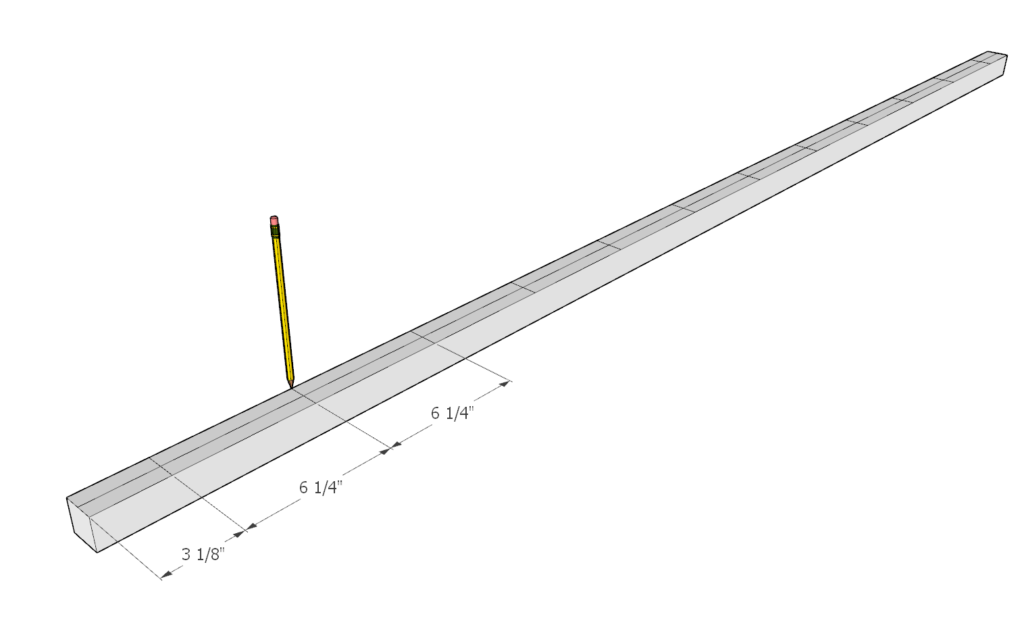
Using a pencil and a straight edge, draw a line in the center on the 1.5 inch side. Using a pencil make the perpendicular lines as shown in the diagram with the appropriate spacing.
These lines will serve as guides when using the drill press.
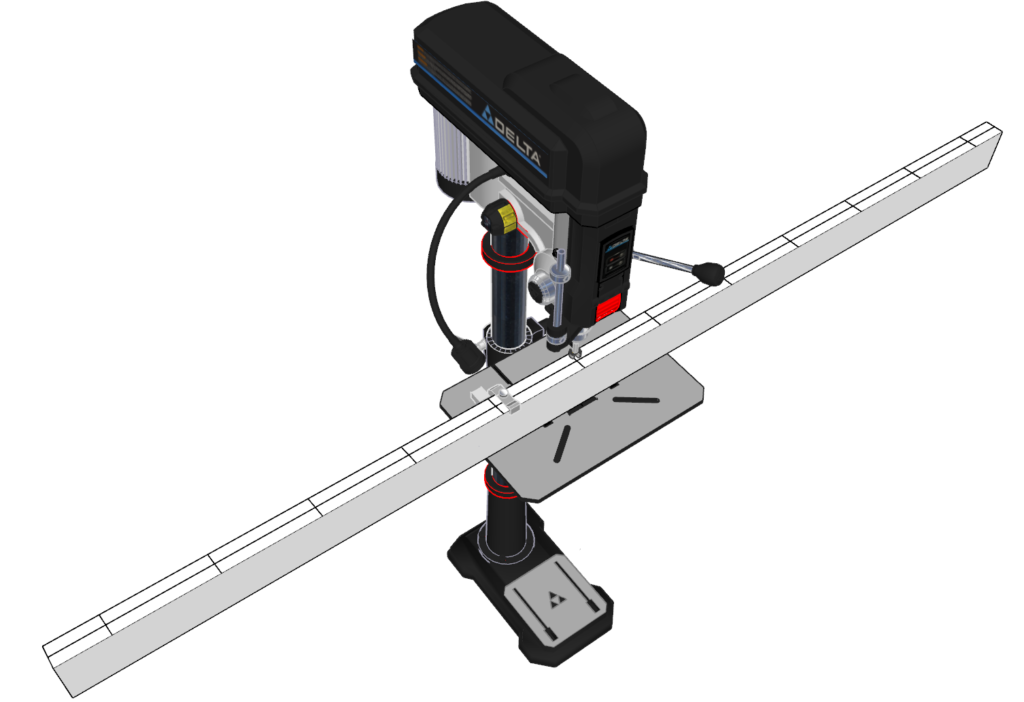
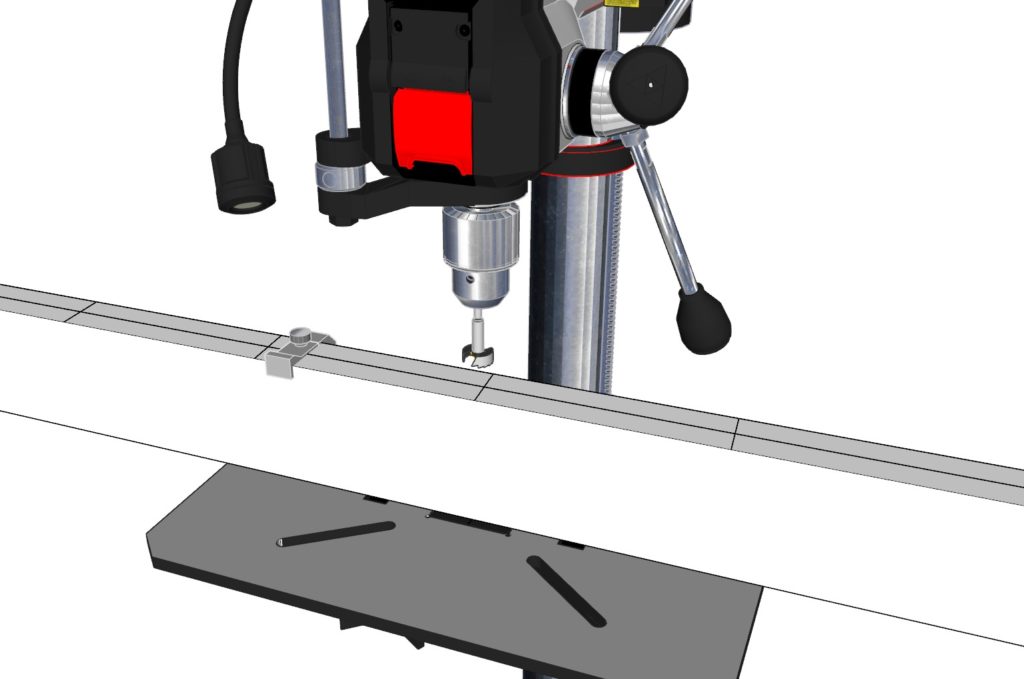
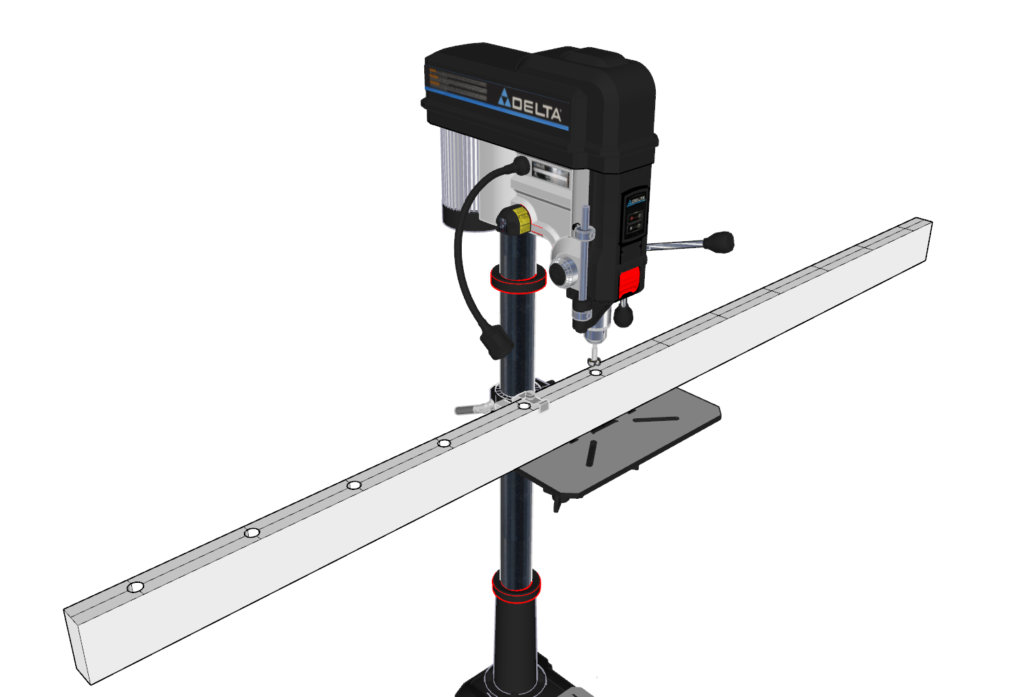
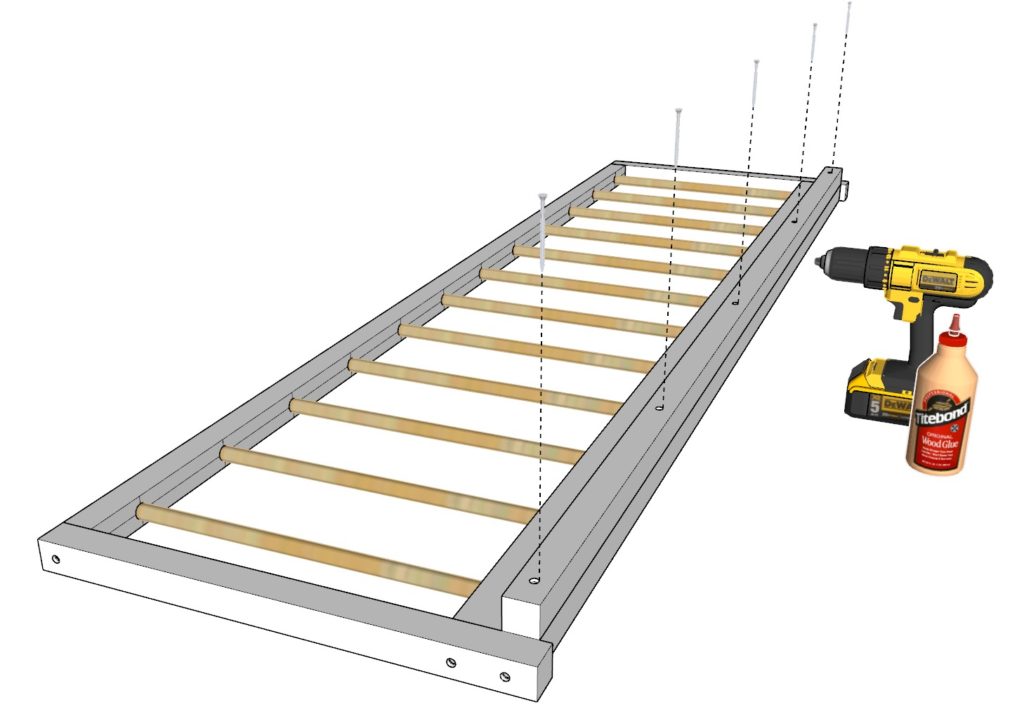
Step 2: (Montessori floor bed)
Use a drill press to drill the holes marked with an X from the previous step.
Using the 3/4 in forstner bit to drill 3/4 in diameter holes at 1 inch depth.
It is important to set up a preset depth and pattern that you will be using again and again for all the railing pieces.

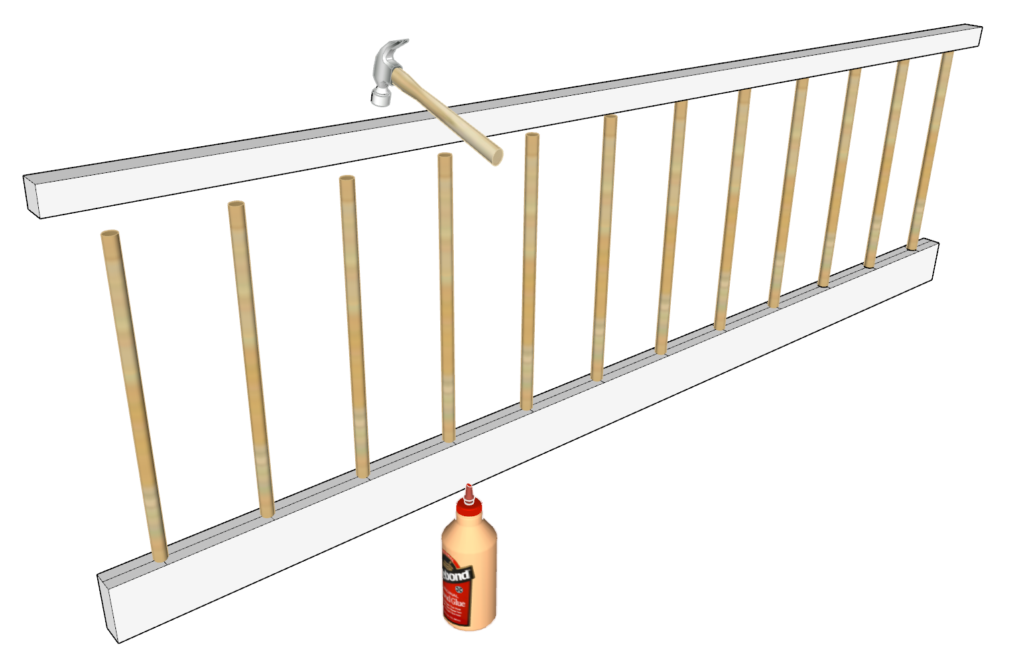
Step 3: (Montessori floor bed)
Next, cut (12) 19 inch 3/4 dowels.
pour glue into the holes you just drilled and hammer in the 19 inch dowels into the holes.
Step 4: (Montessori floor bed)
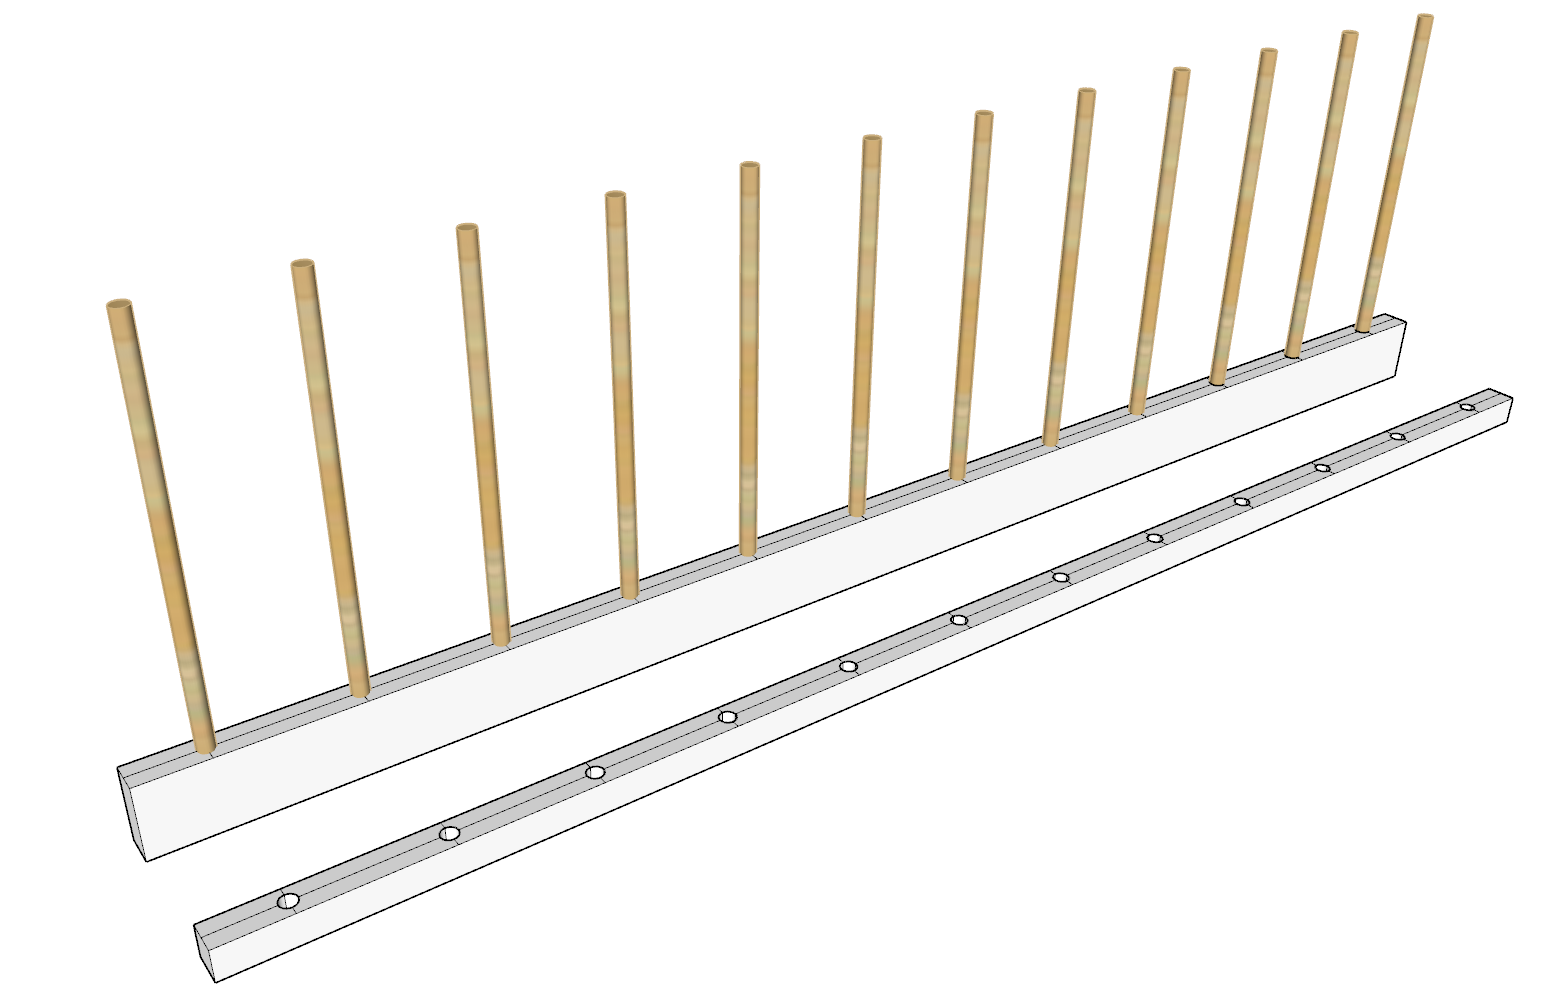
Next, cut a 75 inch piece from 2×2 lumber.
As before, make the same markings using a pencil to match the markings drawn on the 2x4s.
Next, using the drill press, drill 1 inch deep holes on the X’s.
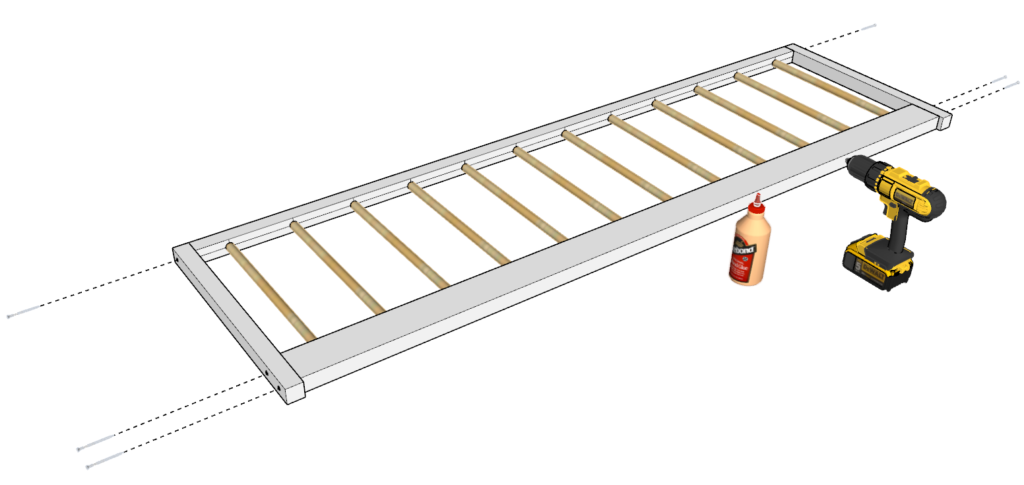
Take the 75 inch 2×2 piece, add glue into the holes, and align the holes with the dowels. Hammer in the 2×2 piece into place as shown in the diagram.
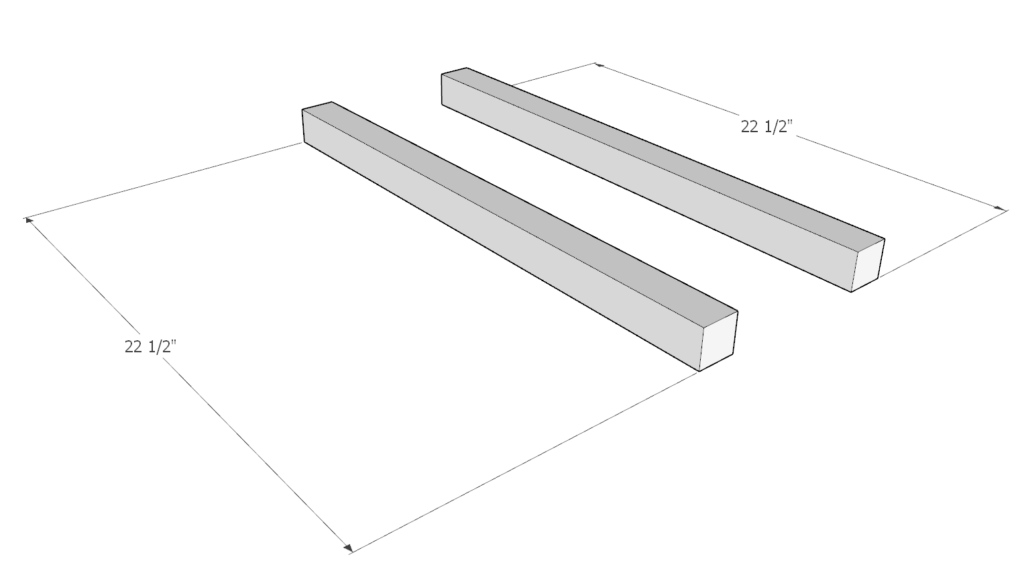
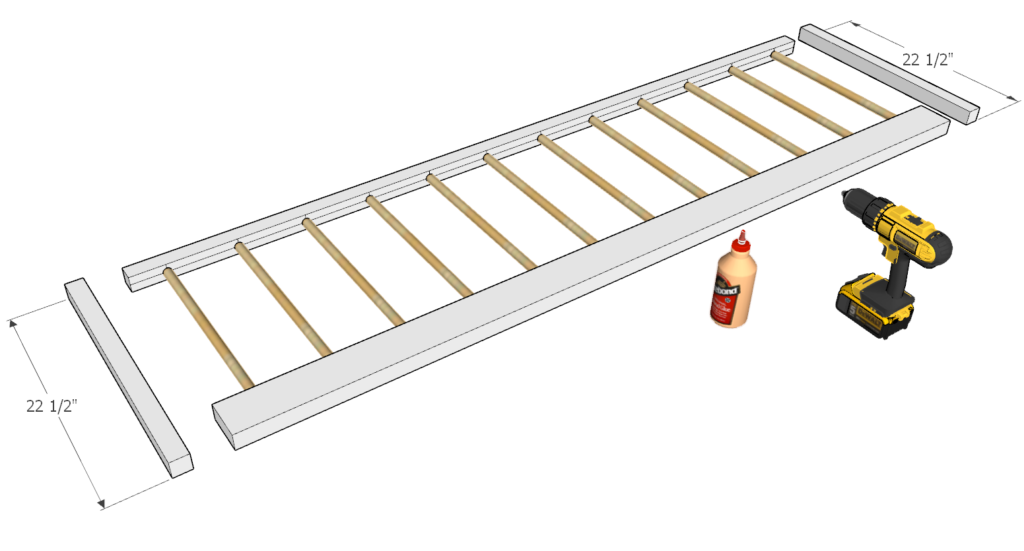
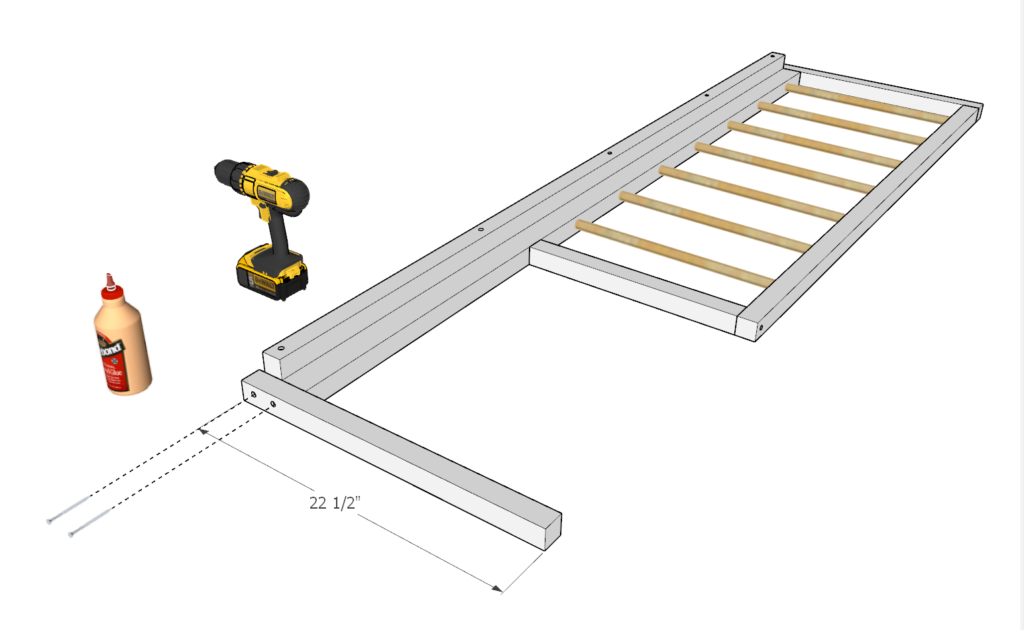
Step 5: (Montessori floor bed)
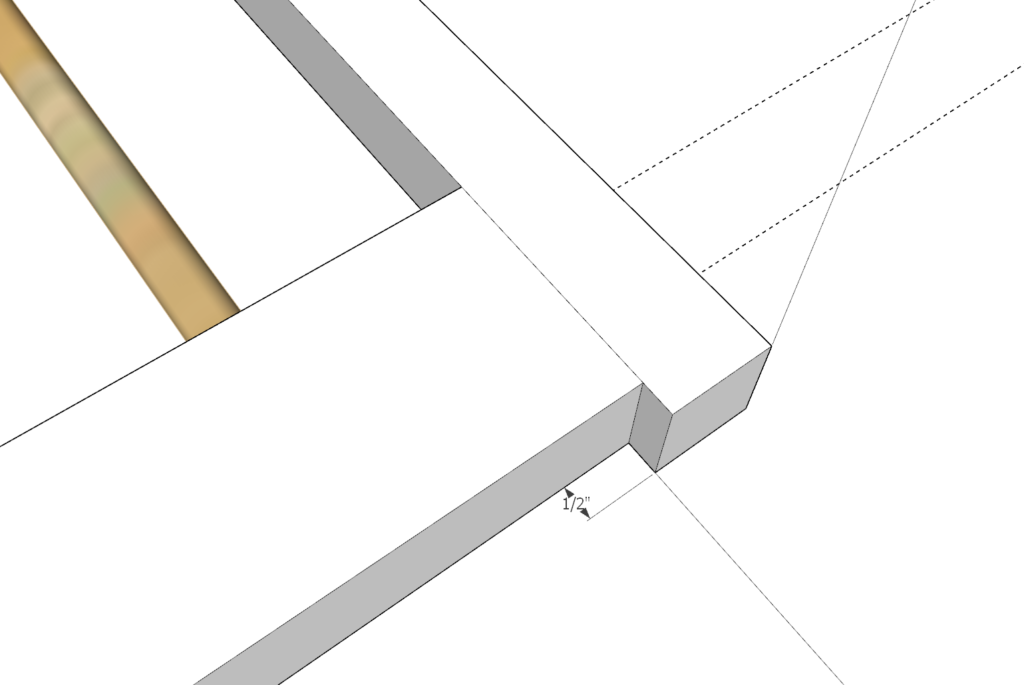
Next, cut two 22.5 inch pieces from 2×2 lumber. These two pieces will be attached to the frame you just made from the previous step.
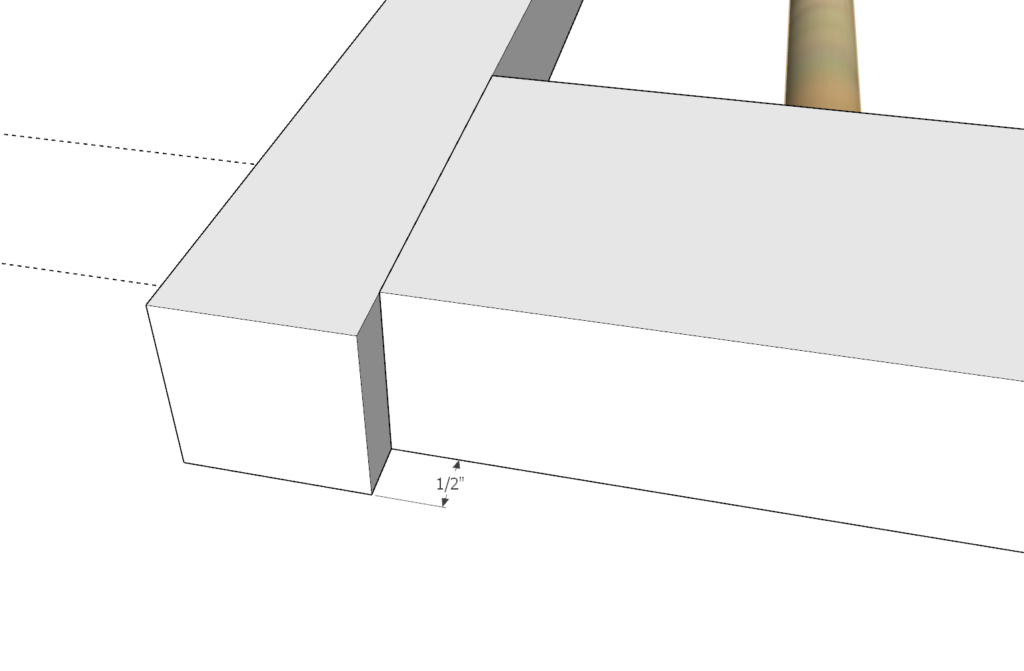
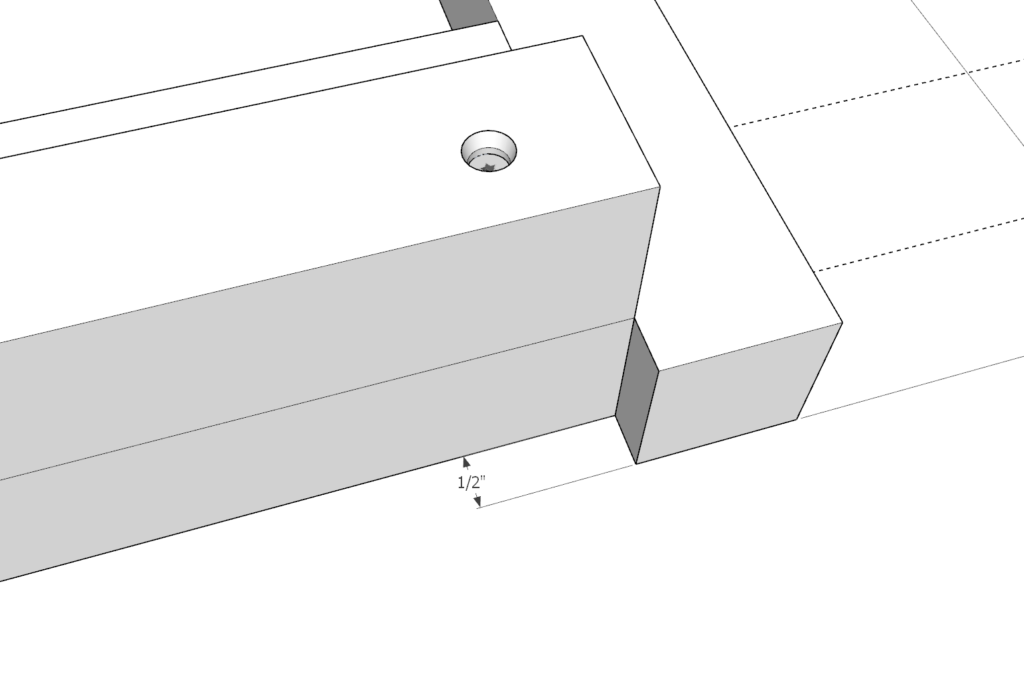
Align the 22.5 inch pieces as shown in the diagram. Make sure that you have 1/2 inch space to serve as the legs.
Once the alignment is complete, add glue, predrill, and add screws.
Step 6
Next, cut a 75 inch pieces from the 2×2 lumber.
Align it as shown in the diagram and attach it using glue and screws.
Make sure to predrill to ensure the wood doesn’t split.
Step 7
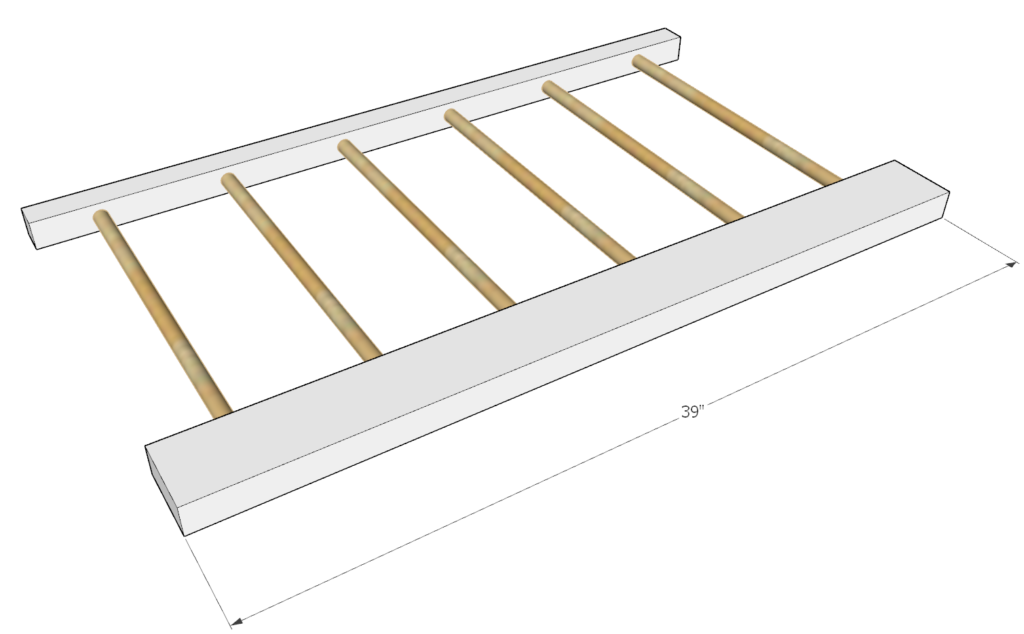
Next, cut two 39 inch pieces. One from the 2×4 wood and one from the 2×2 wood.
Make the markings that are shown in the diagram and use a drill press to make 1 in deep holes as before.
Add glue and dowels to secure the side frame together.
Repeat this step 2x for a total of two side frame pieces.
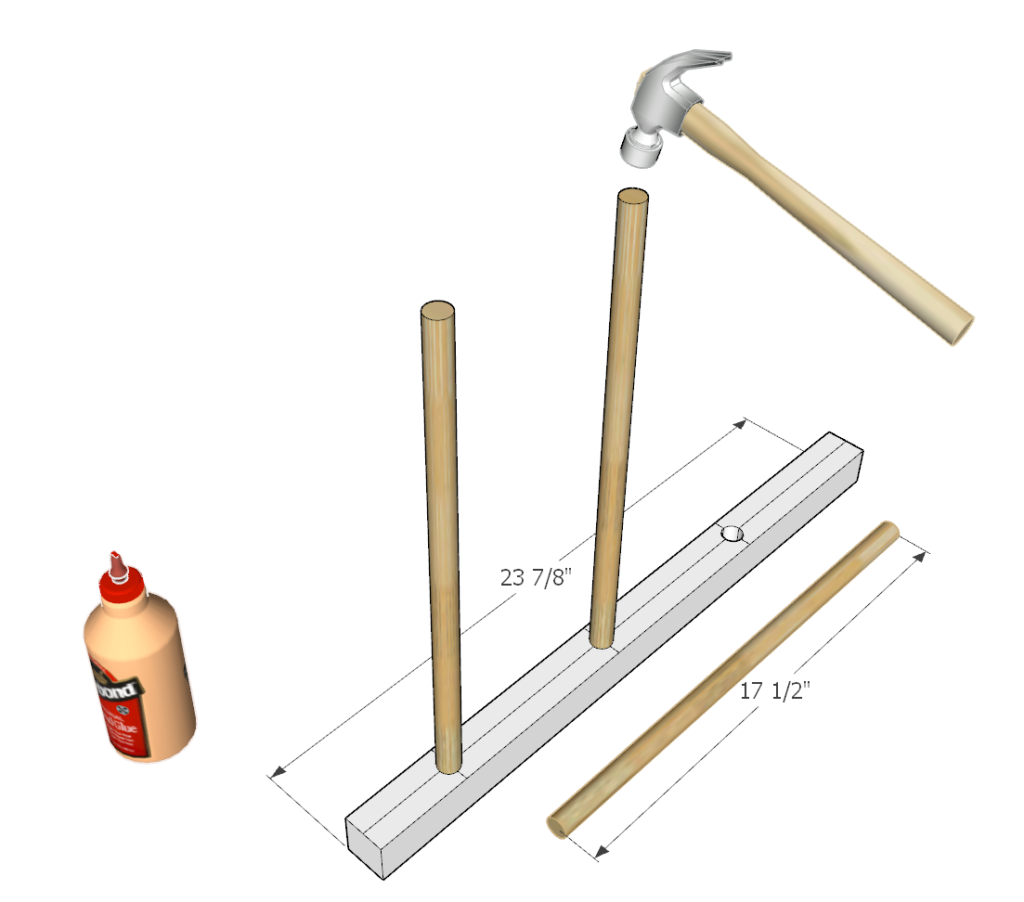
Step 8
Next, cut one 75 inch piece from the 2×4 lumber, and two 23 7/8 inch pieces from the 2×2 lumber, and one 51 1/8 inch pieces from 2×2 lumber.
Make the markings on these as shown in the diagram.
Using a drill press, drill 1 inch deep holes as before.
Next cut three 17.5 inch dowels
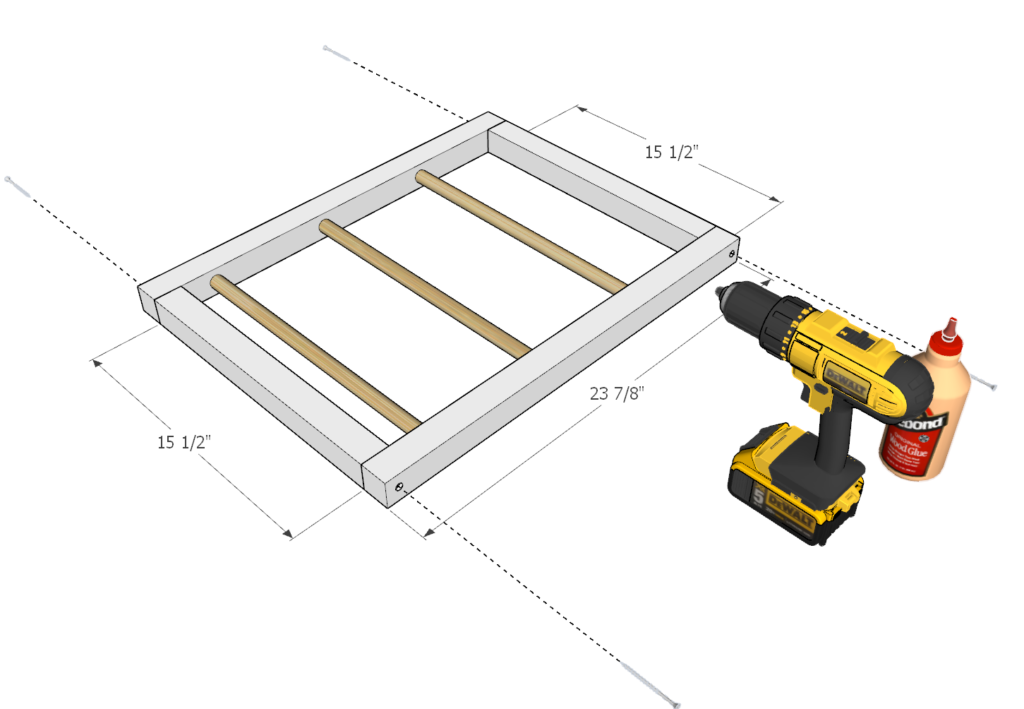
Next, begin the assembly of the doors by using the 23 7/8 inch pieces from 2×2 lumber and adding three 17.5 in dowels as before. Do not forget to use glue. Lastly, cut and add two 15.5 inch pieces from 2×2 lumber to the door and secure them as shown in the diagram using glue and screws.

Step 9
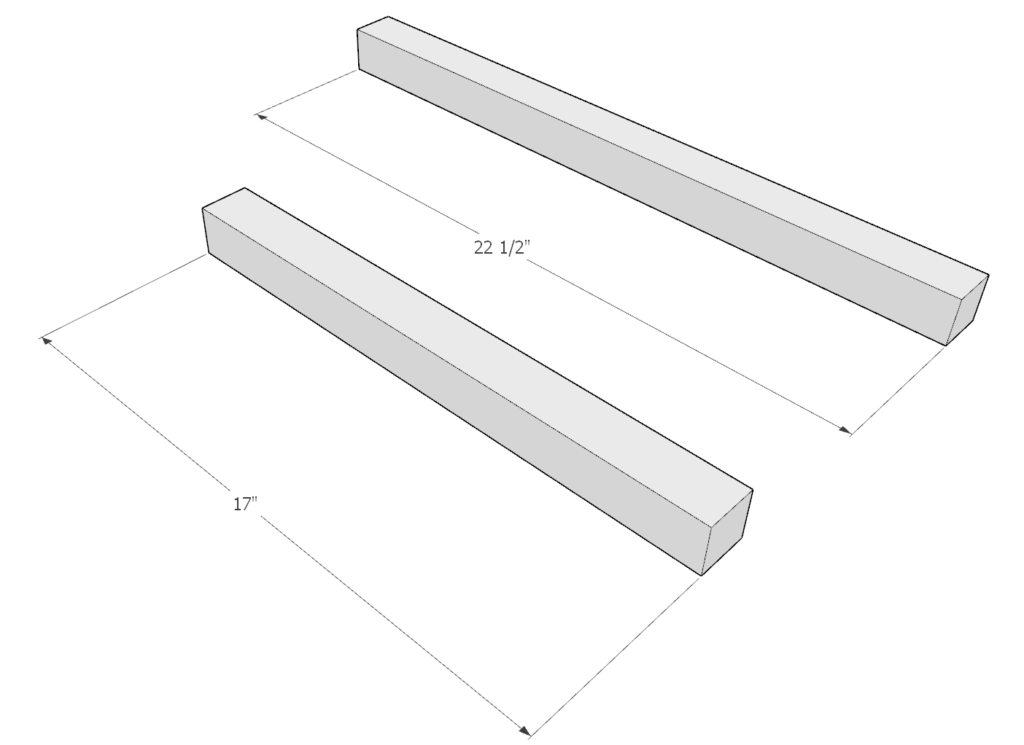
Next, cut a 17 inch and a 22.5 inch piece from the 2×2 lumber.
Cut seven 19 inch dowel pieces.
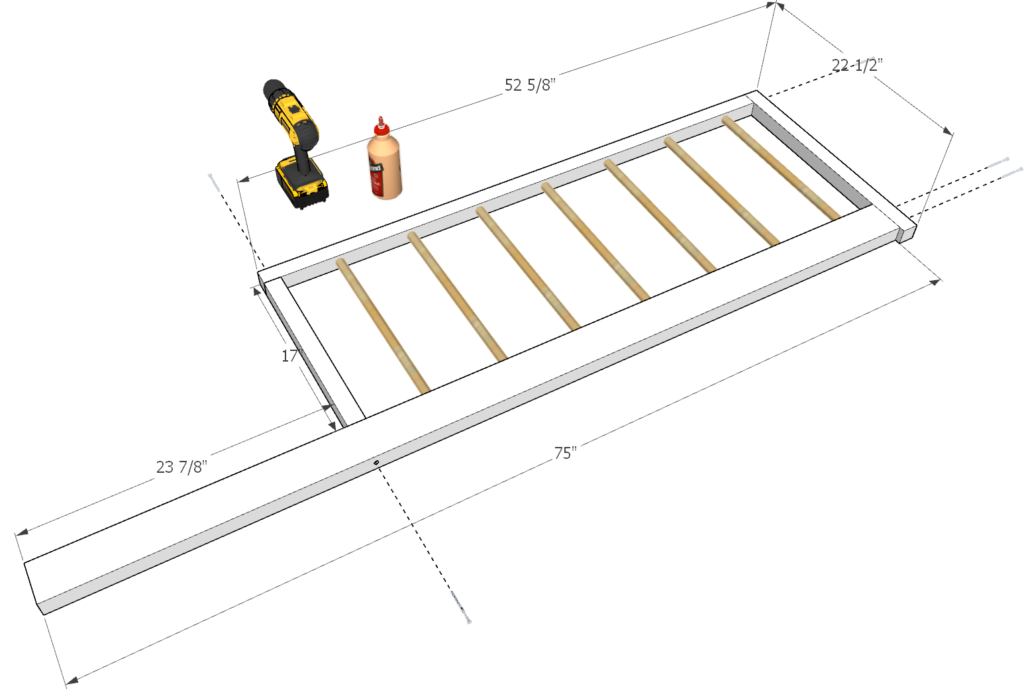
Take the 75 inch 2×4 lumber piece and begin to glue and insert the 19 inch dowels into the holes.
Next, take the 52 5/8 inch 2×2 piece and add it tot the frame by using glue and matching the dowels put in on the 75 inch piece.
Next, cut and add the 17 inch and 22.5 inch 2×2 pieces as shown in the diagram.
Make sure to allow for a 1/2 inch gap on 22.5 inch 2×2 piece as shown in the diagram.
Make sure to use glue, predrill, and add screws.
Step 10
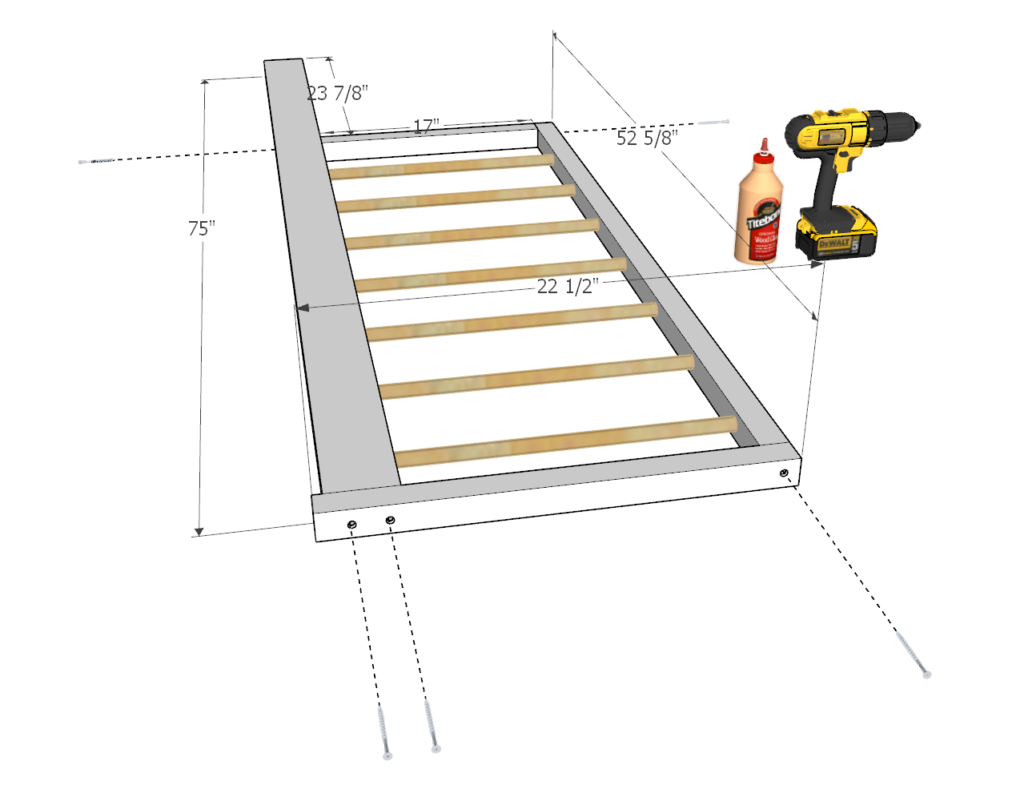
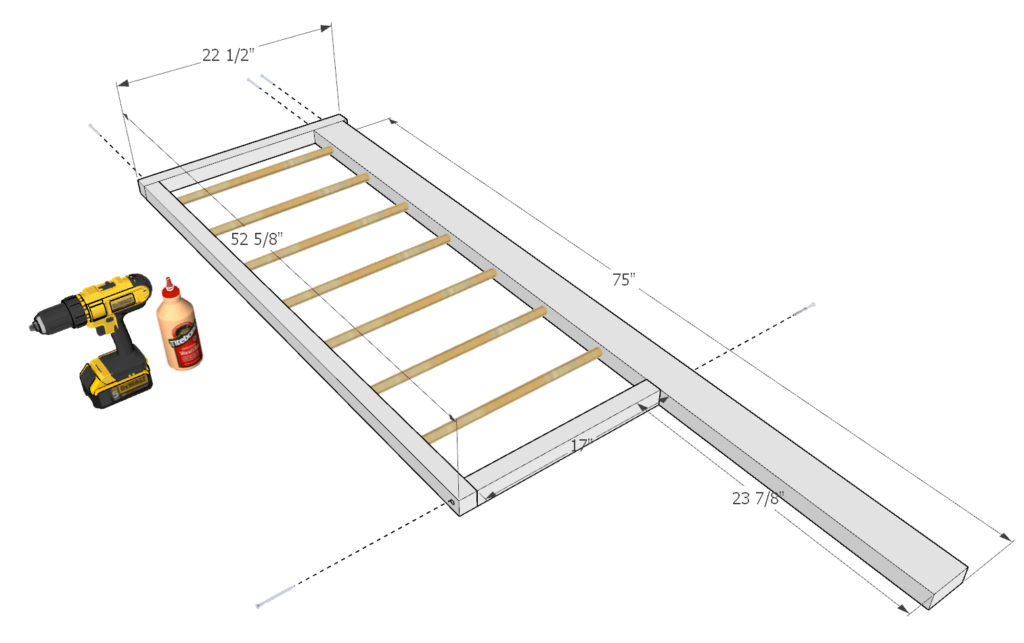
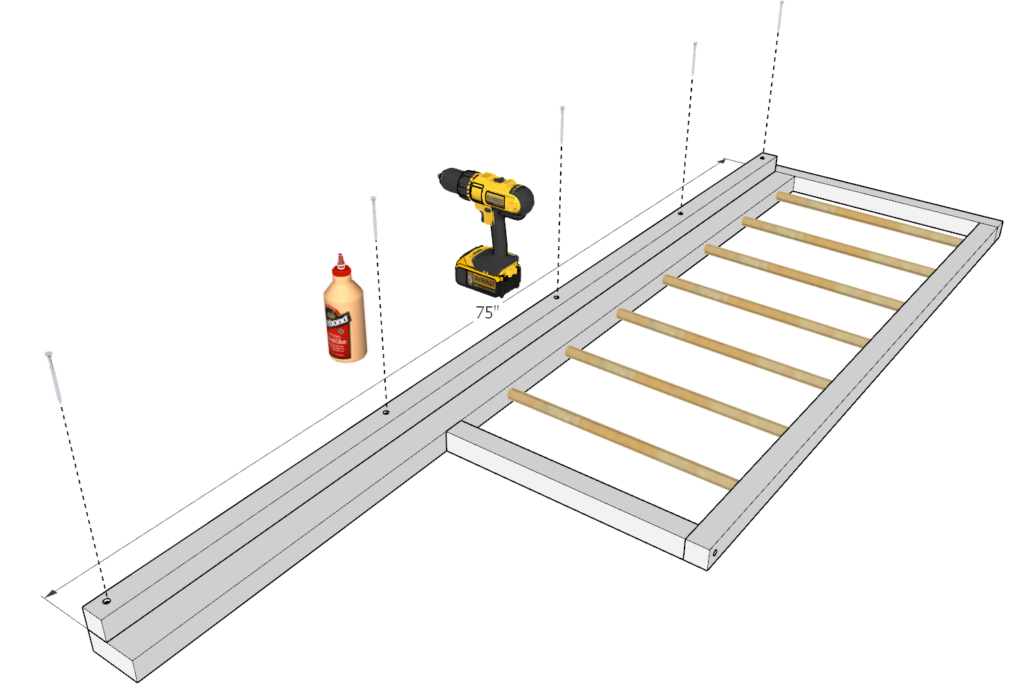
Next, cut a 75 inch piece from 2×2 lumber, add it to the frame piece you just made as shown in the diagram. Use glue and screws to secure it.
Next, cut and add a 22.5 inch piece from the 2×2 lumber as shown in the diagram. Make sure to leave a 1/2 inch indentation to creat a leg.
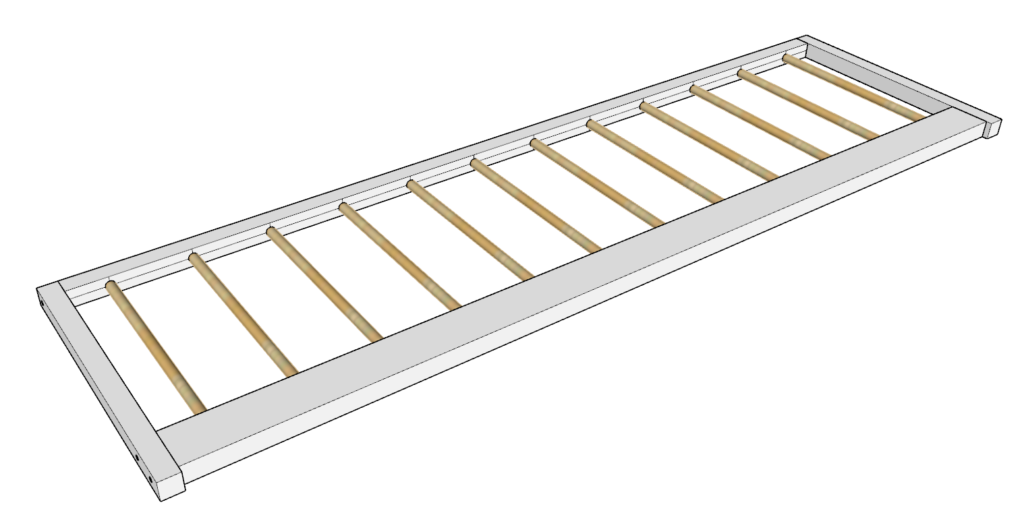
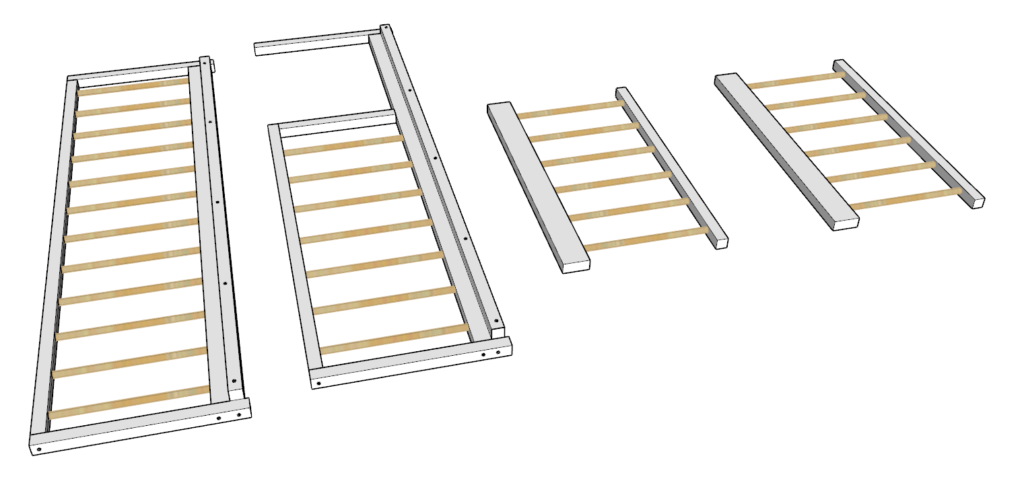
Step 11
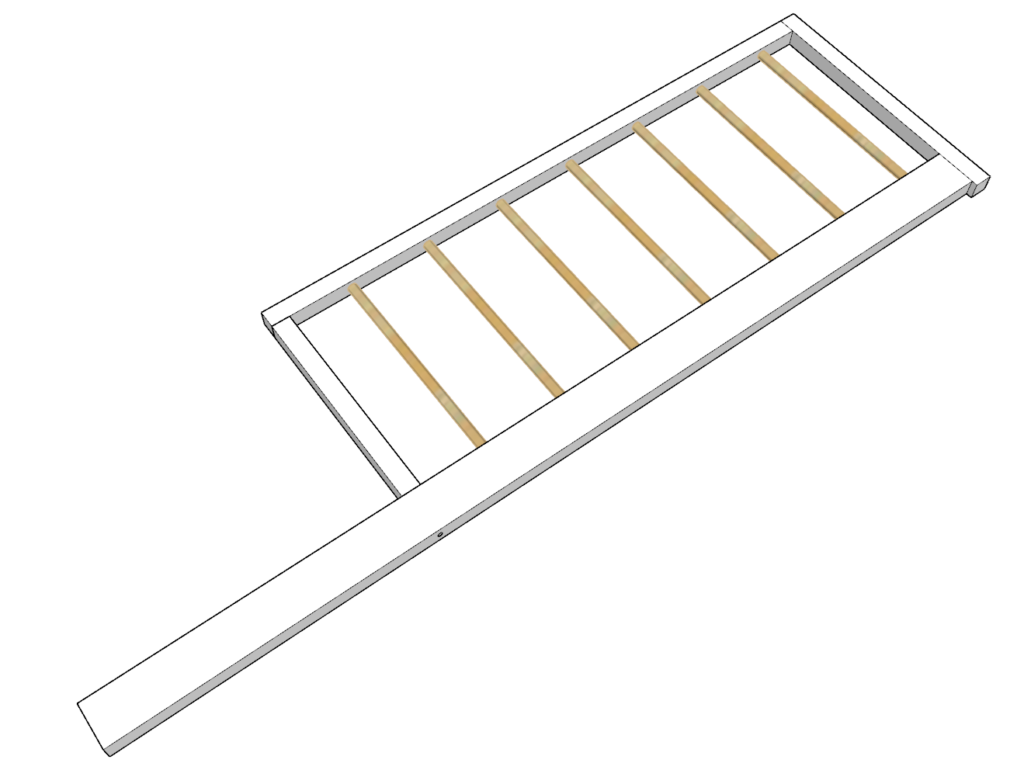
At this point you should have all the bed frame pieces shown in the picture.
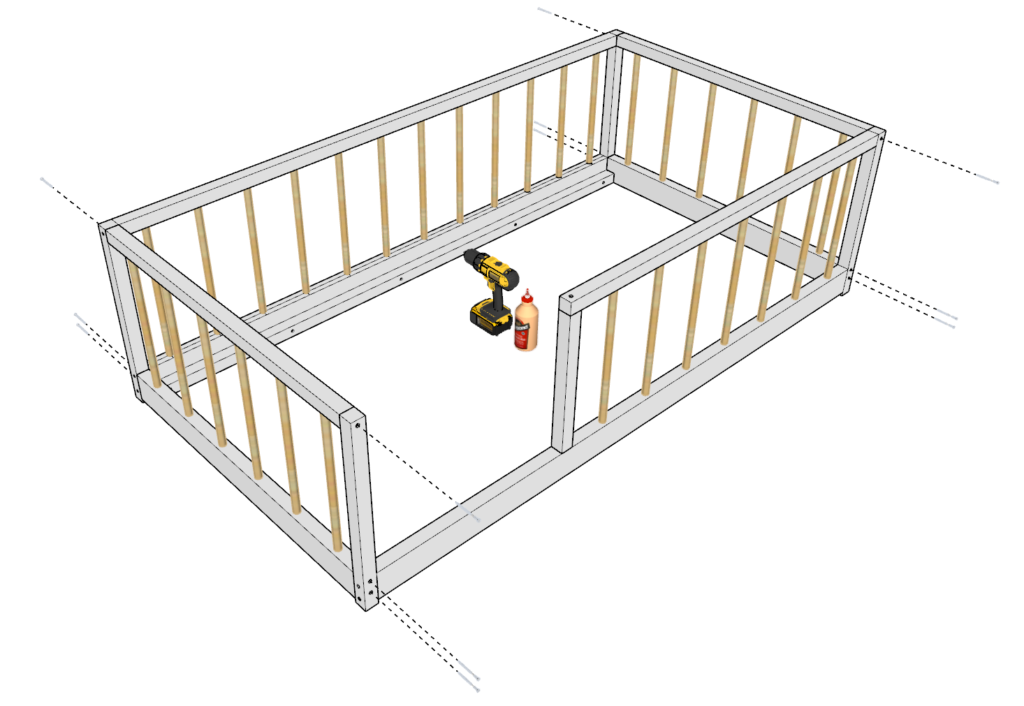
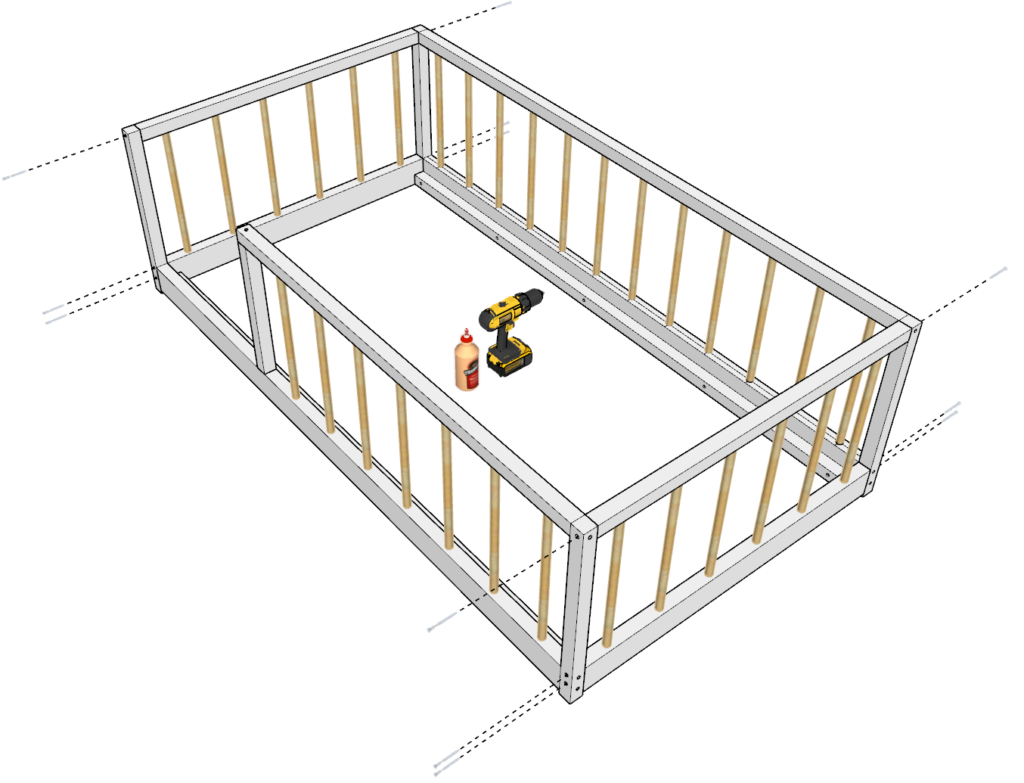
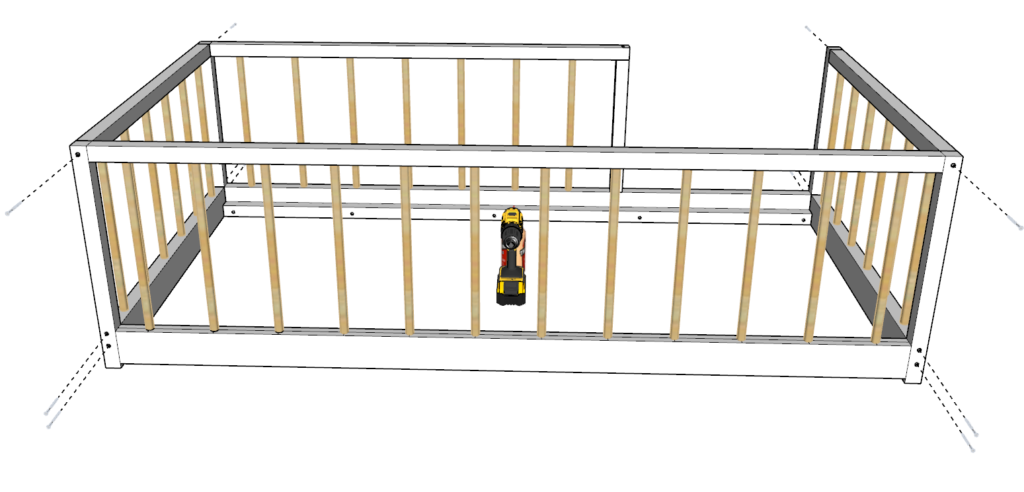
Step 12
In this step, take all the pieces you have made and assemble them together.
Use the diagram to assist with placement.
Secure the frame with glue and screws.
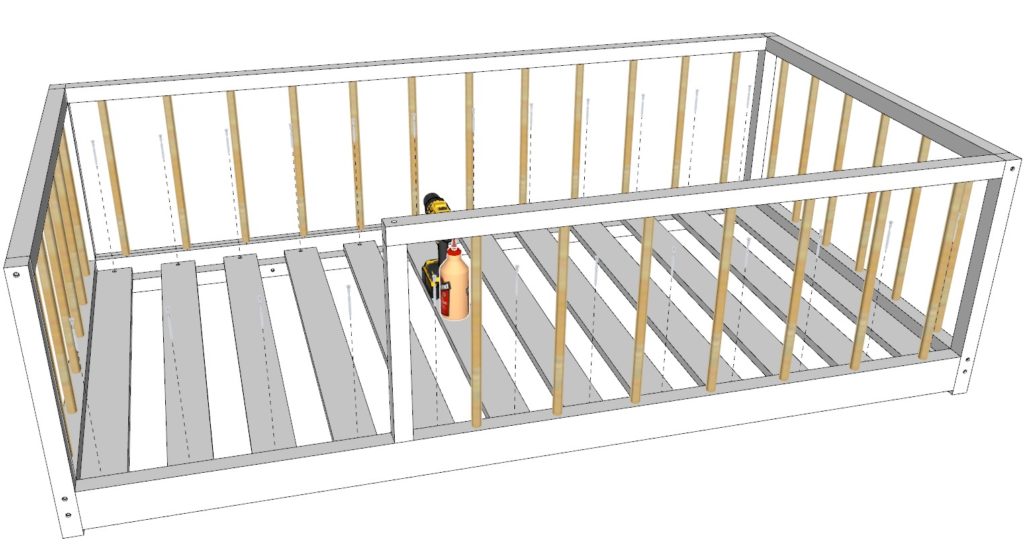
Step 13
Next, cut twelve 39 inch 1×6 pieces.
These will be used to deck the bed.
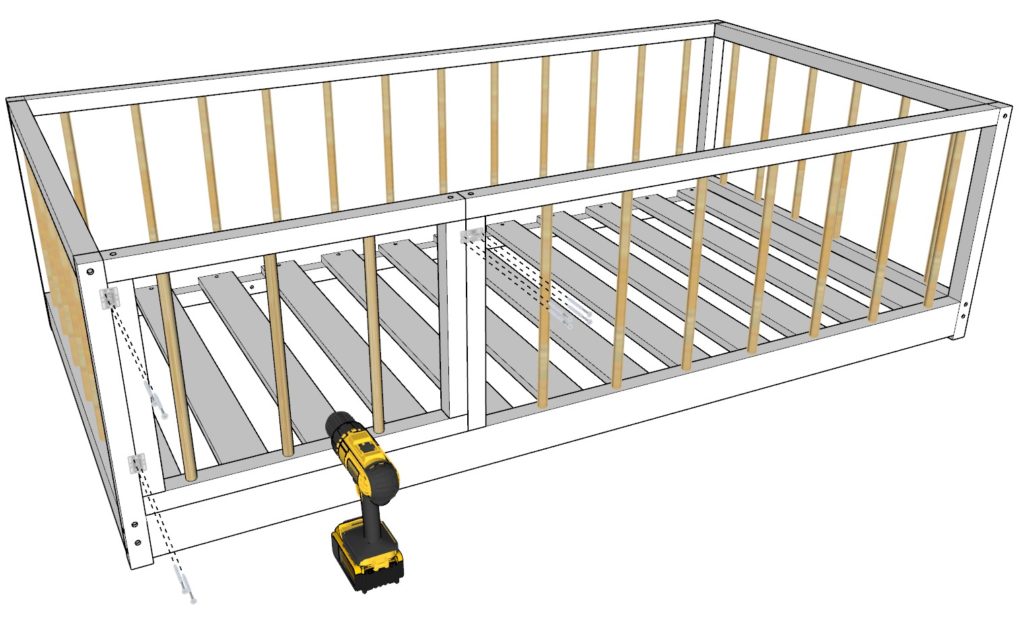
Next, deck the bed floor with the 39 inch 1x6s. The space between each board should be 3 inches. Use screws and glue to secure the decking pieces to the frame.
Next attach the door by adding hinges and a barrel bolt lock. Secure with screws.
Lastly, sand down the whole bed.
I start sanding with a rough grit sandpaper. Usually about 80-grit. Then, for the final touch I use a fine grit. Usually, a 220-grit.
Make sure no rough edges are left. Smooth out the edges just in case your child hits the edge.


You need to update your cost list. This is a minimum of $160 for the raw materials. Didn’t figure that out till I spent the money to download the plans. Kind of misleading.
I apologize for any confusion the cost estimate may have caused.
The prices of materials, particularly lumber, can vary greatly depending on the location and the current market situation. They can fluctuate over time and I acknowledge it can be challenging to provide an exact cost estimate that applies universally.
I’ve included a note in the plans to clarify that prices for materials may vary. This should help future customers have a better understanding of potential cost fluctuations.
Again, I apologize for any inconvenience this may have caused. Your feedback is highly appreciated as it helps me improve the quality and accuracy of my plans.