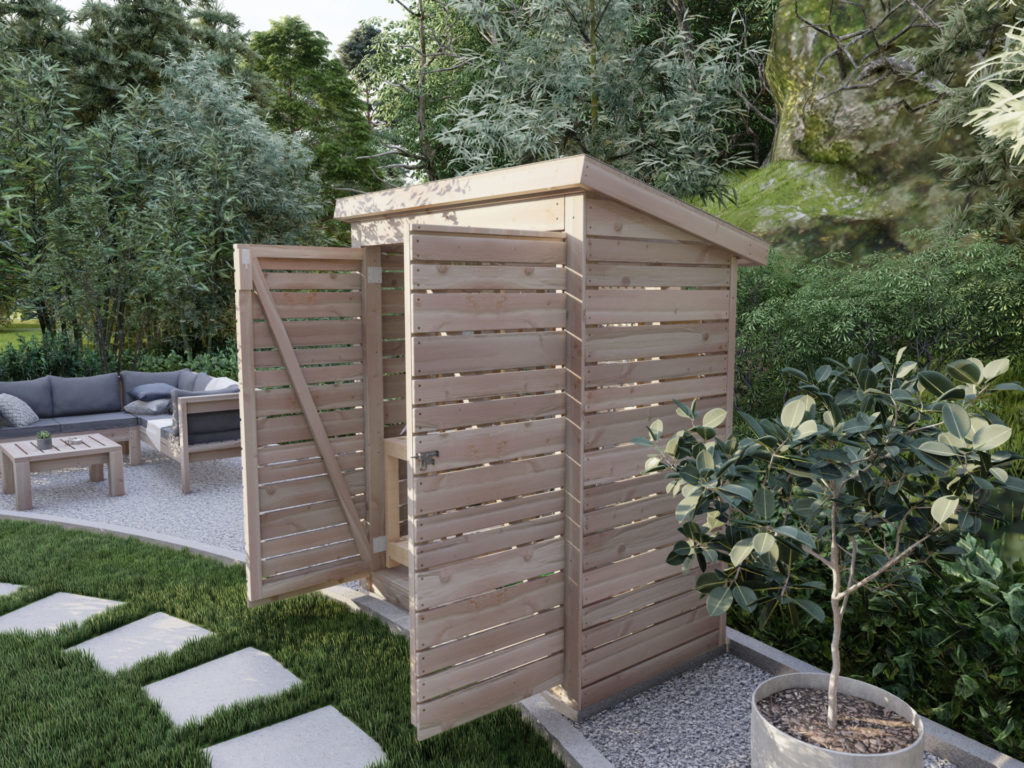
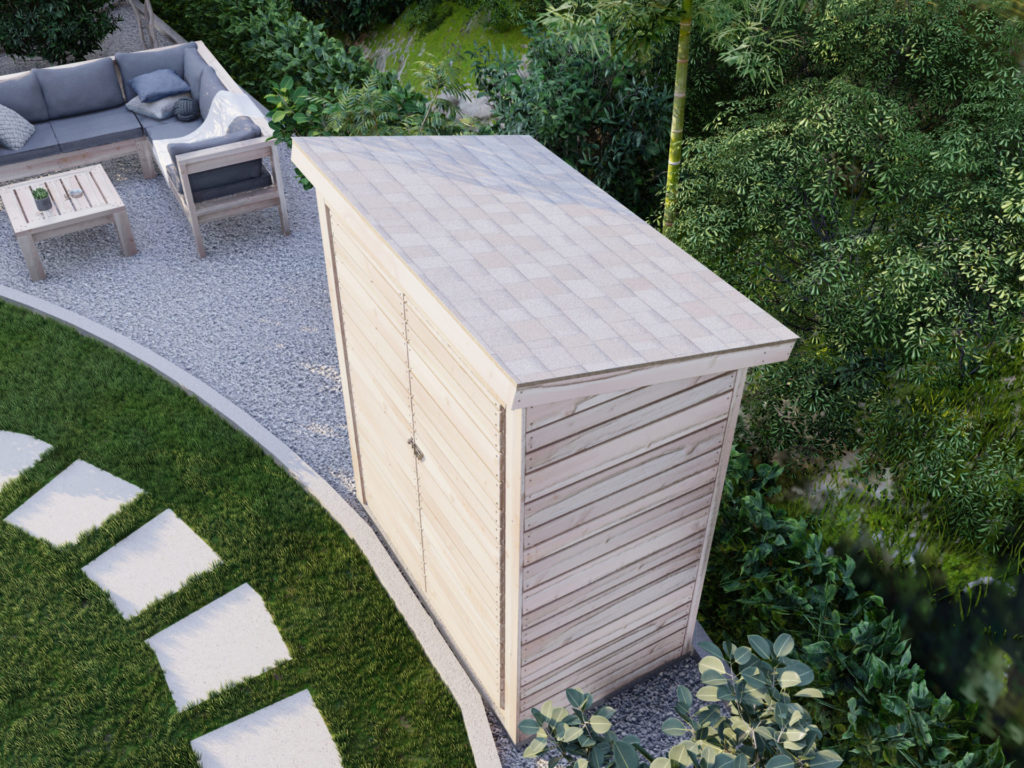
Why build a DIY shed?
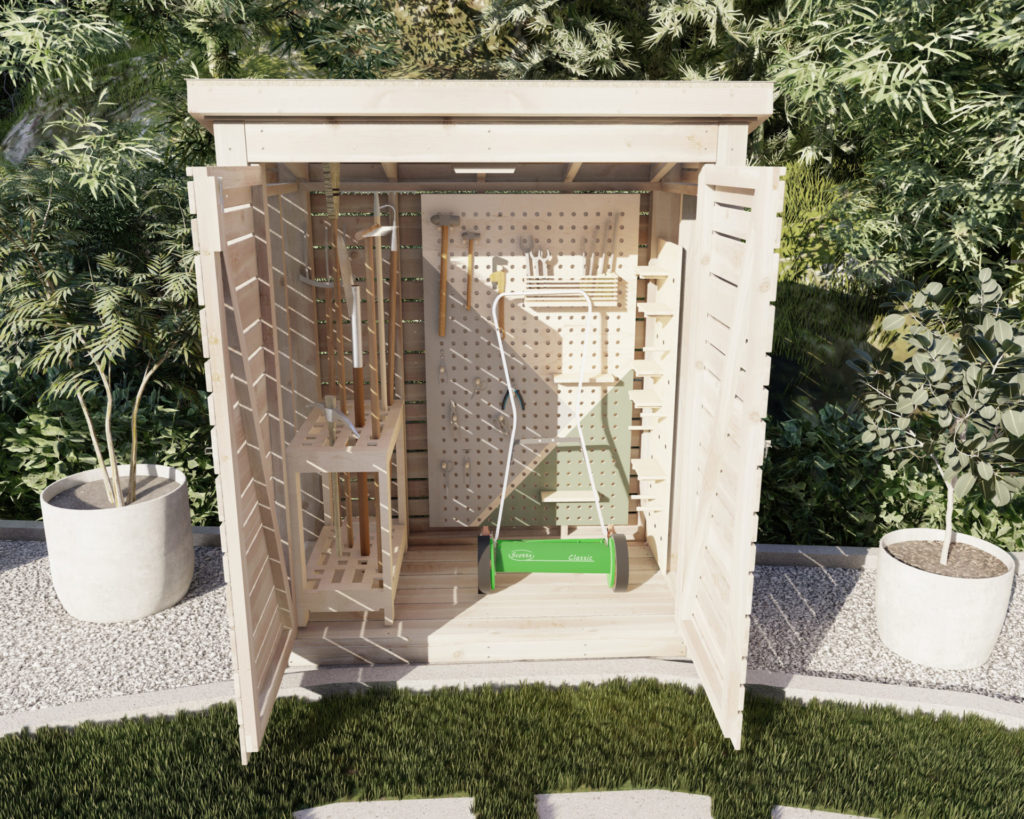
Sheds are a great way to keep your backyard organized and to provide space for gardening and lawn care tools, pool supplies, mechanical equipment, and woodworking tools. We all need space and storage for hobbies and passions.
With a new DIY shed your backyard can be much more organized and tidier. Pulse, all your tools, from hammers, to lawn mowers, to cordless tools can be safe from rain and the elements. Another benefit is being able to keep gardening tools close and on hand while keeping them safe.
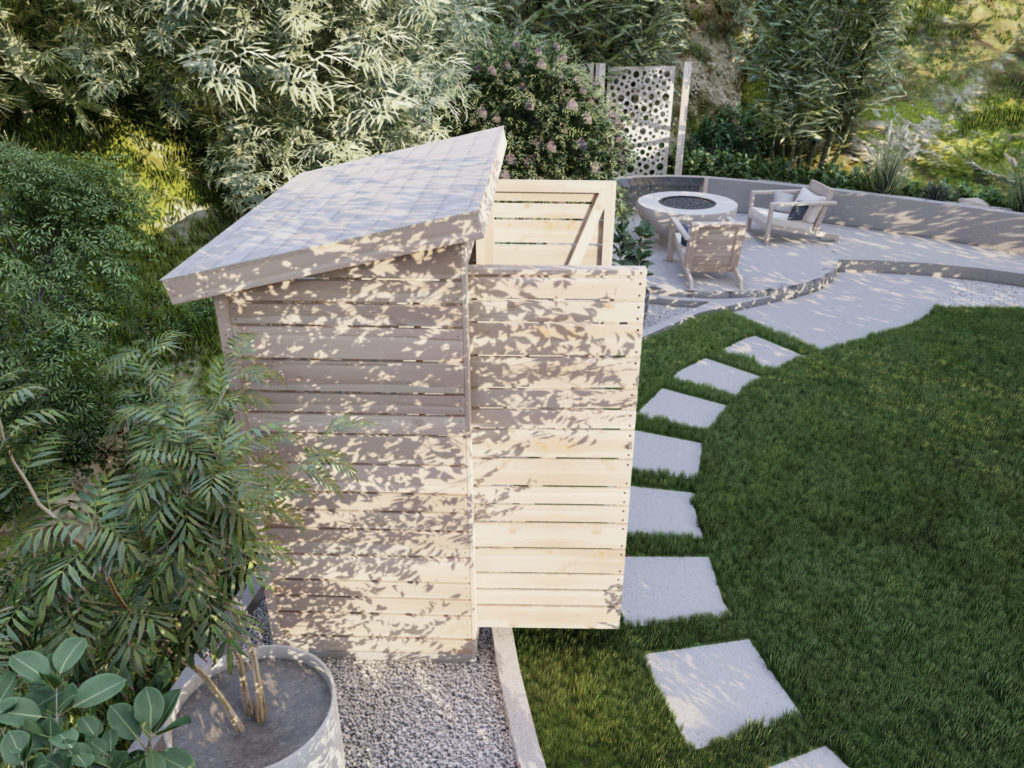
Why a wood DIY tool shed is better than a metal or plastic tool shed.
Because this shed is made from wood and not metal, the DIY tool shed is perfect for installing shelves or a pegboard to be able to hang your collection of tools. Having wood studs make installation of shelves easy. The base of the tool shed can store larger tools and equipment such as lawnmowers or a wheelbarrow.
Plastic sheds tend to fade and weather quickly. The sun also tends to damage it faster especially if it’s a darker color. Metal sheds rust easily in most climates. With a woodshed, if placed on a small concrete slab or blocks, can last for a long time. If the color begins to fade, its possible to spruce it up by applying a fresh coat of paint.
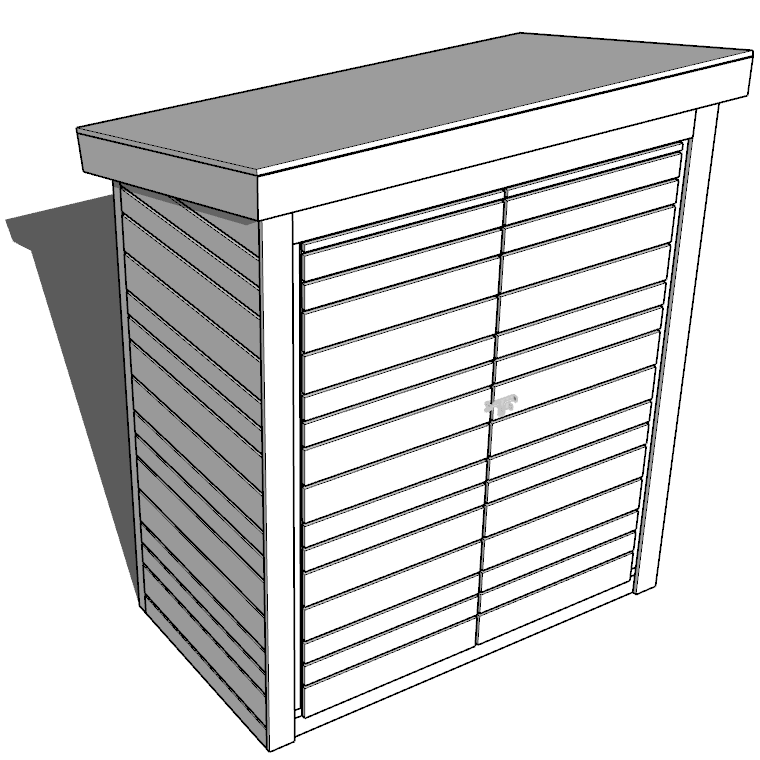
What are the materials used and design specs?
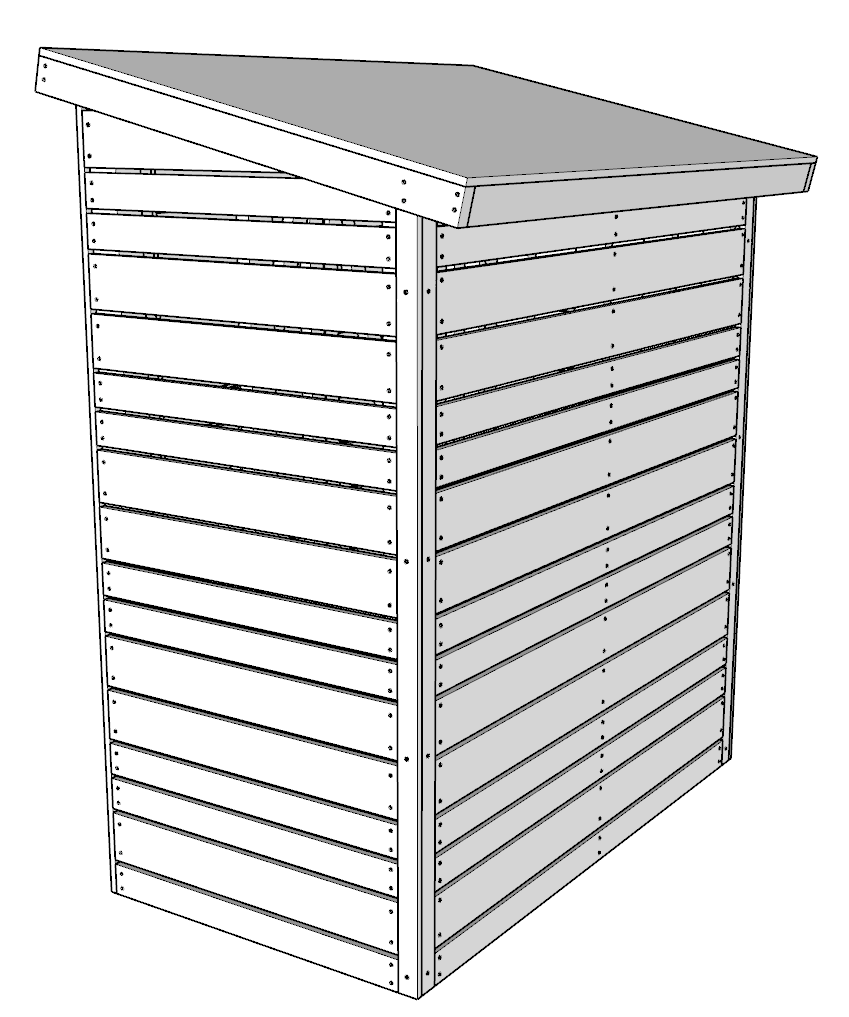
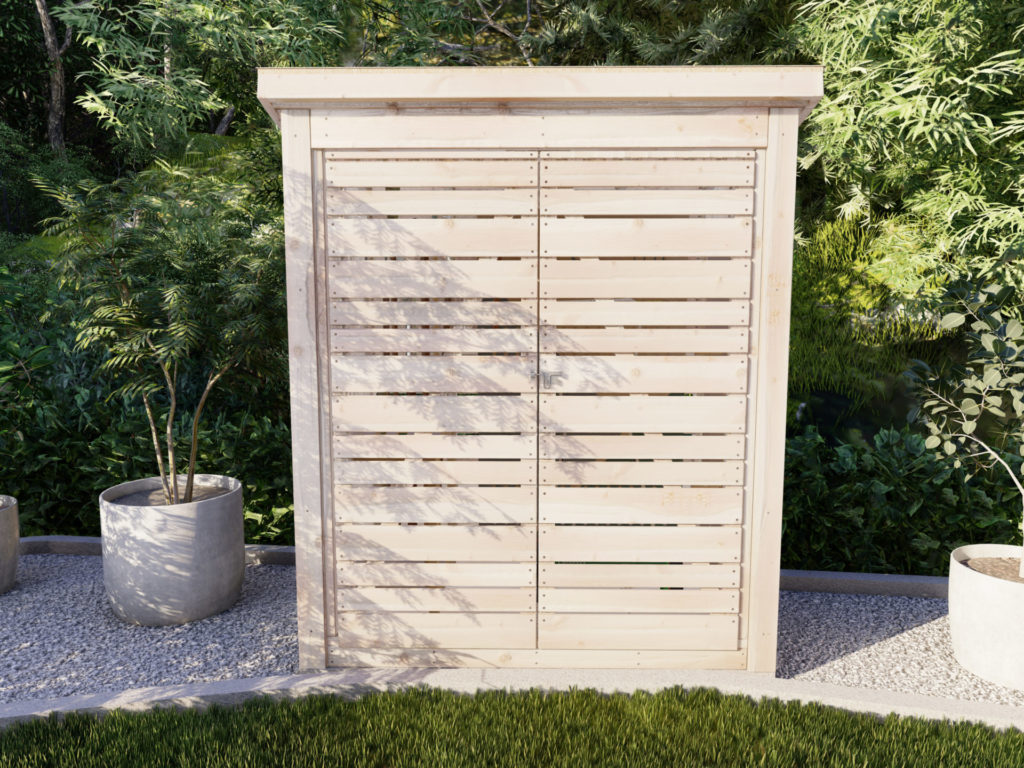
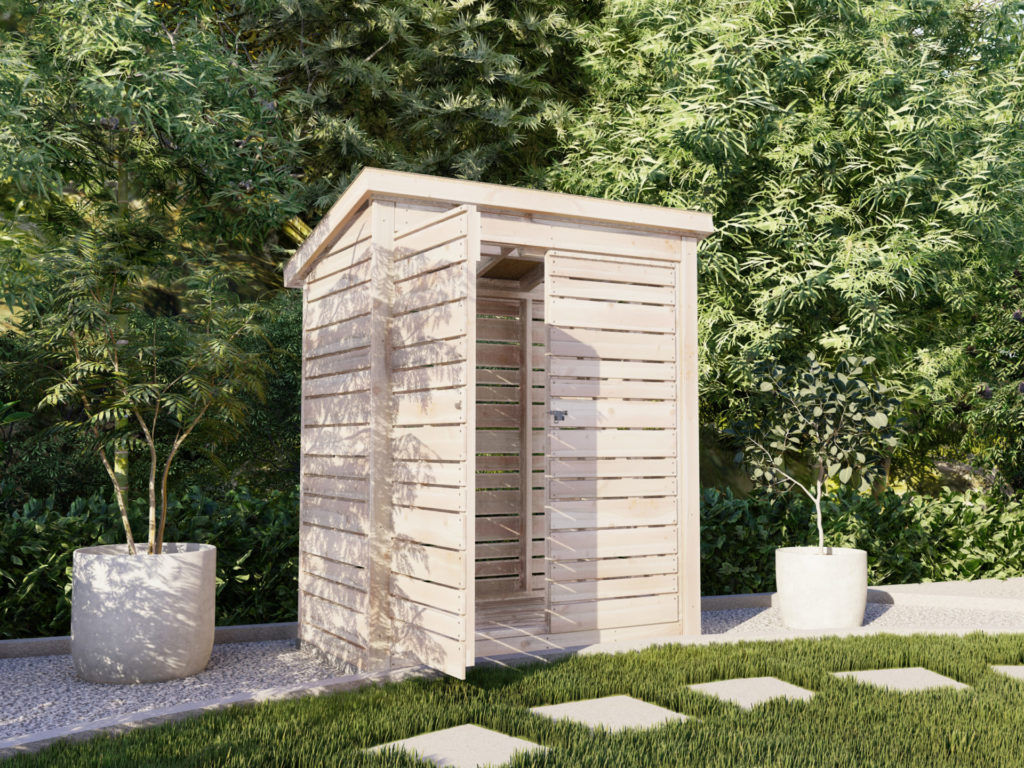
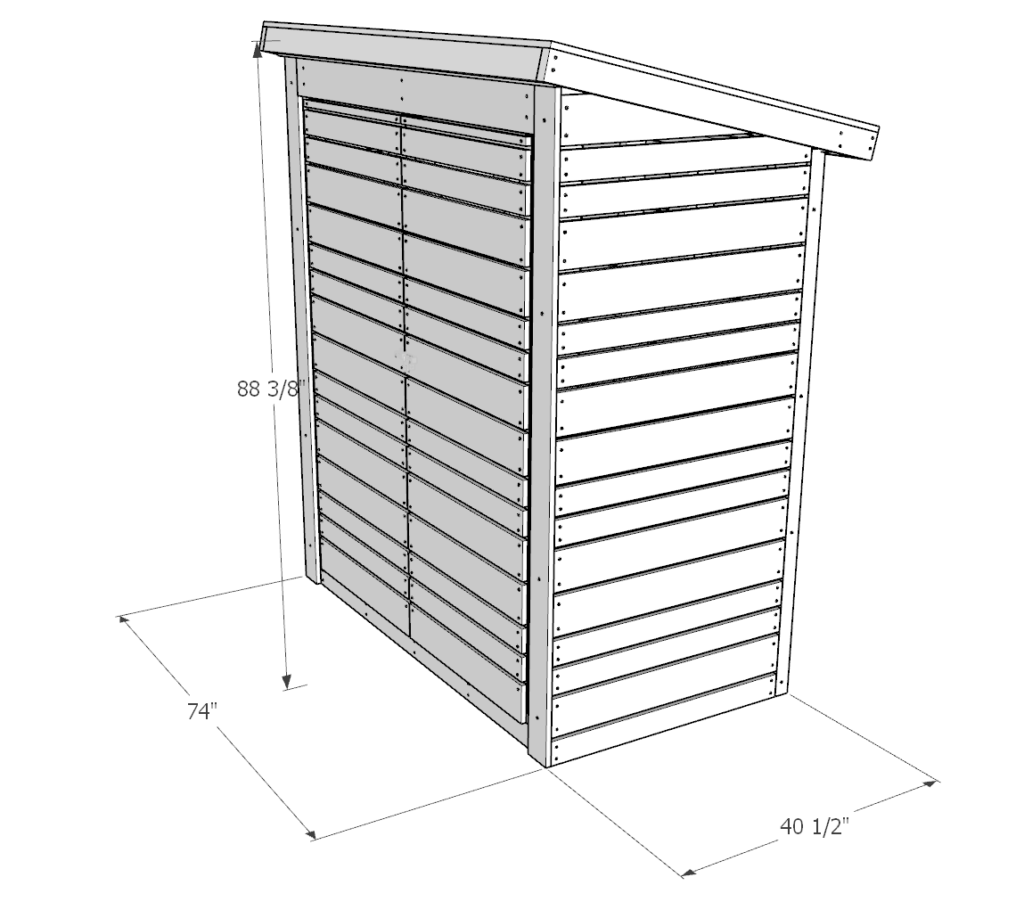
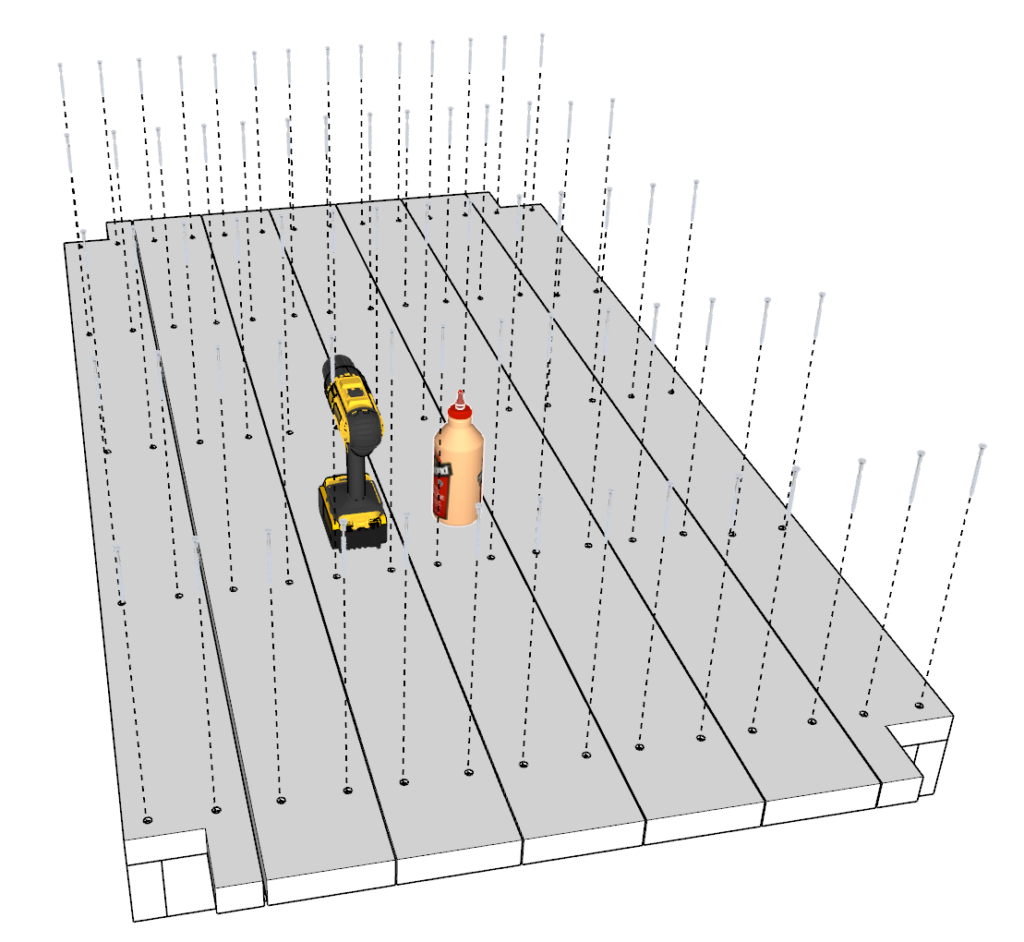
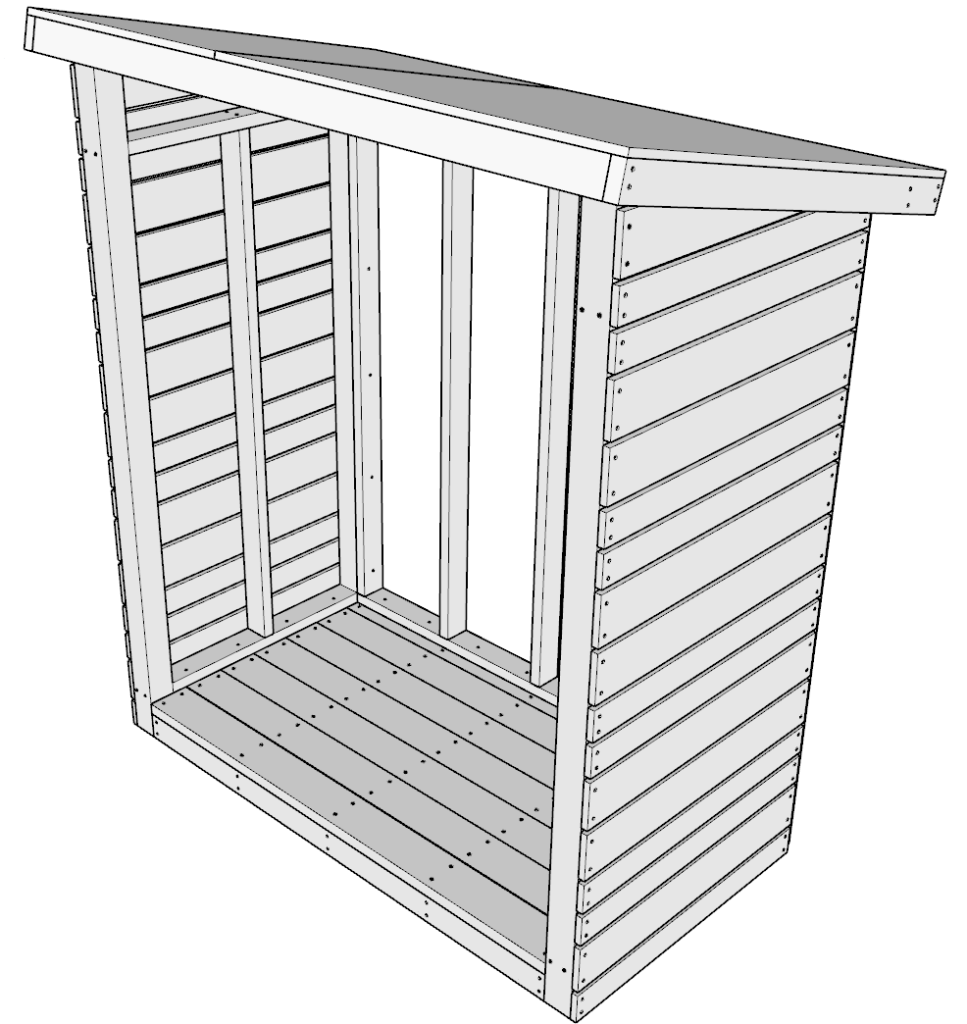
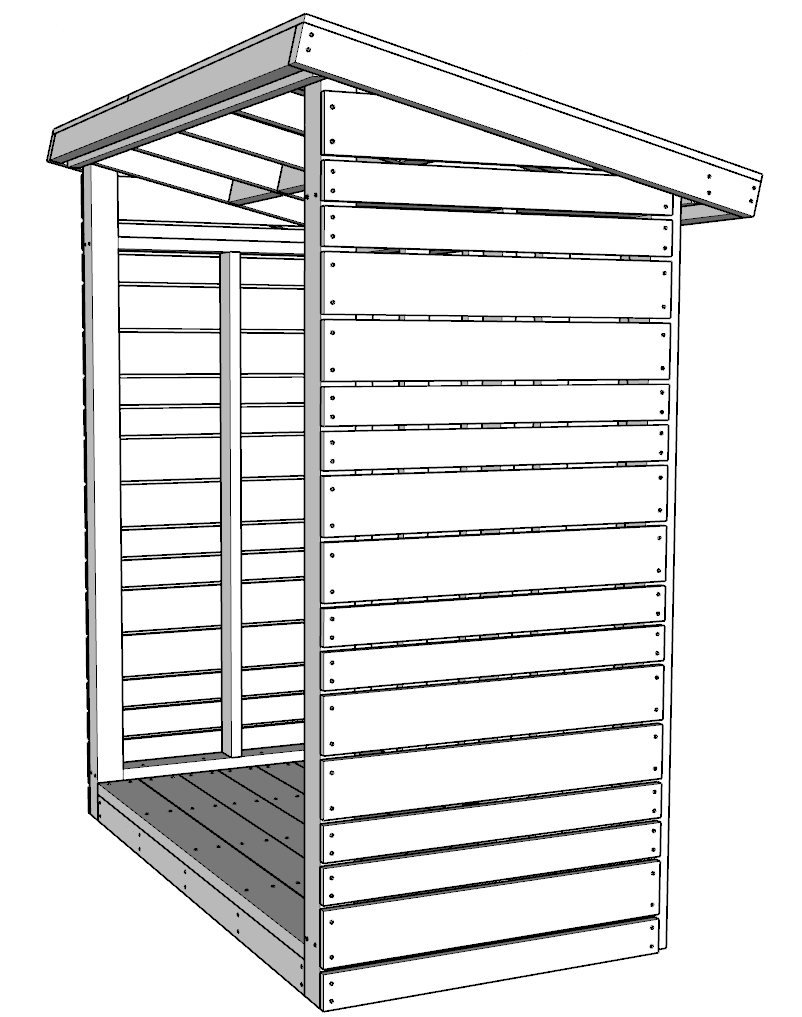
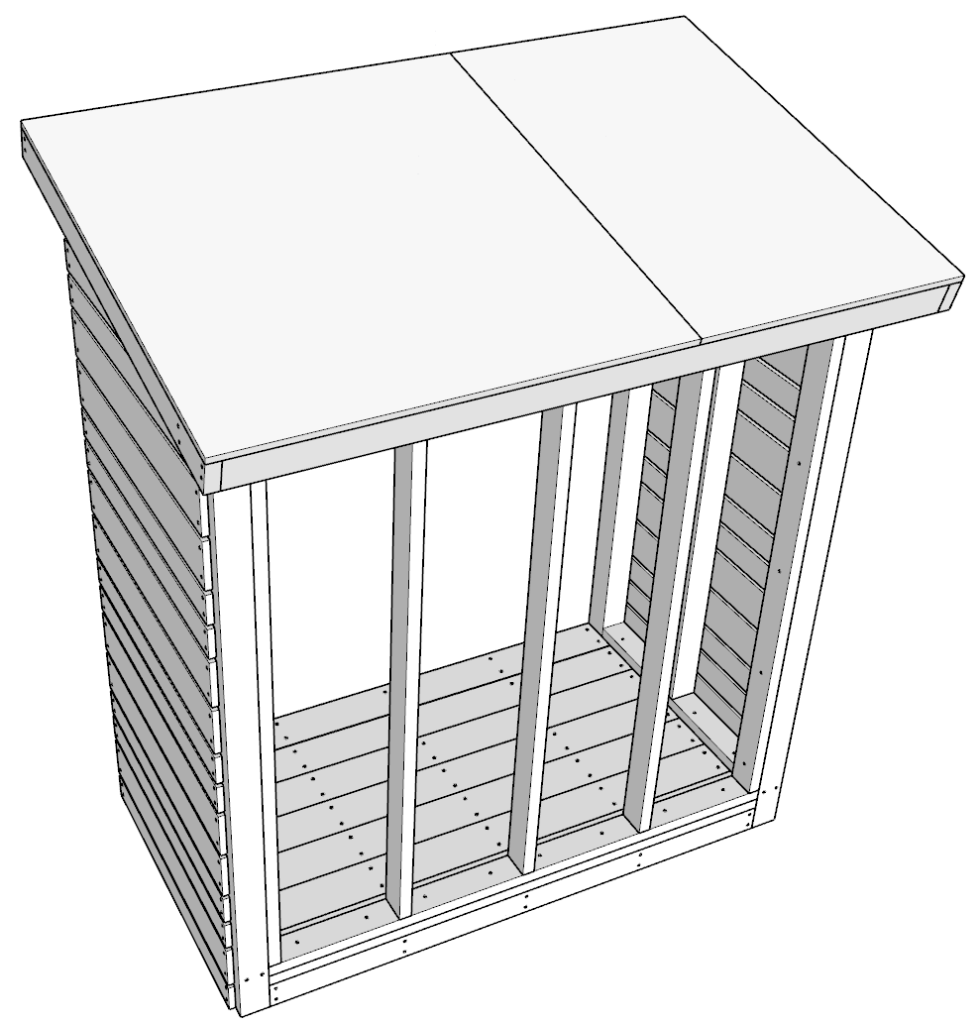
This shed is 74 inches long, 40.5 inches wide, and about 88 inches tall.
This shed uses material such as 2x4s and 4x4s commonly found in most hardware stores. The joints and cuts are designed to be easy and simple to do so that even beginners to woodworking can build the shed.
Time to build
20 hours
Total cost of build
About $1,100
Skill level required
Beginner – Intermediate
Download the PDF plans
DIY tool shed PDF plans
What is included in the PDF download?
Easy to read step by step instructions
Material list
Tools needed
3D illustrations
Recommend tools/materials for this project:
- Sliding miter saw
- Drill
- Impact driver with bit for screws
- Sander
- wood countersink drill bit
- Circular saw
- Pencil
- will need about 50 lbs of 3-in (highly recommend T25 Star Drive screws)
- 1-1/2-Inch All Purpose Wood Construction Screws. T25 5 Pounds
- Wood glue
- Sand paper
- 2 packs of shingles
- Vertical barrel bolt
- Padlock hasp assembly
- 1 pack of short shingle nails
- 4 hinges
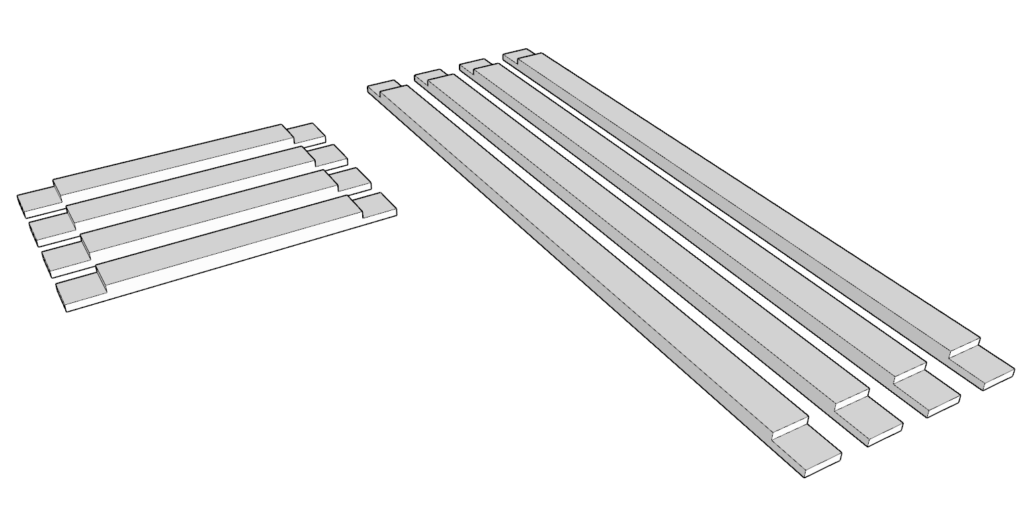
Wood material list:
Available with purchase of PDF plans.
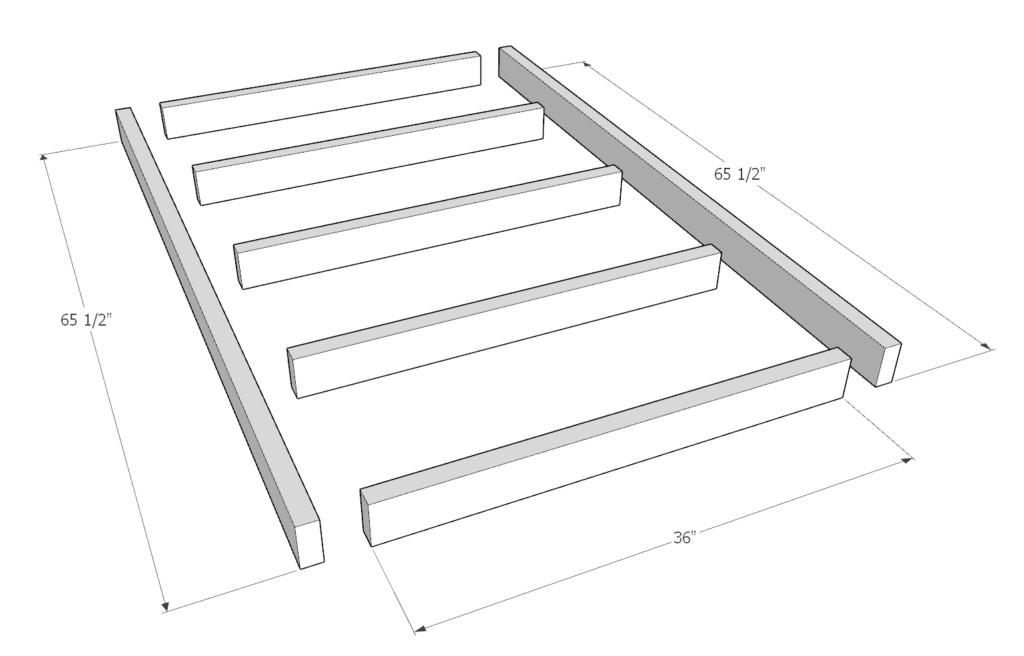
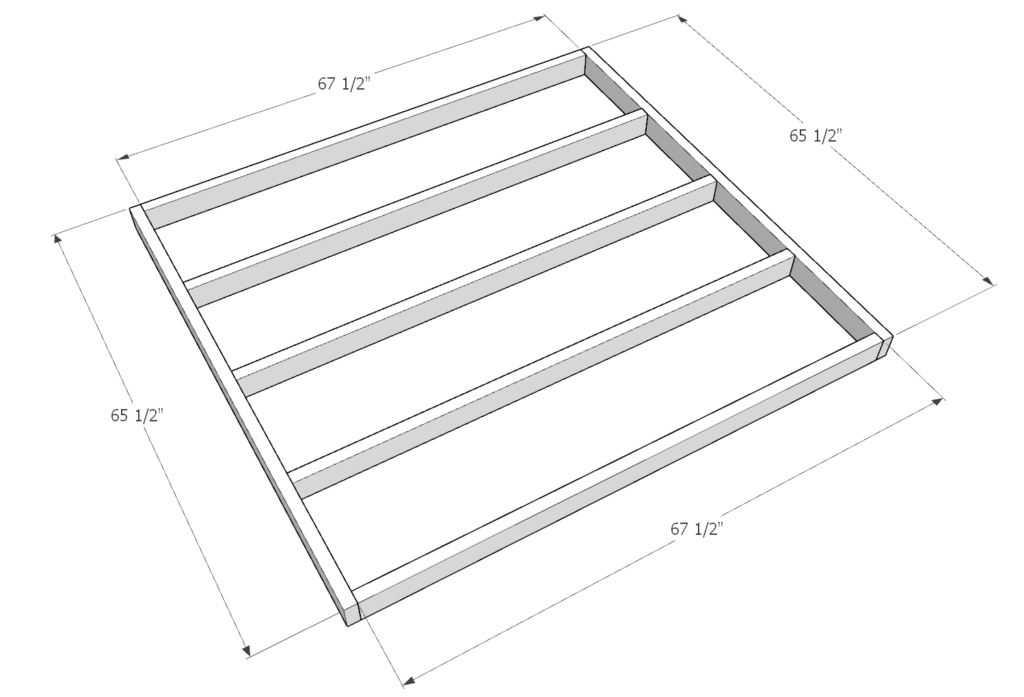
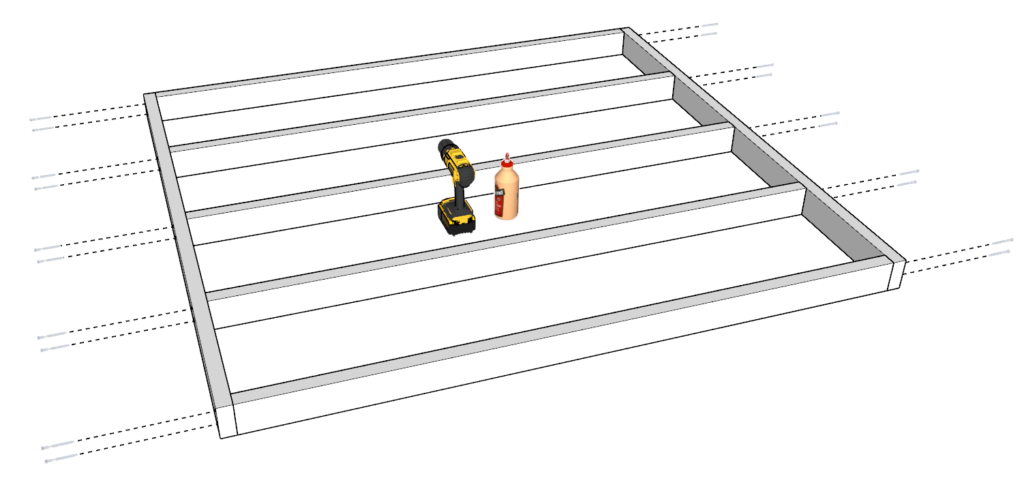
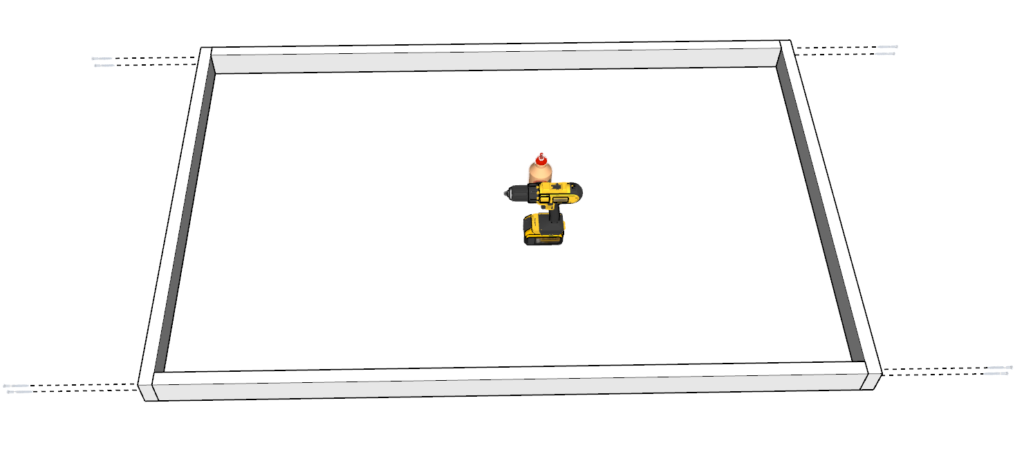
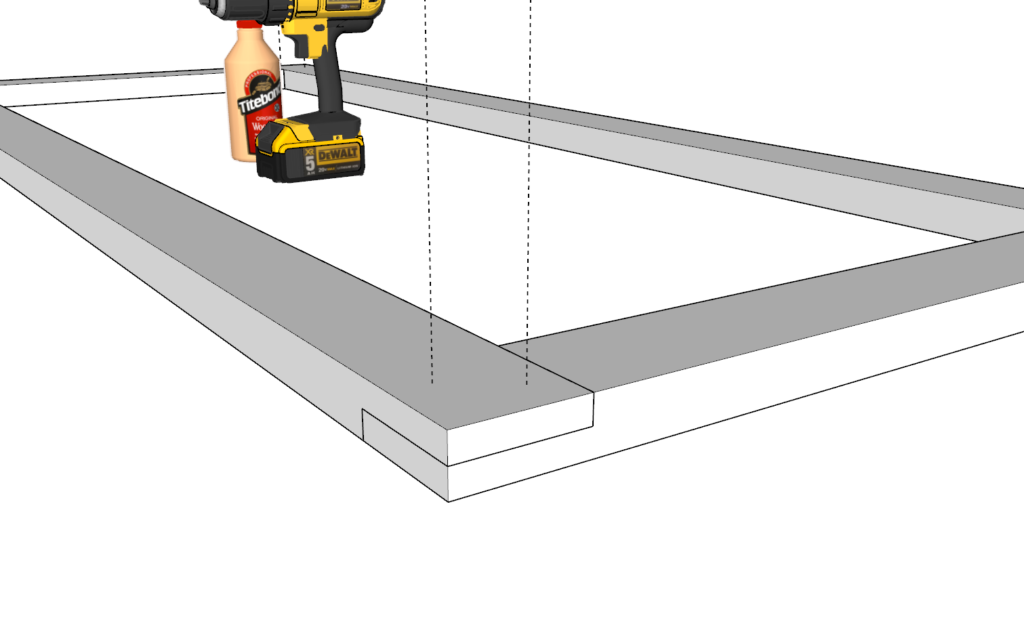
Step 1 (DIY Shed)
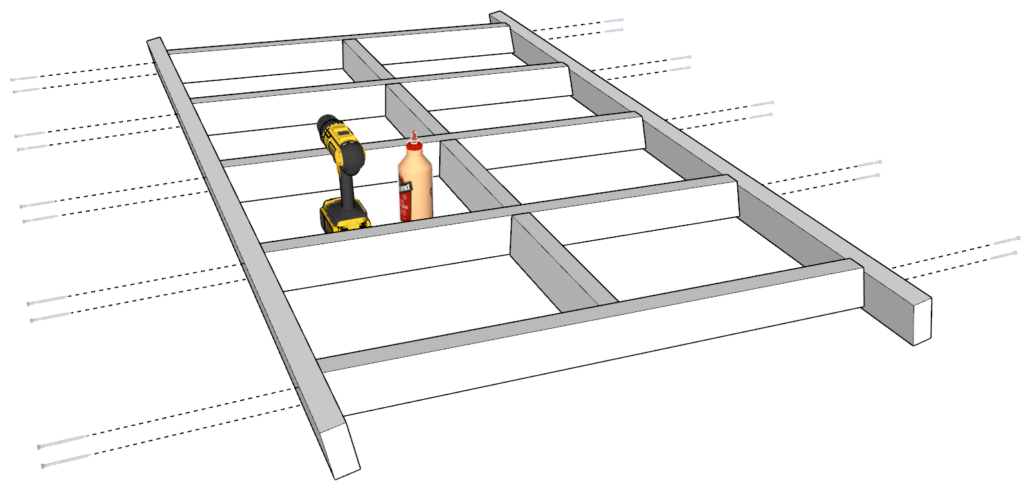
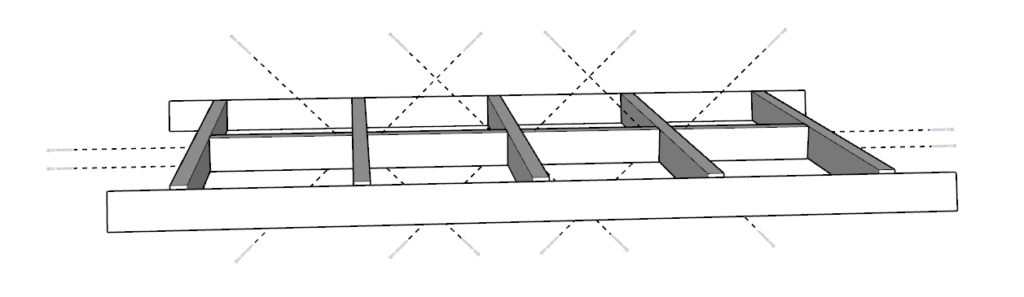
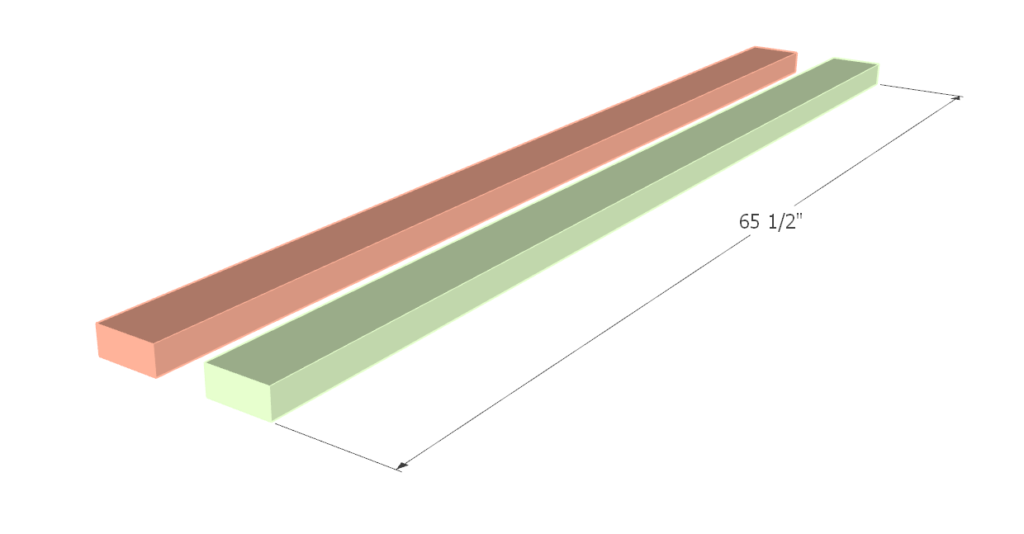
First, cut five 36 inch pieces from 2×4 wood and two 65.5 inch pieces from 2×4 wood.
Arrange them as shown below in the diagram.
Add glue to all the areas where the 2x4s will be making contact. Predrill holes for screws using the countersink drill bit and add screws.

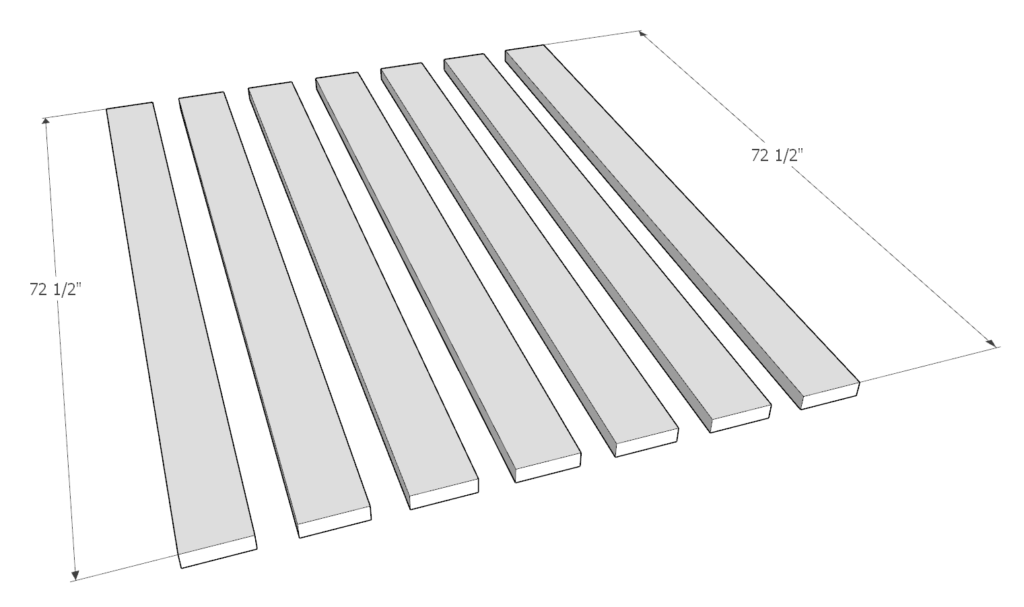
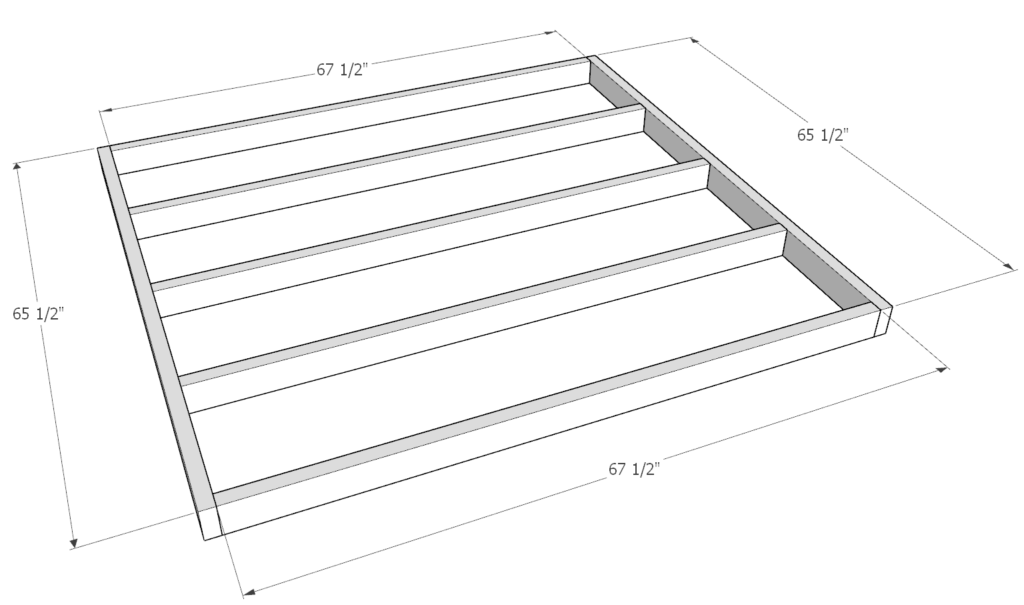
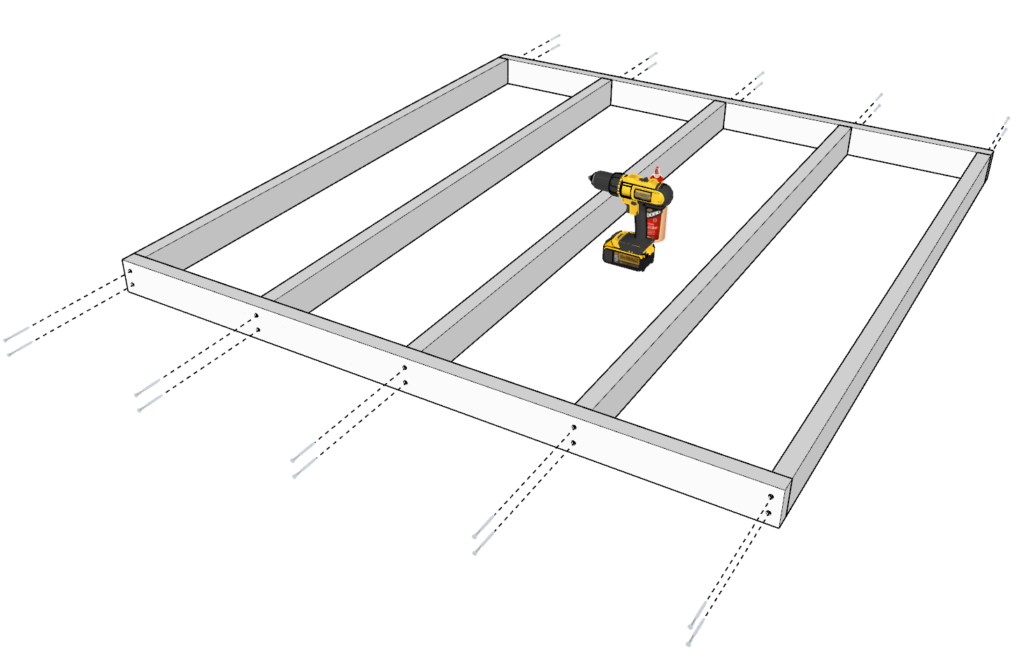
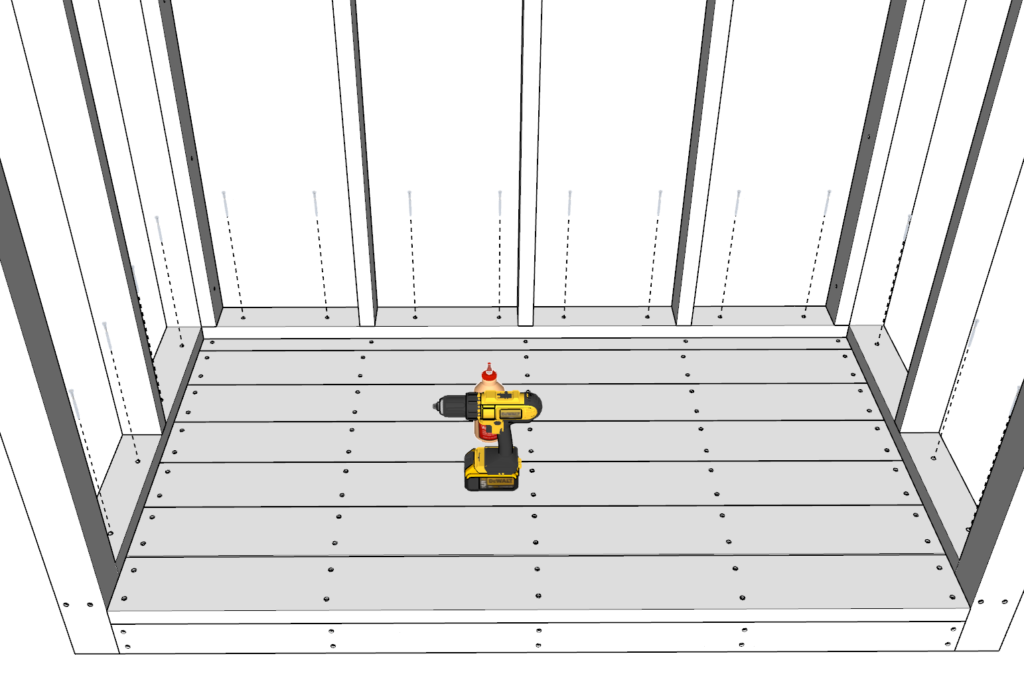
Step 2 (DIY Shed)
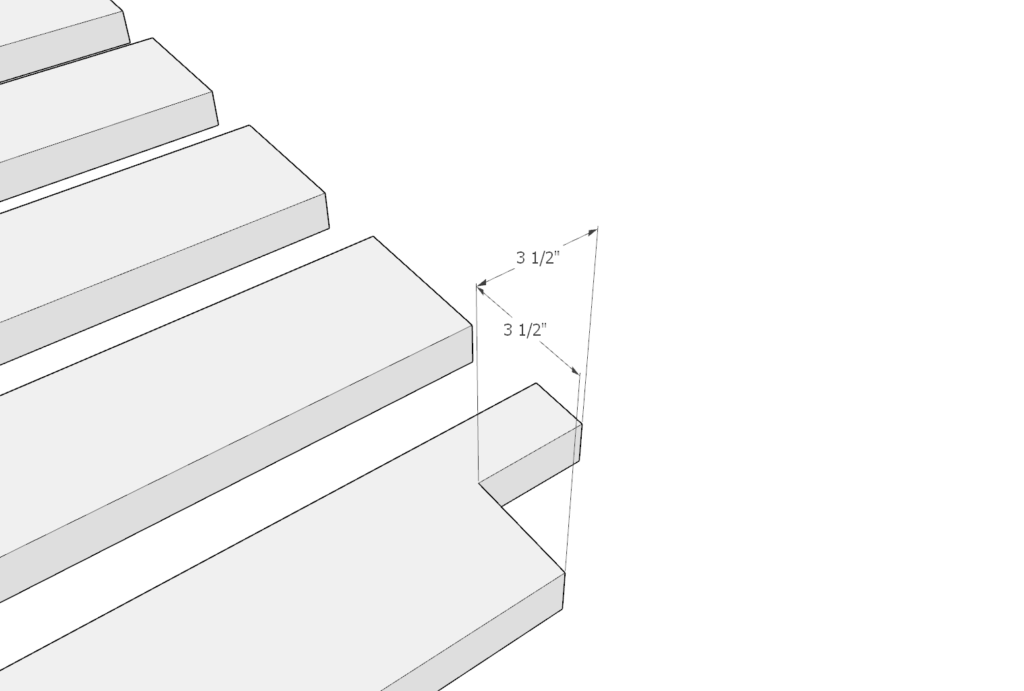
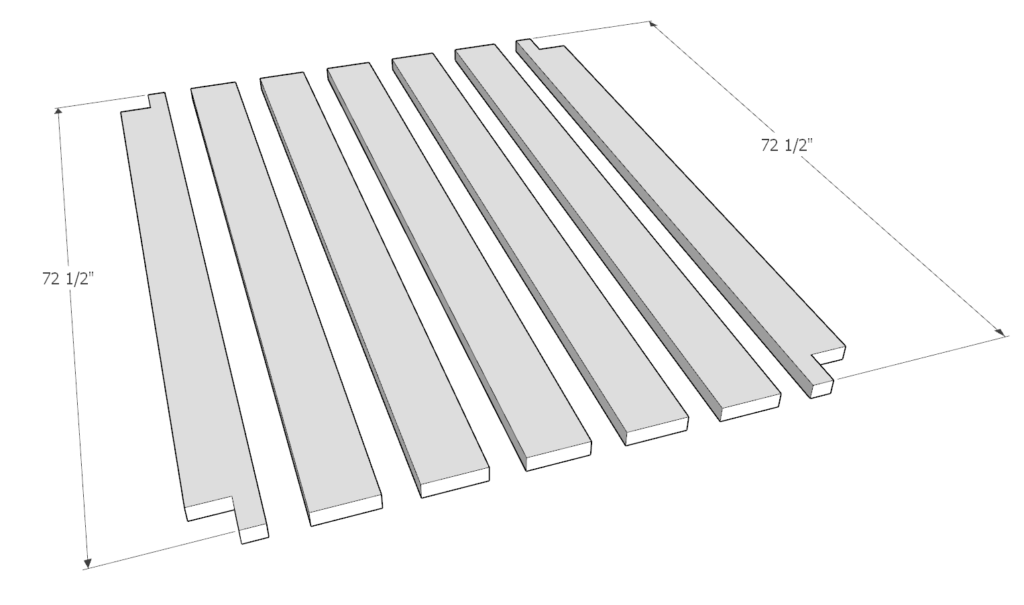
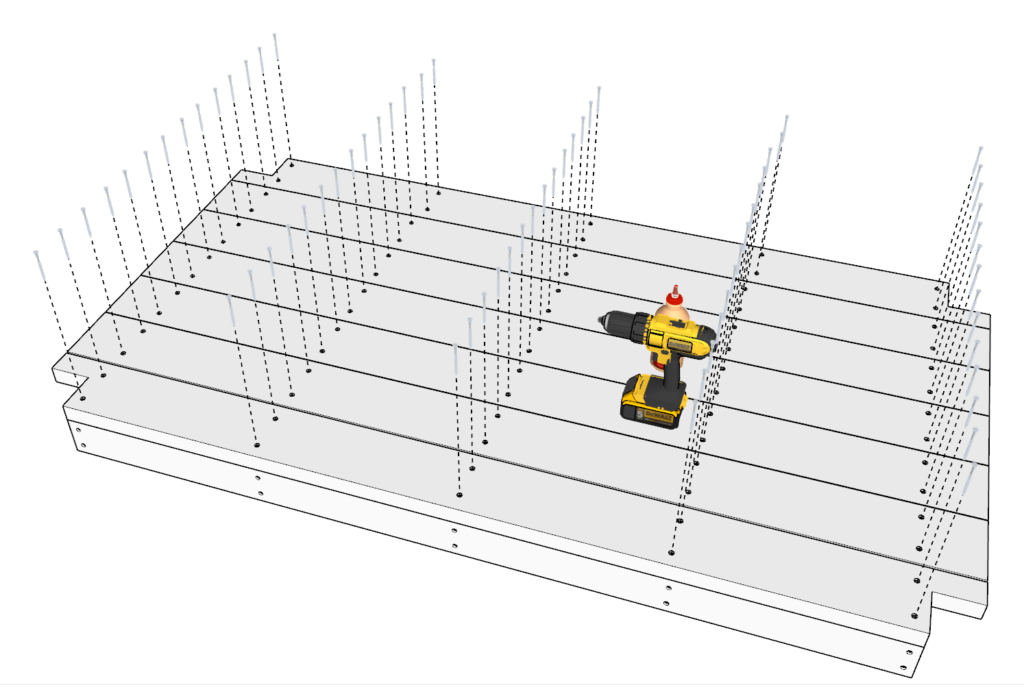
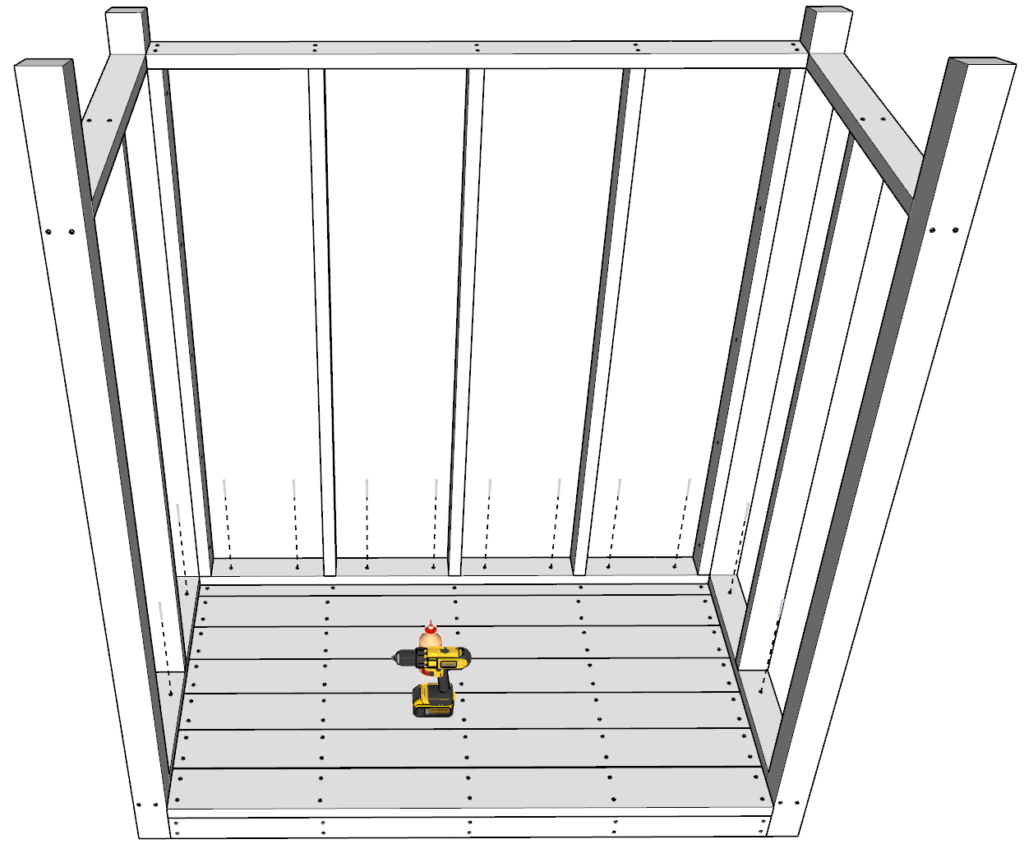
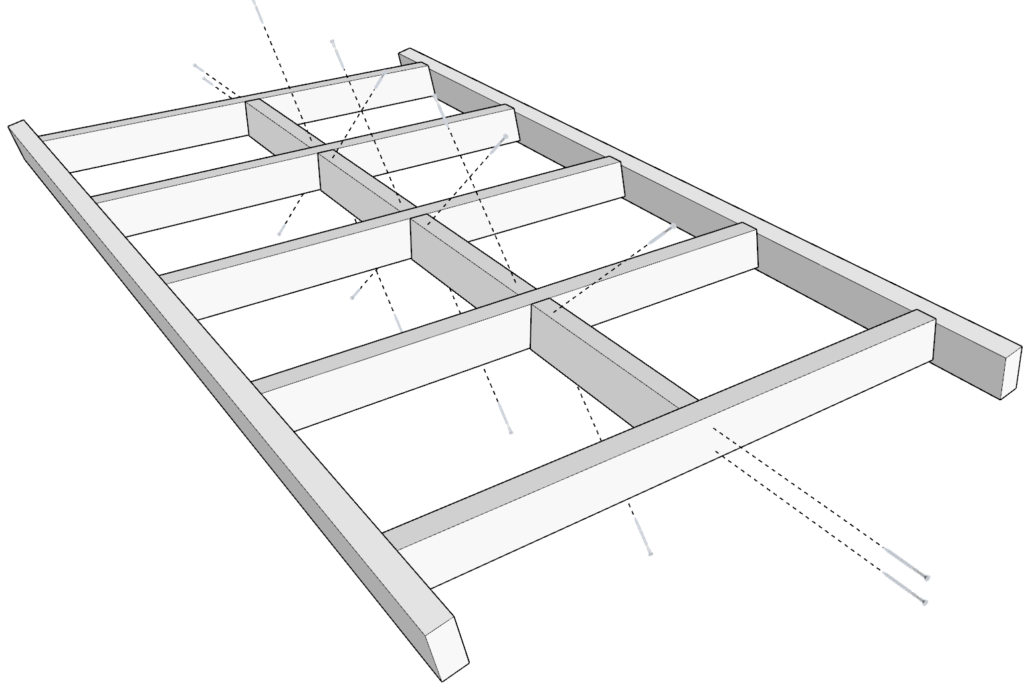
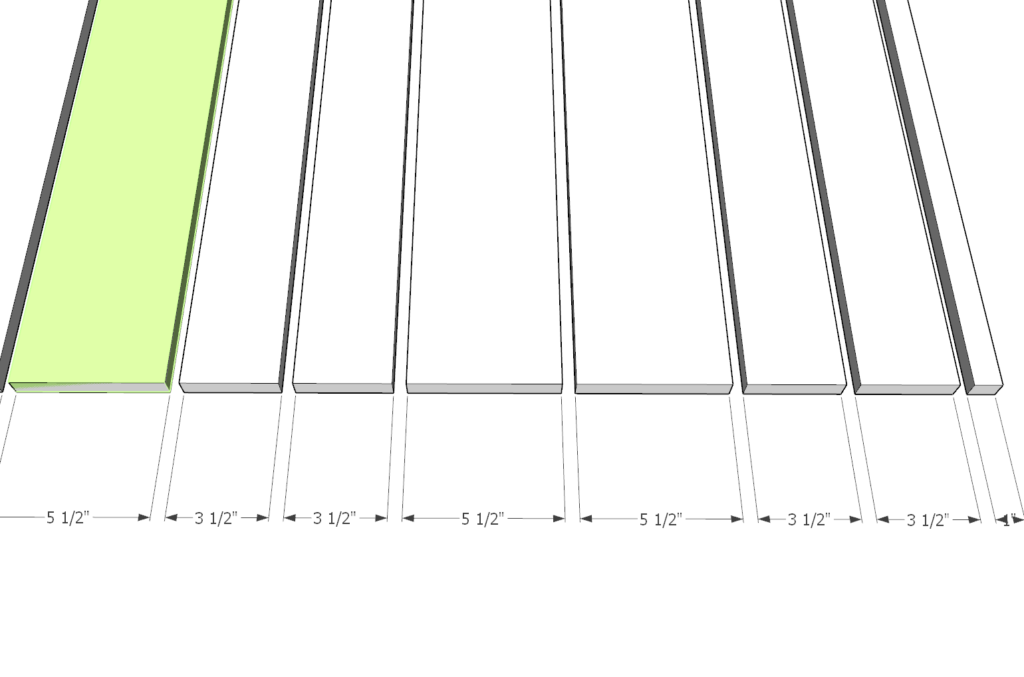
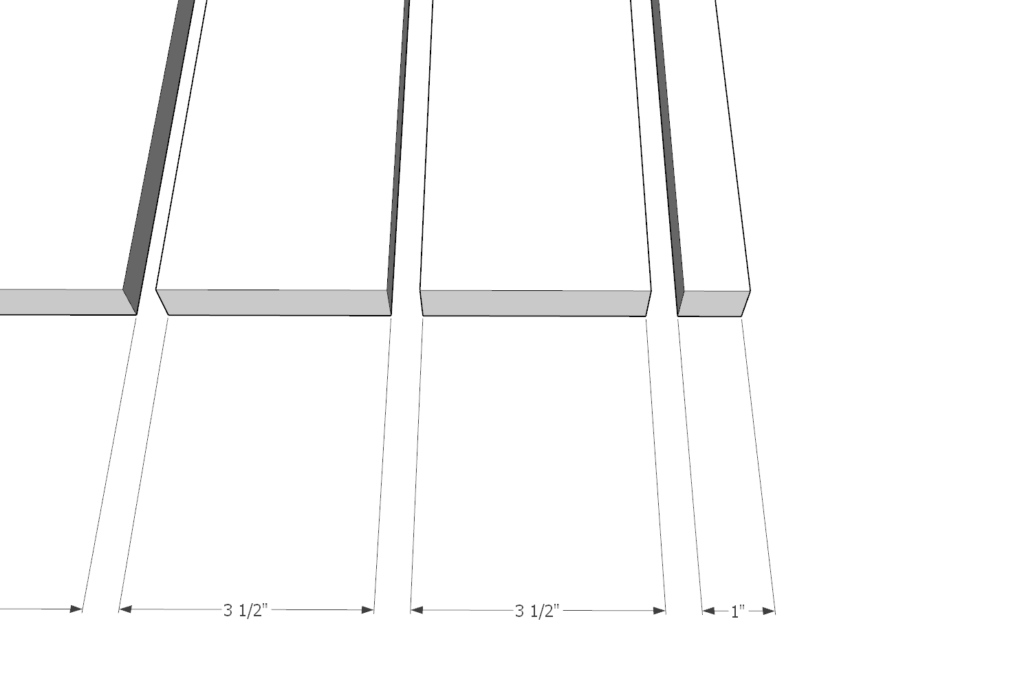
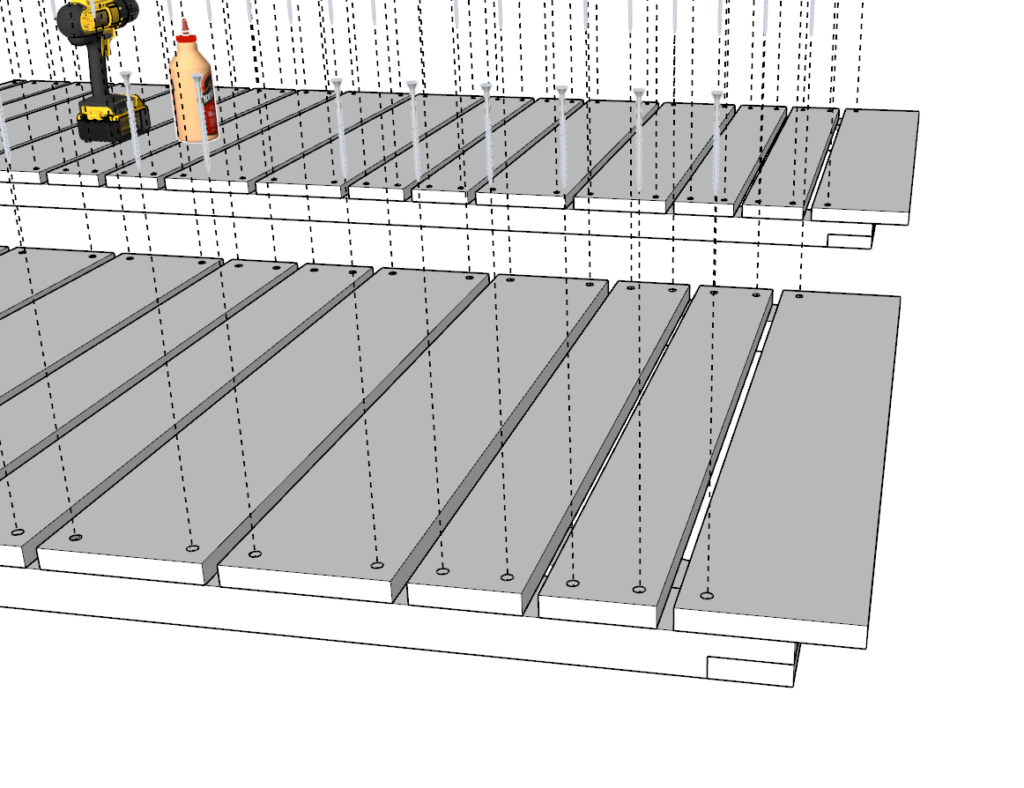
Next, cut seven 72.5 inch pieces from 2×6 lumber.
Cut the edges of the two most outer boards at a depth of 3.5 inches as shown in the diagram.
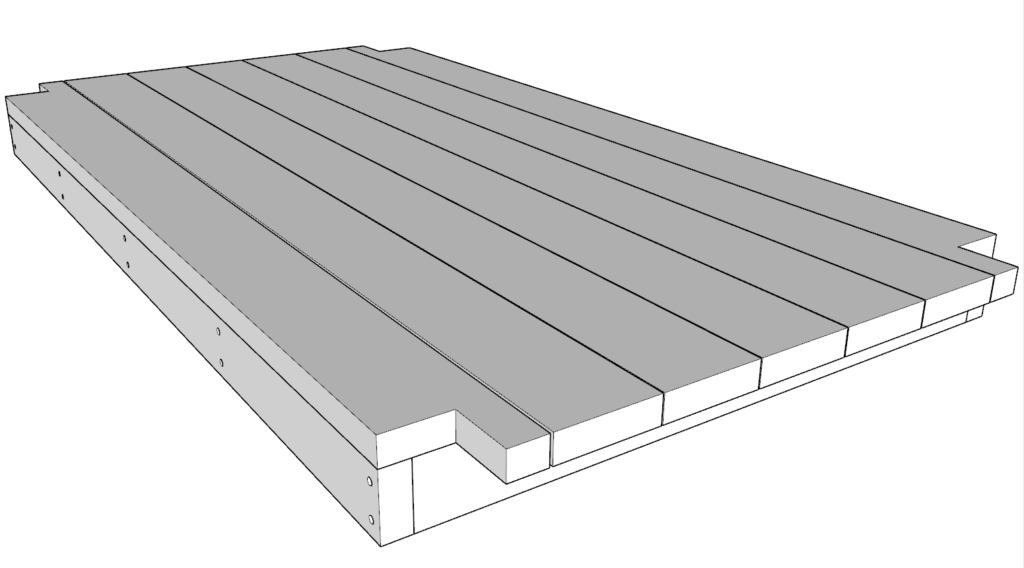
Arrange the 2×6 floorboards on top the floor frame from the previous step as shown below.
Add glue in all the areas where the 2x6s and the frame will be making contact.
Predrill holes and add screws.
Step 3 (DIY Shed)
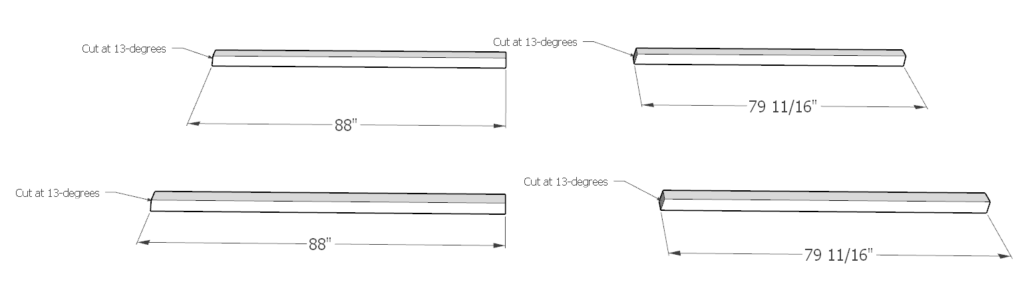
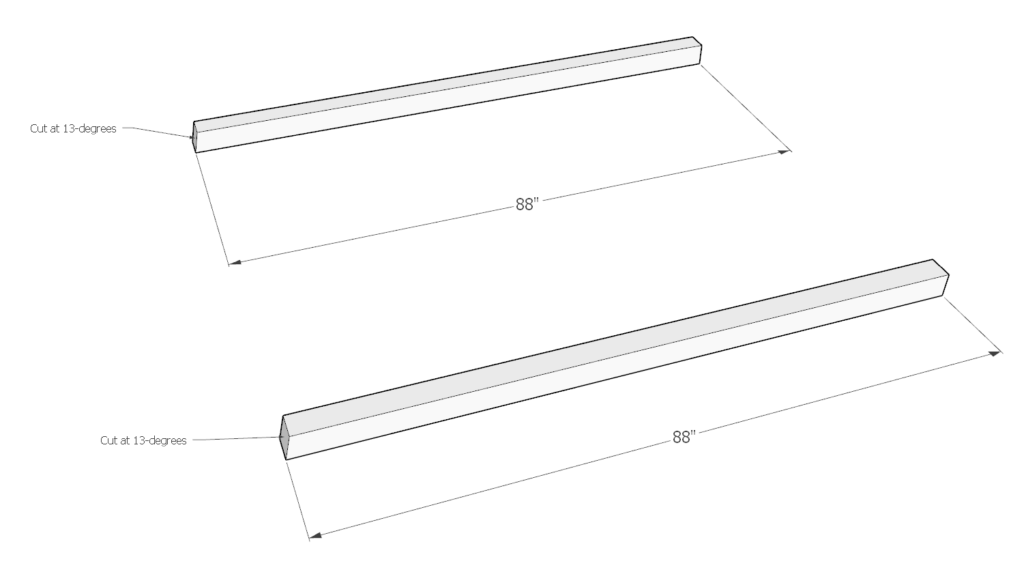
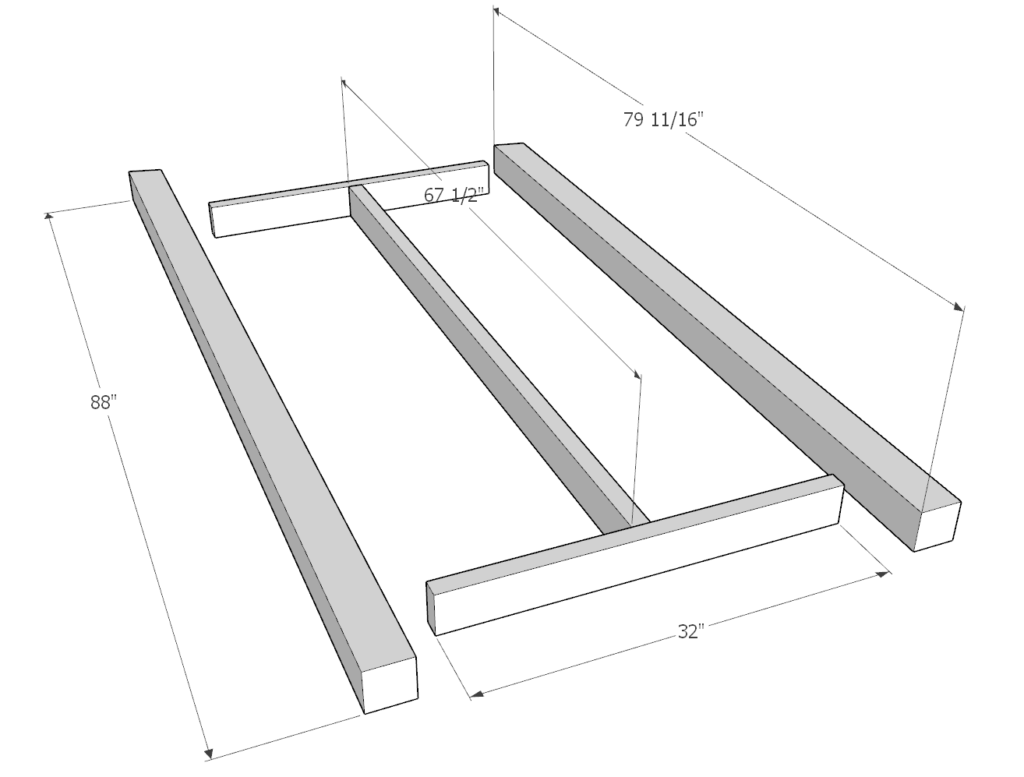
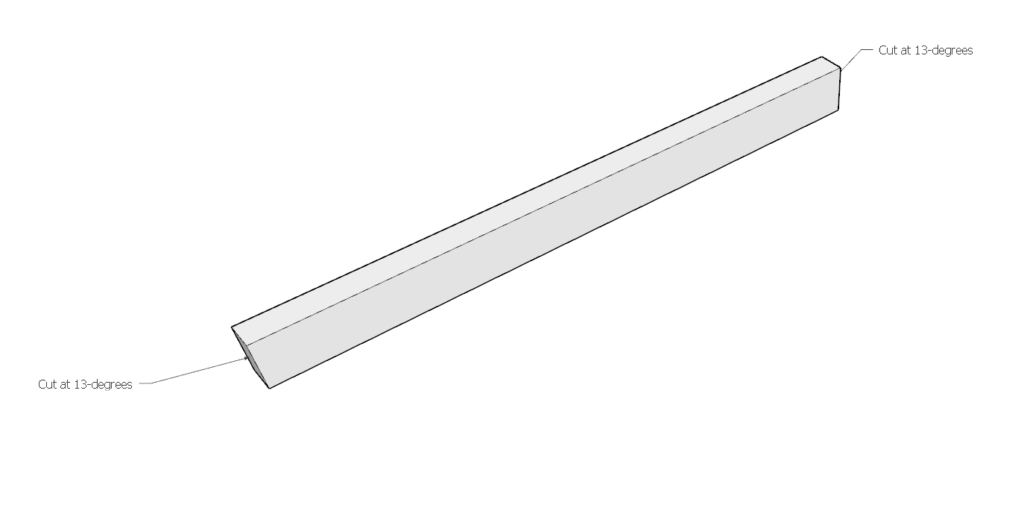
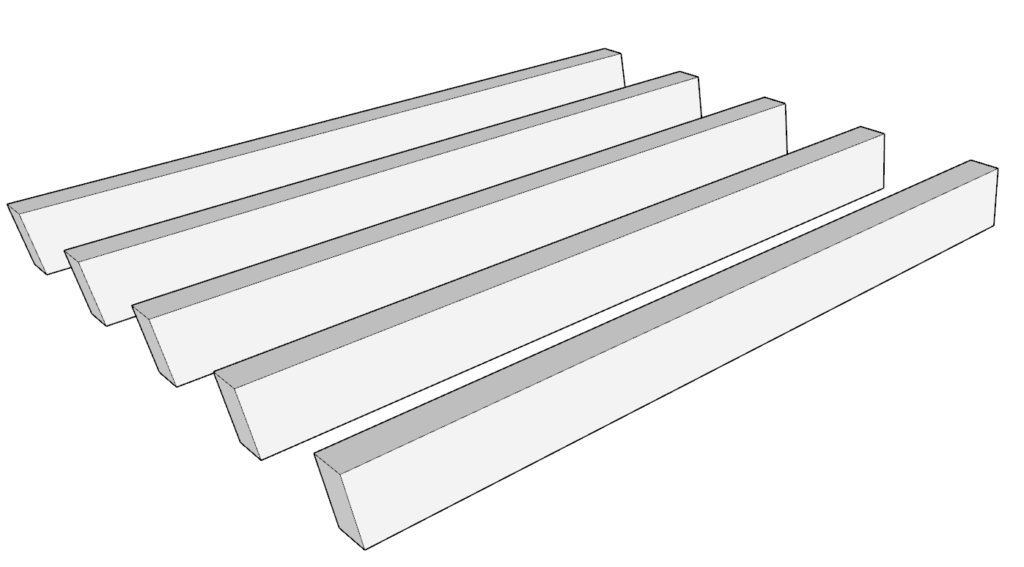
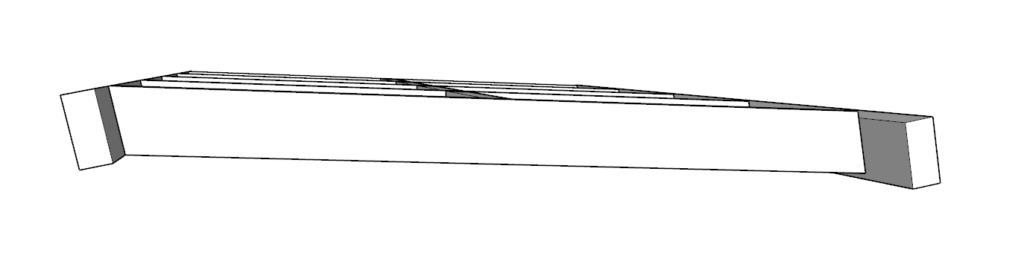
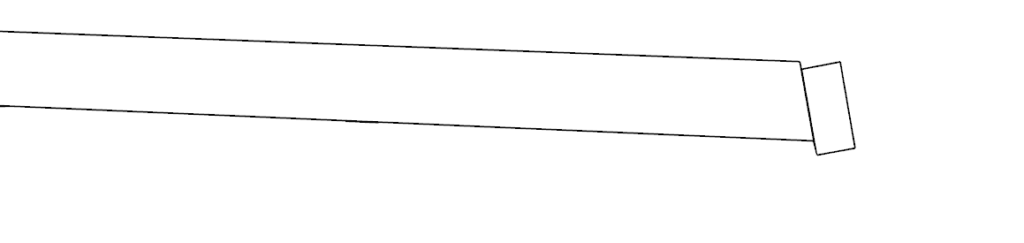
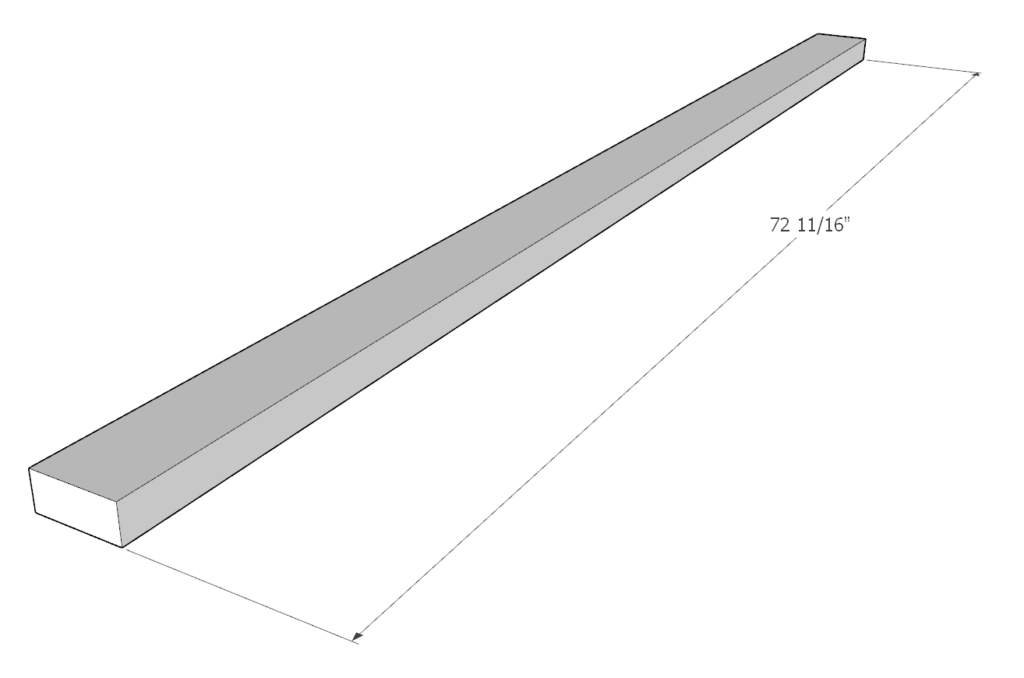
Next, cut two 88 inch pieces from the 4×4 lumber and cut one of the ends at a 13 degree angle.
Next, cut two 79 11/16 inch pieces from the 4×4 lumber and cut one of the ends at a 13 degree angle.

Step 4 (DIY Shed)
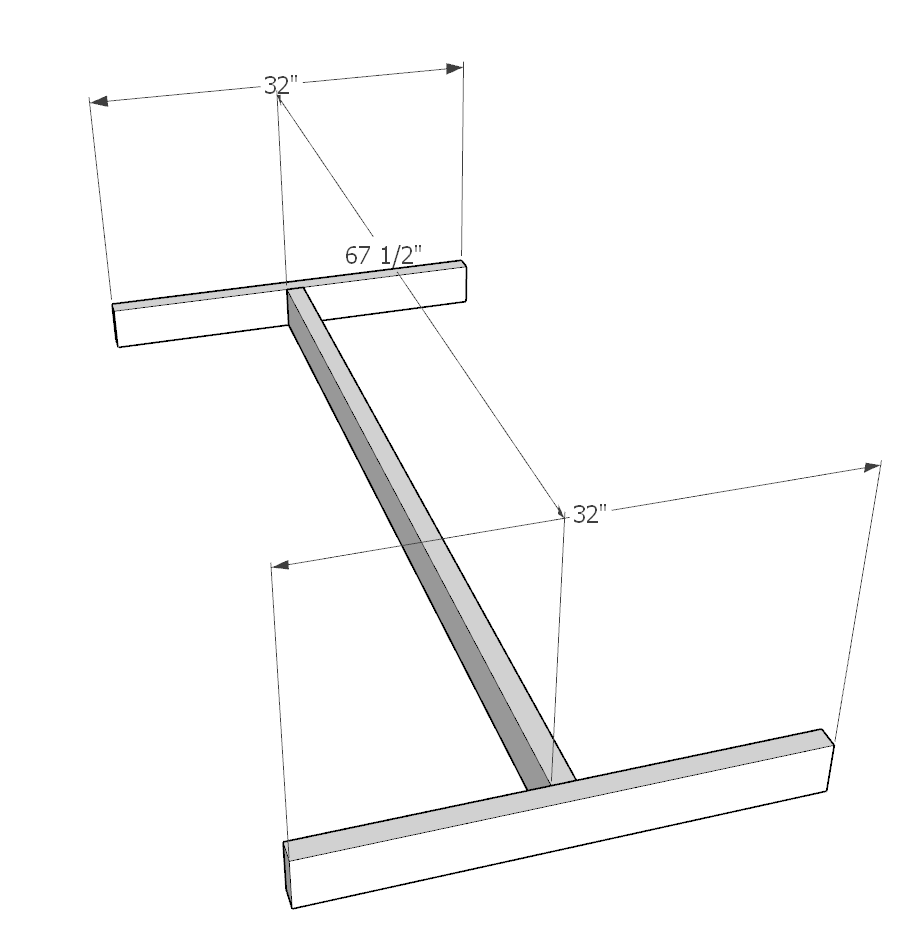
Next, cut a 67.5 inch pieces from 2×4 lumber and two 32 inch pieces from 2×4 lumber.
Arrange them as shown in the diagram below.
Add glue, predrill, and add screws.
Repeat this step 2x to make two “I” shaped shed frame pieces.
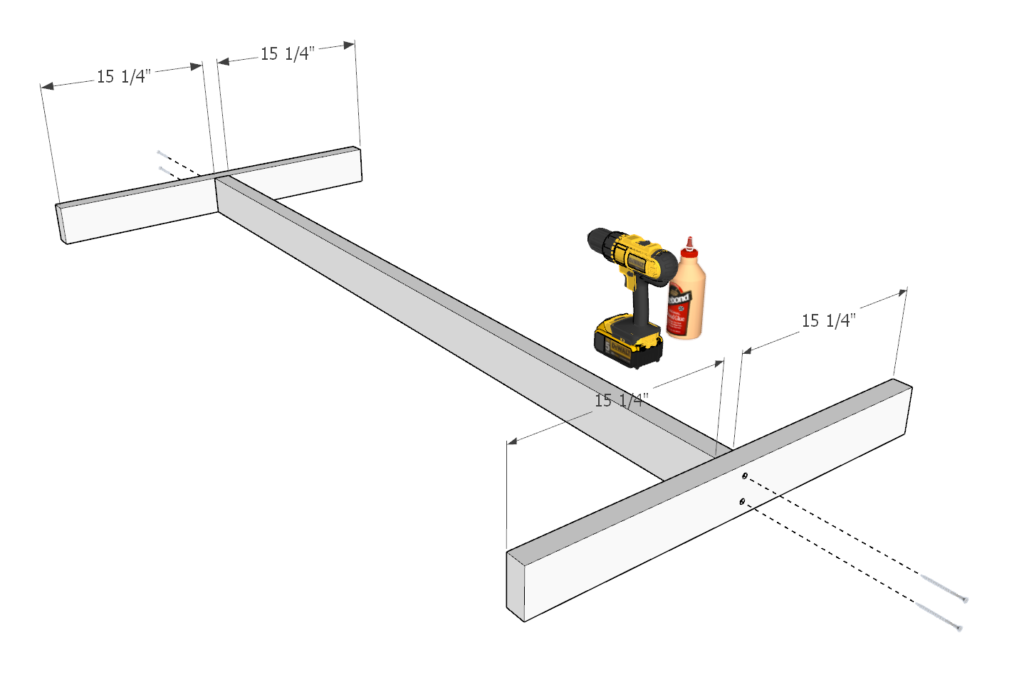
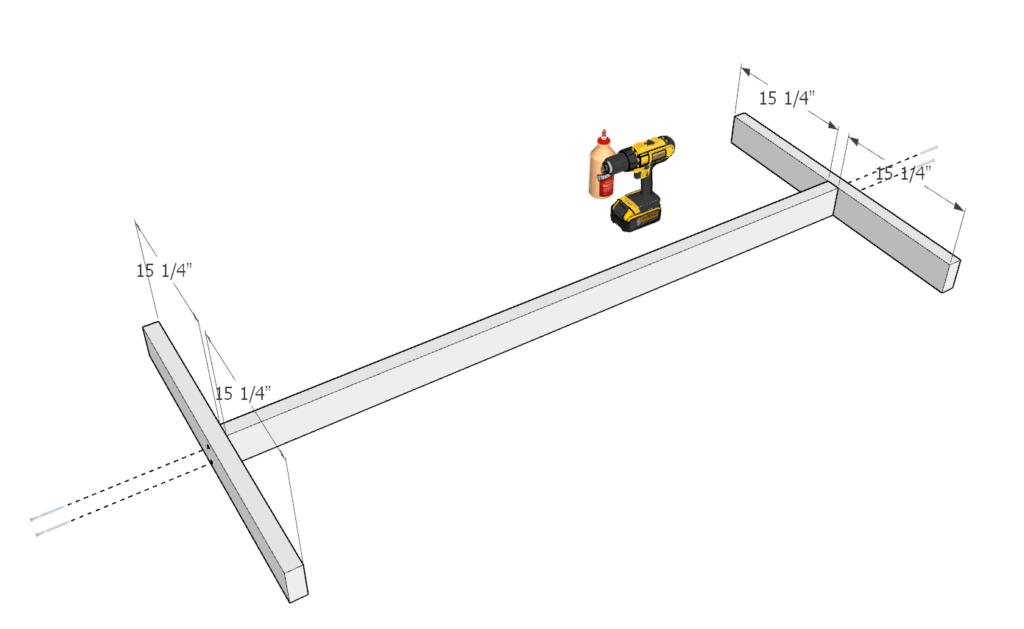

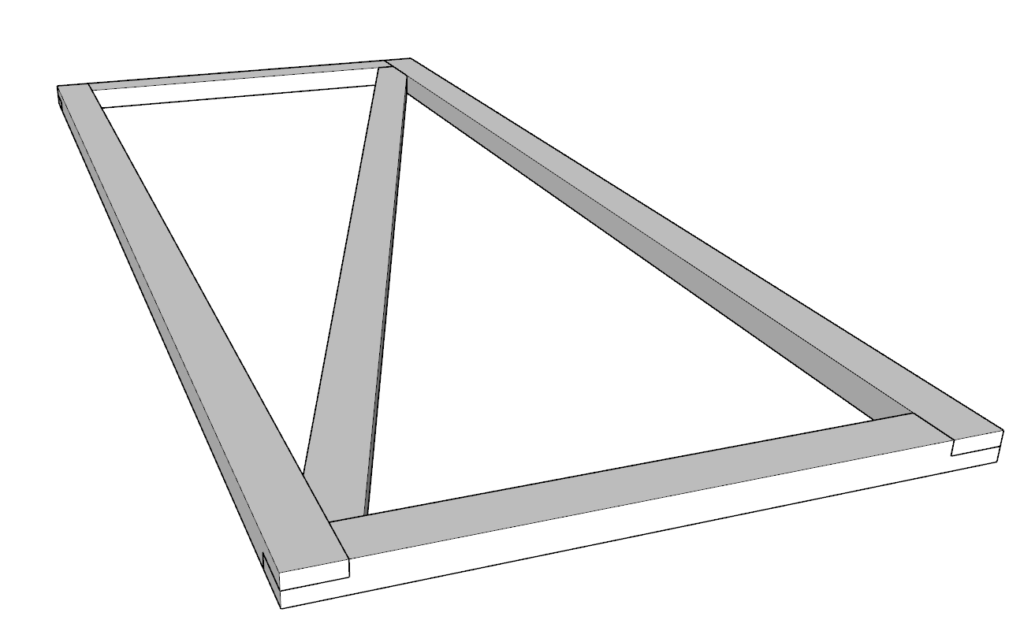
Step 5 (DIY Shed)
Next, take the “I” shaped frame piece from the previous step and arrange it together with the cut 4x4s as shown in the diagram.
Add glue, predrill (you will need to predrill through a 4×4. Use a larger drill bit to be able to go deep enough into the lumber to make sure the joint is secure) and add screws.
Its ok to add more than 2 screws per joint. The surface of the 4×4 will be covered up in future steps.
Repeat this step 2x for a total of two assembled frame pieces.

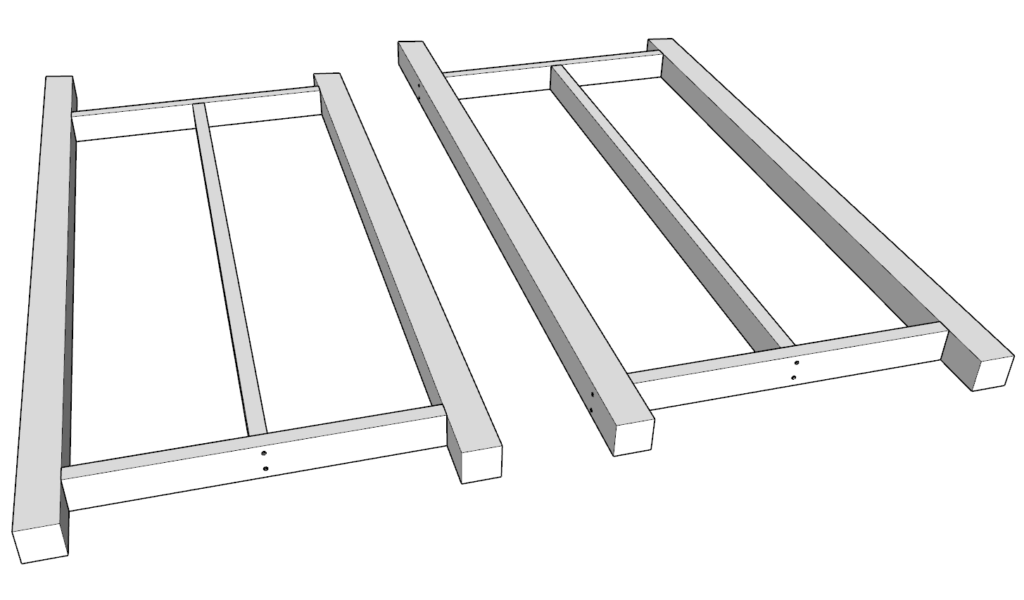
Step 6 (DIY Shed)
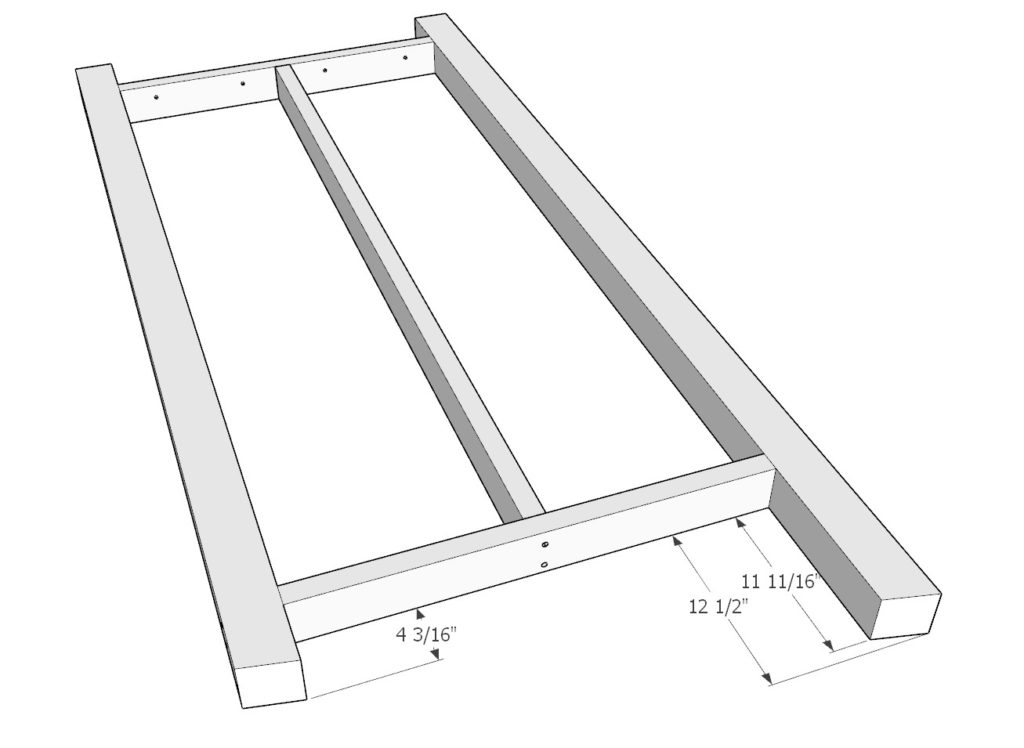
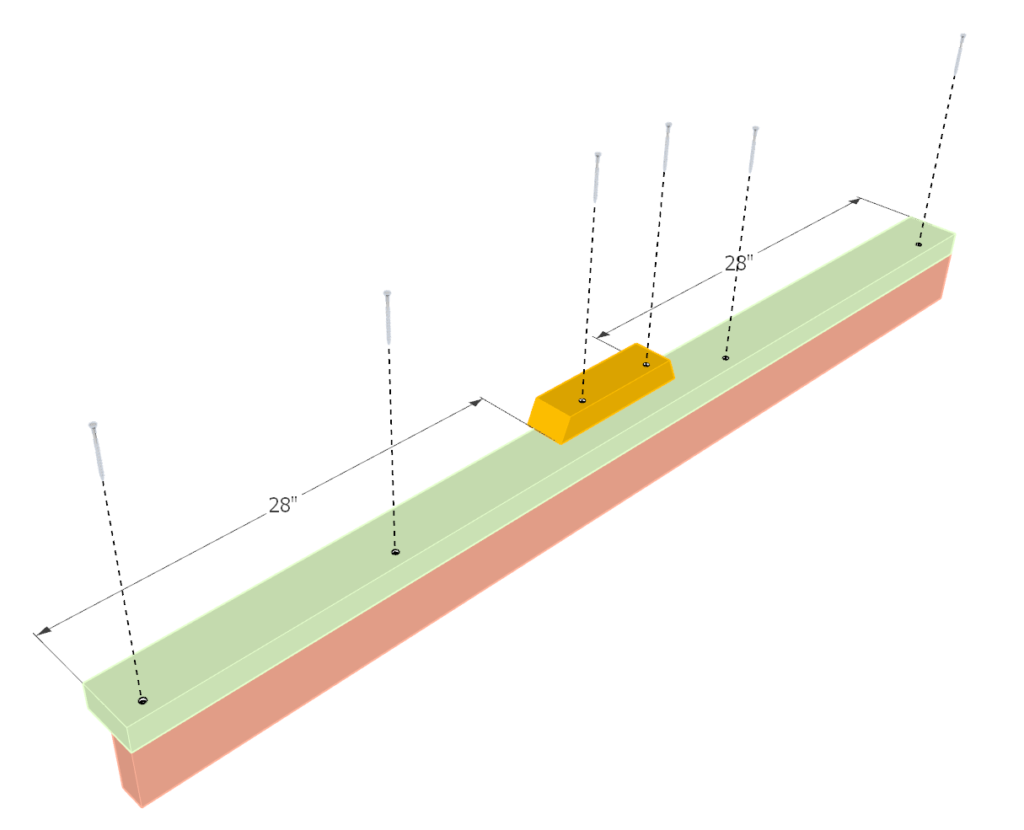
Next, cut two 65.5 inch pieces from 2×4 lumber and five 67.5 inch pieces from 2×4 lumber.
Arrange them as shown in the diagram below.
Add glue to all areas that will be making contact, predrill, and add screws.
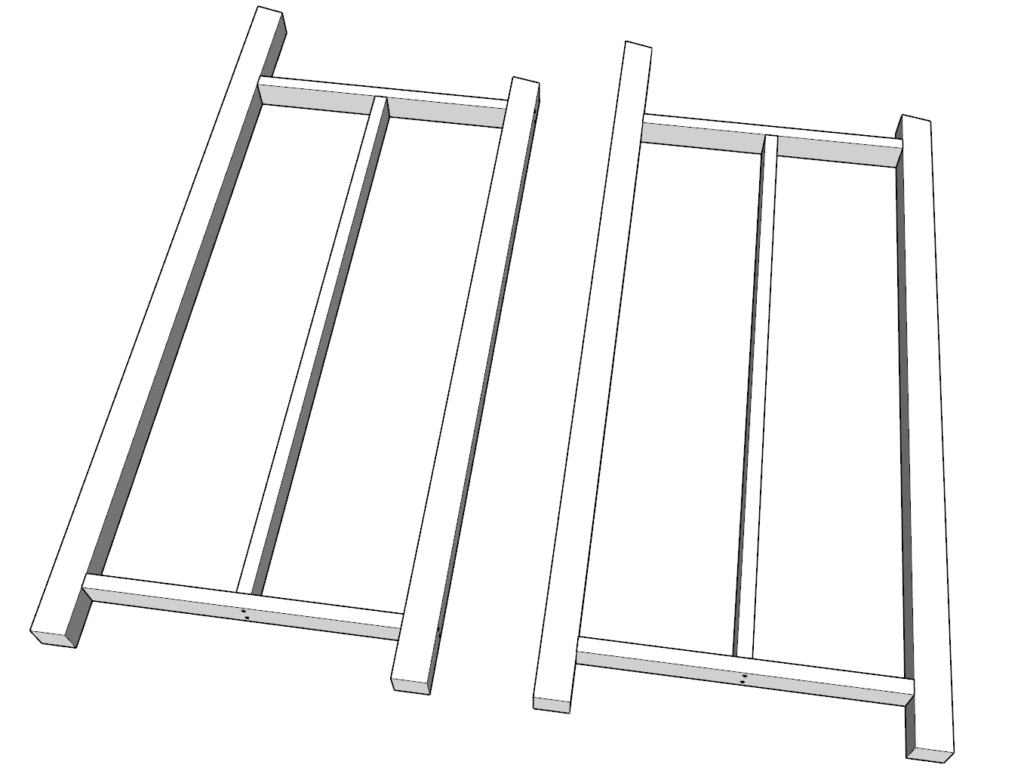
Step 7
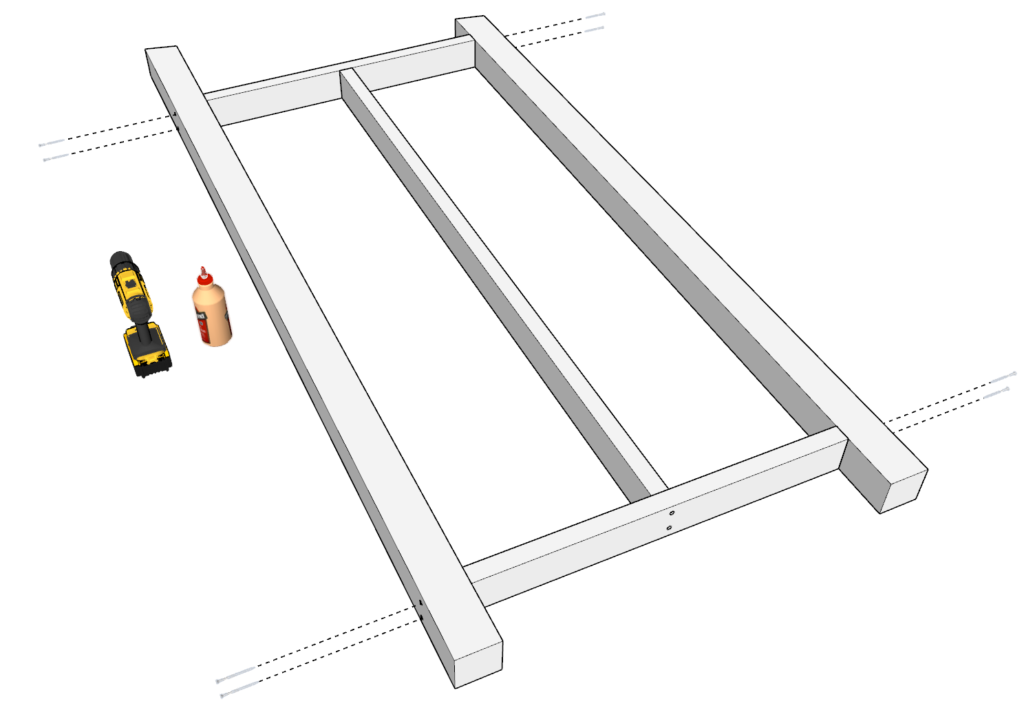
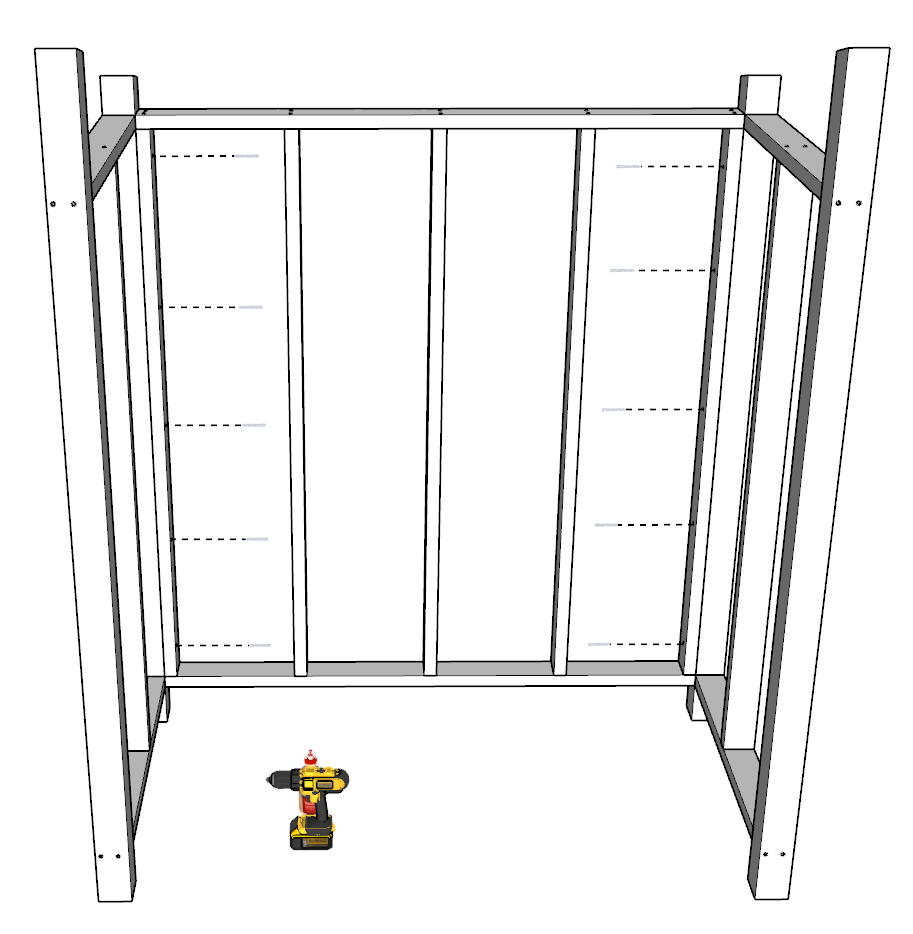
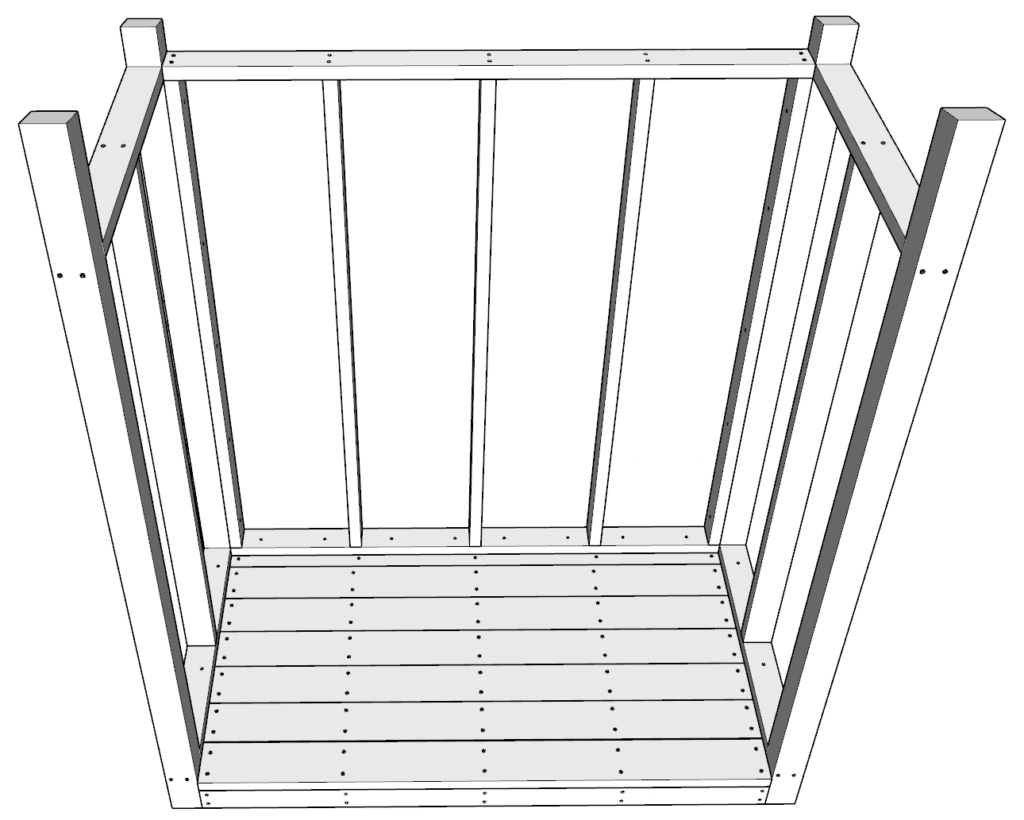
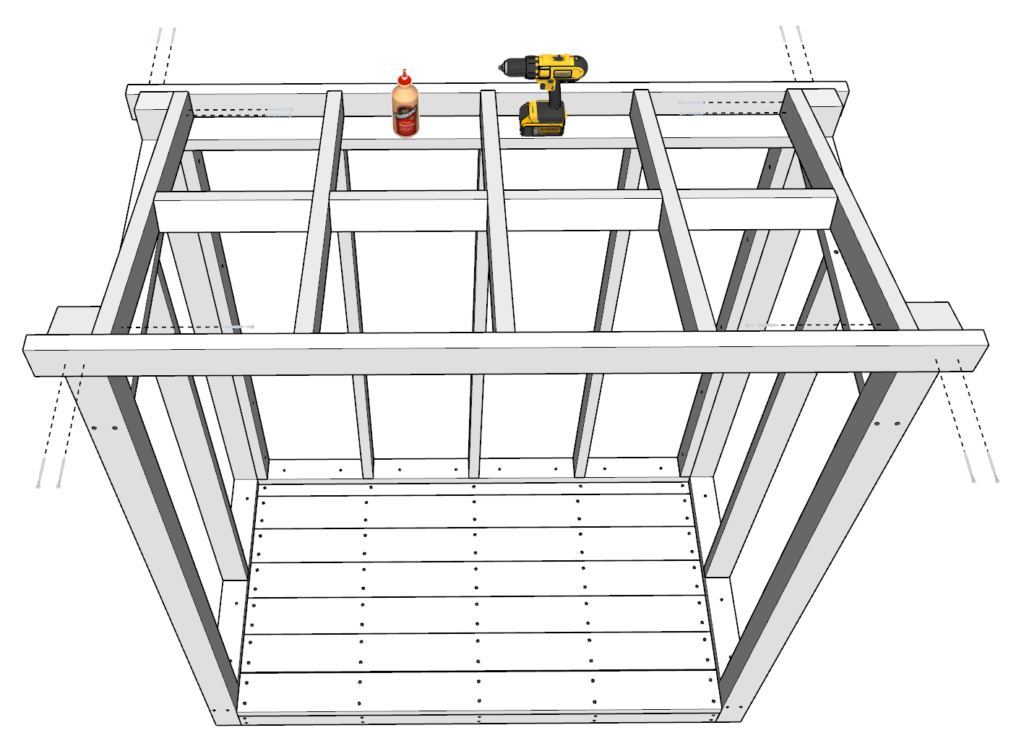
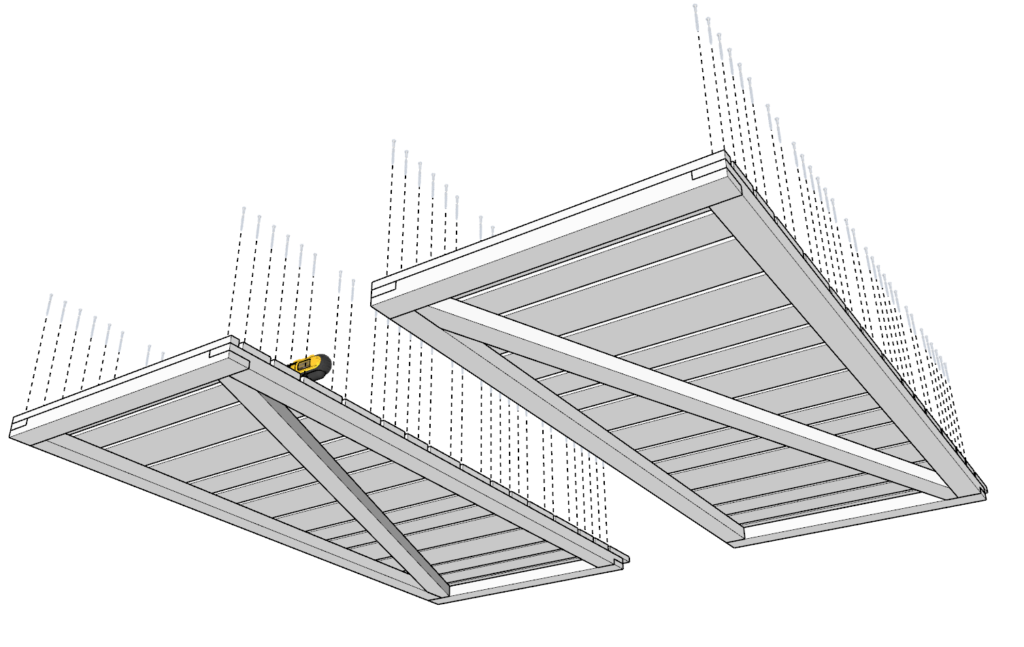
Next, take the frame pieces you have made so far and put them together.
Align the frame pieces as shown below, add plenty of glue, predrill, and add screws.
It may be helpful to do this by laying the pieces on the ground instead of standing as shown in the diagram.
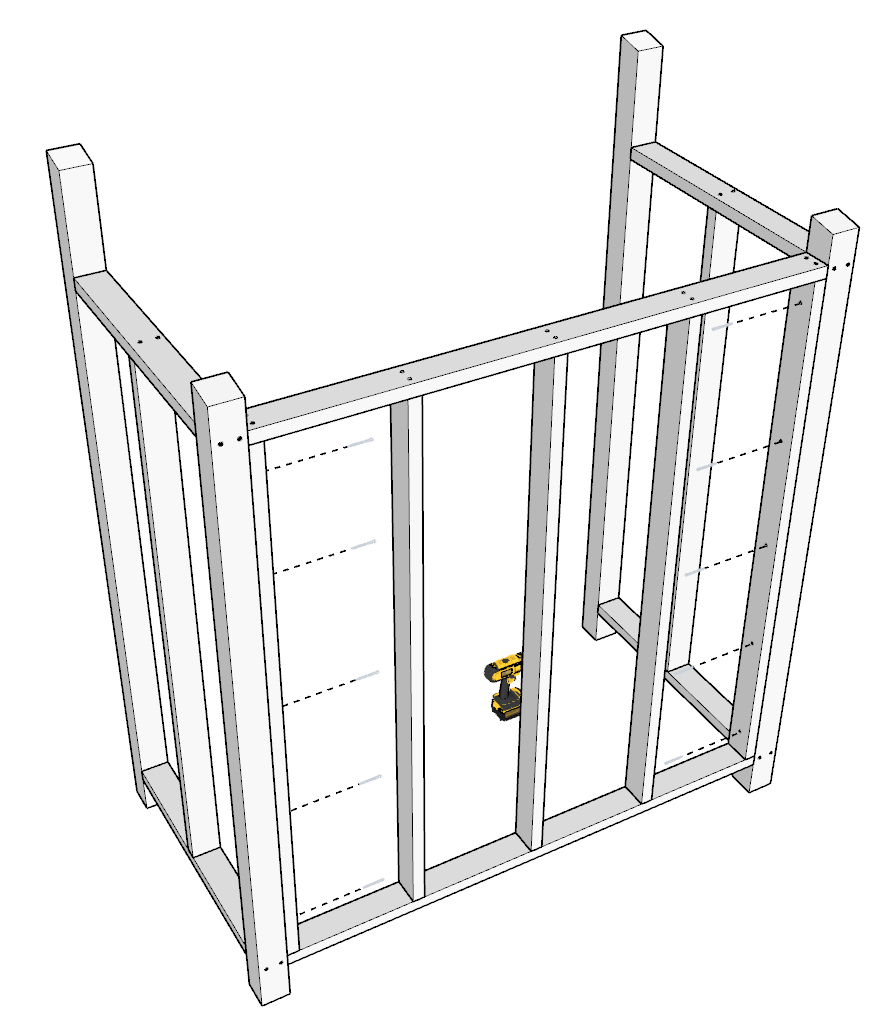
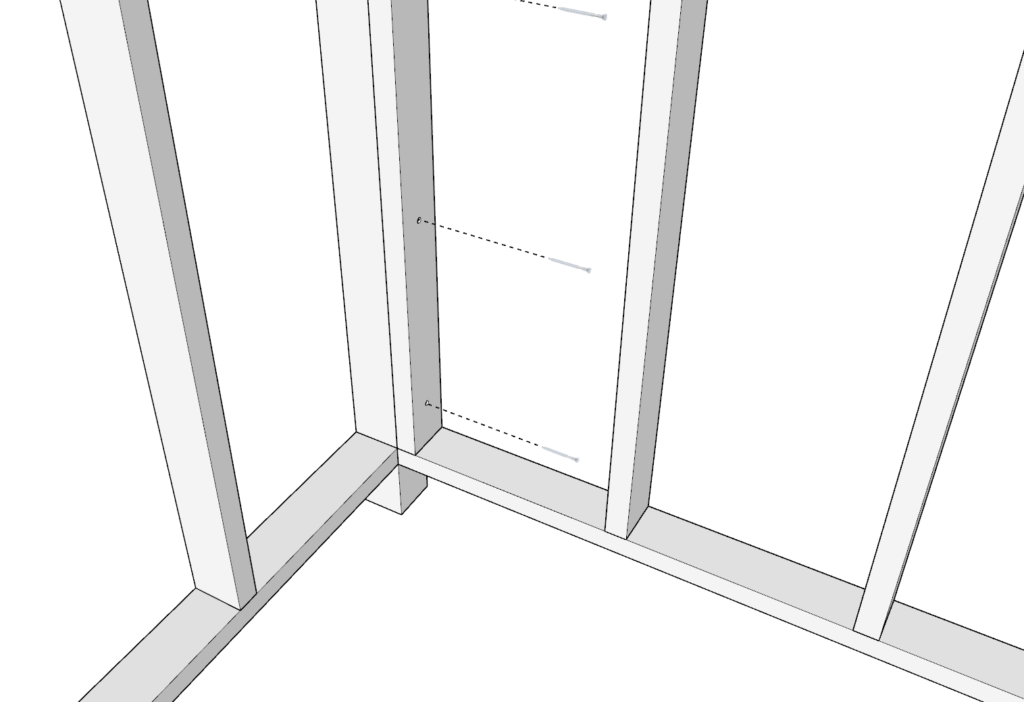
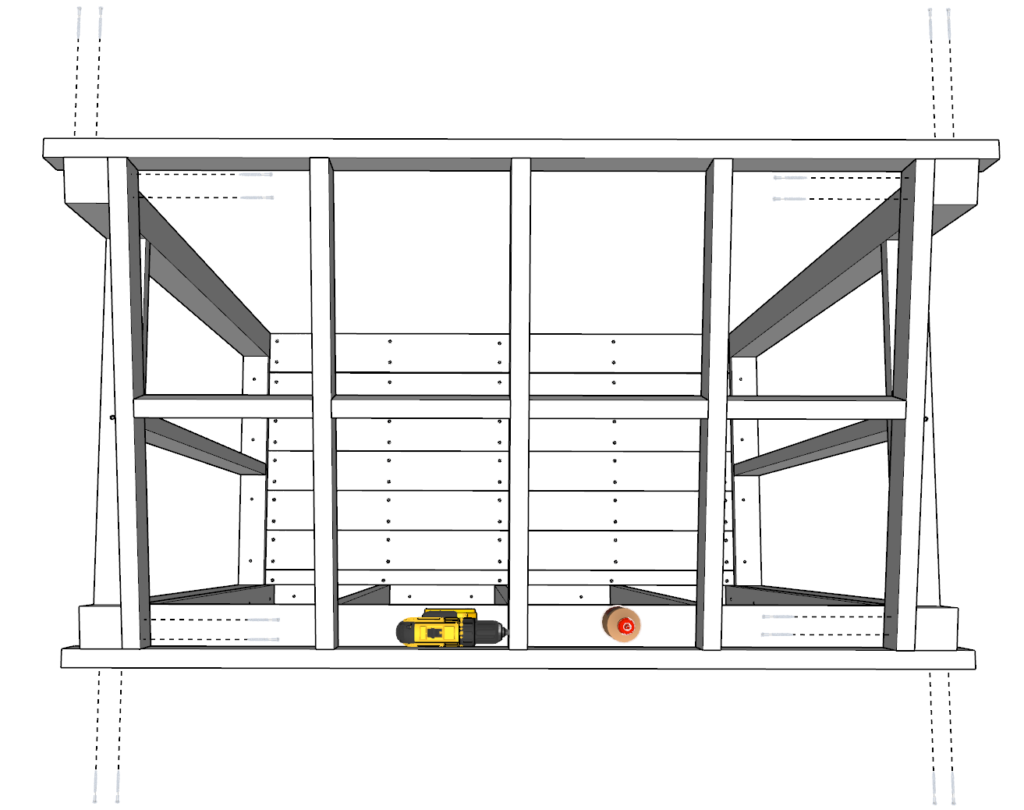
Step 8
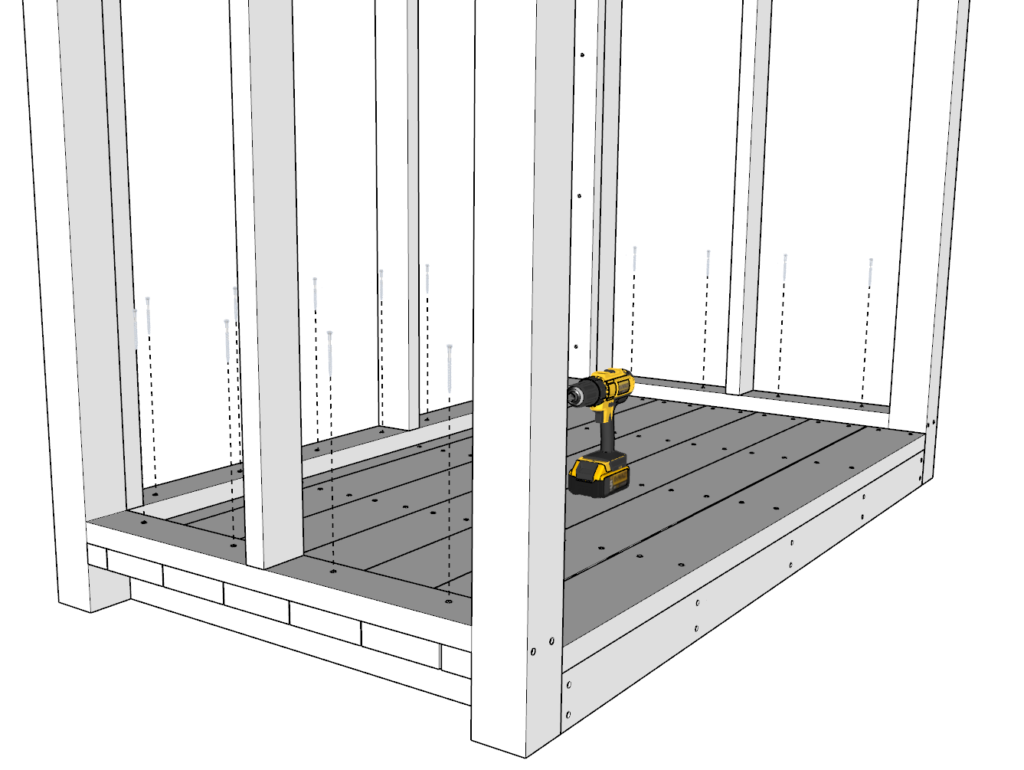
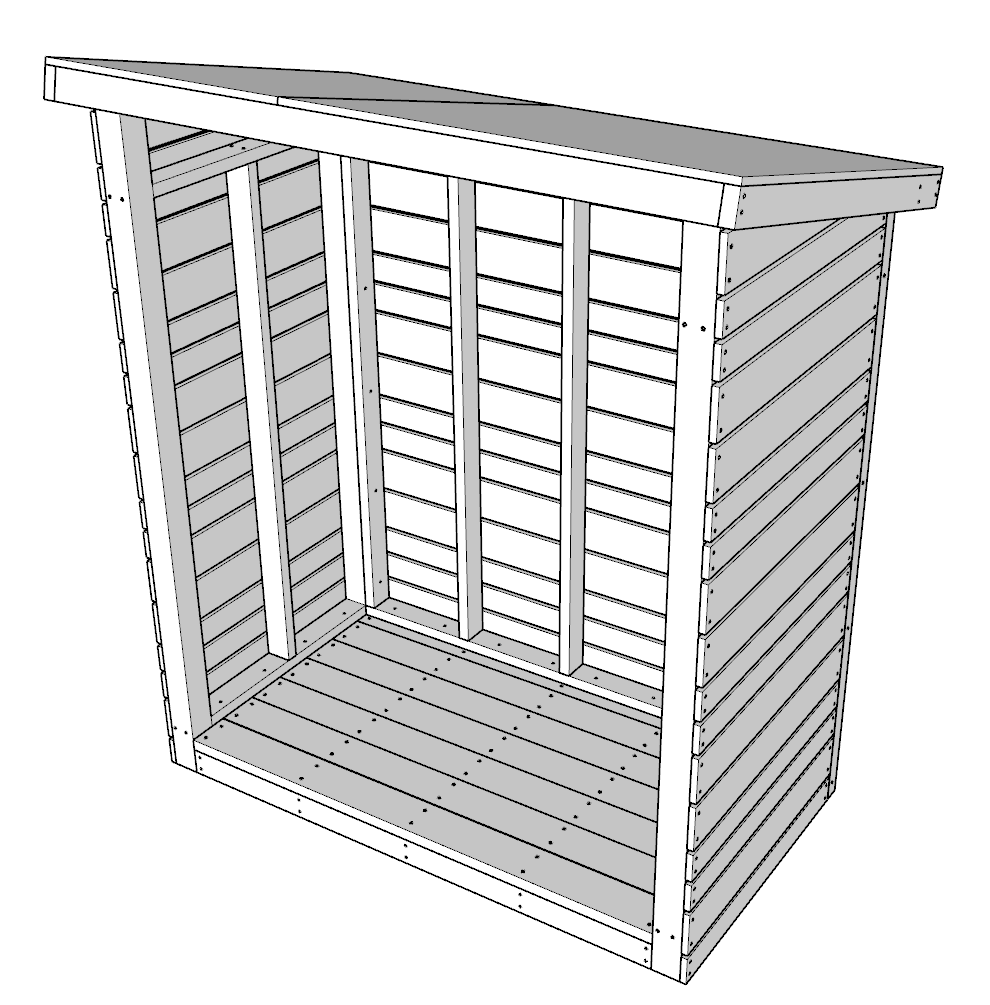
Next, you will add the base made in previous step and add the walls frame to it.
Start by adding the wall framed piece on top of the base. The 4x4s should slide right into the 3.5 x 3.5 inch holes you cut out in the 2×6 lumber.
Make sure to add plenty of wood glue, predrill, and add screws to join everything together.
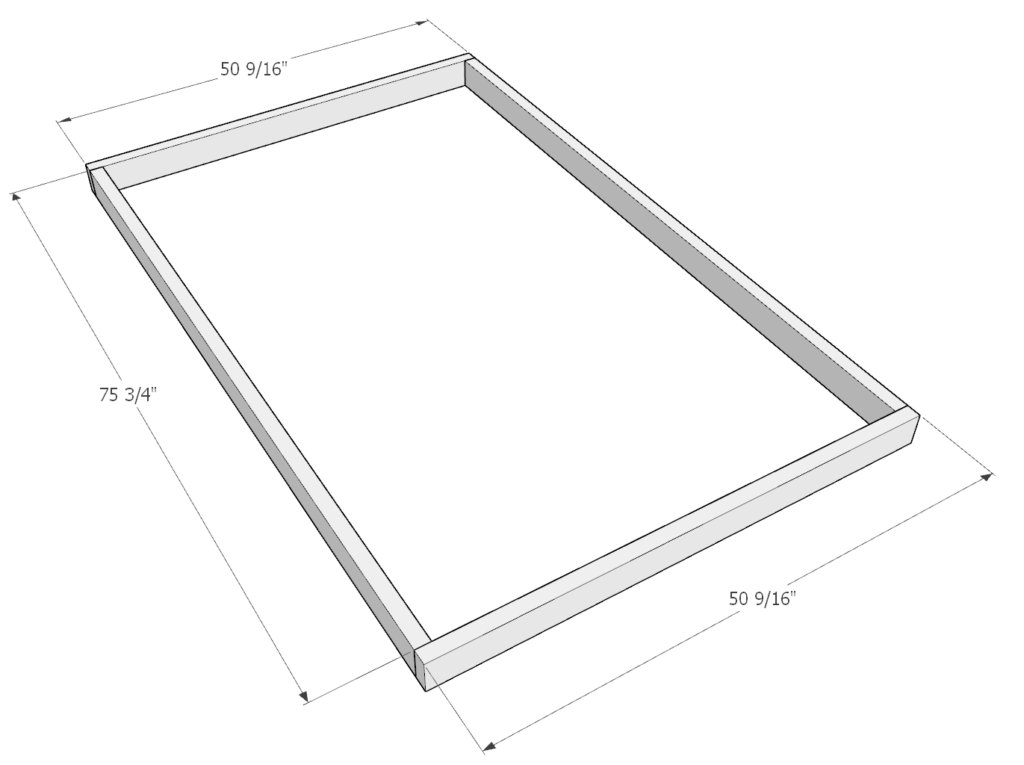
Step 9
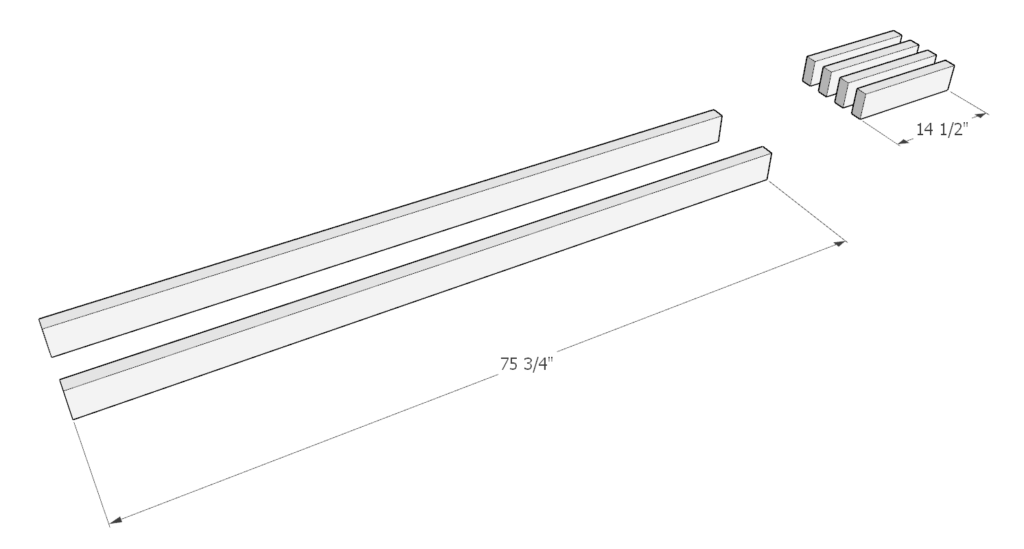
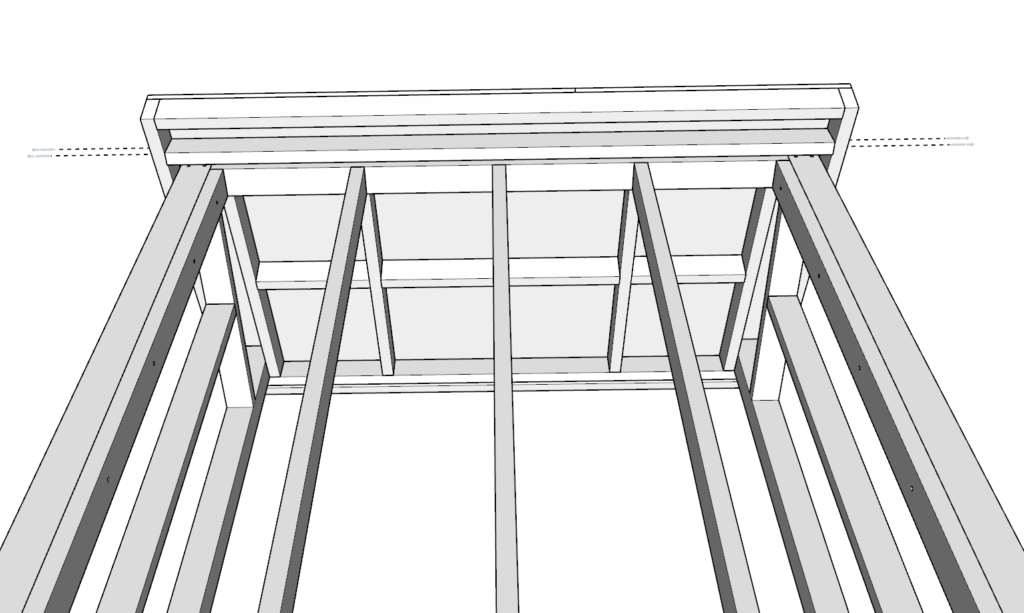
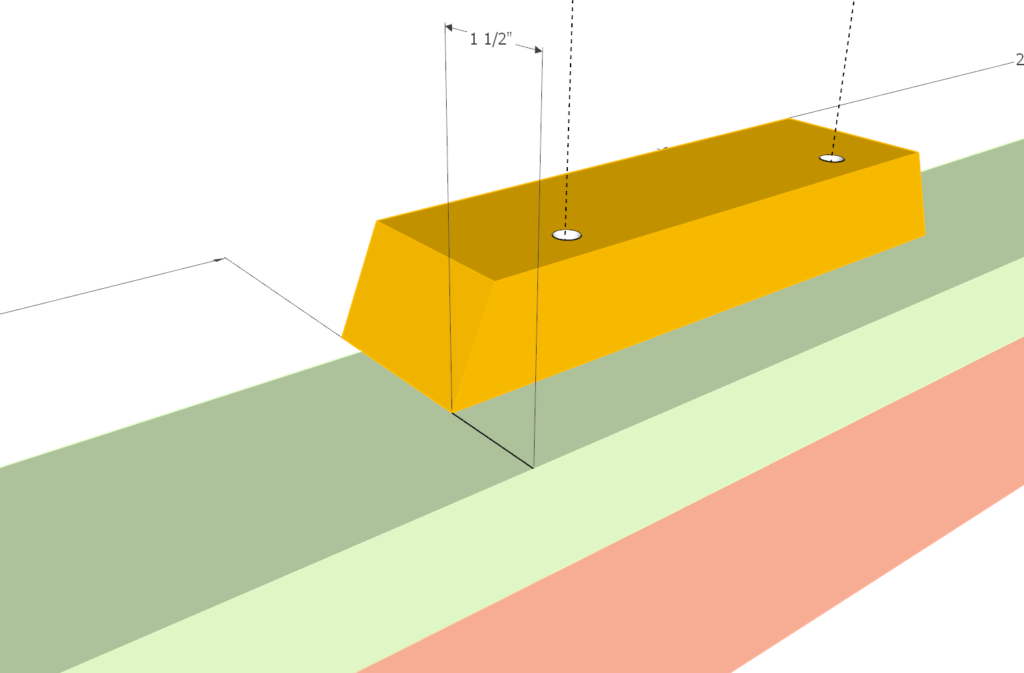
Next, cut two 75 3/4 inch pieces from 2×4 lumber.
Next, cut four 14.5 inch pieces from 2×4 lumber.
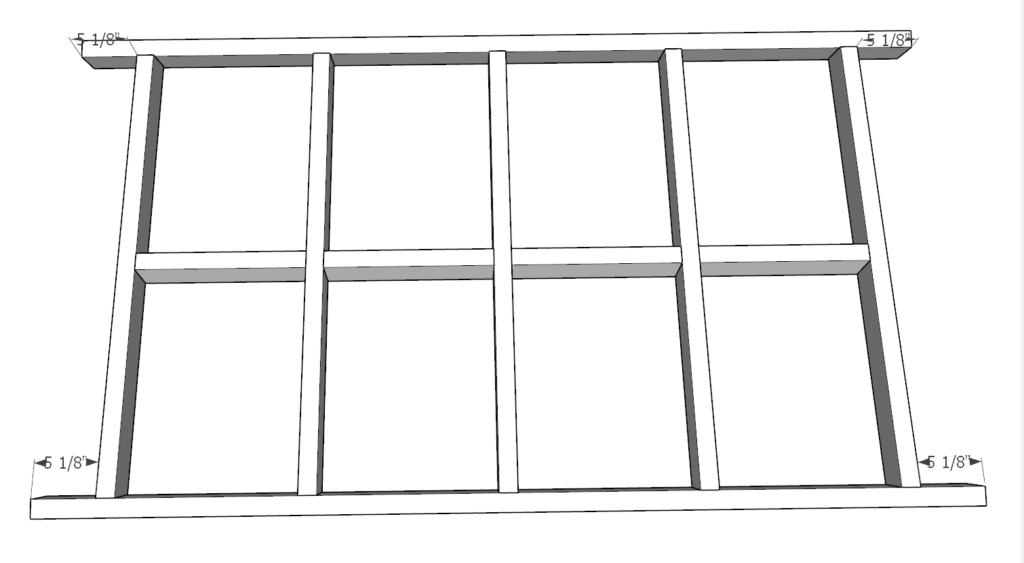
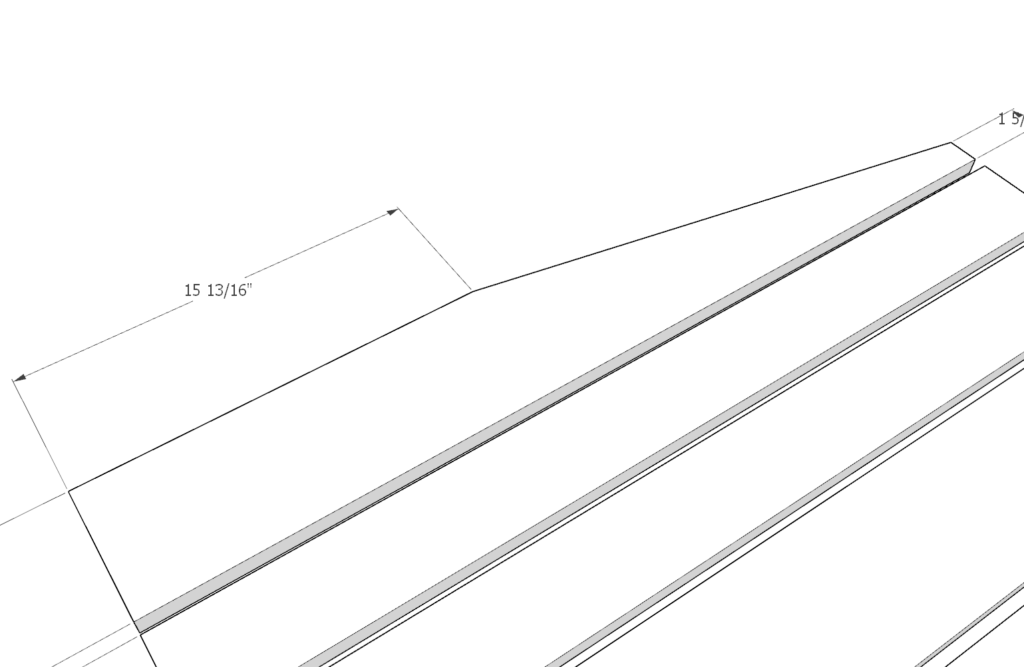
Next, cut five 40 13/16 inch pieces from 2×4 lumber. These 40 13/16 inch pieces need to be cut at 13 degrees on both ends as shown in the diagram.


Step 10
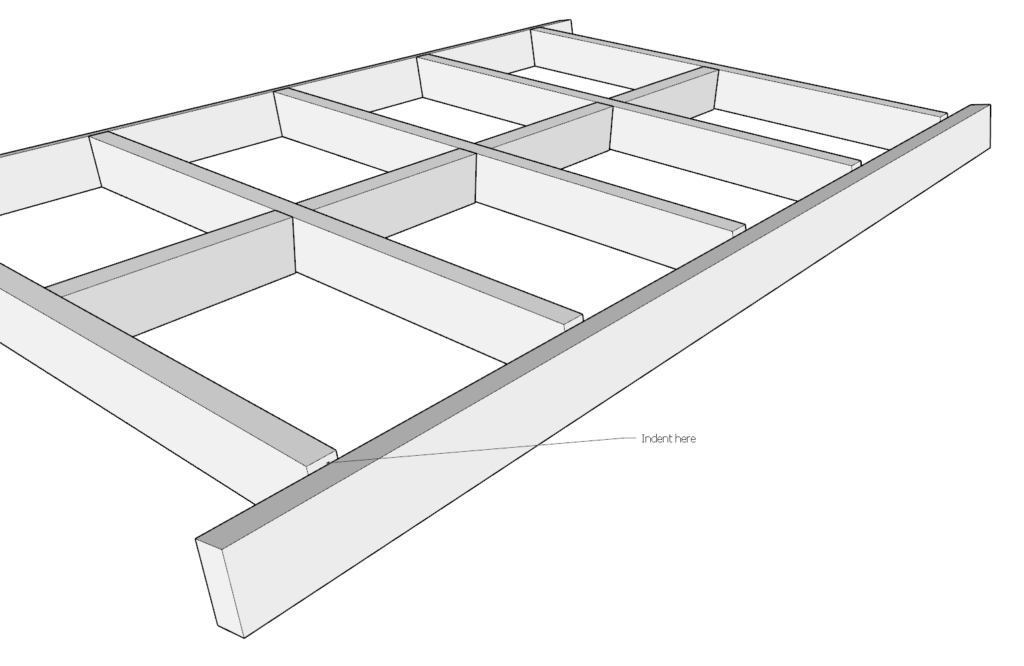
Next, arrange the roof pieces as shown in the diagram bellow.
Place all the pieces in the center of the 75 3/4 inch pieces. The 75 3/4 inch pieces should have 5 1/8 inch indentations on both ends as shown in the diagram
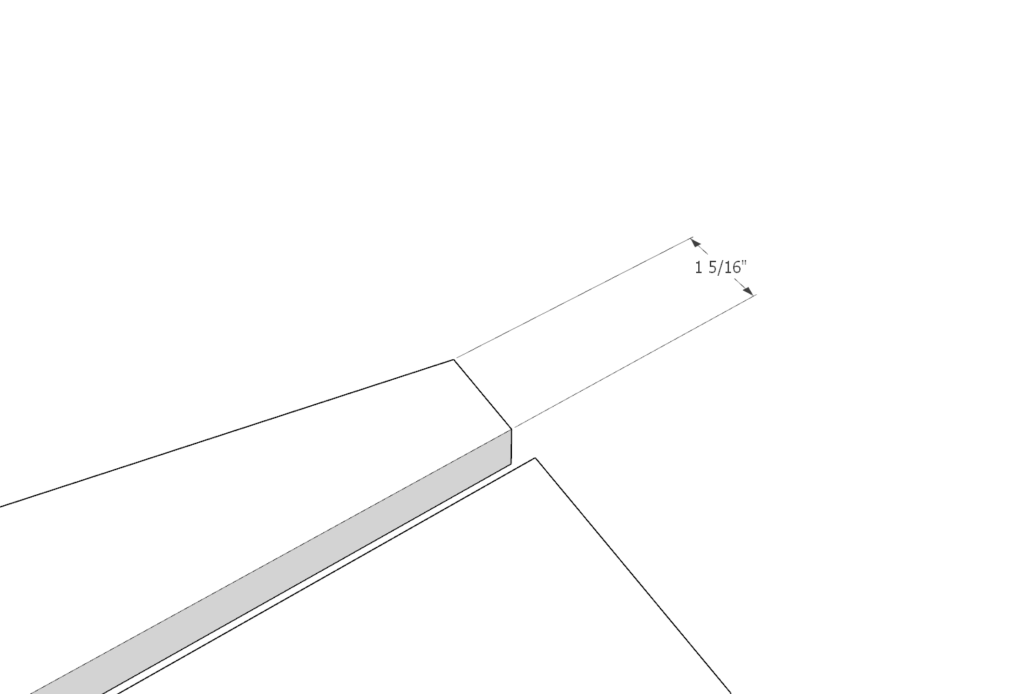
Also make sure that you add a small indentation to expose the 40 13/16 inch pieces as shown in the diagram. This is to ensure that the plywood sheets will be flush against the 2x4s.
Add glue, predrill, and add screws.

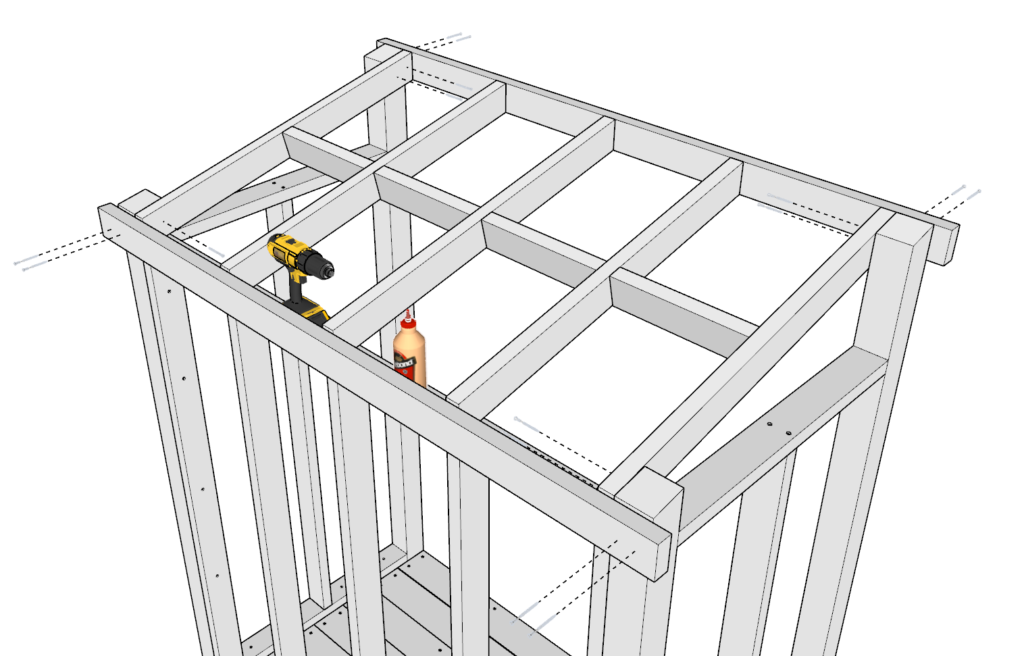
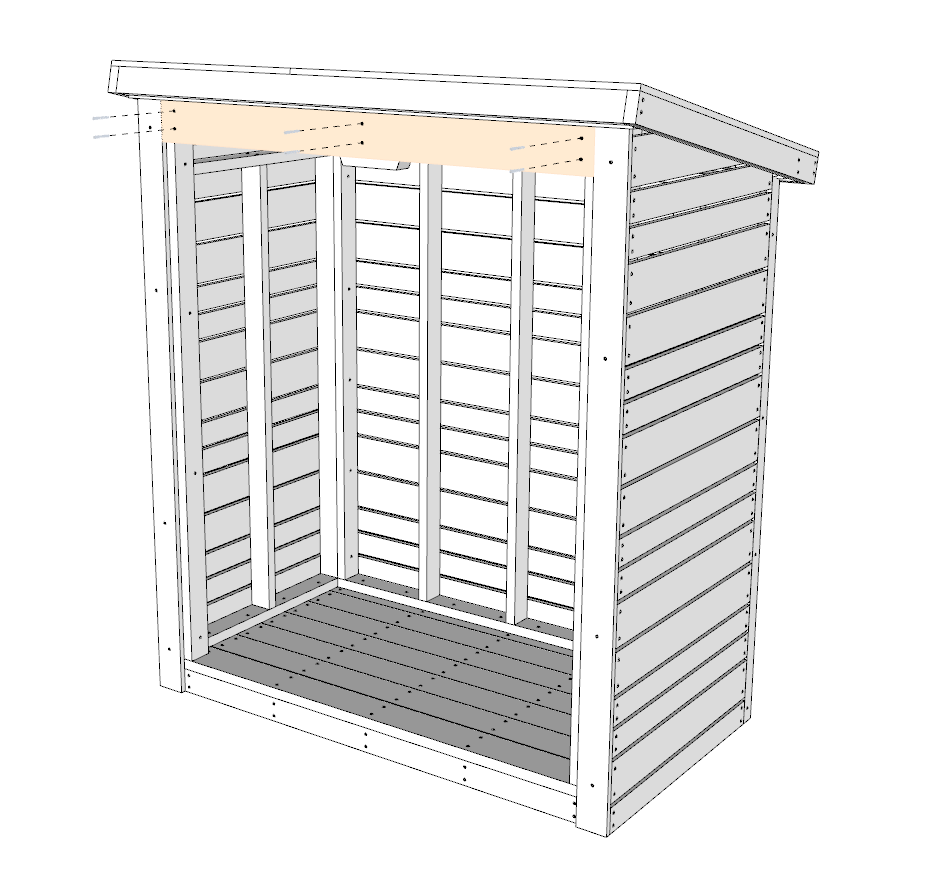
Step 11
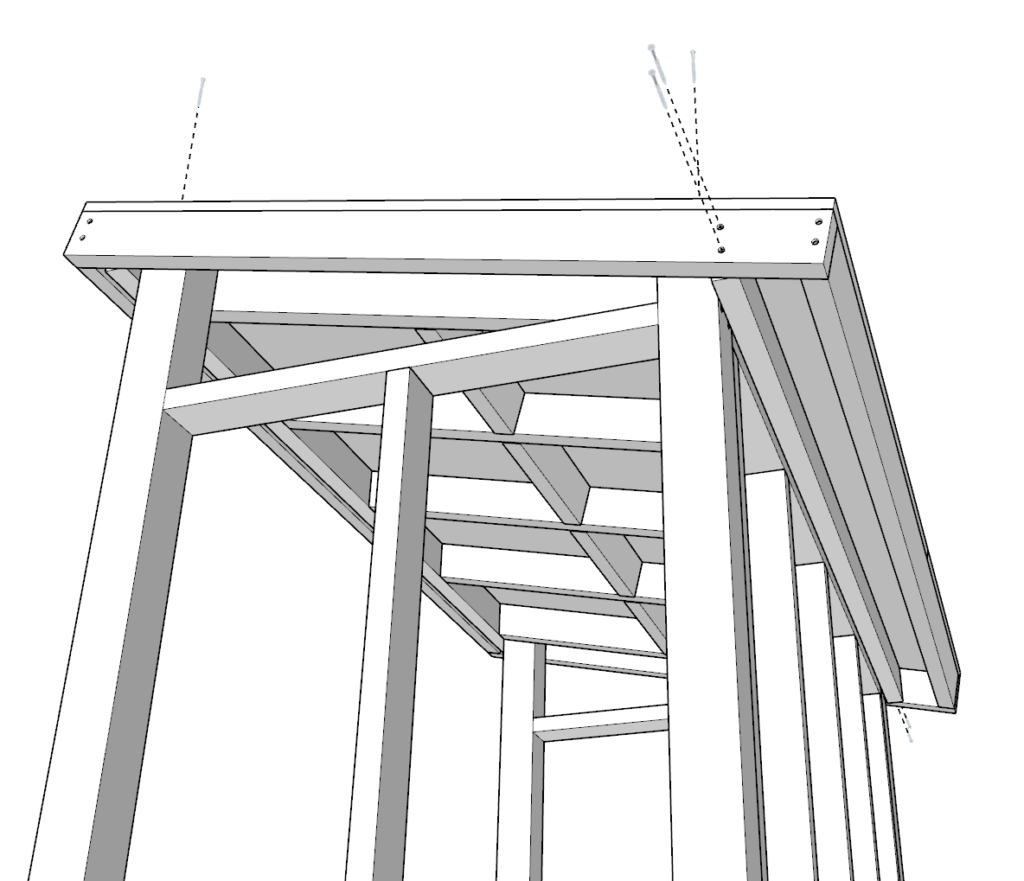
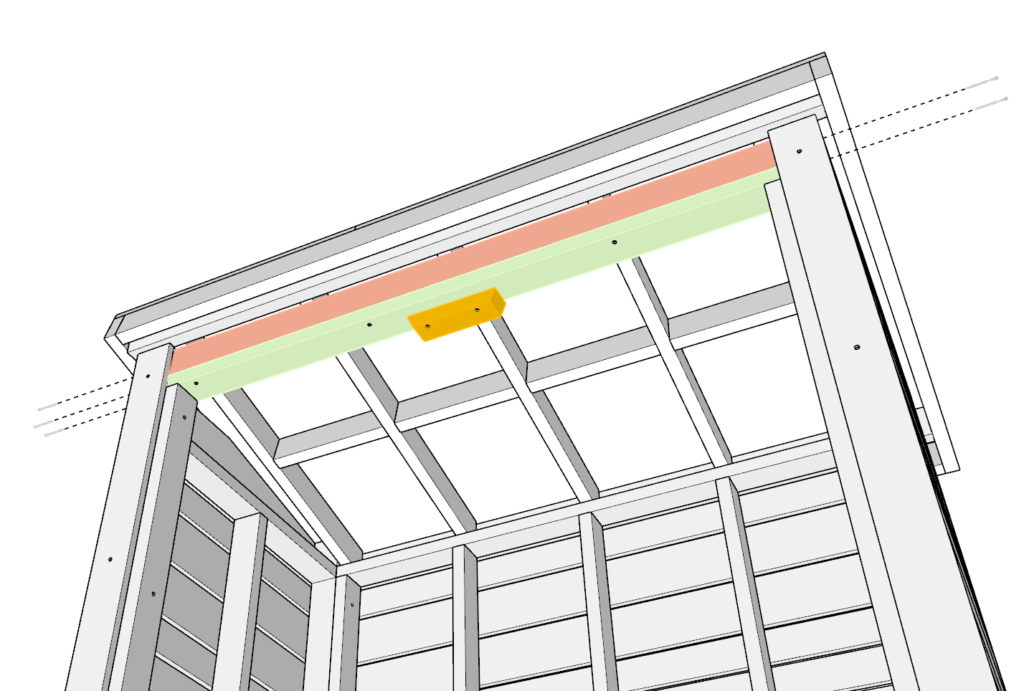
Next, add the roof frame and attach it to the main body frame of the DIY shed.
Add glue, predrill, and add screws.
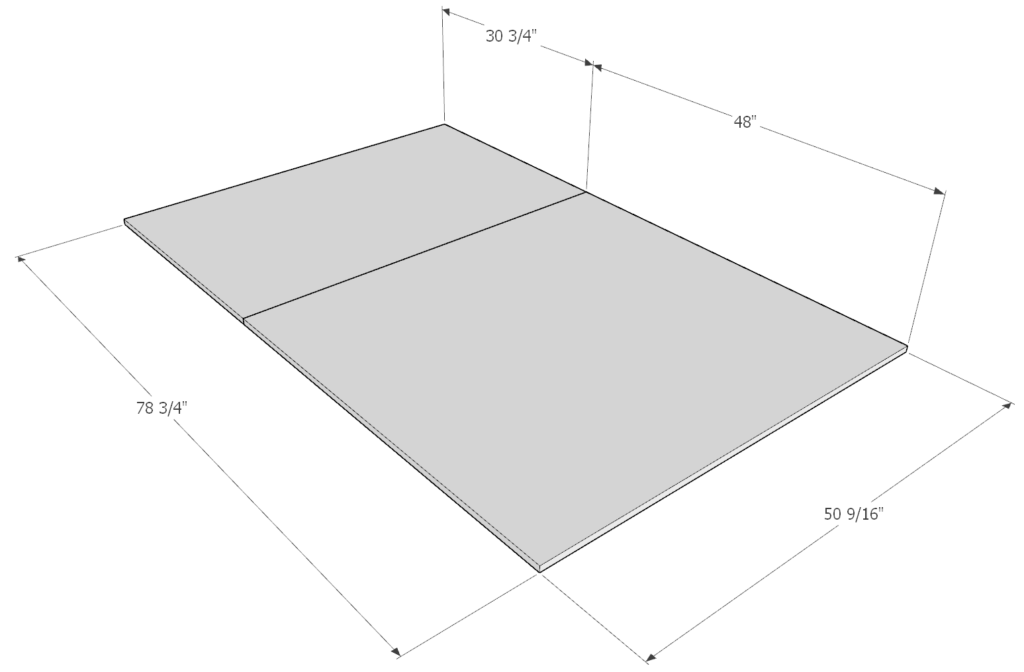
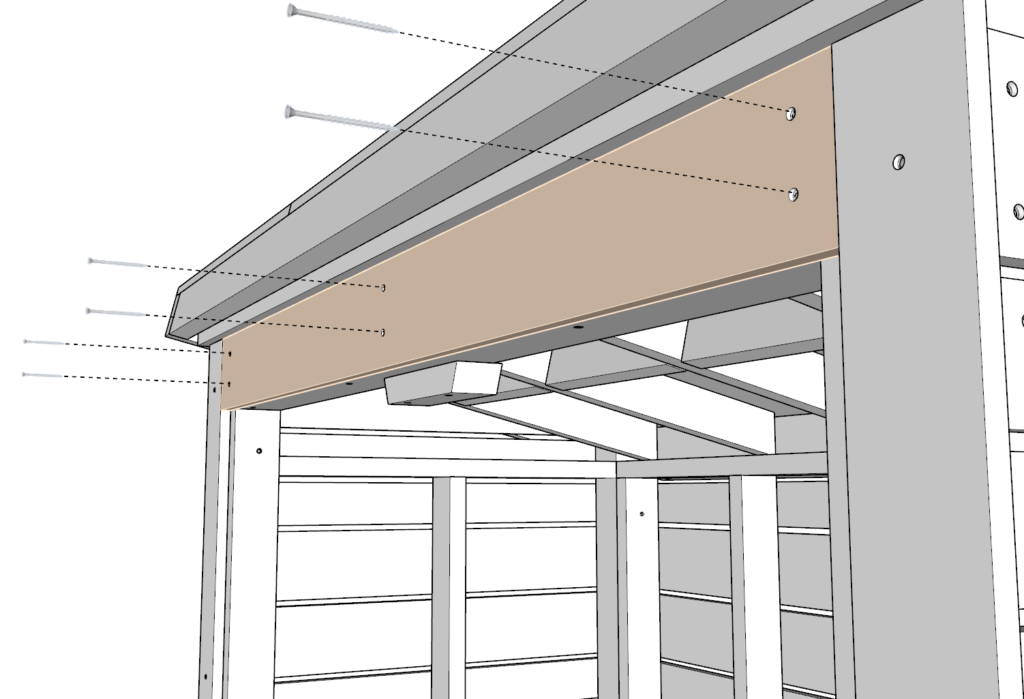
Step 12
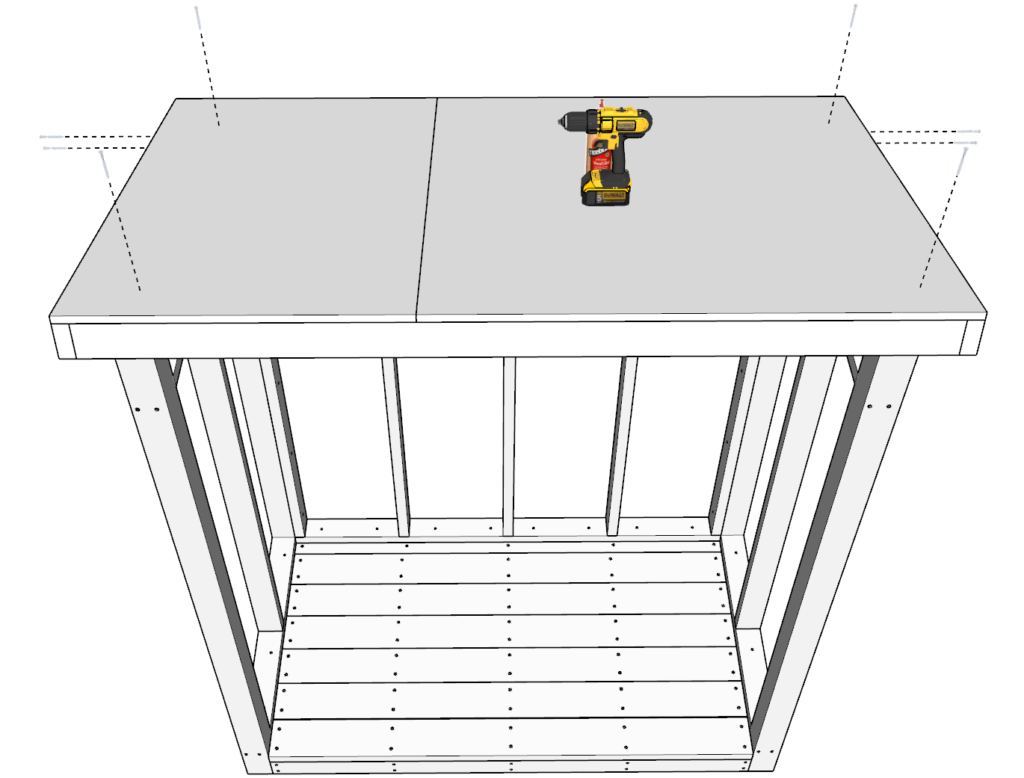
Next, cut two 50 9/16 inch 2×4 pieces and two 75 3/4 inch 2×4 pieces.
Arrange them as shown in the diagram and joint them with glue, predrilling, and screws.
Cut two rectangles with the dimensions shown in the diagram bellow from 4x8ft plywood sheets.
Join the plywood sheets to the frame you just made. Again, use glue, predrill, and add screws.
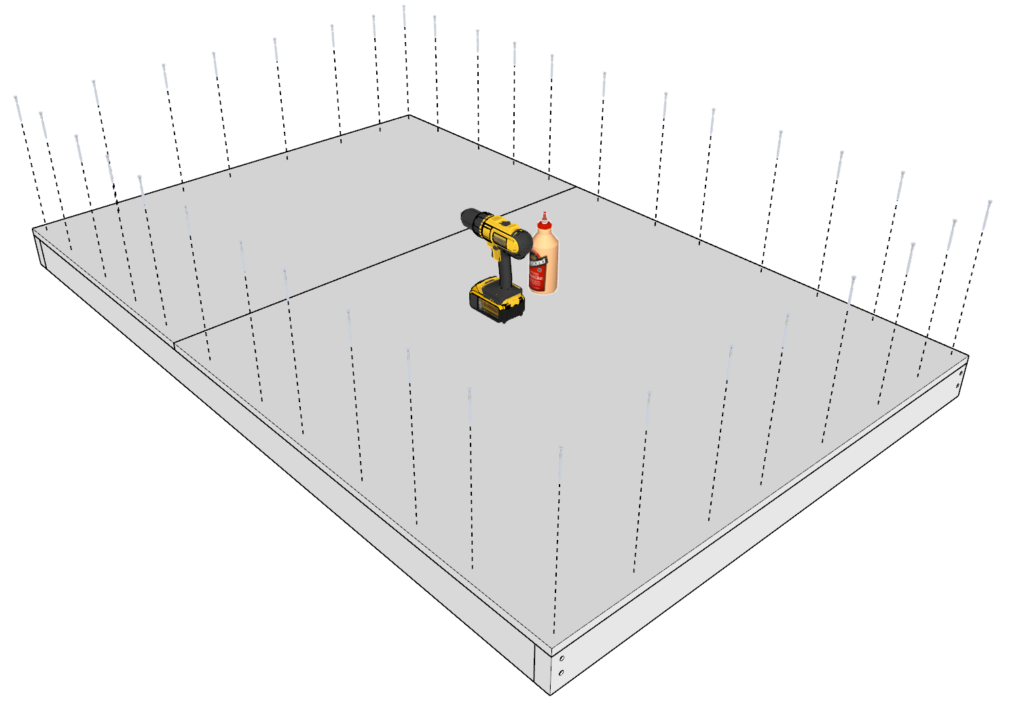
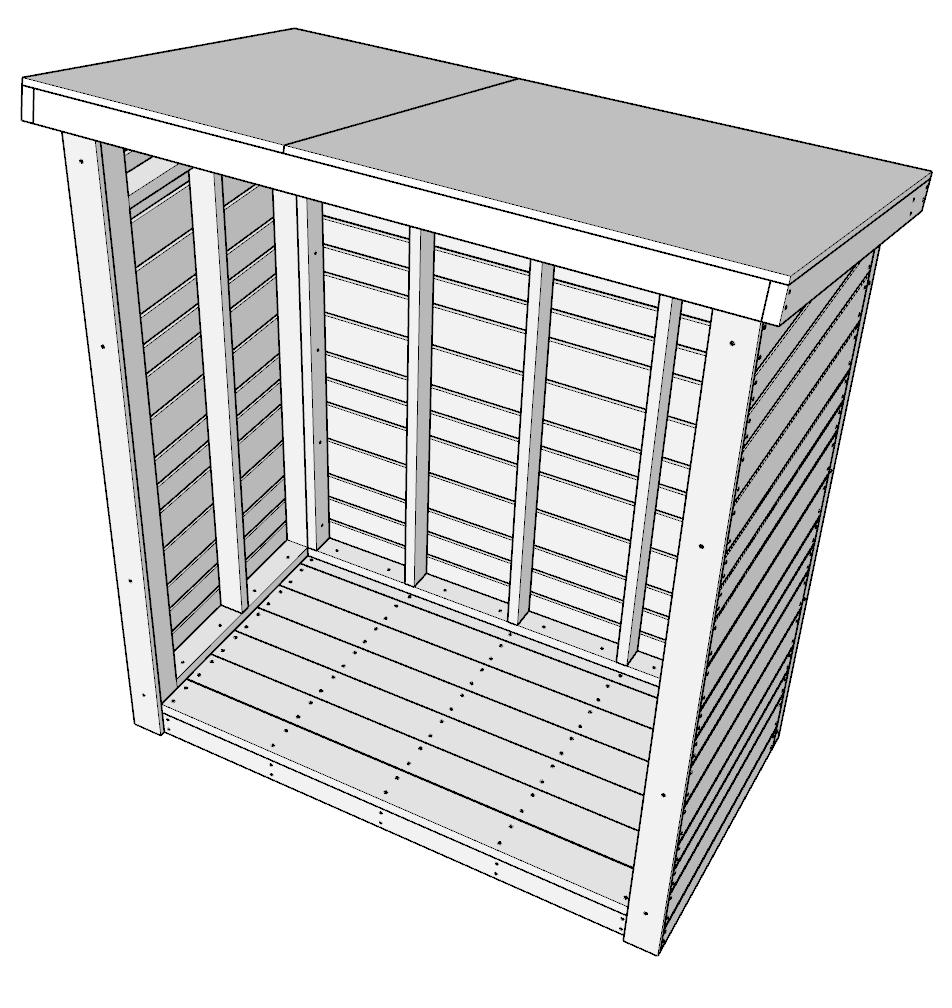
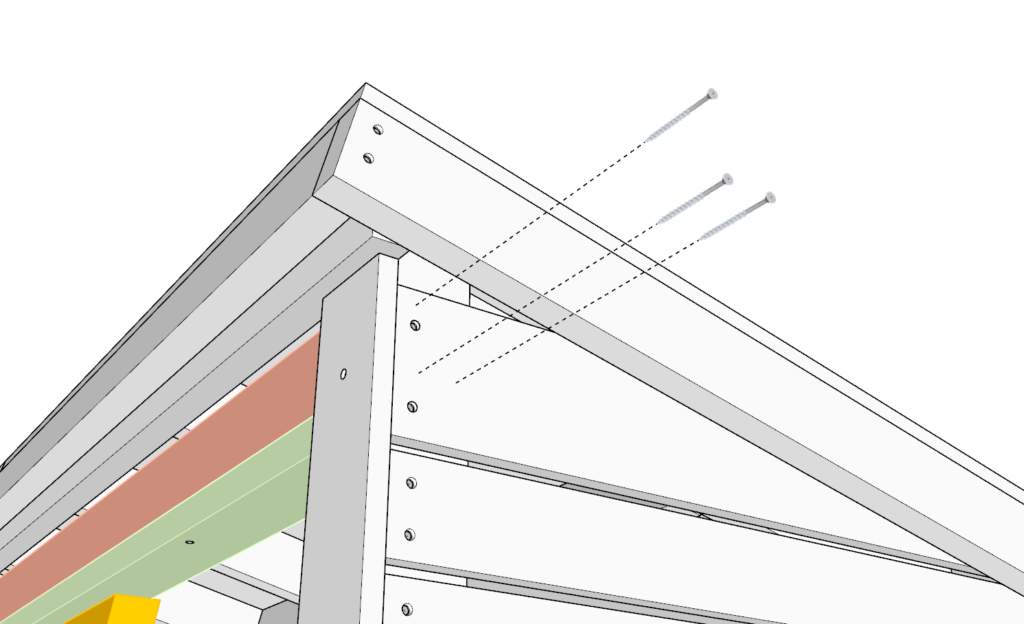
Step 13
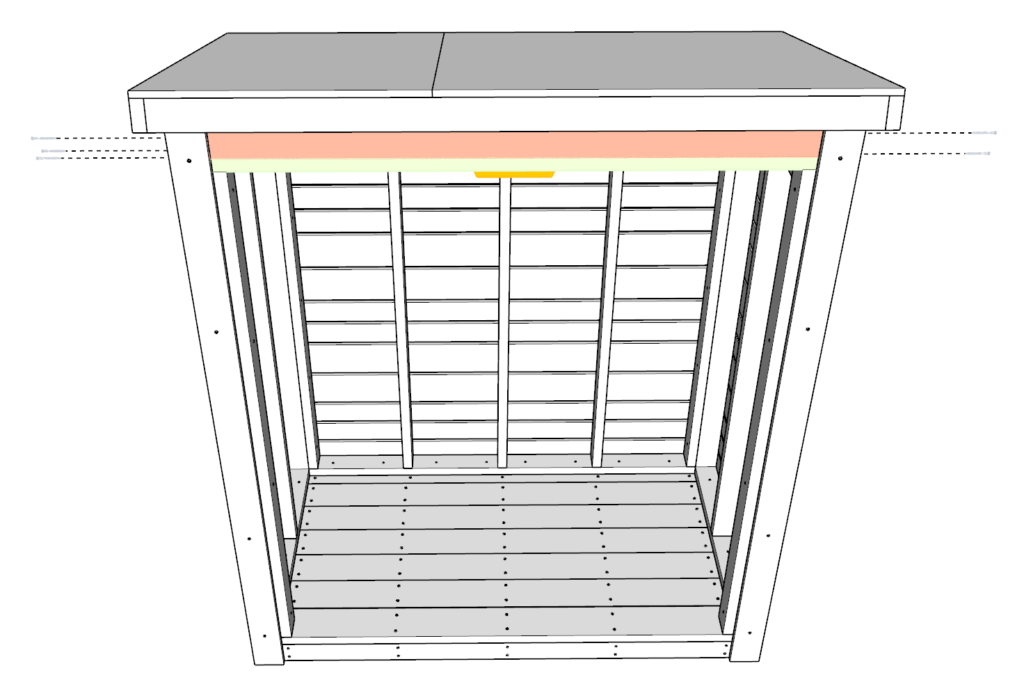
Next, add the plywood roof component to the rest of the shed as shown below.
As before, add glue and screws.
Step 14
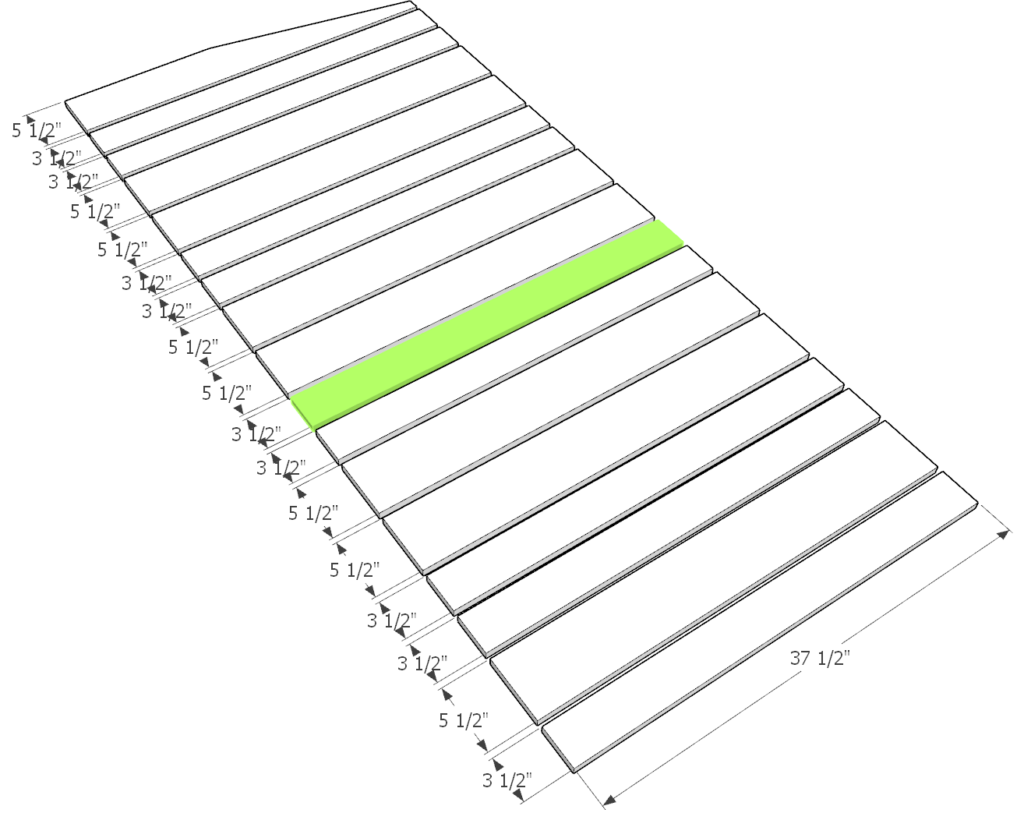
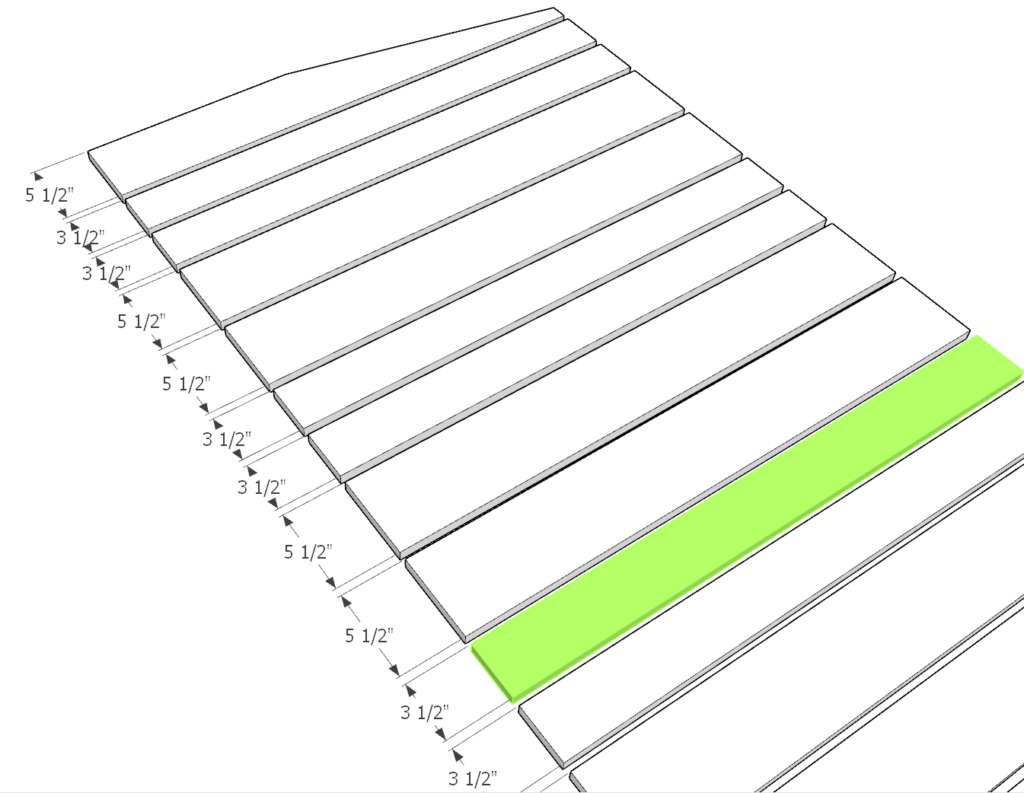
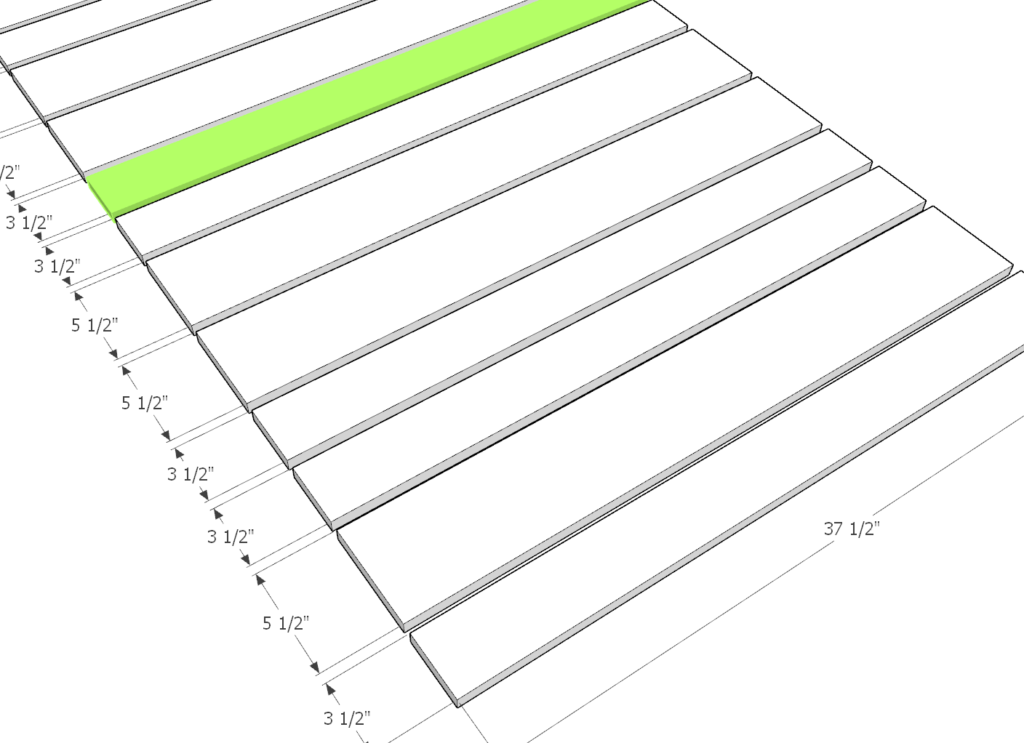
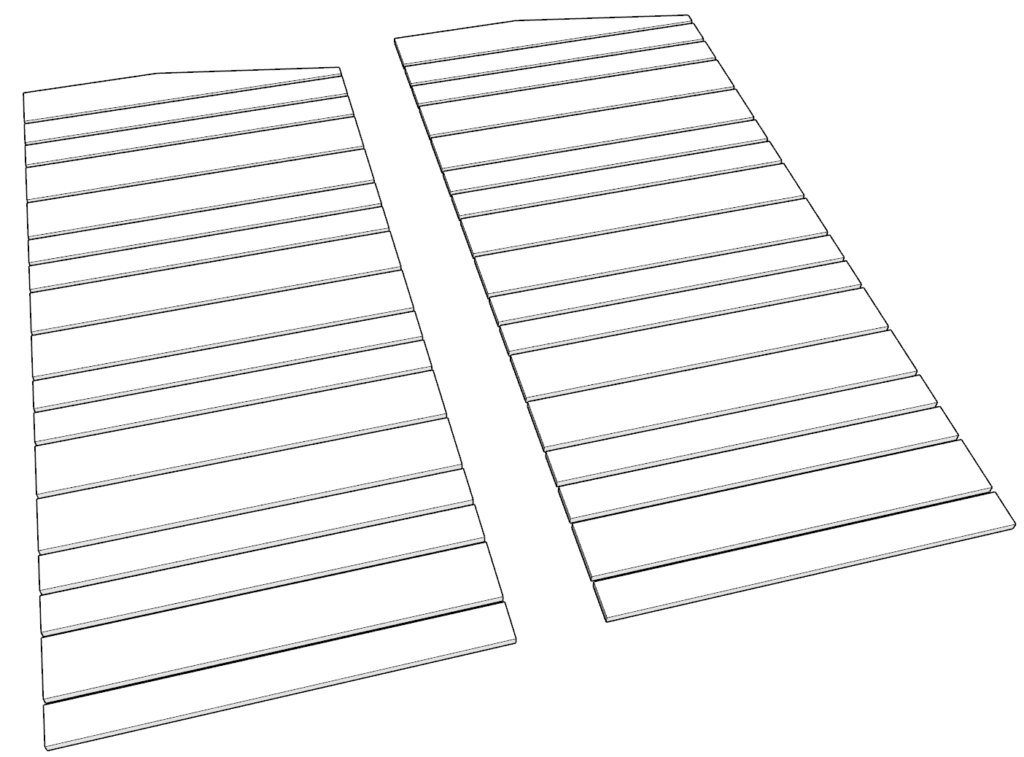
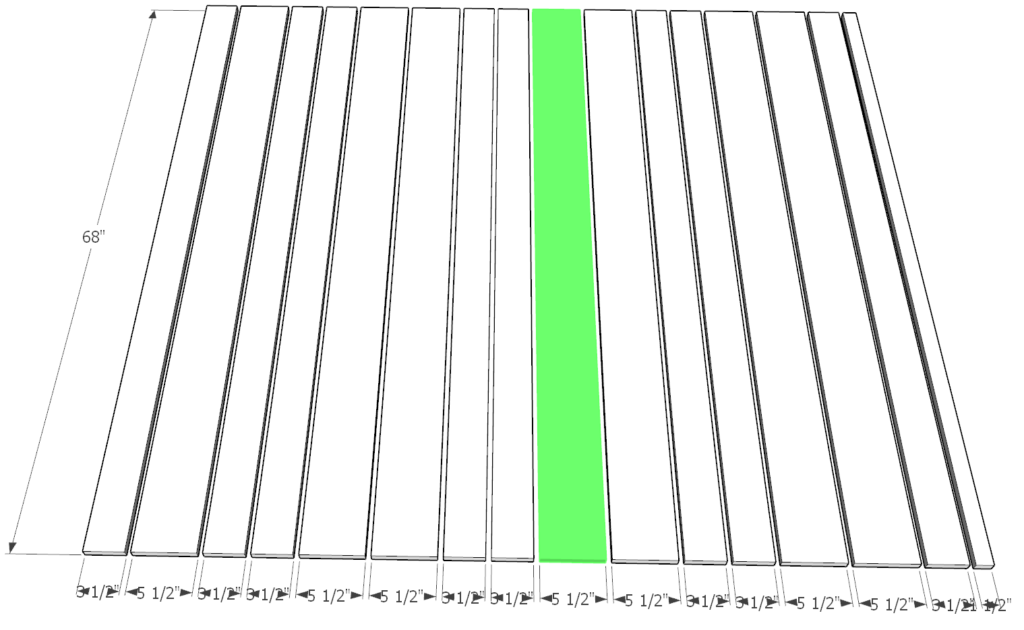
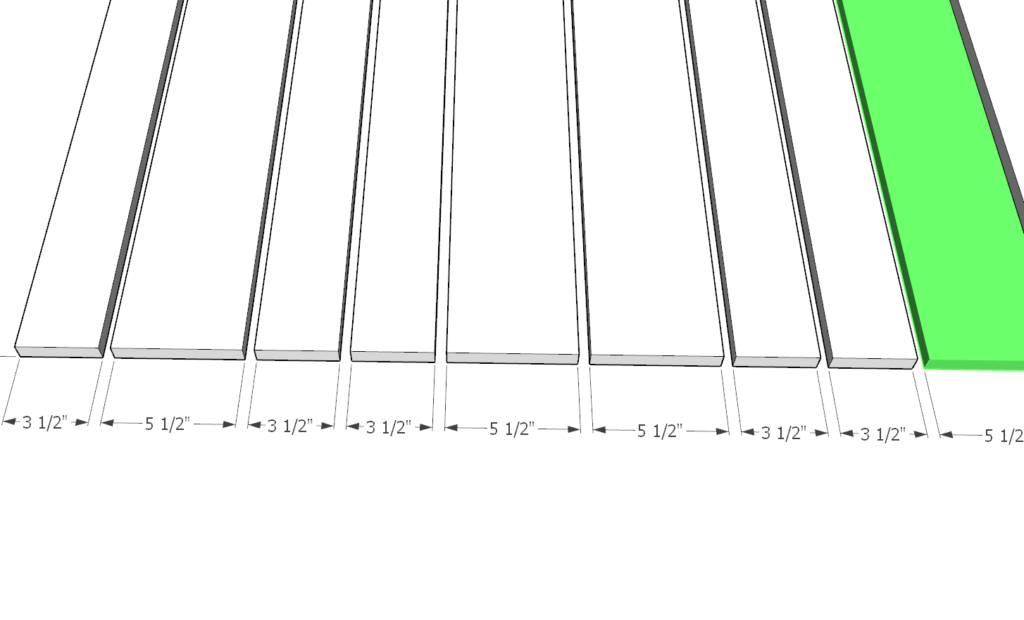
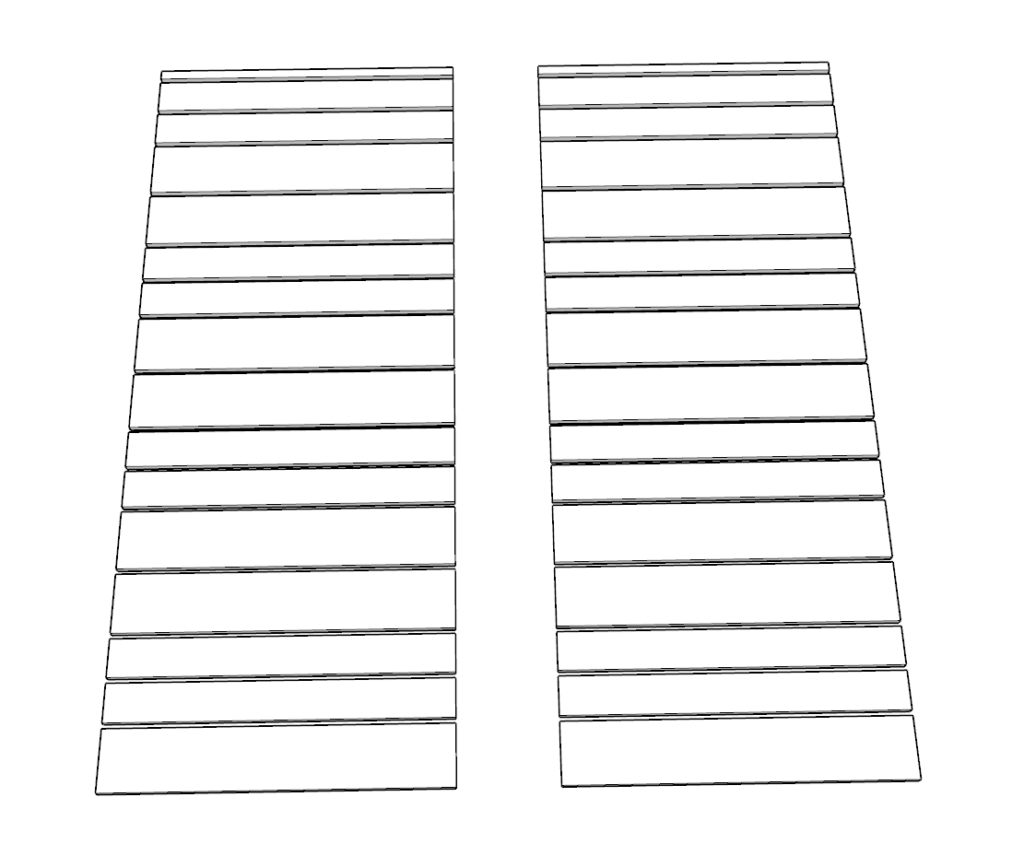
Next, cut the siding pieces that will be added to the side of the shed. The siding is made from 1×4 and 1×6 inch lumber pieces (actual size in stores is 5.5 and 3.5).
These siding pieces are cut at 37.5 inch length.
Cut the top 5.5 inch piece at a 13 degree angle as shown in the diagram below.
Make a total of two identical siding sets.
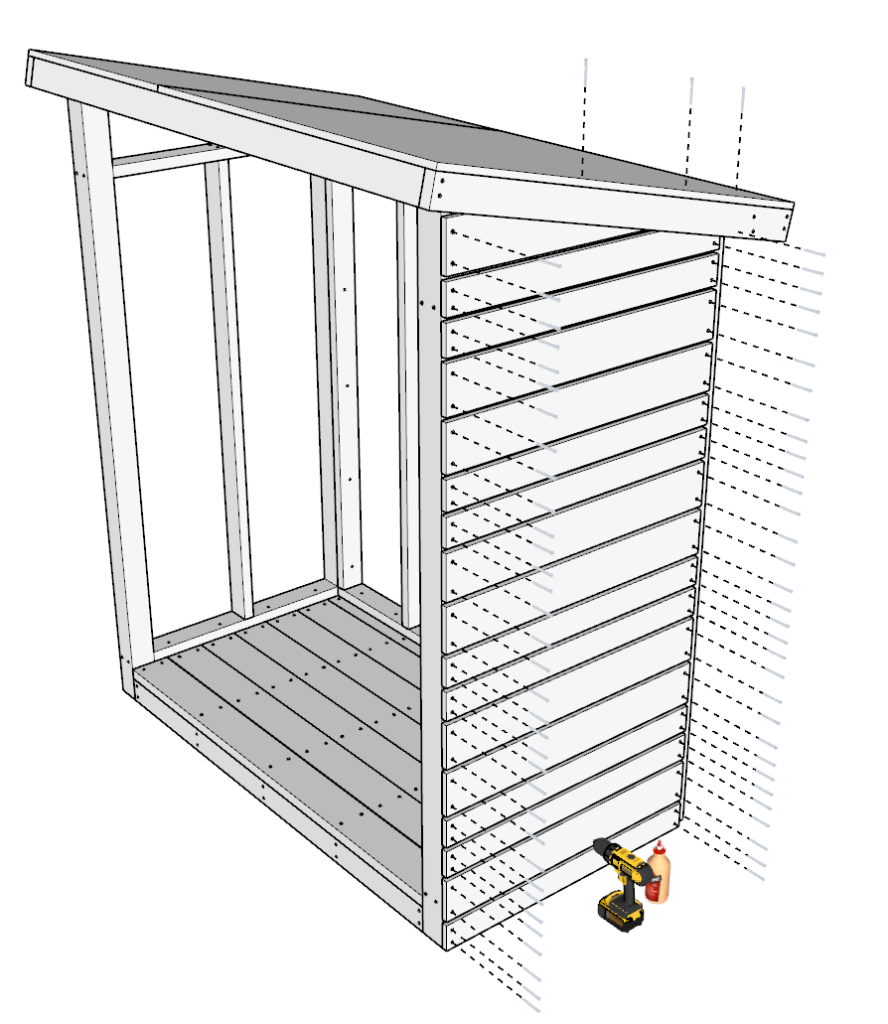
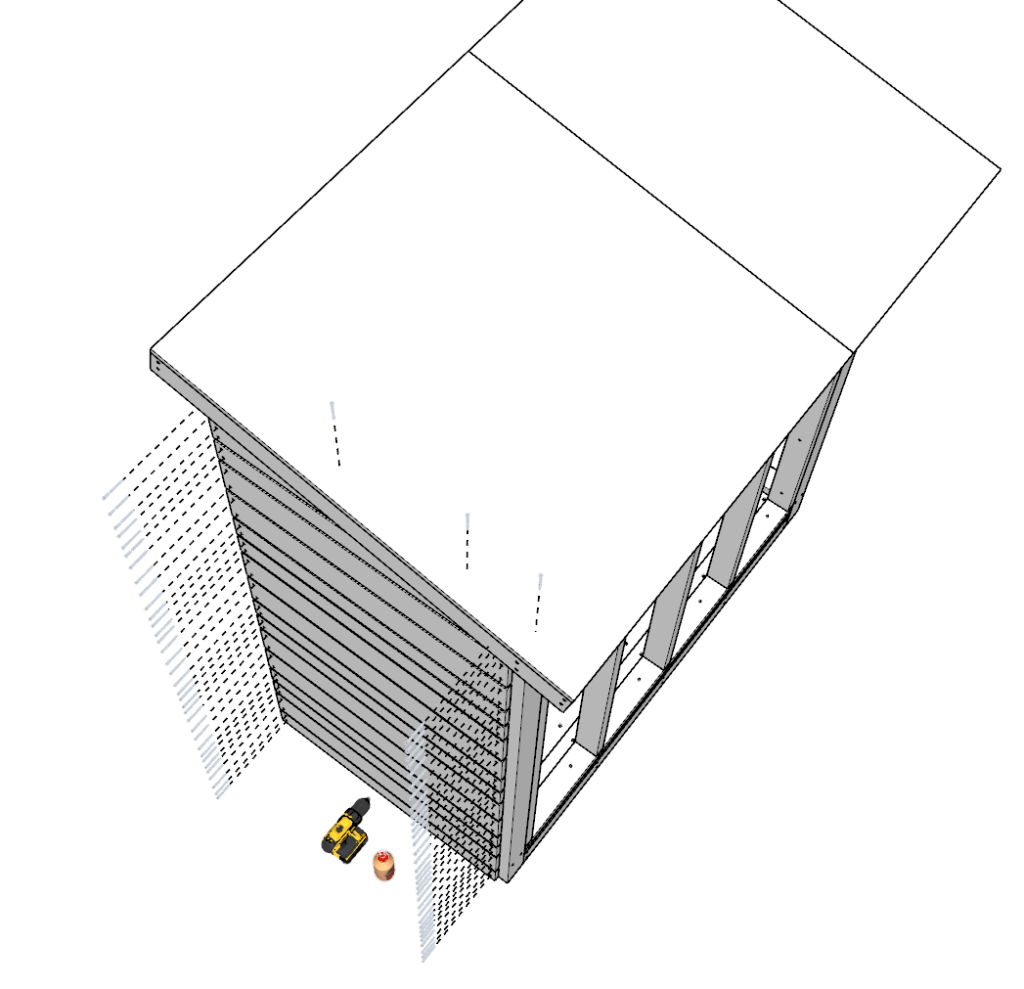
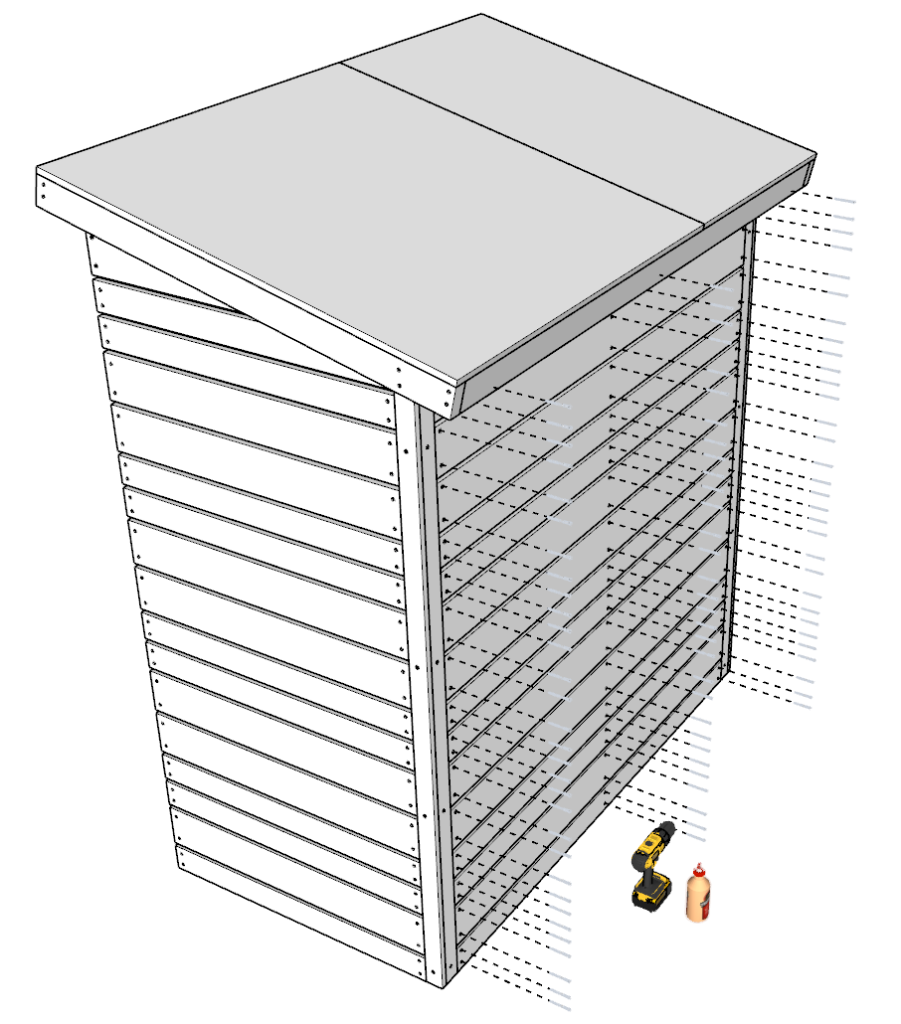
Step 15
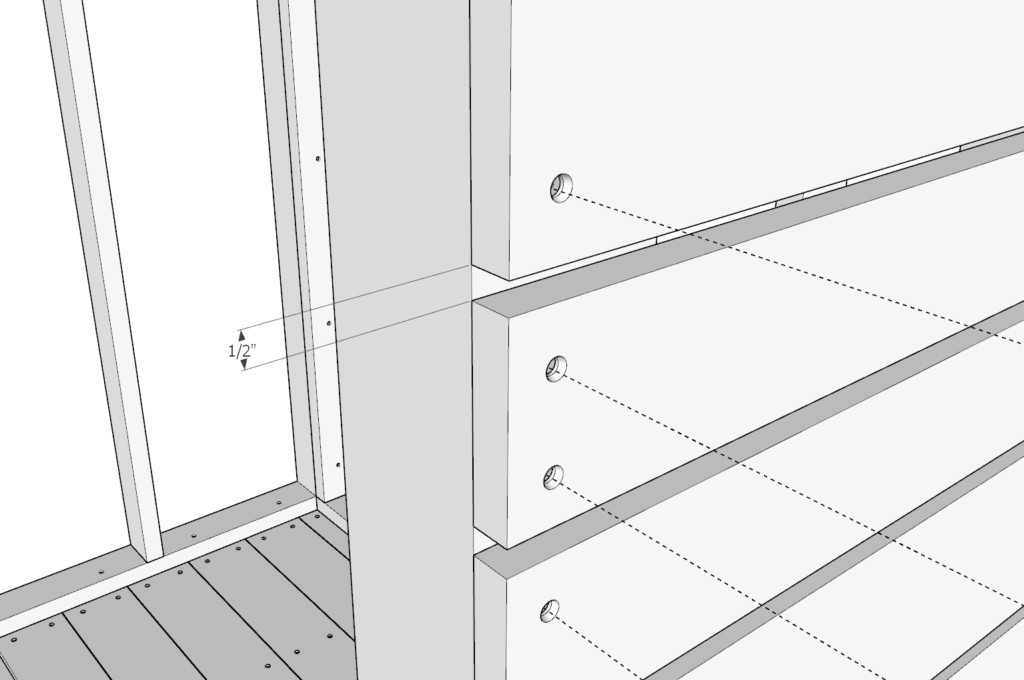
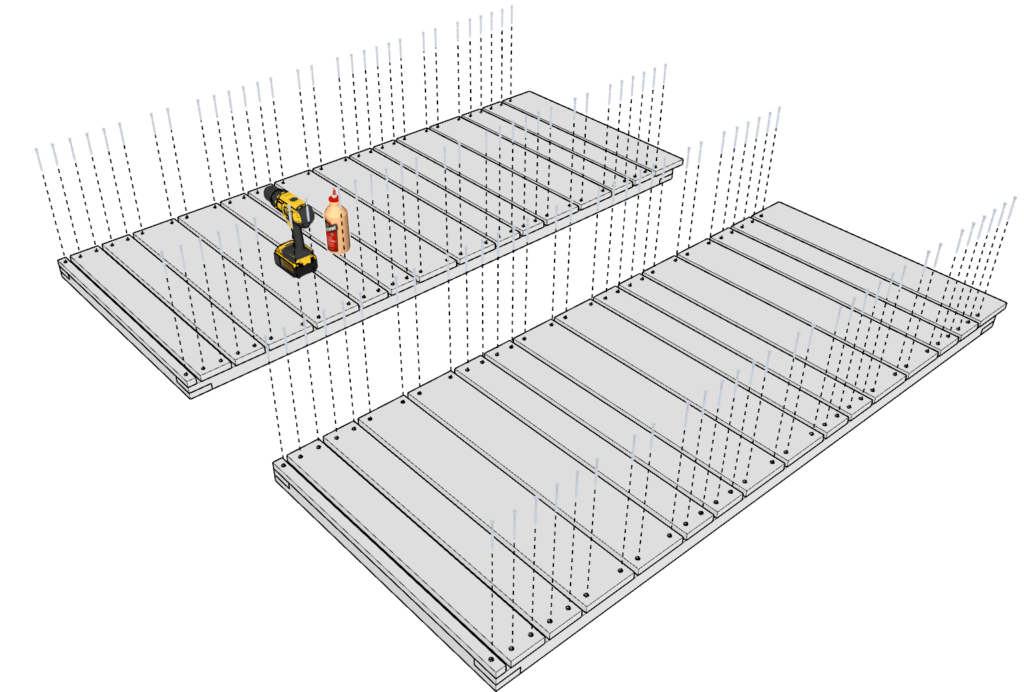
Next, attach the siding pieces to the shed as shown below.
Space out the pieces 1/2 inches apart.
Add glue, predrill, and add screws.
For the top most pieces, since its difficult to access, I add screws right through the roof plywood sheet.
Repeat this for both sides of the house.
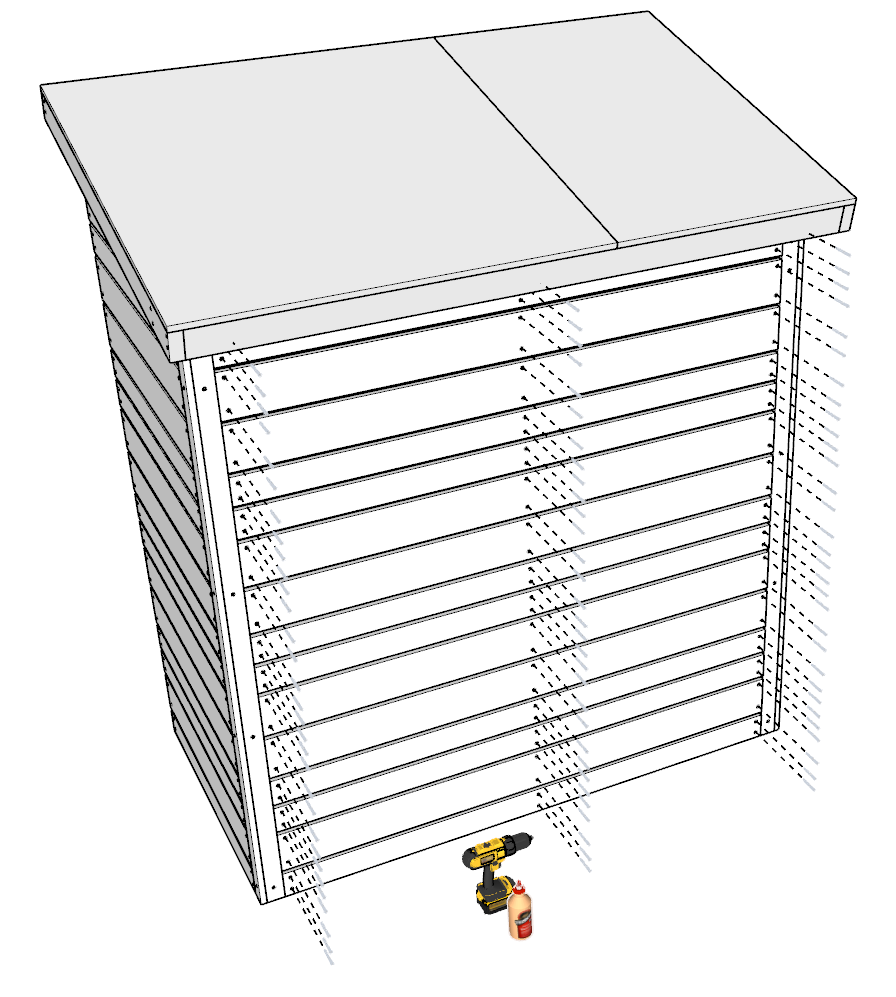
Step 16
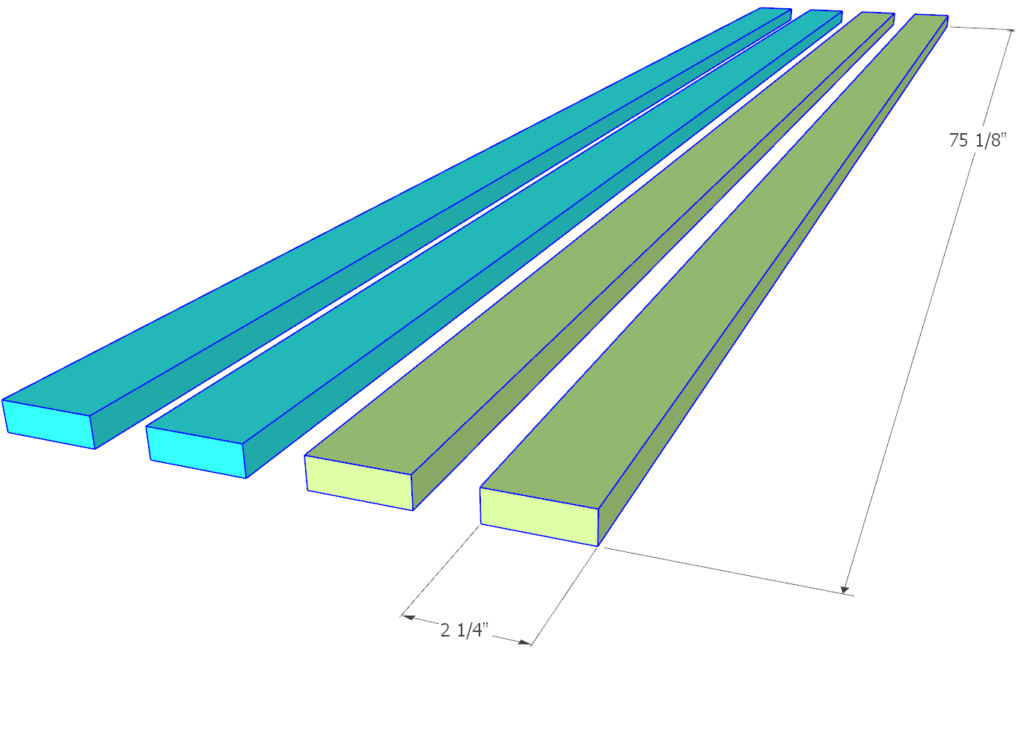
Next, cut four 75 1/8 inch pieces from 1×6 lumber. The 1×6 lumber needs to be cut down to make 2 1/4 inch wide pieces.
Next, add the 75 1/8 inch pieces ad shown in the diagram, secure with glue and screws. Predrill before adding screws.
Step 17
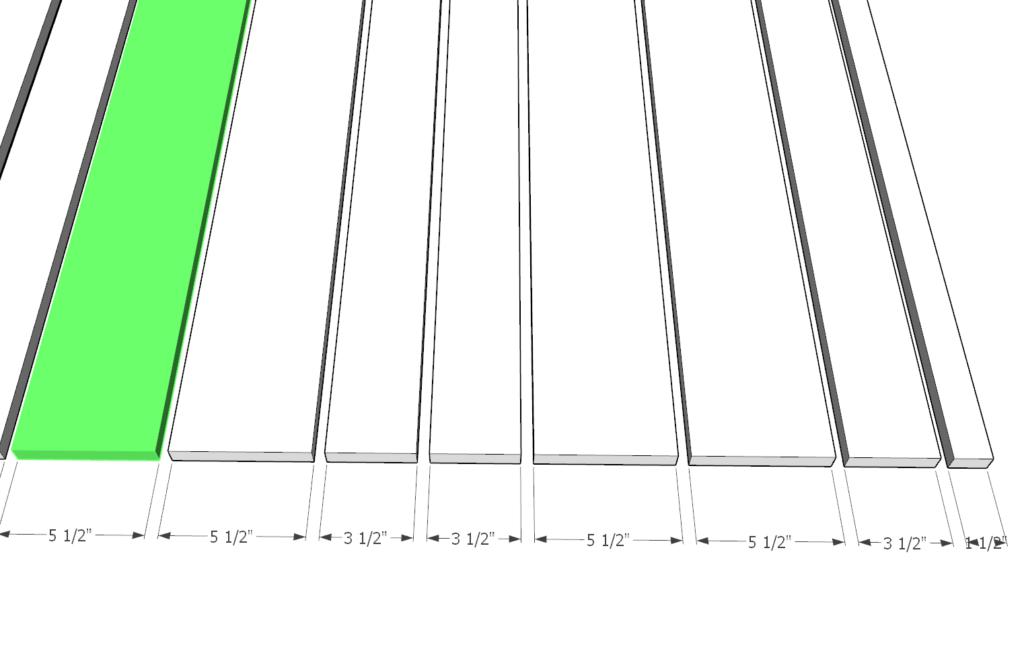
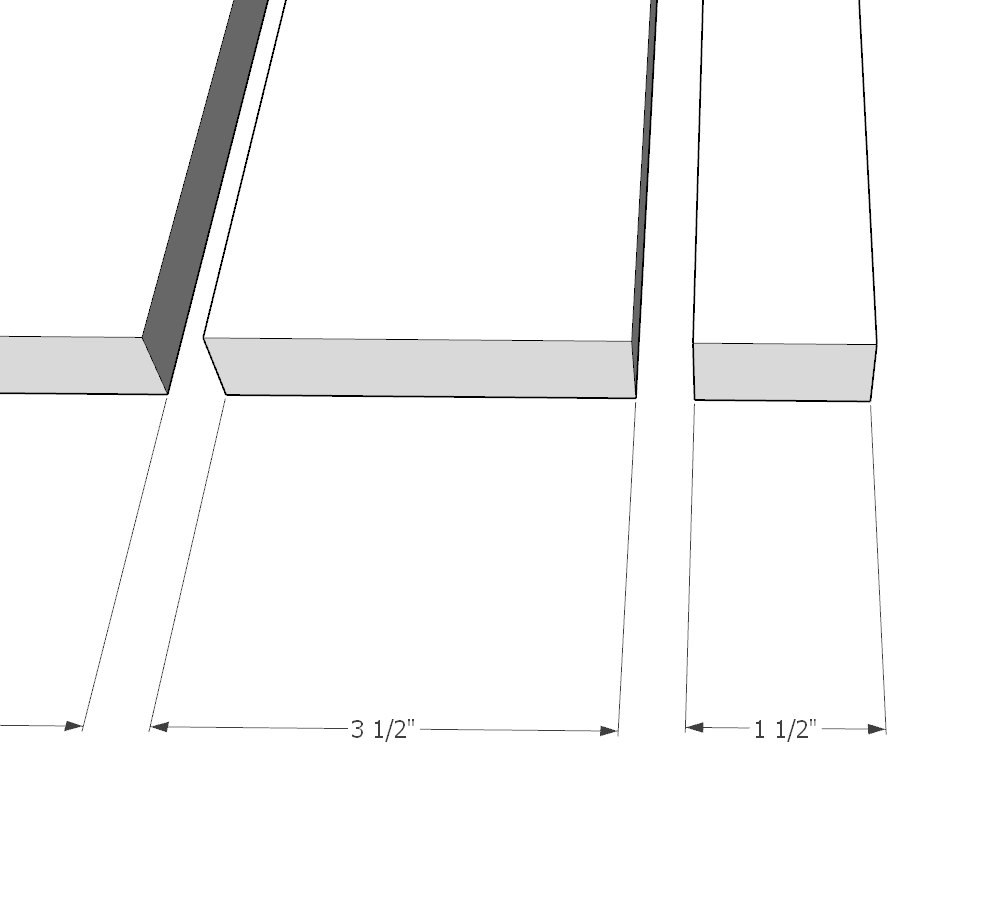
Next, cut the siding pieces that will be added to the back of the shed. The siding is made from 1×4 and 1×6 inch lumber pieces (actual size in stores is 5.5 and 3.5).
These siding pieces are cut at 68 inch length.
One of the siding pieces is going to be 1 1/2 inches wide. This needs to be cut either from a 1×6 or a 1×4.
Step 18
Next, add the back siding pieces as before.
Predrill, add glue, and add screws.
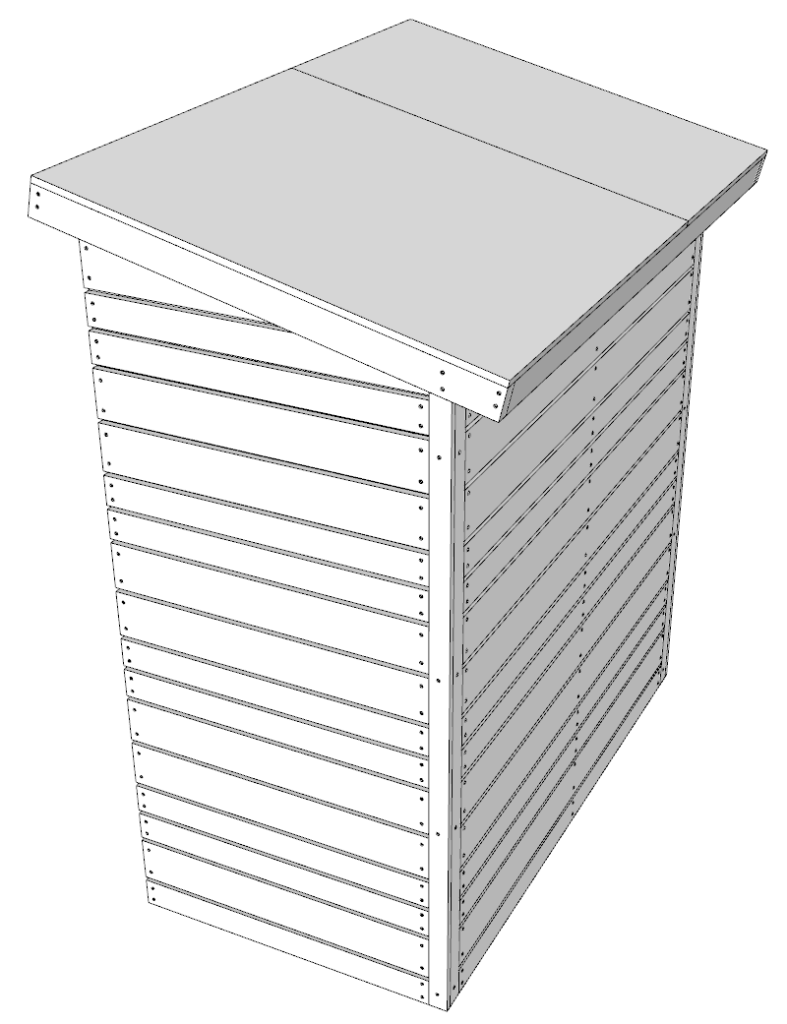
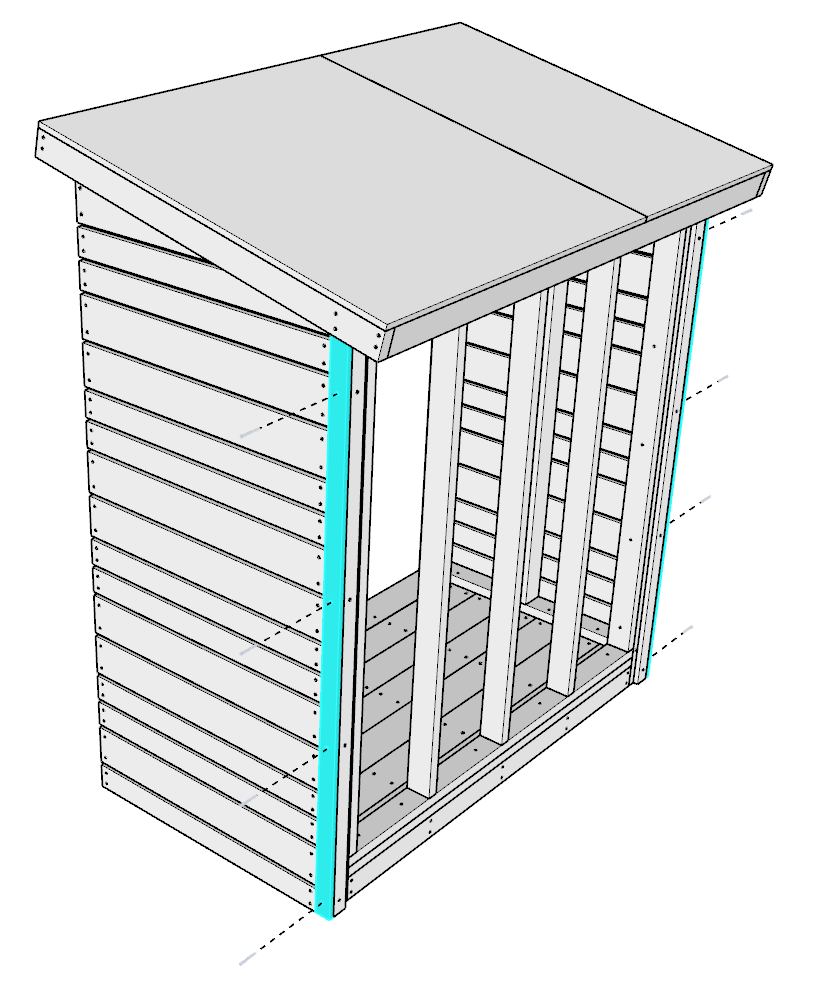
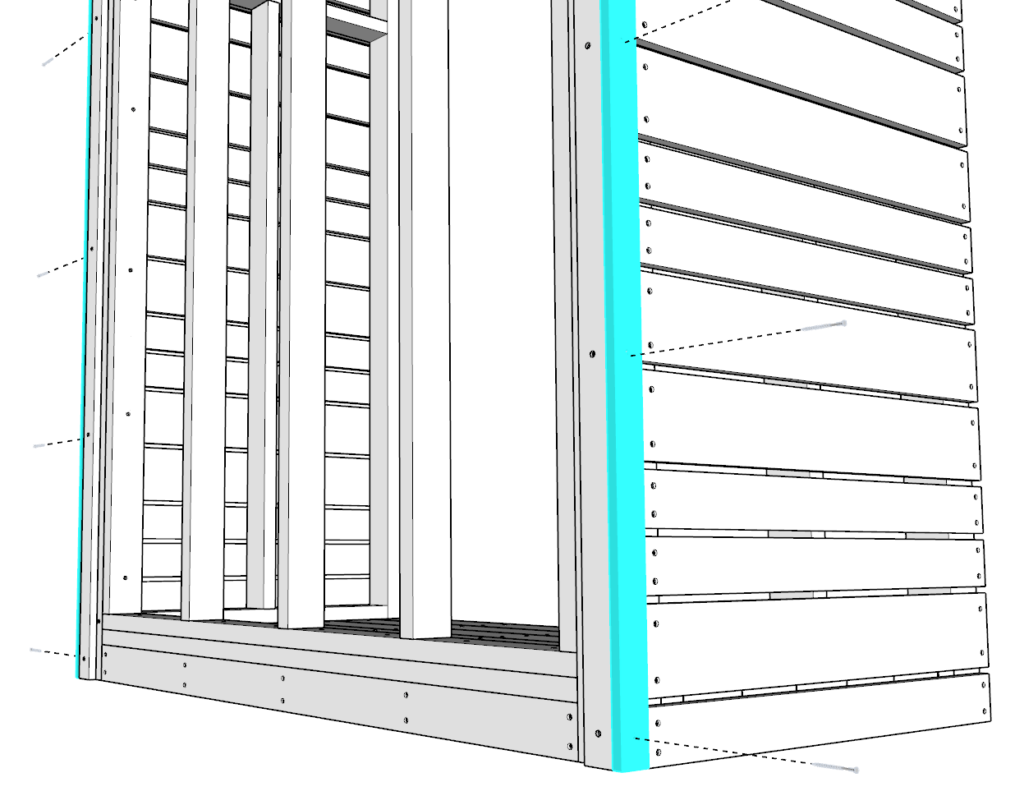
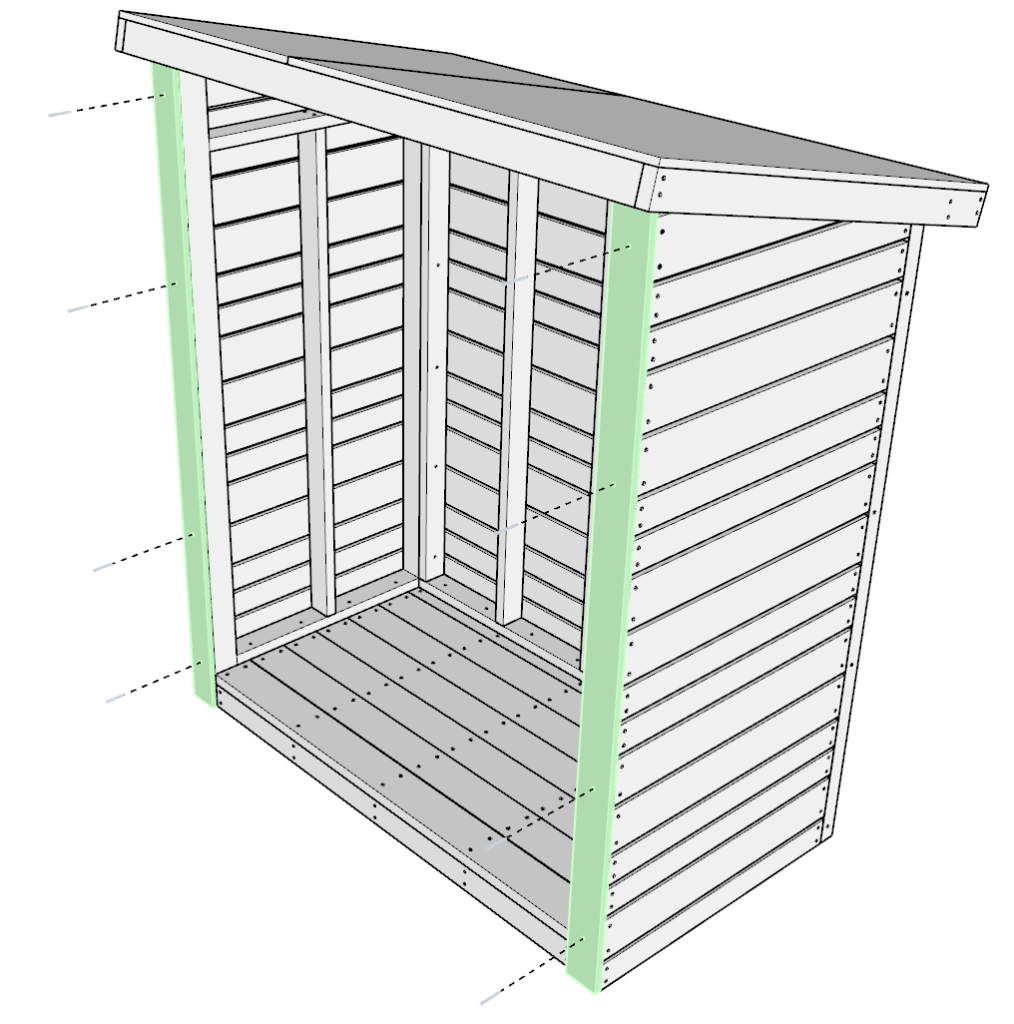
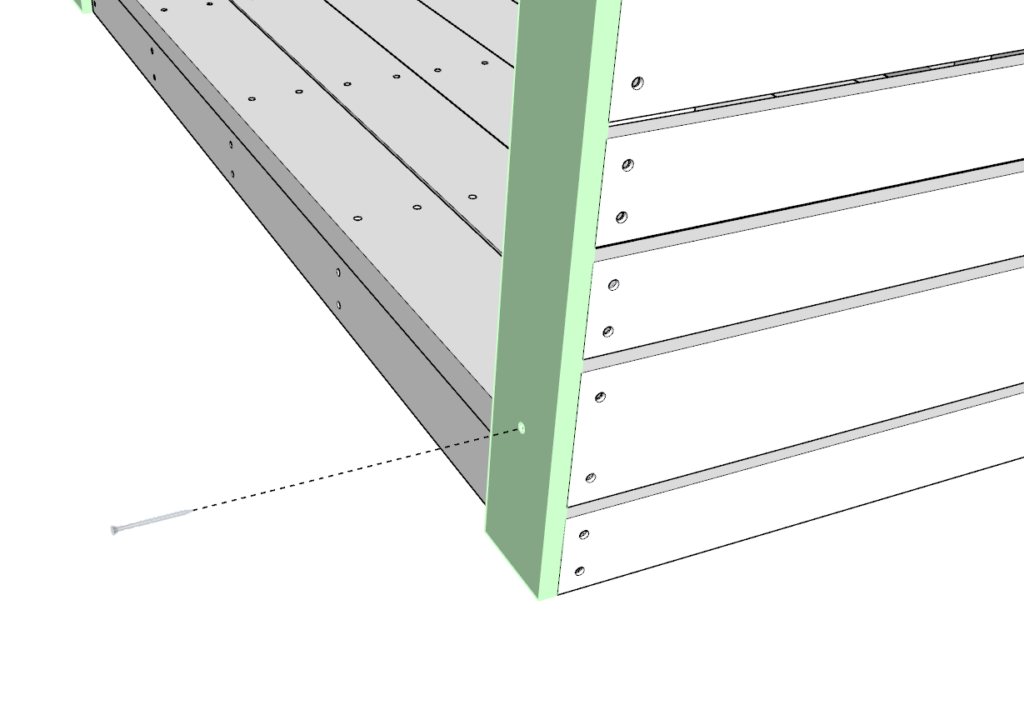
Step 19
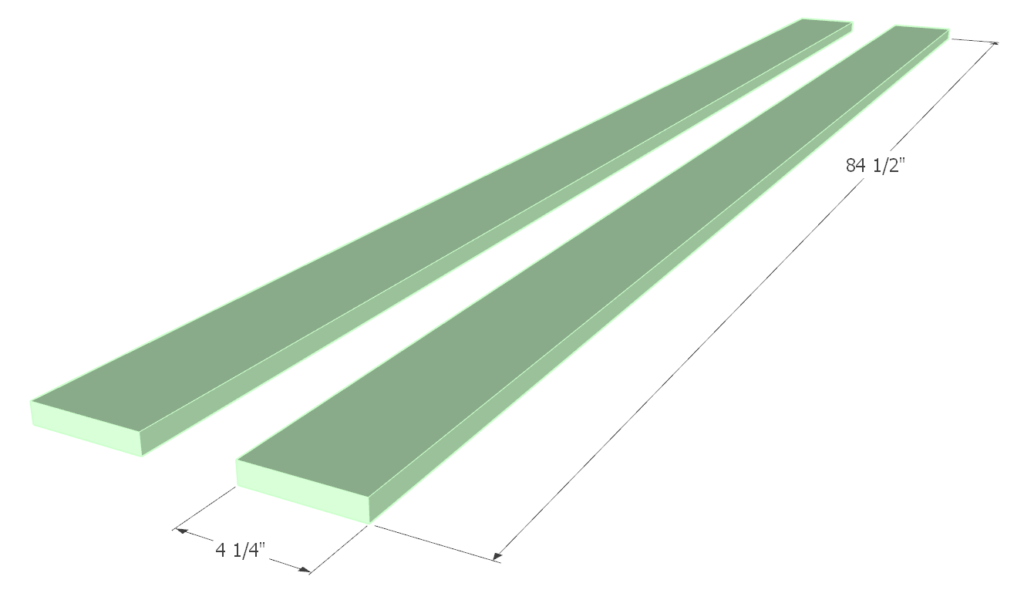
Next, cut two 84 1/2 inch from 1×6 lumber. Cut the width down to 4 1/4 inches.
Add it to the side of the shed as shown below.
Predrill, add screws, and add glue.
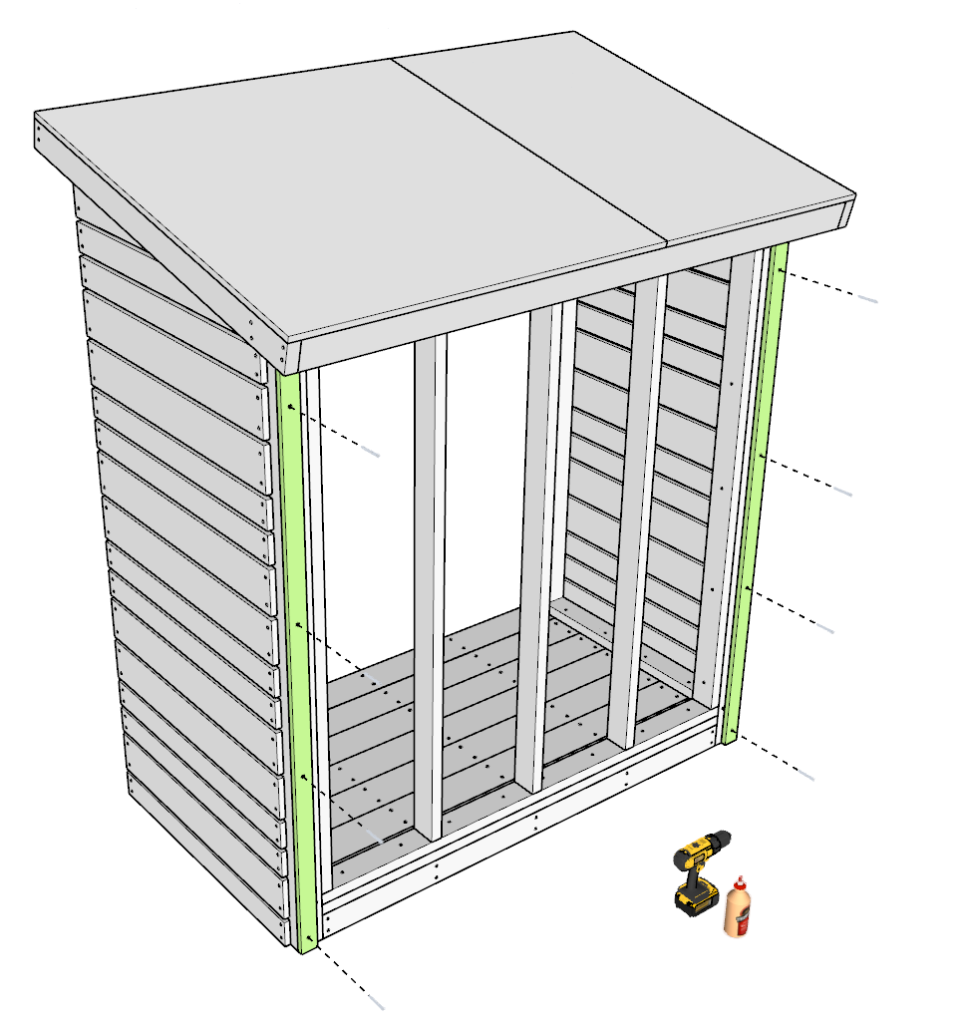
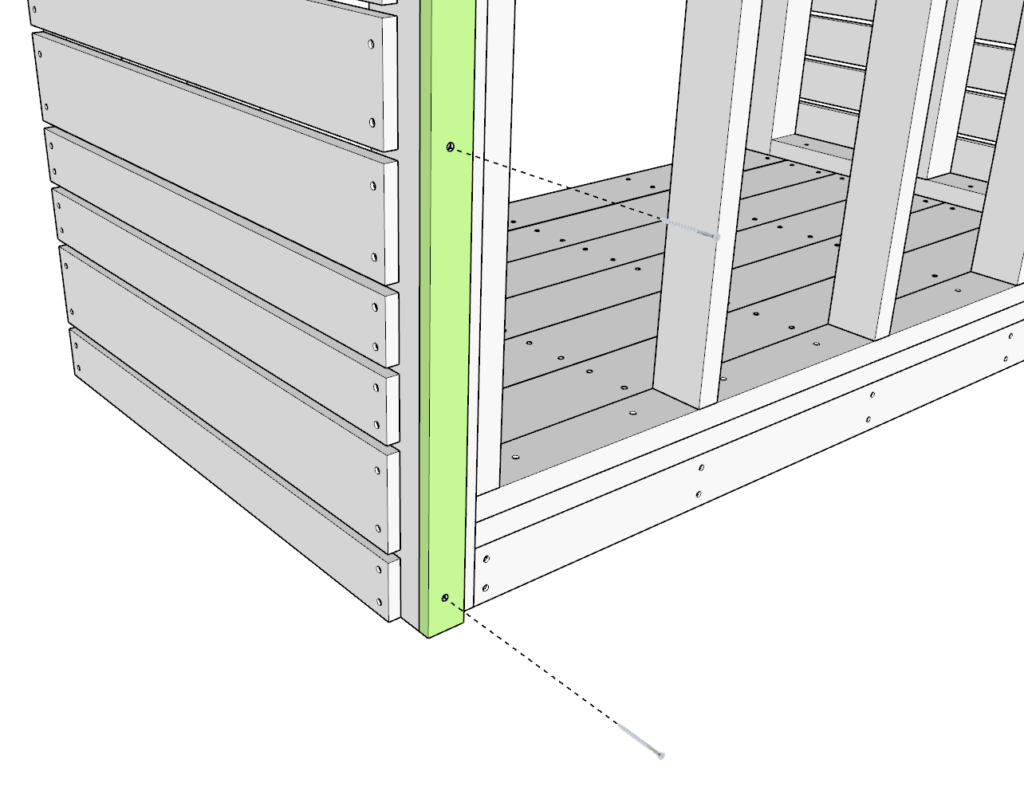
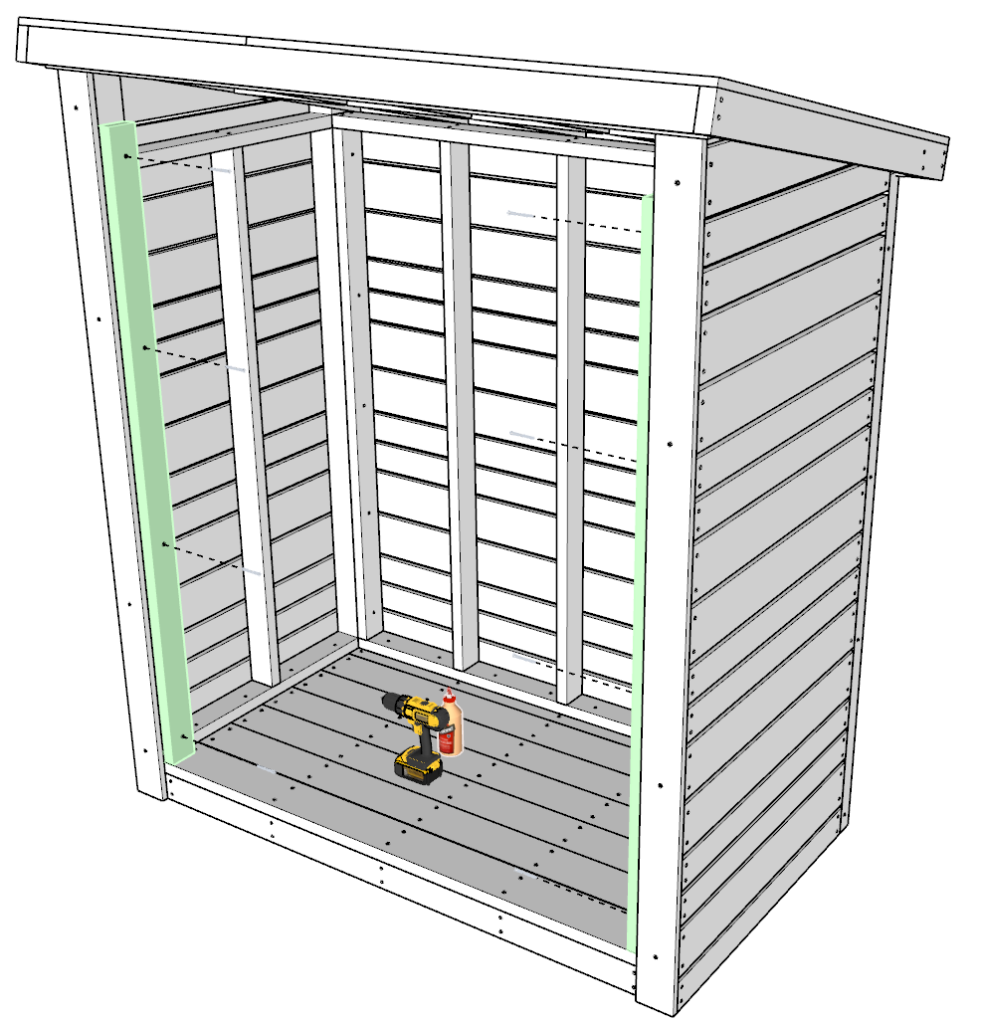
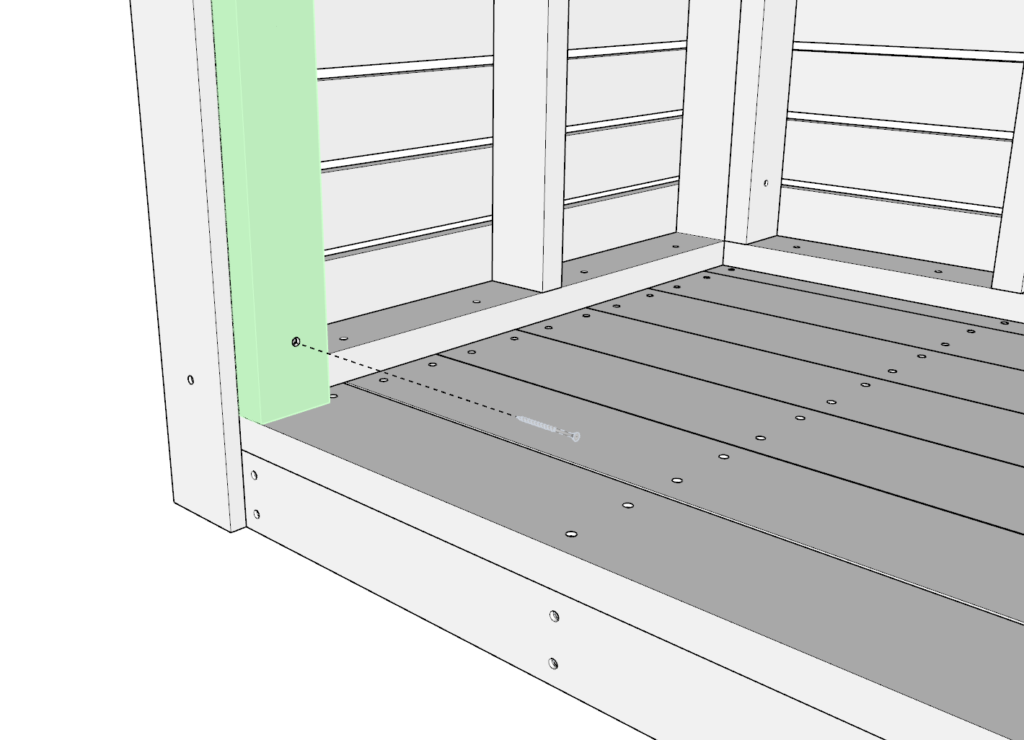
Step 20
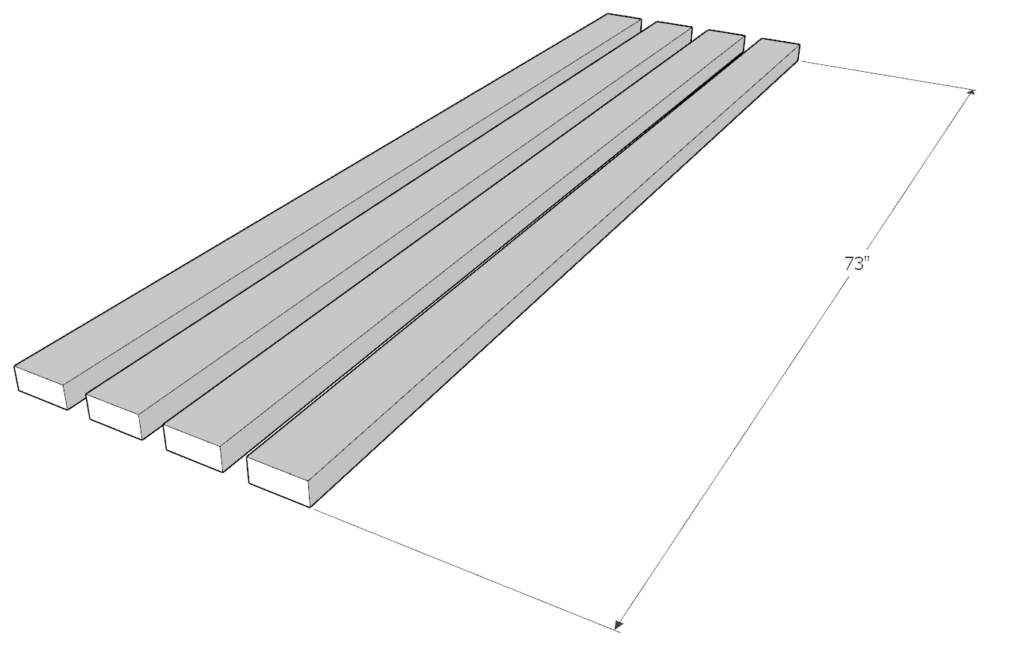
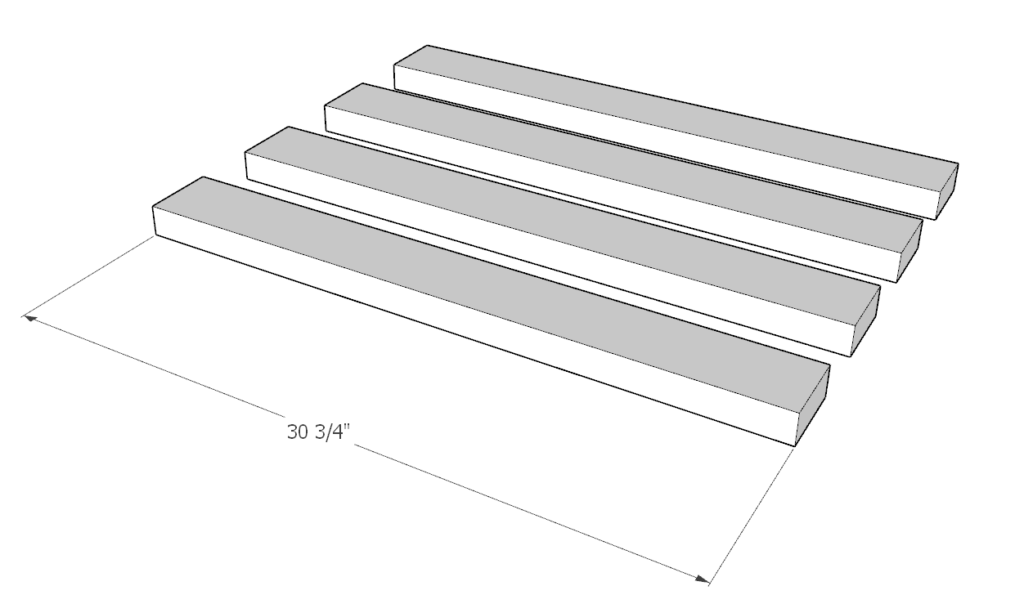
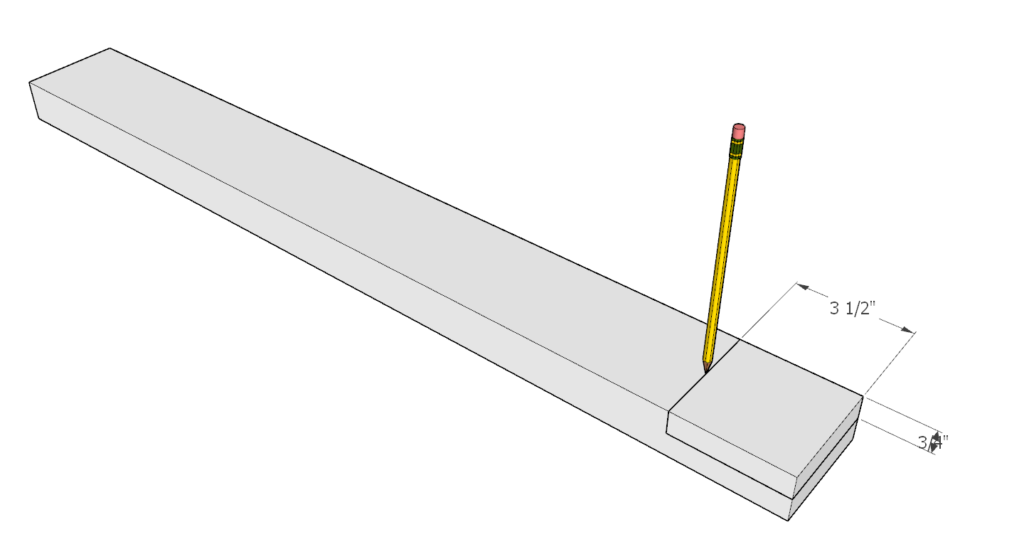
Next, cut four 73 inch pieces from 2×4 lumber and four 30 3/4 inch pieces from 2×4 lumber.
These pieces will have the ends cut down to 3/4 inch height as shown in the diagram below.
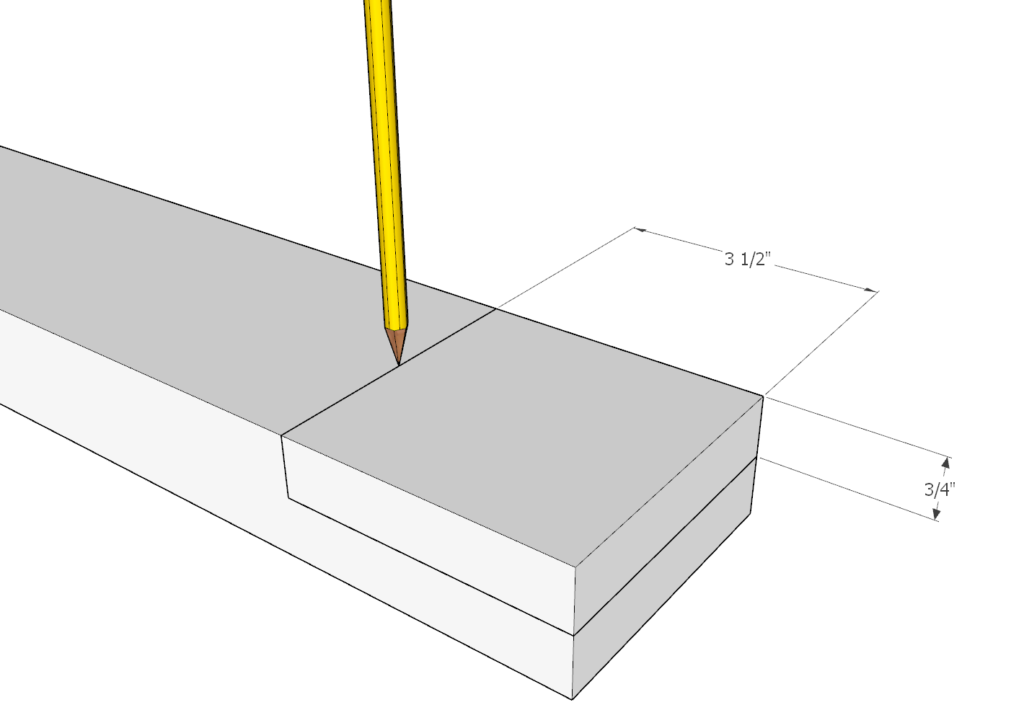
Use a pencil to mark off the ends at 3.5 inches wide, and 3/4 inches high as shown in the diagram.
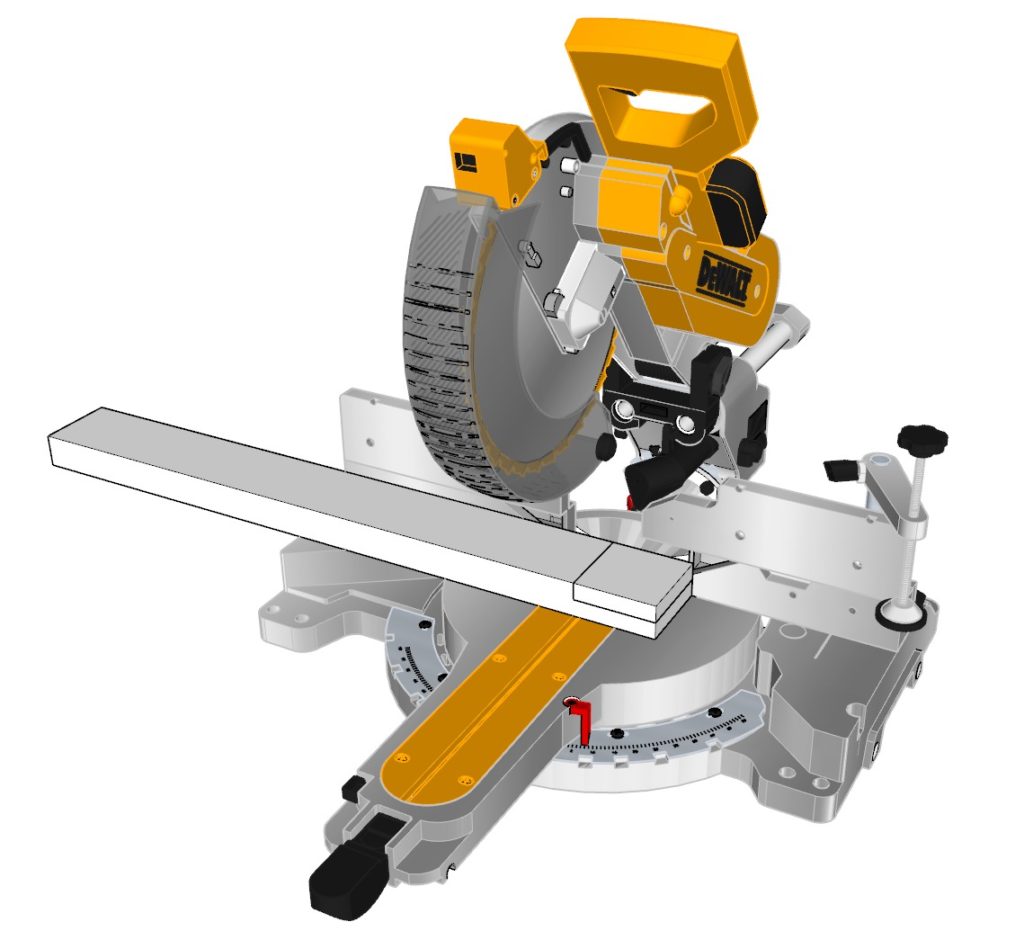
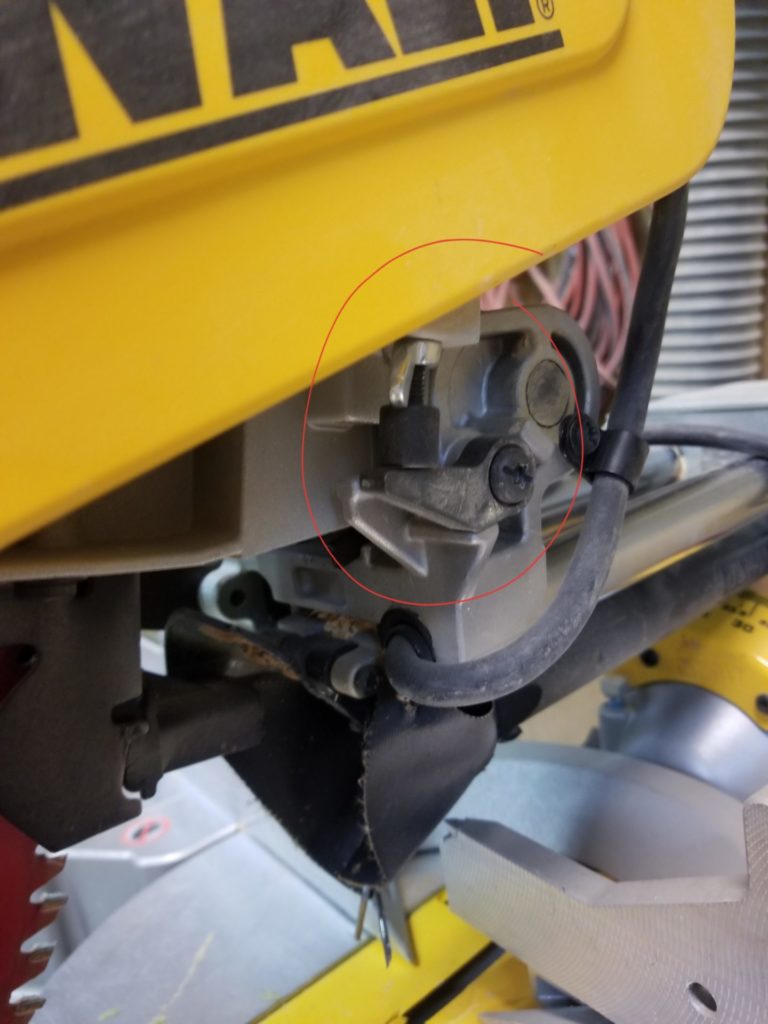
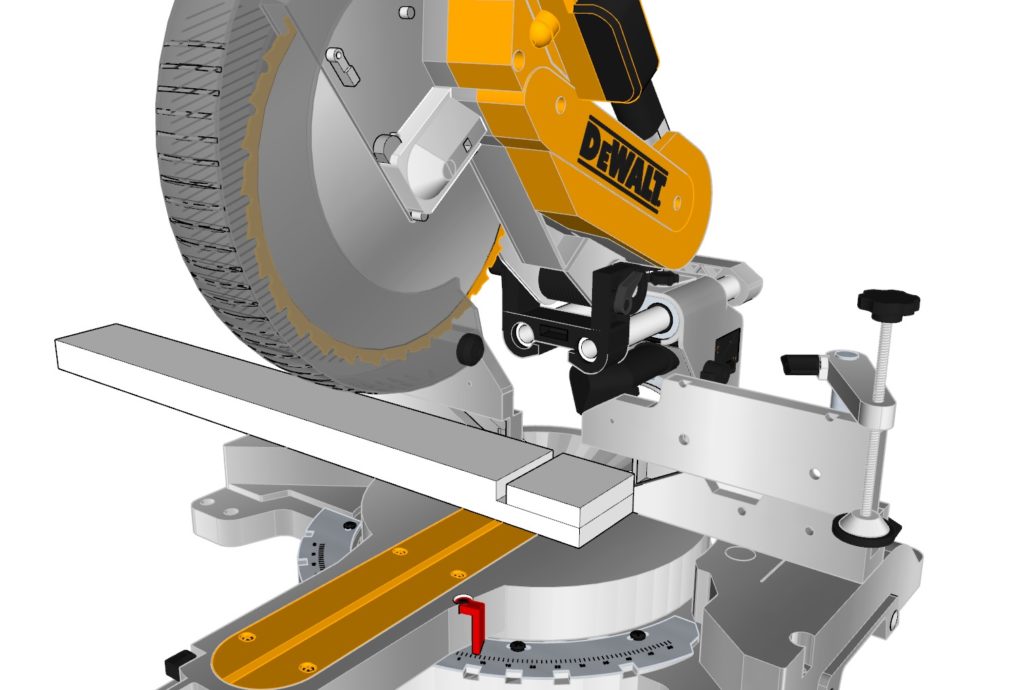
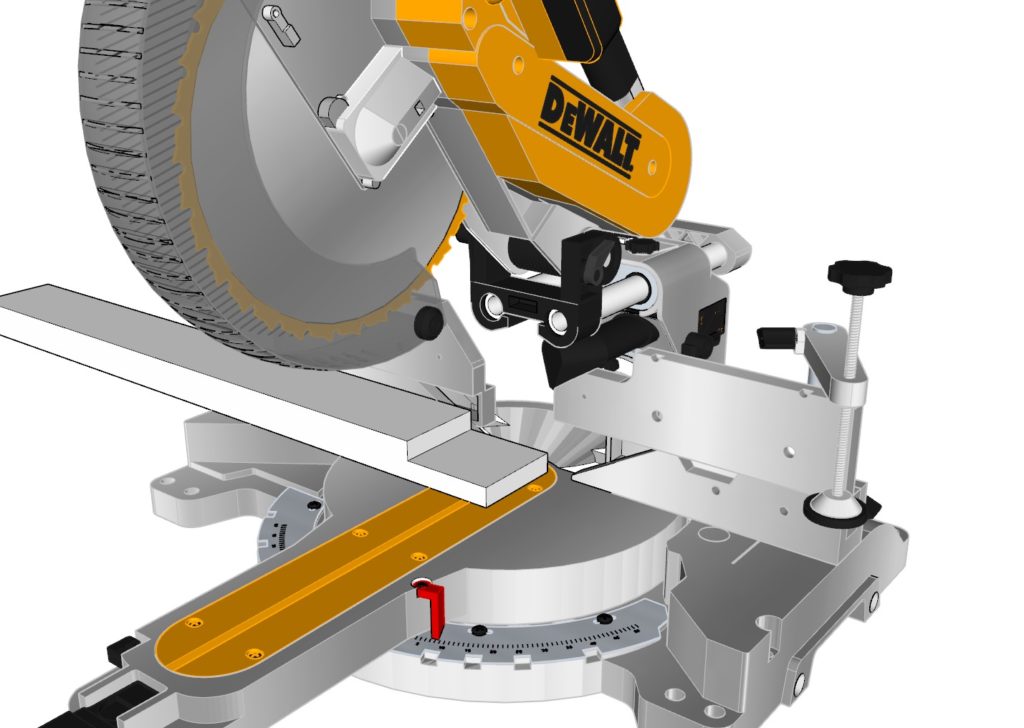
Next, use a sliding miter saw to cut away the marked area.
I use the stopper on the saw (circled in red) to set a maximum depth the saw can cut. This depth should be 3/4 of an inch.
Next, use the sliding feature of the saw to slide back and forth as you cut away the marked area.
Repeat this for all the 2×4 pieces.

Step 21
Next, attach the pieces you cut in the previous steps by arranging them as shown in the diagram below.
Add plenty of glue and add smaller screws to hold them in place. Be sure to predrill the pieces.
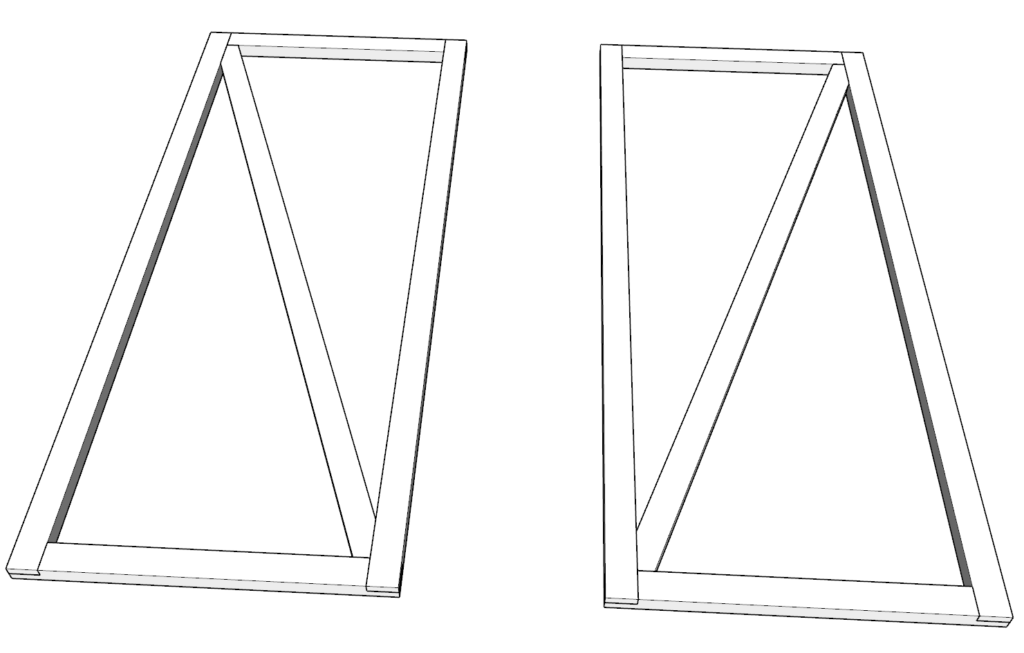
Step 22
Next, insert a 2×4 cross beam to add extra strength to the doors.
The easiest way to do this might be to lay the door frame on top of the 2×4 and then using a pencil to trace the areas that need to be cut away.
Add screws and plenty of glue. Don’t forget to predrill

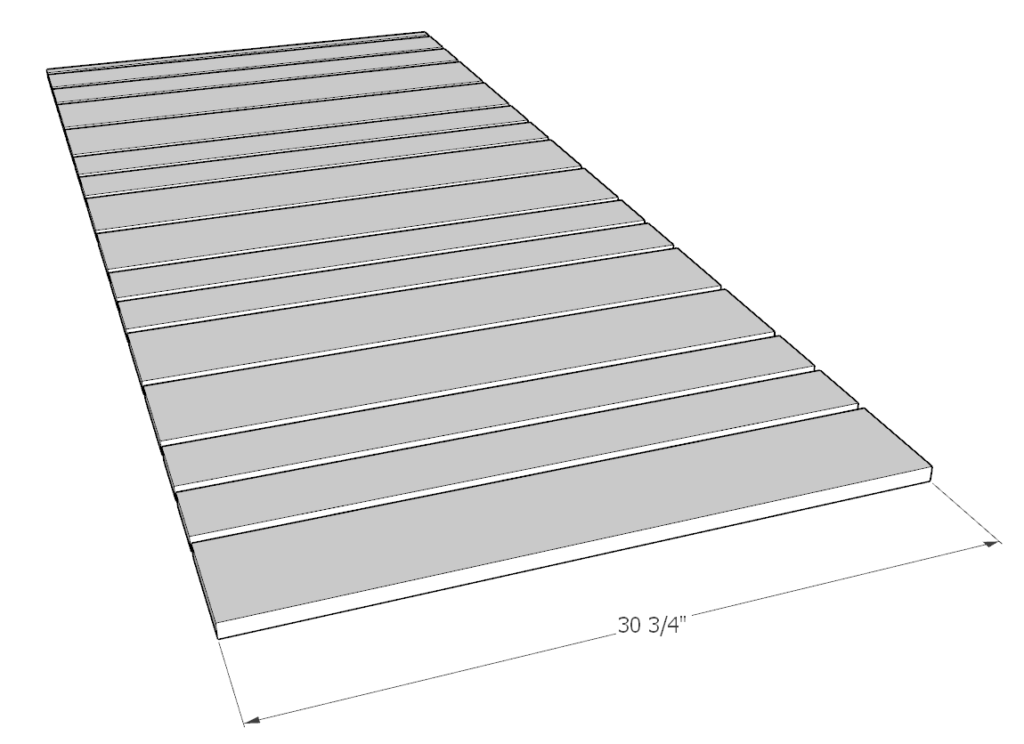
Step 23
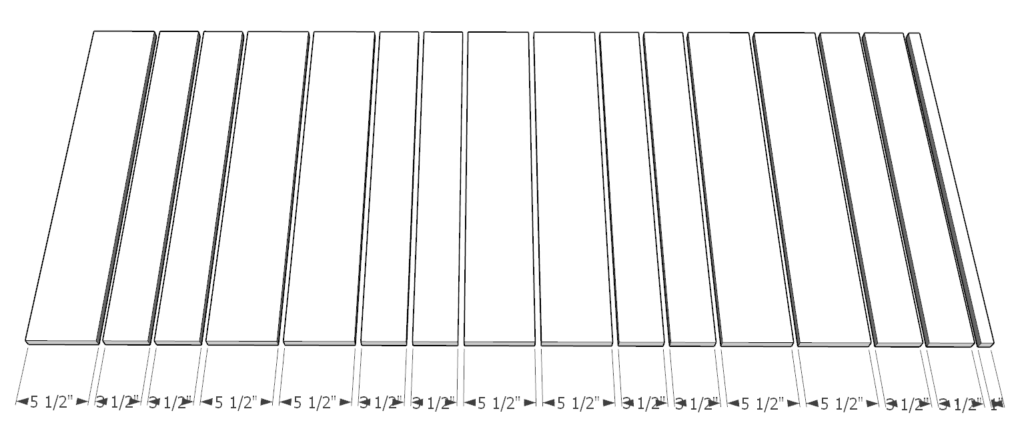
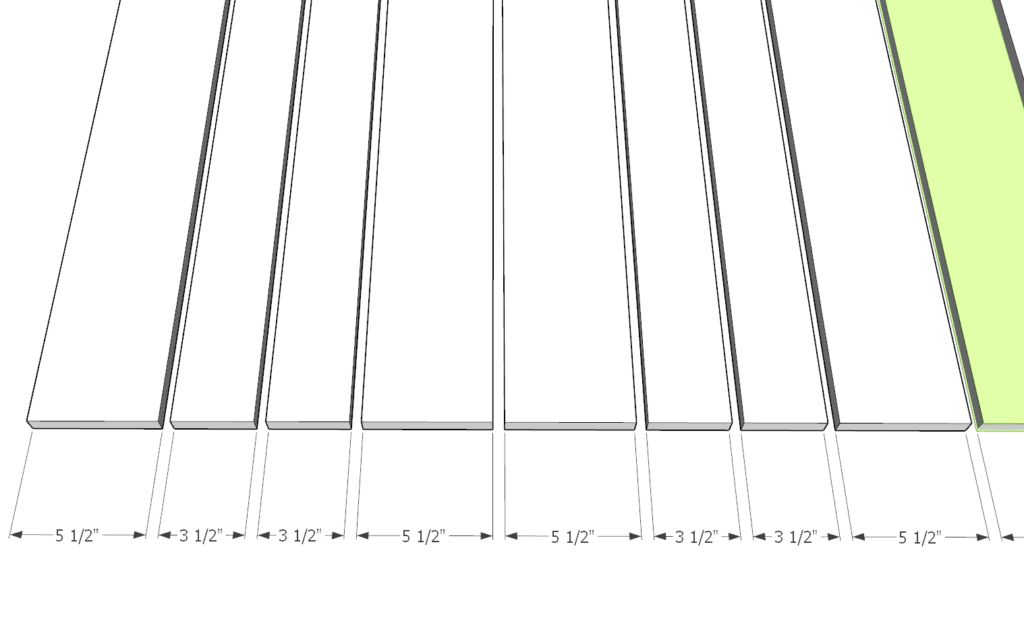
Next, cut the door siding pieces and add them to the doors.
Start by cutting 1x4s and 1x6s down to 30 3/4 inches as shown in the diagram bellow and arrange them as shown bellow.
One of the pieces will be 1 inches wide. This can be cut from a 1×6 or a 1×4.
Next arrange the pieces on top of the door frames with 1/2 inch gaps as before.
Make sure to follow the design and layout specifications in the diagrams.
Add glue, predrill, and add screws.
Use smaller screws to ensure they do not protrude from the 2x4s.
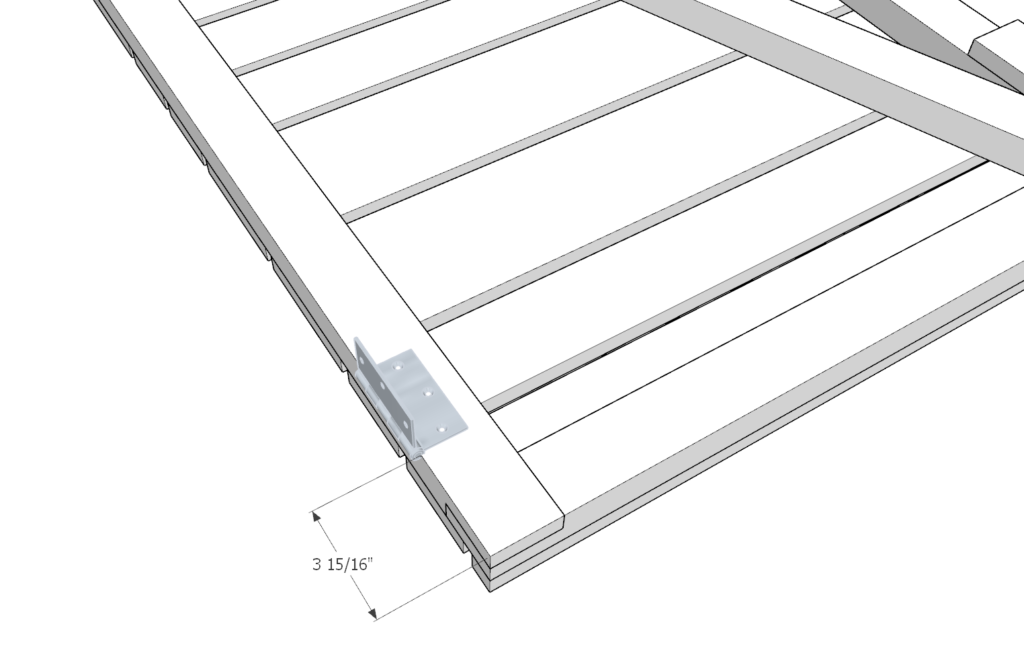
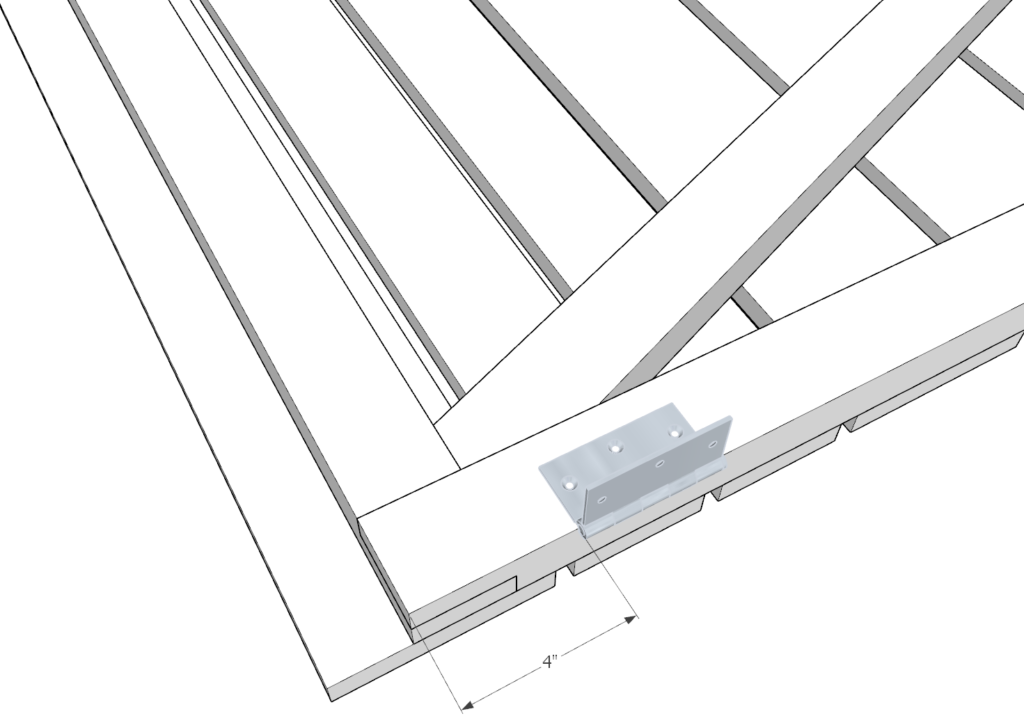
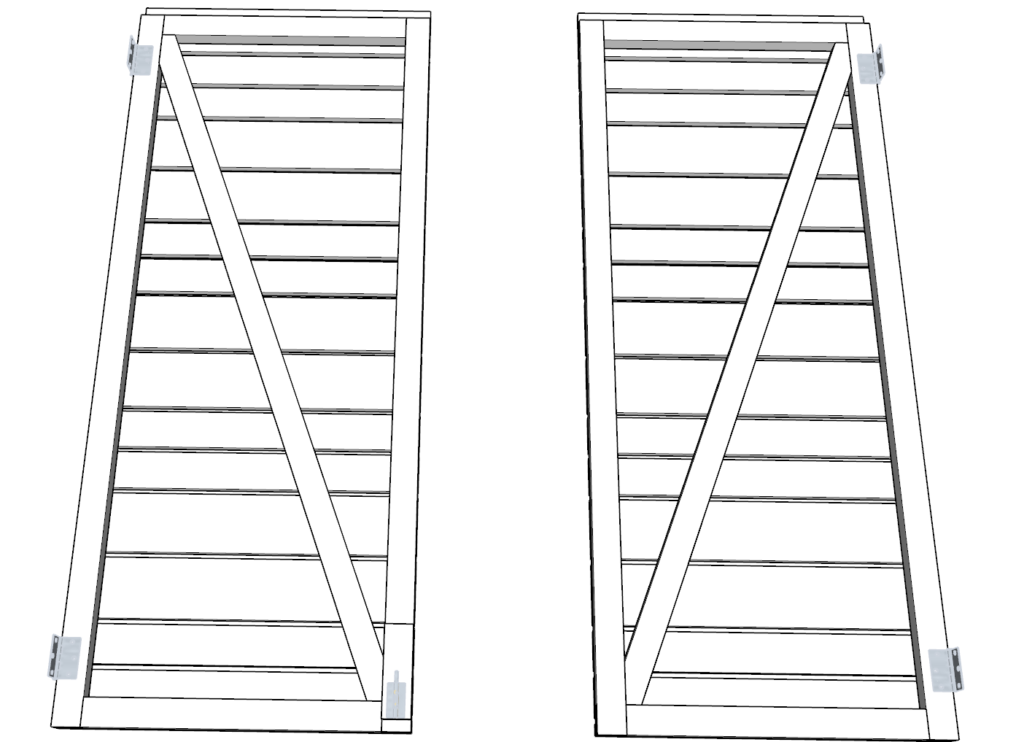
Step 24
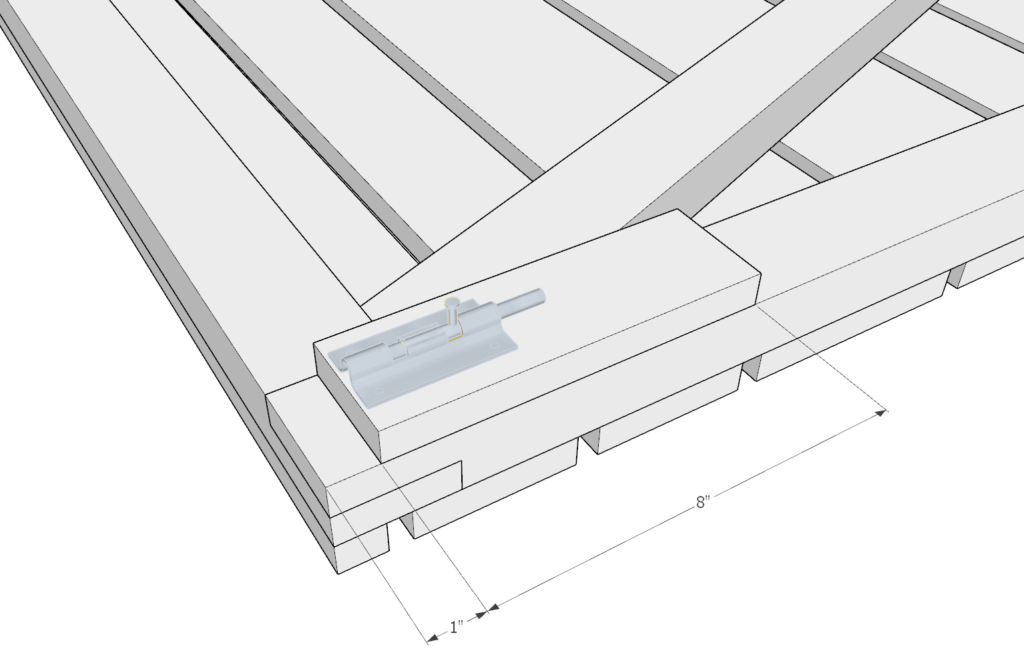
Next, add the hinges as shown below and add the vertical mount bolt to a 8 inch 2×4 piece.
The height of the bolt and 8 inch piece depends on how large your vertical mount bolt assembly is. The vertical mount bolt needs to be able to lock the door in place by going into the shed floor.
Step 25
Next, cut and attach two 74 inch pieces from 2×4 lumber as shown in the diagram. Glue, predrill, and add screws

Step 26
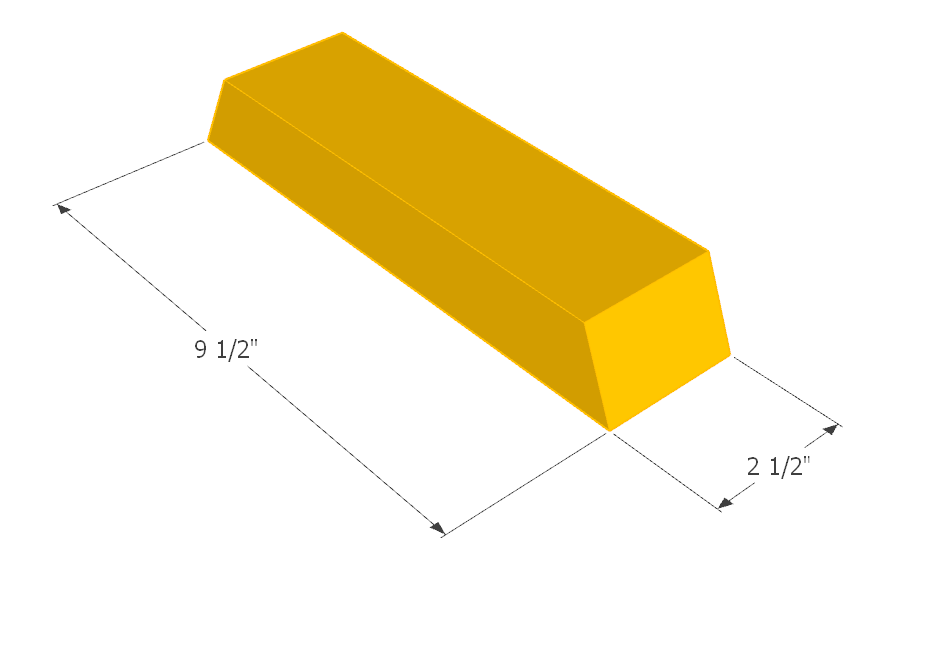
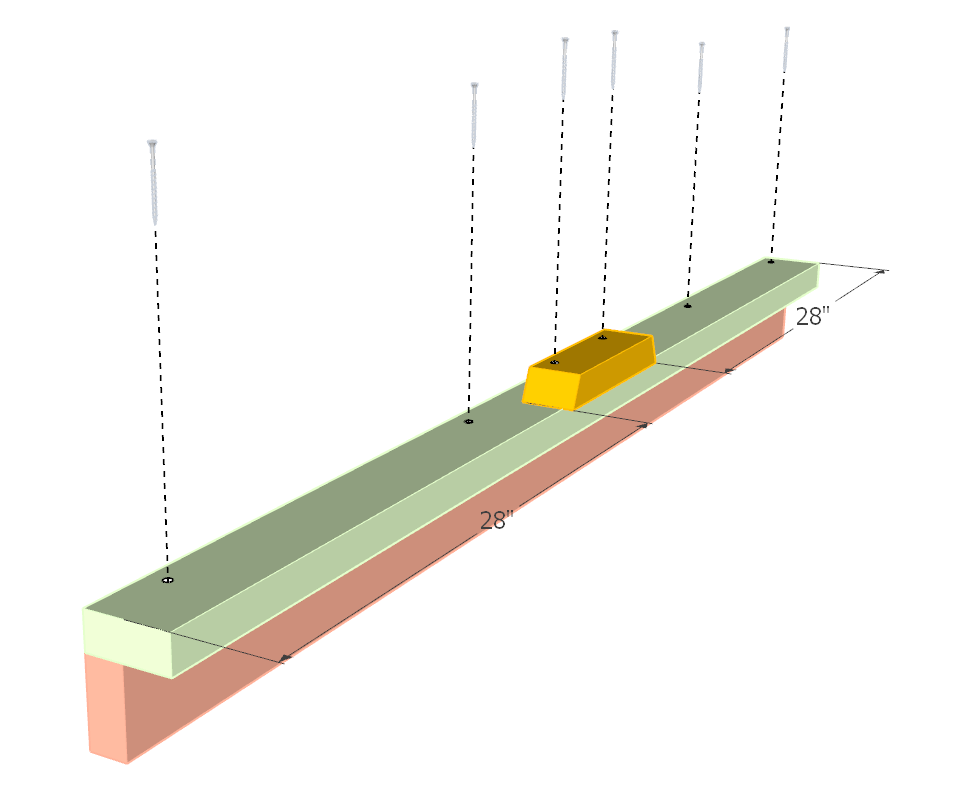
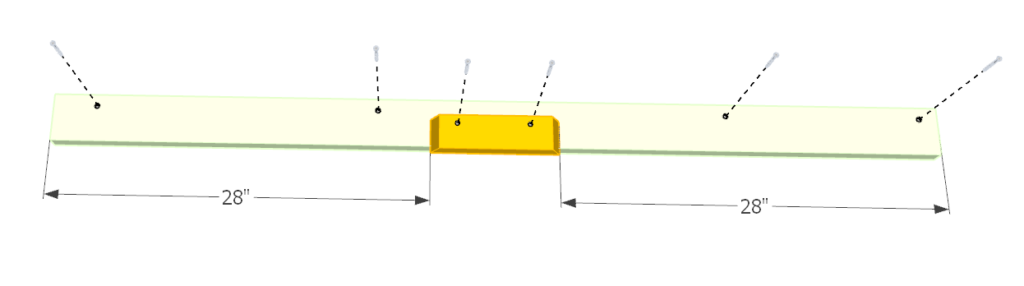
Next, cut two 65.5 inch pieces from 2×4 lumber and one 9.5 inch pieces with a width of 2.5 inches. I cut the 9.5 inch piece at 13 degrees on both end for aesthetic reasons.
Assemble the lumber pieces as shown in the diagram. Make sure the spacing on the 9.5 inch piece is as shown in the diagram to ensure the door closing properly.
Add glue, predrill, and add screws.
Lastly, add the door post to the shed as shown in the diagram. Add glue and screws.
Step 27
Next, cut a 65.5 inch piece from 1×6 lumber and attach it to the shed as shown below. Predrill, add glue, and add screws.

Step 28
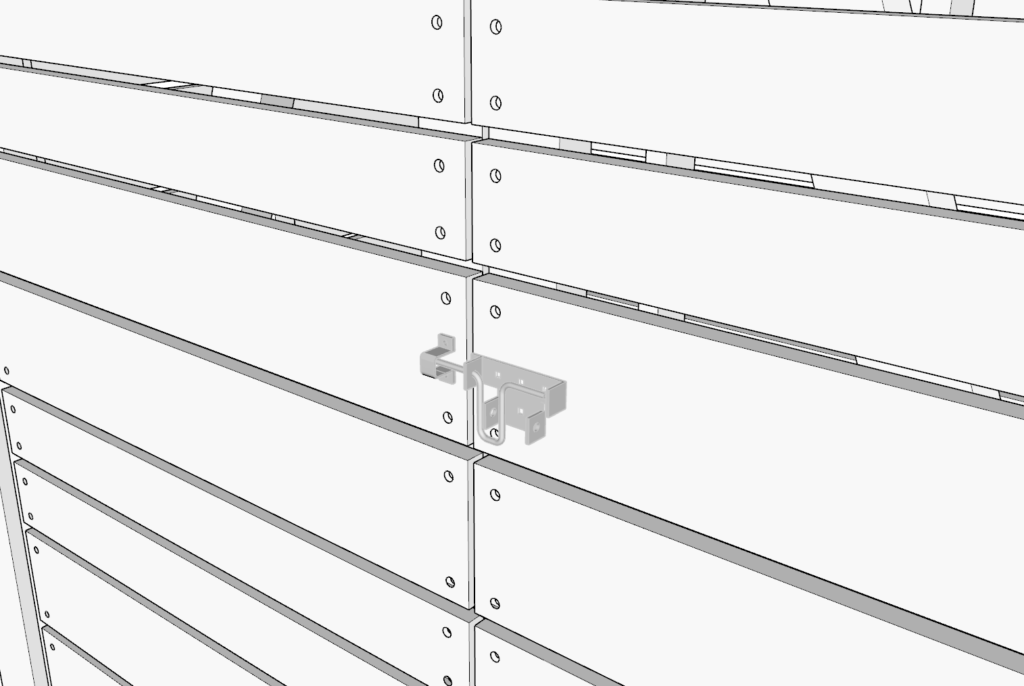
Lastly, attach the doors to the DIY tool shed and add a padlock latch. This can be a hasp and staple system or other system that allows you to hand a lock on the shed door to keep you shed secure.
Sand down the whole structure and add shingles to the roof. The process of adding shingles to the roof is not covered in these plans.
Lastly, seal the wood to protect it with either exterior paint a polyurethane coat.