The DIY queen bed frame
I have been working on an exciting DIY queen bed frame design that I’m thrilled to share with the world! The bed frame is easy to build, inexpensive, and looks like a high-end piece of furniture.
For those of us who are no longer in their 20s, sleeping on a mattress that’s lying on the floor with no box springs, and getting off the ground every morning can be a rough experience.
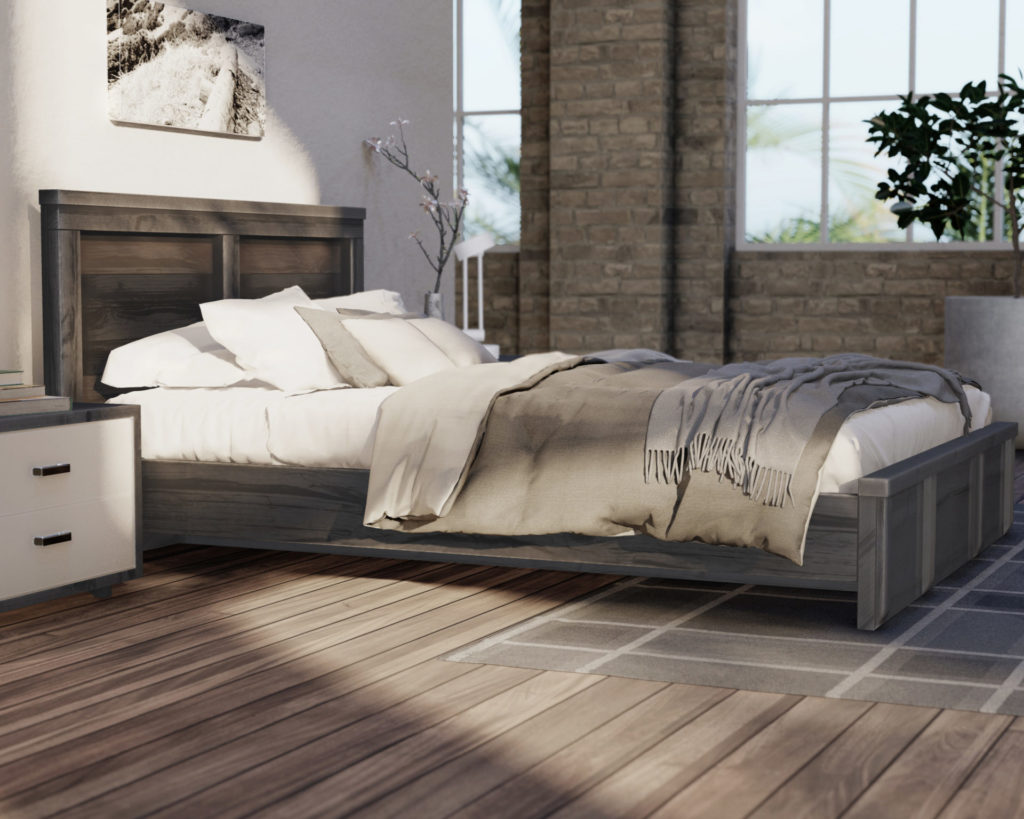
This gorgeous modern bed queen bed frame design is not only the star of the bedroom but can also provide a restful retreat. If you’re like me, the best part of the day is a good night sleep and waking up on a quality and comfortable bed is important to me.
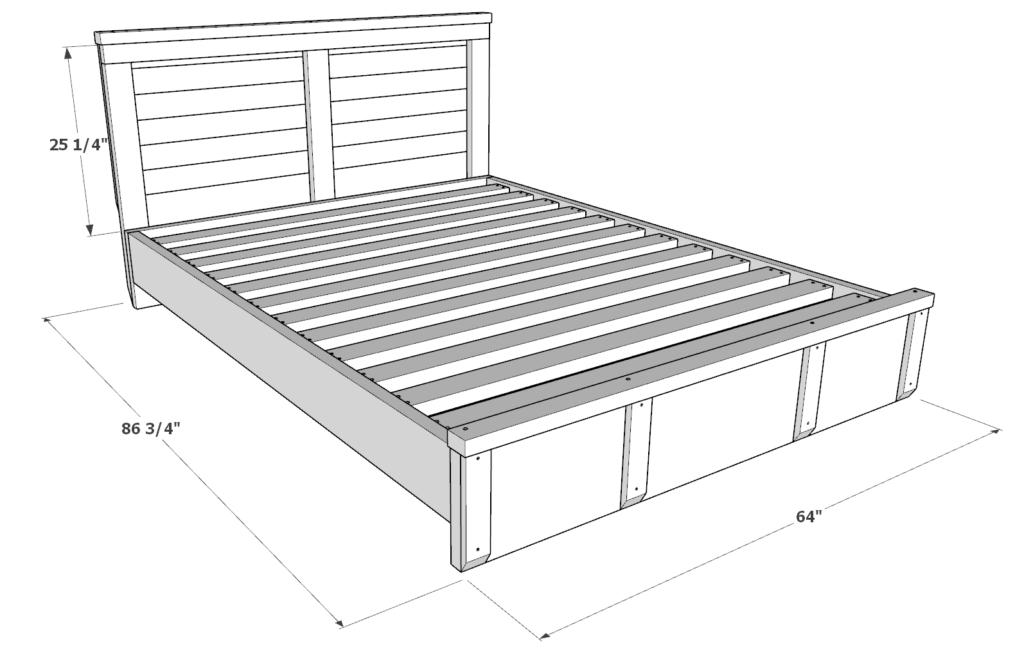
Specifications of the DIY queen bed frame
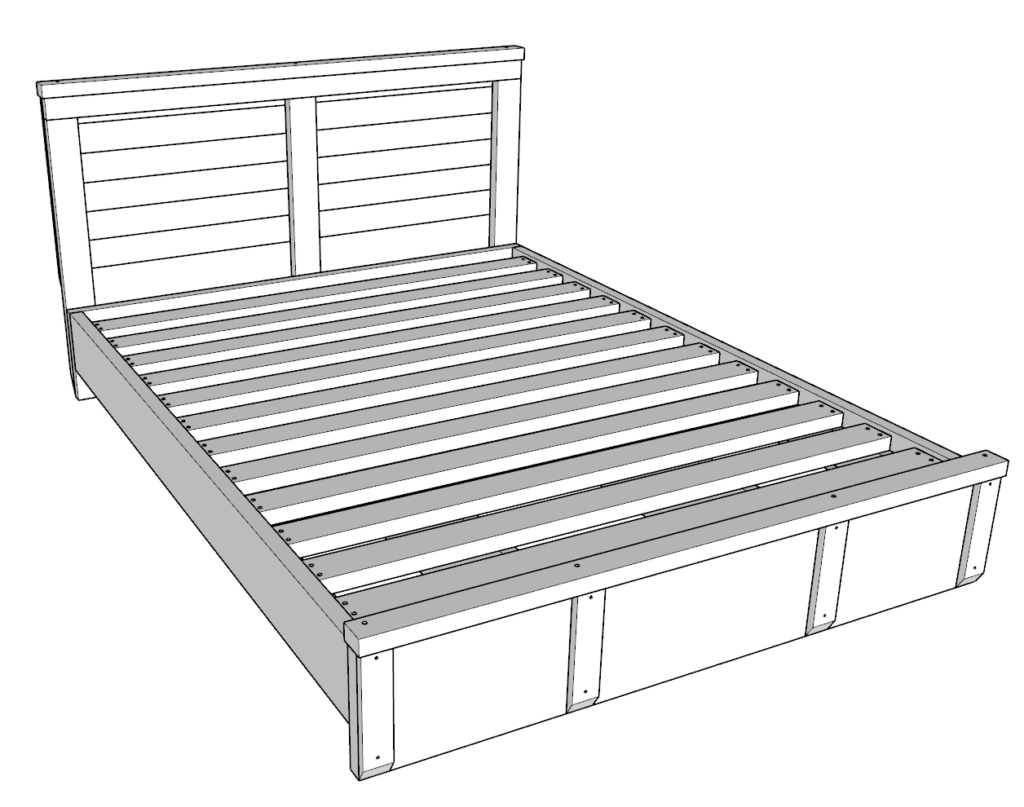
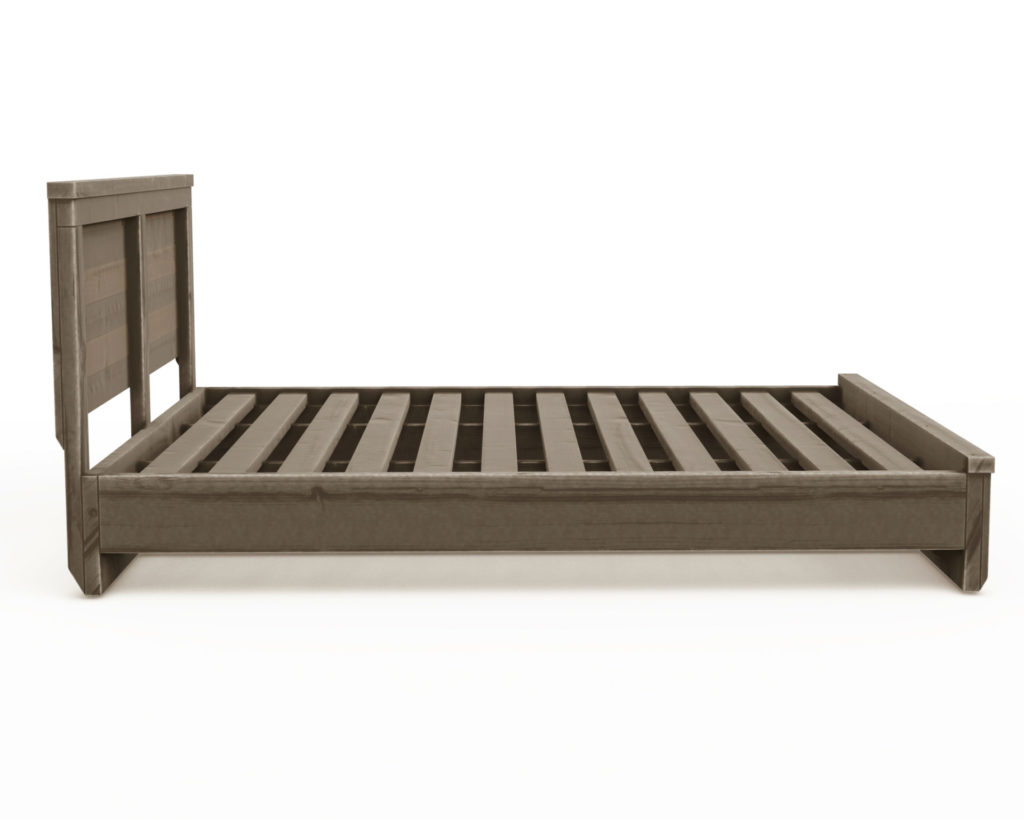
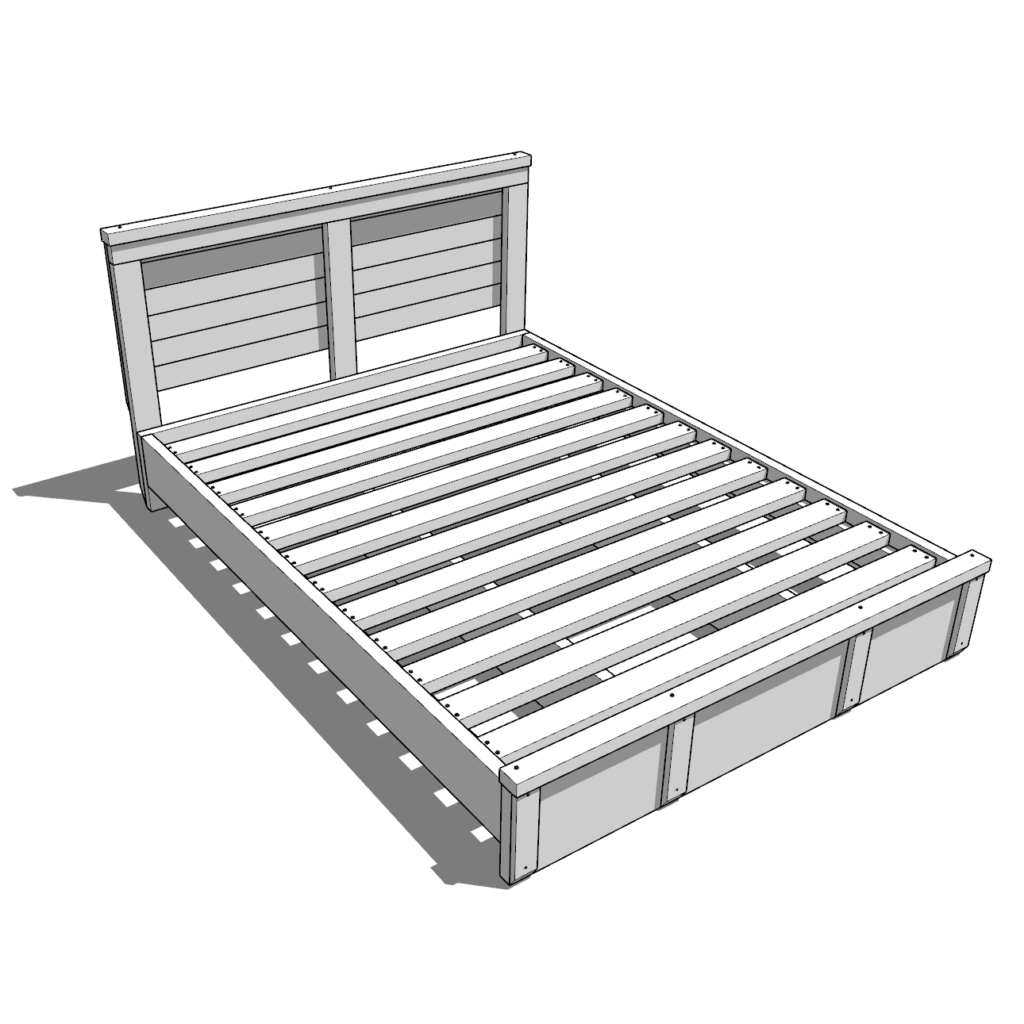
This bed frame can stand alone without the headboard. This means that those who choose to build this bed frame, they can swap out the headboard for any other design to best match the room and the feel of the space.
The platform of this bed I places on top of two 2×10’s and reinforced by parallel 2×4 beams. This makes the bed frame very sturdy and able to handle heavy weight. The weight is distributed along the entire bed instead of the just the legs.
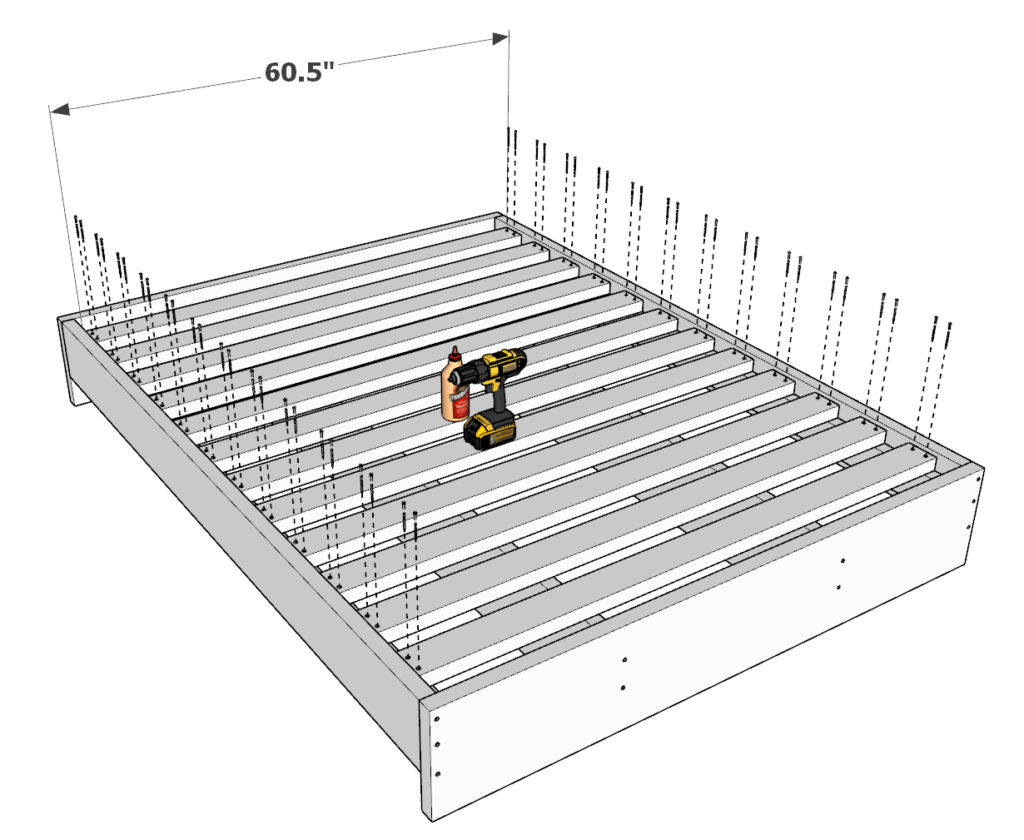
The internal dimensions are 80.5 inches x 60.5 inches. The extra ½ inches is to ensure the box springs fits inside the bed frame without any issues (as the usual box springs dimensions for a queen bed are 60 in x 80 in).
The bed sides allow for some bed storage. The storage gap is 4 inches high. This means that small boxes or items can slide underneath the bed for storage.
This frame can be built with common Douglas Fir lumber found in most hardware stores. This lumber can be rough and unfinished. After some sanding and staining the bed, you can transform it from a rough looking piece of furniture into a beautiful interior bed frame that can fit perfectly with the room and décor. The sturdy solid pine frame not only has beautiful grain, color, and texture, but it’s also easy to maintain and restain if needed! I love working with wood because it brings is the natural elements into the home that I don’t get with plastics.
Who can build the DIY queen bed frame?
I would recommend this project to anyone who is a beginner to woodworking as the build doesn’t require any complicated cuts and the joints as easy and basic. By following the easy-to-read step by step instructions, you don’t have to experiment with the design, have unnecessary waste, and can have an overall more pleasant building experience


Time to build
About 6-8 hours
Total cost of build
About $200
Skill level required
Beginner
Download the PDF plans
DIY queen size bed frame PDF plans
What is included in the PDF download?
- Easy to read step by step instructions
- Material list
- Cut list
- Tools needed
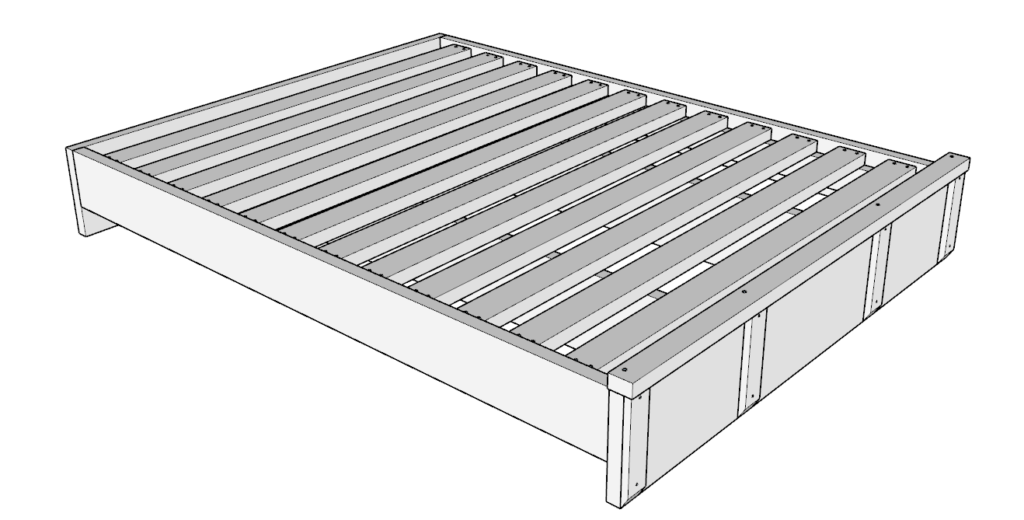
Step-by-step instruction on building the DIY queen size bed frame.
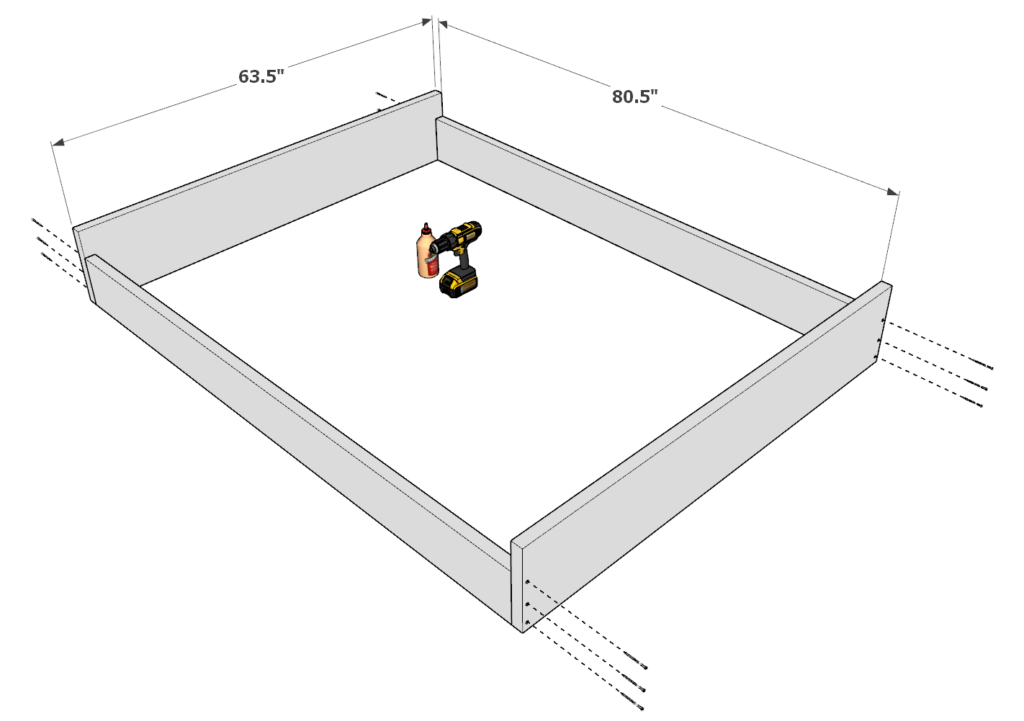
Step 1 (DIY queen bed frame)
Take two 63.5 inch 2×12 lumber pieces and two 80.5 inch 2×8 lumber pieces and arrange them as shown bellow.
Join the pieces by predrilling holes, add glue, and add 3.5 inch long screws.
It is recommended to predrill the wood prior to putting in a screw to prevent the wood from splitting. What works for me is to us a wood countersink drill bit.
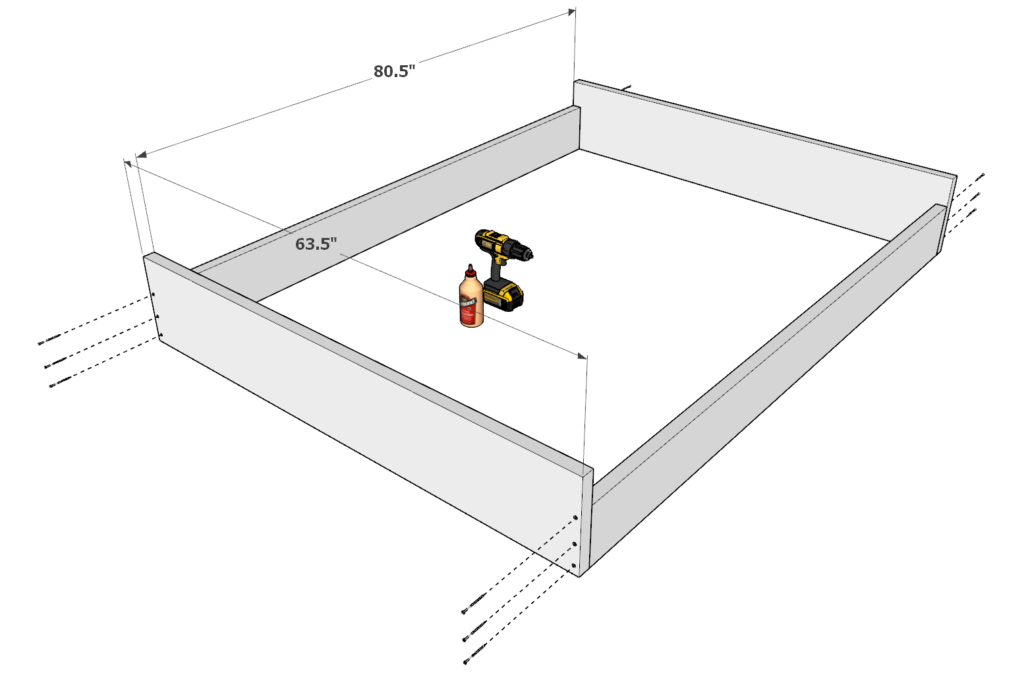
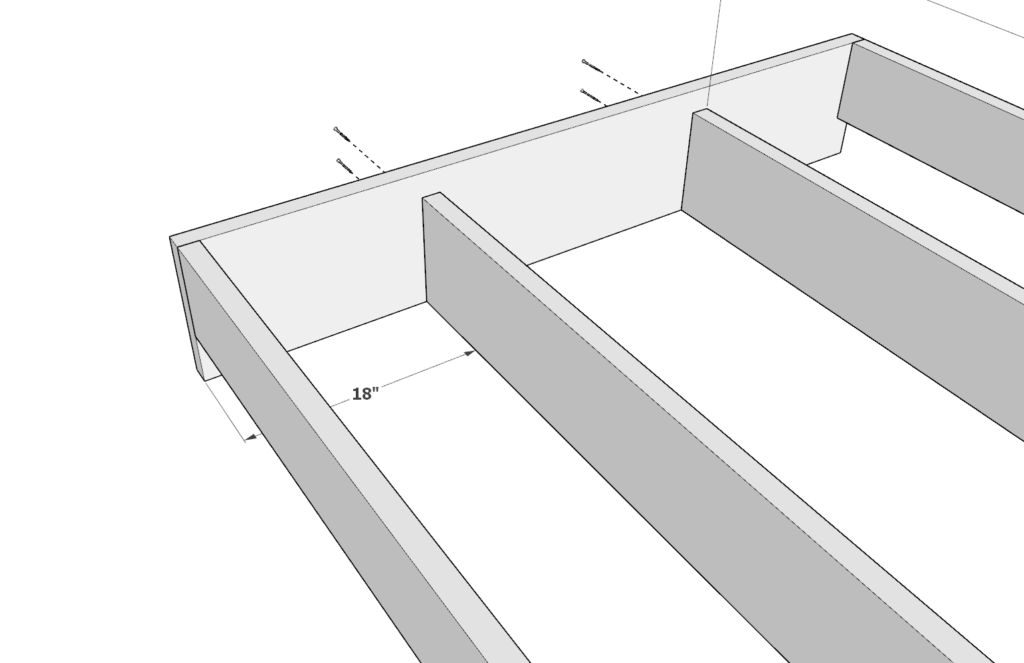
Step 2 (DIY queen bed frame)
Next, take two 80.5 inch 2×10 lumber pieces and arrange them as shown bellow.
Indent the 2x10s 18 inches away from the edge of the bed frame as shown below.
Join the pieces by predrilling holes, add glue, and add 3.5 inch long screws.

Step 3 (DIY queen bed frame)
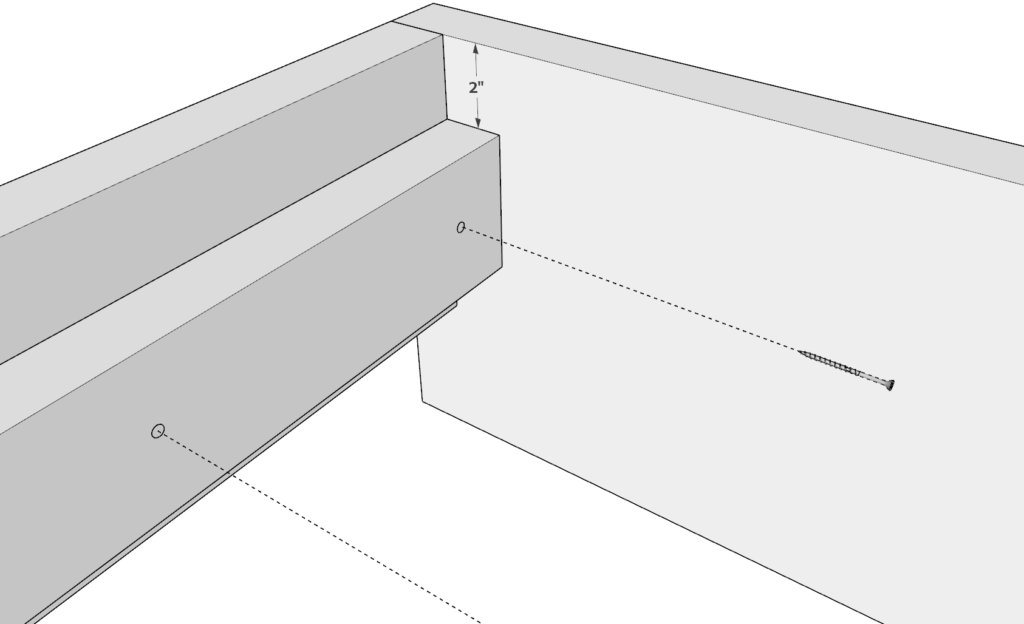
Next, take two 80.5 inch 2×4 lumber pieces and arrange them as shown in the diagram.
Space them 2 inches from the rim of the bed frame as shown below.
Add glue, predrill, and add 2.5 inch screws to join the pieces together.
Don’t use the 3.5 inch screws so that they don’t show through the side of the bed.
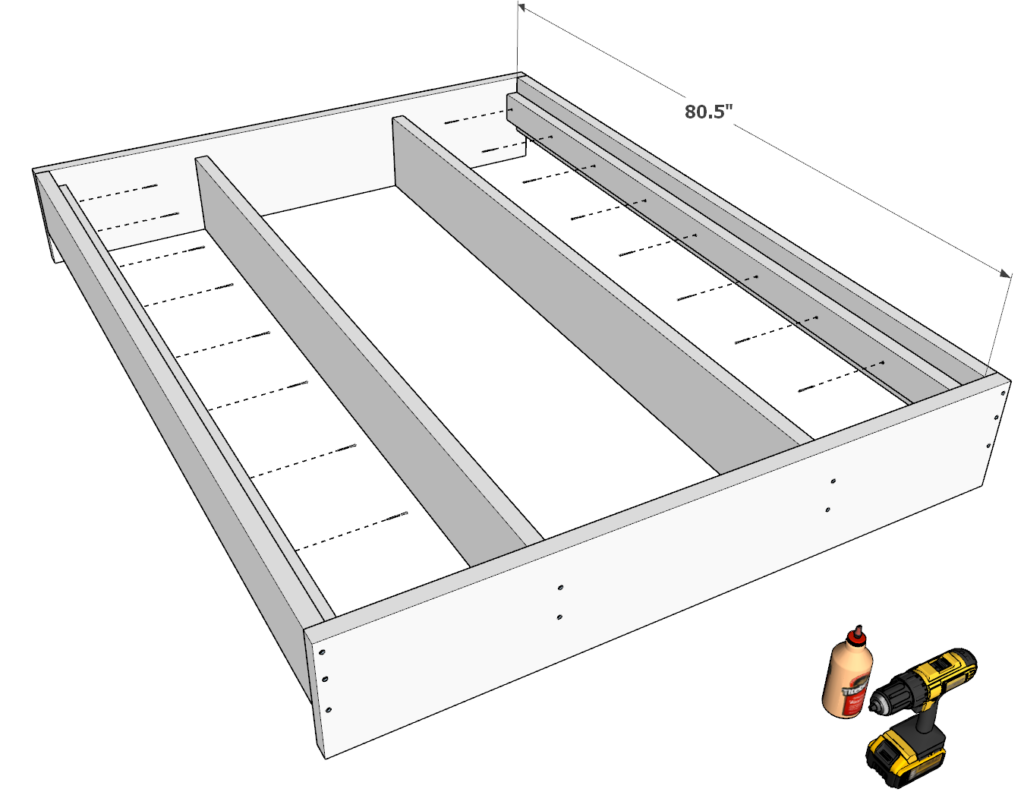
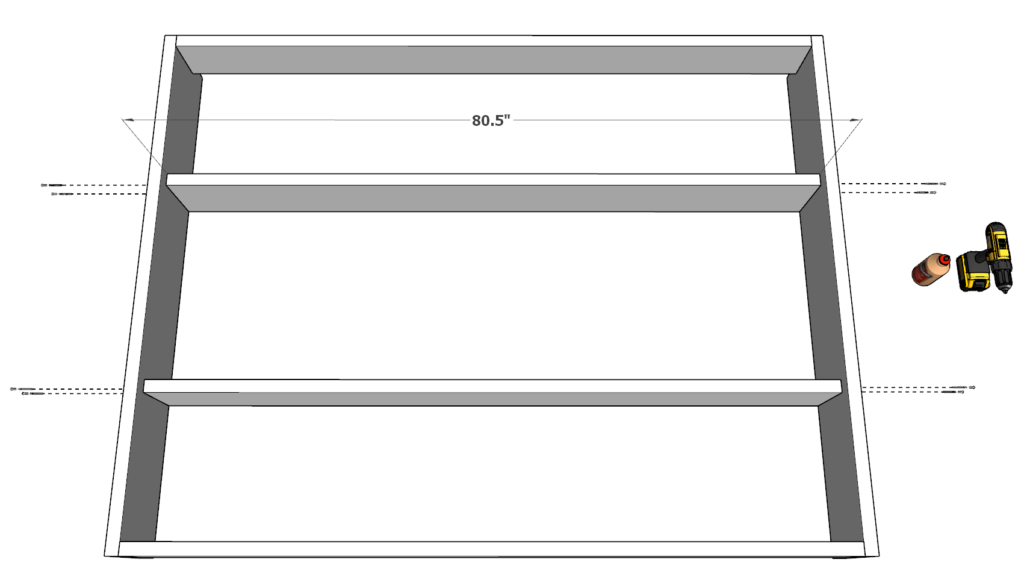
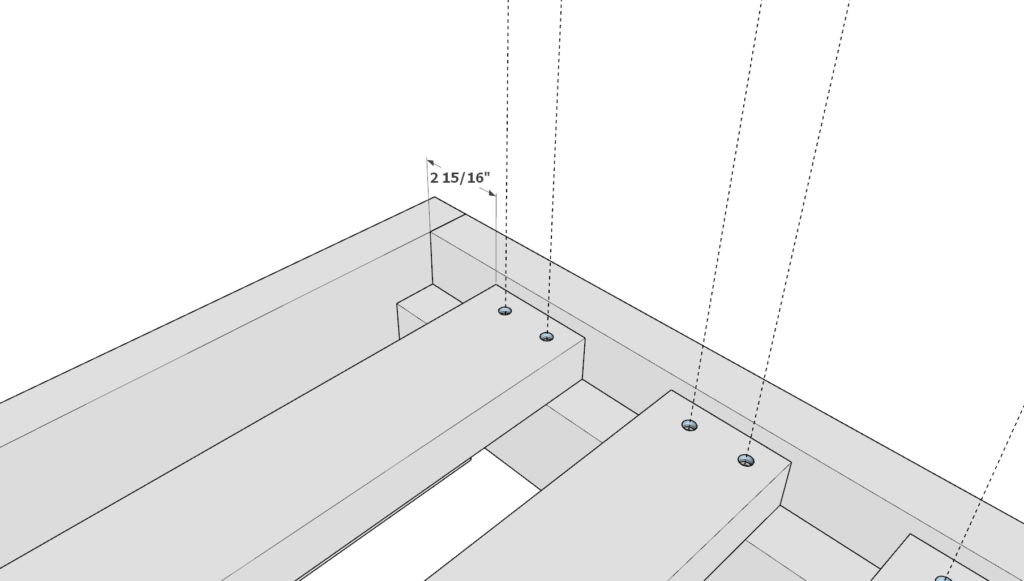
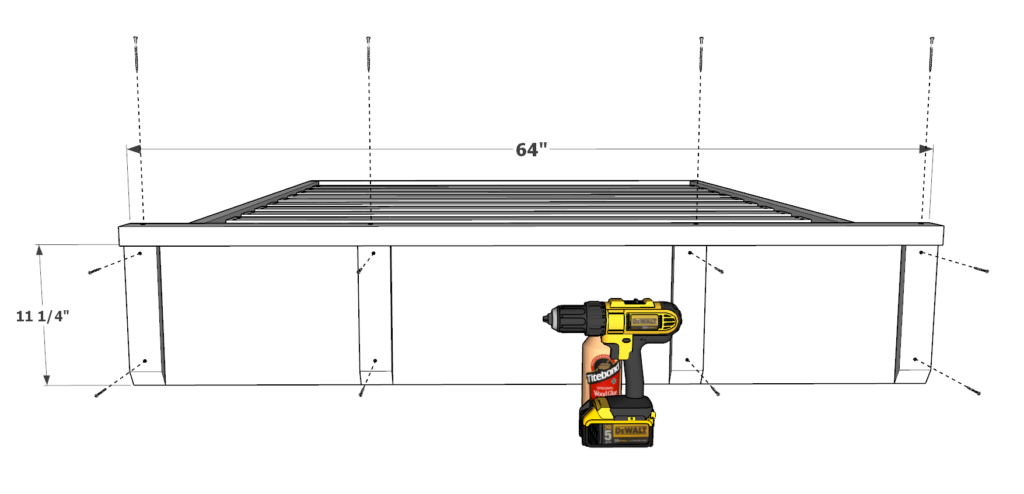
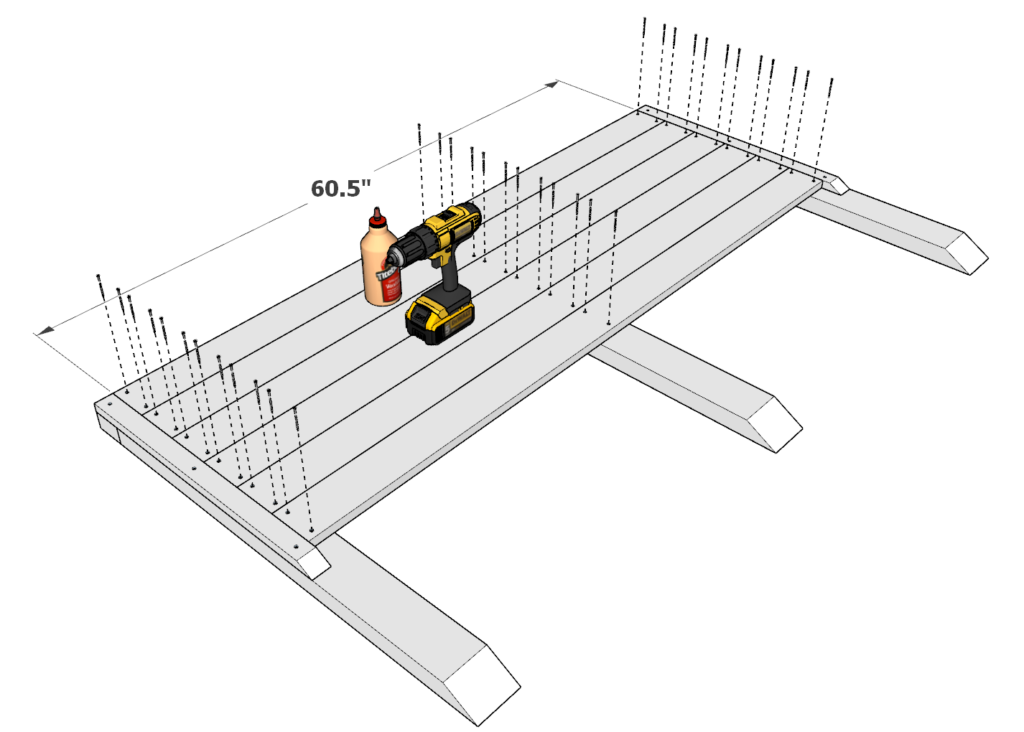
Step 4 (DIY queen bed frame)
Next, add twelve 60.5 inch 2×4 lumber platform pieces. They must be about 2-15/16 inches apart (you can make a spacer from scrap wood and just reuse it to space out the 2x4s).
As before, predrill, add glue, and add 3.5 screws.
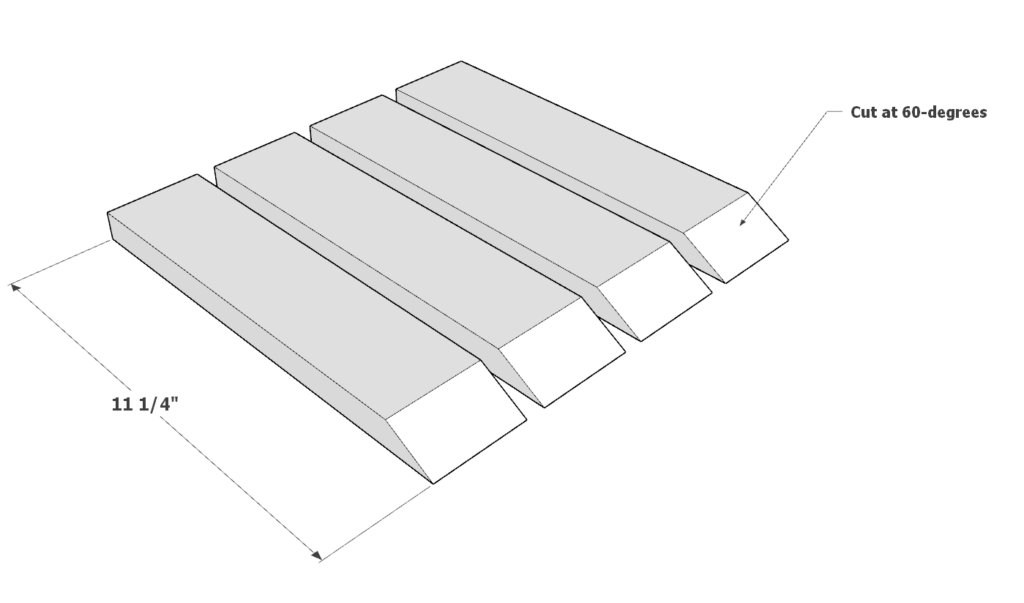
Step 5 (DIY queen bed frame)
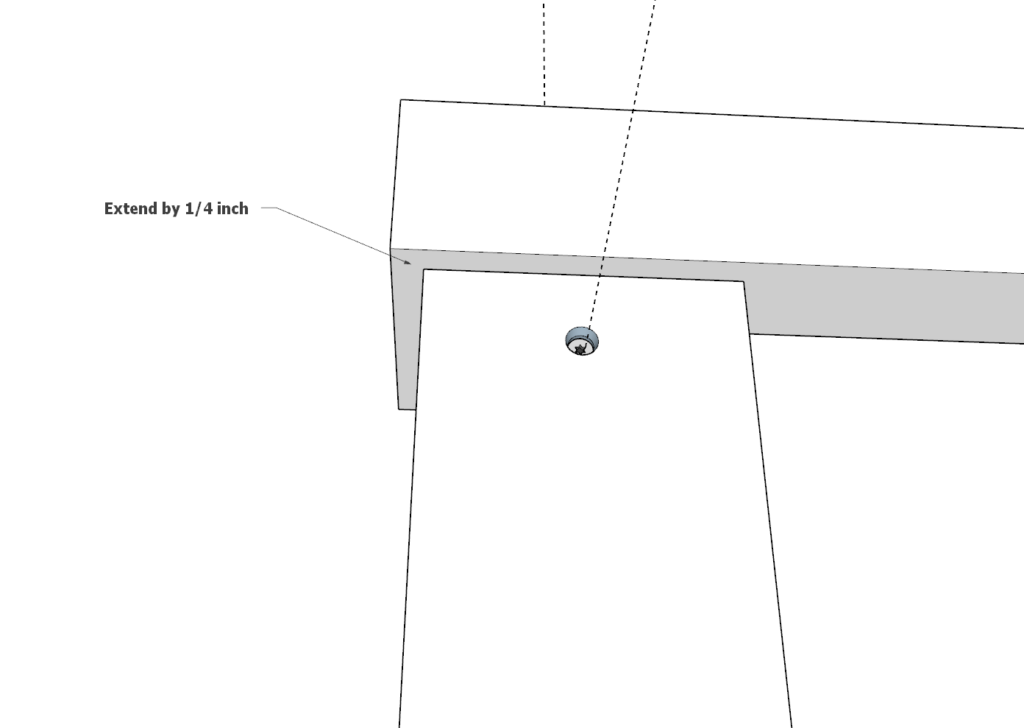
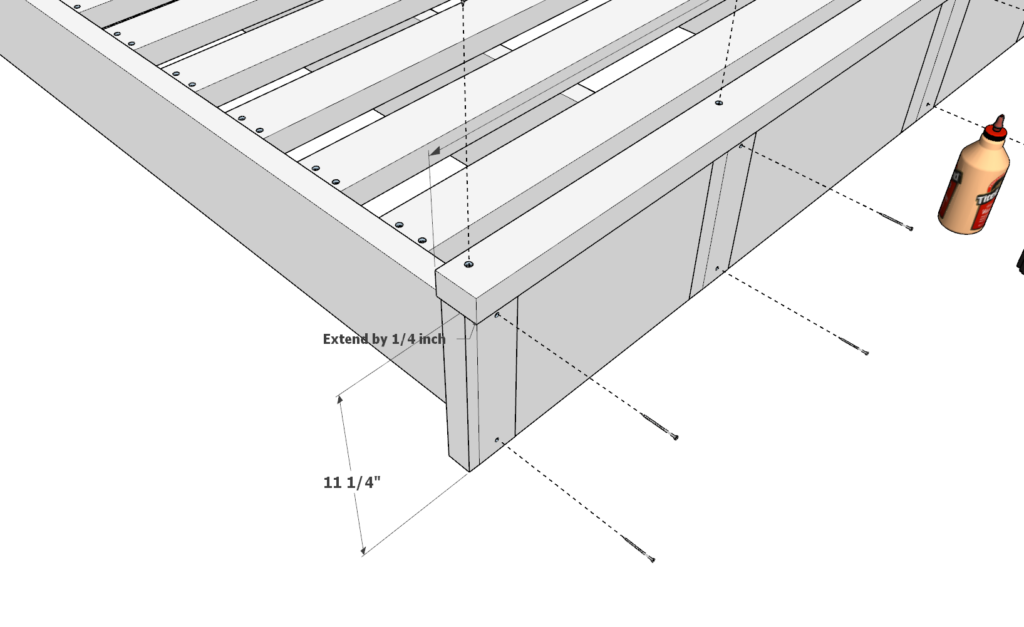
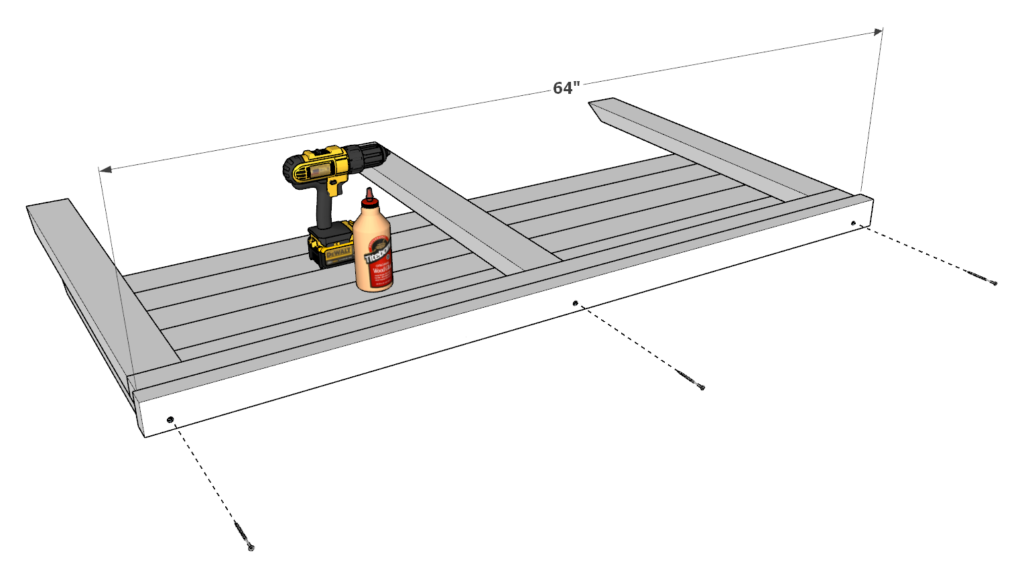
Next, take the four 11-1/4 inch 1×3 lumber pieces (cut at 60-degrees on one of the ends) , and one 64 inch 2×3 lumber piece and arrange them as shown below.
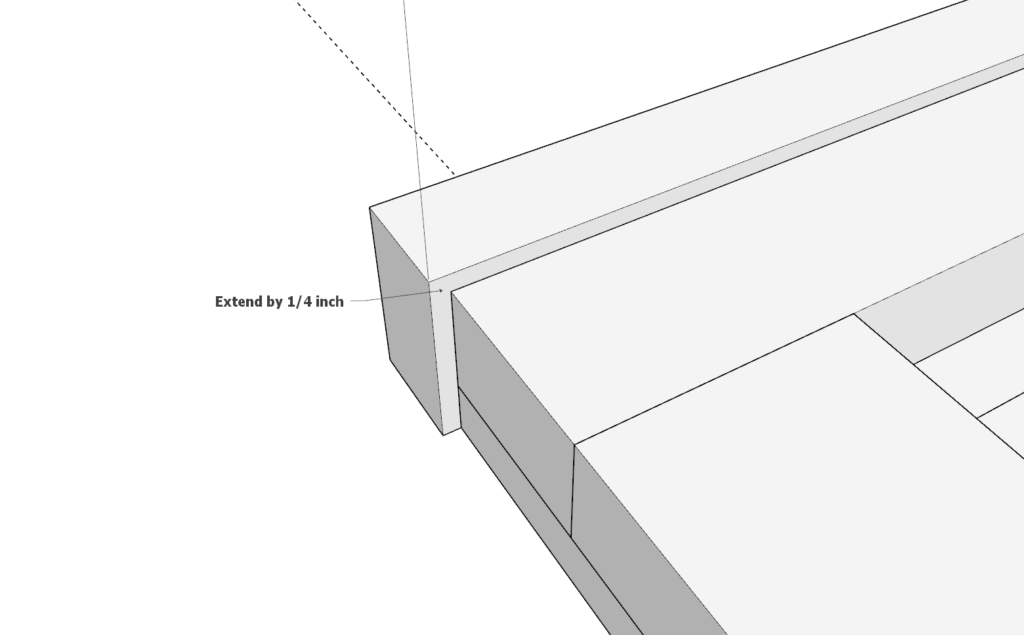
Make sure to place the 64 inch 2×3 lumber piece in the correct place. It needs to be extended 1/4 inches on both ends.
As before, predrill, add glue, and add screws (3.5 inch screws for the 2×3 piece and 2.5 inch screws for the 1×3 pieces.

Step 6 (DIY queen bed frame)
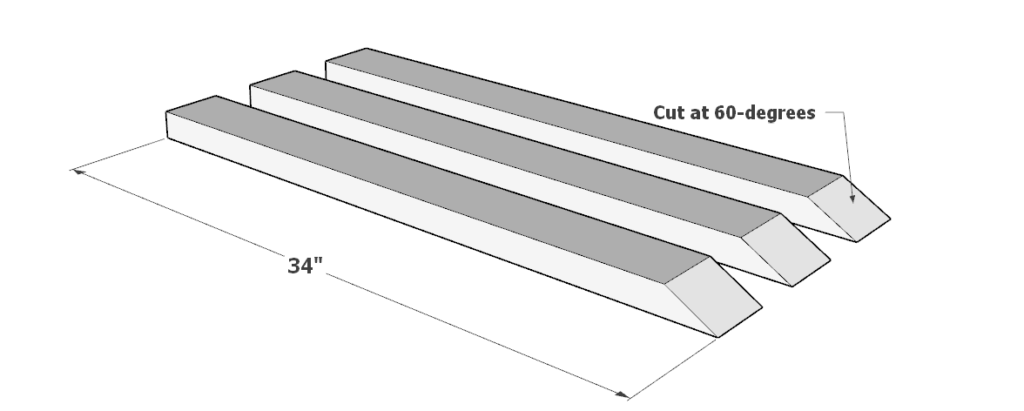
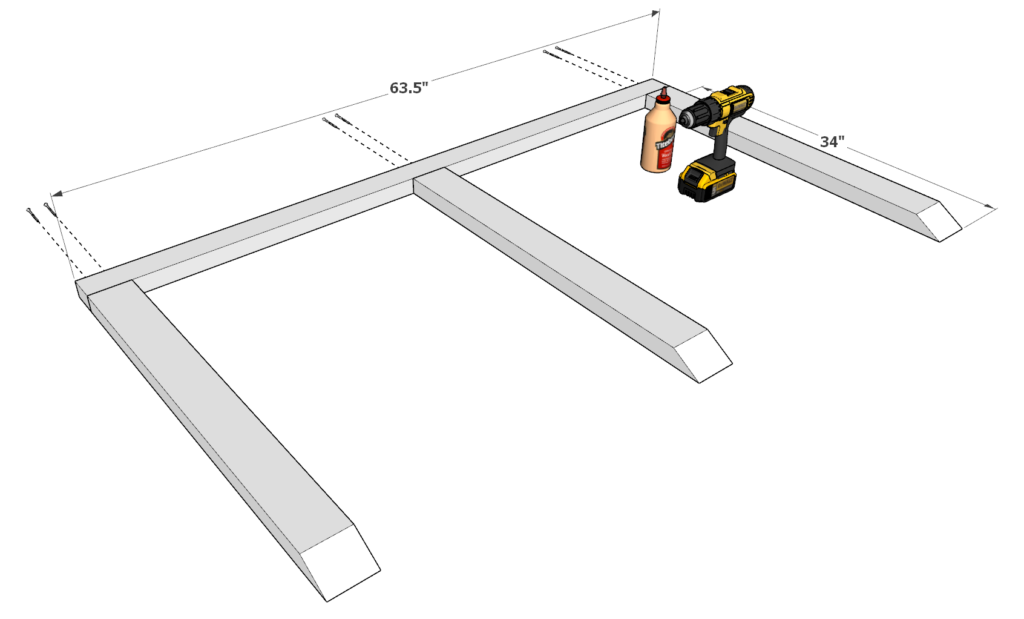
Next, take three 34-inch 2×4 lumber pieces (cut at 60-degrees the end) and one 63.5 inch 2×3 lumber pieces and arrange them as shown below.
Add glue, predrill, and add 3.5 inch screws as shown below. Use 3.5 inch screws and place them deep into the 63.5 inch 2×3 lumber piece to ensure a safe joint.
Next, add tow 23 inch 1×2 lumber pieces (with one end cut at 60-degrees) and join them to the headboard frame using 1.5 inch screws.
Next, add six 60.5 inch 1×4 lumber pieces. Pack them tightly together, add glue, add 1.5 inch screws.
Lastly add a 64 inch 2×3 lumber pieces as the “cap” of the headboard. Make sure to mimic the indentation of 1/4 inches you did for the baseboard. Add glue, predrill, and add 3.5 inch screws.

Step 7 (DIY queen bed frame)
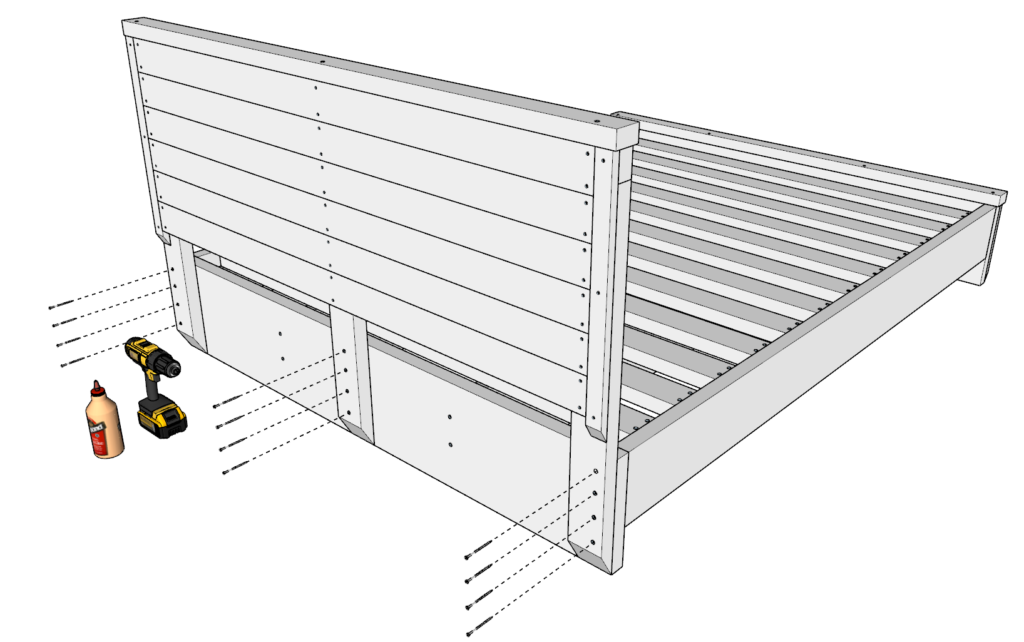
Lastly, add the headboard to the queen size bed frame.
Align the headboard as shown below, add glue, and add screws. Use 3.5 inch screws on the ends of the headboard and 2.5 inch screws in the middle.
Step 8 (DIY queen bed frame)
Next, sand down the whole bed frame. This can be time consuming. I use an orbital sander to speed up the process
I use a rough 80 grit paper first and then finish it with a 220 grit paper.
Filling in the holes is optional.
At this point it is ready to be stained or painted!