Pros of building a homemade DIY power rack
Working out can be super satisfying and beneficial to your health but going to the gym on a regular basics can be time consuming and costly. If you have ever thought about building a home gym in your garage or spare room, then you may have realized that the squat and power rack is the centerpiece around which a gym is typically built.
Purchasing a steel power rack can cost hundreds, if not thousands of dollars. Building the weightlifting rack yourself can be a great way to save money. In this post you will find step by step instructions on how to build your own fitness power zone that not only looks like a beast but is designed to continue performing like a beast for years to come.
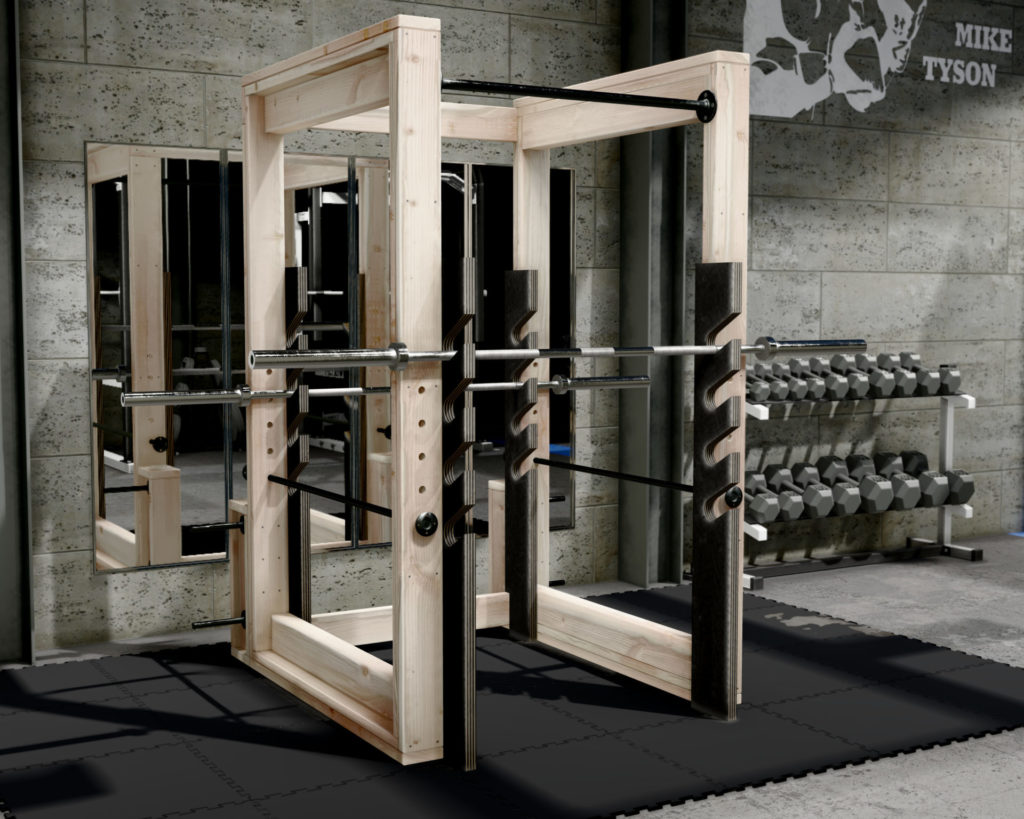
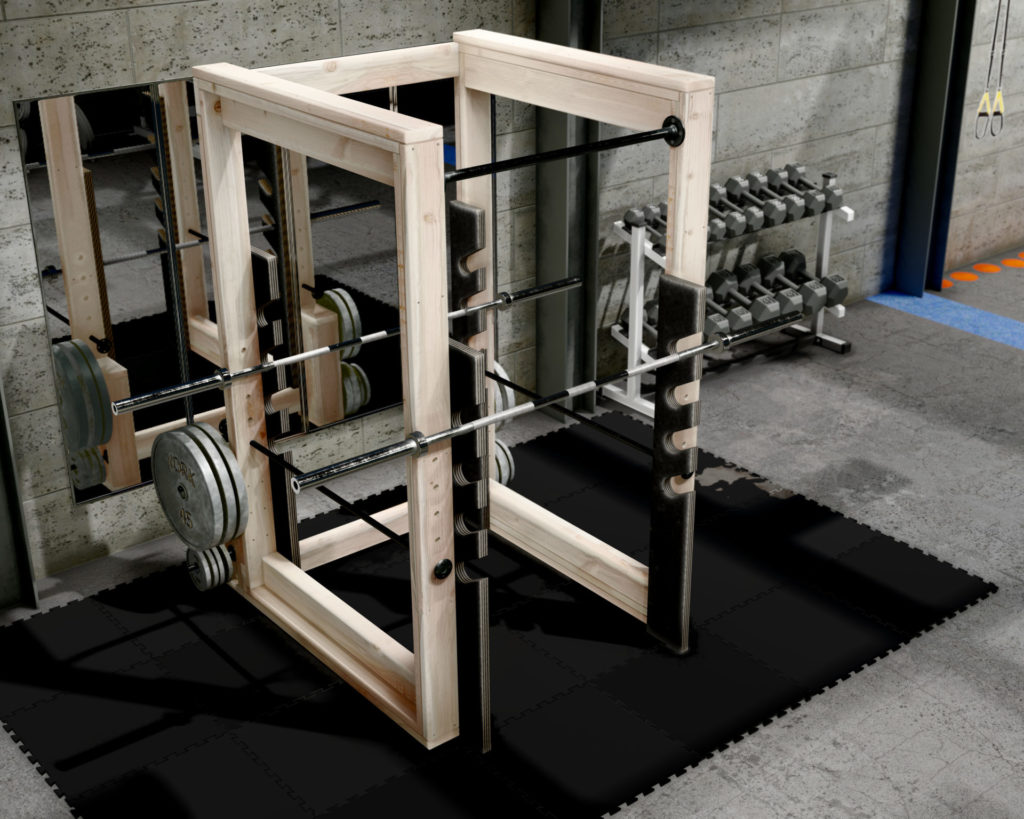
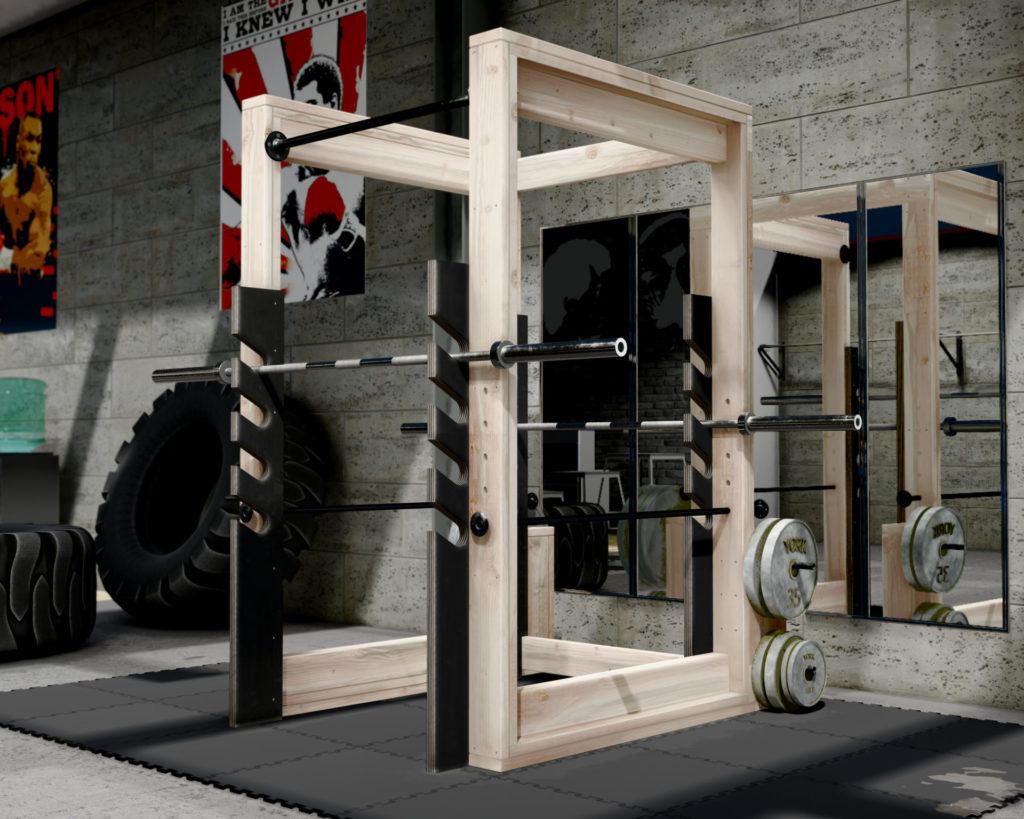
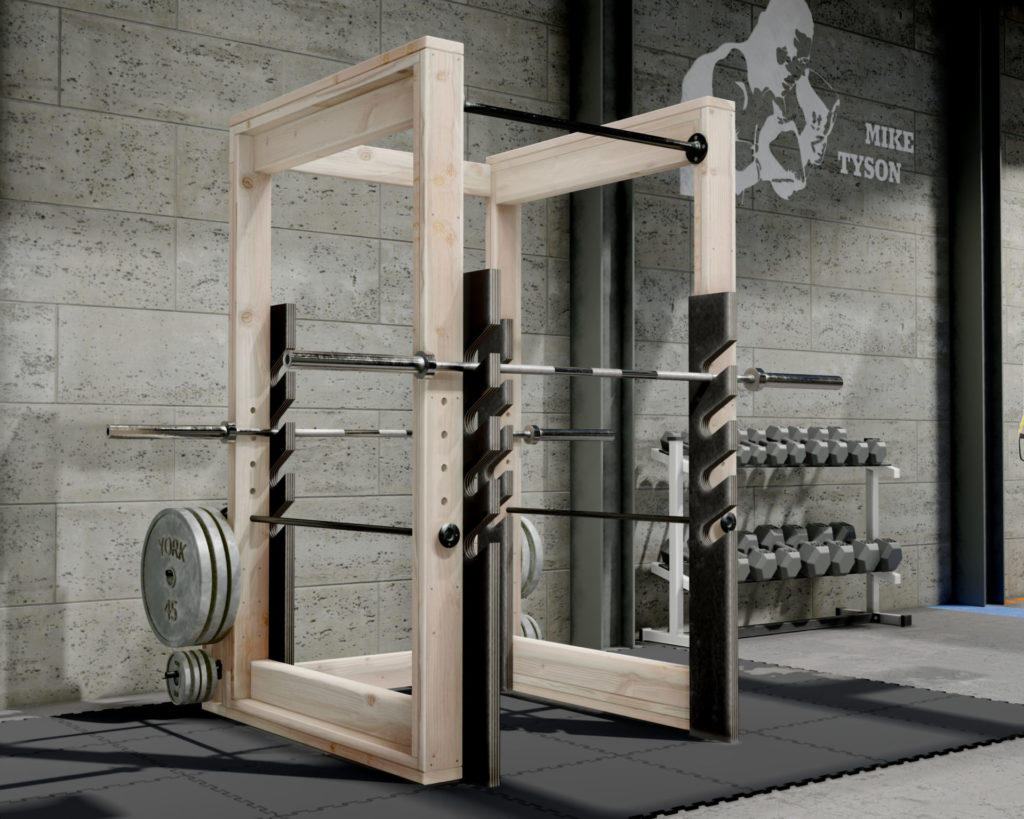
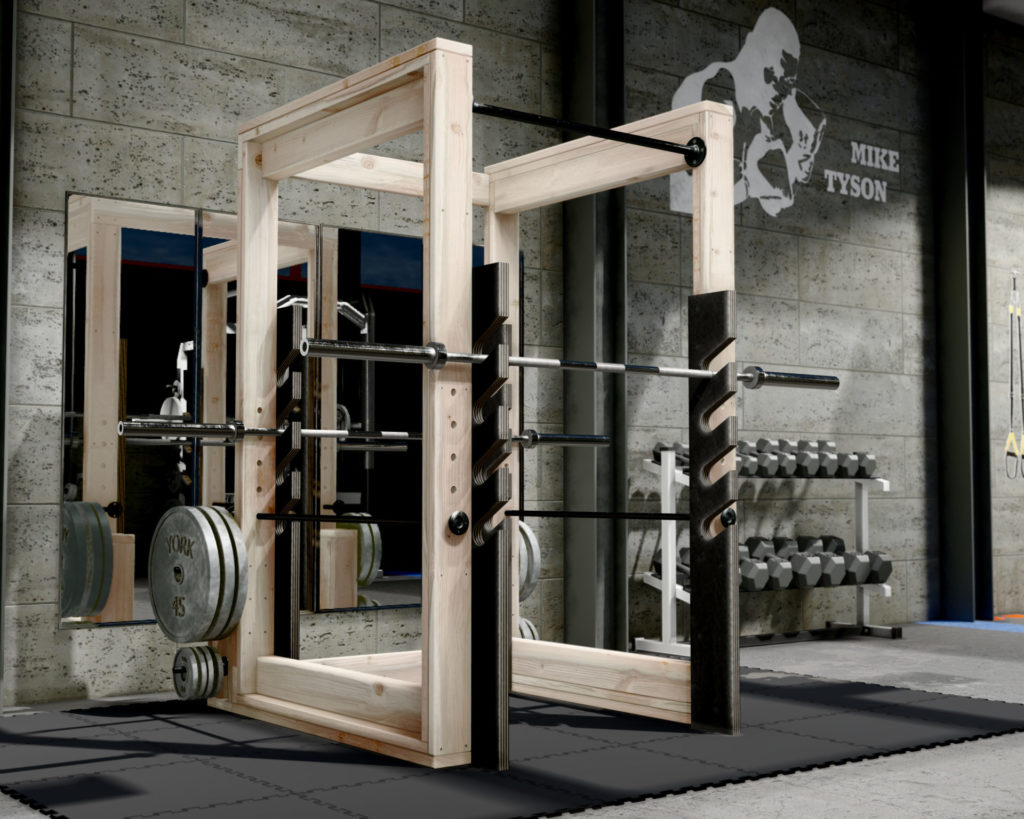
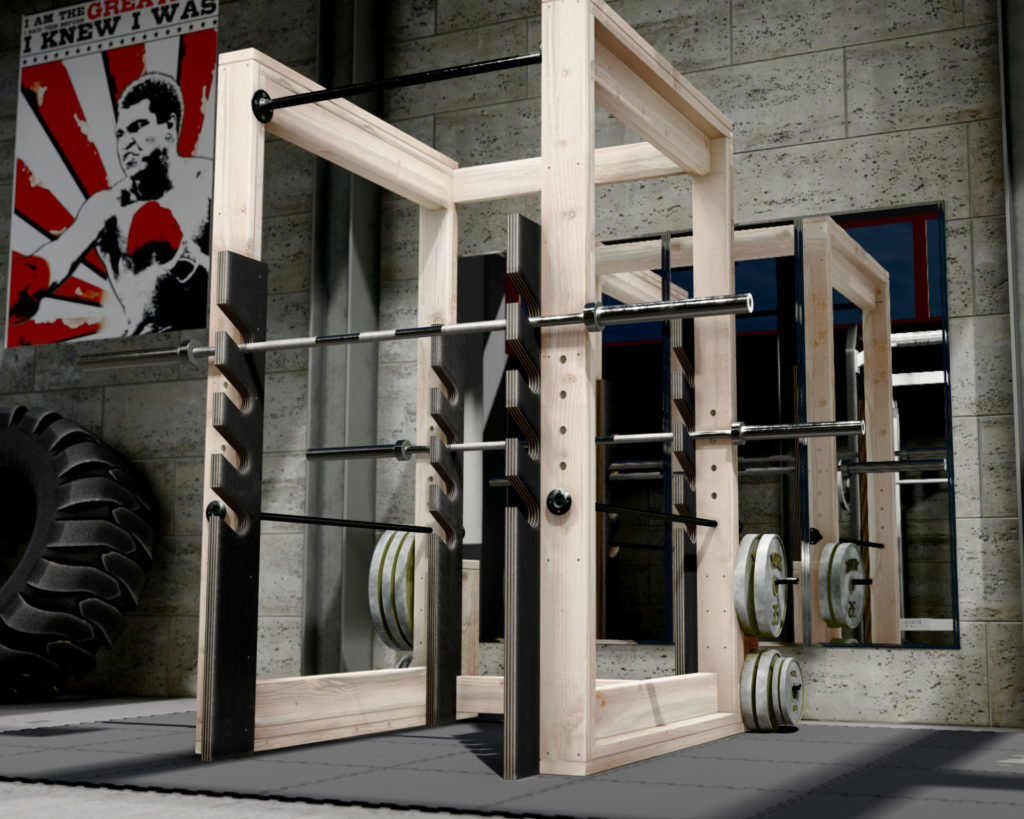
This rack has a minimalistic and professional look that take a homemade DIY power rack to a new level. You can use inexpensive common construction material without compromising on the style.
This robust wooden construction design is perfect for an 8ft or taller garage or any room in the house. You can now have a professional piece of equipment for training, lifting, and body building without the need to spend huge amounts of money.
Specs of the DIY power rack
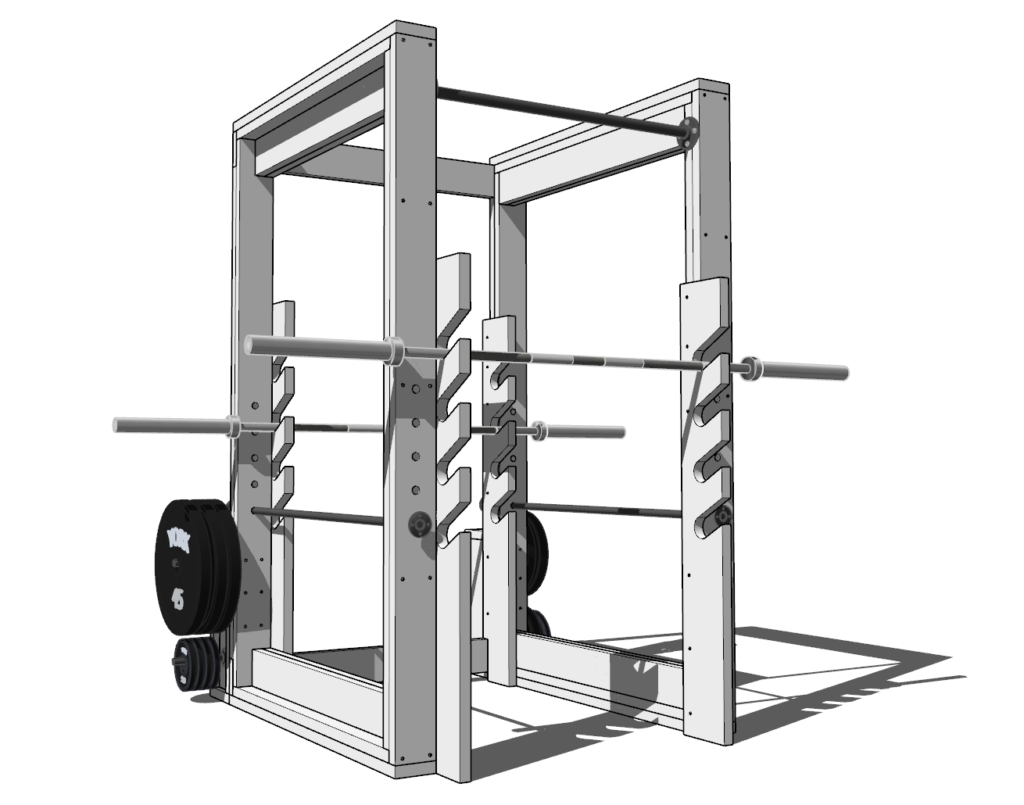
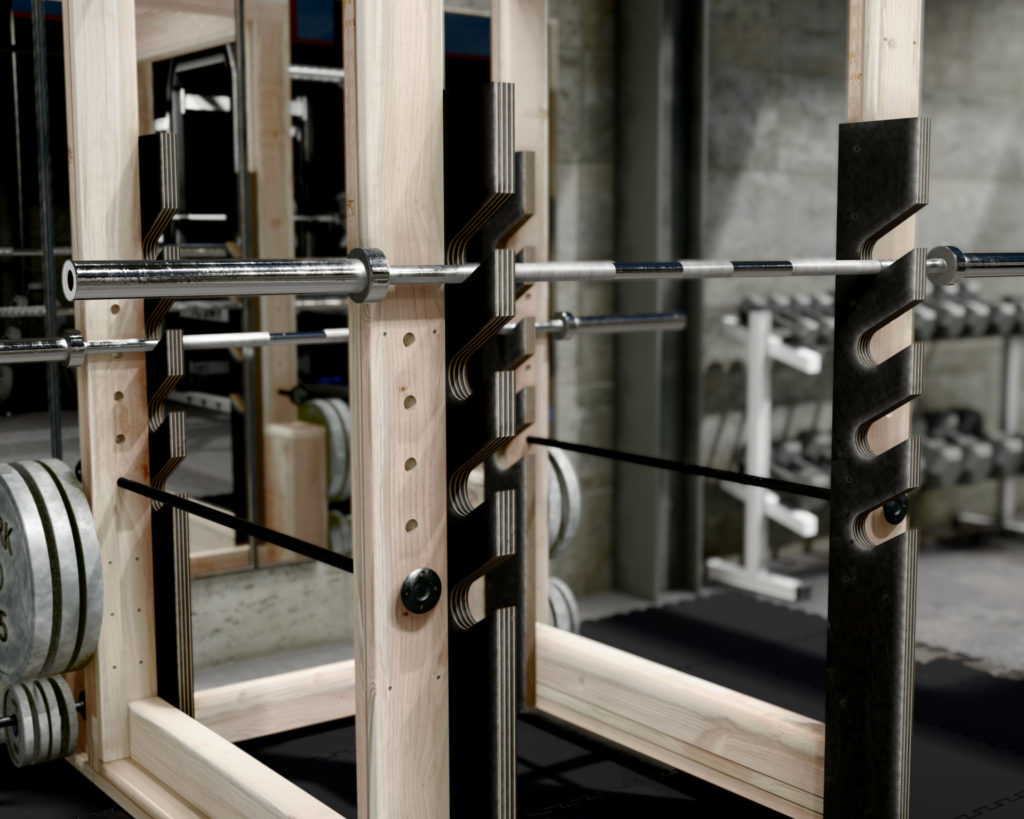
This power cage has a heavy-duty 2×6 Douglas Fir lumber frame and uses plywood for the black spotter arms. Douglas Fir can hold huge amounts of weight and is very durable when properly joined and glued. 2x6s were used instead of 4x4s or 2x4s because the extra width enables this rack to hold massive amounts of weight and still be safe. The 2x6s provide extra stability and safety needed for heavy lifting.
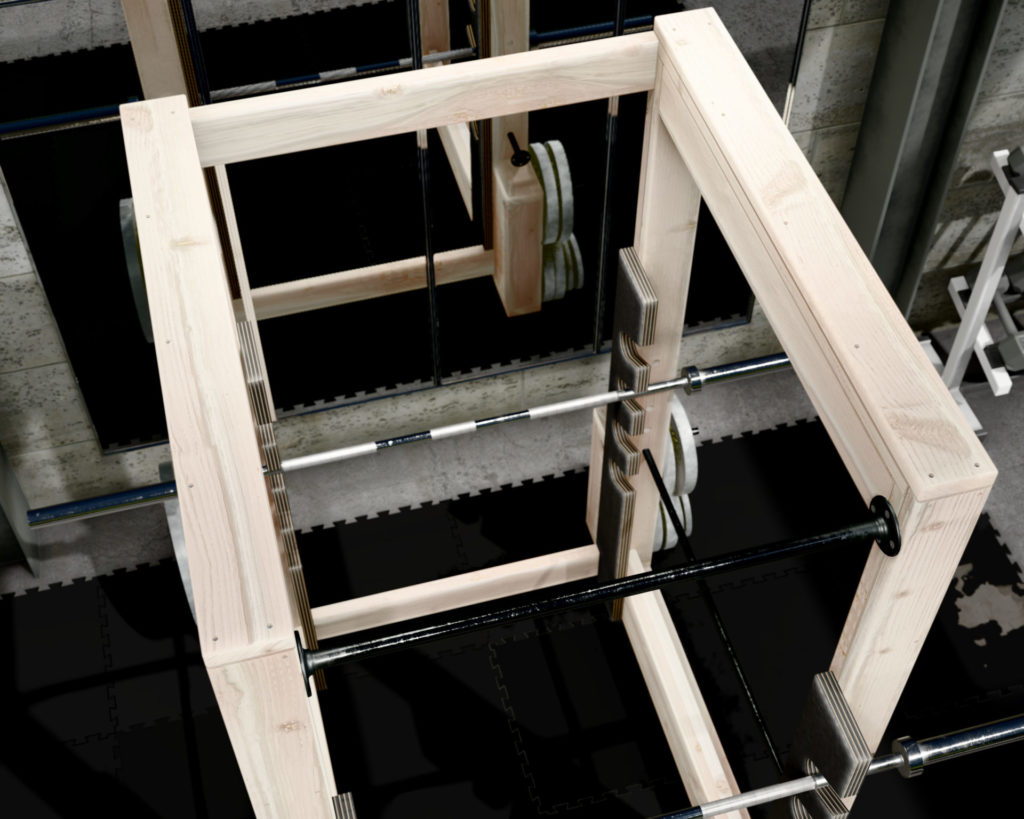
The Olympic plate storage system and the weight horns not only allow for additional storage of weight plates, but also serve as additional stabilization for the power rack, enabling you to lift heavy while being safe.
At the front of the power rack, this design features a pull up bar made from a iron pluming pipe attached to the wood with an iron plumbing flange. When the weight horns are fully loaded, you can use the pull up bar with full confidence. The weight stabilizes the whole structure and prevents it from tipping over. It is however HIGHLY recommended that you bolt down the power rack to the ground.
The adjustable safety spotter bars are also made from common iron plumbing pipes with a flange on both ends to ensure the pipe stays in place. The spotter pipes can be moved to accommodate taller or shorter users by moving them up and down the rack holes.
Dimensions of the DIY power rack
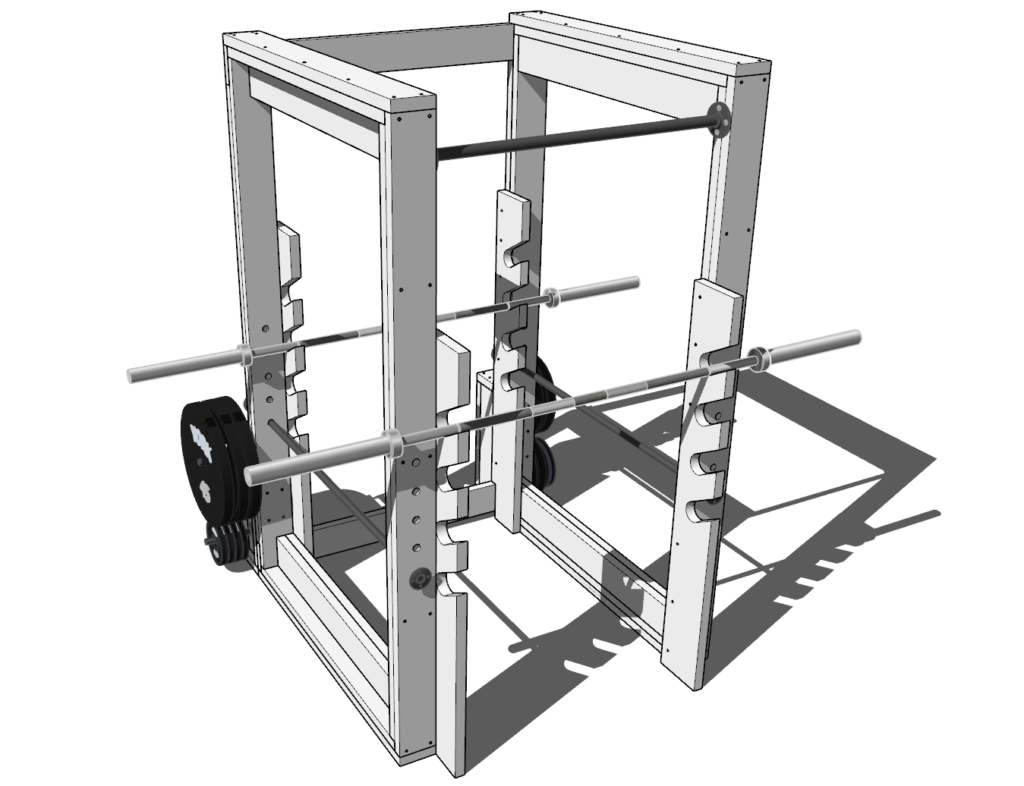
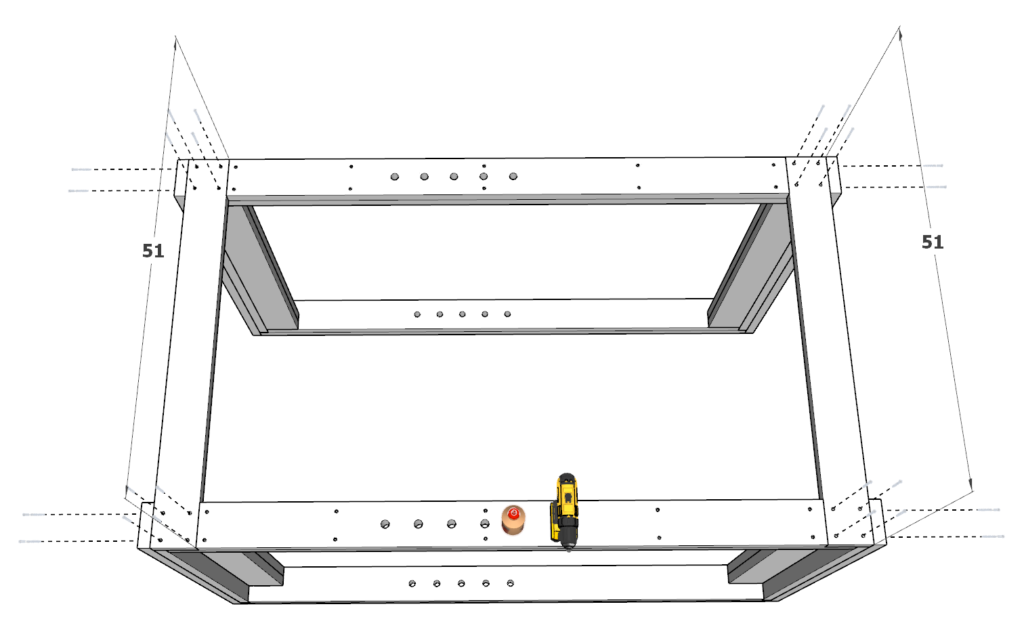
This power rack is 51 inches wide, 64 inches deep, and 89.5 inches tall.
The inside “lifting space” is 50 inches x 37 inches.
The spotter arms are 40 inches apart and can fit and hold an Olympic sized bar.
Time to build
6 hours
Total cost of build
About $450
Skill level required
Beginner – intermediate
Download the PDF plans
Plans for how to build the DIY power rack.
What is included in the PDF download?
- Easy to read step by step instructions
- Material list
- Cut list
- Tools needed
- 3D illustrations
- Helpful links to tools and materials needed for the project
Recommend tools for this project
- Saw (miter saw recommended for precision cuts)
- Drill
- Impact driver with bit for screws
- Sander
- Jigsaw
- wood countersink drill bit
- Wood clamps (at least 6)
- 1-1/2 in. High-Speed Steel Forstner Bit
Discloser: Some links are affiliate links
Cut list and material list
Available with purchase of PDF plans.

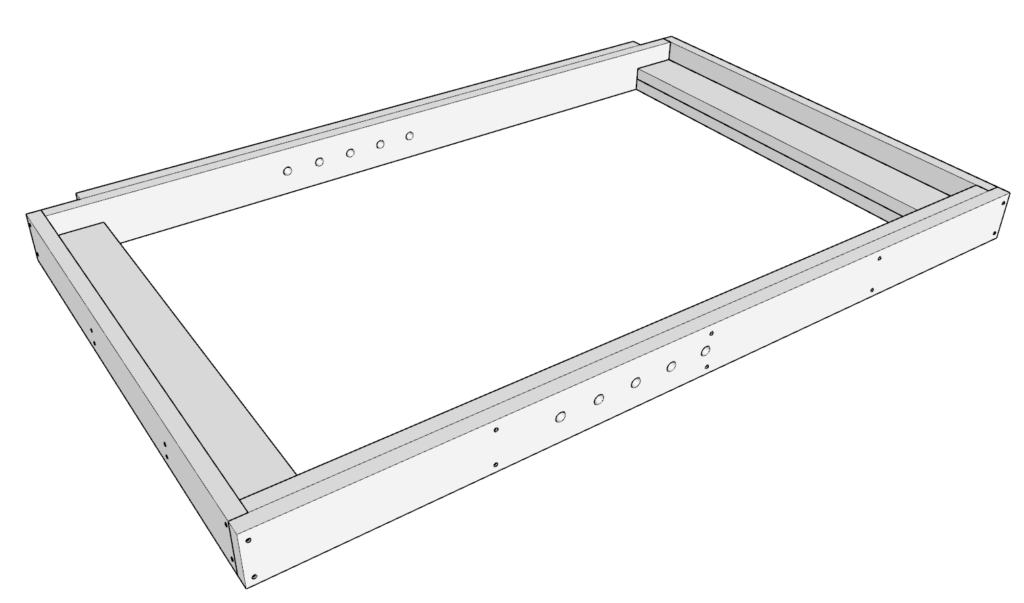
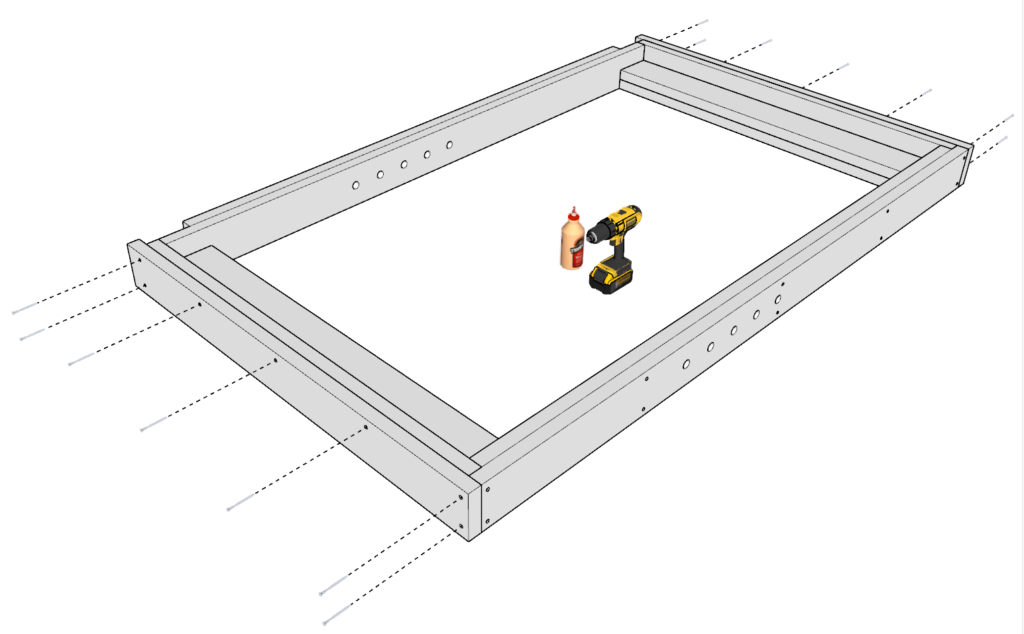
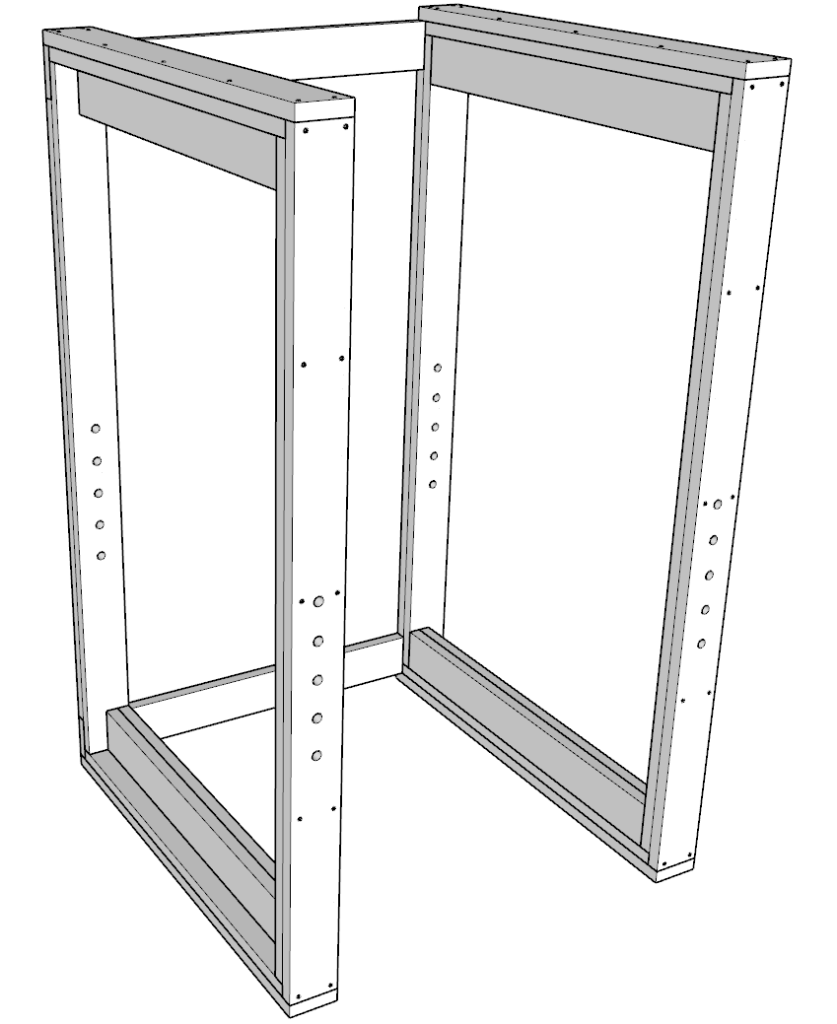
Step 1 (DIY power rack frame assembly)
In this step you will be making two frame pieces that will make up the sides of the power rack.
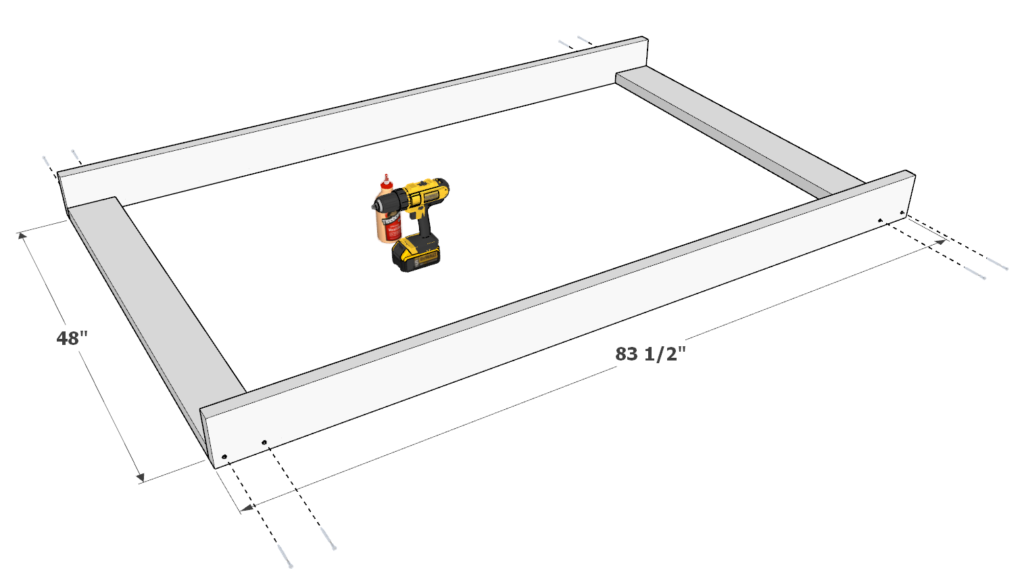
First, take two 83.5 inch 2×6 pieces and two 48 inch 2×6 pieces and arrange them as shown above. Add glue to all the areas that will be joined together, predrill holes to prevent wood from splitting, and add 3.5 inch screws to secure the pieces together.
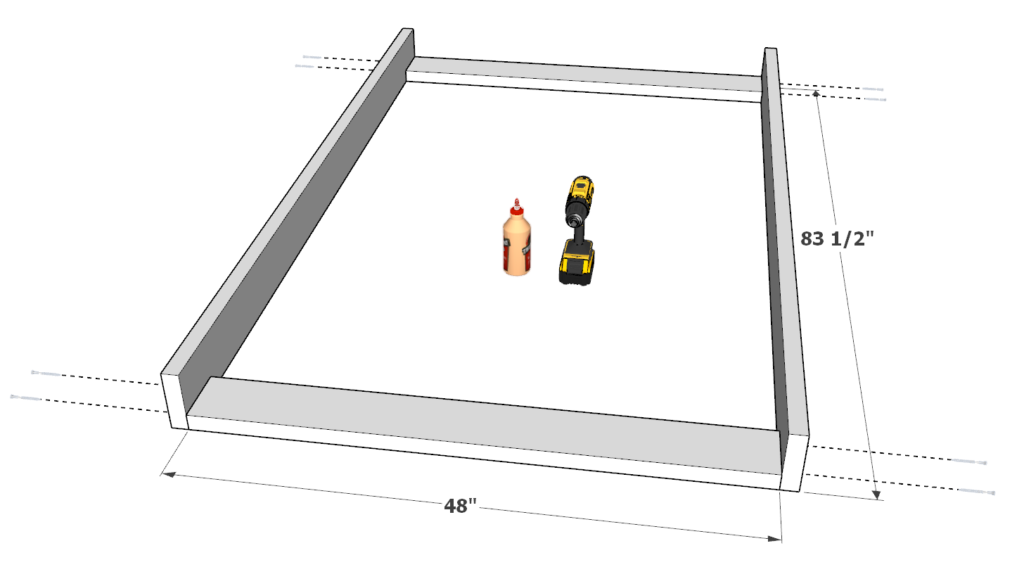
Next, take two 51 inch 2×6 pieces and add them to the ends of the frame as shown above. Again, predrill, add glue, and add 3.5 inch screws.
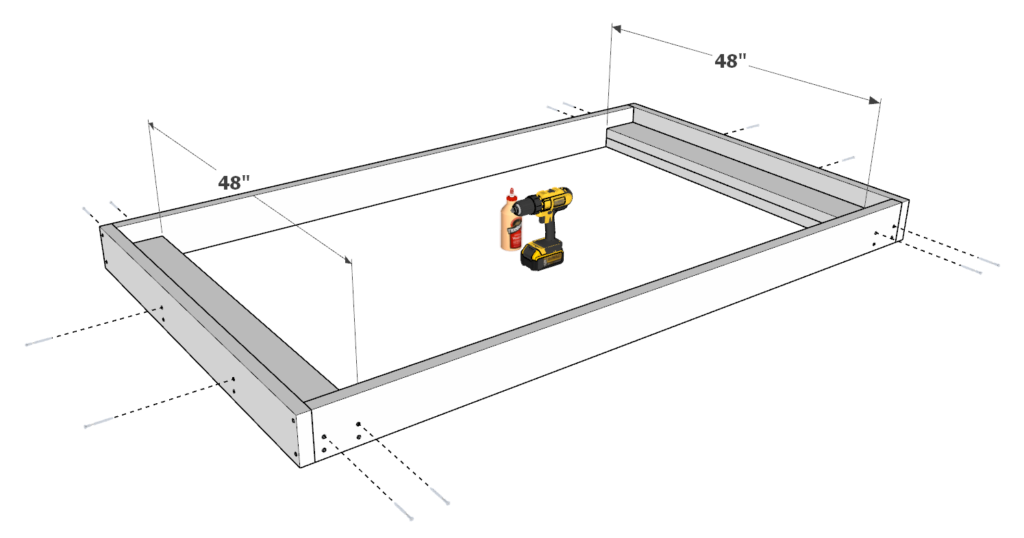
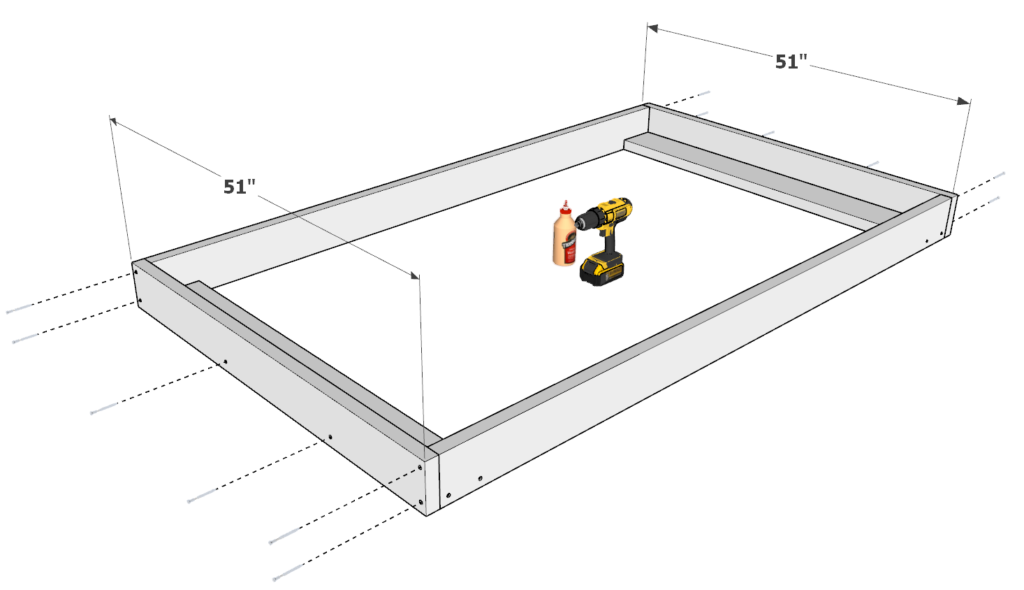
Next add two more 48 inch 2×6 pieces on top of the already installed 48 inch 2×6 pieces from before. Make sure to add plenty of glue, predrill holes, and add 3.5 inch screws.
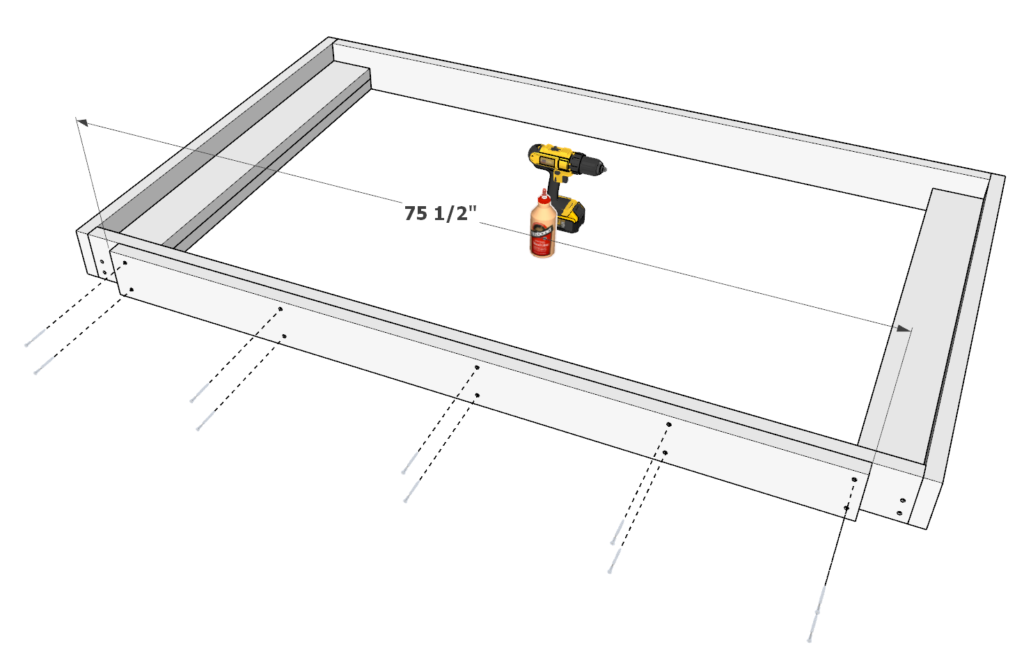
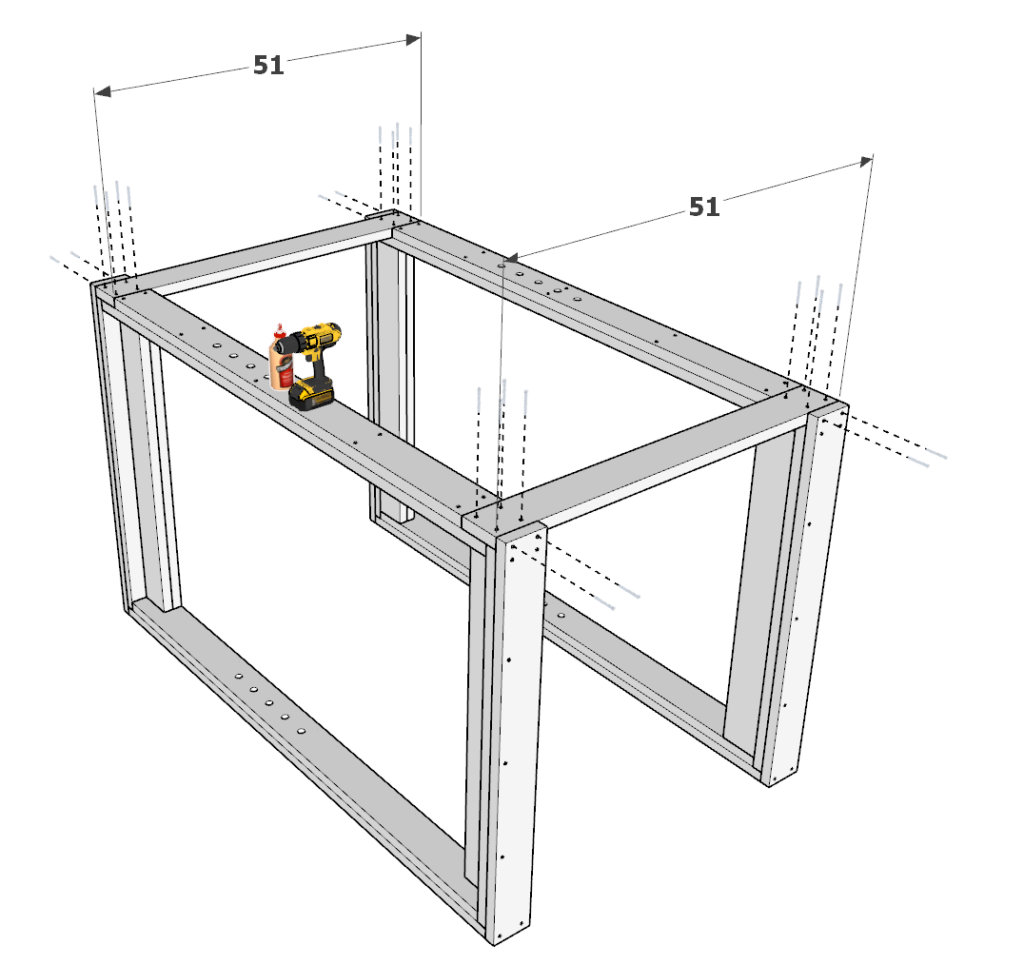
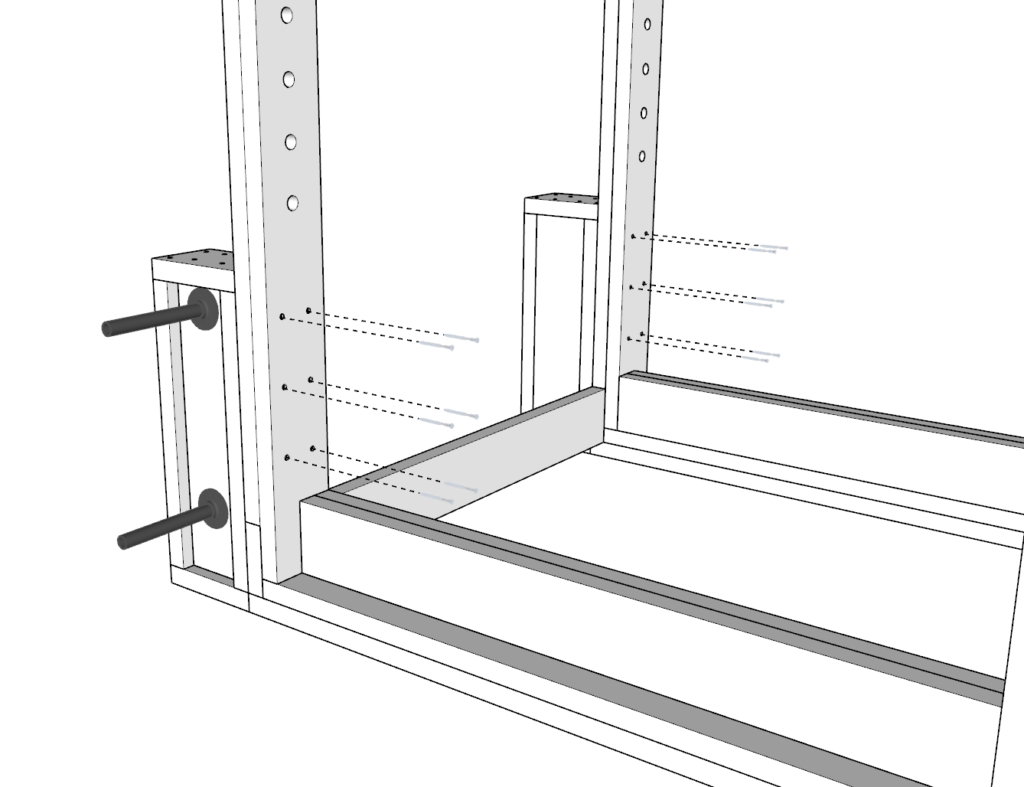
Next, add a 75.5 inch 2×6 piece to one of then sides as shown above. Use the 2.5 inch screws to attach it to the frame. As before make sure to predrill.
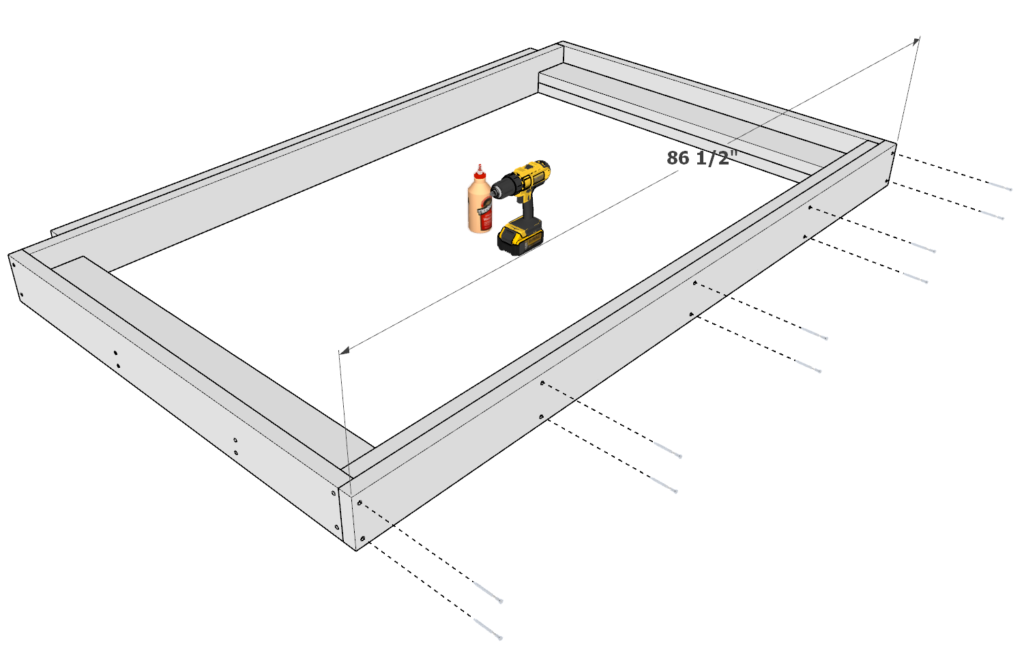
Next, add a 86.5 inch 2×6 piece to the other side of then as shown above. Use the 2.5 inch screws to attach it to the frame. As before make sure to predrill.
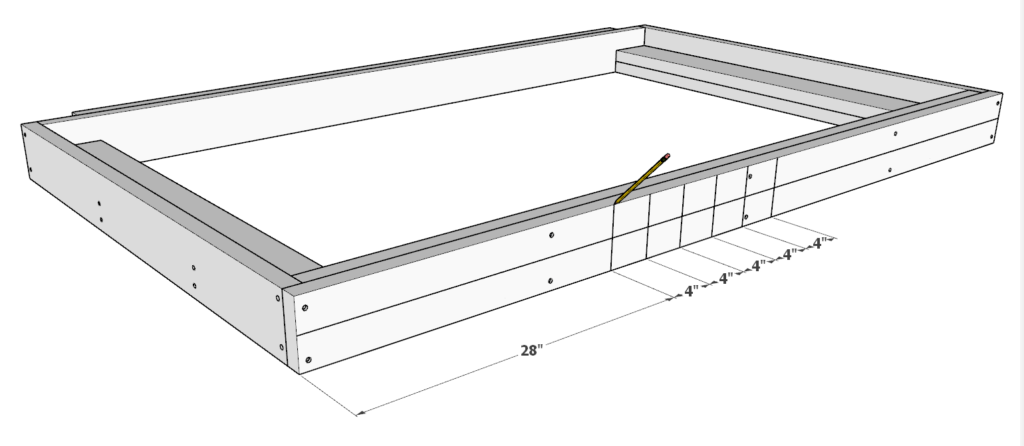
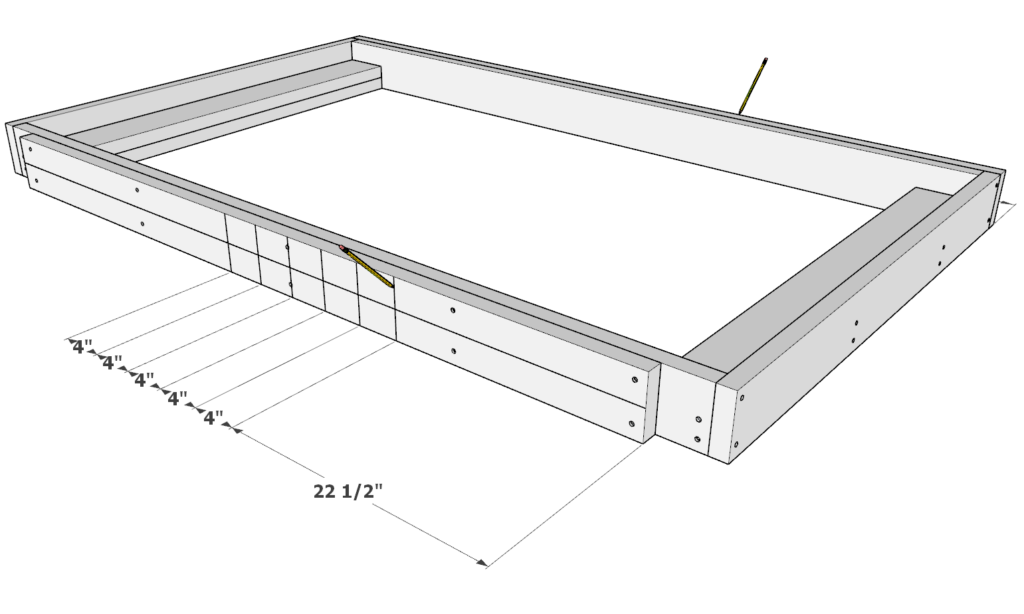
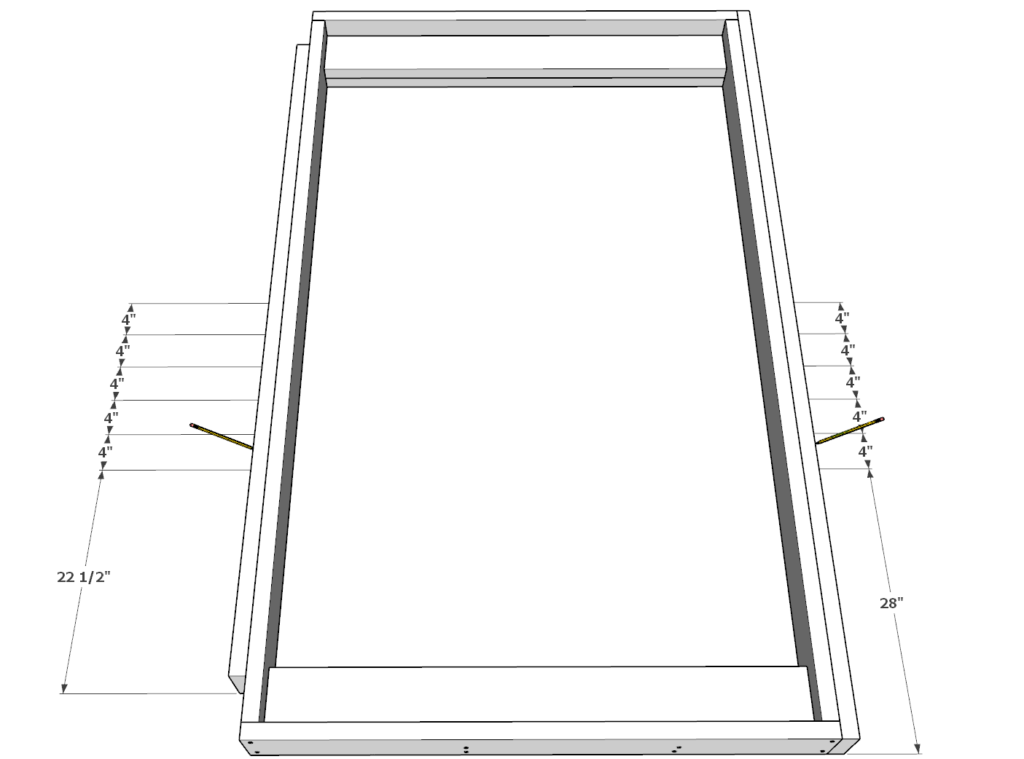
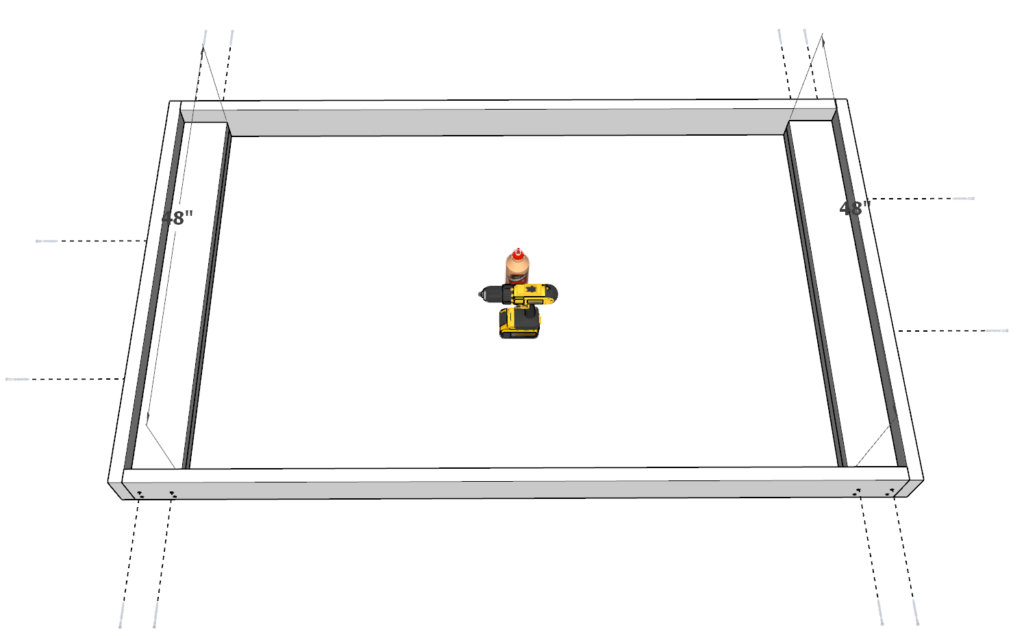
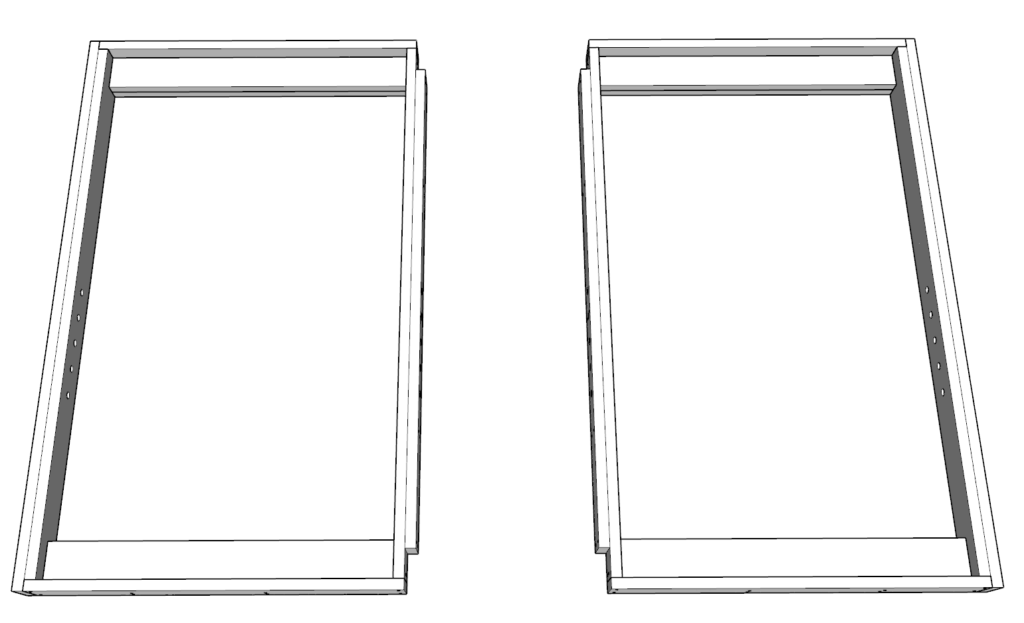
Next, you will need to draw some lines to indicate where to drill the holes that will be used for the safety bars.
Draw a line going up and down the center of the frame as shown above. Draw vertical lines 4 inches apart as shown above. Repeat this on the other side as well.

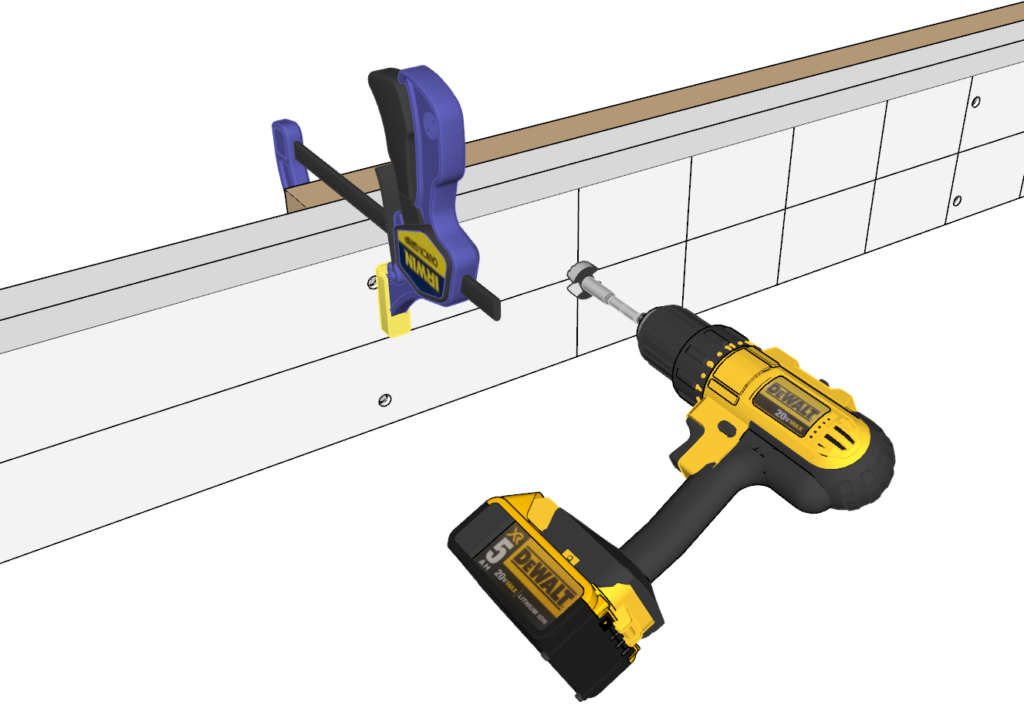
Next, using a 1-1/2 in. High-Speed Steel Forstner Bit to drill holes through the frame at the “x’s” you just drew. I add a piece of scrap 2×6 to the back to prevent the drill bit from breaking through the back and causing the wood to splinter. I use the wood clamps to hold the scrap wood in place.
Continue to drill all the holes as shown above on both sides.
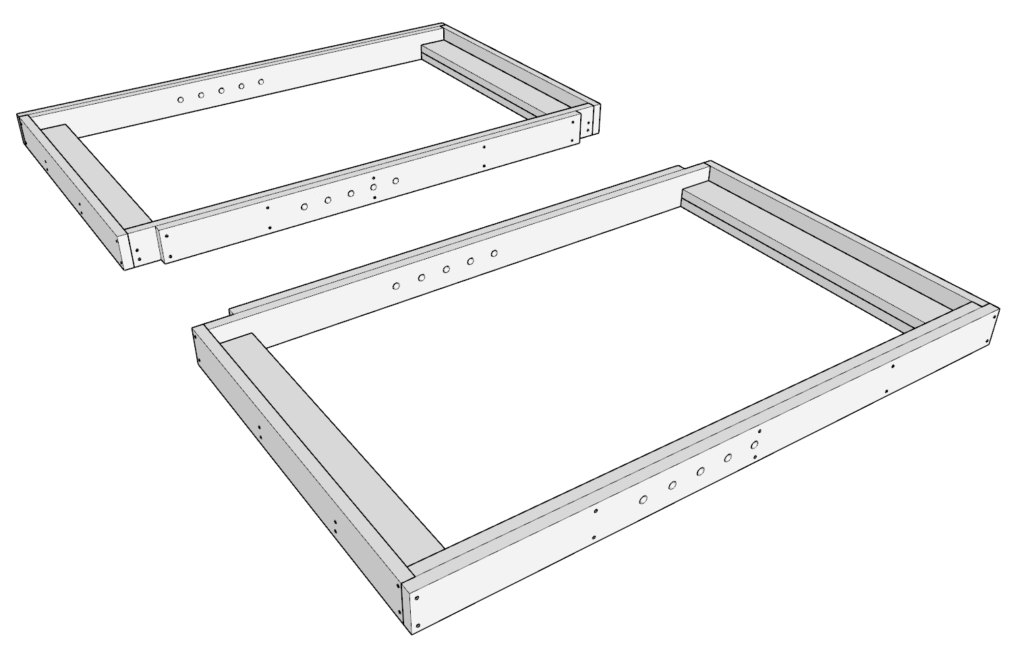
Next, repeat this step to create two mirroring pieces. To create a mirror pieces, simply switch the placement of the 86.5 inch 2×6 piece with the 75.5 in 2×6 piece.
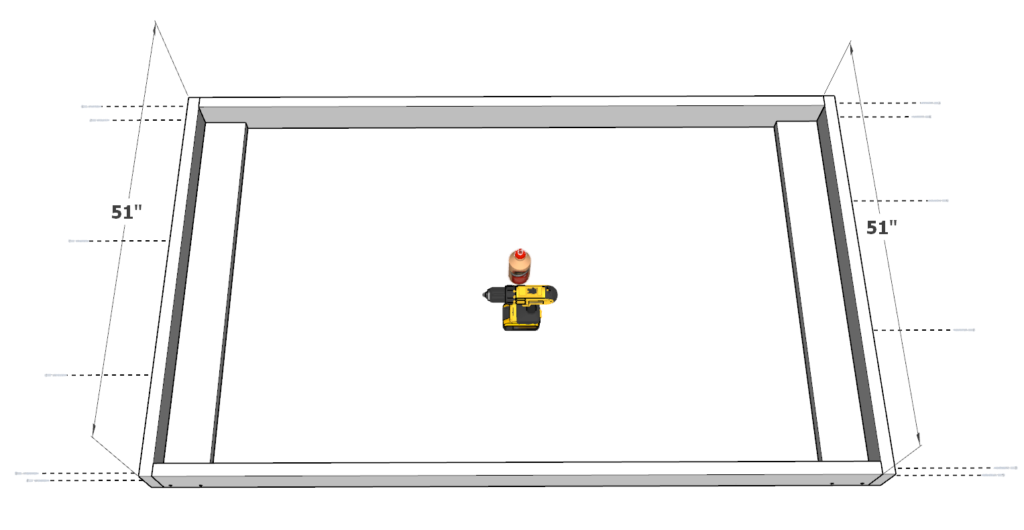
Next add two 54 inch 2×6 pieces to each of the ends of the frames as shown below. Again make sure that your final frame pieces are mirror images of each other.
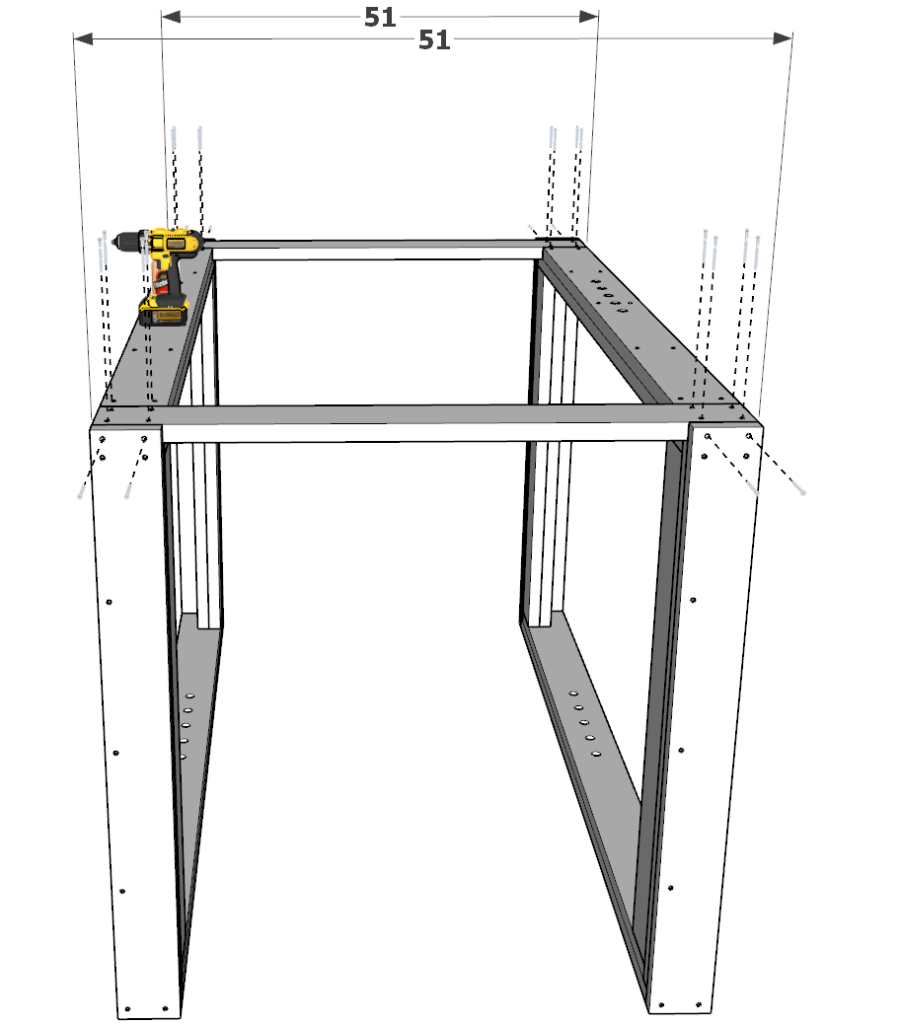
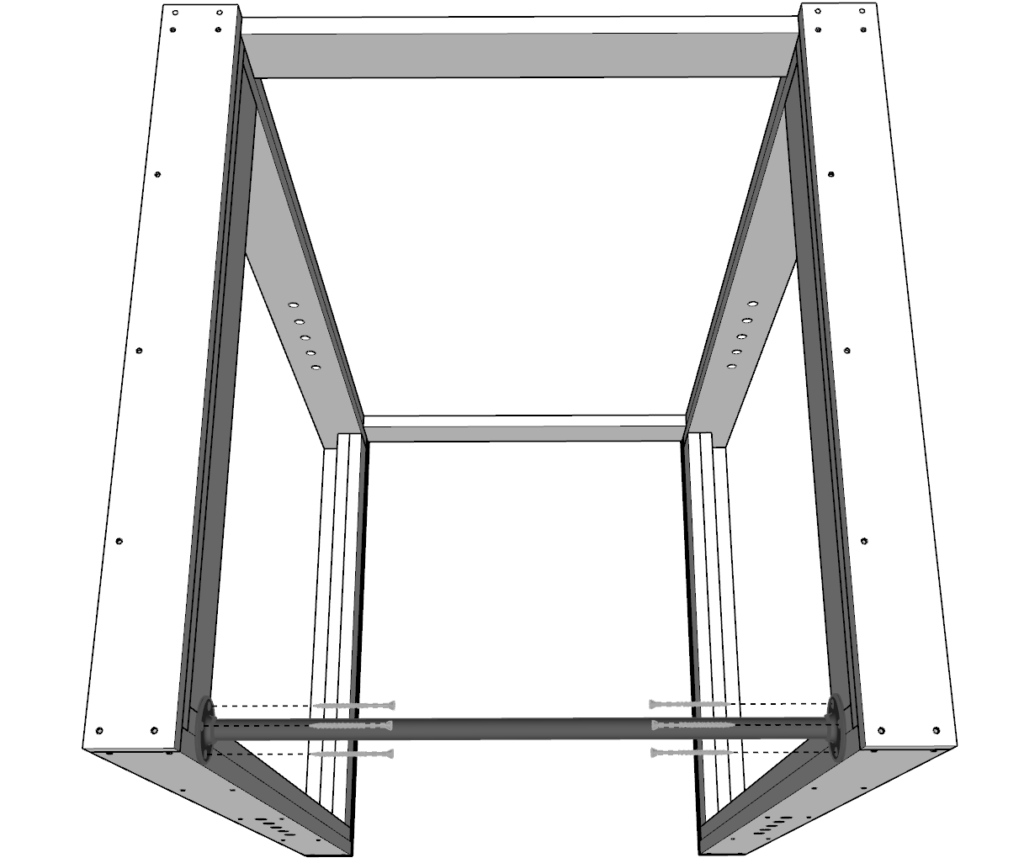
Step 2 (DIY power rack frame assembly)
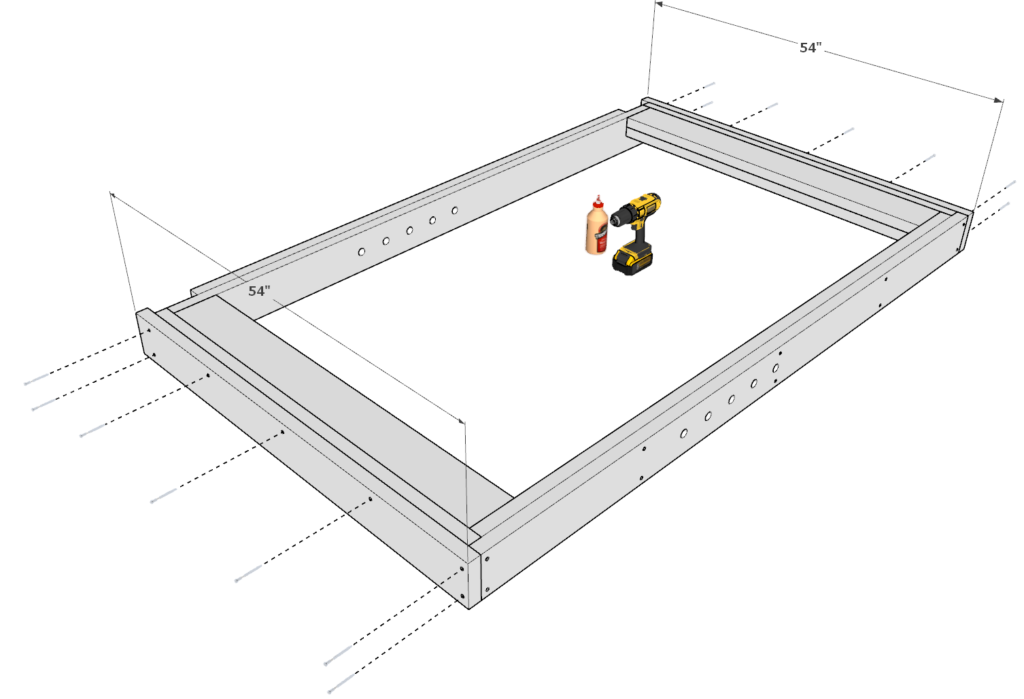
In this step you will be attaching the two frame pieces together to create the main frame of the power rack.
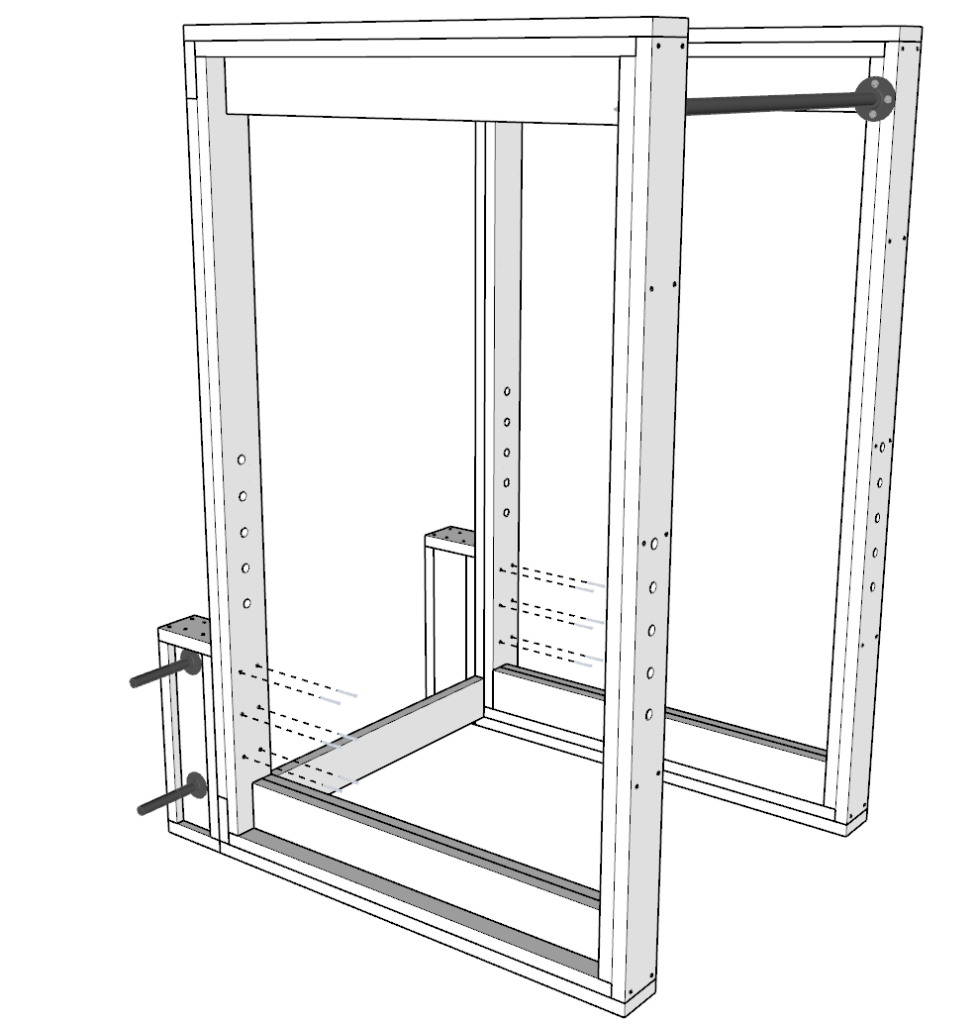
To do this, add two 51 inch 2×6 lumber pieces the groves in the frames you just created in the previous step. Add glue, predrill holes, and add screws.
Add 3.5 inch screws to join the frame pieces together and 2.5 inch pieces where needed to prevent screws from sticking out of the wood.
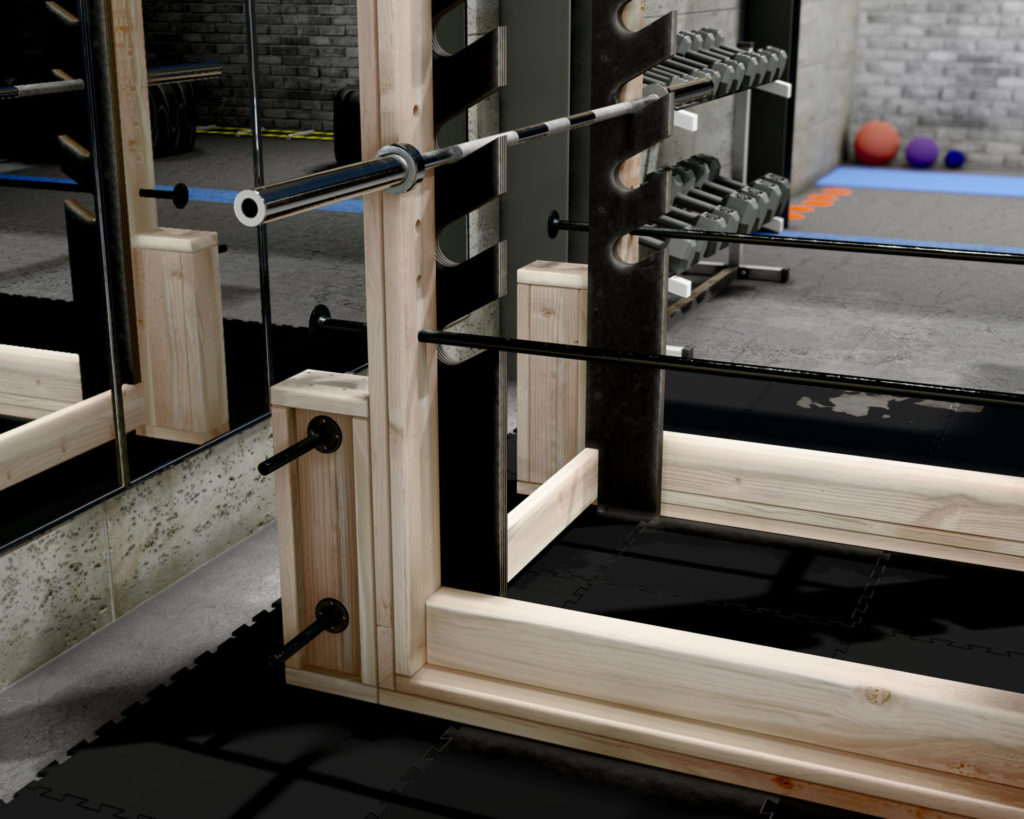
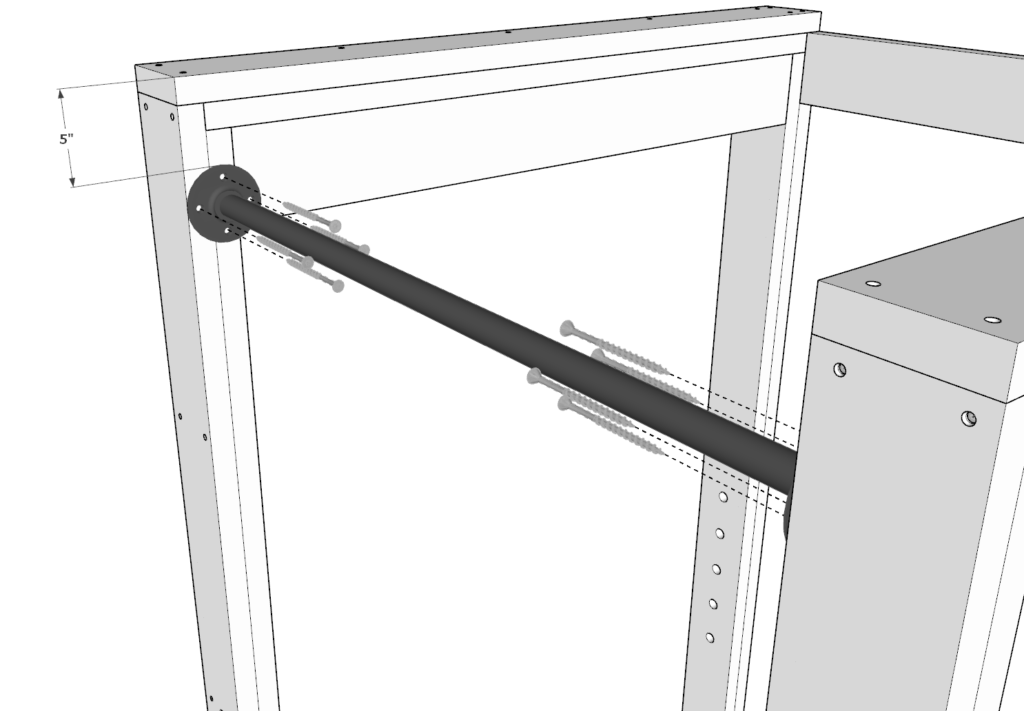
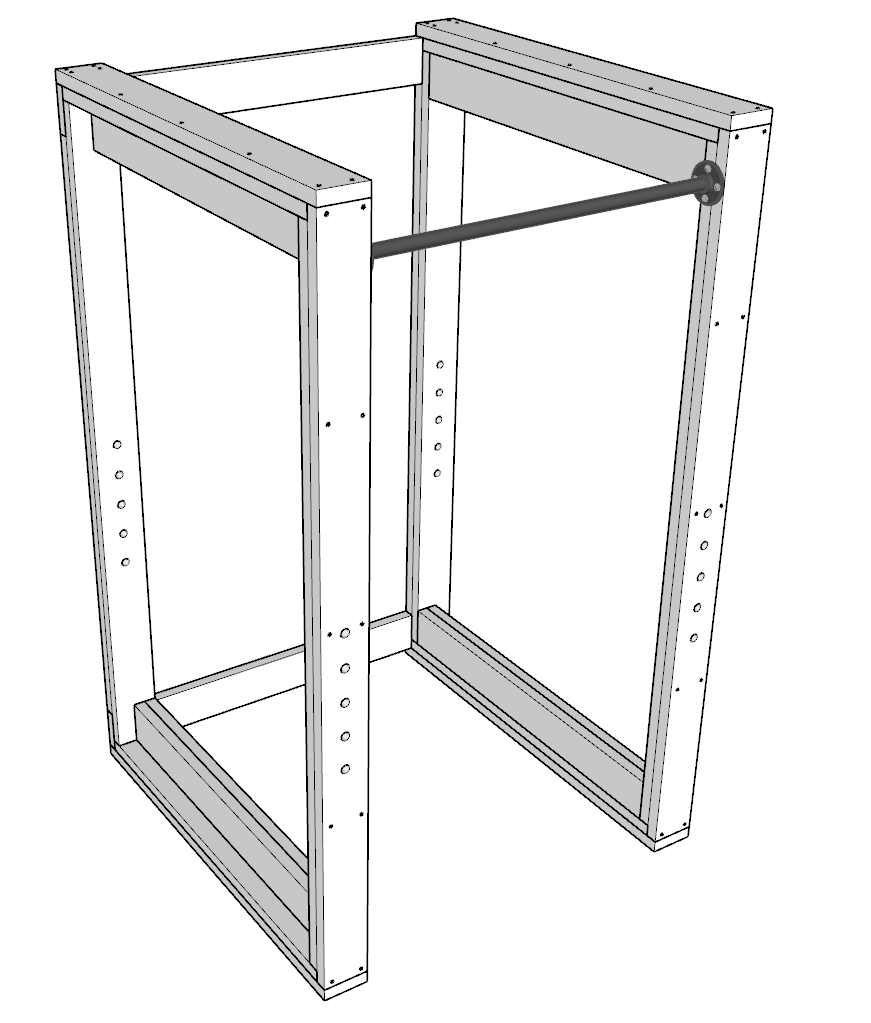
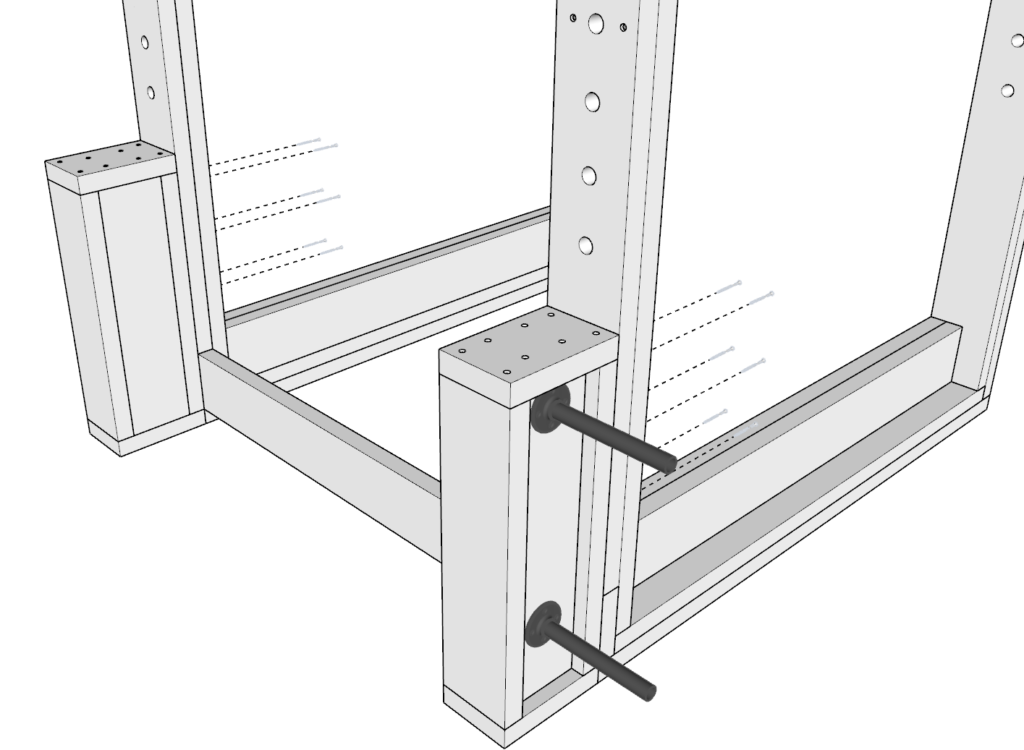
Step 3 (DIY power rack pull up bar)
Next, add the pull up bar. You will need to take the 1-1/4 inch pipe and the ends (flanges) and assemble them together. The total length of the pipe and the flanges needs to be 41 inches long to properly fit with this power rack design.
I have my pipe cut a Home Depot because I can assemble it in the store and ensure its the correct length with the flanges attached. The Home Depot staff can cut the pipe and thread it as well in most locations.
Attach the pipe with eight thick 2 inch screws.

Step 4 (Building and attaching weight storage system of DIY power rack)
Next, build and attach the weight storage system and weight horns from pipes.
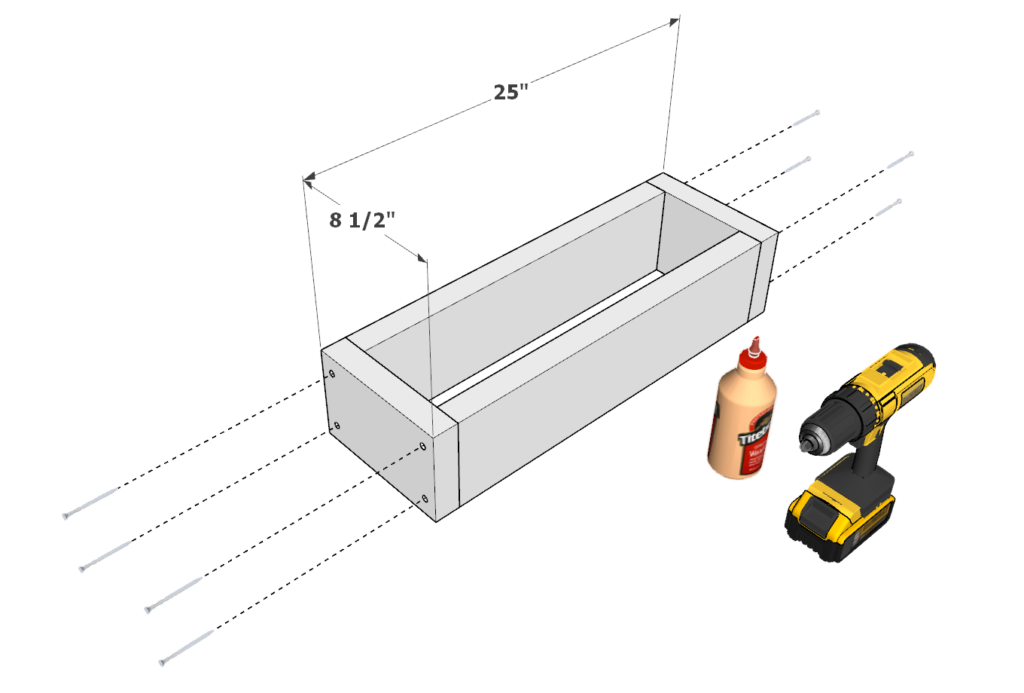
First, take two 25 inch 2×6 pieces and two 8.5 inch 2×6 pieces and arrange them as shown above. As before, add glue, predrill, and add 3.5 inch screws.
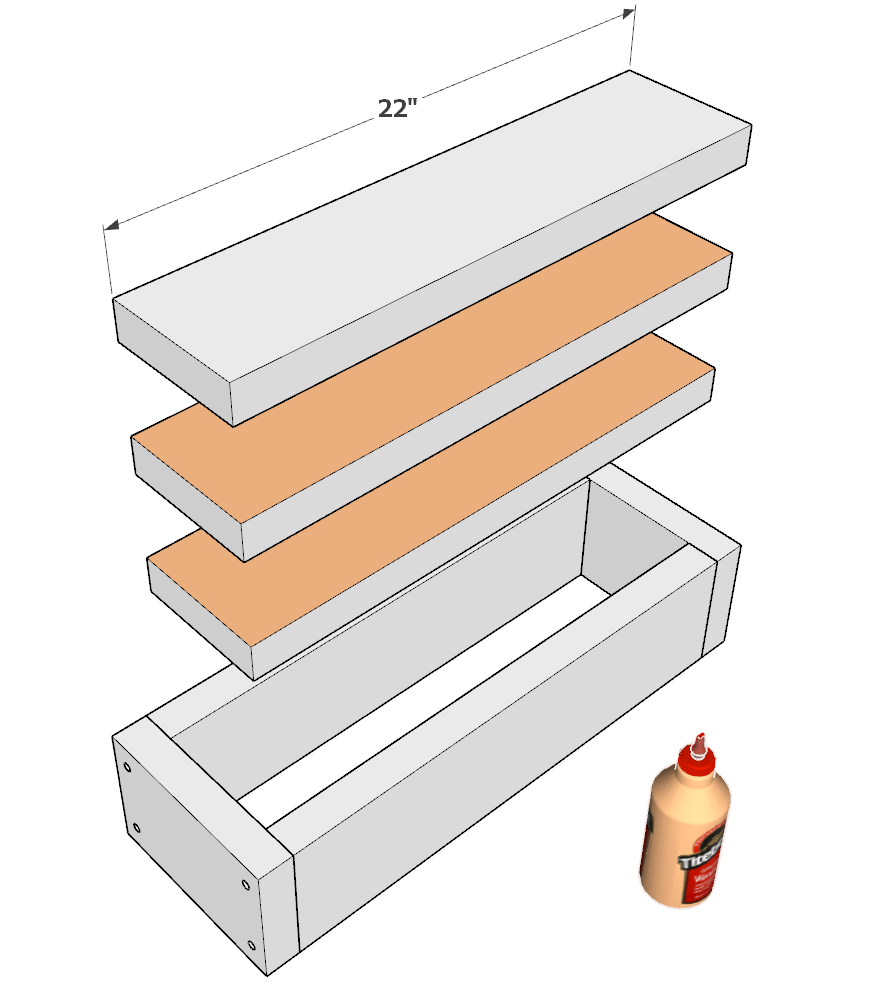

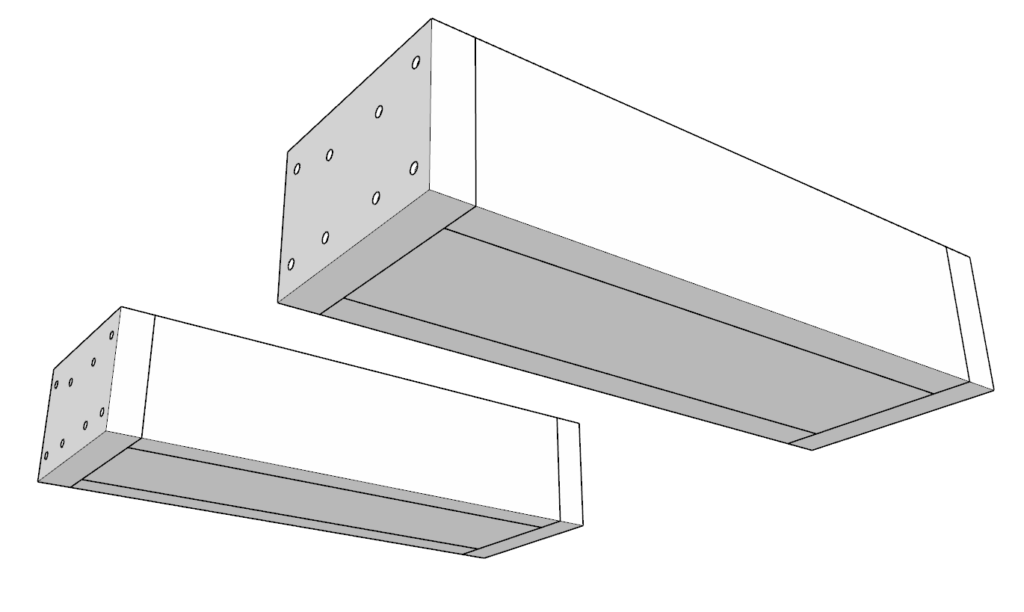
Next, take three 22 inch 2×6 pieces, add glue to all the ends that will be making contact, and glue/screw them into place as shown above. Don’t forget to predrill holes to prevent wood from splitting.
Next, repeat the step to create an identical piece for storing weight. You should have a total of two as shown above.
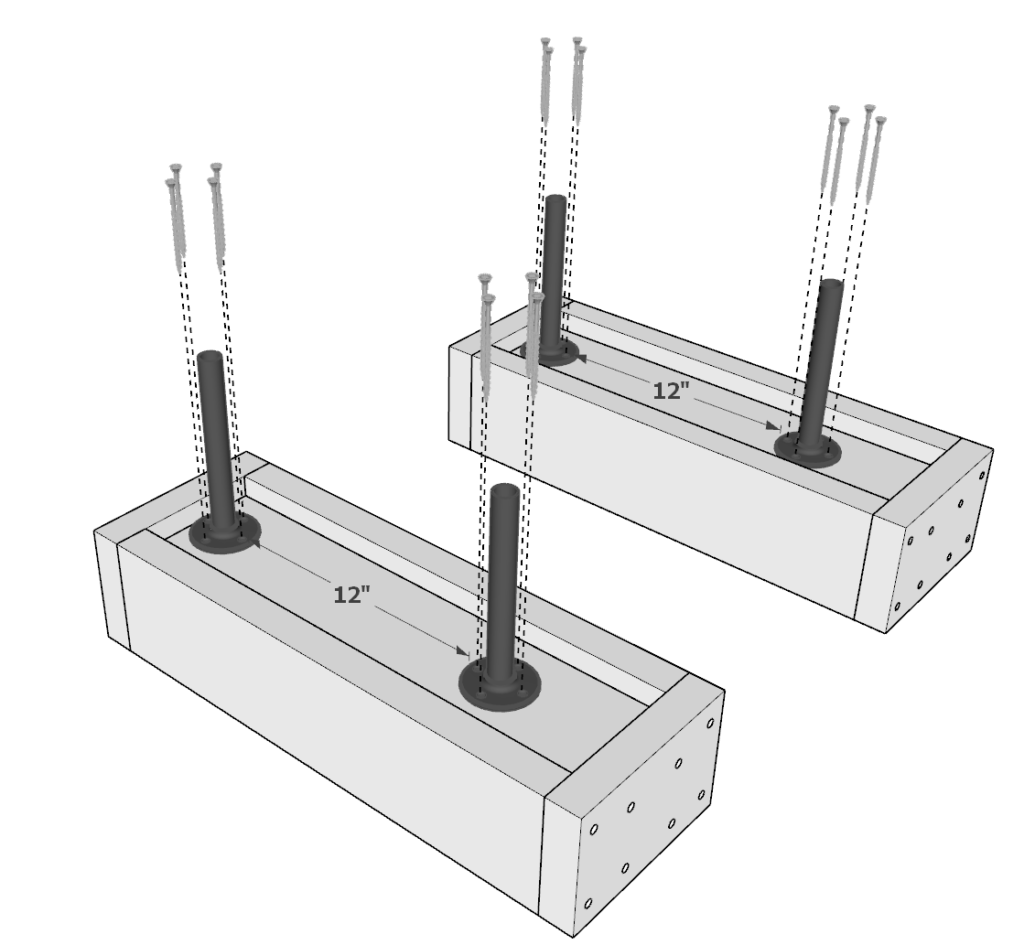
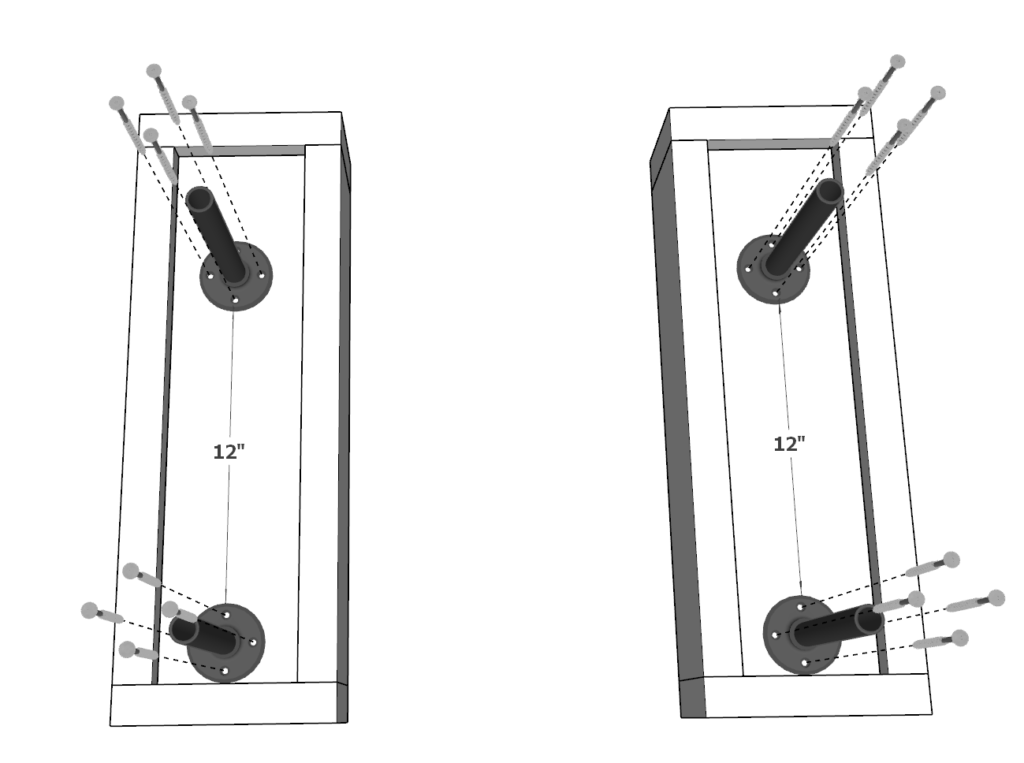
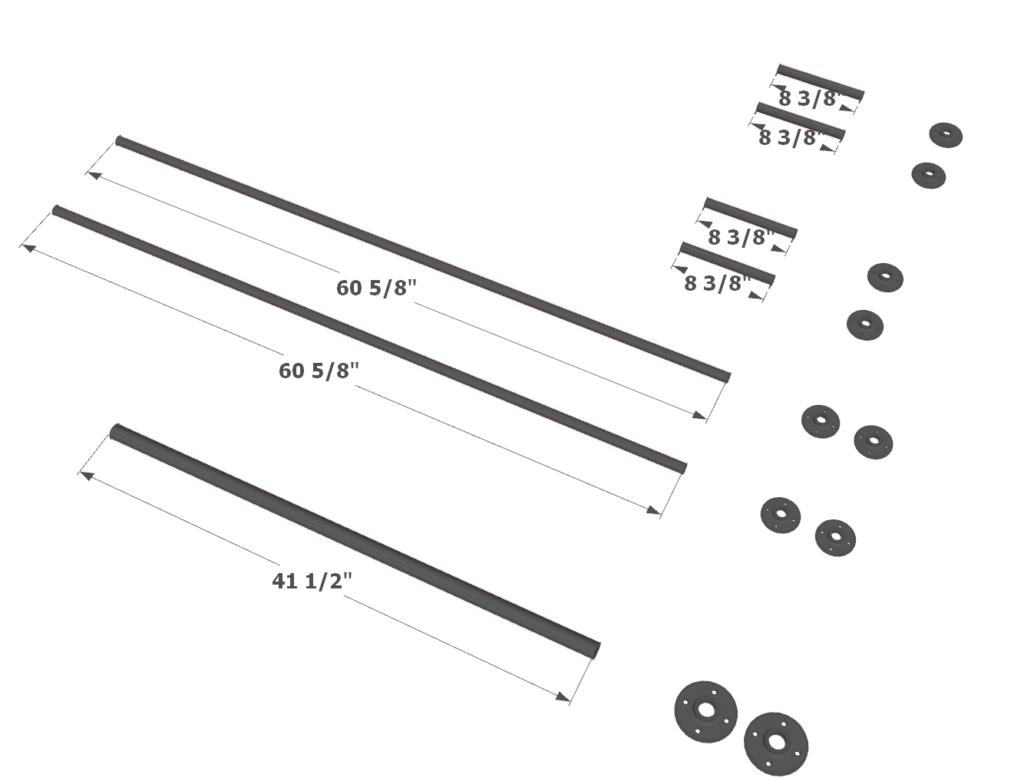
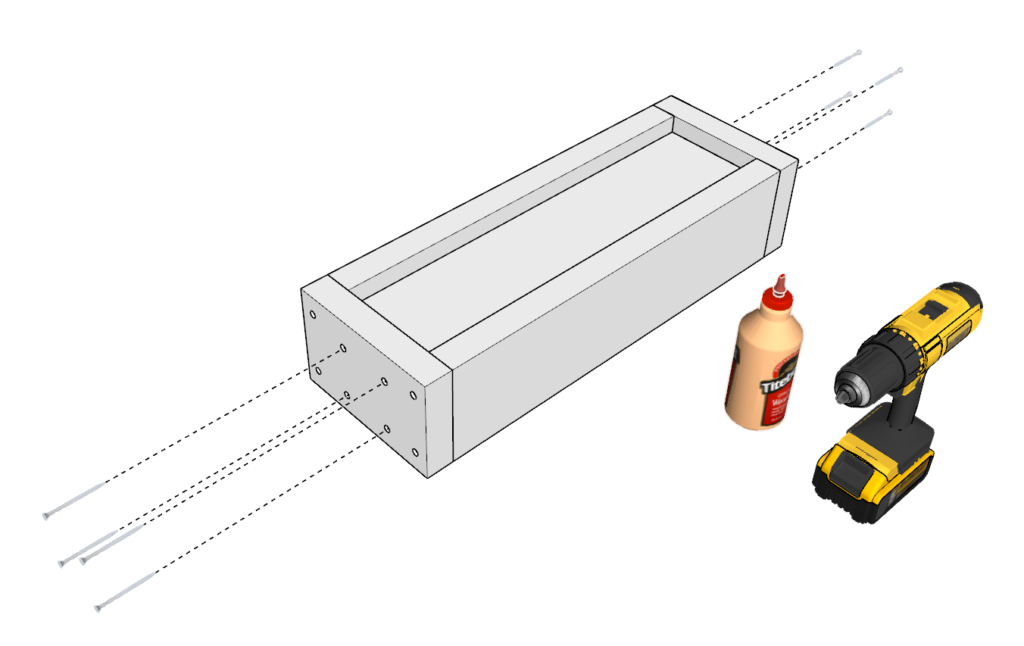
Next, take four 3/4 inch diameter 8-3/4 inch long pipes and four 3/4 flanges and assemble them as shown above.
Attach these to the wooden pieces you just built using thick 2 inch screws as before.
Space them out about 12 inches apart to allow the weight plates to fit appropriately.

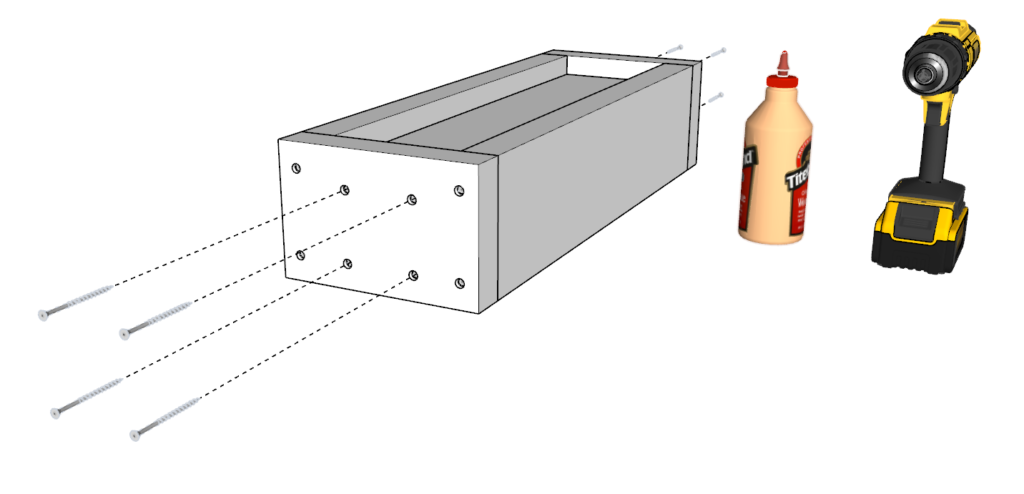
Next attach the weight storage system to the main DIY power rack frame. Use glue, predrill, and add 3.5 inch long screws as shown above.
Step 5 ( building and attaching bar rack to DIY power rack)
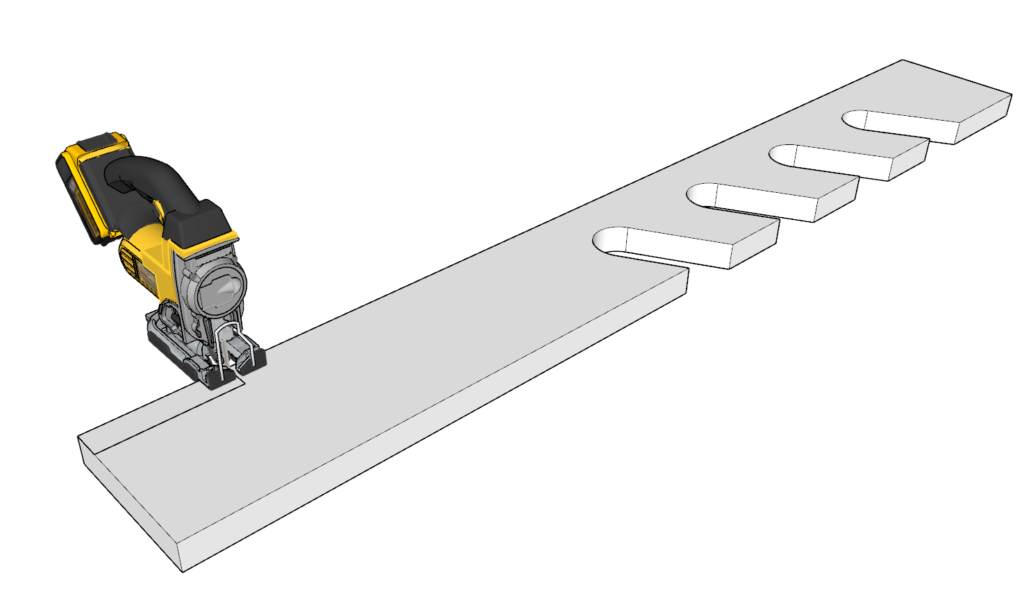
Next, build and attach the bar rack holding system. These supports are made from 3/4 inch thick plywood cuts that are glued together to make 1.5 inch thick plywood supports.

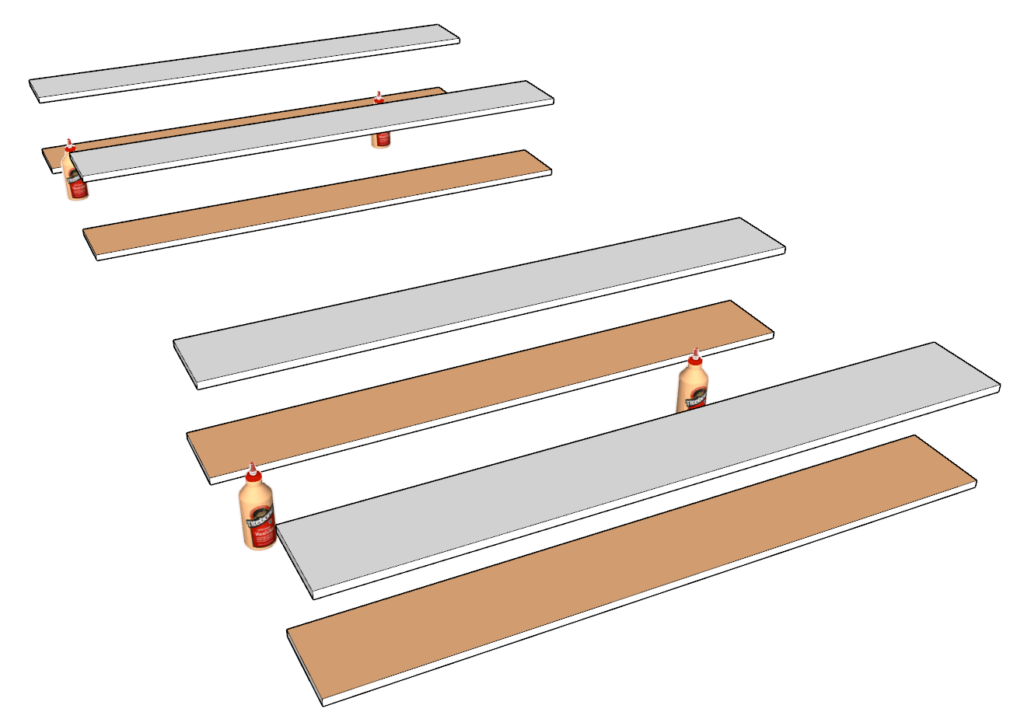
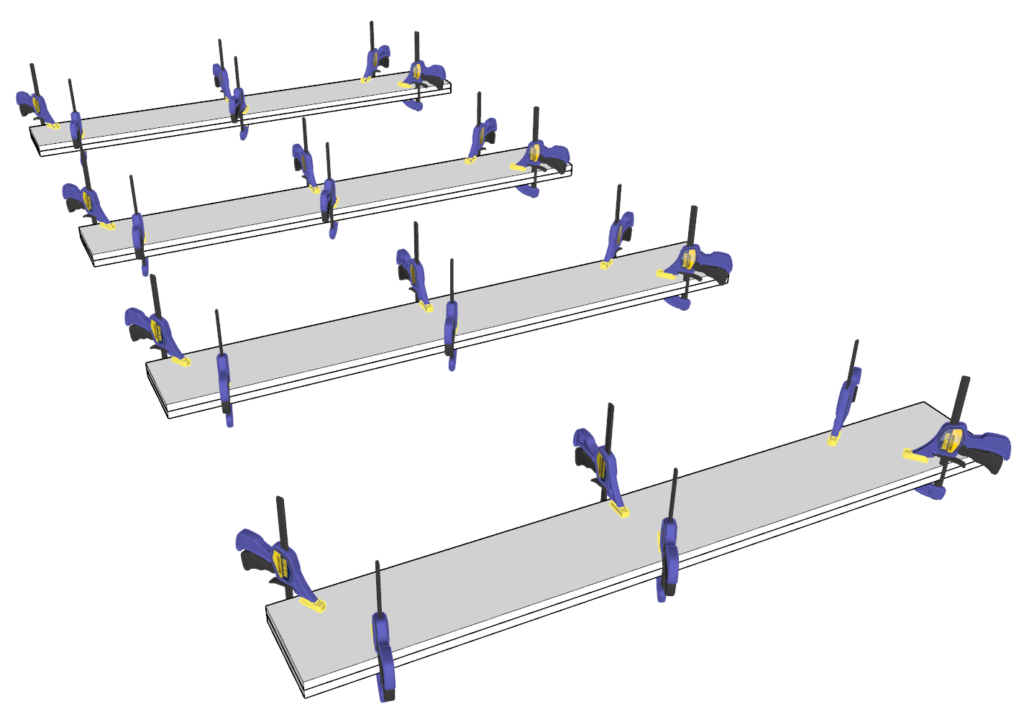
First, take eight of the 8 inch x 61.25 inch plywood sheets and glue them together. Make sure you add PLENTY of glue to make sure that all the pieces join well together.
Next, align the cut plywood sheets as shown above and use clamps to hold them in place as the glue dries.
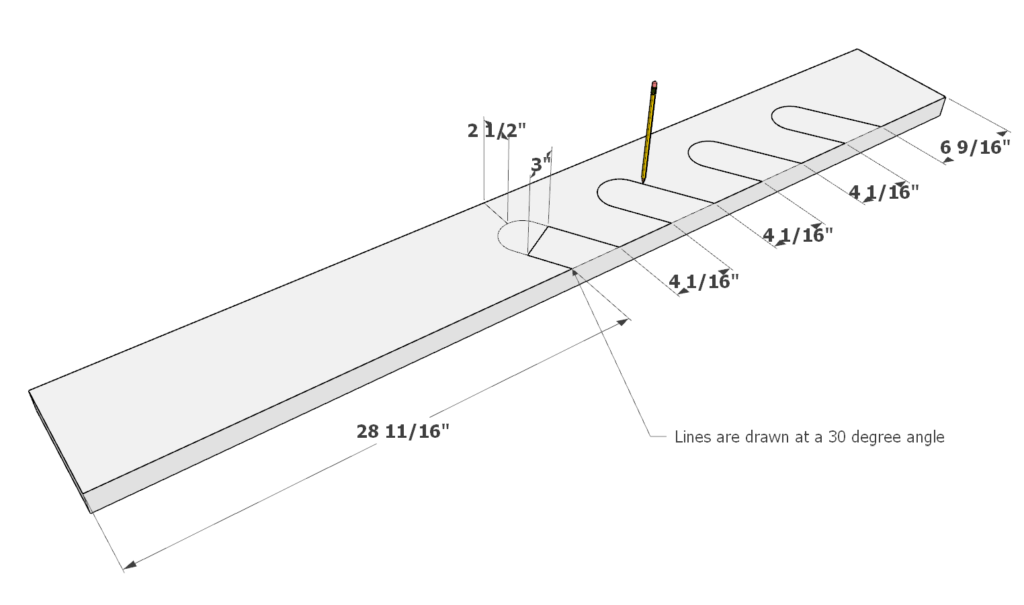
Next, take the now glue plywood pieces and draw the pattern that will hold the olympic bar.
To draw the pattern, I find it helpful to use a Protractor to draw lines at 30 degrees as shown above.
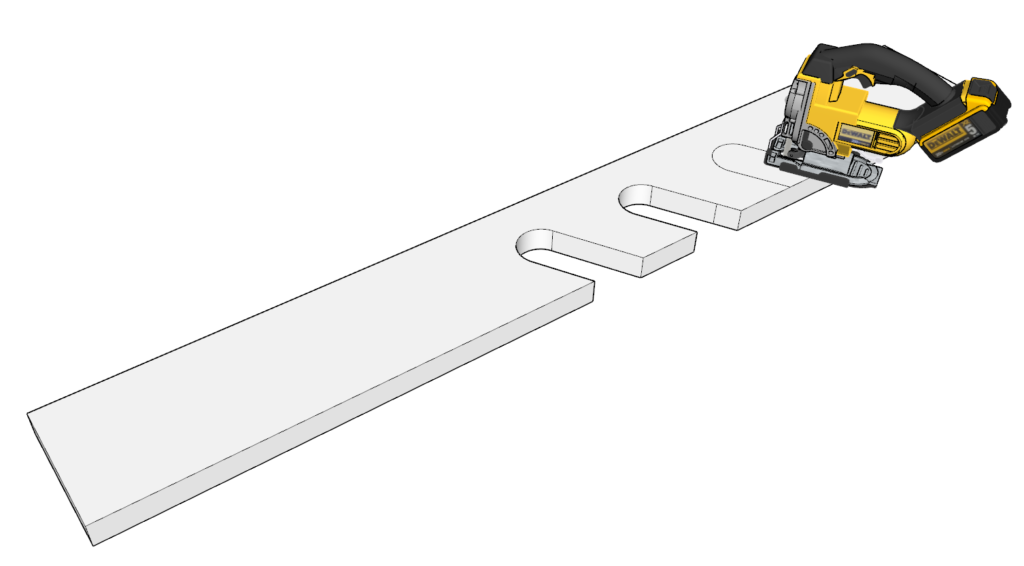
Once the pattern is drawn out, use a Jigsaw saw to cut out the pattern.
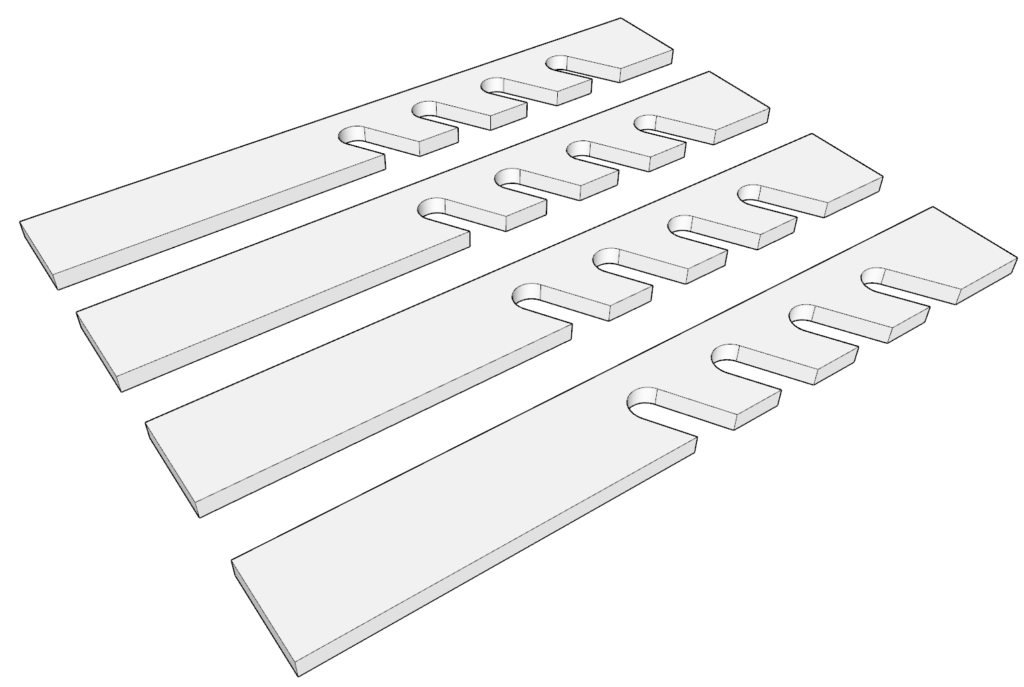
Repeat this for all four glued plywood pieces.
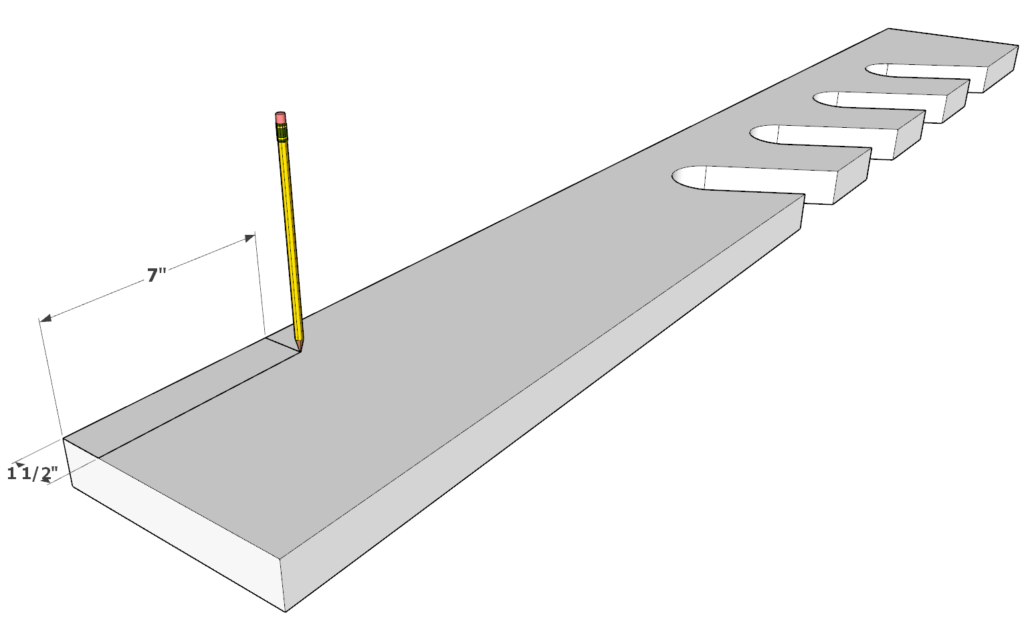
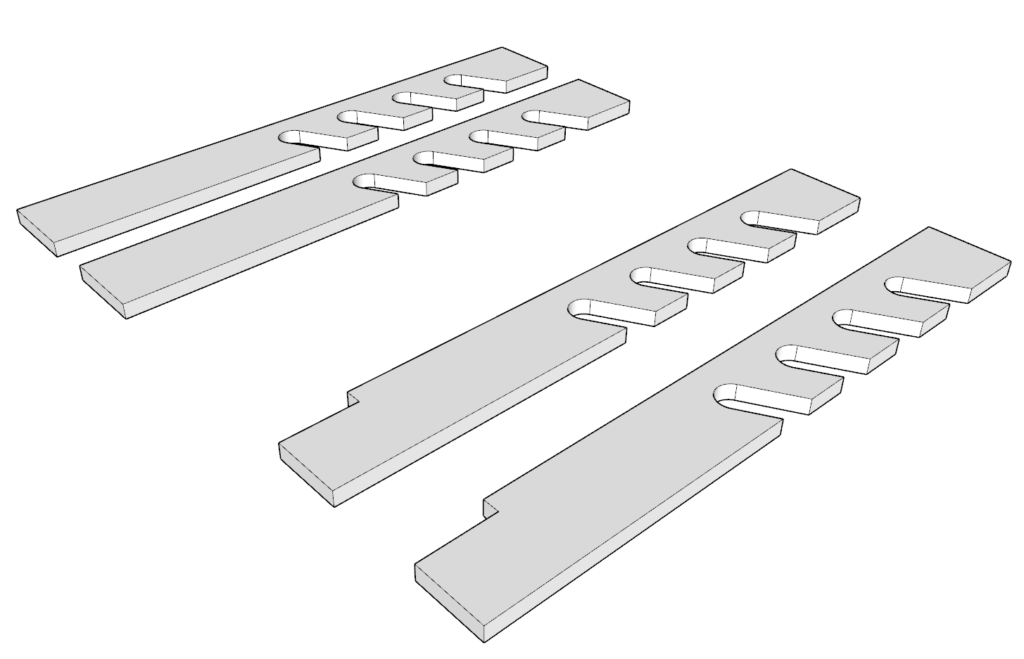
Next, take two of the cut plywood pieces you just worked with and subtract a small 1.5 inch x 7 inch corner as shown above. These tow pieces will be placed in the back of the DIY squatting rack.
In the end you should have two sets of identical plywood support pieces.
I recommend sanding them down and staining or painting them at this point so that you don’t have to dal with that after they are attached.
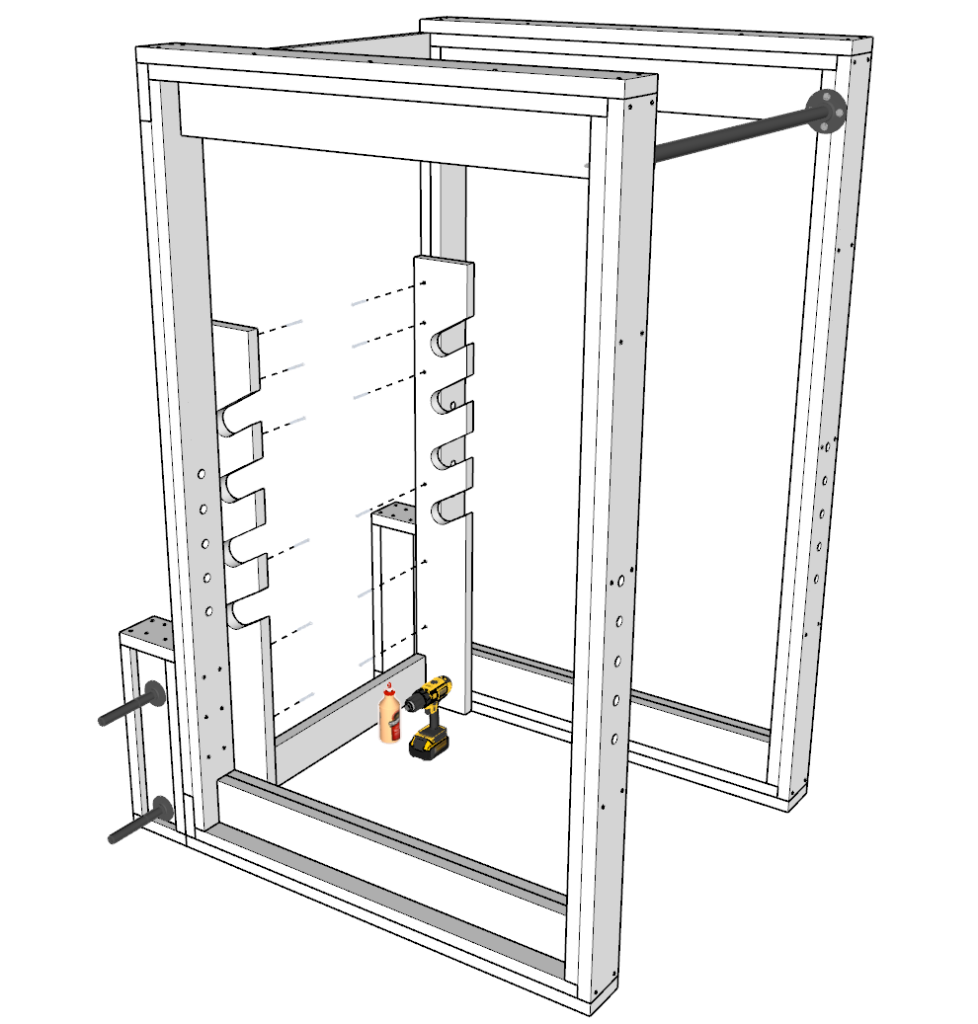
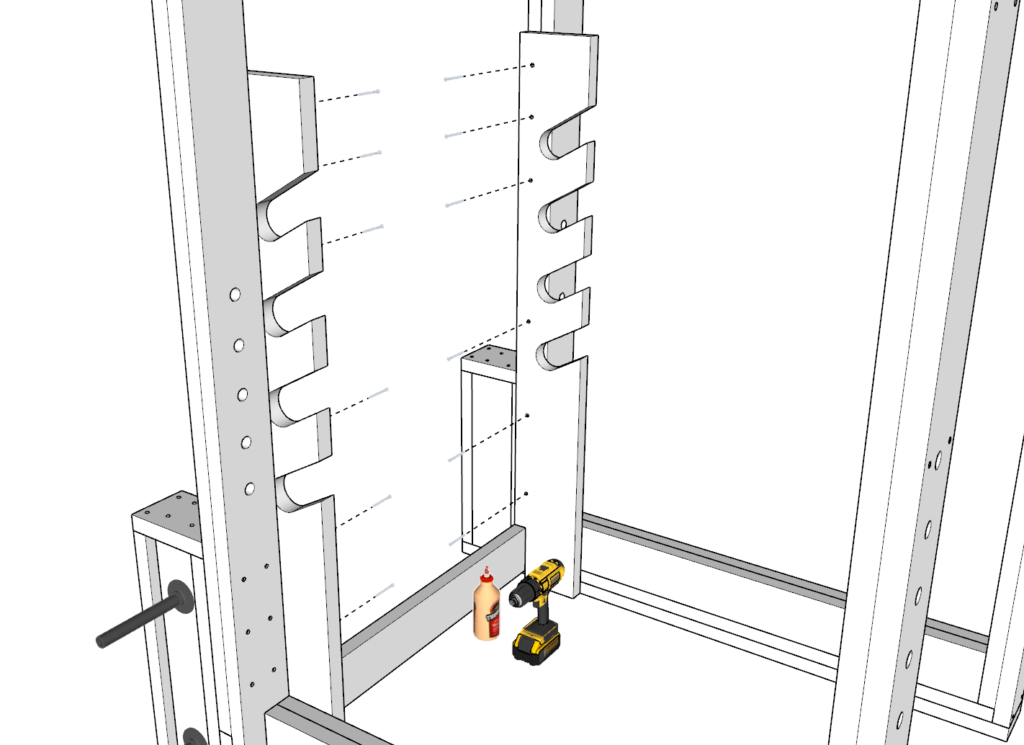
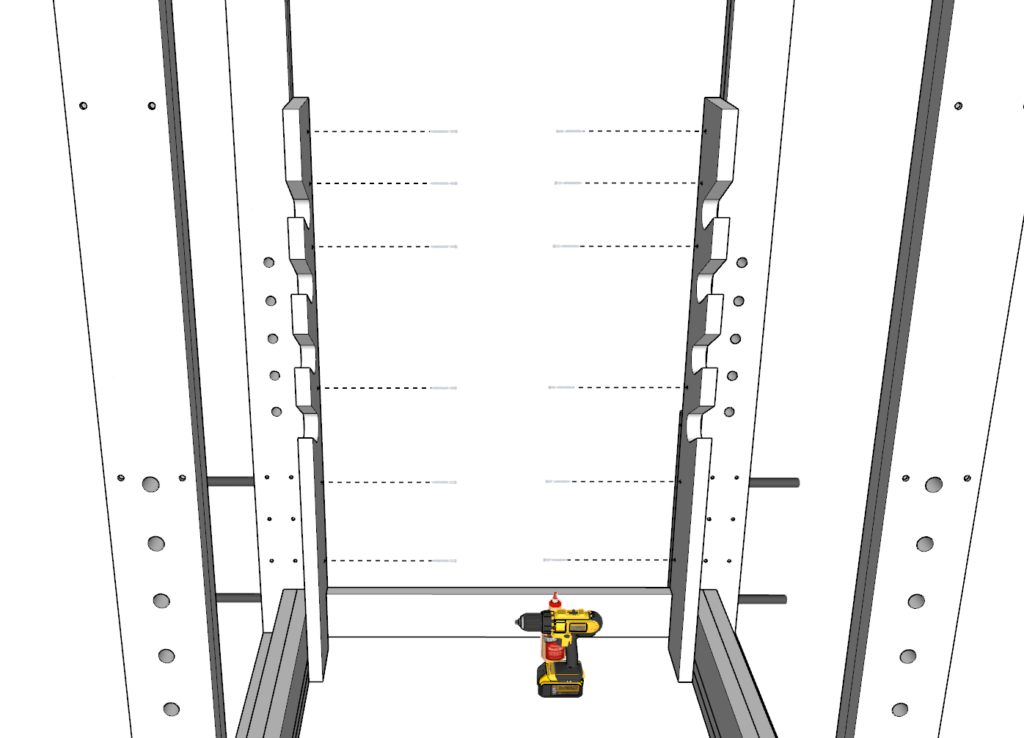
Next, attach the plywood Olympic bar supports with indents to the back of the squatting rack frame. Use 3.5 inch screws and glue to attach them as shown above.
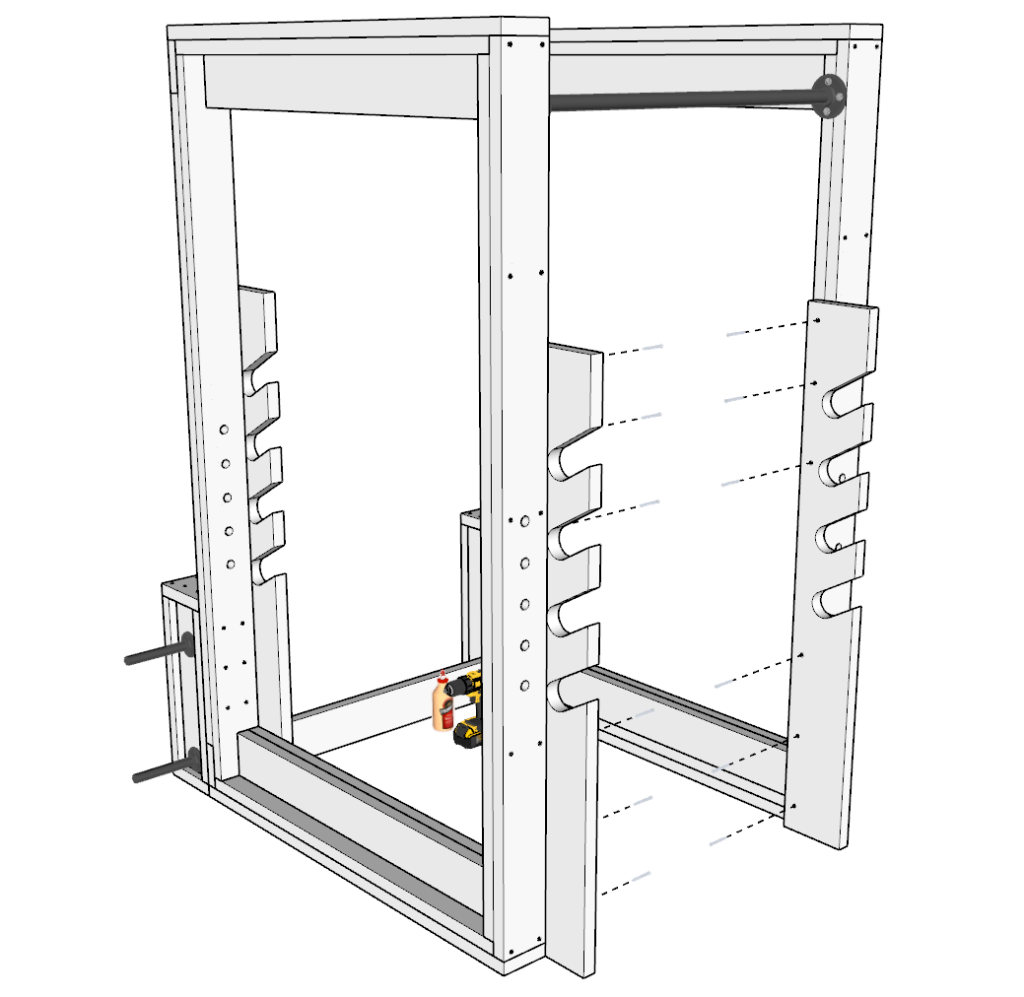
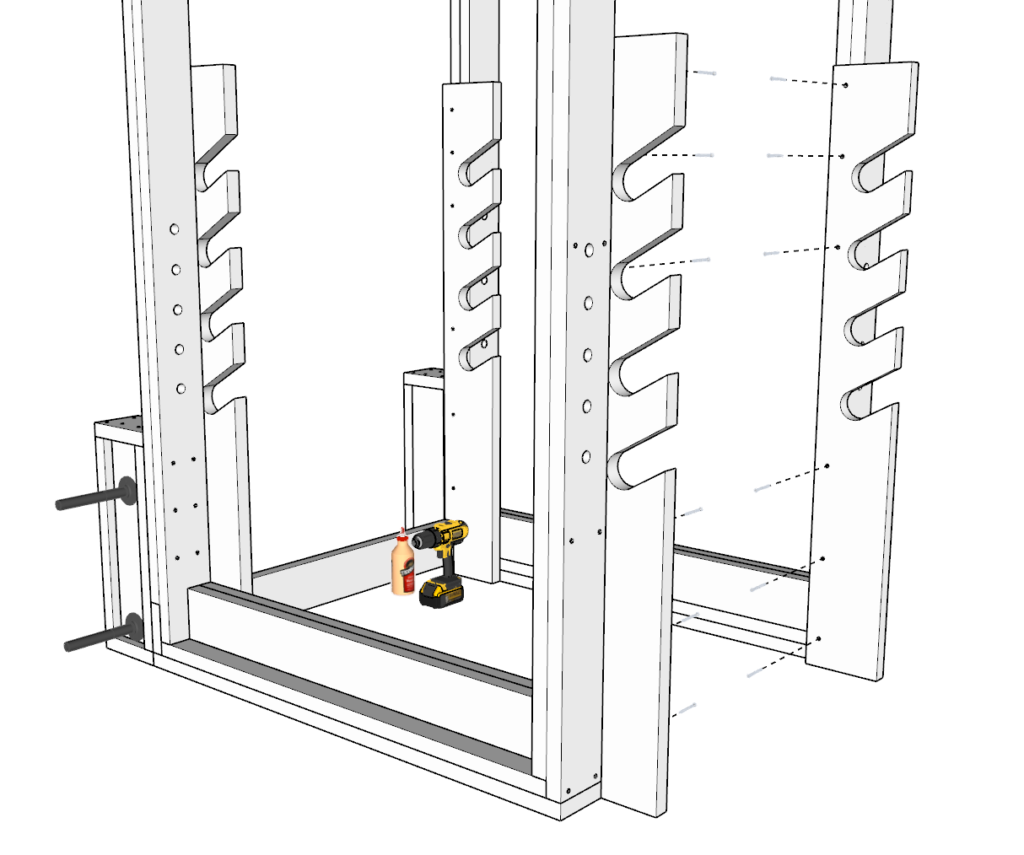
Next, attach the front Olympic bar supports in the same way as the back supports.
Step 6 (DIY power rack finishing touches)
Next, attach the whole structure to the ground for safety. This post does not have instruction of how to attach this power rack.
Lastly sand down the whole structure. I start with a 80-grit sand paper to take out all major imperfections, next I follow with a 220 grit sandpaper to ensure a smooth surface that is ready for staining or painting. I use an orbital sander to speed up the process of sanding.