Introduction: The Joy of Building Your Own Planter Box
Discover the satisfaction of creating your very own planter box, a project suited for gardening enthusiasts and DIY novices alike. Our planter box design simplifies construction without sacrificing style or durability, making it an ideal choice for anyone looking to dip their hands into some soil. With no need for fancy woodworking skills, our straightforward approach uses just screws and glue to bring your garden to life.

Effortless Construction for Lasting Enjoyment
This planter box project is a testament to simplicity. We provide you with a comprehensive PDF file complete with a lumber shopping list, a cut list, and a detailed materials and tools list. Our instructions are meticulously written and paired with clear, visual diagrams to ensure a hassle-free building experience. Designed with beginners in mind, this guide promises a smooth journey from start to finish, leaving no room for guesswork or confusion.
Ideal for Varied Spaces and Lifestyles
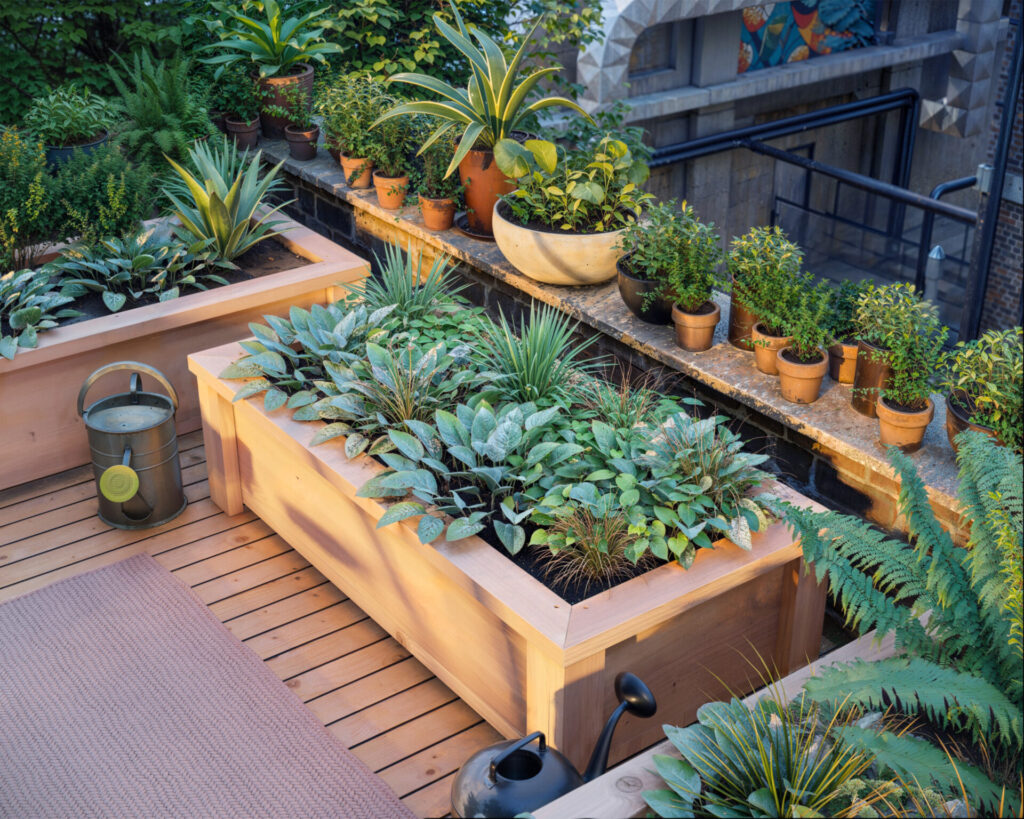
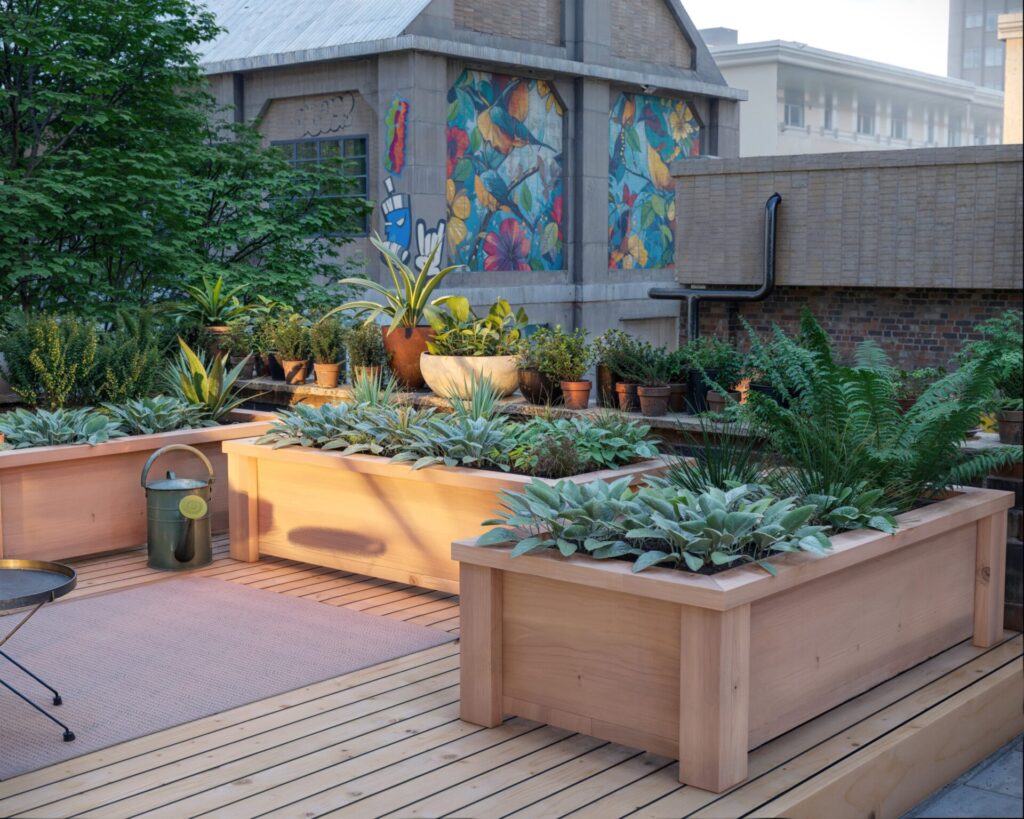
Tailored for adaptability, the interior dimensions of this planter box—54 inches in length, 26-1/2 inches wide, and 15-1/4 inches tall—make it a versatile fit for a variety of settings. Whether you’re adorning a compact balcony, enhancing the side of your house, or adding character to a small garden space, this medium-sized planter box is just the right size. It’s lightweight enough to be relocated as needed, offering flexibility for seasonal changes or design updates.
Grow a Cornucopia of Vegetables
Imagine harvesting your own lettuce, spinach, radishes, carrots, and more from a planter box you built with your own two hands. The interior dimensions ensure deep, healthy roots for a range of vegetables and herbs. And beyond practicality, these planters can be stained or painted to match your home’s palette, making them a stylish addition to any outdoor space.
An Affordable Venture into Gardening
At approximately $55 per planter, embarking on this gardening project is not only accessible but also cost-effective. While prices may vary slightly based on your location and choice of materials, the value added to your home and lifestyle is immeasurable. Embrace the green thumb life with a planter box that offers boundless opportunities for growth and enjoyment.
Time
(varies with experience)
Cost
Estimated Project Cost: $55 Per planter box (Note: Costs can vary by location and supplier.)
Skill level required
Beginner
DIY Planter Box PDF Plan
What is included in the PDF download?
- Easy to read step by step instructions
- Material list
- Tools needed
- Helpful links to materials and tools needed
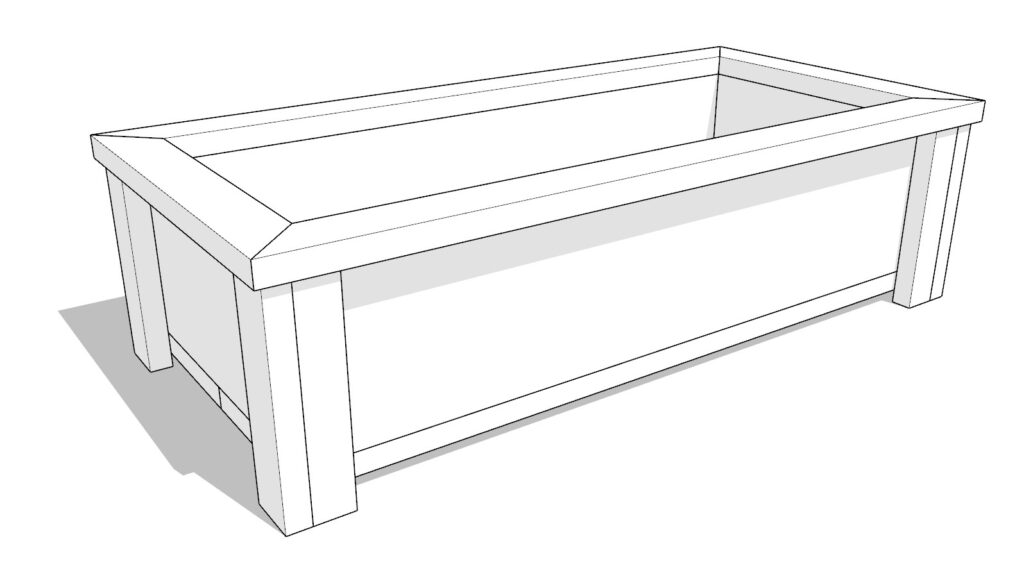
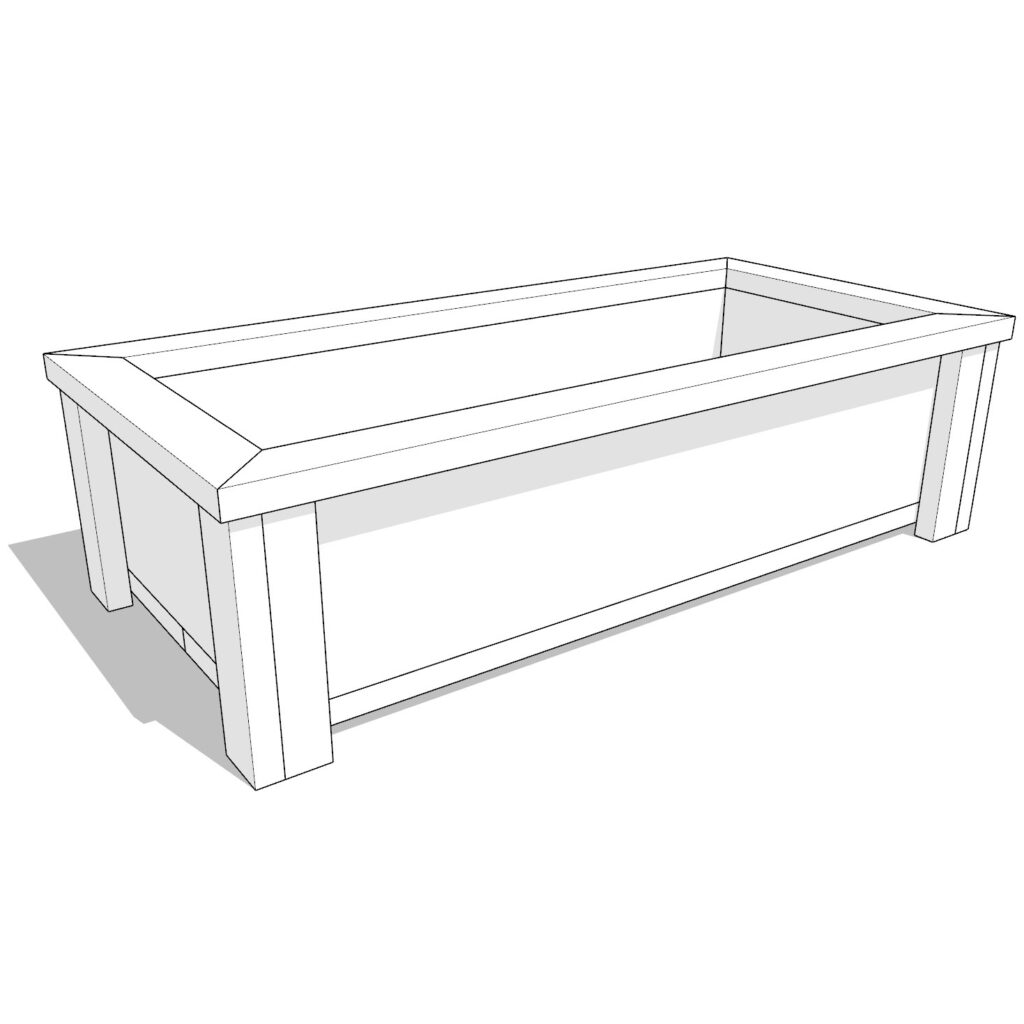
DIY Planter Box Dimensions

Tools and Materials List:
Available with the purchase of the DIY plan PDF.
Lumber Cut List:
Available with the purchase of the DIY plan PDF.
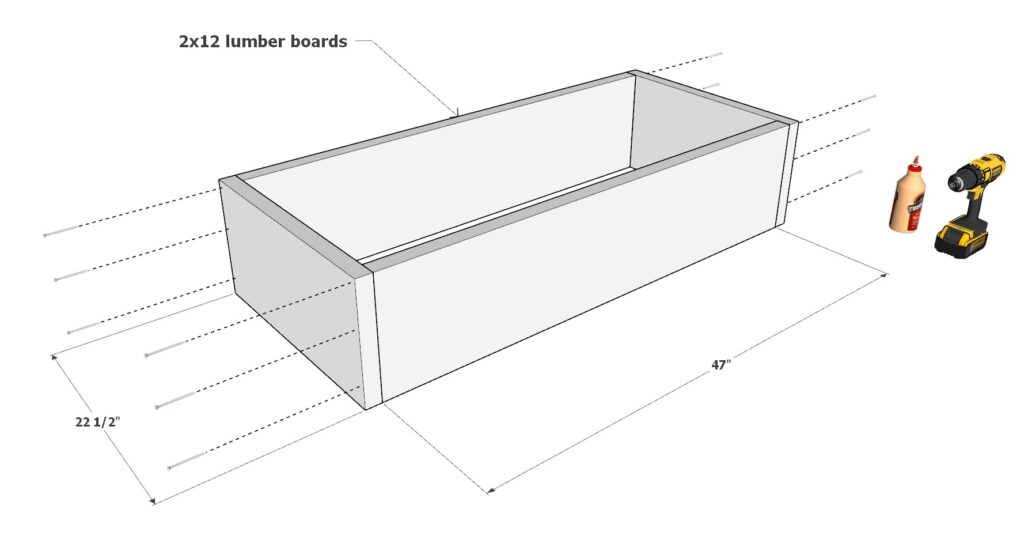
Step 1: Constructing the Frame
Begin by creating the frame of your planter box. You’ll need two pieces of 2×12 lumber, each cut to 47 inches, and two more cut to 22-1/2 inches. These will form the rectangle that serves as the base of your planter box. Securely join these pieces using wood glue and 2.5-inch screws to ensure a stable frame.
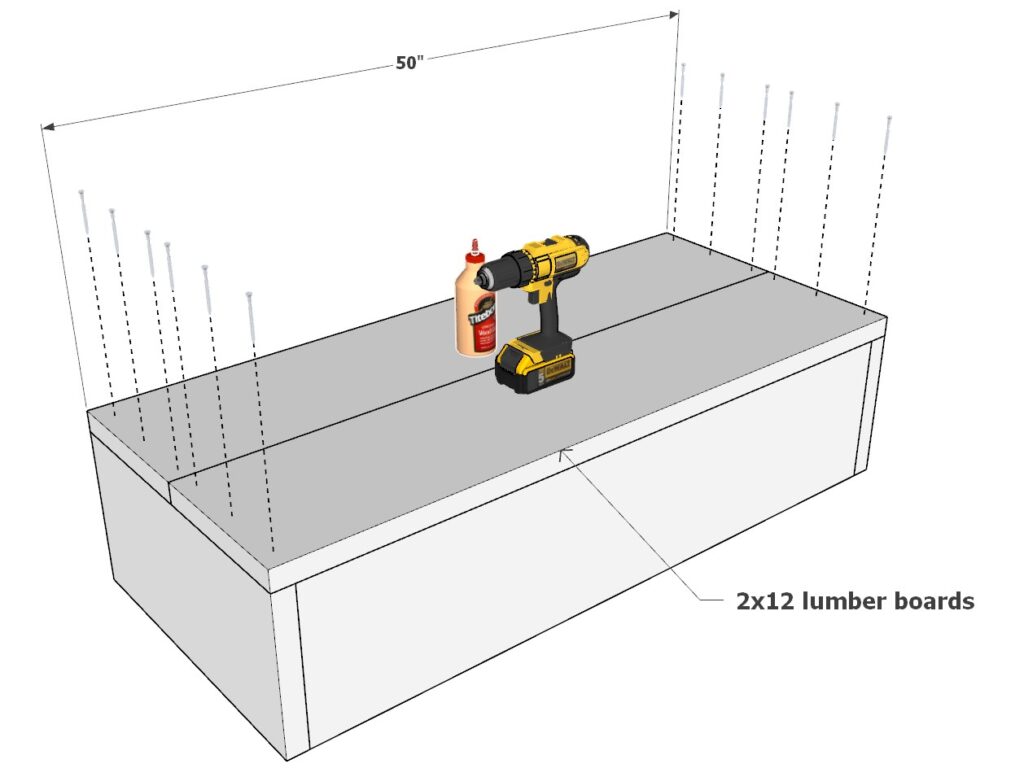
Once the frame is assembled, attach two additional 2×12 lumber pieces, each 50 inches long, to the bottom of the frame to create a solid base. Apply wood glue to the edges and fasten them with 2.5-inch screws for a sturdy foundation.
Tips for a Professional Finish:
- Before assembly, consider sanding and planing the wood for a smoother, more refined appearance. It’s much harder to sand the wood after the planter box is assembled.
- To prevent the wood from splitting and to extend the life of your planter, use a countersink drill bit when driving the screws in. This will allow the screws to sit flush with the wood surface and provide a more finished look.
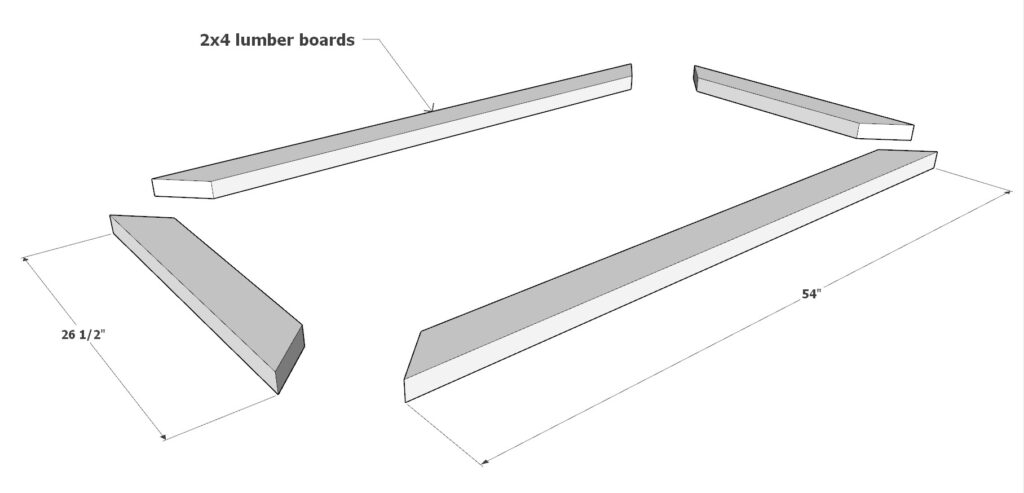
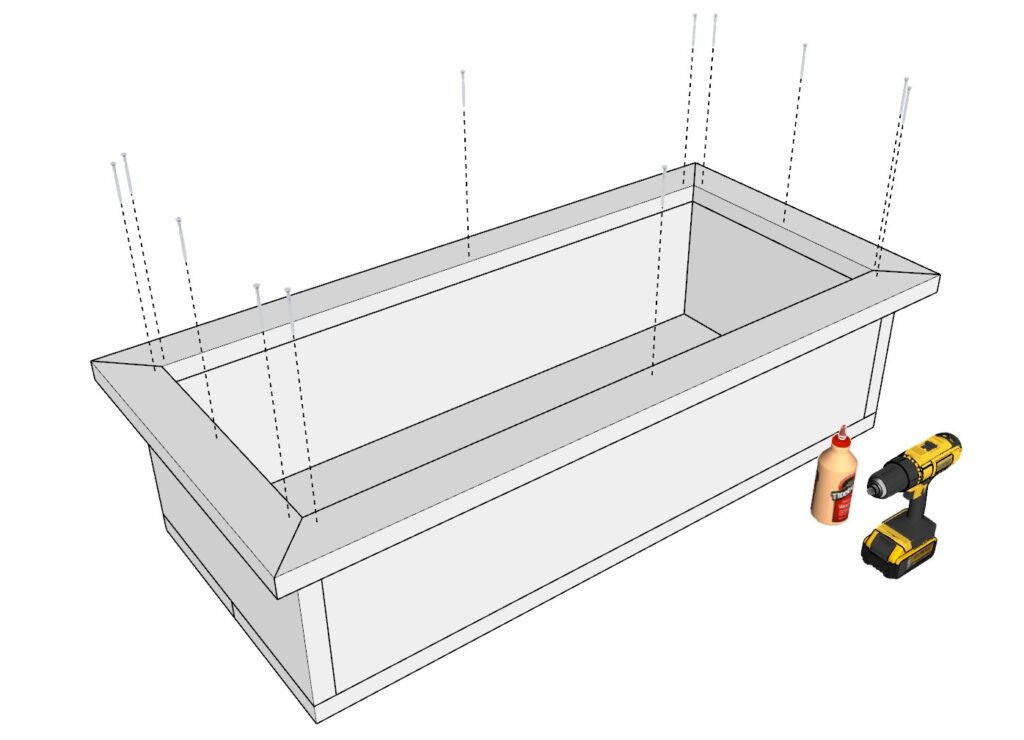
Step 2: Adding the Decorative Lip
The next step is to add a decorative lip around the top edge of your planter box. Not only does this enhance the visual appeal of the planter, but it also serves a practical function, providing a convenient ledge to place your gardening tools while you work.
For this part, you will need two 2×4 lumber pieces, each measuring 54 inches in length, with both ends cut at a 45-degree angle. You will also need two 26-1/2 inch 2×4 lumber pieces, with both ends similarly cut at 45 degrees, as per the diagram provided.
Position these boards around the top perimeter of your planter box to form the lip. Secure them in place using wood glue and 2.5-inch screws, ensuring they are firmly attached and aligned with the top edge for a cohesive look.
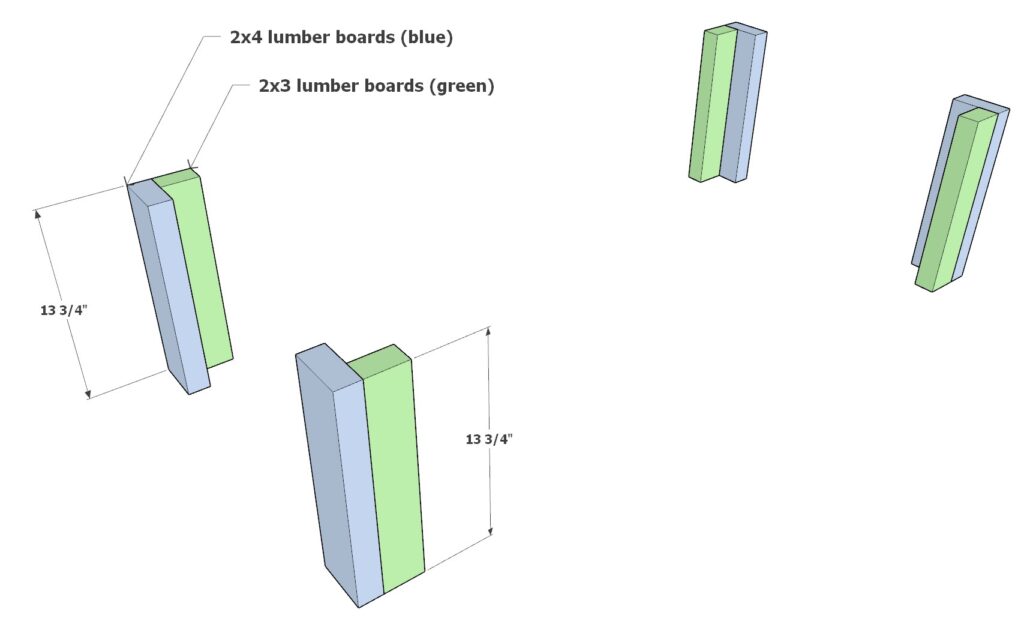
Step 3: Attaching the Legs
Now it’s time to give your planter box some height by adding legs. You will need four pieces of 2×4 lumber, each 13-3/4 inches in length, and four pieces of 2×3 lumber, also 13-3/4 inches long. In your provided diagram, these are indicated by blue (2×4) and green (2×3) colors for clarity.
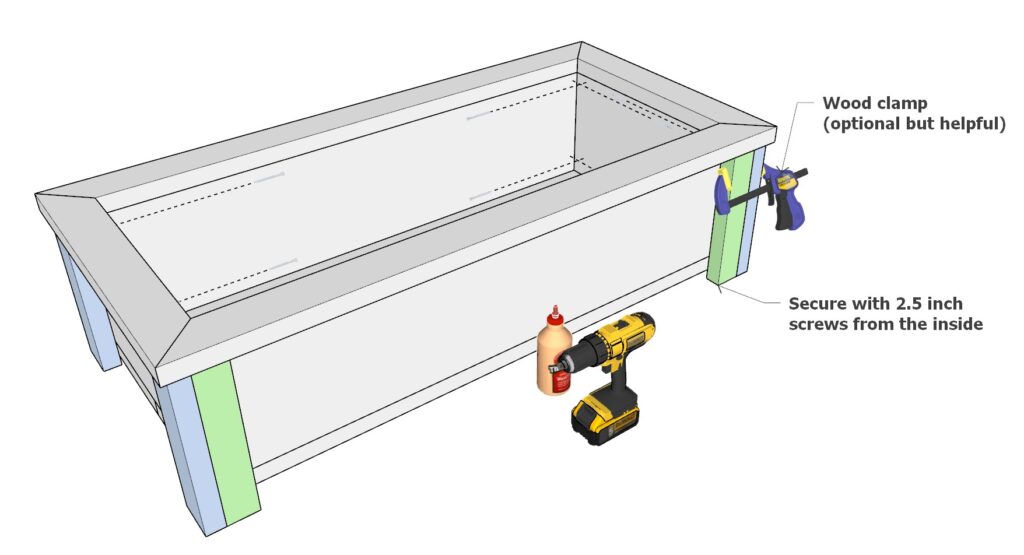
To attach the legs:
- Apply wood glue to one end of each lumber piece.
- Use clamps to hold each leg against the corners of the planter box for stability as you work.
- Secure the legs by fastening from the inside of the planter box with 2.5-inch screws. This will hide the screw holes and provide a cleaner finish. If the appearance of screw holes is not a concern for you, attaching from the outside is a simpler process.
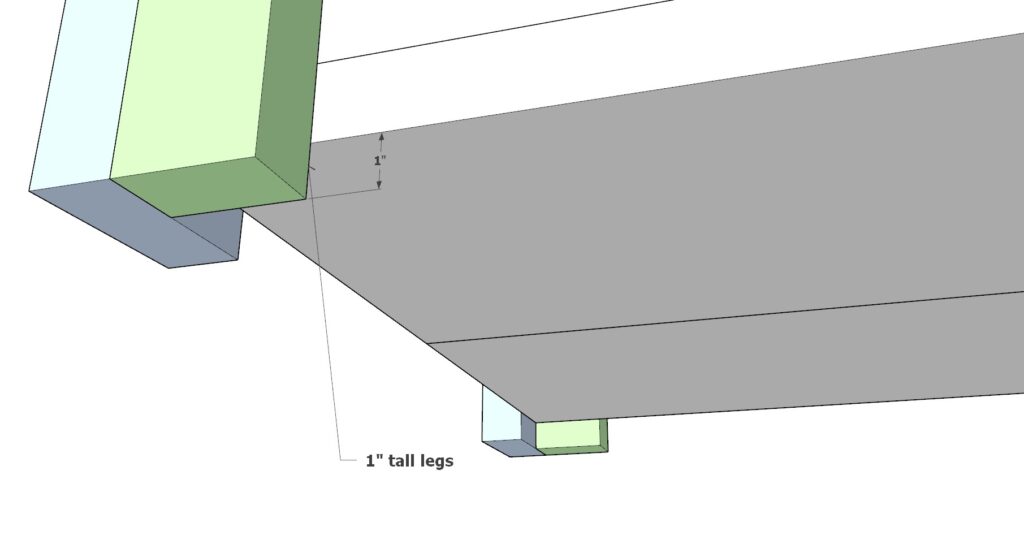
Ensure that the legs are positioned to raise the frame exactly 1 inch off the ground. This slight elevation will protect the bottom of the box from direct contact with the ground, potentially extending the lifespan of the planter.
Step 4: Drainage, Finishing, and Maintenance
Drilling Drainage Holes:
Adequate drainage is crucial for plant health as it prevents water from pooling at the bottom of the planter, which can cause root rot. To ensure proper drainage:
- Select a wide drill bit, at least 1/2 inch in diameter, for creating drainage holes.
- Space the holes evenly across the bottom of the planter box, about every 6 inches, to allow for uniform drainage.
- Drill the holes from the inside out to reduce splintering of the wood on the exterior.
Sanding and Preparing for Finishing:
Before painting or staining, it’s important to sand down the planter box to remove any rough spots and to create a smooth surface that will take the finish well.
- Start with a coarse-grit sandpaper to remove major imperfections and follow up with a finer grit for a smooth finish.
- Wipe down the box with a damp cloth to remove all sawdust.
Staining and Painting Tips:
When choosing a stain or paint, consider one that is suitable for outdoor use to ensure longevity.
- Apply the stain or paint only to the exterior surfaces of the planter box to prevent any potential chemicals from leaching into the soil and affecting your plants.
- Follow the manufacturer’s instructions for the best application method and drying times.
Using a Garden Bed Liner:
A garden bed liner is a beneficial addition to your planter box for several reasons:
- It helps to contain soil and prevents it from spilling out of the drainage holes.
- A liner can extend the life of your planter by protecting the wood from moisture and soil contact.
- To install, simply cut the liner to the size of the planter’s interior and staple or tack it in place just below the top edge.
Maintenance Information:
To ensure your planter box remains in top condition:
- Regularly check the integrity of the wood and the tightness of the screws, especially at the beginning and end of each growing season.
- Refresh the paint or stain as needed to maintain a protective layer against the elements.
- Keep the drainage holes clear to prevent water buildup.
- If you used a liner, inspect it for tears or degradation over time and replace it when necessary to continue protecting the wood.