Introduction
Transform your bedroom with our elegant, yet functional DIY nightstand, designed with both aesthetics and convenience in mind. A harmonious blend of style and utility, this wooden masterpiece is the perfect addition to any modern bedroom, offering a touch of sophistication while addressing practical needs.
Specifications
Crafted from 100% quality wood, this nightstand stands at a height of 20 inches, with a width of 14-1/4 inches, and length of 13-1/8 inches. Designed to be sturdy yet stylish, it’s a tangible testament to craftsmanship that marries form and function.
Functional and Aesthetic Features
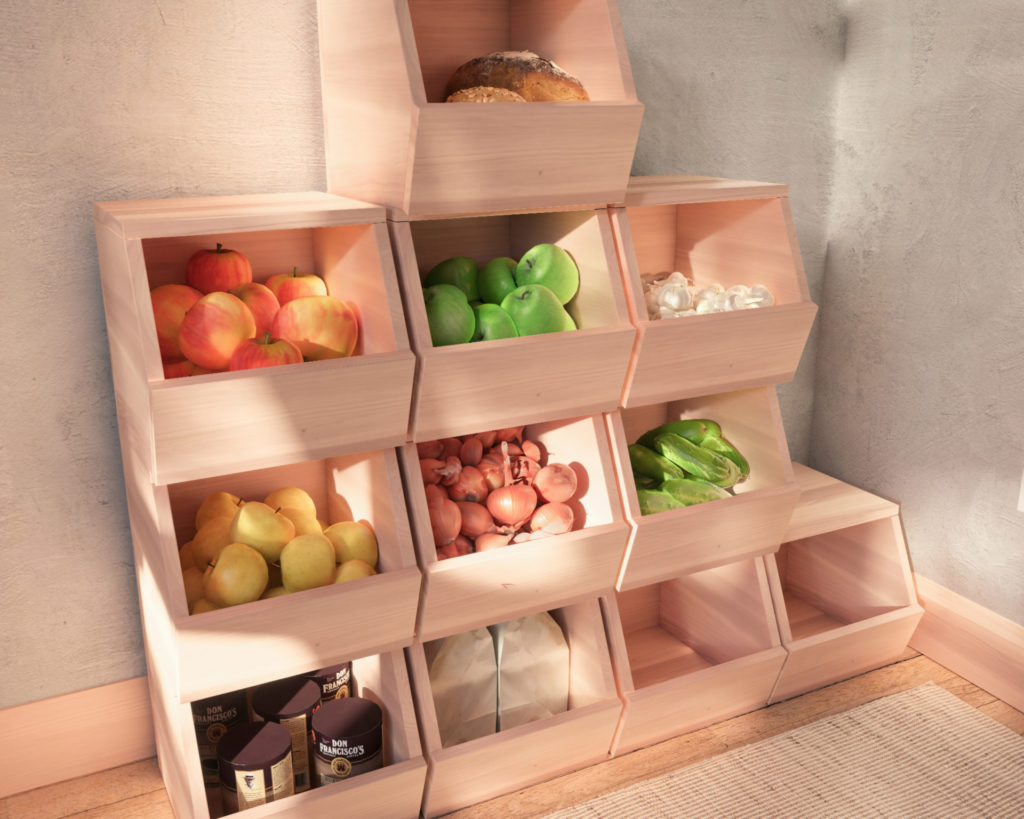
Boasting a sleek A-frame design, the nightstand is not just an aesthetic centerpiece but a storage solution. It features a smoothly sliding pull-out drawer, equipped with soft close stainless steel full extension drawer slides for silent and effortless access. The open shelf beneath the tabletop is an added storage boon, offering a convenient space that’s also perfect for tucking away charging cords, ensuring a clean and clutter-free appearance.
Ease of Assembly
Even for the novice woodworker, this nightstand is a delight to assemble. With no need for complex cuts or intricate joints, the design leverages simple lumber readily available at home improvement stores. The thoughtful design ensures that screw holes can easily be concealed with dowels, guaranteeing not just a straightforward assembly process but a polished, professional finish.
What’s Included in the DIY Plan
Our DIY plan is your comprehensive guide to transforming lumber into an elegant nightstand. Included are detailed step-by-step instructions, easy-to-follow diagrams, a complete list of required tools and materials, and helpful tips to guide you along the way. Visual and textual guides ensure a seamless building process, making this plan perfect for woodworkers of all skill levels.
Conclusion
Step into a world where elegance, functionality, and the joy of DIY converge. Our DIY nightstand plan offers a rewarding journey from simple materials to a bespoke piece of furniture that elevates both form and function in your space. Are you ready to build a nightstand that combines sleek design, practical storage, and the incomparable touch of handmade craftsmanship? Your journey begins here.
Time
30 minutes per bin (varies with experience)
Cost
14 Bins: $6.50 per bin
2 Bins: $25.47 per bin
Note: Costs may vary based on location and supplier.
Skill level required
Beginner

DIY Storage Bins PDF Plan
What is included in the PDF download?
- Easy to read step by step instructions
- Material list
- Tools needed
- Helpful links to materials and tools needed
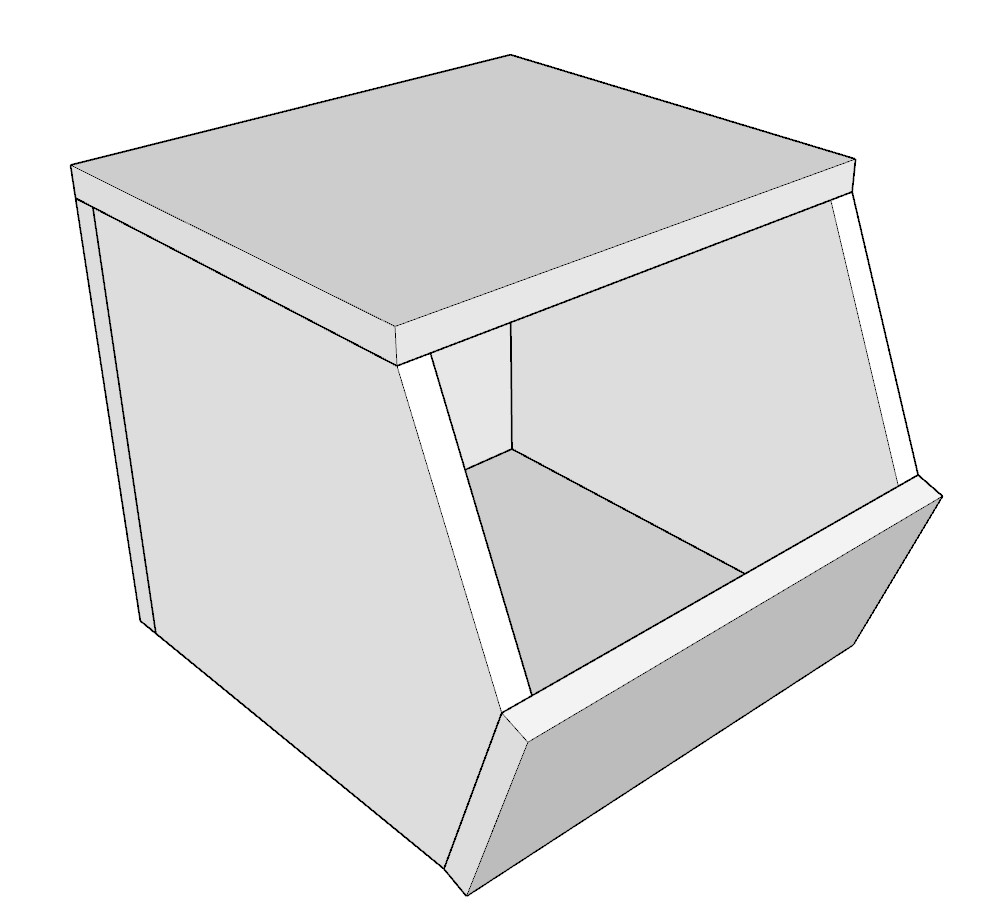
DIY Storage Bins Dimensions
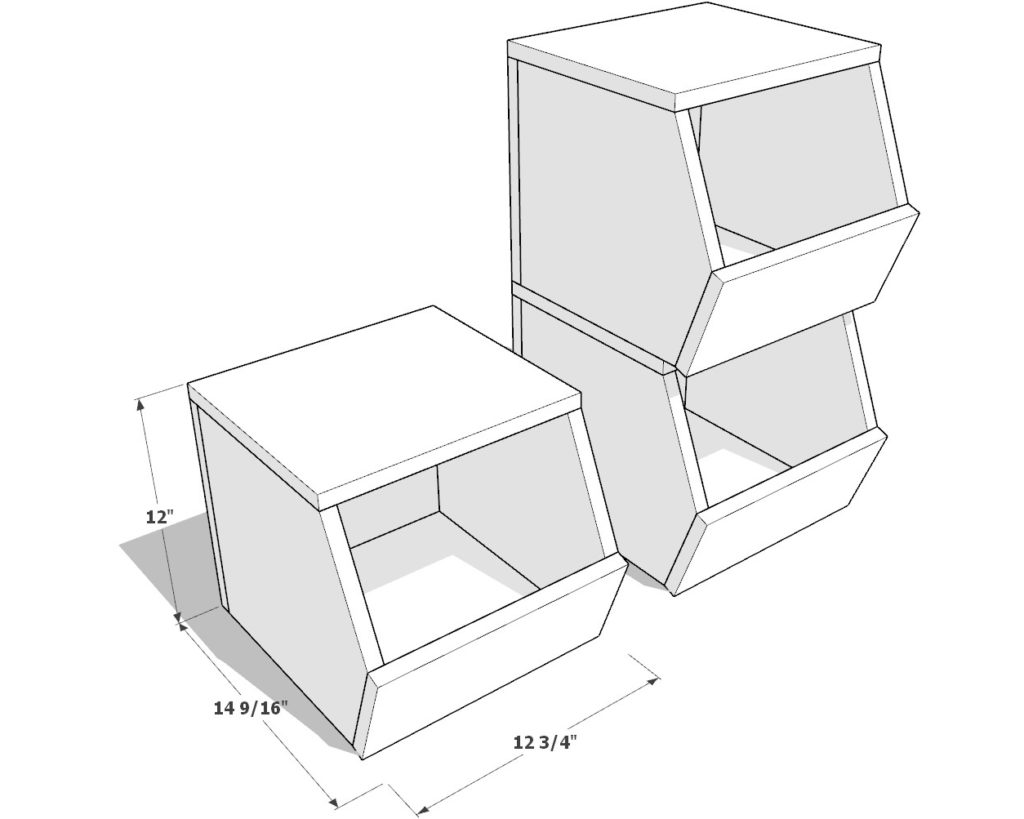
Step 1: Preparing and Assembling the Wood Pieces
In this initial step, focus on cutting and assembling the wood pieces to form the structure of the bin. Follow these instructions to ensure precision and safety.
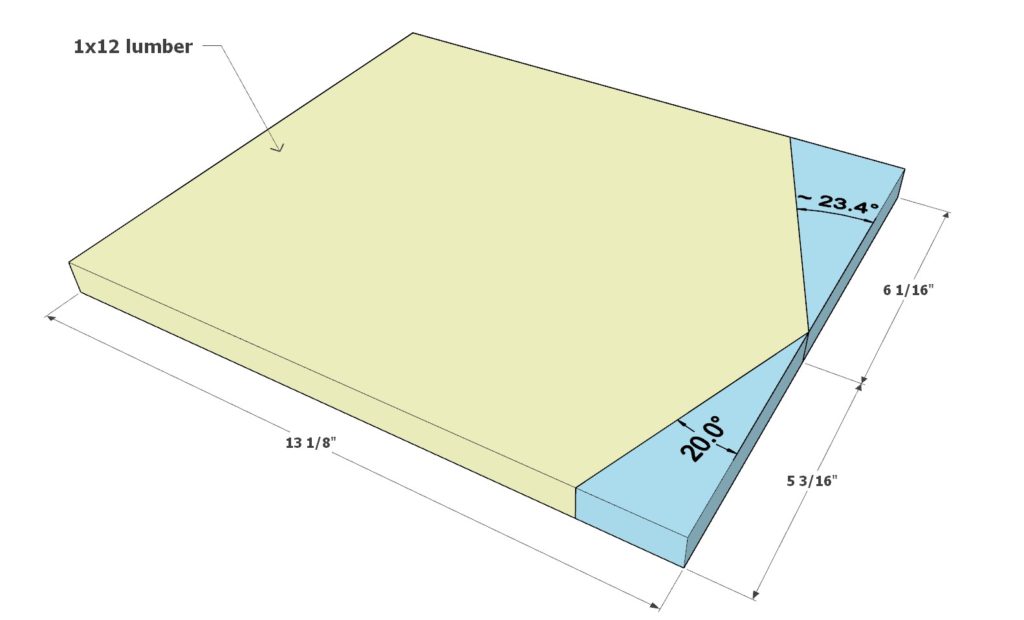
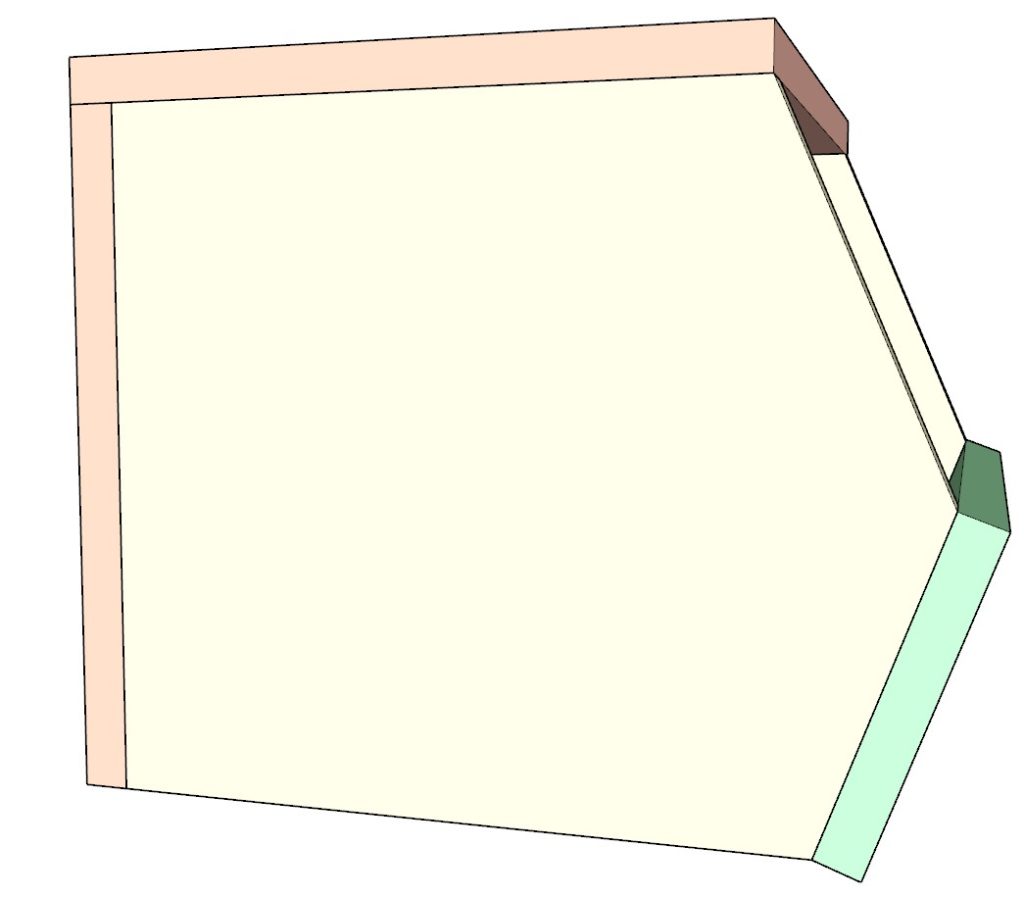
Cut the Wood Pieces:
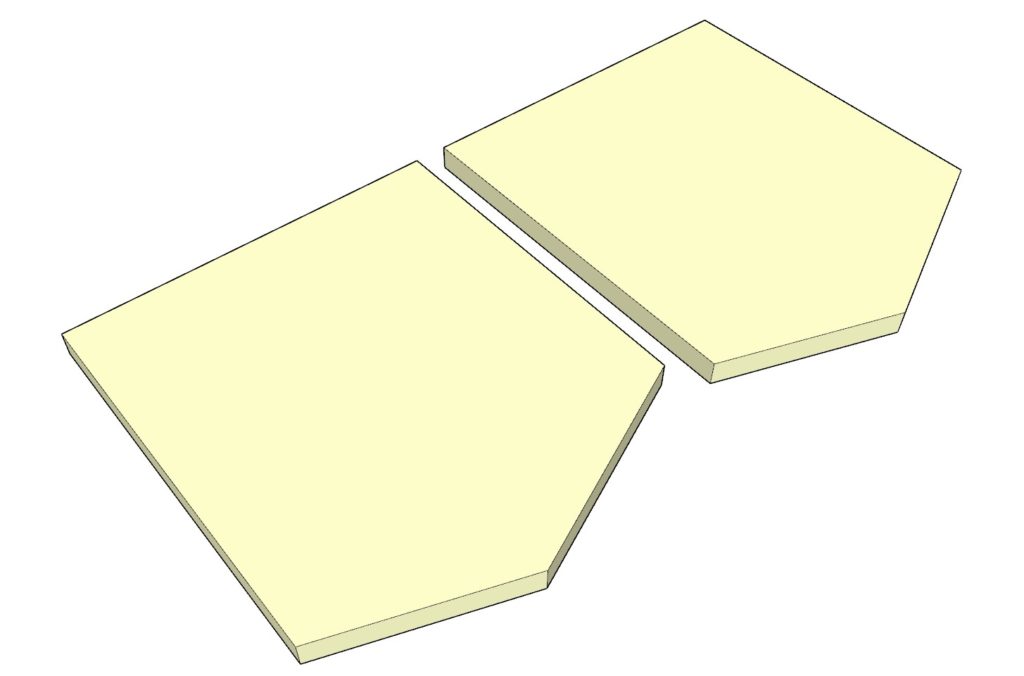
- Cut two 13-1/8 inch pieces from the 1×12 lumber. One end should be cut at a 23.4-degree angle and another at a 20-degree angle to form a point. These pieces are represented in yellow.
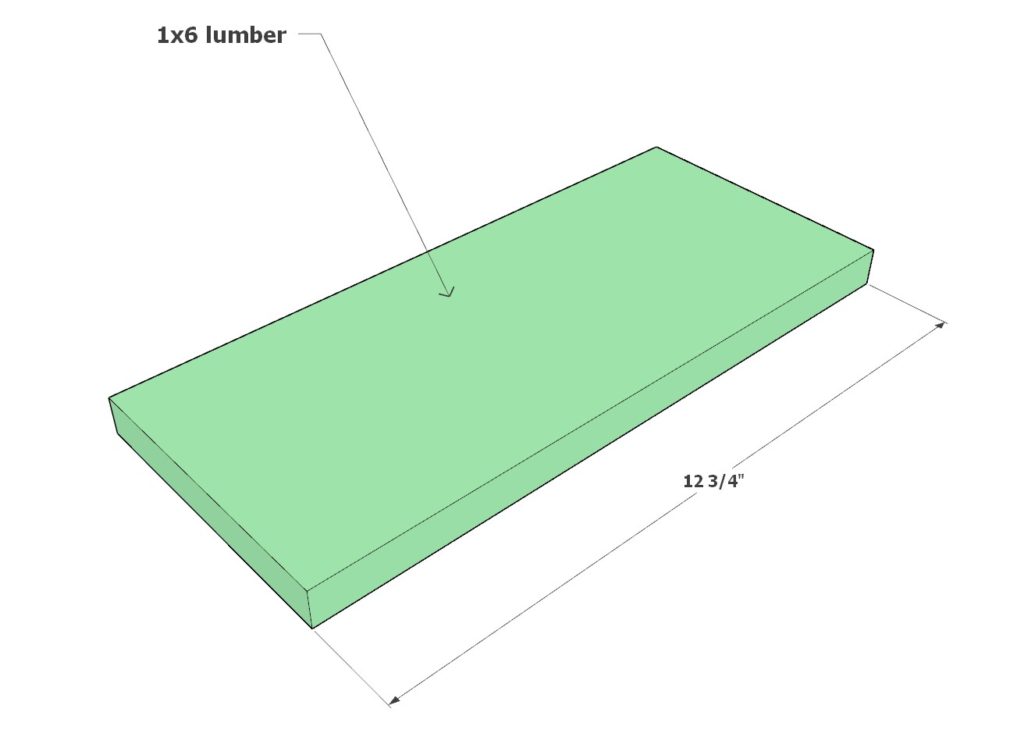
- Cut one 12-3/4 inch piece from the 1×6 lumber, represented in green.
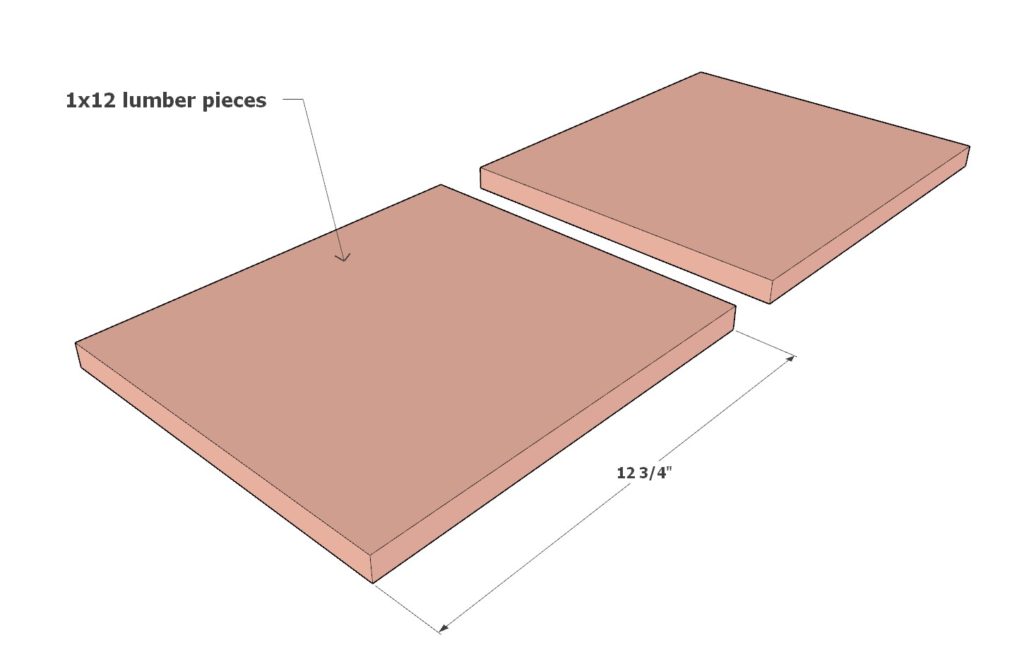
- Cut two 12-3/4 inch pieces from the 1×12 lumber, represented in peach.
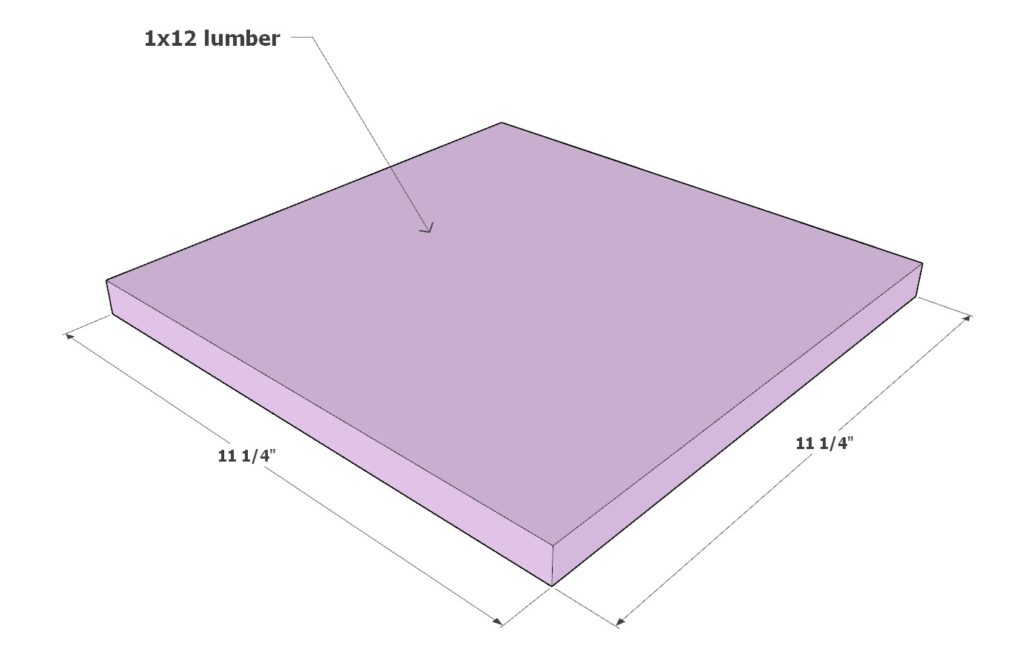
- Cut one 11-1/4 inch piece from the 1×12 lumber, represented in lavender.
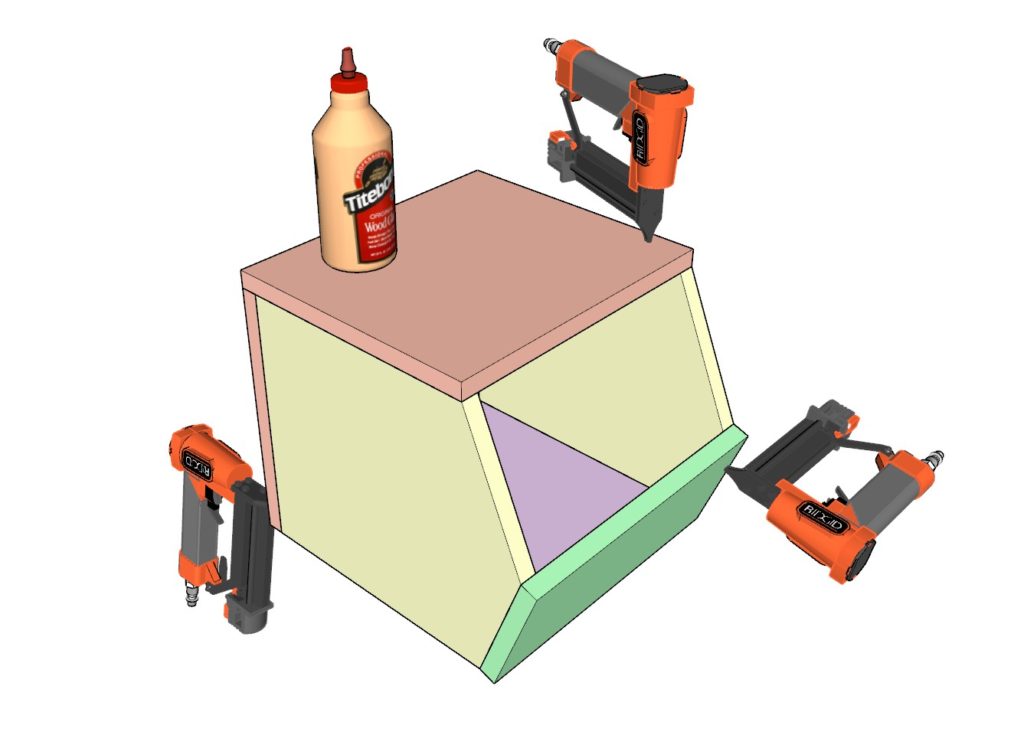
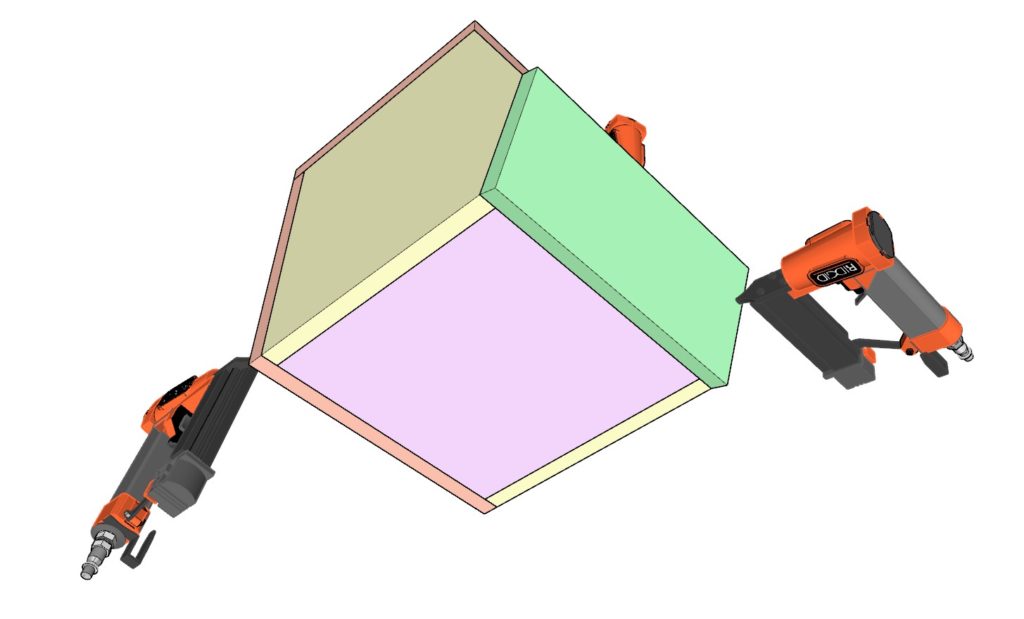
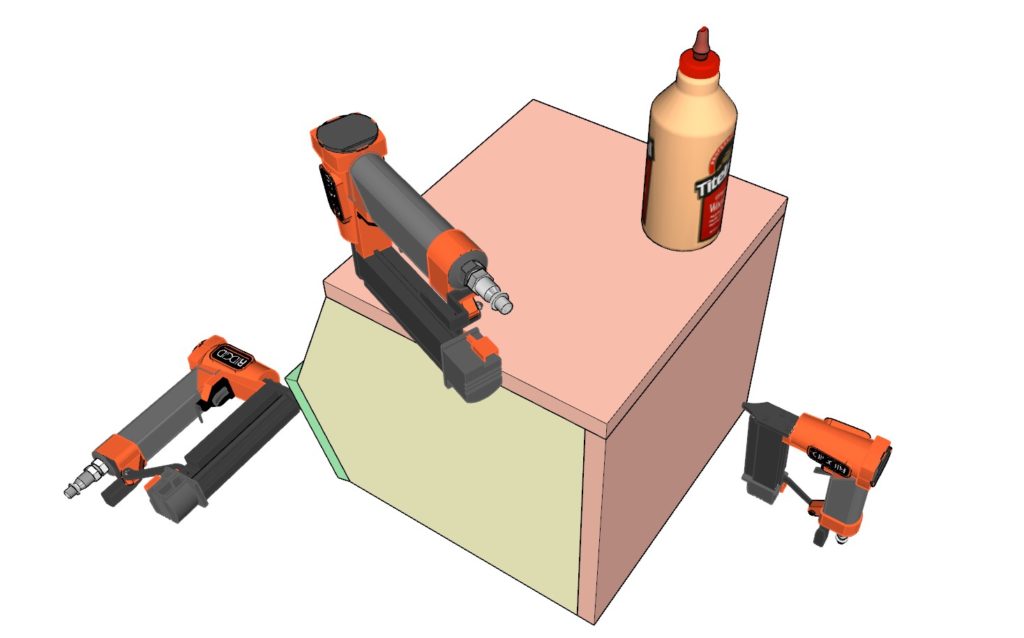
Assemble the Cut Pieces:
- Using 1.5 inch pin nails and wood glue, secure all the components together with a nail gun. Ensure each piece fits snugly and is firmly attached.
Tips for a Neat and Safe Assembly:
- Utilize wood clamps to hold parts together while nailing to achieve a neat finish.
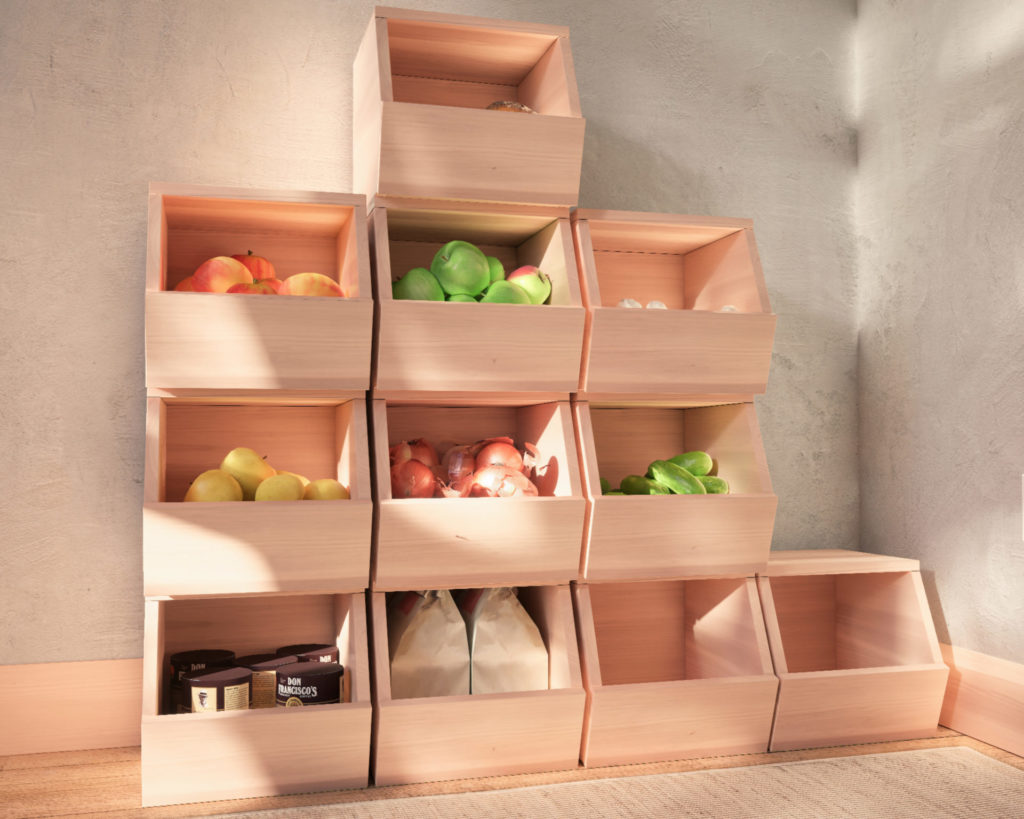
- Allow the 1×6 lumber piece to have a little overlap. This design ensures the bin leans back slightly, enhancing stability and safety when stacked or leaned against a wall.
- For a polished look, consider staining or painting all the pieces before assembly. Touch up as necessary after assembly to maintain a clean, professional appearance.
Step 2: Preparing, Staining, and Painting the Bins
In this step, we’ll guide you through the detailed process of preparing your wooden bins for staining and painting. Follow these instructions to achieve a professional, long-lasting finish.
A. Preparing the Bins:
Sanding:
- Begin with sanding each piece thoroughly. Use a medium-grit sandpaper (120-grit is ideal) to smooth out any rough edges or surfaces.
- Pay close attention to the corners and edges, ensuring they are smooth to touch. This not only makes the bins safer but also helps in the even application of stain or paint.
- Wipe the wood pieces with a tack cloth to remove any dust or debris.
Cleaning:
- Clean the wood with a damp cloth to remove any residual dust. Allow the wood to dry completely before proceeding.
B. Staining Process (For Those Choosing to Stain):
Pre-Stain Application:
- Apply a coat of pre-stain wood conditioner using a brush or clean cloth. Ensure even coverage to allow the stain to be absorbed uniformly.
- Allow the pre-stain to sit for about 5-15 minutes, then wipe off any excess with a clean cloth.
- Let the wood dry as per the manufacturer’s instructions.
Stain Application:
- Stir the stain well before application. Use a brush or cloth to apply the stain, working along the grain of the wood.
- Allow the stain to penetrate the wood for about 5-15 minutes. The longer it sits, the deeper the color will be.
- Wipe away excess stain with a clean cloth, again following the grain of the wood.
- Allow the stain to dry completely, which could take from a few hours to overnight, depending on the brand and type of stain.
Polyurethane Application:
- Apply a coat of polyurethane with a fine-bristle brush, foam pad, or cloth. Work in the direction of the grain, ensuring an even coat.
- Allow the first coat to dry as per the manufacturer’s guidelines, then lightly sand the surface with a fine-grit sandpaper to ensure the next coat adheres properly.
- Apply a second coat of polyurethane and allow it to dry completely.
C. For Those Choosing Natural Look or Painting:
Natural Look:
- If leaving the wood natural, apply only the pre-stain wood conditioner and polyurethane following the steps outlined above.
Painting:
- If you choose to paint the bins, start by applying a primer. Allow it to dry completely.
- Apply the first coat of paint using a brush or roller, ensuring even coverage. Allow the paint to dry as per the manufacturer’s instructions.
- If necessary, apply a second coat of paint for a more vibrant and even finish. Allow it to dry.
Step 3: Maintenance of Your Wooden Bins
In this section, we delve into the comprehensive maintenance practices to ensure the longevity, safety, and aesthetic appeal of your wooden bins. Wood, as a natural and versatile material, offers the benefit of renewability through refinishing processes like staining and painting.
A. Benefits of Using Wood:
Durability and Renewability:
- Wooden bins are known for their durability. One of the significant advantages is the ease of refinishing. As the bins age and wear, a simple restaining or repainting can restore their appearance and integrity.
- Scratches, dents, and other minor damages can often be repaired, giving the bins a fresh look while retaining their robust structure.
Aesthetic Appeal:
- Wood has a timeless beauty. With proper maintenance, the bins will not only be functional but also add an aesthetic touch to your space.
B. Safety Considerations for Food Storage:
Use of Food-Safe Finishes:
- If you intend to store food directly in the wooden bins, it’s crucial to use food-safe stains or paints. These finishes are specially formulated to ensure that no harmful chemicals leach into the food.
- Always check the labels and opt for finishes that are certified food-safe.
Avoiding Cross-Contamination:
- Even with food-safe finishes, consider using liners or containers within the bins to store food, reducing the risk of cross-contamination and making cleaning easier.
C. Maintenance Tips for the Wooden Bins:
Regular Cleaning:
- Dust the bins regularly to prevent the accumulation of dirt and debris. Use a soft, dry cloth for this purpose.
- For a deeper clean, wipe the bins with a damp cloth and allow them to dry thoroughly to prevent moisture damage.
Refinishing:
- Over time, the finish on the bins may wear. Assess the bins periodically and consider refinishing with stain or paint to restore their look and protect the wood.
- Always sand the surface lightly before refinishing to ensure the new finish adheres well.
Avoiding Excessive Moisture:
- While wood is a sturdy material, excessive moisture can lead to issues like warping or mildew. Always ensure the bins are kept in a dry place, and avoid storing wet items in them.
Inspection and Repair:
- Regularly inspect the bins for any signs of damage. Address issues like cracks or loosening joints promptly to maintain the structural integrity of the bins.