Pros of a DIY outdoor bar?
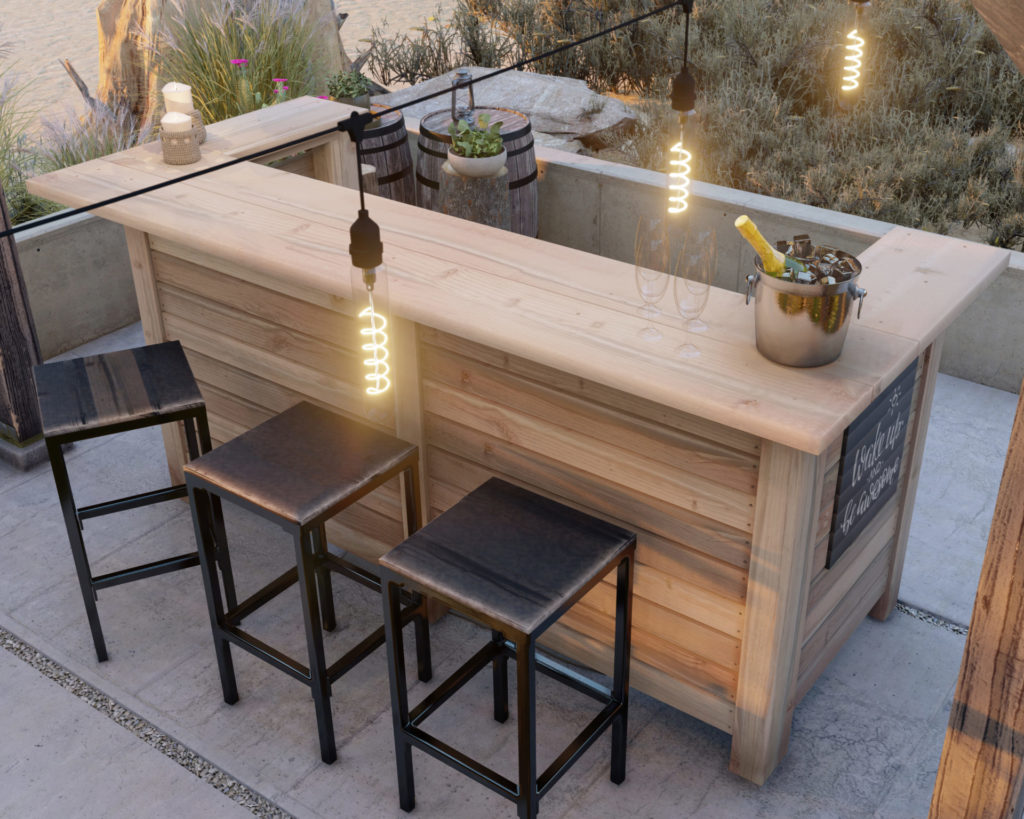
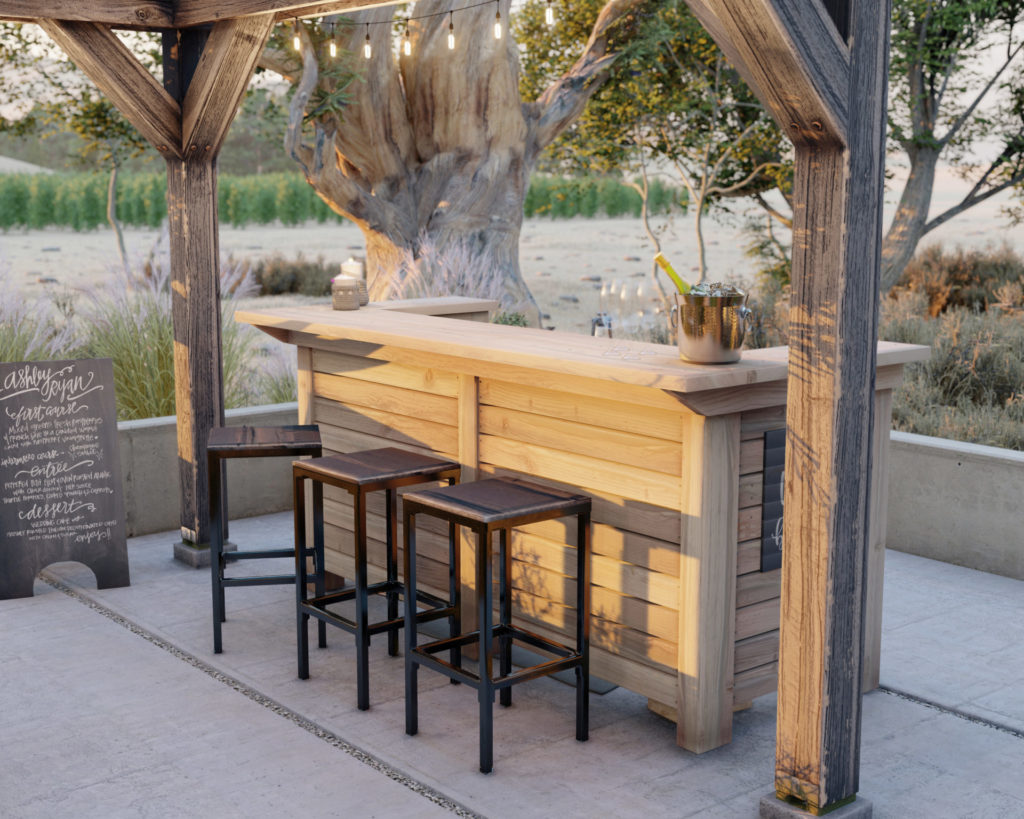
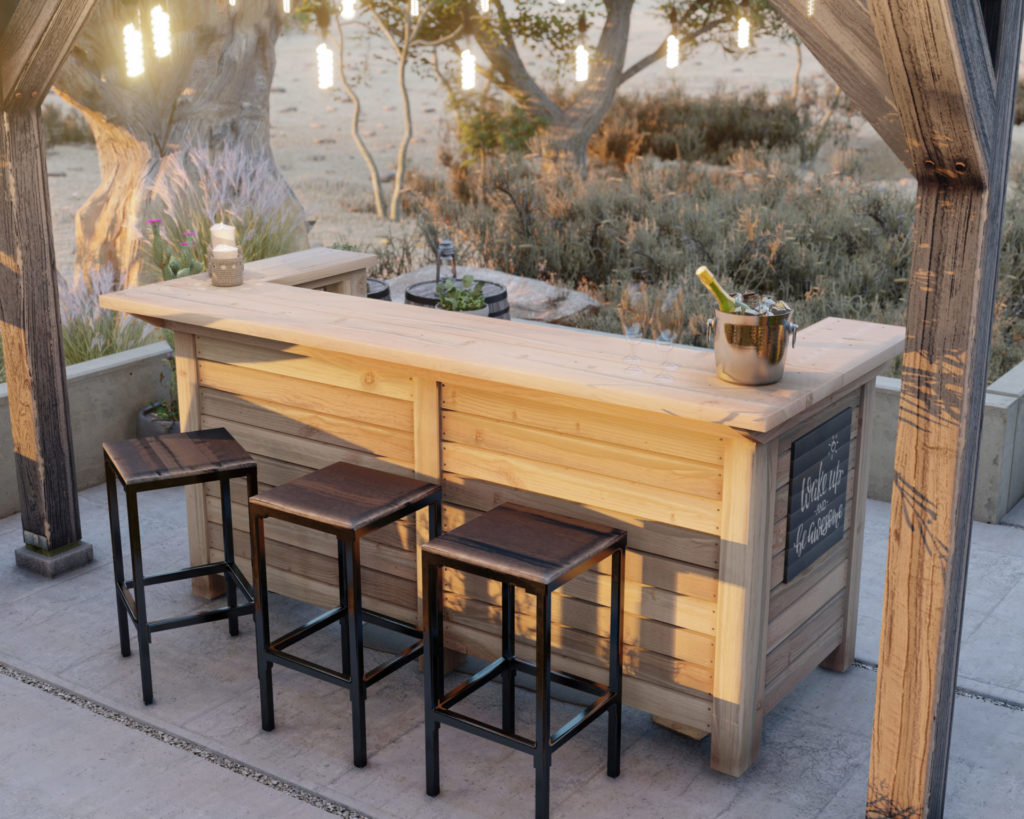
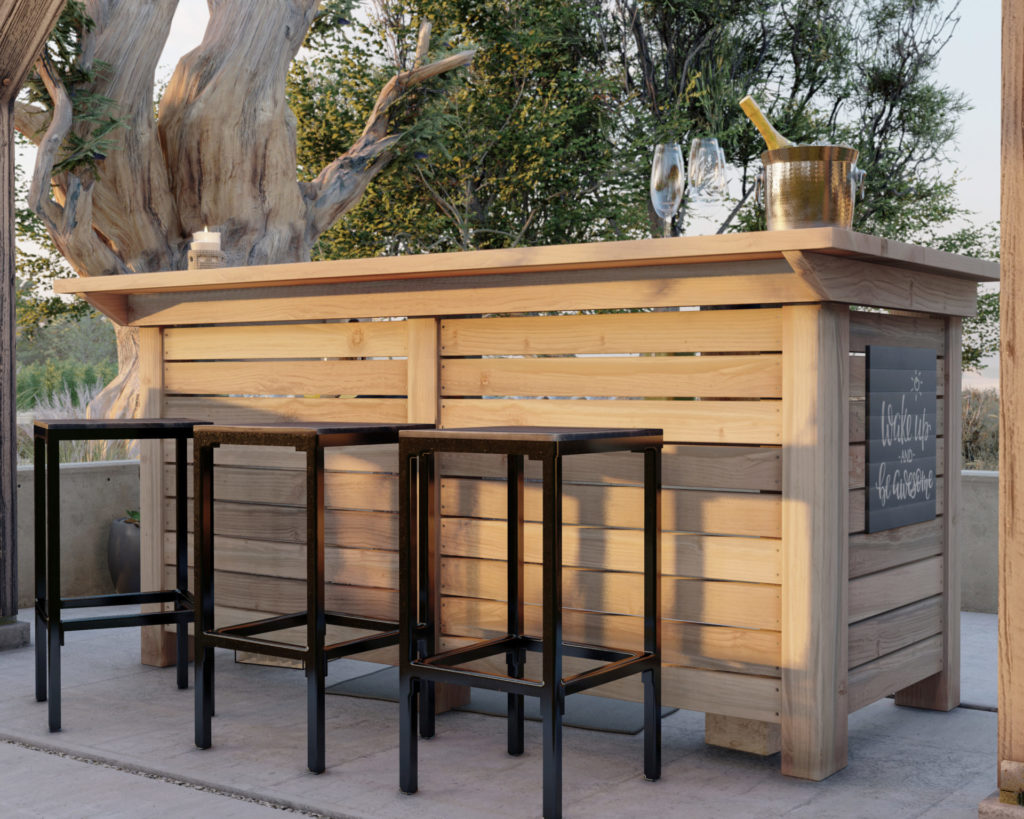
Summer is just around the corner and it’s a perfect time to gather friends and family to relax and enjoy the outdoors. This fantastic bas provides the necessary storage to hold glass bottles, glassware, napkins, and bar accessories.
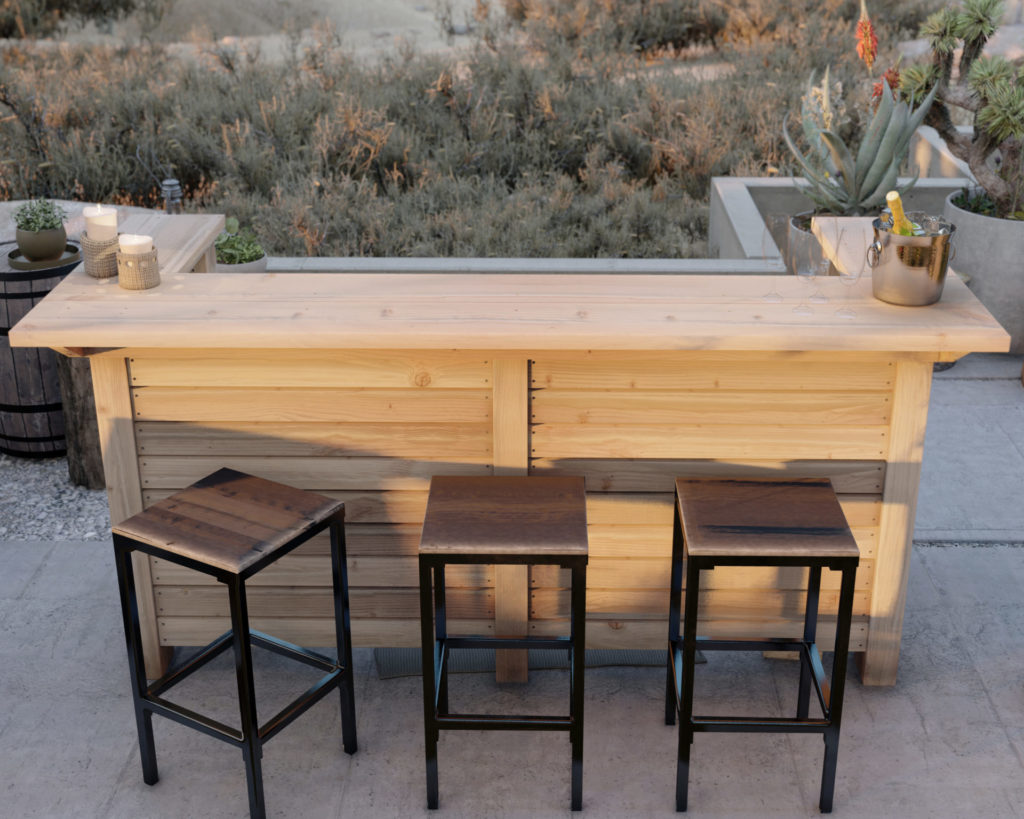
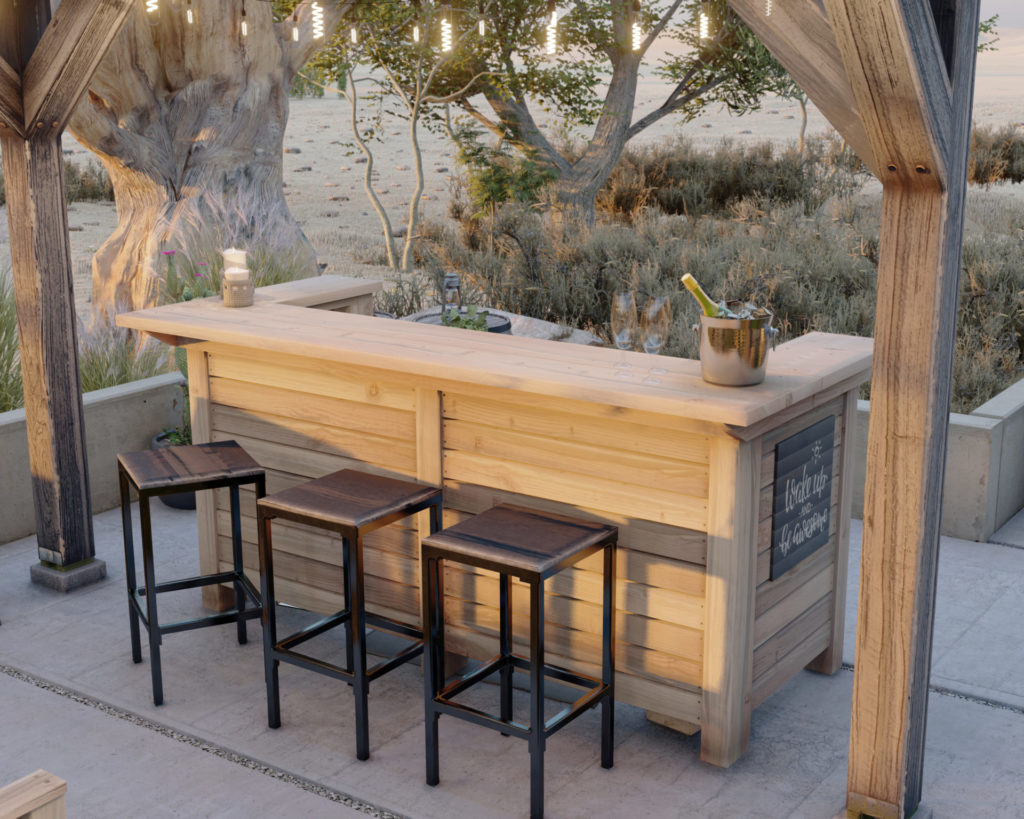
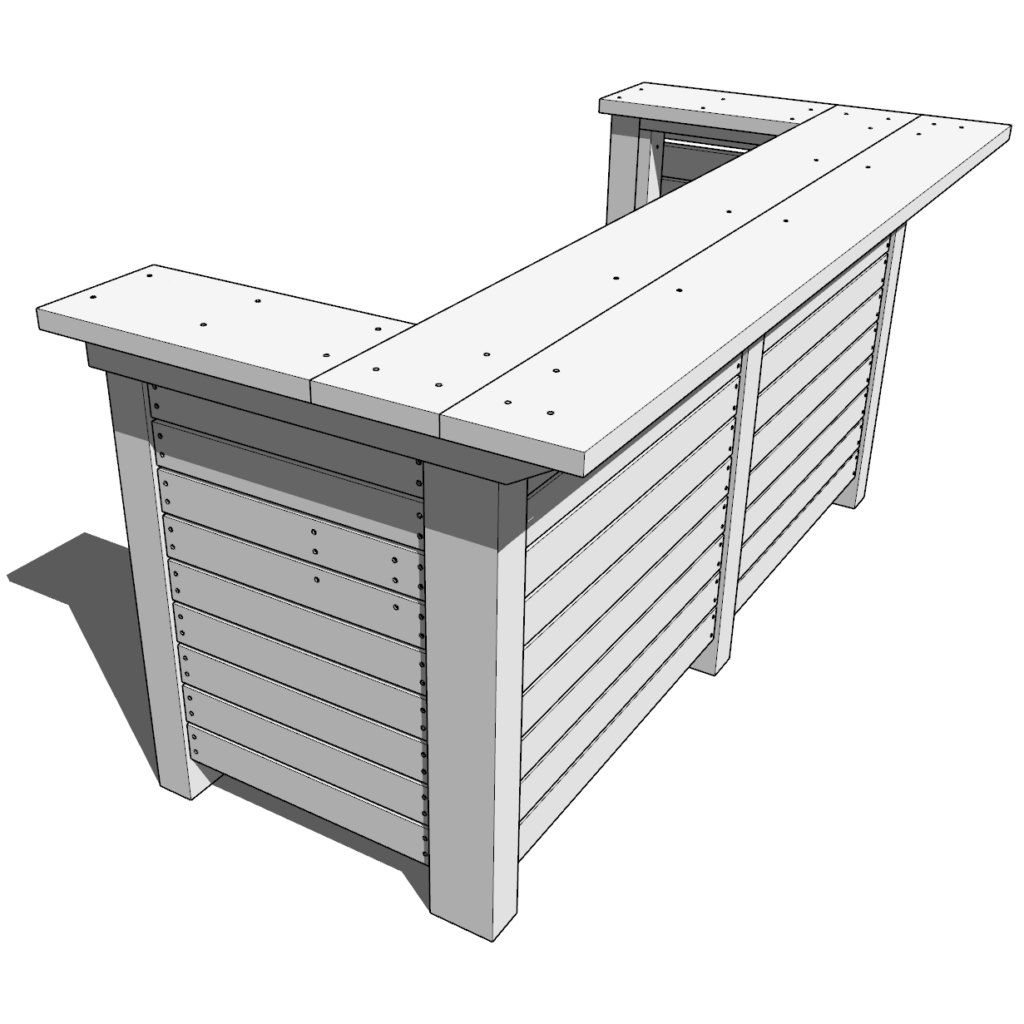
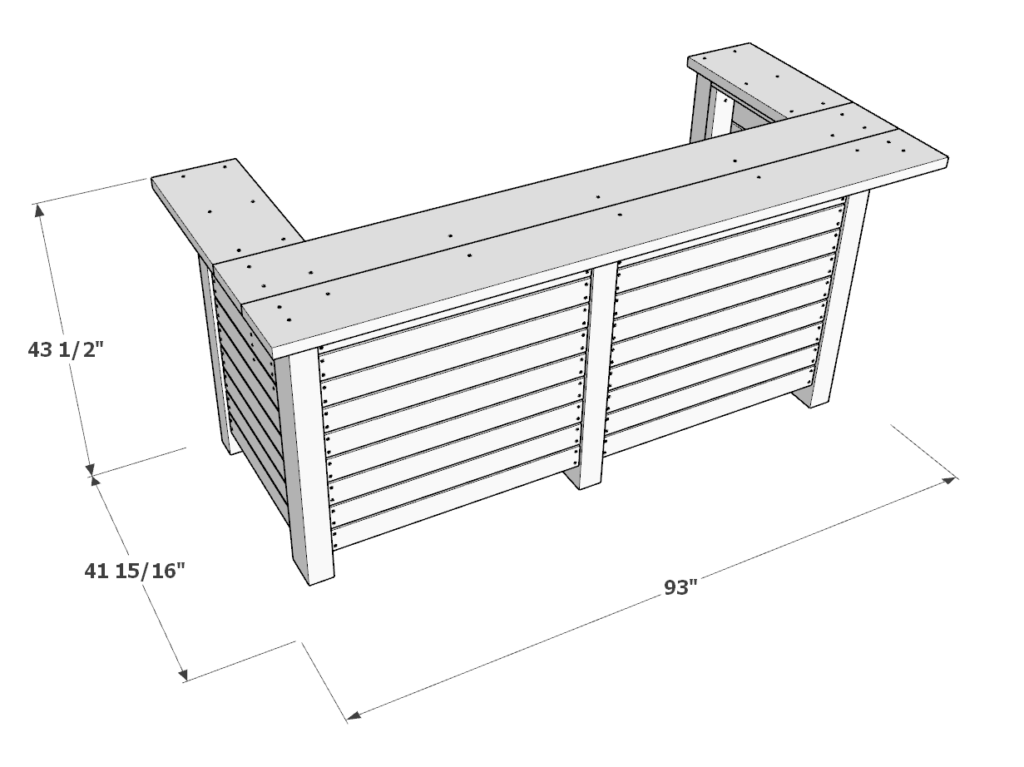
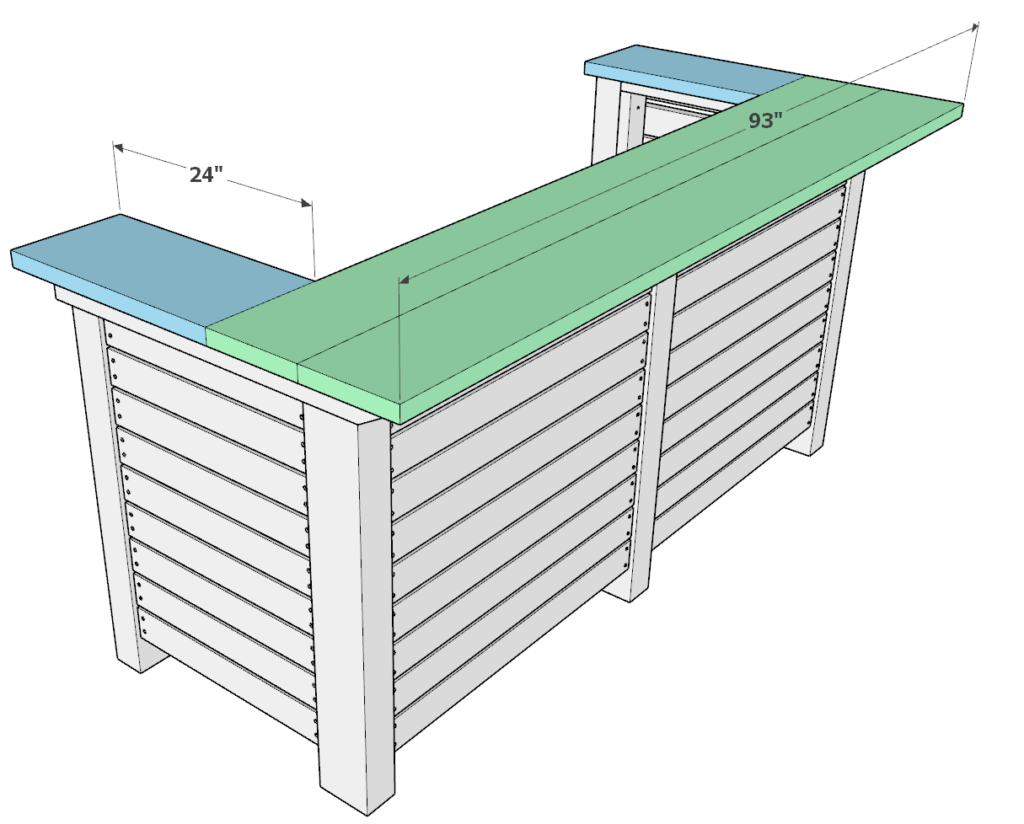
One of the most important features of the outdoor deck bar is adequate seating. This design features a 93-inch bar top that is can comfortably seat 3-4 so that your guests can enjoy their food and drinks without feeling crammed for your next cookout.
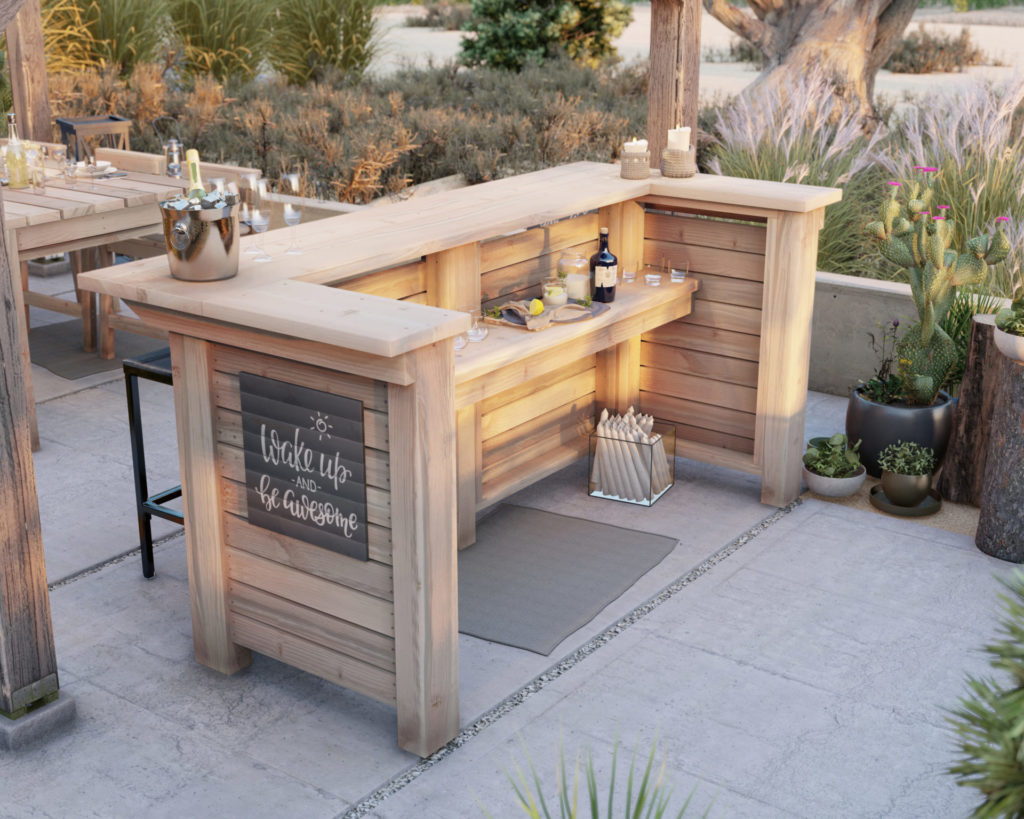
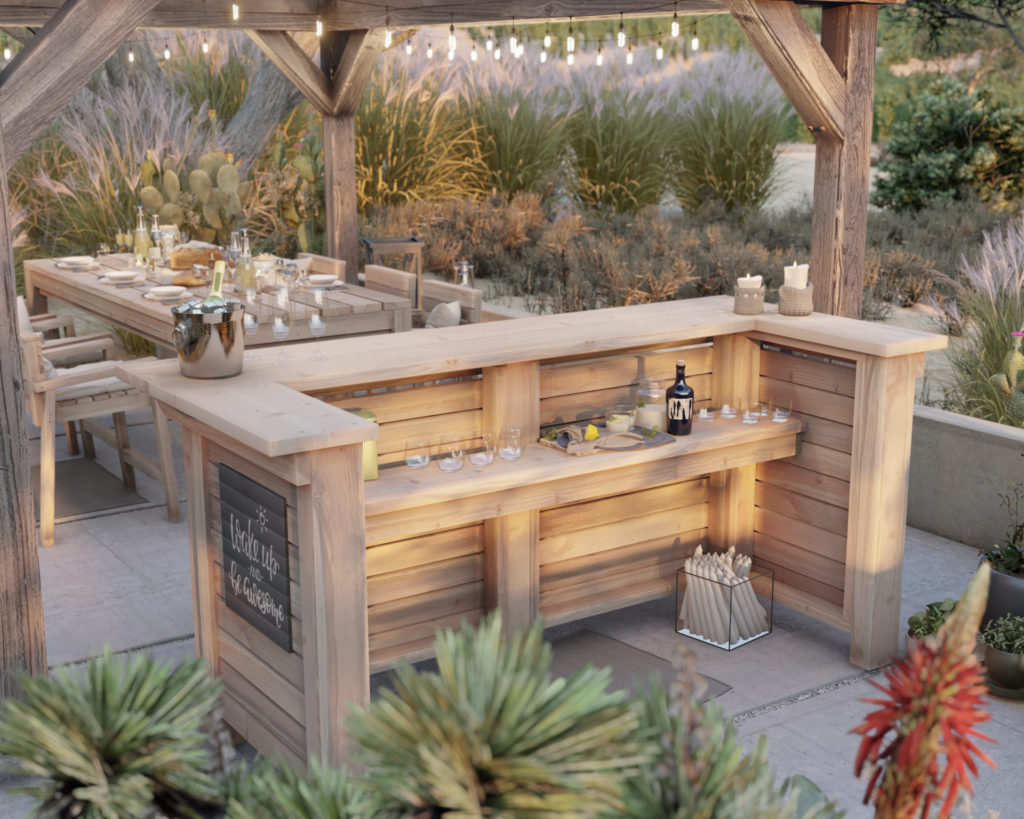
This DIY outdoor bar is more than just seating, it provides a space that enables you to host and service the guests and family in a more organized and professional way. The working counter of the outdoor bar provides a spacious area that can serve both as a working space and as storage for bar accessories. The two arms of the DIY bar provide an area where a mini refrigerator, kegerator, ice maker, or wine cooler can be set up.
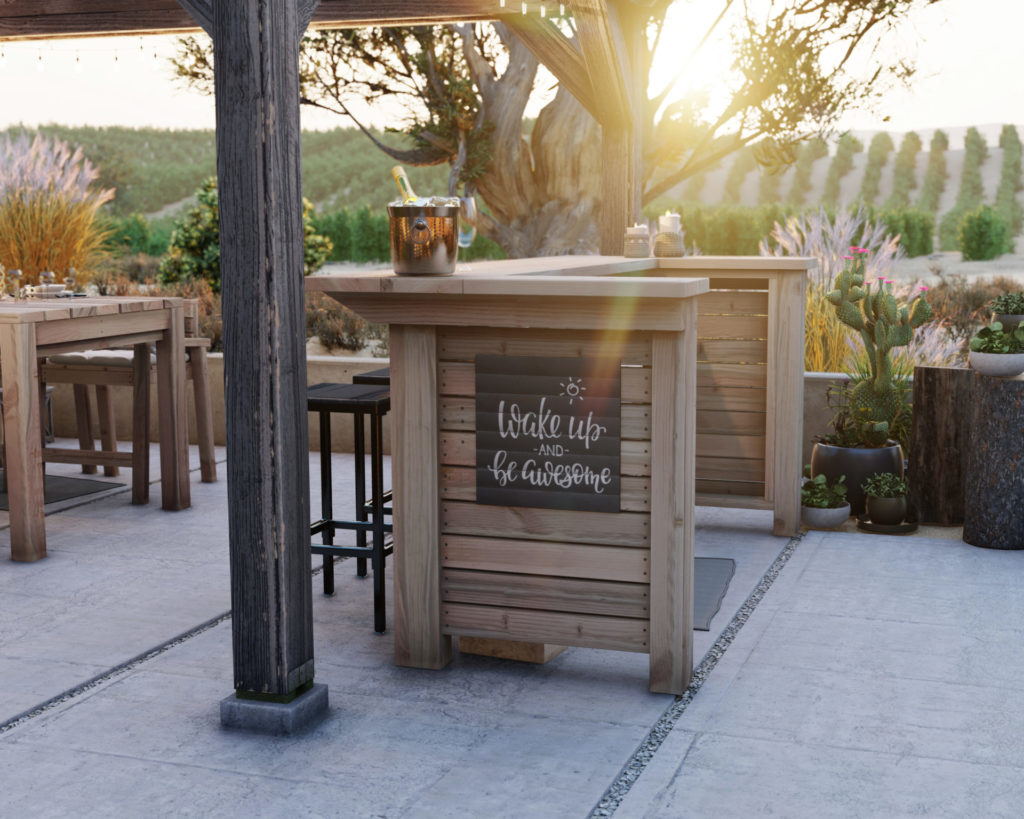
You can also use this bar center as a DIY outdoor buffet stand, beverage stand, and area for dispensing food for guests to take to their seats. You can place ice bins and coolers to keep drinks cold for the duration of a backyard, deck, or patio event.
How difficult is it to make this outdoor DIY bar?
Creating the design for this DIY bar table was easier than I anticipated. I think this would be a great project for anyone who is new to woodworking. The joints and cuts are simple and beginner friendly. If you follow the step-by-step instructions, you will be able to avoid mistakes, waste material, and in the end create the bar table without much hassle or worry.
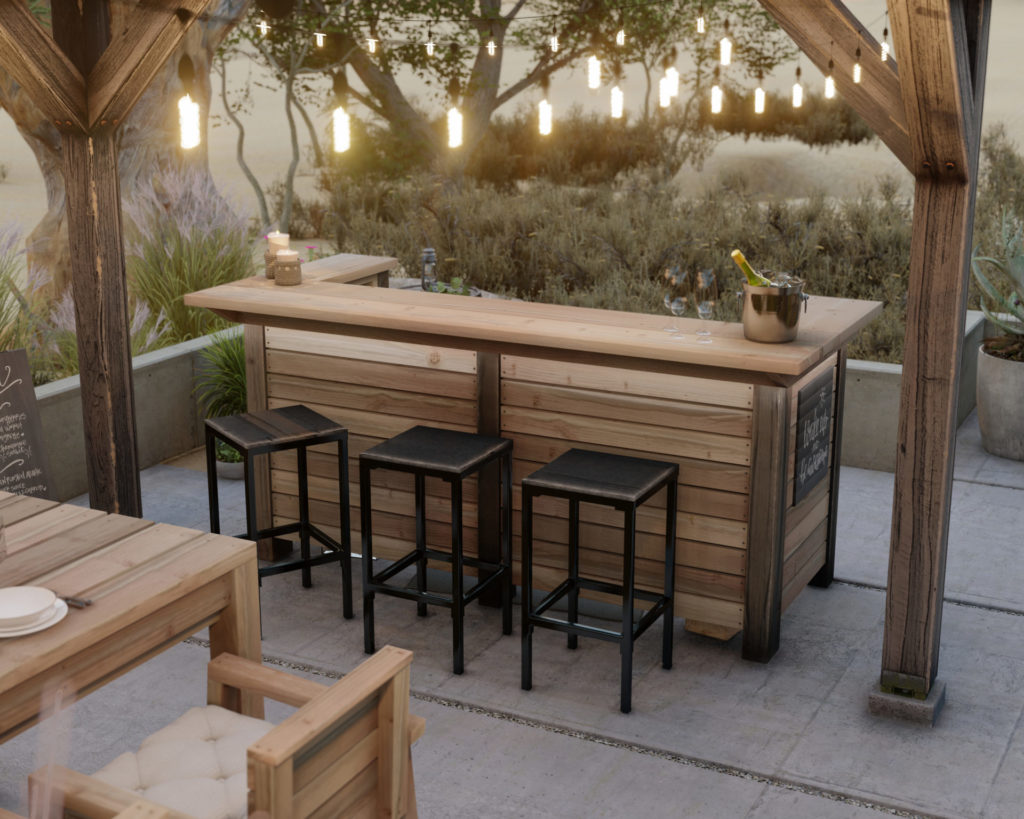
What about the other furniture pieces I see in the pictures?
Plans for the full-size counter-height table and chairs can be found here.

Time to build
About 6 hours
Total cost of build
About $300
Skill level required
Beginner
Download the PDF plans
Outdoor bar center PDF plans
What is included in the PDF download?
- Easy to read step by step instructions
- Material list
- Tools needed
- Helpful links to materials and tools needed
Step-by-step instruction on building the DIY outdoor bar
Recommend tools
- Saw (miter saw recommended for precision cuts)
- Drill
- Impact driver with bit for screws
- Sander
- wood countersink drill bit
- measuring tape
- pencil
Material list and cut list
Available with purchase of PDF plans.
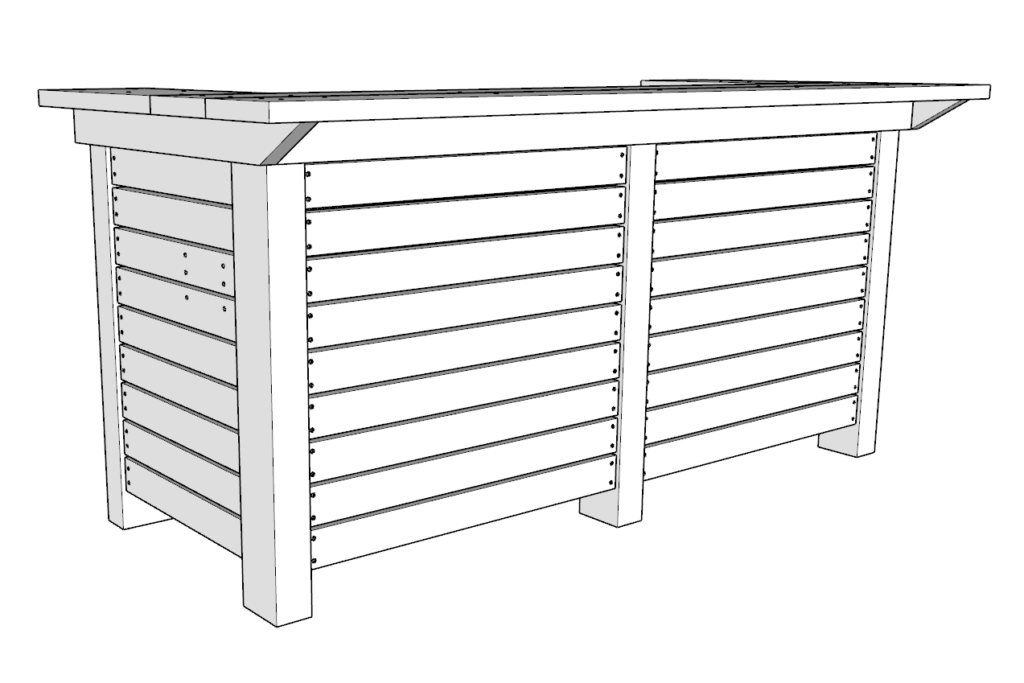
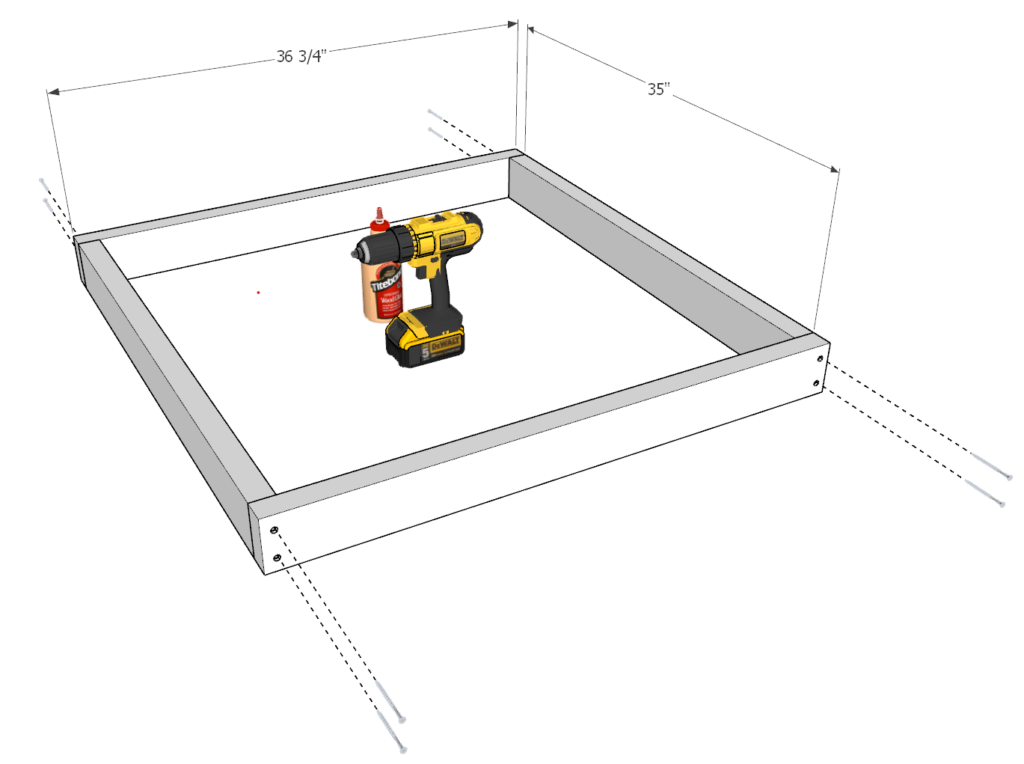
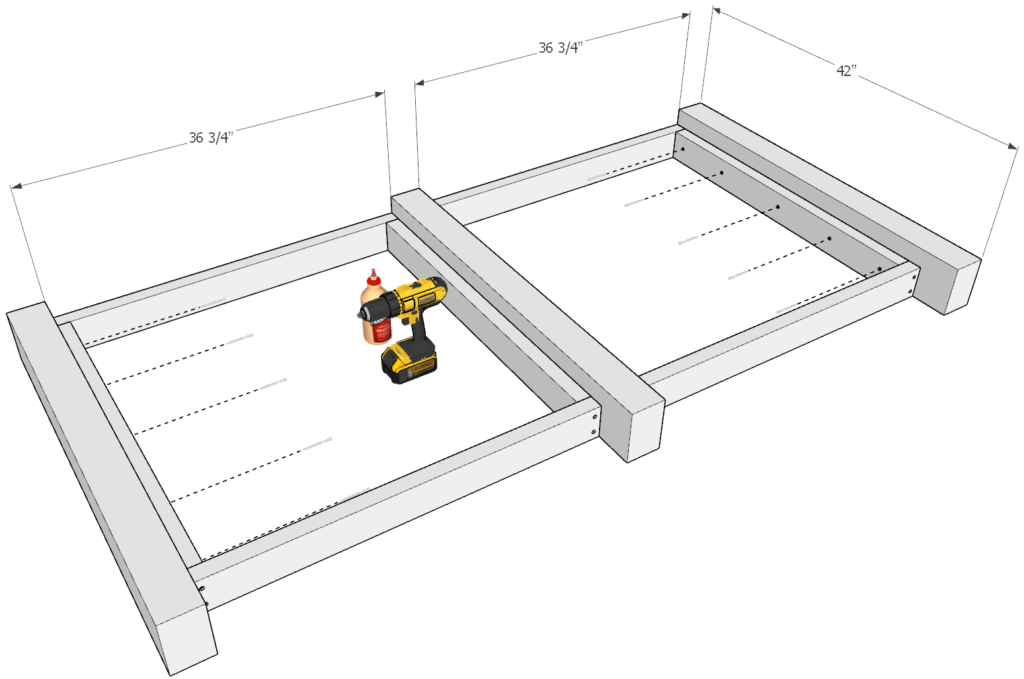
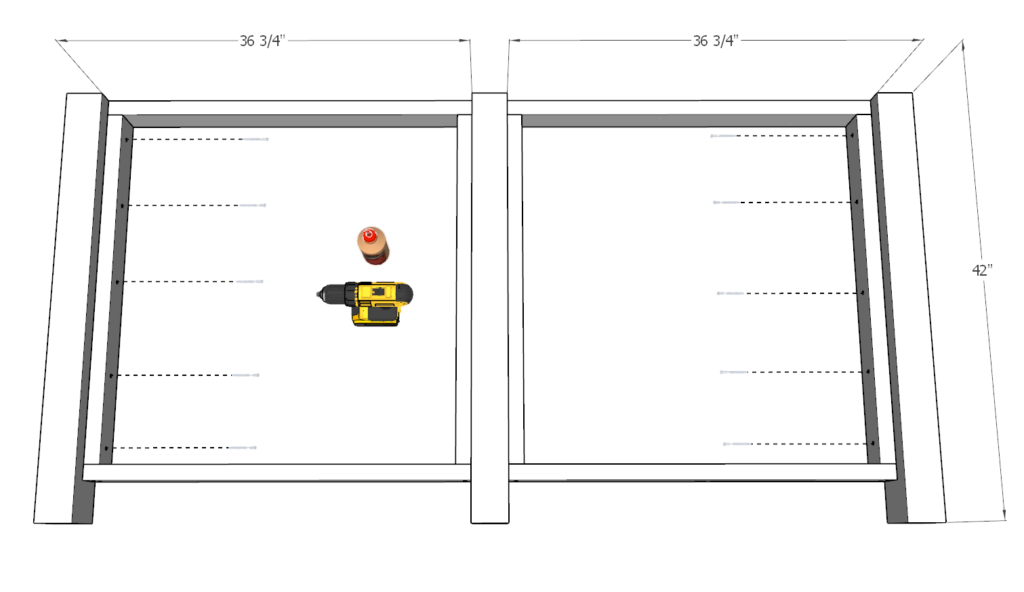
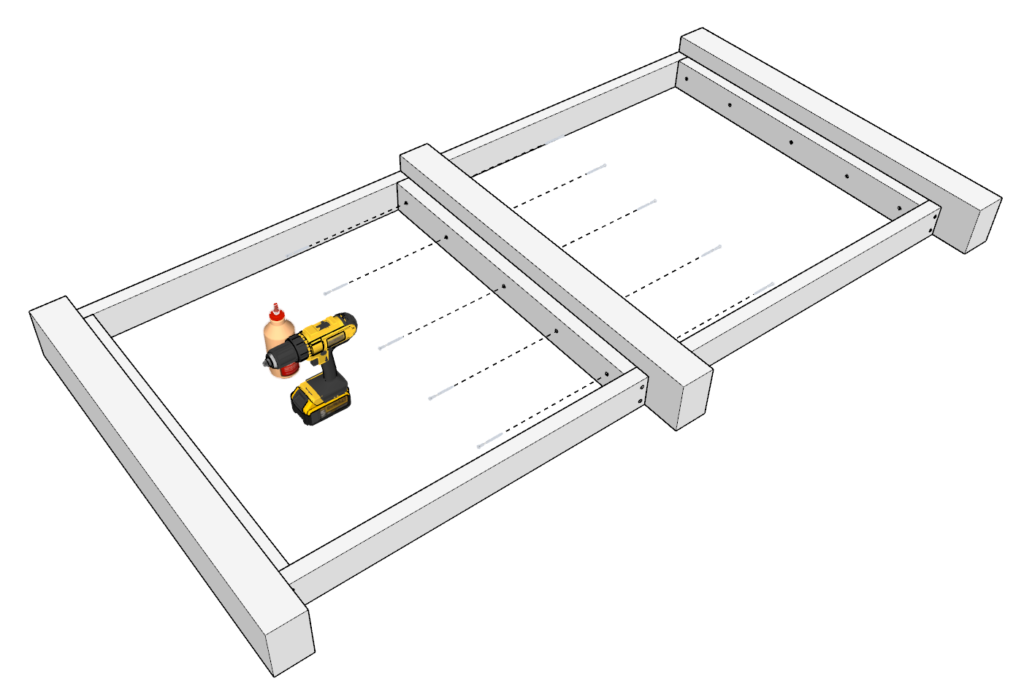
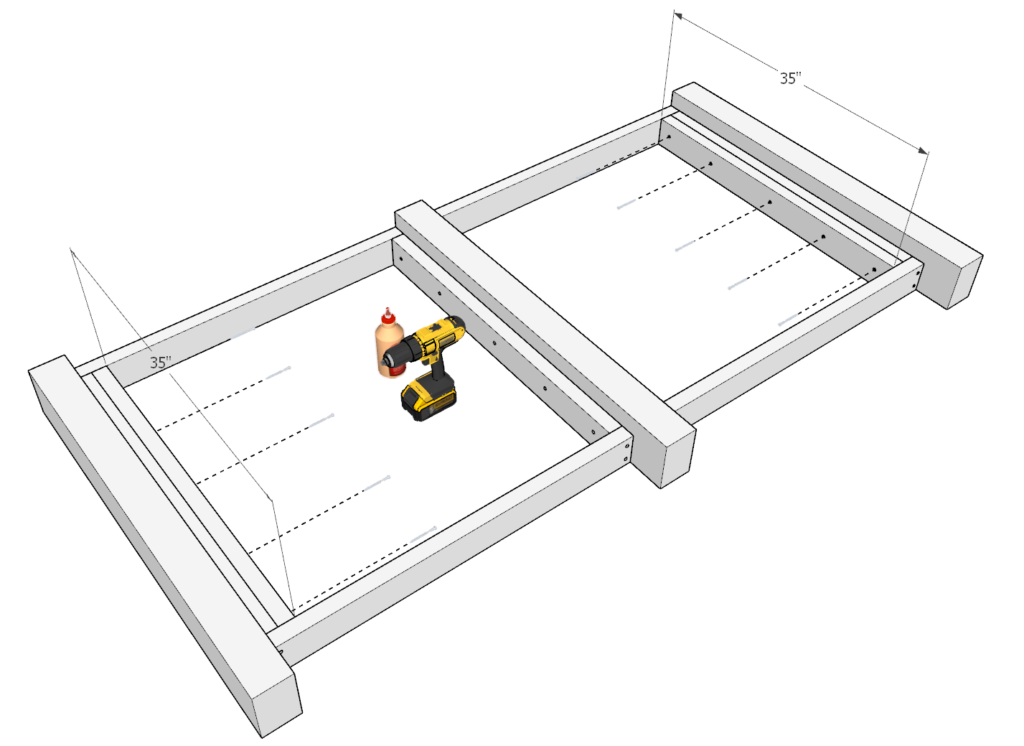
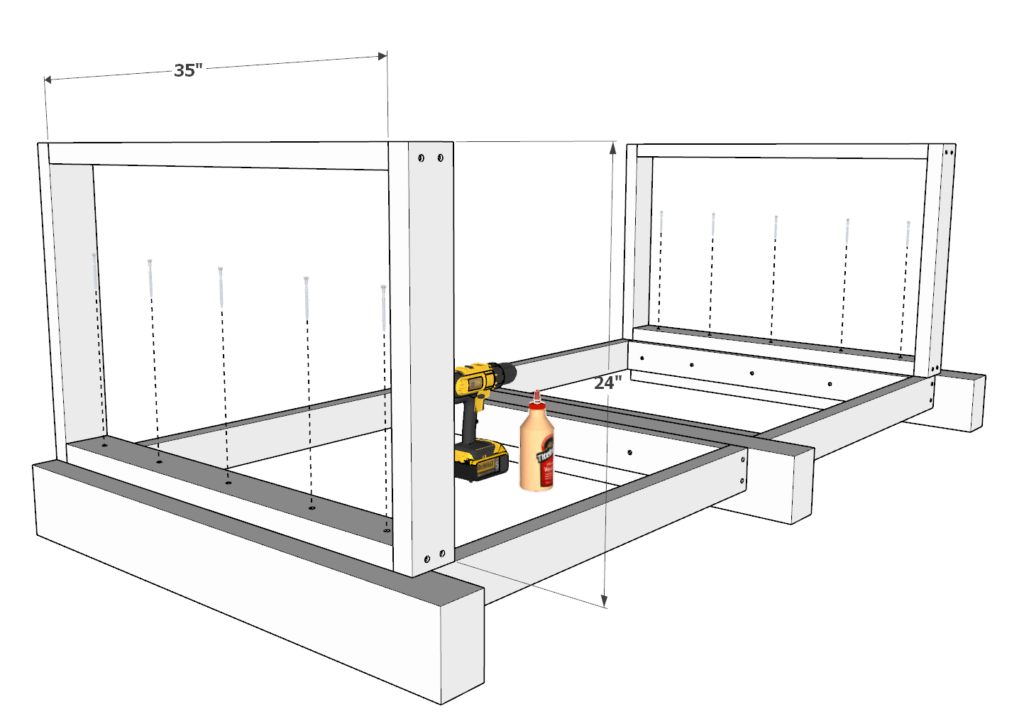
Step 1 (DIY outdoor bar)
First, take two 35 inch 2×4 lumber pieces and two 36-3/4 inch 2×4 lumber pieces and arrange them as shown below. Add glue to the areas of the 2x4s that will be joined together, predrill (to prevent wood splitting), and add 3.5 inch screws.
Repeat to make an identical second frame piece for a total of two pieces.
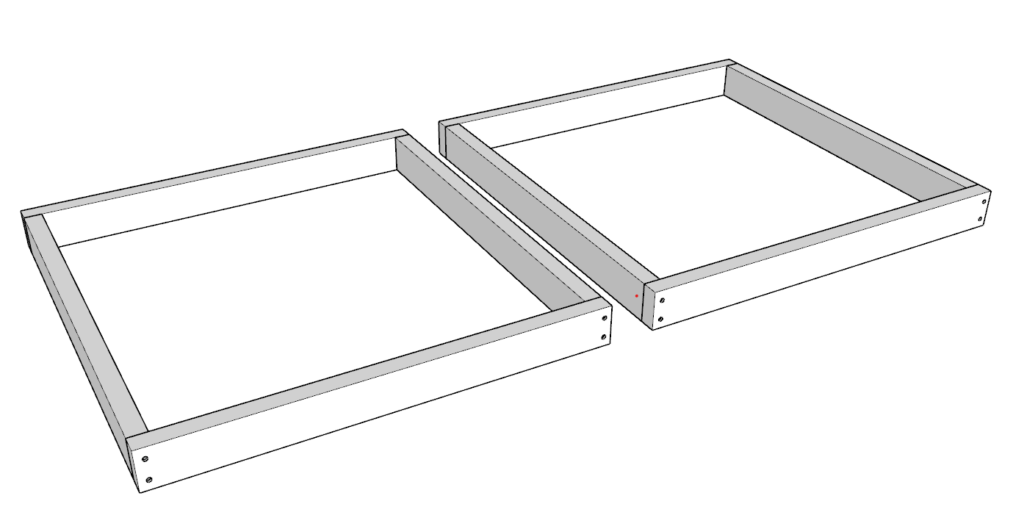
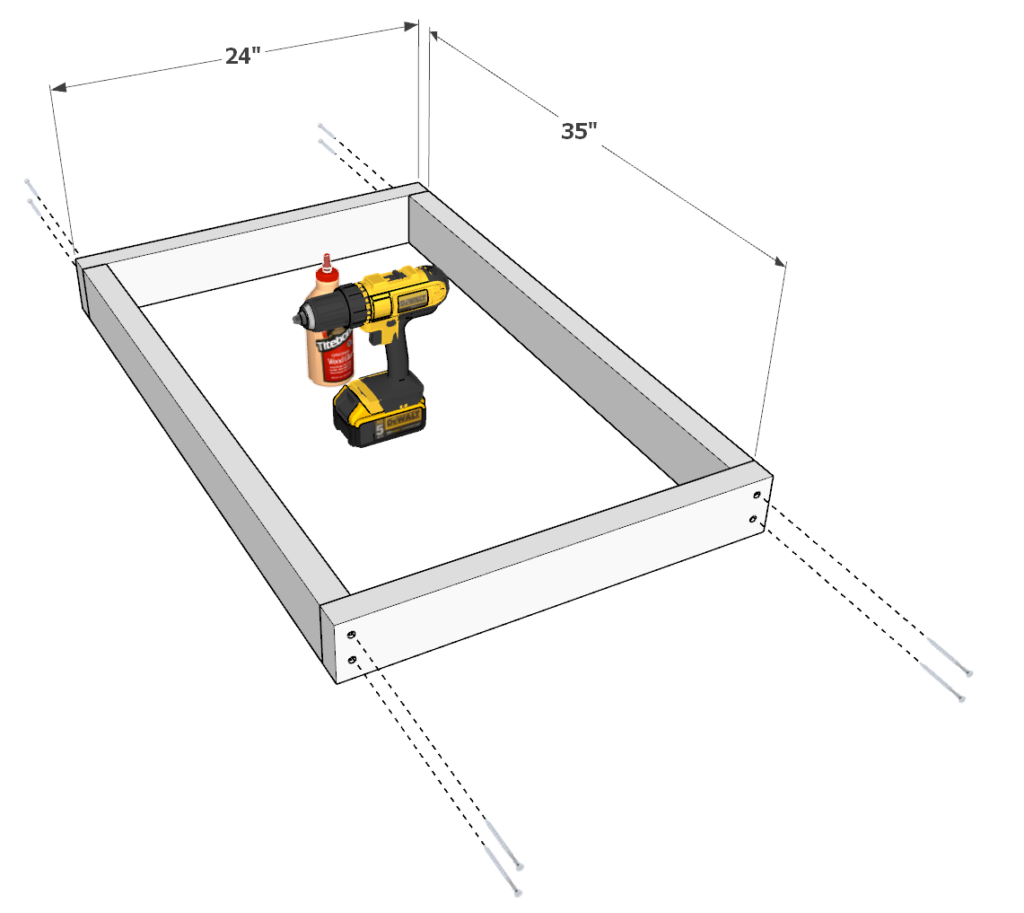
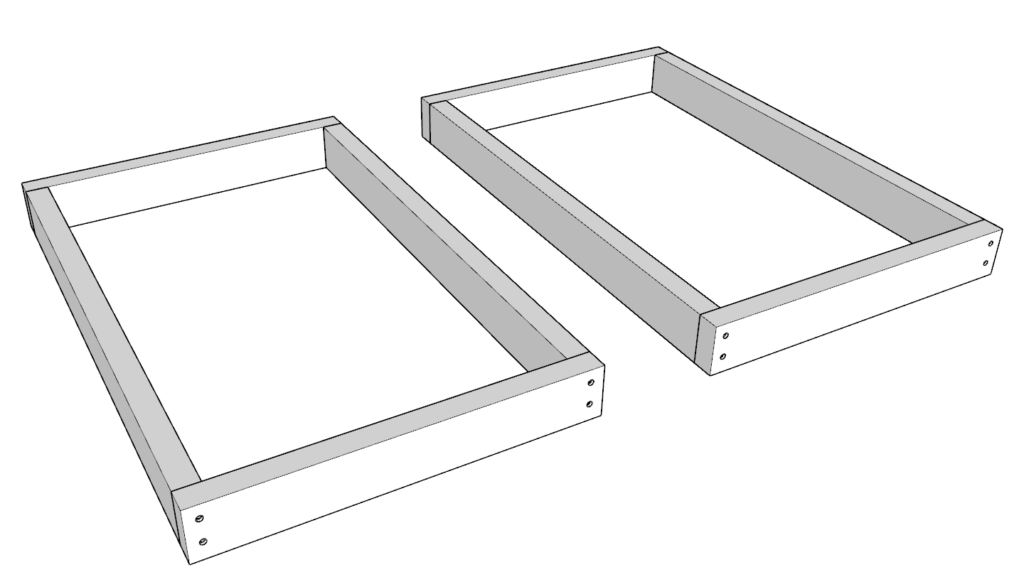
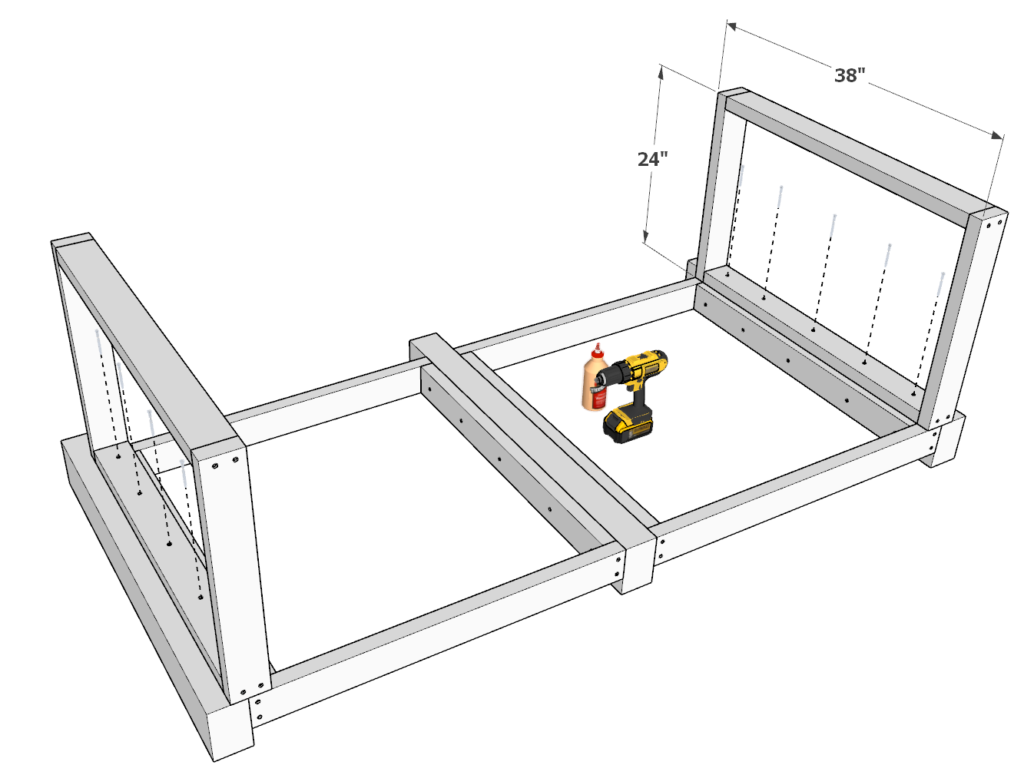
Step 2 (DIY outdoor bar)
Next, take two 35 inch 2×4 lumber pieces and two 24 inch 2×4 lumber pieces and arrange them as shown below. Add glue to the areas of the 2x4s that will be joined together, predrill, and add 3.5 inch screws.
Repeat to make an identical second frame piece for a total of two pieces.
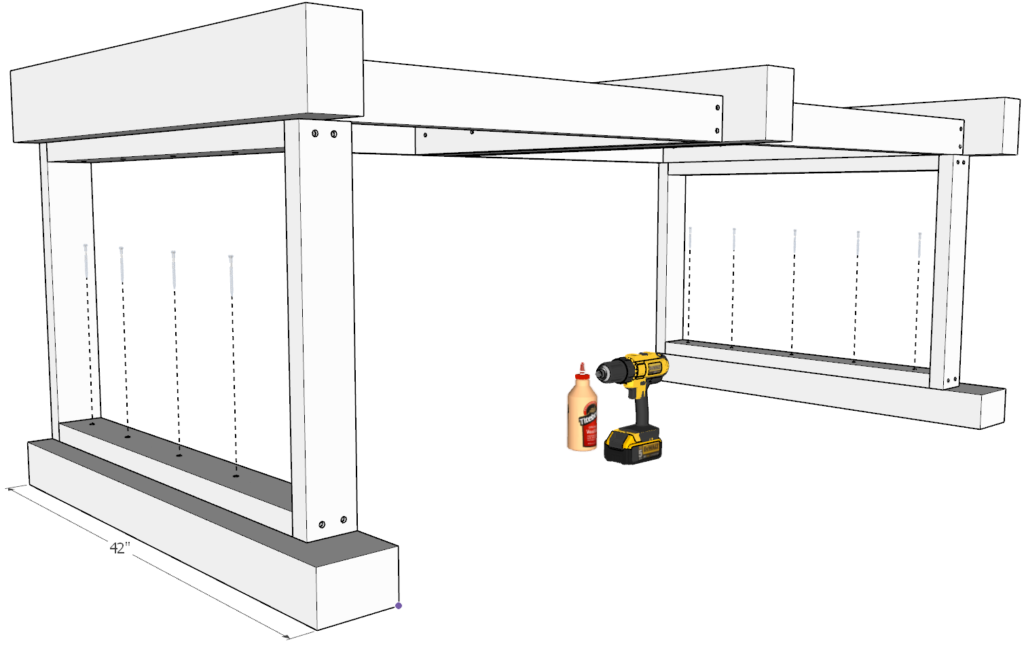
Step 3 (DIY outdoor bar)
Next, take three 42 in 4×6 lumber pieces and the two larger frame pieces you just assembled and arranged them as shown below.
Add glue to all areas that will be joined together.
Predrill holes and add 3.5 inch screws to all areas that need to be joined.
Next, take two more 35 inch 2×4 lumber pieces and add them to the outdoor bar frame as shown in the last picture in this step. Again, add glue, predrill, and add 3.5 inch screws.
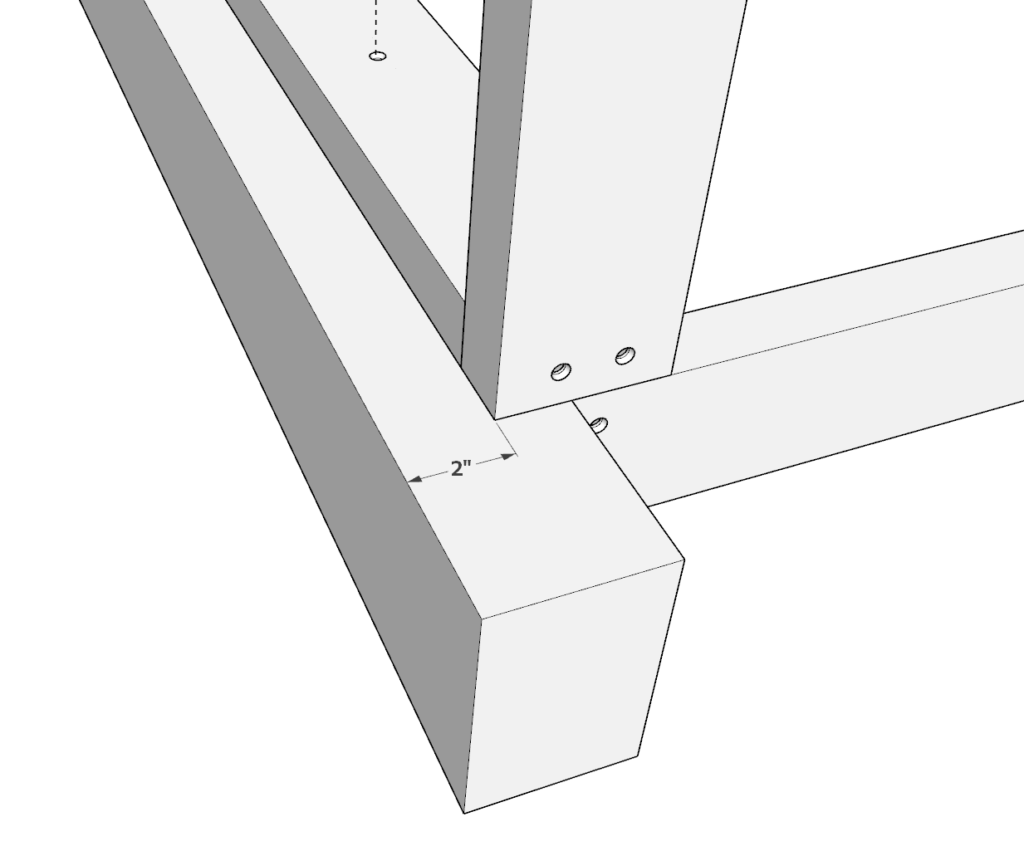
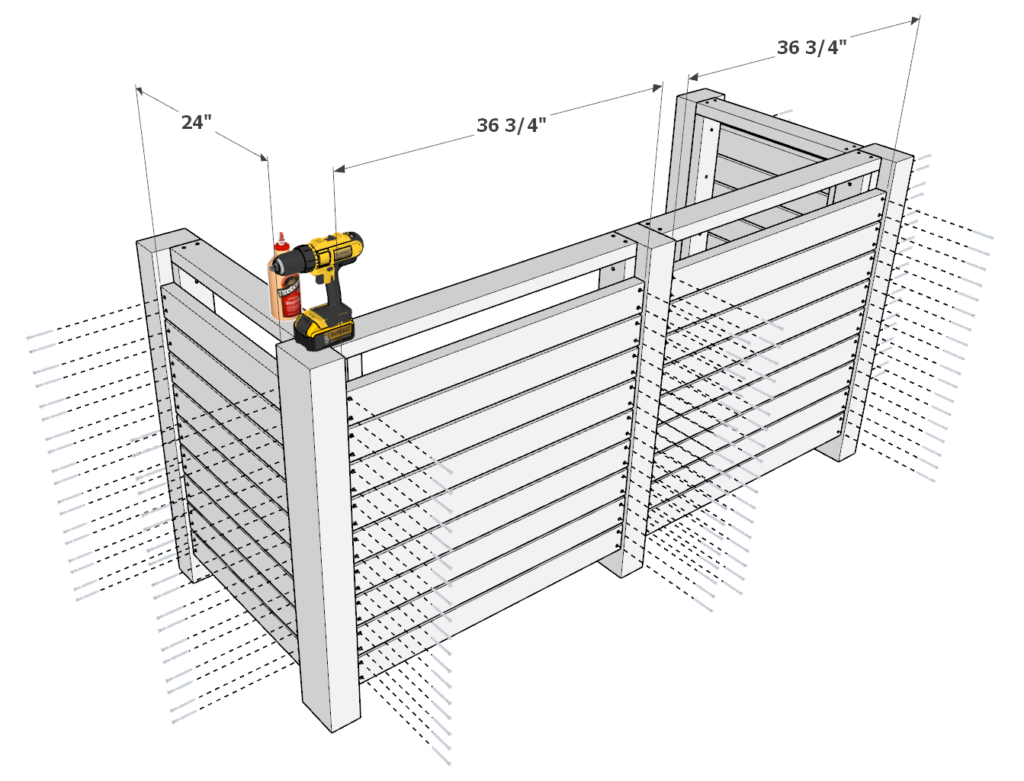
Step 4 (DIY outdoor bar)
Next, take the other smaller 38 in x 24 in frame pieces you assembled in the previous steps and add them to the main frame of the bar. When adding, indent by 2 inches as shown below.
Secure the frame pieces with glue, predrilling, and screws.
Next, take two more 42 inch 4×6 lumber pieces and add them to the main frame as shown in the last picture of this step. Make sure to add glue, predrill, and add screws.
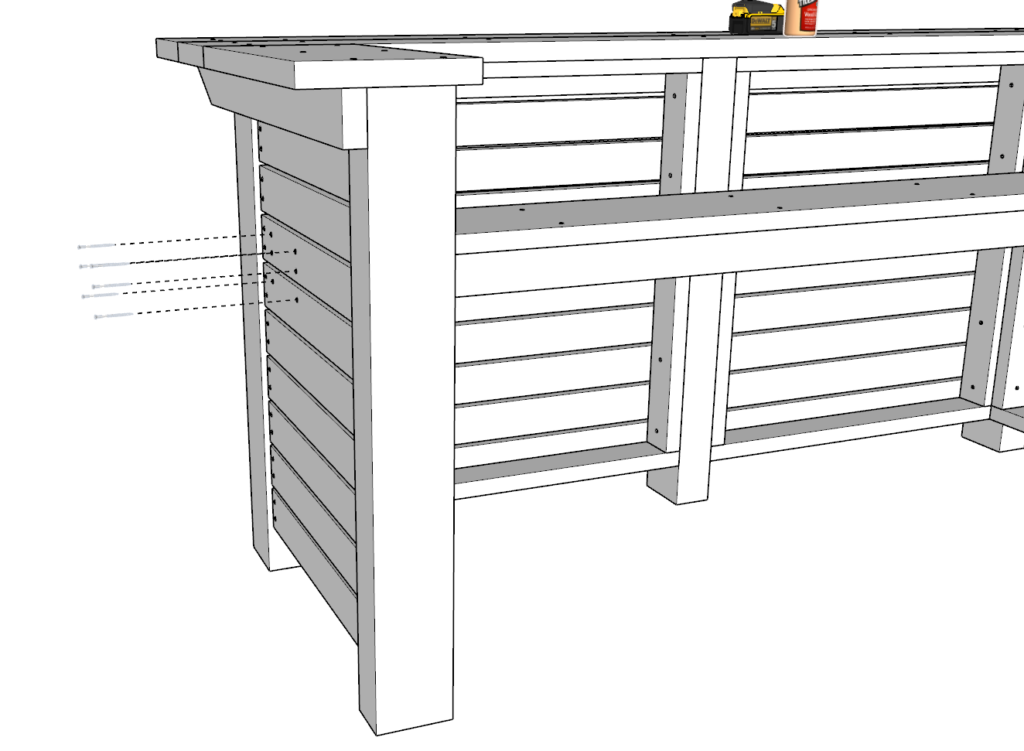
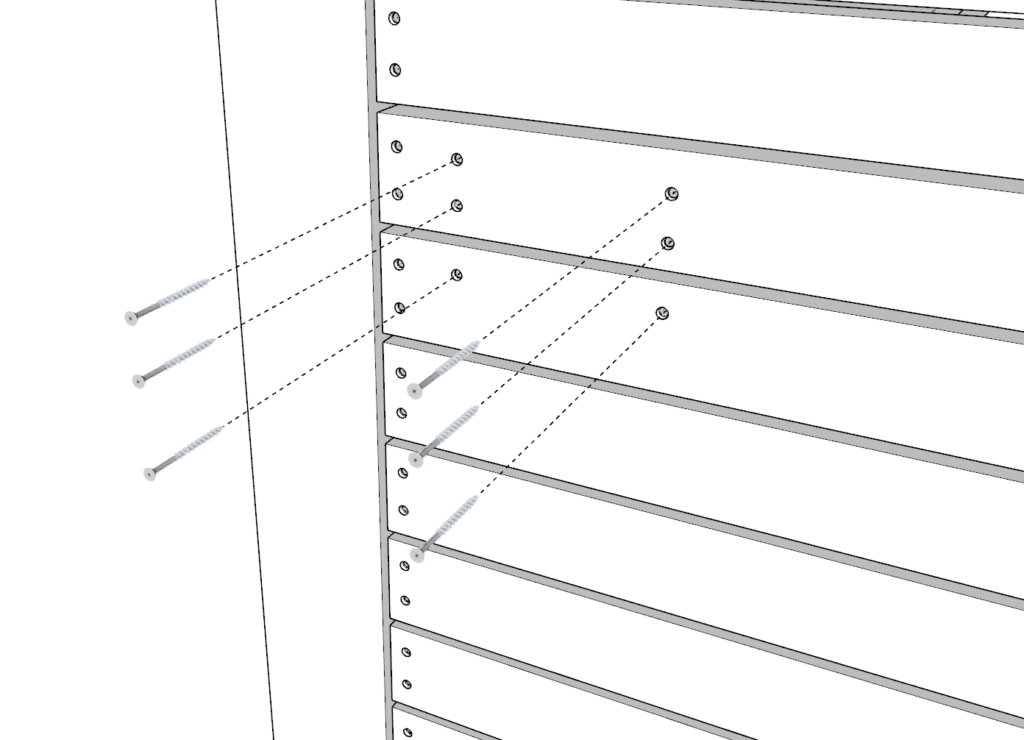
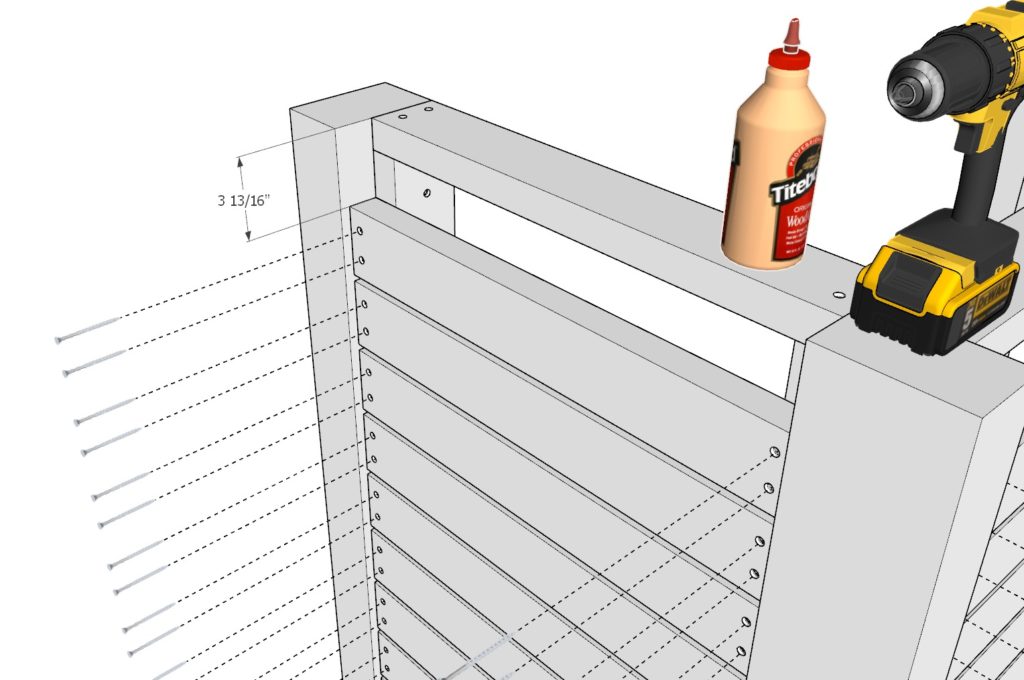
Step 5 (DIY outdoor bar)
Next, add the siding pieces.
Take eighteen 36-3/4 2×4 lumber pieces and eighteen 24 2×4 lumber pieces and add them to the outdoor bar frame as shown below.
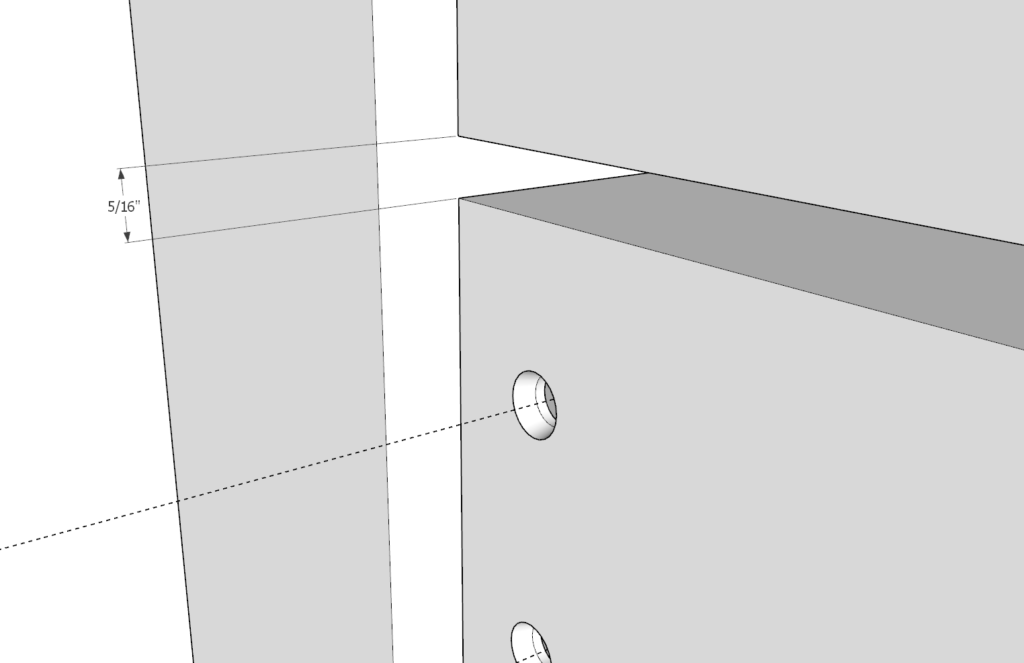
Begin by attaching the first 2x4s about 3-13/16 (or about 4 inches) away from the top of the bar frame as shown below.
The remaining pieces need to be about 5/16 inches apart.
To space out the pieces evenly you can use a spacer. This spacer can be cut from a scrap piece of wood on hand.
As before, glue, predrill, and add screws.
Step 6 (DIY outdoor bar)
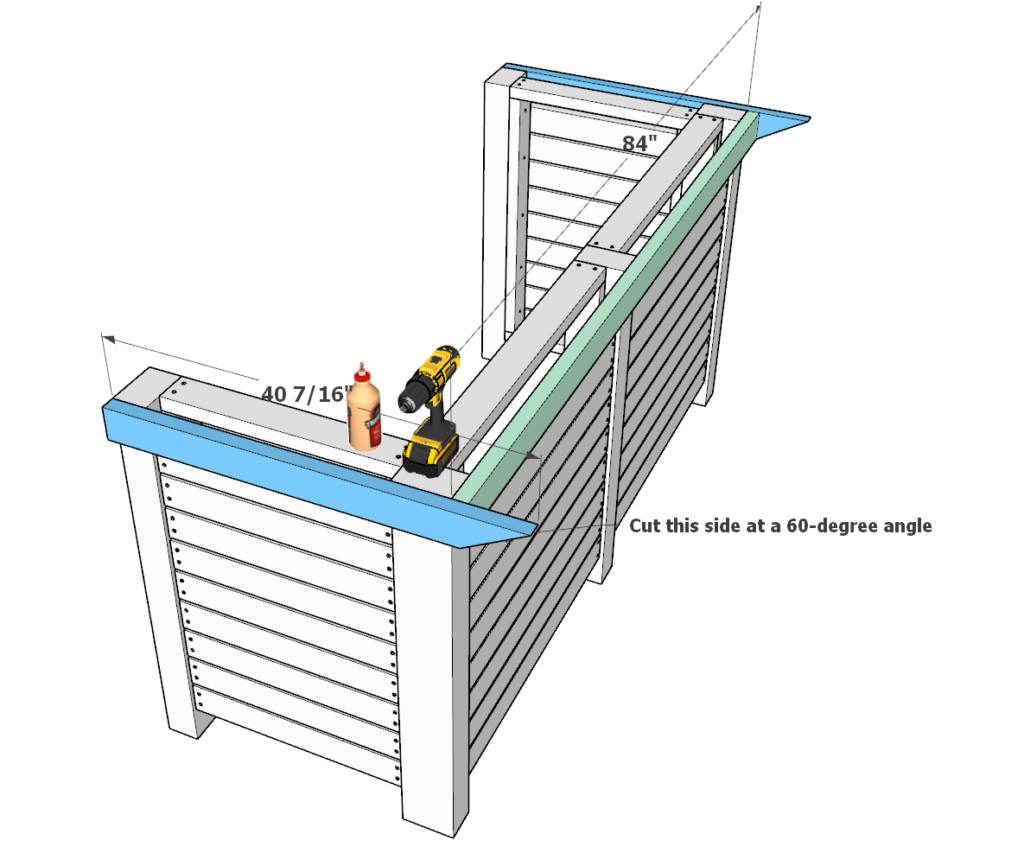
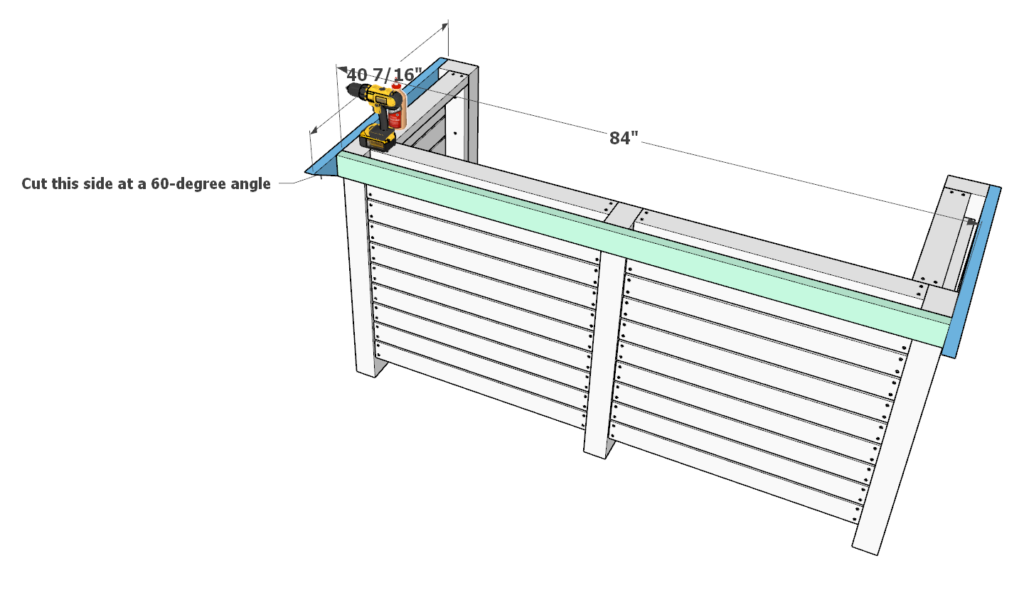
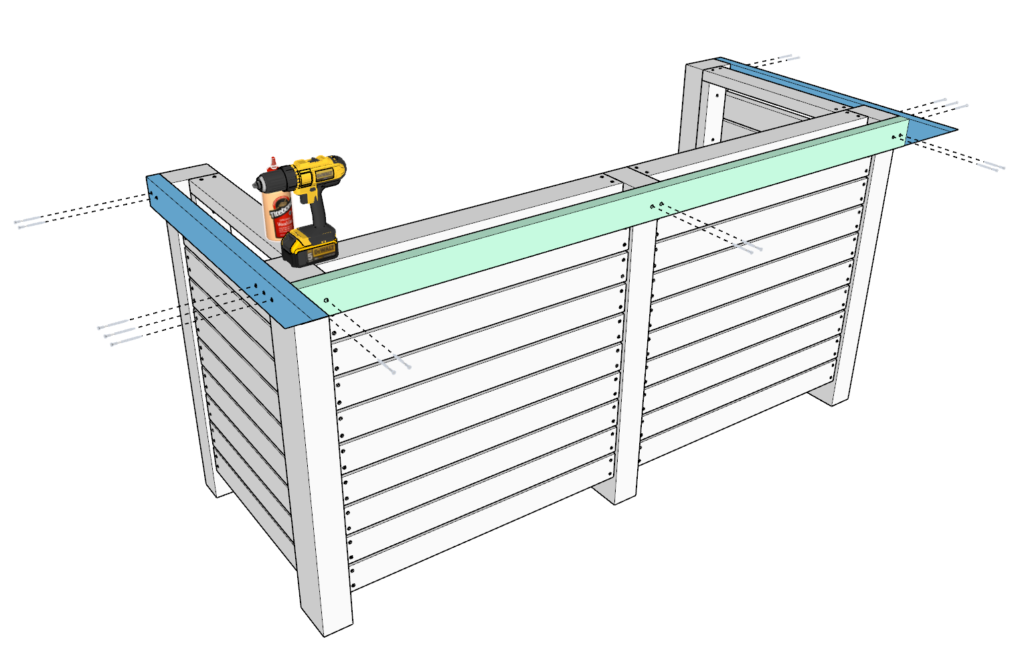
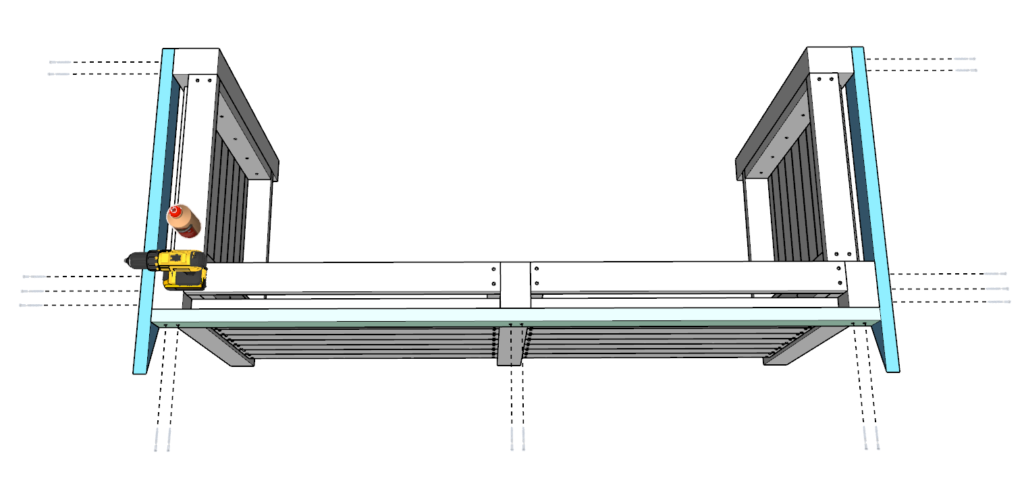
Next, add two 40-7/16 in 2×4 pieces that are cut at 60-degrees on one end and one 84 inch 2×4 lumber piece to the frame of the bar as shown below.
As before, predrill, add glue, and add 3.5 inch screws.
Step 7 (DIY outdoor bar)
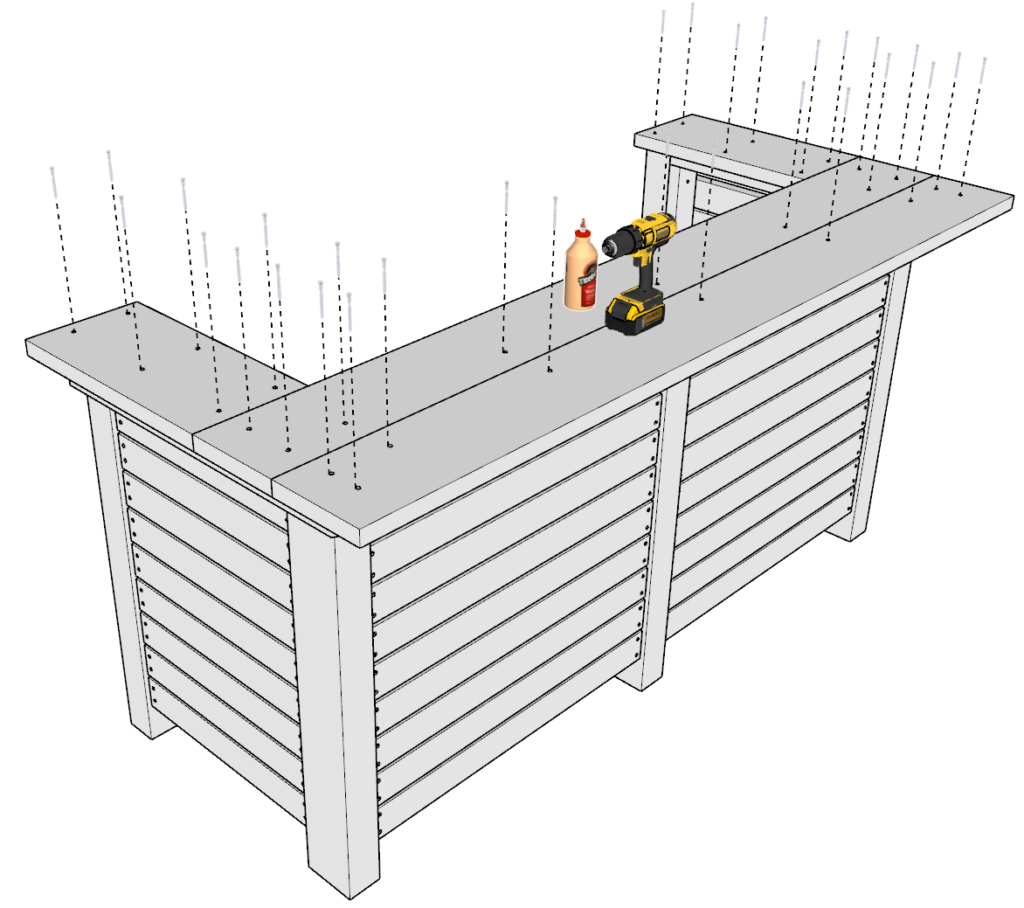
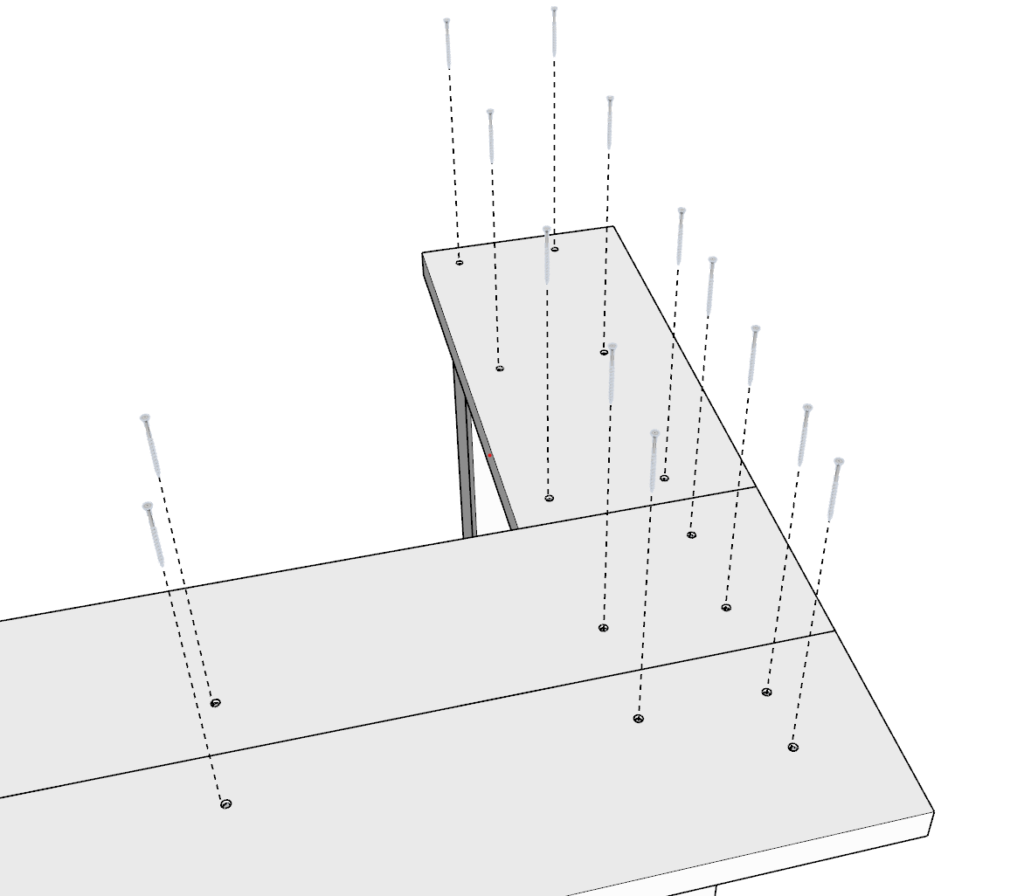
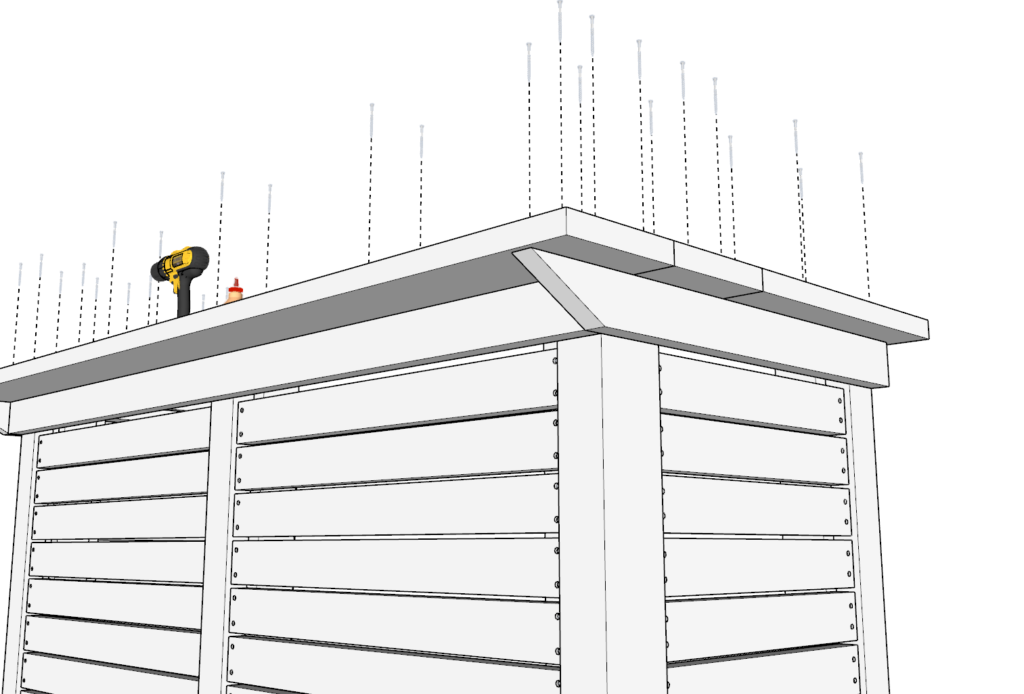
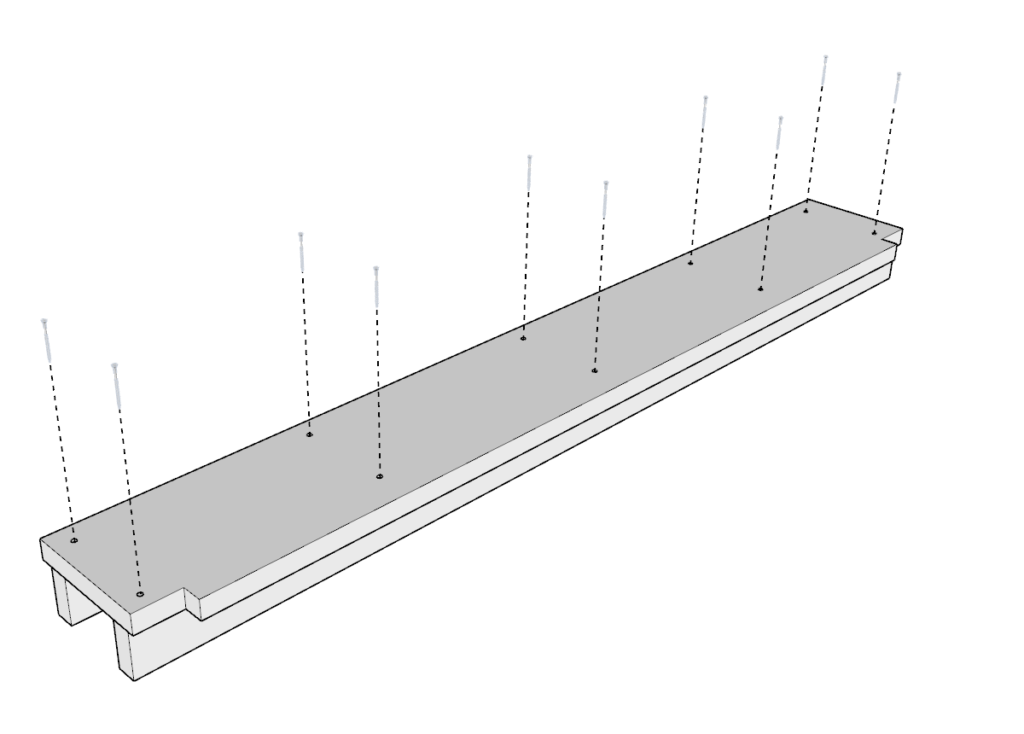
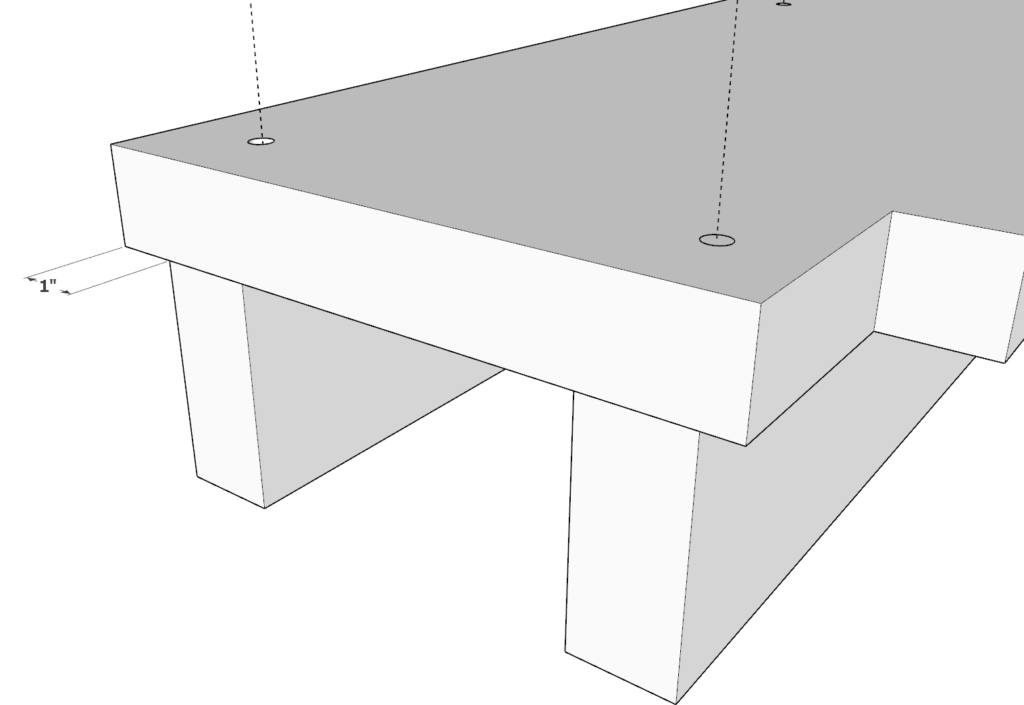
Next, add two 93 inch 2×10 lumber pieces and two 24 inch 2×12 lumber pieces to the bar frame as shown below.
Add glue to all areas that will hold up the bar top, including the parts of the top that will join to the other bar top planks.
As before, predrill, add plenty of glue, and add screws.
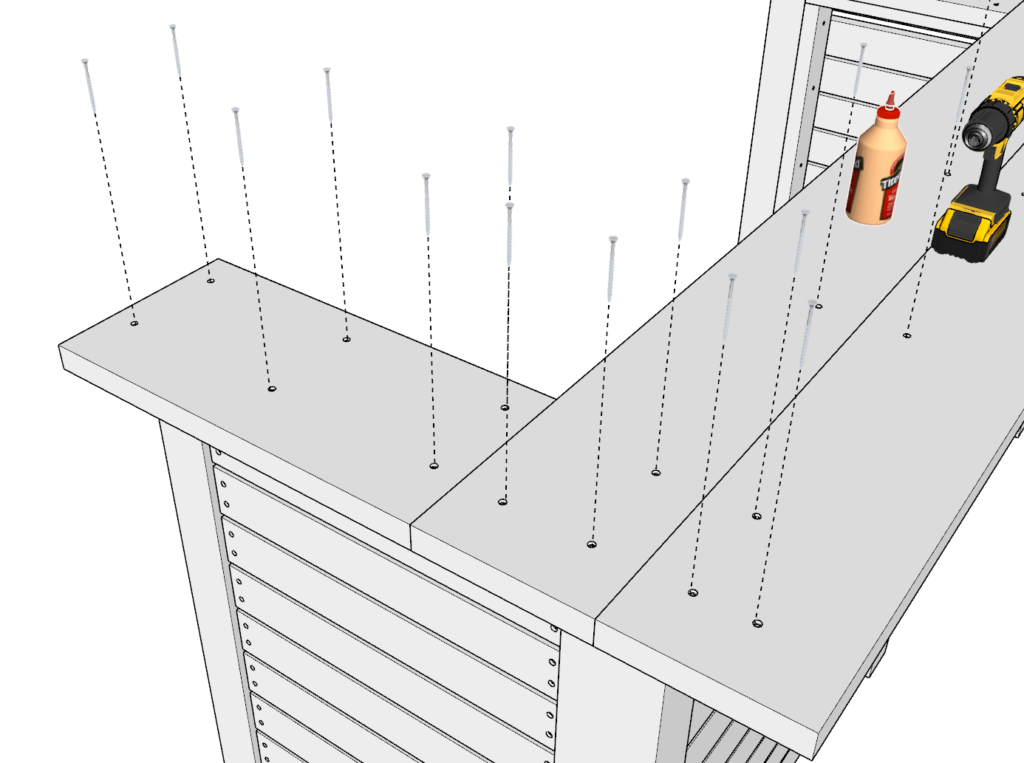
The screw pattern I have in the photo is just one way to secure the top.
These screw holes can later be covered up to have a flush and clean looking surface.
I would also recommend using some sort of clamp or vice to bring all the bar top board together to minimize the gaps. This will make the bar top look more clean and nice.

Step 8 (DIY outdoor bar)
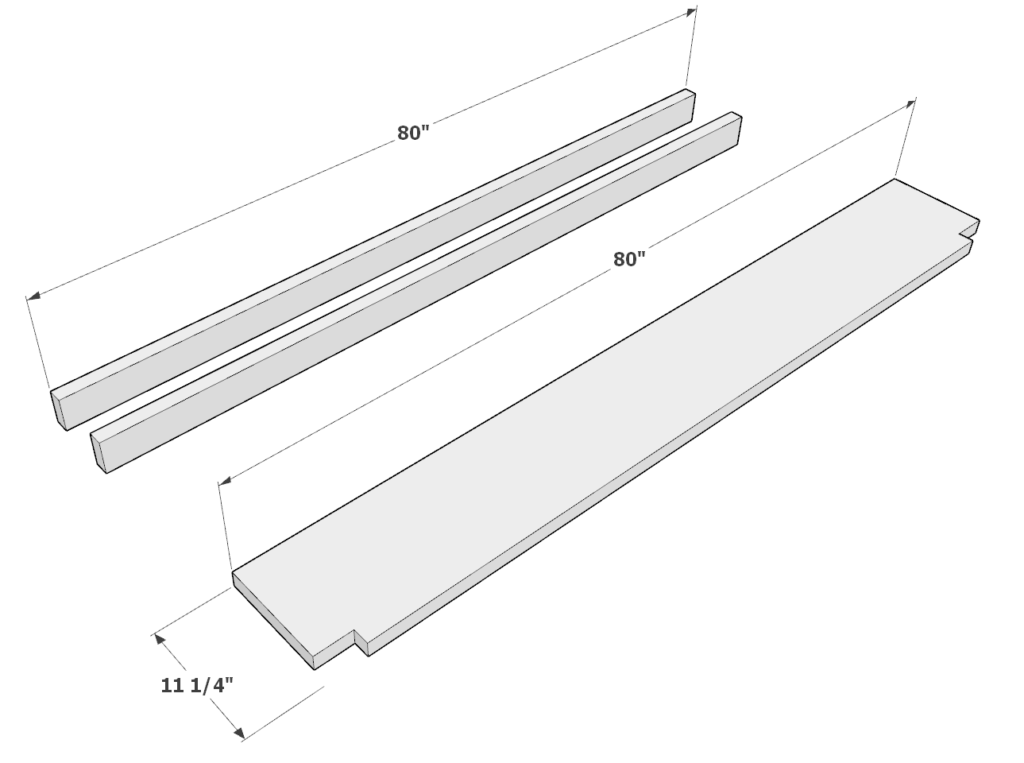
Next, take two 80 inch 2×4 lumber pieces and one 80 inch long 2×12 lumber pieces to make the shelve.
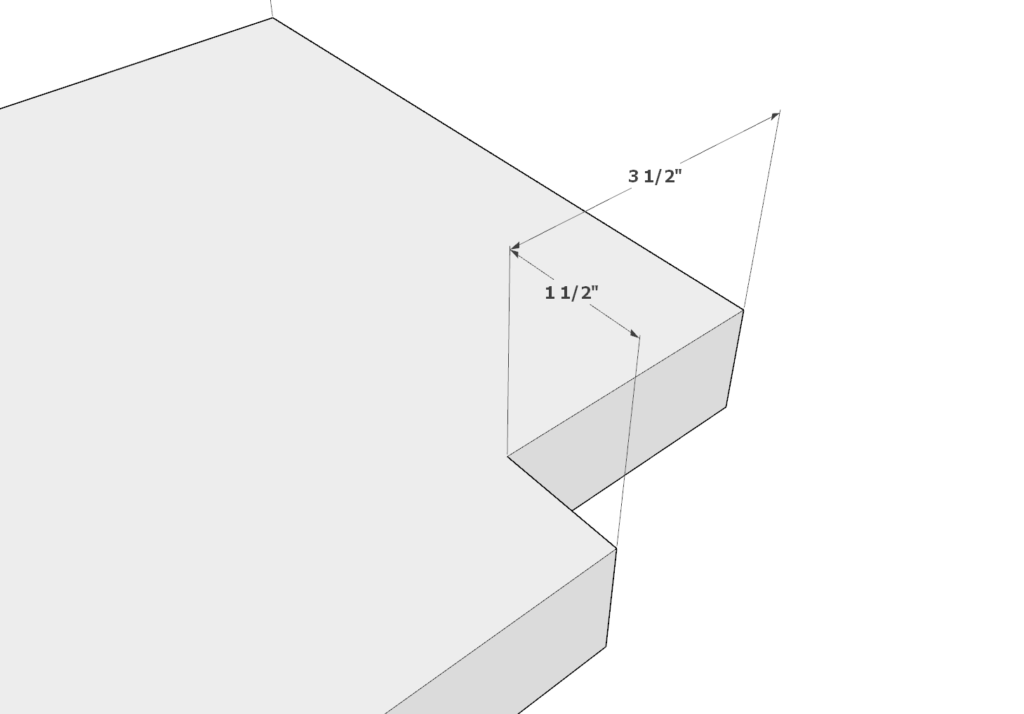
Cut 3-1/2 inch x 1-1/2 inch indents on both ends of the 2×12 lumber piece as shown below.
Next, attach the frame of the shelve to the shelve top.
I indent the shelve frame 2x4s by 1 inch on each side as shown in the last picture in this step. The indent is only for aesthetics and is inconsequential.
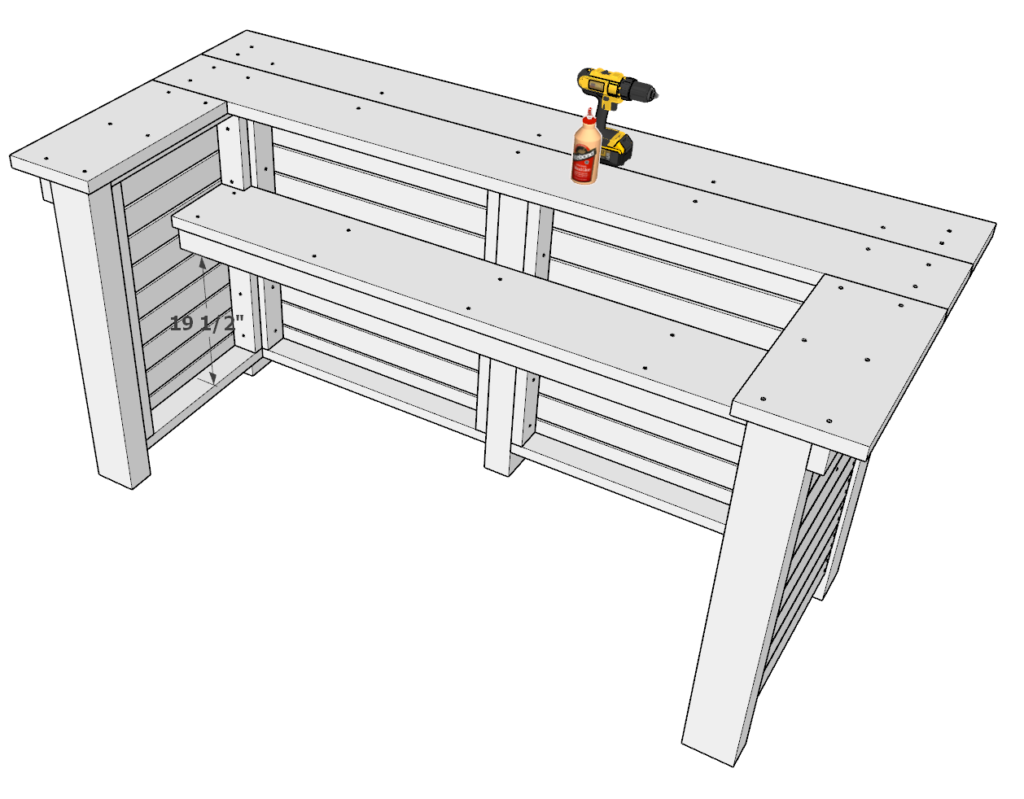
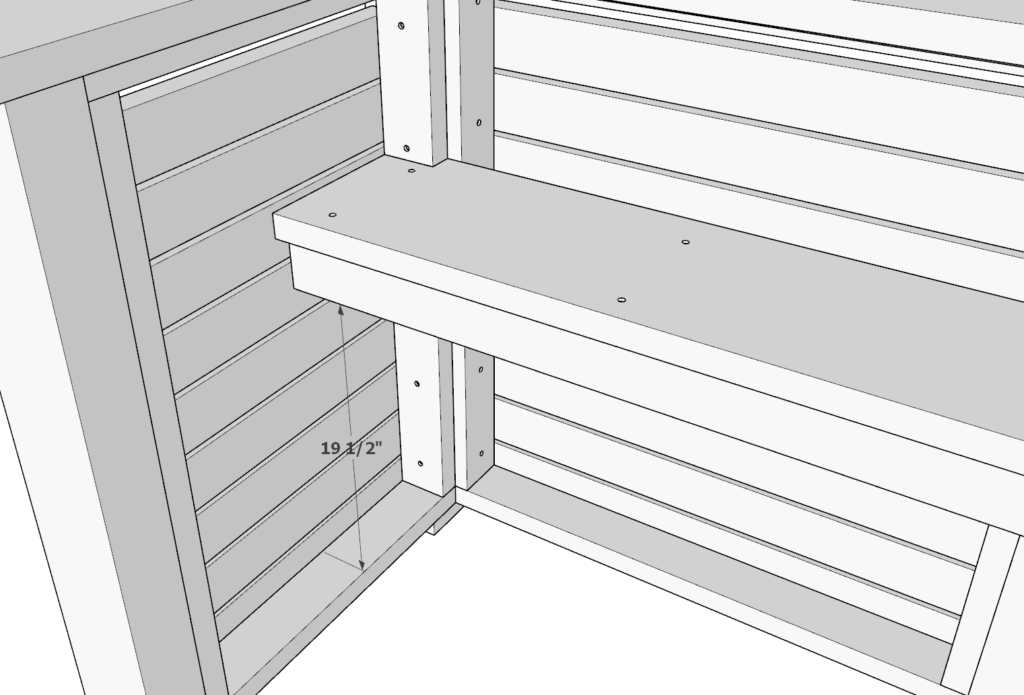
Step 9 (DIY outdoor bar)
Next, attach the shelve to the main bar frame.
The height that I attach the shelve is at 19-1/2 inches. This make the bar shelve working surface to be at 24.5 inches tall. This height can be modified depending on how tall you are.
Next, add glue, predrill, and add screws directly through the bar siding to secure the shelve in place. I use at least six 3.5 inch screws to make sure the shelve can hold weight.
Lastly, sand down the whole bar. I use an orbital sander to speed up the process
I use a rough 80 grit paper first and then finish it with a 220 grit paper.
Filling in the holes is optional.
I also like to use a router on the perimeter edges of the bar top to round off my corners so that the top doesn’t press in on the forearms and elbows when its in use. This makes the table more comfortable. This can also be done with a sander if you don’t have a router on hand.
At this point it is ready to be stained or painted!