Why build a DIY Montessori children's wardrobe?
A wardrobe is a must in a Montessori room to promote independence an order.
By providing a wardrobe that is the appropriate size and height you can help enable your child to dress themselves. Your children can practice essential care-of-self skills at home and grow in confidence.
The size of the dresser is designed to fit a minimal amount of clothing. This is great since limiting choices is a one way to prevent your child from being overwhelmed by a stuffy closet with many choices. Limiting and rotating out clothing is a perfect way to promote independence while still giving the grownups control over the clothing options to ensure clothing options appropriate for the weather and season. Your child will love the autonomy of picking out the outfit!
What are the specs of the DIY Montessori children's wardrobe?
This is an easy to build and a low-cost Montessori wardrobe closet. This build is great for beginners to woodworking because of the simple joints and easy to understand step by step instructions.
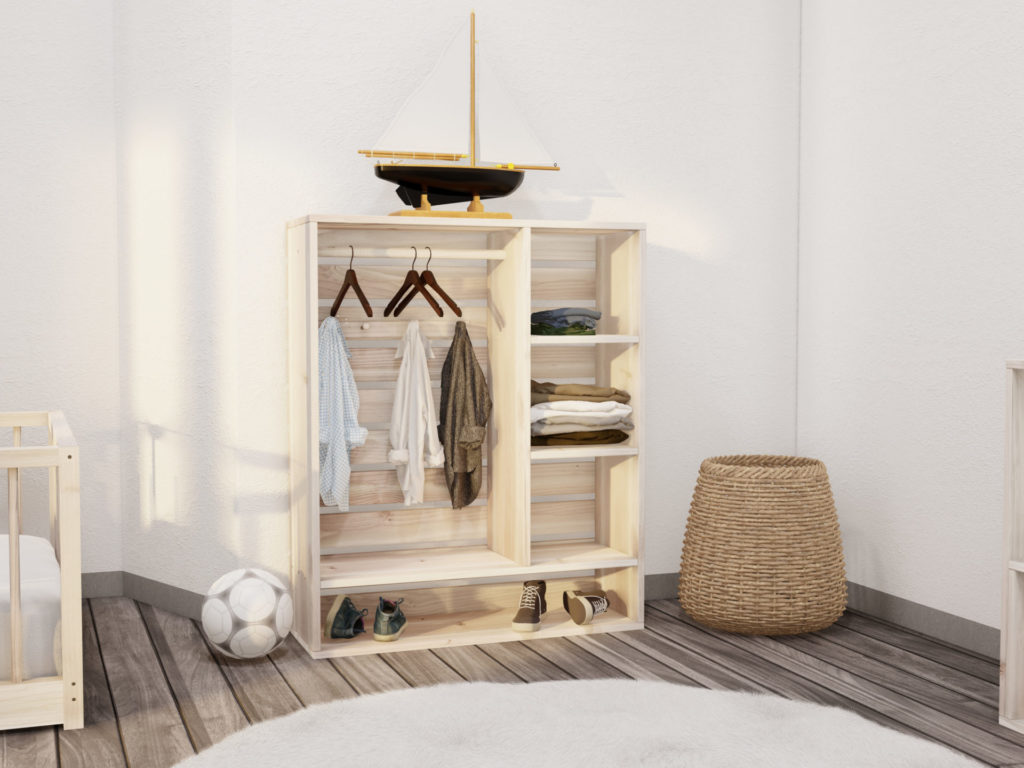
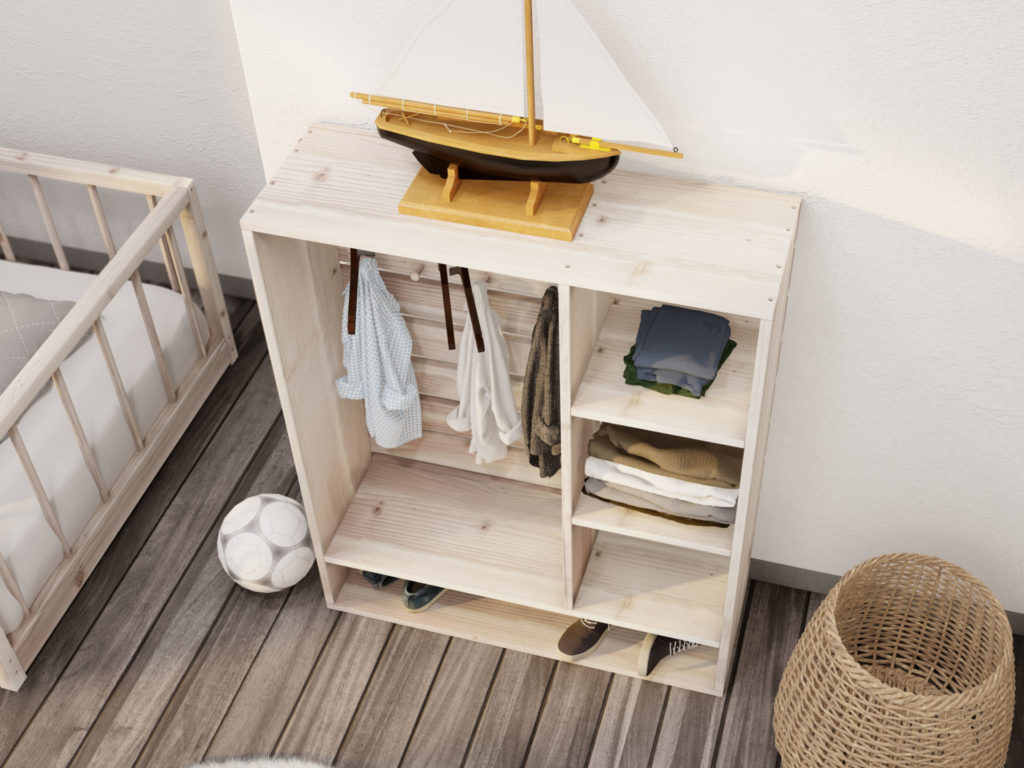
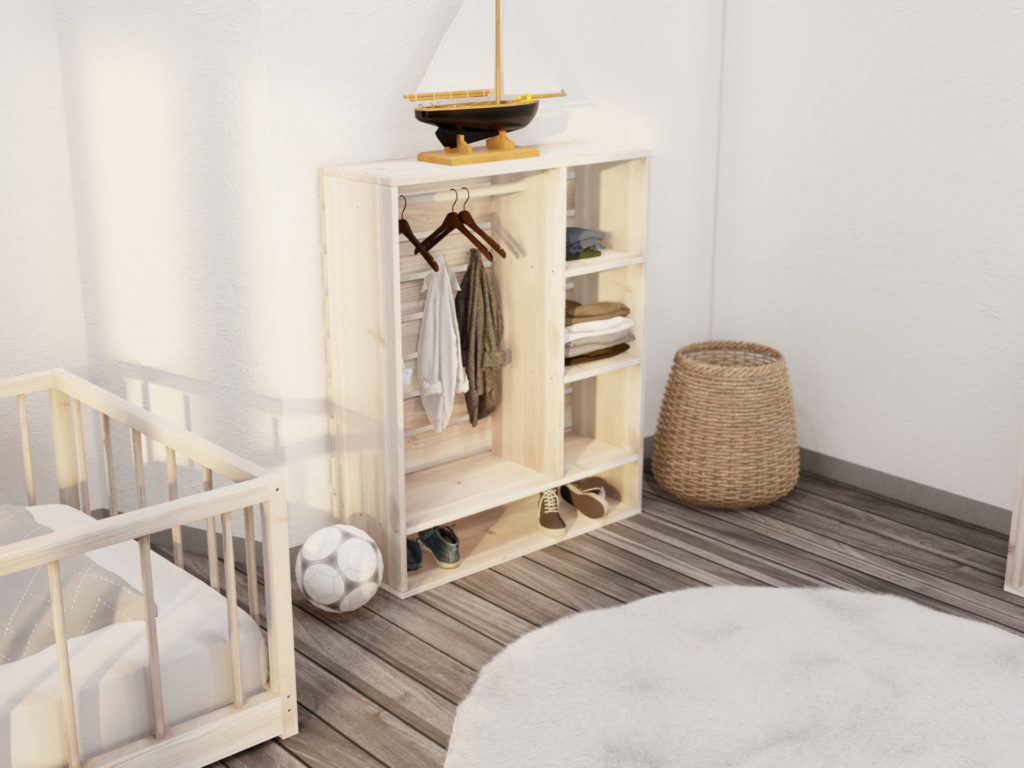
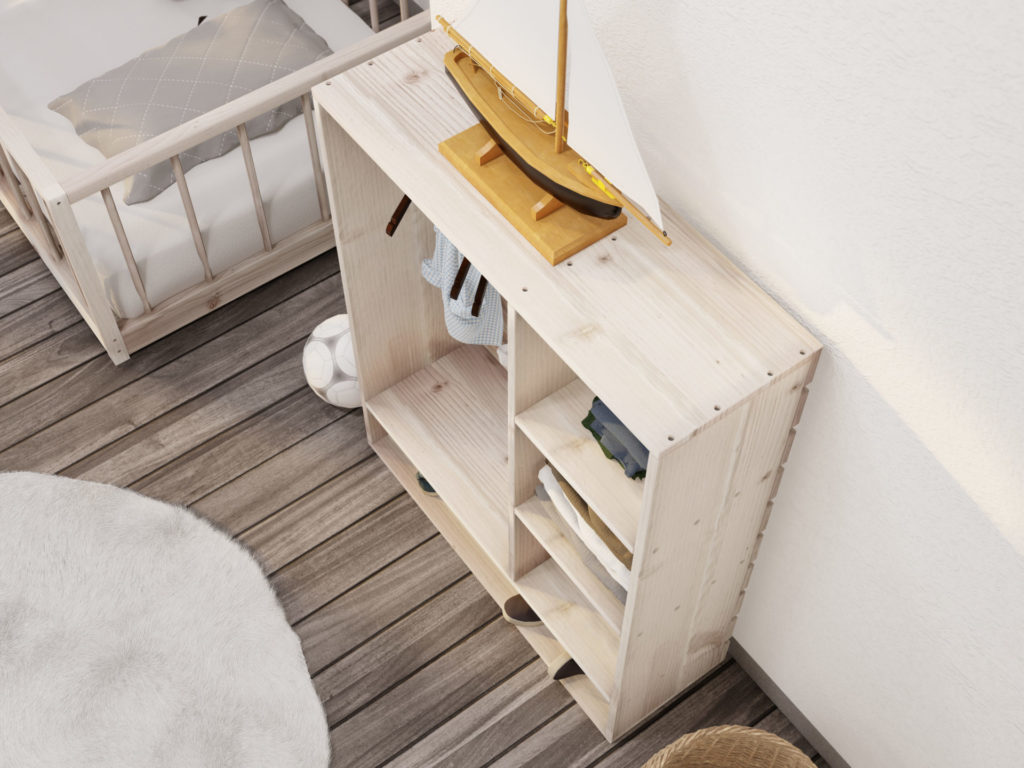
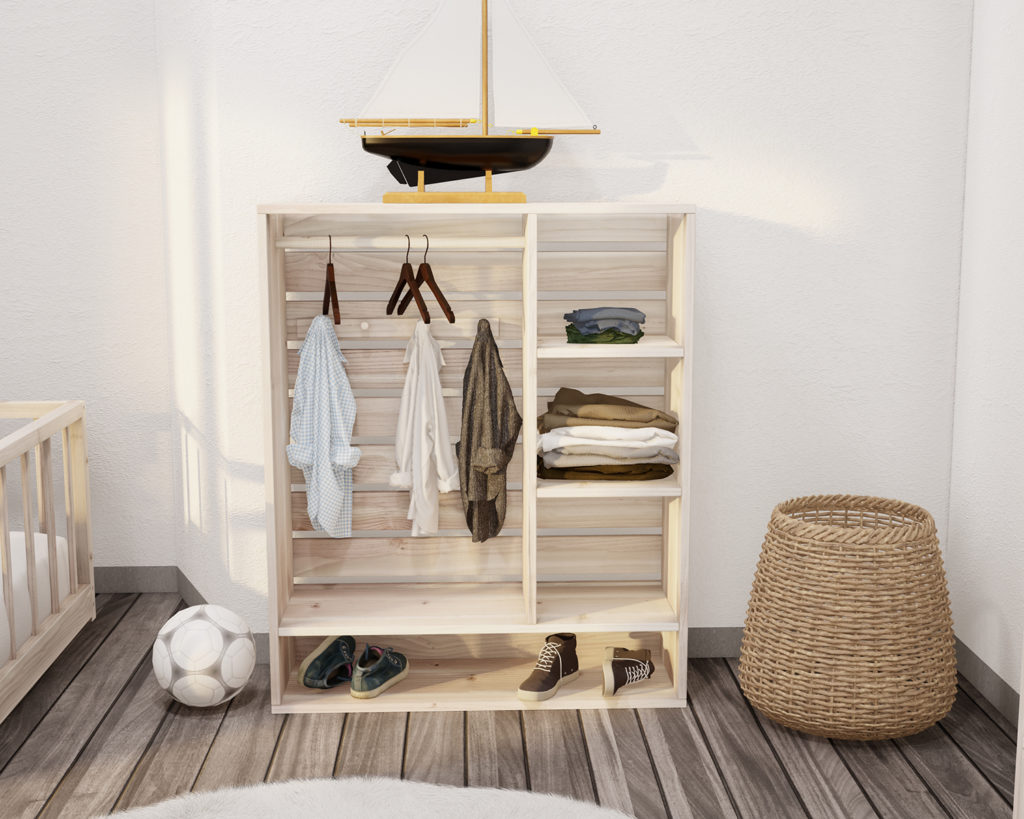
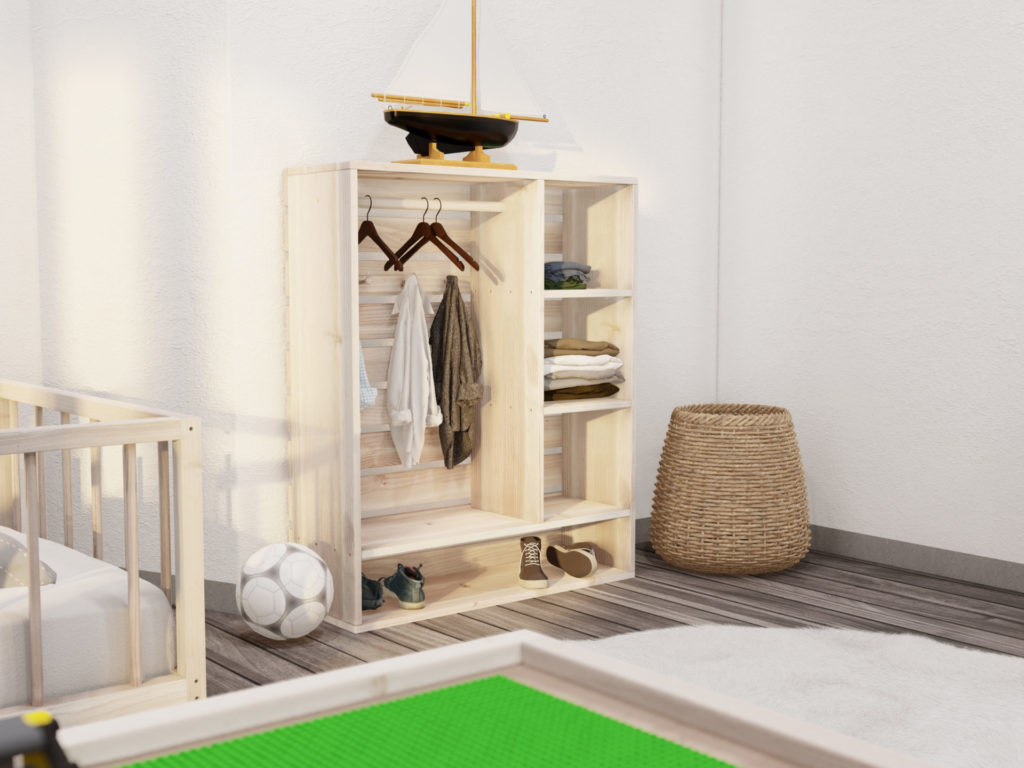
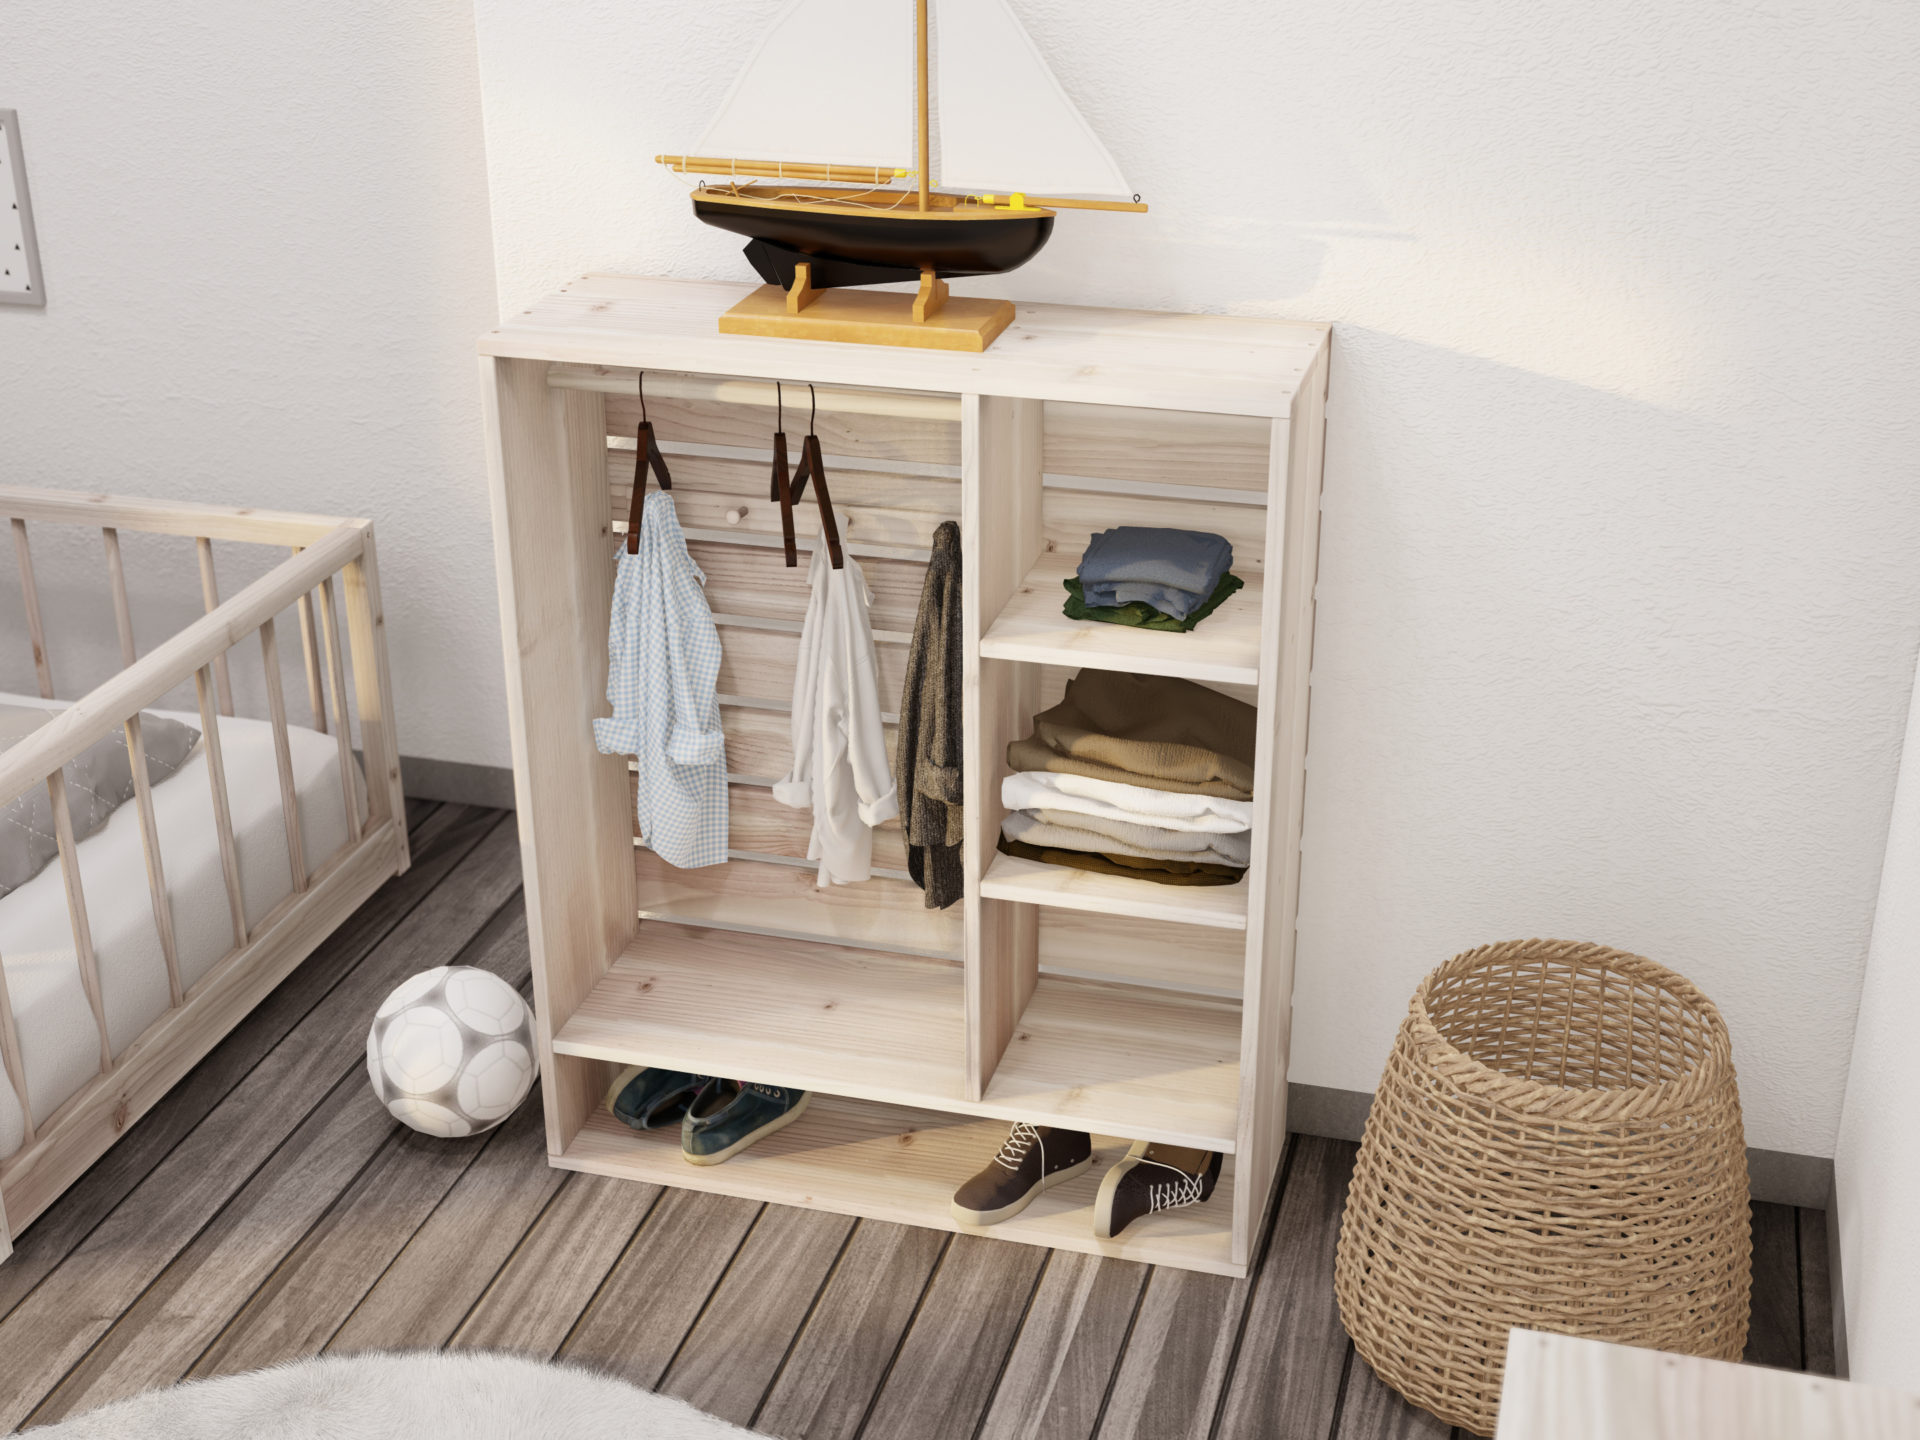
The lower section of the wardrobe is great for storing shoes and slippers, while the upper cubbies can store other articles of clothing.
The closet rod or bar can be used for hanging cloths on hangers. The bar can be made much lower depending on your child’s age and height so that it can be accessed easily and enable children to hang up clothing by themselves.
You can easily add drawers, trays, or dowel hangers to customize the closet so that the space makes sense to your child. Adding an IKEA Knagglig wood crate for example, can help designate separate spaces for folded for socks, pants, short sleeve, shorts, pajamas, diapers, long sleeve tops, etc.
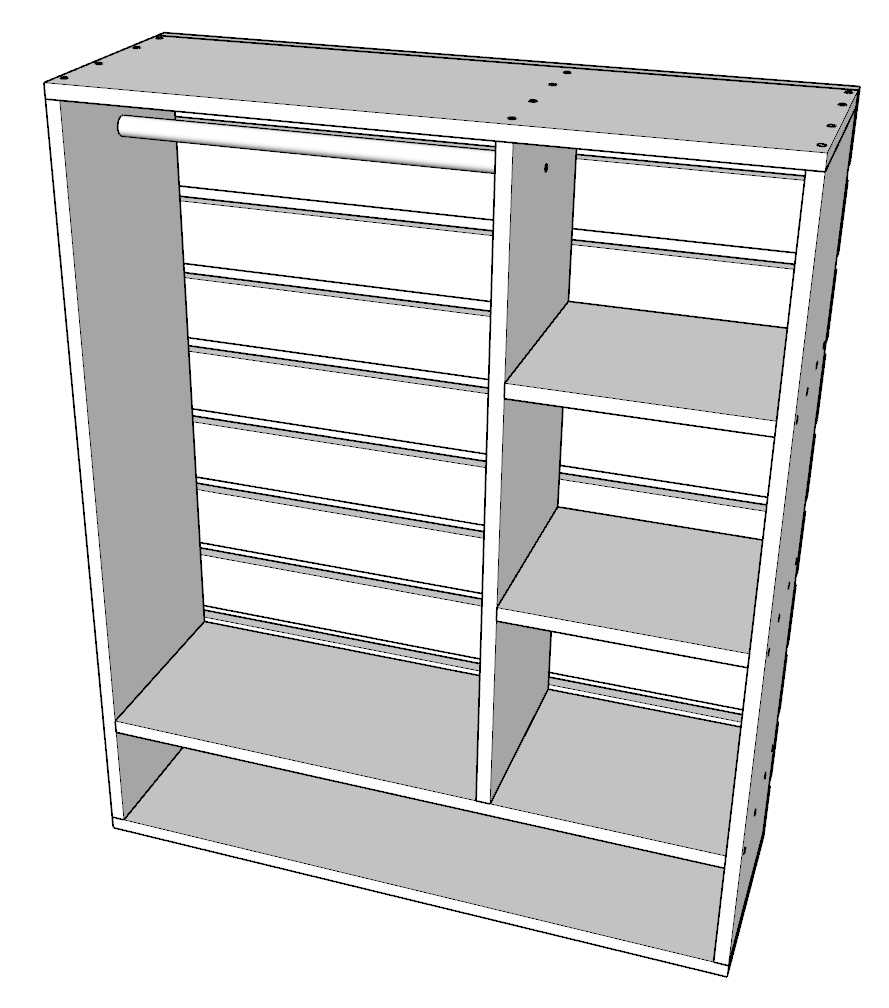
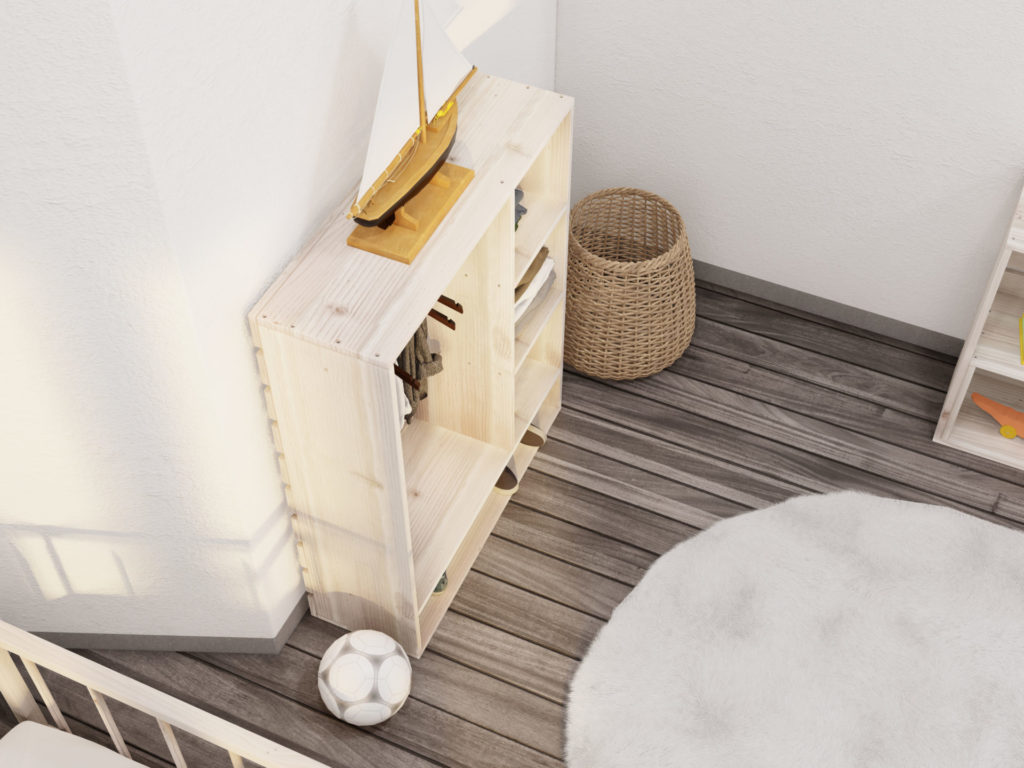
The back of the dresser has horizontal wood planks in place to provide extra structural support and to prevent items from falling through to the back. The slat width matches the other furniture pieces seen in the photos and video to create an overall uniform look and to tie in the entire room in an aesthetic way.
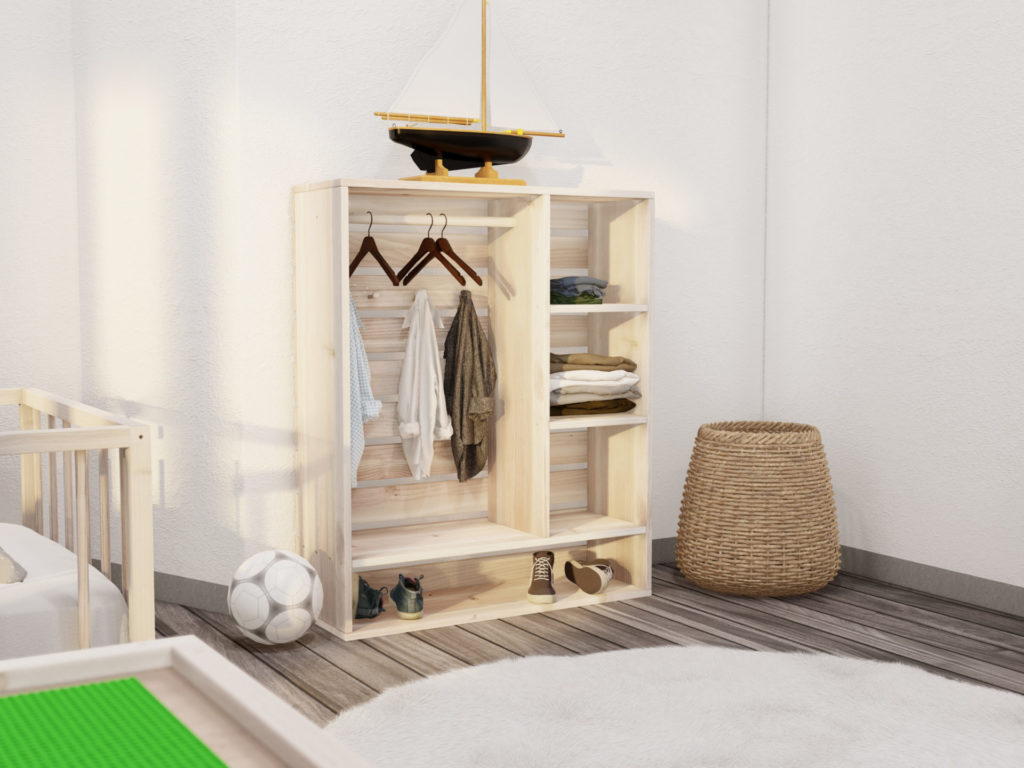
What are the dimensions of the wardrobe?
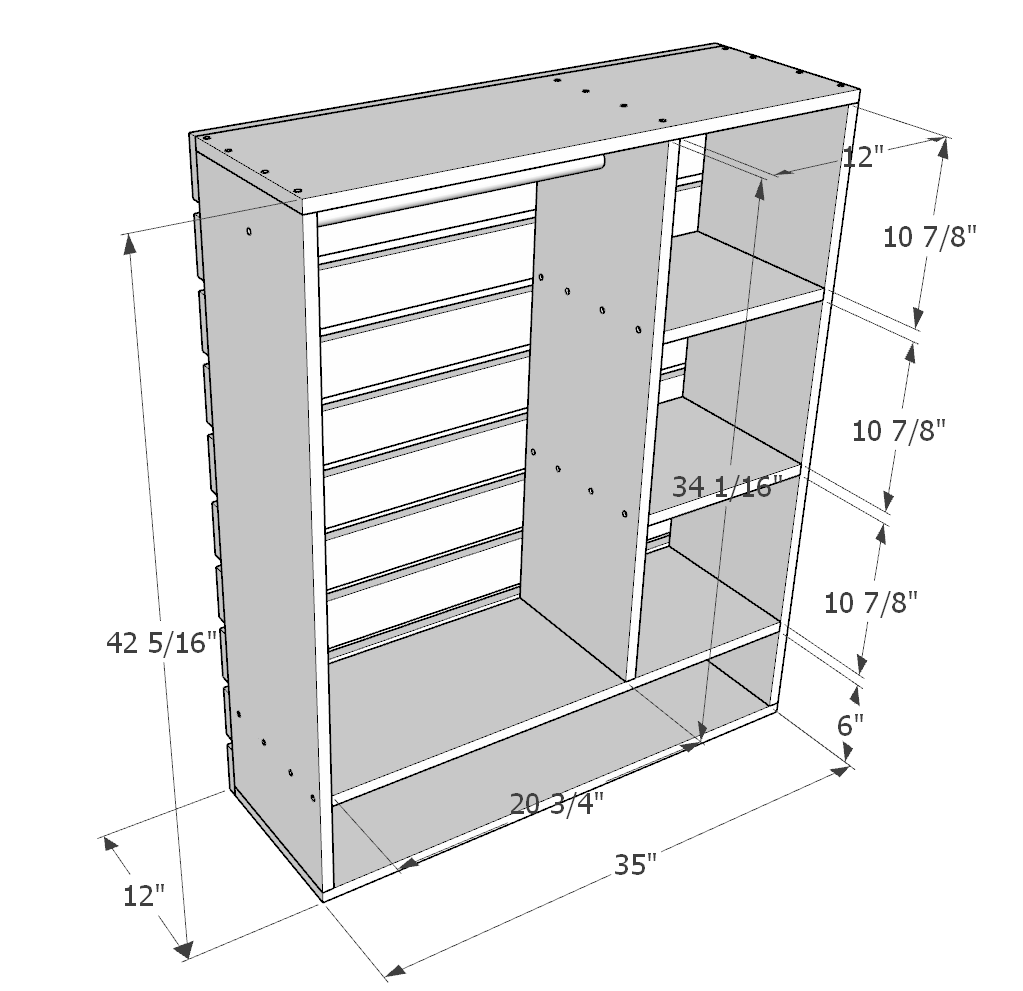
The closet is approximately 43 inches tall, 35 inches wide, and 12 inches deep.
The lowest cubby is 35 inches wide and 6 inches tall.
The side cubbies are about 11 inches tall and 12 inches wide.
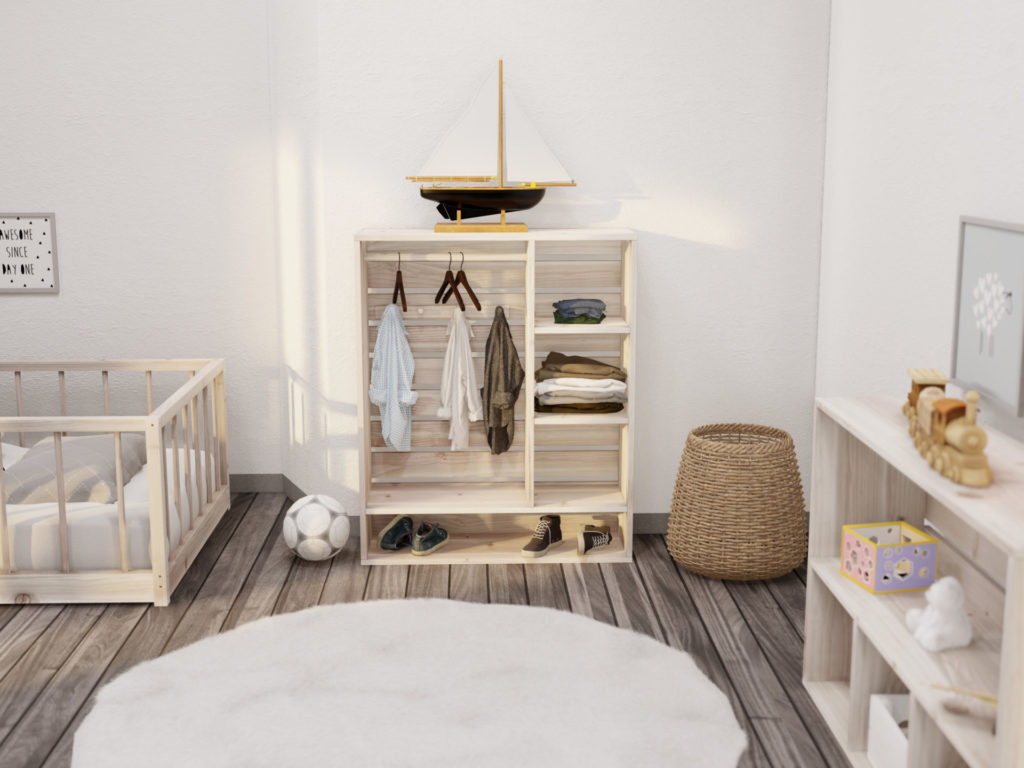
What other Montessori room pieces are a part of this room set-up?
Lego play and storage system plans can be found here.
Floor shelf plans can be found here.
Wall shelf plans can be found here.
Step stool plans can be found here.
Chair plans can be found here.
Activity and weaning table plans can be found here.
Twin size floor bed plans can be found here.
Children’s wardrobe plans can be found here.
Storage and activity shelf plans can be found here.
Time to build
2 hours
Total cost of build
$55
Skill level required
Beginner
Download the PDF plans
Plans for how to build the DIY Montessori children's wardrobe.
What is included in the PDF download?
- Easy to read step by step instructions
- Material list
- Cut list
- Tools needed
- 3D illustrations
- Helpful links to tools and materials needed for the project
Recommend tools for this project
- Saw (miter saw recommended for precision cuts)
- Drill
- Impact driver with bit for screws
- Sander
- wood countersink drill bit
Cut list and material list
Available with purchase of PDF plans.
Step 1 (Montessori children's wardrobe)
First, cut the lumber pieces into the dimensions into the following dimensions.
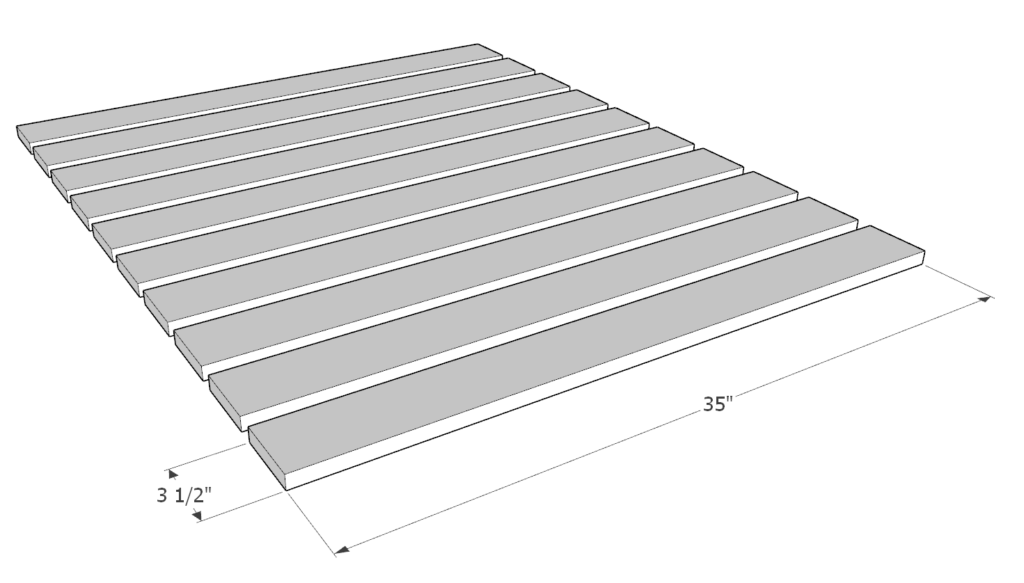
- (10) 1in x 4in x 35 in
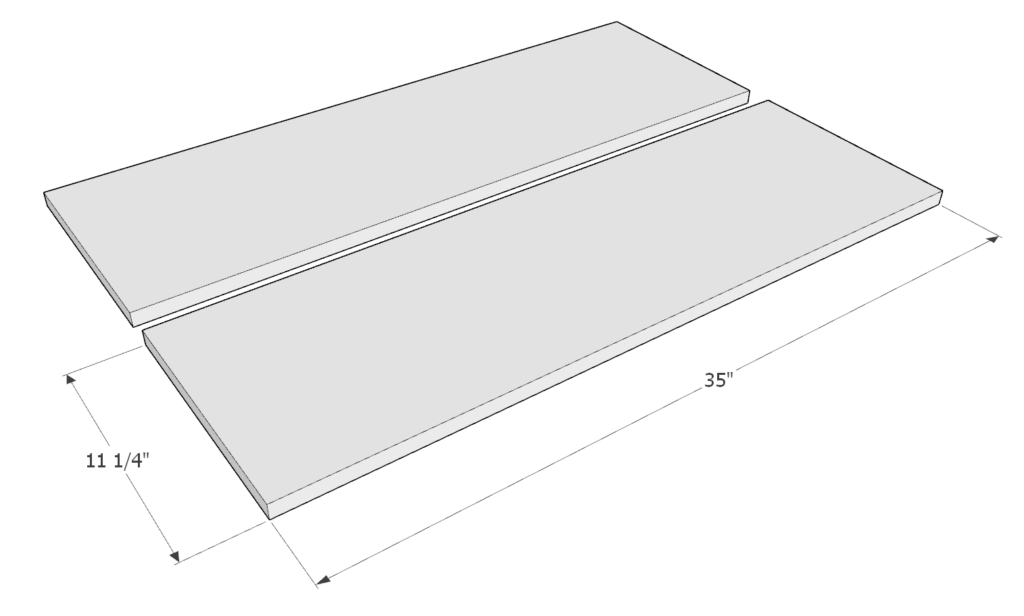
- (2) 1in x 12in x 35 in
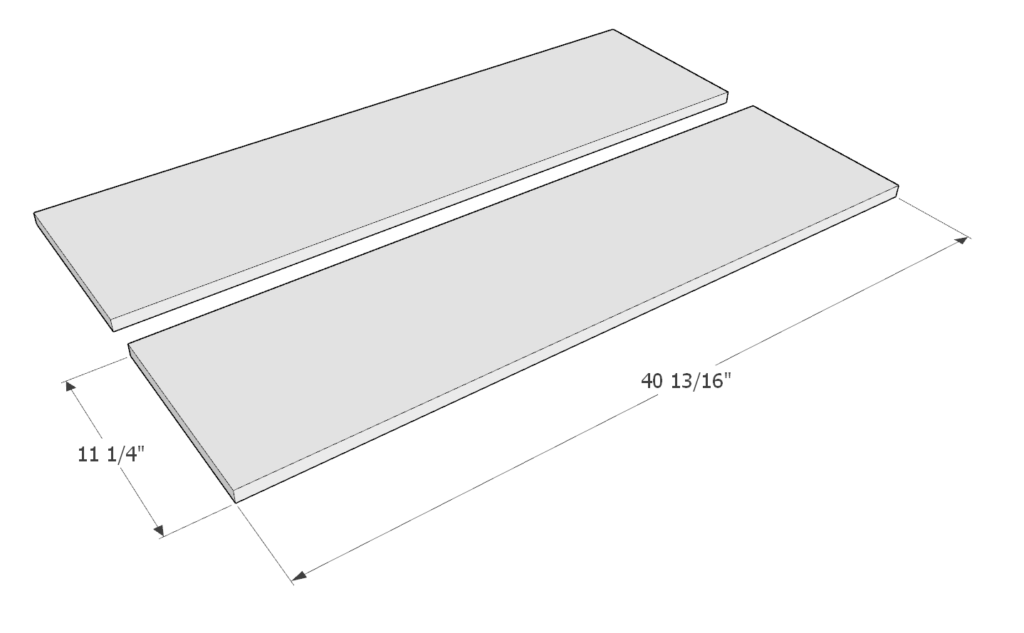
- (2) 1in x 12in x 40 13/16 in
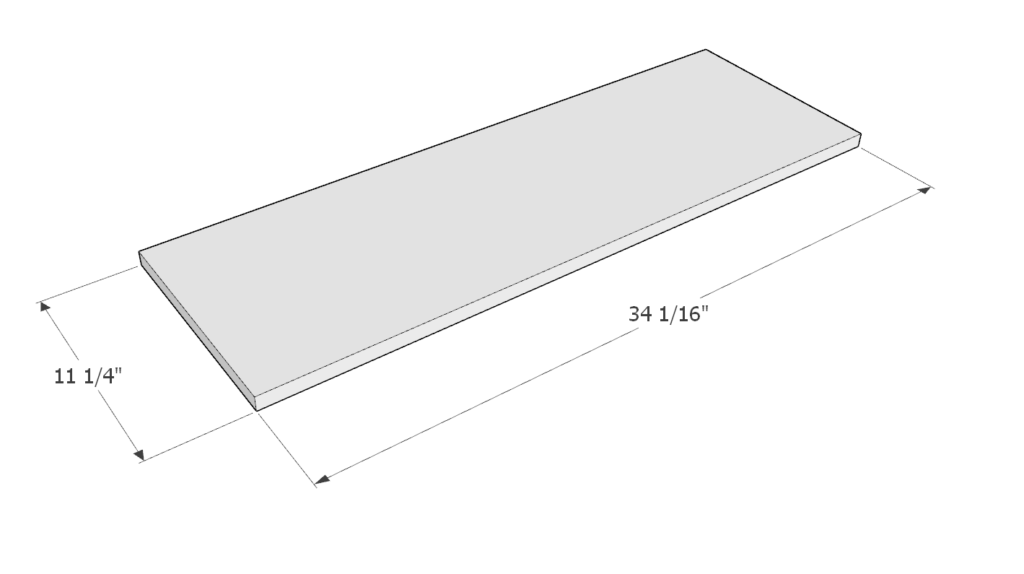
- (1) 1in x 12in x 34 1/16 in
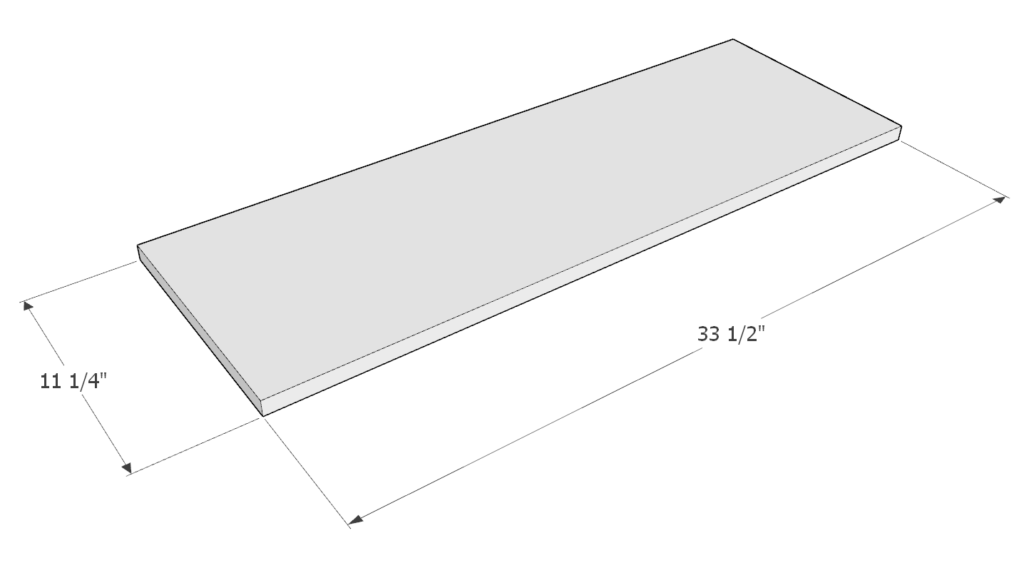
- (1) 1in x 12in x 33 1/2 in
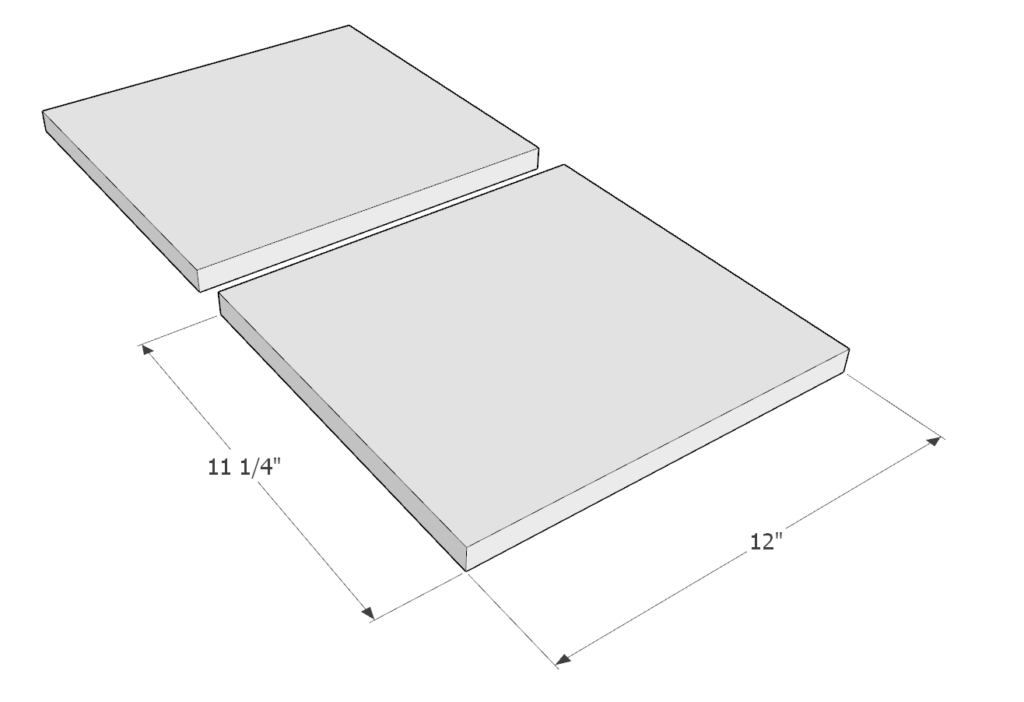
- (2) 1in x 12in x 12 in
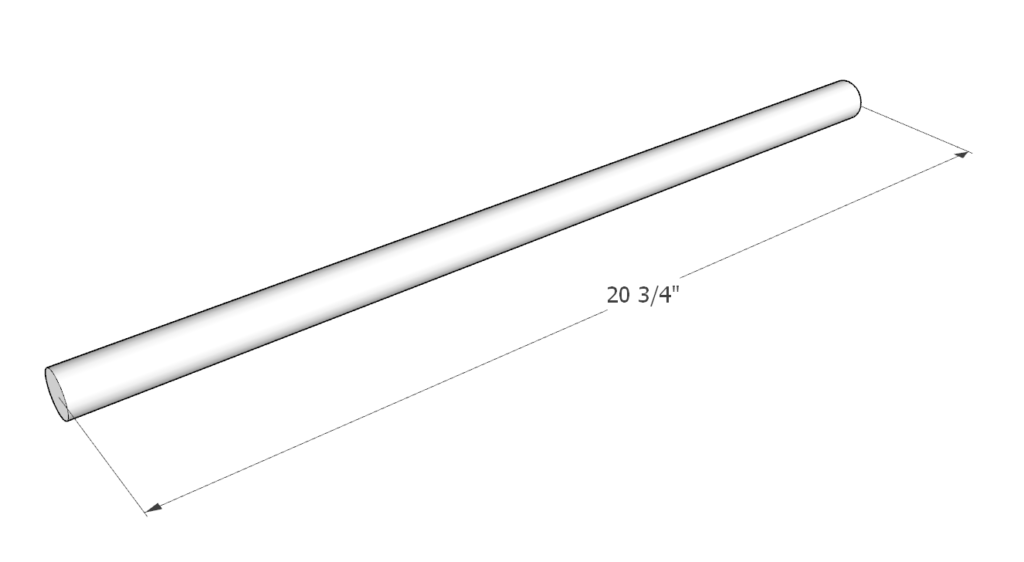
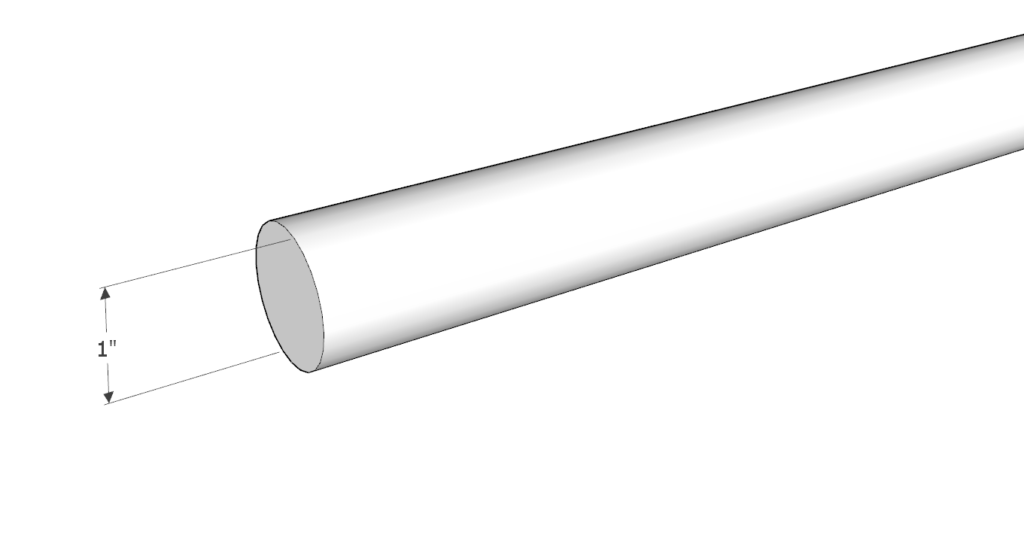
- (1) 1 inch diameter dowel 20 3/4 inch long
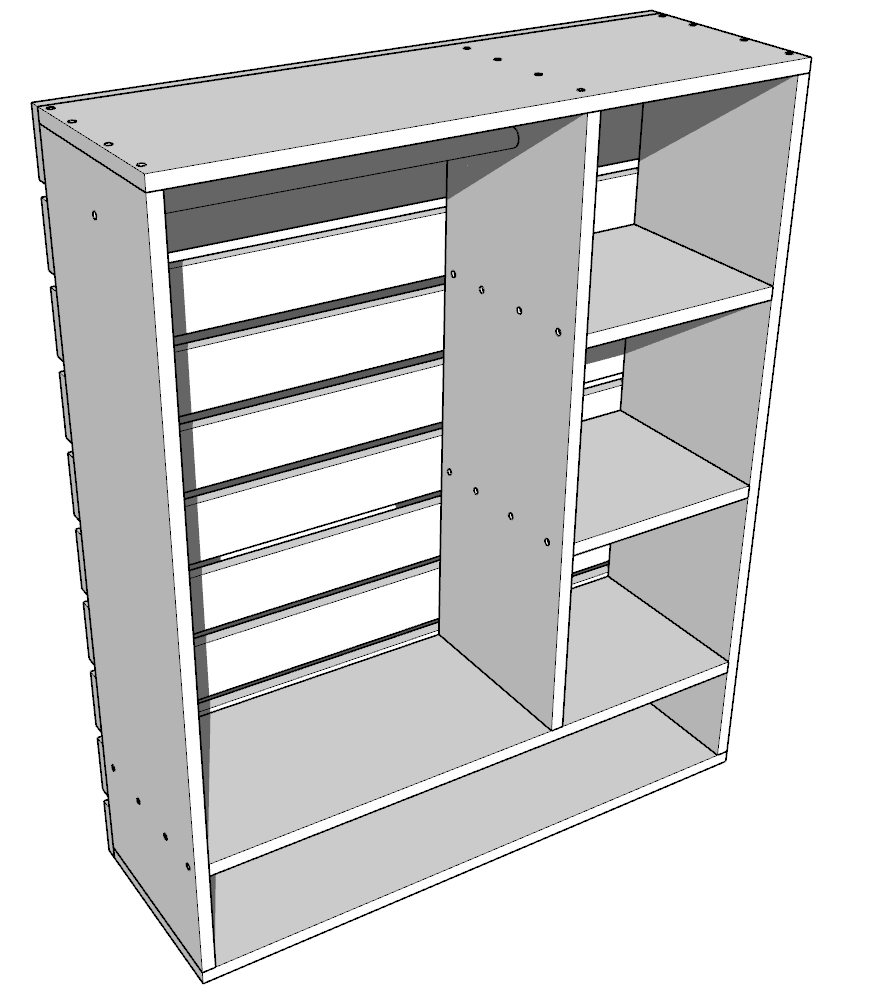
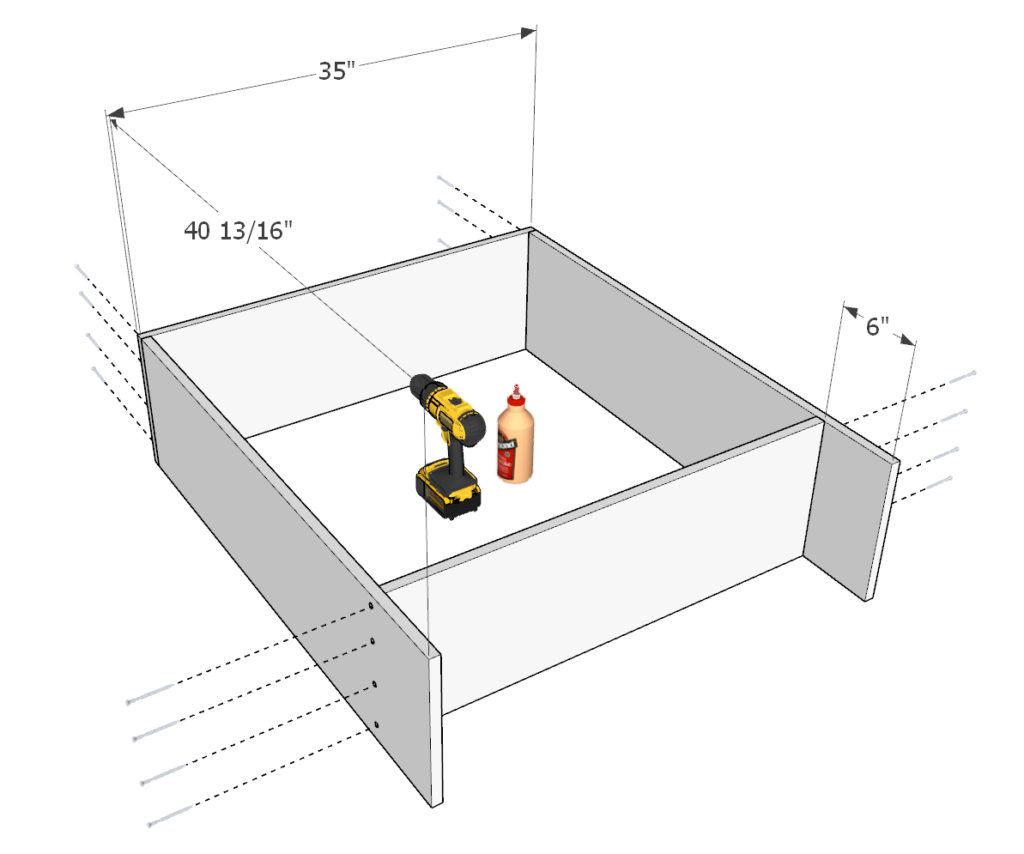
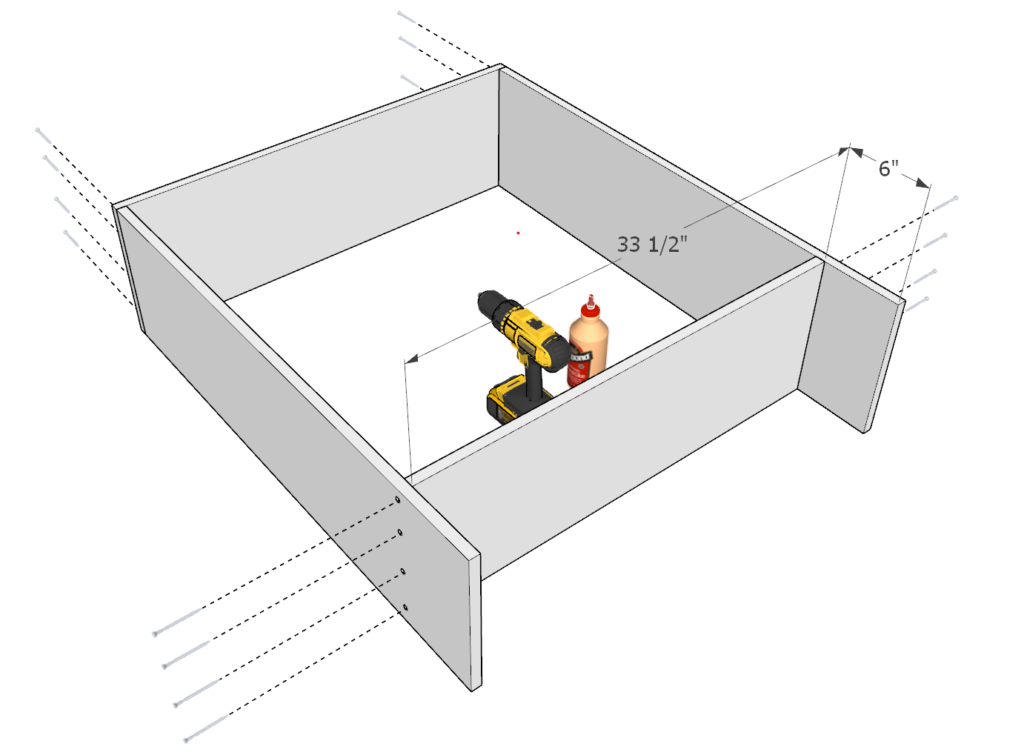
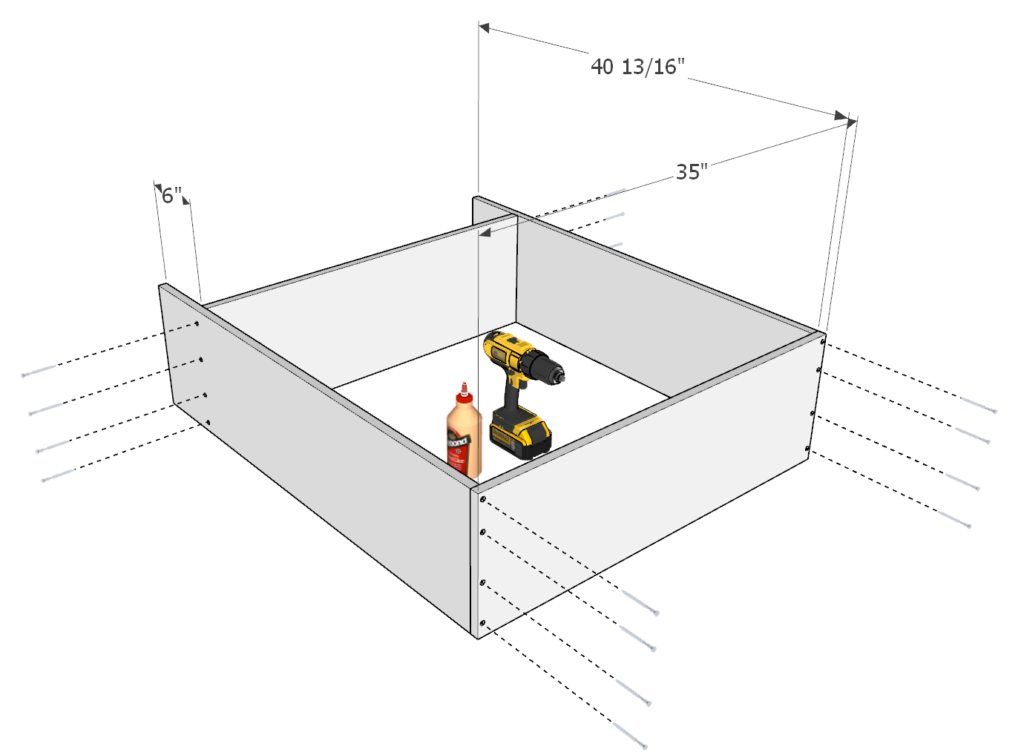
Step 2 (Montessori children's wardrobe)
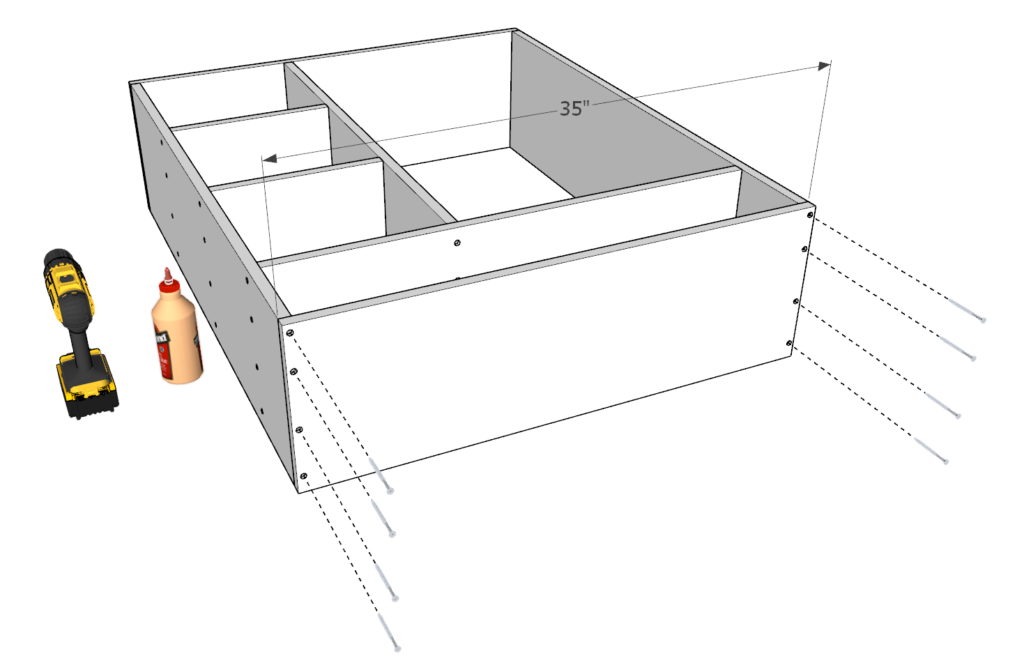
Next assemble the frame using two of the 40 13/16 in 1×12 lumber pieces, one 35 in 1×12 lumber piece, and one 33.5 in 1×12 lumber piece as shown in the diagram below.
Apply glue to all the areas that will be joined together. Predrill holes for the screws and add the 2.5 inch screws.
predrilling is important to prevent the wood from splitting and to create an overall stronger joint.
Step 3 (Montessori children's wardrobe)
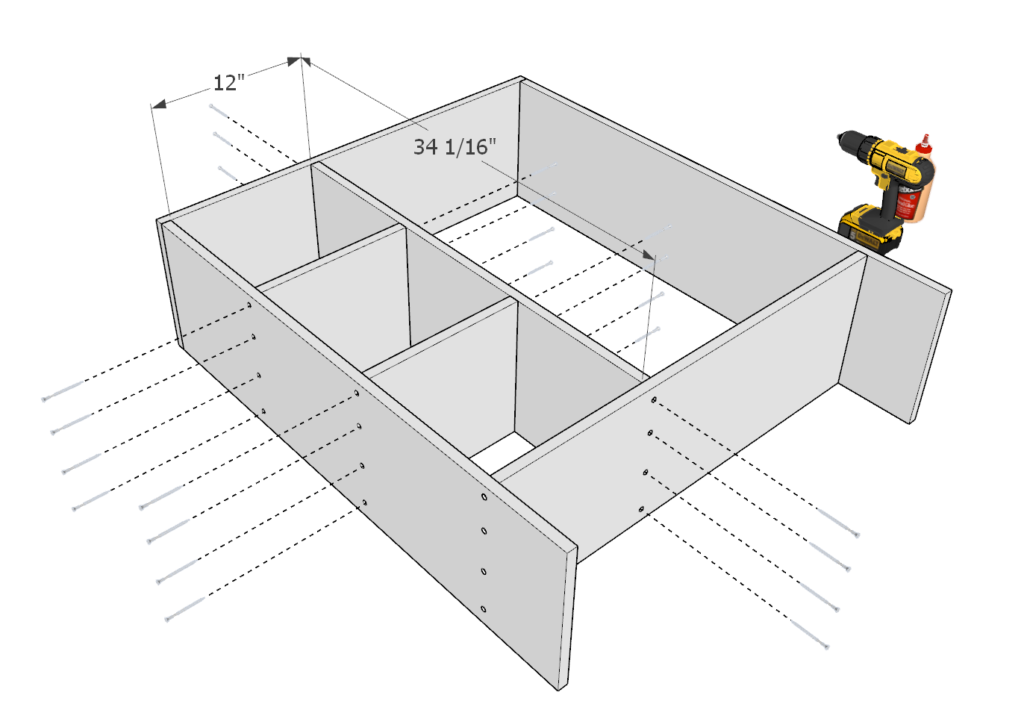
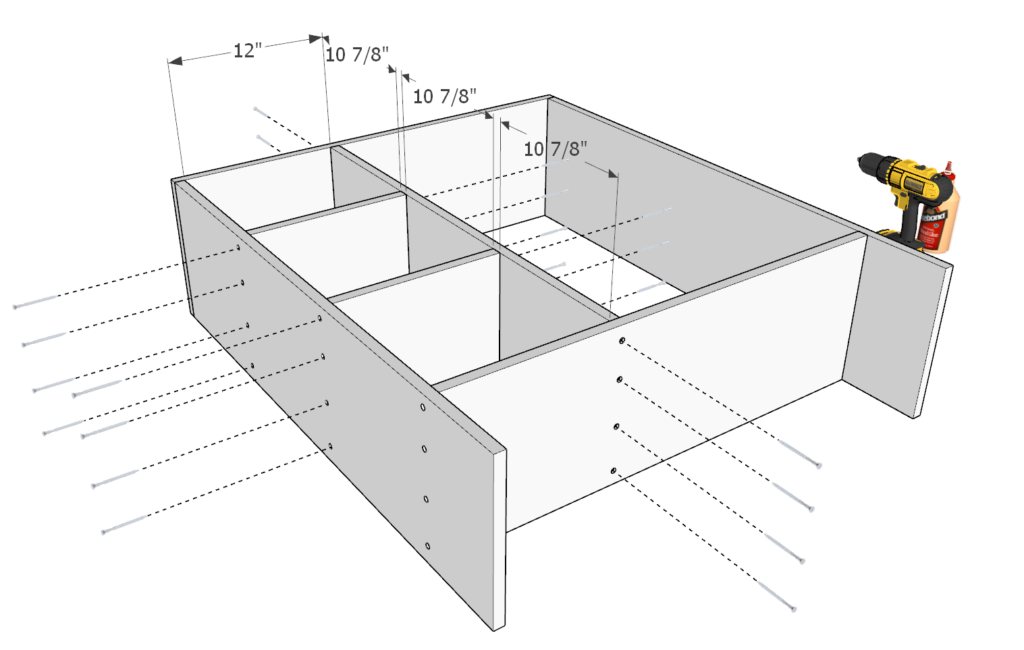
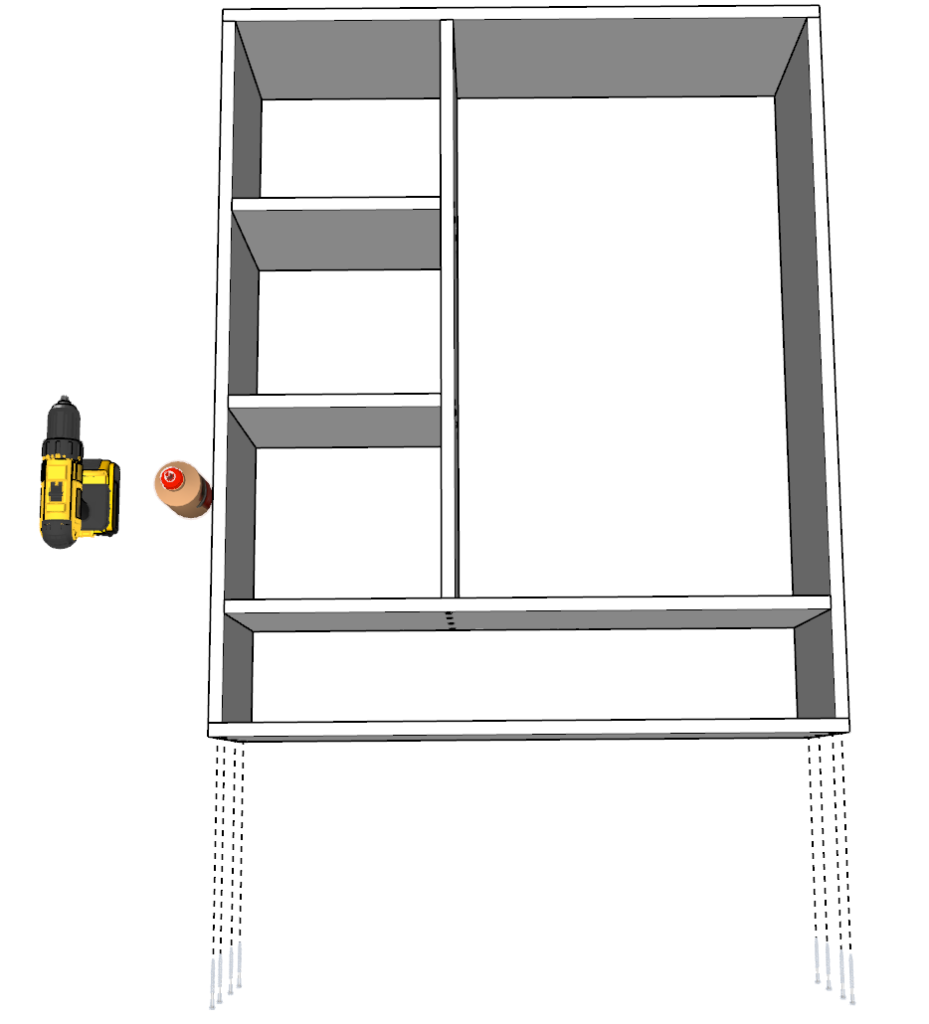
Next, create the base the side cubbies of the wardrobe dresser by adding two of the 12-inch 1×12 pieces and one of the 34 1/16 inch 1×12 pieces as shown below. Again, apply glue, predrill, and add screws.
The spaces between each 12 inch divider pieces should be about 10 7/8 inches to create equal sized spaces.
Step 4 (Montessori children's wardrobe)
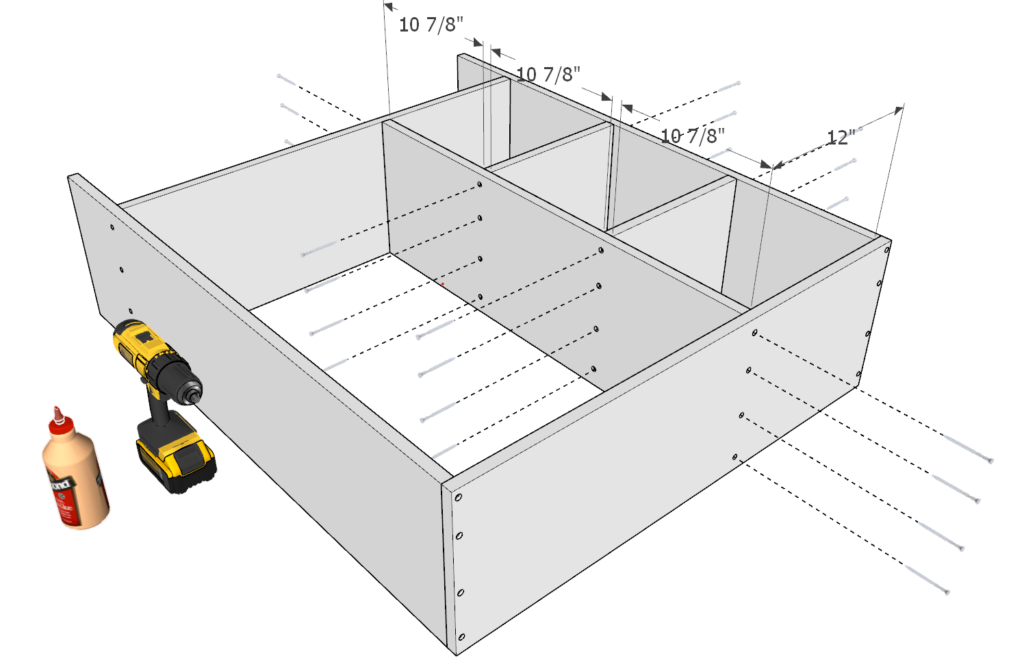
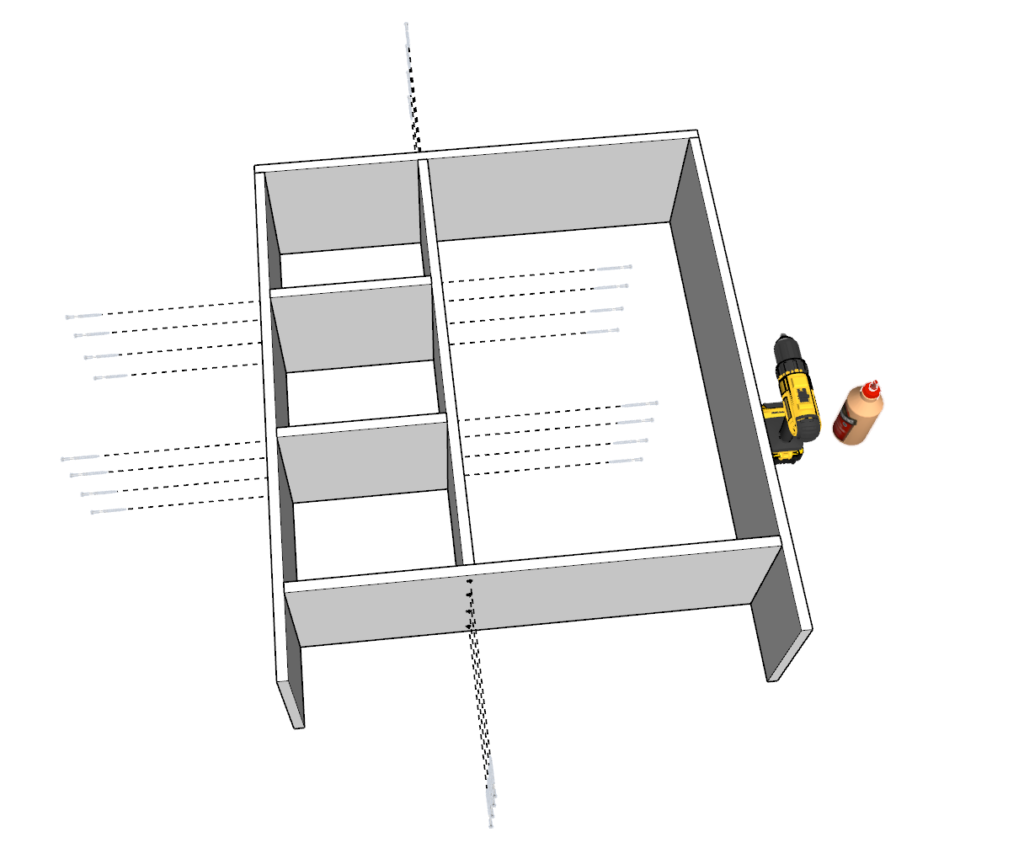
Next, add the 35 inch 1×12 lumber base piece to the dresser. Predrill, add glue, and add screws as shown below.
Step 5 (Montessori children's wardrobe)
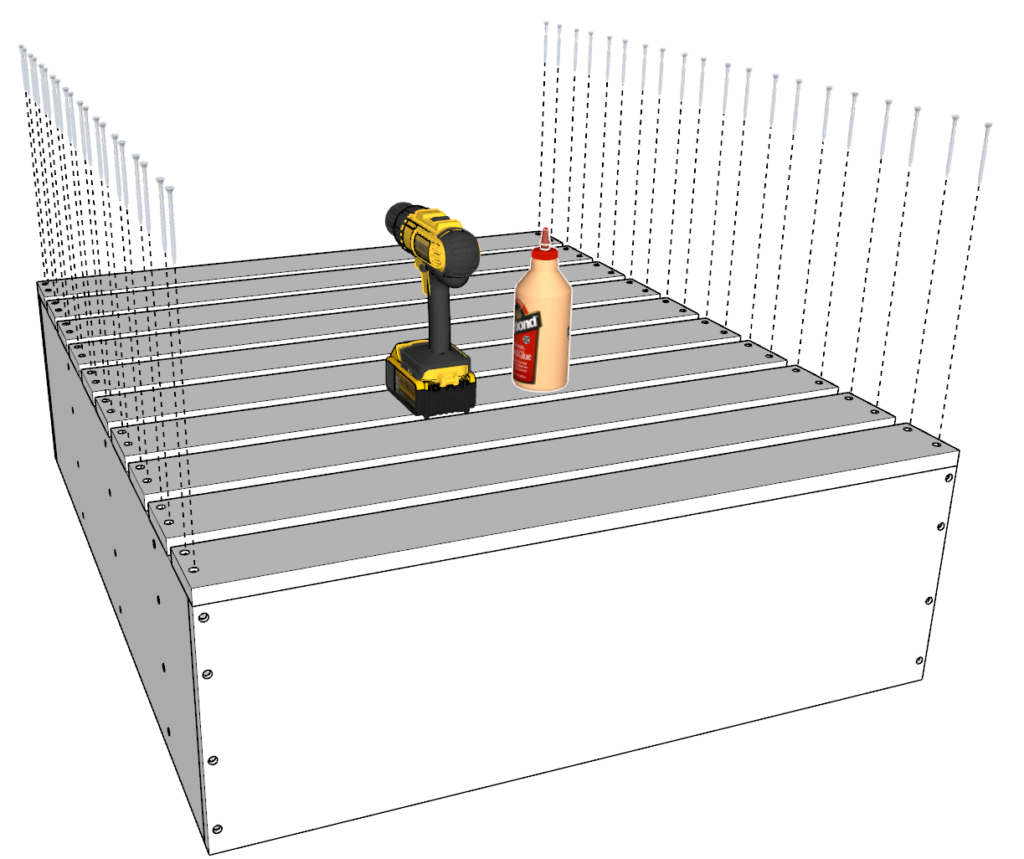
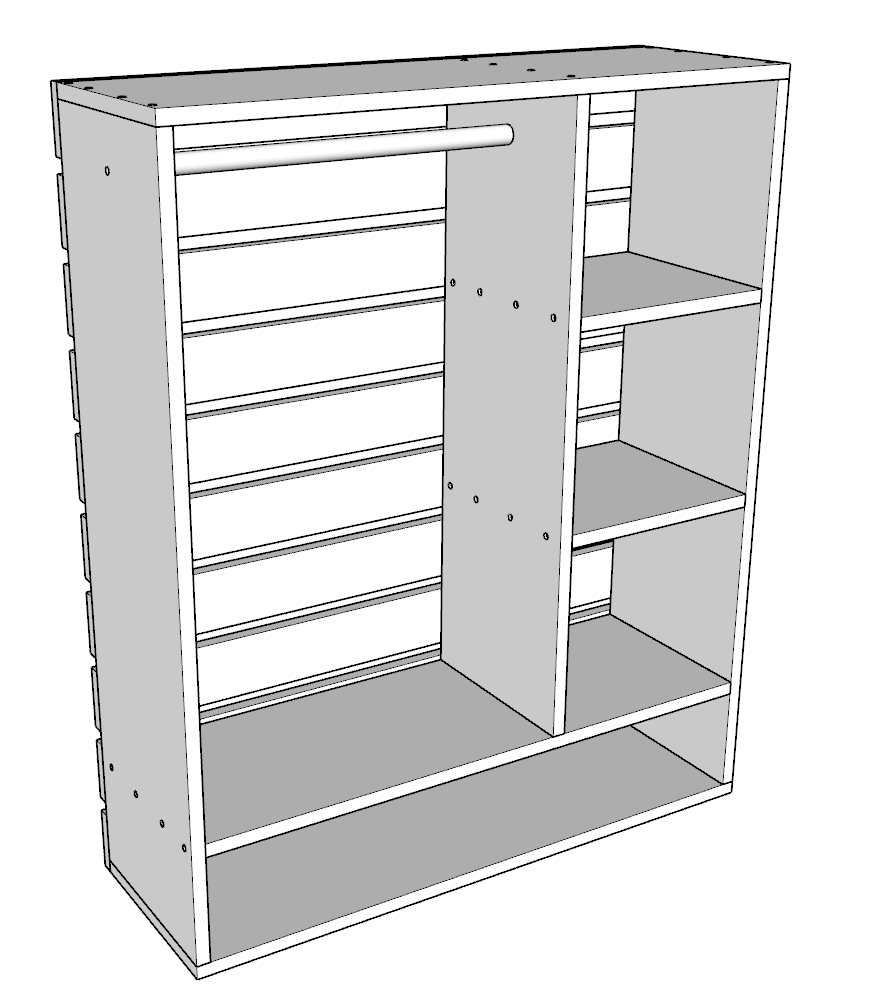
Next, add the back supporting 35 inch 1×4 boards as shown in the diagram. Space them out 13/16 inch apart. you can create a simple spacer from scrap lumber. This spacing is also used in most of the Montessori furniture pieces used in this set. Spacing it out correctly will give a beautiful uniform look for all furniture pieces.
Add glue, predrill, and add screws.

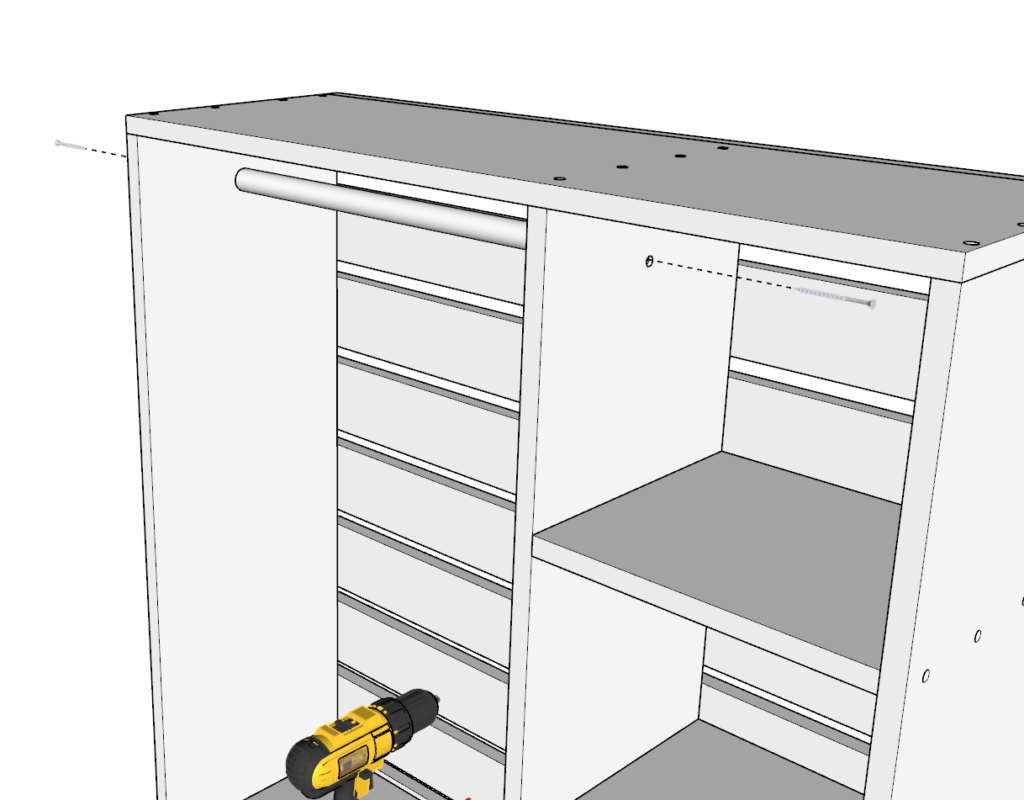
Step 5 (Montessori children's wardrobe)
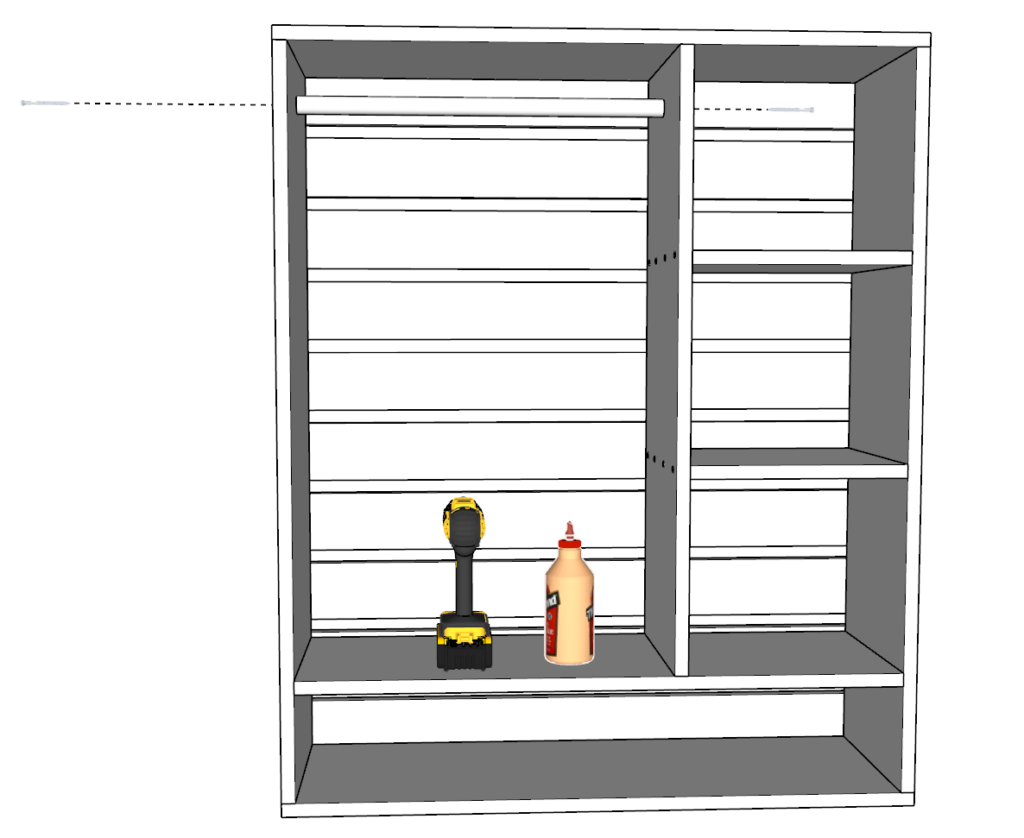
Next, add the 20 3/4 inch long closet pole for hanging cloths. The height of the pole can be adjusted to your child’s age and height. It would be important for your clod to be able to reach this pole.
When you settle on a height, predrill holes, add glue, and add screws.

Step 5 (Montessori children's wardrobe)
The final step is to sand down the dressor.
I start sanding with a rough grit sandpaper. Usually about 80-grit. Then, for the final touch I use a fine grit. Usually, a 220-grit.
It is important to round the corners to prevent injury in case your child bumps their head into an edge.
MAKE SURE TO STRAP OR TIE DOWN THE SHELF TO THE WALL TO PREVENT INJURY.