Benefits of a DIY Montessori chair.
Home is the most important learning environment for children because its typically where they spend much of their time growing up, learning, and developing. We believe that A Montessori style room can serve as a foundation for developing important life skills such as creativity and critical thinking.
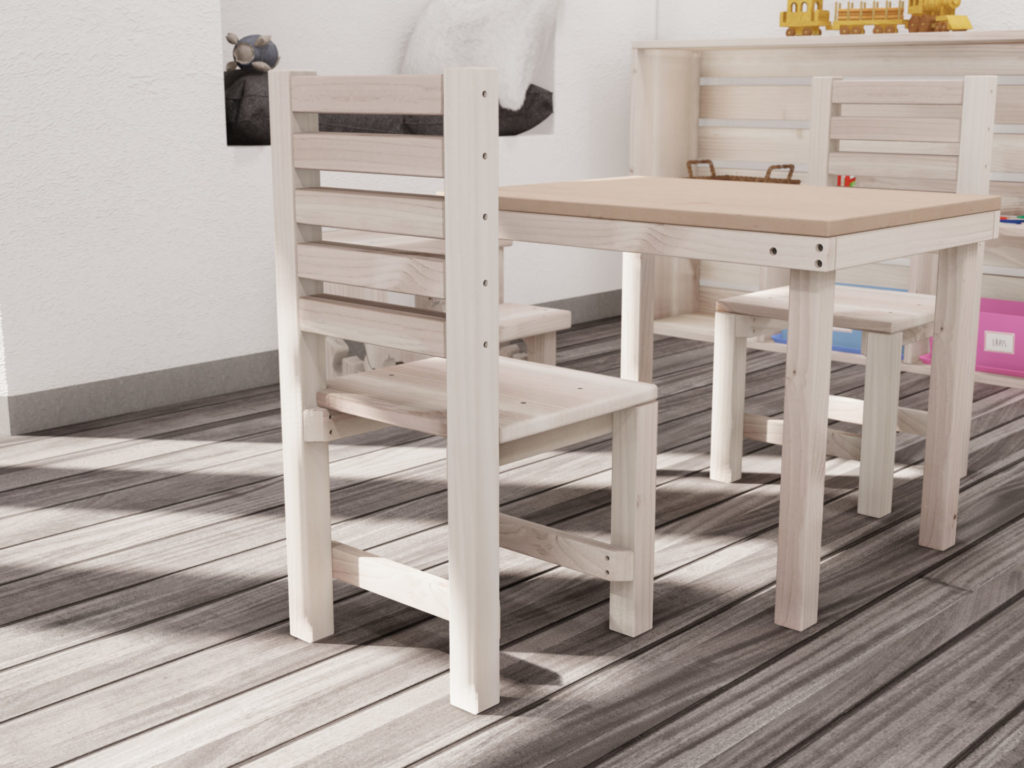
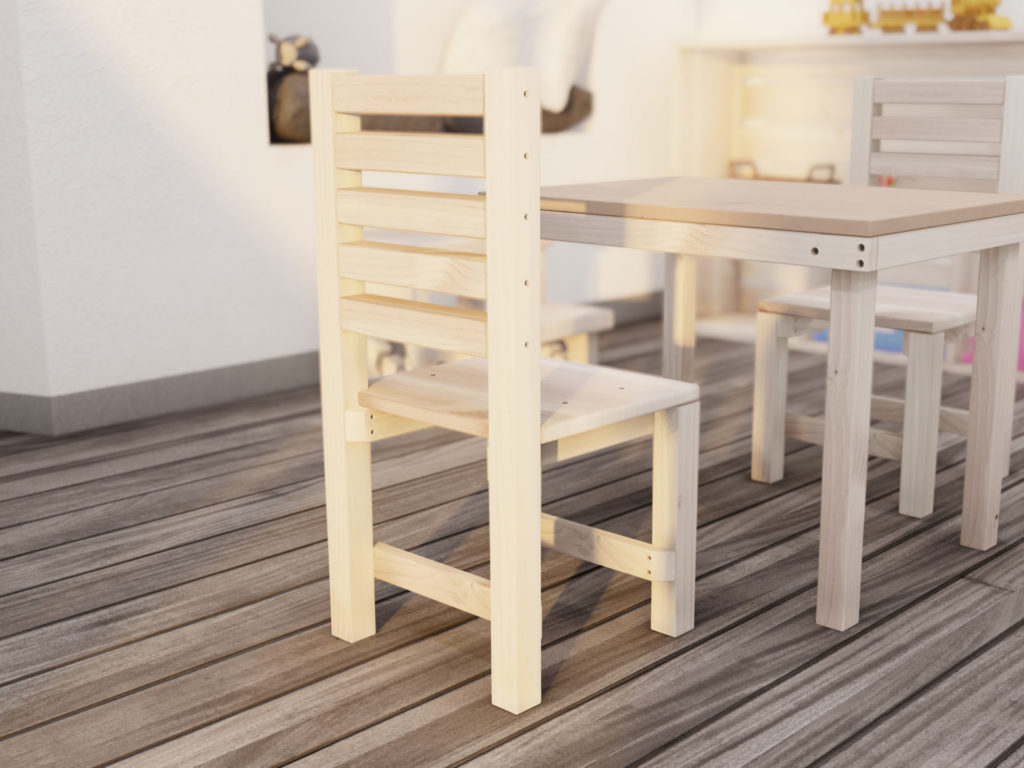
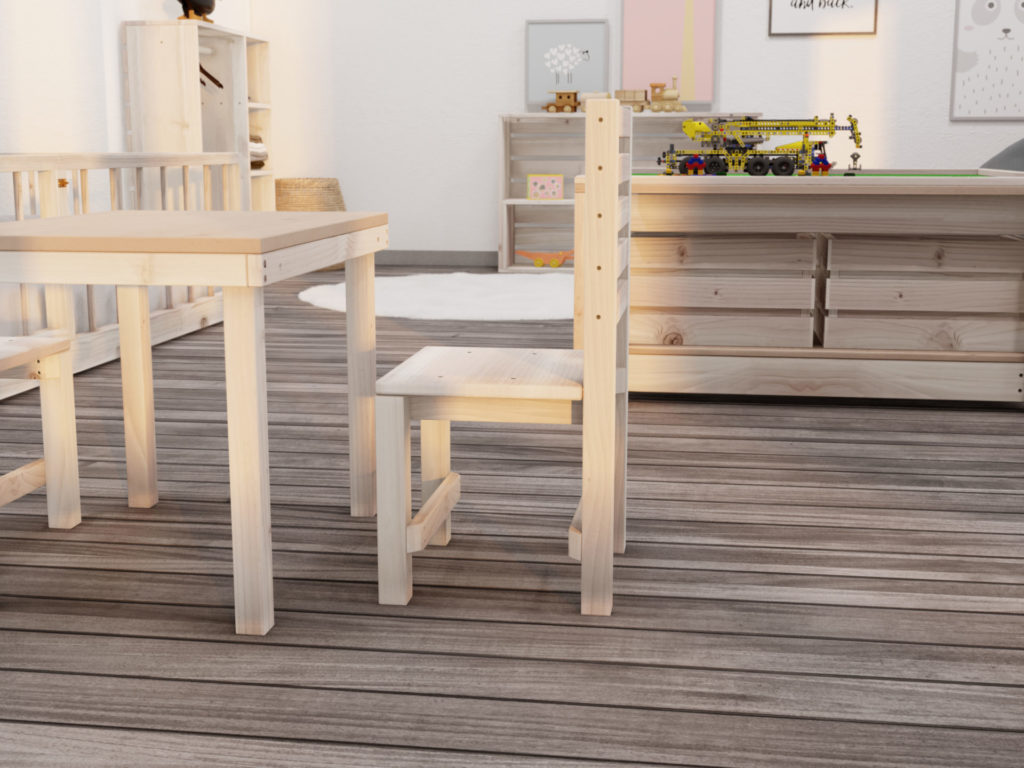
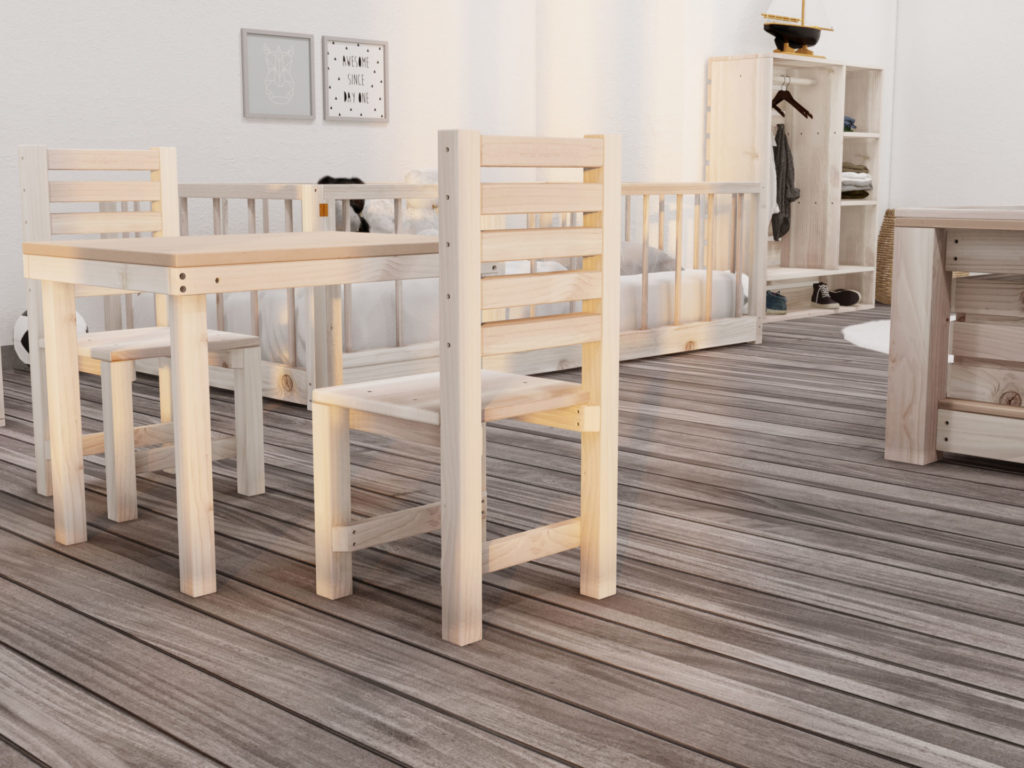
A chair that is the appropriate size for your child is a great way to create an environment that prepares and equips the child to learn more naturally. We designed a DIY Montessori chair with the child’s size in mind. We believe that a child can feel more included and independent and can participate in activities alongside their family better if they are enabled to do so with the table and chair set.
This table and chair set can be used for Montessori education and is indispensable for activities and learning and participating is art, science, culture, etc.
The table and chair combo can also serve as a weaning table in the dining room during meals. Its sturdy, simple, and perfect for better including your child in family meals. when your child is finished with the meal, they can excuse themselves from the table instead of being bound by a highchair. The weaning table and chair allows children to come and go as needed. It’s an important feature of the table and chair combo to allow for the development of confidence and independence.
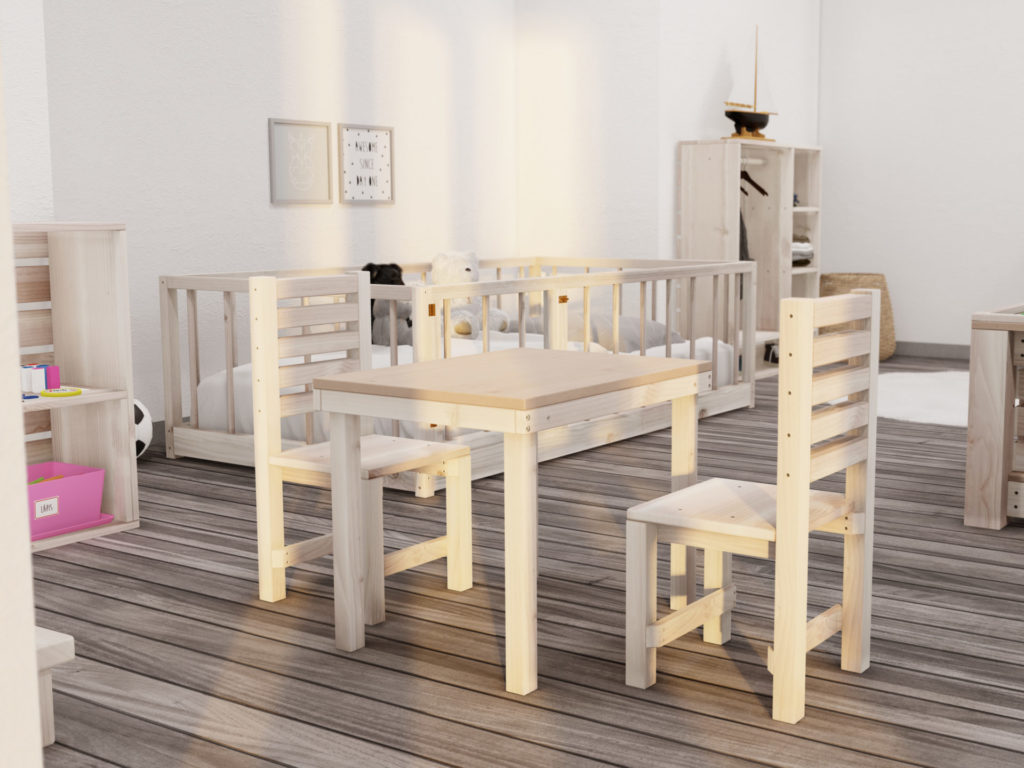
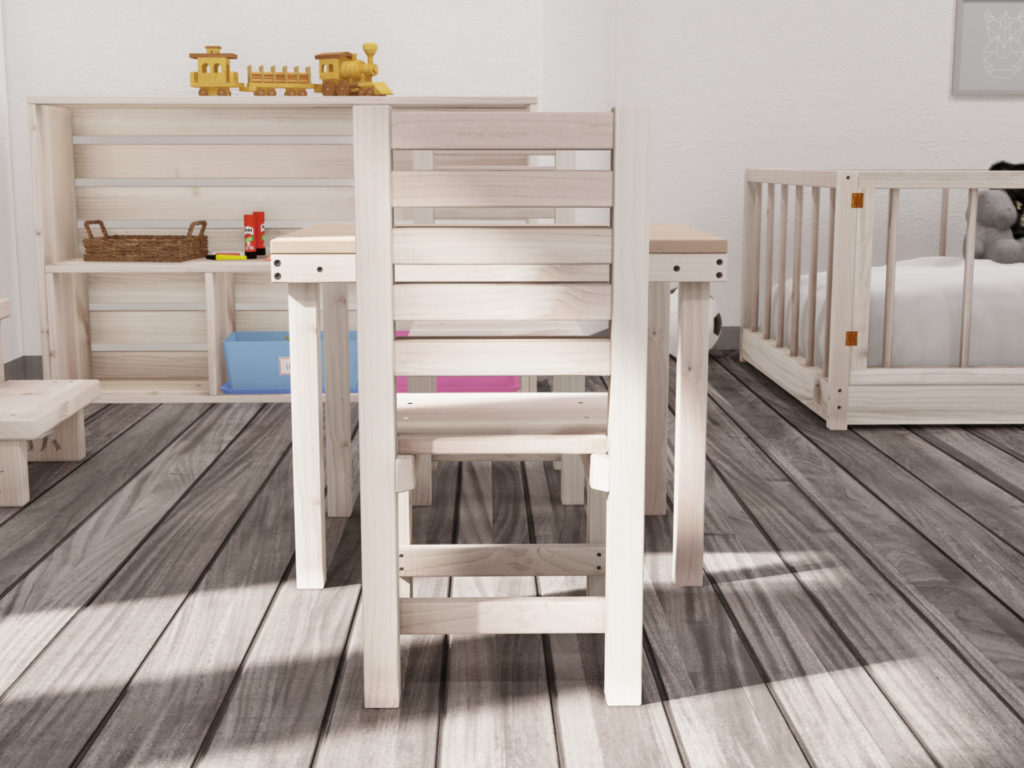
This DIY Montessori chair is a part of a set that includes not only the appropriately sized table but also other furniture pieces that enable your child to thrive.
What are the specs of the chair?
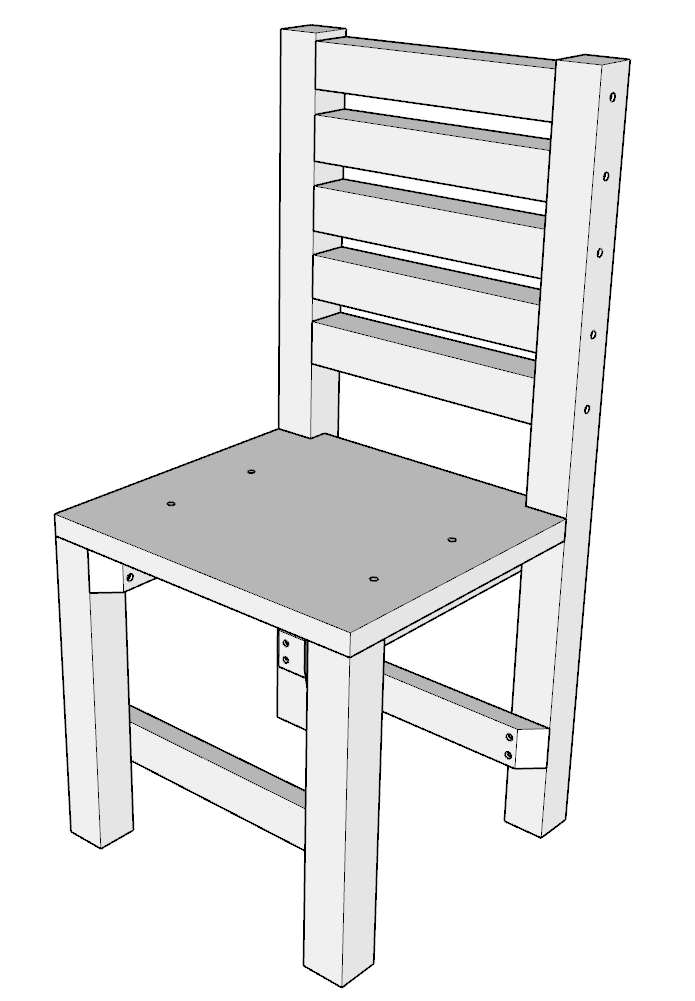
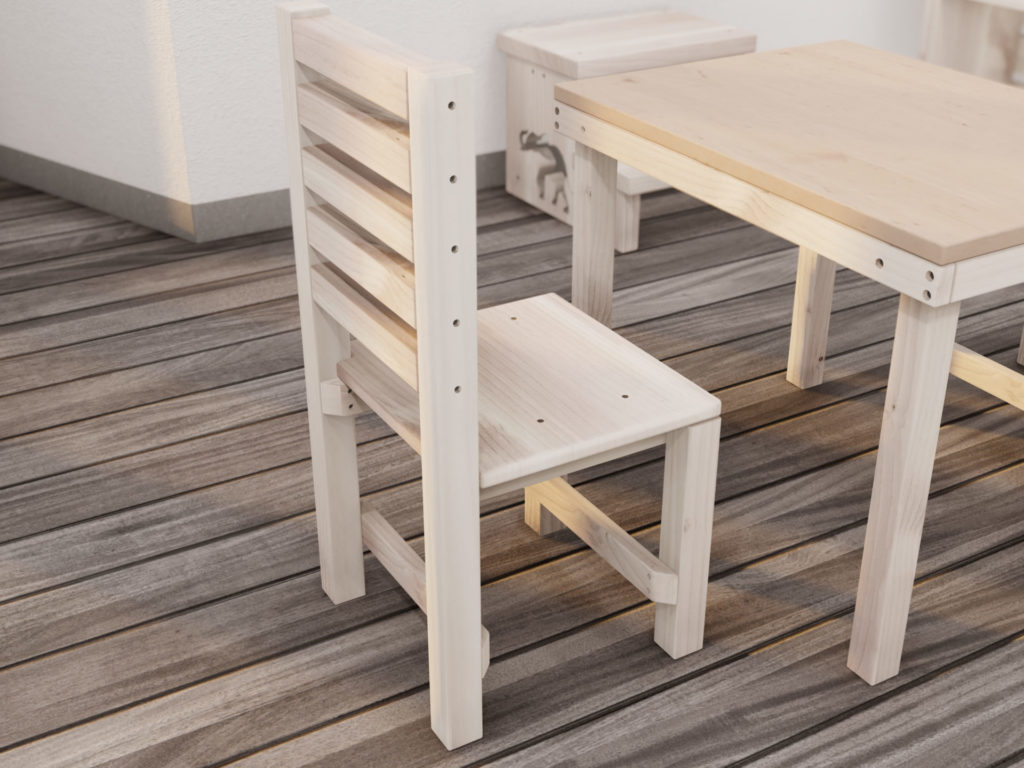
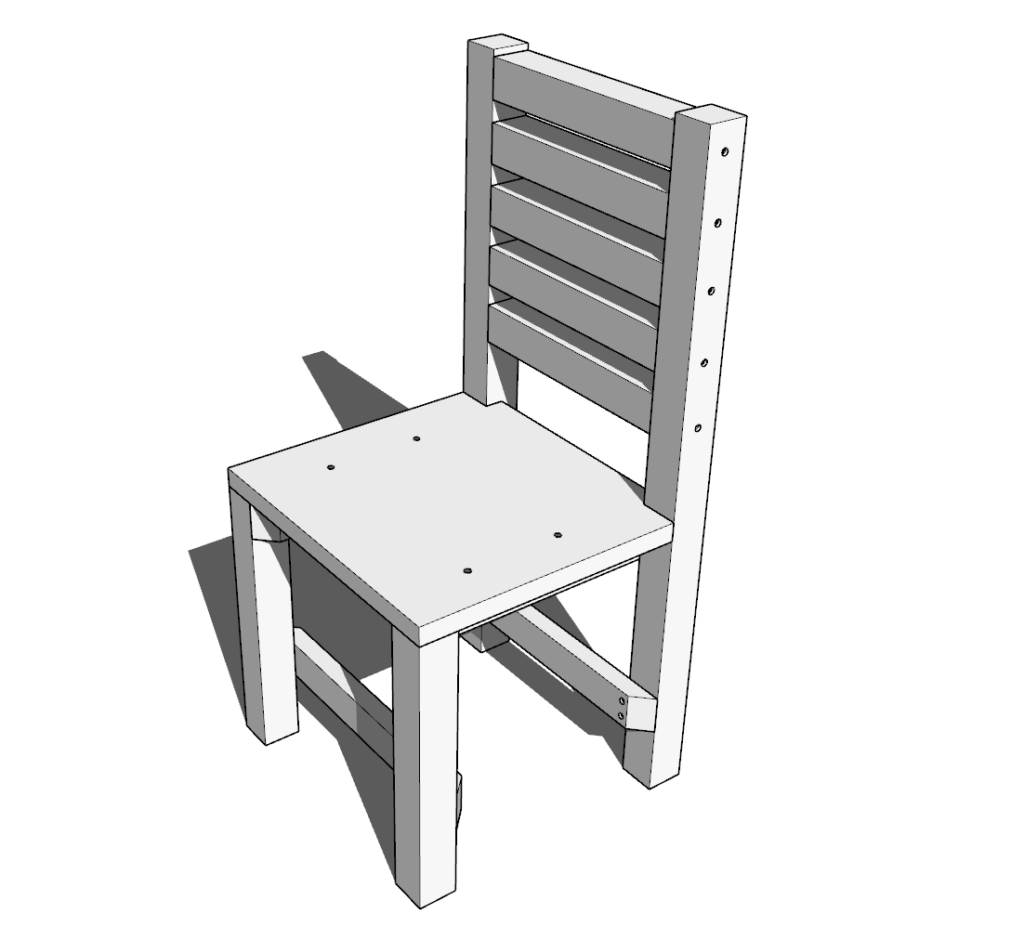
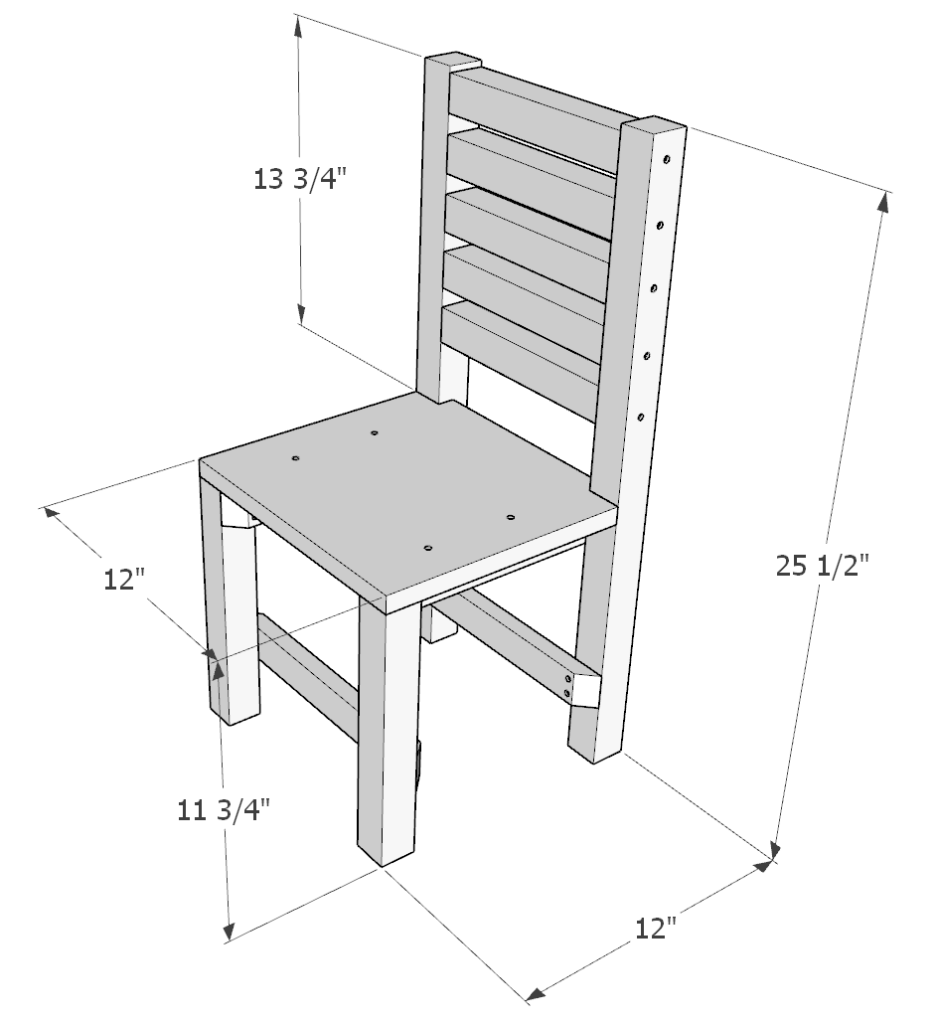
This chair is 25.5 inches tall, 12 inches wide, 12 inches deep. The seating height is 11.75 inches off the ground.
The chair is part of a larger set designed for a Montessori room.
Joints and cuts are easy to do and are designed for beginners to woodworking. The step-by-step instructions provide an easy and straight forward guide and include helpful links to materials and tools needed.
The project uses material that is widely available in most hardware stores and requires basic woodworking tools.
What other Montessori room pieces are a part of this room set-up?
Lego play and storage system plans can be found here.
Floor shelf plans can be found here.
Wall shelf plans can be found here.
Step stool plans can be found here.
Chair plans can be found here.
Activity and weaning table plans can be found here.
Twin size floor bed plans can be found here.
Children’s wardrobe plans can be found here.
Storage and activity shelf plans can be found here.
Time to build
1 hours
Total cost of build
$25
Skill level required
Beginner
Download the PDF plans
Plans for how to build the DIY Montessori chair.
What is included in the PDF download?
- Easy to read step by step instructions
- Material list
- Cut list
- Tools needed
- 3D illustrations
- Helpful links to tools and materials needed for the project
Recommend tools for this project
- Saw (miter saw recommended for precision cuts)
- Drill
- Impact driver with bit for screws
- Sander
- wood countersink drill bit
Discloser: Some links are affiliate links
Cut list and material list
Available with purchase of PDF plans.
Step 1 (Montessori chair)
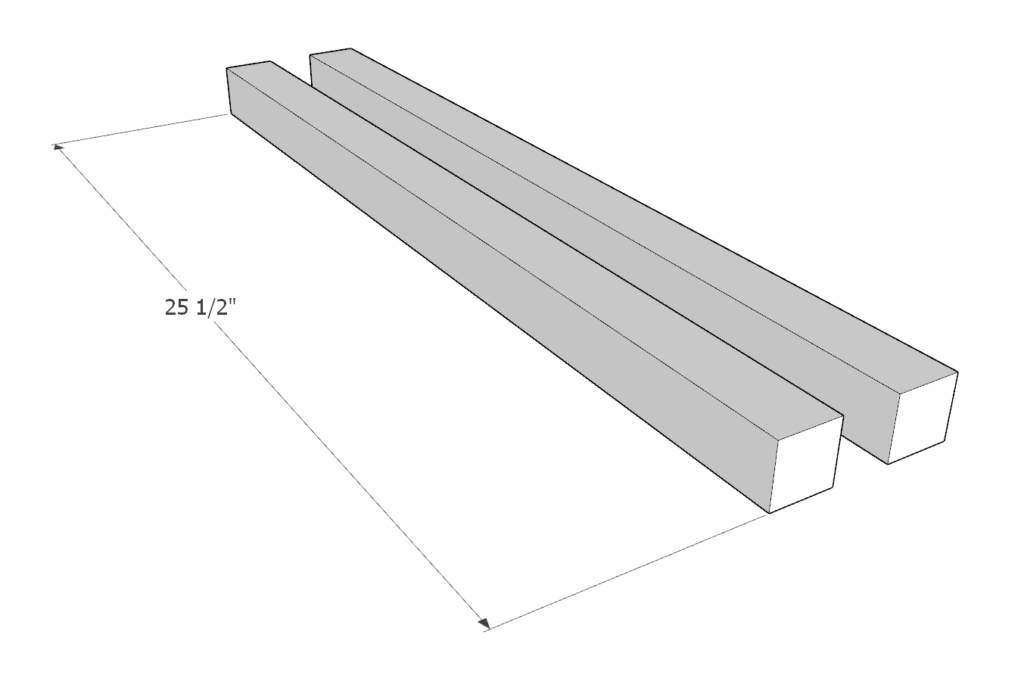
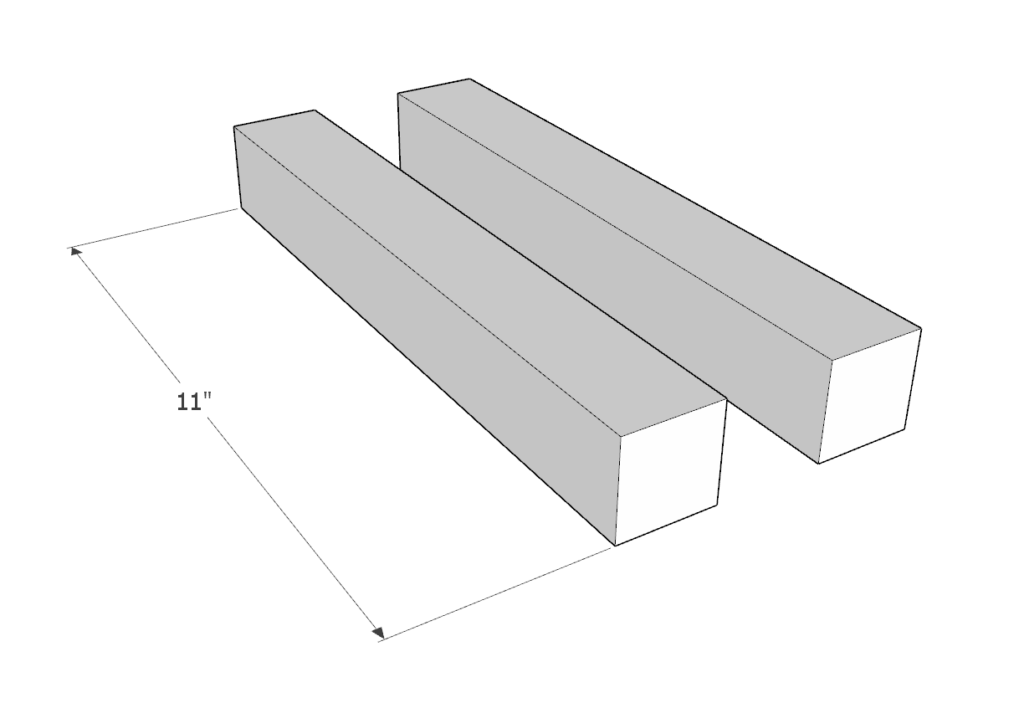
First, cut the lumber pieces into the dimensions into the following dimensions.
- (2) 2in x 2in x 25.5 in long
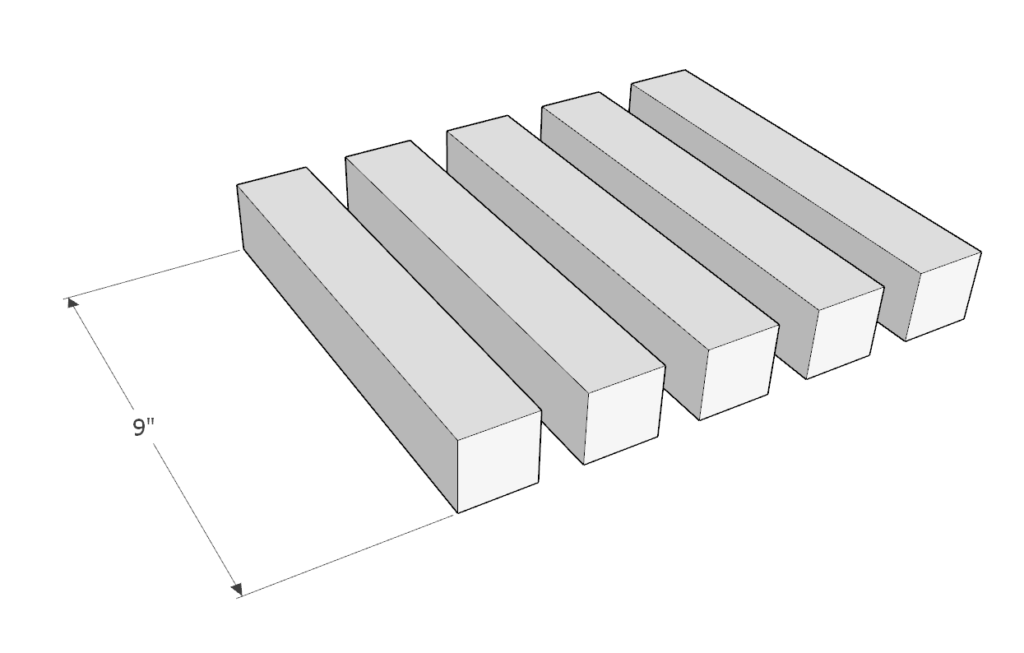
- (2) 2in x 2in x 11 in long
- (5) 2in x 2in x 9 in long
- (4) 1in x 2in x 12 in long. Cut at 45 degrees on both ends (see diagram)
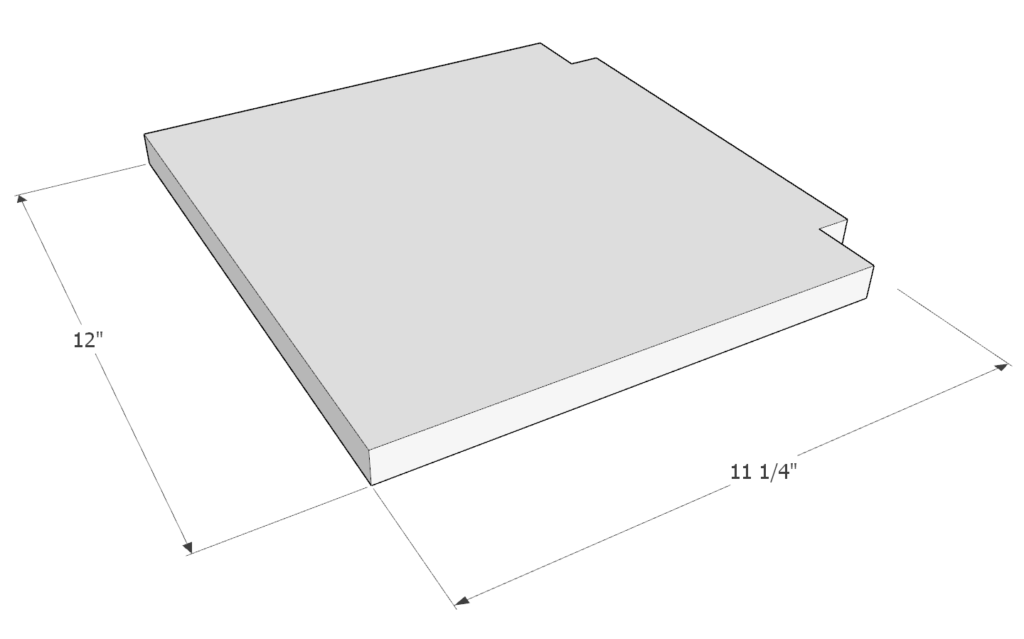
- 1in x 12in x 12 in long
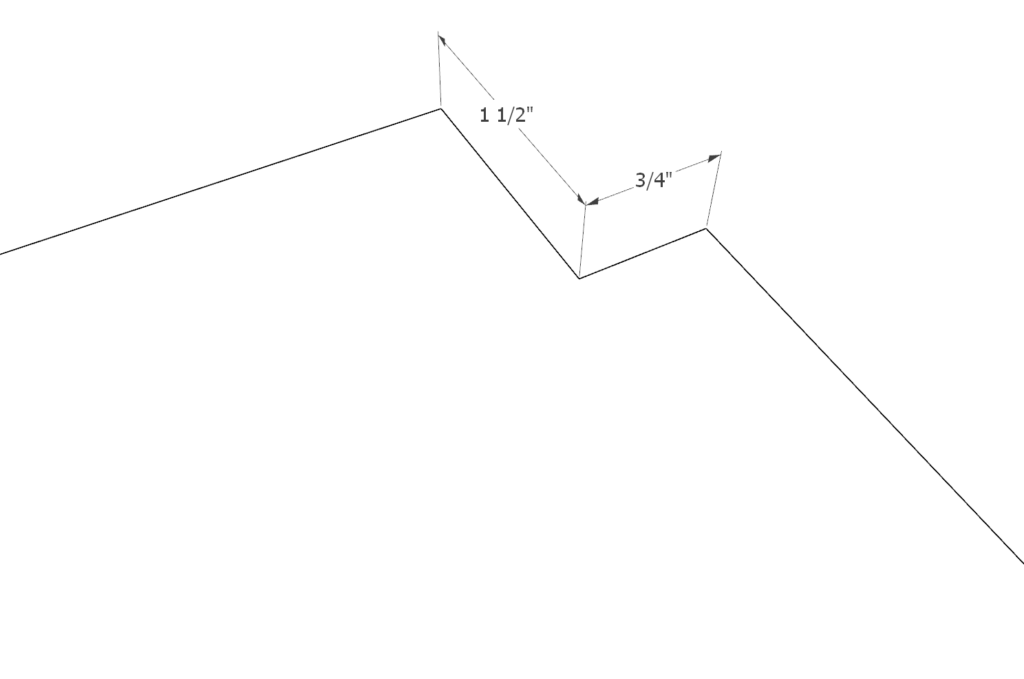
- For the 12 inch 1×12 lumber piece, make sure to cut ¾ inch x 1.5 inch notches on one end of the 1×12. See diagram. This can be done with a miter saw or a hand saw.
Step 2 (Montessori chair)
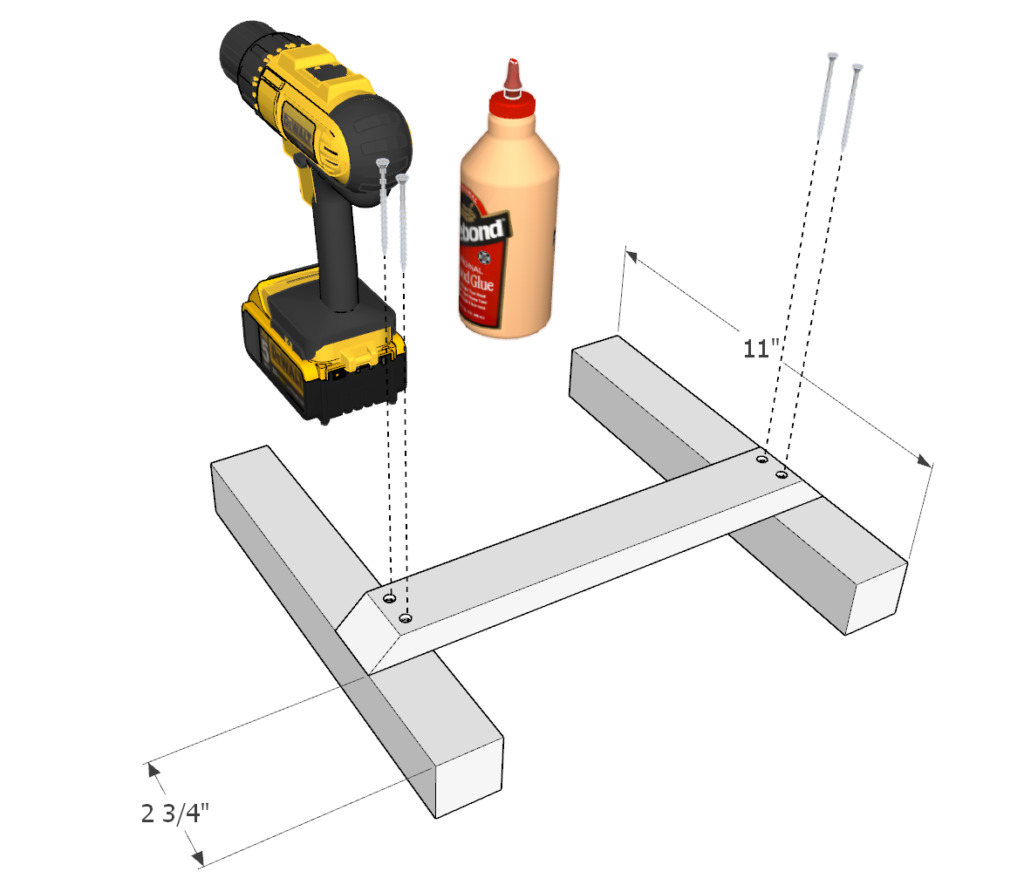
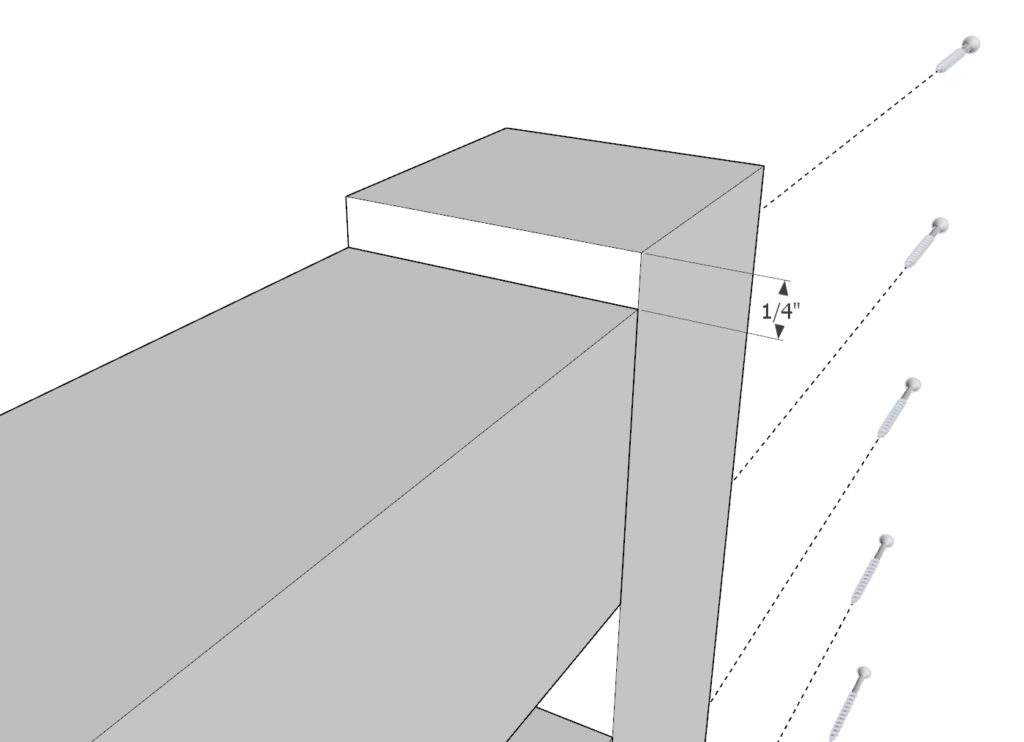
Next assemble the front legs of the chair using two of the 11 in 2×2 lumber pieces and one 12in 1×2 lumber piece as shown in the diagram below.
The 1×12 should be placed approximately 2.75 inches away from the edge as shown below.
Apply glue to all the areas that will be joined together. Predrill holes for the screws and add the 1.5 inch screws.
predrilling is important to prevent the wood from splitting and to create an overall stronger joint.
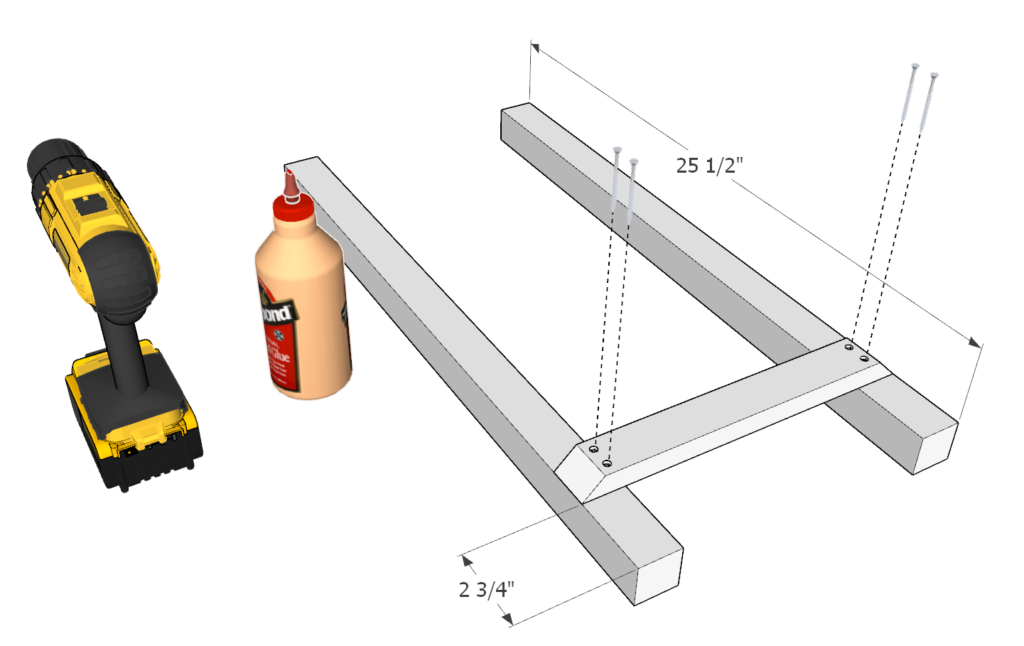
Repeat this for the back legs as well. instead of the 11 inch 2×2 lumber pieces, use the 25.5 inch 2×2 lumber pieces.
Step 3 (Montessori chair)
Next, add two of the 12 inch 1×2 lumber pieces that are cut at a 45 degree angle and add them to the leg pieces you assembled in the previous step as shown below.
Predrill, add glue, and add screws as shown.
Step 4 (Montessori chair)
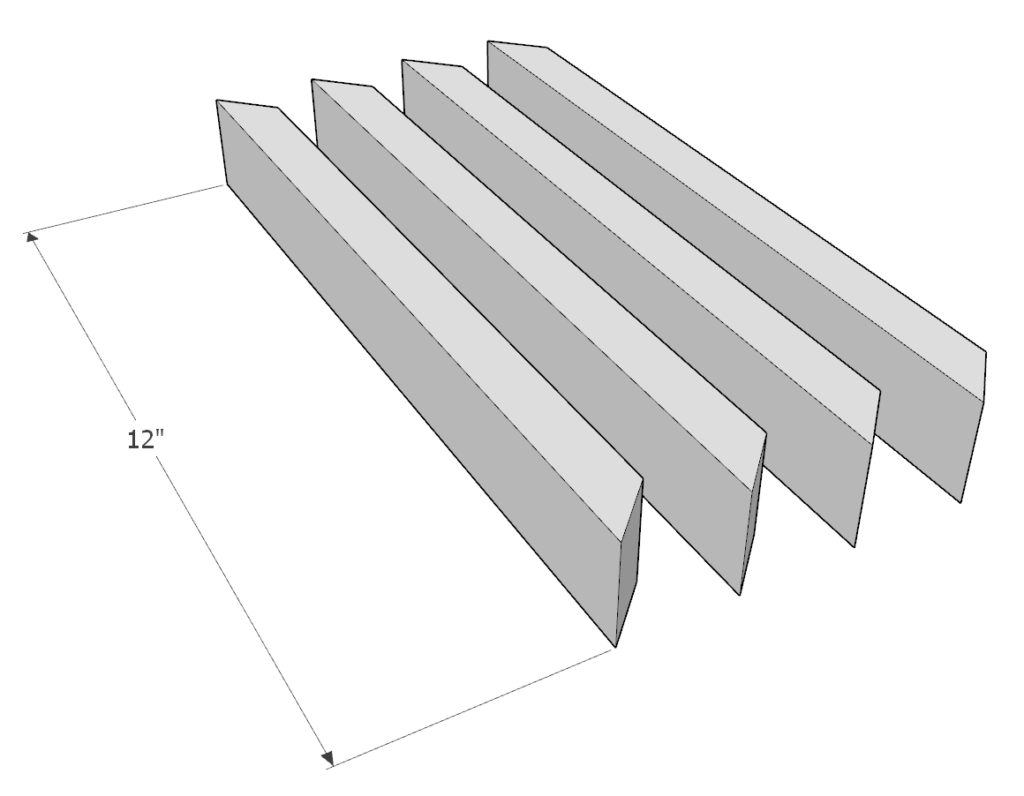
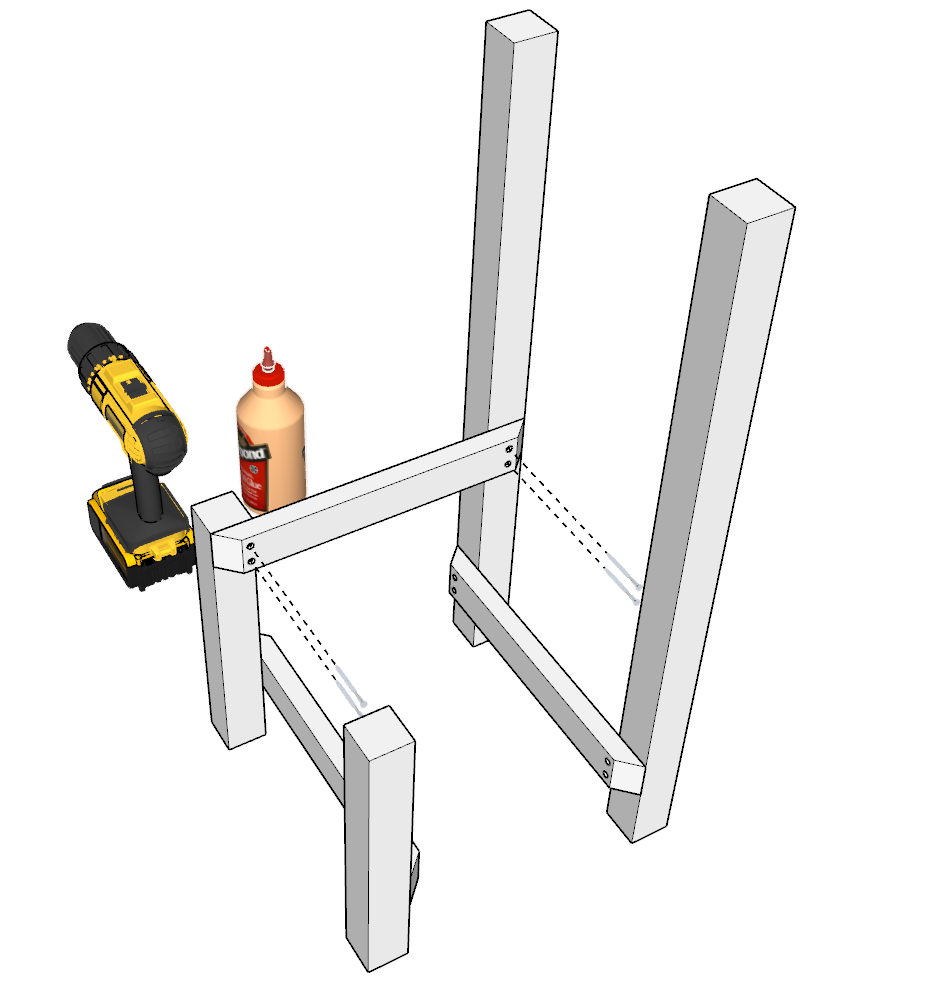
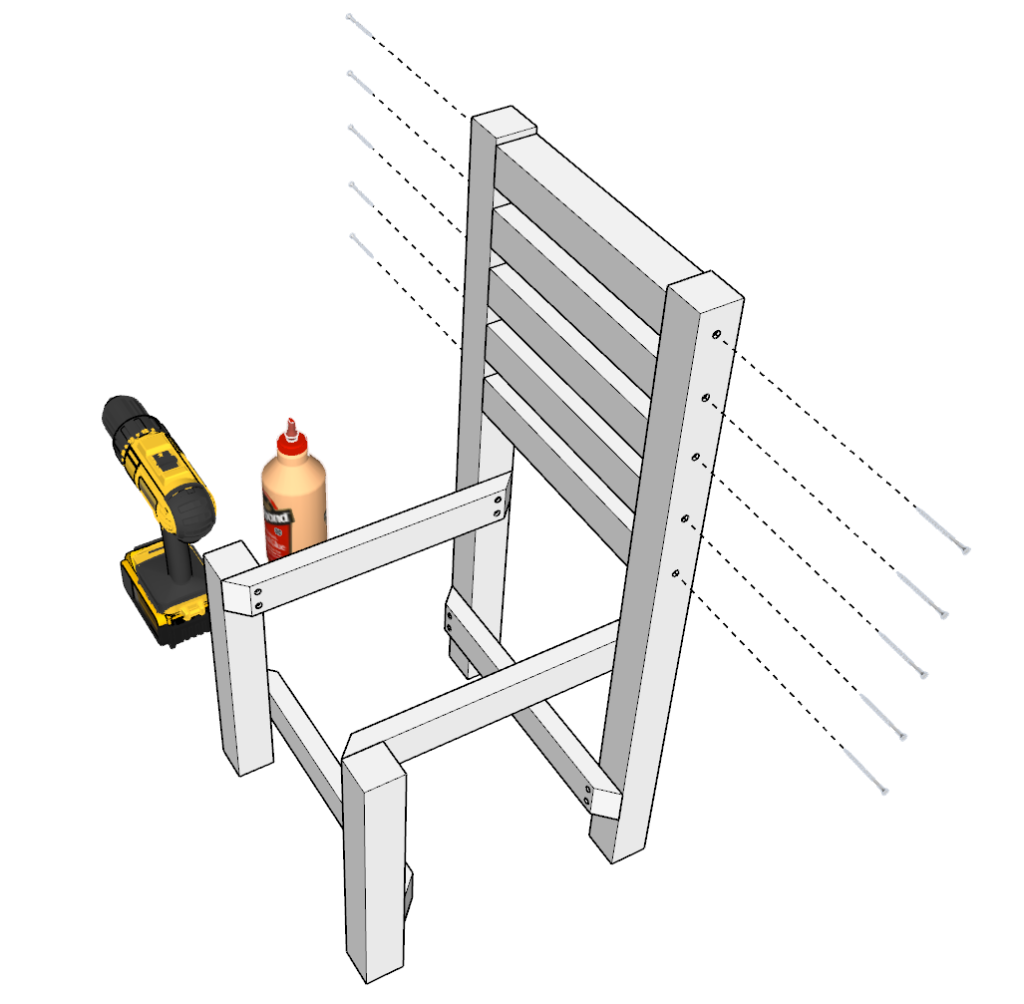
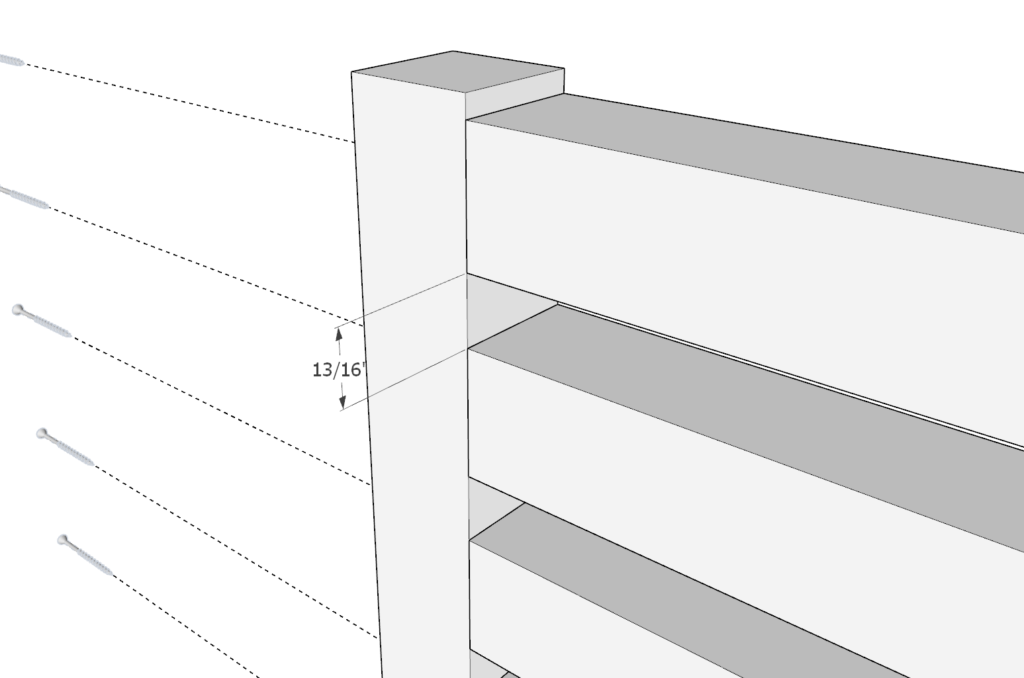
Next, add the 9 inch 2×2 lumber back rest pieces.
These can be spaced about 13/16 inch apart. I indent the first one 1/4 inch for aesthetics.
Apply glue to all the areas that will be joining to the frame. Add four screws as shown below.
Step 5 (Montessori chair)
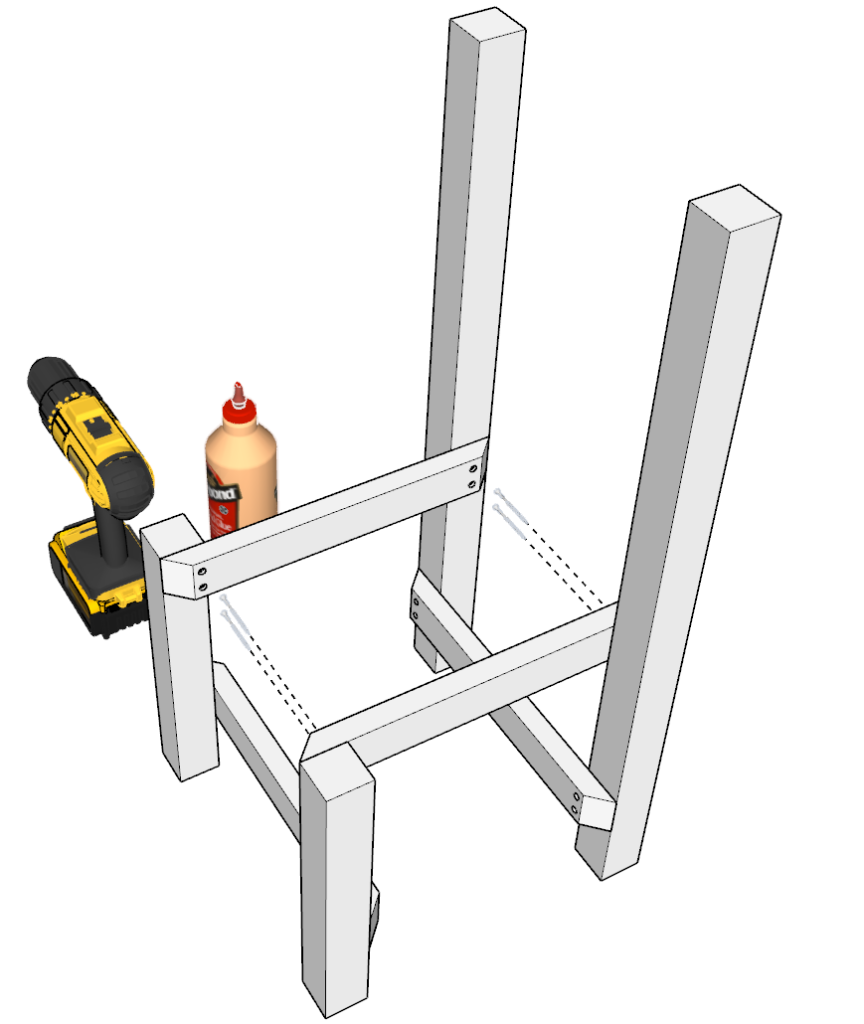
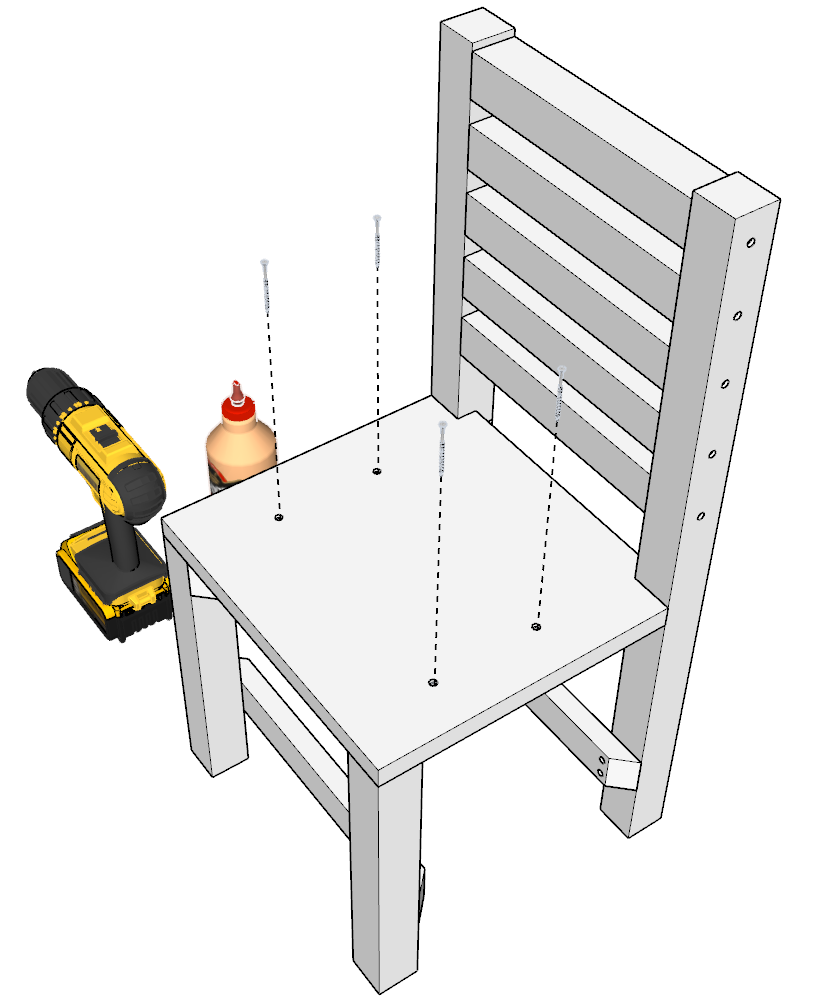
Next, add the 12 inch 1×12 lumber pieces for the seating as shown below.
As before, add glue, predrill, and add screws.
Step 6 (Montessori chair)
The final step is to sand down the chair.
I start sanding with a rough grit sandpaper. Usually about 80-grit. Then, for the final touch I use a fine grit. Usually, a 220-grit.
It is important to round the corners to prevent injury in case your child bumps their head into an edge.