Introduction
There’s a common scenario many of us find ourselves in: wanting to spruce up our living space without emptying our bank account. In these times, when every penny counts, finding a balance between quality and cost can be a challenge.

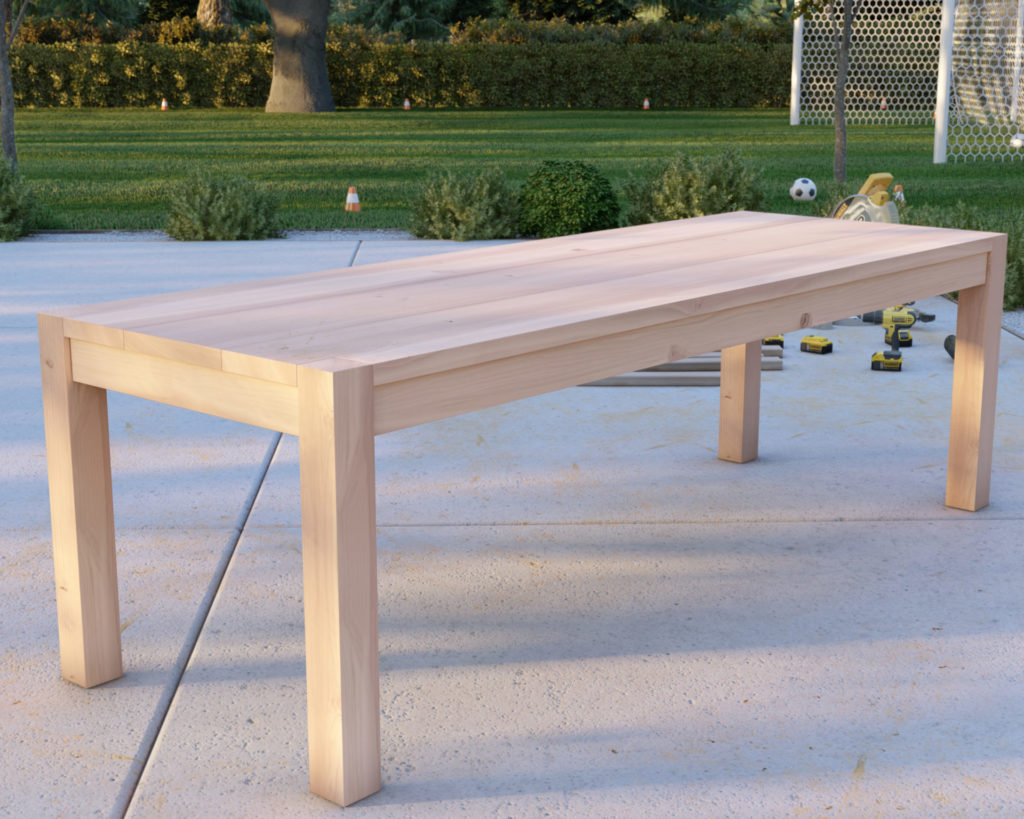
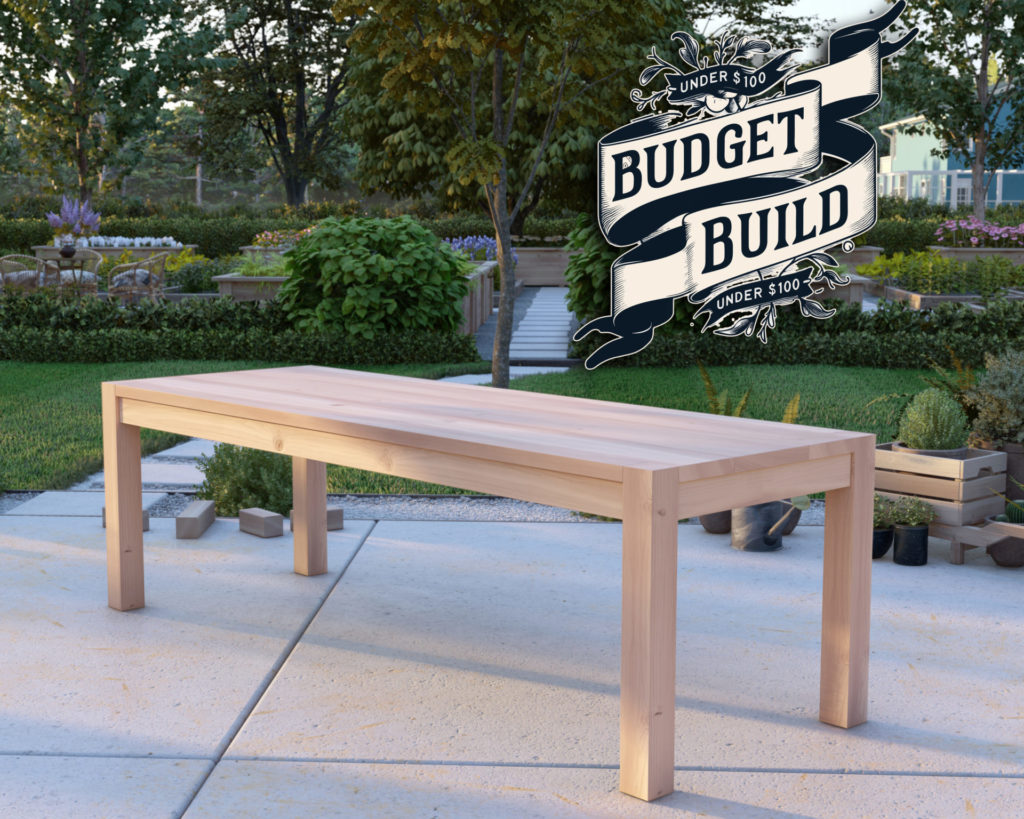
Meet the Modern Wooden Table
Here’s the deal – we all want a piece of furniture that doesn’t just serve its function but adds something special to our home. That’s where this wooden table comes into play. It’s solid, it’s stylish, and guess what? It won’t have you dipping into your savings.
Real Transformation Doesn’t Have to Be Expensive
You might be thinking that a project like this is for the experienced woodworkers among us, but that’s far from the truth. This table plan is a favorite because it’s straightforward and forgiving, yet the end result is something truly special. We’ve seen folks who couldn’t tell a nail from a screw create something beautiful with their own two hands. It’s proof that you don’t need a workshop full of tools or years of experience to bring a touch of elegance into your home without burning a hole in your wallet.
Your Next Project Awaits
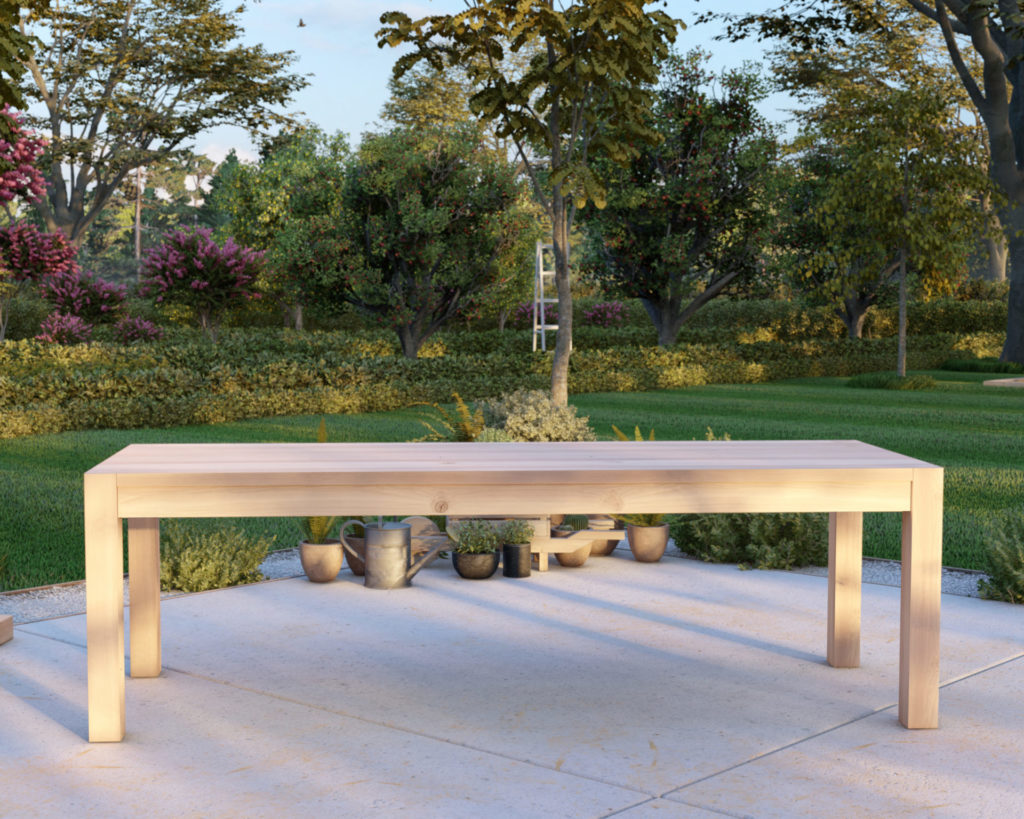
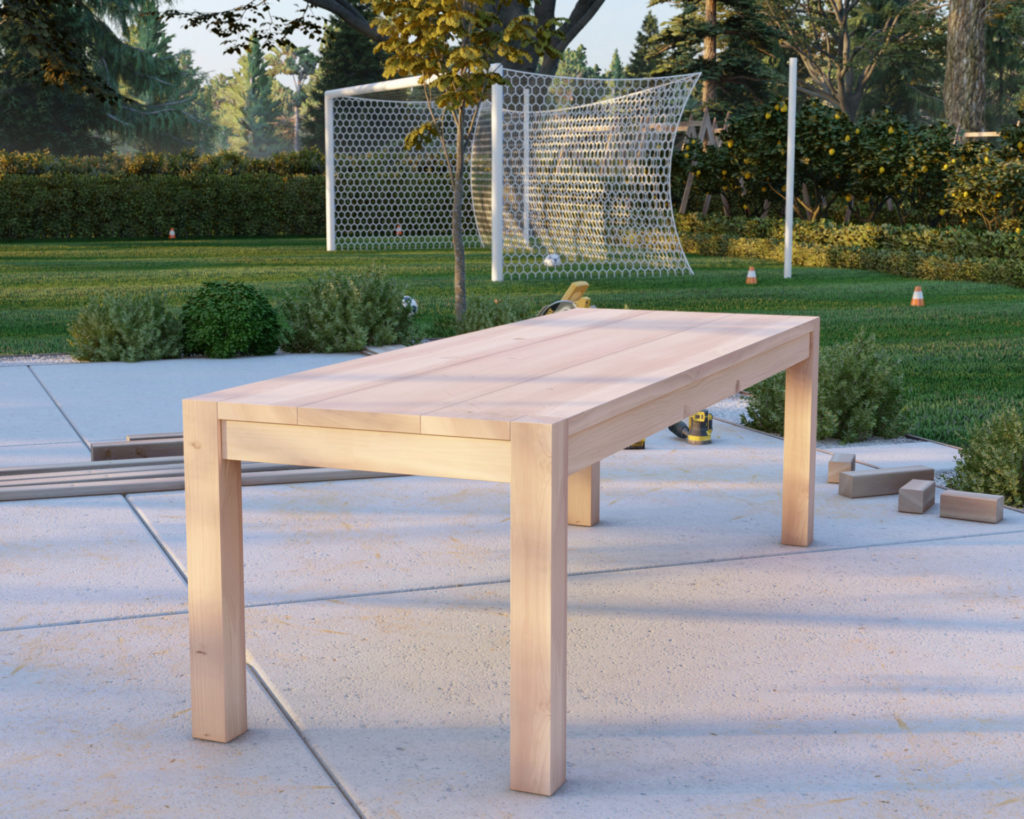
What makes this table a winner is its simplicity and style. It’s a project that’s doable for anyone and yields something you’ll be proud to show off. We’re talking about a sturdy, good-looking table that fits right into the heart of your home without breaking the bank.
Wrap-Up
In times like these, it’s the smart, practical choices that make all the difference. This table is one of those choices – a project that respects both your desire for quality and the reality of your budget. Ready to take the leap? Your next masterpiece awaits, and it’s just as attainable as it is beautiful.
Time
6 hours
Cost
$99
Skill level required
Beginner
DIY Dinning Table PDF Plan
What is included in the PDF download?
- Easy to read step by step instructions
- Material list
- Tools needed
- Helpful links to materials and tools needed
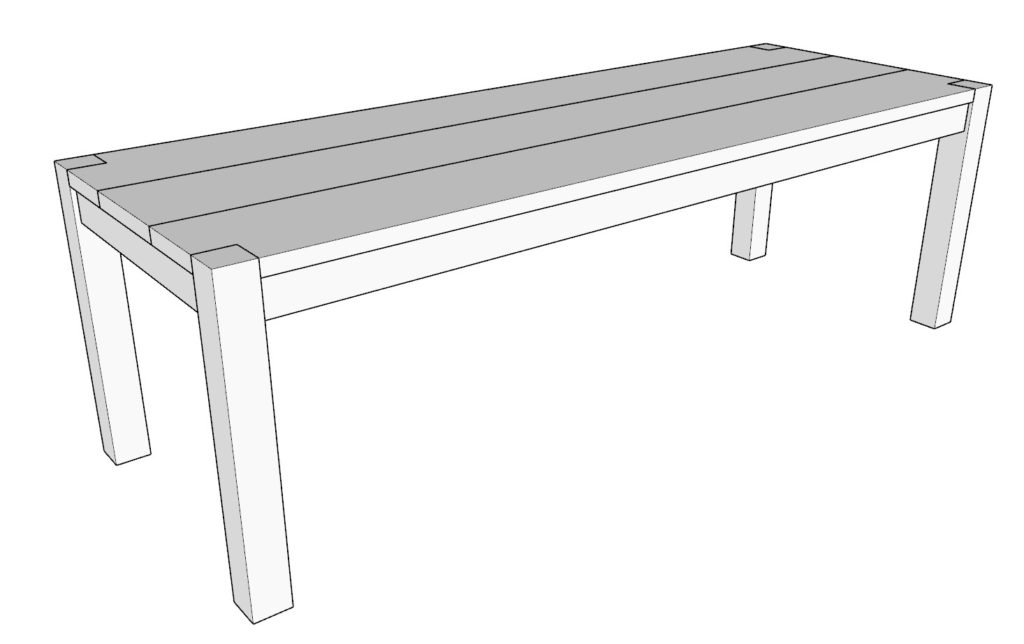
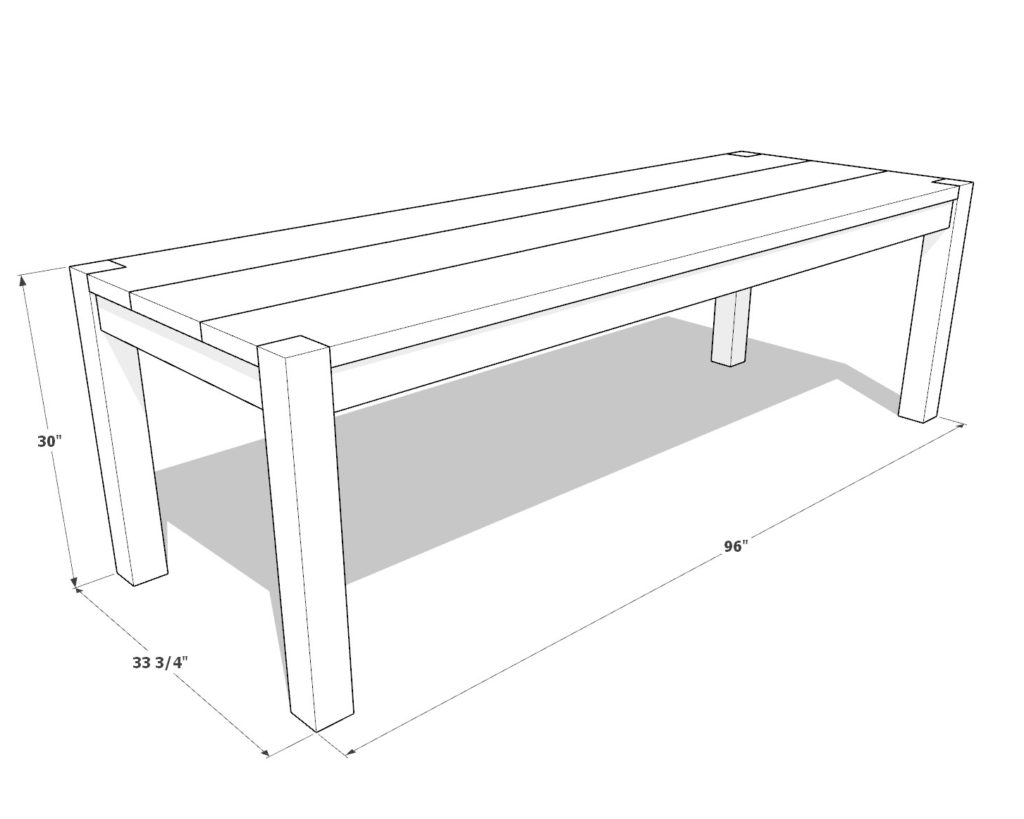
DIY Dinning Table Dimensions
Step 1: Assembling the Table Frame
Preparation Tip:
For a polished look, it’s a good idea to sand and plane the wood before you start putting the pieces together. This makes the finishing touches a breeze, with just minor touch-ups needed after assembly.
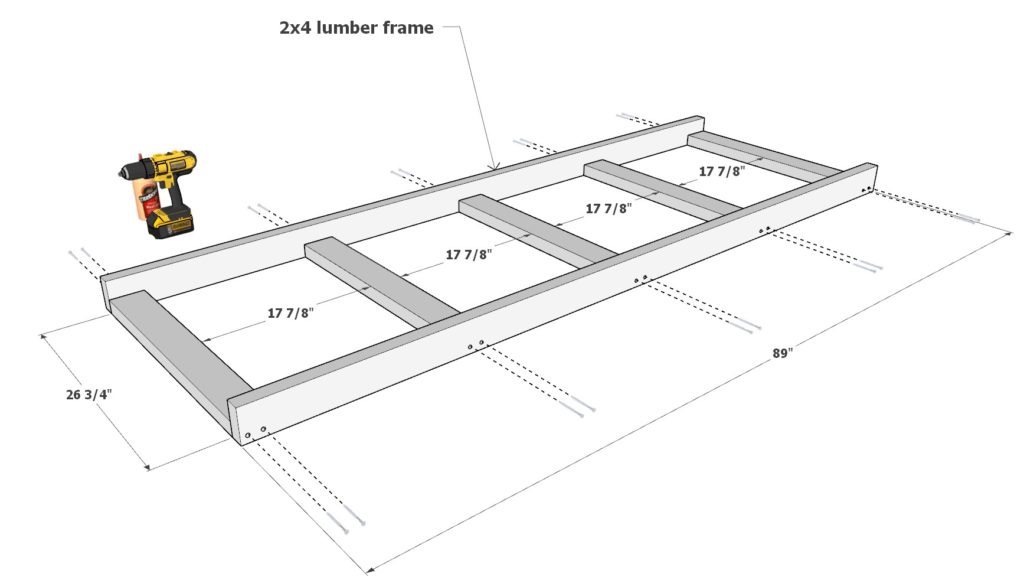
Part A: Assembling the Base
Gather Your Materials:
- Get two 2×4 lumber pieces that are 89 inches long and five that are 26-3/4 inches long.
Layout:
- Arrange them to match the setup shown in Diagram 1.
Securing the Pieces:
- Use wood glue and 3.5-inch screws to attach the pieces together. If you don’t have 3.5-inch screws, 2.5-inch will work too. Make sure they’re tightly secured to form the base of your table frame.
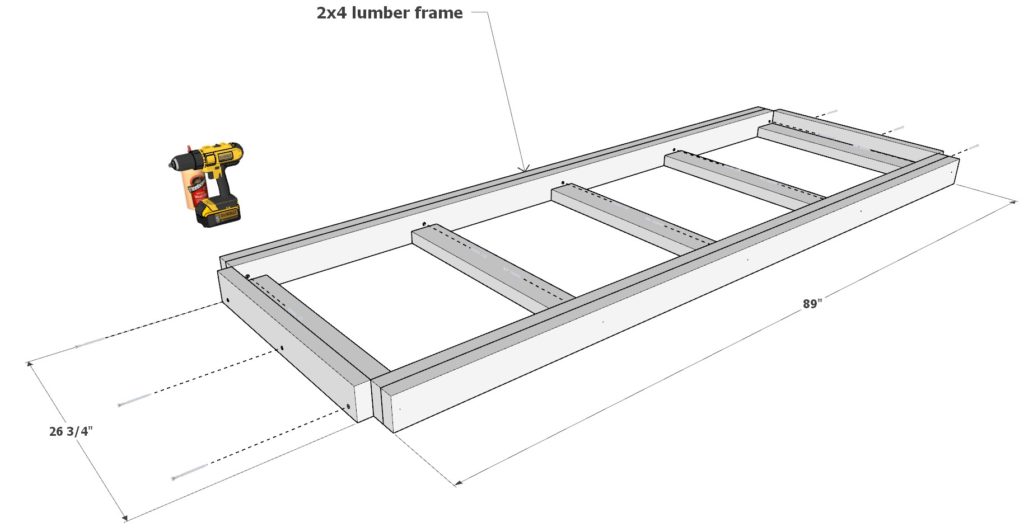
Part B: Building the Second Layer
Refer to the Guide:
- Check out Diagram 2 to know exactly where each piece should go.
Arrange the Pieces:
- Place two more 26-3/4 inch 2x4s and two 89-inch 2x4s on top of the base you just built. Make sure they’re positioned as shown in the diagram.
Attach Them:
- With 2.5-inch screws and some wood glue, secure these pieces in place. The screws should be tight but not visible.
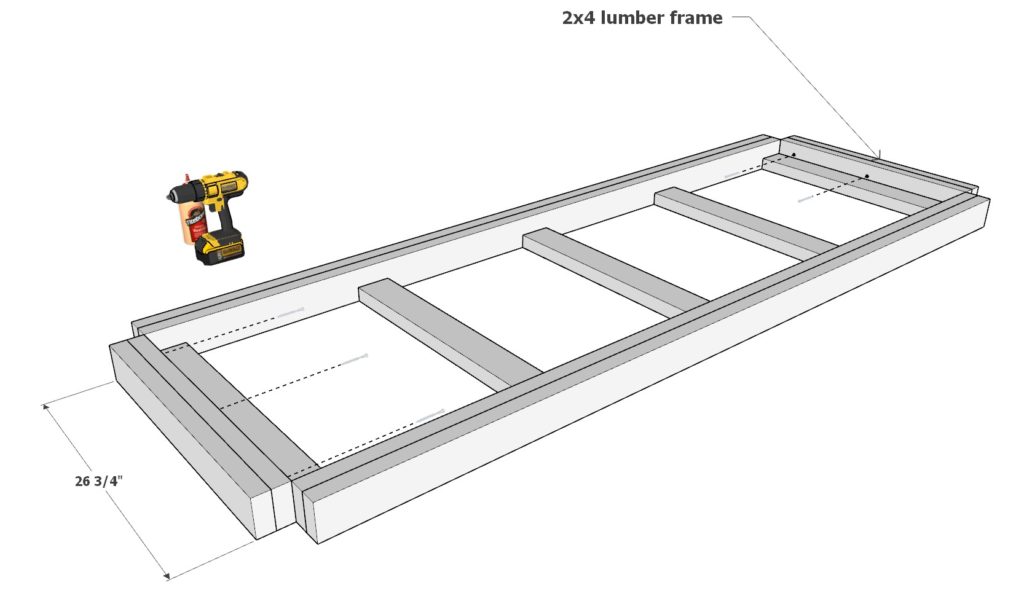
Part C: Finishing the Frame
Final Placement:
- Look at Diagram 3 to see where the last two 26-3/4 inch pieces go.
Attach the Pieces:
- Use 2.5-inch screws and wood glue to attach them firmly. Make sure every piece is secure and the frame is sturdy.
Additional Assembly Tips
- Drill Pilot Holes: Before screwing everything together, drill some pilot holes. It helps the screws go in easier and prevents the wood from splitting.
- Flat Surface: Make sure the surface you’re working on is flat. It’ll make the assembly process easier and ensure your table frame is level.
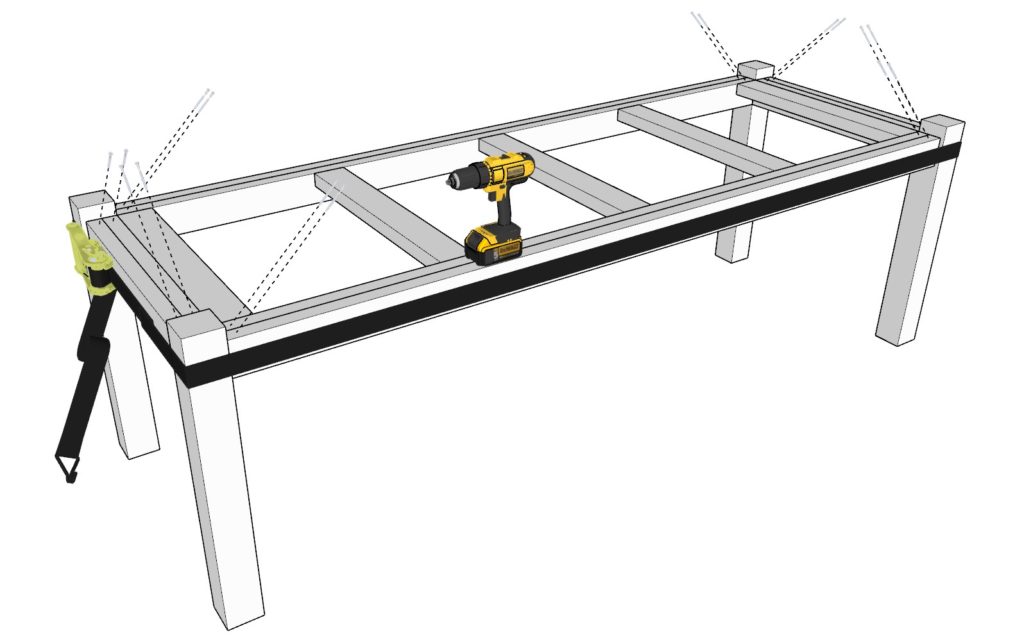
Step 2: Attaching the Legs to the Table Frame
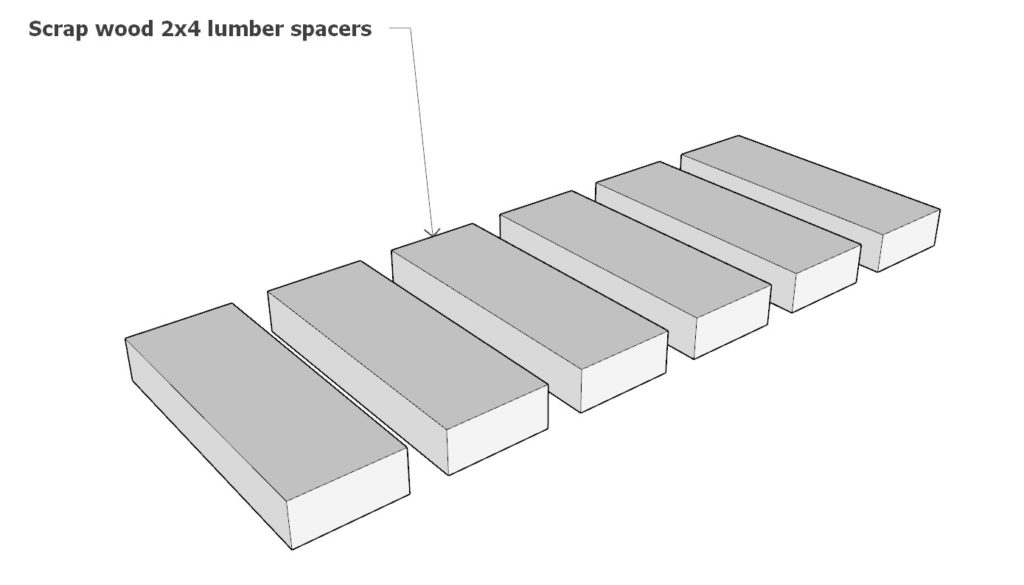
Raising the Frame
- Using Spacers:
- Place some scrap wood spacers beneath the table frame to lift it off the ground, ensuring the ground is even and level for a stable working base.
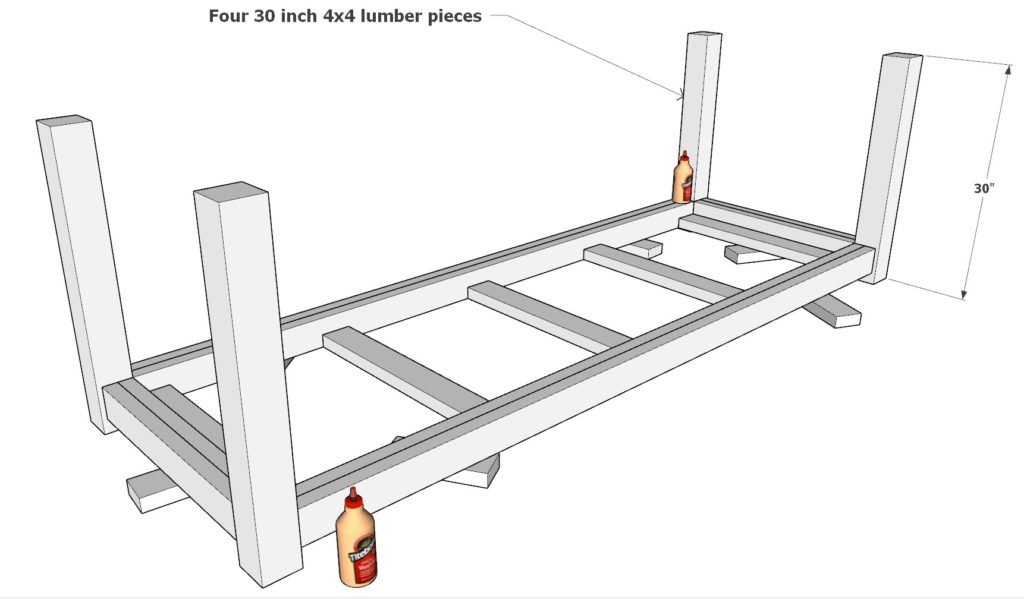
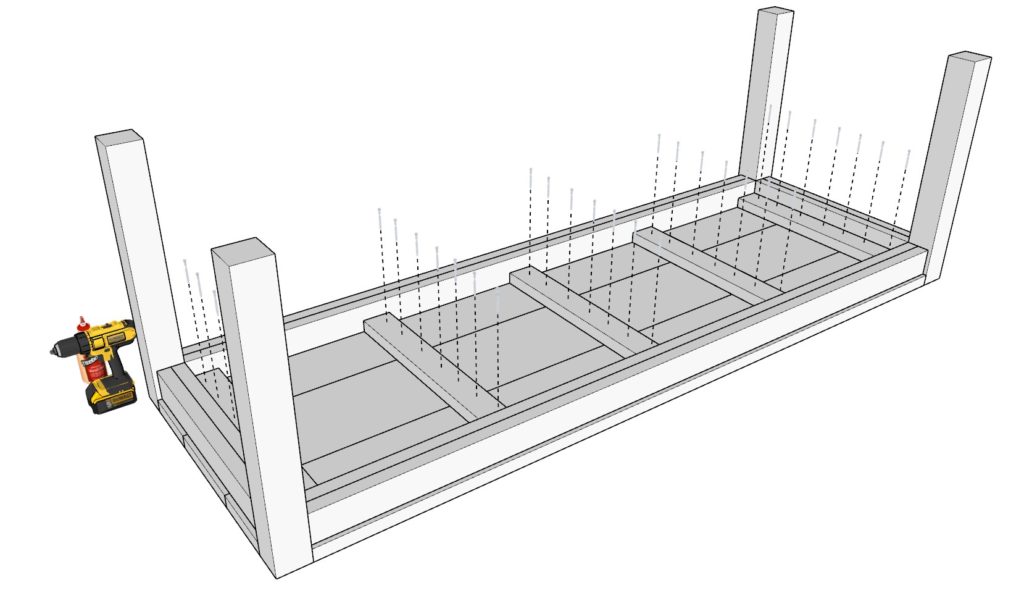
Attaching the Legs
Preparation:
- Have four 30-inch 4×4 pieces ready and refer to the provided diagram for proper placement.
Gluing:
- Apply a generous amount of wood glue to the areas of the legs that will attach to the table frame to ensure a solid bond.
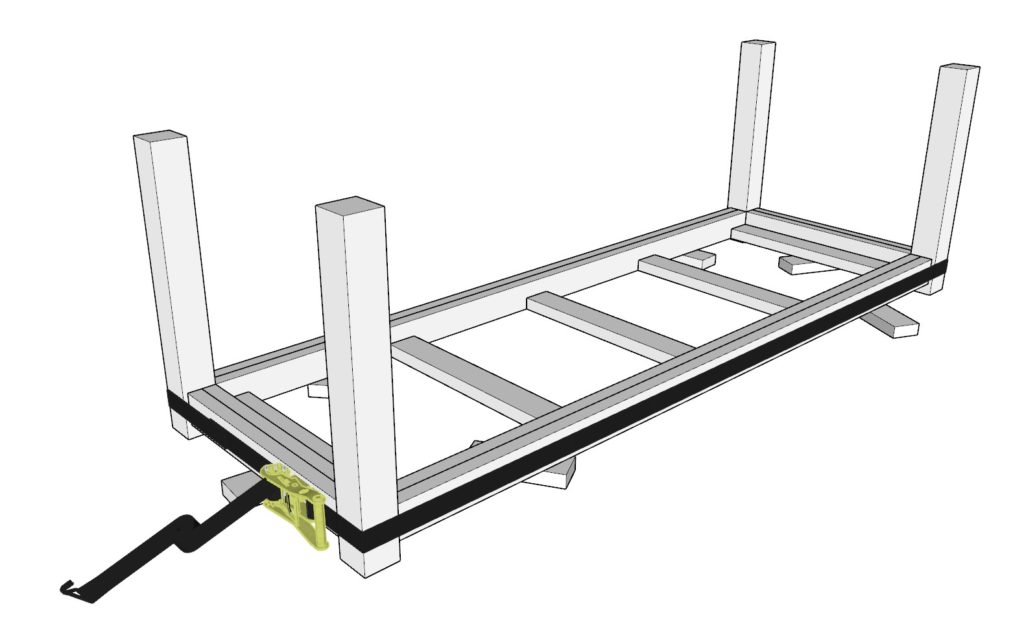
Positioning and Alignment:
- Place the 4×4 pieces against the table frame as per the diagram. Use ratchet straps to pull the legs tightly against the frame. If needed, gently tap them with a hammer to adjust their positions so they fit flush against the frame.
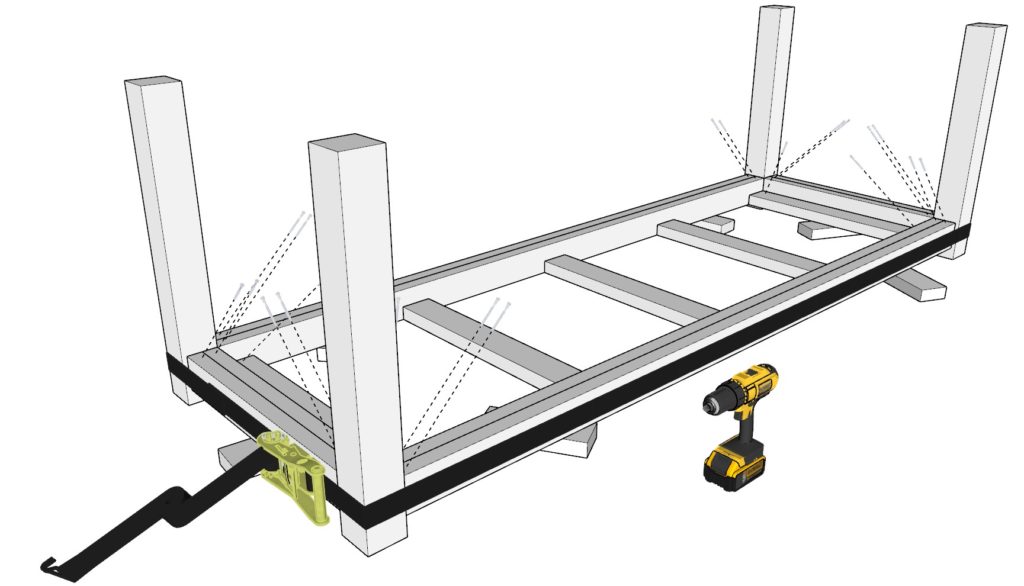
Securing the Legs
Drilling:
- Predrill the holes to avoid splitting the wood. It helps the screws go in smoothly and ensures a stronger hold.
Screwing:
- Secure the legs to the frame using 3.5-inch screws, following the pattern shown in the second diagram. Make sure the screws are tightened securely.
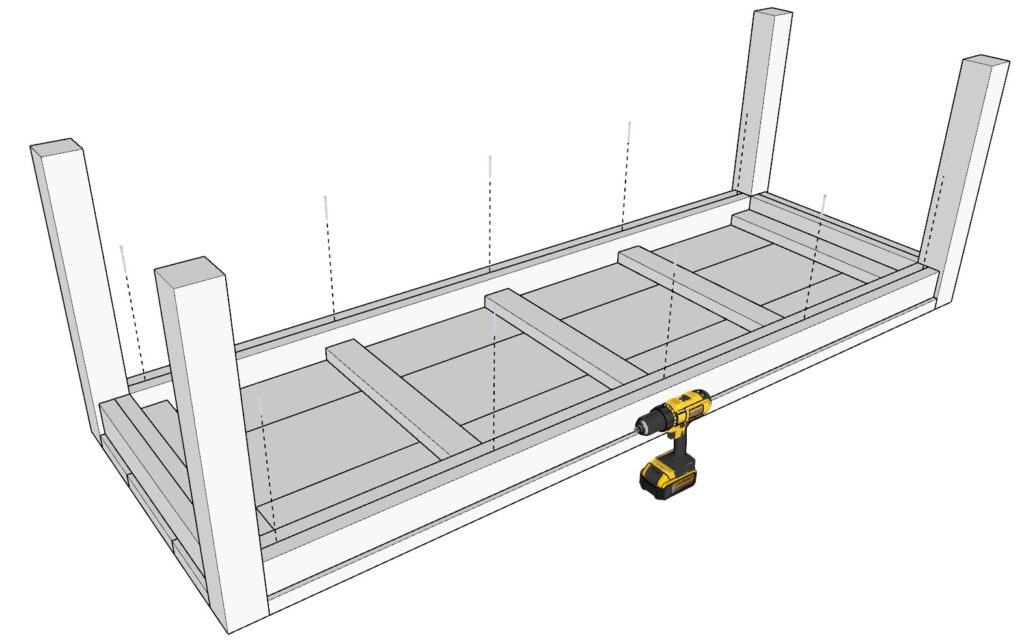
Bringing the Table Upright
Flipping the Table:
- Get a friend to help carefully turn the table upright. Make sure the legs don’t touch the ground while turning to avoid any pressure on the unsecured joints.
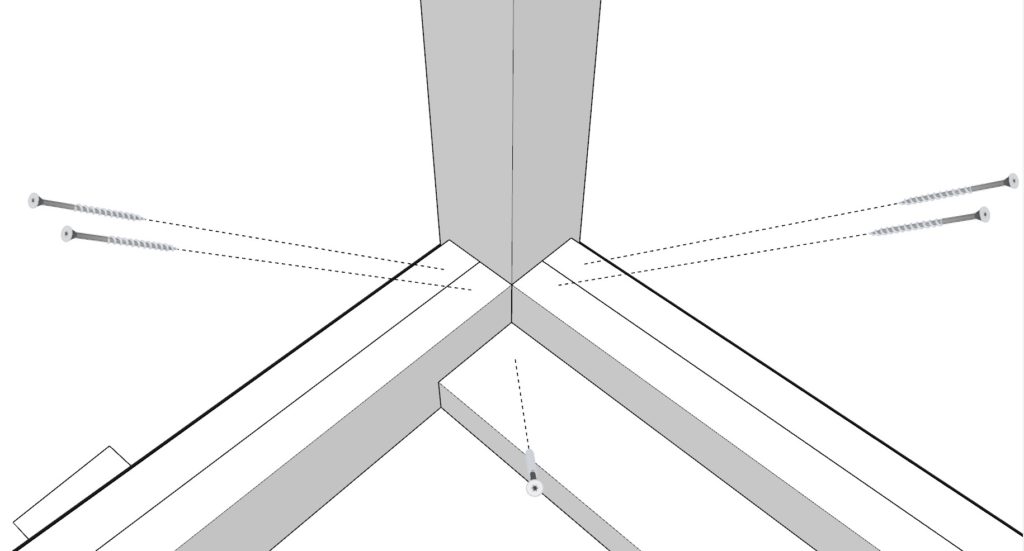
Additional Securing:
- Add more screws as indicated in the final diagram to reinforce the joints, ensuring each screw is tightened firmly for a stable and durable table.
Tips and Additional Advice
Drilling Holes:
- Always predrill the holes before inserting screws. It’s a small step that makes a huge difference in the joint’s strength and the overall durability of the table.
Using Ratchet Straps:
- If ratchet straps are new to you, take a moment to watch a tutorial online. Proper usage ensures the legs are pulled in tightly and safely.
Checking Alignment:
- Use a carpenter’s square to confirm the legs are aligned perfectly to the frame. It ensures your table isn’t just strong but stands stable and even.
Choosing Screws:
- Opt for screws made specifically for wood. They ensure a strong hold and will prolong the life of your table.
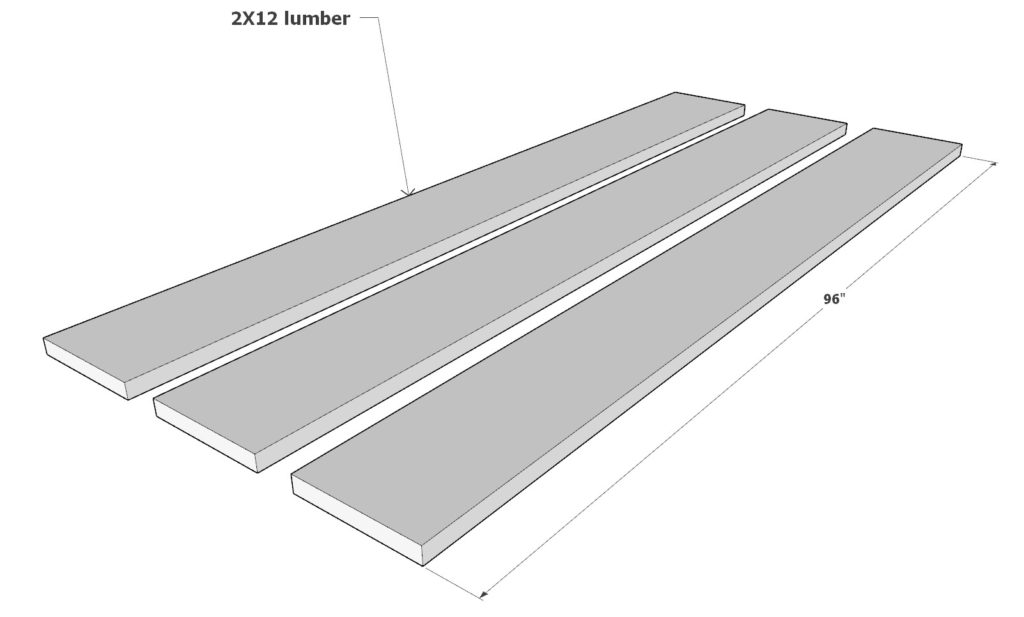
Step 3: Constructing the Table Top
Preparing the Table Top
Gather Your Materials:
- Have three 96-inch 2×12 boards ready. These will form the surface of your table.
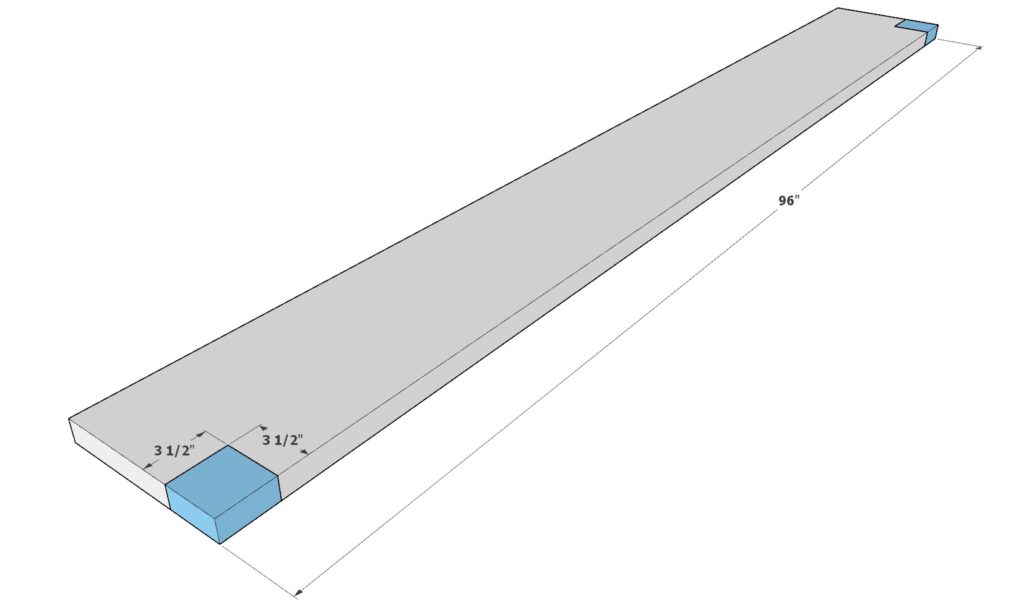
Marking the Notches:
- On two of the 2×12 boards, mark a 3-1/2″ x 3-1/2″ square at both ends. These markings are indicated in blue on the diagram. This is where you’ll be cutting notches to fit the table legs.
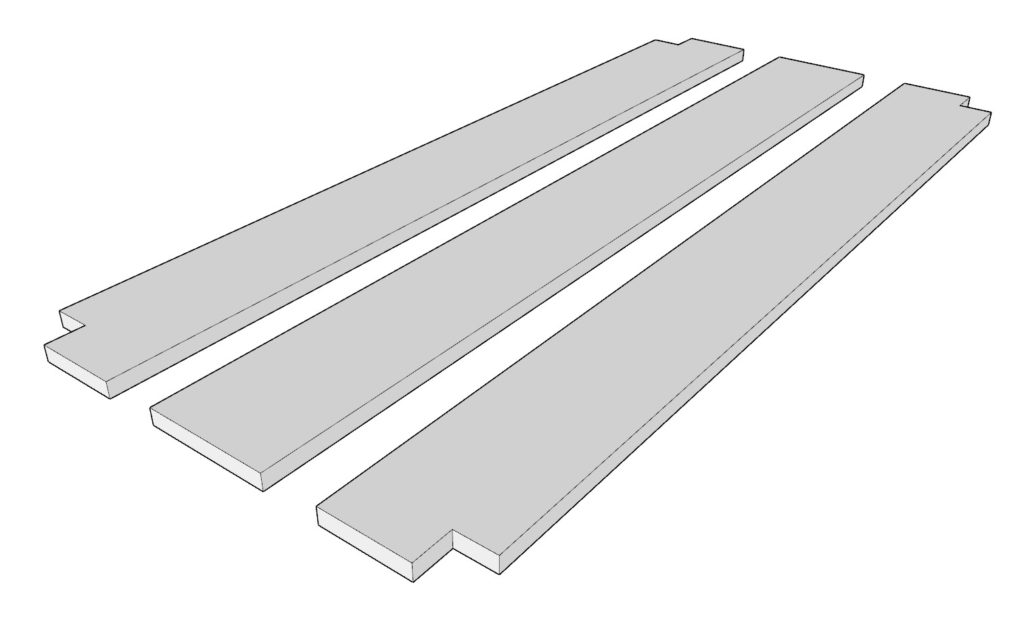
Cutting the Notches:
- Use a saw to cut out the marked squares, creating notches at both ends of the two boards. Be precise with your cuts to ensure the 4×4 legs fit snugly into these spaces.
Tip
- Precision is Key:
- Take your time with the cuts to ensure accuracy. The better the fit, the more stable and professional-looking your table will be.
Step 4: Securing the Table Top to the Base
Attaching the Table Top
Position the Boards:
- Place the three 2×12 boards on the table base, aligning them as shown in the first diagram. Ensure the notches fit securely around the 4×4 legs.
Securing the Boards:
- Use wood glue for an initial bond, applying it to the areas of contact between the boards and the base. Follow up with 2.5-inch screws to firmly secure the boards in place.
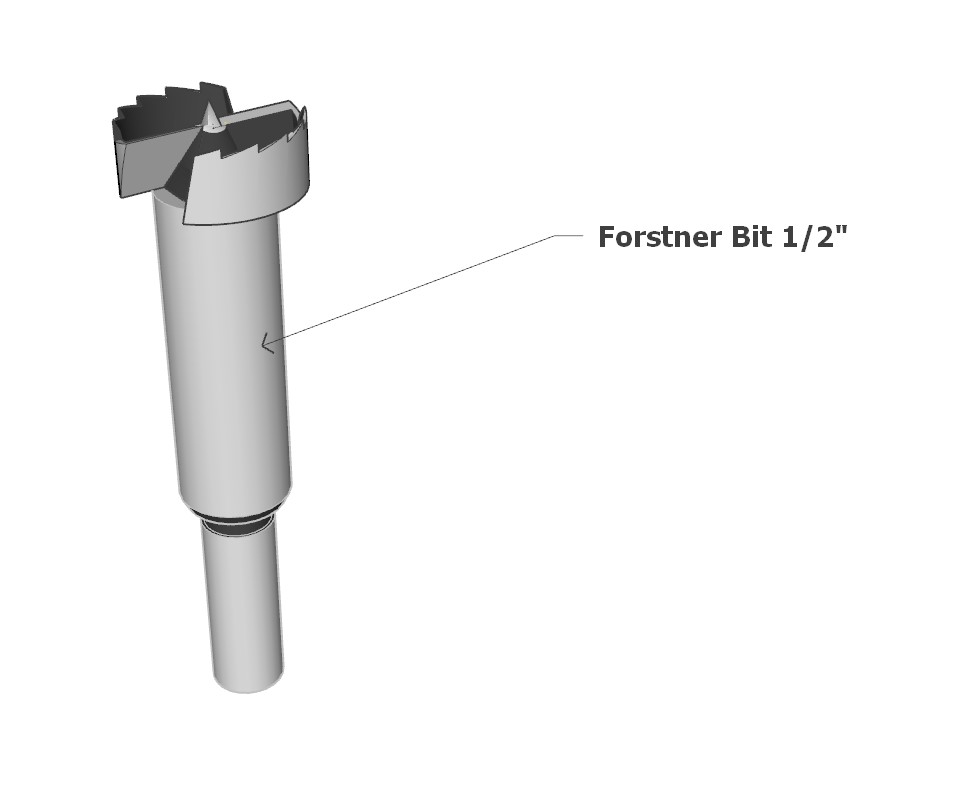
Drilling Deeper Holes:
- Utilize a 1/2″ Forstner bit to drill clean, deep holes on the sides of the 2×4 boards as indicated in the last diagram. These holes allow for a secure connection between the table top and the 2×4 base.
Securing the Base to the Top:
- Insert 3.5-inch screws through the drilled holes to connect the 2×12 boards to the 2×4 base. If you prefer, drill the holes a bit deeper and use 2.5-inch screws instead.
Tips
Clean Holes:
- The Forstner bit is your friend for drilling clean, precise holes. It ensures your screws sit flush or below the surface of the wood for a neat finish.
Strong Connection:
- Make sure the screws are tightened firmly to ensure the table top is securely attached to the base, enhancing the overall stability of the table.
Step 5: Preparing, Staining, Painting, and Final Touches
Step 5: Preparing, Staining, Painting, and Final Touches
A. Preparing the Table for Staining and Painting
To achieve a stunning and durable finish, meticulous preparation of your DIY table is essential. Begin by cleaning the table to remove any sawdust, debris, or dirt. A tack cloth or soft, damp cloth works effectively to capture fine dust particles.
Sanding is the next pivotal step. Use a fine-grit sandpaper, preferably 220-grit, to smooth the entire surface of the table, paying close attention to the legs and edges. Every corner and crevice should be smooth to the touch. After sanding, another wipe down is necessary to ensure a completely dust-free surface.
If you’re opting to stain the table, applying a pre-stain wood conditioner is advised. This preparation aids in achieving an even and richly colored stain, preventing blotchiness.
B. Staining the Table
Select a wood stain that not only complements the wood’s natural hue but also aligns with your aesthetic preferences and room decor. Apply the stain evenly with a brush or cloth, moving in the direction of the wood grain to accentuate the natural beauty of the wood. Allow the stain to sit for 5-15 minutes, then wipe off any excess. Let the first coat dry completely before deciding if additional coats are necessary for a deeper hue.
C. Painting the Table
If painting is your chosen finish, start with a primer application to ensure enhanced adhesion and durability of the paint. Once the primer is dry, apply your chosen wood paint evenly with a brush or roller. Avoid visible stroke lines for a seamless look. Allow ample drying time, as recommended on the paint’s label, before considering a second coat for a richer appearance.
D. Installing Felt Pads
With the paint or stain completely dry, the final touch is adding protective felt pads to the bottom of each table leg. Turn the table upside down and attach the pads. These protect your floor from scratches and facilitate smoother movement of the table.
Each of these steps, from preparation to the final touches, is integral to transforming your hand-built table into a functional and aesthetically pleasing piece of furniture that adds character, warmth, and utility to your space.