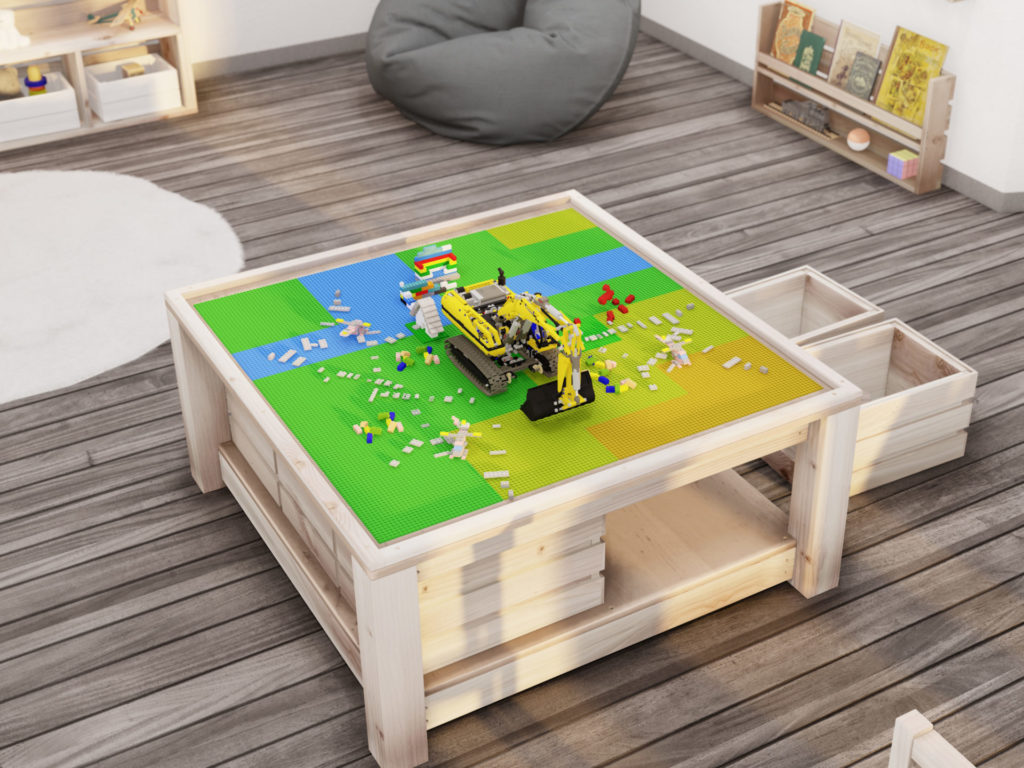
Why include a DIY Montessori Lego table in your chi
Legos are a great way for children to learn not only fine motor skills but also problem solving, resilience, perseverance, creative thinking, teamwork, and communication.
Even though these amazing playsets are great for a Montessori home, they tend to be difficult to store, hard to clean up, and hard to be easily accessible without looking like a mess.
We have developed a great solution to these problems with the DIY Lego play and storage table system.
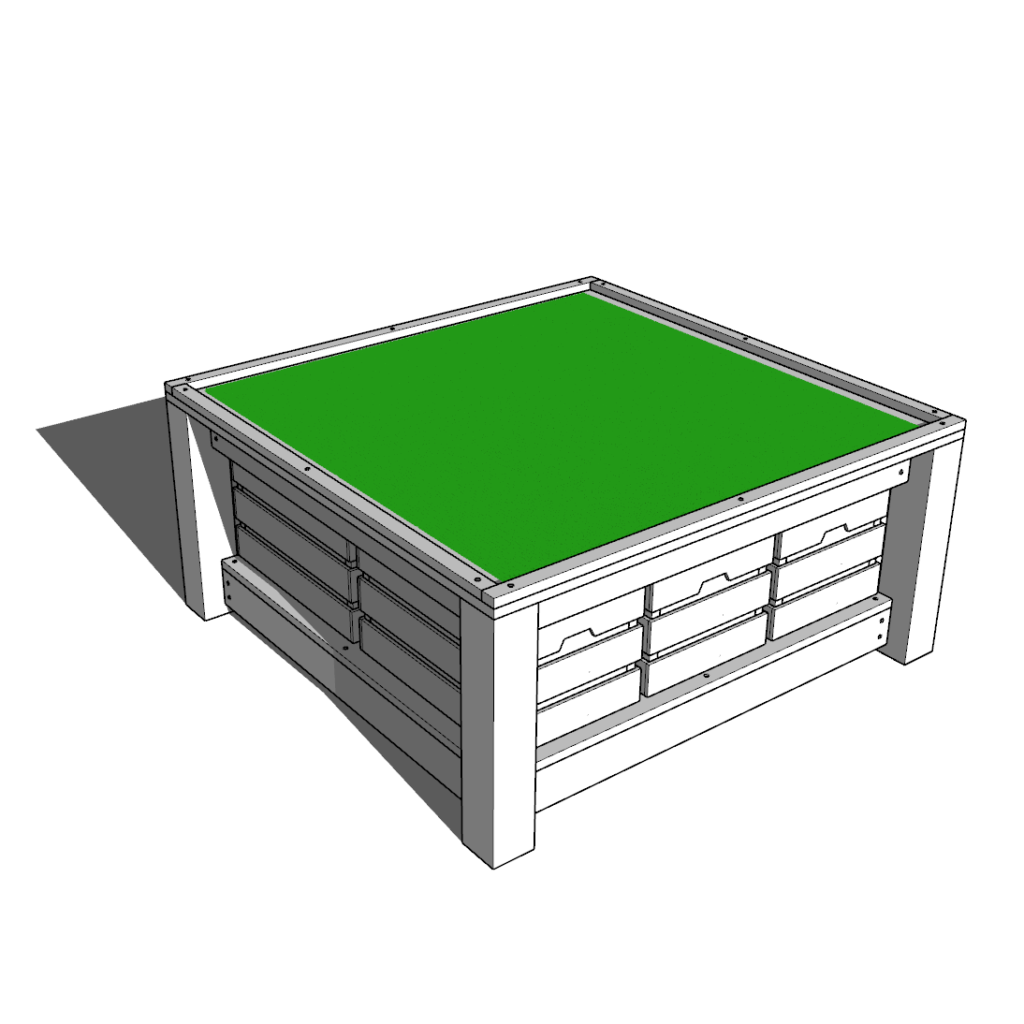
Lego storage system.
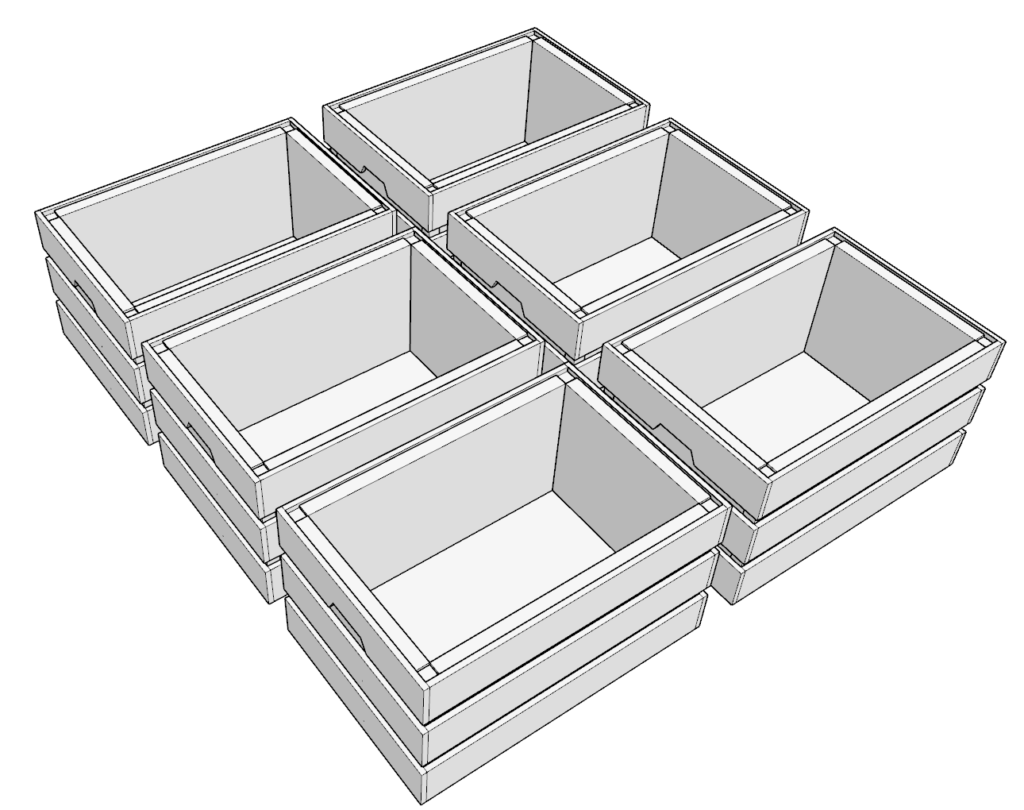
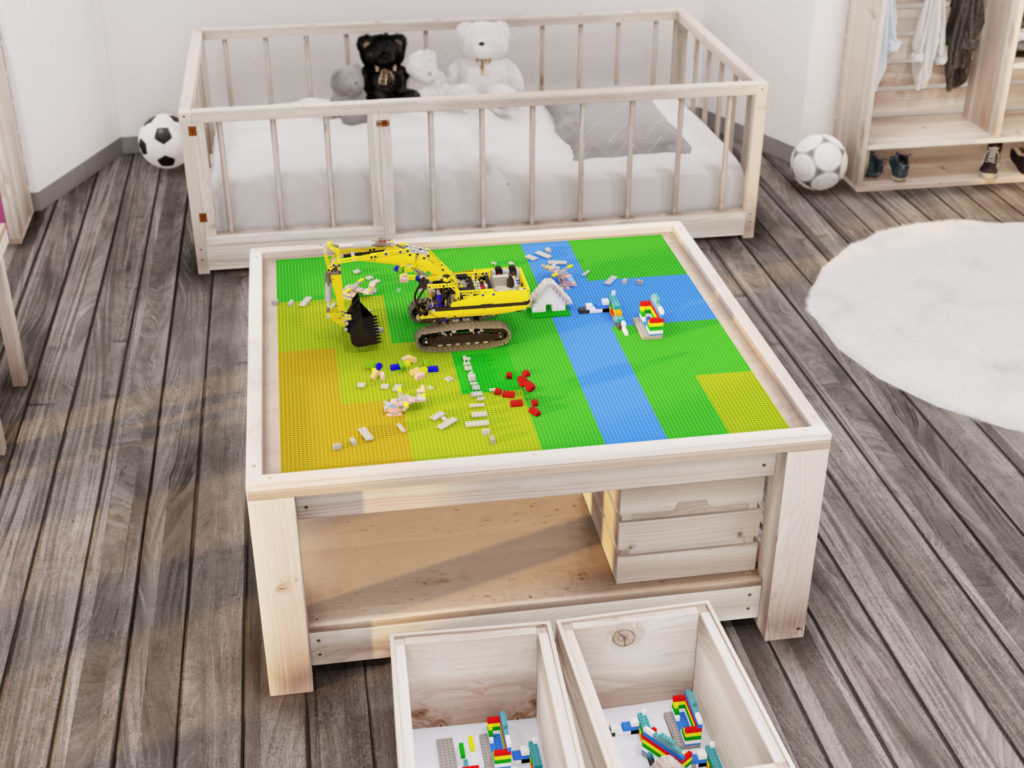
The storage and sorting system for the Legos is made from 6 KNAGGLIG IKEA crates that are lined with 1×12 lumber pieces to prevent Legos from falling through.
Although the crates can be built at home, the KNAGGLIG crates are only $14 each! This is a great buy as it saves a lot of time, material, and effort to make these more delicate pieces. The boxes can be color coded, labeled, or even used as much needed additional storage for the child’s room.
The slats of these crates match the slat width on the other Montessori room furniture pieces to give an overall uniform look.
The KNAGGLIG crates have a handle built into them for easy lilting and carrying. The depth of the crates is also deep enough to allow children to put away and store their hard work without disassembling it. This way your children can preserve their creations for future play without getting them damaged.
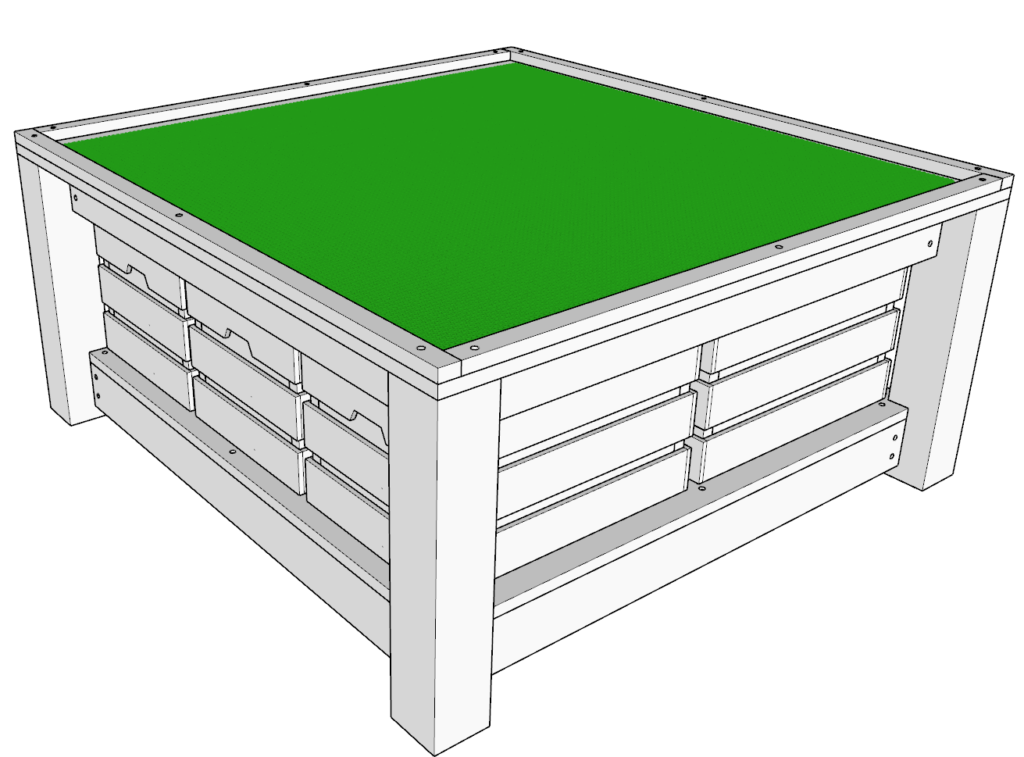
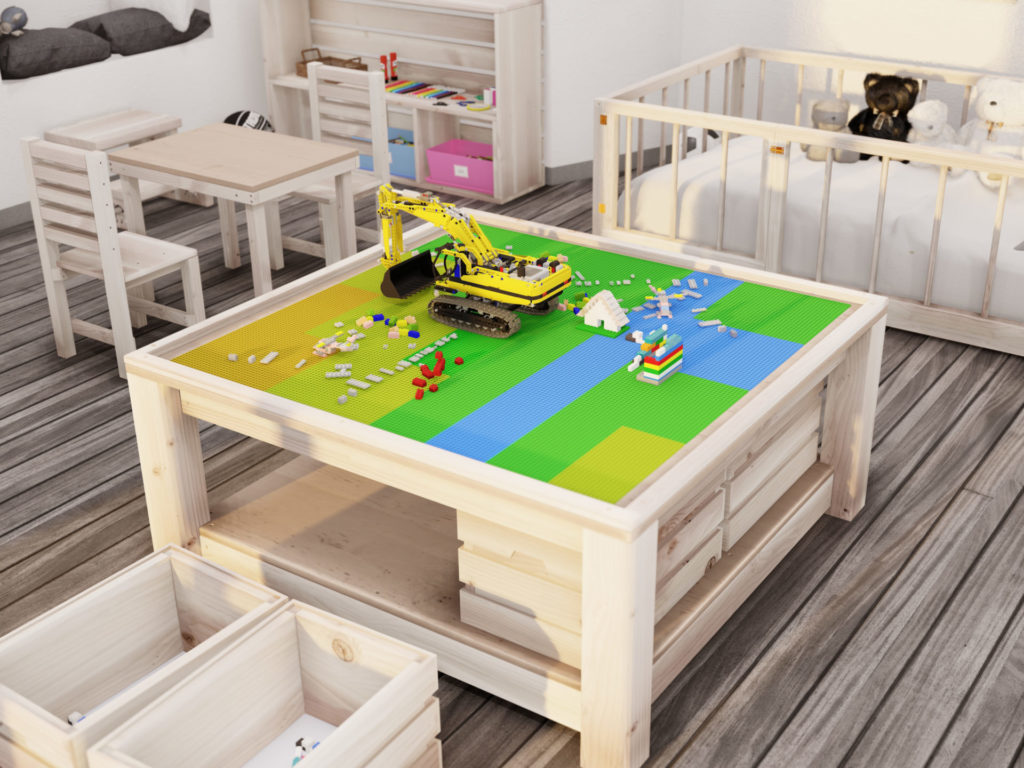
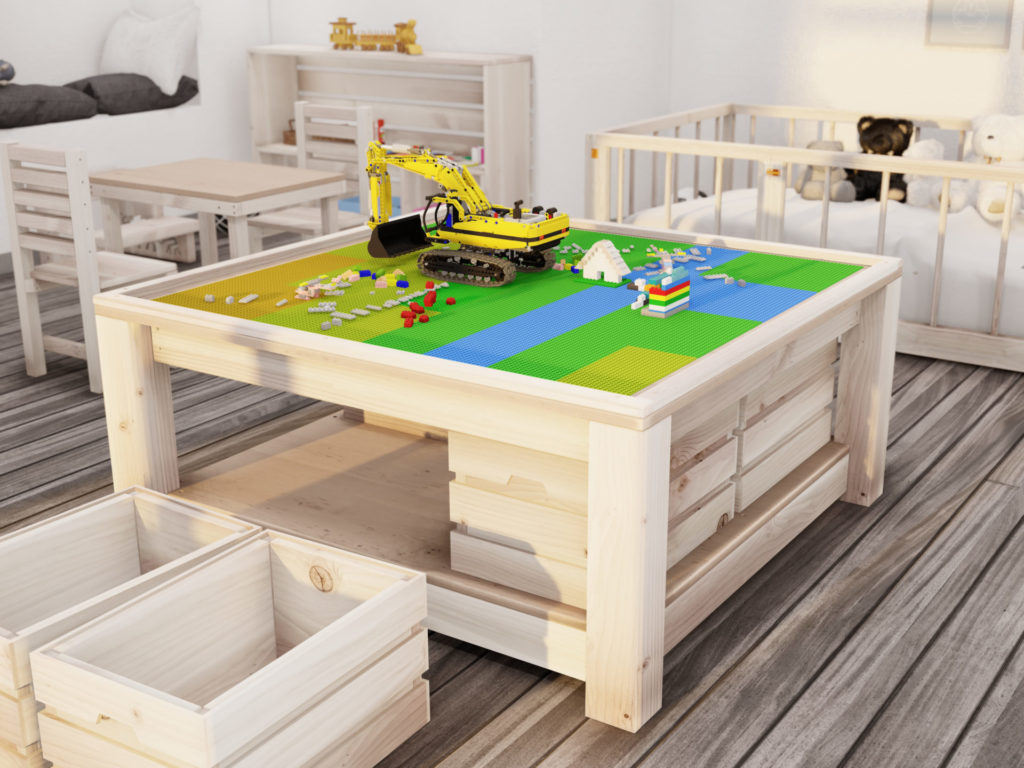
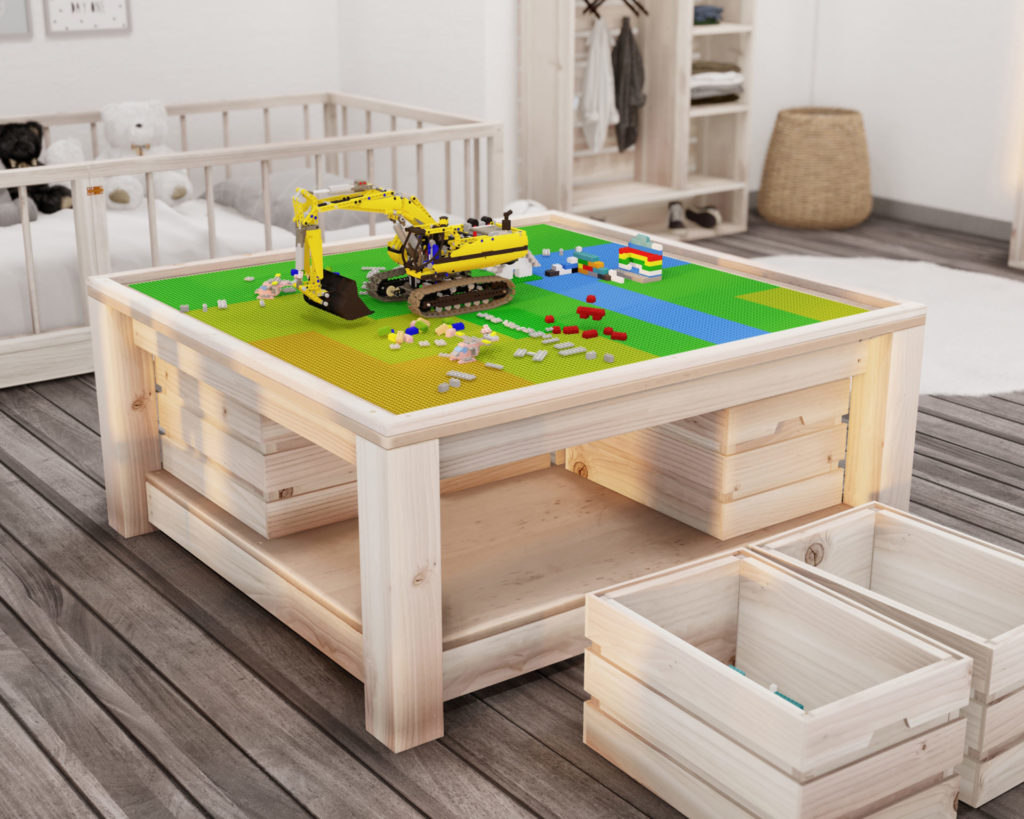
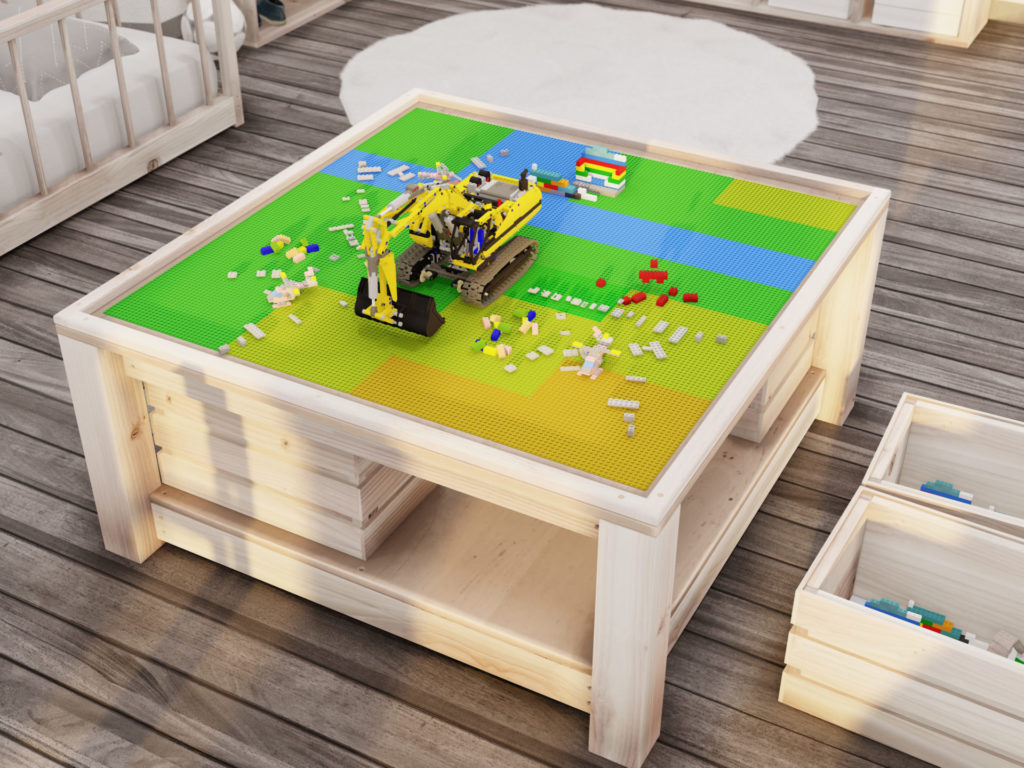
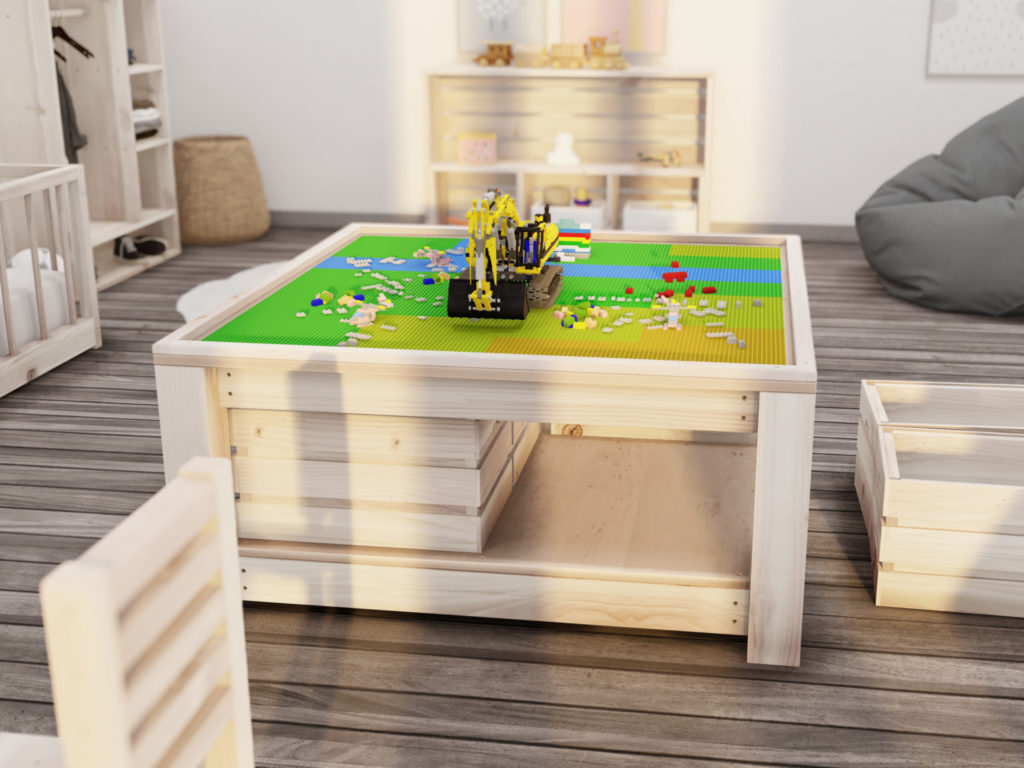
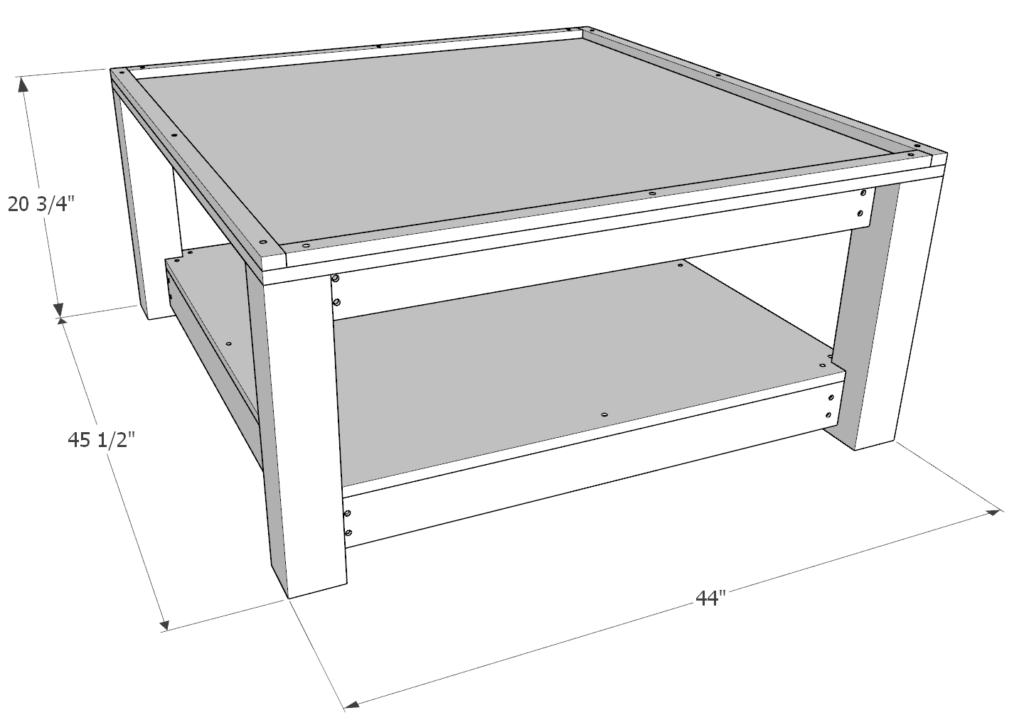
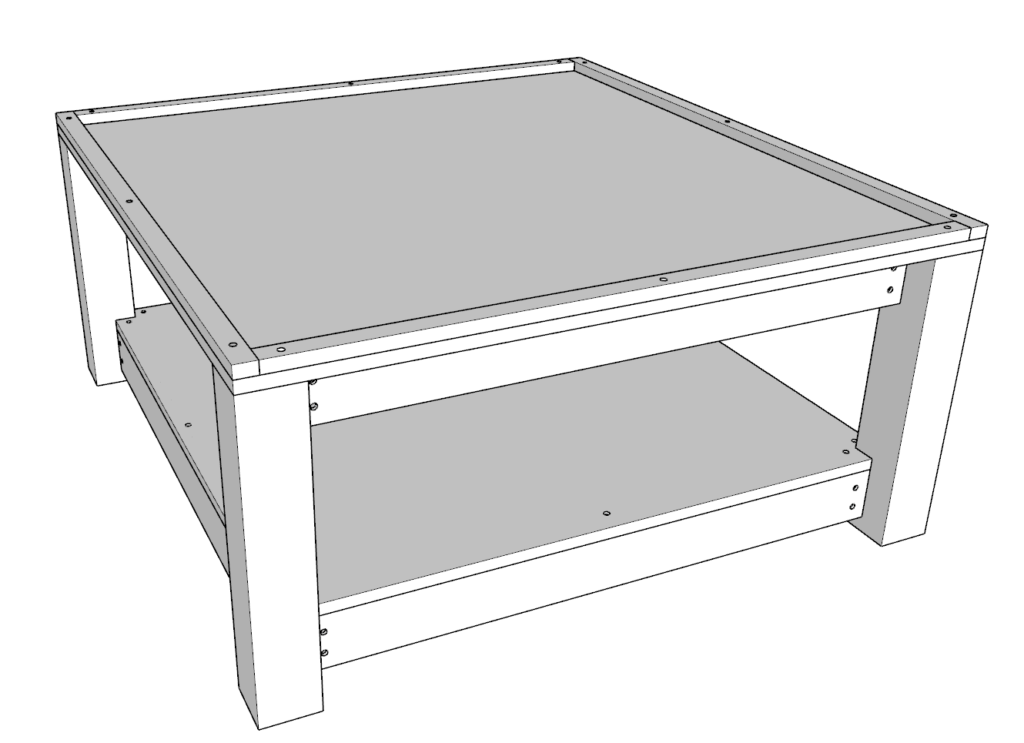
The table design.
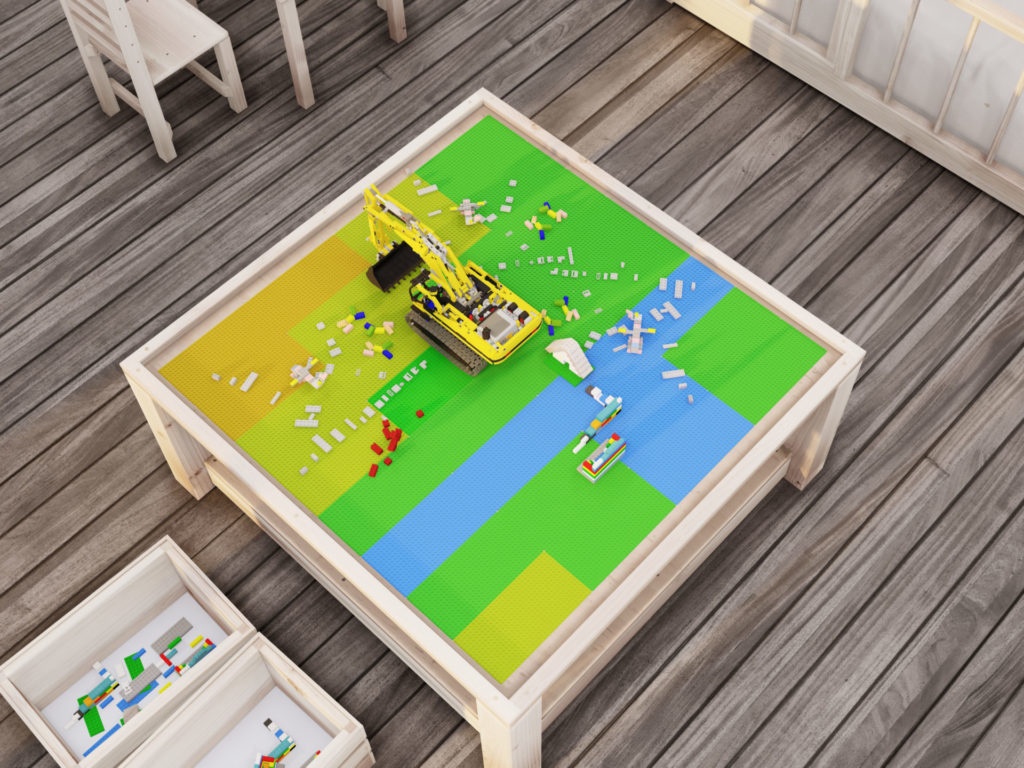
The Lego table is square in design to allow up to four children to play at one time with equal space to be creative. With set logo plates, kids instantly have a place to begin attaching into place their creations.
The height of the Lego table is 20.75 inches. The width is 45.5 inches. The length is 44 inches.
The activity table is made from lumber that is commonly found in most hardware stores. The lumber pieces are joined together with simple and durable joints that are easy to do. This build is great for any beginner and novice to woodworking.
What other Montessori room pieces are a part of this room set-up?
Lego play and storage system plans can be found here.
Floor shelf plans can be found here.
Wall shelf plans can be found here.
Step stool plans can be found here.
Chair plans can be found here.
Activity and weaning table plans can be found here.
Twin size floor bed plans can be found here.
Children’s wardrobe plans can be found here.
Storage and activity shelf plans can be found here.
Time to build
3 hours
Total cost of build
$220
Skill level required
Beginner – intermediate
Download the PDF plans
Plans for how to build the DIY Montessori Lego table.
What is included in the PDF download?
- Easy to read step by step instructions
- Material list
- Cut list
- Tools needed
- 3D illustrations
- Helpful links to tools and materials needed for the project
Recommend tools for this project
- Saw (miter saw recommended for precision cuts)
- Drill
- Impact driver with bit for screws
- Sander
- Router (possible to build without it)
- Ratchet straps
- wood countersink drill bit
Cut list and material list
Available with purchase of PDF plans.
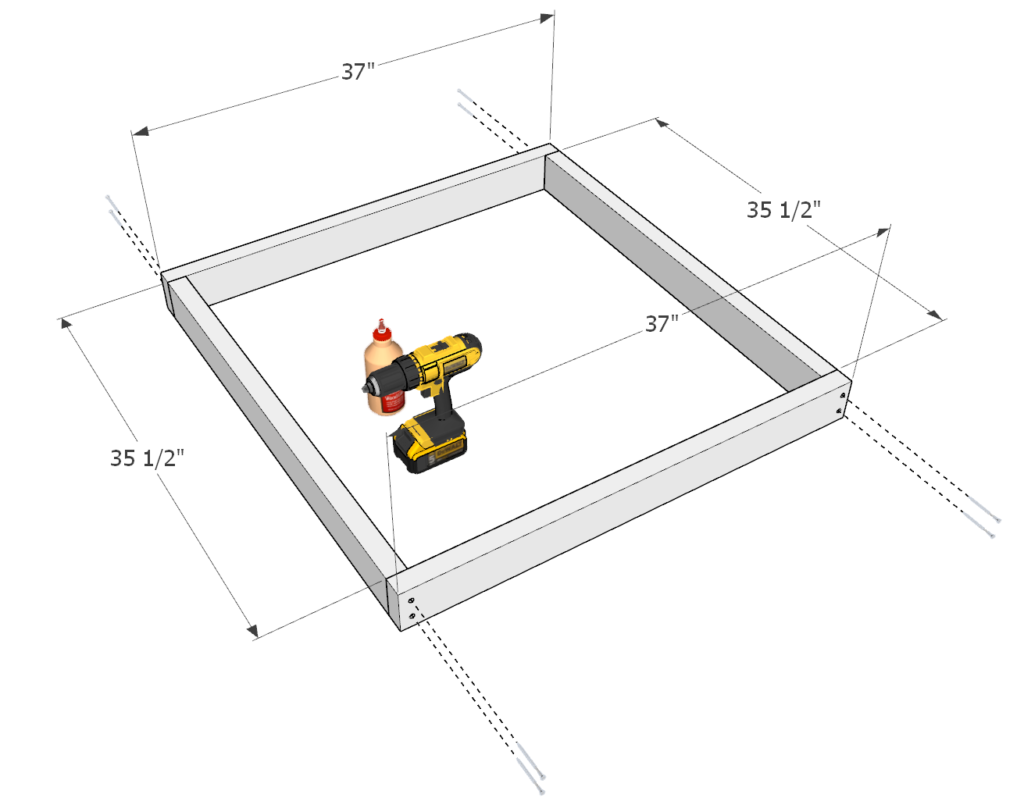
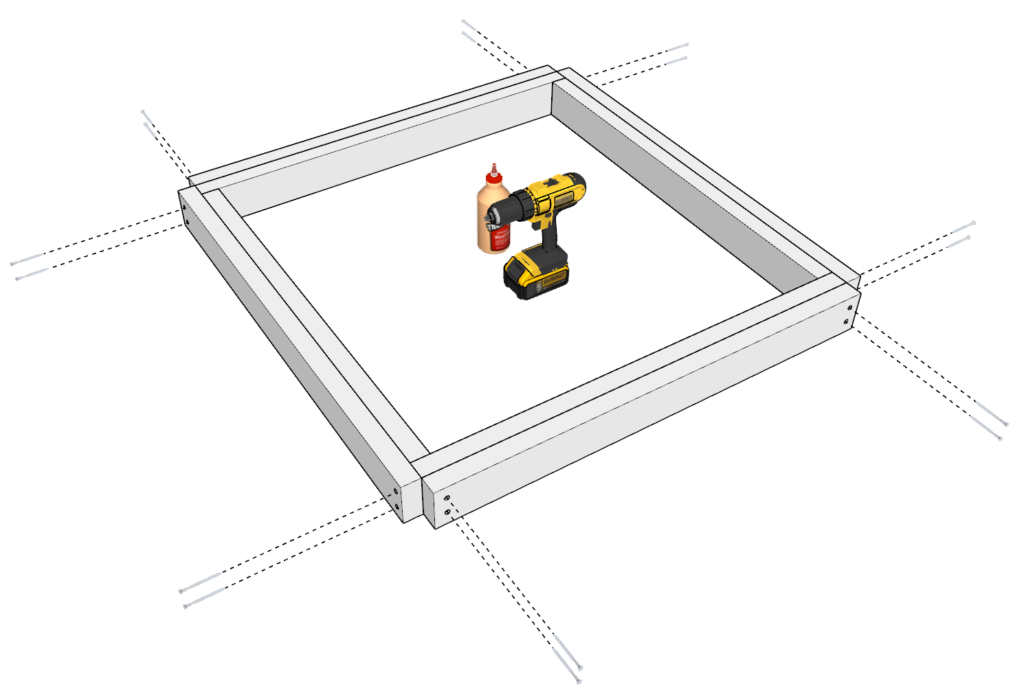
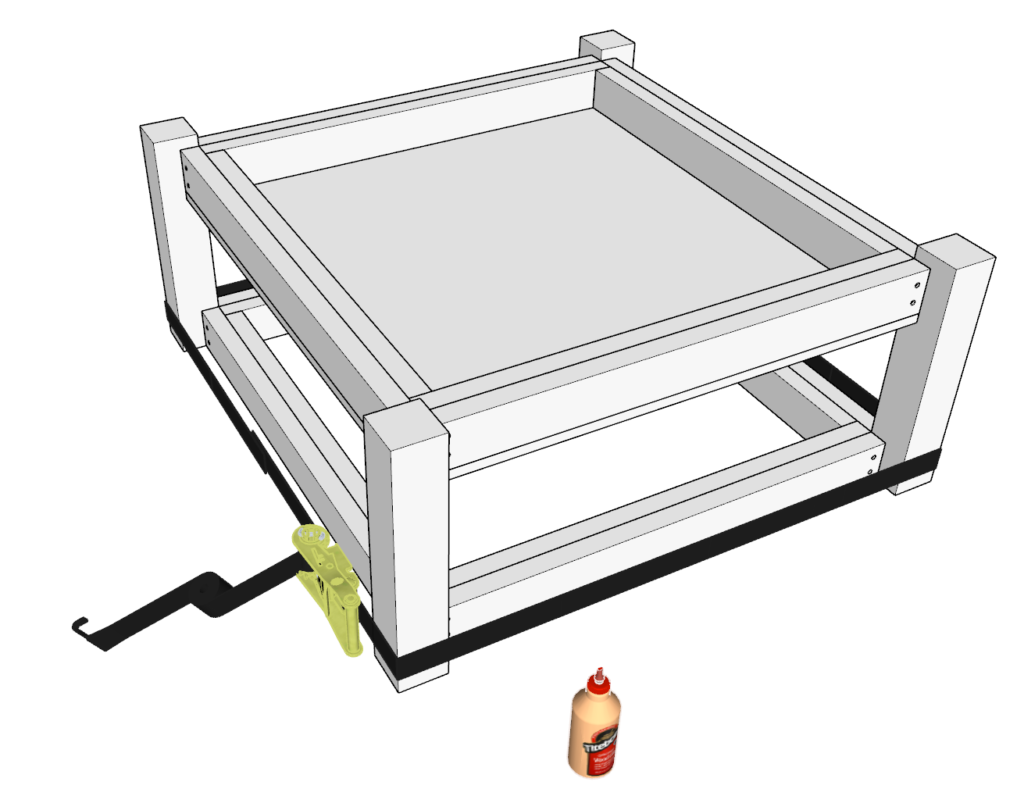
Step 1 (Montessori Lego table and storage system)
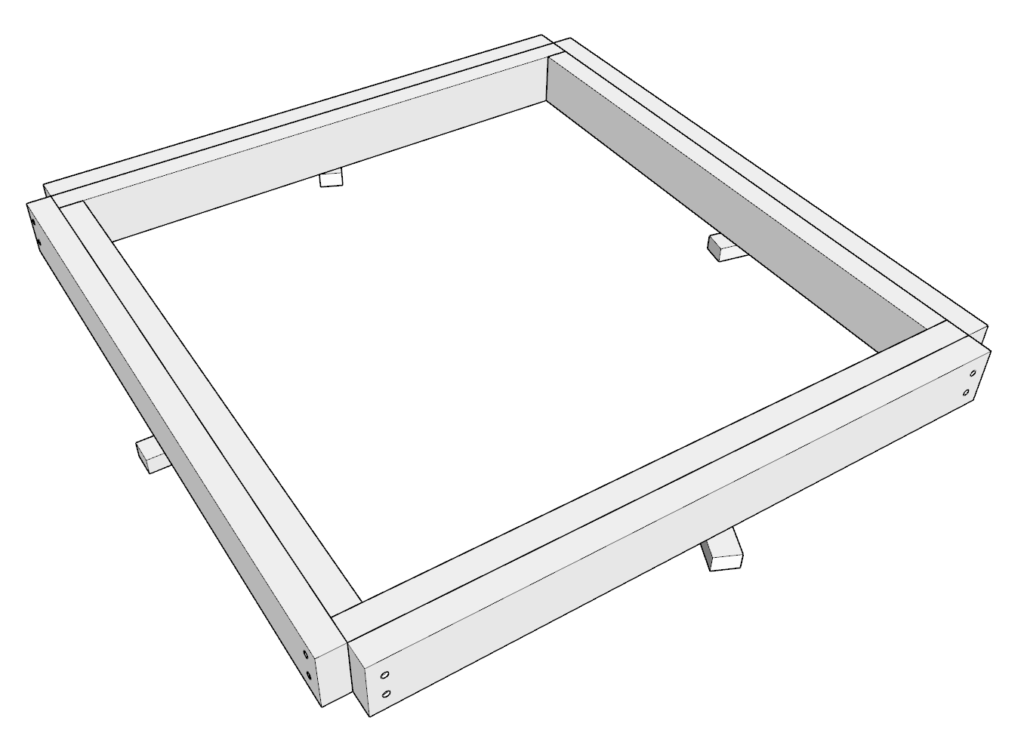
First, cut two 35.5 inch 2×4 lumber pieces and two 37 inch 2×4 lumber pieces and arrange them as shown in the first picture in this step.
Join the 2×4 cuts by applying glue to all areas that will be joined, predrilling, and adding the 3.5 inch screws.
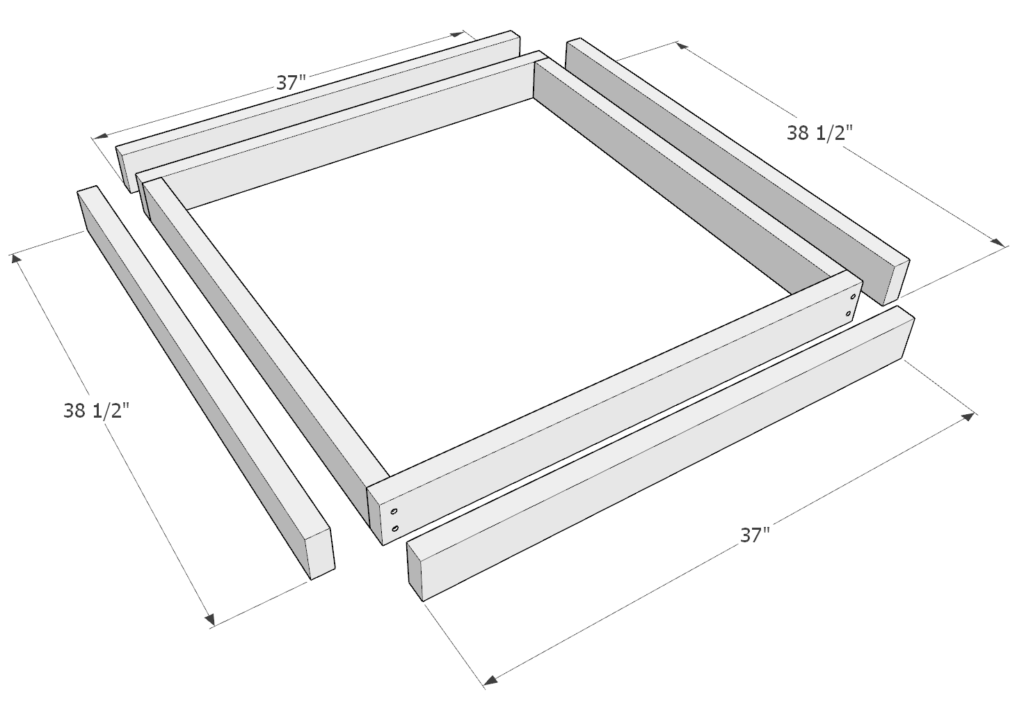
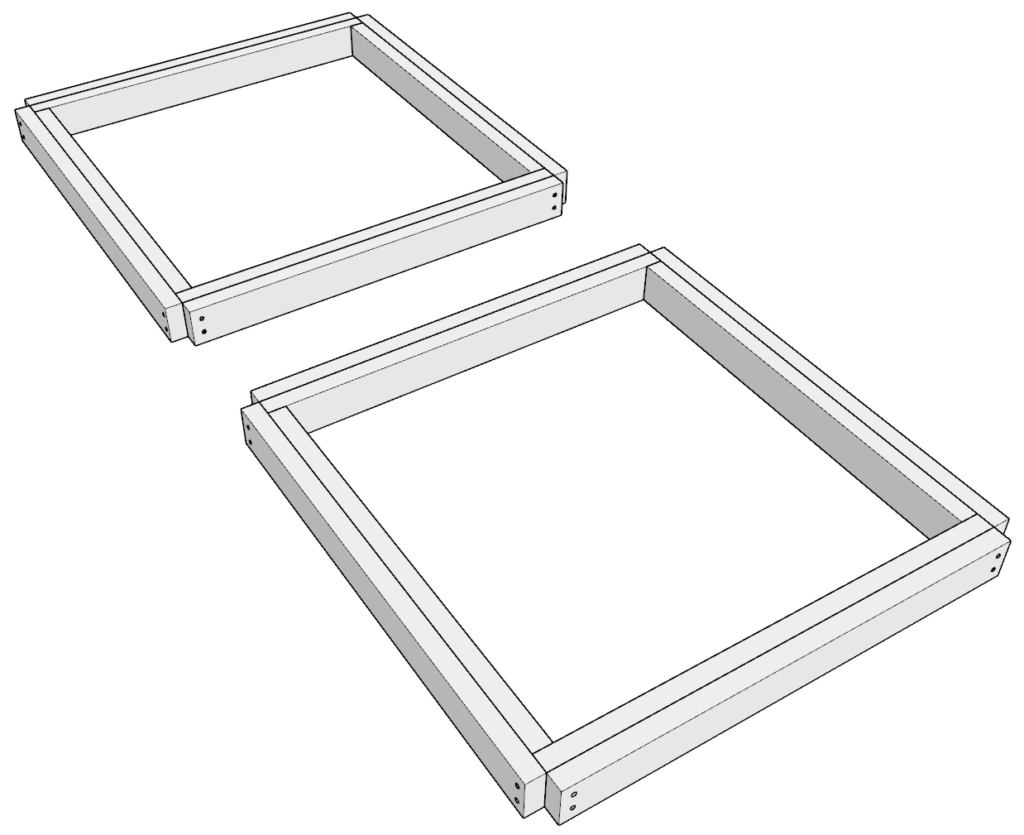
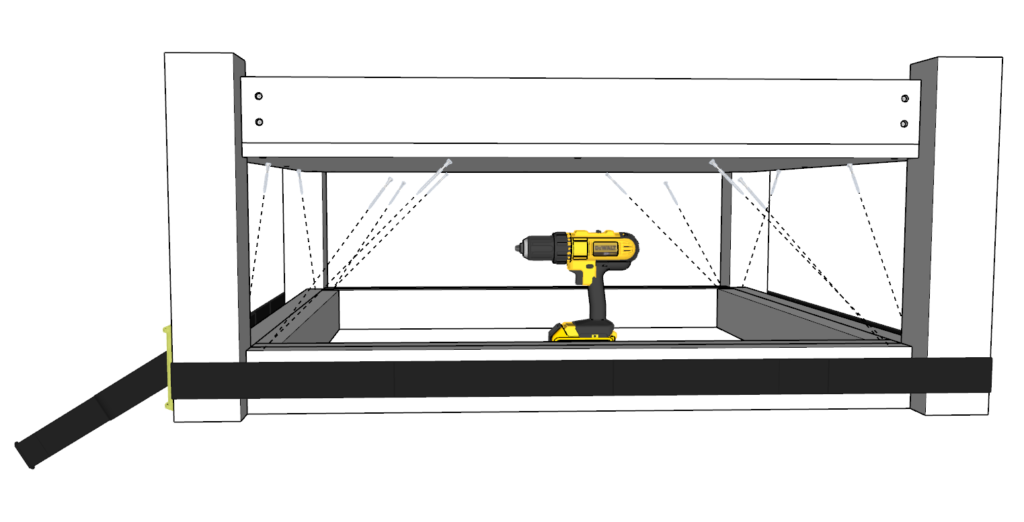
Next, cut and add two more 37 inch 2×4 lumber pieces and two 38.5 inch 2×4 lumber pieces as shown in the diagram below.
Add glue, predrill, and add 2.5 inch screws. Using the 2.5 inch screws in this step prevents the screws from going through the lumber and sticking out on the other side.
Repeat this step a second time. You should have two identical Lego table frame pieces.
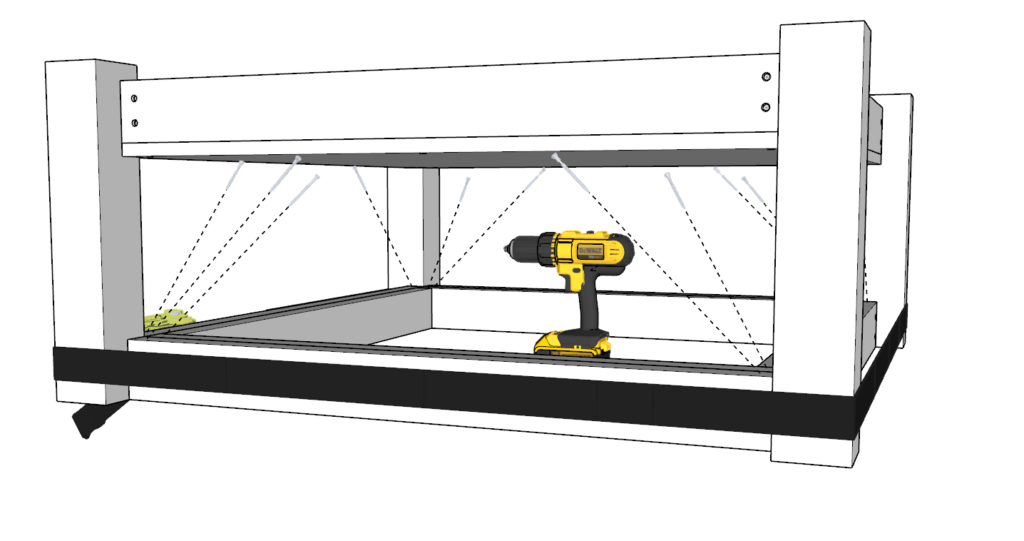
Step 2 (Montessori Lego table and storage system)
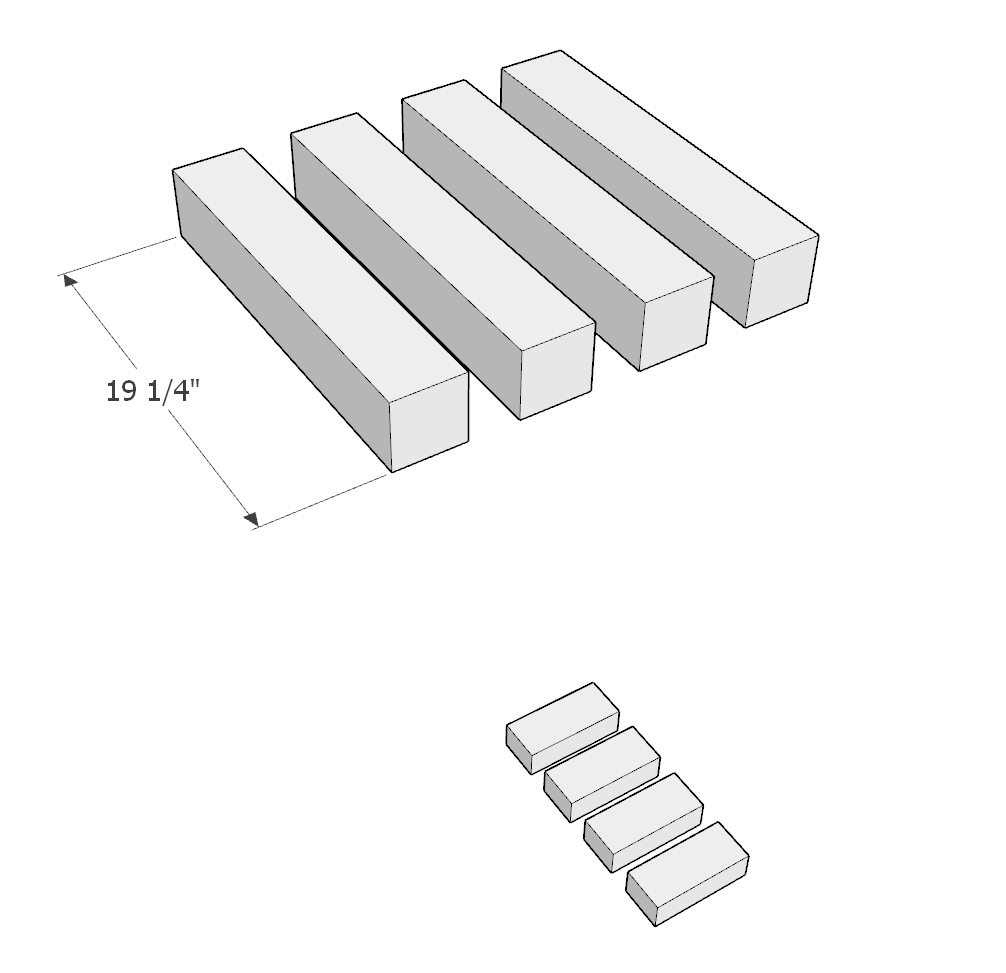
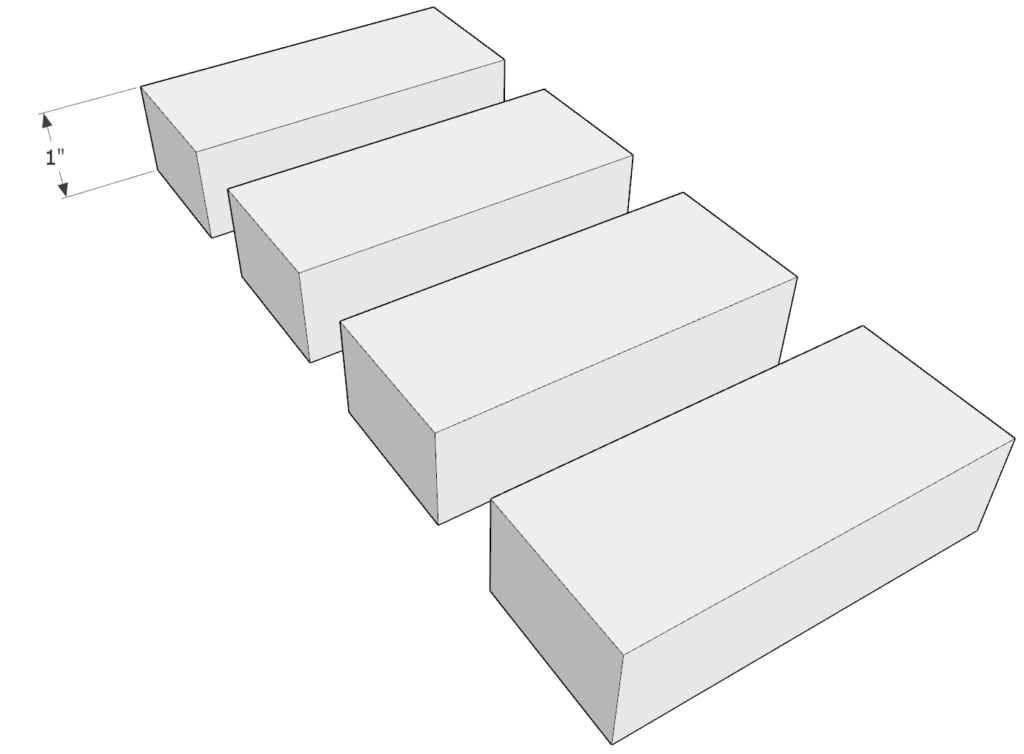
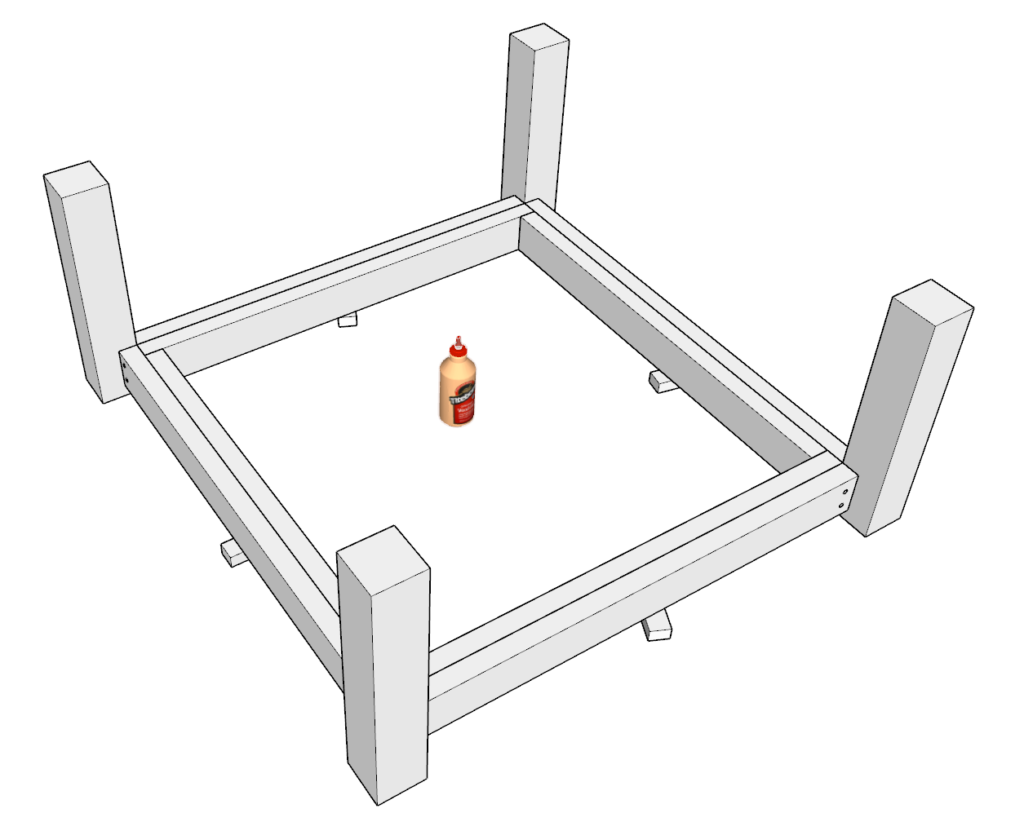
Next, cut four 19.25 inch long 4×4 lumber pieces and four 1 inch thick spacers. The spacers can be from any lumber scraps.
Next, lay one of the frames you assembled in the previous step and lay it on top of the 1 inch spaces to elevate the frame by 1 inch off the ground. Make sure to use a flat and leveled surface so your table doesn’t come out crocked.
Next, add the four 19.25 inch long 4×4 lumber pieces to the frame as shown below. Add glue to all the areas that will be joined together.
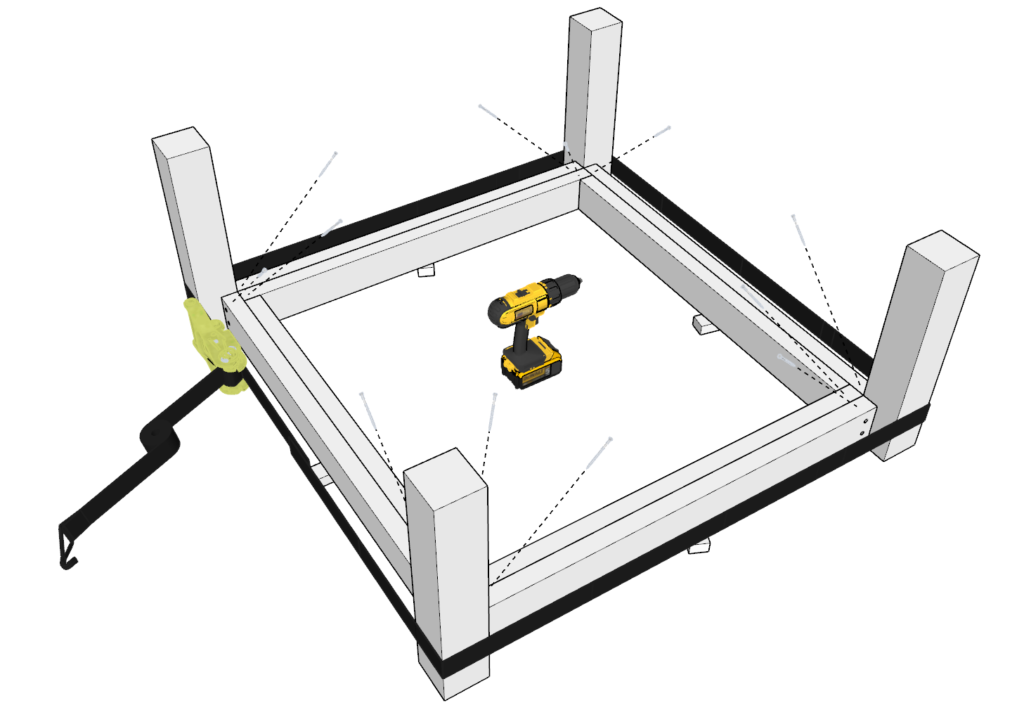
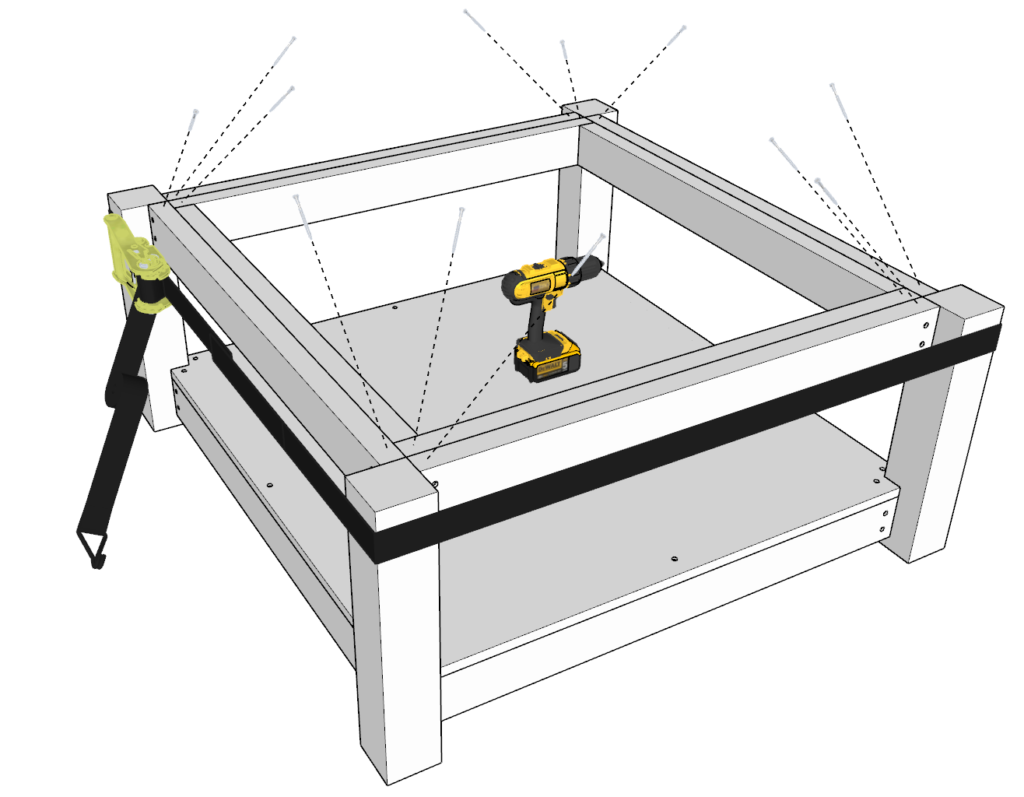
Next, take a ratchet strap and wrap it around all four legs. The strap will be used to tighten the legs to the frame so that you can secure the legs with screws. Tighten the straps really tight so that the 4×4 lumber pieces are not moving. You can use a hammer to knock any pieces into the correct place before tightening very hard.
Next, add 3.5 inch long screws diagonally as shown below.
Lastly, flip the table upside down and add screws in the same pattern you did on the opposite side
Step 3 (Montessori Lego table and storage system)
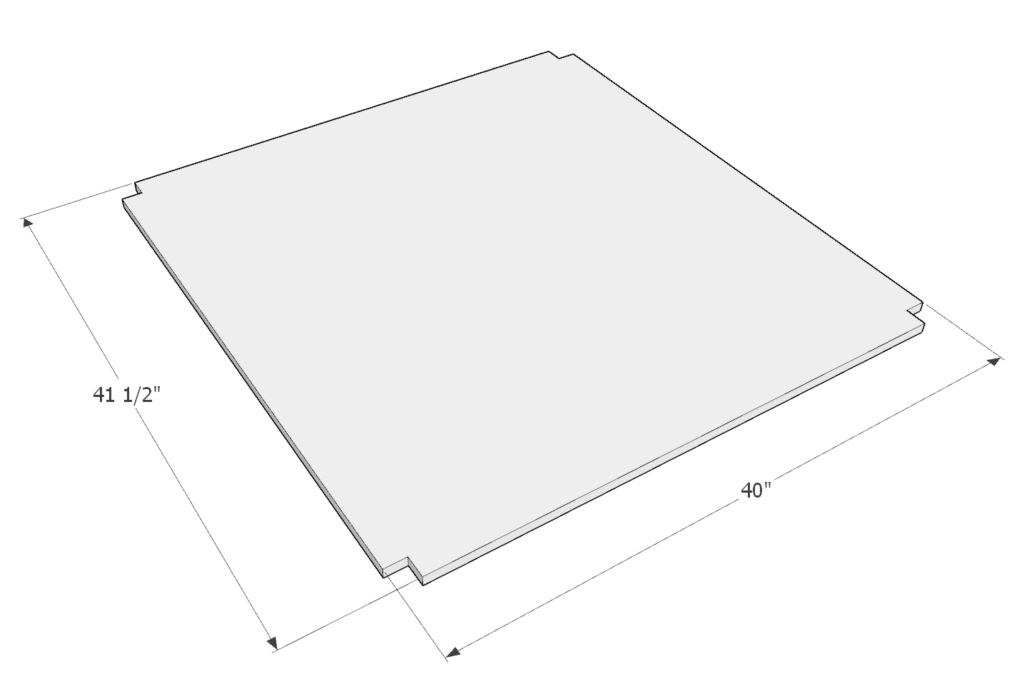
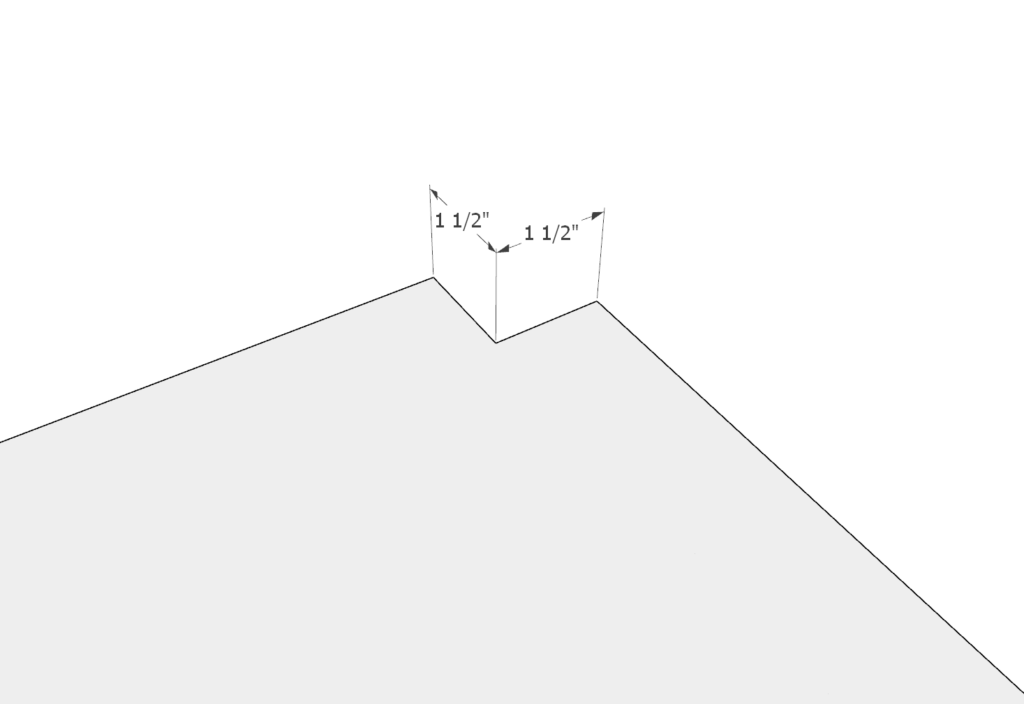
Next, cut a 41.5 inch x 40 inch plywood sheet. indent all the corners 1.5 inch x 1.5 inch as shown below.
Next, add the plywood sheet to the table frame you assembled in previous step.
Add glue, predrill, and add screws.
Step 4 (Montessori Lego table and storage system)
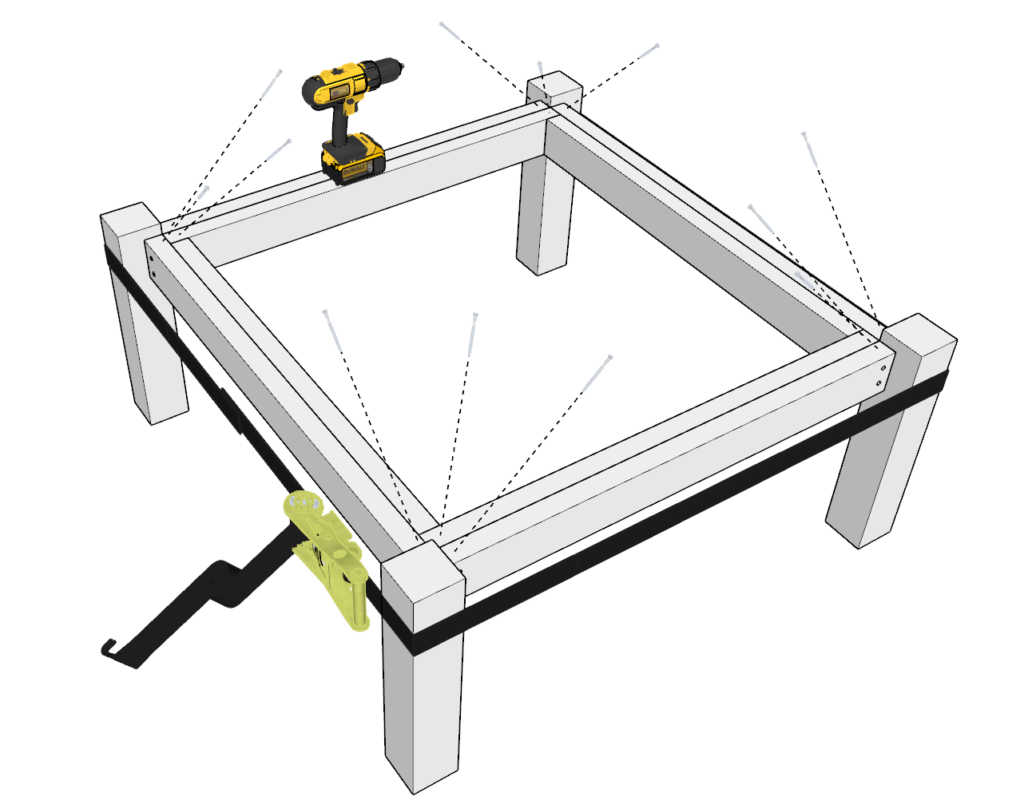
Next, flip the table frame and add the second frame piece you made in step 1. Attach it in the same way as before.
Add glue, add straps, ensure all pieces are leveled, predrill, and add 3.5 inch long screws.

Step 5 (Montessori Lego table and storage system)
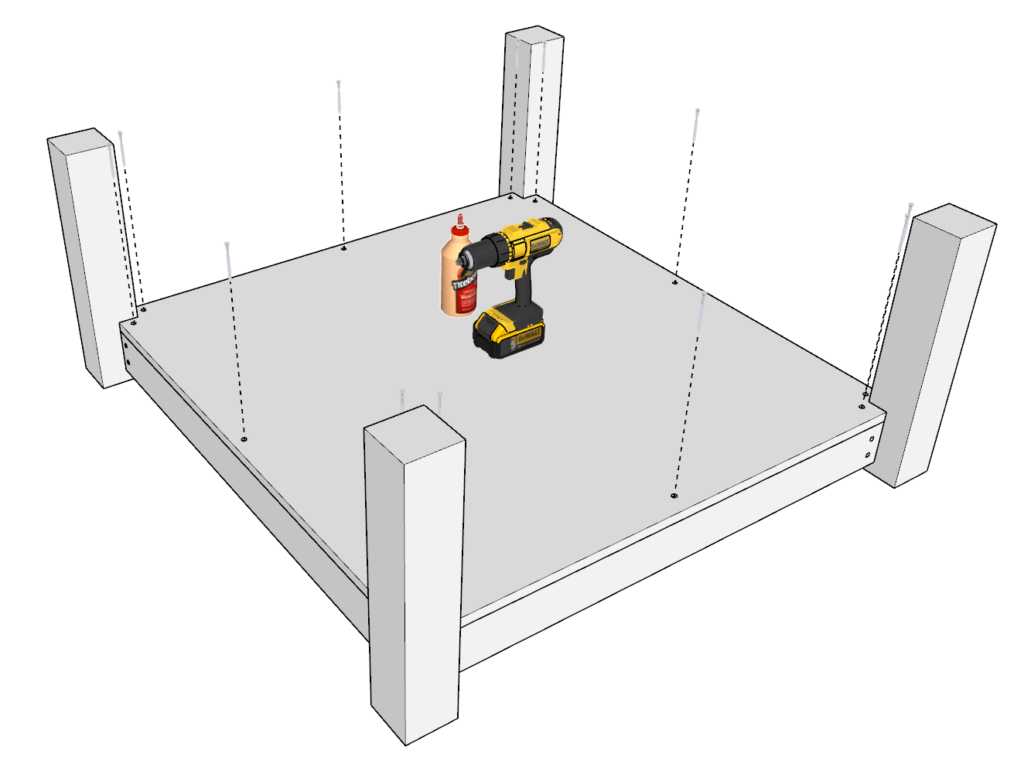
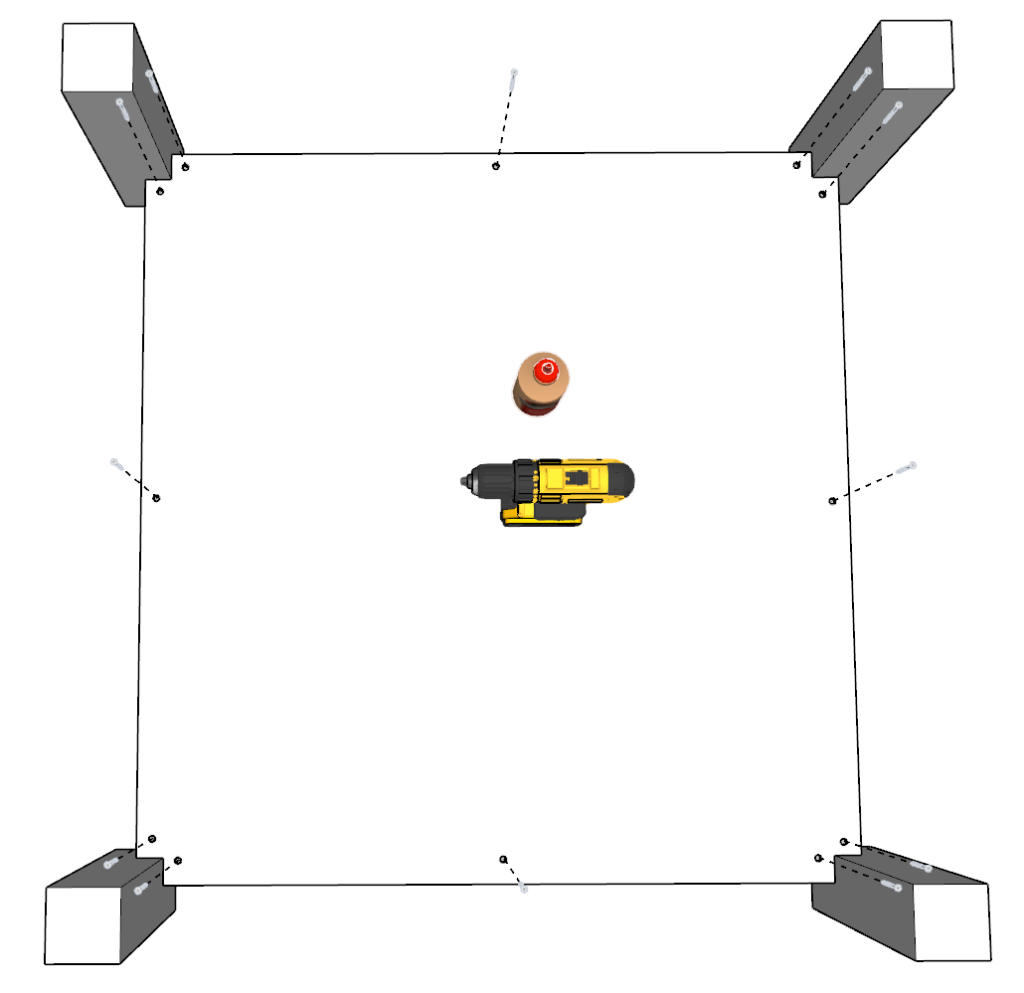
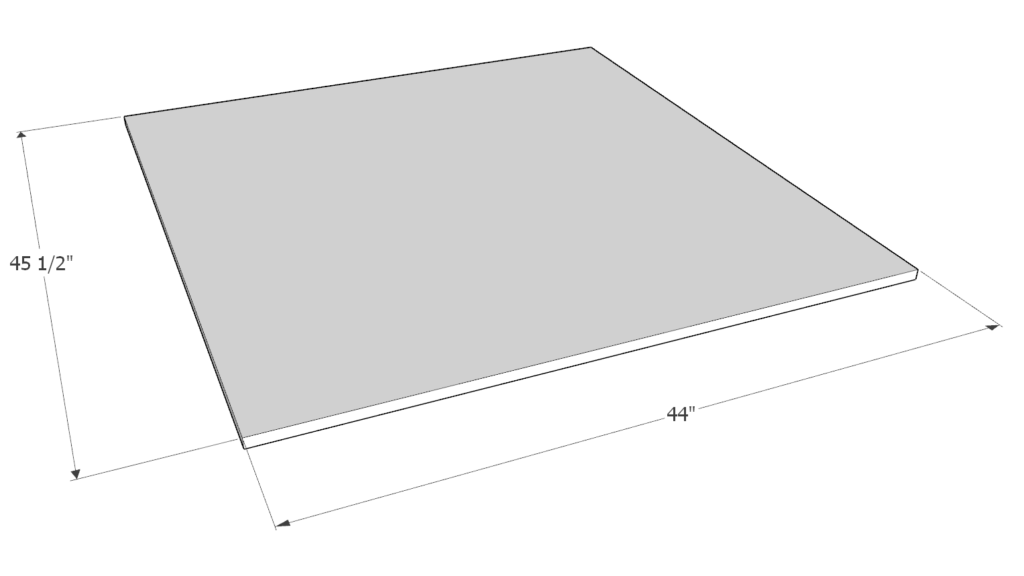
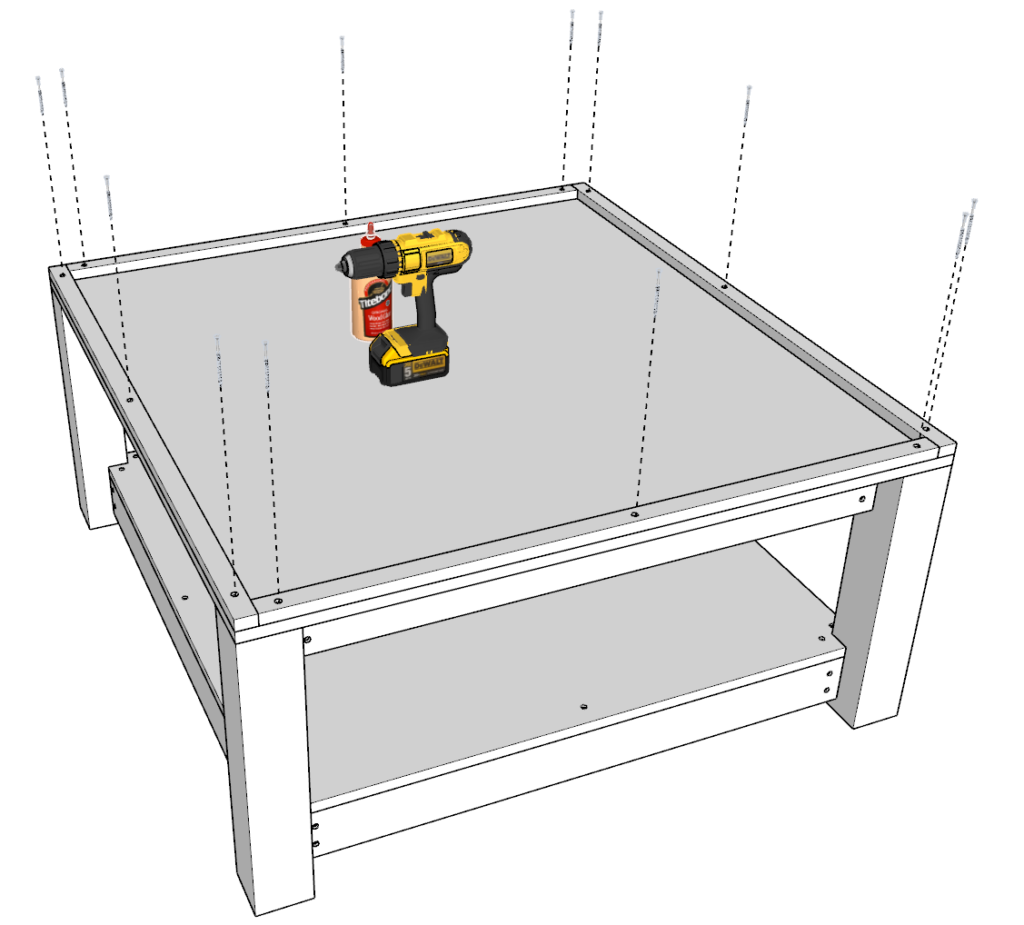
Next, cut a plywood sheet to 45.5 inches x 44 inches. Add this plywood sheet on top of the table frame. Make sure to add glue to all areas that will be making contact, Predrill, and add screws. I recommend adding the screws closer to the edge so that they can be concealed by the additional lumber brace pieces that will go on top.
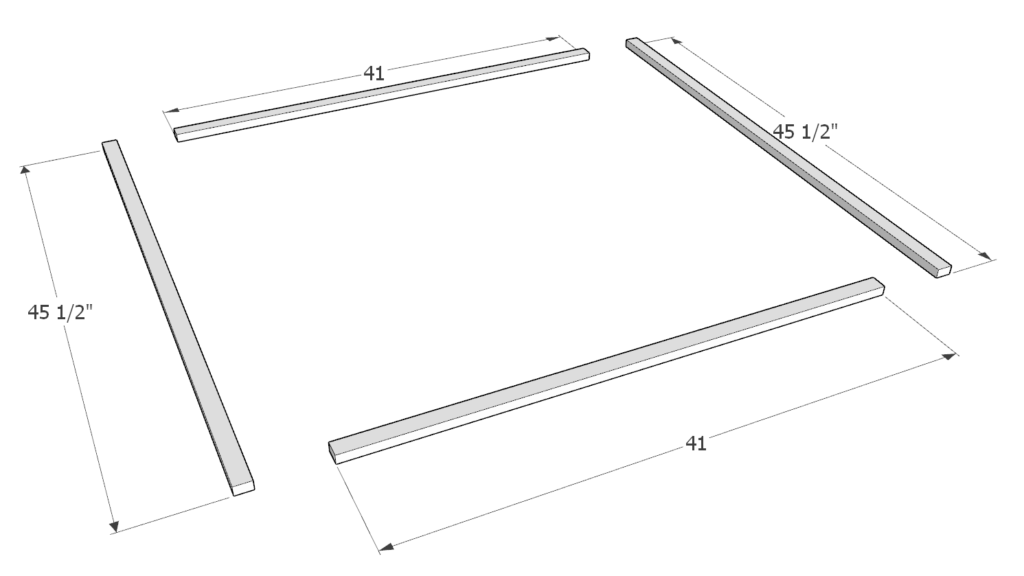
Next, cut two 41 inch 1×2 lumber pieces and two 45.5 inch 1×2 lumber pieces and attach them to the table top as shown in the diagram. Predrill, add glue, and add 1 inch screws.
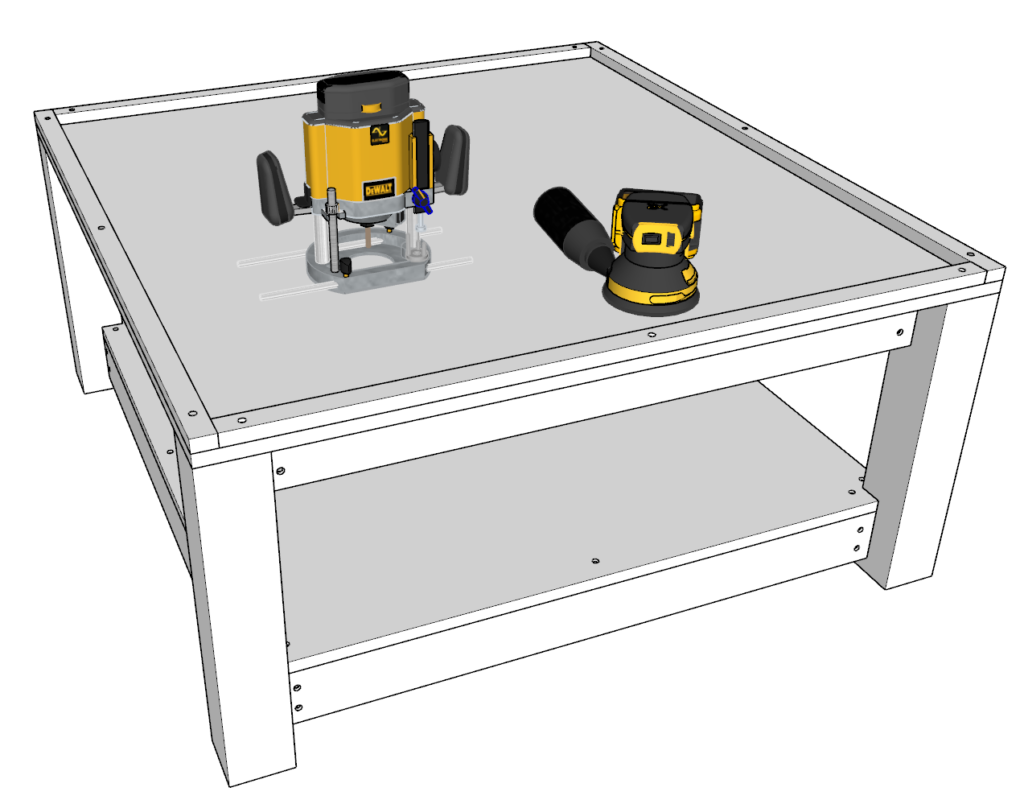
Lastly sand down and the Lego table. Its optional to use a router on the edges on the table. The rounded corners make the table safer and more aesthetic.
I start sanding with a rough grit sandpaper. Usually about 80-grit. Then, for the final touch I use a fine grit. Usually, a 220-grit.
It is important to round the corners to prevent injury in case your child bumps their head into an edge.

Step 6 (Montessori Lego table and storage system)
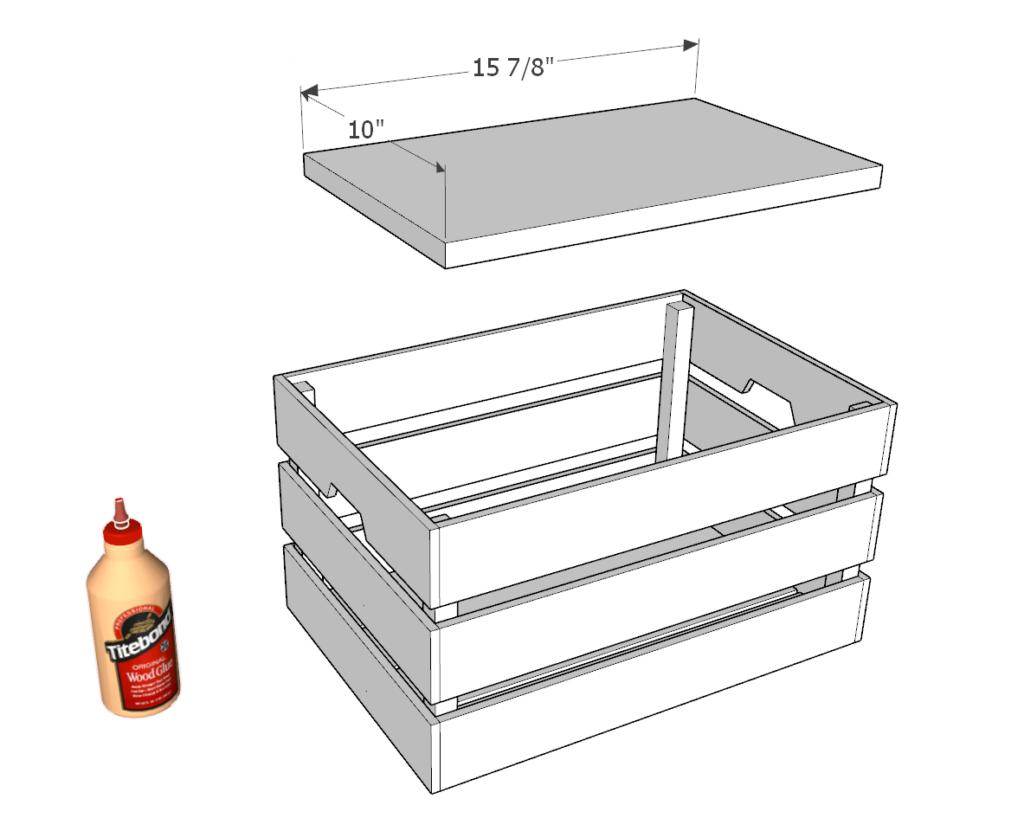
Next you will need to add and modify the IKEA KNAGGLIG crates.
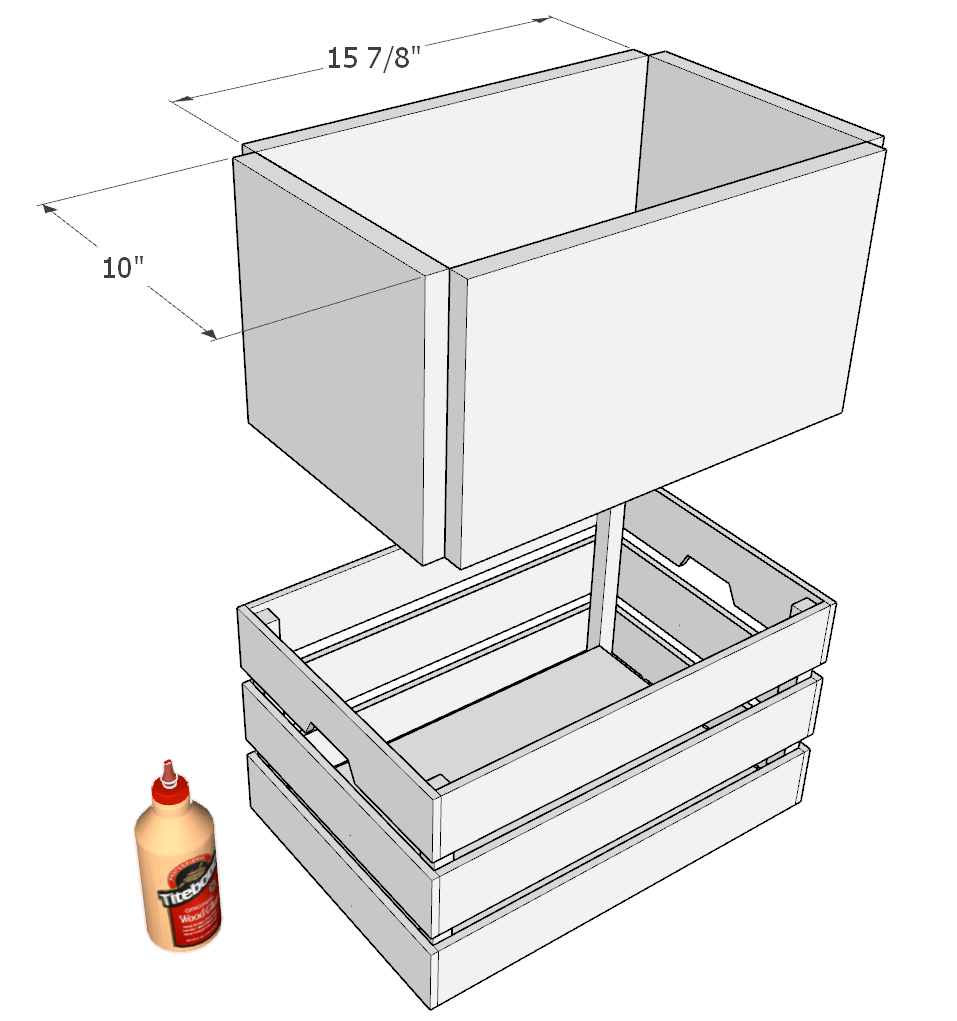
WARNING! Some of the cuts may not be the right size if you’re using a crate from a different distributor. Measure your crate before you cut!
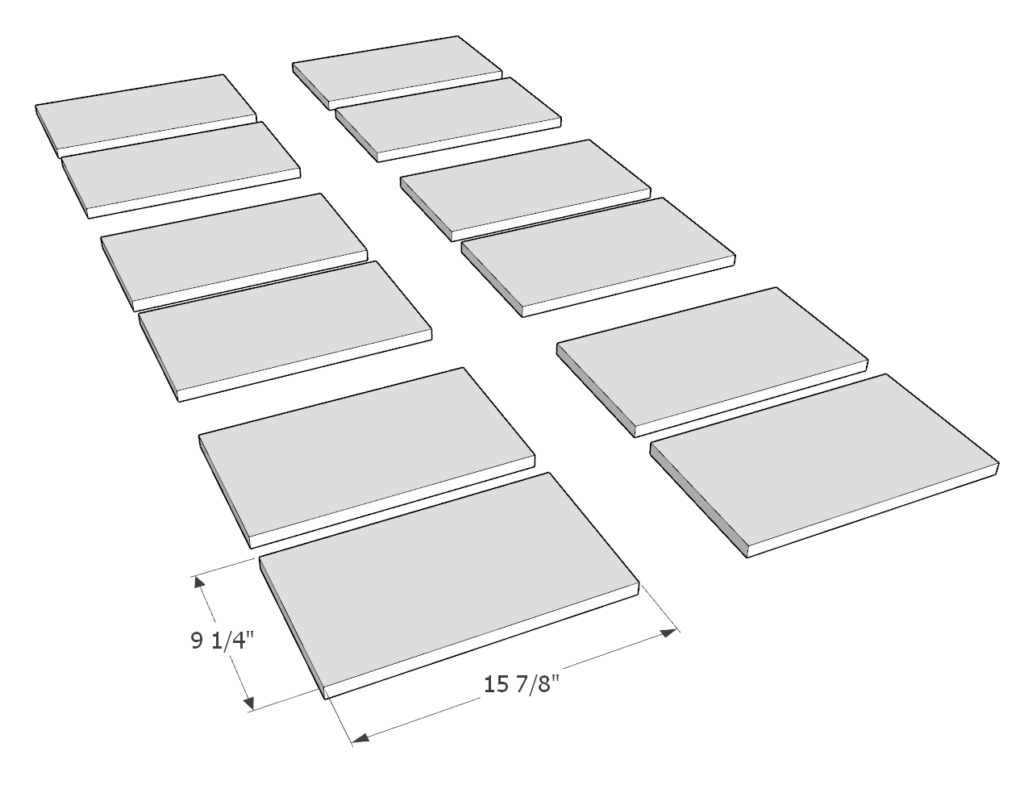
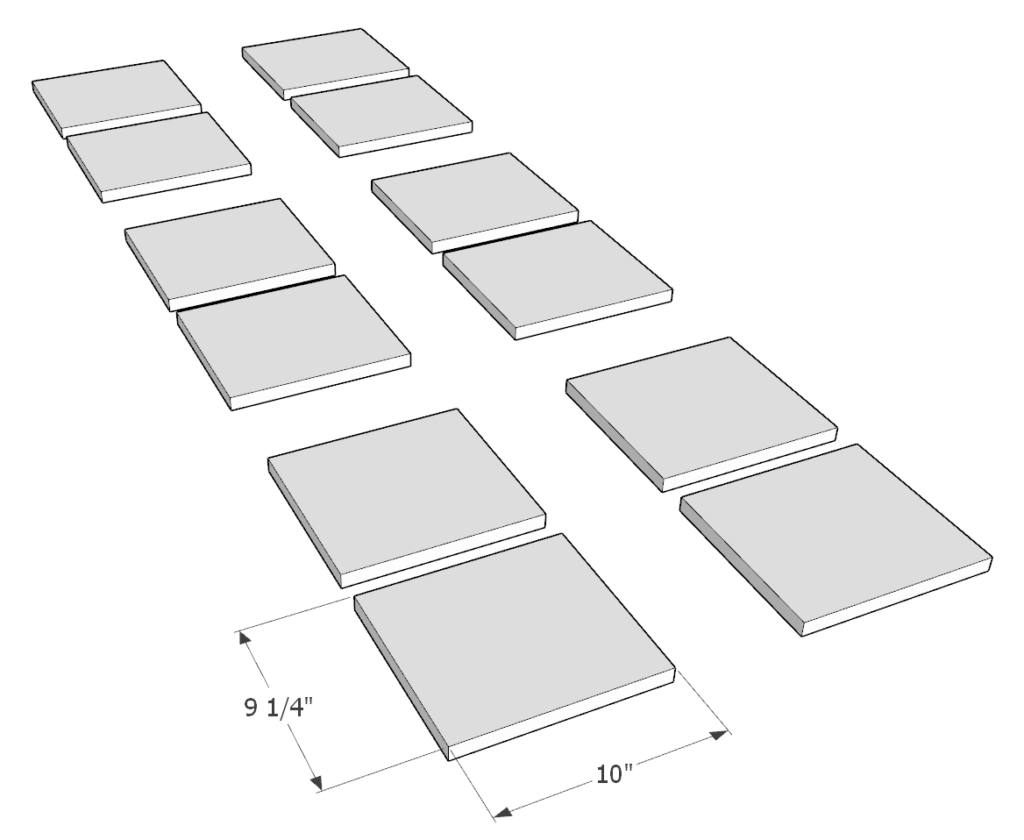
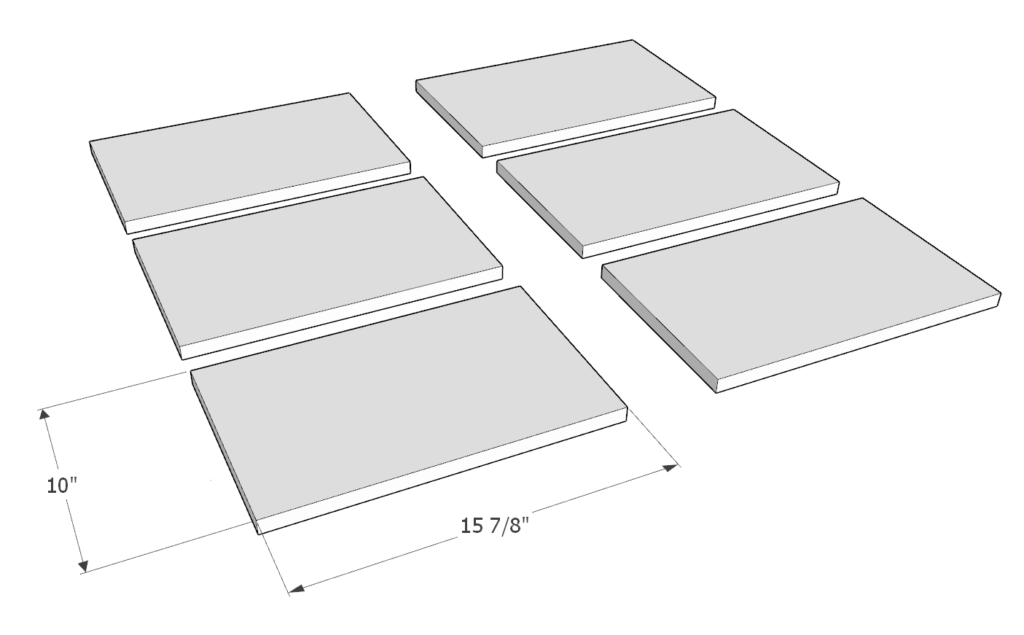
Start by cutting twelve 15 7/8 inch long 1×10 lumber pieces, twelve 10 inch long 1×10 lumber pieces, and six 15 7/8 inch x 10 inch lumber pieces.
The 15 7/8 inch x 10 inch lumber pieces will need to be cut from 1×12 lumber.
Next, insert the 15 7/8 inch x 10 inch lumber pieces into the crate base. Add glue to all areas that will be making contact.
Next, add the 10 inch and 15 7/8 inch long 1×10 lumber pieces as the inner walls of the crate. Add glue to all areas that will be making contact.
If you walls don’t stay upright as the glue dries, you can add some temporary tape to hold things in place.
Lastly, add the 5×10 Lego base plates by gluing them into place.