Introduction
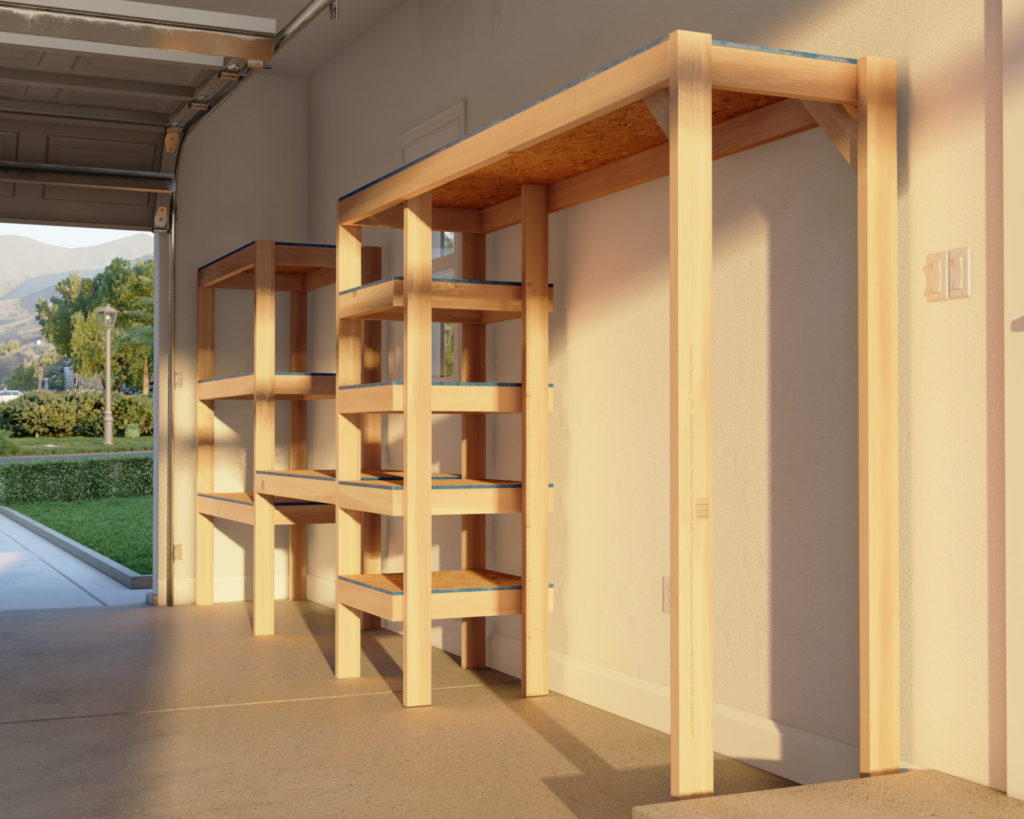
Imagine a garage where vertical space is maximized, tools are neatly hung, and every item is within easy reach. That’s the power of vertical storage solutions, and it’s exactly what our DIY garage shelf plans offer. This project isn’t just about adding shelves—it’s about enhancing the way you use your garage, making it a model of efficiency and organization.

Specifications
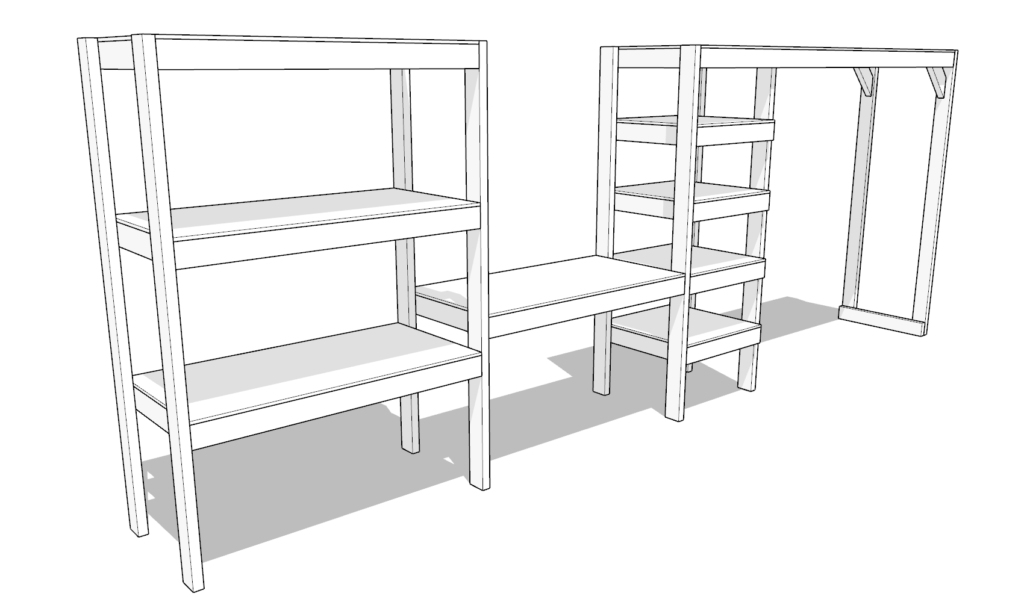
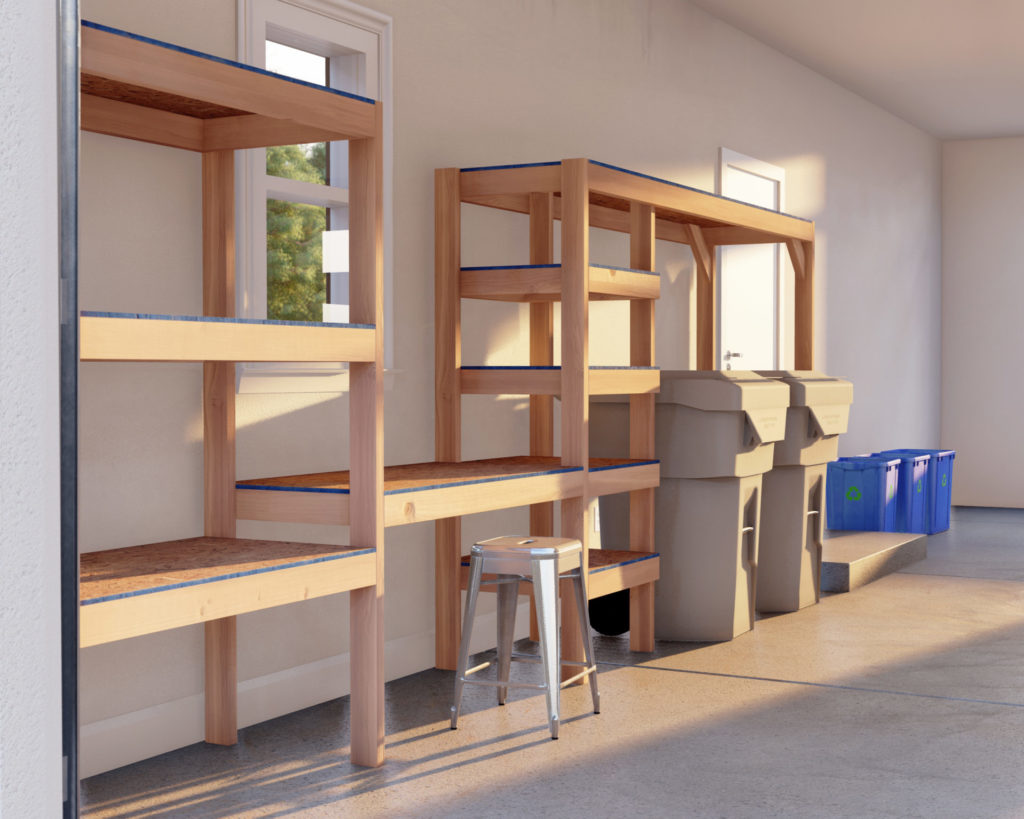
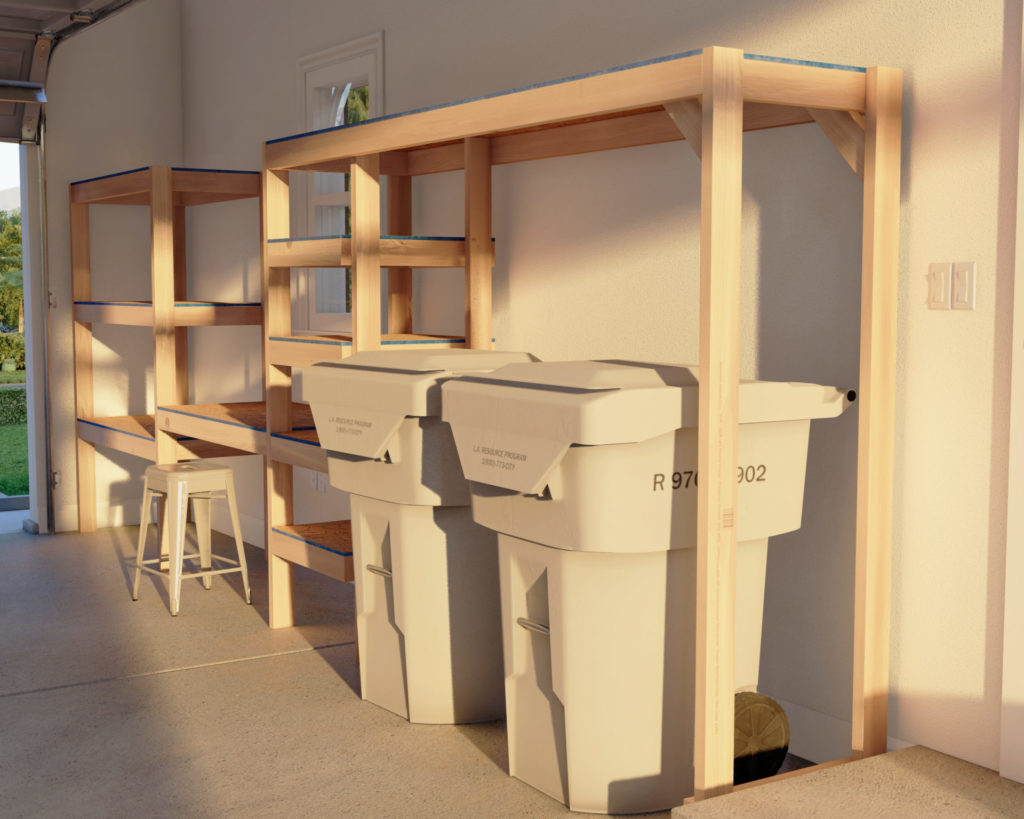
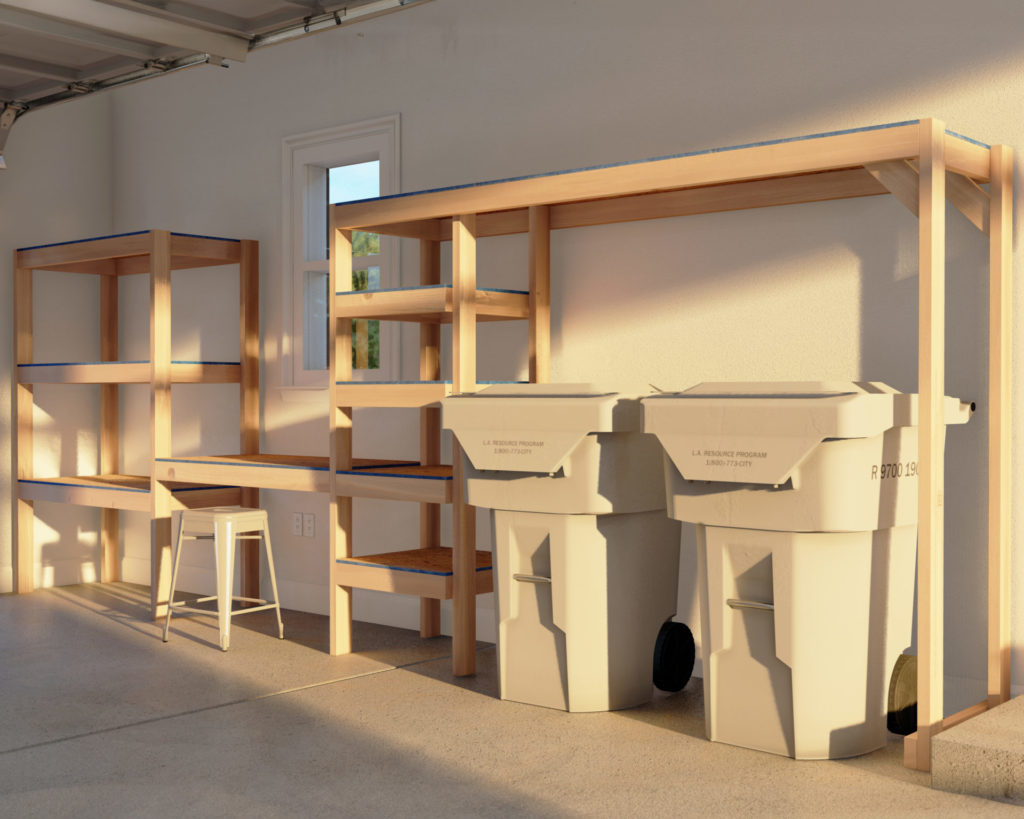
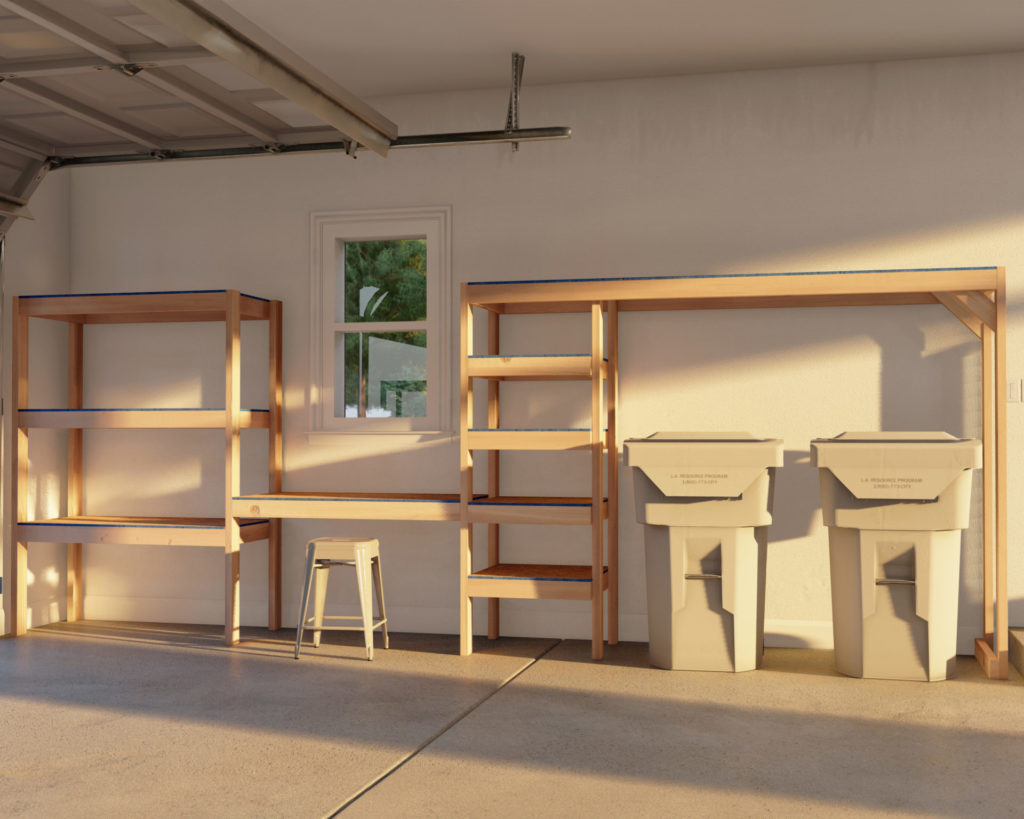
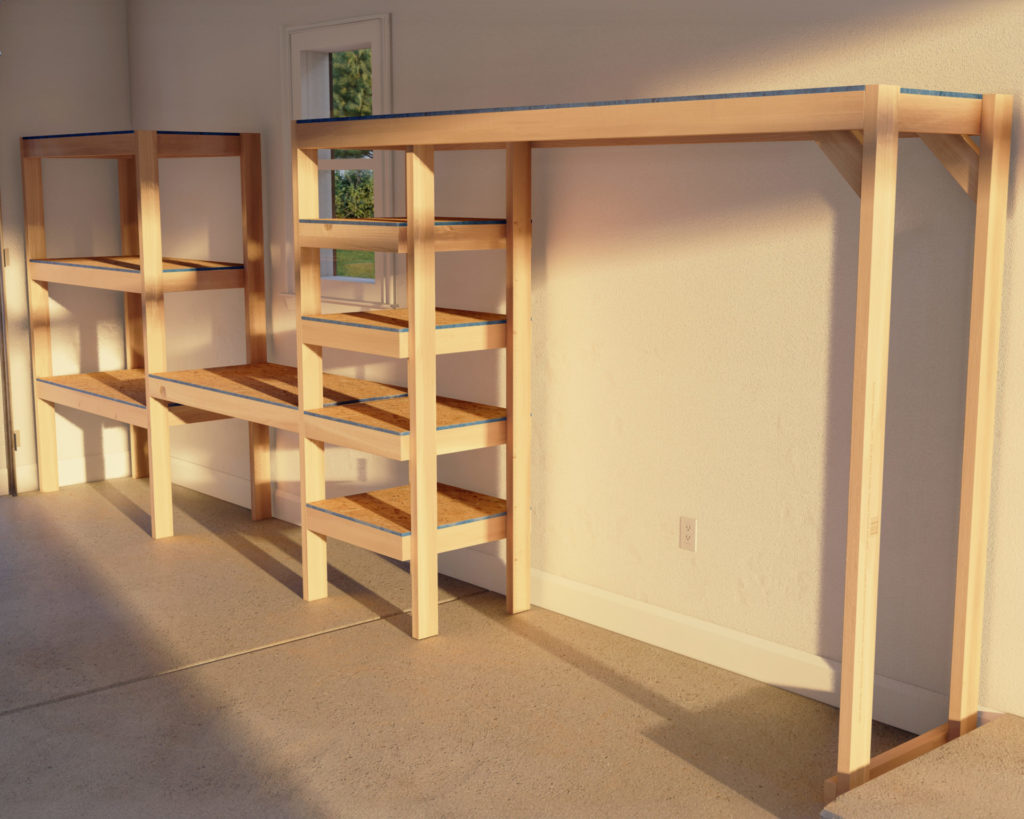
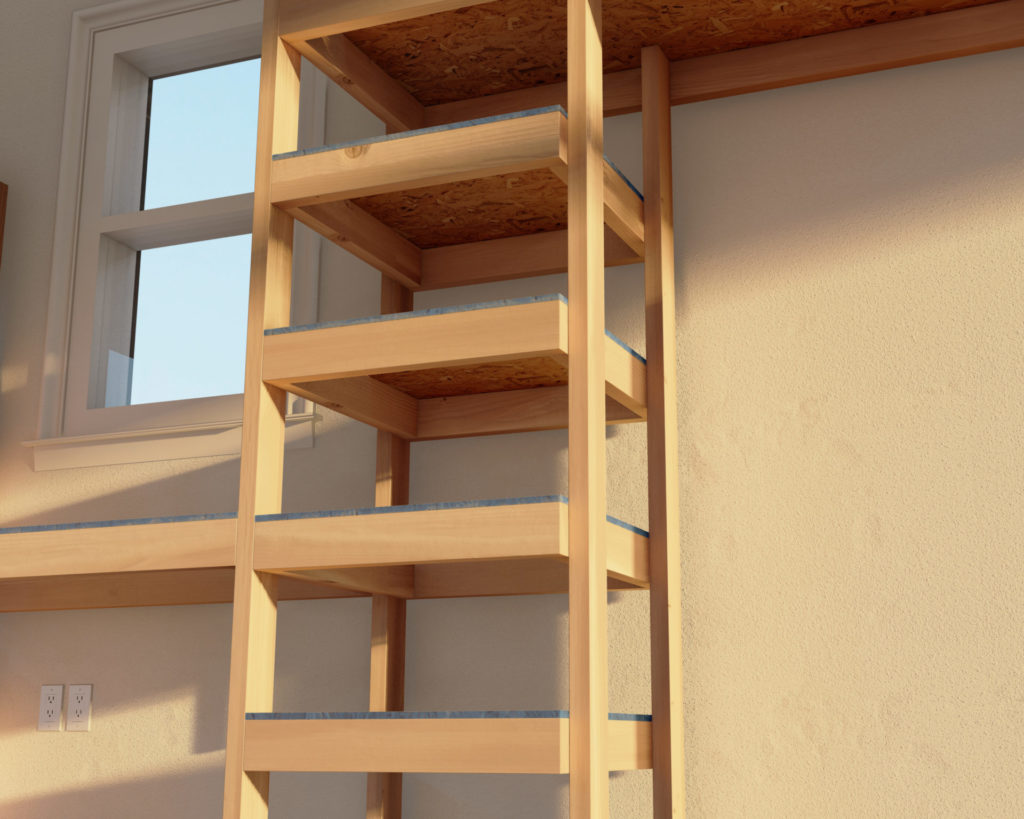
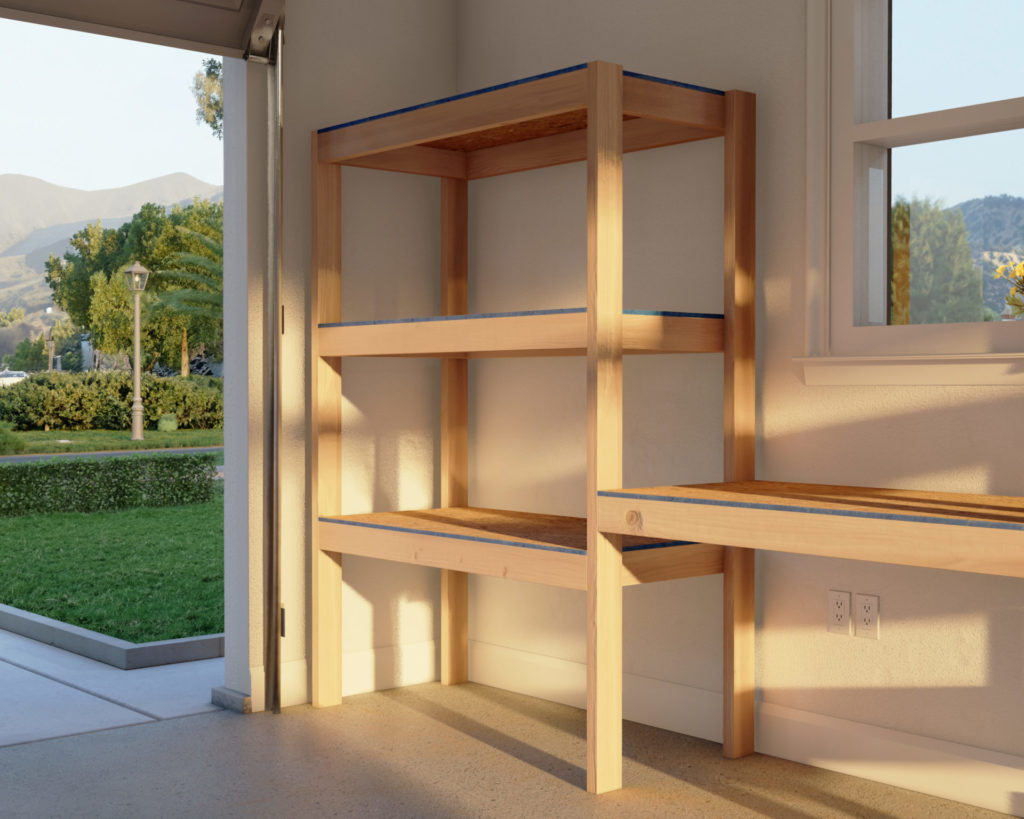
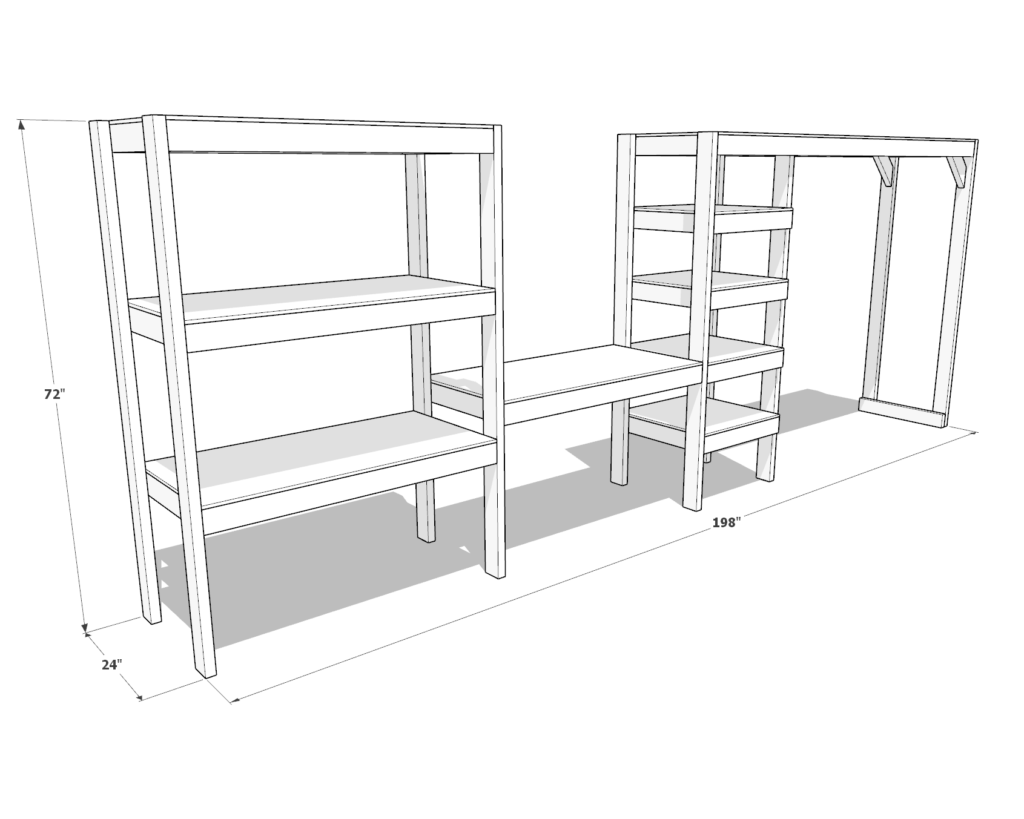
Our shelving design takes advantage of vertical space, stretching 198 inches wide and rising to a height of 72 inches, ensuring that your garage’s footprint is optimized. Built with durability in mind, these shelves can handle everything from hefty power tools to bulky storage bins, all while providing a designated area for your garbage cans, keeping them out of sight yet easily accessible.
Simplicity
Crafted for the DIY novice, these plans demystify the building process. You’ll achieve impressive results with just basic tools and materials like plywood or composite sheets and 2x4s. The simplicity of the design does not compromise on quality—your finished shelves will have the look and strength of a professional build.
Customization
Tailoring your garage to fit your lifestyle is at the heart of our DIY plans. With adjustable shelving, the storage possibilities are endless. Create a space for large tools, seasonal items, or hefty equipment—the choice is yours. This plan is designed to adapt to your storage requirements, ensuring that your garage is not just organized, but personalized.
Conclusion
Take the first step toward a clutter-free garage today. Our downloadable plans provide you with a clear roadmap to creating a space where everything has its place. From accommodating trash bins—keeping them handy but out of the way, to a system that categorizes your belongings, these plans are your guide to a transformed garage.
Time
2 hours (varies with experience)
Cost
$150 (Costs may vary based on location and supplier.)
Skill level required
Beginner

DIY Garage Shelf PDF Plan
What is included in the PDF download?
- Easy to read step by step instructions
- Material list
- Tools needed
- Helpful links to materials and tools needed
DIY Garage Shelf Dimensions
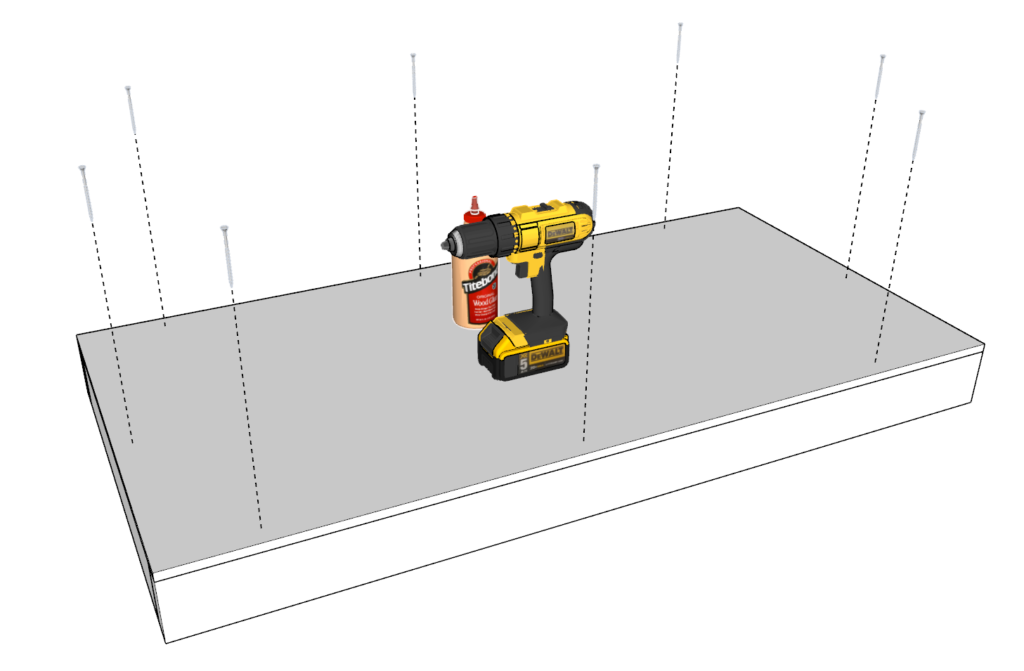
Tools Needed for This Project:
Available with the purchase of the DIY plan PDF.
Lumber Shopping & Cut List
Available with the purchase of the DIY plan PDF.
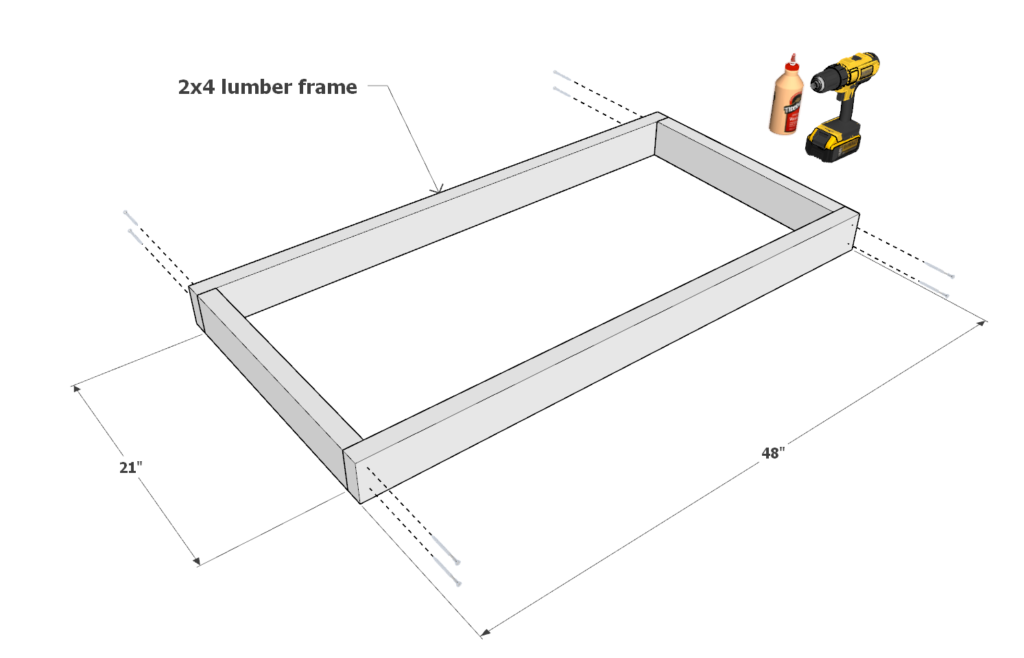
Step 1: Assemble the Shelf Frames
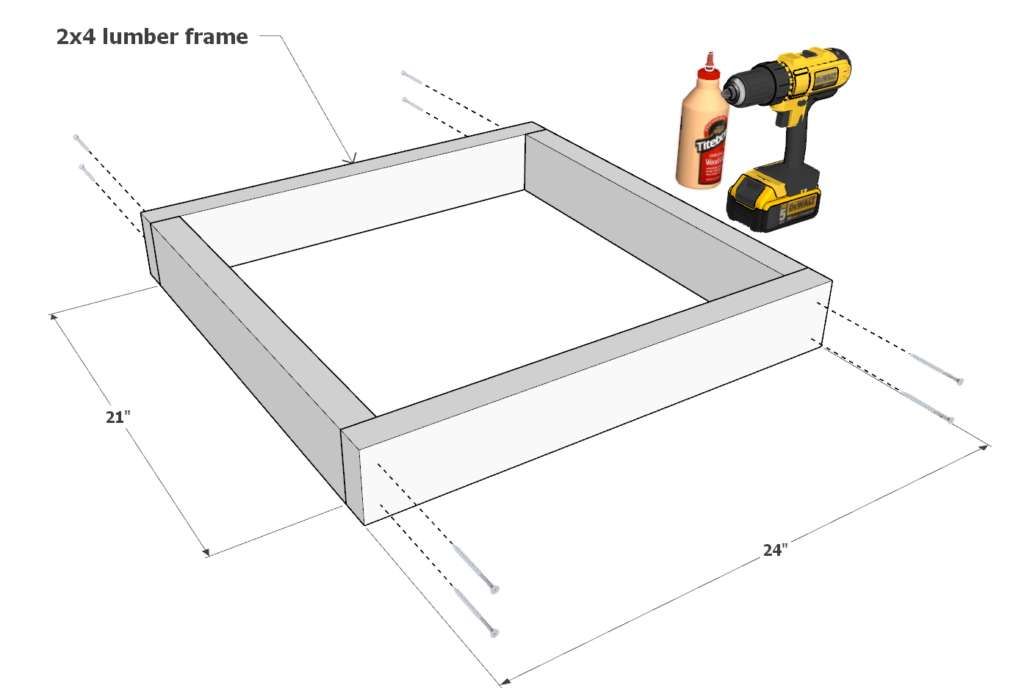
Form the Rectangles:
- Arrange two 48-inch 2x4s as the top and bottom, and two 21-inch 2x4s as the sides to form a rectangle.
- Secure the corners with wood glue and 2.5-inch screws.
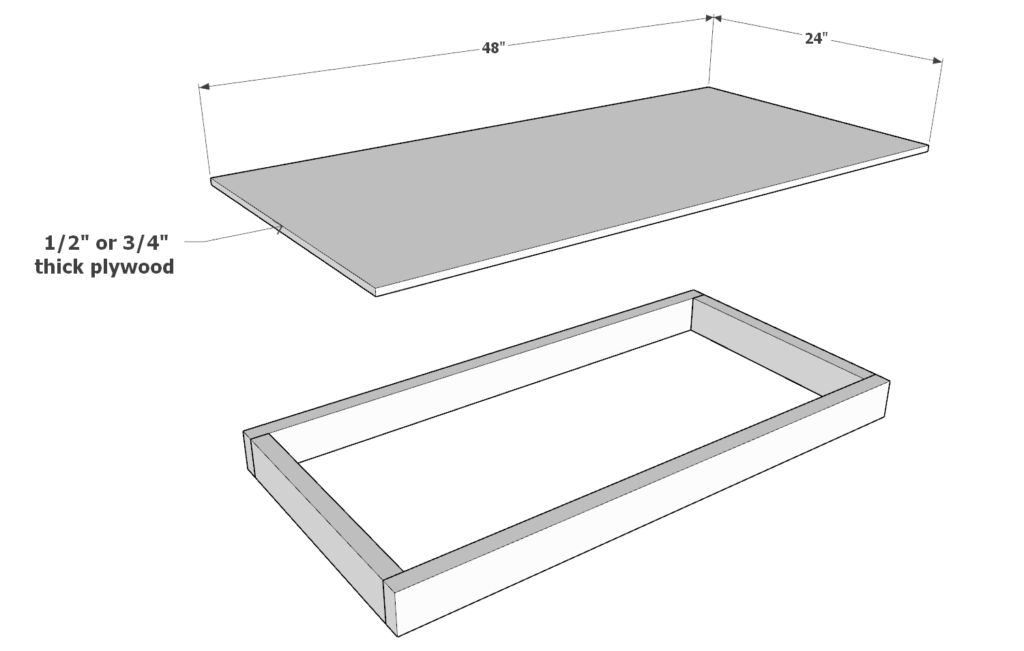
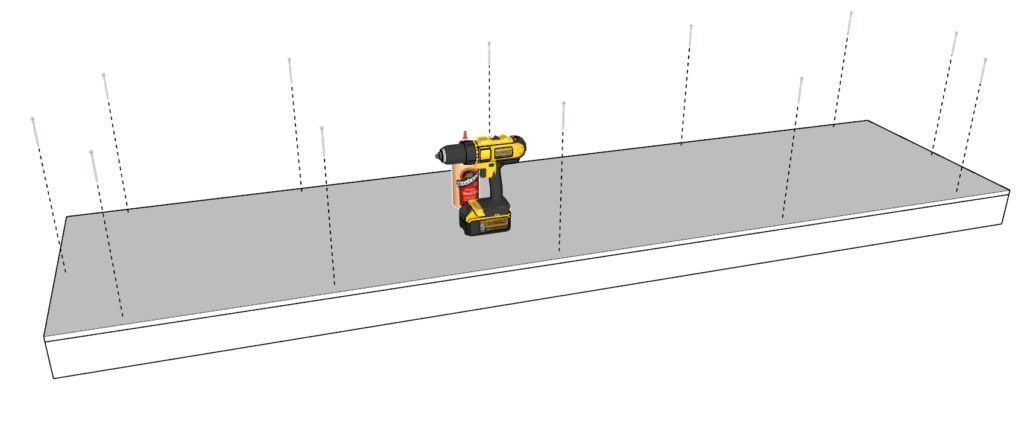
Attach Plywood:
- Place a 48×24 inch plywood sheet on the rectangle.
- Glue, pre-drill, and screw down with 2.5-inch screws.
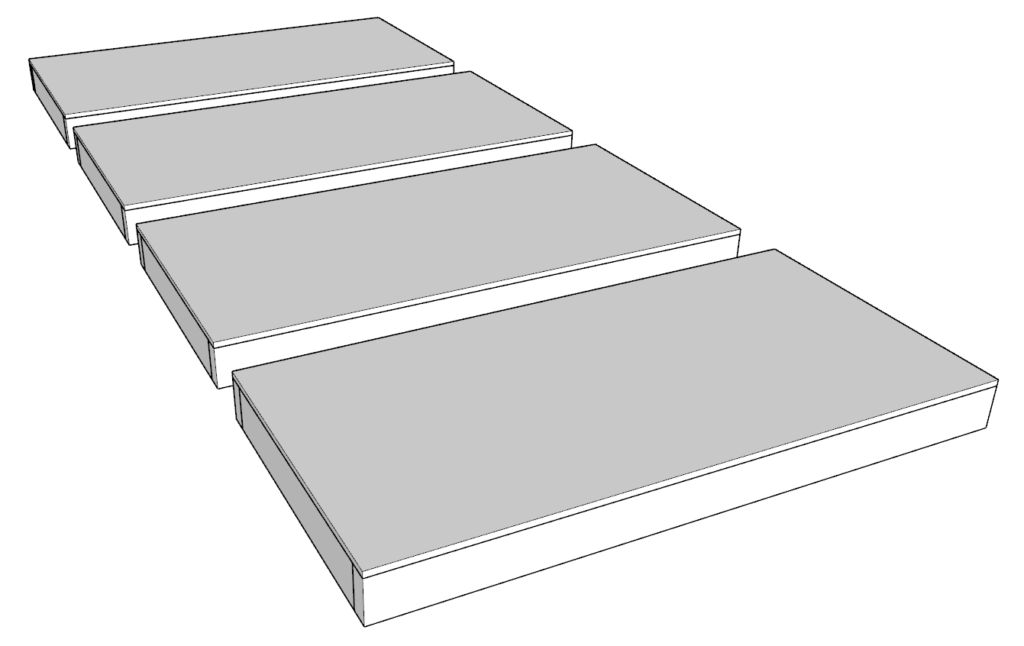
Create Multiple Units:
- Repeat to make four shelf frames.
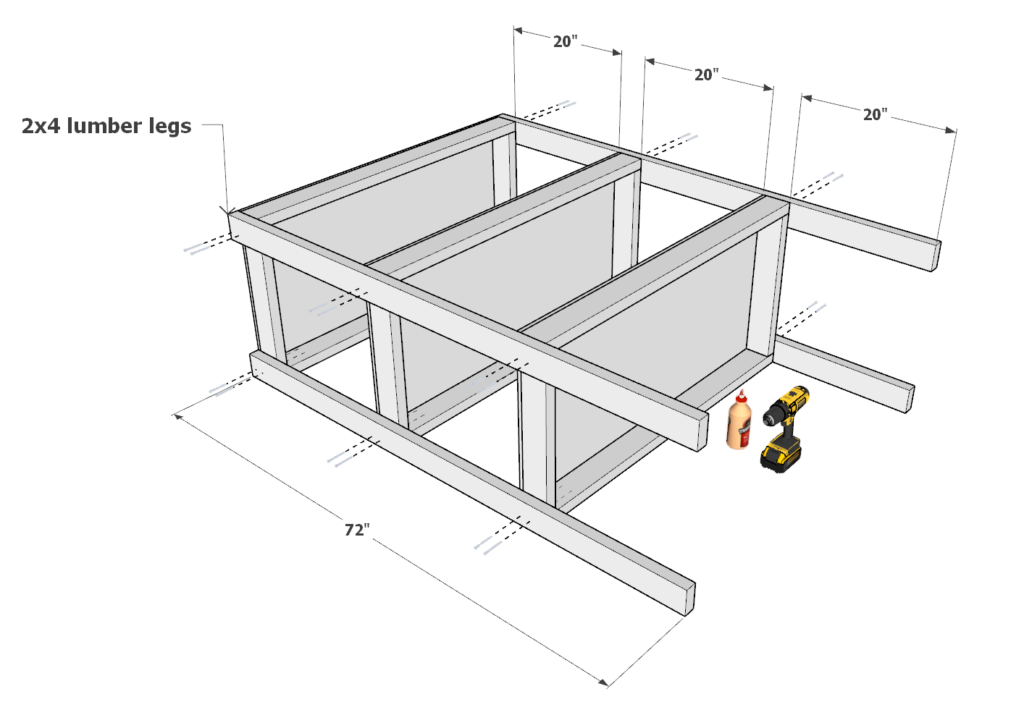
Combine with Legs:
- Attach three frames to the 72-inch legs, spacing as desired.
- Use glue and screws for each connection.
Tip: Pre-drilling with a countersink bit will ensure a cleaner finish and stronger hold.
Step 2: Construct the Smaller Shelf Units
Build the Frame:
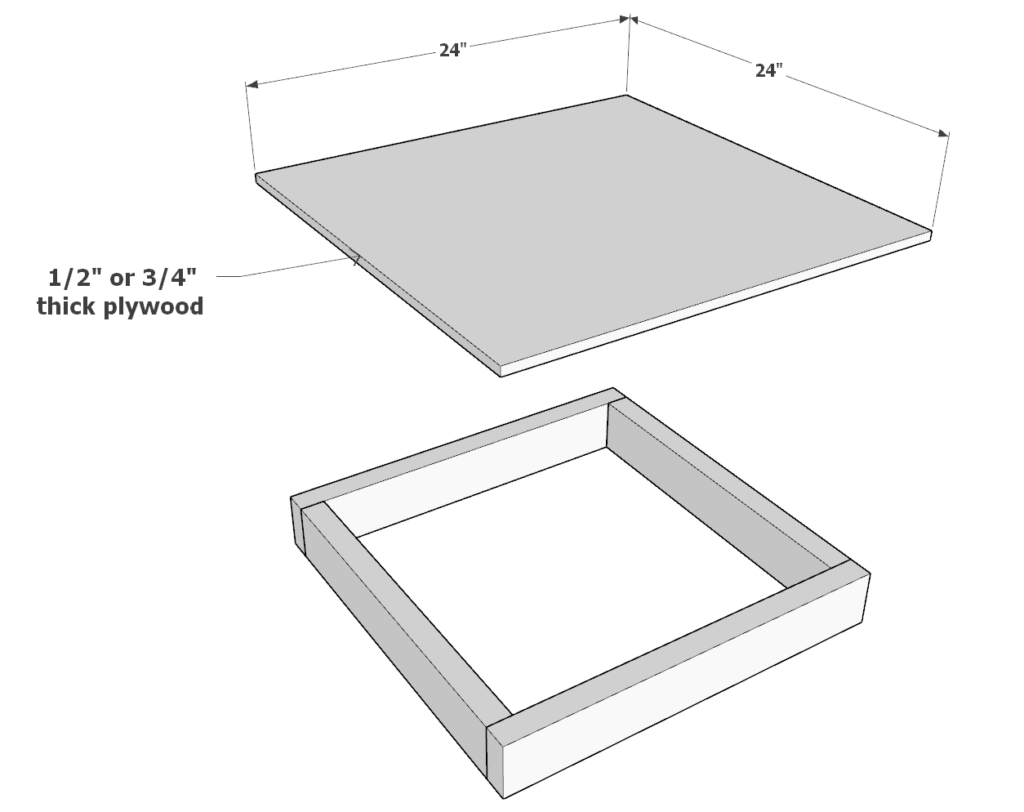
- Form a square by positioning two 24-inch 2x4s parallel to each other and placing two 21-inch 2x4s between them at each end.
- Join the corners using wood glue and 2.5-inch screws.
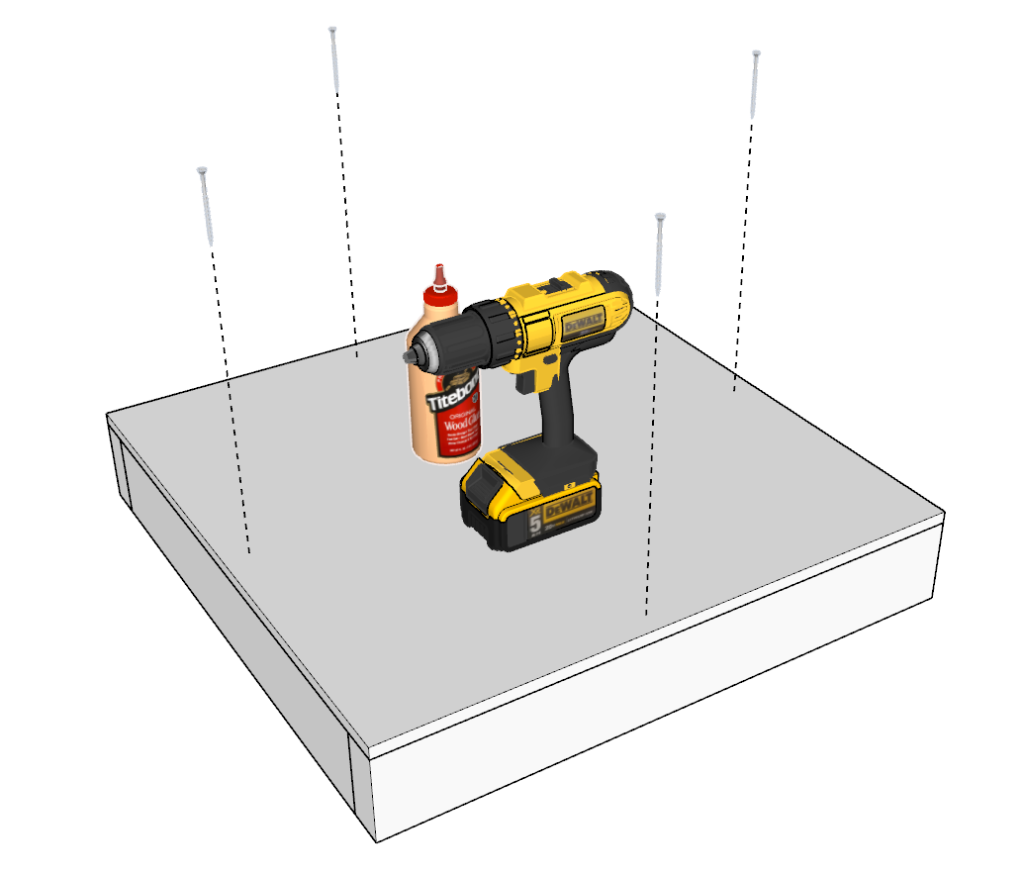
Fix the Plywood:
- Align a 24×24 inch plywood sheet on top of the frame.
- Affix with wood glue, pre-drill, and then fasten using 2.5-inch screws.
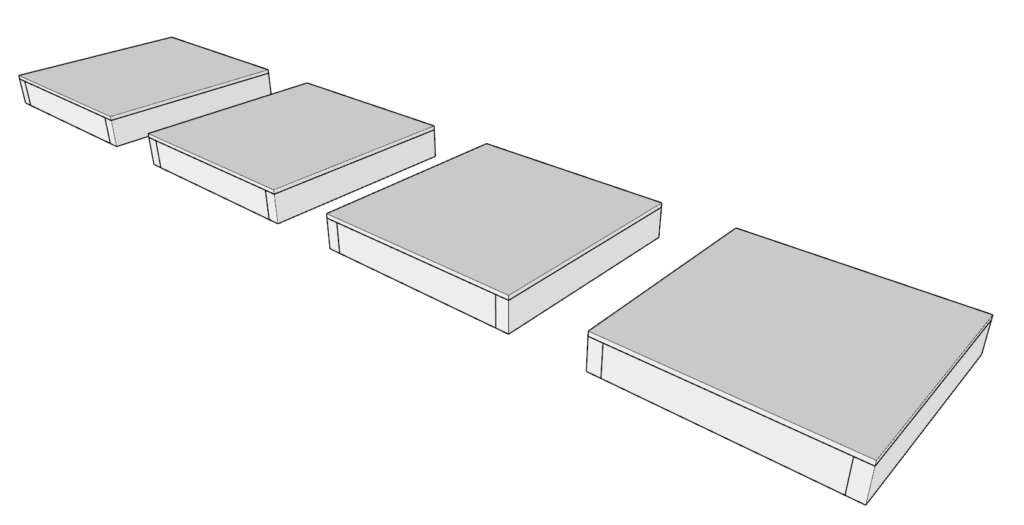
Replicate for Additional Units:
- Repeat the process to create a total of four small shelf units.
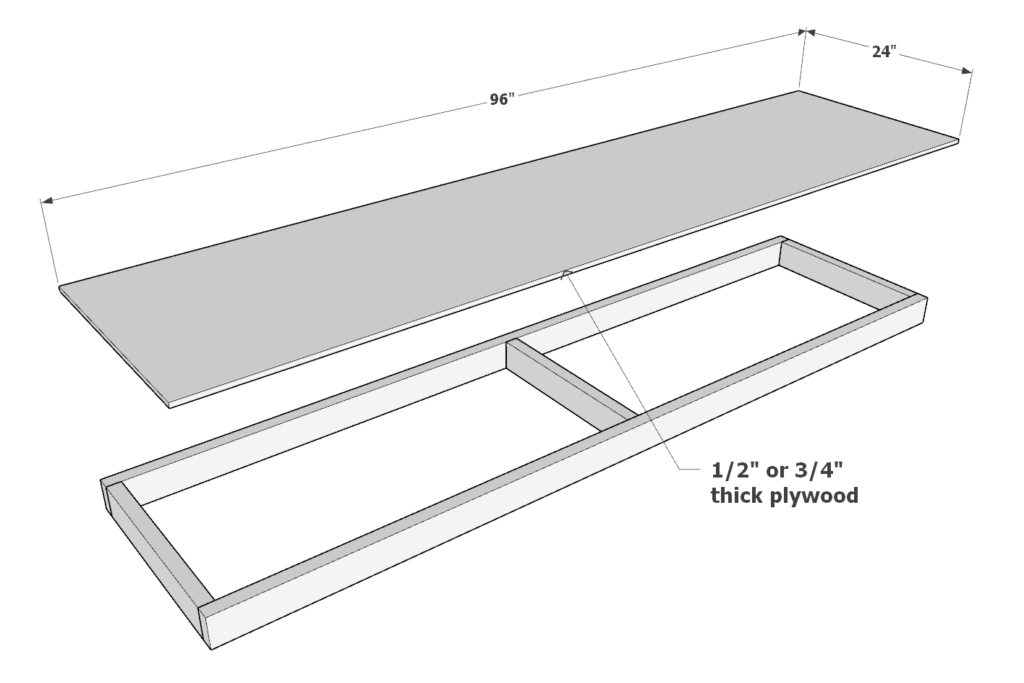
Step 3: Build the Top Shelf
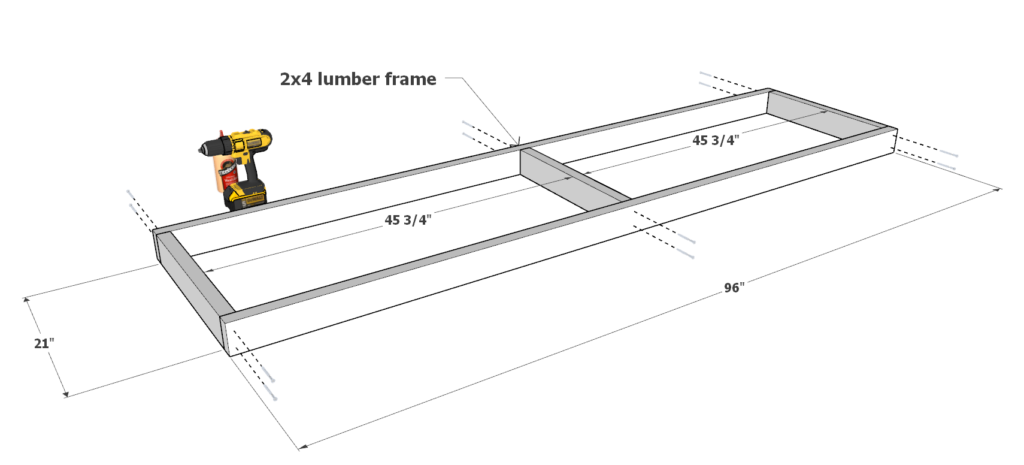
Frame Construction:
- Lay out two 96-inch 2x4s parallel to each other.
- Space out three 21-inch 2x4s along the length of the 96-inch pieces, according to the diagram provided.
- Attach each 21-inch piece with wood glue and 2.5-inch screws to the 96-inch boards.
Attach Plywood:
- Place the 24×96 inch plywood sheet atop the frame you’ve constructed.
- Secure it by applying wood glue along the top edges of the frame, then drilling and screwing down with 2.5-inch screws.
Step 4: Finalize the Extended Shelf Assembly
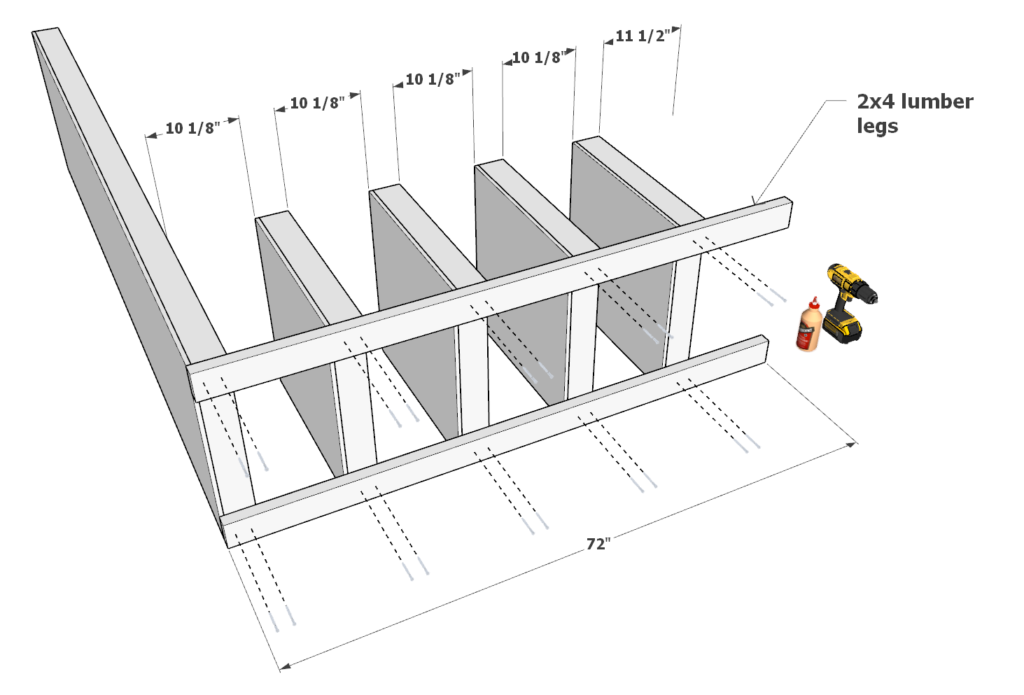
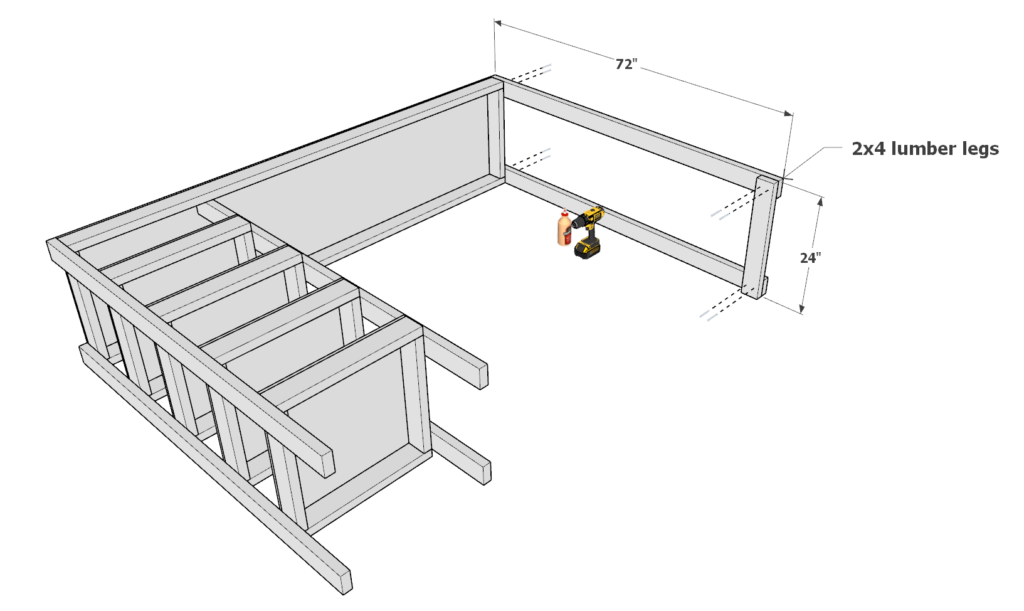
Lay Out the Large Shelf and Legs:
- Place the long 96-inch shelf flat on your work area.
- Align two 72-inch 2x4s perpendicular to each end of the 96-inch shelf, these will serve as the legs for the structure.
Secure Square Shelves to the Legs:
- Position the four square shelf pieces you previously constructed against the 72-inch legs, spacing them as desired for your storage needs.
- Attach each square shelf to the legs using wood glue and 2.5-inch screws, ensuring they are straight and evenly spaced.
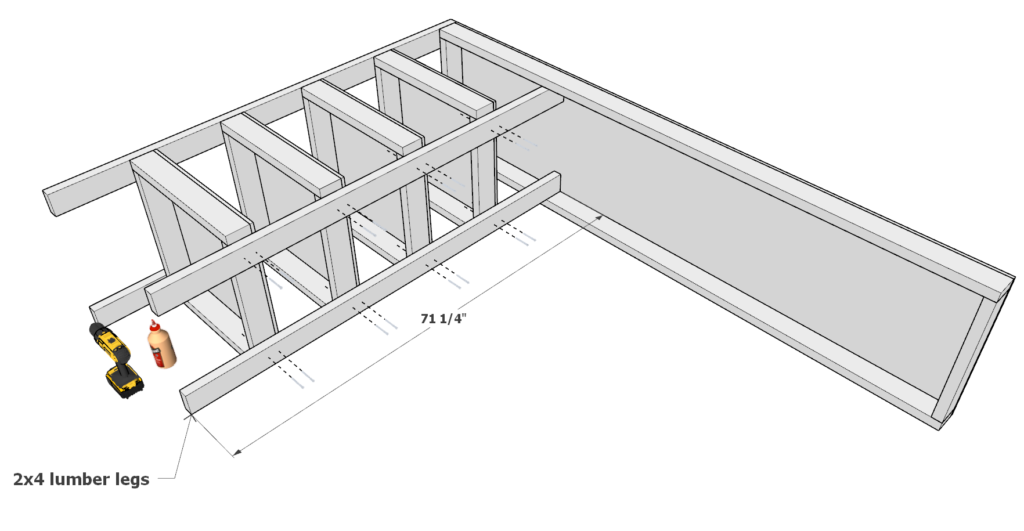
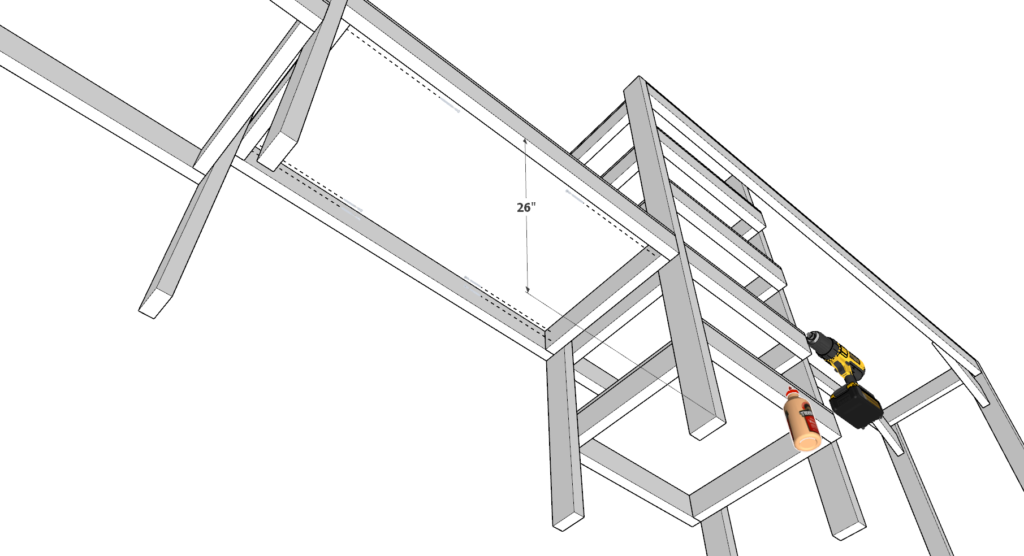
Add Horizontal Supports:
- Fasten two 71-1/4 inch 2x4s horizontally across the span of the square shelves for added support, securing them with wood glue and screws.
Install Additional Leg Supports:
- Affix two more 72-inch 2x4s to the end of the 96-inch shelf, creating a “U” shape with the legs.
- Connect a 24-inch 2×4 piece horizontally at the bottom of the “U” to complete the end support structure.
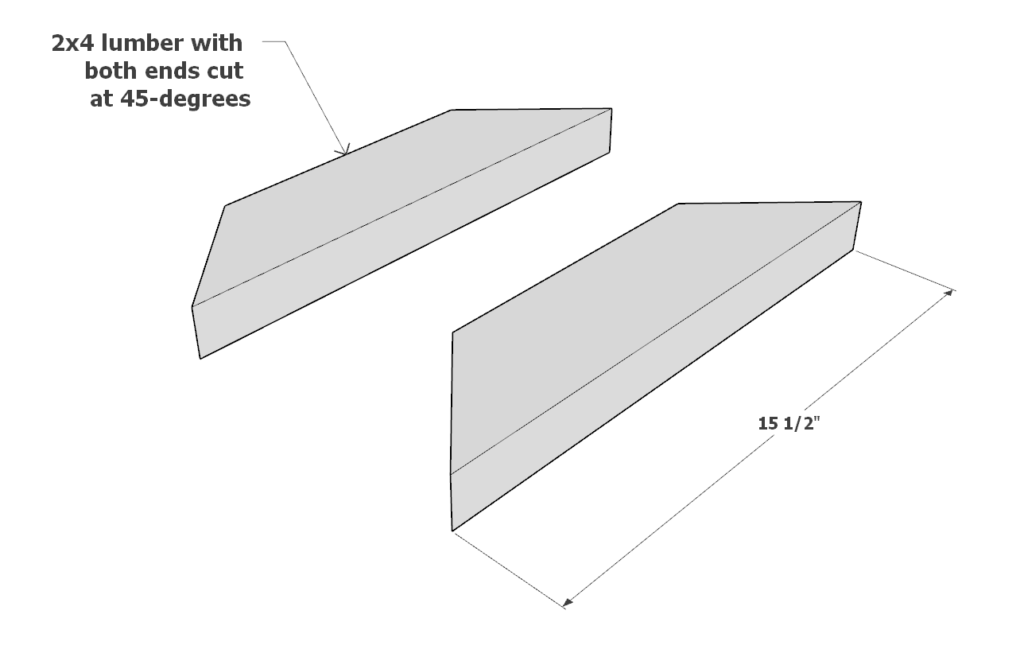
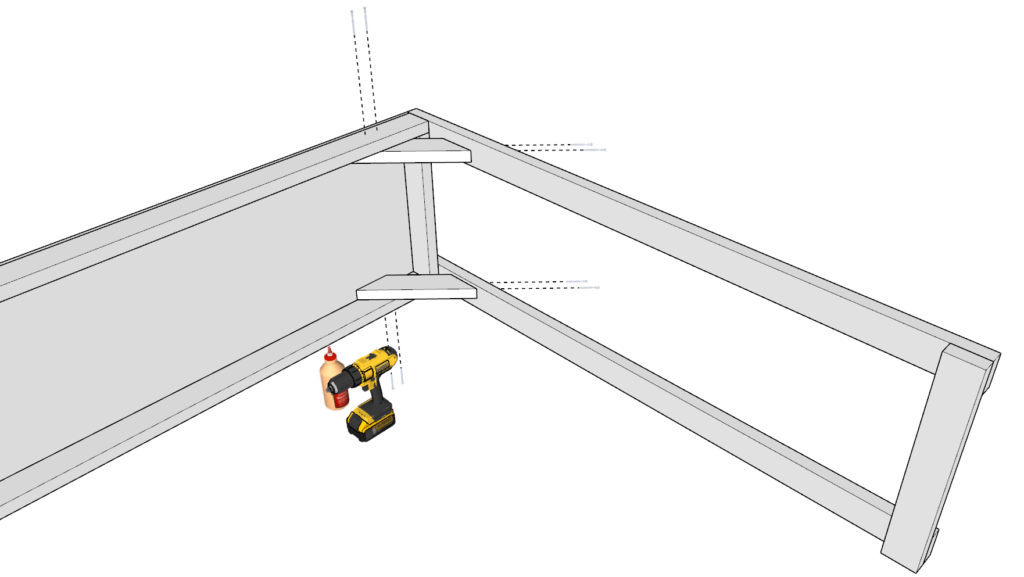
Cross Bracing:
- To ensure the structure’s stability, add two 15-1/2 inch 2x4s cut at 45-degrees on both ends between the legs and the main shelf frame as cross braces.
- Secure the braces with wood glue and screws at each contact point for a robust build.
Note: It’s important to keep all components level during assembly. The cross bracing is essential for stability, so ensure each brace fits snugly before securing. This step adds the necessary rigidity to your shelving unit, preparing it to safely hold your items.
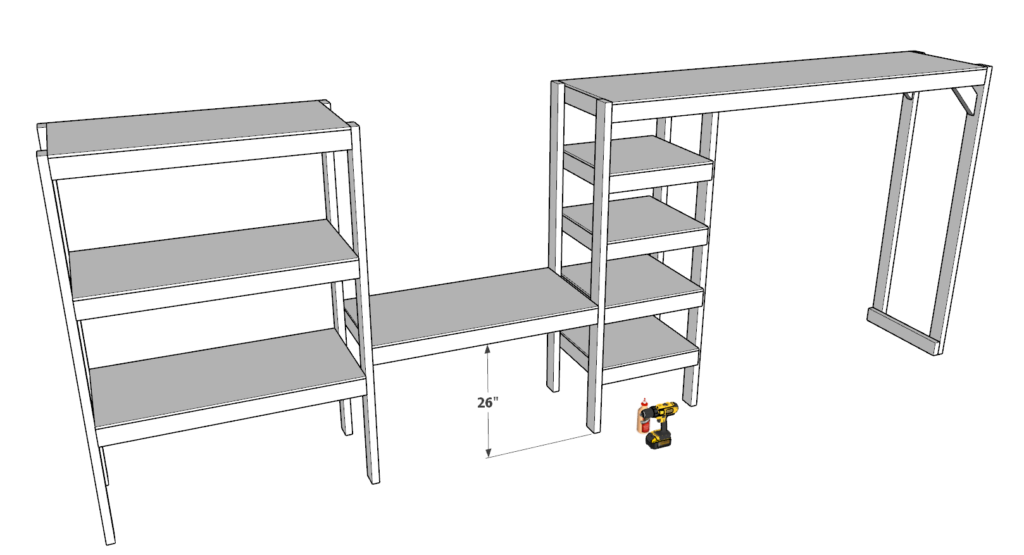
Step 5: Unify the Shelving Components
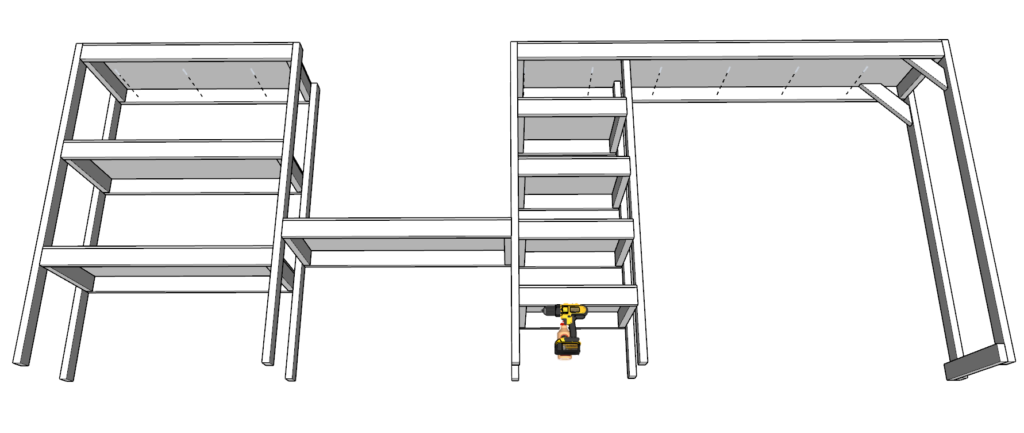
Arrange the Units:
- Place the shorter shelving unit, the desk, and the extended shelving/trash unit as laid out in the diagram.
Join the Units:
- Align the components so they are flush with each other where they will connect.
- Apply wood glue at the joining edges for a stronger bond.
- Secure the units together using 2.5-inch screws, ensuring each is tightly fastened.
Tip: Adjust the desk height to fit your ergonomic needs. Standard height is suitable for sitting, counter height for a mix of sitting and standing, and bar height if you prefer standing.
Step 6: Secure Shelves to the Wall
Materials Needed:
- Long screws (preferably 3.5 inches)
- Wall brackets or bracing (if there’s baseboard molding)
Locating Wall Studs:
Trial and Error:
- Gently knock across the wall; a solid sound typically indicates a stud.
- Pros: Doesn’t require special tools.
- Cons: Time-consuming and not always accurate.
Using a Stud Finder:
- Glide the stud finder across the wall to locate the edges of studs.
- Mark the edges and the center for the most secure attachment.
- Pros: Accurate and efficient.
- Cons: Requires purchasing a stud finder if you don’t already own one.
Attaching the Shelves:
Direct to Wall:
- If no baseboard is present, drill directly through the 2×4 pieces of the shelf into the studs using 3.5-inch screws.
- Ensure screws are long enough to penetrate through the shelf and deeply into the studs for a secure hold.
With Baseboard Molding:
- If baseboard is present, you will need to attach brackets or braces first.
- Secure brackets to the studs over the baseboard.
- Then attach the shelf to the brackets, ensuring the screws are long enough to hold the weight of the shelf and its contents.
Legal Disclaimer:
- GoodDIYplans provides guidance for your DIY projects but is not responsible for the installation process.
- It is crucial to use your judgment and follow safety guidelines to prevent accidents.
- We do not assume liability for shelves that are improperly installed or fail. Always double-check your work and make sure everything is secure before use.
Final Checks:
- After installation, gently pull on the shelves to test their stability.
- Do not place heavy items on the shelves until you are confident in the security of the installation.
- Regularly inspect the shelves for any signs of weakness or loosening screws.
Step 7: Finishing and Loading the Shelves
Preparation for Painting or Staining:
Sanding:
- Begin with sanding the wood to remove any splinters and to create a smooth surface.
- Start with a coarser grit sandpaper and finish with a finer grit for a polished look.
Cleaning:
- After sanding, wipe down the shelves with a tack cloth or a damp rag to remove all dust.
Applying Primer (for painting):
- If painting, apply a quality wood primer to ensure even paint coverage and to improve paint adhesion.
Staining the Shelves:
Choosing Your Stain:
- Select a wood stain in your desired color and finish (oil-based stains penetrate deeper but take longer to dry than water-based stains).
Application:
- Use a natural bristle brush or a clean rag to apply the stain.
- Follow the grain of the wood, and apply the stain evenly.
- Allow the stain to penetrate the wood for a few minutes, then wipe off excess with a clean rag.
Painting the Shelves:
Choosing Your Paint:
- Choose a paint formulated for wood and suitable for the intended use of the shelves (e.g., heavy-duty paint for garage shelves).
Application:
- Apply paint with a brush or roller in even, thin coats.
- Allow sufficient drying time between coats, as recommended by the paint manufacturer.
Pros and Cons of Staining vs. Painting:
Staining:
- Pros: Enhances natural wood grain, requires less prep work, and generally needs fewer coats.
- Cons: Offers less protection than paint, may require reapplication sooner.
Painting:
- Pros: Provides a wide range of color options, offers better protection against wear and tear, and hides imperfections in the wood.
- Cons: Can be more labor-intensive to apply properly, requires more thorough surface preparation.
Loading the Shelves:
Weight Distribution:
- Start by placing the heaviest items on the bottom shelves. This lowers the center of gravity, making the shelving unit more stable.
- Distribute weight evenly across the shelves to prevent warping or undue stress on any one area.
Organization:
- Organize items in a way that places frequently used items at a convenient height.
- Consider grouping items by category (e.g., automotive supplies, gardening tools) to make things easy to find.
Accessibility:
- Ensure that all items are easily accessible. Avoid stacking items in a way that
makes it difficult to remove them without shifting other items.
- Leave enough space between levels for easy access to taller items.
- Safety Considerations:
- Do not overload the shelves.
- Secure loose items that may roll or shift, potentially causing instability or falling hazards.
- For items stored higher up, use a sturdy step stool or ladder to place and retrieve them safely.
Maintenance:
- Regularly check the shelves for signs of wear, such as chipping paint or fading stain, and touch up as needed to maintain protection and appearance.
- Periodically inspect the structural integrity, ensuring screws remain tight and wood has not split or warped.