Introduction
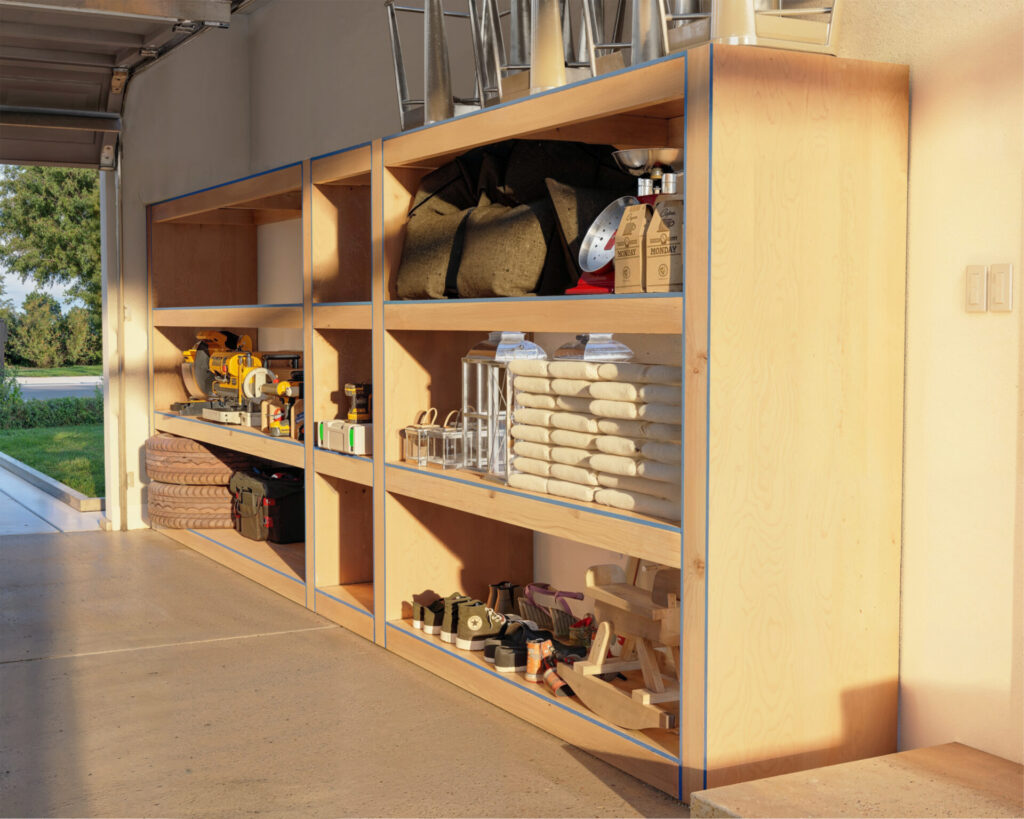
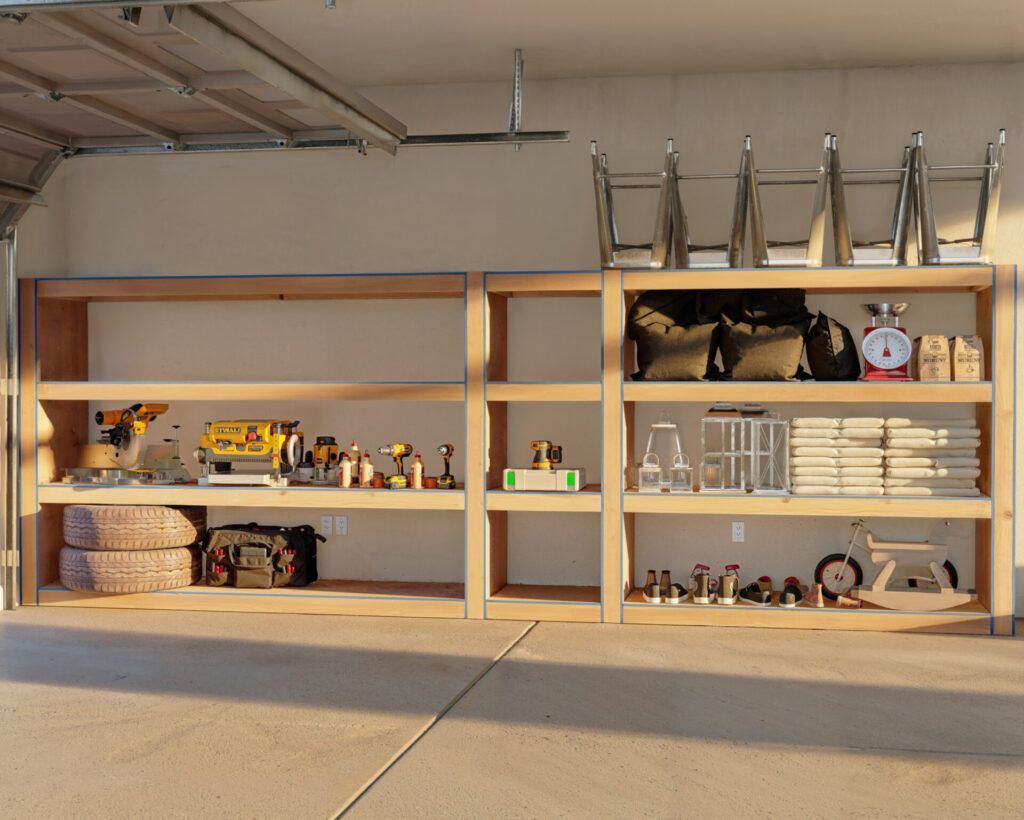
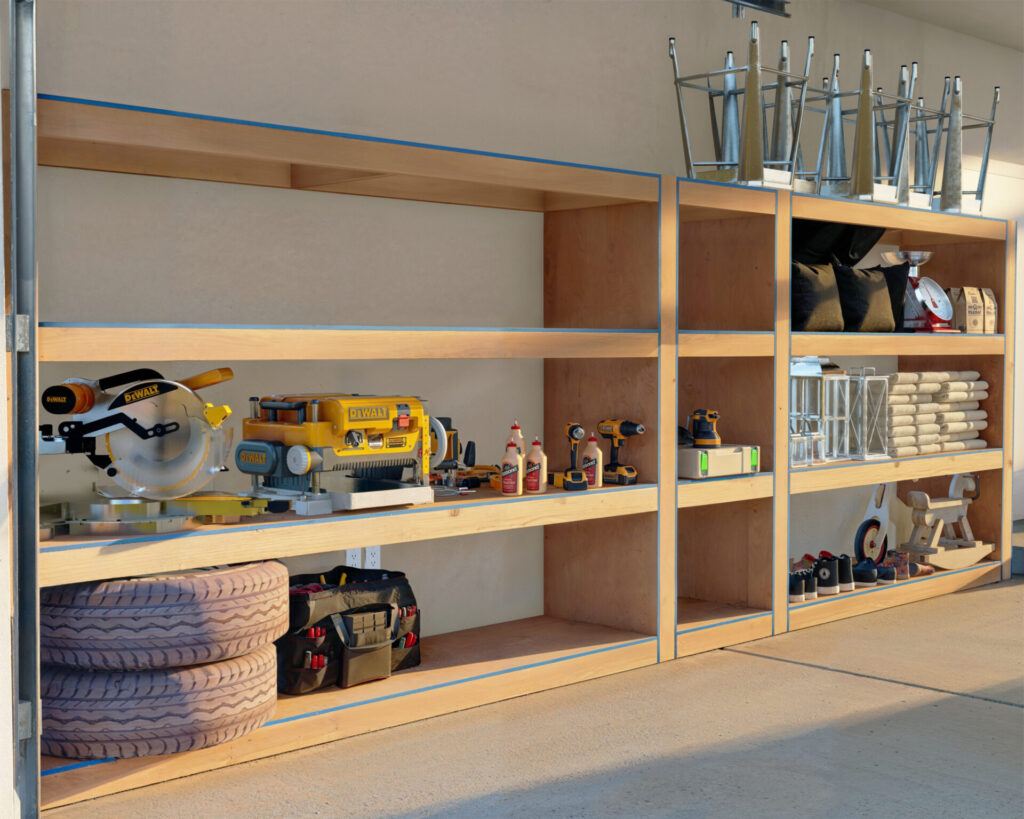
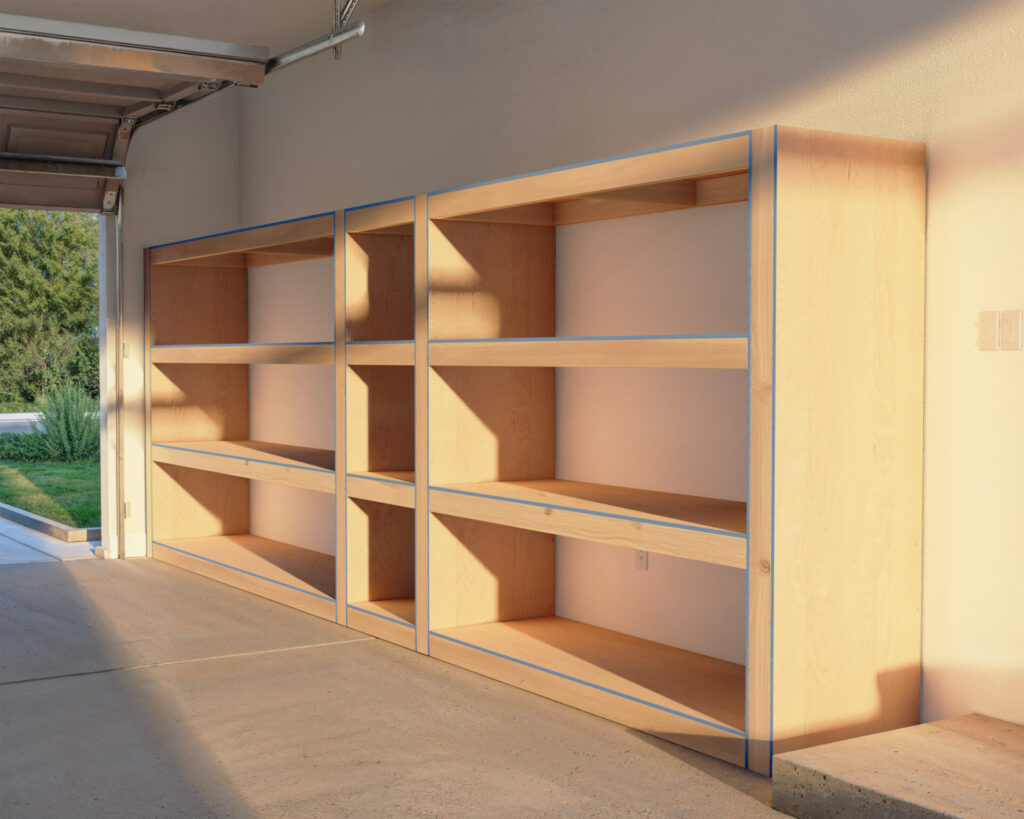
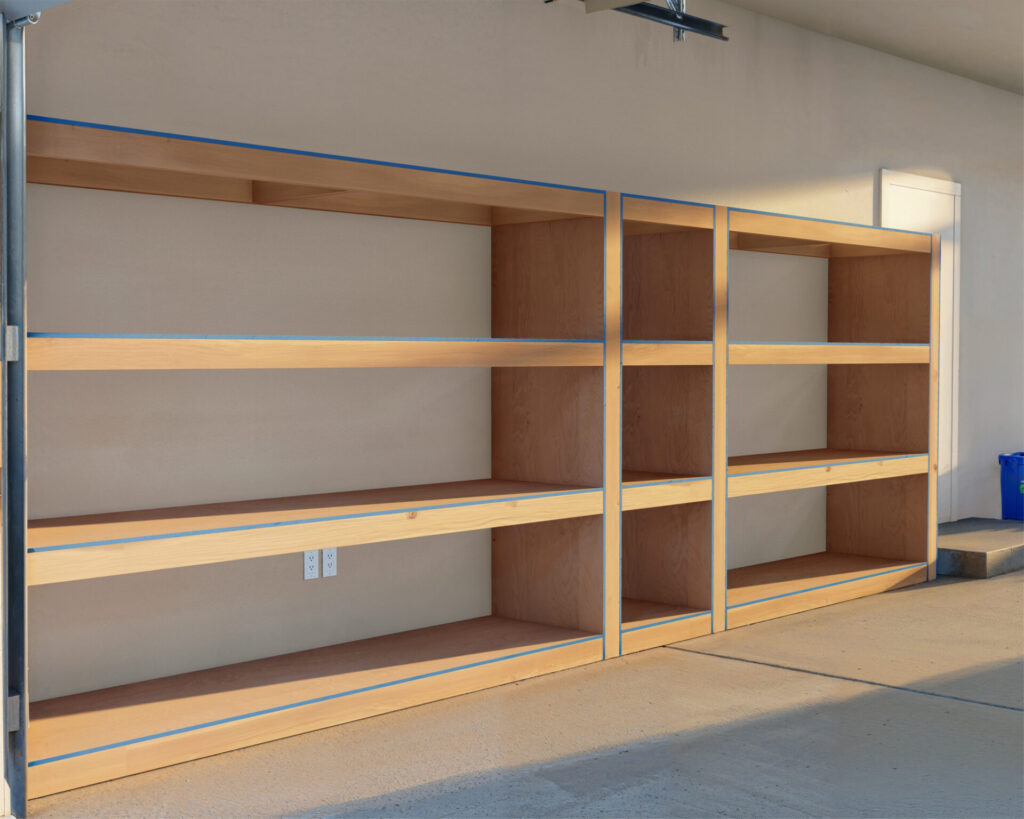
Transform your garage into a masterpiece of organization and style with our expertly designed DIY garage shelf plans. Picture your space not as it is, but as it could be: a beacon of efficiency, where every tool and treasure has a home, and every project starts with inspiration. This plan isn’t just a set of instructions; it’s a pathway to reinventing your space with a touch of elegance and the pride of self-accomplishment. Embrace the art of organization with a solution that speaks to both form and function—crafted by you.
Specifications
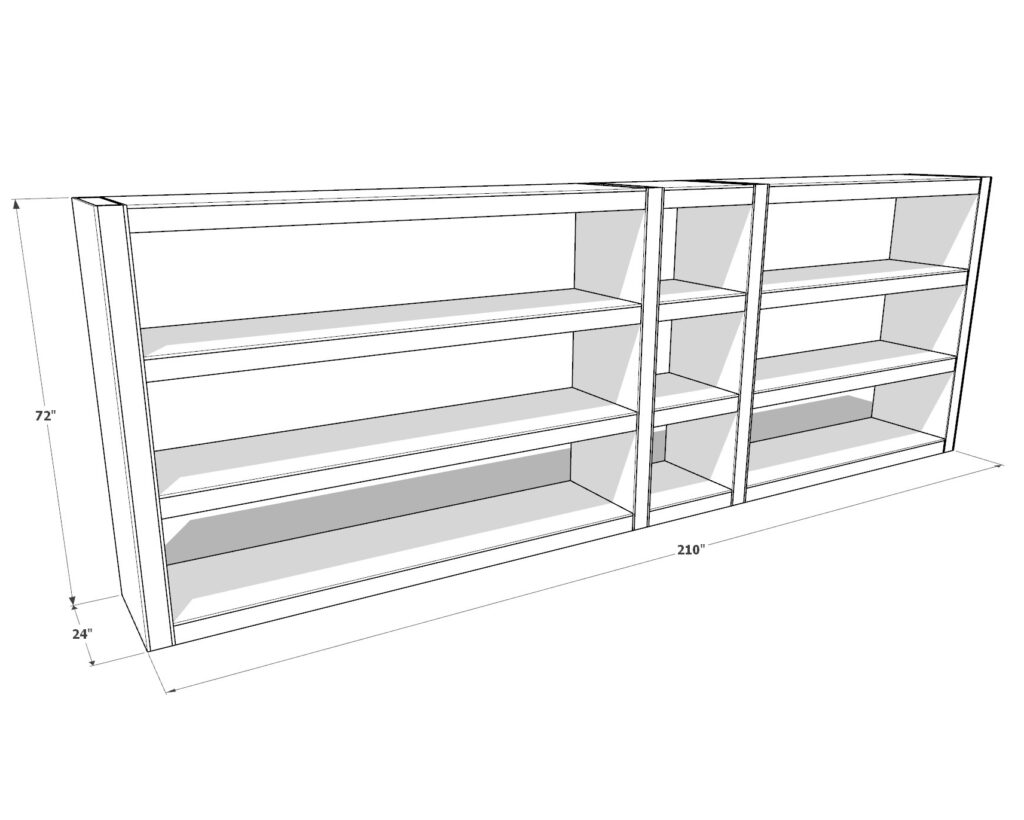
Our shelving plan is a blueprint for optimizing your space, extending 210 inches wide and soaring to 72 inches tall, to capitalize on every available inch. We’ve engineered a structure from robust 2×4 lumber and reliable 1/2″ plywood that’s capable of supporting a diverse array of items. Whether it’s heavy-duty power tools or essential bulk goods, our design ensures that your space remains orderly and accessible.
Simplicity
We believe in the power of doing it yourself, and our plans reflect that ethos. Created with clarity and ease-of-use at the forefront, they empower even those new to the craft to achieve professional-grade results. Through straightforward cuts and simple assembly, you will create a storage solution that’s both sturdy and stylish—without the need for a professional contractor.
Customization
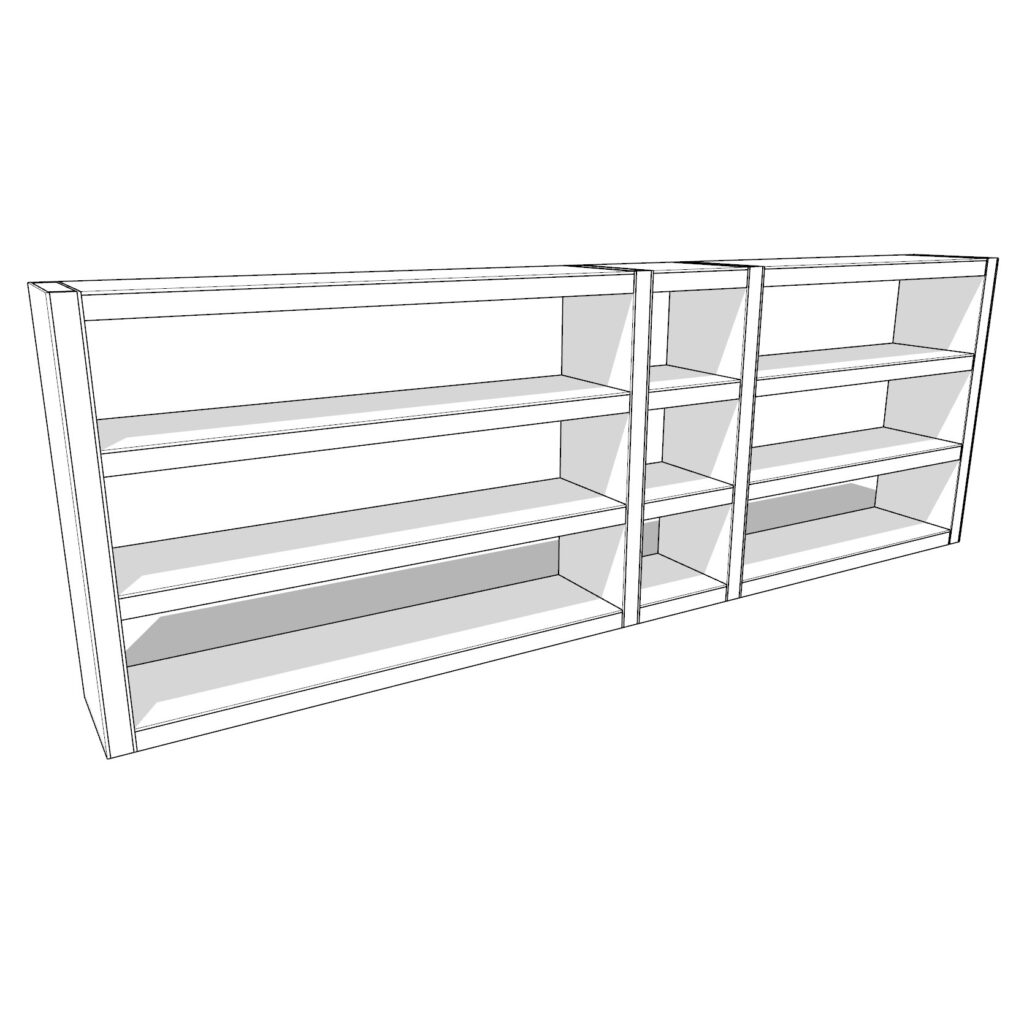
Our plans provide the canvas, but your vision brings it to life. With adjustable shelving and thoughtful design, your garage can evolve to meet your changing needs. The three distinct storage areas, each with full casing, offer both security and versatility, so that you can store, protect, and organize your belongings exactly as you see fit.
Conclusion
Step towards a cleaner, more organized garage today with our comprehensive DIY plans. Complete with a detailed list of materials, tools, and step-by-step instructions, these plans are your guide to crafting not just shelves, but a transformed space. This is where functionality meets aesthetics, where your garage becomes more than just a storage area—it becomes a testament to your skill and vision. Elevate your home DIY projects with our garage shelf plans—where your tools are stored in style, and your car fits perfectly in its spot.
Time
(varies with experience)
Cost
$400 (Costs may vary based on location and supplier.)
Skill level required
Beginner
DIY Garage Shelf PDF Plan
What is included in the PDF download?
- Easy to read step by step instructions
- Material list
- Tools needed
- Helpful links to materials and tools needed
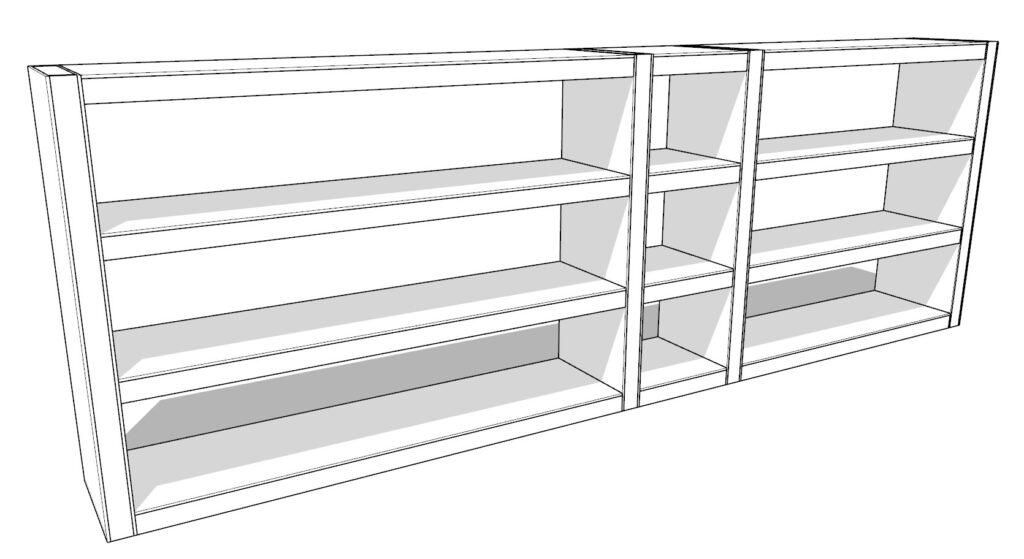
DIY Garage Shelf Dimensions
Tools Needed for This Project:
Available with the purchase of the DIY plan PDF.
Lumber Shopping & Cut List
Available with the purchase of the DIY plan PDF.
Step 1: Assembling the Shelf Support Structure
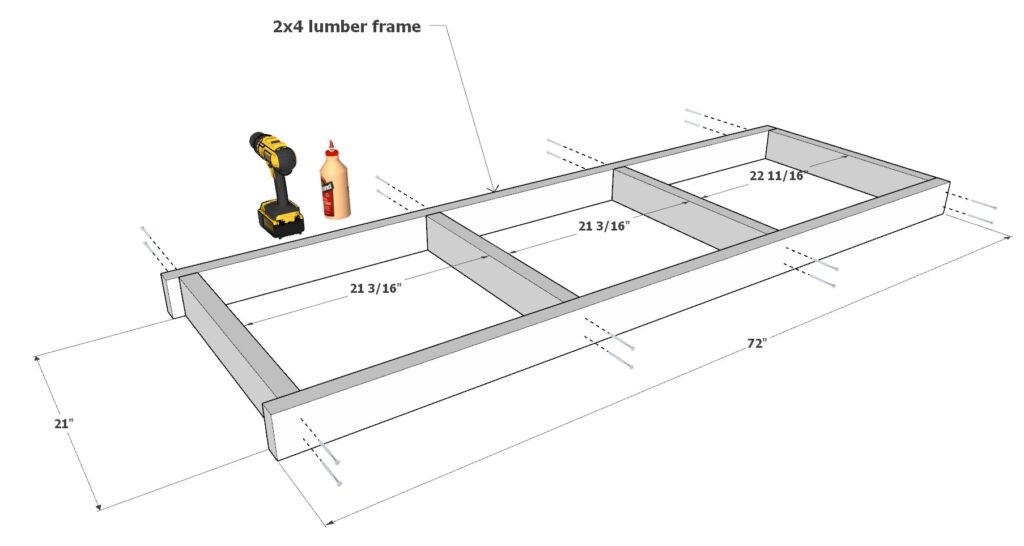
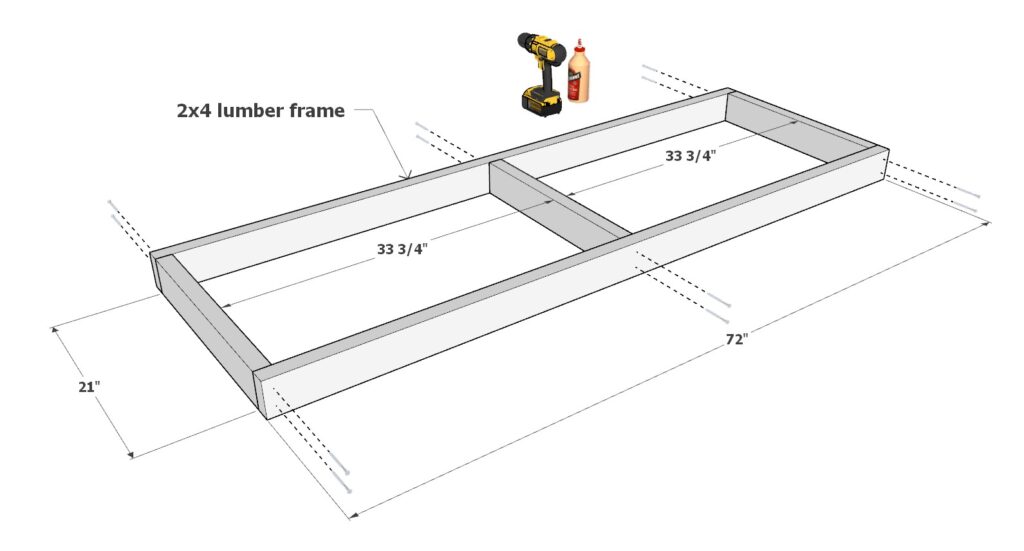
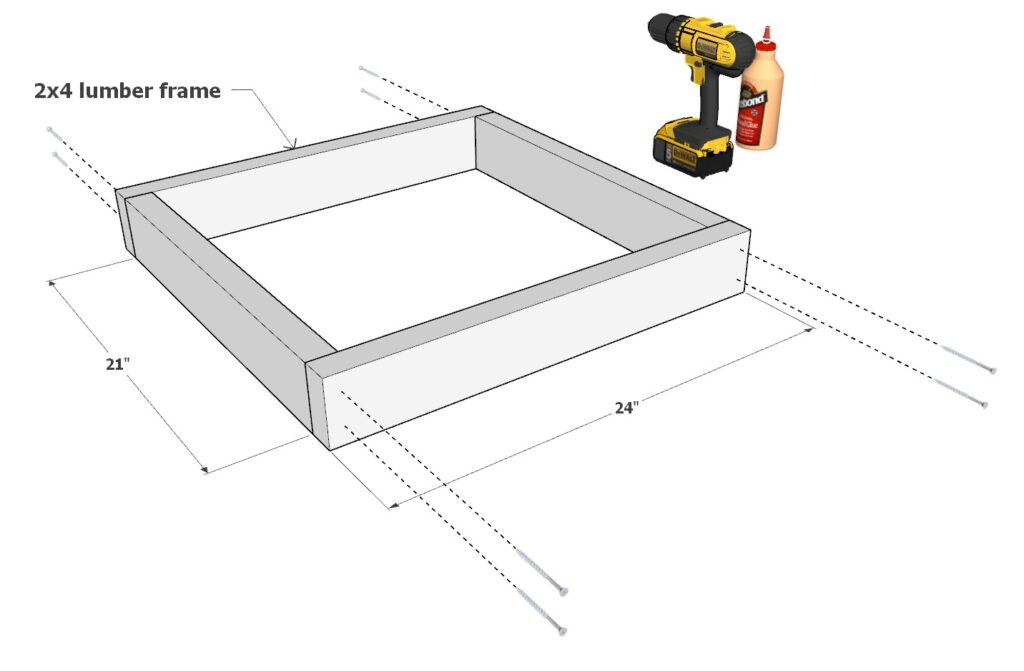
Lay Out the Frame: Begin by arranging two 72-inch 2x4s parallel to each other on your work surface. Position four 21-inch 2x4s as shown in the diagram.
Secure the Joints: Apply wood glue on the ends of the 21-inch 2x4s. Align them with the 72-inch 2x4s and secure each joint with 3.5-inch screws. Ensure each screw is flush with the lumber’s surface.
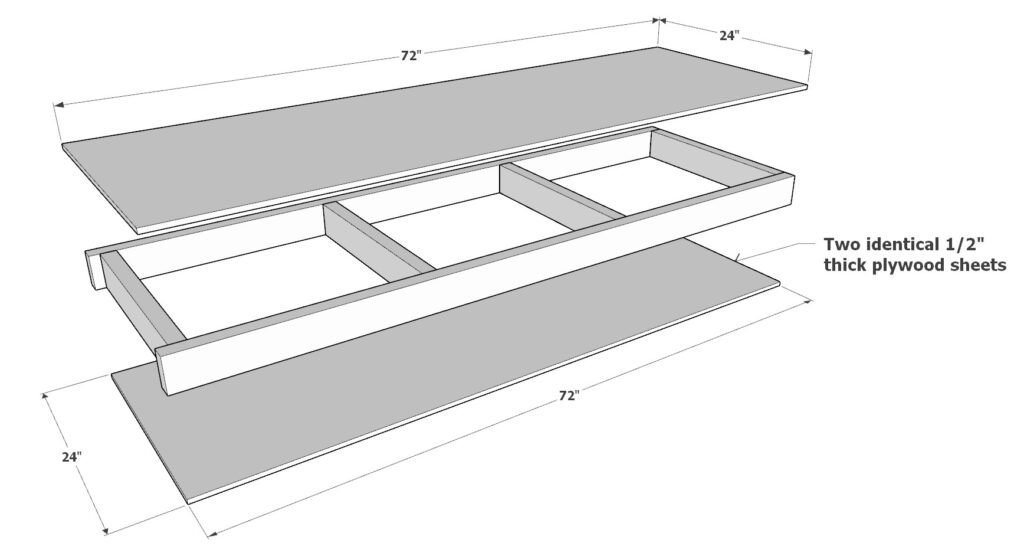
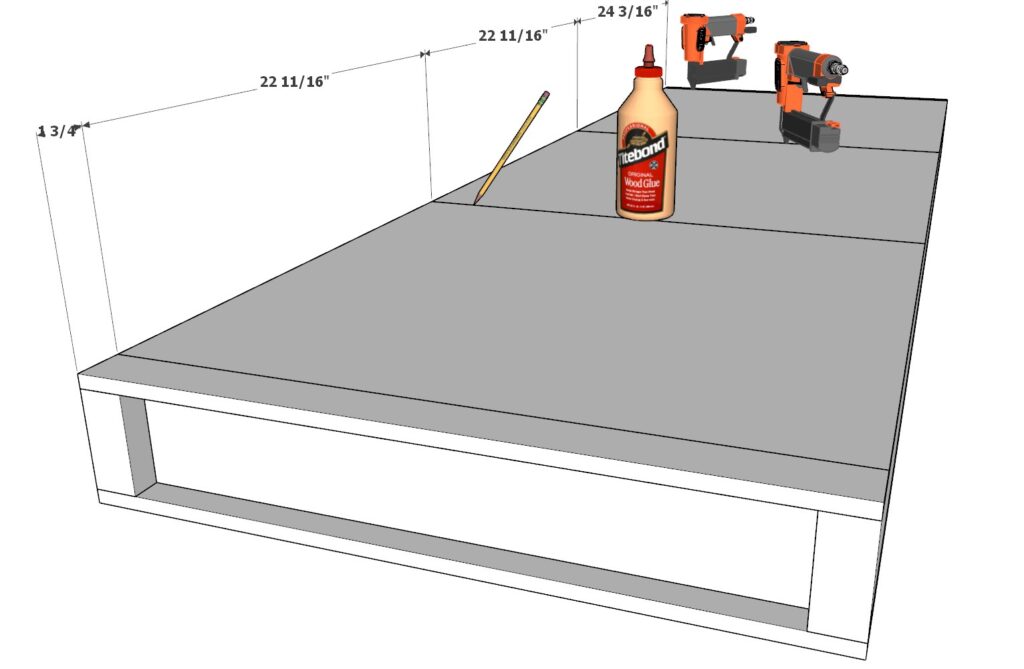
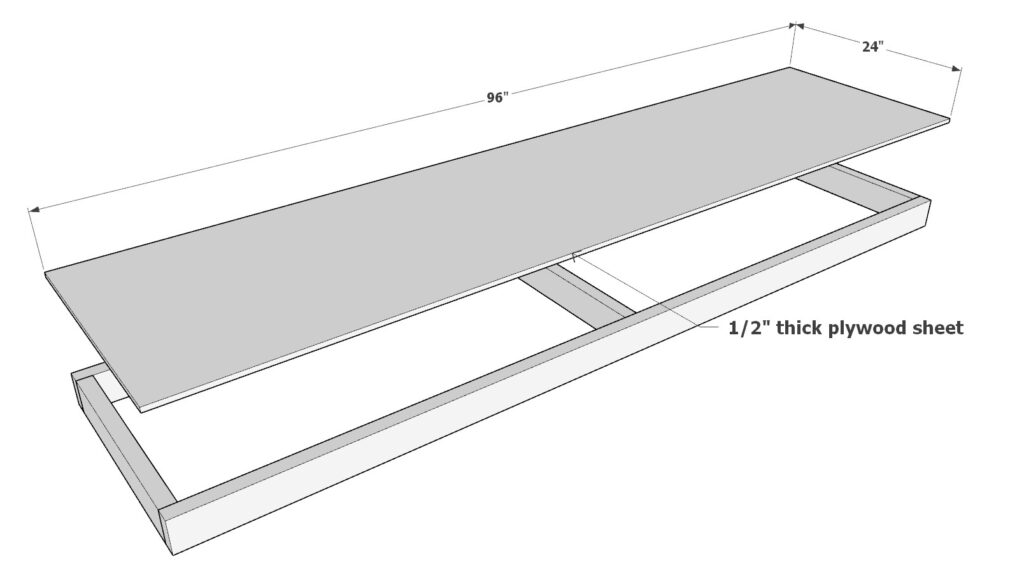
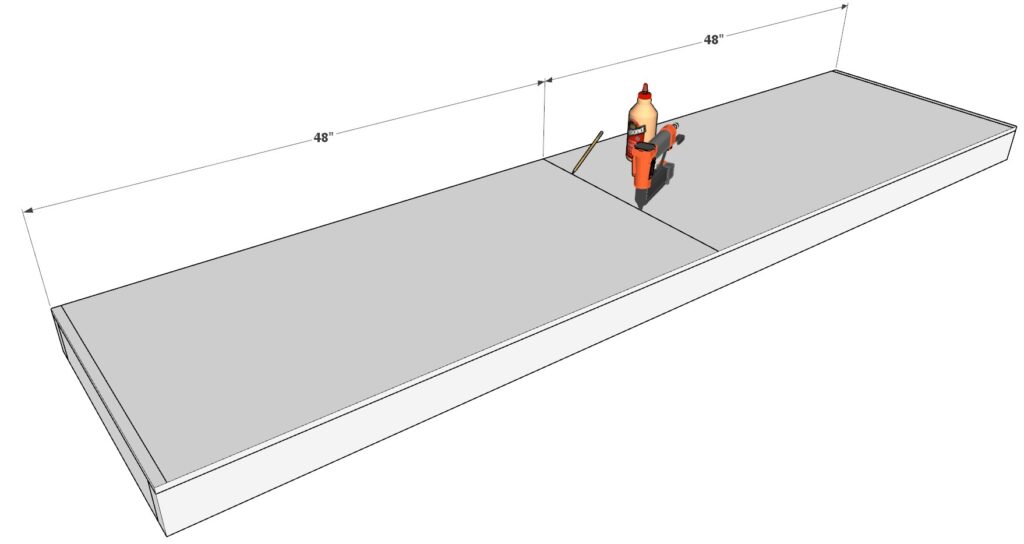
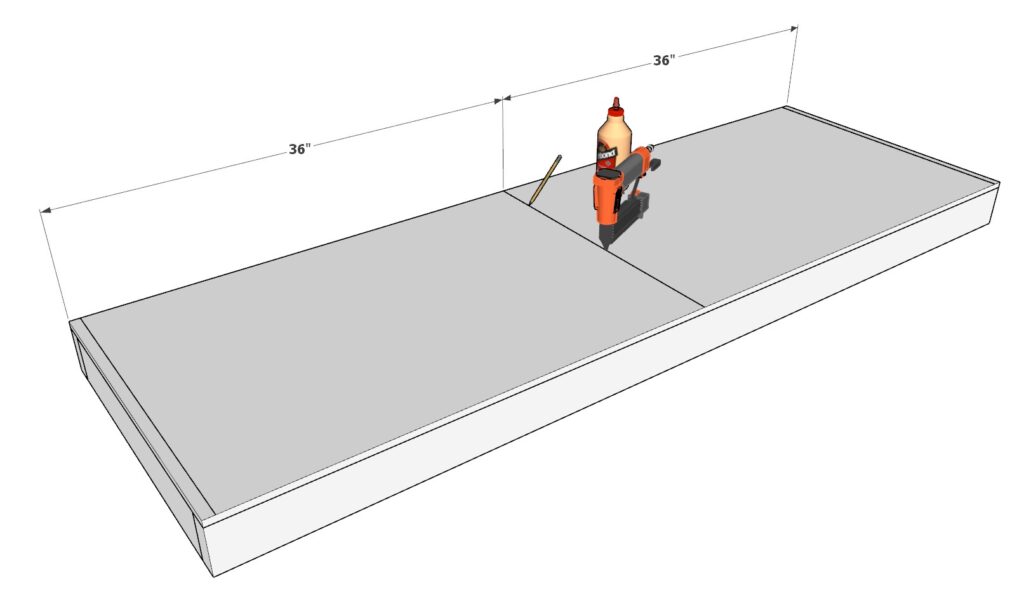
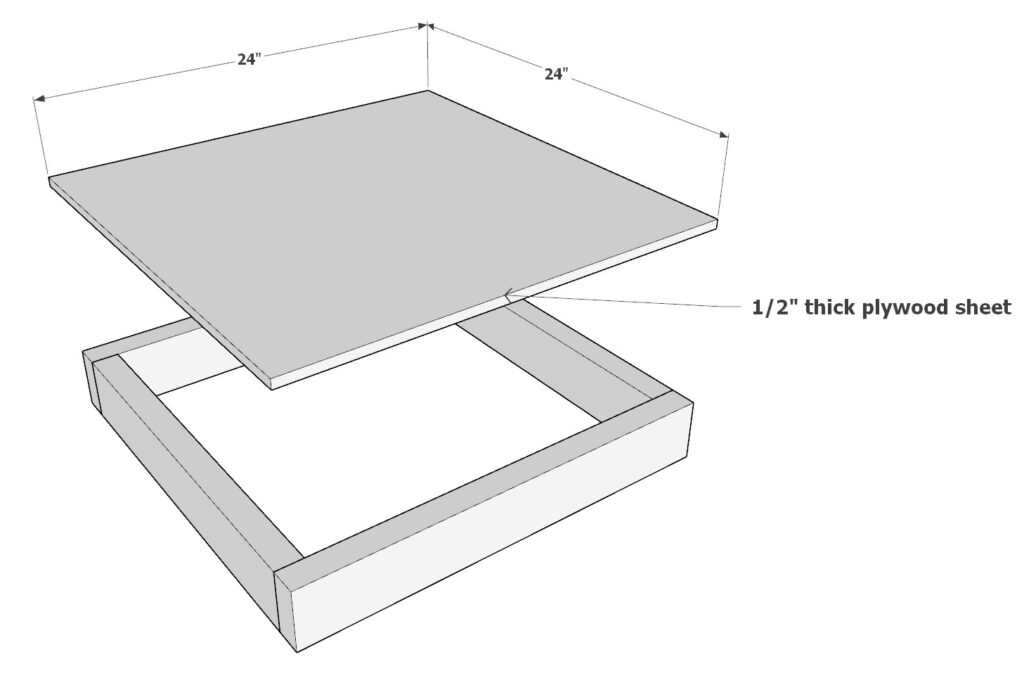
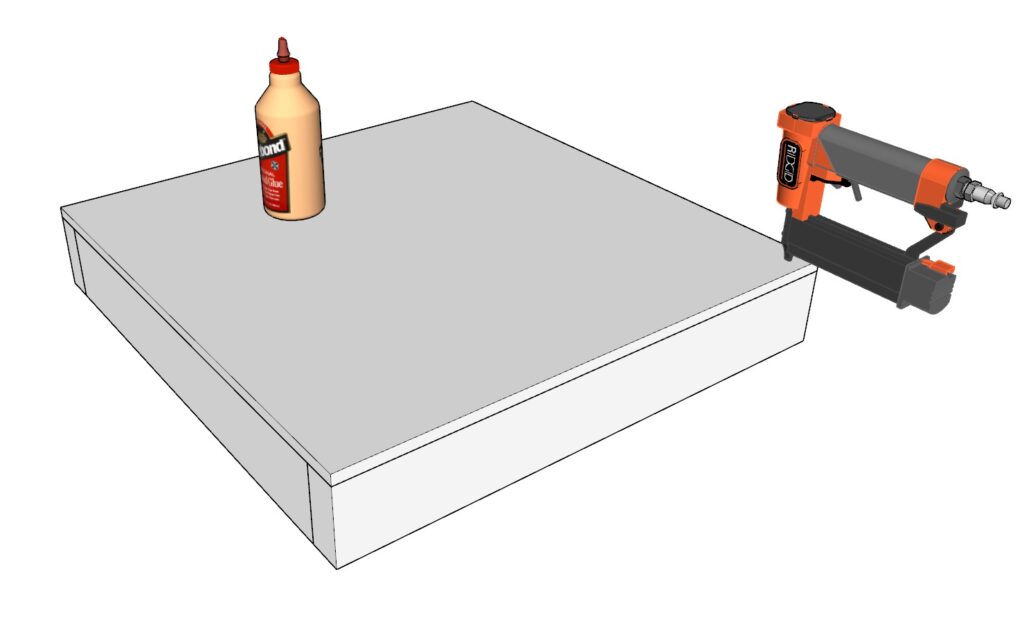
Attach the Plywood: Place the two 72×24 inch plywood sheets atop the frame you just assembled. For precise nail placement, draw lines on the plywood to indicate the frame underneath. Secure the plywood with wood glue and 1.5-inch nails using a pin nailer.
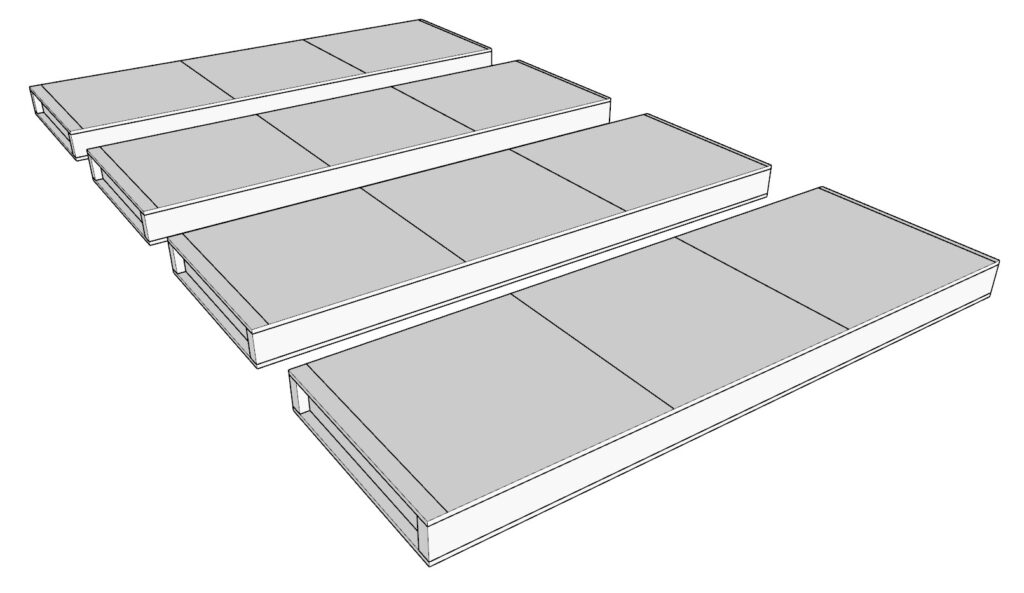
Repeat for Consistency: Construct three more identical vertical components using the same steps to ensure consistency across all units.
Handy Tips:
- Pre-drill screw holes to avoid splitting the wood.
- Sand all edges for a smooth finish before assembly.
- Use clamps to keep components steady while assembling.
Step 2: Crafting the Shelf Units of Varying Sizes
Construct the Long Shelf Unit: Begin by aligning two 96-inch 2x4s as the horizontal supports with three 21-inch 2x4s placed vertically between them, according to the diagram. Affix these together using wood glue and 3.5-inch screws. Then, secure a 96×24 inch plywood sheet on top with wood glue and 1.5-inch pin nails. Repeat to create a total of four long shelf units.
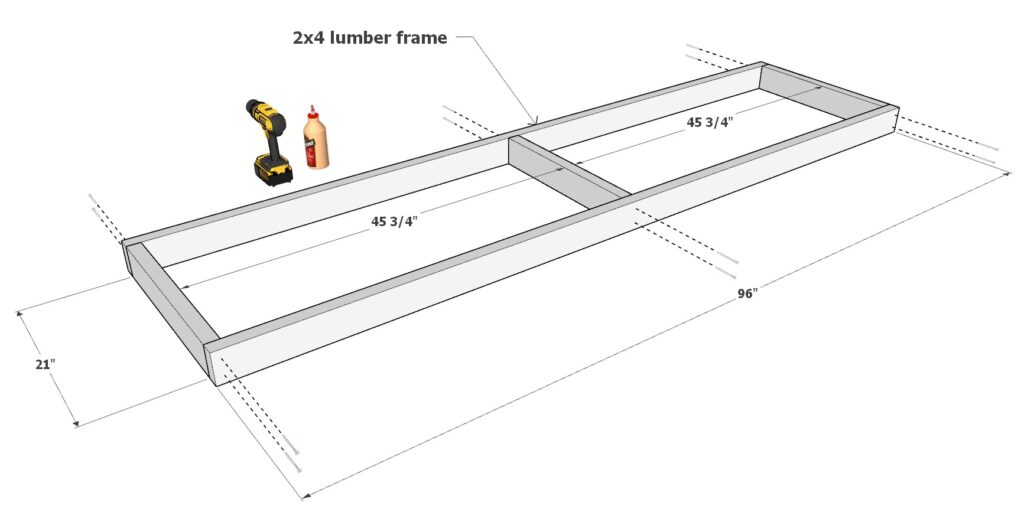
Assemble the Medium Shelf Unit: Arrange two 72-inch 2x4s parallel to each other and space out three 21-inch 2x4s between them as shown. Connect these with wood glue and 3.5-inch screws. Attach a 72×24 inch plywood sheet to the frame using wood glue and 1.5-inch pin nails. Construct four of these medium shelf units in total.
Build the Small Shelf Unit: Place two 24-inch 2x4s parallel and fit two 21-inch 2x4s perpendicularly between them, following the layout in the diagram. Combine them using wood glue and 3.5-inch screws. Add a 24×24 inch plywood piece on top with wood glue and 1.5-inch pin nails. Ensure you make four identical small shelf units.
Pro Tip:
- For a stronger bond and a cleaner finish, pre-drill all screw holes with a countersink drill bit before driving in the screws.
- Keep all screws flush with the wood’s surface to maintain a sleek appearance and to enhance the structural integrity of the shelf units.


Step 3: Assembling and Installing the Shelves
Join the Long Shelf Components: Start by positioning two vertical frame components on the floor. Place the 96-inch long shelf units between them as illustrated in the diagram. Ensure the shelf units are spaced correctly so that the screws will penetrate the 2×4 beneath the plywood, creating a robust shelf. Once aligned, secure them with wood glue and 3.5-inch screws.
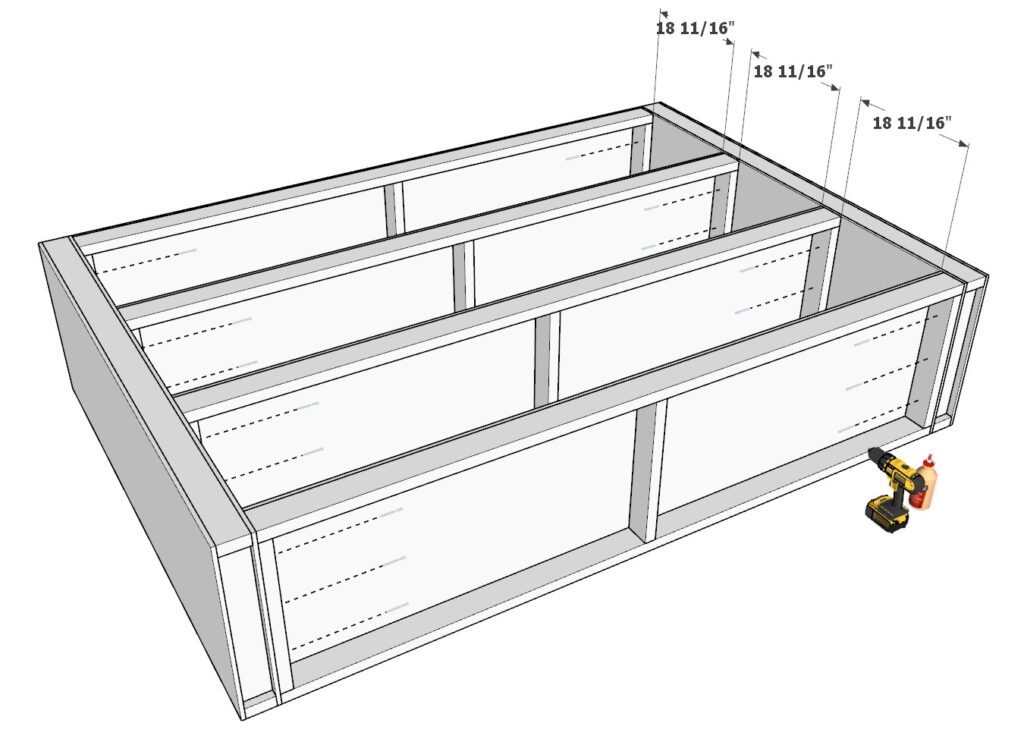
Assemble the Medium Shelf Components: Follow the same process for the 72-inch shelf components, ensuring they are spaced and secured properly to the vertical frames.
Erect and Position the Shelves: With the long and medium shelf units assembled, stand them up and move them into their designated spots in your garage.
Connect with the Shortest Shelf Units: Lastly, take the four 24-inch shelf units and use them to bridge the gap between the long and medium shelf sections. Adhere to the spacing guidelines to ensure consistent and secure placement. Affix these with wood glue and screws as you did with the previous units.
Pro Tip:
- Double-check that each screw is driven in straight and that the heads are flush with the wood to prevent any irregularities on the surface.
- Before securing the shelves, confirm that everything is level and square to avoid any wobbling or instability.


Step 4: Securing and Finishing the Garage Shelf
Attaching the Shelf to the Wall Without Baseboard:
- Locate the Studs: Use a stud finder to locate the studs in your garage wall where you will attach the shelf.
- Position the L Brackets: Place L brackets at the top of the shelf where the studs are located. Three brackets should suffice: one at each end and one in the middle.
- Secure the Shelf: Pre-drill holes through the L bracket holes into the studs to avoid splitting the wood. Then, fasten the L brackets to the wall studs using appropriate-length screws that penetrate the studs at least 1 inch.
Attaching the Shelf with a Baseboard Present:
- Extend the Brackets: If a baseboard is present, you’ll need to extend the L brackets out to accommodate the thickness of the baseboard. Use spacers equal to the thickness of the baseboard to create a flush surface for the L brackets to lie against.
- Install Extended Brackets: Secure the spacers to the wall first, ensuring they are anchored into the studs. Then, attach the L brackets to these spacers, aligning them with the shelf and using screws long enough to reach through the spacers into the studs.
Preparing, Painting, and Staining:
- Sanding: Before painting or staining, sand the entire shelf smoothly, paying special attention to the edges and corners.
- Cleaning: Wipe down the shelf with a tack cloth to remove all dust.
- Applying Primer (If Painting): If you’re painting the shelf, apply a primer suitable for the wood type and let it dry according to the manufacturer’s instructions.
- Painting: Apply your chosen paint with a brush or roller in even strokes. Let the first coat dry completely before applying a second coat if necessary.
- Staining: If staining, apply the stain with a brush or rag in the direction of the wood grain. Wipe off excess stain and allow it to dry. Apply a second coat if you desire a darker color.
- Sealing: Whether painted or stained, apply a clear sealer to protect the wood from moisture and wear. Allow adequate drying time as suggested by the sealer’s instructions.
Pro Tip:
- Safety First: Always wear protective gear, such as safety glasses and gloves, when drilling or sanding.
- For a professional finish, consider using a paint sprayer for even paint application or apply multiple thin coats of stain for a controlled finish.
- Ensure the shelf is completely dry and cured before loading it with items.