DIY dining table overview:
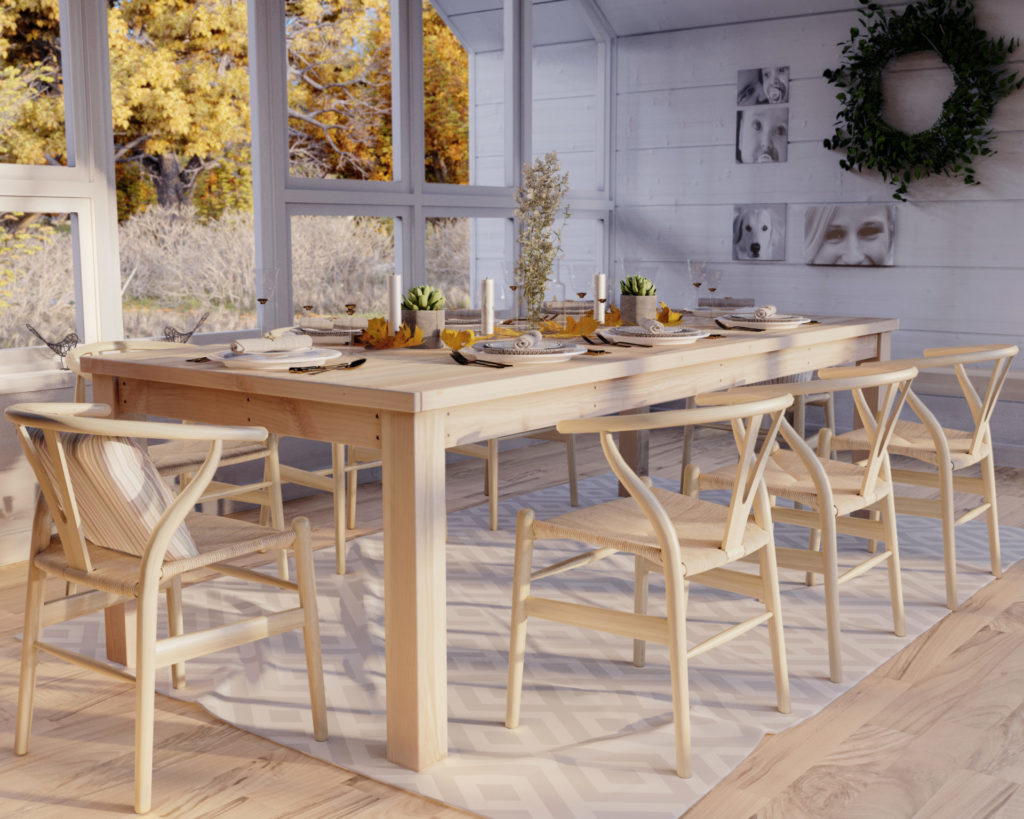
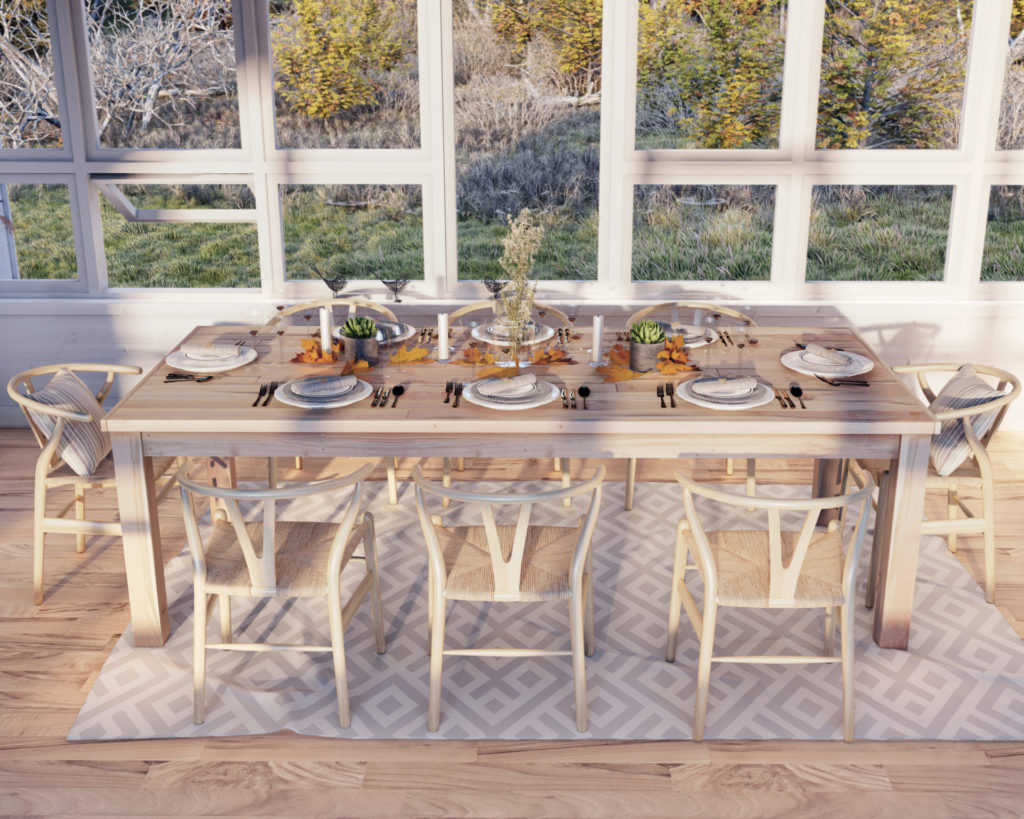
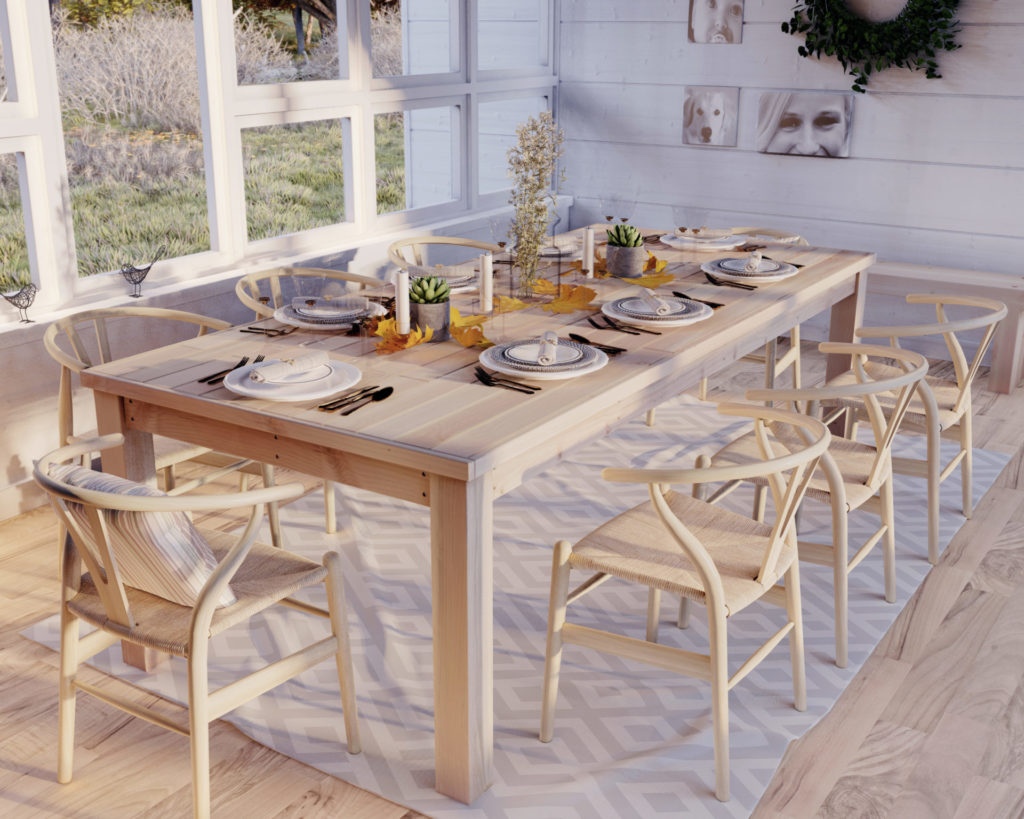
A beautiful and sturdy indoor DIY table is the perfect place to host your Thanksgiving feast. As the weather cools and the leaves begin to change color, many of us start to think about the upcoming holidays. Thanksgiving is a time when family and friends gather together to enjoy a delicious meal and catch up on what’s been going on in each other’s lives. With a little bit of planning and some elbow grease, you can build a DIY wooden indoor table that will be the centerpiece of your holiday gathering.
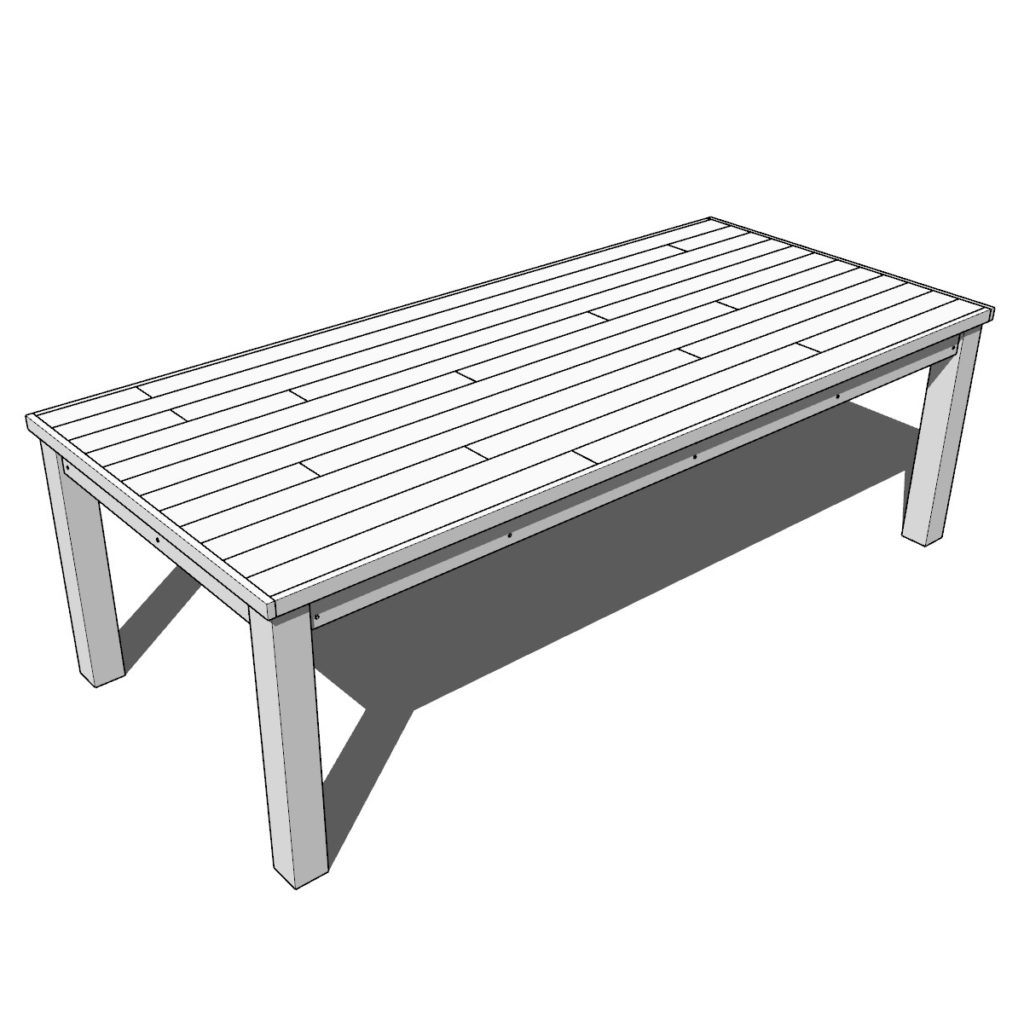
DIY indoor table details:
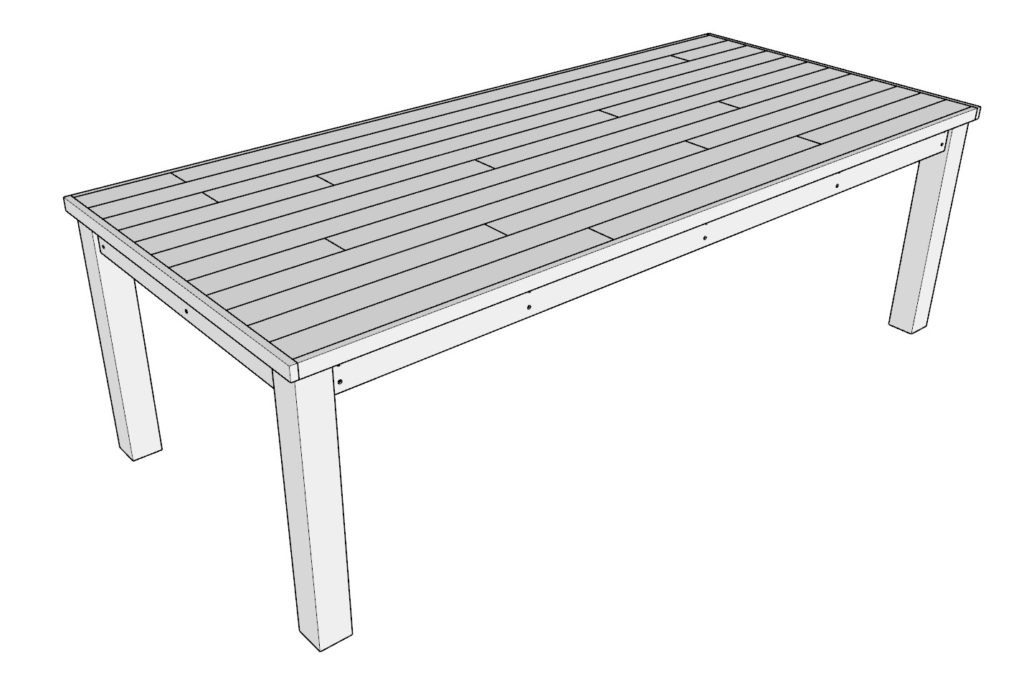
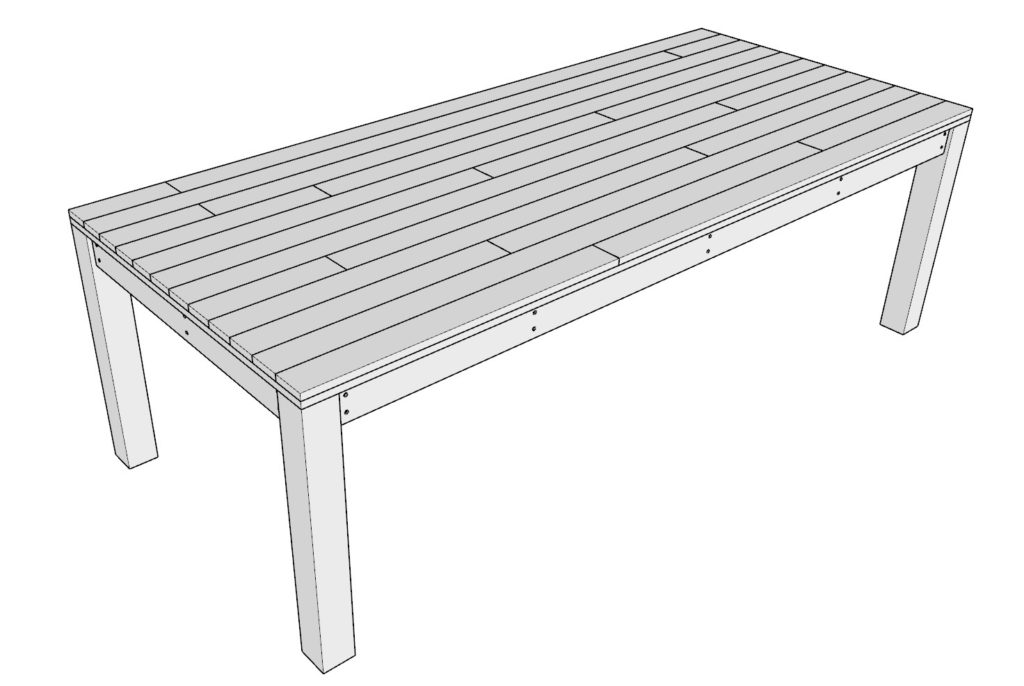
This table features a sturdy 2×4 frame that joins to four 4×4 legs. The butcher block design tabletop is made from 1×4 lumber cuts that are attached to a ¾” plywood sheet with a 1×2 lumber decorative trim.
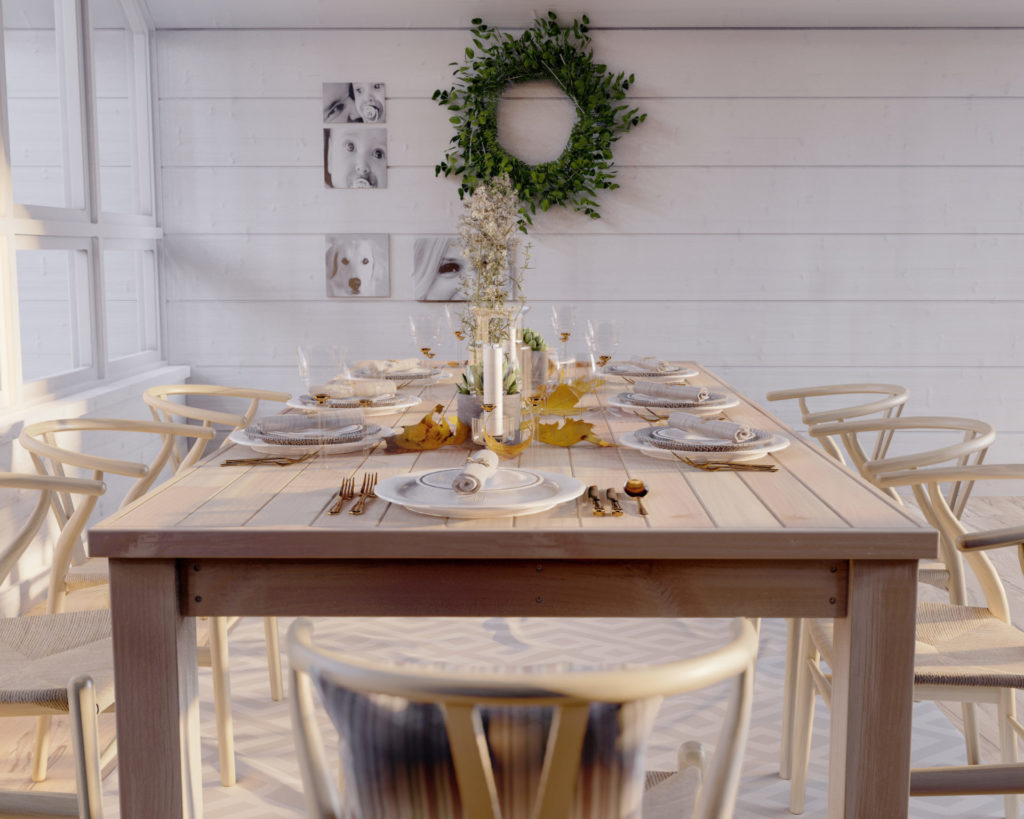
The table has a rustic charm that makes it a perfect addition to any country-themed kitchen or dining room. The table can easily be dressed up for the holidays and family get together.
How easy is it to build this table?
If you are a beginner when it comes to woodworking, you may feel overwhelmed trying to build a DIY table on your own. Building a home table can be a fun and rewarding project, but it’s important to have a plan before you start. This project is beginner-friendly, and my step-by-step instructions will help you save time, money, and frustration. The building process can be made simple and easy. I’m not using any advanced woodworking techniques or creating complicated designs, so you can feel confident tackling this project on your own.
Time to build
5 hours
Total cost of build
$300
Skill level required
Beginner
Download the PDF plans
Dining table aPDF plans
What is included in the PDF download?
- Easy to read step by step instructions
- Material list
- Cut list
- Tools needed
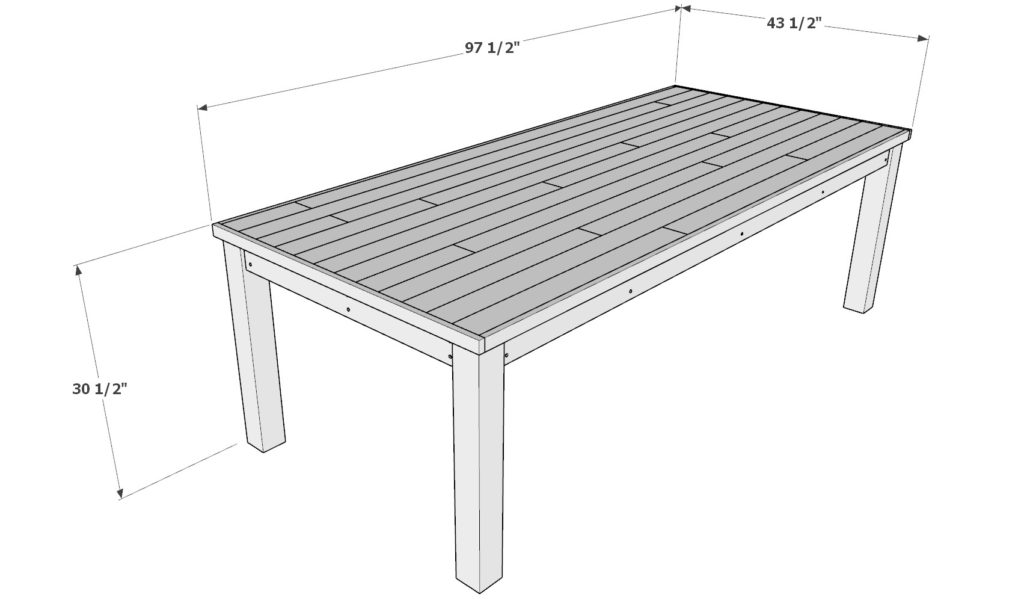
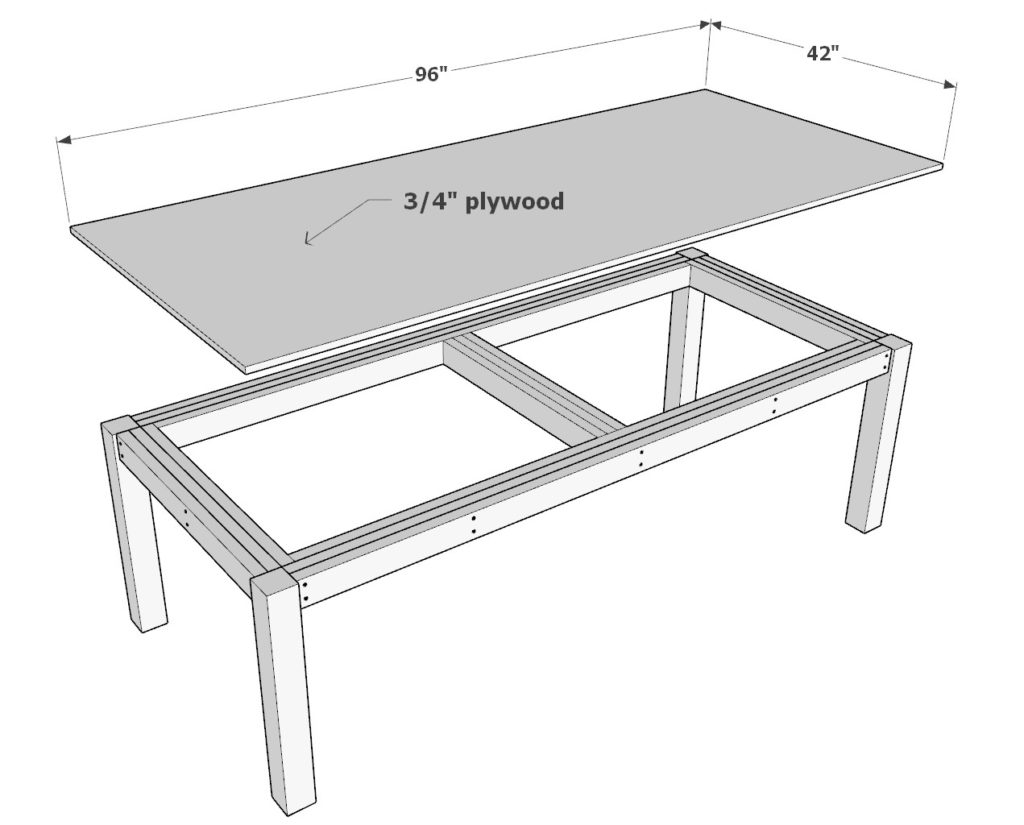
DIY dinging table dimensions
Recommend tools
- Saw (miter saw recommended for precision cuts)
- Drill
- Impact driver with bit for screws
- Sander
- wood countersink drill bit
- Ratchet straps (at least 2 sets)
- Small pack of 1.25 inch nails
- Small nail gun
- 5 lb of 3.5 inch screws
- 1/2 lb 2.5 inch screws
Cut list and material list
Need a total of (10) 2x4x8s, (3) 1x2x8s, (12) 1x4x8s, and (2) 4x4x8s. These will be cut into the dimensions listed in the following bullets.
You will also need one 8×4 full size plywood sheet that is ¾ inch thick.
2×4 lumber cuts:
(4) 2in x 4in x 89in
(6) 2in x 4in x 35in
(2) 2in x 4in x 86in
(3) 2in x 4in x 32in
1×4 lumber cuts:
(12) 1in x 4in x random length
1×2 lumber cuts:
(2) 2in x 4in x 96in
(2) 2in x 4in x 43-1/2in
4×4 lumber cuts:
(4) 4in x 4in x 29in
¾ inch plywood sheet:
(1) 96in x 42in
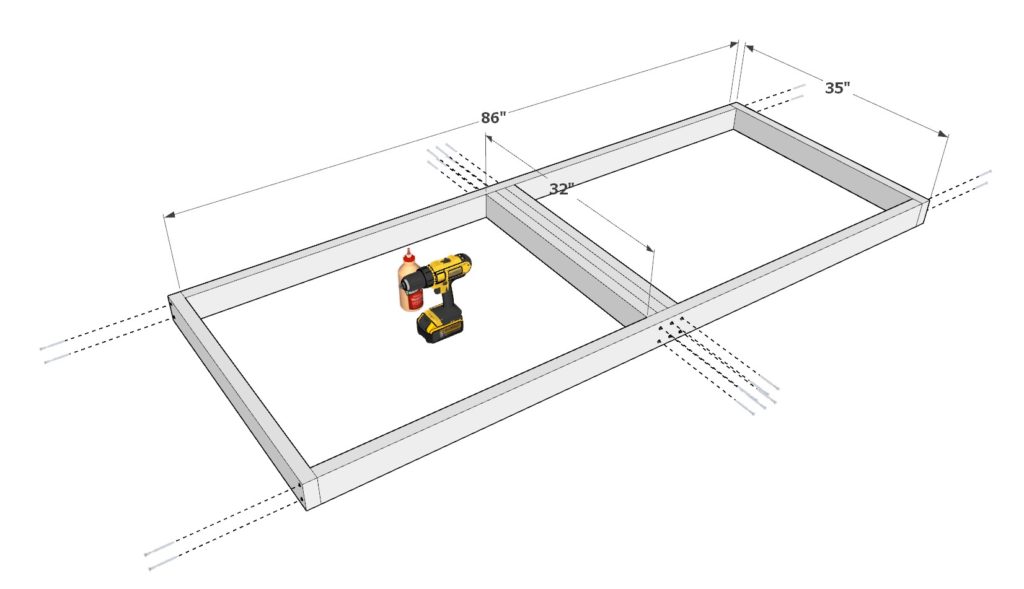
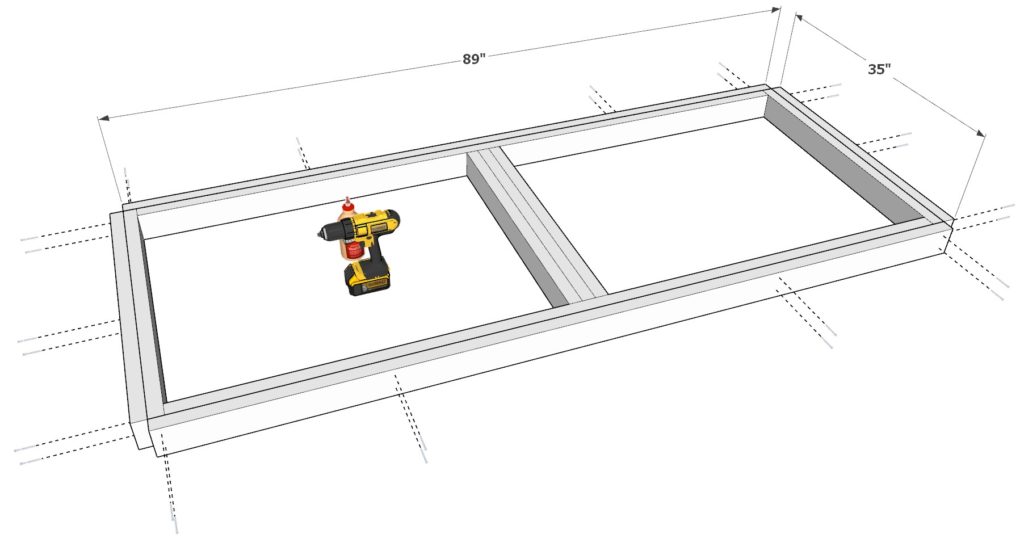
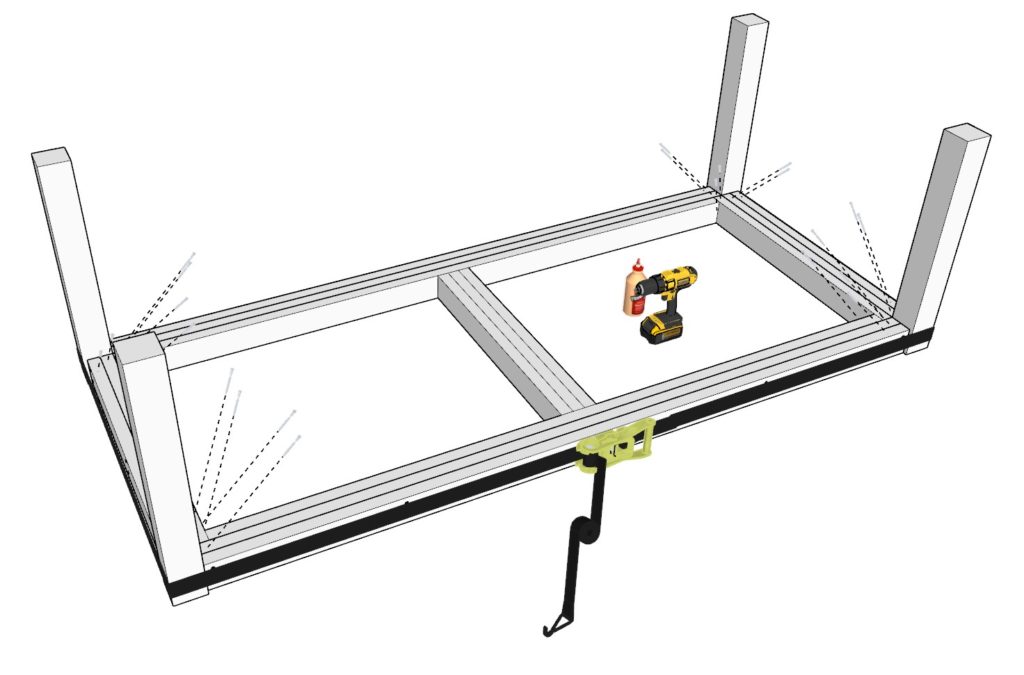
Step 1 (DIY Dining table frame construction)
First, build the table frame.
Start by taking two 86 inch 2×4 lumber pieces, two 35 inch 2×4 lumber pieces, and three 32 inch 2×4 lumber and arranging them as shown below.
join the pieces together using 3.5 inch screws. Add glue to all areas that will be making contact when joined, predrill, and add screws.
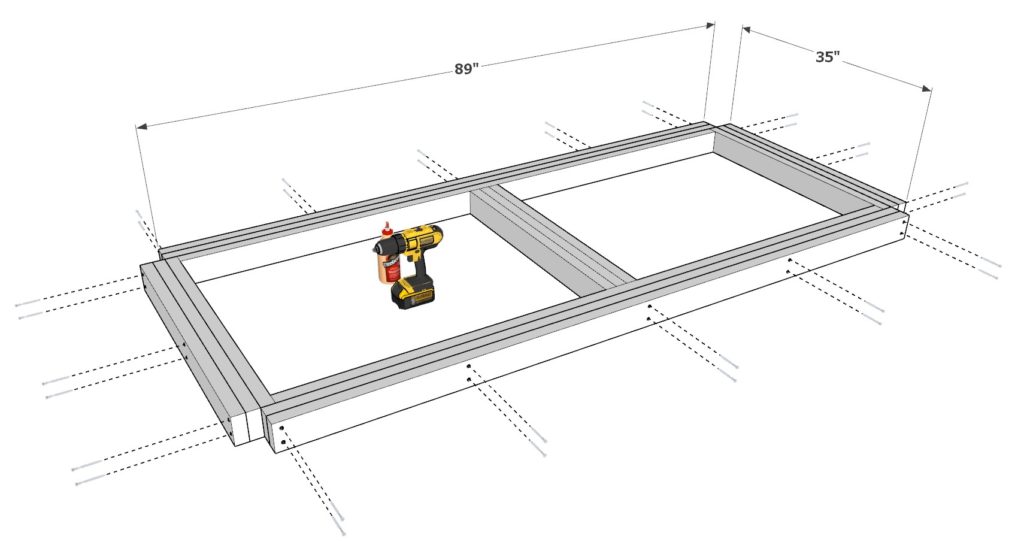
Continue adding lumber to the frame. Take two more 89 inch 2×4 lumber pieces and two 35 inch 2×4 lumber pieces and joining them to the table frame as before. Use 2.5 inch screws.
Lastly, add two more 89 inch 2×4 lumber pieces and two 35 inch 2×4 lumber pieces and add them to the frame as well.
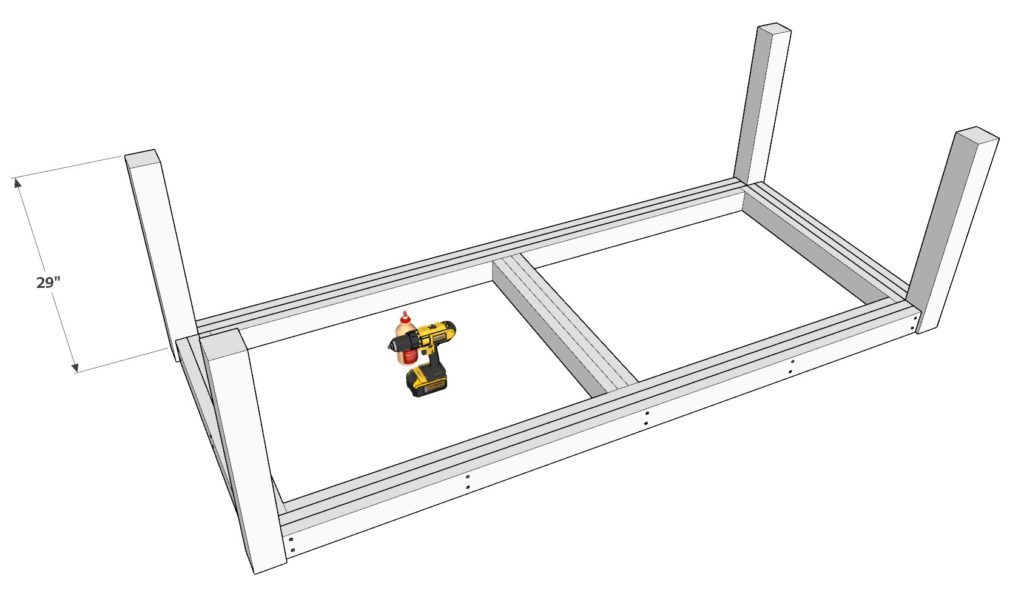
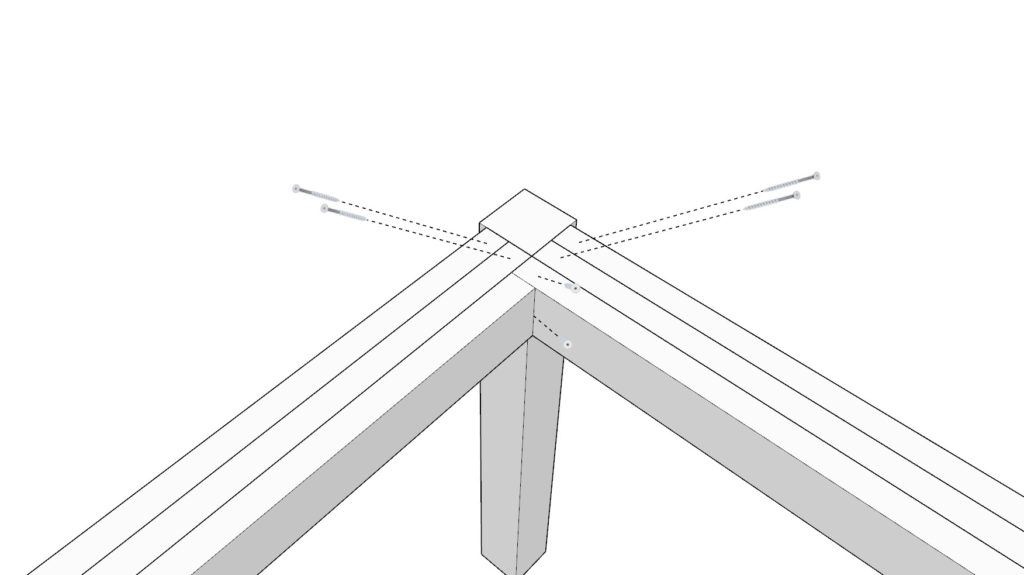
Step 2 (Adding legs to DIY dining table)
Add the table legs and secure them to the frame.
Start by adding four 29 inch 4×4 lumber pieces to the four corners of the table frame. Add glue to all areas that will be making contact with the table frame. Be generous with glue.
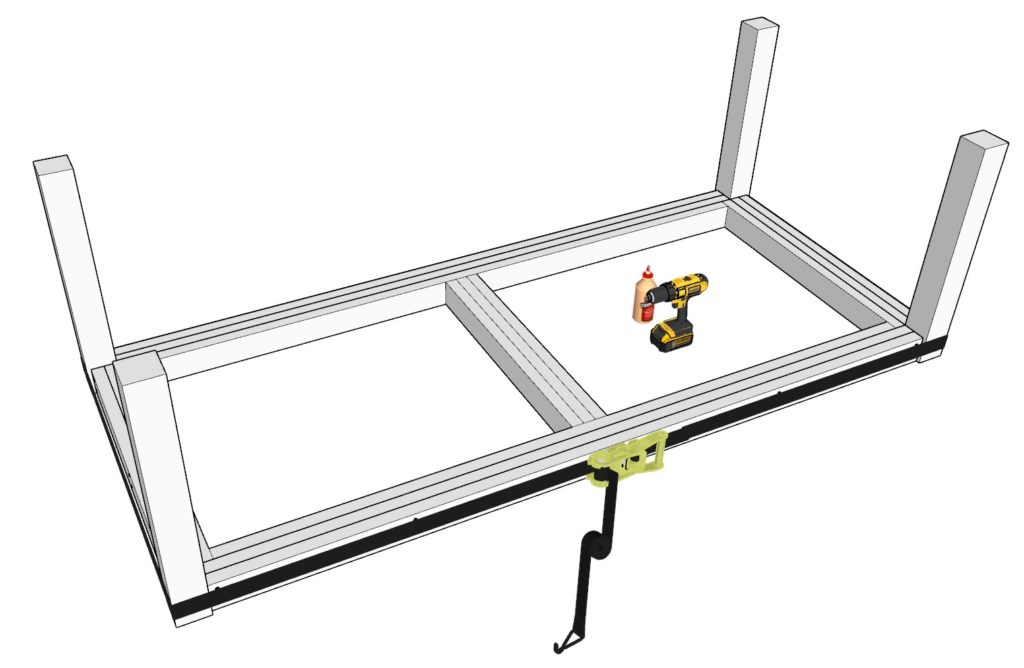
Next, take a ratchet strap and wind it around the table legs as shown below. This is to bring the table legs together so they can be tightly joined with screws. If your strap is too short, use two straps.
Next, tighten the straps. Use a hammer to “hammer” the parts of the table frame that are not aligned with the table legs. Make sure your using a flat surface for this part so that your table surface would turn out flat as well. Once you have “hammered” in all the stubborn parts, tighten the straps even more until the line is very tight.
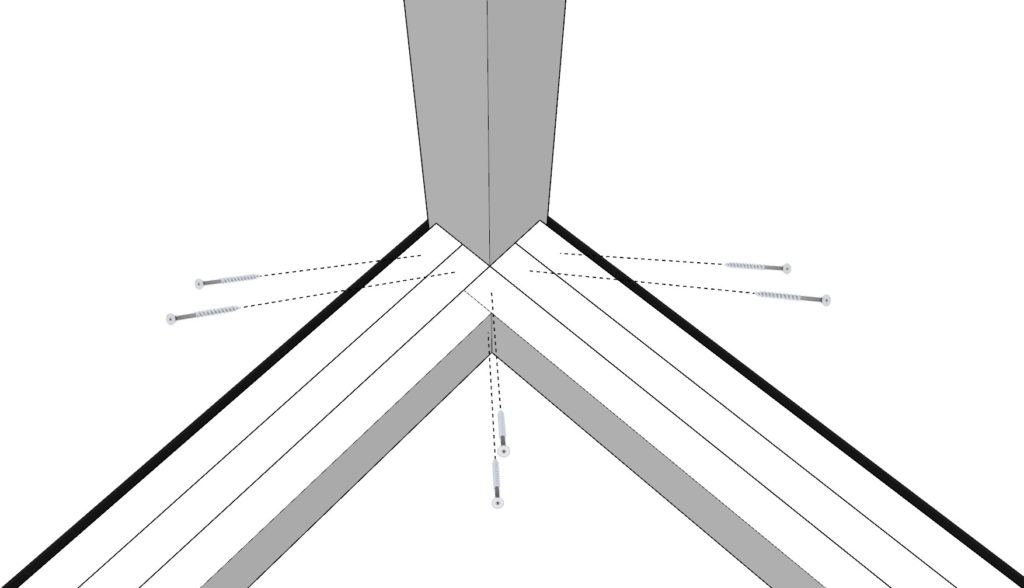
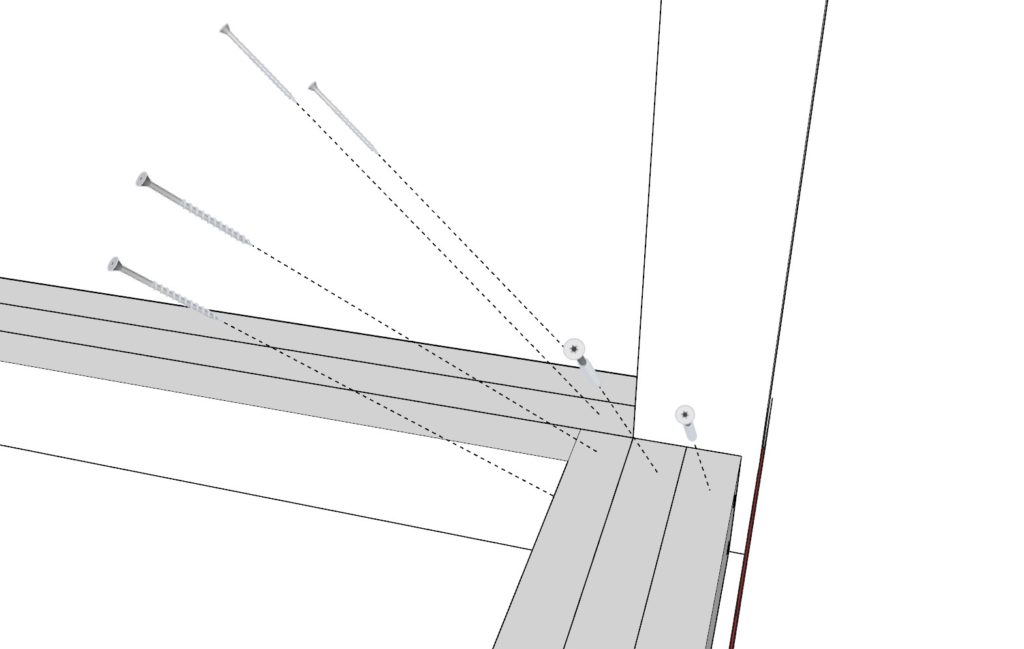
Next, add 3.5 inch screws as shown in the diagram below. Its 6 screws per side for under the table.
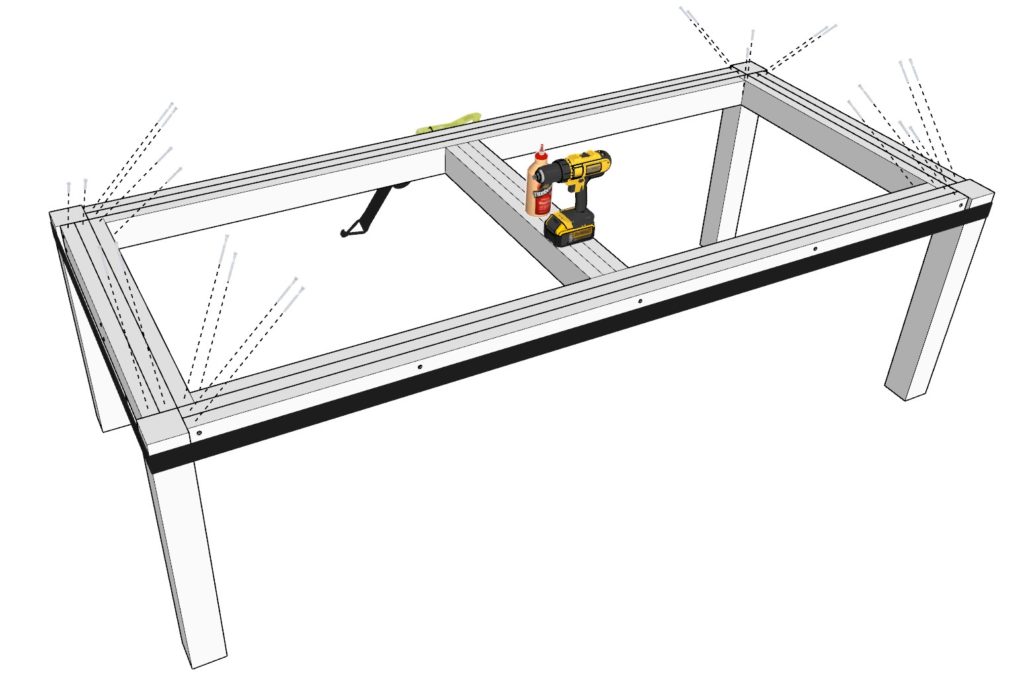
Next, flip the table. Do not rest the weight of the table on the table legs when turning. Turn the table mid-air with help.
Add screws in a similar way that you added them for under the table. Again 6 screws per side.

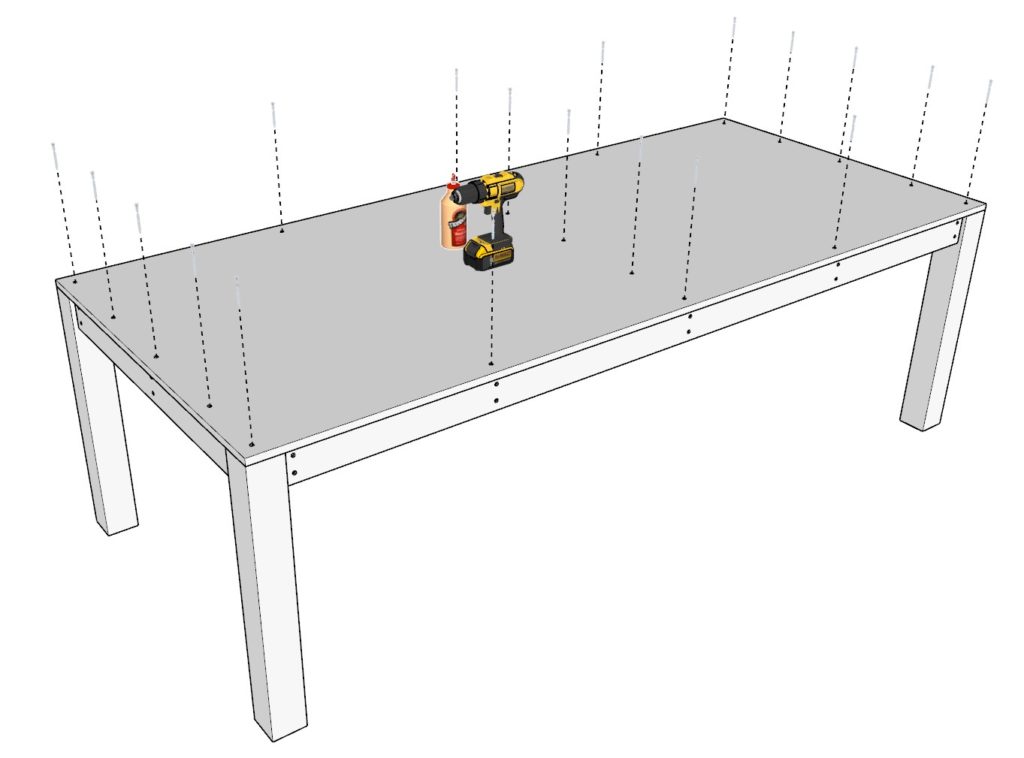
Step 3 (Table top construction and installation)
Next, put together the table top.
Add one sheet of 3/4 inch thick plywood that measures 96 inch x 42 inch.
Secure the plywood sheet with 3.5 inch screws and glue as shown below.
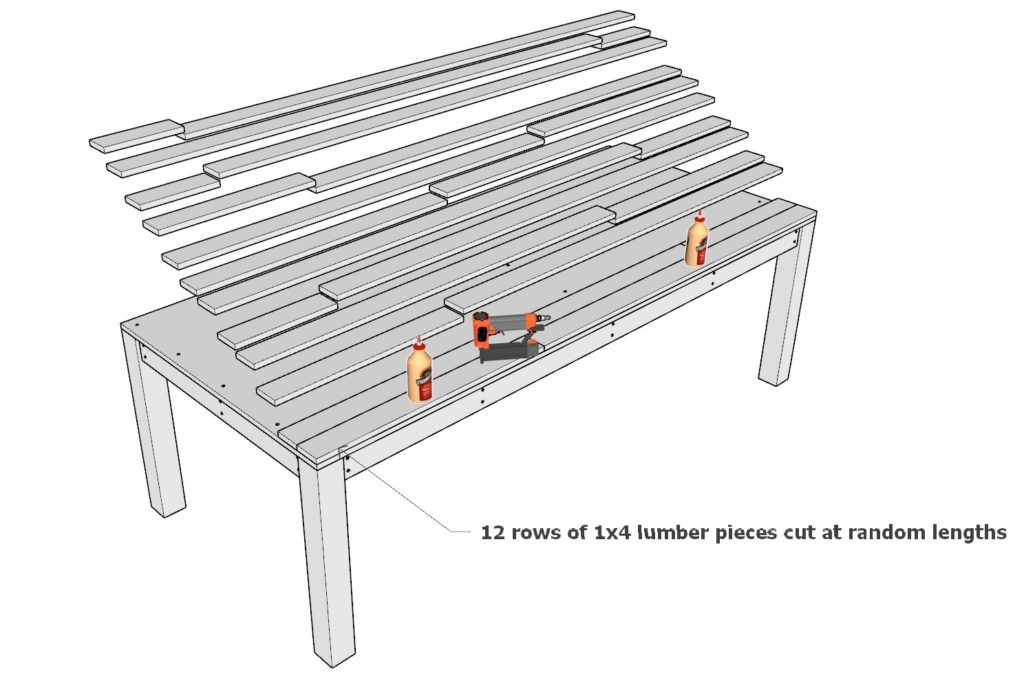
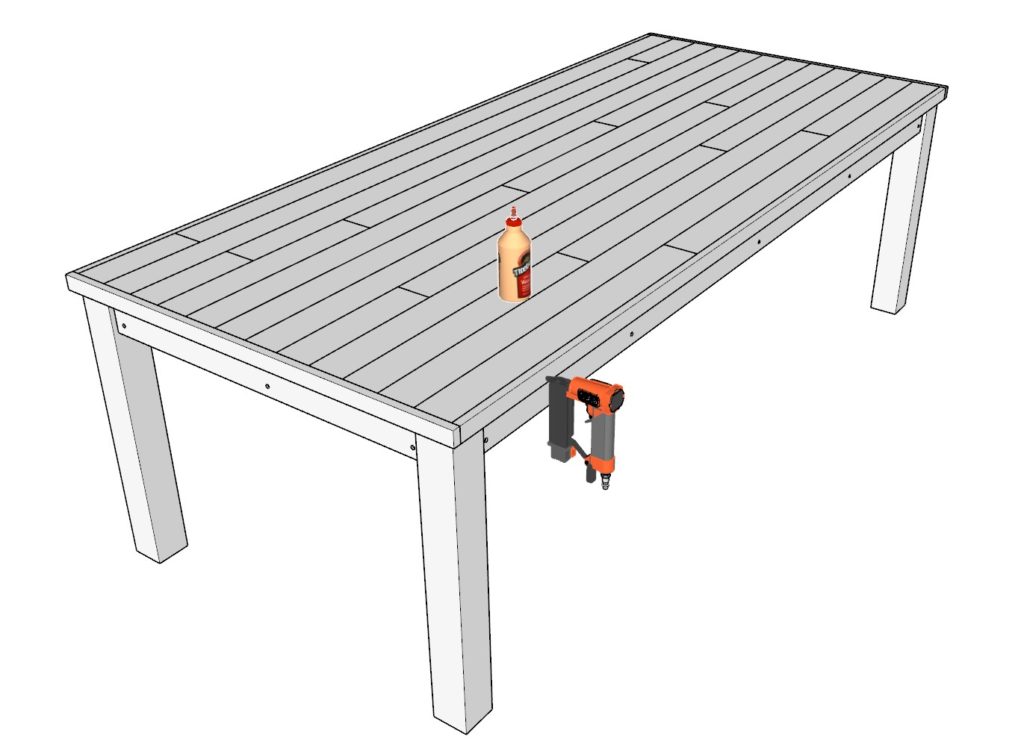
Next, cut 12 rows-worth of 1×4 lumber pieces and arrange them tightly side by side.
Secure them in place with a nail gun and glue. The pattern can be random or intentional based on your taste and style.
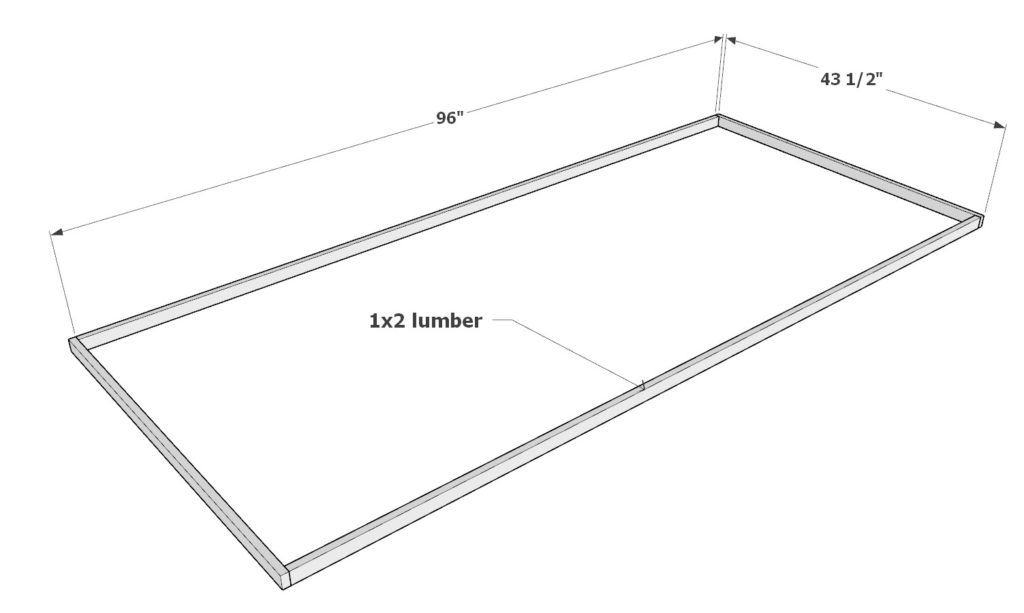
Step 4 (Adding trim to DIY table)
Next, add a trim made from four 1×2 lumber pieces.
Take two 96 inch 1×2 lumber pieces and two 43-1/2 inch 1×2 lumber pieces and attach them to the sides of the table top using a nail gun and glue.
Step 5 (Final touches)
Next, sand down the whole table. I use an orbital sander to speed up the process
I use a rough 80 grit paper first and then finish it with a 220 grit paper.
Filling in the holes is optional.
I also like to use a router on the perimeter edges of the table top to round off my corners so that the table doesn’t press in on the forearms and elbows when its in use. This makes the table more comfortable. This can also be done with a sander if you don’t have a router on hand.
At this point it is ready to be stained or painted!