The Many Benefits of a DIY Folding Wooden Table
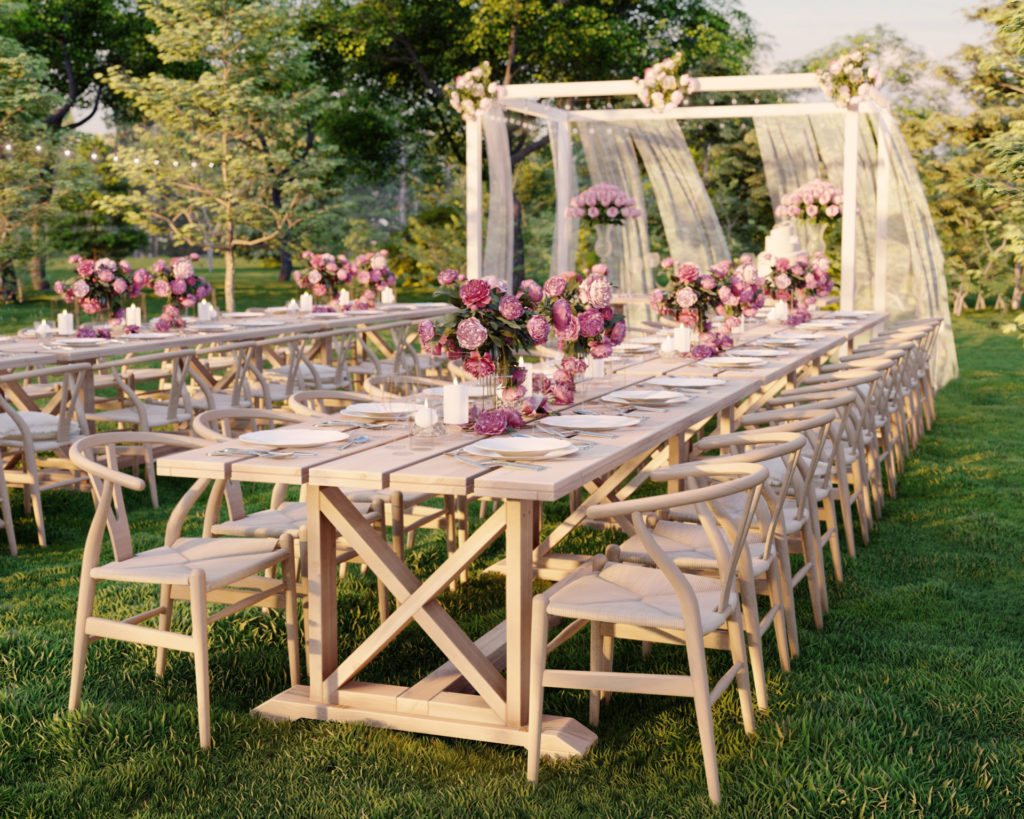
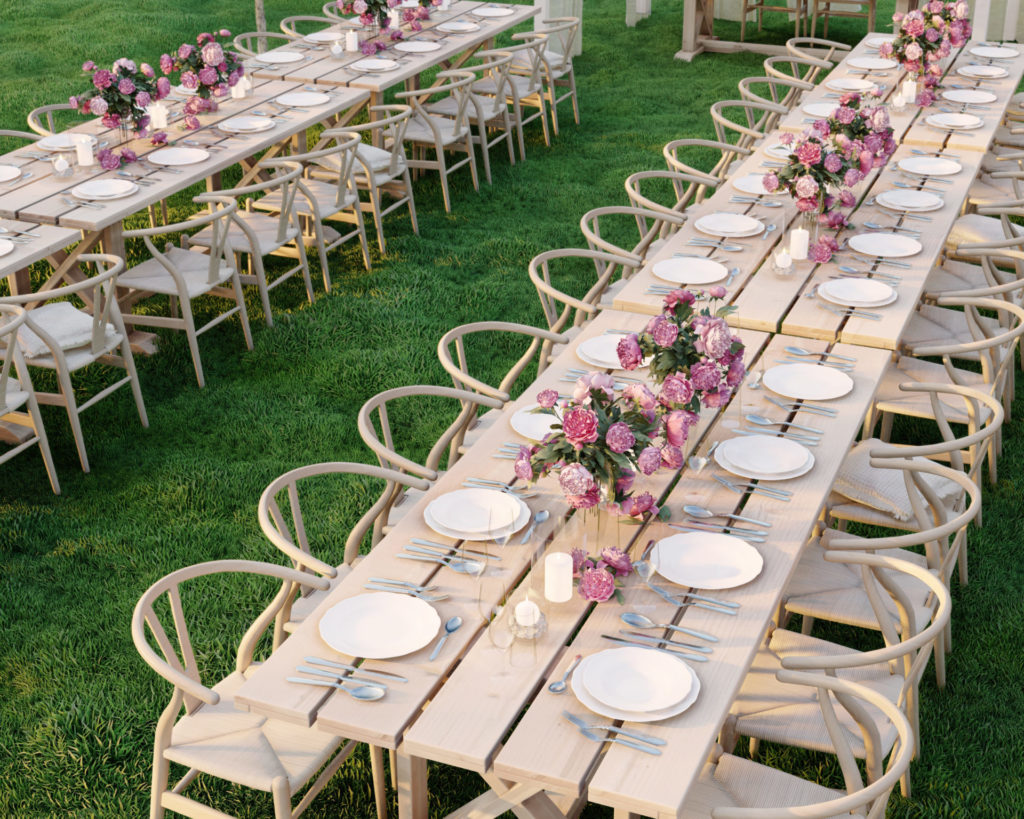
- This DIY folding table design is so versatile and is perfect for any event such as a wedding, shower, party, or a simple backyard get together. The tables can be set up in a variety of ways to accommodate different needs such as a buffet table, a bar, or a place to sit and eat.
- These DIY folding tables are easy to set up and take down and can withstand heavy use and still look great because it is made from solid wood. If the table undergoes wear and tear, it can be refinished quicky and be ready for event use in no time.
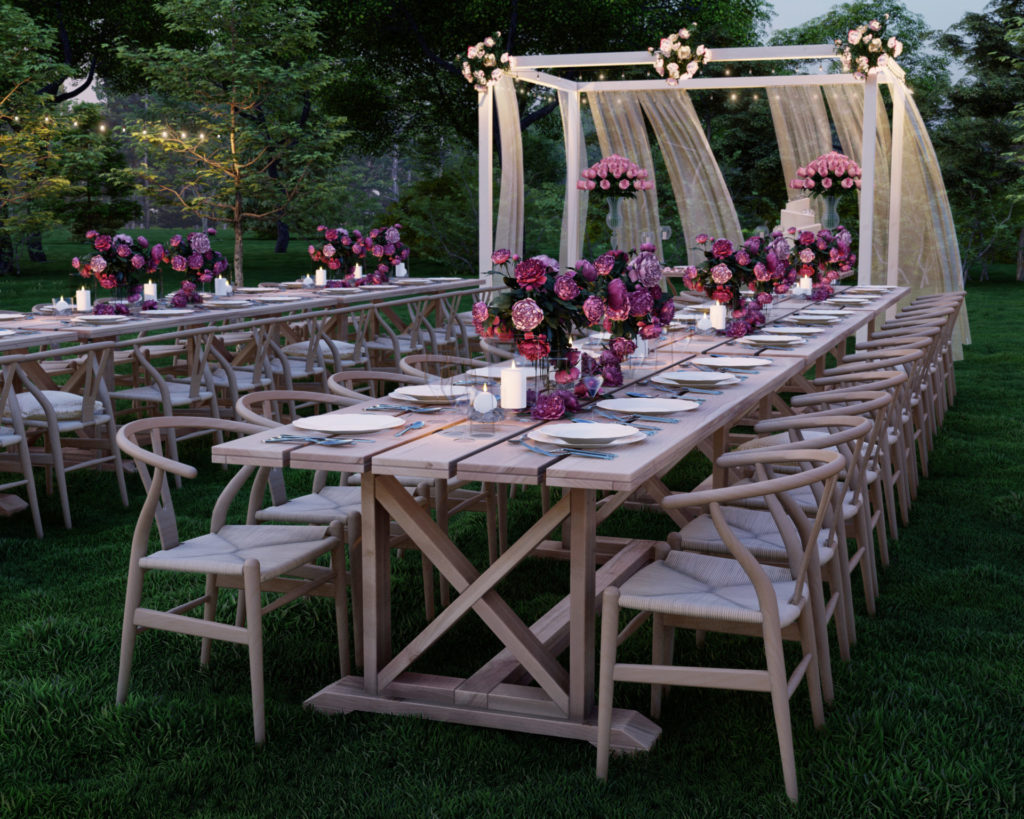
- The Beautiful classic look of the table will never go out of style. They can be easily decorated to match the rest of the décor of the event.
- This folding wooden table is only $90 to build! That means you can focus your budget on other aspects of your event such as choosing the perfect venue, booking vendors, and creating lasting memories.
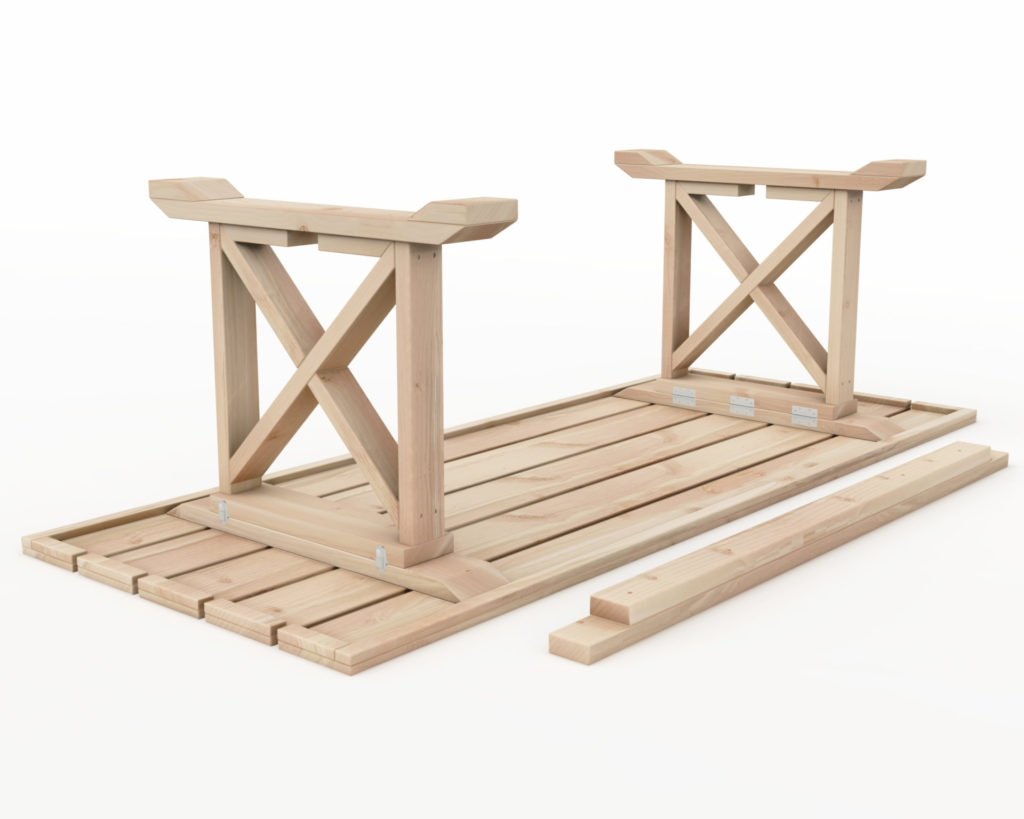
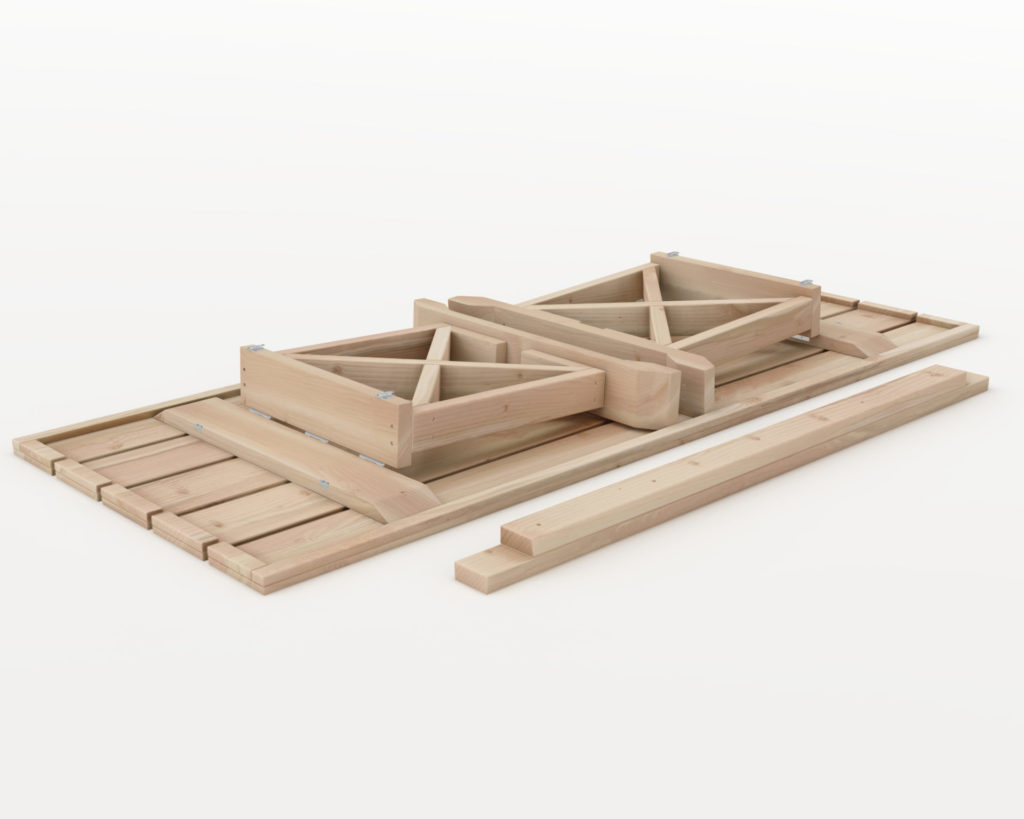
- Best of all these tables are easy to transport because they fold into a compact form. A folding wooden table can be easily moved from one location to another.
Specifications of the DIY folding table
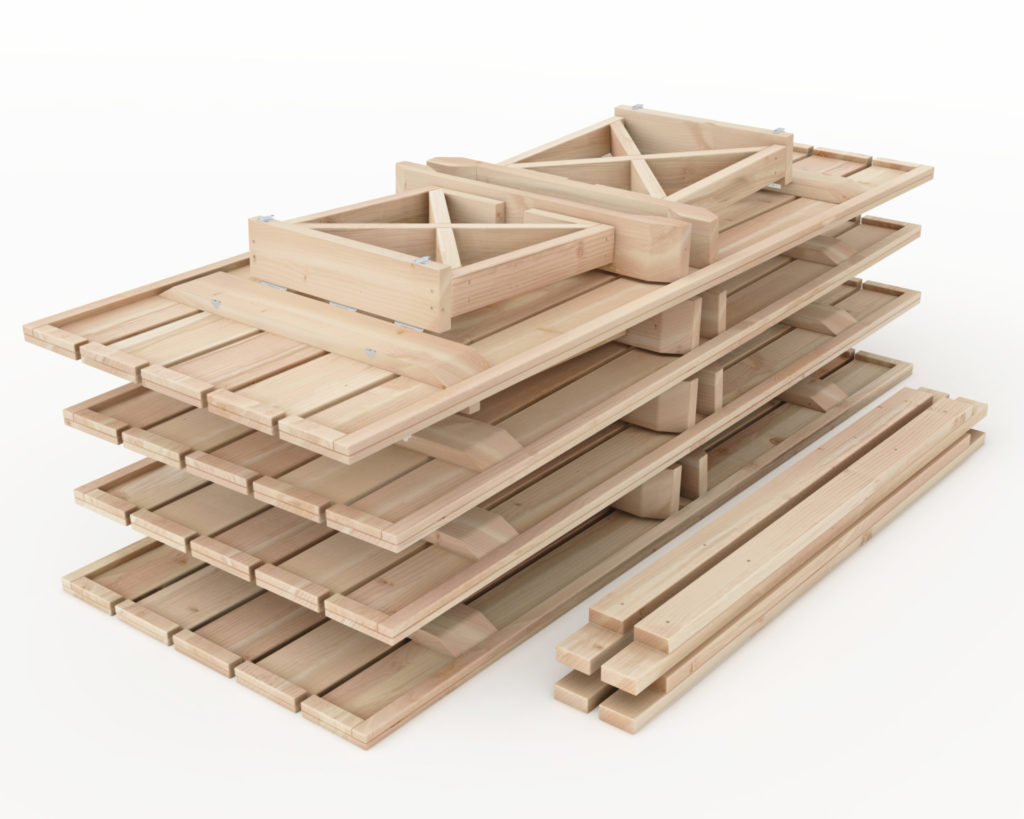
The table is made from common lumber that is sold at most hardware stores. I used 2x4s and 2x6s for the legs and 1x2s and 1x8s for the tabletop.
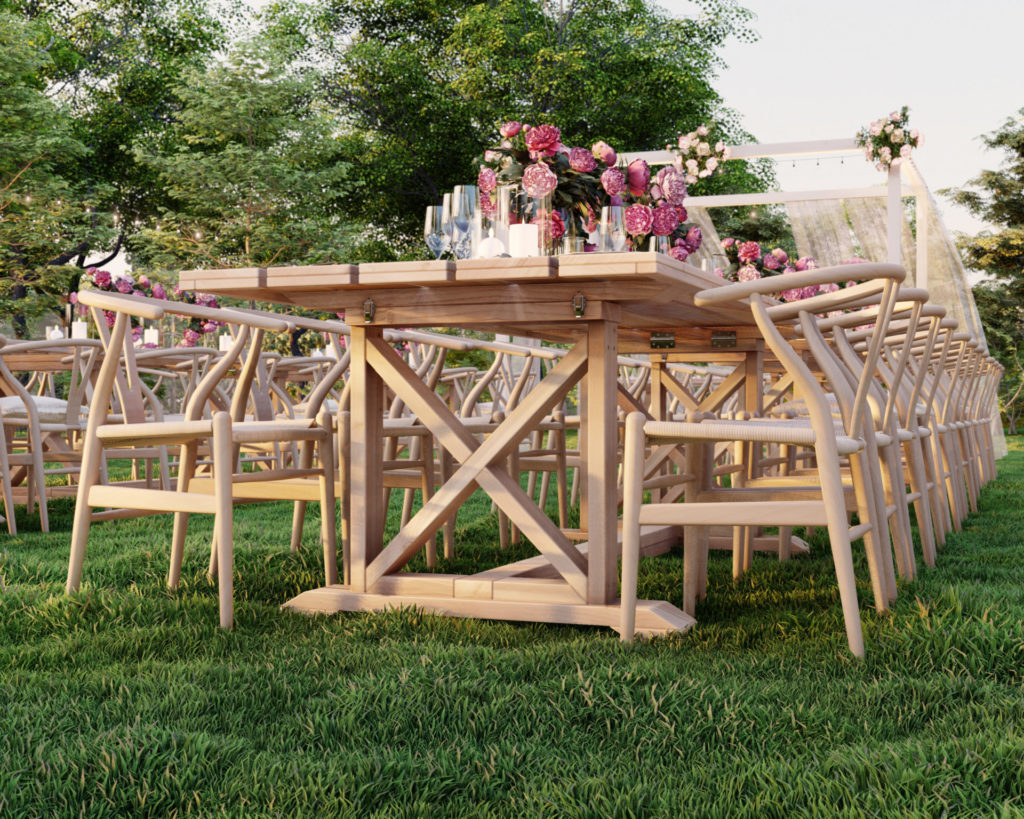
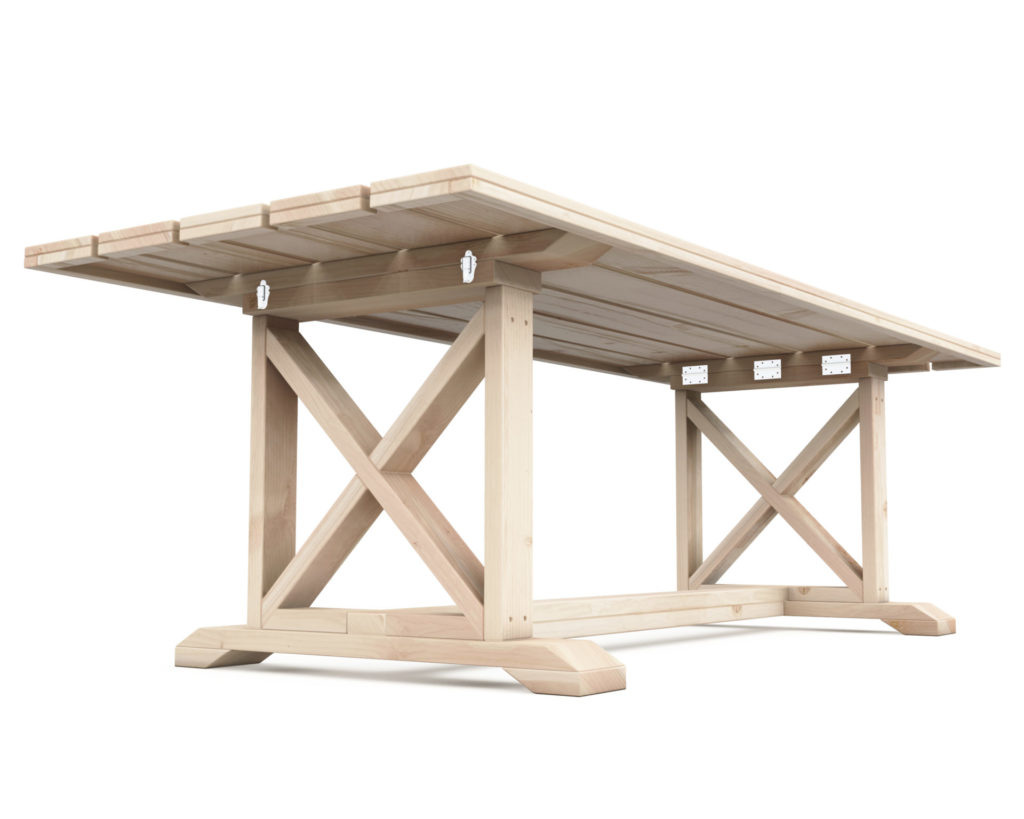
The legs of this folding table are connected with three sets of hinges on each leg and are secured into place with toggle latches when the table is set up. The table legs are propped to stay open with a 2×4 stretcher that keeps the legs from collapsing. Once the table is set up it is stable and able to handle weight being placed on it.
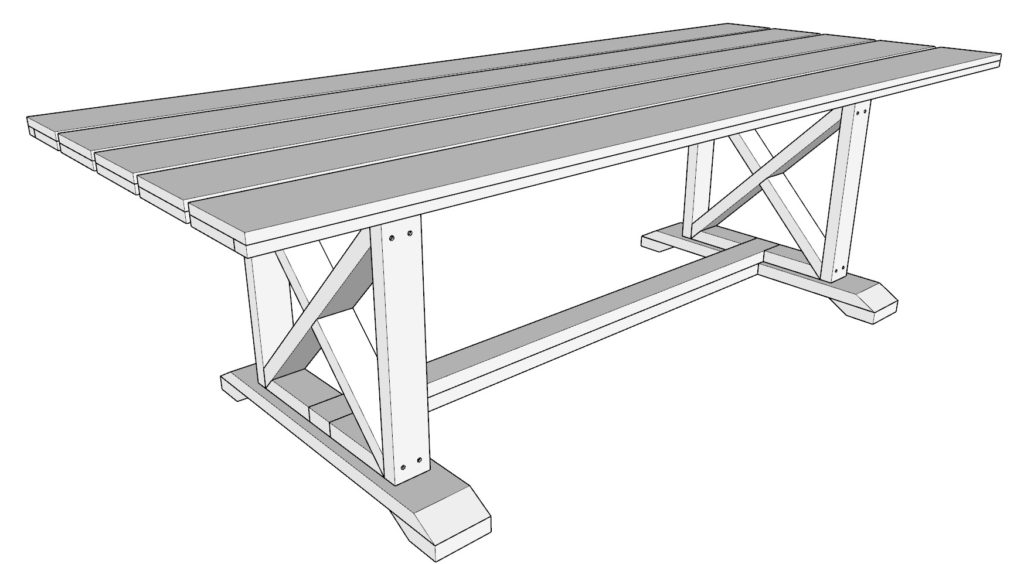
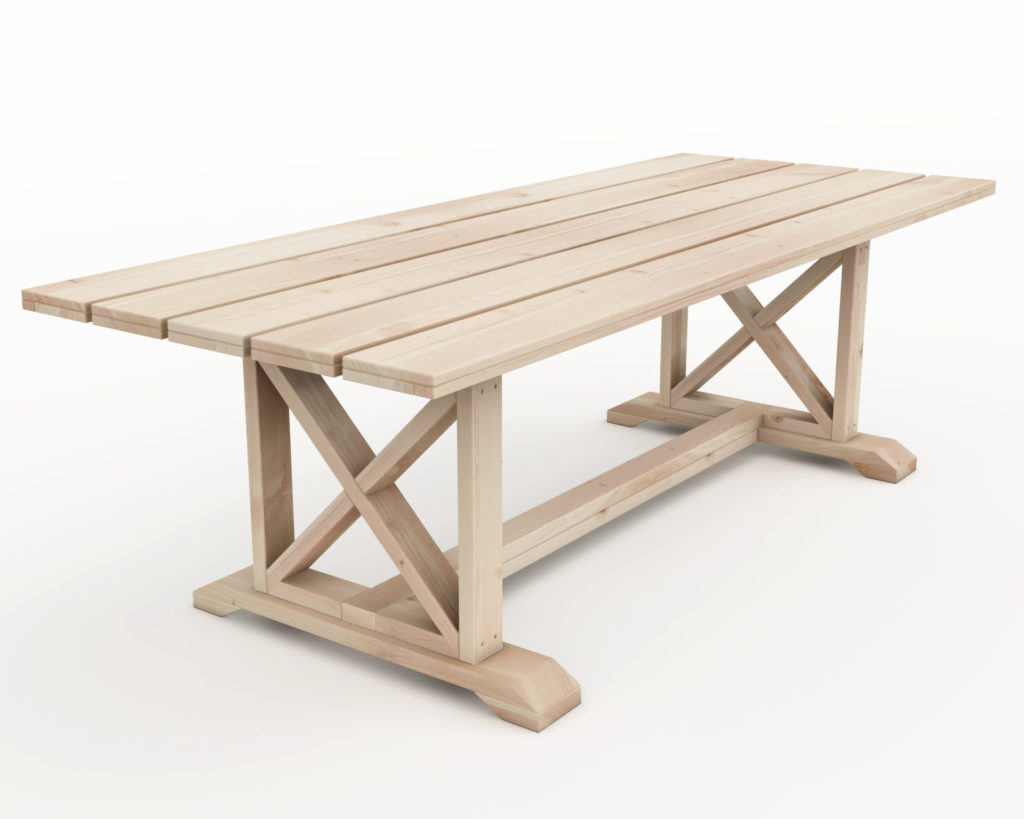
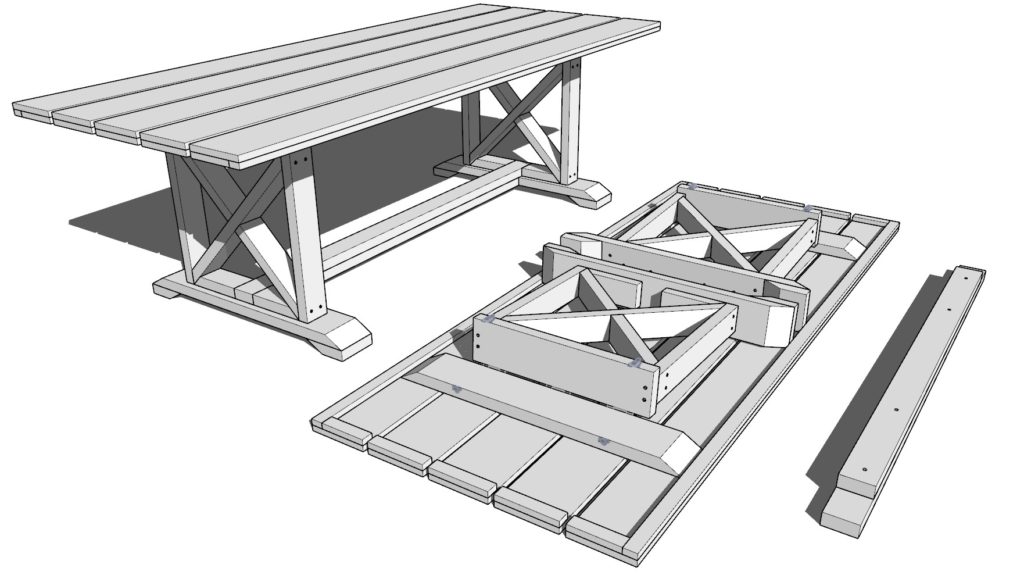
The legs of the table have an “X” trestle design to prevent the table from rocking side to side. This makes the table more stable and secure.
The tabletop is made from 1×8 lumber with a 1×2 skirt running around the perimeter of the table to add thickness to the sides of the table.
Is this folding table for indoor or outdoor spaces?
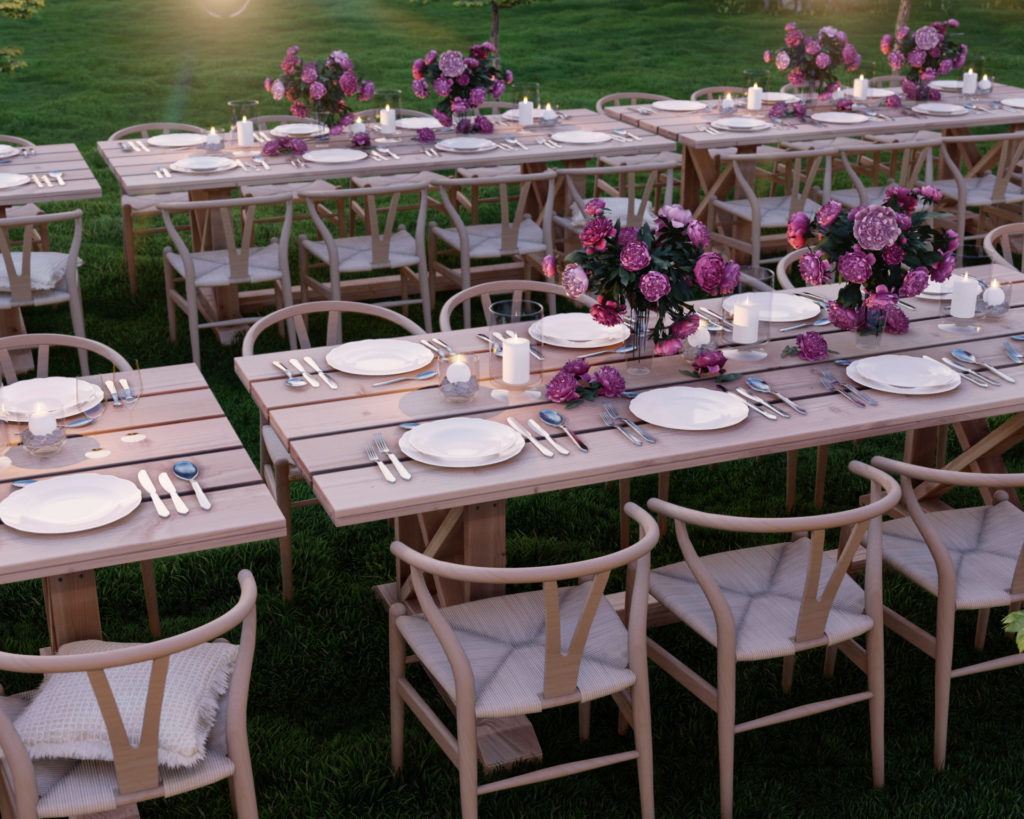
The DIY folding table is a versatile piece of furniture that can be used both indoors and outdoors. Indoors, it can be used as a dining table, kitchen table, or even a work table. Outdoors, it can be used as an event table, patio table, garden table, or picnic table.
The farmhouse style of this table is a great way to add a rustic touch to your home, and it can be used in both formal and informal settings. Whether you’re looking for a table to use for everyday meals or one to dress up for special occasions, a farmhouse table is a great option.
Who can build this DIY folding table?
This table is easy to assemble with the step-by-step instructions provided in this post. I believe this base would be a great project for beginners to woodworking and anyone with minimal woodworking experience. The DIY plans offered in this post include helpful description, images, diagrams, helpful links, and more to ensure that the DIY build is smooth, efficient, and easy.
Time to build
2 hours (varies with experience)
Total cost of build
$90 (COSTS MAY VARY BASED ON LOCATION AND SUPPLIER.)
Skill level required
Beginner
Download the PDF plans
Outdoor table base PDF plans
What is included in the PDF download?
Easy to read step by step instructions
Material list
Tools needed
3D illustrations
Tools and Materials List
Available with the purchase of the DIY plan PDF.
Shopping and cut list
Available with the purchase of the DIY plan PDF.
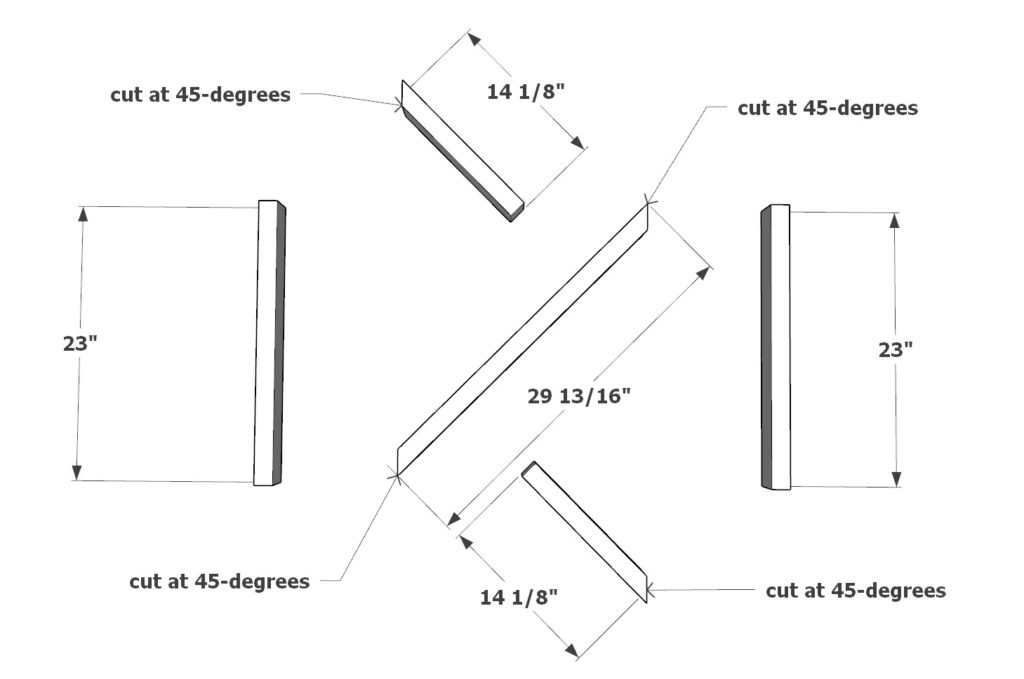
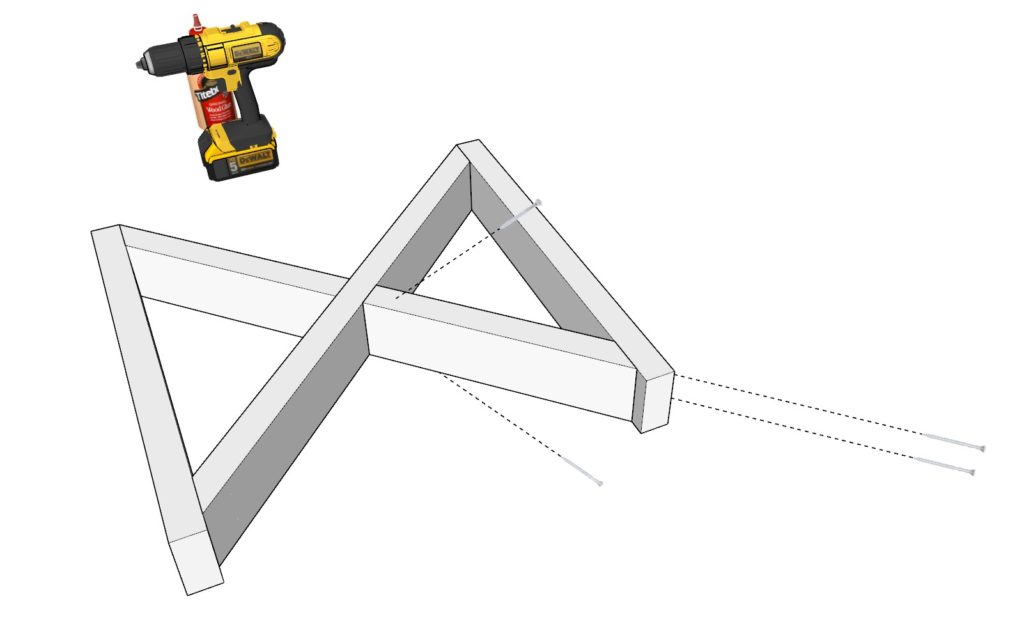
Step 1: Assembling the Leg Frames
Prepare the Materials:
- Gather two pieces of 2×4 lumber, each 14-1/8 inches long, cut at a 45-degree angle on one end.
- Take one 29-13/16 inch 2×4 lumber piece, cut at a 45-degree angle on both ends.
- Have two pieces of 23-inch 2×4 lumber ready for use.
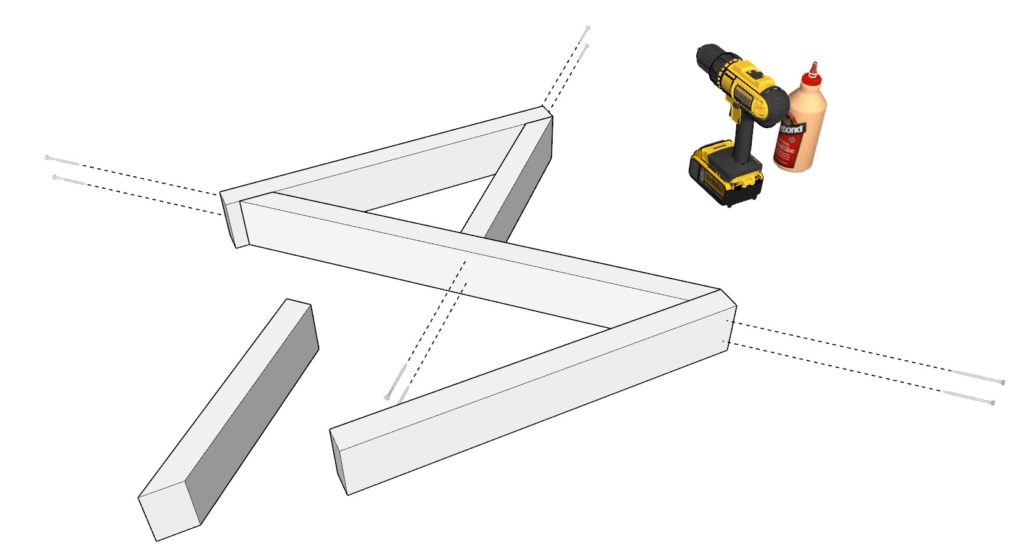
Arrange the Pieces:
- Lay out the lumber on a flat surface as per the diagram.
Joining the Pieces:
- Pre-Drill: To prevent splitting, pre-drill holes for the screws.
- Glue: Apply wood glue to the ends of the 2×4 pieces where they will connect.
- Screw: Fasten the pieces together using 3.5-inch screws.
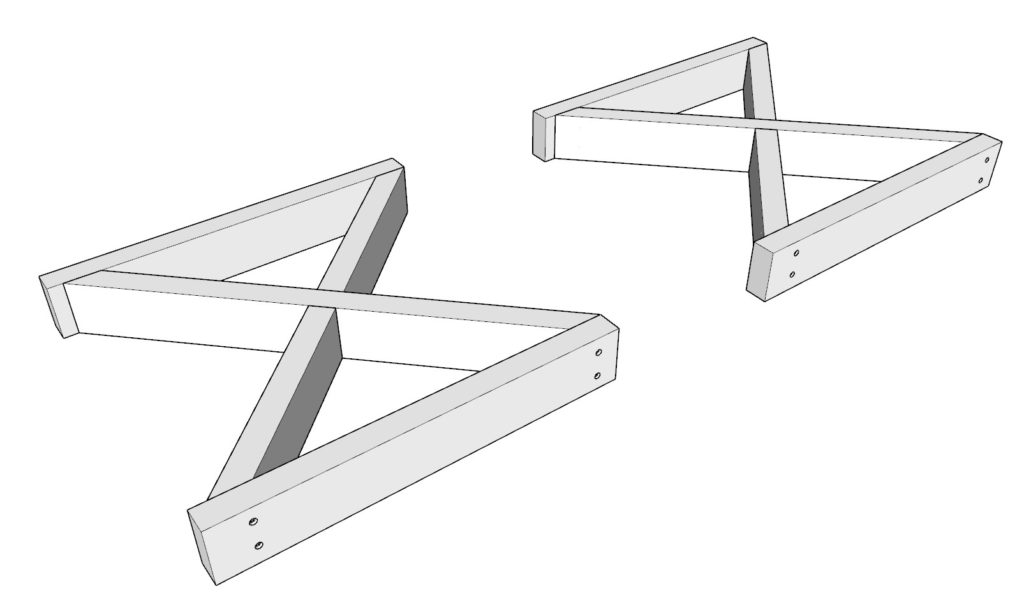
Repeat for Second Leg Frame:
- Create a second leg frame identical to the first to ensure symmetry and stability.
Tip: Ensure all angles are precise, and the screws are tightened securely for a sturdy frame. It’s also a good practice to check for square after joining each piece.
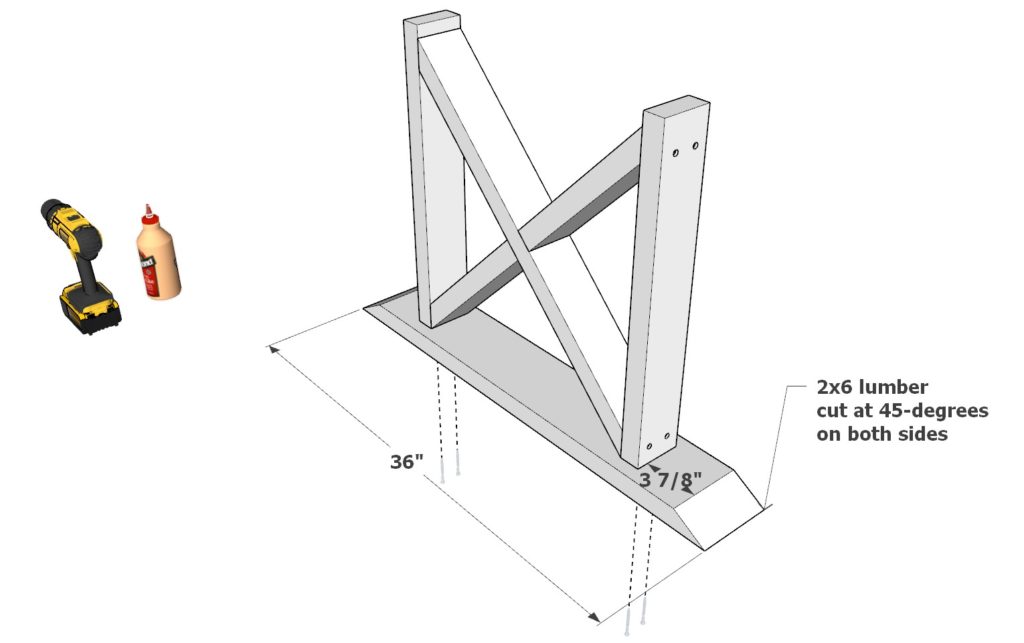
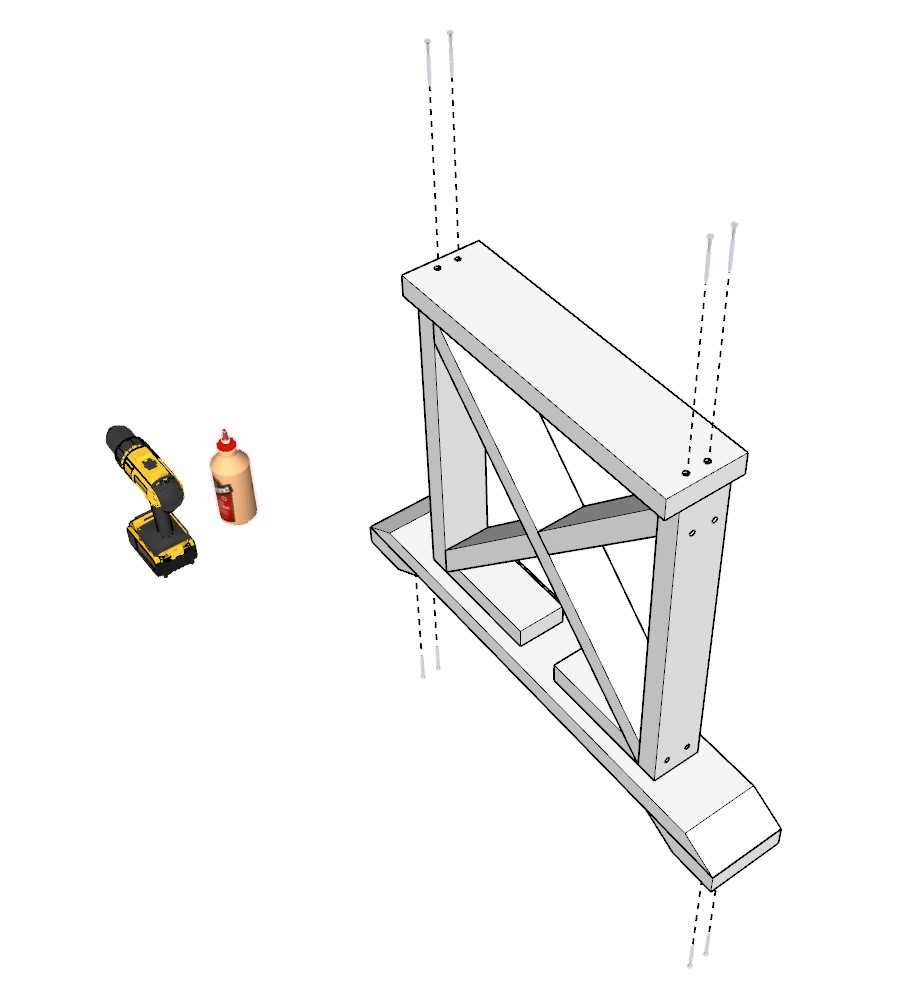
Step 2: Attaching the Base and Feet to the Leg Frames
Base Attachment:
- Position a 36-inch 2×6 lumber piece at the bottom of the leg frame.
- Ensure it is centered for balance and symmetry.
- Pre-Drill: Holes to prevent splitting the wood.
- Glue: Apply wood glue at the contact points.
- Screw: Secure with 3.5-inch screws.
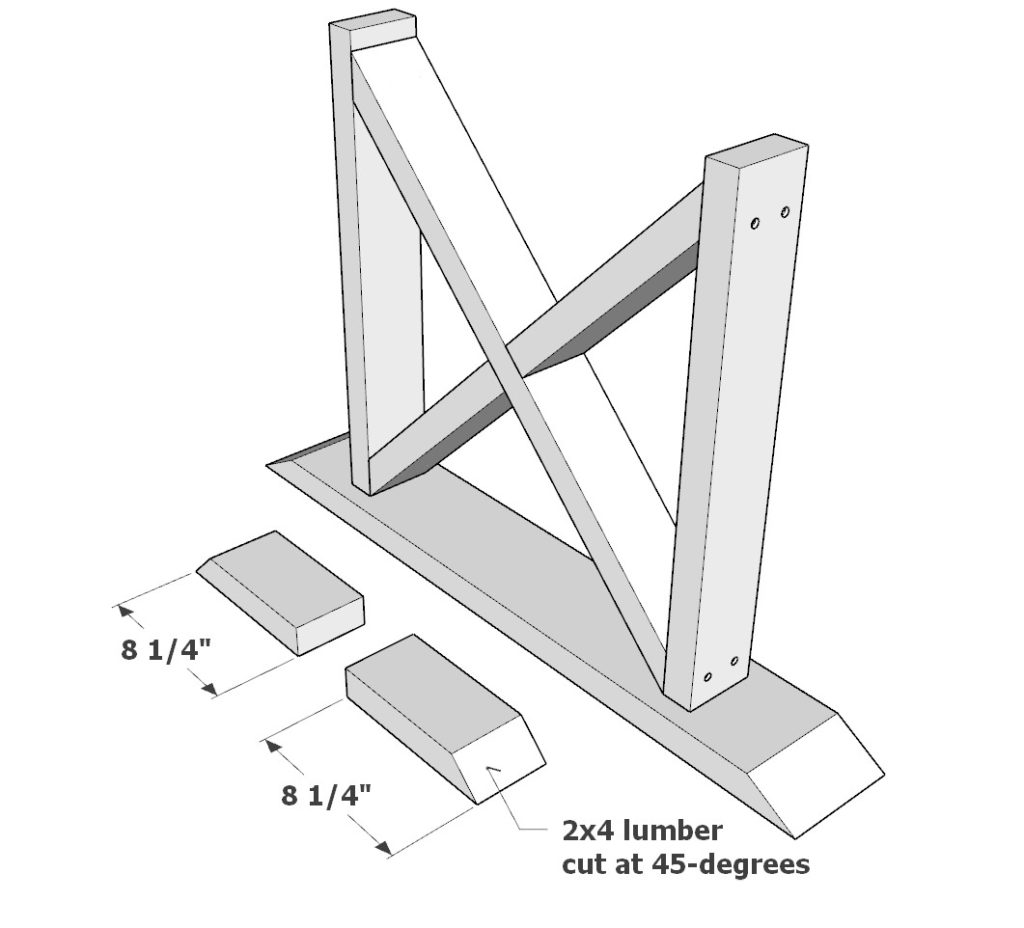
Installing Supports:
- Take two 8-1/4 inch 2×4 pieces, cut at 45-degrees.
- Fit them into the space between the legs as indicated in the diagram.
- Join using the same pre-drilling, gluing, and screwing process.
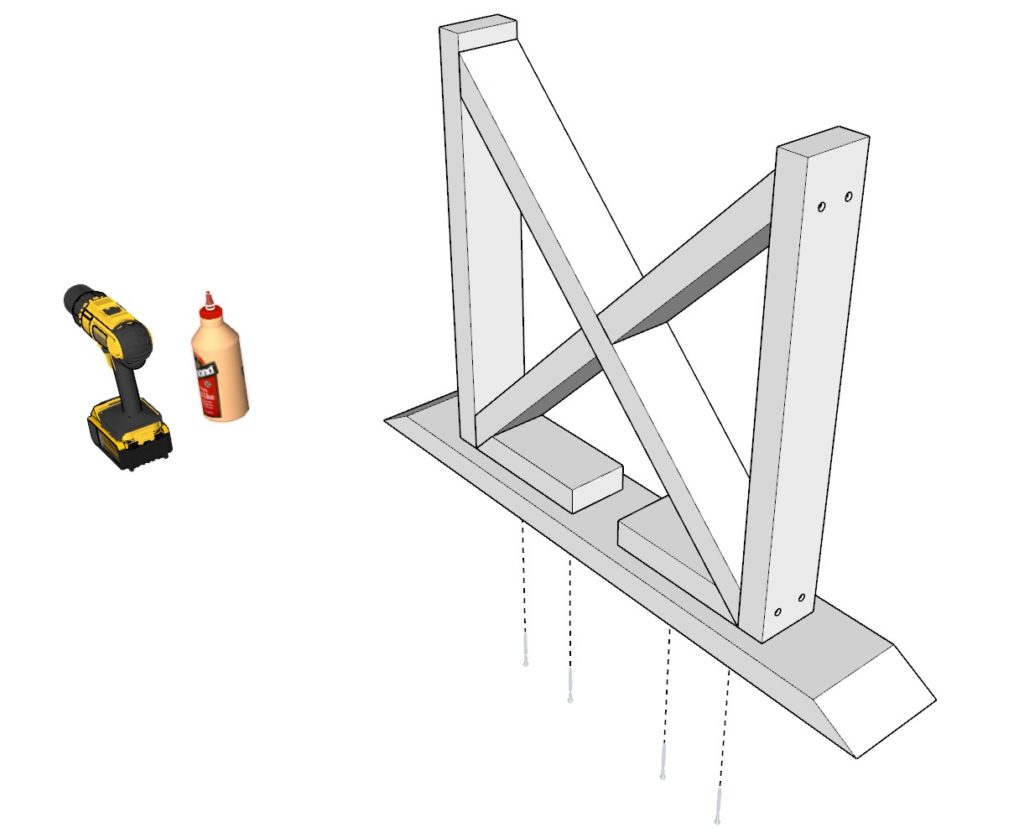
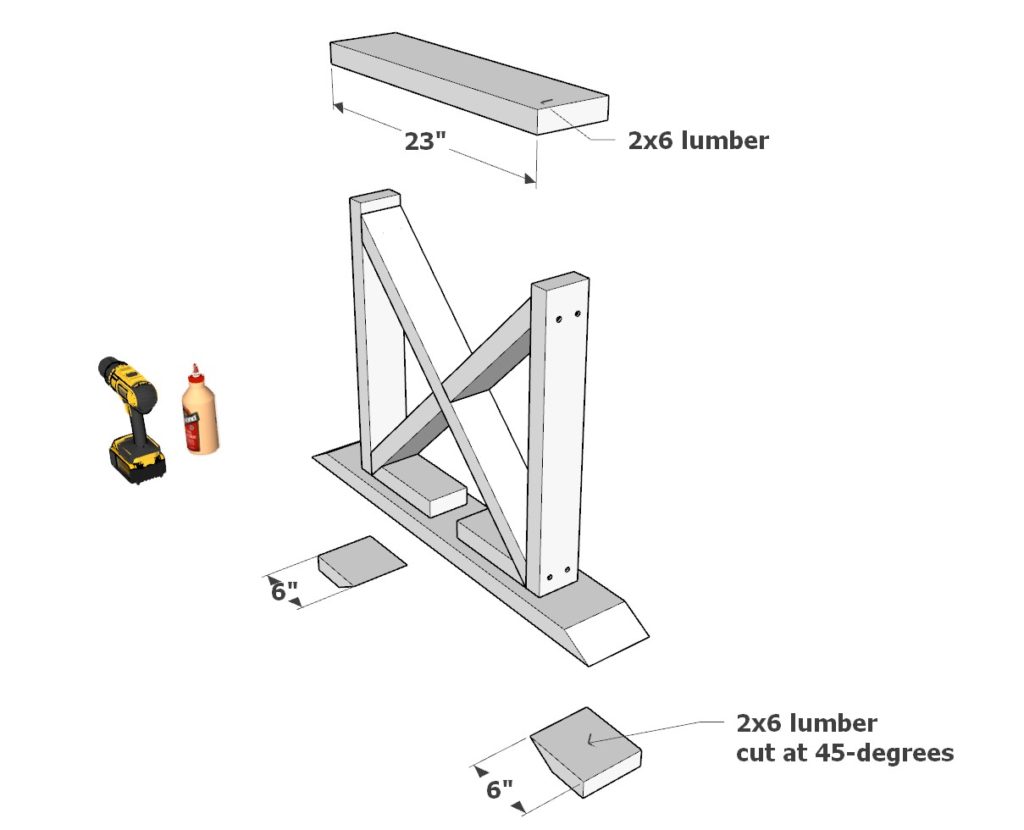
Capping the Legs:
- Place a 23-inch 2×6 lumber cap on the top of the leg frame.
- Fasten similarly with pre-drilling, gluing, and screwing.
Attaching Feet:
- Attach two 6-inch 2×6 pieces, cut at 45-degrees on one side, to the bottom to act as feet.
- Ensure they are aligned and secure them with the same method.
Repeat for Second Leg Frame:
- Perform the same process on the second leg frame to ensure you have two identical complete leg frames.

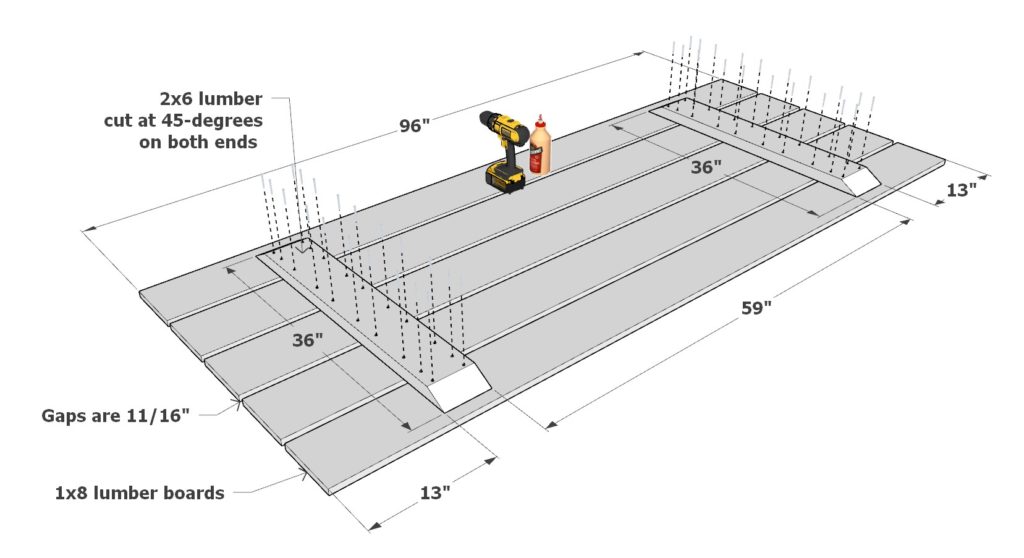
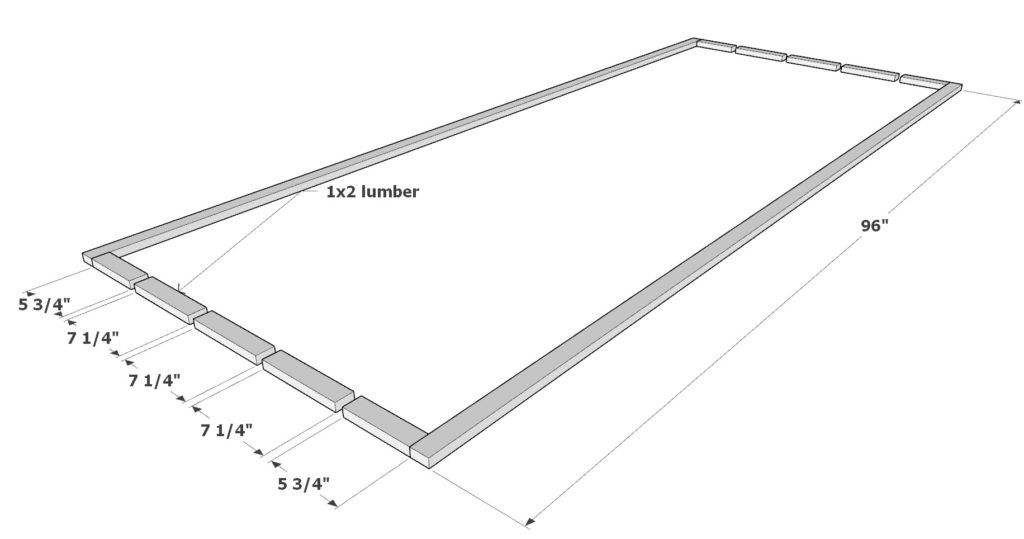
Step 3: Constructing the Tabletop with Trim
Tabletop Assembly:
- Lay out five 96-inch 1×8 lumber boards.
- Position two 36-inch 2×6 lumber pieces on each end of the tabletop assembly.
- Ensure an 11/16-inch gap between each 1×8 board.
- Pre-Drill: Holes to avoid wood splitting.
- Glue: Apply a generous amount of wood glue on the contact surfaces.
- Screw: Secure the boards with 2-inch screws.
- Set the 2×6 pieces 59 inches apart, aligning them with the diagram provided.
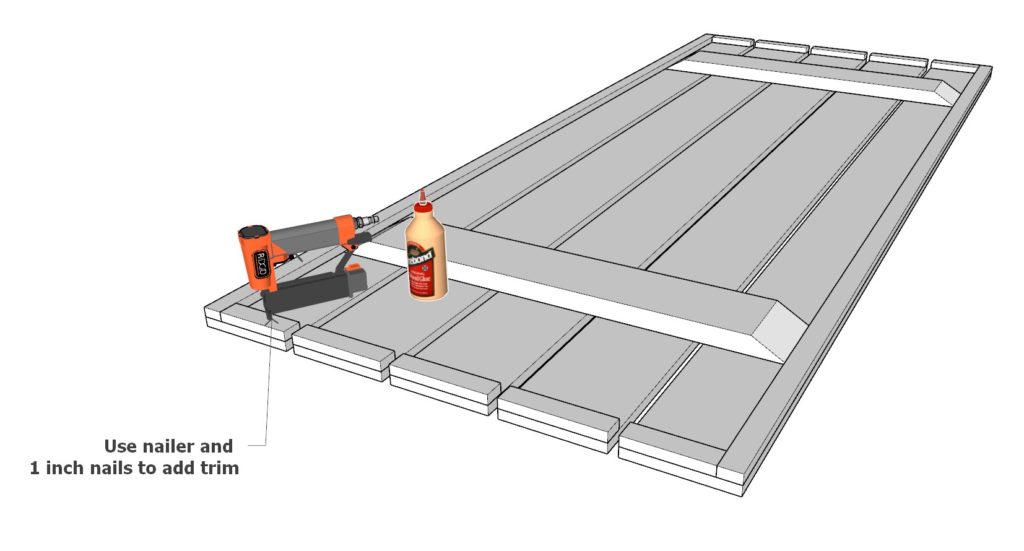
Adding the Trim:
- Prepare the trim pieces:
- Two 96-inch 1×2 lumber pieces for the long sides.
- Four 5-3/4-inch 1×2 lumber pieces for the short sides.
- Six 7-1/4-inch 1×2 lumber pieces to support the gaps.
- Glue: Apply wood glue to the edges of the tabletop where the trim will attach.
- Nail: Use a nail gun to attach the trim with 1-inch nails.
- Prepare the trim pieces:
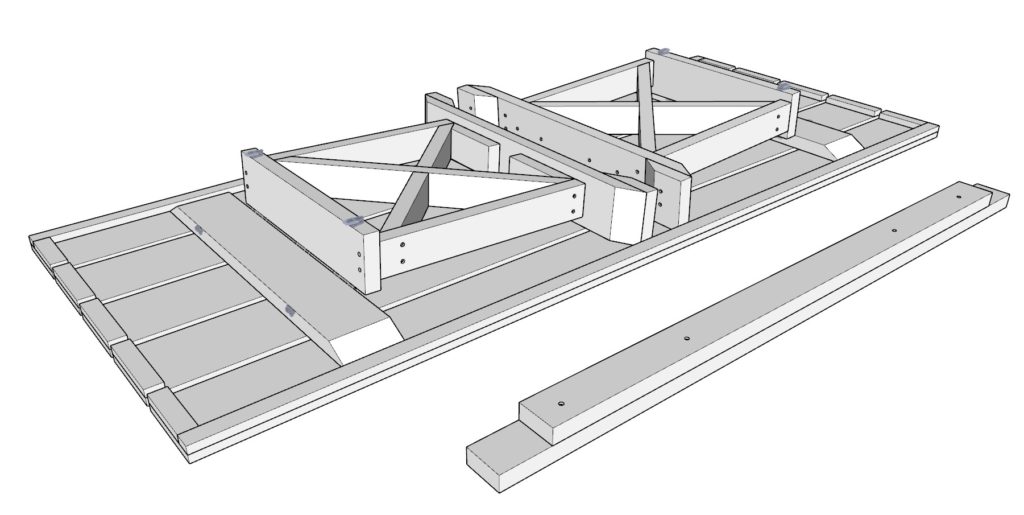
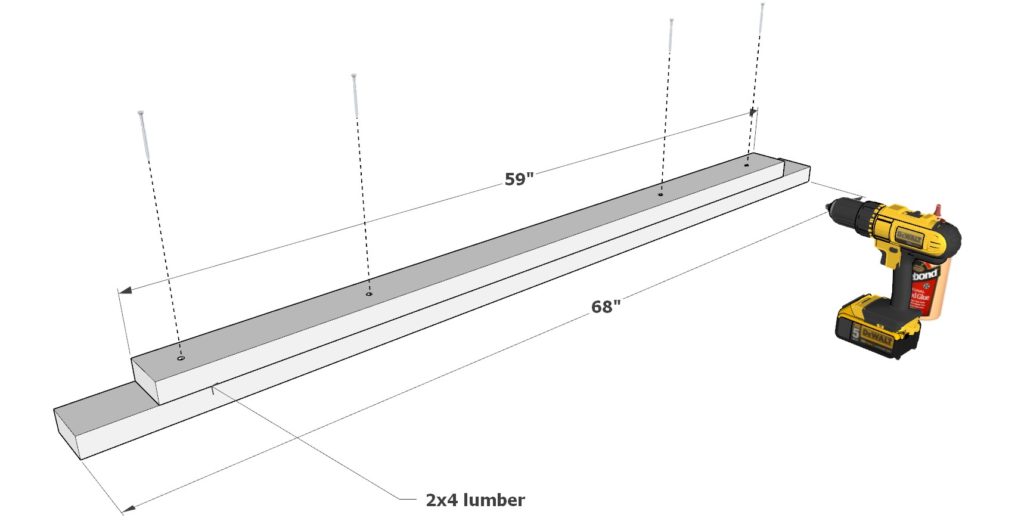
Step 4: Constructing the Stretcher Beam
Cutting the Lumber:
- Prepare the following pieces of lumber:
- One 59-inch 2×4 lumber piece.
- One 68-inch 2×4 lumber piece.
- Prepare the following pieces of lumber:
Joining the Pieces:
- Align: Place the 59-inch and 68-inch 2×4 pieces in a cross formation.
- Pre-Drill: Holes to prevent wood from splitting.
- Glue: Apply wood glue at the joint for extra stability.
- Screw: Fasten the pieces together using 2 -inch screws.
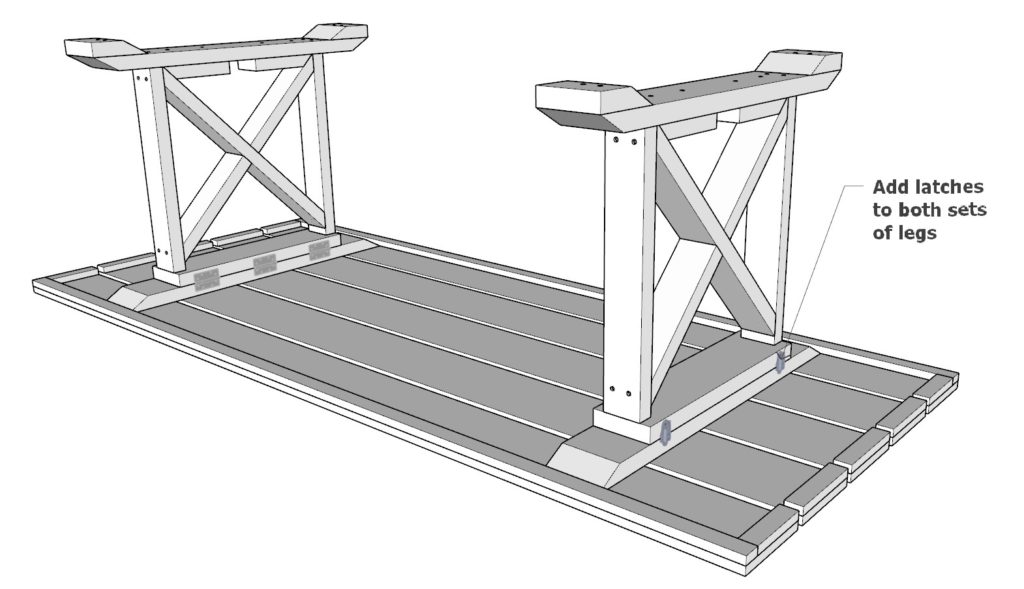
Step 5: Final Assembly with Hinges and Latches
Step 5: Final Assembly with Hinges and Latches
Adding Hinges:
- Position hinges at the top of each leg frame where it meets the tabletop.
- Use screws suitable for the hinge size to attach them to both the legs and the tabletop.
Installing Latches:
- Attach toggle latches to the leg frames to lock the legs in place when the table is set up.
- Ensure the latches are evenly spaced and aligned with the legs for proper function.
Finishing Touches:
- Sanding: Smooth the entire table with fine-grit sandpaper to prepare for finishing.
- Staining/Painting: Apply your chosen stain or paint to the table, following the manufacturer’s instructions for best results.
Setting Up and Collapsing the Table:
- To set up, unfold the legs and secure them with the toggle latches, then place the stretcher beam in position.
- To collapse, remove the stretcher beam, release the latches, and fold the legs inward.