Introduction
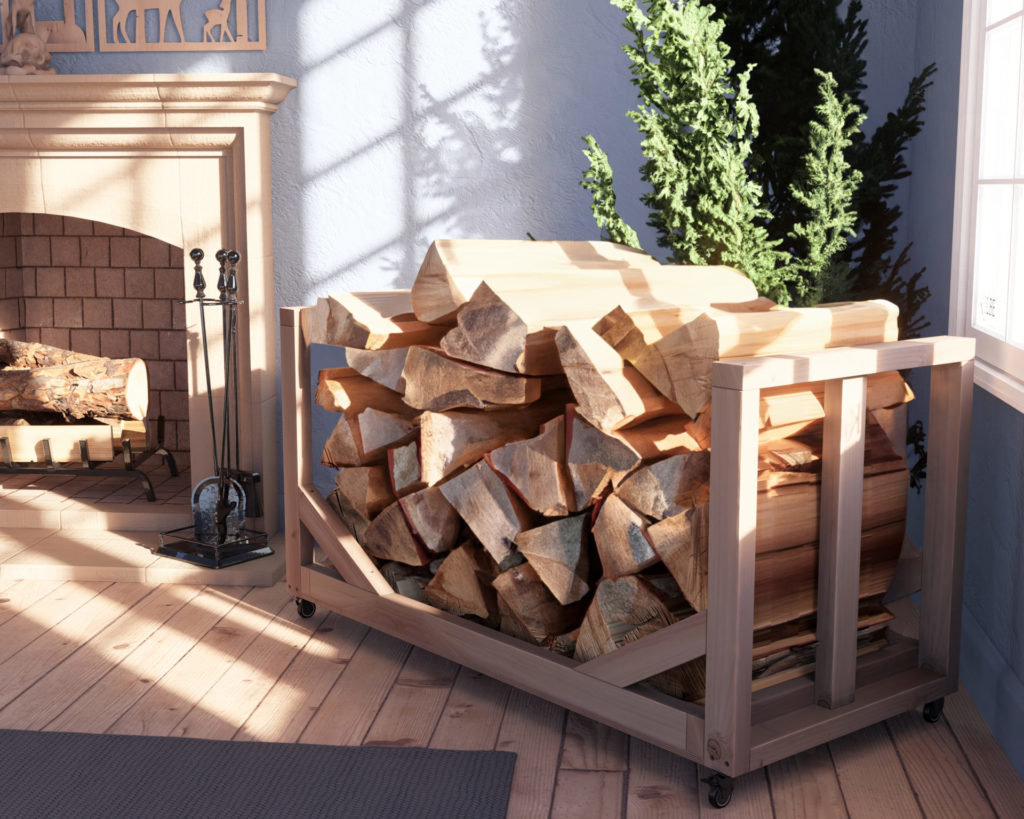
Looking for a smarter, easier way to manage your firewood? Meet the DIY Indoor Rolling Log Holder—your next home improvement project that’s both practical and stylish.

The Rolling Log Holder: Convenience Meets Function
Glide Your Way to Simplicity
With 4-pack 1″ low-profile caster wheels, moving firewood has never been this easy. One glide, and your firewood is fireplace-ready.
Smart Space-Saving Design
Crafted from sturdy 2×3 lumber, this log holder is as sleek as it is functional. It’s designed to fit seamlessly into your indoor space without being an eyesore.
A Cleaner, More Organized Home
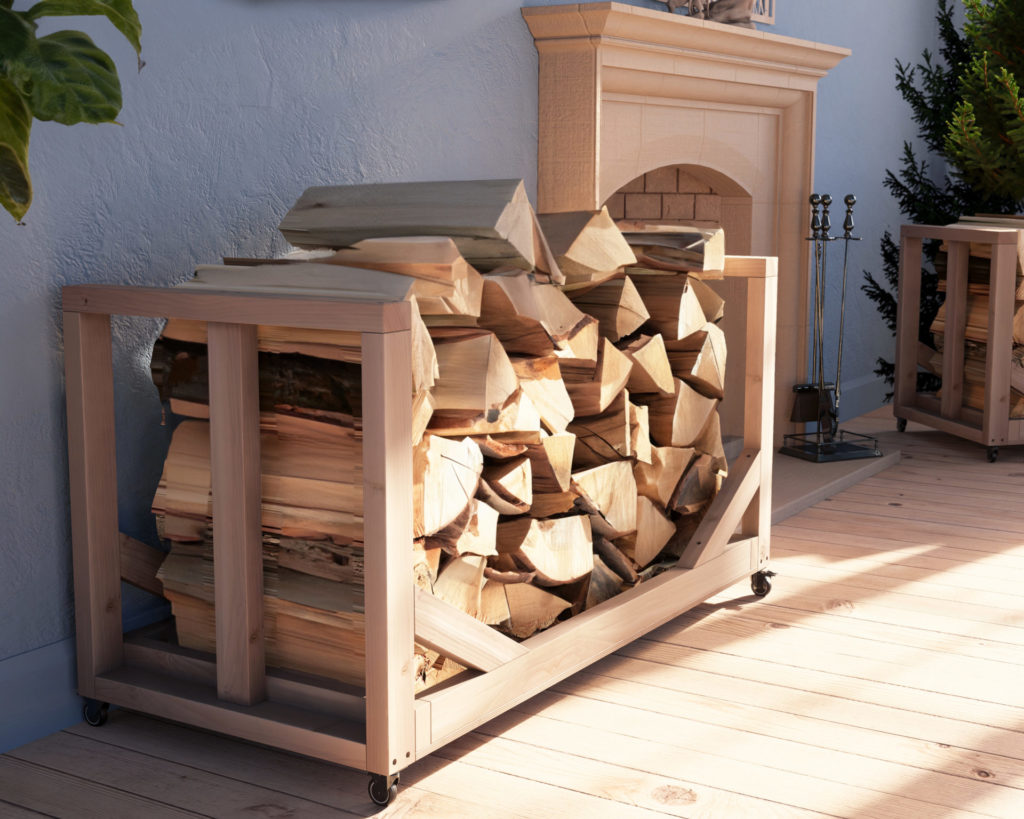
Keep your floors spotless with the built-in plywood base that catches all the stray wood debris. Plus, the three-slat arm design ensures your firewood stays right where it should.
A Design That Speaks Volumes
This rolling log holder isn’t your average wood storage. It’s designed for practicality and aesthetics, with easy-to-assemble joints and a sturdy structure that can hold logs up to 18 inches long.
DIY Simplicity for Everyone
If you can use a hammer and nails, you can build this rolling log holder. It’s the perfect introduction to woodworking, requiring only basic tools and skills.
Tailor It To Your Needs
Looking to add some personal flair? This rolling log holder can be stained to match your interior. And if you have fireplace tools, you can easily add hooks. For those needing to store larger logs, extending the dimensions is a breeze.
A Universal Fit: From Urban Chic to Rustic Charm
This log holder isn’t just for the countryside; it fits beautifully in modern urban interiors as well. Its neutral, customizable design makes it a versatile addition to any home.
Let’s Get Rolling!
Ready to make your firewood storage as efficient as it is stylish? Your DIY Indoor Rolling Log Holder awaits—start your project today!
Time
2 hours
Cost
$40
Skill level required
Beginner
Firewood Rolling Cart DIY Plan PDF
What is included in the PDF download?
- Easy to read step by step instructions
- Material list
- Tools needed
- Helpful links to materials and tools needed
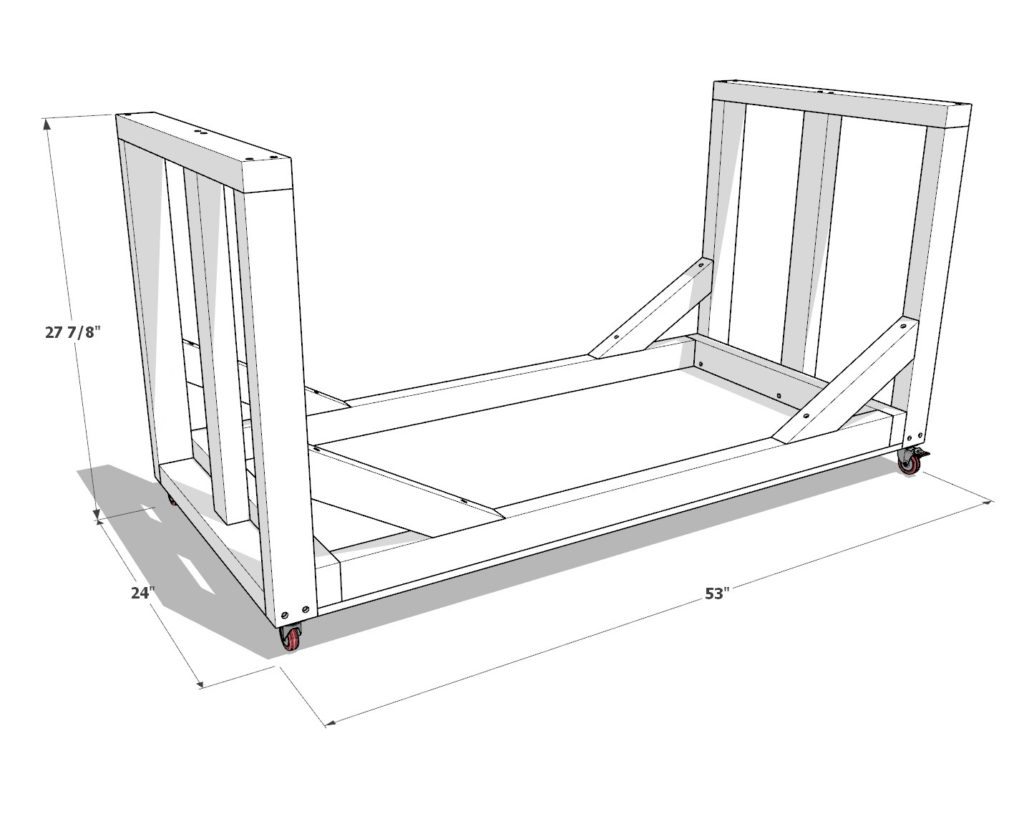
DIY Firewood Rolling Cart Dimensions
Tools Needed for This Project:
Available with the purchase of the DIY plan PDF. Thank you for your support and for making this website possible.
Lumber Shopping & Cut List
Available with the purchase of the DIY plan PDF. Thank you for your support and for making this website possible.
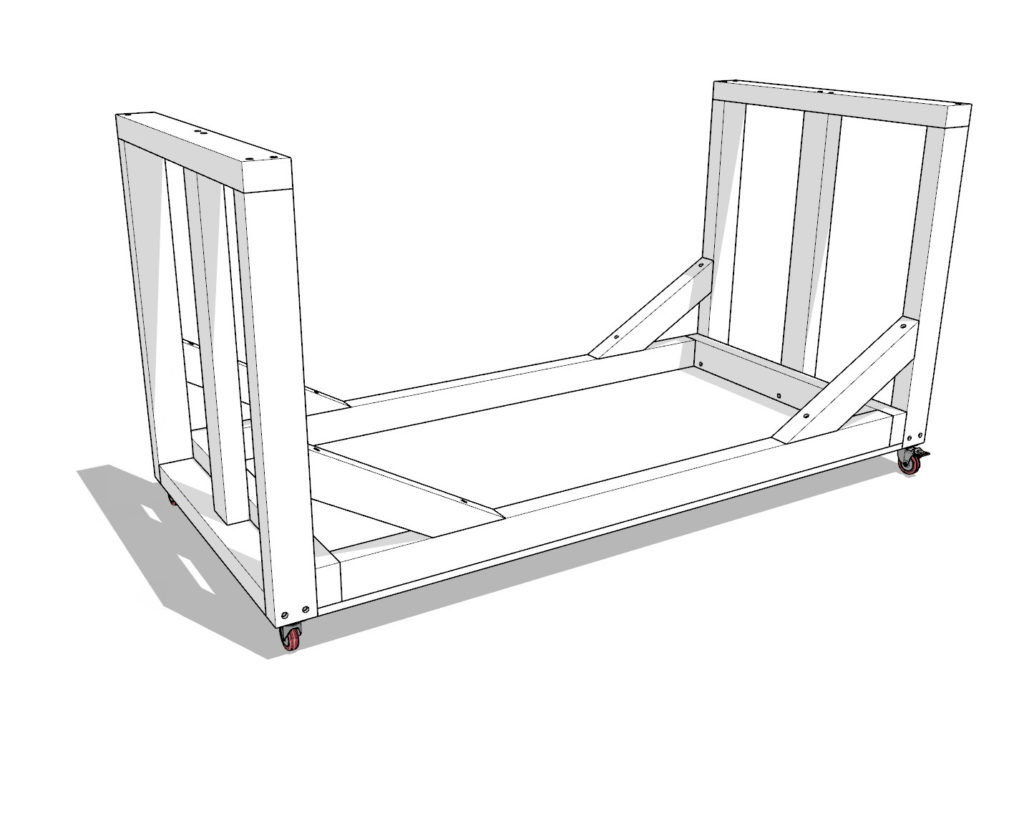
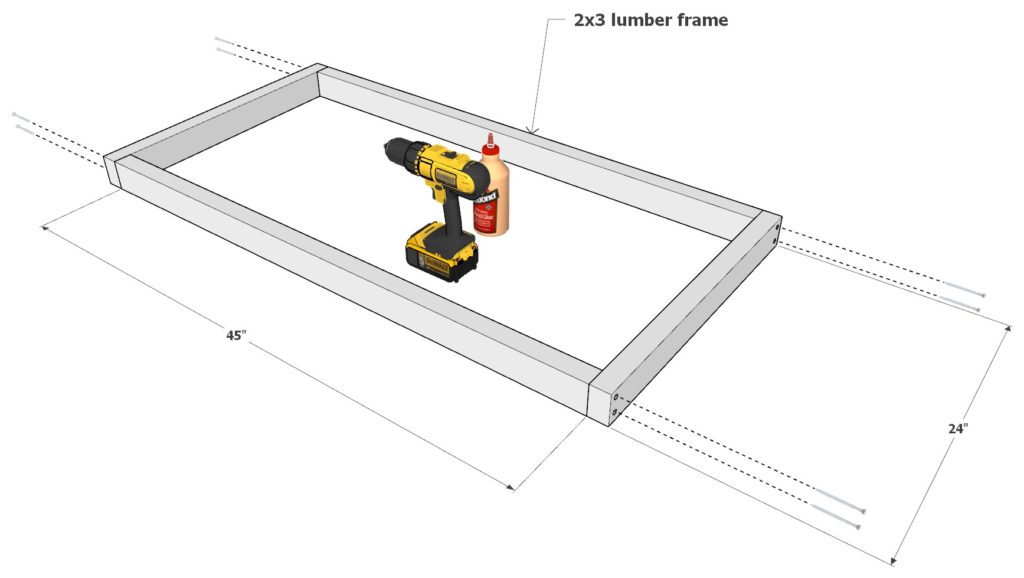
Step 1: Assemble the Log Cart Base
Start by placing two 24-inch lengths of 2×3 lumber parallel to one another on a flat surface. Fit two 45-inch lengths of 2×3 lumber between them to create a rectangular shape. Before securing anything, double-check that the corners are square. Pre-drill holes at the corners to avoid splitting the wood, then use a countersink bit for a professional finish. Fasten the pieces together using 2.5-inch screws along with wood glue for extra strength.
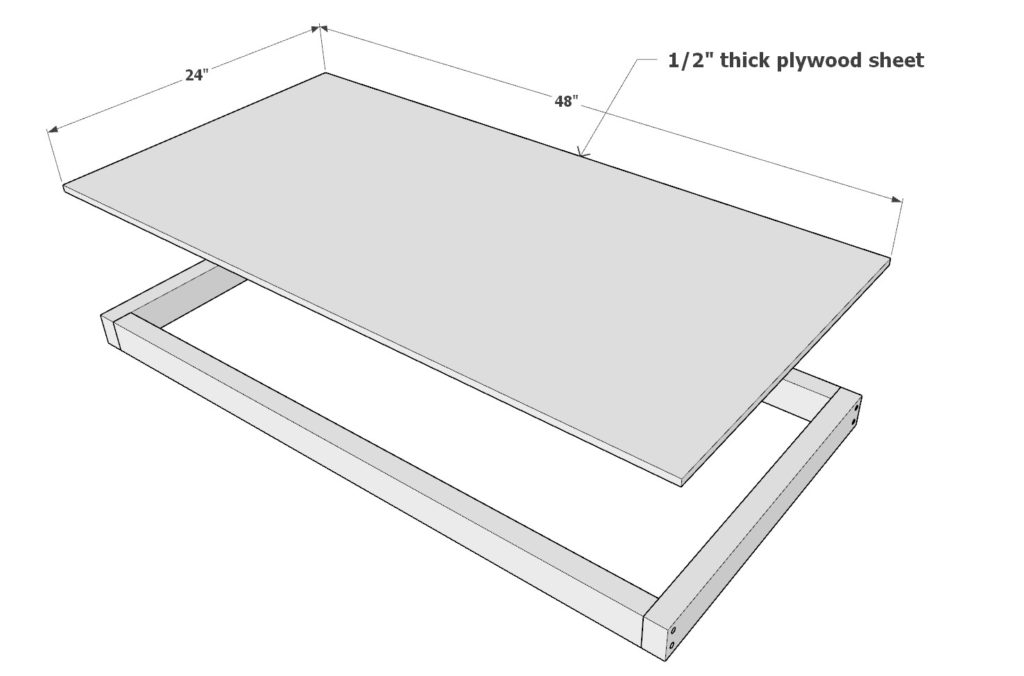
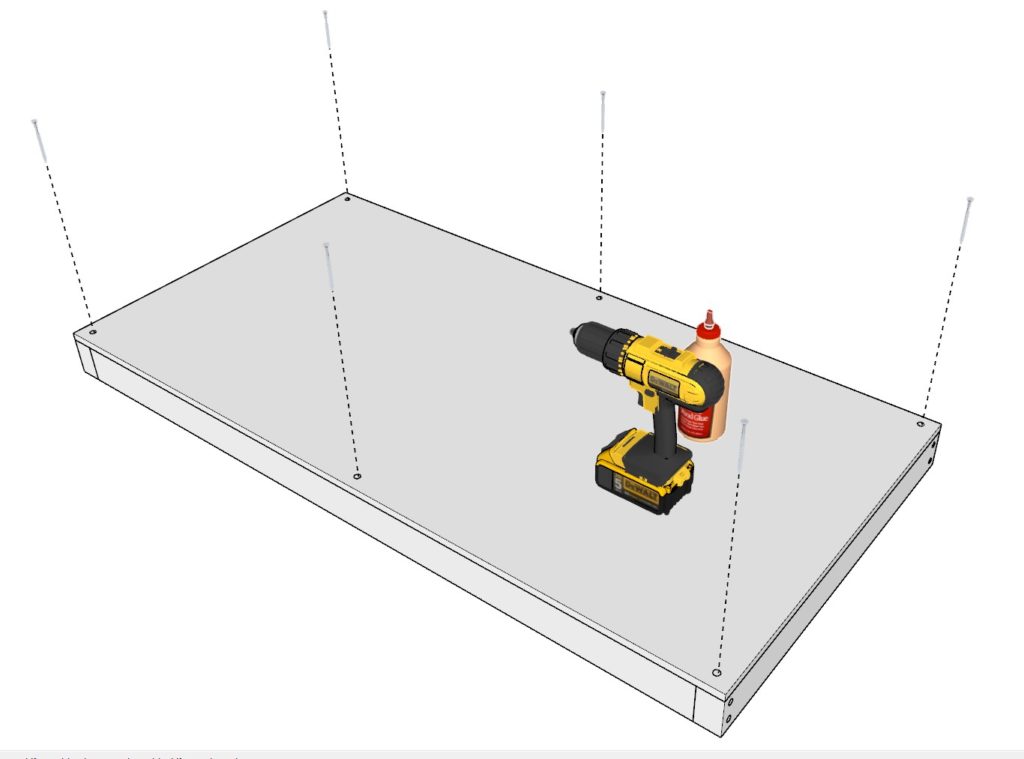
Once the frame is secure, align a 48-inch by 24-inch plywood sheet of 1/2-inch thickness on top. Ensure it sits flush with the frame, then affix it in place using wood glue first, followed by 2.5-inch screws for added stability.
Tips
- Tip 1: Consider staining or painting the individual pieces before assembly. This ensures an even application and allows you to reach corners and crevices more easily.
- Tip 2: Sand each piece of lumber before you begin assembly. This not only enhances the look but also ensures a smoother finish, which is especially beneficial if you plan to stain or paint the wood.
- Tip 3: Always use a carpenter’s square to confirm that the corners are at a 90-degree angle. This ensures a square, professional-looking end product.
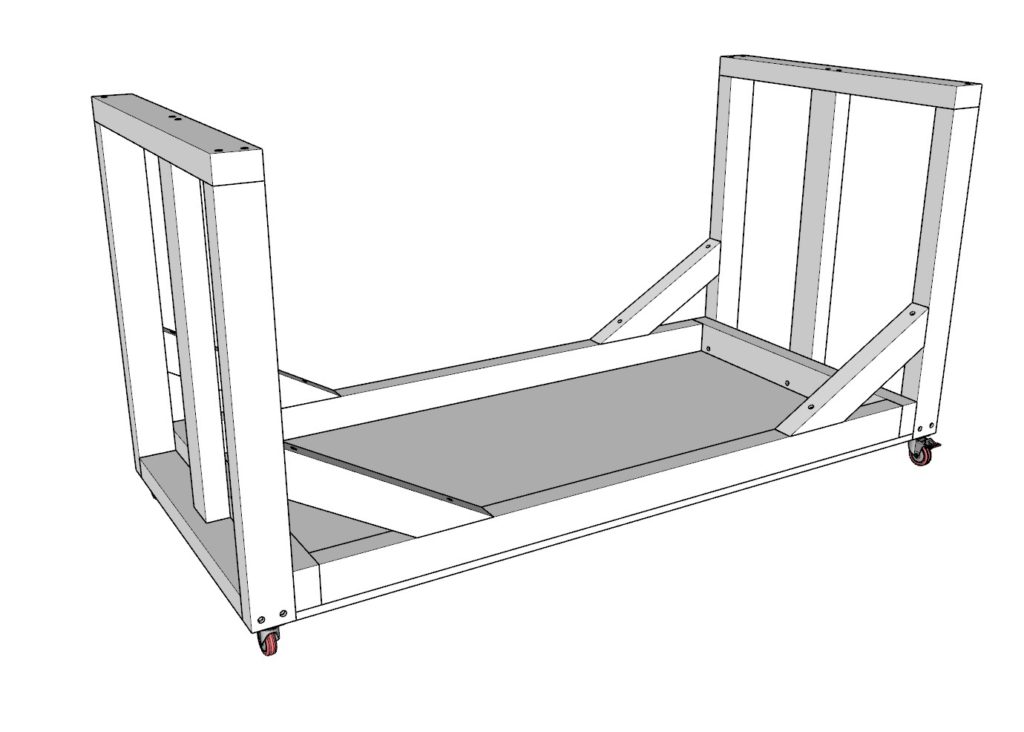
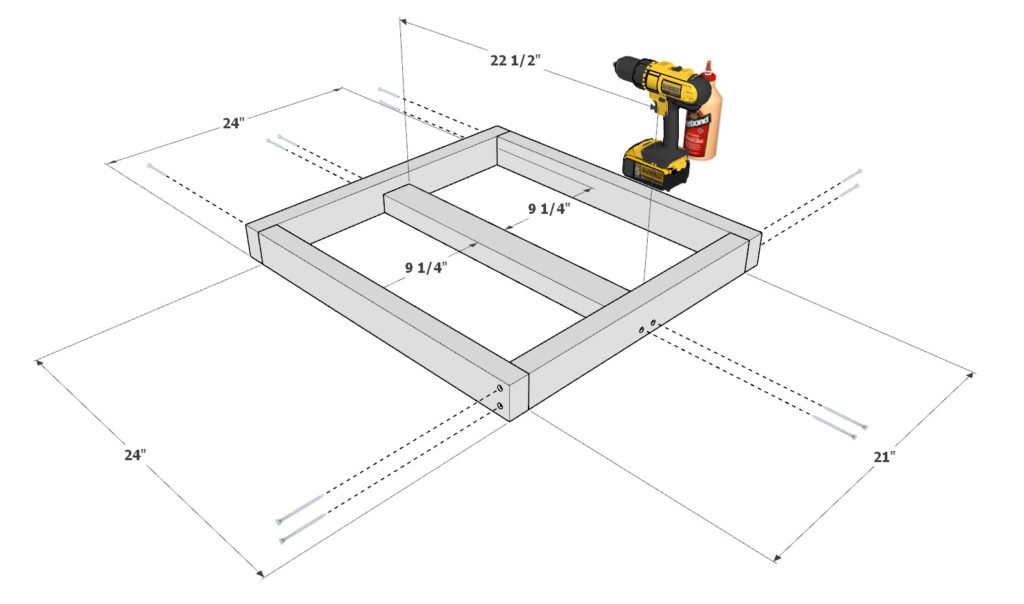
Step 2: Build and Attach the Cart Arms
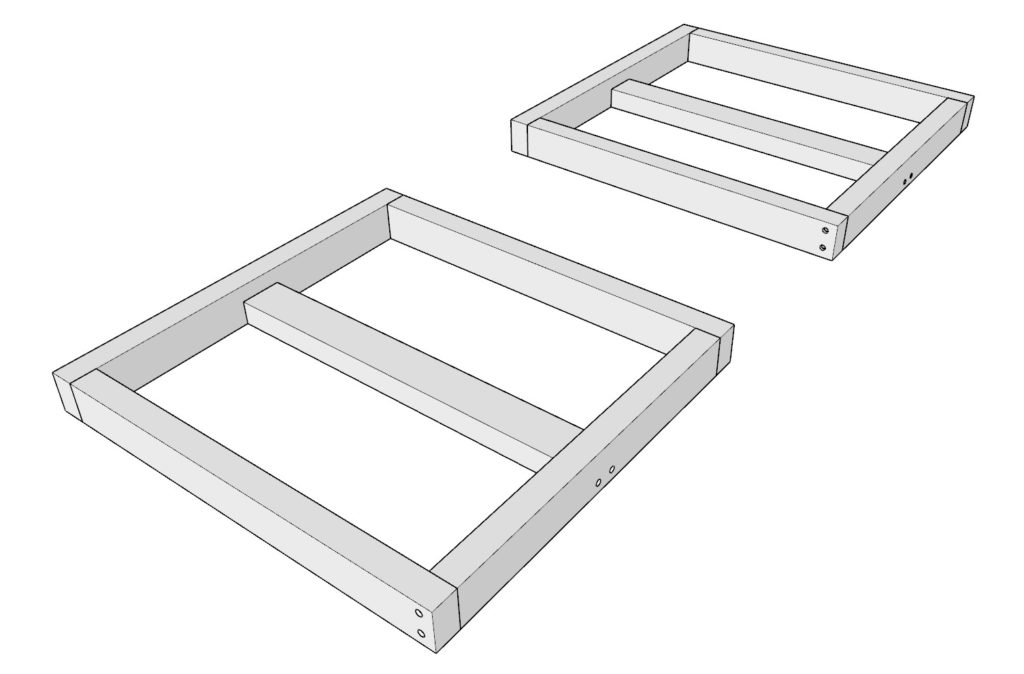
Start by collecting three 24-inch pieces, one 21-inch piece, and one 22-1/2-inch piece of 2×3 lumber for each arm. Arrange them as shown in the diagram. Pre-drill and countersink the holes, then secure the pieces together using wood glue and 2.5-inch screws. Repeat to create a second, identical arm.
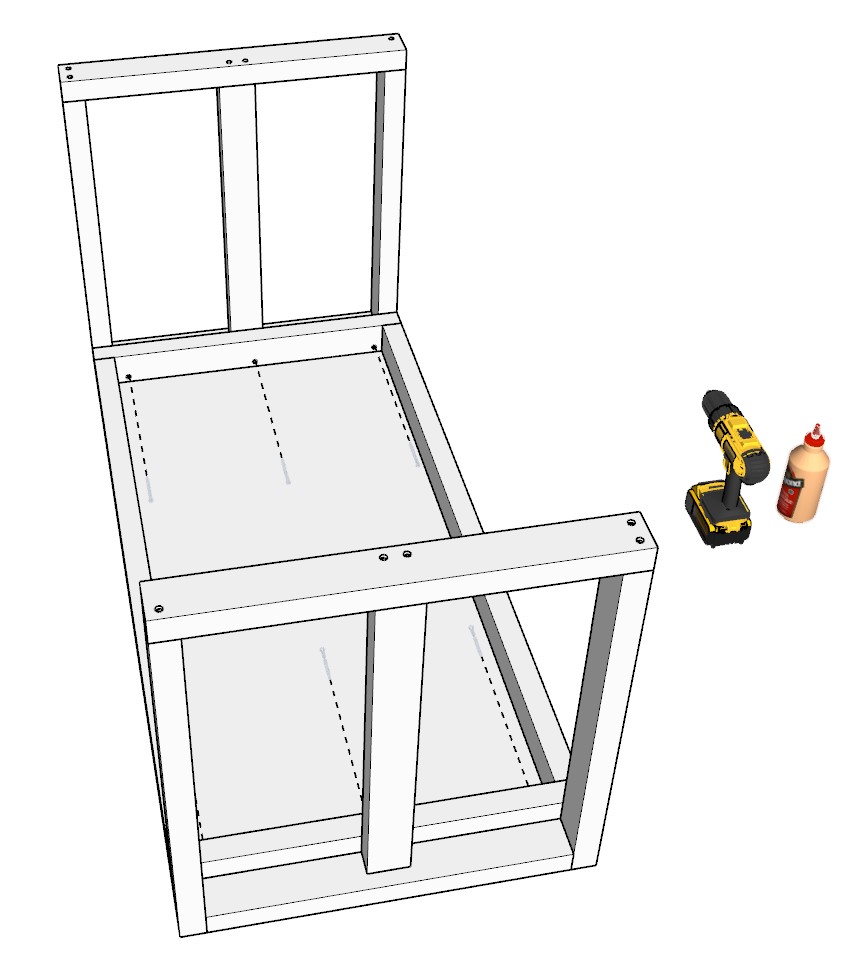
After both arms are constructed, line them up with the sides of the base frame. Ensure they are flush and level before securing them in place with wood glue and 2.5-inch screws.
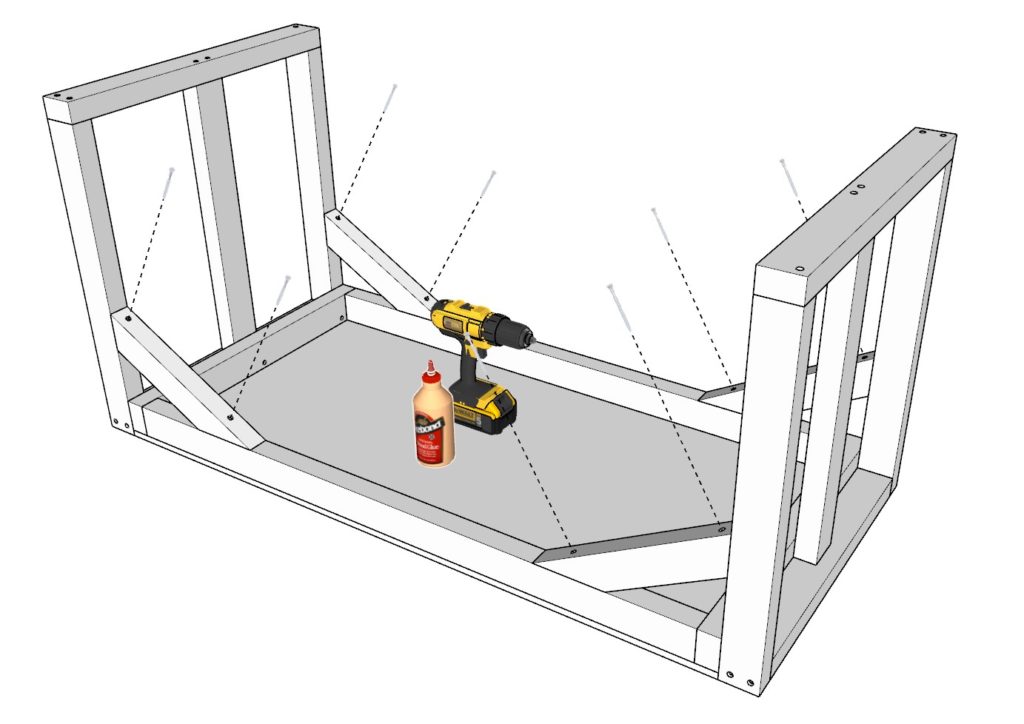
Step 3: Add Support Braces and Wheels
Begin by taking a 14-5/16-inch 2×3 lumber piece. Cut one end at a 30-degree angle and the opposite end at a 60-degree angle, as illustrated in the diagram. Repeat this process to create a total of four identical support braces.
Align these braces with the arms of the log cart, ensuring they fit snugly against the frame. Pre-drill and countersink the holes before securing them in place with 2.5-inch screws and a dab of wood glue for extra hold.
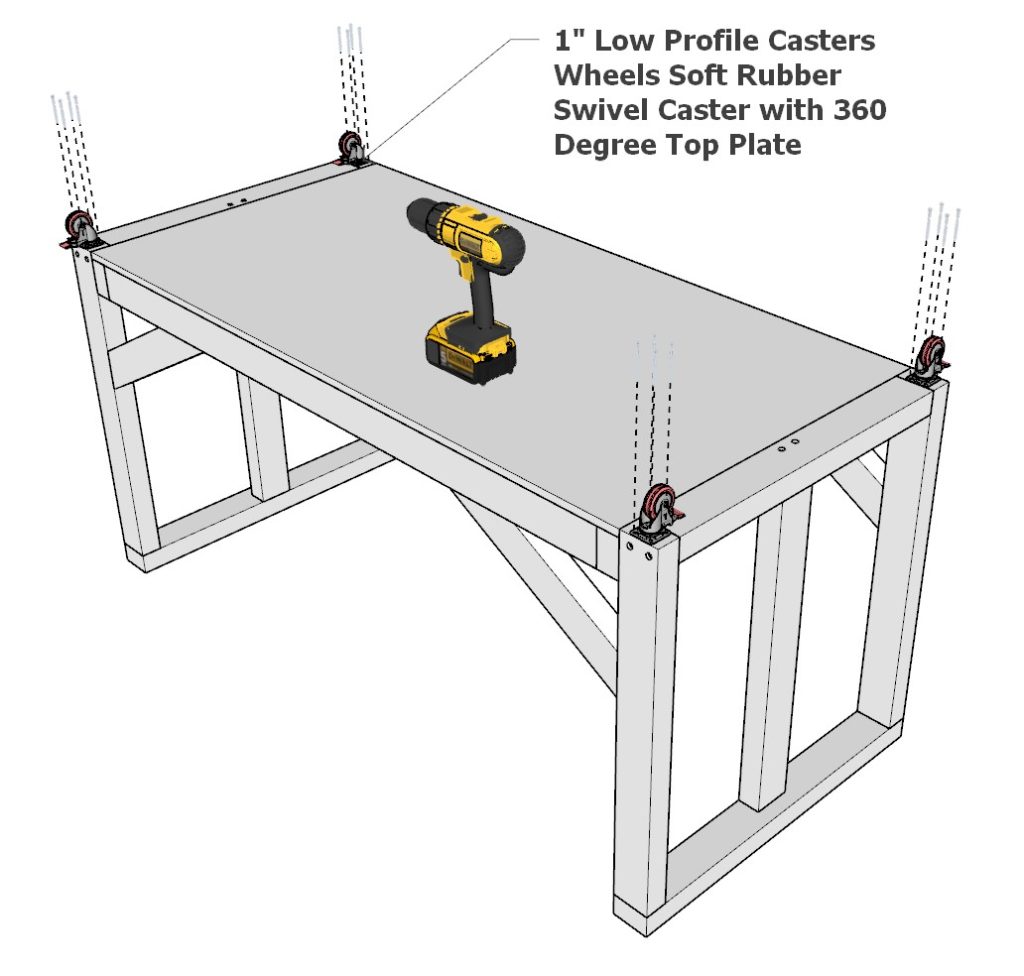
To finish off, flip the cart over to install the 4 Pack 1″ Low Profile Casters Wheels. Use the screws provided to secure each wheel to the corners of the wood, making sure they’re tightly fastened.
Tips
- Tip 1: When cutting angles on the lumber, make sure your saw is accurately calibrated. Double-check the angles with a protractor for precise cuts.
- Tip 2: Before securing the support braces, temporarily hold them in place with clamps to ensure they fit and align well. Make any necessary adjustments before adding screws and glue.


Step 4: Prepping and Finishing Your Cart
Sanding: Start by sanding all wooden surfaces of the cart using a medium-grit sandpaper, such as 120-grit. This will help remove any rough spots or splinters. For hard-to-reach corners or intricate areas, consider using a detail sander.
Cleaning: After sanding, use a tack cloth or a damp rag to wipe down all surfaces. This will remove any dust or debris that could interfere with the paint or stain.
Masking: If your cart has any hardware or wheels already installed, use painter’s tape to mask these areas to prevent them from getting stained or painted.
Priming: (For Painting Only) If you’re planning to paint the cart, apply a coat of wood primer to all surfaces. Allow to dry as per the manufacturer’s instructions.
Instructions for Painting the Cart
Choosing Paint: Select an appropriate paint that is suitable for wood and the environment where the cart will be used. Exterior paints are best if the cart will be used outdoors.
Mixing: Stir the paint thoroughly before applying. If you’re using more than one can, mix them together to ensure color uniformity.
Application: Using a high-quality brush or roller, apply the first coat of paint. Make sure to use long, even strokes to avoid brush marks.
Drying: Allow the first coat to dry fully, as per the manufacturer’s guidelines.
Second Coat: After the first coat is dry, lightly sand the surfaces with a fine-grit sandpaper. Then, apply a second coat.
Final Touch: Once the second coat is dry, remove all masking tape and perform any necessary touch-ups.
Instructions for Staining the Cart
Choosing Stain: Opt for a wood stain that complements your wood type and suits your desired aesthetic.
Pre-Stain: Apply a pre-stain wood conditioner to help the stain apply more evenly.
Application: Using a clean cloth or brush, apply the stain in the direction of the wood grain. Wipe away any excess stain.
Drying: Allow the stain to penetrate the wood for the time specified on the product label, then wipe away any excess.
Sealing: Once the stain is dry, apply a wood sealer to protect the finish.
Tips
Tip 1: Always test your paint or stain on a scrap piece of the same wood before applying it to the cart.
Tip 2: When painting, use a “W” pattern for large surfaces to help distribute the paint evenly.
Tip 3: When staining, less is more. It’s easier to darken the wood with additional coats than to lighten it.
Tip 4: Consider using a spray-on primer or paint for a smoother finish, especially if your cart has intricate designs or hard-to-reach areas.
Tip 5: Always work in a well-ventilated area and wear appropriate safety gear, like masks and gloves, especially when staining or painting.