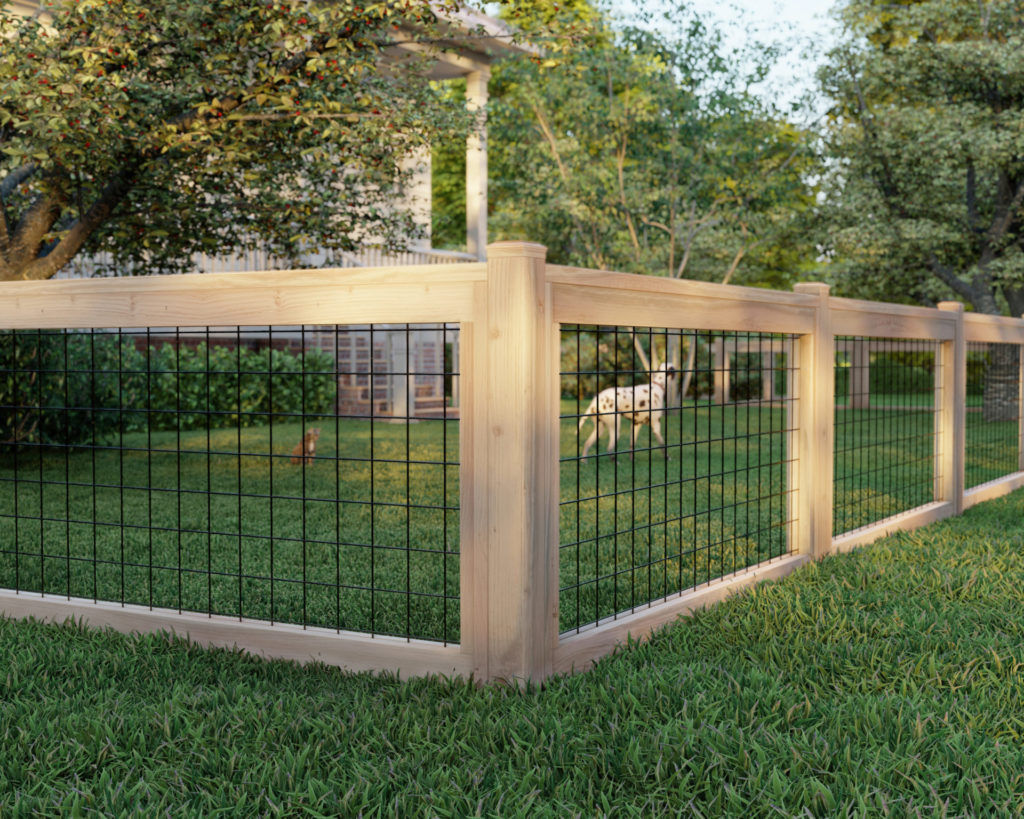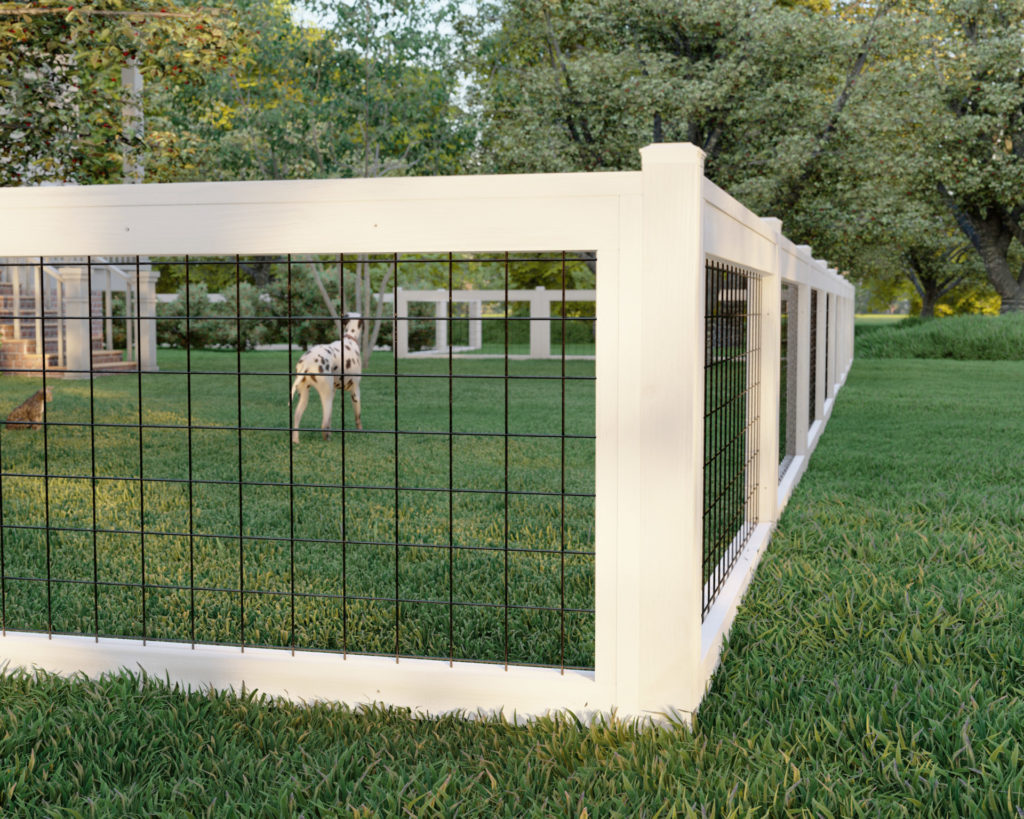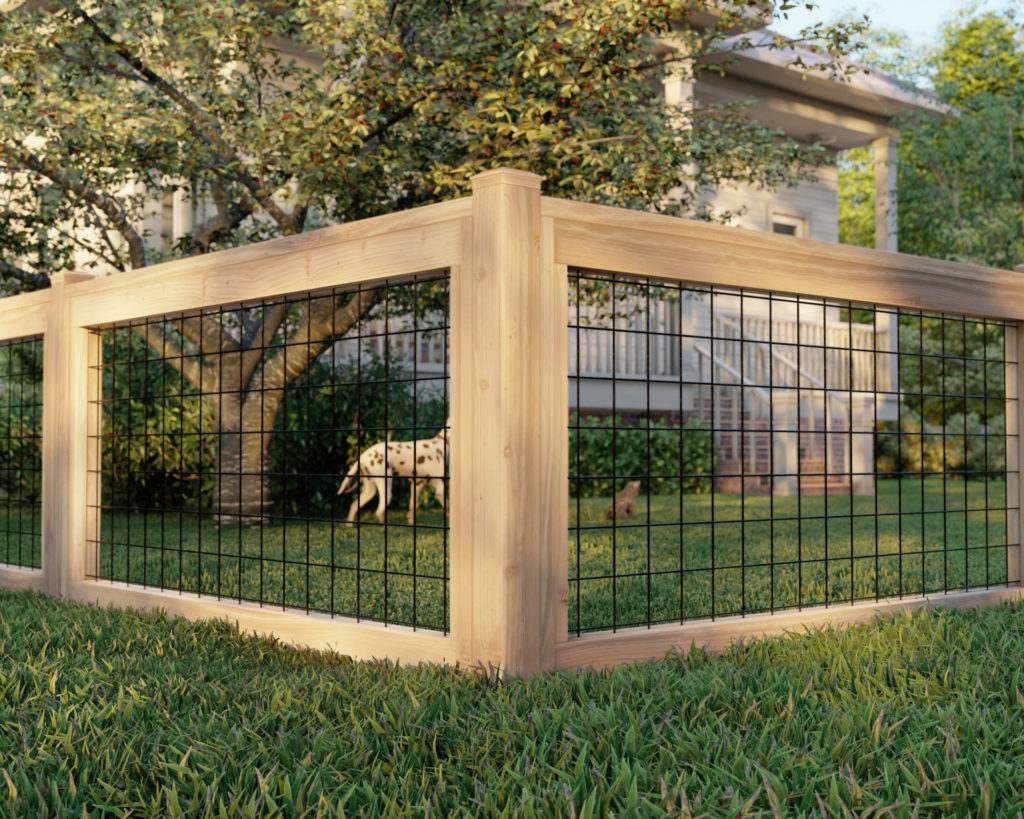
Overview of the DIY fence project
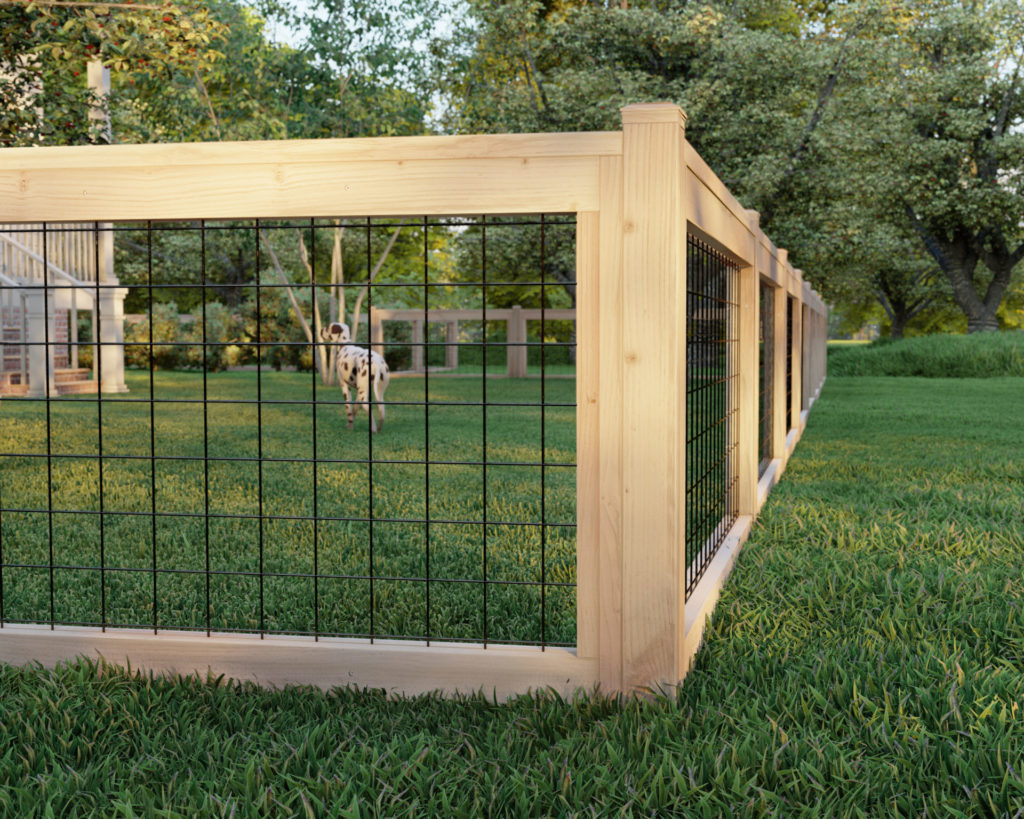
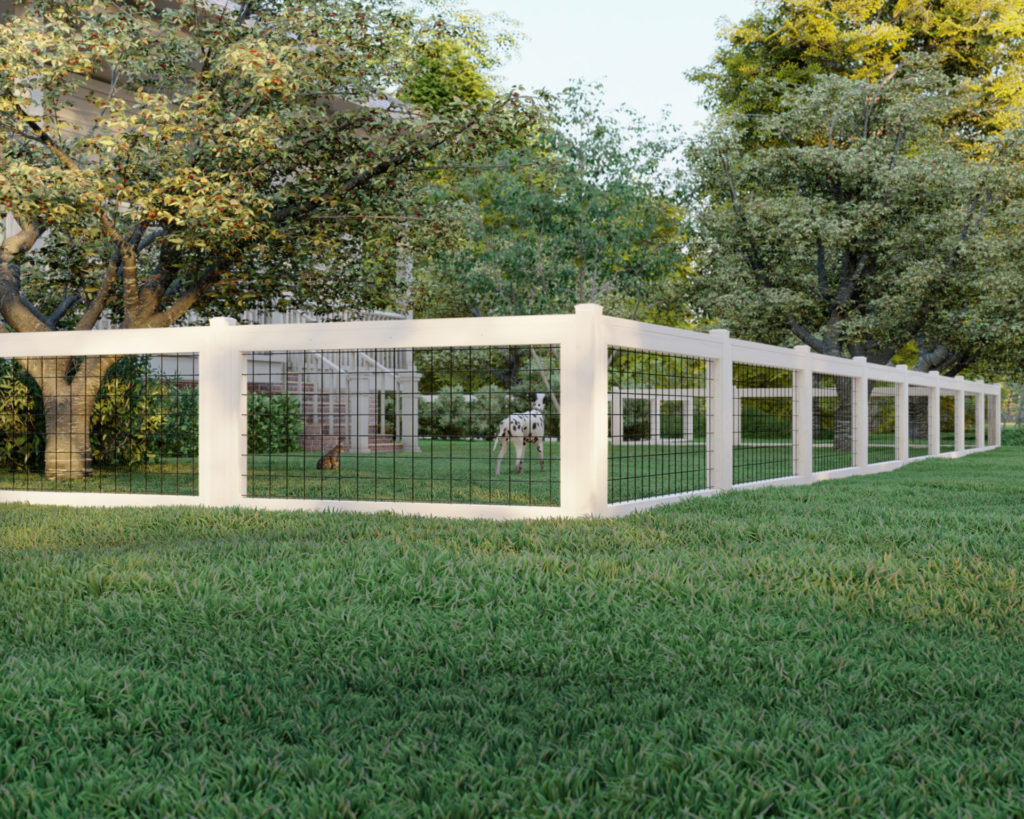
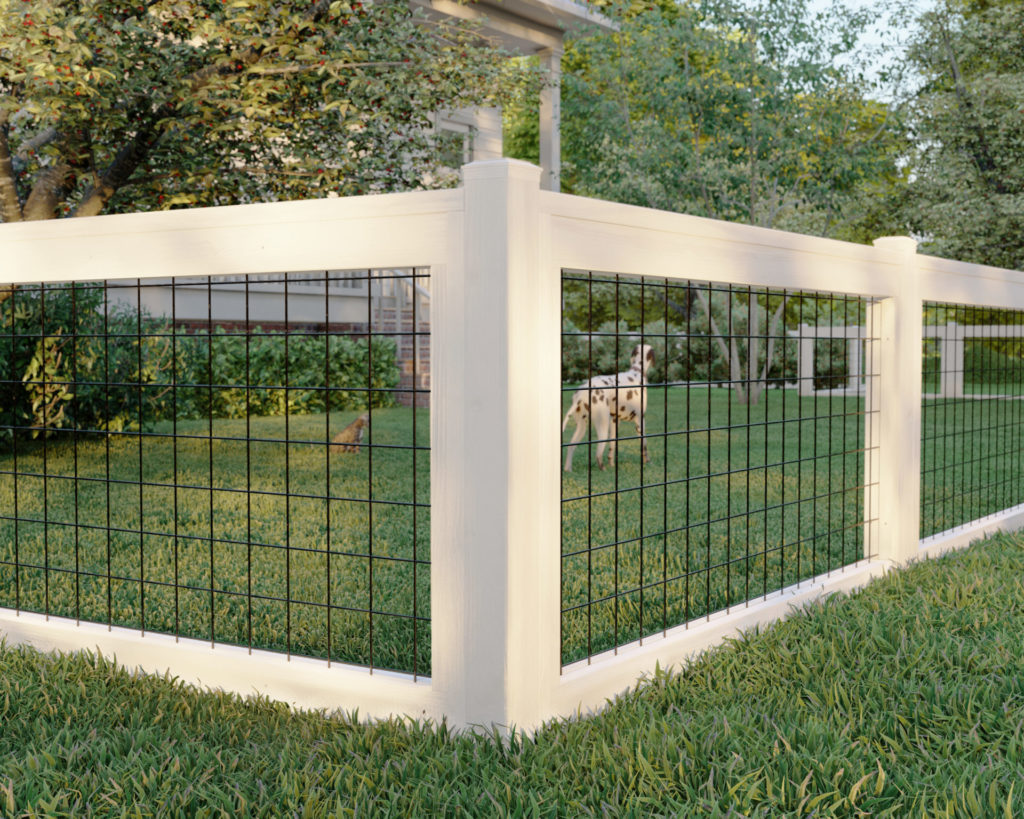
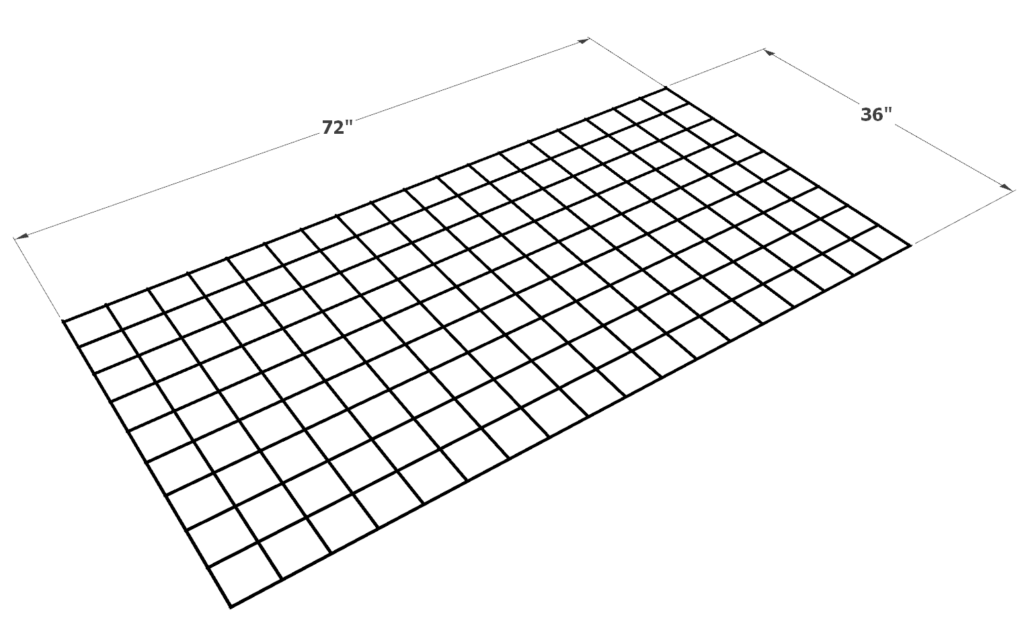
These DIY fence panels use 36 in. x 72 in. Wild Hog Black Metal Railing Panels that Feature 6-gauge wire with powder coating. The combination of durable metal railing panel and wood construction provides security without keeping “the nature” out. These panels can serve as a “window” to the outside. These fence panels are perfect for use on balconies, decks, patios, railing, fencing, arbors, trellis, porches, and garden application because the 4 in. x 4 in. mesh pattern allows for great visibility while being extremely durable.
In this design, the durable mesh fence panels are “wedged” and secured with Black Double Point Staples in between 2×4’s. This makes the panels ridged and secure.
If you’re looking for DIY fence ideas to keep your dog and pets in, wild animals out, or provide a safe space for your children to play and enjoy the outdoors, building a DIY fence can be a great way to save money and to build the perfect fence for your home. These fence panels can add privacy as well. Allowing for fast climbing plants like Pileostegia viburnoides, Jasminum nudiflorum, , vitis vinifera, Japanese wisteria, or morning glory can add not only privacy, but transform your yard landscape into a beautiful, lush, and pleasantly scented getaway space.
Who can build this DIY fence?
The DIY friendly fence panels are easy to assemble with the step-by-step instructions provided in this post. Once the posts are set, the DIY fence is easy to install and attach.
I believe this fence would be a great project for beginners to woodworking and anyone with minimal woodworking experience.
The DIY plans offered in this post include helpful description, images, diagrams, helpful links, and more to ensure that the DIY fence build is smooth, efficient, and easy.
What does this post cover?
This post will focus on covering the step on how to build the fence panels and attaching them to the fence post. Measuring and laying out of the fence posts, digging holes, pouring concreate, staining or treating the wood ARE NOT COVERED.
Check list before you start the DIY fence building.
It is important to consider a few important things before starting a DIY fence.
- You will likely need a permit. You will need to check your local codes and regulations.
- Some areas may have a homeowners association that have rules to govern the style, size, and placement of fences.
- If unclear, you may also need to check property lines and discuss the project with your neighbors before construction.
- Consider the building material. A cedar fence, if built appropriately, can last up to 40 years. Here in California, the lumber of choice for fencing is redwood due to its availability, durability, and cost.
- Determine fence gate location and all access points.
- When building with the fence panels covered in this DIY post, you will need to calculate the total length of each side of your property and calculate the total panel length needed. You may need to install a partial panel to make everything fit. (Good thing is that these panels are easily customizable, and the metal can be cut with small bolt cutters or a cutting wheel).
- Call the utility company before construction to ensure your fence posts will not hit any utility lines.
- Determine the number of posts needed for the project.
Time to build
1-3 day project
Total cost of build
About $20/ linear foot of fence. (prices change overtime and cost estimate may not reflect current material prices)
Skill level required
Beginner
Download the PDF plans
DIY wood and metal railing panels fence PDF plans
What is included in the PDF download?
- Easy to read step by step instructions
- Material list
- Tools needed
- Helpful links to materials and tools needed
Step-by-step instruction on building DIY fence panels
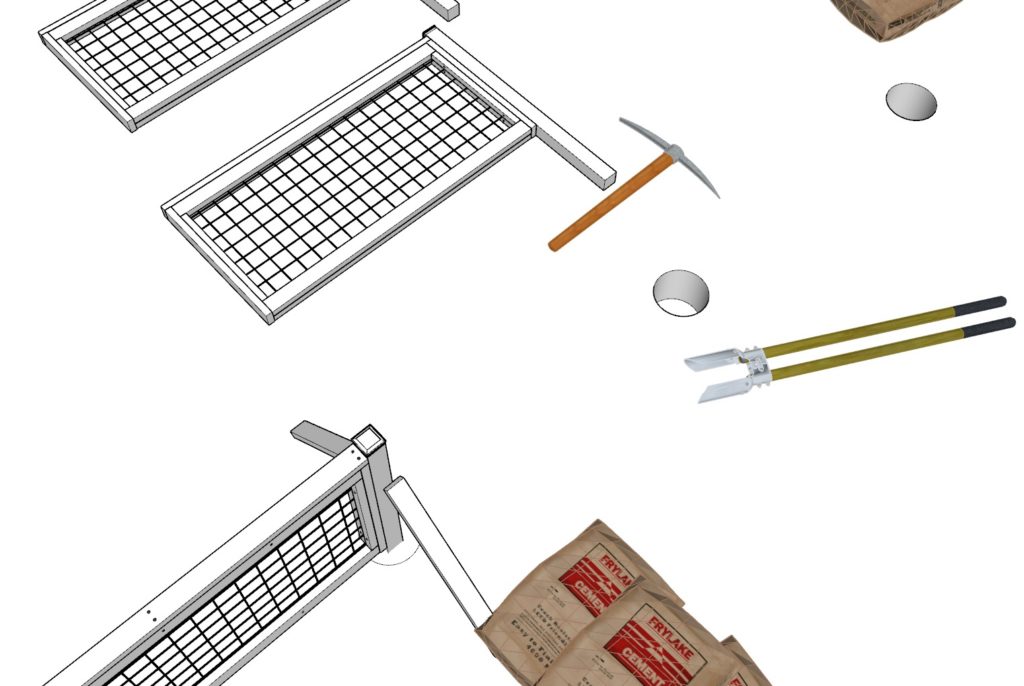
Recommend tools and materials
- Saw (miter saw recommended for precision cuts)
- Drill
- Impact driver with bit for screws
- wood countersink drill bit
- measuring tape
- pencil
- hammer
- 1 post cap per post
- 5lbs of 3 inch long screws per panel (highly recommend T25 Star Drive screws) (Home depot also has great prices for 25 lb bucket of 3 inch screws as well)
- 3/8 in. Black Double Point Staples
- 36 in. x 72 in. Wild Hog Black Metal Railing Panel
Disclaimer: Affiliate links
Lumber list and cut list
Available with purchase of PDF plans.
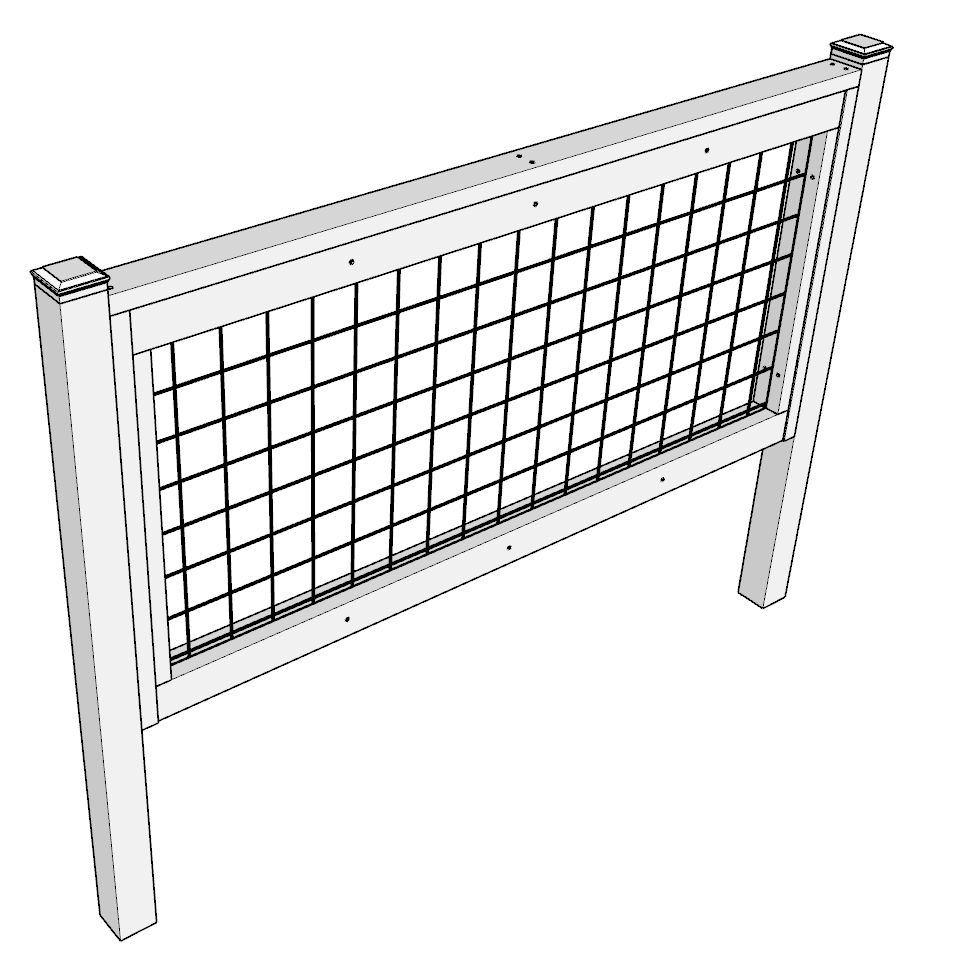
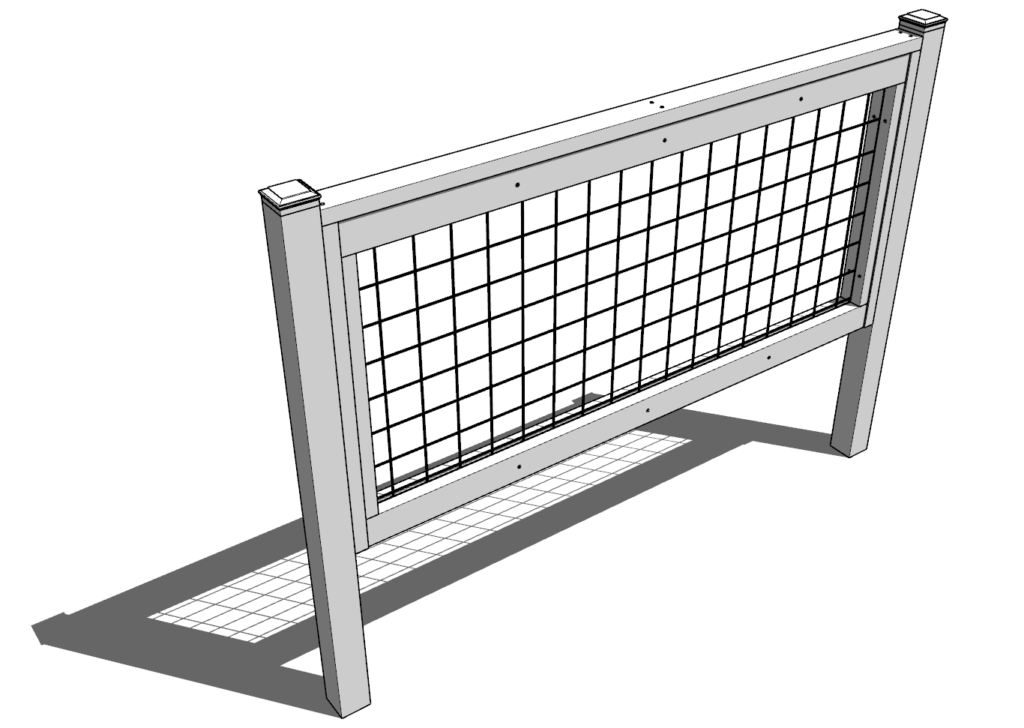
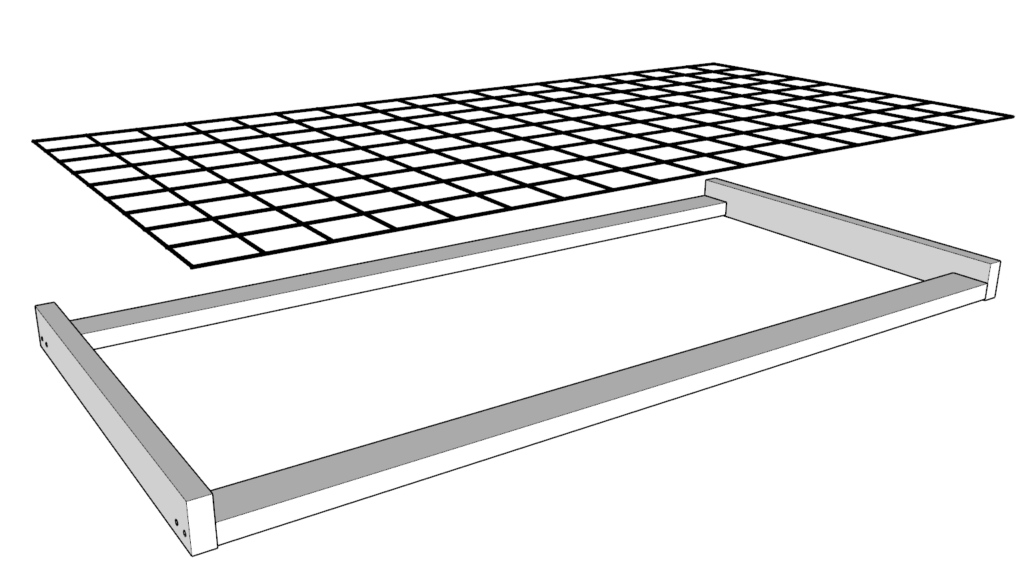
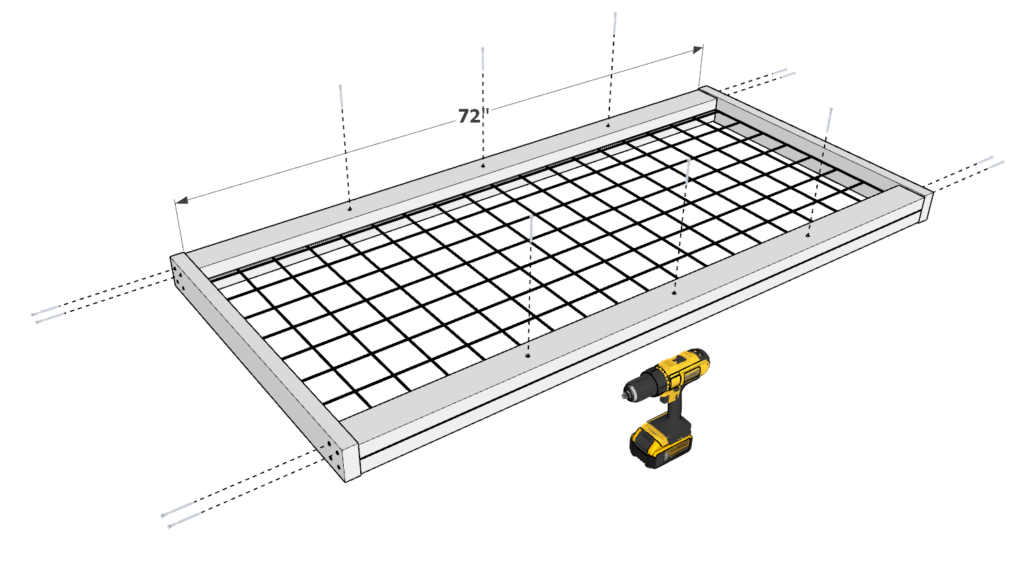
Step 1 (DIY fence panels)
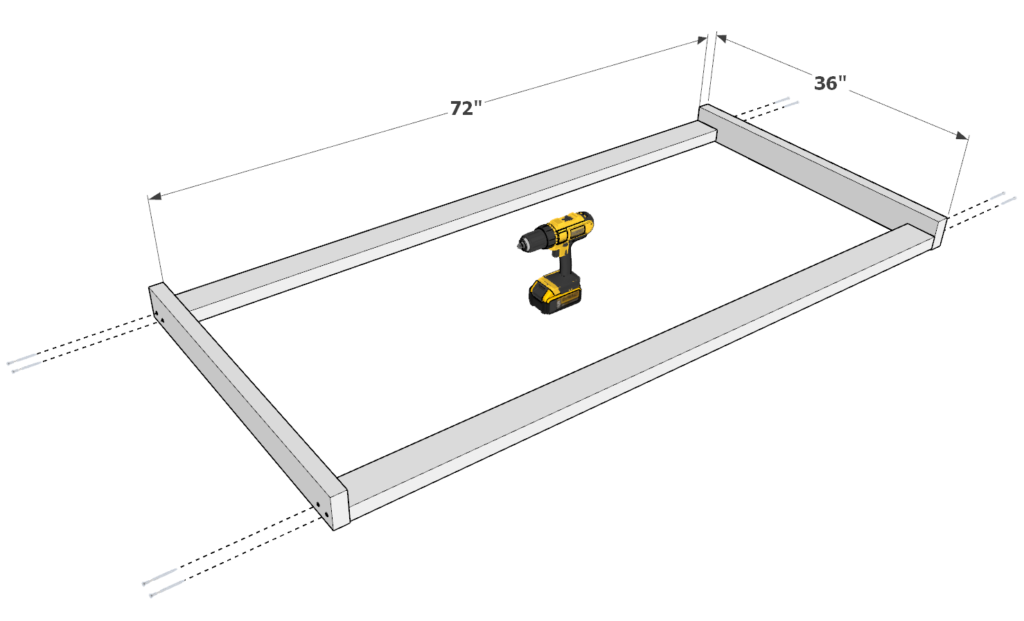
First, take two 36 inch 2×4 lumber pieces and two 72 inch 2×4 lumber pieces and arrange them as shown below. Predrill (to prevent wood splitting), and add 3 inch screws.
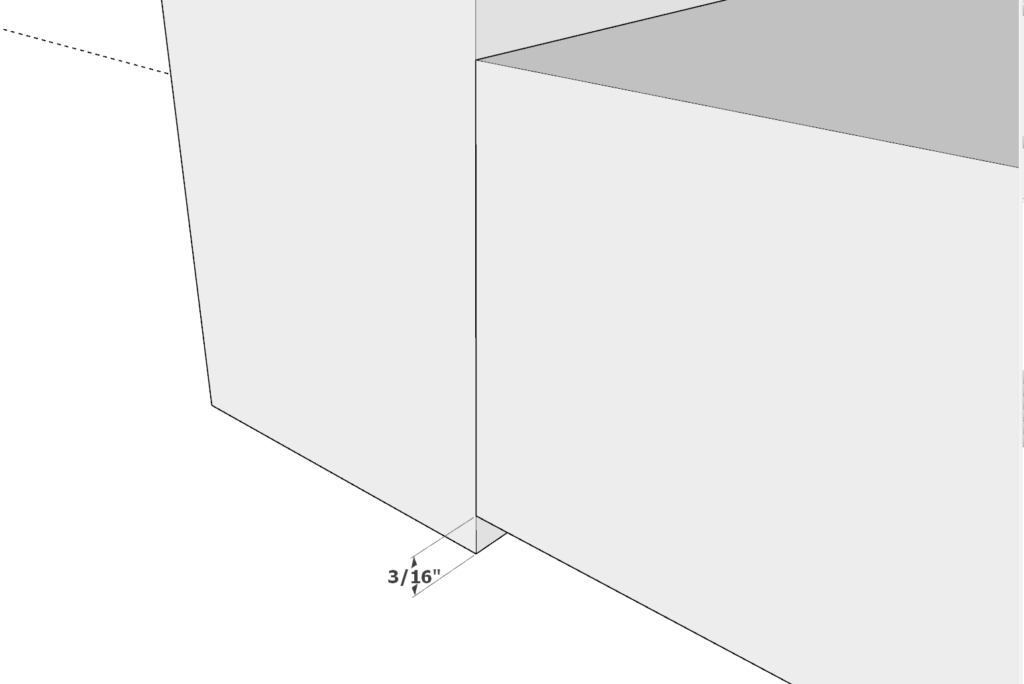
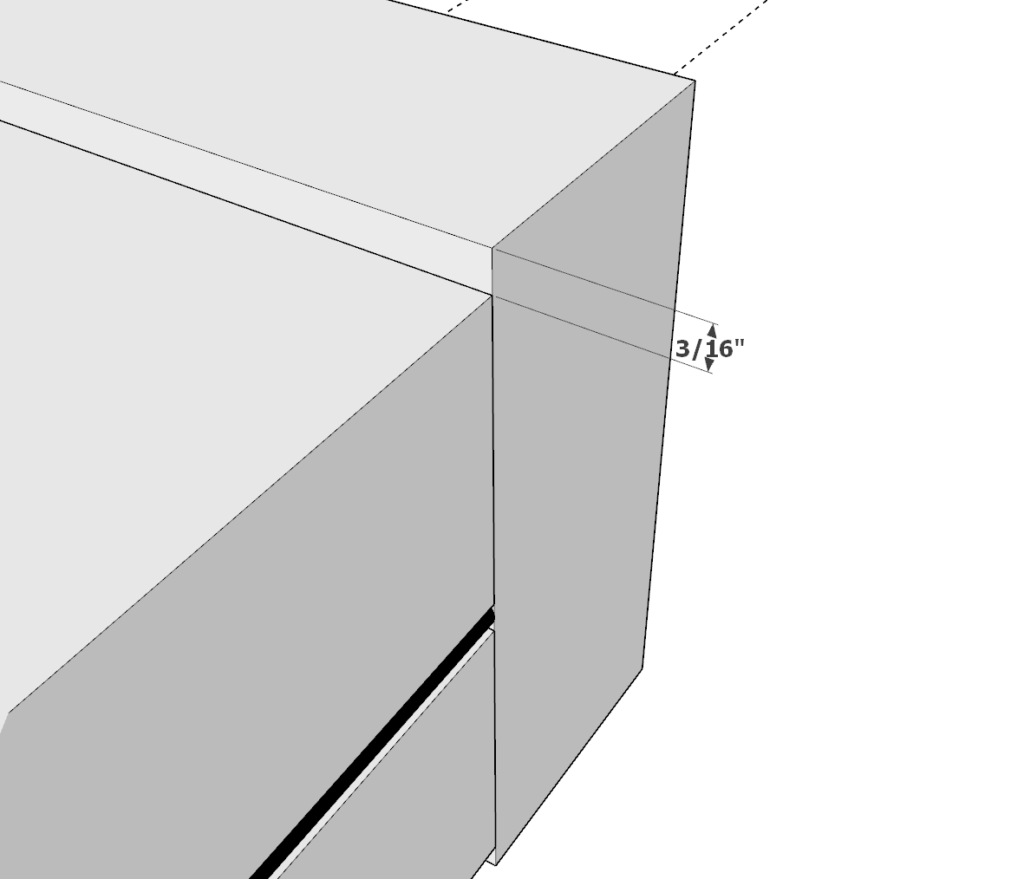
Each panel has a small 3/16 indent on either sides of the 72 inch 2×4 lumber pieces as shown below. To make all the panels match, consider using a 3/16 inch spacer. This can be cut from scrap lumber and reused for all the panels you will be building for the fence.
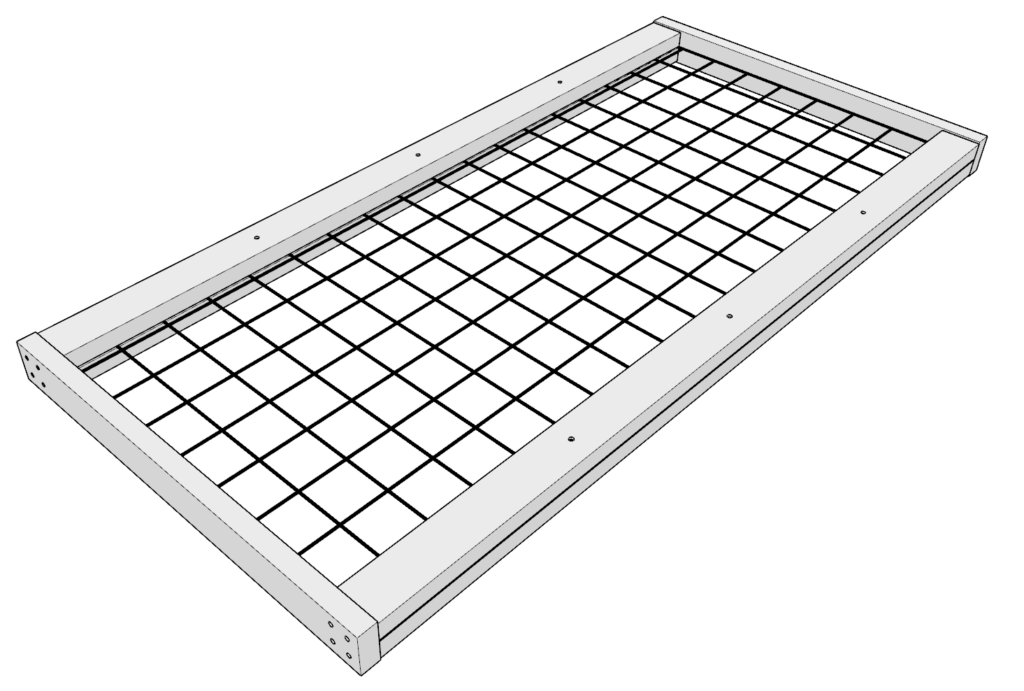
Step 2 (DIY fence)
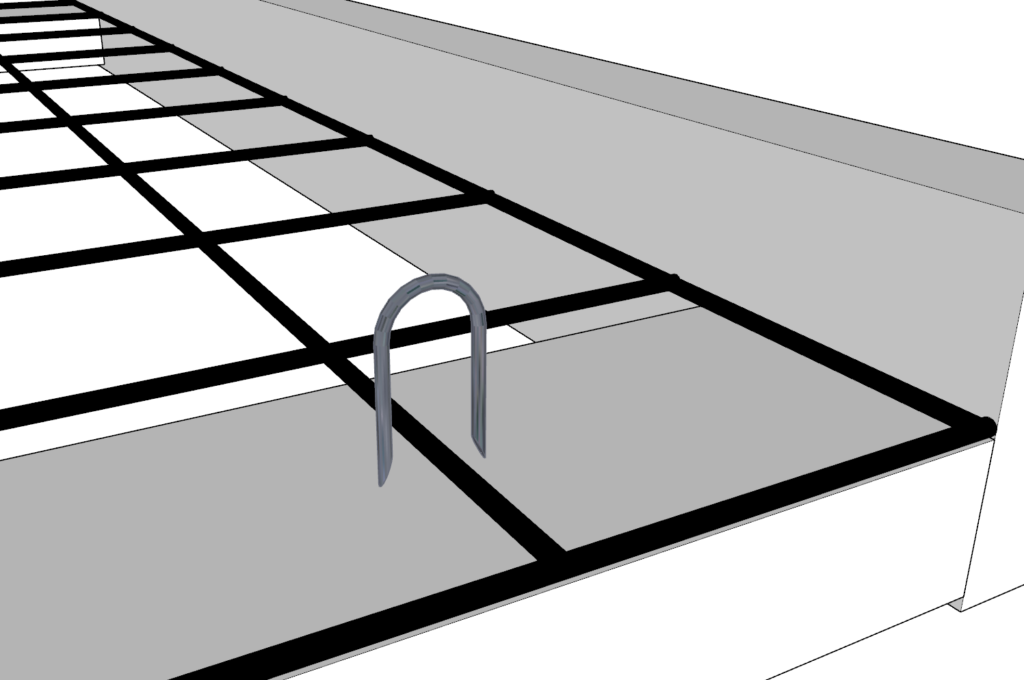
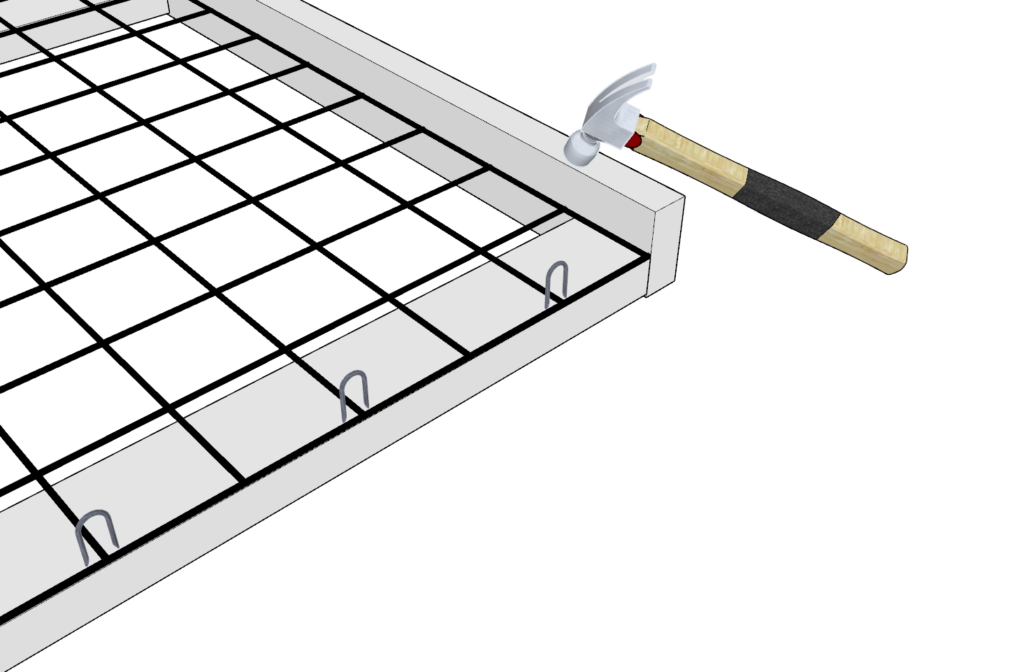
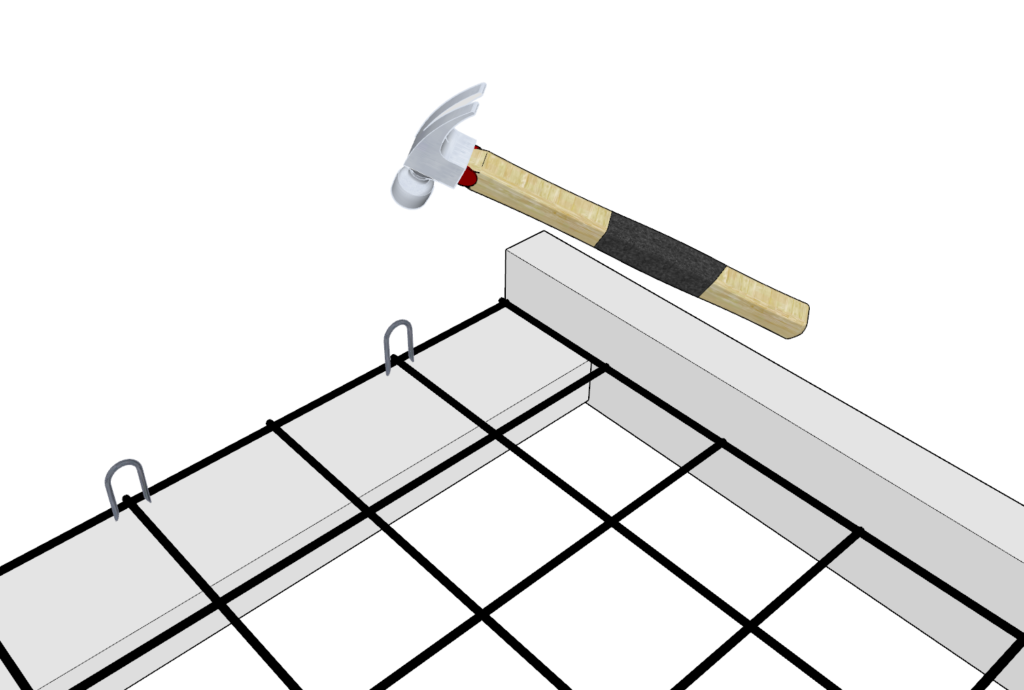
Next, add the 36 inch x 72 inch metal railing panel.
Secure the panels with double point staples by hammering them into place until flush.
I recommend placing the staples in such a way that will prevent the metal railing panel from sliding around.
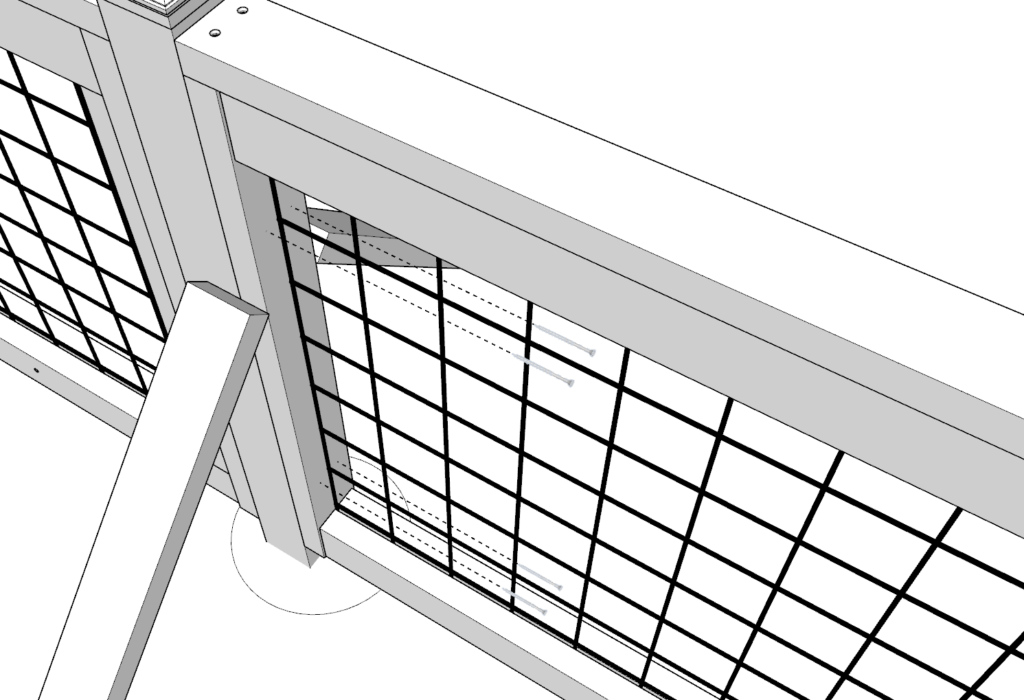
Step 3 (DIY fence panels)
Next, add two 72-inch 2×4 lumber pieces directly on top of the metal railing as shown below.
Predrill, and add screws to secure the metal panel into place.
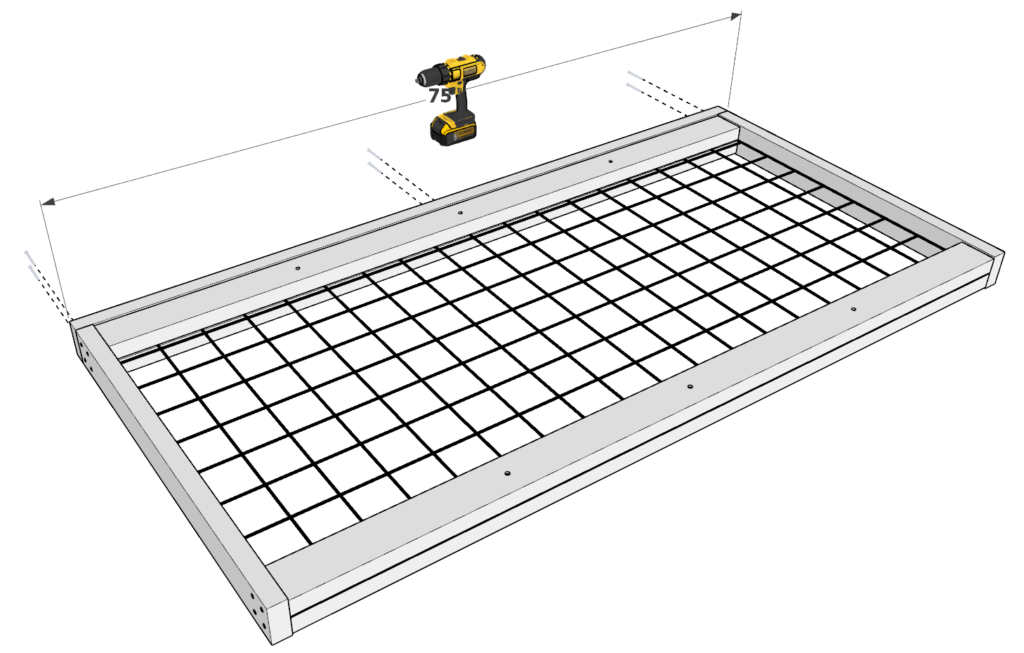
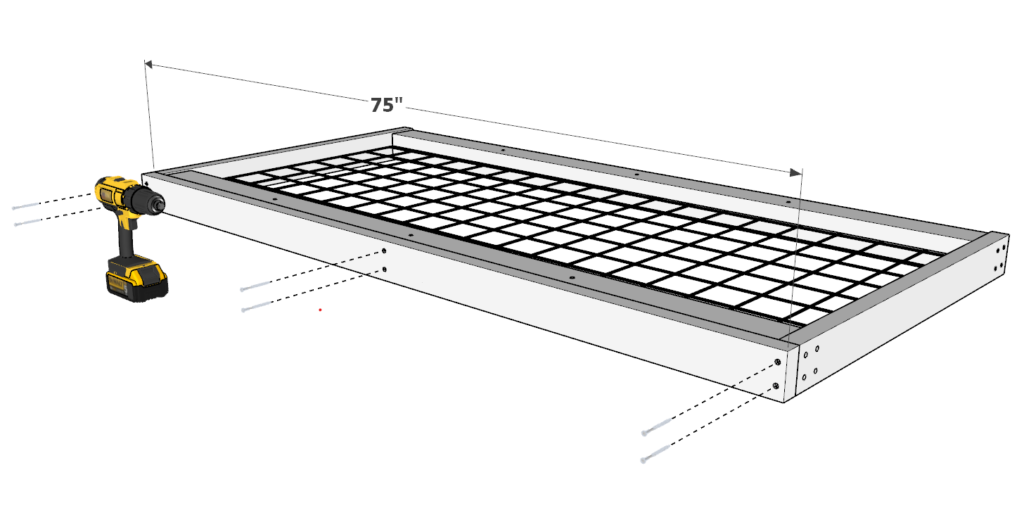
Step 4 (DIY fence panels)
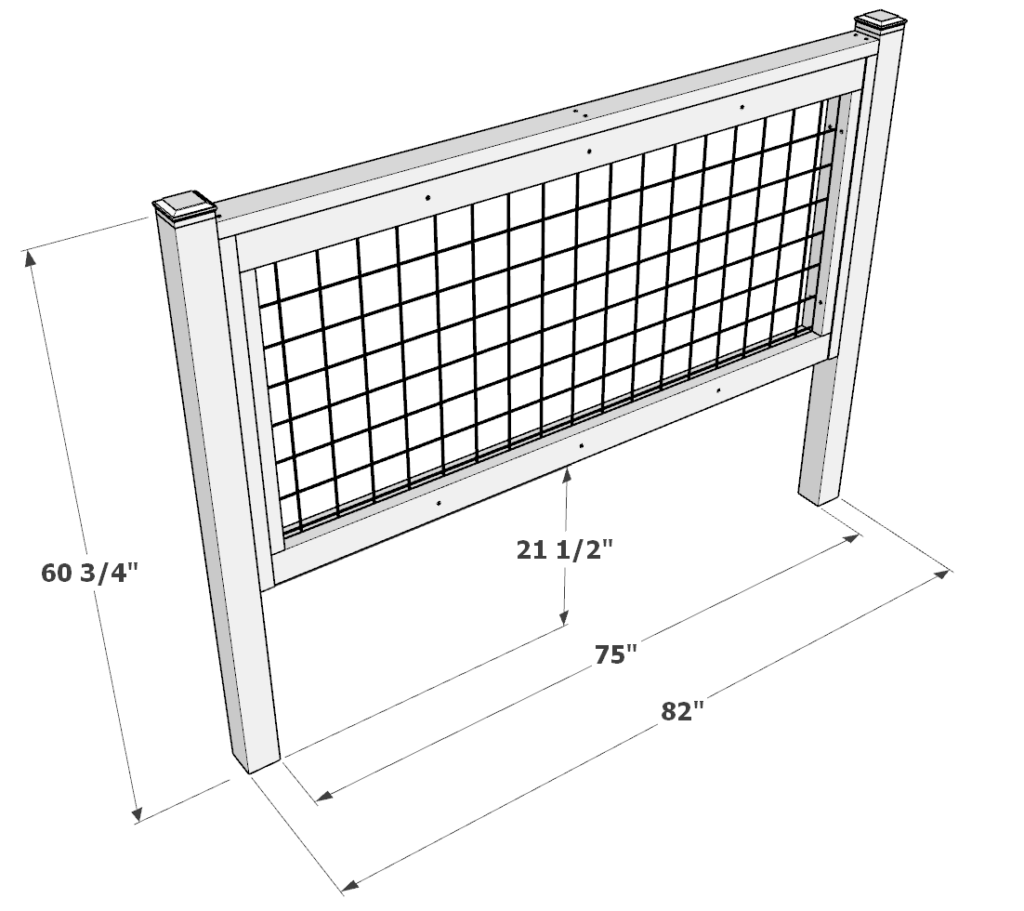
Next, take one 75-inch 2×4 lumber piece and add it to the top of the fence panel.
Predrill and secure with screws.
Step 5 (DIY fence panels)
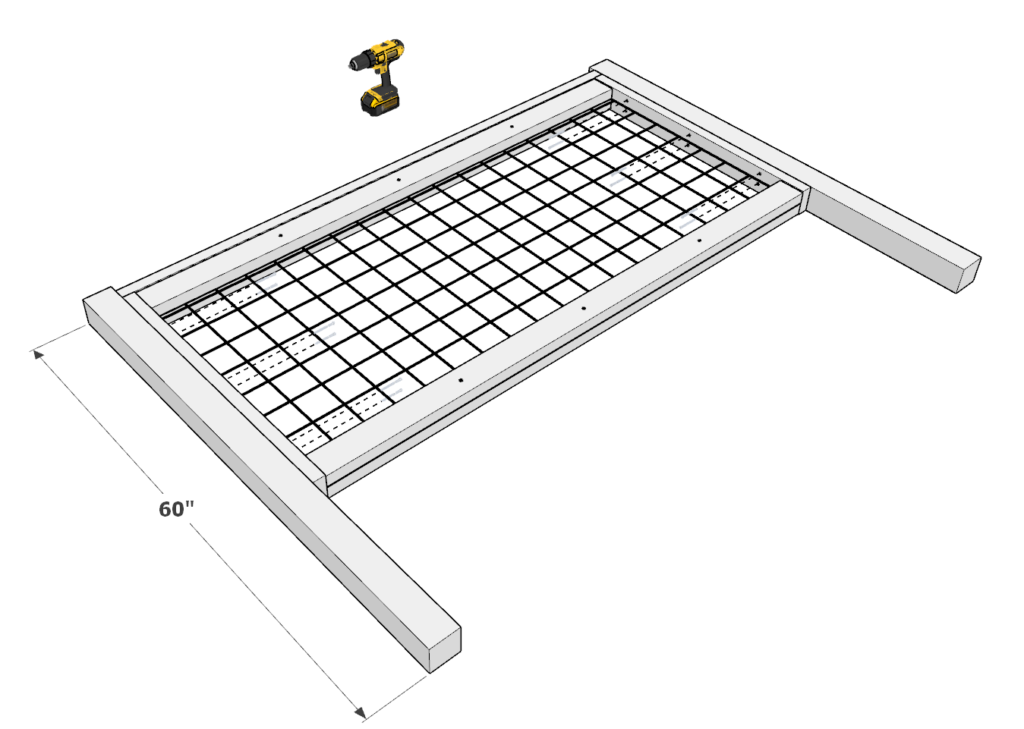
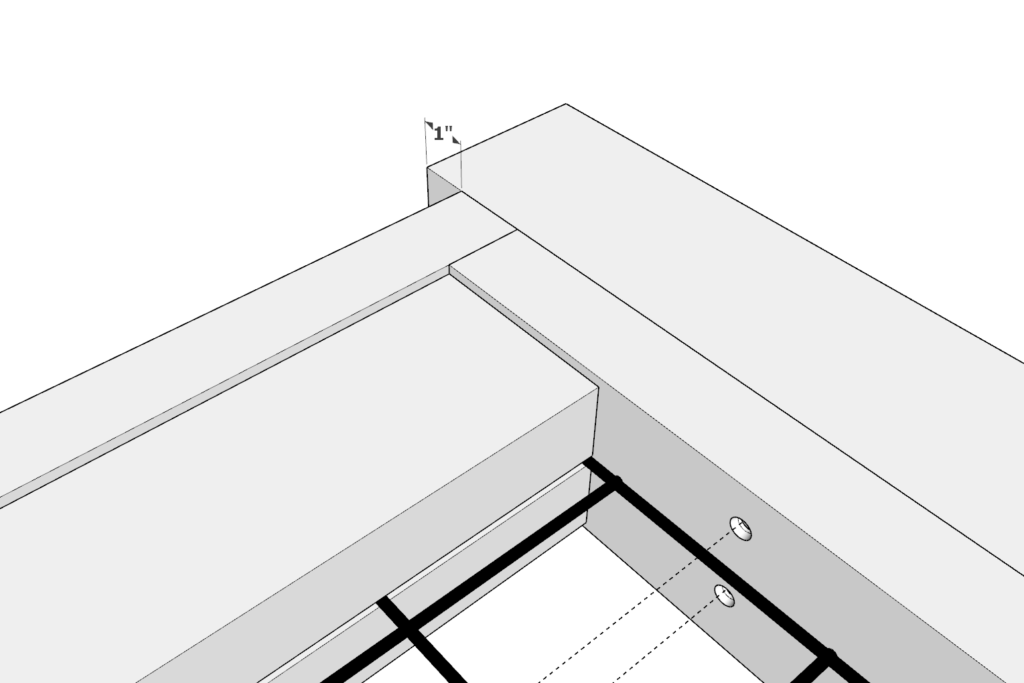
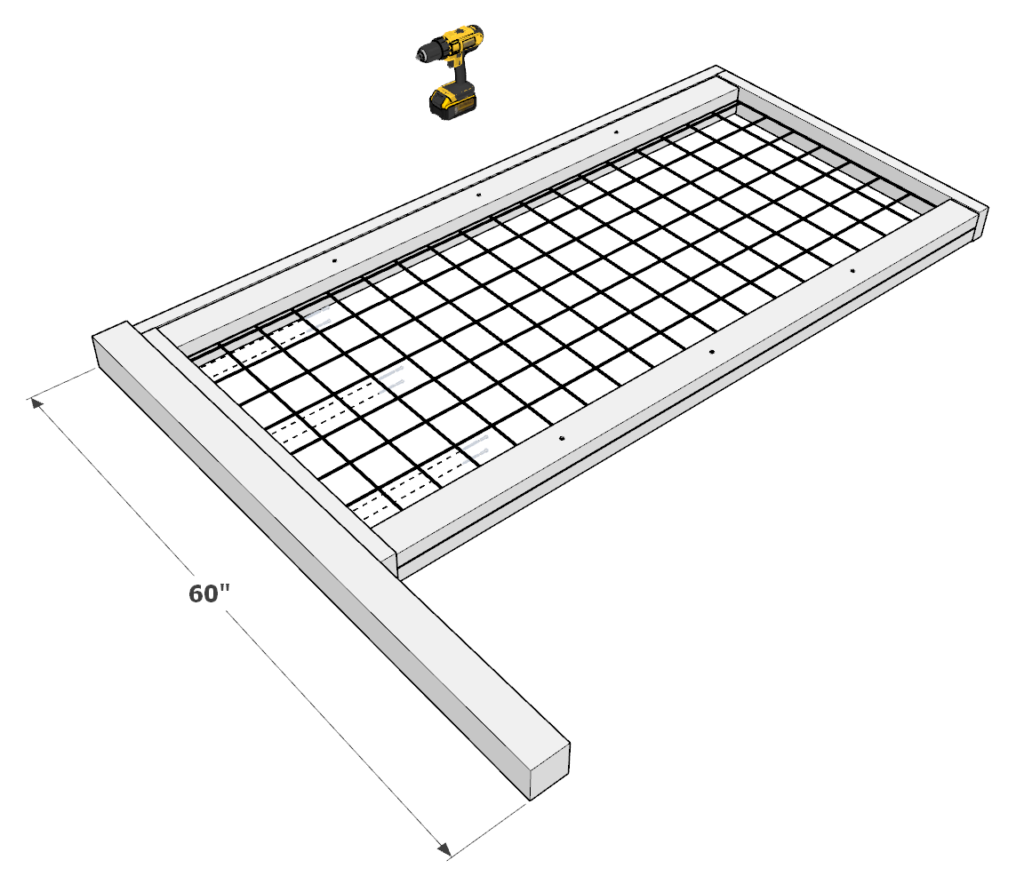
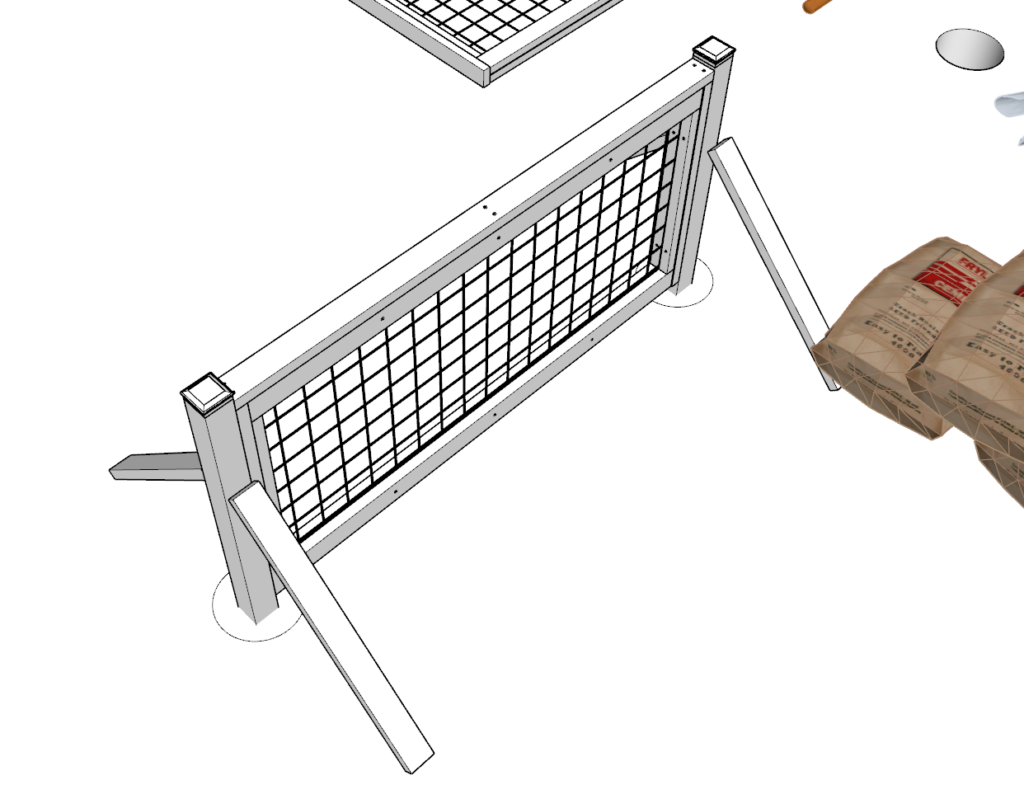
Next, add two (or 1. More information below in this step) 60-inch 4×4 lumber pieces to the ends of the fence panel.
Indent the fence panel by 1-inch as shown below.
Attach the sides of the 36-inch 2×4 lumber pieces to the sides of the 60-inch 4×4 lumber pieces as shown below
Predrill, and secure with screws.
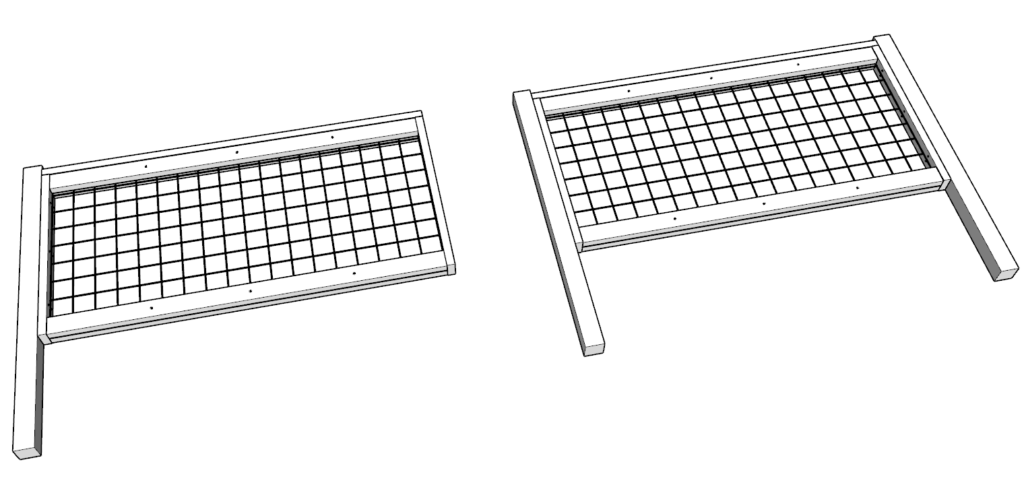
You will need one “starter” panel for the installation of the fence. The “starter” panel has two posts, the other panels need to only have one post attached since they will be sharing the neighboring post. More information on installation is available in the future steps on this page.
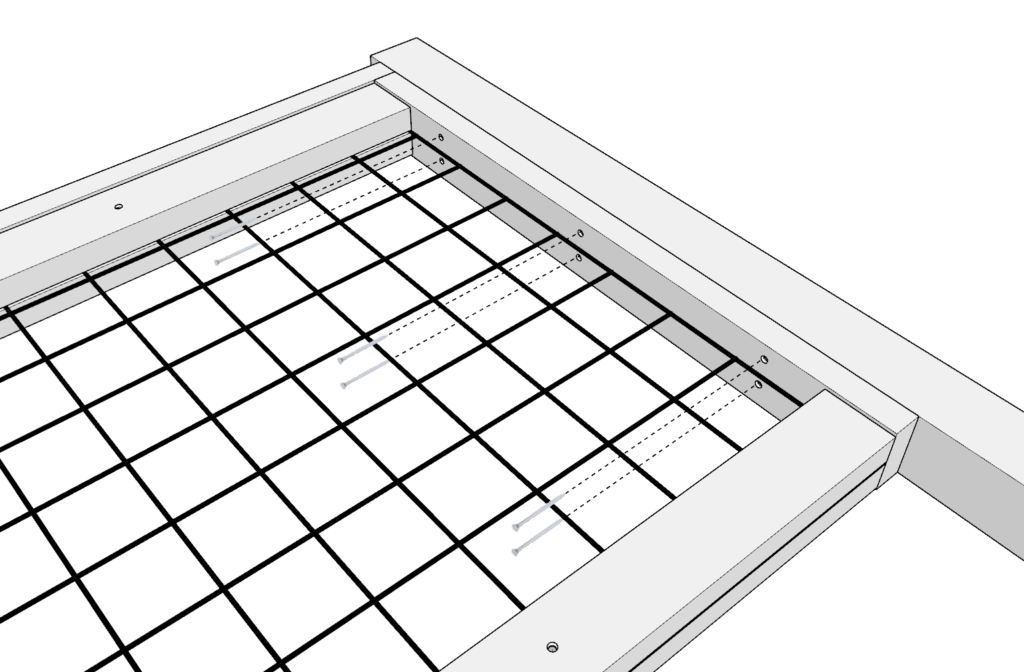
Step 6 (DIY fence panels)
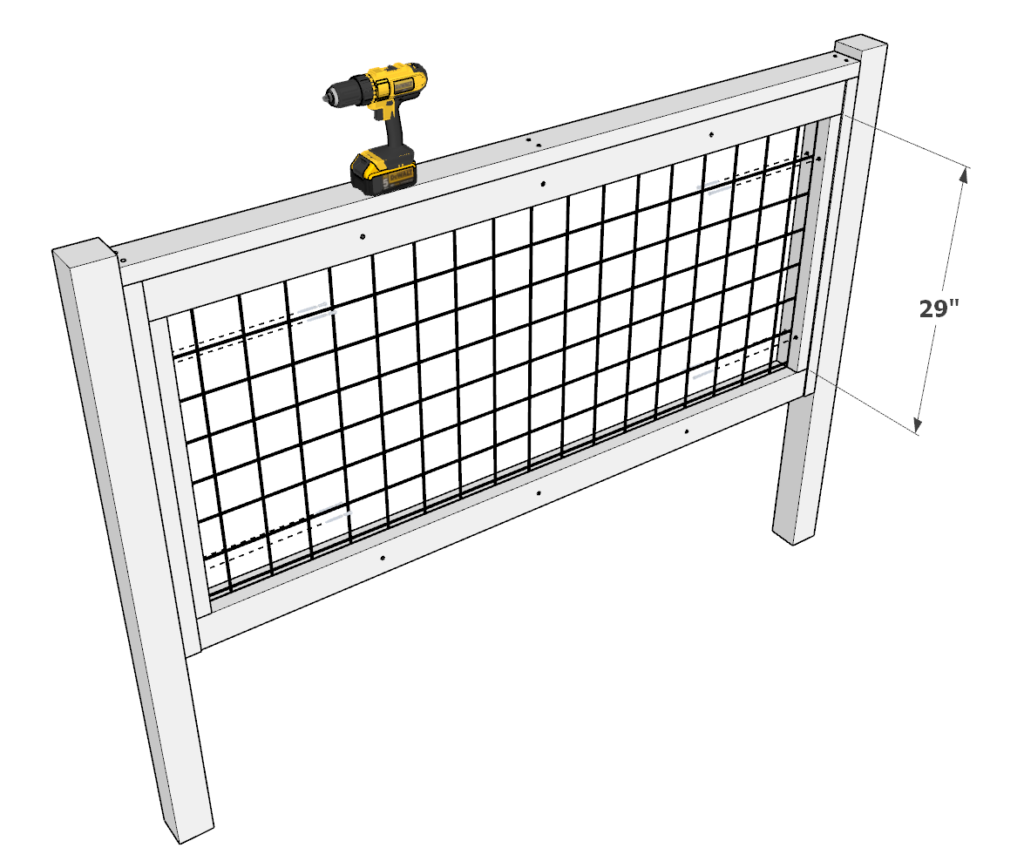
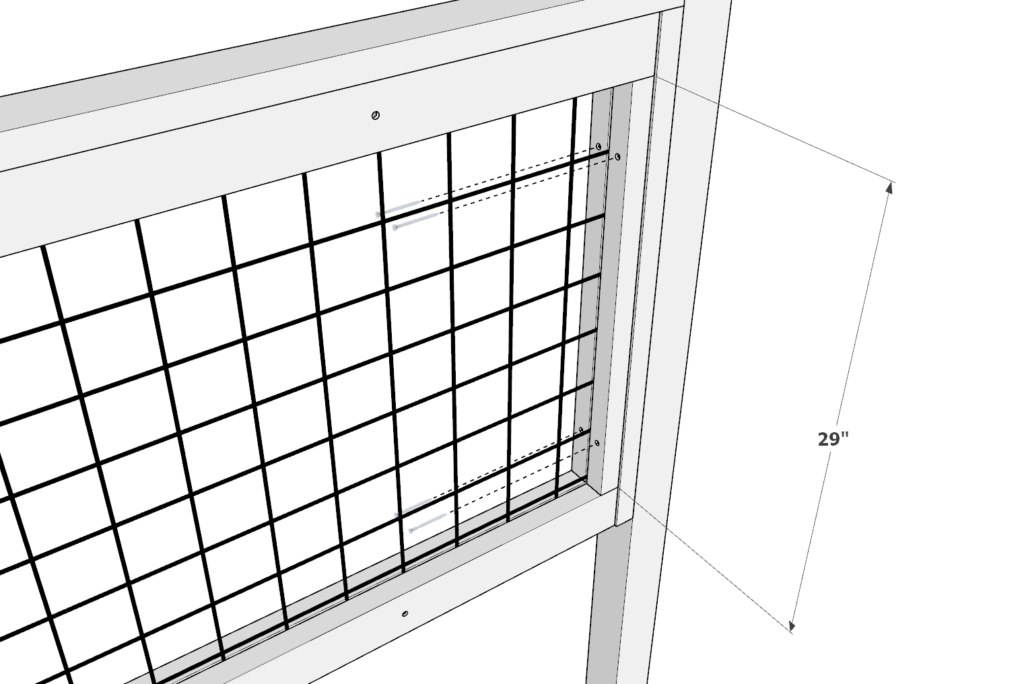
Next, ONLY ON THE “STARTER” PANAL, add four 29-inch 2×2 lumber pieces as shown below.
These 2×2 lumber pieces will secure the metal railing in place.
Ad before, predrill and add screws.
Step 7(DIY fence panels)
Next, add post caps. These may need to be glued or secured with screws depending on the design and where you purchase them.
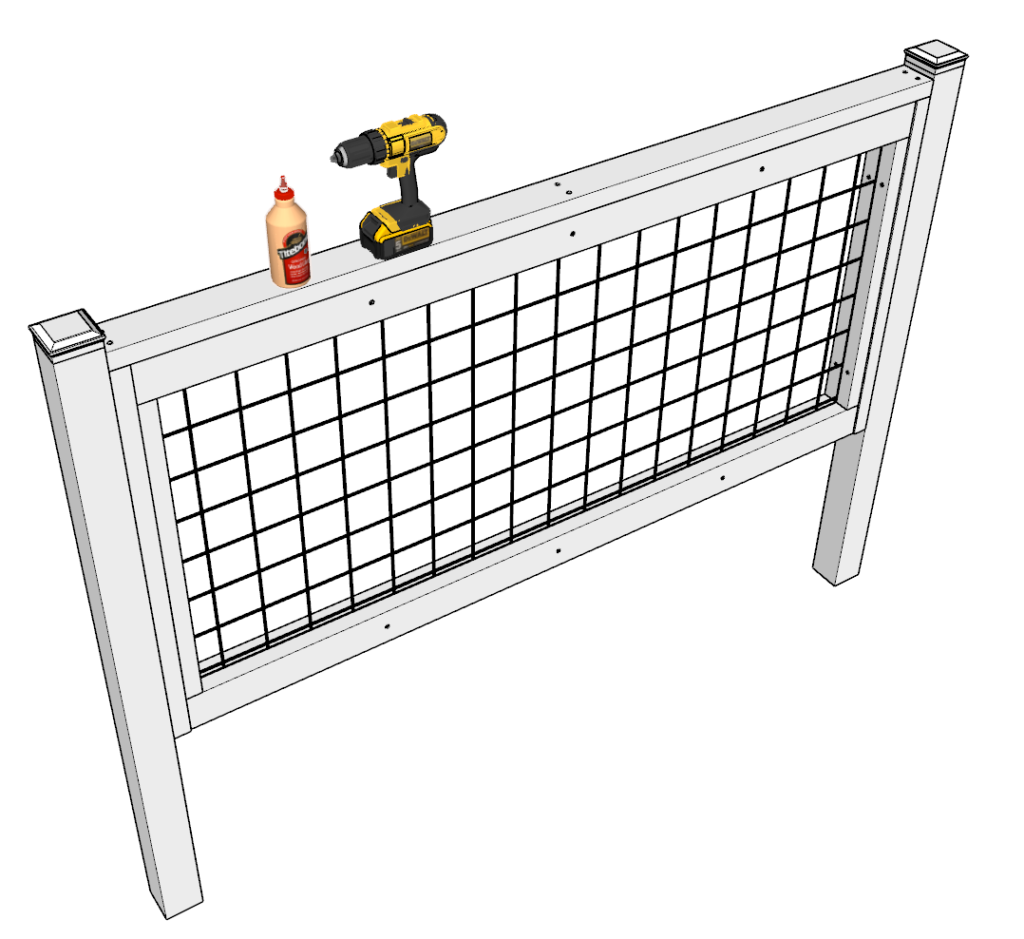
Step 8 (DIY fence panels)
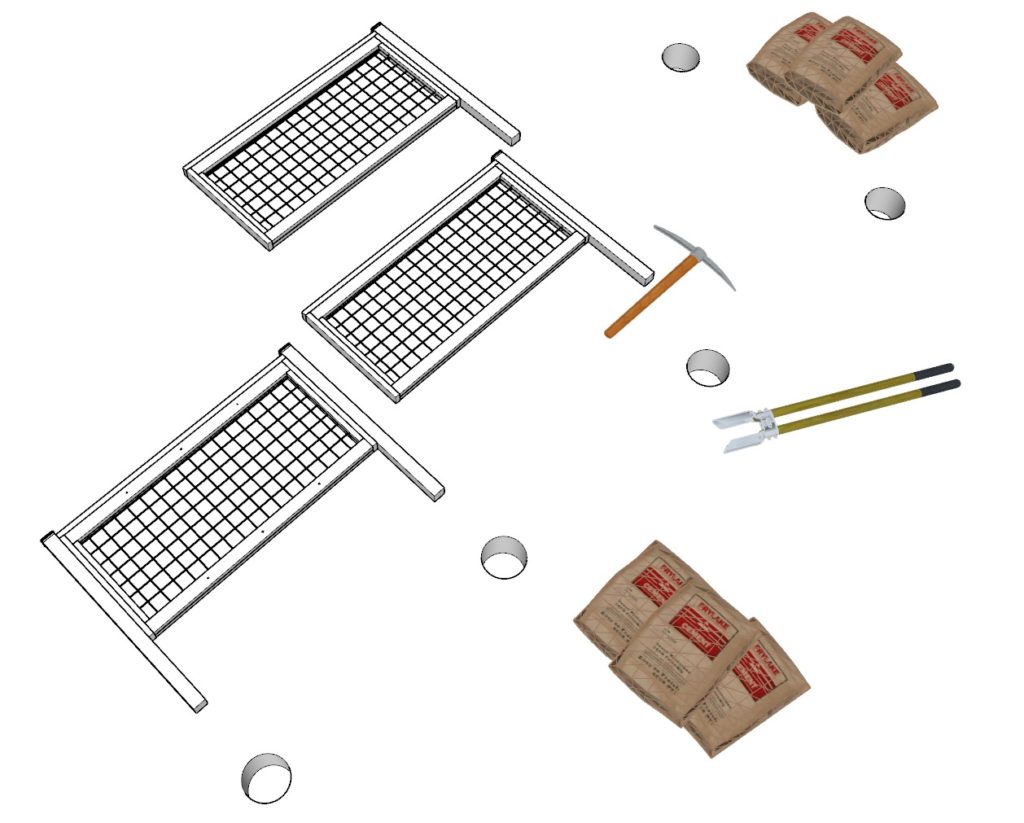
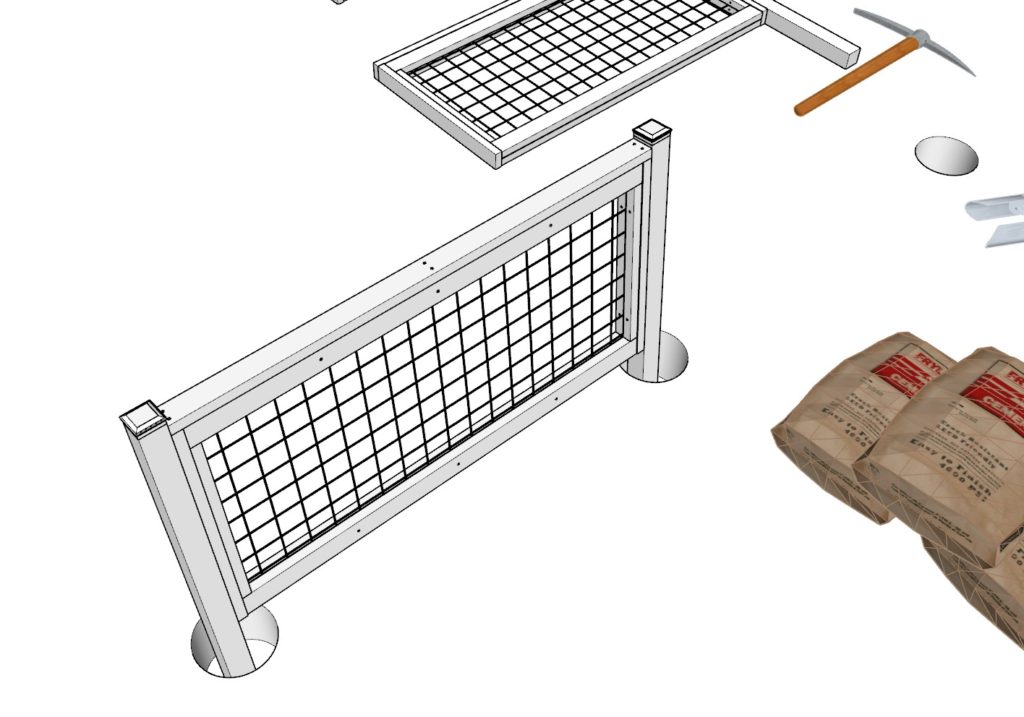
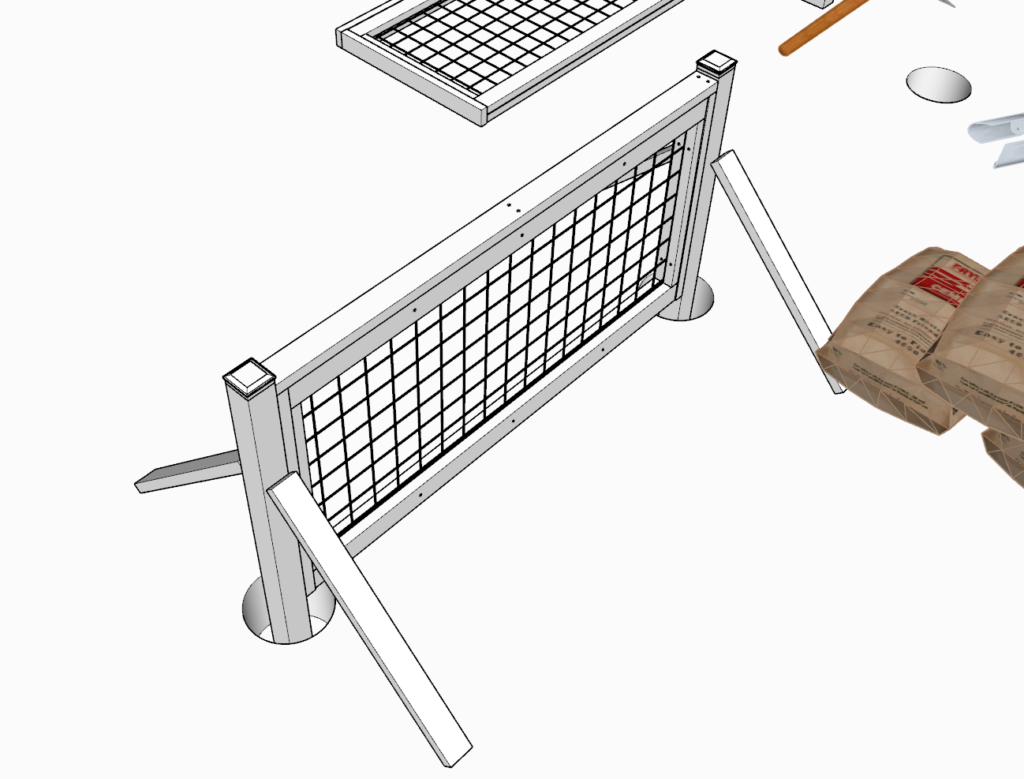
Next, install the DIY fence panels.
This post does not go over the details of digging holes, filling holes with gravel, or cement work. The images below show how the fence panels connect to each other when installing the fence.
Start with the “starter” panel that has two posts attached. Once its in place and secured, add the next fence panel with only one post.
Continue to add panels until the entire perimeter is fenced.
Lastly, add the 29-inch 2×2 lumber pieces to all the fence panels (except the starter panel).

Step 9 (DIY fence panels)
At this point you your fence is ready to be stained, painted, or treated with a wood preservative.
If your using pressure treated lumber, you don’t need to add wood preservatives.