Hey, DIY Enthusiasts!
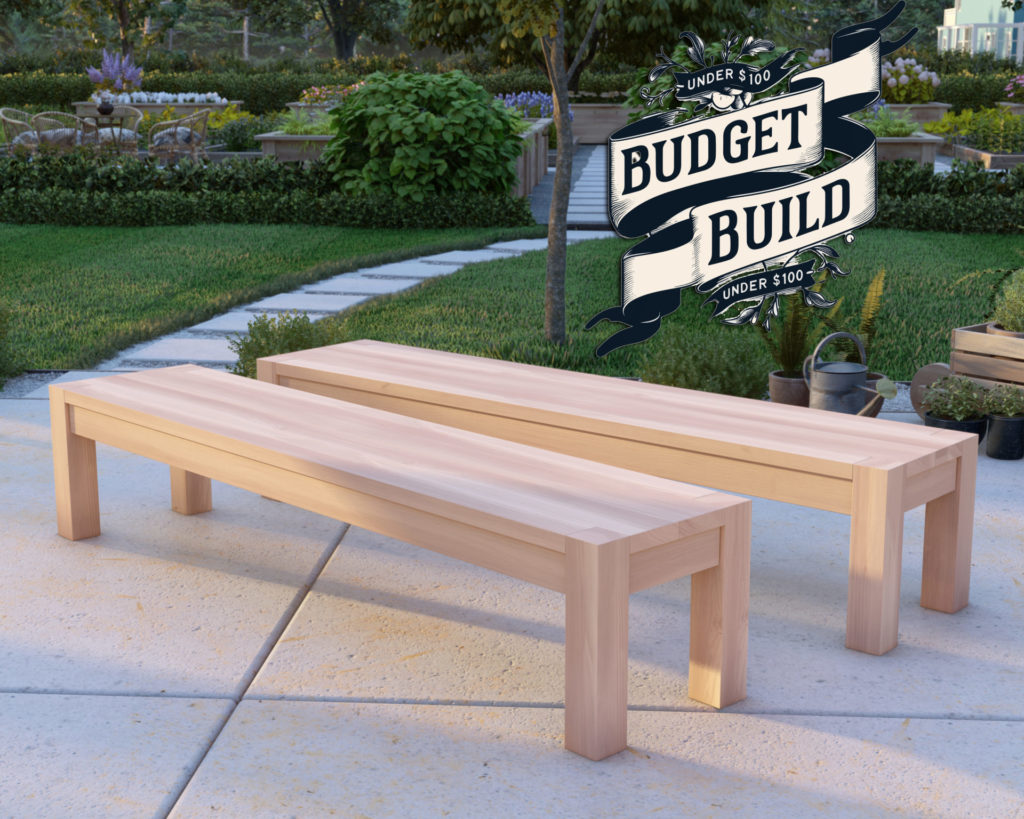
Who says you can’t have a stylish, sturdy bench without emptying your wallet? We’ve got plans that’ll walk you through crafting a bench that’s not just easy on the eyes but is super wallet-friendly too.


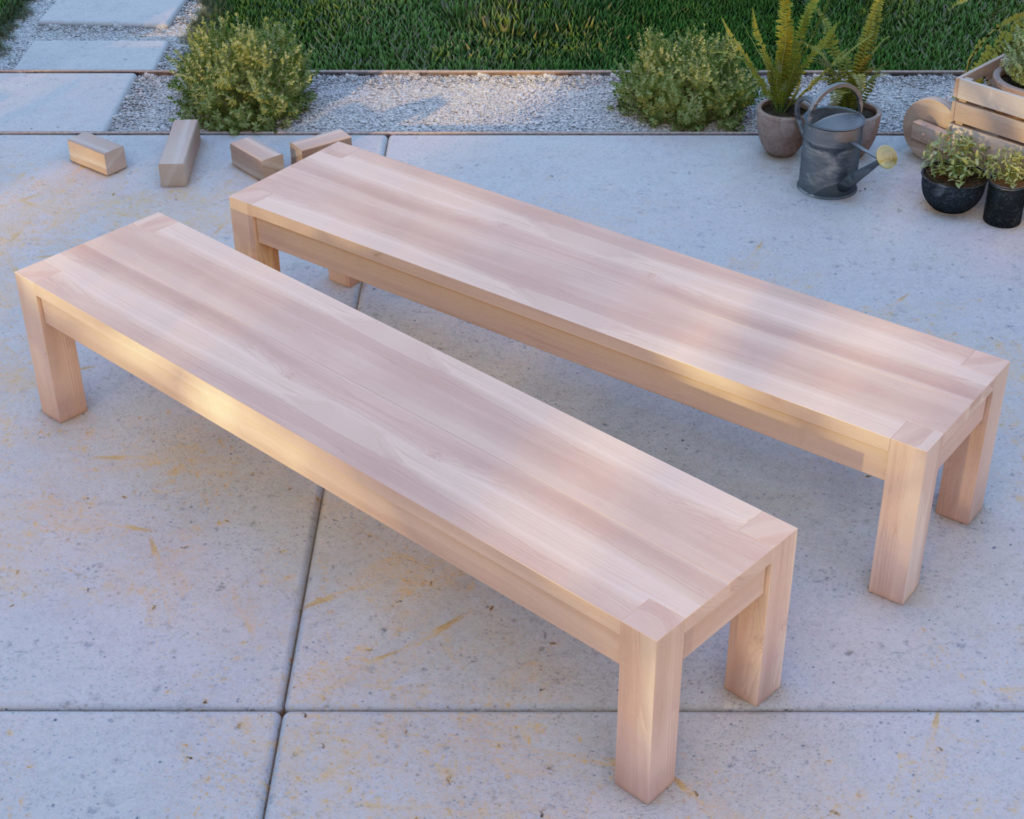
Meet Your Next Favorite Piece of Furniture
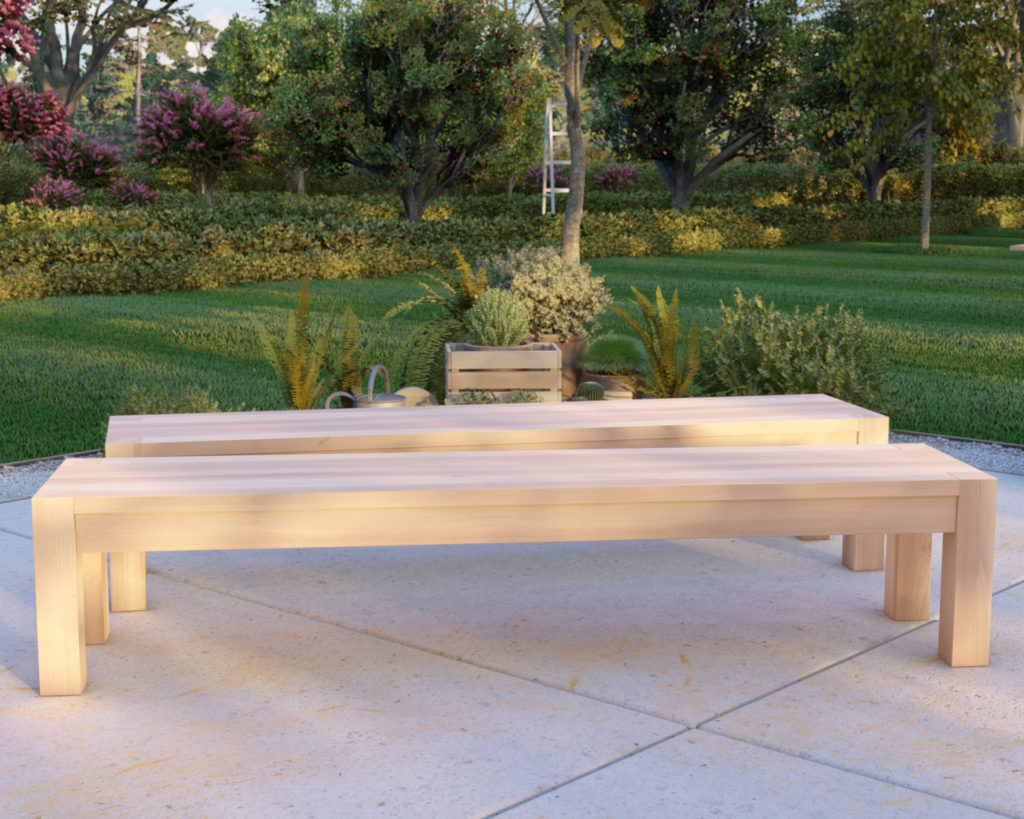
This bench is the perfect blend of modern style and practicality. It’s designed to fit right into any space, adding that extra touch of warmth and comfort. Whether it’s a cozy spot in your dining room or a nice addition to your entryway, this bench is as versatile as it gets.
Quality on a Budget
Now, let’s talk dollars. We’re all about saving where we can, especially these days. So, guess what? You can bring a pair of these benches to life for under $100. Yup, you heard that right. It’s all about getting that perfect mix of quality and affordability.
Built to Last
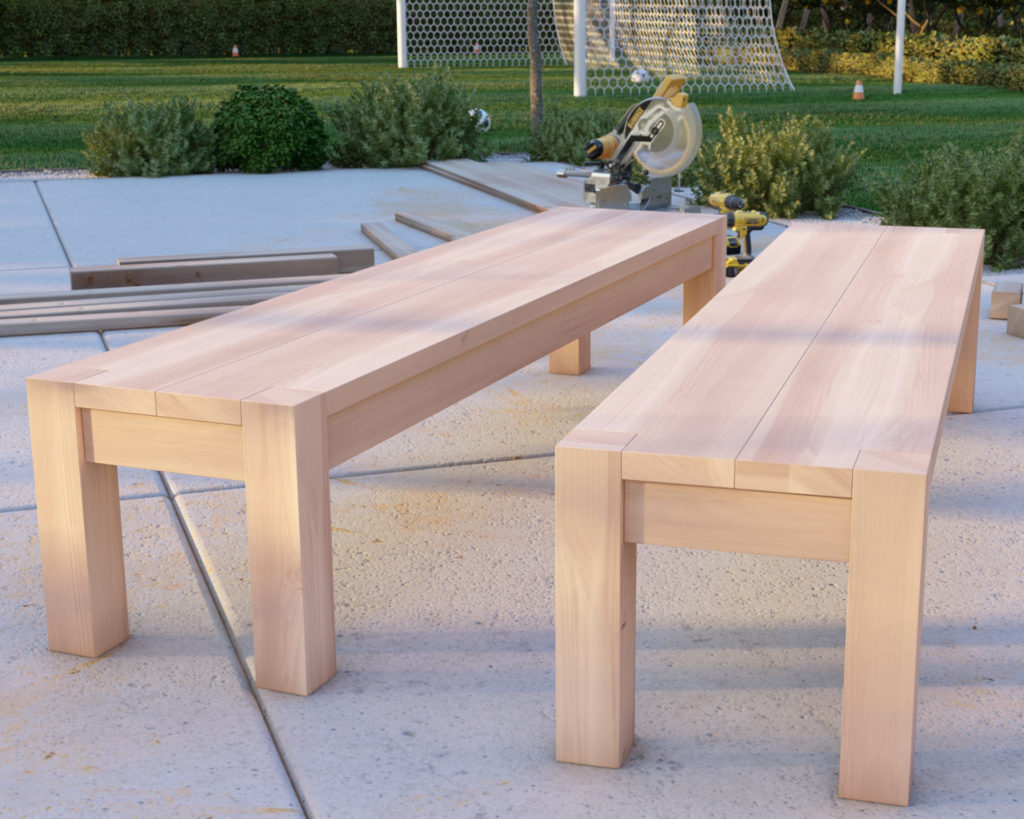
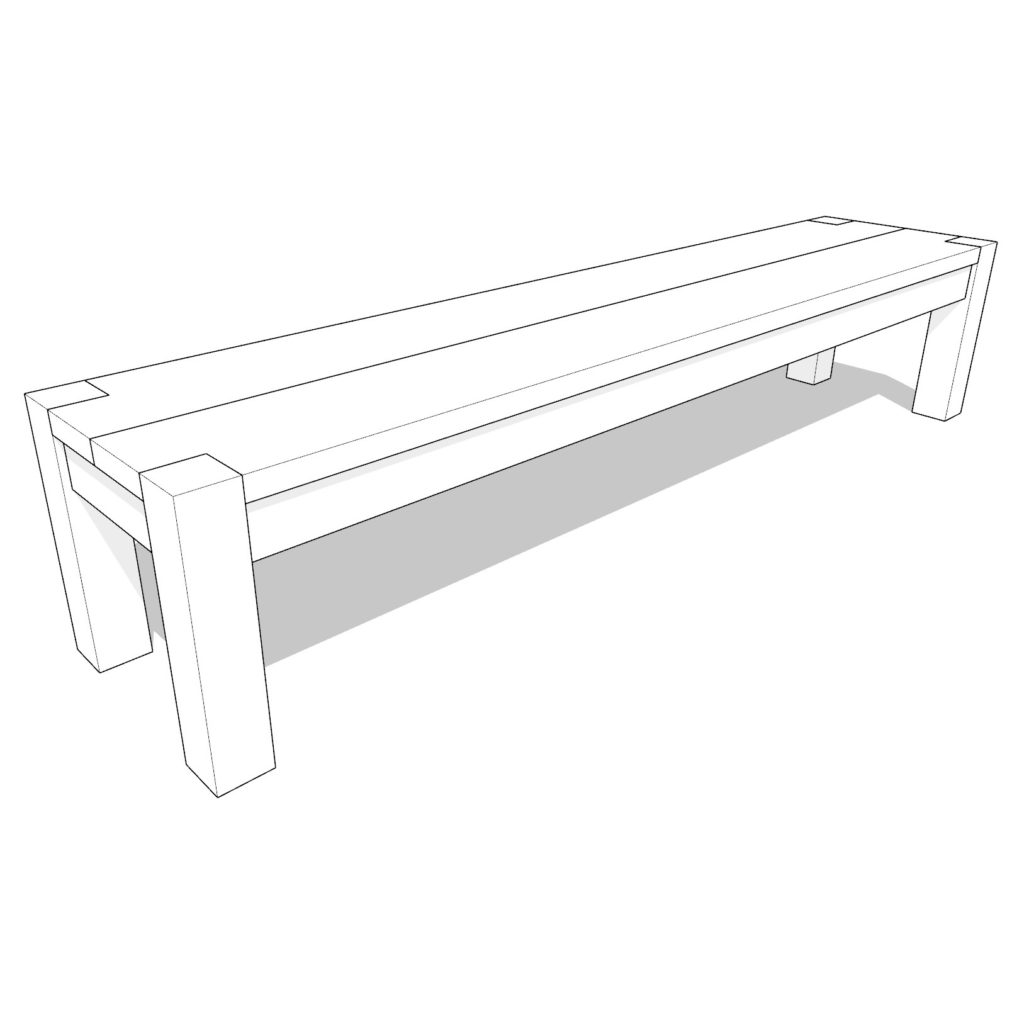
With its solid wood construction – think sturdy 4×4 legs and a smooth 2×10 seat – this bench isn’t just for show; it’s built to stand the test of time. You’re creating something that’s not only budget-friendly but also a lasting piece of furniture for your home.
Ready to Dive In?
So, why wait? Your journey to creating a beautiful, budget-friendly bench is just a click away. Grab these plans and discover the joy of creating something awesome, durable, and budget-friendly with your own hands. Your cozy, stylish bench awaits!
Time
6 hours
Cost
$100 (cost may vary)
Skill level required
Beginner
DIY Dinning Table Bench PDF Plan
What is included in the PDF download?
- Easy to read step by step instructions
- Material list
- Tools needed
- Helpful links to materials and tools needed
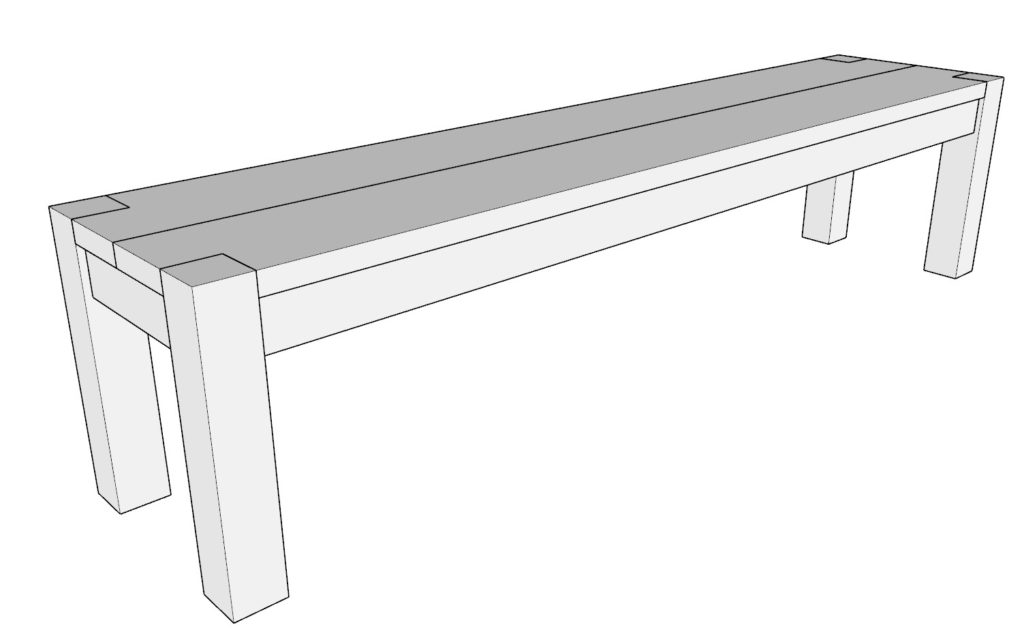
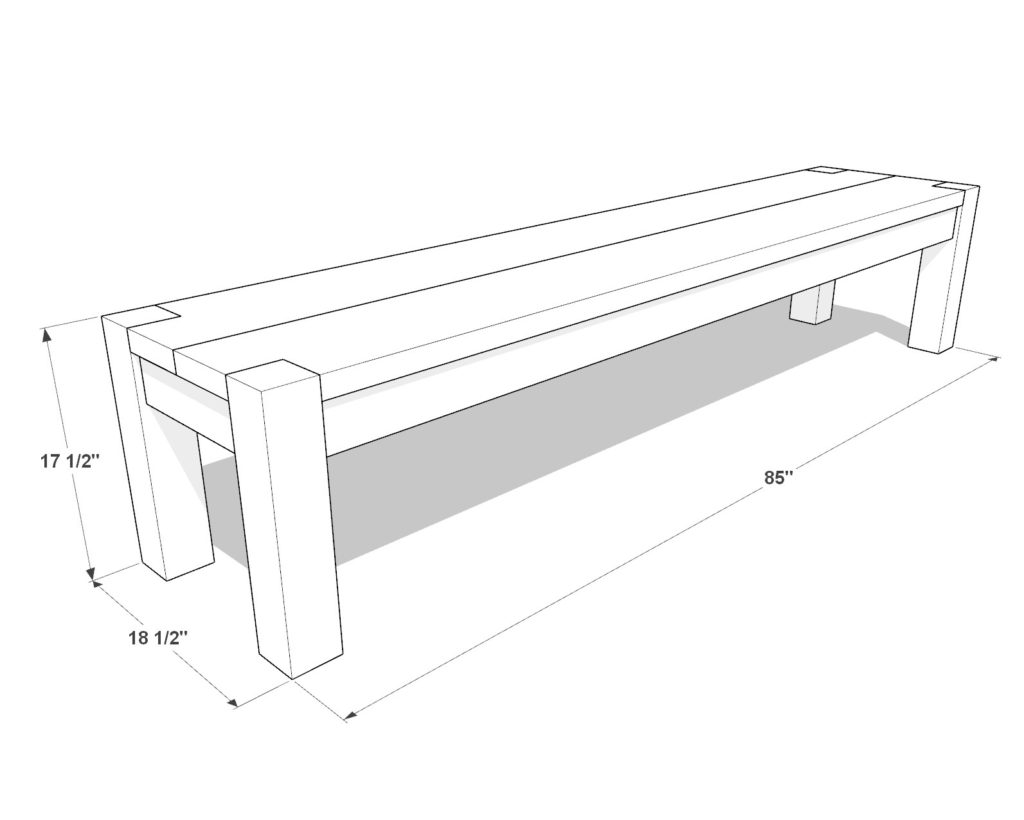
DIY Dinning Table Bench Dimensions
Tools Needed for This Project:
Available with the purchase of the DIY plan PDF.
Lumber Shopping & Cut List
Available with the purchase of the DIY plan PDF.
Step 1: Building the Bench Frame
Preparation Tip: Start with Smooth Wood – For a clean, professional look, begin by sanding and planing the wood. Doing this upfront eases the finishing process, leaving only minor touch-ups after assembly.
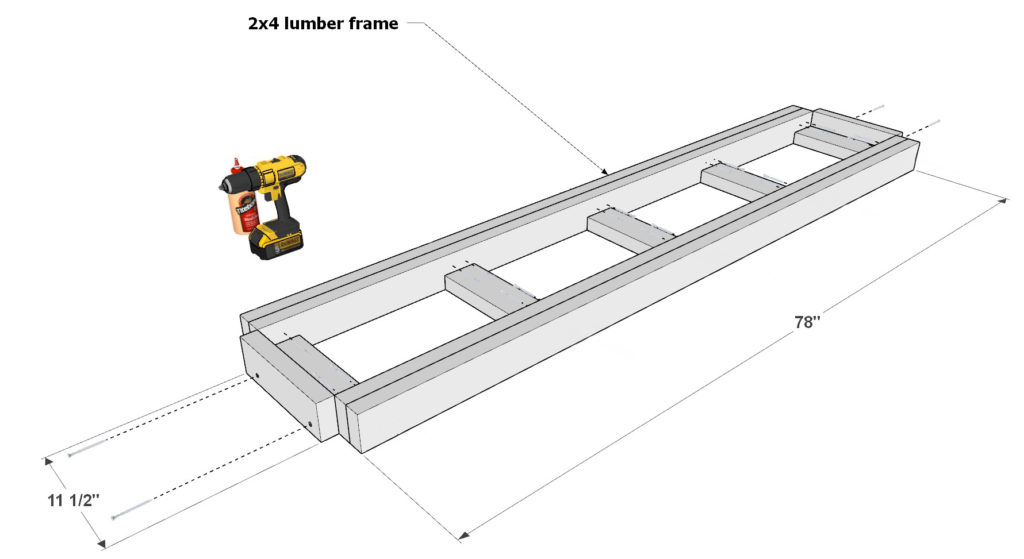
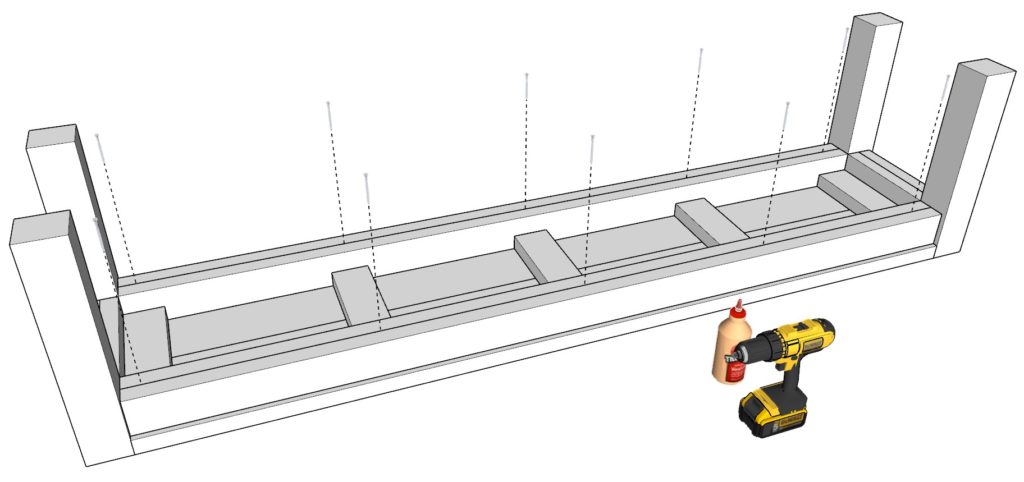
Part A: Assembling the Base
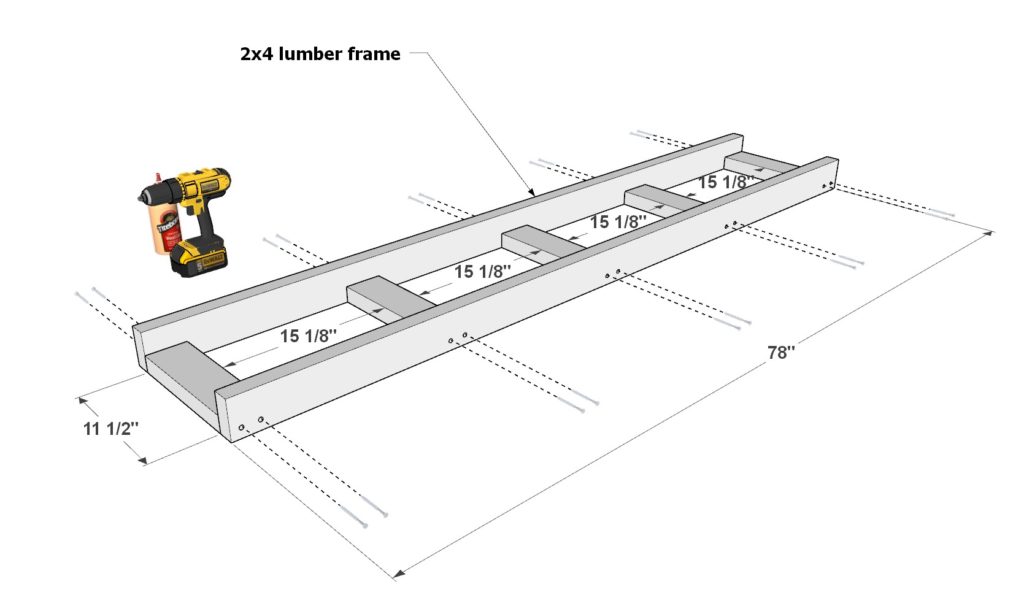
- Gather Your Materials: Start with two 2×4 lumber pieces that are 78 inches long and five that are 11-1/2 inches long.
- Layout: Position them as illustrated in Diagram 1.
- Securing the Pieces: With wood glue and 2.5-inch screws (2.5-inch can also be used), connect the pieces firmly to form the base of your bench frame.
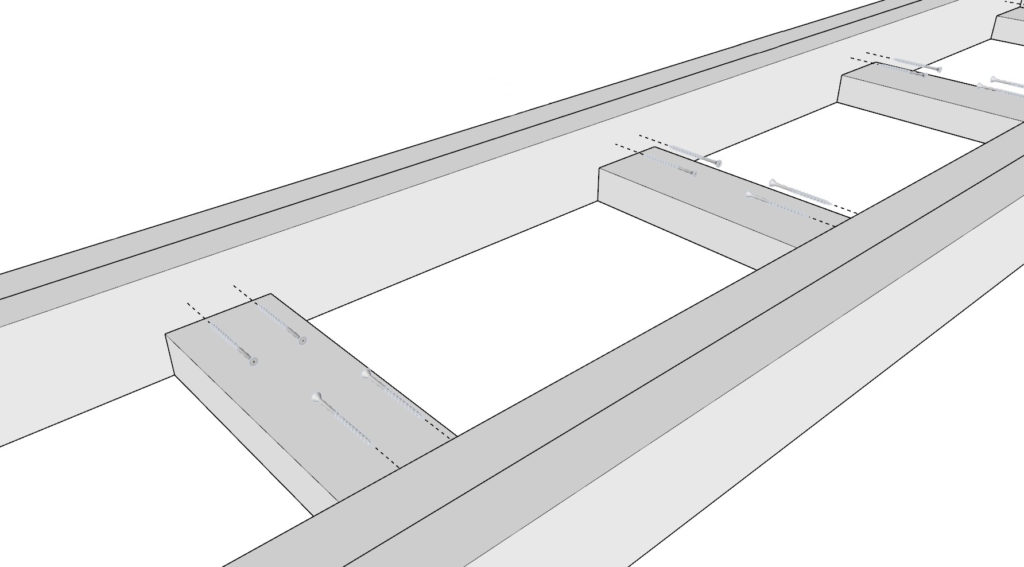
Part B: Building the Second Layer
- Refer to the Guide: Consult Diagram 2 for accurate placement of each piece.
- Arrange the Pieces: Add two more 11-1/2 inch 2x4s and two 78-inch 2x4s on top of the base. Ensure they align with the diagram.
- Attach Them: Use 2.5-inch screws and wood glue, securing from the inside to conceal the screws, firmly affixing the pieces.
Part C: Finishing the Frame
- Final Placement: Refer to Diagram 3 for the placement of the final two 11-1/2 inch pieces.
- Attach the Pieces: Using 2.5-inch screws and wood glue, ensure these pieces are firmly attached, checking the overall sturdiness of the frame.
Additional Assembly Tips:
- Drill Pilot Holes: Make this a step before assembly to ease the screwing process and avoid splitting the wood.
- Flat Surface Work: Ensure your workspace surface is flat to facilitate easy assembly and a level bench frame.

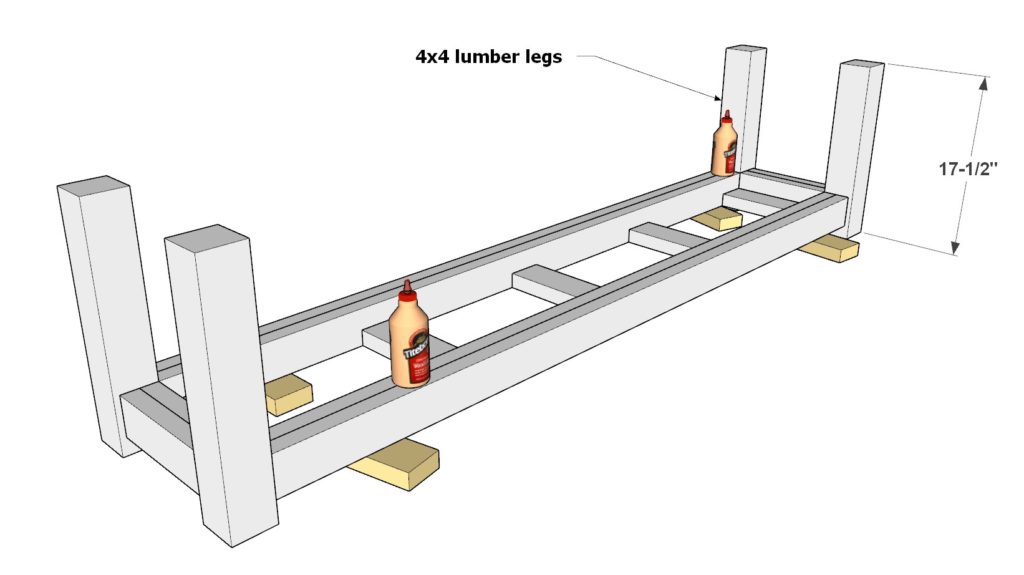
Step 2: Attaching the Legs to the Bench Frame
Raising the Frame
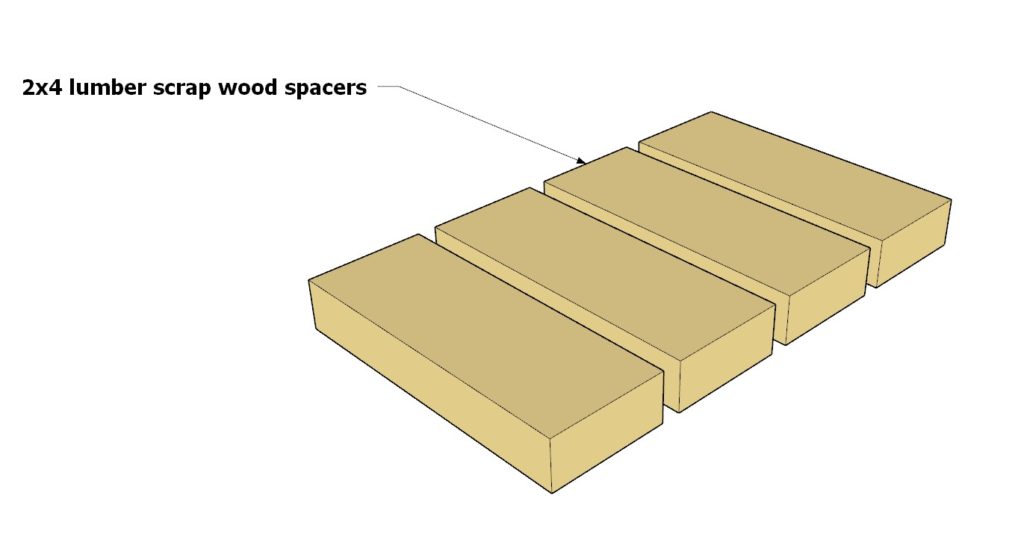
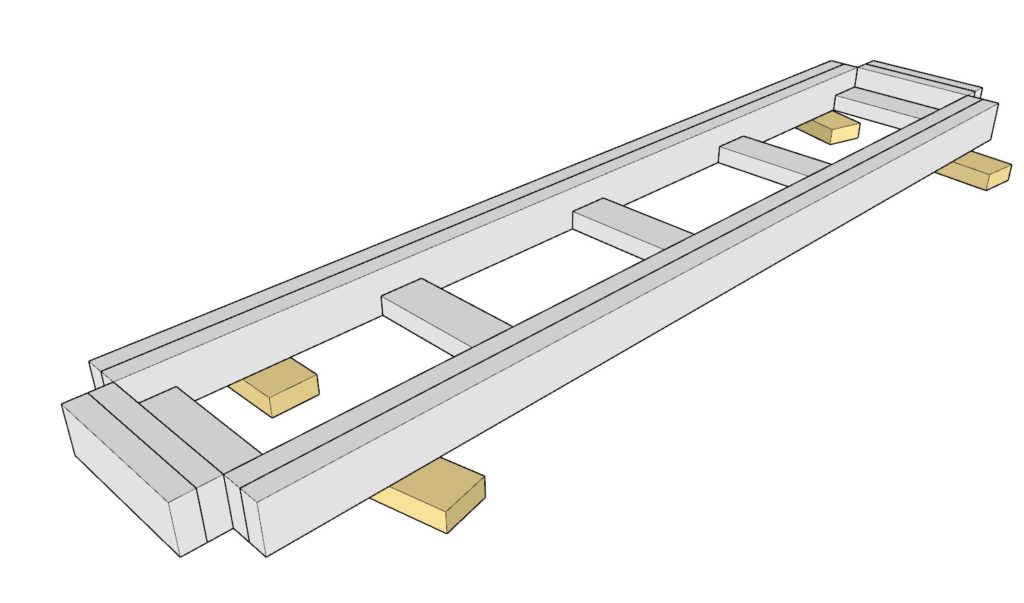
- Using Spacers: Elevate the bench frame off the ground with scrap wood spacers, ensuring an even and stable base for working.
Attaching the Legs
- Preparation: Prepare four 17-1/2-inch 4×4 pieces and refer to the diagram for correct placement.
- Gluing: Apply wood glue to the areas where the legs will attach to the frame to ensure a solid bond.
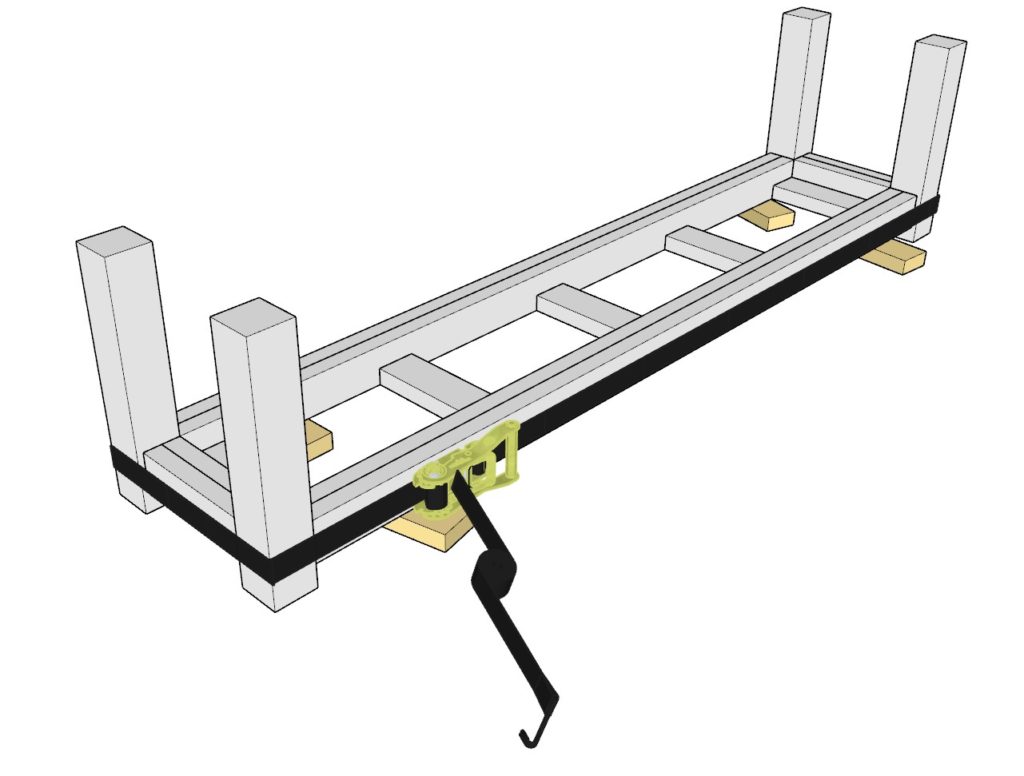
- Positioning and Alignment: Align the 4×4 pieces with the frame as per the diagram, using ratchet straps to pull the legs tightly against the frame. Adjust with a hammer if necessary to ensure they are flush against the frame.
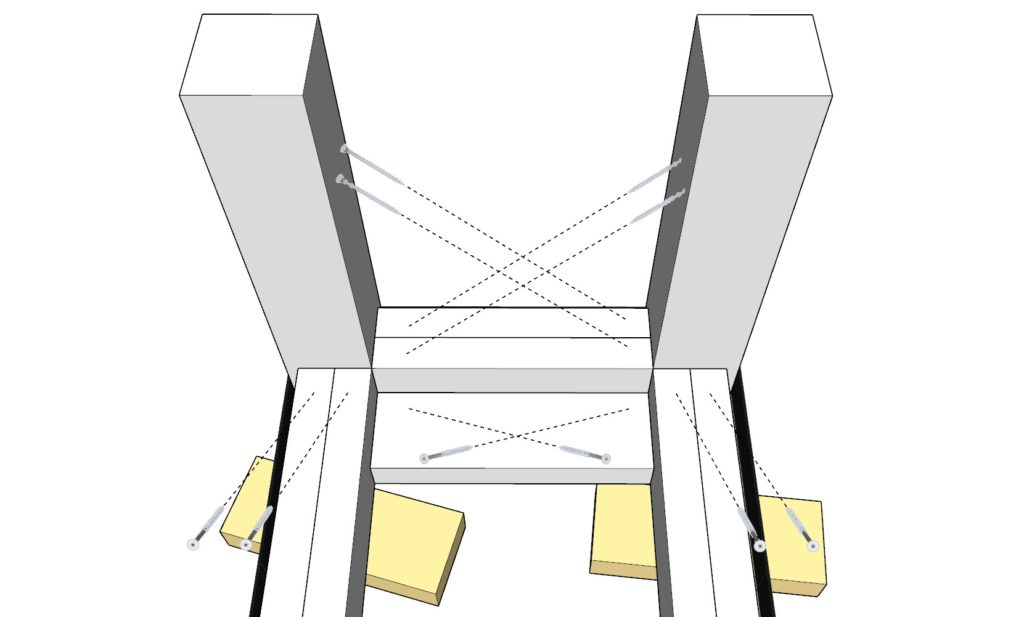
Securing the Legs
- Drilling: Predrill holes to facilitate smooth screw insertion and prevent wood splitting, ensuring a stronger hold.
- Screwing: Attach the legs to the frame with 2.5-inch screws as indicated in the diagram, ensuring they are tightened securely.
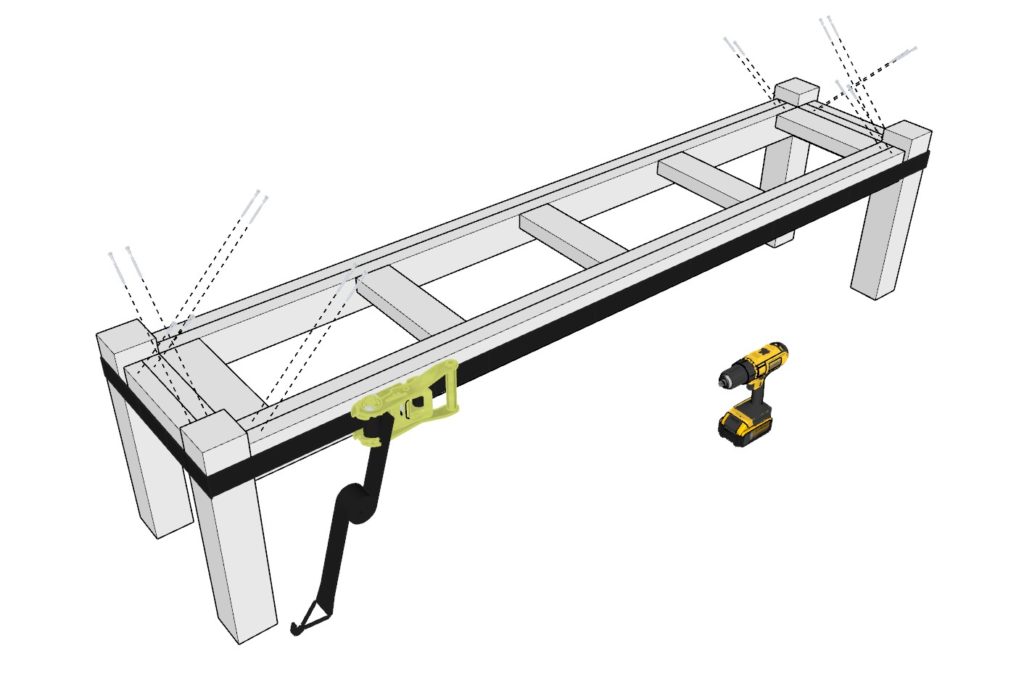
Bringing the Bench Upright
- Flipping the Bench: With a friend’s help, carefully turn the bench upright, avoiding pressure on the unsecured joints by ensuring the legs don’t touch the ground during the turn.
- Additional Securing: Add extra screws as shown in the final diagram to reinforce the joints, ensuring each screw is tightened firmly for a stable and durable bench.
Tips and Additional Advice
- Drilling Holes: Always predrill holes before inserting screws to enhance the joint’s strength and overall bench durability.
- Using Ratchet Straps: If you’re unfamiliar with ratchet straps, consider watching a tutorial online to ensure safe and tight attachment of the legs.
- Checking Alignment: Use a carpenter’s square to ensure the legs are perfectly aligned with the frame for a stable and even bench.
- Choosing Screws: Opt for wood-specific screws to ensure a strong hold and prolong the life of your bench.

Step 3: Preparing the Bench Top
Preparing the Bench Top
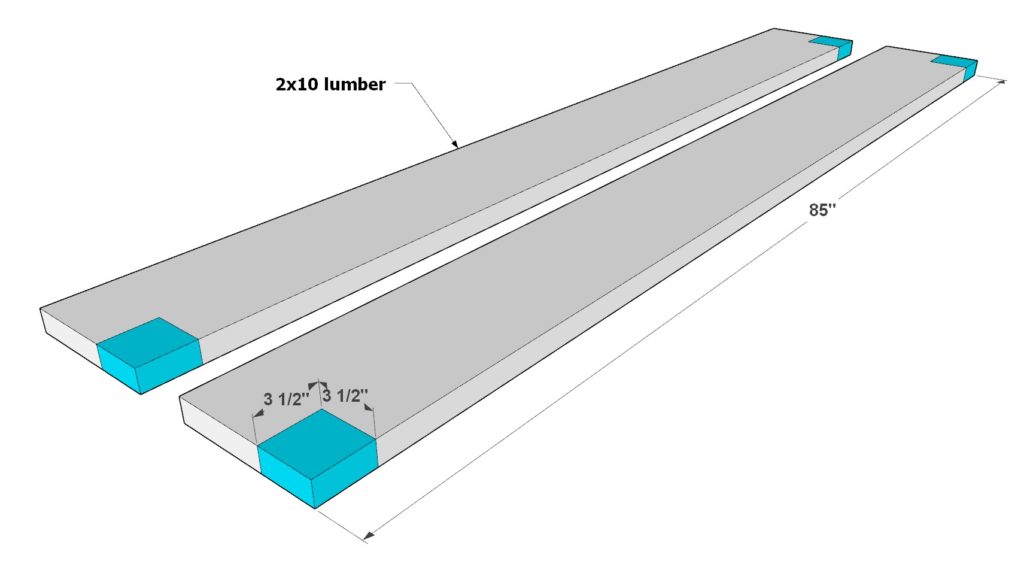
- Gather Your Materials: Have two 85-inch 2×10 boards on hand; these will be transformed into the surface of your bench.
- Marking the Notches: Measure and mark a 3-1/2″ x 3-1/2″ square at both ends of each 2×10 board, as highlighted in blue on the diagram. These notches will accommodate the 4×4 bench legs.
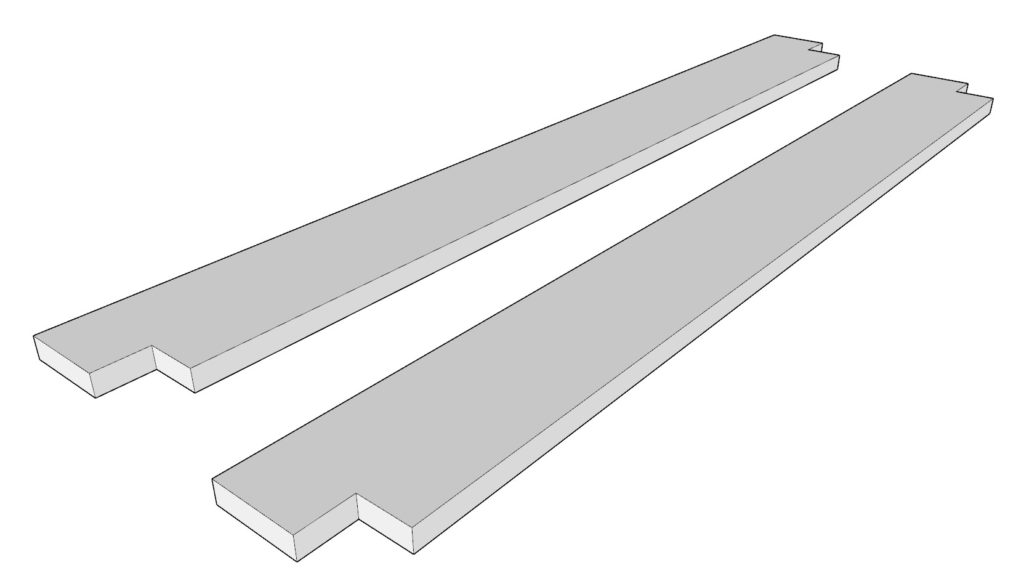
- Cutting the Notches: With a saw, carefully cut out the marked squares to create notches. Precision here is essential to ensure the bench legs fit perfectly.
Tip
- Precision is Key: Patience and accuracy during cutting will pay off. A snug fit not only adds to the bench’s stability but also gives it a professional finish.
Step 4: Securing the Bench Top to the Base
Attaching the Bench Top Boards
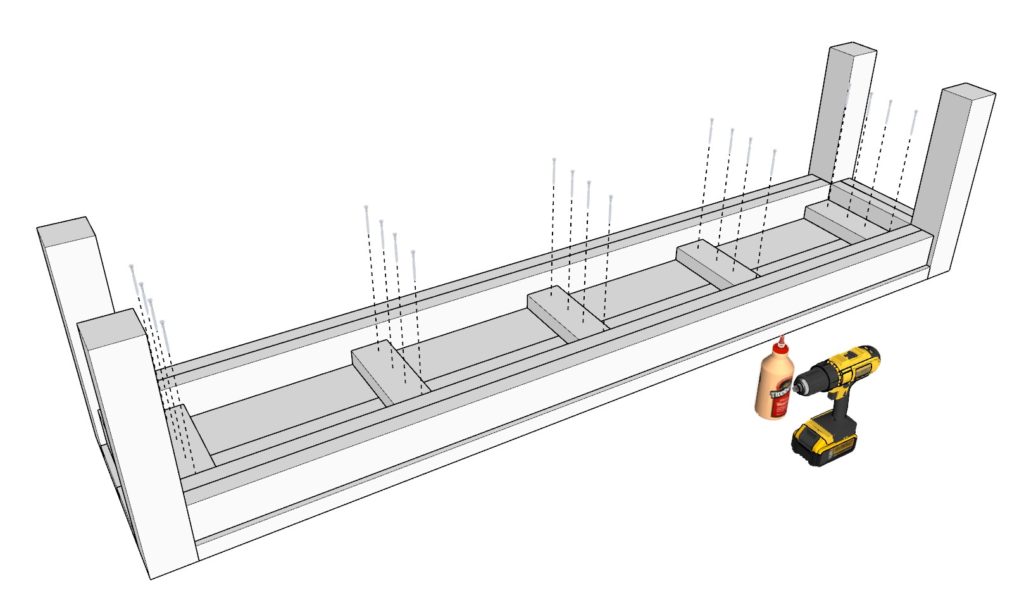
- Position the Boards: Lay the two 2×10 boards onto the bench base, ensuring they align as depicted in the first diagram and that the notches securely fit around the 4×4 legs.
- Securing the Boards: Apply wood glue to the contact points between the boards and the base for initial adherence. Use 2.5-inch screws to reinforce the bond, ensuring the boards are firmly in place.
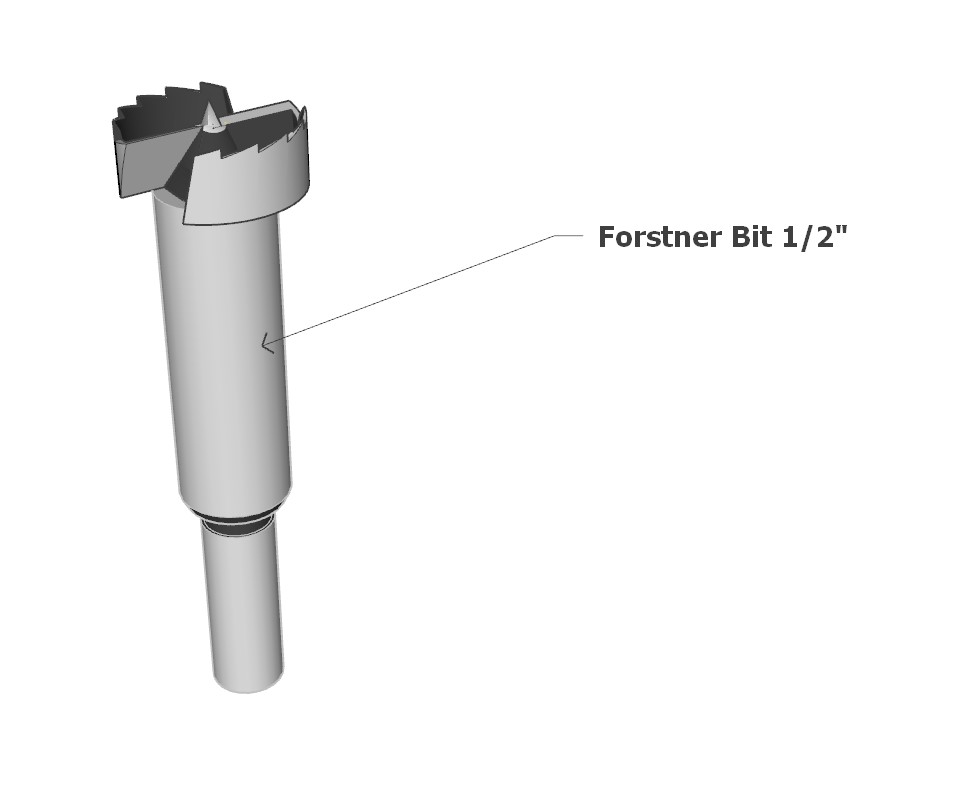
- Drilling Deeper Holes: With a 1/2″ Forstner bit, drill clean, deep holes on the sides of the 2×4 boards, as shown in the last diagram, to facilitate a robust connection between the bench top and base.
- Securing the Base to the Top: Drive 2.5-inch screws through the drilled holes to anchor the 2×10 boards to the 2×4 base. For a subtler finish, consider drilling the holes deeper and using 2.5-inch screws.
Tips
- Clean Holes: Utilize the Forstner bit for drilling precise holes, ensuring your screws sit flush or below the wood’s surface, contributing to a polished appearance.
- Strong Connection: Tighten the screws firmly to guarantee the bench top is solidly attached to the base, bolstering the bench’s overall stability and durability.
Step 5: Preparing, Staining, Painting, and Final Touches to the Bench
A. Preparing the Bench for Staining and Painting
- Cleaning: Begin by wiping down the bench to remove sawdust, debris, or dirt. A tack cloth or soft, damp cloth is effective for capturing fine dust particles.
- Sanding: Use 220-grit sandpaper to smooth the entire surface of the bench, including legs and edges, ensuring a smooth touch in every corner and crevice. Follow up with another wipe down for a dust-free surface.
- Pre-Stain Preparation (if applicable): Apply a pre-stain wood conditioner if you plan to stain the bench. This helps achieve an even, rich color and prevents blotchiness.
B. Staining the Bench
- Choosing the Stain: Pick a wood stain that complements the wood’s natural color and your room’s decor.
- Application: Apply the stain evenly, moving with the wood grain to highlight the wood’s natural beauty. Wipe off excess stain after letting it sit for 5-15 minutes. Allow the first coat to dry before considering additional coats for a deeper color.
C. Painting the Bench
- Priming: Apply a primer to enhance the paint’s adhesion and durability. Allow it to dry.
- Painting: Apply your chosen wood paint evenly, avoiding visible stroke lines for a professional look. Let it dry as per the label’s instructions before considering a second coat, if desired.
D. Installing Felt Pads
- Protection: Once the paint or stain is completely dry, add protective felt pads to each bench leg. Turn the bench upside down to attach them easily. These pads protect your floor from scratches and allow easier movement of the bench.