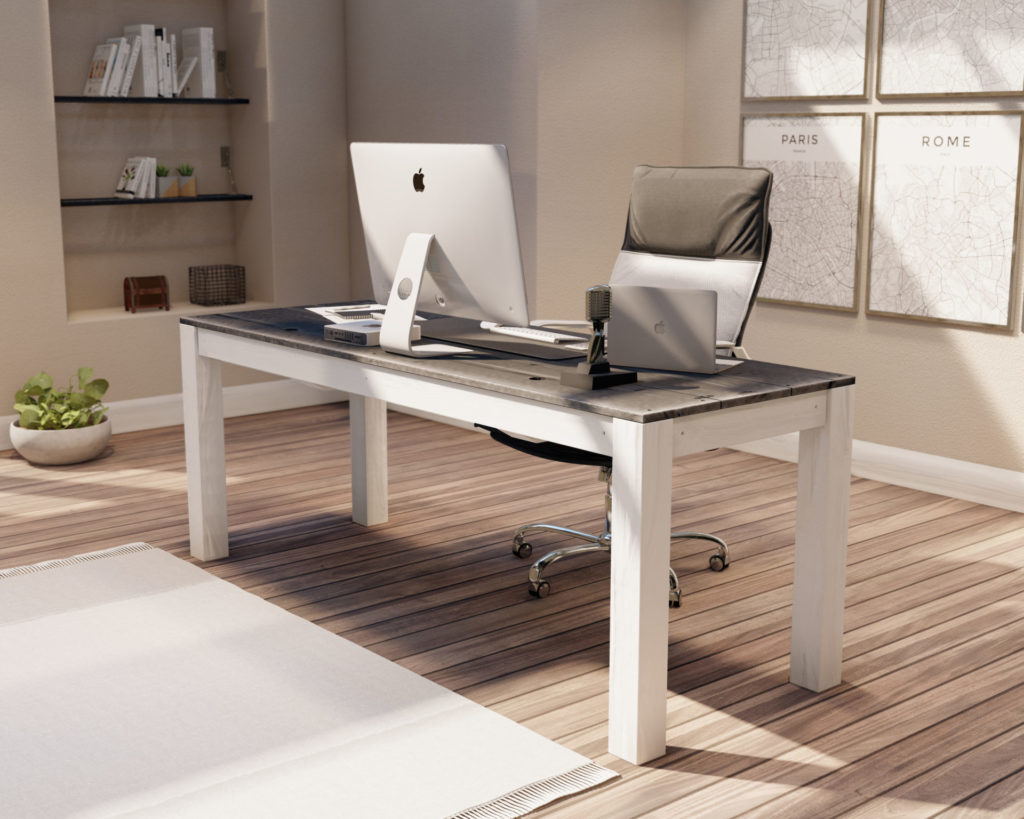
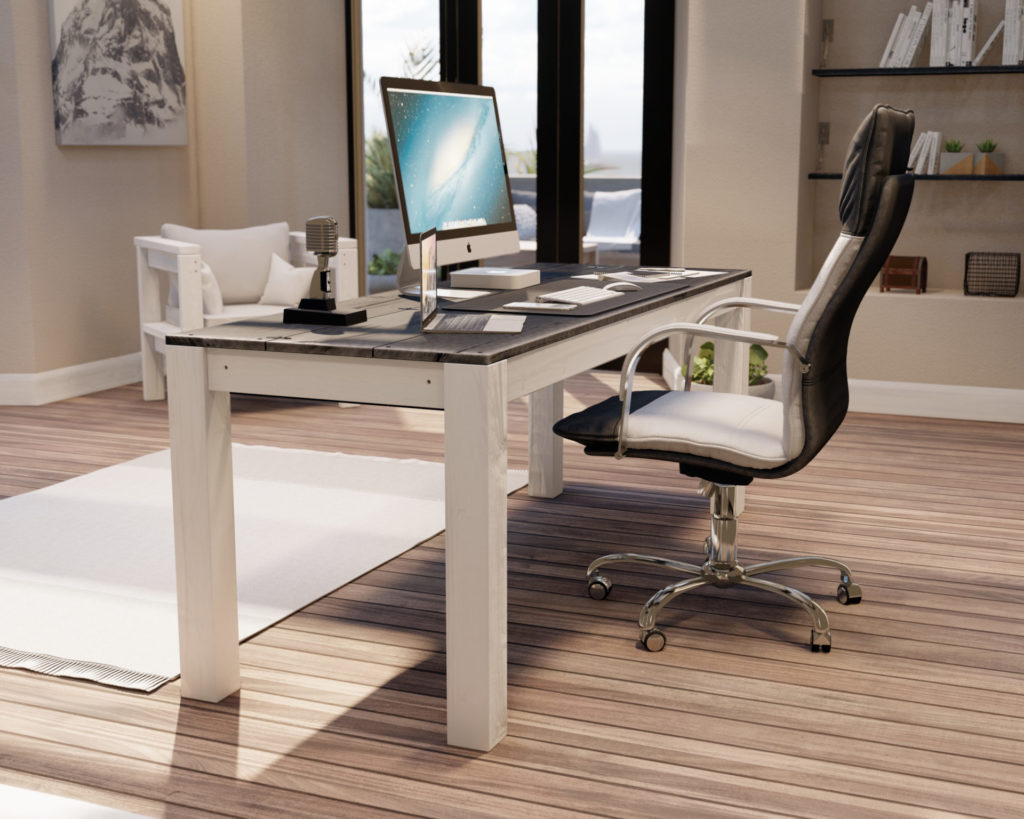
Why choose this DIY desk design?
This DIY computer desk has a hidden storage compartment, is aesthetic, and simple to build. If you are looking for desk ideas for a work desk, gaming desk, or office desk, then look at this exciting design! Some of the important features of this DIY computer desk are listed below.
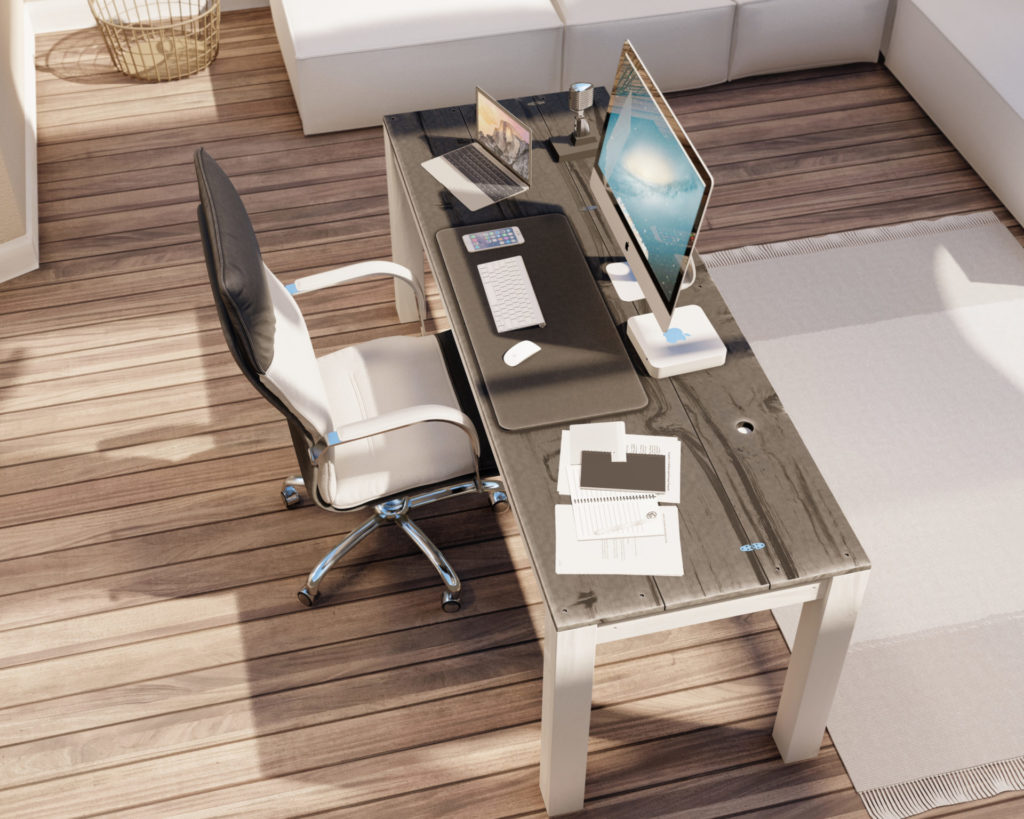
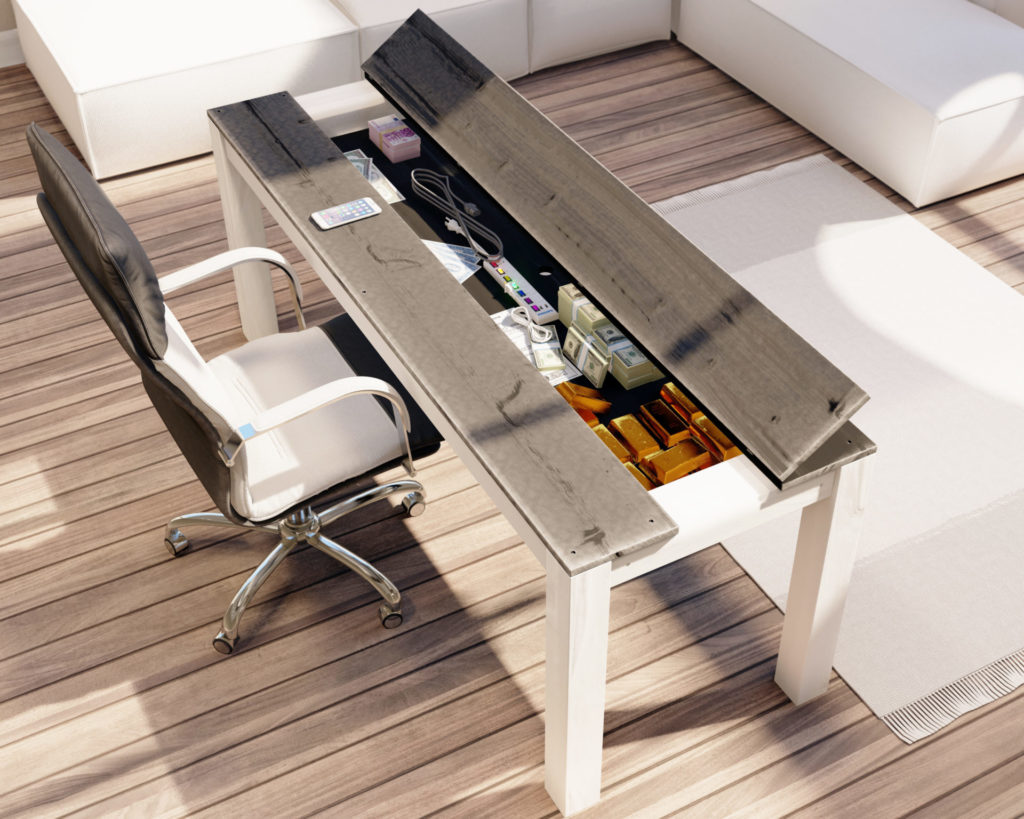
DIY desk hidden compartment and storage.
- One of the features that I love about this desk is that it has a space for the storage of valuable items and documents that doubles as additional storage for extension cords, outlets, and cables. All cords can come together in a single power strip that can then be plugged into just one or two outlets. This not only organized the desktop to look neater, but it also hides the unwanted cords out of sight.
- Having the cords out of the way allows you to have larger equipment like an office PC, monitor, office printers, gaming computers, networking tools (like routers), backup storage hard drives, etc. out on the desktop without looking messy.
- The desktop has plenty of space for office equipment such as office phones, laptops, iPad, speakers, etc. More space means that you can remain organized and on task when working.
DIY desk aesthetics
This beautiful design can be made to look modern, minimalistic, rustic, or farmhouse style. The flexibility you get when building your own desk allows you to stain or paint the desk to make this office desk fit in virtually any room.
Who can build this DIY computer desk?
I would recommend this project to anyone who is new to woodworking. No fancy joints, no fancy cuts, the simple step by step instruction provided will guide beginners though the build in a smooth way. Using a DIY plan helps reduce waste, save time, and save the do-it-yourselfers from frustration.
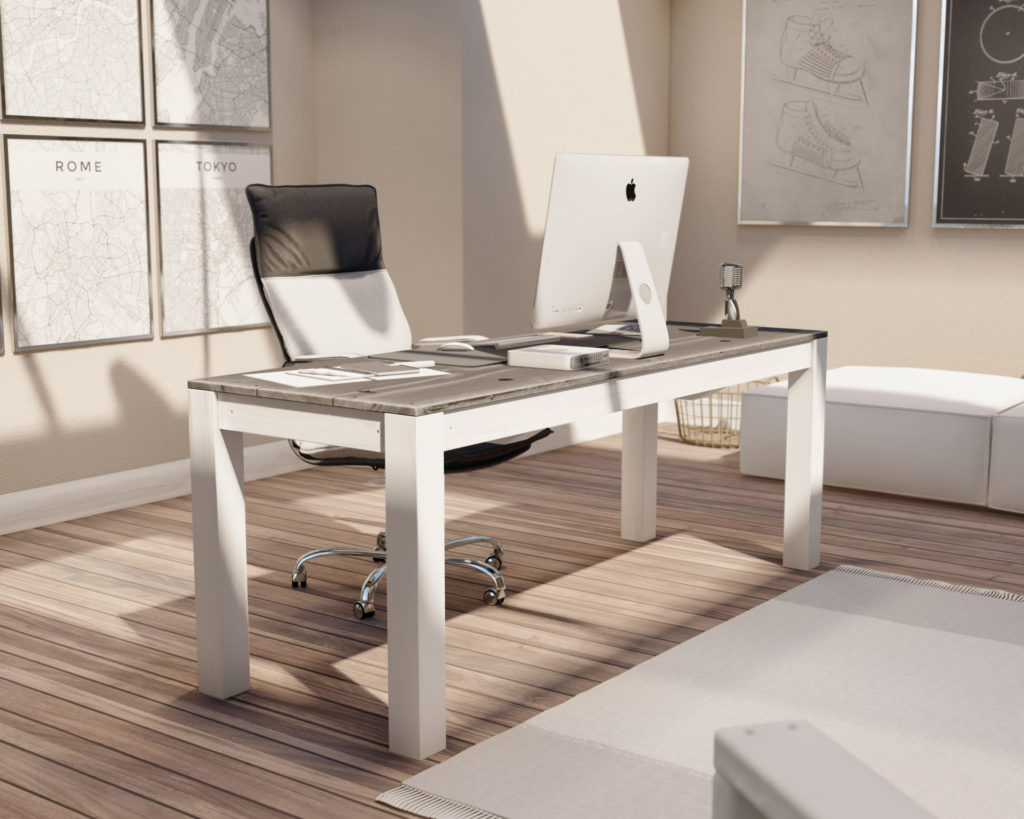
What about the other DIY pieces in the photos?

Time to build
About 5 hours
Total cost of build
About $145
Skill level required
Beginner
Download the PDF plans
DIY desk PDF plans
What is included in the PDF download?
- Easy to read step by step instructions
- Material list
- Cut list
- Tools needed
DIY desk step by step instructions
Tools and material list
- Saw (miter saw recommended for precision cuts)
- Drill
- Impact driver with bit for screws
- Sander
- wood countersink drill bit
- about 15lbs of 3.5 in long screws (highly recommend T25 Star Drive screws)
- Wood glue
- Sand paper
- Small hinges and small screws for small hinges
- 2 inch forstner bit
- Pencil
Wood cut list
Available with purchase of PDF plans.
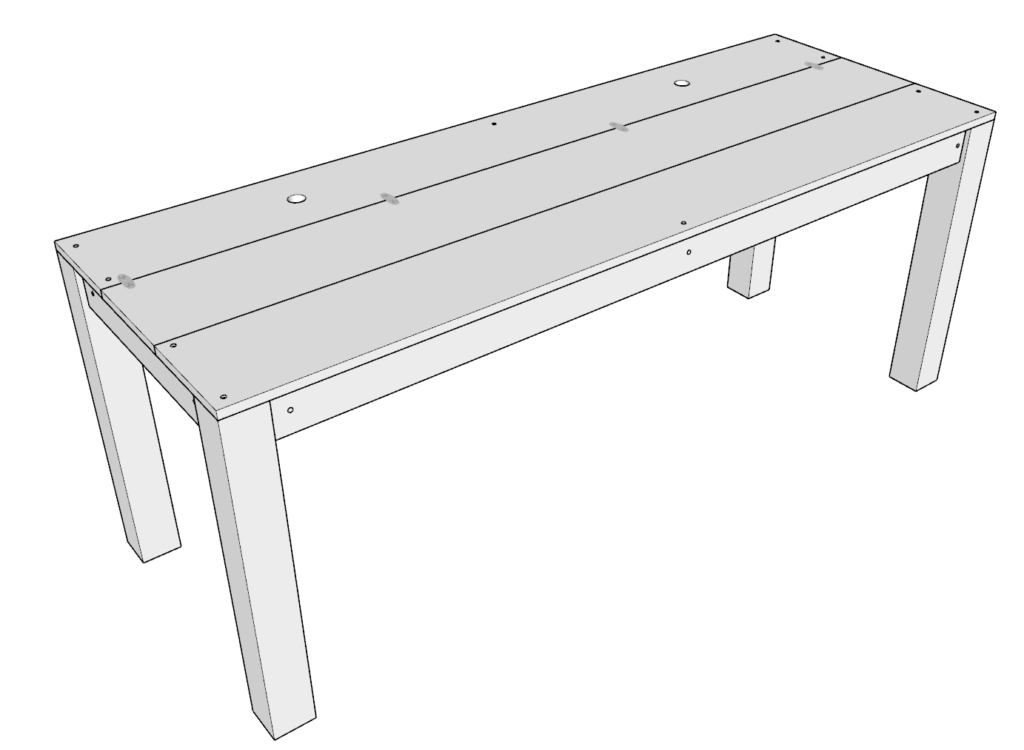
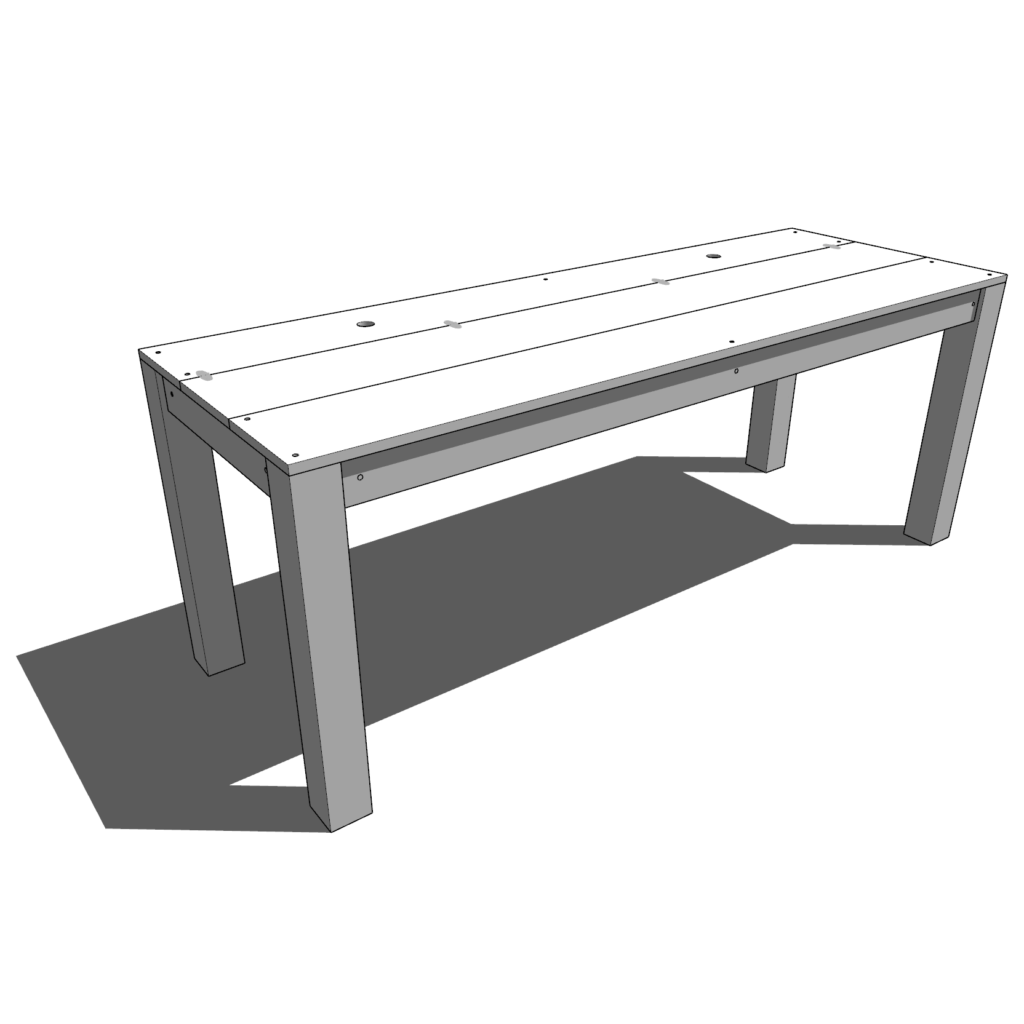
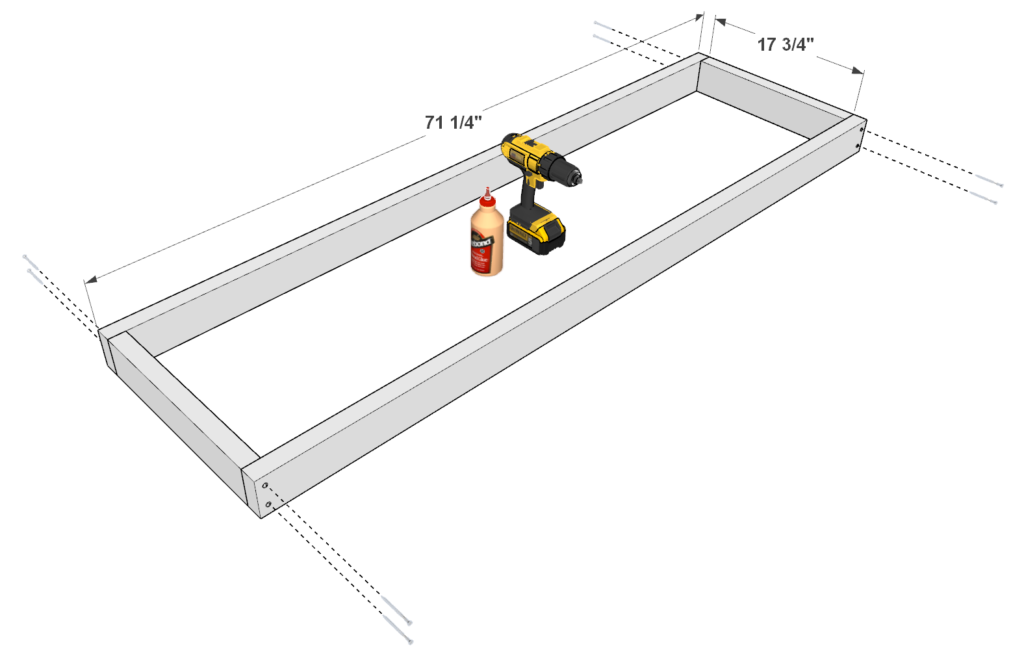
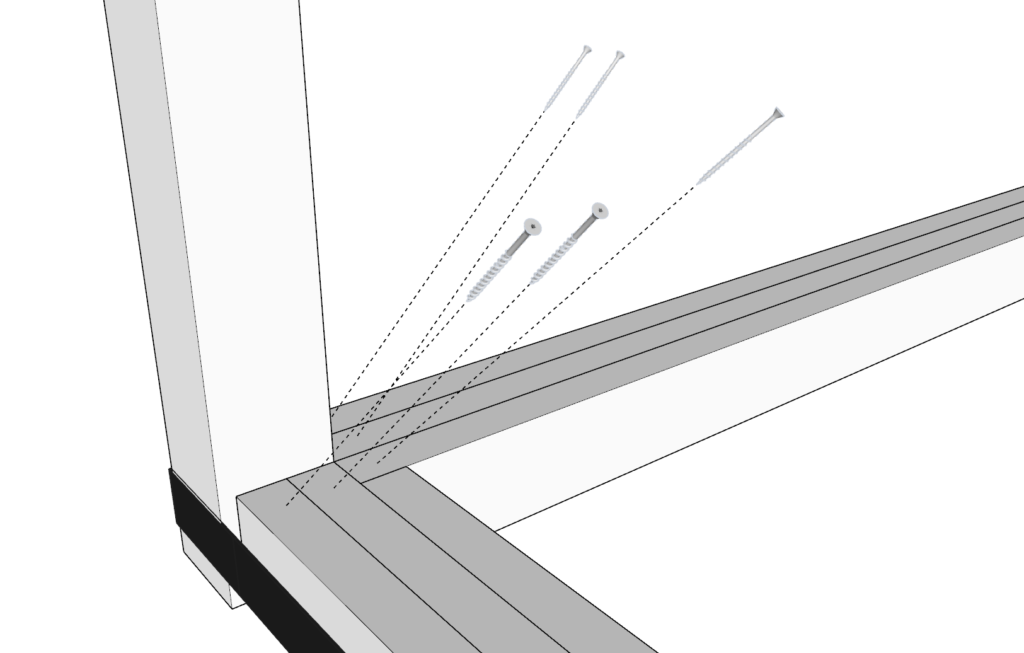
Step 1 (DIY desk)
Take two 71-1/4 inch 2×4 lumber pieces and two 17-3/4 inch 2×4 lumber pieces and arrange them as shown bellow.
Join the pieces by predrilling holes, adding glue, and adding 3.5 inch long screws.
It is recommended to predrill the wood prior to putting in a screw to prevent the wood from splitting. What works for me is to us a wood countersink drill bit.
Make a total of two identical frame pieces.
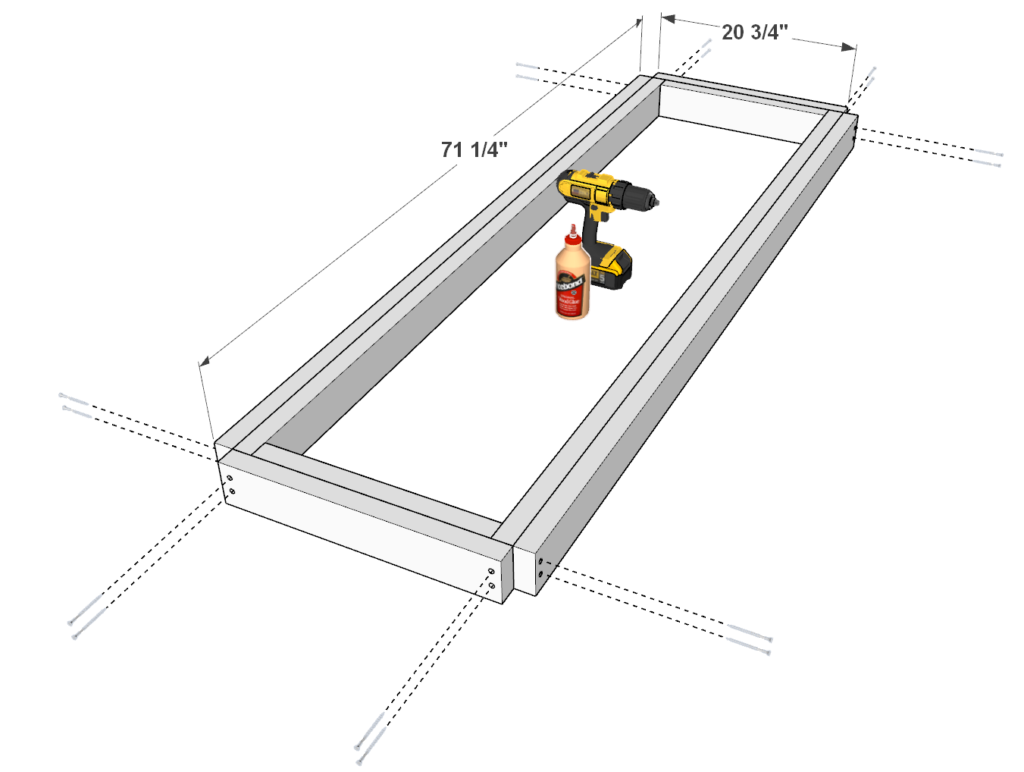
Step 2 (DIY desk)
Next, take two 20-3/4 inch 2×4 and two 71-1/4 inch 2×4 lumber pieces and arrange them as shown in the diagram. Add glue, predrill, and add 3.5 inch screws to join the pieces together.
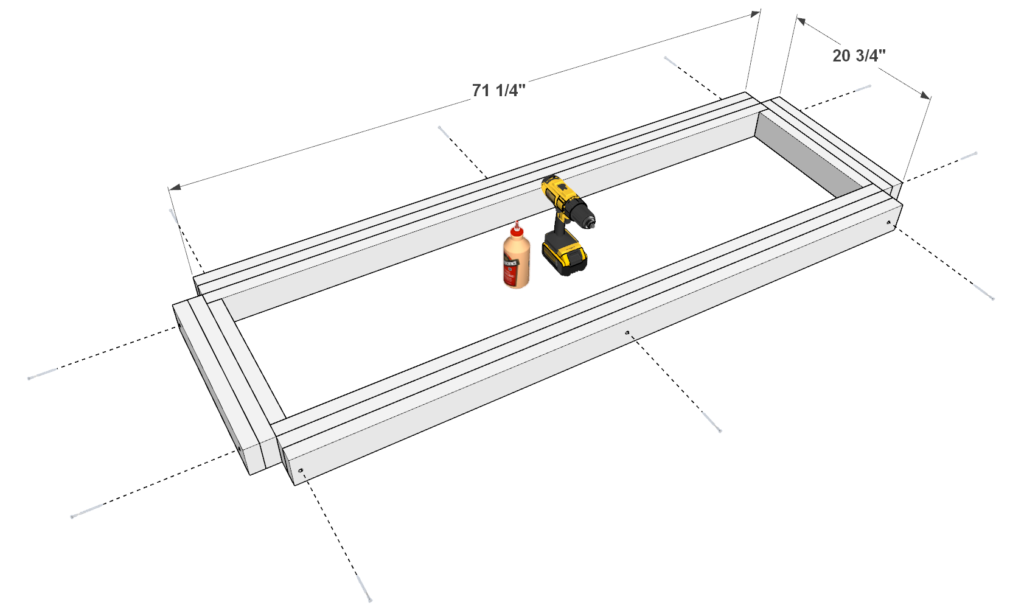
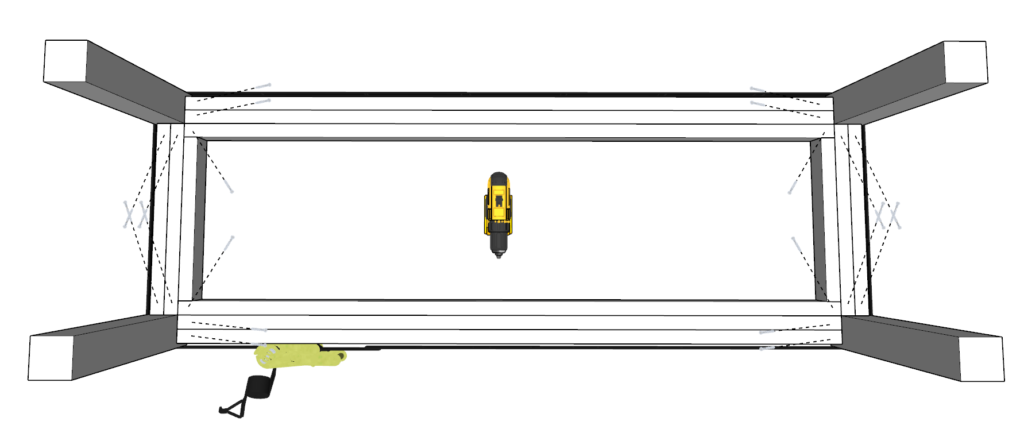
Step 3 (DIY desk)
Next, take two 20-3/4 inch 2×4 and two 71-1/4 inch 2×4 lumber pieces and arrange them as shown in the diagram. Add glue, predrill, and add 3.5 inch screws to join the pieces together.
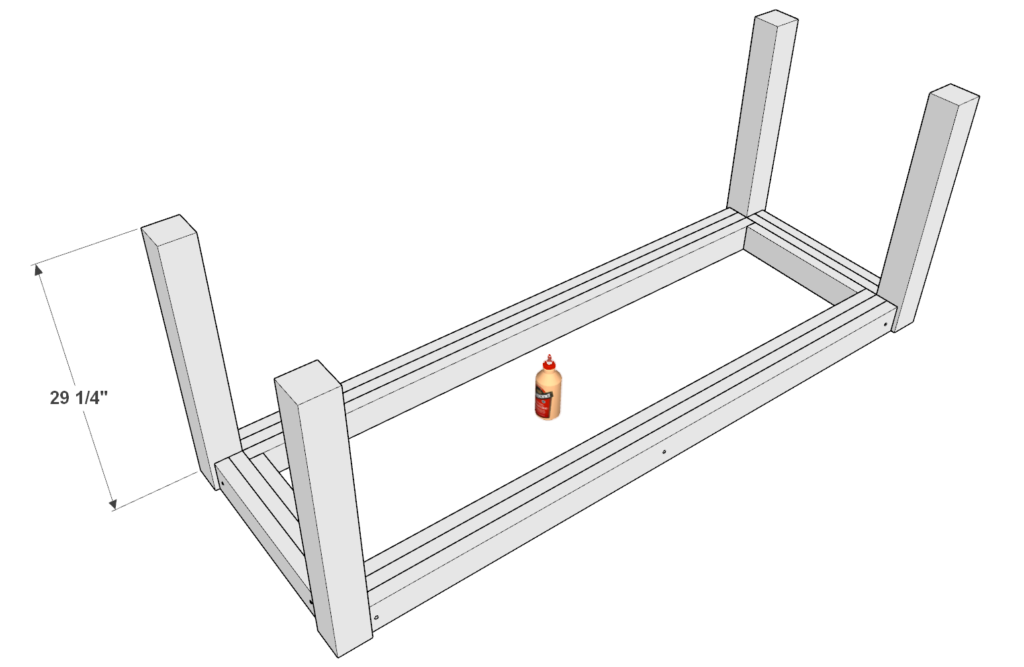
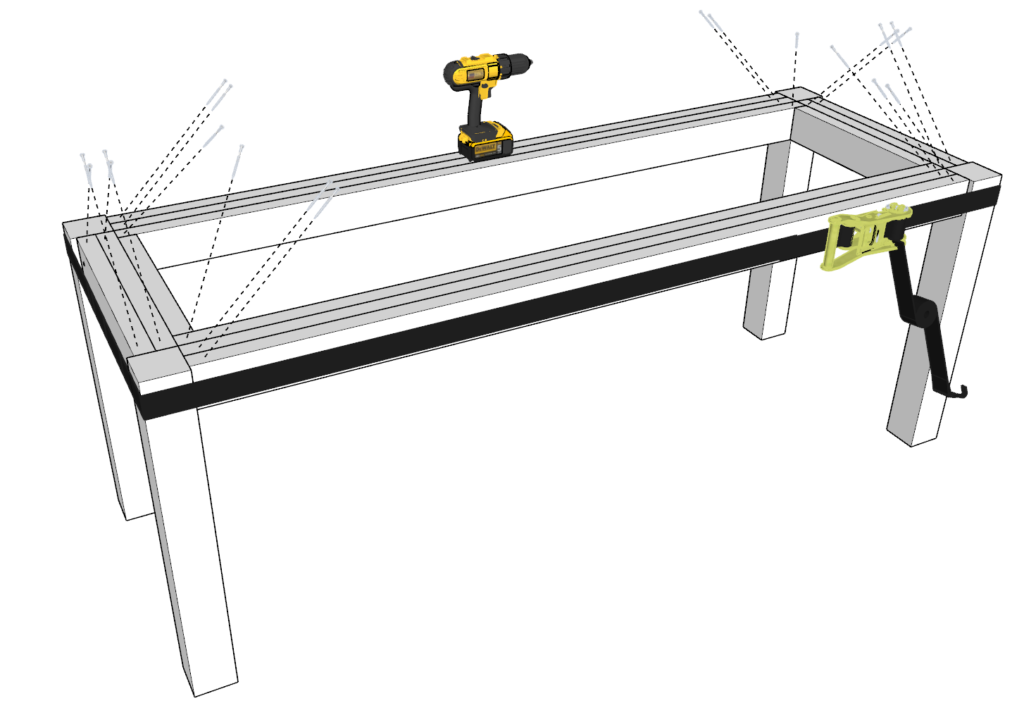
Step 4 (DIY desk)
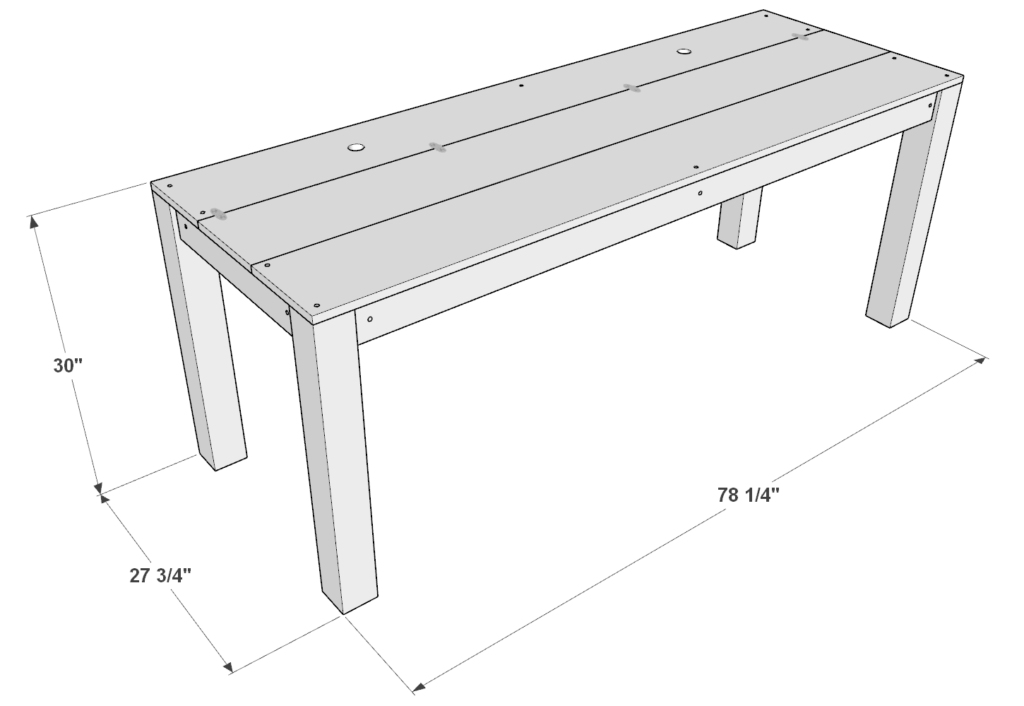
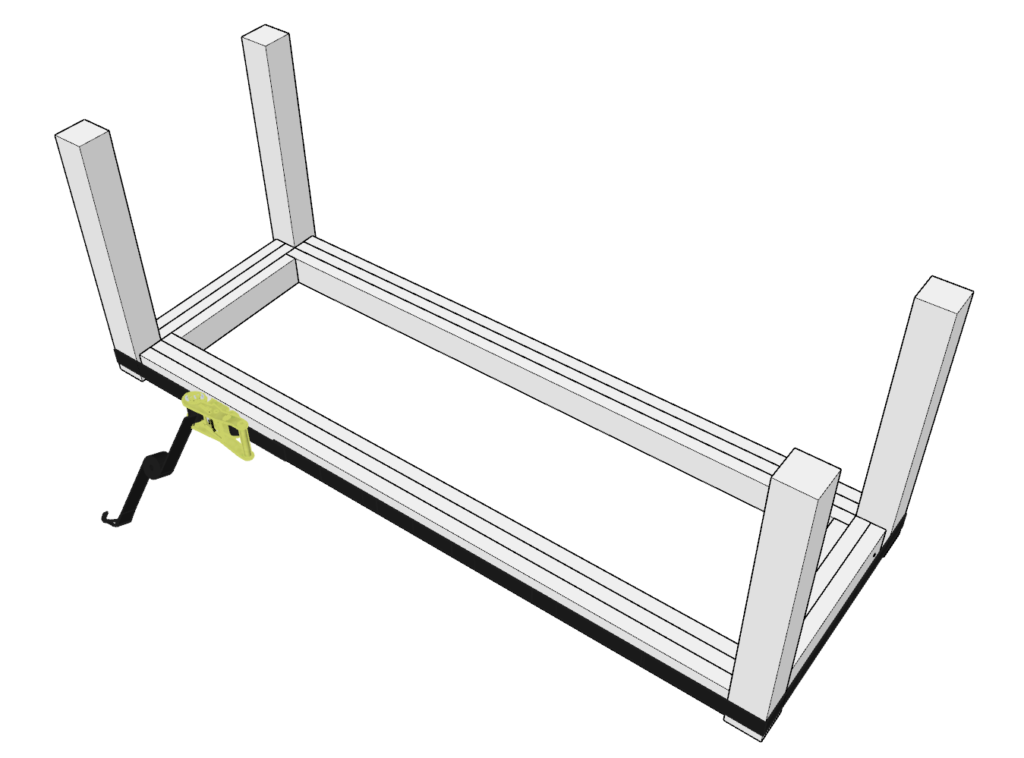
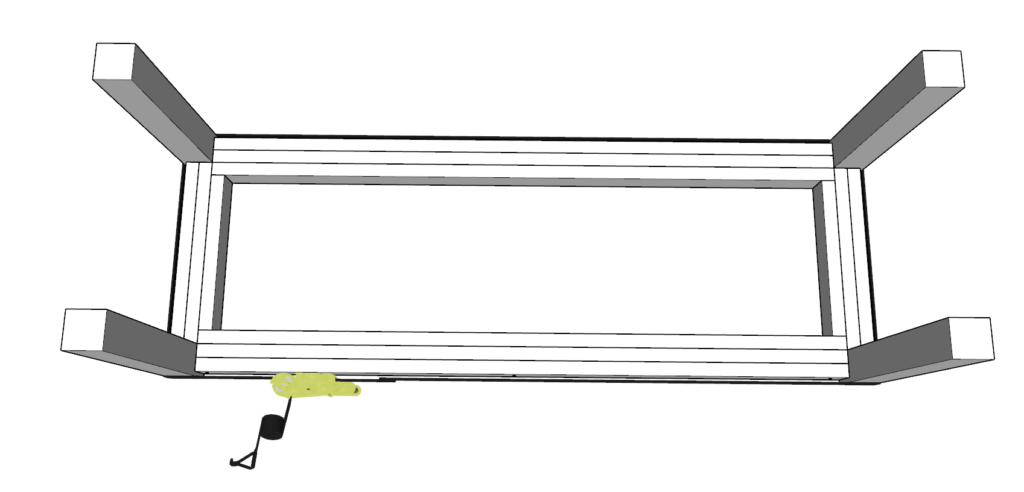
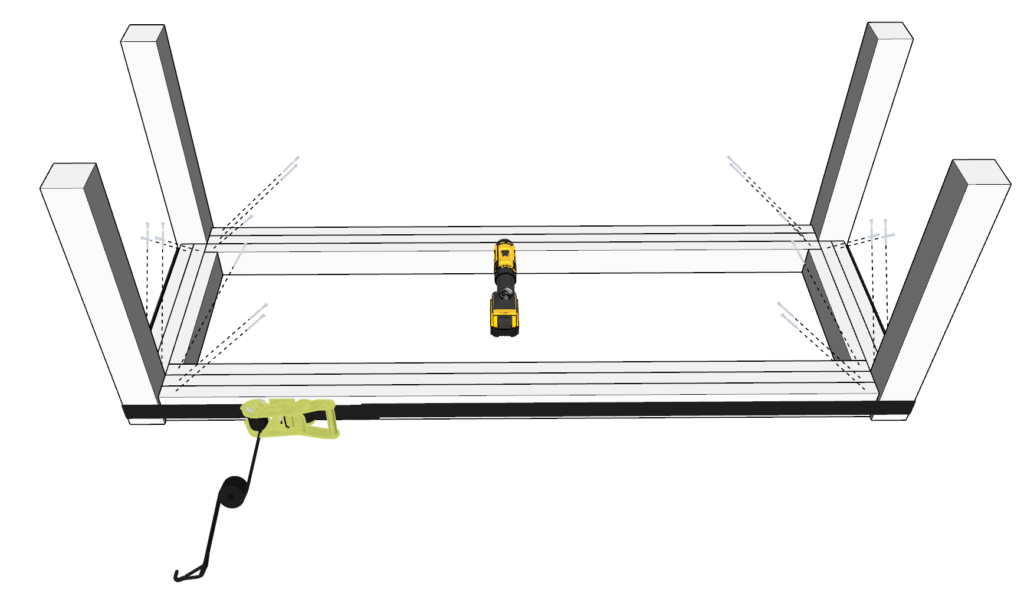
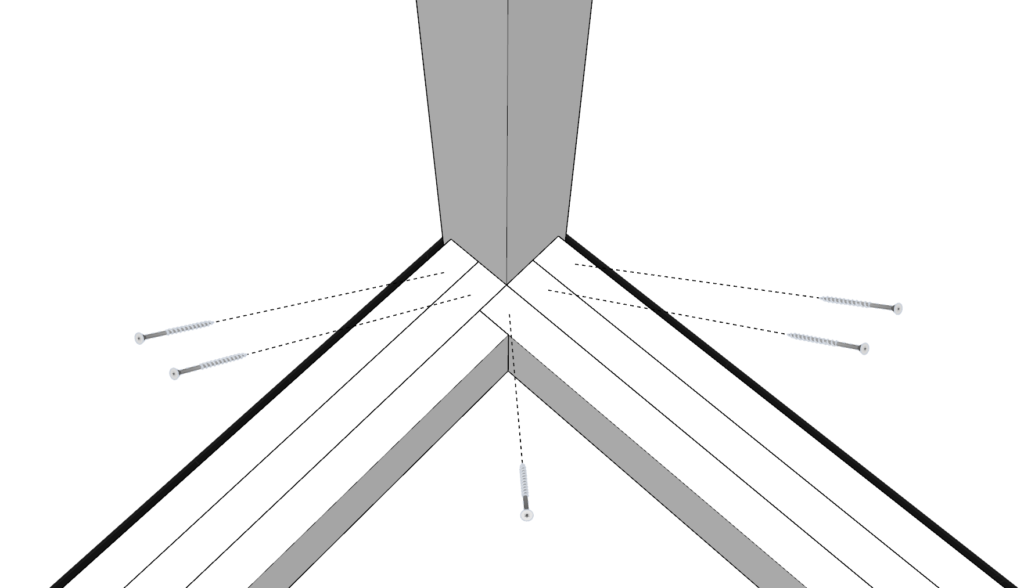
Next, take four 29-1/4 inch 4×4 lumber pieces and arrange them as shown below. Add glue to all areas that will be joined together.
Next, take a ratchet strap and wrap it around the entire perimeter of the table frame as shown below. Tighten the straps to a point where you can still “hammer” the legs or table frame into the correct position. Next, “hammer” into position the legs and table frame where needed. Make sure this is done on a level surface.
Next, tighten the straps very tightly so the legs do not move. Add 3.5 inch screws as shown below. Its recommended to go deep with the screws to ensure a proper joint.
Step 5 (DIY desk)
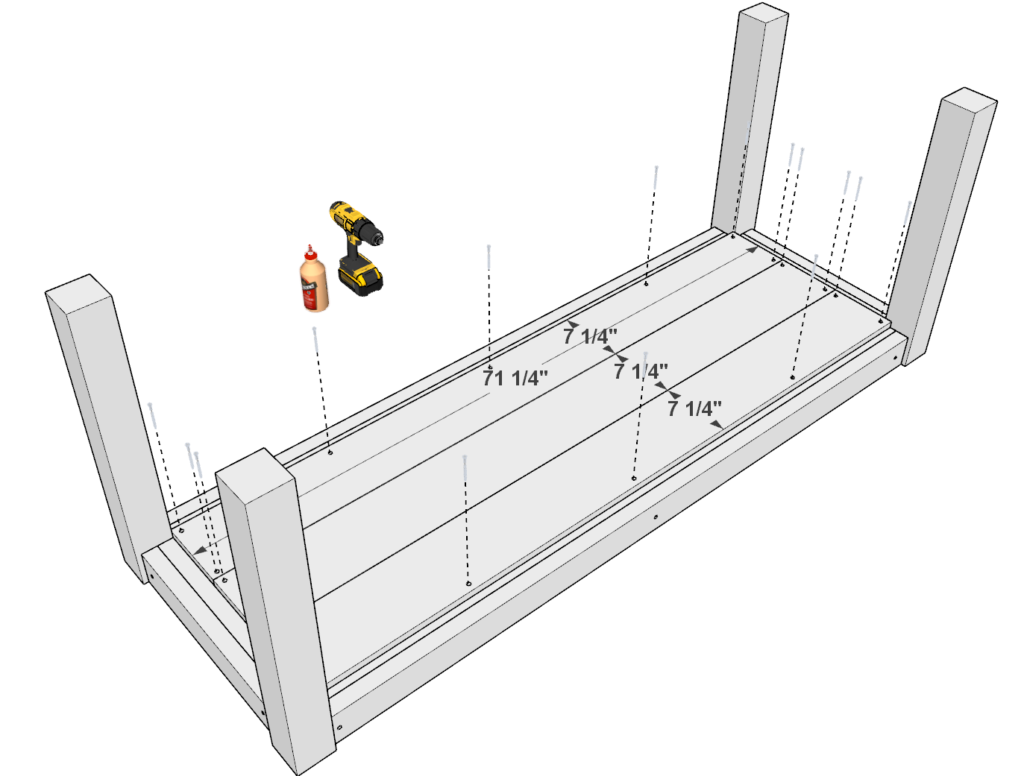
Next, add the boards that will serve as the bottom of the secret compartment.
Take three 71-1/4 inch 1×8 lumber pieces and arrange them as shown below.
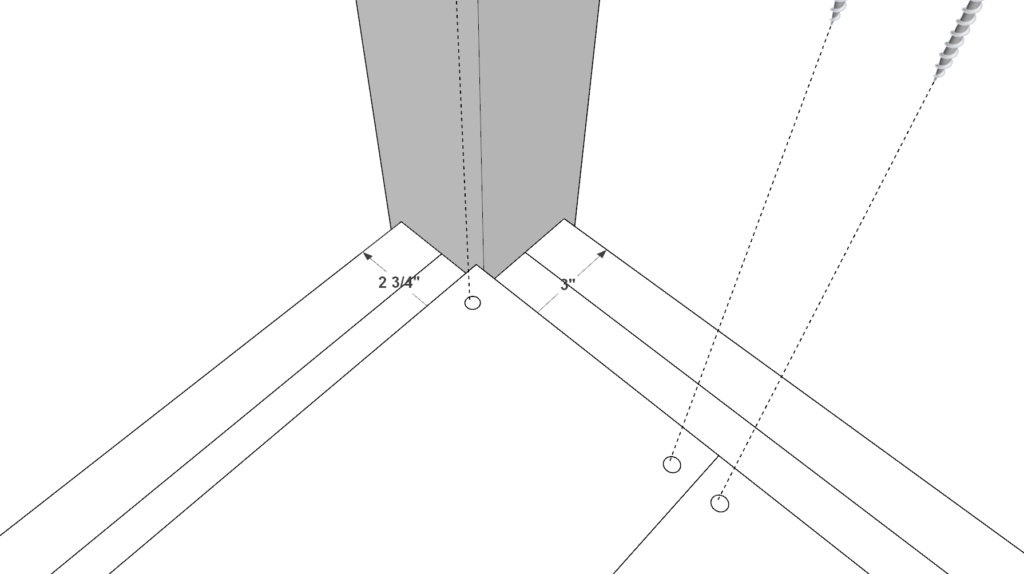
The edges of the boards need to be about 3 inches and 2-3/4 inches away from the edge of the desktop frame as shown below.
As before, predrill, add glue, and add 3.5 inch screws.
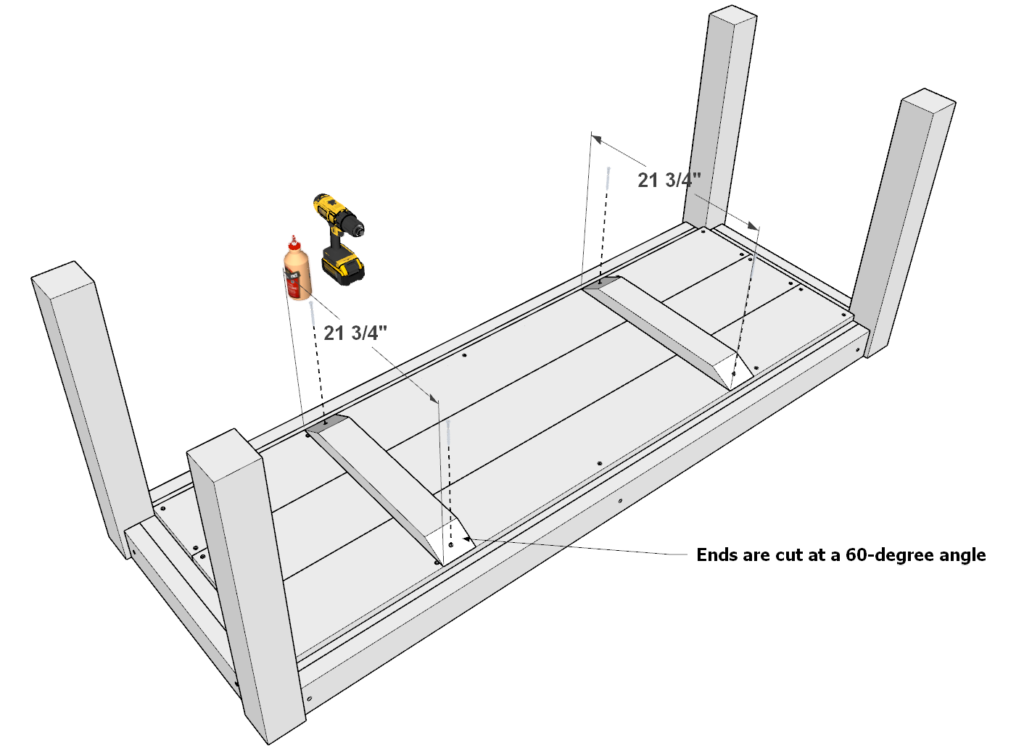
Lastly, add two 21-3/4 inch 2×4 lumber pieces that are cut at 60-degrees on both ends to the bottom. They can be spaced out about 18 inches away from the edges of the table.
Add glue, predrill, and add 3.5 inch screws.
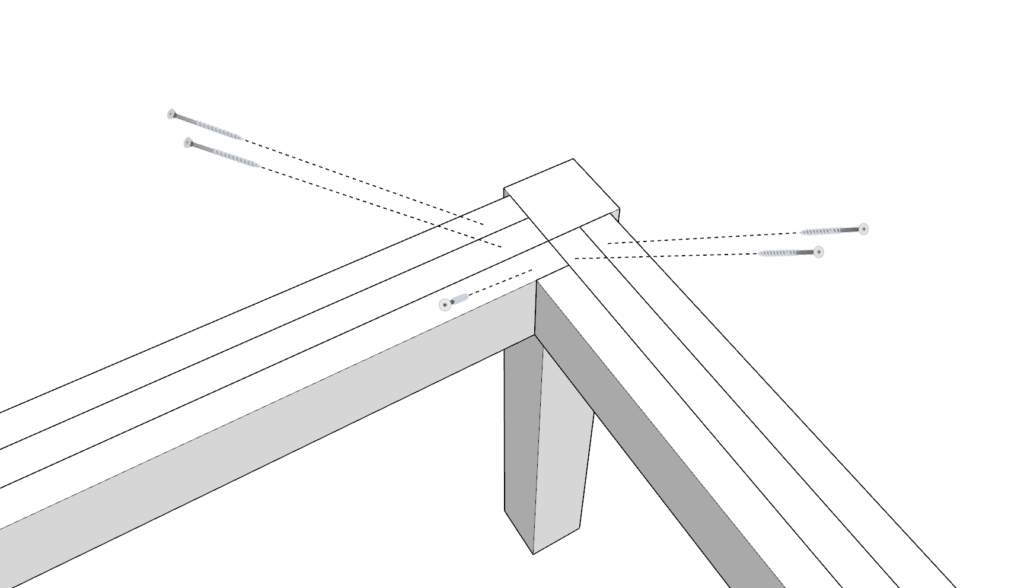
Step 6 (DIY desk)
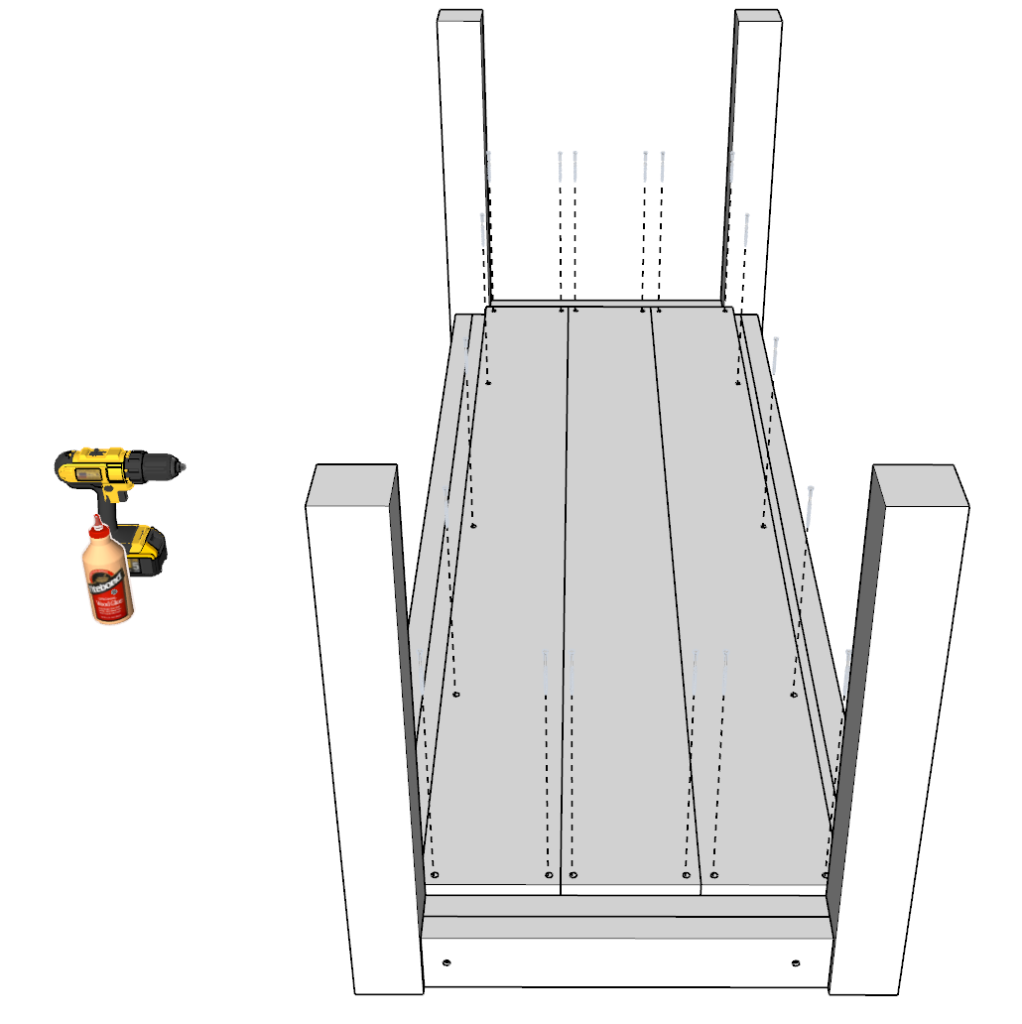
Next, take the two shelfing frame pieces and attach them the main desk top frame.
Align the shelving frame pieces with the main desk frame as shown below. Keep in mind that the desktop frame is not the same on both sides.
Add glue, predrill, and add 3.5 inch screws.
Step 7 (DIY desk)
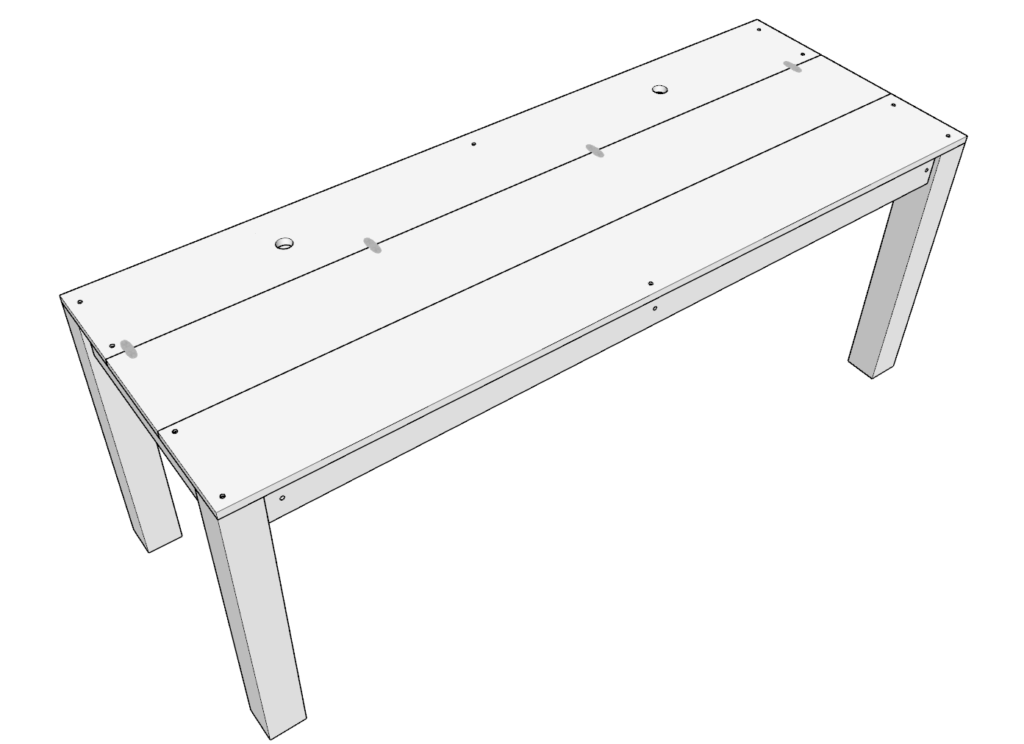
Next, add the cable hole in the table.
Take a 2 inch forstner bit and drill a hole that would be close to your wall outlet. This is the cable hole for the outlet.
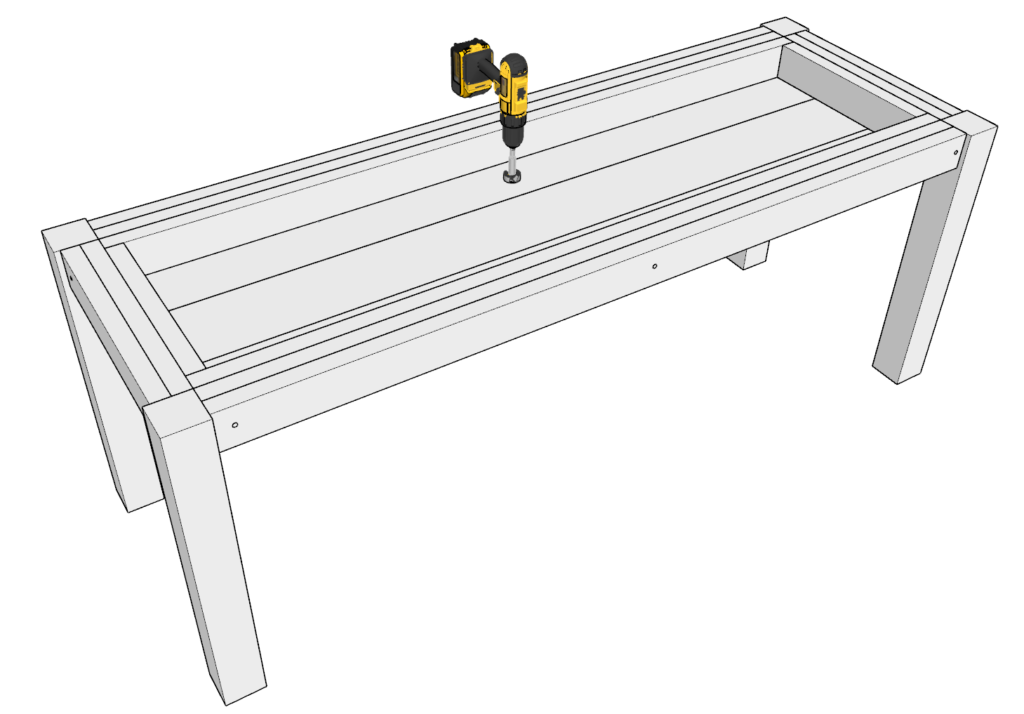
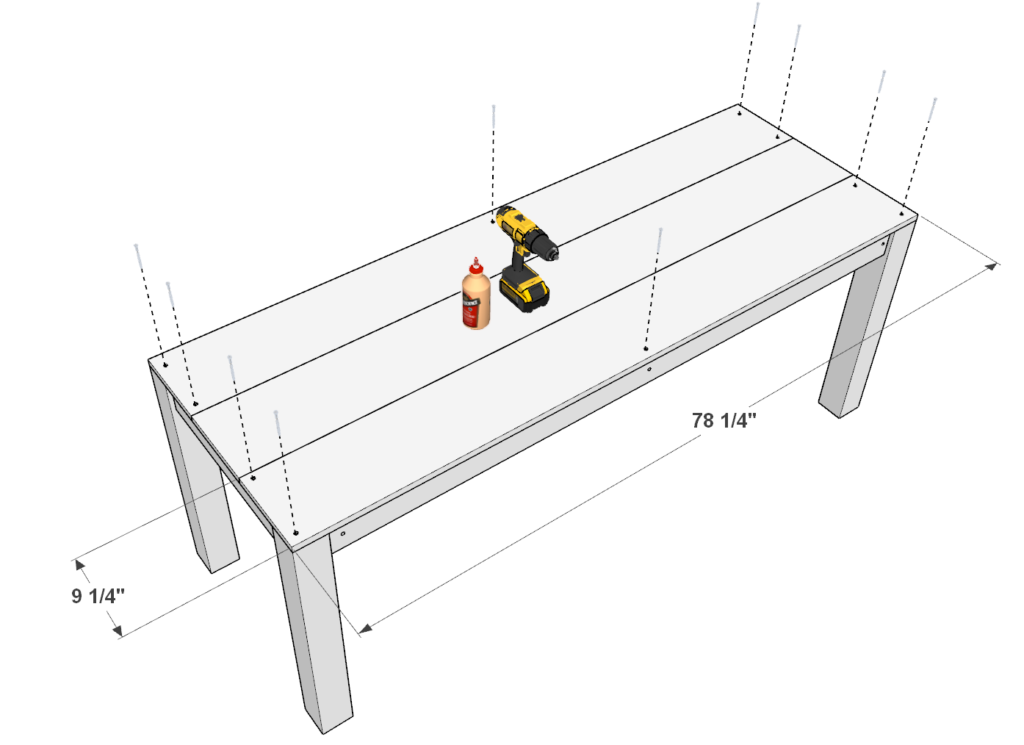
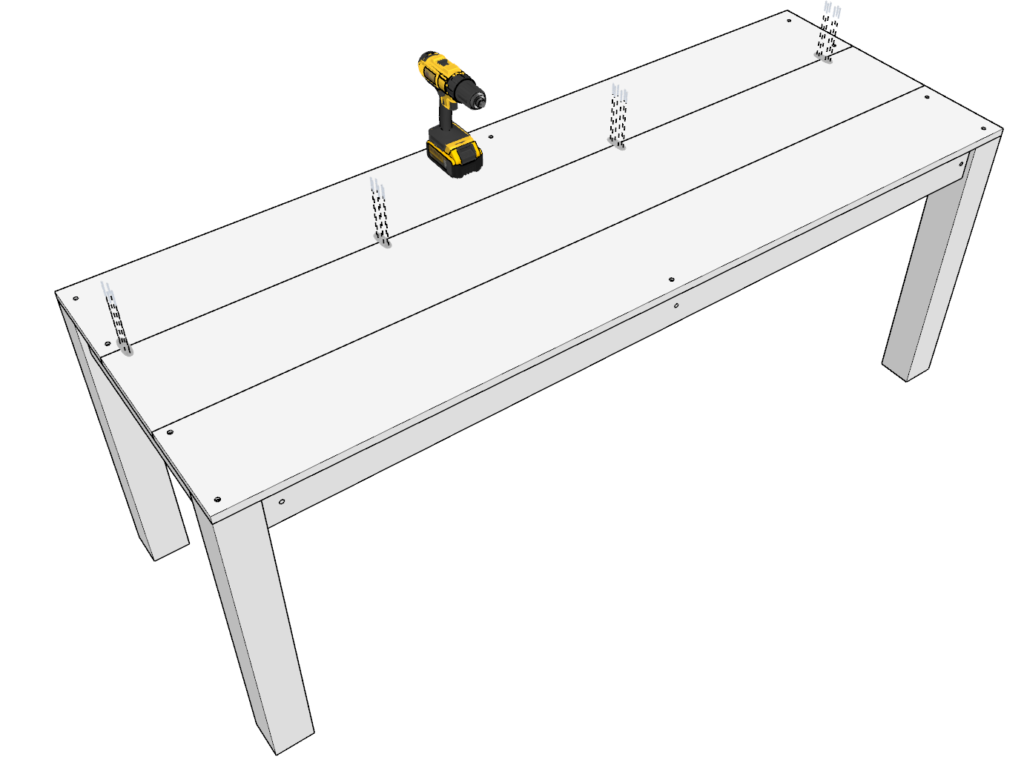
Step 8 (DIY desk)
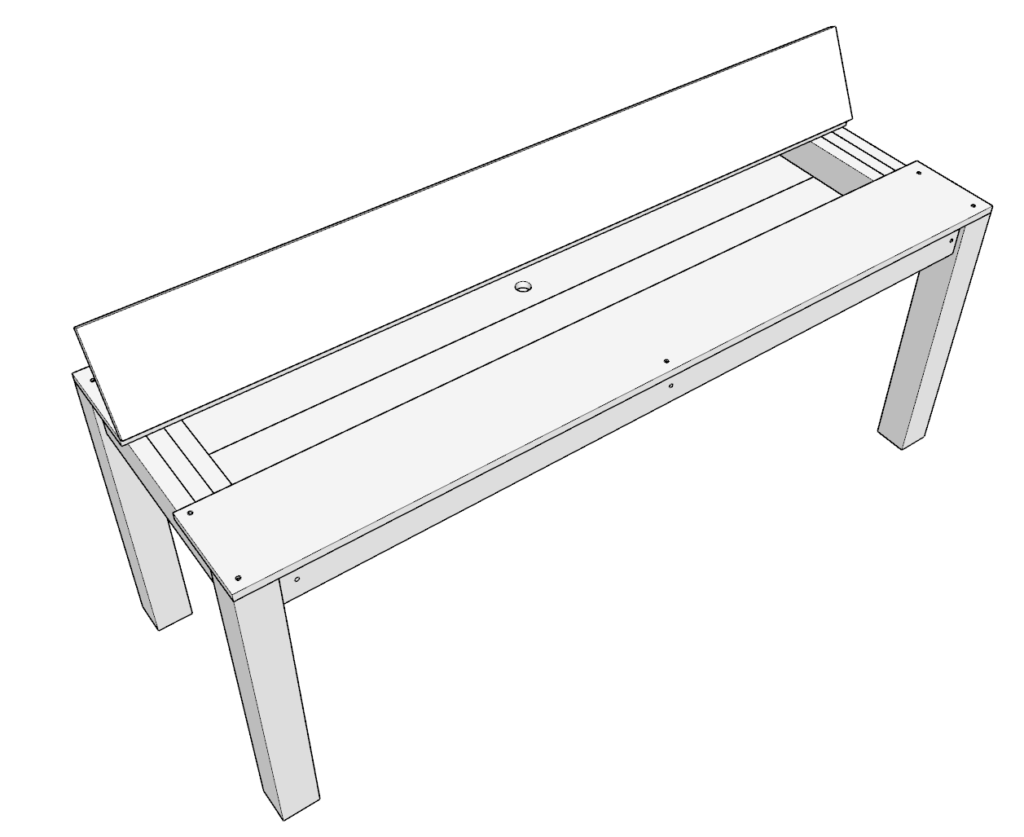
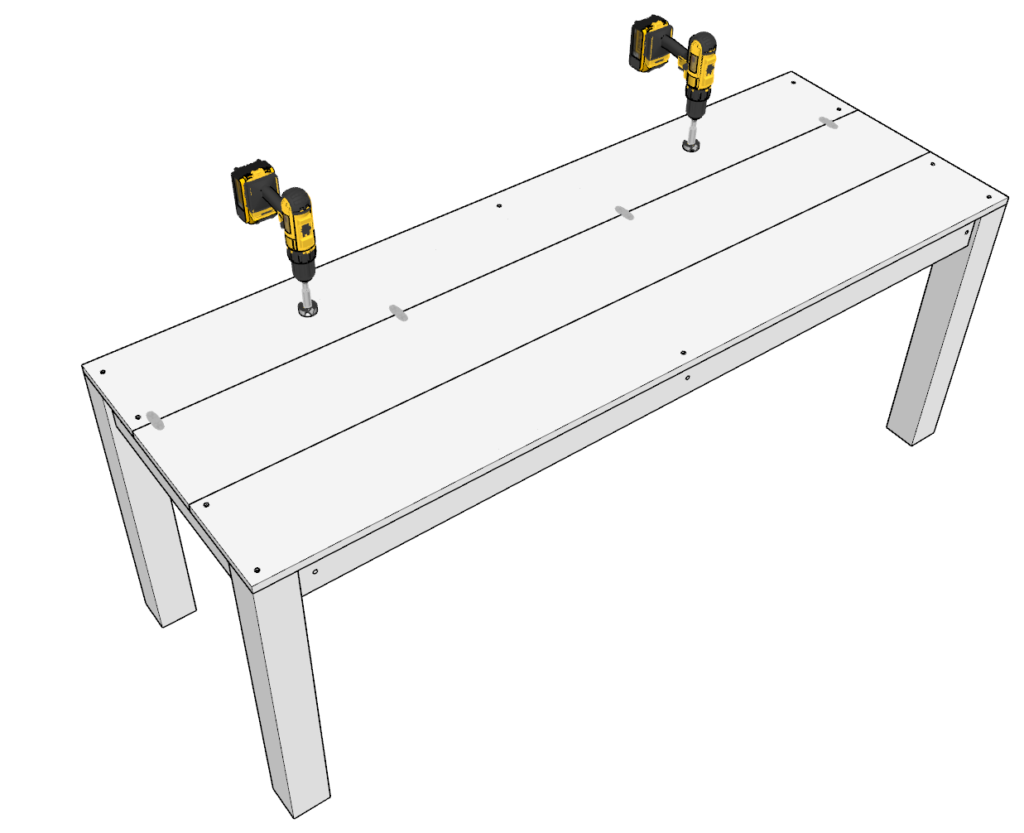
Next, Add the desk top boards.
Take three 78-1/4 inch 1×10 lumber pieces and arrange them as shown below. Add glue, predrill, and add 3.5 inch screws to secure them in place. MAKE SURE NOT TO SCREW DONW THE CENTER BOARD.
The center board is NOT to be screwed in. Instead, use hinges to secure it in place and ensure that it can swing open and closed (you may need to sand down some of the edges of the board to achieve both a snug fit and the ability to swing open and closed freely).
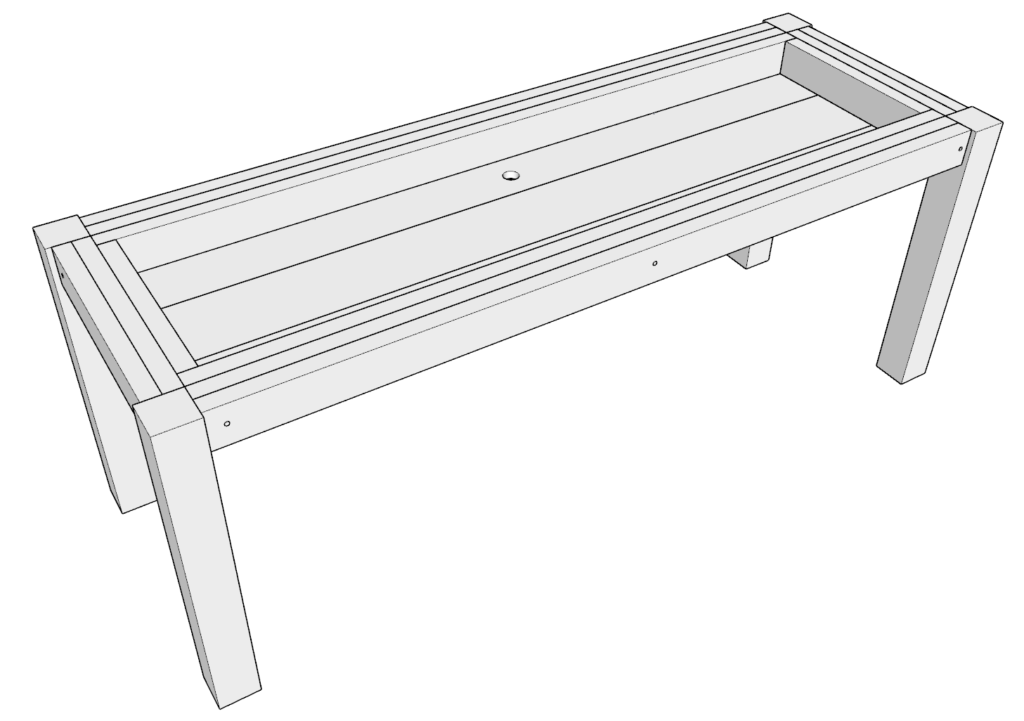
Step 9 (DIY desk)
Next, add cable holes as needed. The placement can vary based on type and the location of equipment and cables on the desk.
Step 10
Next, sand down the desk . This can be time consuming. I use an orbital sander to speed up the process
I use a rough 80 grit paper first and then finish it with a 220 grit paper.
Filling in the holes is optional.
At this point it is ready to be stained or painted!