
The DIY Daybed Overview:
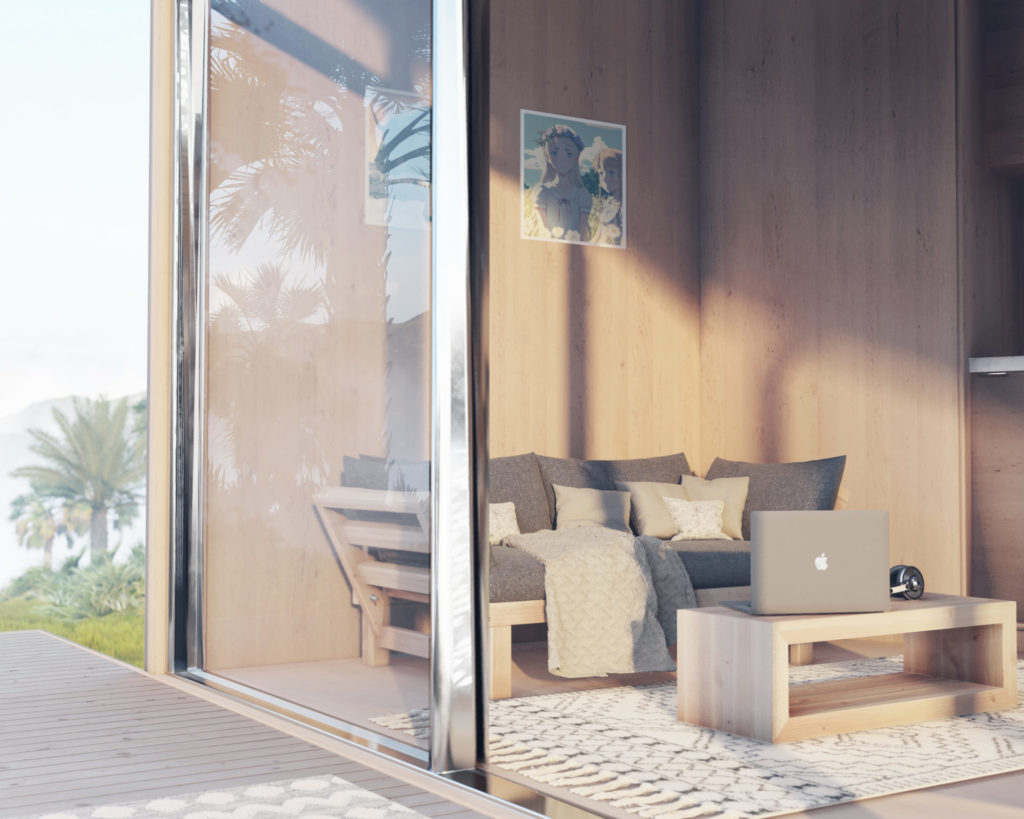
The DIY daybed and sofa is the perfect addition to any indoor living space. Whether you’re looking for a comfortable seating area to relax, a place to sleep, or a conversation area to entertain, this DIY daybed and sofa offers a stylish and practical solution.
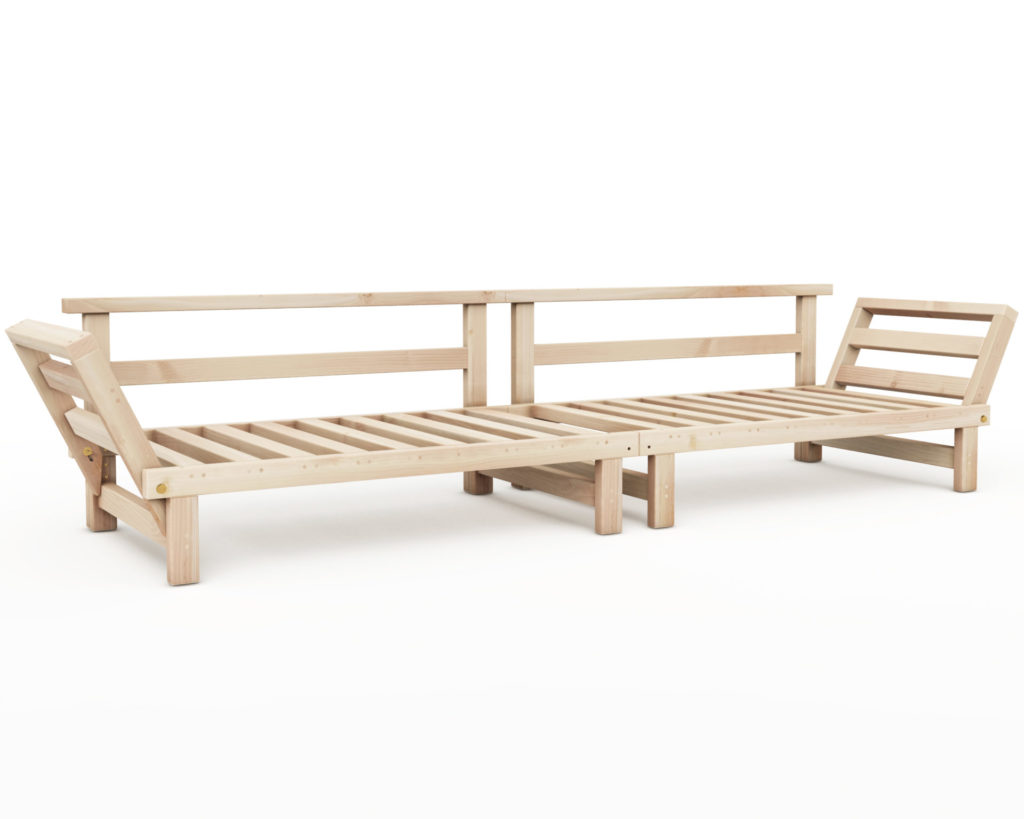
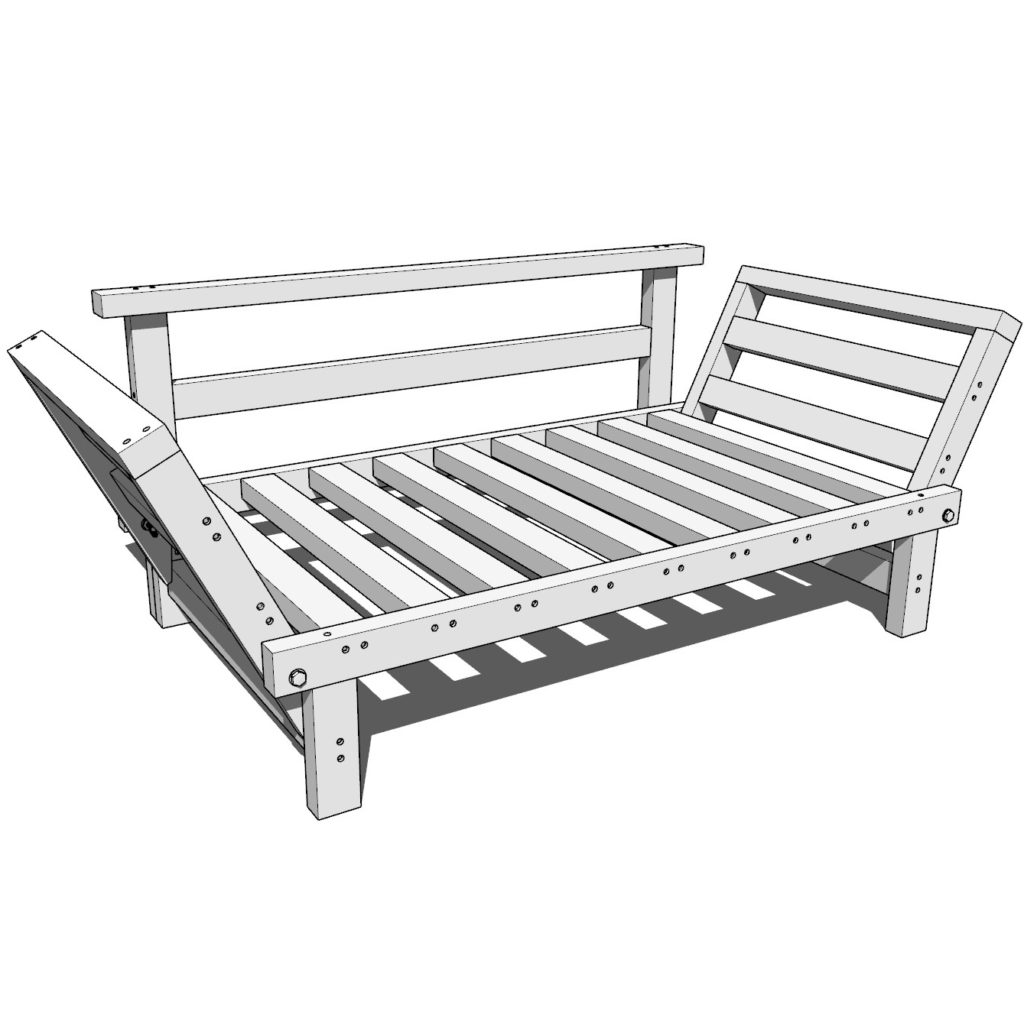
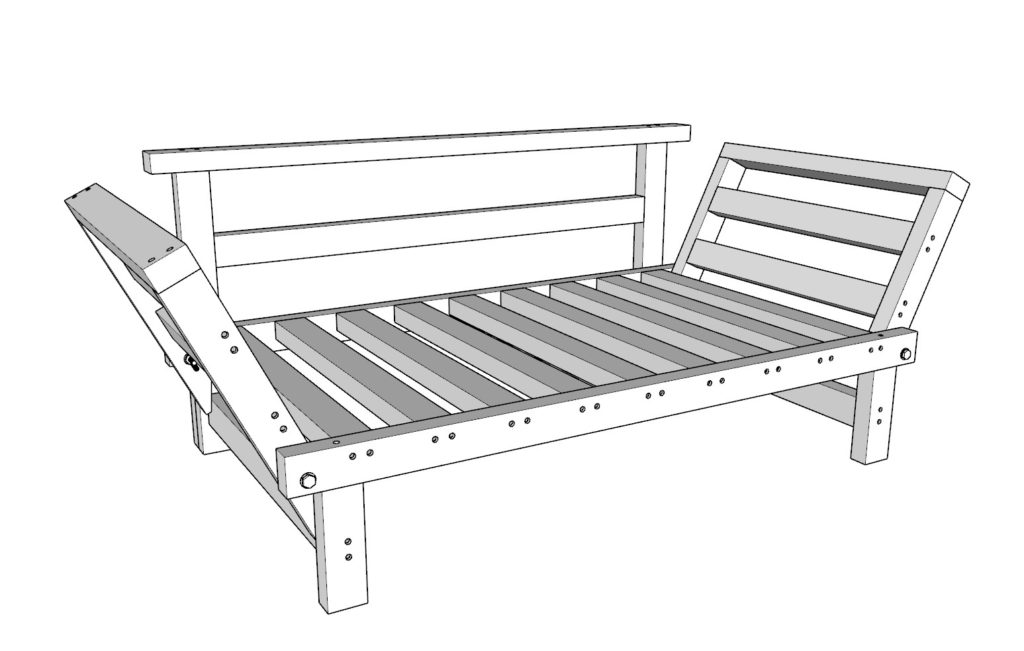
The frame of the daybed and sofa is constructed from sturdy 2×3 dimensional lumber, providing superior durability and strength for indoor use. The frame is designed to be easily assembled with basic tools, and the instructions provided make the construction process straightforward. Once assembled, the frame can be stained or painted to make it weatherproof and resilient, ensuring a lasting and beautiful piece of furniture.
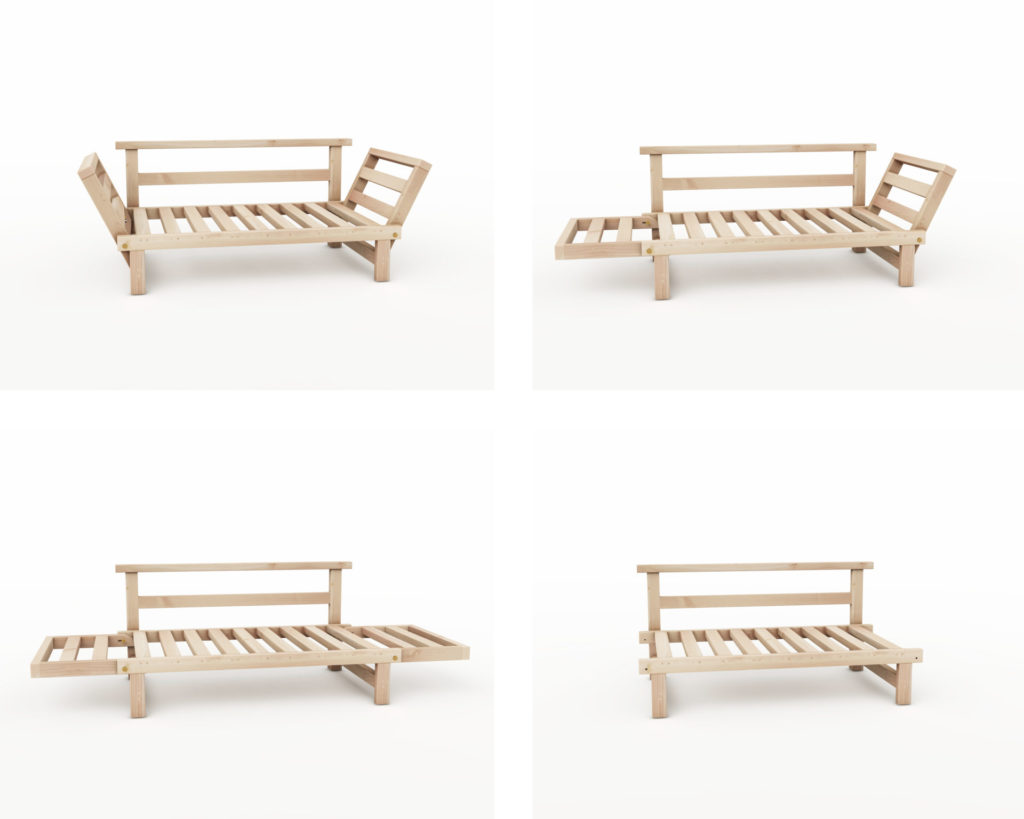
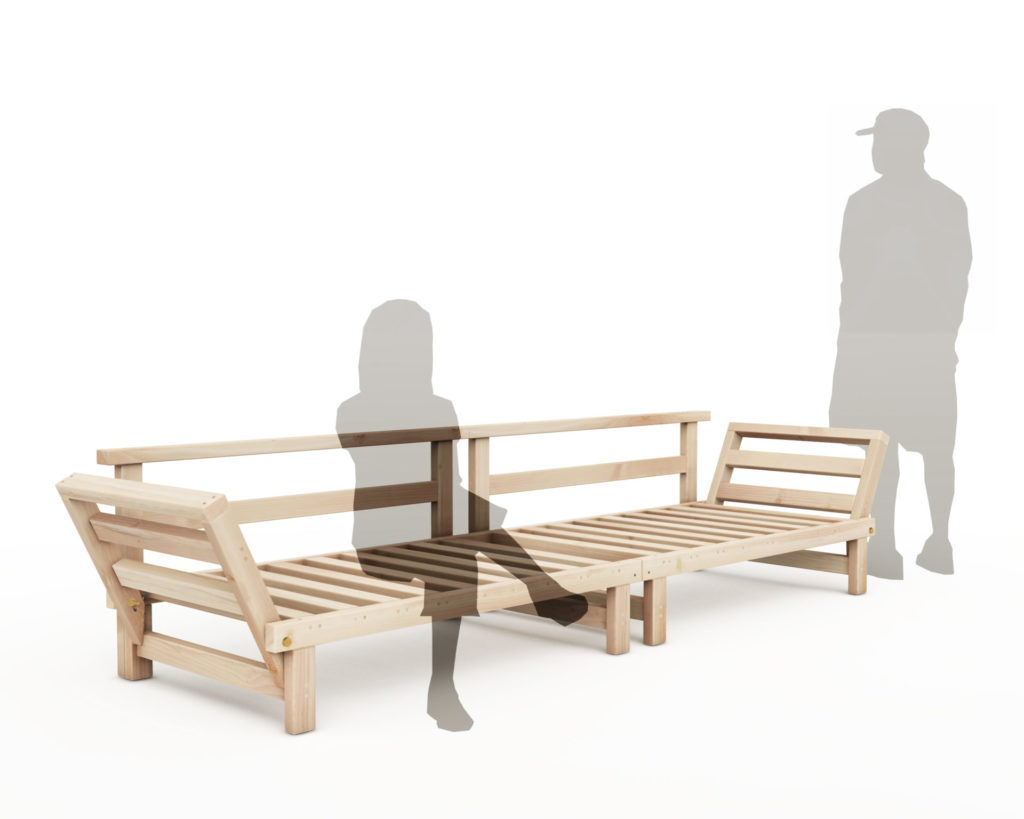
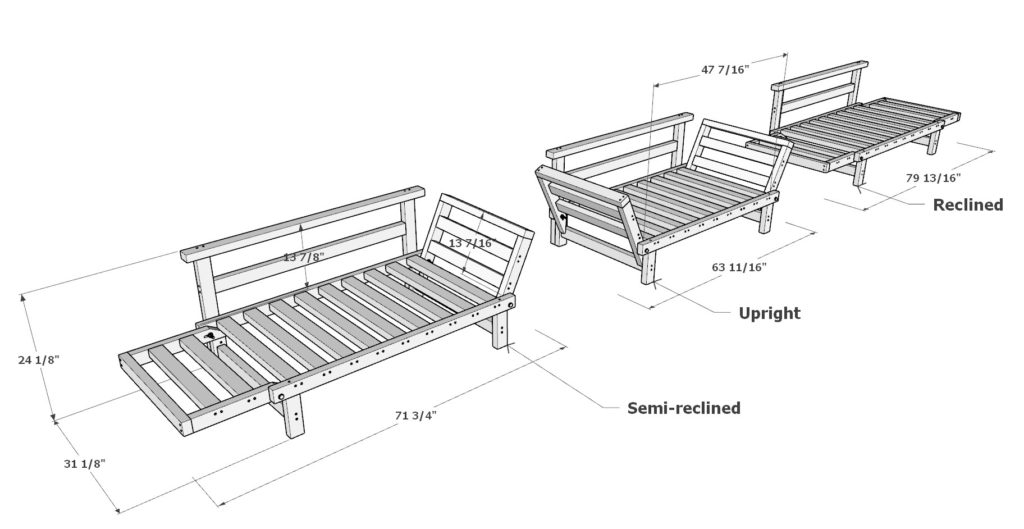
The daybed also features two adjustable armrests, allowing for multiple positions for comfortable lounging, reading, studying, napping, or sleeping. The armrests are secured with a simple bolt mechanism that is easy to assemble, and can be removed and reattached, allowing the daybed and sofa to be configured to fit any size space.
The daybed and sofa is also designed with convenience in mind and the folding mechanism allows it to be easily converted, offering a great way to maximize space.
Who Can build the DIY Daybed?
This DIY bed is easy to assemble with the step–by–step instructions provided in this post. I believe this essential piece of furniture would be a great project for beginners to woodworking and anyone with minimal woodworking experience. The DIY plans offered in this post include helpful description, images, diagrams, helpful links, and more to ensure that the DIY build is smooth, efficient, and easy.
Where can I get DIY plans for the fence panels and firepit?


Time to build
About 1-2 hours
Total cost of build
About $45 per daybed
Skill level required
Beginner
Download the PDF plans
DIY daybed PDF plans
What is included in the PDF download?
Easy to read step by step instructions
Material list
Tools needed
3D illustrations
Recommended tools/materials
- Saw (miter saw recommended for precision cuts)
- Drill
- Impact driver with bit for screws
- wood countersink drill bit
- (6) 3.5 inch long screws
- 1-2 lb of 2.5 inch screws
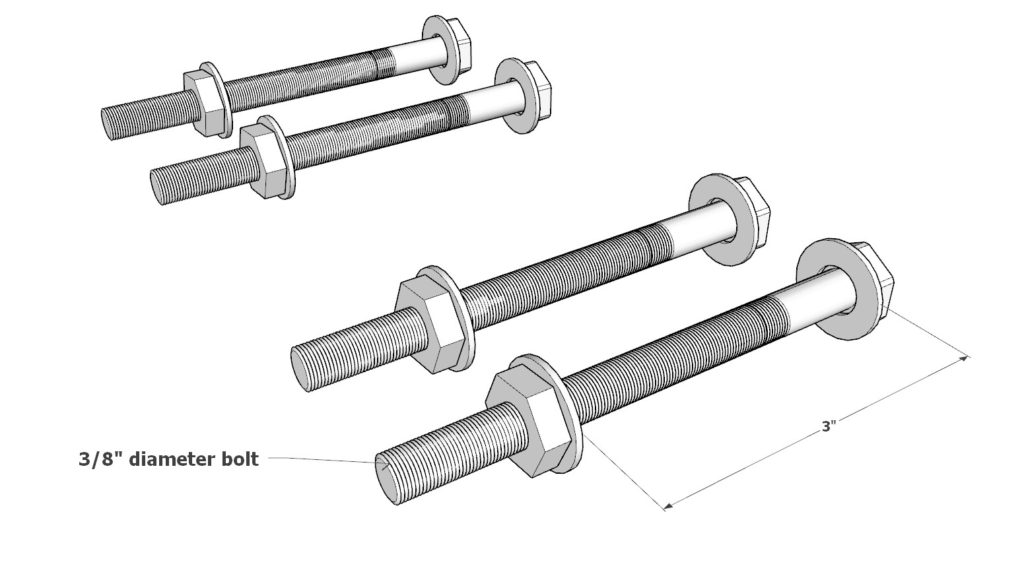
- (4) 3/8″ diameter bolts, (8) washers, (4) nuts
- Sander
- Wood glue
- Chisel, hammer, and pencil
- 3/8″ thick drill bit
Shopping list and cut list
Available with purchase of DIY plans. Thank you for supporting our hard work!
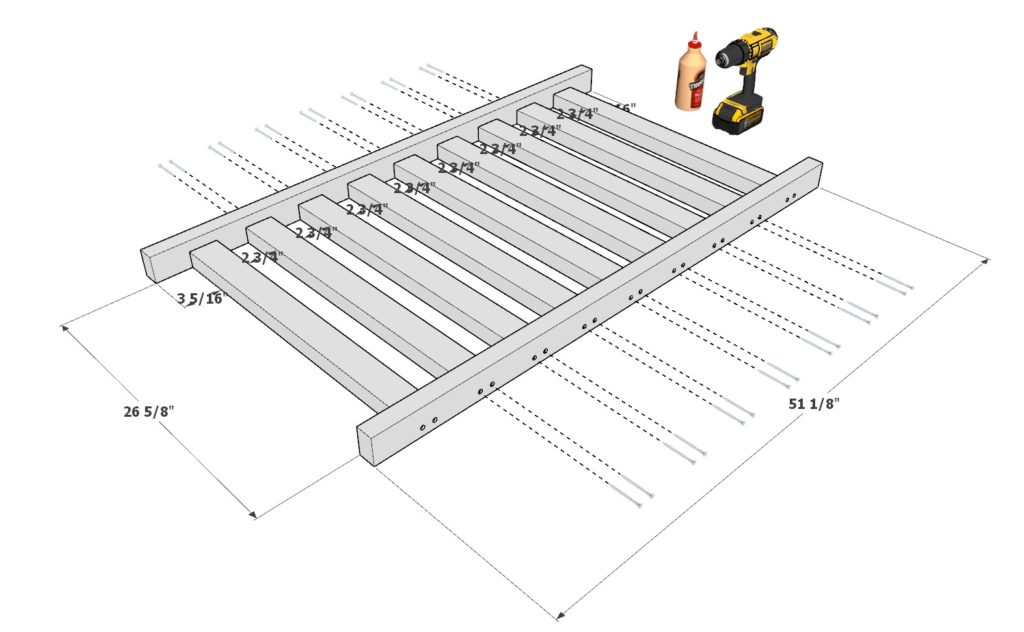
Step 1 (DIY daybed seating platform assembly)
First, assembly the seating platform.
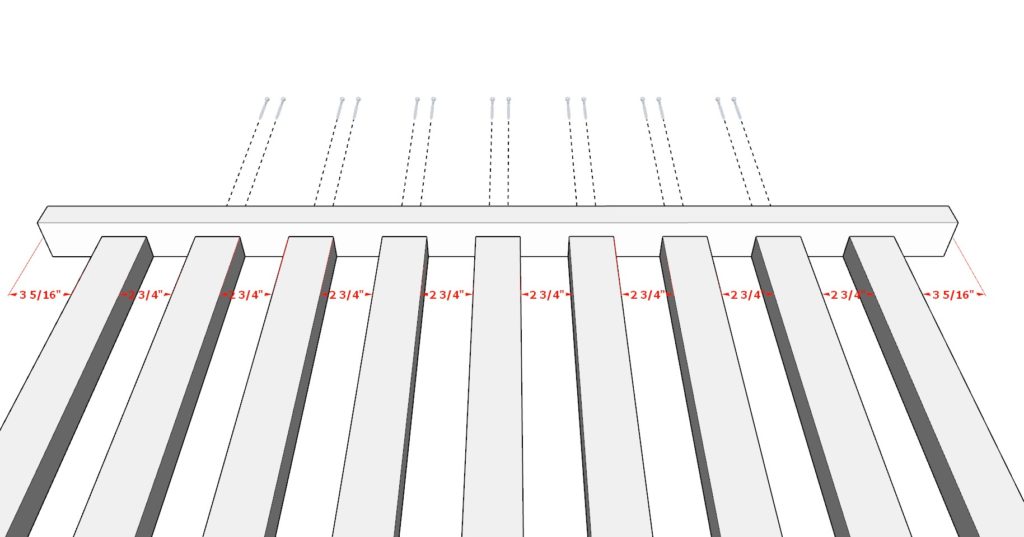
Take two 51-1/8 inch 2×3 lumber pieces and nine 26-5/8 inch 2×3 lumber pieces and arrange them as shown below.
Ensure proper spacing, add glue, predrill to prevent the wood from splitting, and add 2.5 inch screws.
Step 2 (DIY daybed back rest assembly)
Next, assemble the daybed back rest.
Take two 22-5/8 inch 2×3 lumber pieces, one 42-1/16 inch 2×3 lumber piece, and one 51-1/8 inch 2×3 lumber piece.
Arrange these pieces as shown below. Add glue, predrill, and 2.5 inch screws. To attach the 42-1/16 lumber piece, not that you have to use 3.5 inch screws and glue.

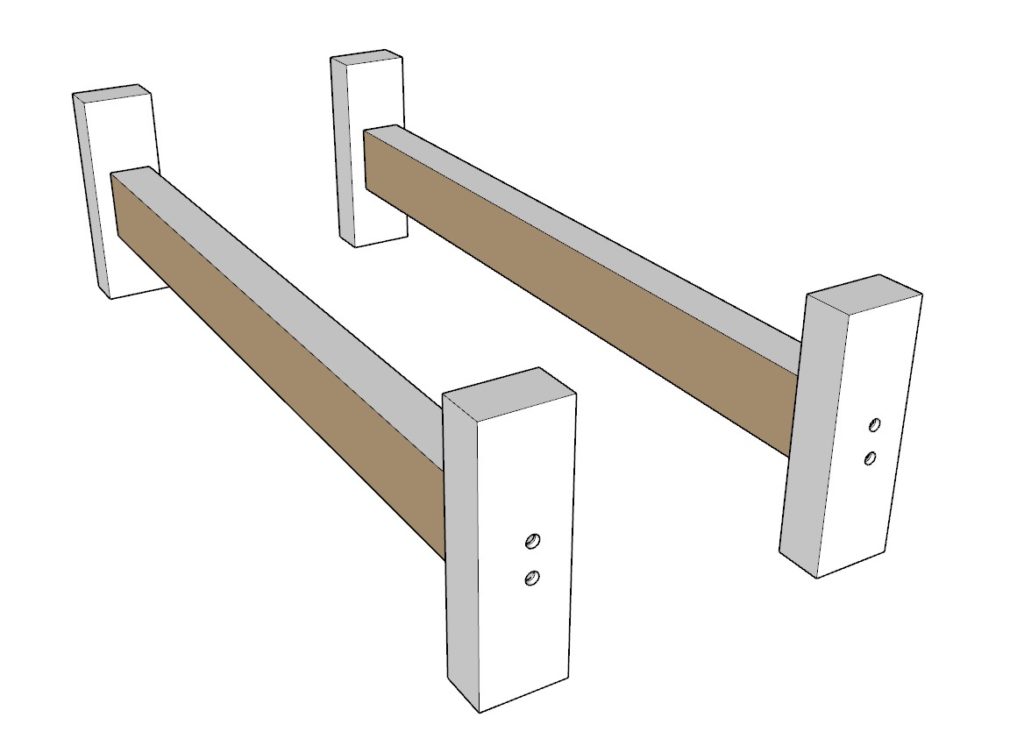
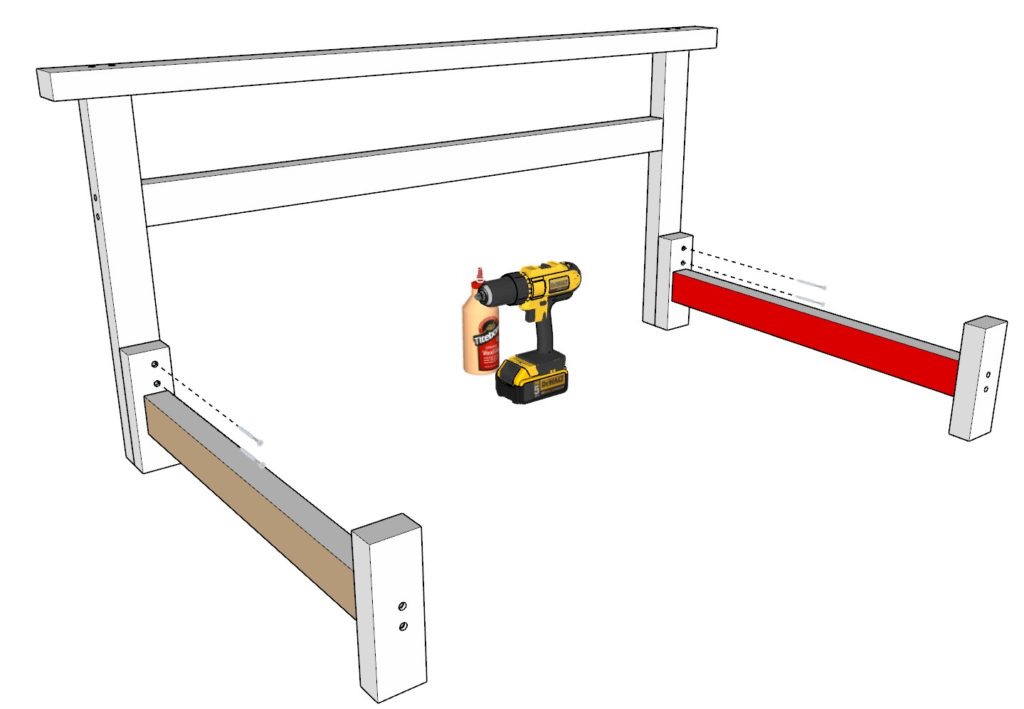
Step 3 (Daybed leg assembly)
Next, assemble the legs of the daybed.
Take two 26-5/8 inch lumber pieces and two 7-3/4 inch 2×3 lumber pieces. Arrange these as shown below.
Once you have the proper spacing, add glue, predrill, and add 2.5 inch screws.
Make two identical leg pieces.
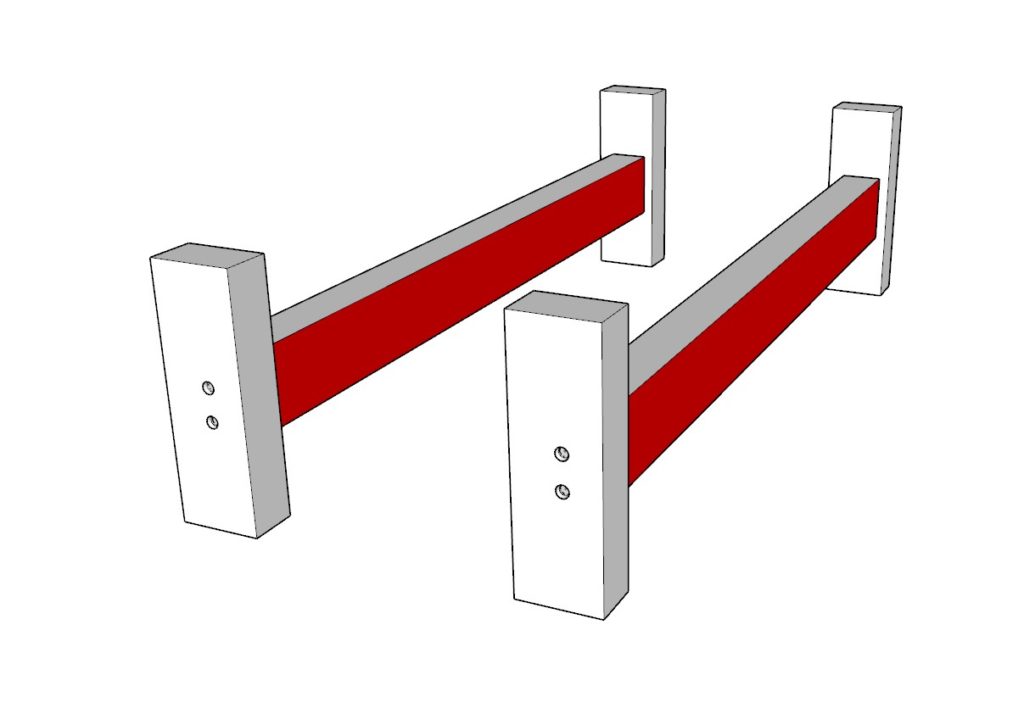
Note that one of the sides is color coded brown and another side is color coded red. This will be relevant in a future step.

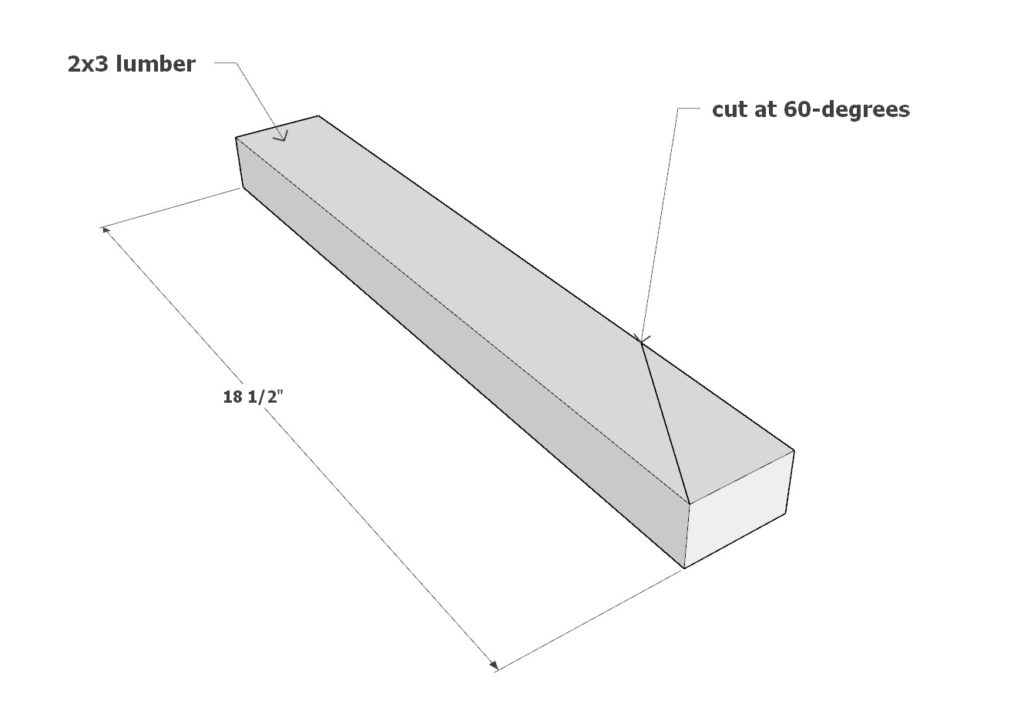
Step 4 (DIY daybed armrest component construction)
Next, cut to size the arm rest components that will enable the bed to recline.
Try to be as precise as possible with the cuts in this step so that the daybed doesn’t “over recline” or “under recline.”
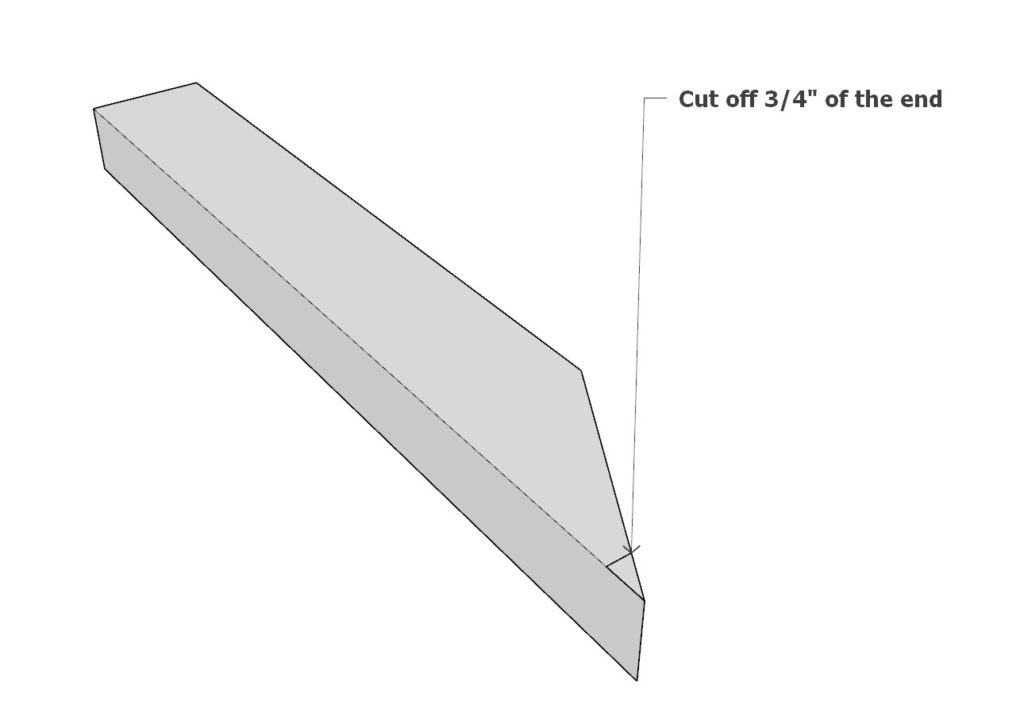
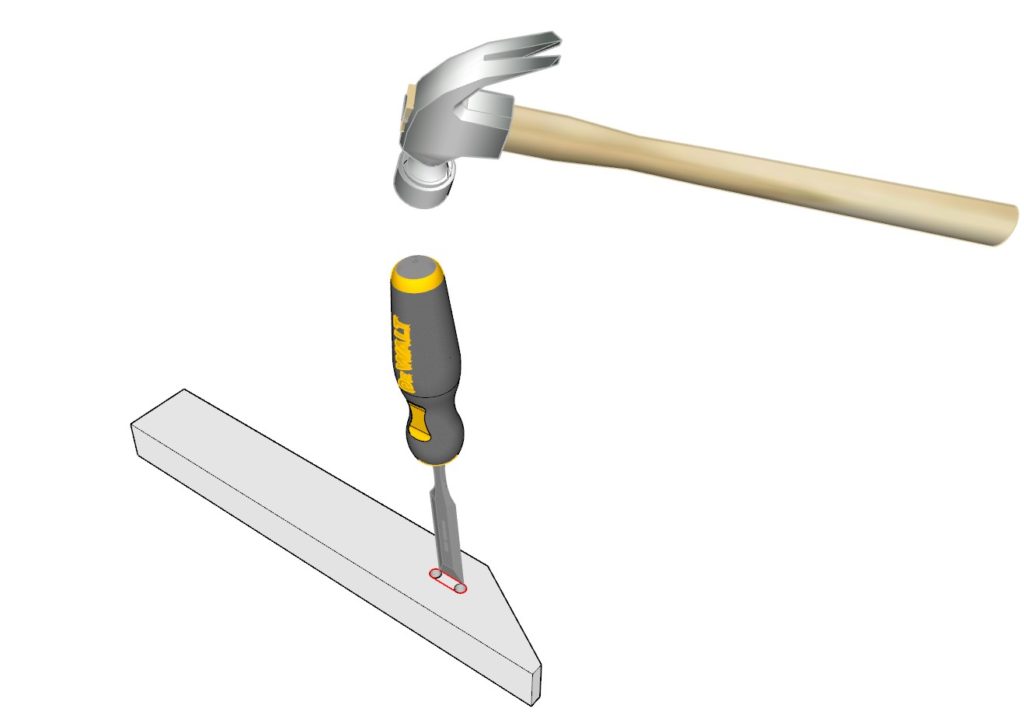
Take a 18-1/8 inch 2×3 lumber piece and cut one side at 60-degrees.
Next, cut off the sharp tip by 3/4 inches.
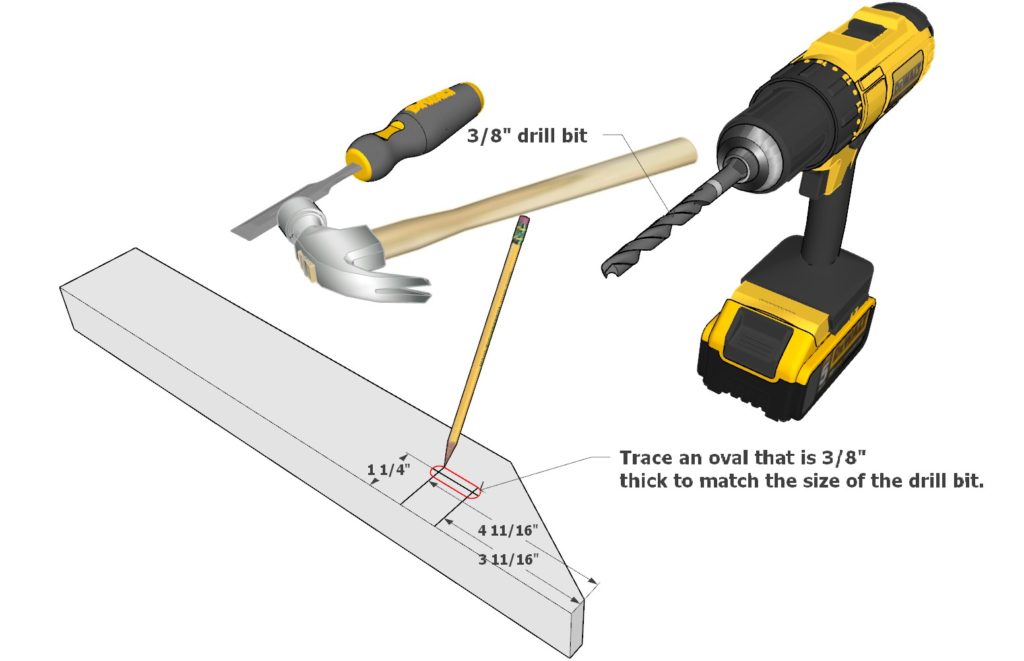
Next, draw an “X” or an oval for where you will need to drill two holes. The diagram shows the placement of these markings.
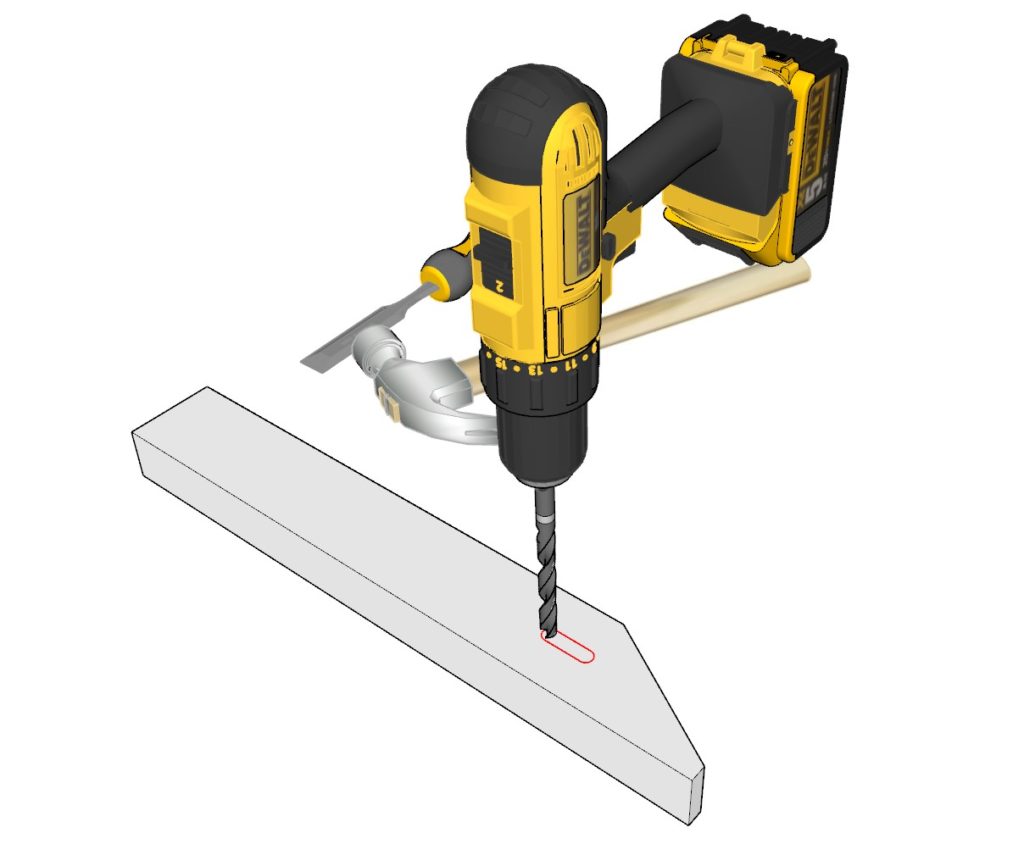
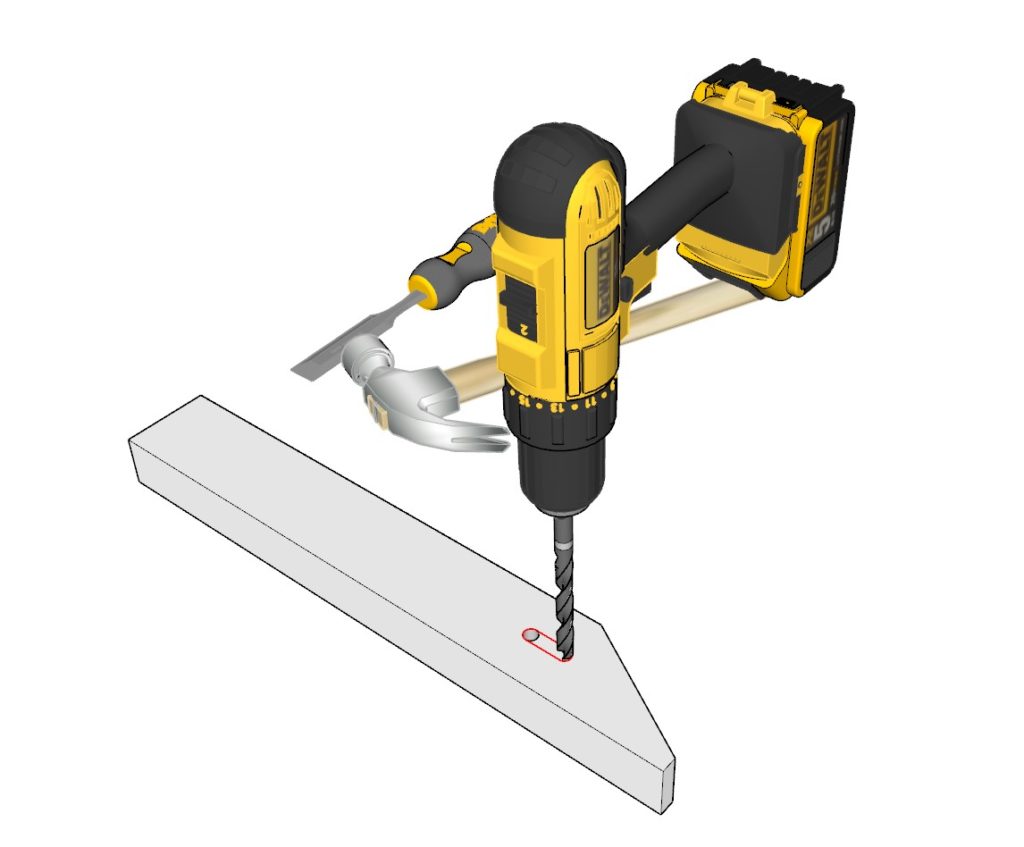
Next, drill two holes with a 3/8″ diameter drill bit. These holes will be the outer parameters for bolt assembly in a future step.
Next, use a chisel to carve out the remaining wood particles. Take care not to damage the board when hammering.
Make four identical pieces.
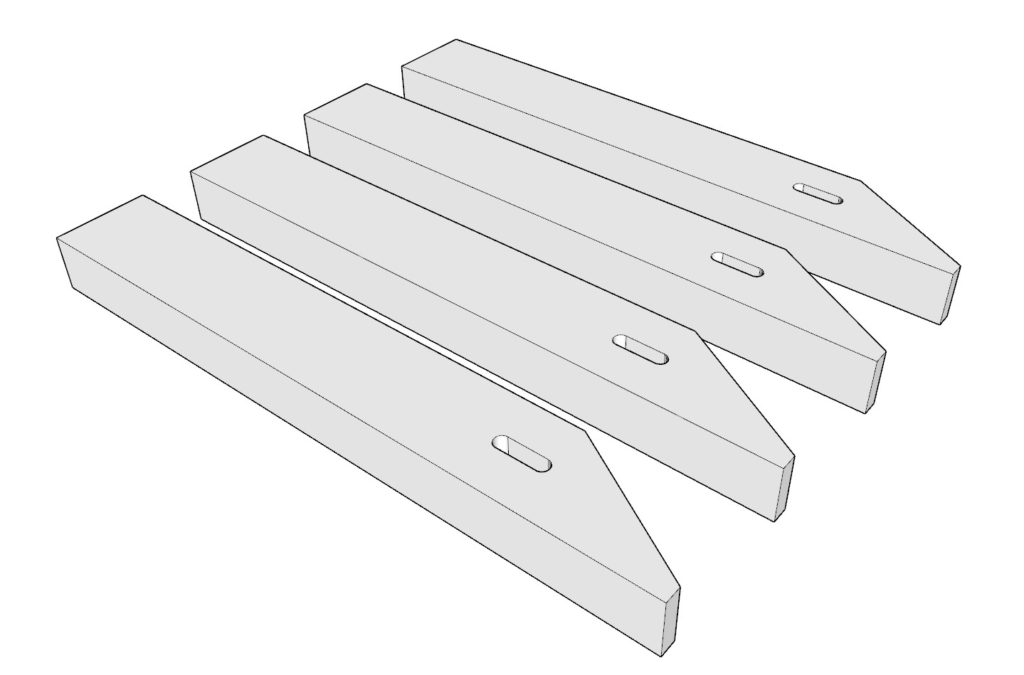
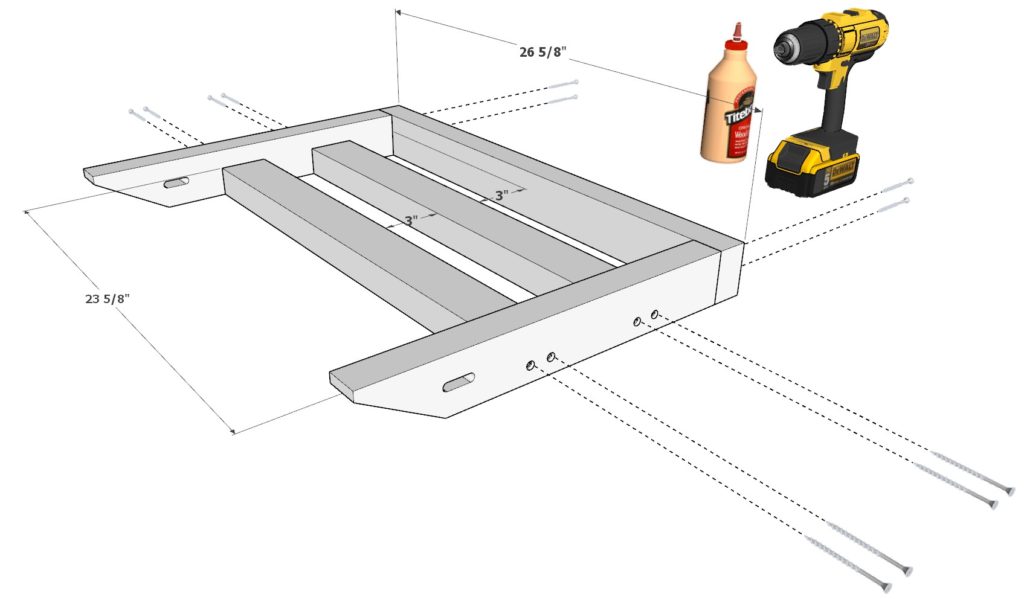
Step 5 (DIY daybed armrest assembly)
Next, assemble the two arm rests.
Take one 26-5/8 inch lumber pieces, two of the arm rest components with holes from the previous step, and two 23-5/8 inch 2×3 lumber pieces.
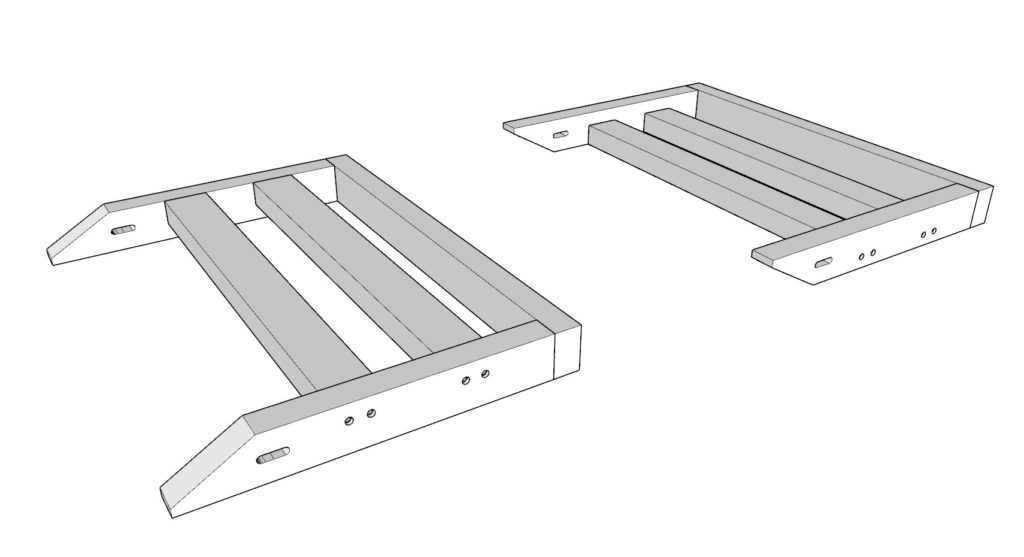
Arrange these as shown below, predrill, add glue, and add 2.5 inch screws.
Make two identical side rest pieces.
Step 6 (Attaching legs to the back rest)
Next, add the legs to the back rest. Use plenty of glue, predrill, and add 2.5 inch screws.
Note that the brown color sides need to face out and the red sides need to face in.
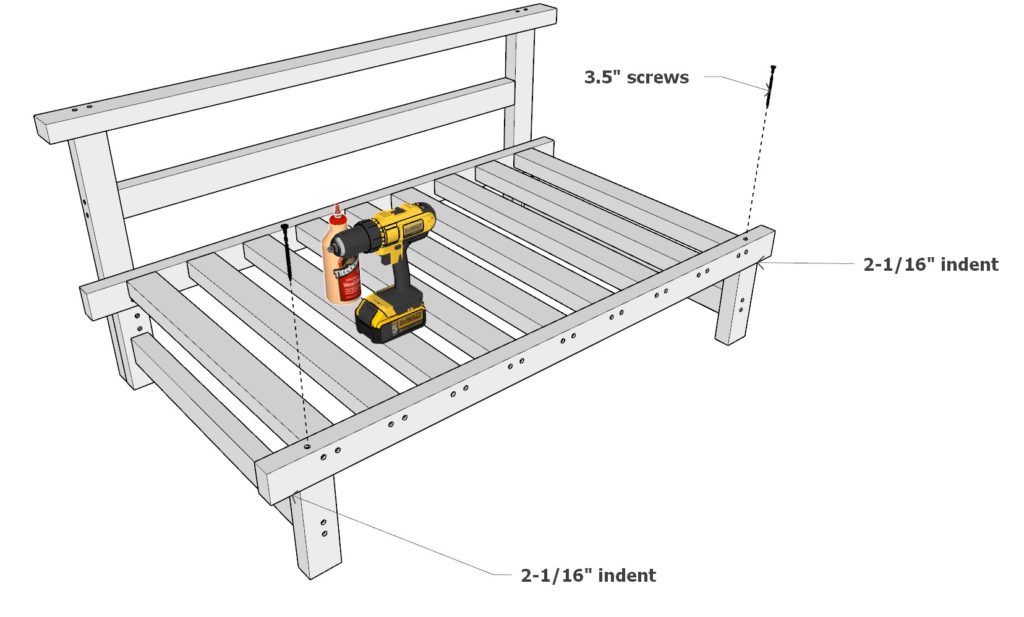
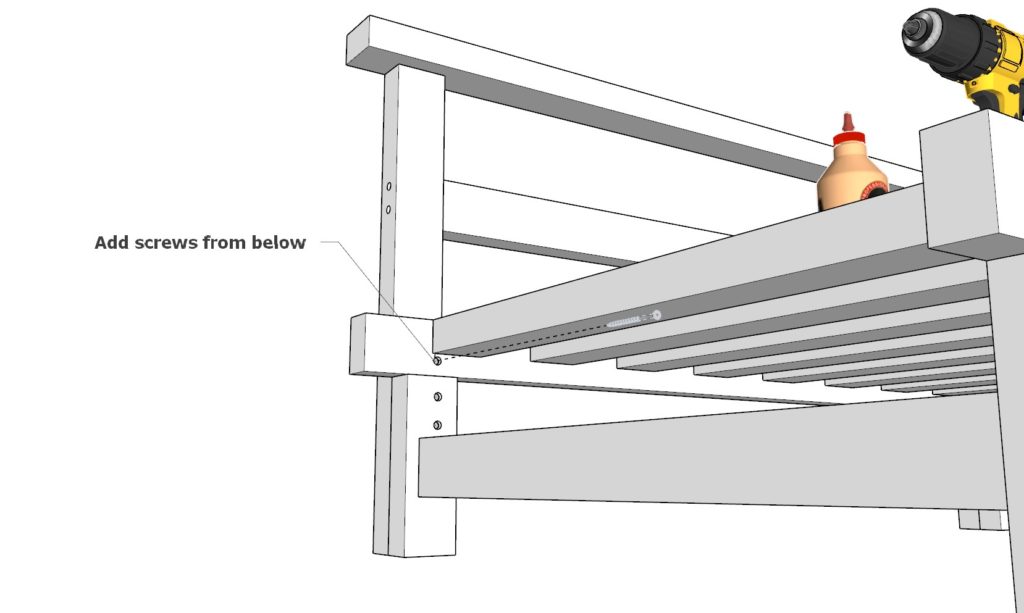
Step 7 (Attaching seating platform to legs and backrest)
Next, add the seating platform to the legs and back rest of the day bed.
Use plenty of glue, predrill, and 3.5 and 2.5 inch screws.
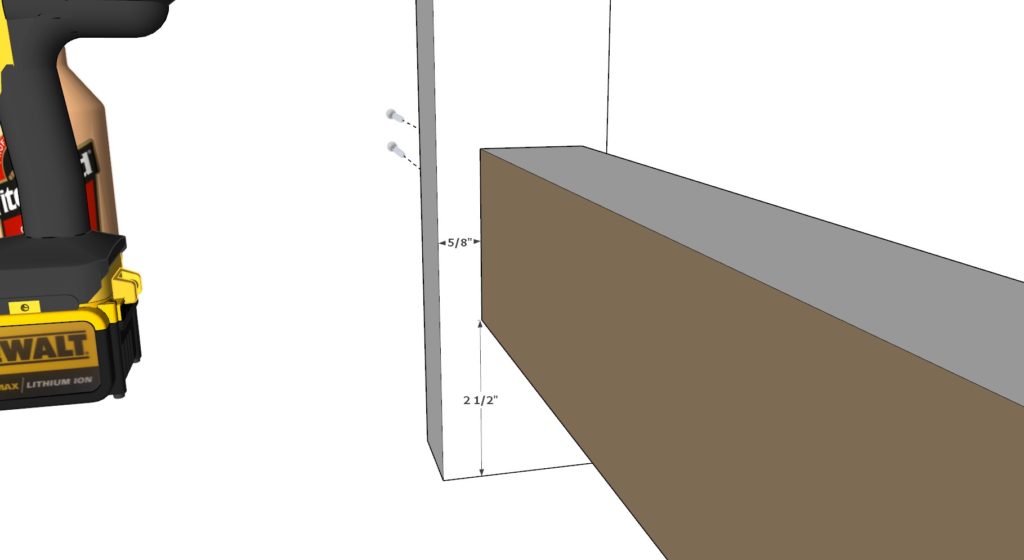
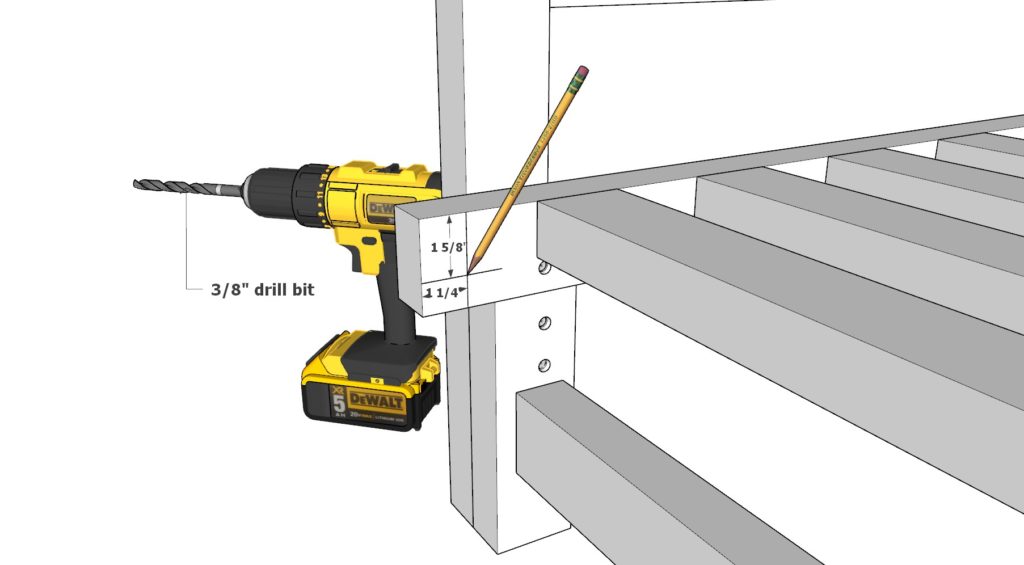
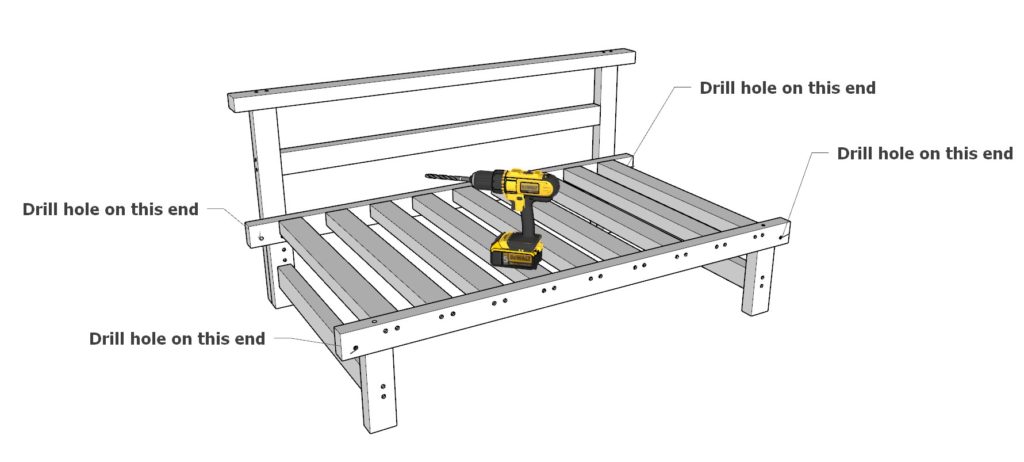
Step 8 (Attaching armrest to seating frame)
Next, add the arm rests to the bed.
Drill four holes on all four corners of the seating platform at the indicated “X” dimensions listed below. Use the same 3/8″ drill bit so that your bolts fit snugly.
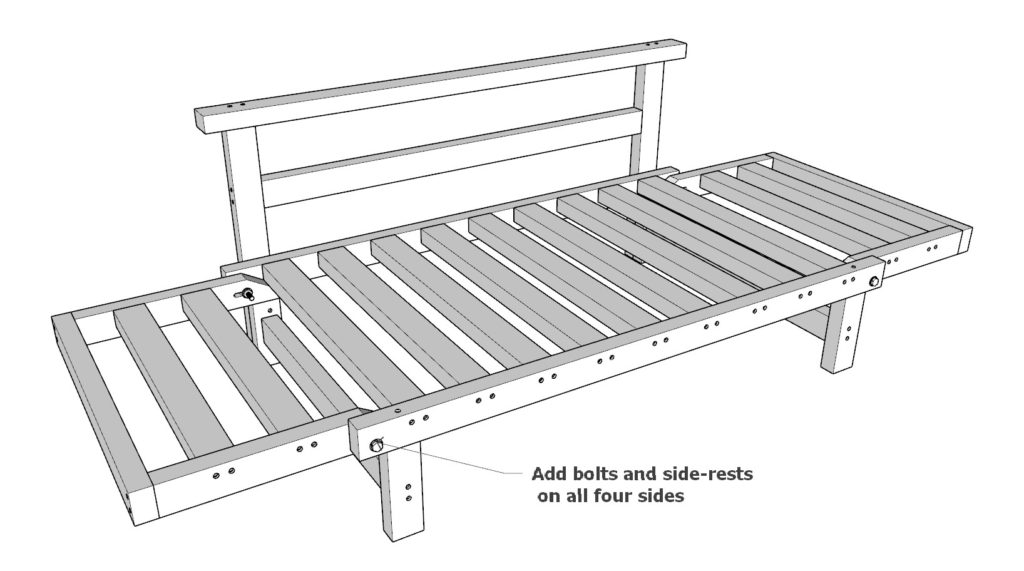
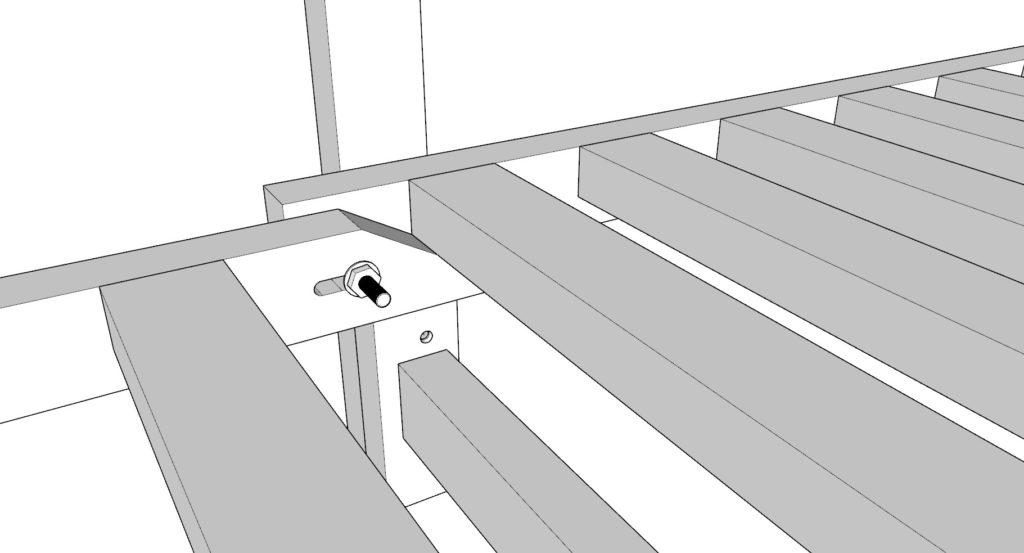
Next, add the arm rests and secure them into place using the bolt assembly.
The bolt assembly allows for the arm rests to recline as well as go upright when needed. The 60-degree cut lumber part acts as a stopper to hold the desired position.
Step 9 (DIY daybed finishing touches)
Filling in the screw holes with wood putty.
To fill screw holes using wood putty, begin by using a putty knife to spread the wood putty into the screw hole, making sure to apply it evenly and fill the hole completely. Allow the putty to dry for the recommended amount of time, then wipe off any excess putty with a damp cloth. Finish by using sandpaper to sand down the putty until the surface is even with the surrounding wood. This simple process will ensure that the screw hole is properly filled and the putty is seamlessly blended into the wood.
Sanding down the day bed.
To properly sand down a DIY daybed, start by using an 80 grit sandpaper to remove any large splinters from the wood surface. Then, move up in grit, using a 120, 150, and 220 grit sandpaper to ensure the surface is smooth and free of blemishes. If a smoother finish is desired, use a 400 grit sandpaper to ensure the surface is extremely smooth. Finally, use a clean, dry cloth to remove any dust or debris from the daybed.
How to stain the DIY daybed
When it comes to staining the DIY daybed, there are a few things you need to keep in mind in order to get the best results. First of all, make sure that you sand the wood down completely before applying any stain. This will help to ensure that the stain goes on evenly and that the final product looks professional. If you have any rough spots on the wood, sand them down as well so that the stain can penetrate evenly.
After sanding, I add a wood conditioner. A wood conditioner helps to even out the absorbency of the wood, so that the stain is applied more evenly. If you don’t use a conditioner, the stain can come out patchy and uneven.
Once the wood is sanded, it’s time to apply the stain (note some wood putty does not stain well). Make sure to wear gloves and protective clothing, as stain can be messy. Apply the stain evenly with a brush, making sure to get into all the nooks and crannies. Once the stain is applied, let it sit for a few minutes before wiping off any excess with a rag. Allow the stain to dry completely before moving on to the next step.
If you want to add a topcoat to the DIY daybed, now is the time to do it. Apply a thin layer of topcoat evenly over the whole surface. This will help to protect the stain and make it last longer. I use a spray gun and a water based polyurethane so that the result comes out looking more professional.
How to paint the DIY daybed
When painting a DIY Daybed, it is important to choose a paint color that is durable and easy to clean. A high-gloss or semi-gloss paint is a good choice for a DIY Daybed since it will be easy to wipe down and will resist dirt and stains. A light color may show dirt and scuffs more easily than a dark color.
Before beginning to paint, it is important to prep the surface. This means removing any staples, nails, or screws, sanding down rough spots, and cleaning the surface with a degreaser or TSP. Once the surface is prepped, you can begin painting. Start with a primer, then paint the DIY Daybed with your chosen color. A high-quality paintbrush, paint gun, or roller will give the best results.