Introduction
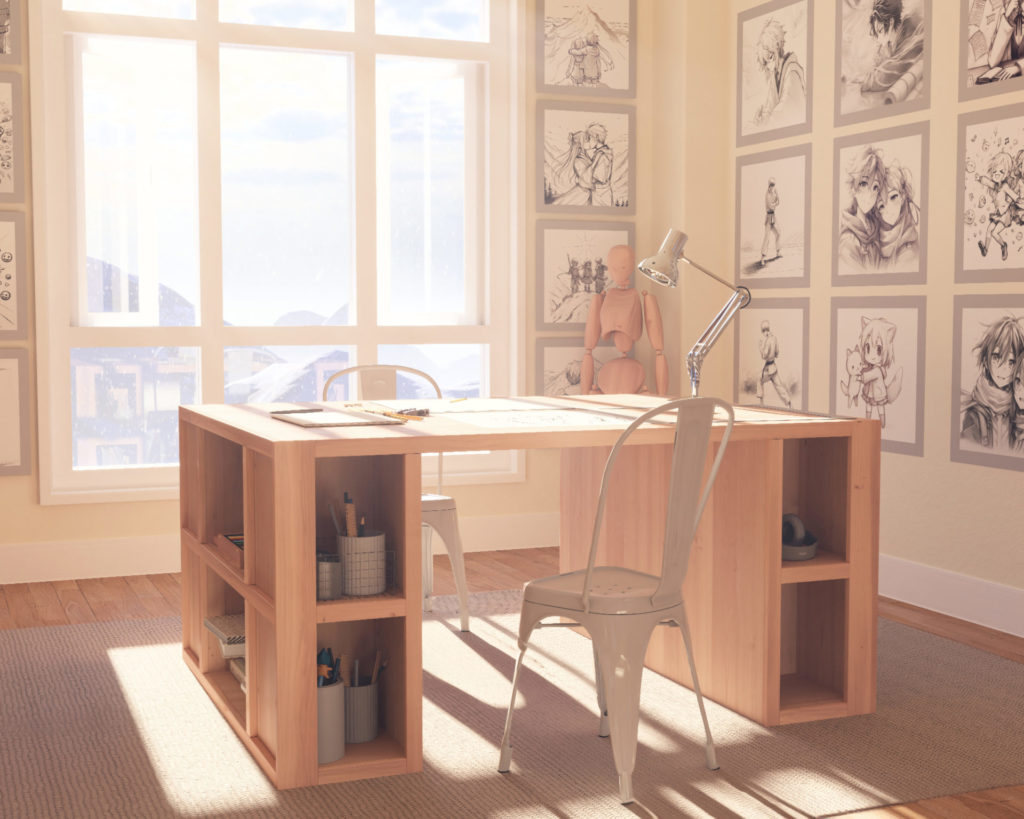
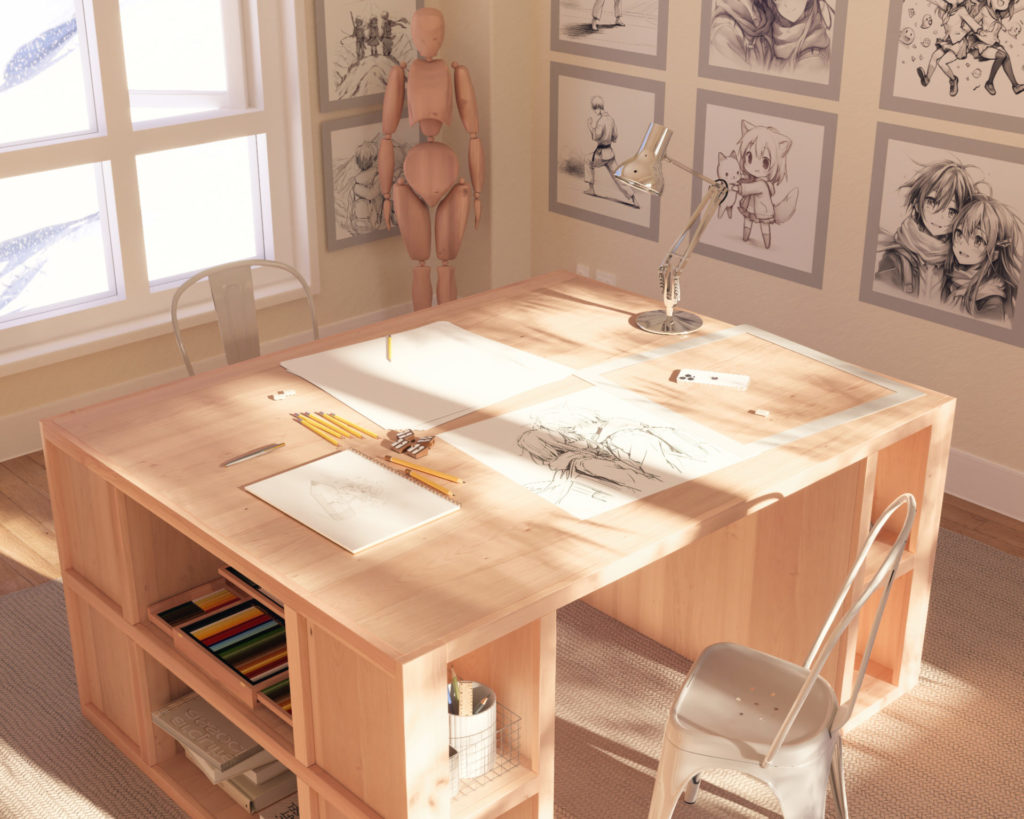
In the heart of every home, there lies a space where creativity blossoms, ideas take flight, and camaraderie is nurtured. Our DIY dual-sided craft and study table is designed to be the centerpiece of such spaces. With a structure that promotes both individual and shared activities, this table is perfect for a wide range of purposes – whether it’s studying, crafting, gaming, or sewing. The simplicity and effectiveness of our DIY plan make this table a feasible project for anyone looking to enhance their living space.
The Inspiration Behind the Design
The modern home is a hub of creativity and learning. However, finding furniture that caters to various needs while promoting a shared family environment can be a challenge. That’s where the idea of a multi-functional table came to life. A table that not only serves diverse purposes but also promotes organization, creativity, and the joy of shared experiences.
Key Features of the DIY Dual-Sided Craft and Study Table
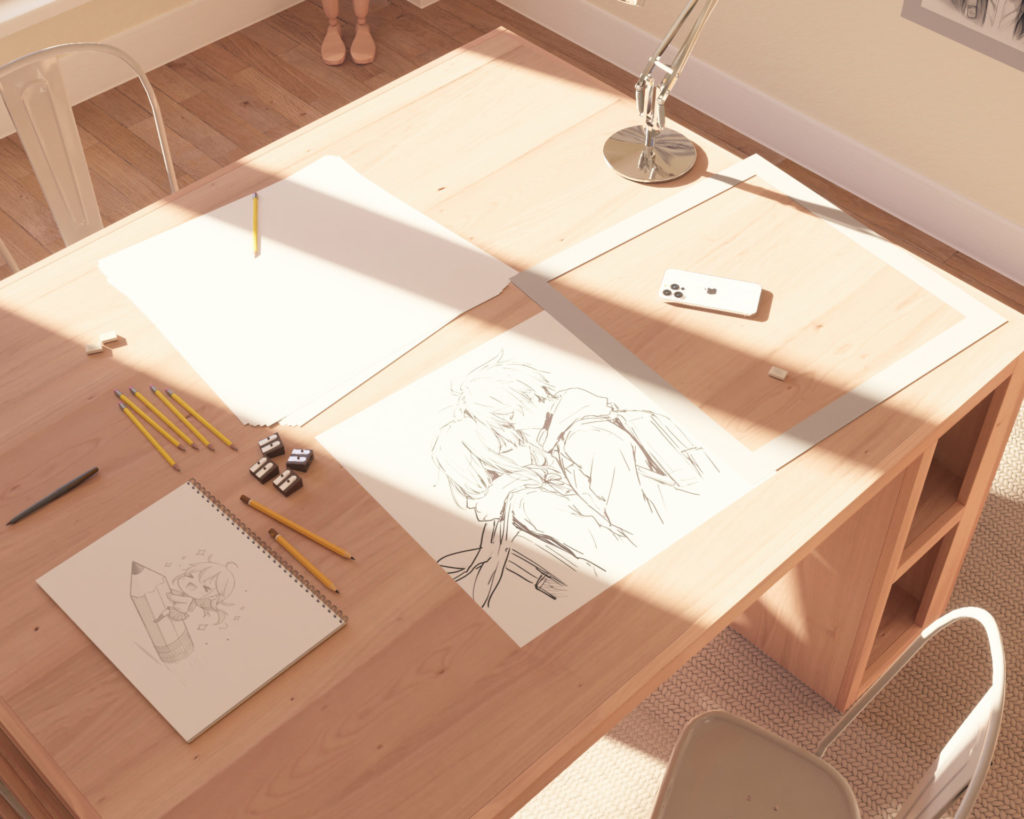
Dual-Sided Access: Designed for multiple users, the dual-sided access allows for a shared workspace, making it perfect for kids and parents, or crafting buddies.
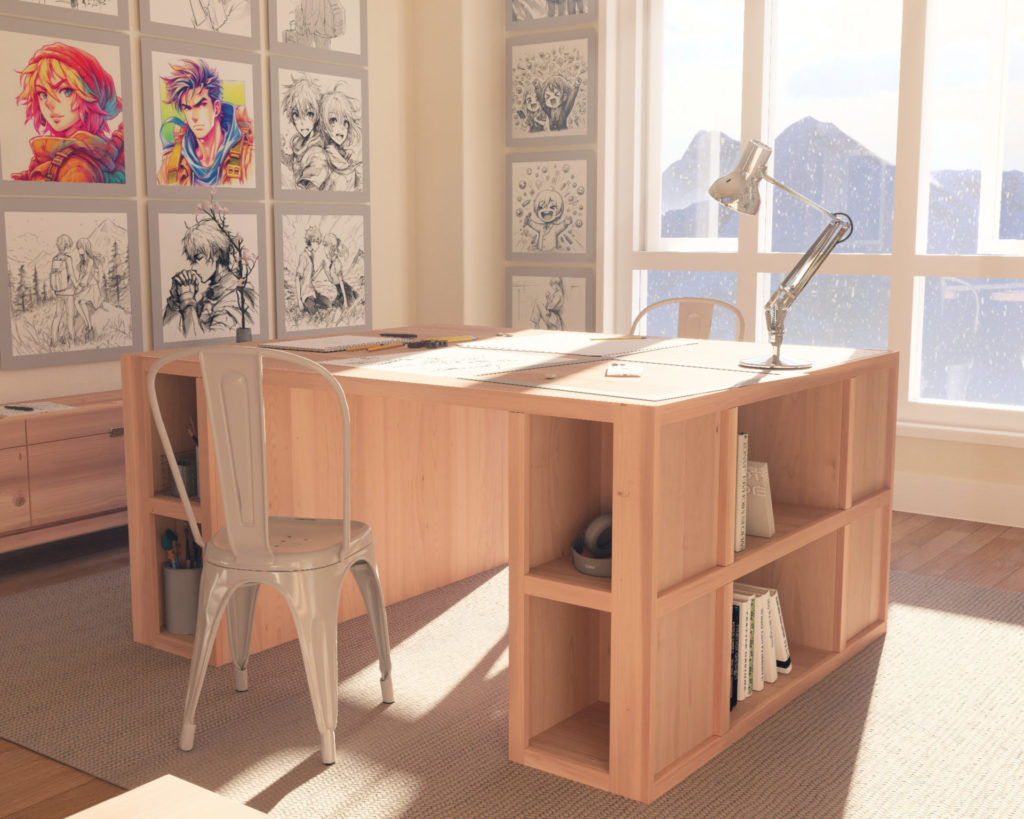
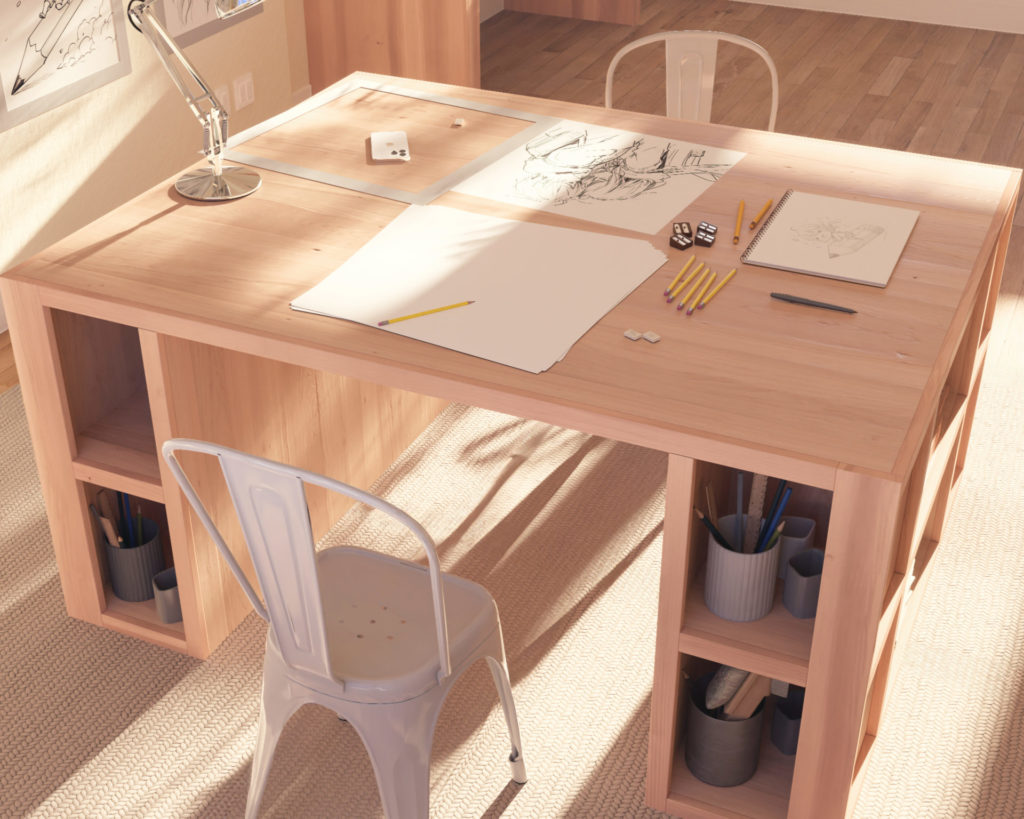
Ample Storage Cubbies: With storage cubbies on both sides, keeping your materials organized and within reach is a breeze.
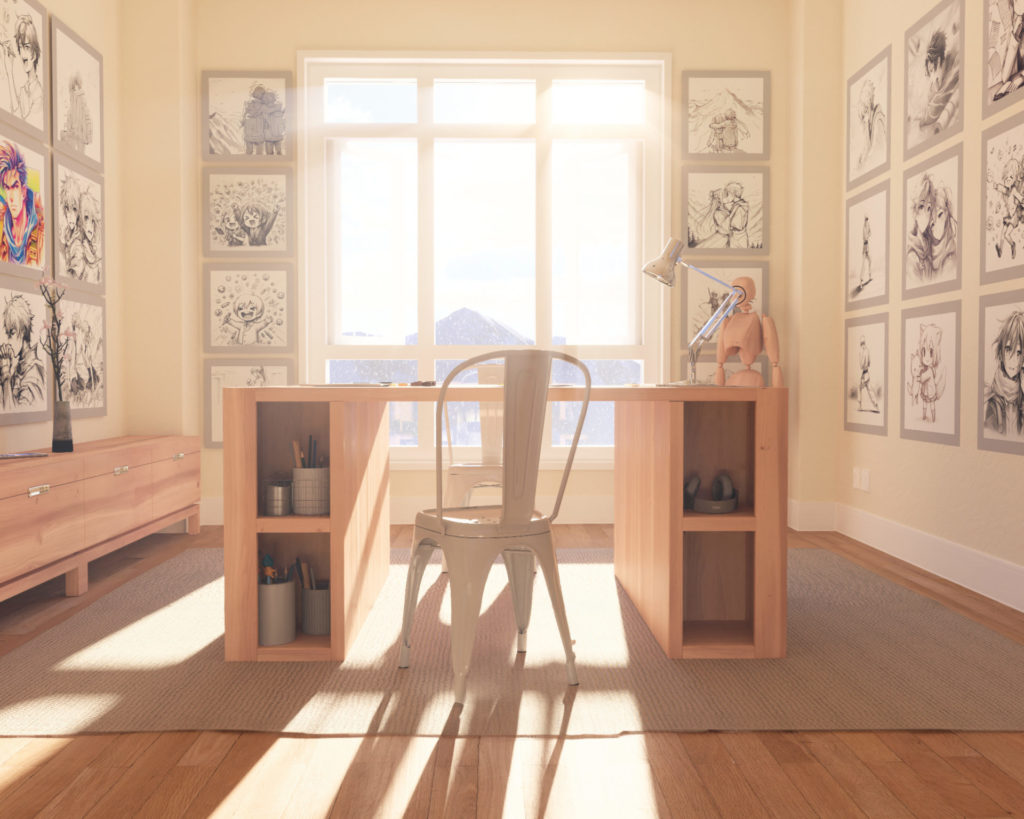
Modifiable Height: The option to modify the table to counter height provides a sit-stand version for those looking to avoid hunching over during long crafting or studying sessions.
Versatility: Its design makes it a perfect game table, sewing table, or craft table, adapting to your needs with ease.
Why This DIY Plan is a Game-Changer
Building your own multi-functional table with our DIY plan not only saves you a considerable amount compared to buying a pre-made one but also provides a level of customization and satisfaction that’s hard to match. The straightforward steps in our plan make the assembly process a breeze, turning what might seem like a daunting task into an enjoyable project.
What You Will Get with This DIY Plan
With our DIY plan, we aim to make the process of building your dual-sided craft and study table as straightforward as possible. Here’s what you’ll receive:
- Step-by-Step Instructions: Clear, no-nonsense steps guiding you through the build from start to finish.
- Materials List: A straightforward list ensuring you have all necessary materials at hand from the get-go.
- Tools List: A comprehensive list of tools required, so there are no unexpected trips to the store.
- Visual Diagrams: Clear, intuitive images to support and simplify your building process.
Note: The instructions are provided in imperial units. Please check and confirm your measurements before purchasing.
Conclusion
The DIY dual-sided craft and study table is more than just a piece of furniture; it’s a gateway to a more organized, functional, and enjoyable living space. We invite you to explore the benefits of this multi-functional table by purchasing our DIY plan. It’s not just about building a table; it’s about creating a space where memories are made, projects are completed, and learning is a joyous journey.
Time
6 hours (Varies based on experience)
Cost
$175 (cost may vary)
Skill level required
Beginner
DIY Craft Table PDF Plan
What is included in the PDF download?
- Easy to read step by step instructions
- Material list
- Tools needed
- Helpful links to materials and tools needed
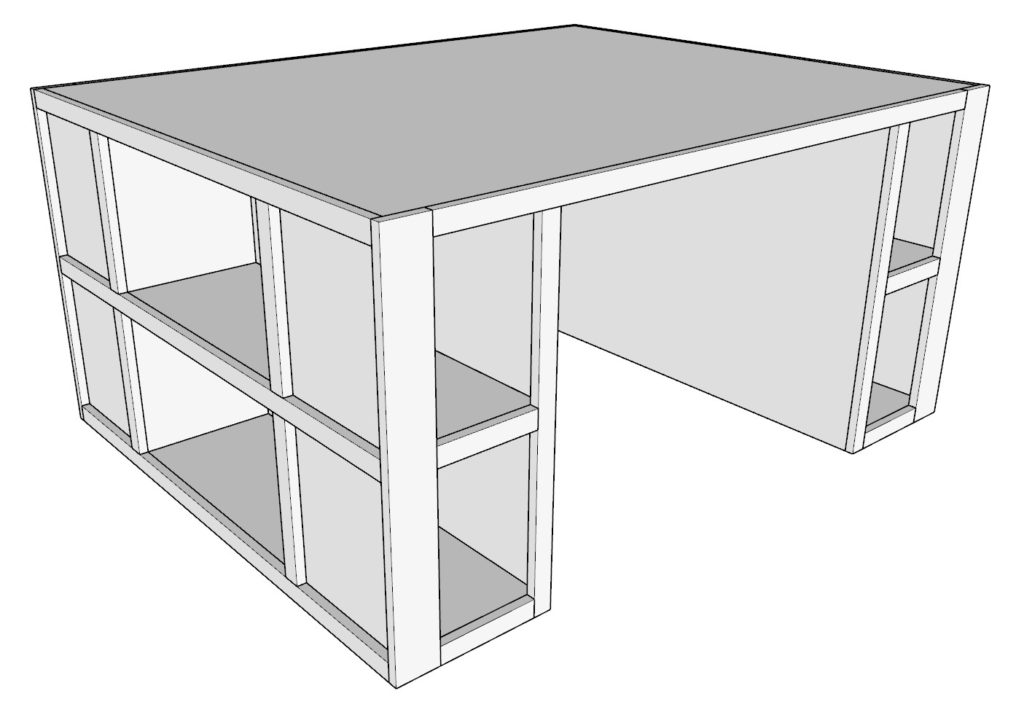
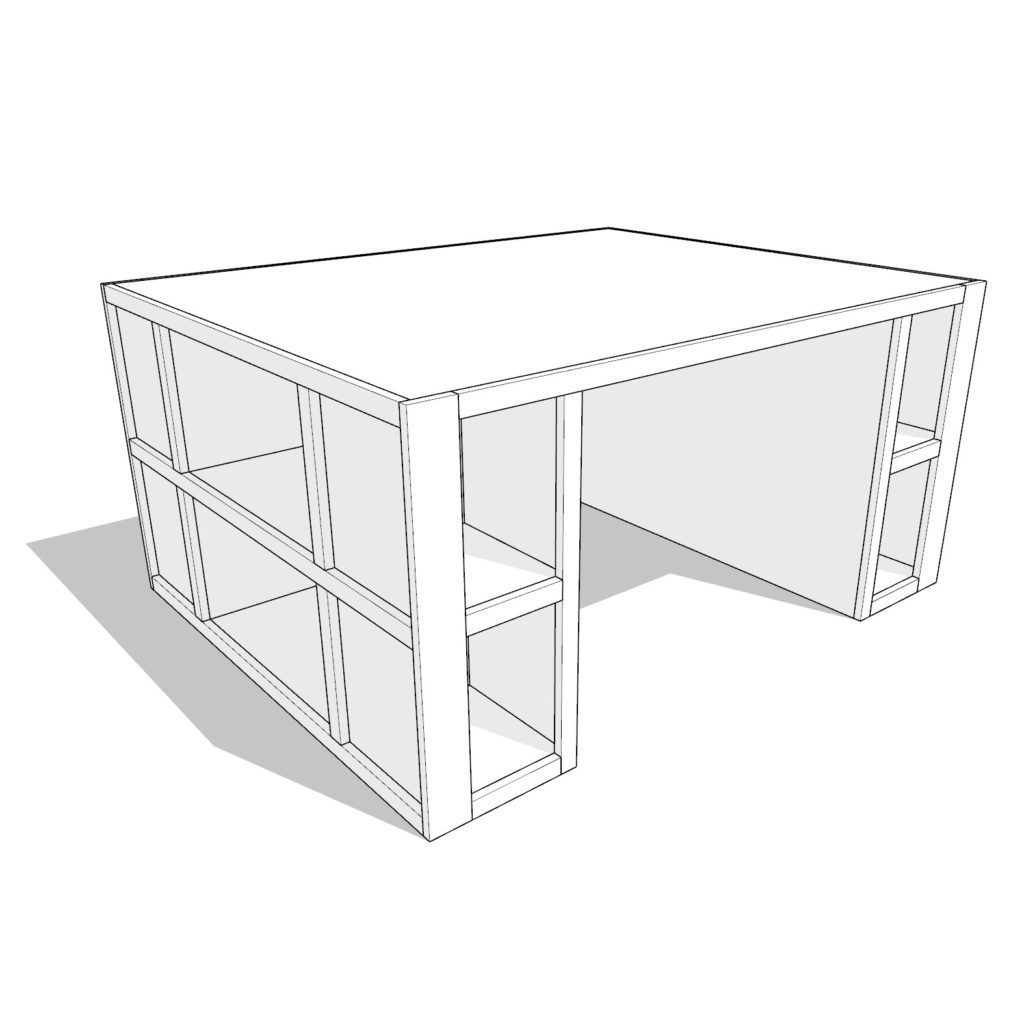
DIY Craft table Dimensions
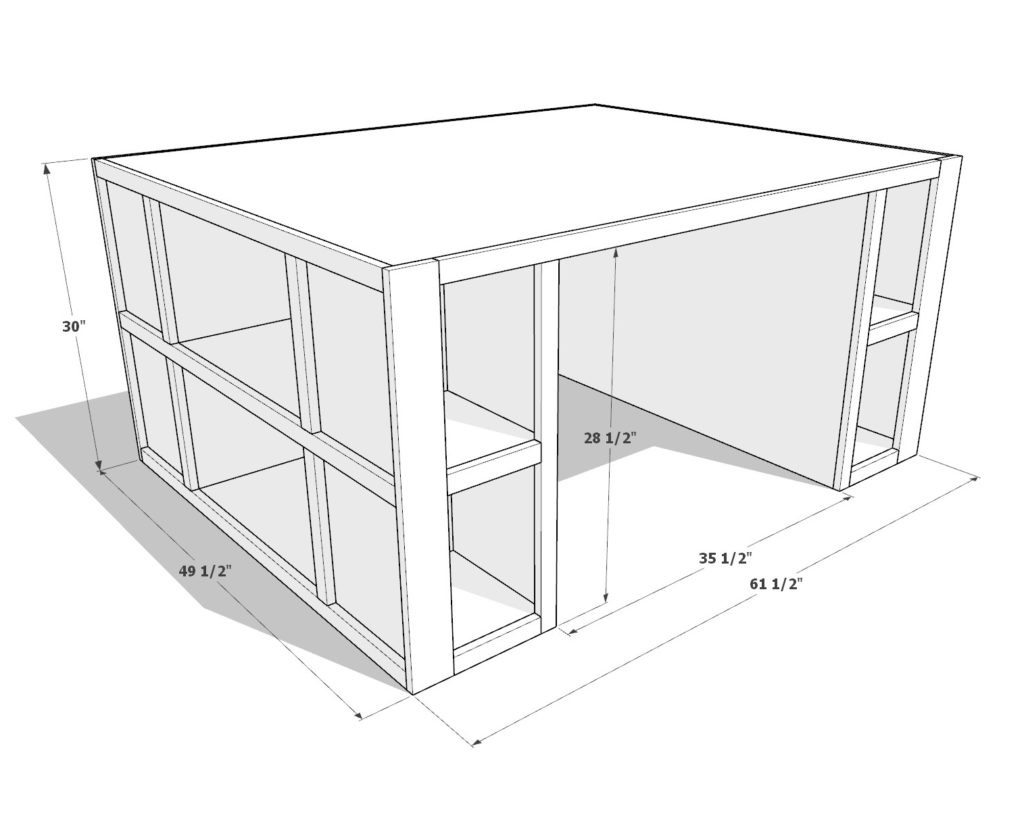
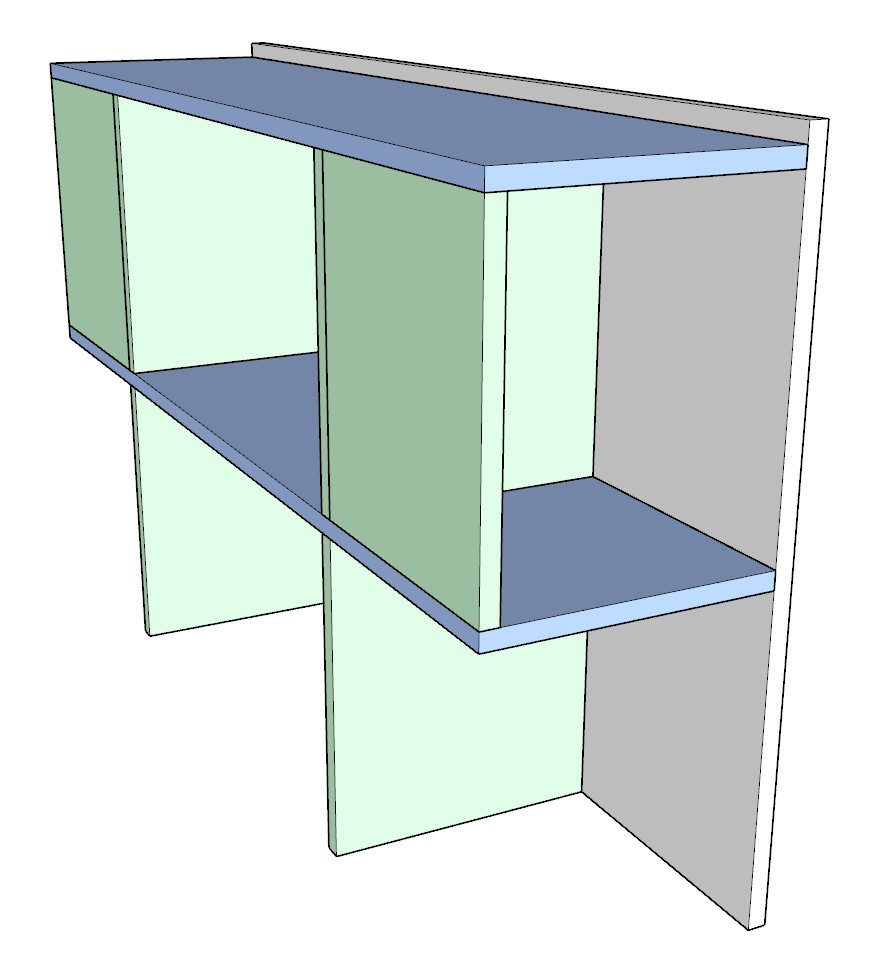
Step 1: Constructing the Storage Cubbies
Begin by building the storage cubbies.
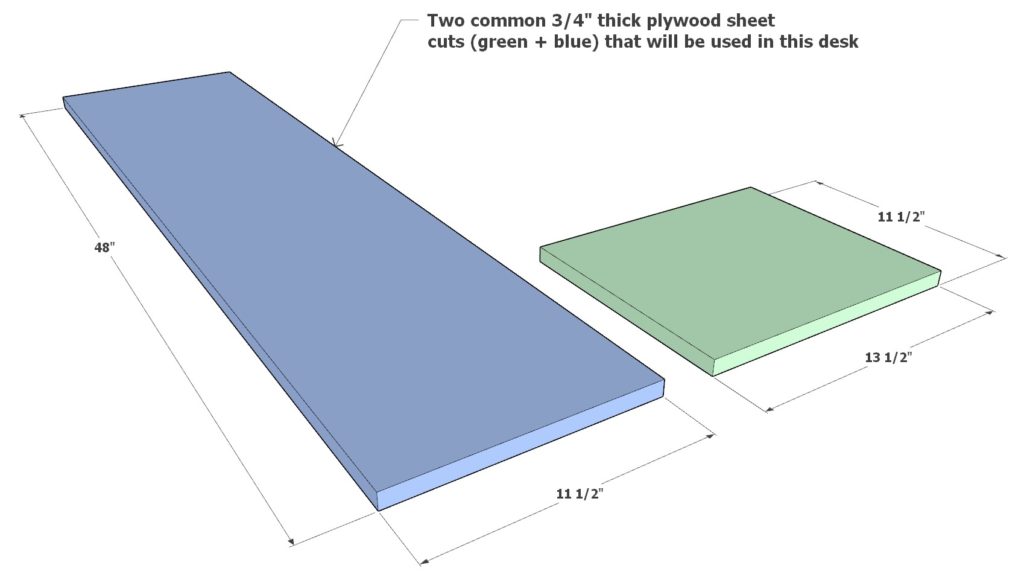
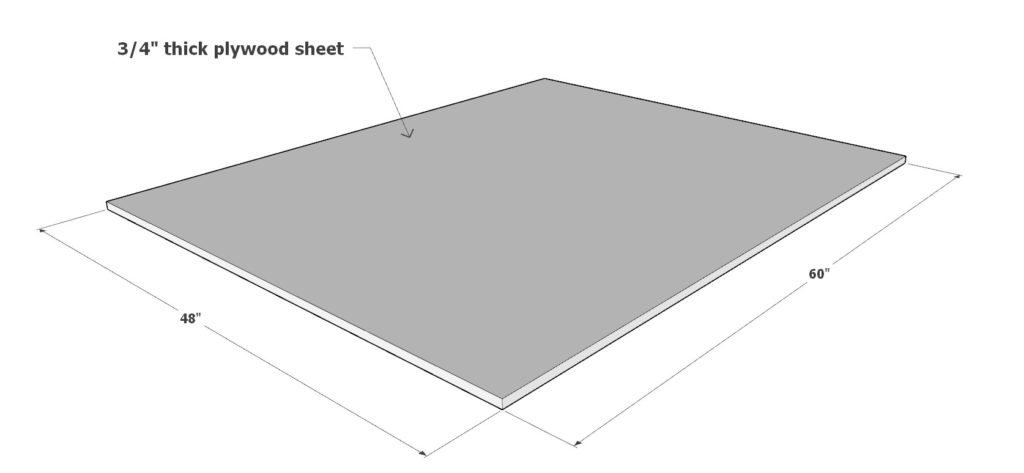
Since most of this craft table is made from plywood, there are two types of plywood cuts that will be commonly used in this guide. Their dimensions are illustrated in the first diagram below.
- The green piece is an 11-1/2″ x 13-1/2″ (3/4″ thick) plywood sheet.
- The blue piece is a 48″ x 11-1/2″ (3/4″ thick) plywood sheet.
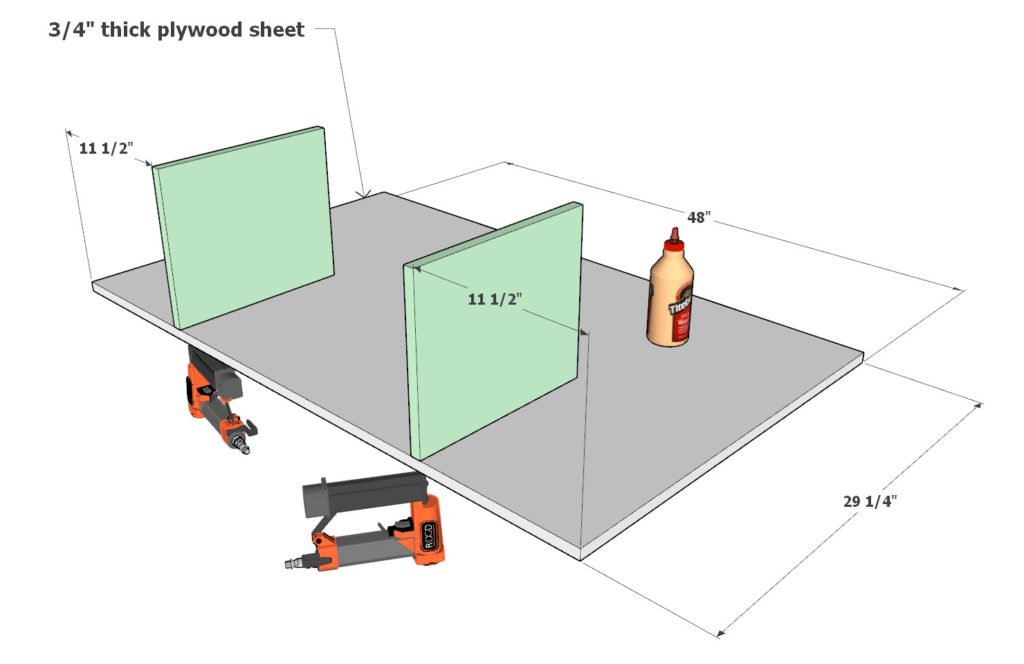
For the first part of the build, take two green pieces and two blue pieces and arrange them as shown in the second diagram below. Use glue and tiny nails (1.5″ thin) to secure the pieces together.
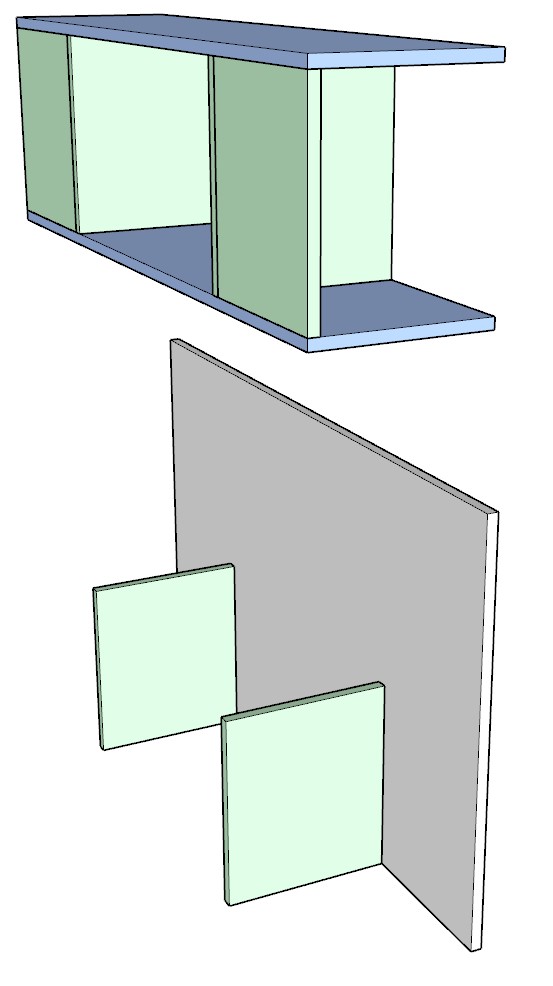
Next, add two more green pieces as shown in the last diagram in this step and secure them in the same way.
Tip: Use thin 1.5″ nails from a nail gun so that the holes will not be noticeable.


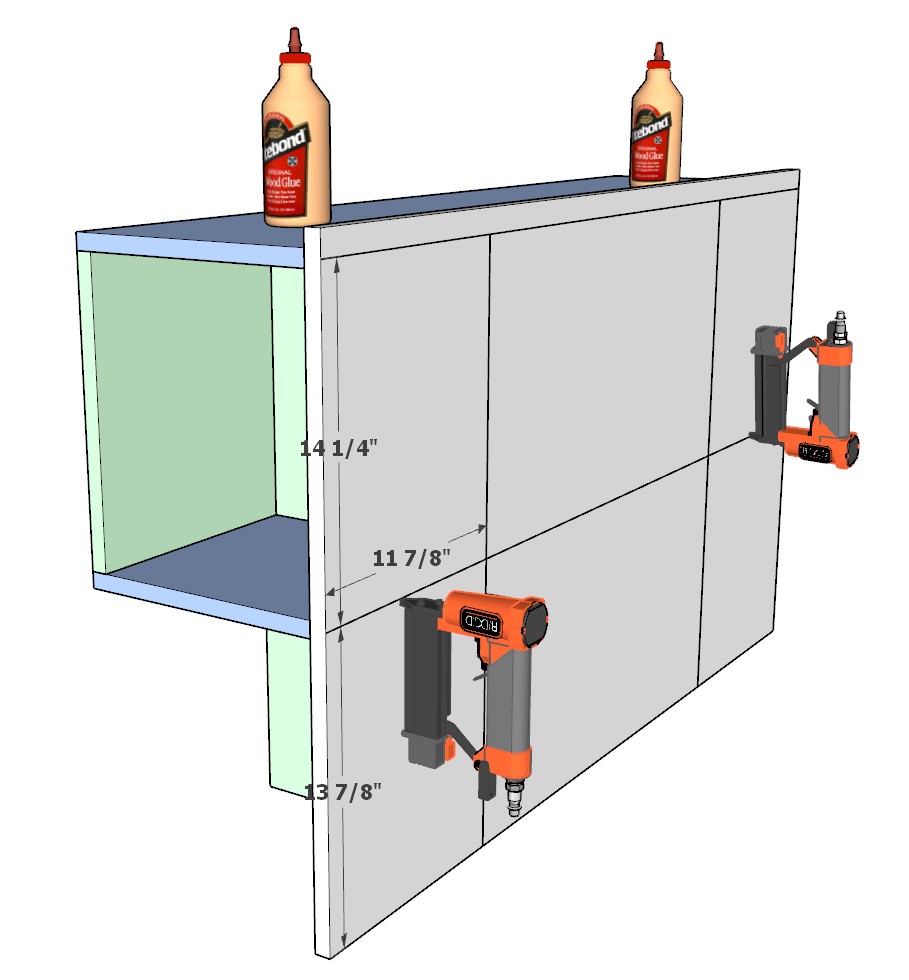
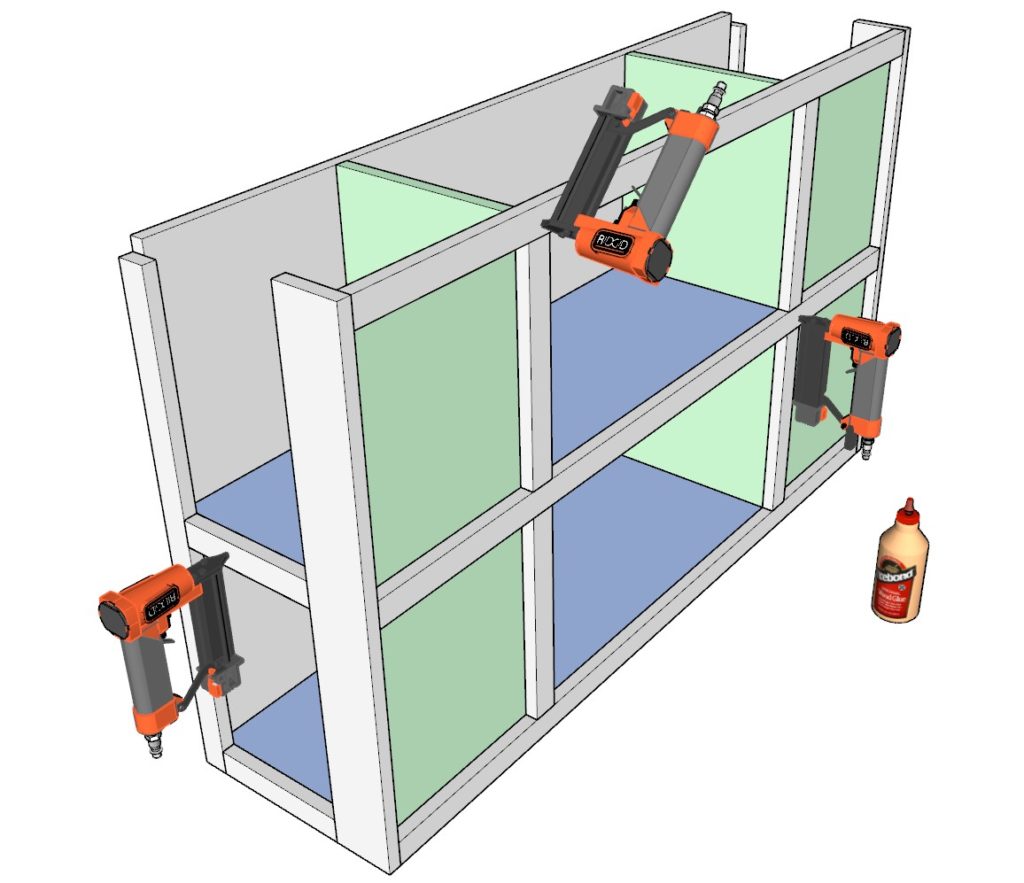
Step 2: Assembling the Cubby Components
Begin by taking two green plywood pieces and a 29-1/4″ x 48″ (3/4″ thick) plywood sheet. Arrange these pieces as illustrated in the first diagram of this step. Secure the pieces together using 1.5-inch nails and glue.
Next, take the storage cubby component from the last step and combine it with the cubby component you built in this step. Join the two pieces together using glue and pin nails. The last diagram shows where the nails should be placed.
Tip 1: It might be helpful to draw a faint line on the wood with a pencil to ensure that the nails don’t come through the plywood in the wrong place. Erase the line after you nail everything together.
Tip 2: Consider using wood clamps to hold things together as you build, to ensure better alignment and ease of assembly.
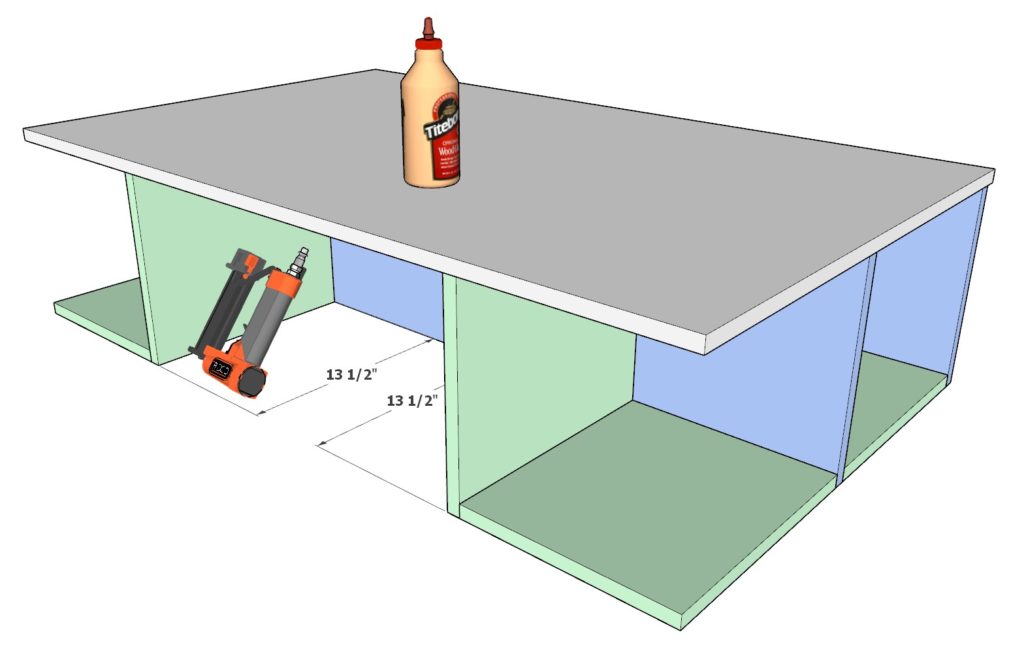
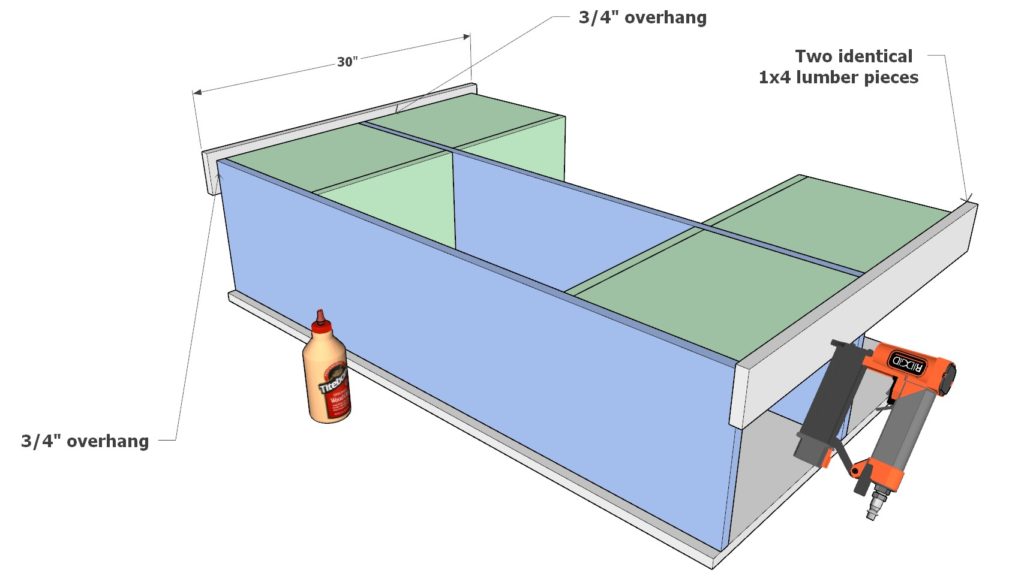
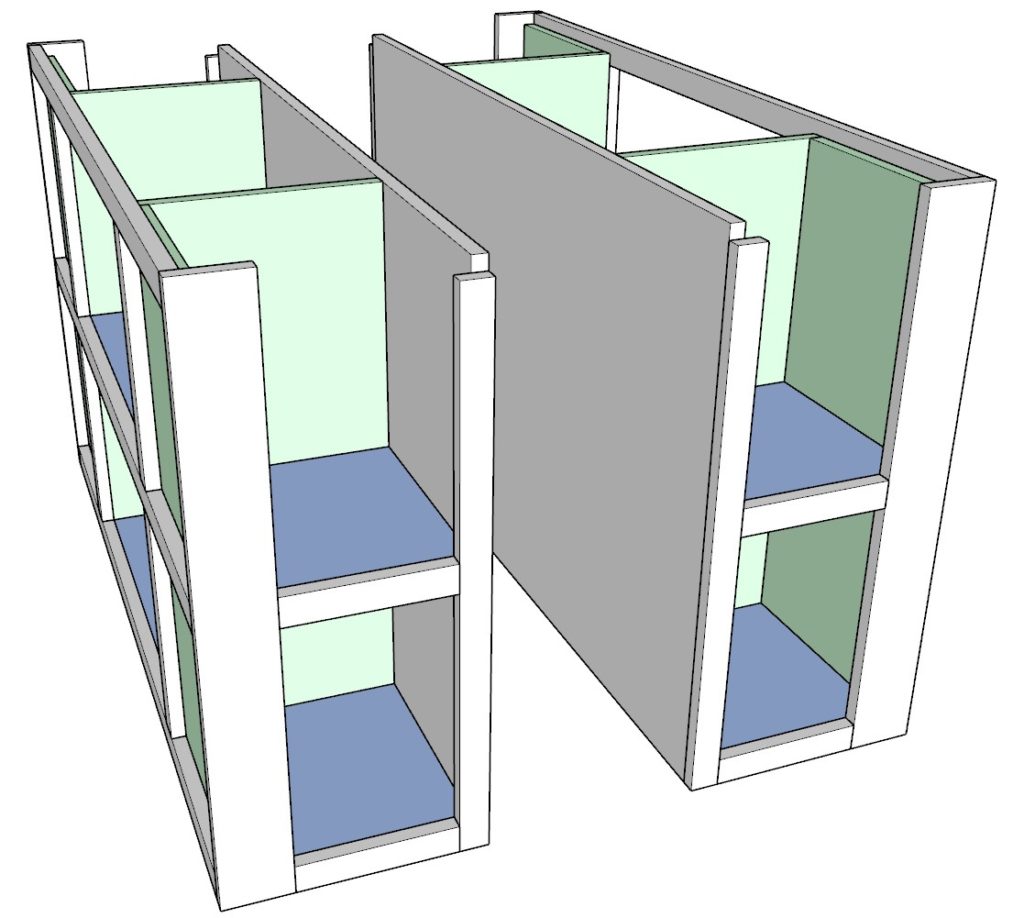
Step 3: Expanding the Storage Cubby and Adding Support
Begin by adding two more green plywood pieces to the storage cubby as indicated in the first diagram. Attach them as you did before.
Next, add two identical 30-inch long 1×4 lumber pieces. Ensure that they are placed as illustrated in the diagram, with a 3/4″ overhang on two sides. Apply glue and secure them with pin nails.
Tip: Double-check the overhang measurement before nailing the lumber pieces, to ensure they are positioned correctly and provide the intended support and appearance.
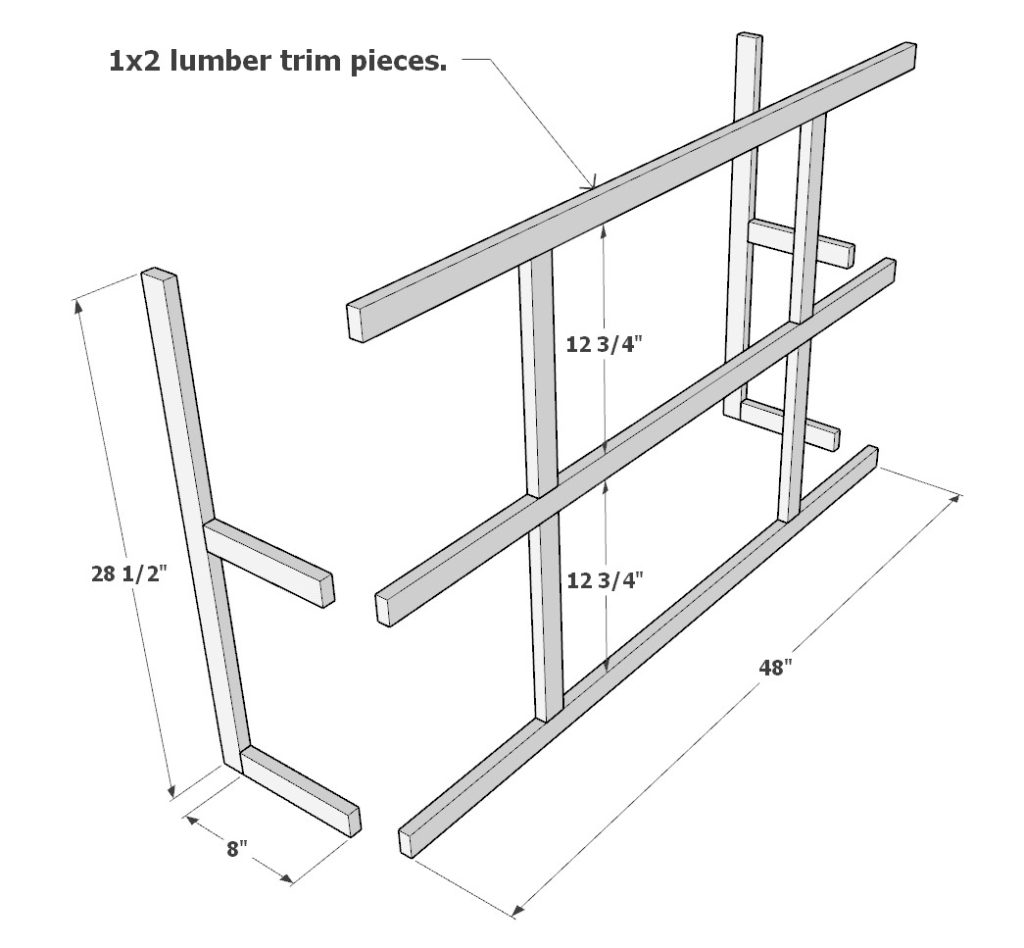
Step 4: Installing Trim Pieces and Constructing a Second Cubby
Begin by preparing all the trim pieces for the cubbies, which are made of 1×2 lumber.
Here’s what you’ll need:
- Three 48-inch 1×2 lumber pieces
- Two 28-1/2-inch 1×2 lumber pieces
- Four 8-inch 1×2 lumber pieces
- Four 12-3/4-inch 1×2 lumber pieces
Attach these trim pieces to the cubby you constructed, as shown in the second diagram of this step, using pin nails and glue.
Once completed, proceed to construct a second cubby identical to the first one you made.
Tip: Lay out all the trim pieces beforehand, and double-check their lengths to ensure accurate assembly.
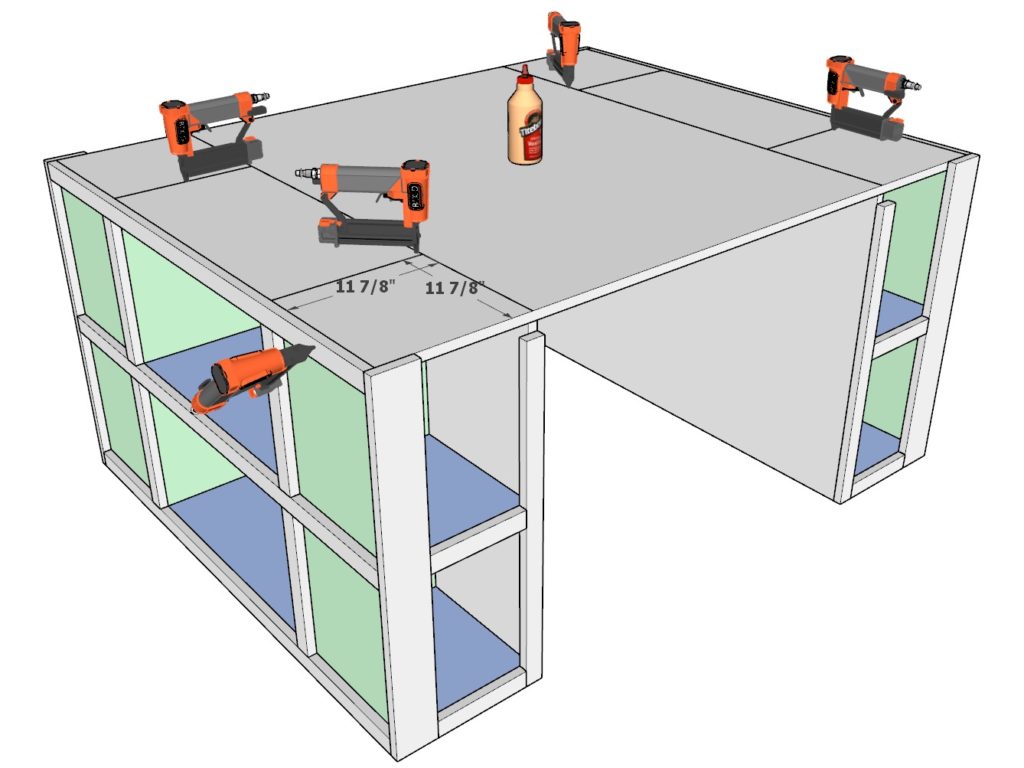
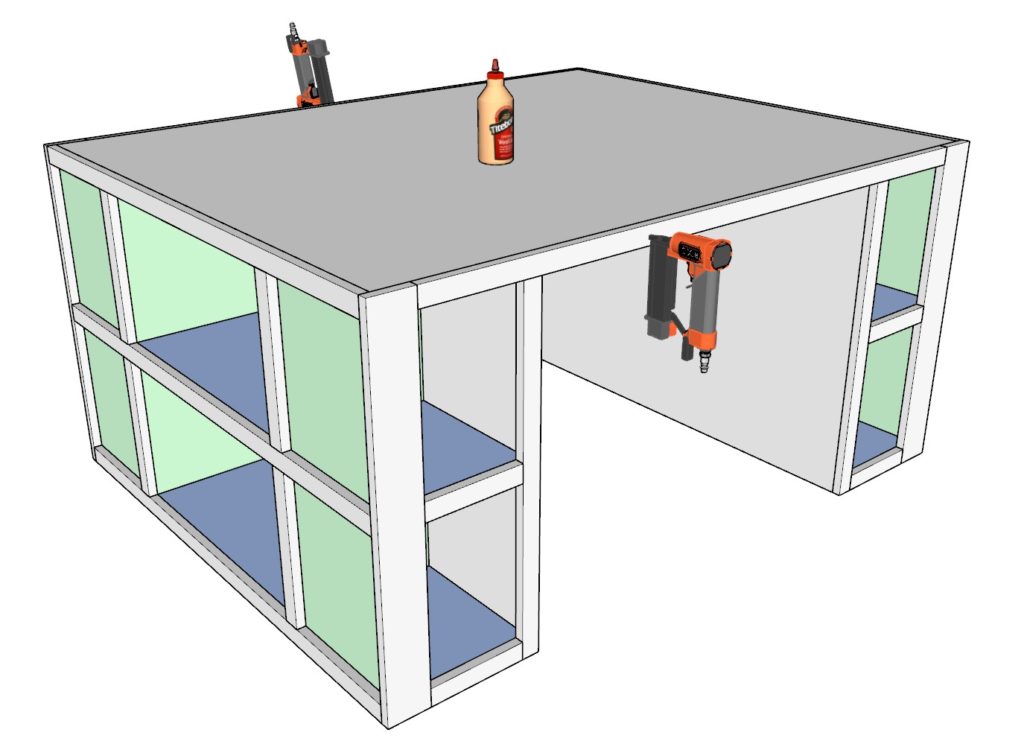
Step 5: Attaching the Tabletop and Finalizing the Framework
Begin by taking a 60-inch x 48-inch (3/4″ thick) plywood sheet. Place it on top of the storage cubbies to form the tabletop. It’s advisable to perform this step in the room where the table will reside, as the table will become large and more difficult to maneuver if assembled elsewhere. Secure the plywood to the cubbies using pin nails and glue, following the nail placement outlined in the second diagram of this step (apply the pencil drawing method as suggested earlier).
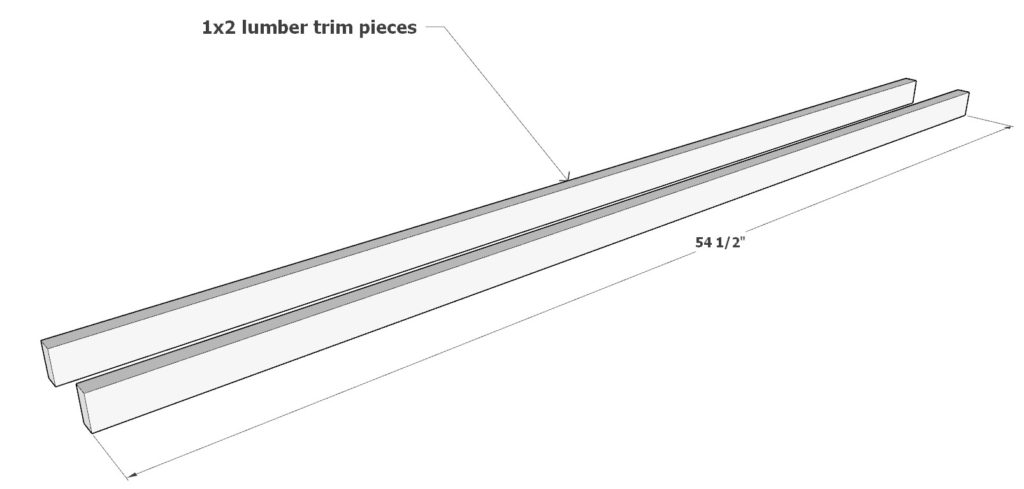
Next, add two 54-1/2-inch long 1×2 lumber pieces to the tabletop. Secure them in place with glue and pin nails.
Step 6: Preparing and Finishing the Table
In this step, we’ll go through the process of preparing your table for staining, painting, and adding some finishing touches.
Sanding:
Begin by sanding all the wooden surfaces to smooth out any rough edges or splinters. Use a fine-grit sandpaper (such as 220-grit) for this task. It’s important to sand lightly, especially on plywood, as it has thin layers and sanding too deeply can cause an unsightly appearance.
Applying Pre-stain, Stain, and Polyurethane:
- Pre-Stain: Apply a pre-stain wood conditioner to all surfaces you plan to stain. This will help the stain apply evenly.
- Staining: Apply your choice of wood stain using a clean cloth or a brush, following the grain of the wood. Allow it to penetrate the wood for about 5-15 minutes, then wipe off any excess stain.
- Polyurethane: Once the stain is dry, apply a coat of polyurethane to protect the wood and give it a nice finish. Ensure you’re in a well-ventilated area, and follow the manufacturer’s instructions on the polyurethane can.
Painting:
If you prefer a painted finish, apply a primer first, then your choice of paint. It’s advisable to do this in a well-ventilated area outside the room. Once dry, bring the table inside.
Leaving Natural:
If you prefer a natural look, simply apply a clear wood finish or wax to protect the wood and enhance its natural beauty.
Adding Felt Pads:
Attach felt pads to the bottom of the table legs to protect your flooring from scratches.
Installing an Outlet:
For organized cord management, consider adding an outlet to your table. Create a hole in the tabletop shaped to fit the outlet type, then plug in the outlet. This way, your cords will look more organized and the table will have added functionality.
Safety Tip: Whether staining or painting, ensure to work in a well-ventilated area to avoid inhaling fumes. Wearing a mask and gloves can provide additional safety.