Introduction
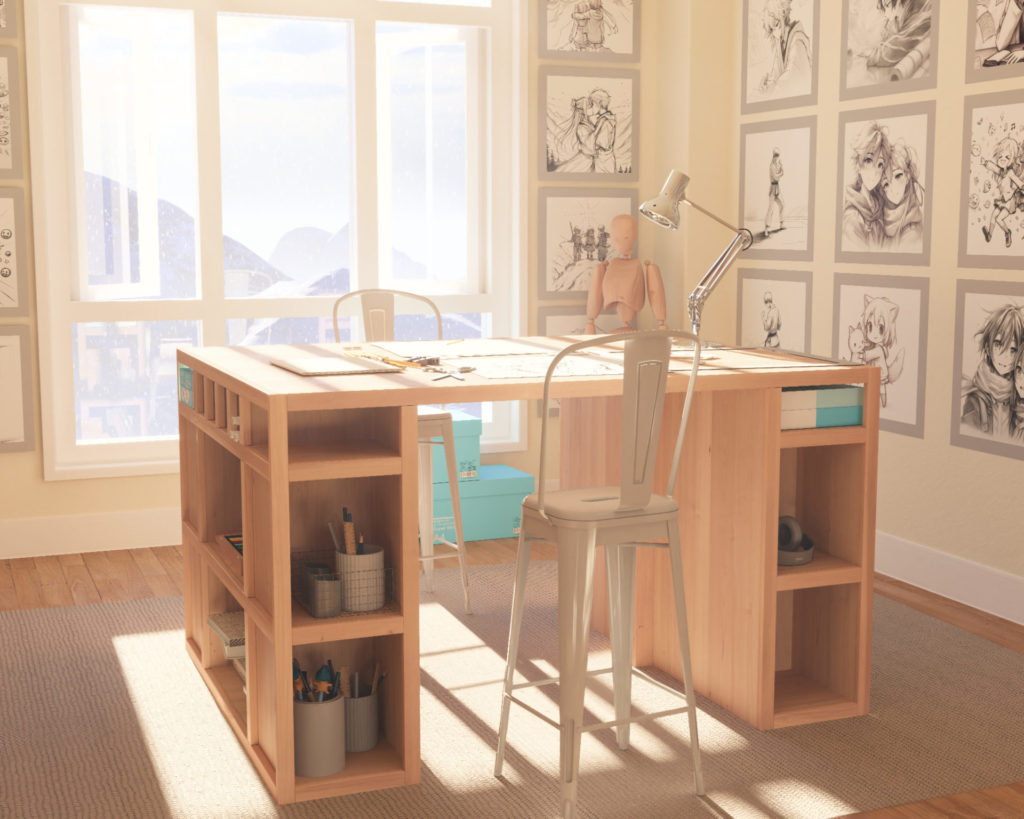
Dive into a world of crafting with our thoughtfully designed Counter-Height Craft Table DIY Plan. The common discomfort of bending over a standard table during crafting hours is something many can relate to. This DIY plan aims to address that by offering a counter-height table that promotes a more comfortable crafting experience, whether you’re working solo or with a companion.
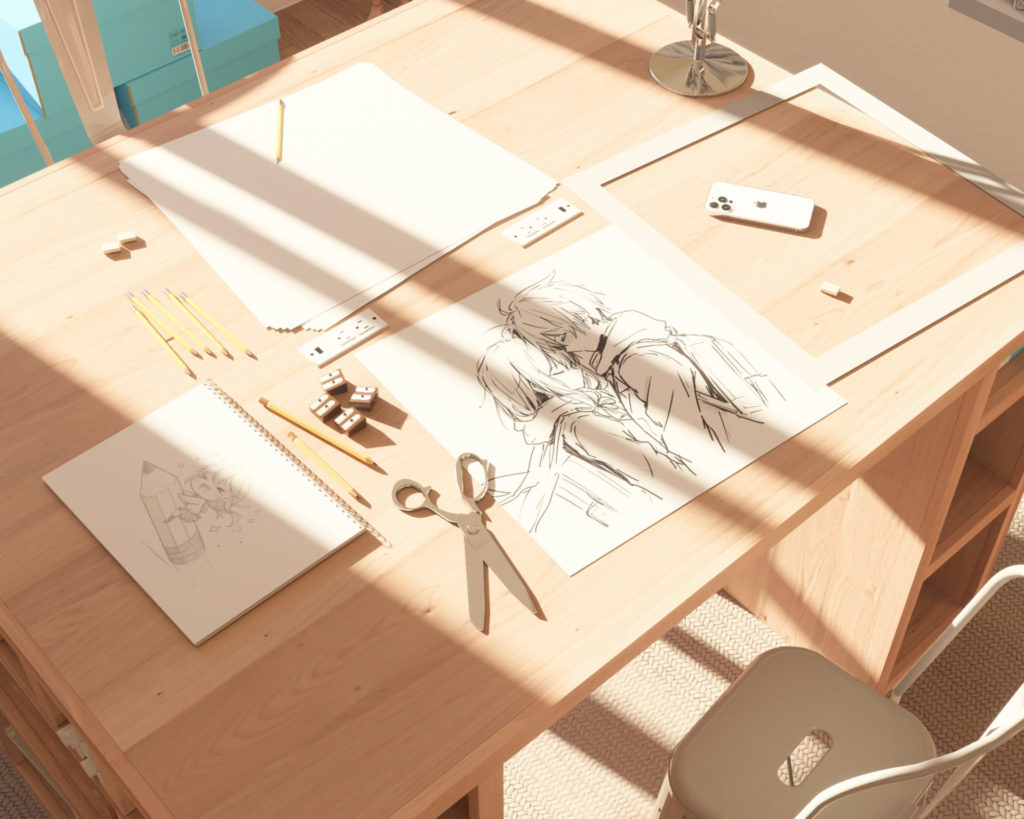
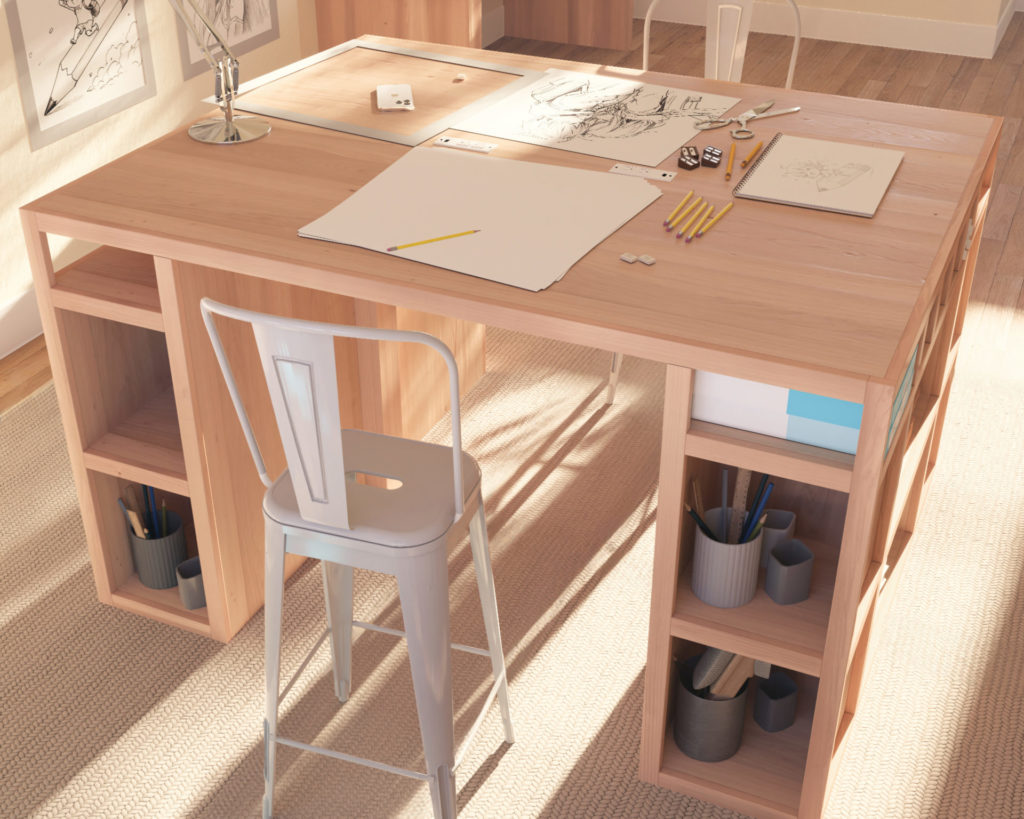
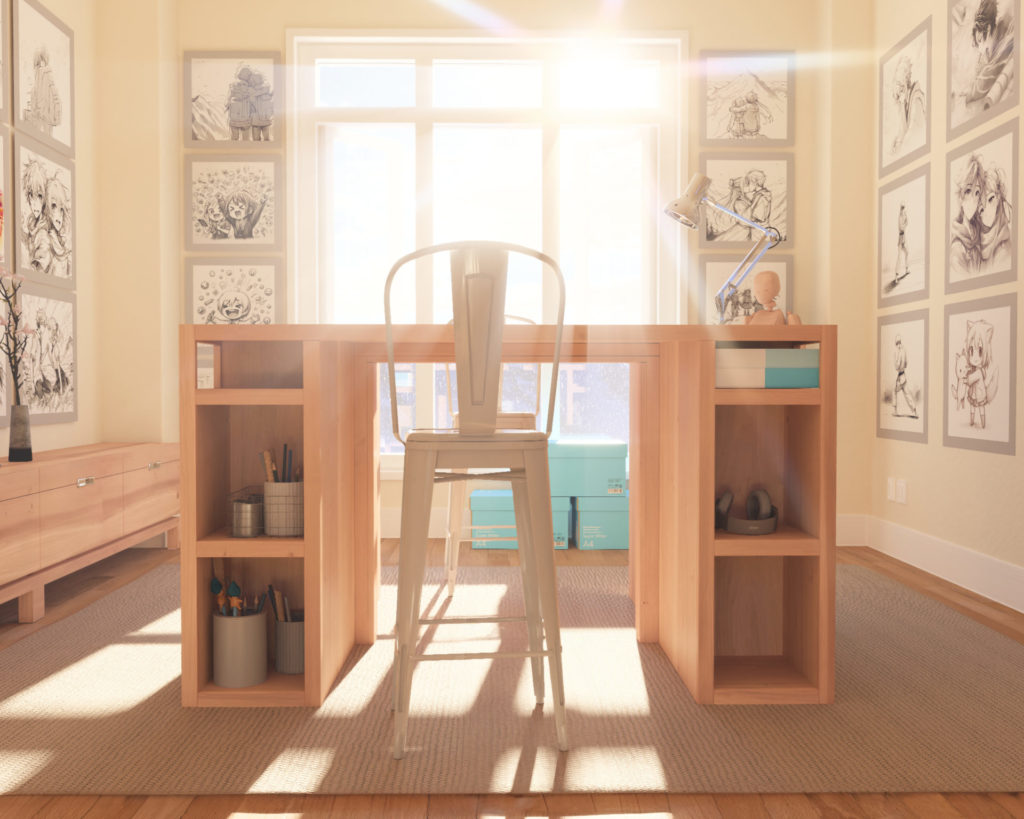
Key Features
Counter-Height Comfort: Standing at 36 inches, this table aims to alleviate back strain by providing a comfortable height for both standing and seated crafting activities.
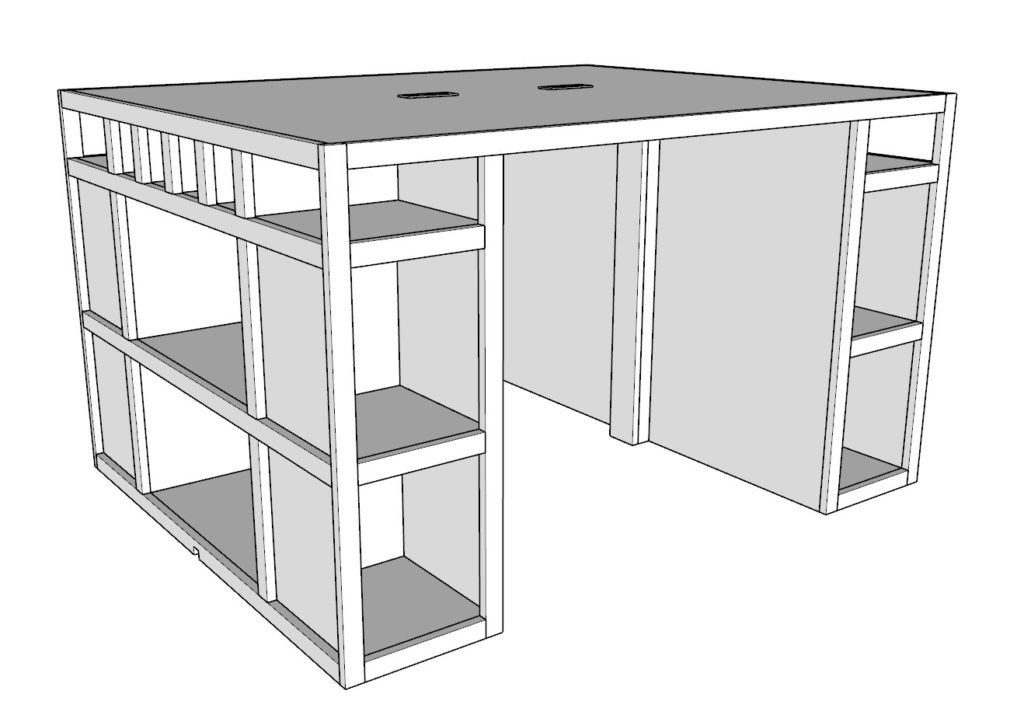
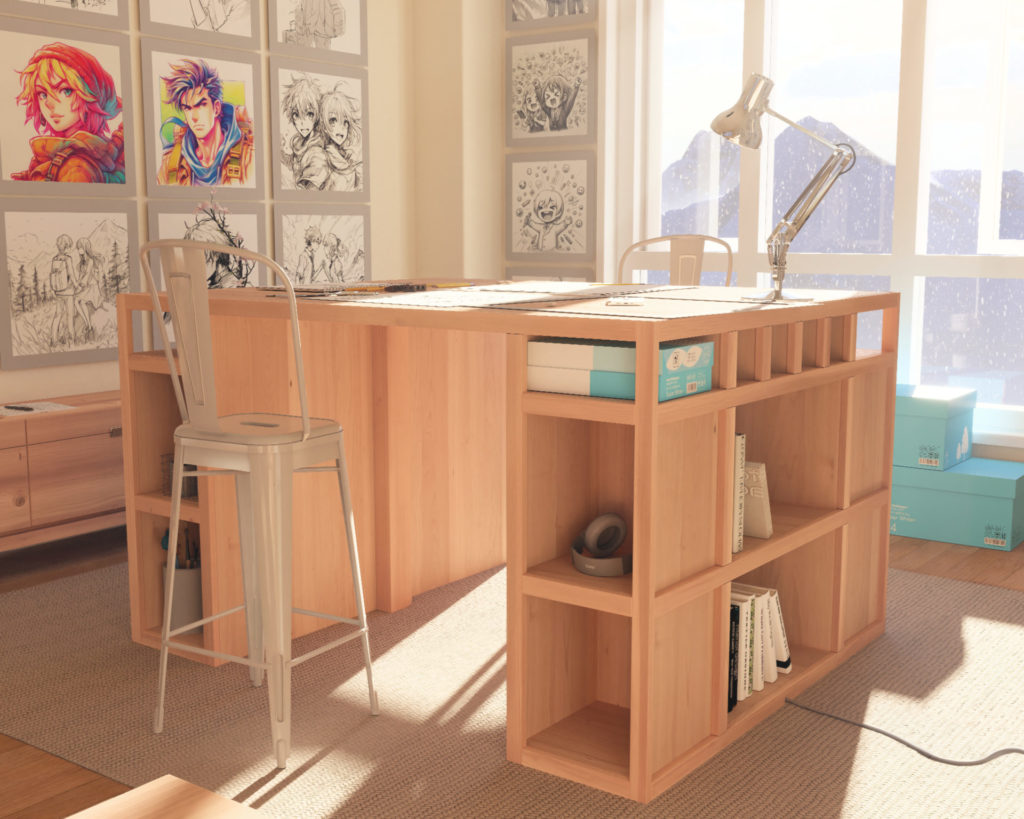
Generous Storage: Storage cubbies on both sides offer a practical solution for organizing your crafting supplies, keeping them within easy reach.
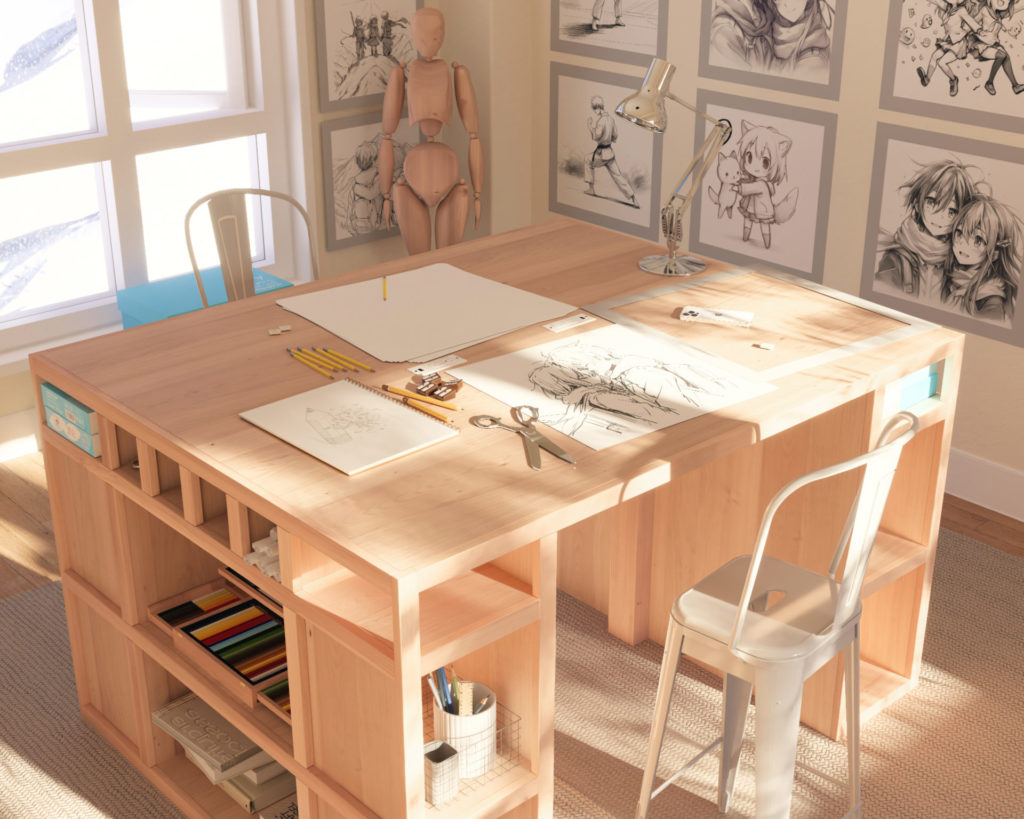
Communal Crafting Space: With dimensions of 61-1/2 inches in width and 49-1/2 inches in length, the table accommodates two people working from either end, encouraging a shared crafting experience.
Efficient Material Use: The table is constructed from a combination of 3/4 inch thick plywood, and 1×2 and 1×4 lumber pieces, minimizing waste and ensuring a solid build.
Technical Specifications
Materials: Utilizing durable 3/4 inch thick plywood, and 1×2 and 1×4 lumber pieces.
Assembly: Assembled with pin nails and wood glue for a sturdy build.
Dimensions: Measures 36 inches in height, 61-1/2 inches in width, and 49-1/2 inches in length.
Integrated Technology
Recessed Power Strip: The integrated Recessed Power Strip with USB C PD 30W Fast Charging minimizes cord clutter and keeps your devices charged and ready, all while adding a neat touch to the table’s design.
Versatility
Multipurpose Usage: This table can transition seamlessly between a study table, craft table, sewing table, or game table, offering a practical solution for various needs.
Conclusion
The Counter-Height Craft Table is designed with practicality and comfort in mind. Its ergonomic height, ample storage, and neat power solution make crafting a more organized and enjoyable activity. Explore the DIY plan and see how this table can fit into your crafting routine.
Time
8 hours (varies with experience)
Cost
$150 (Cost may vary)
Skill level required
Beginner
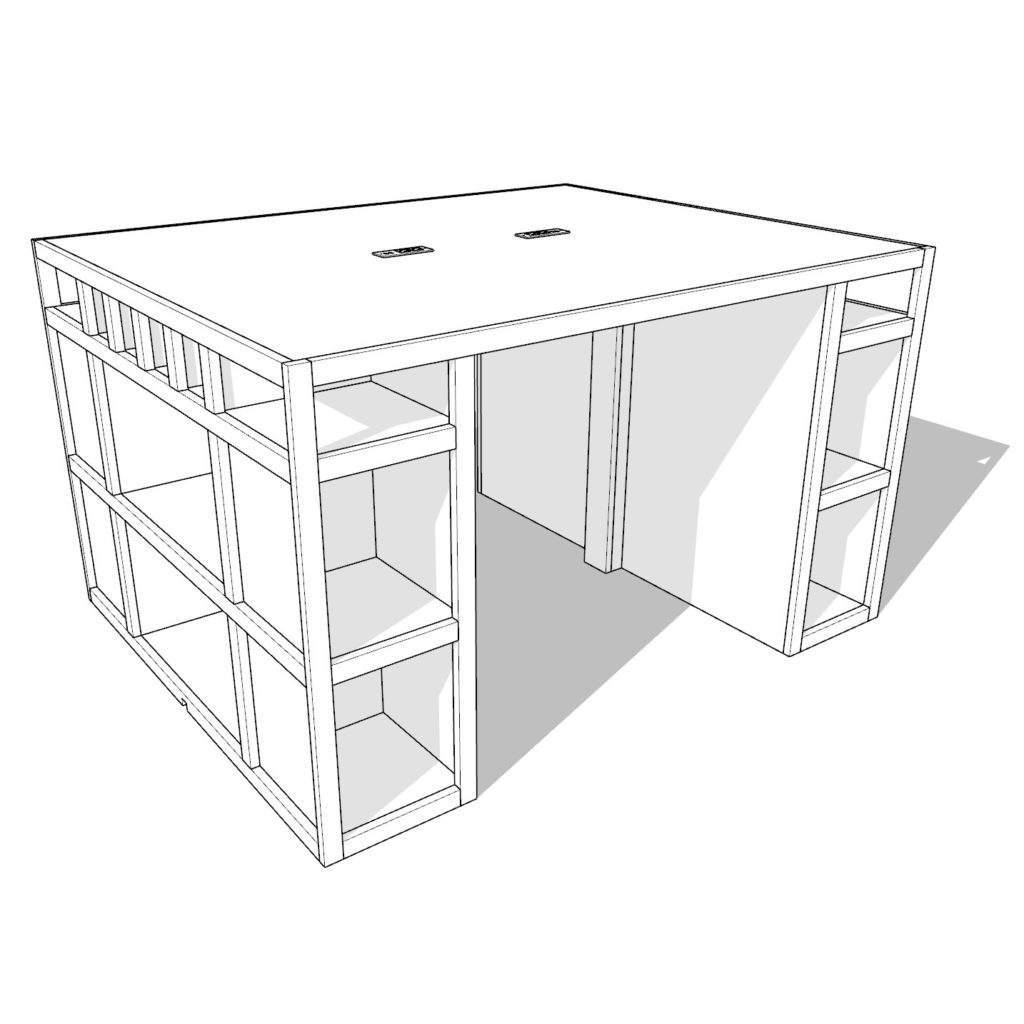
DIY Craft Table PDF Plan
What is included in the PDF download?
- Easy to read step by step instructions
- Material list
- Tools needed
- Helpful links to materials and tools needed
DIY Craft table Dimensions
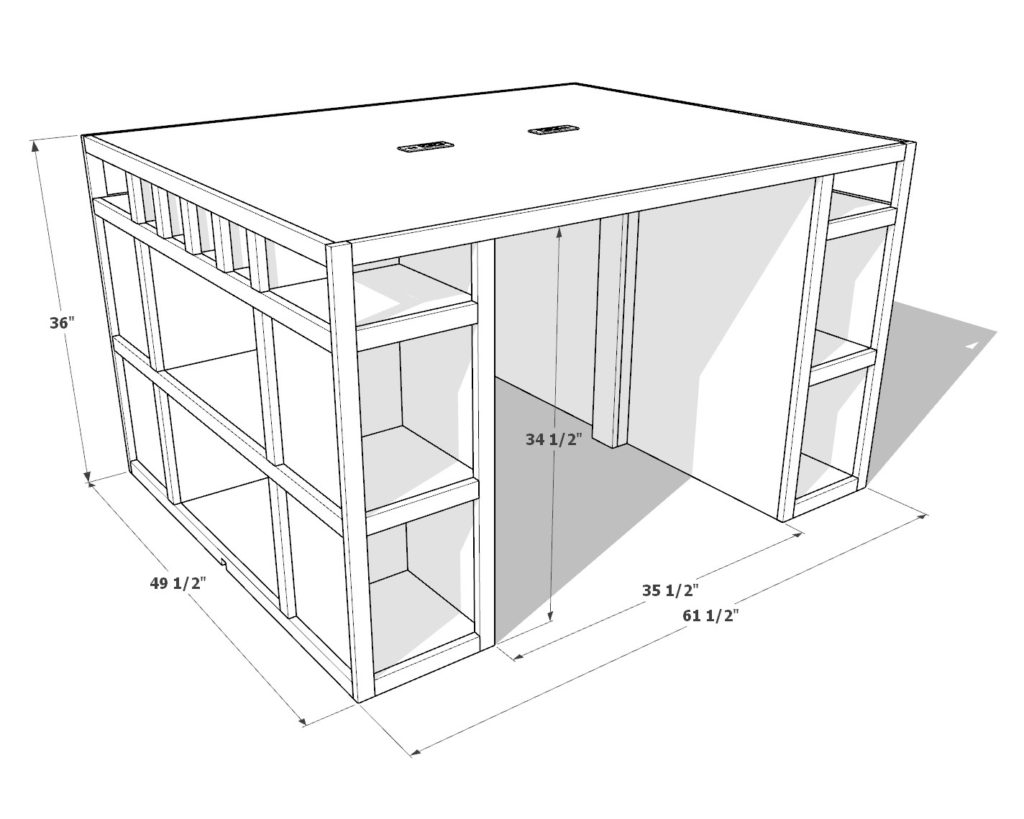
Step 1: Assembling the Cubbies
Start off by preparing for the assembly of the craft table cubbies.
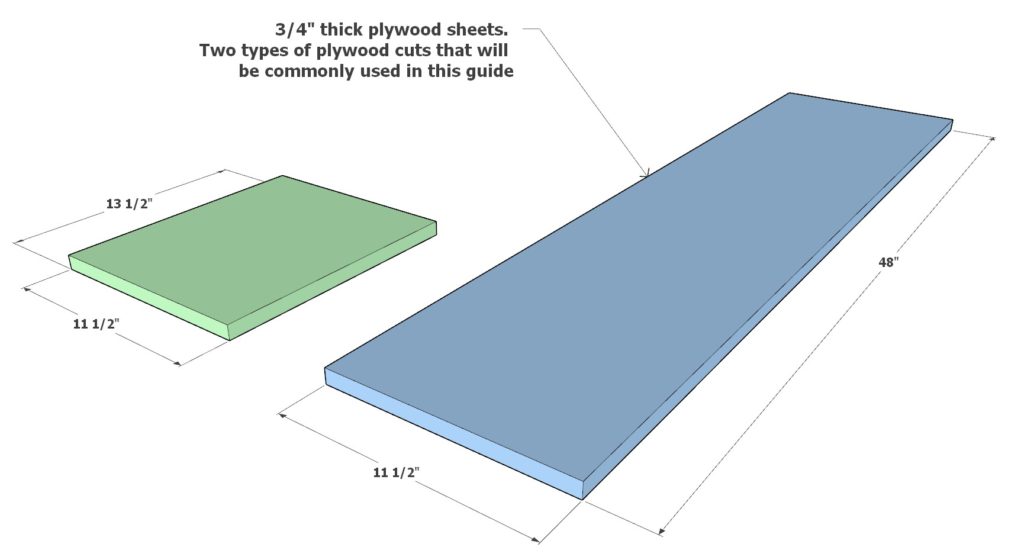
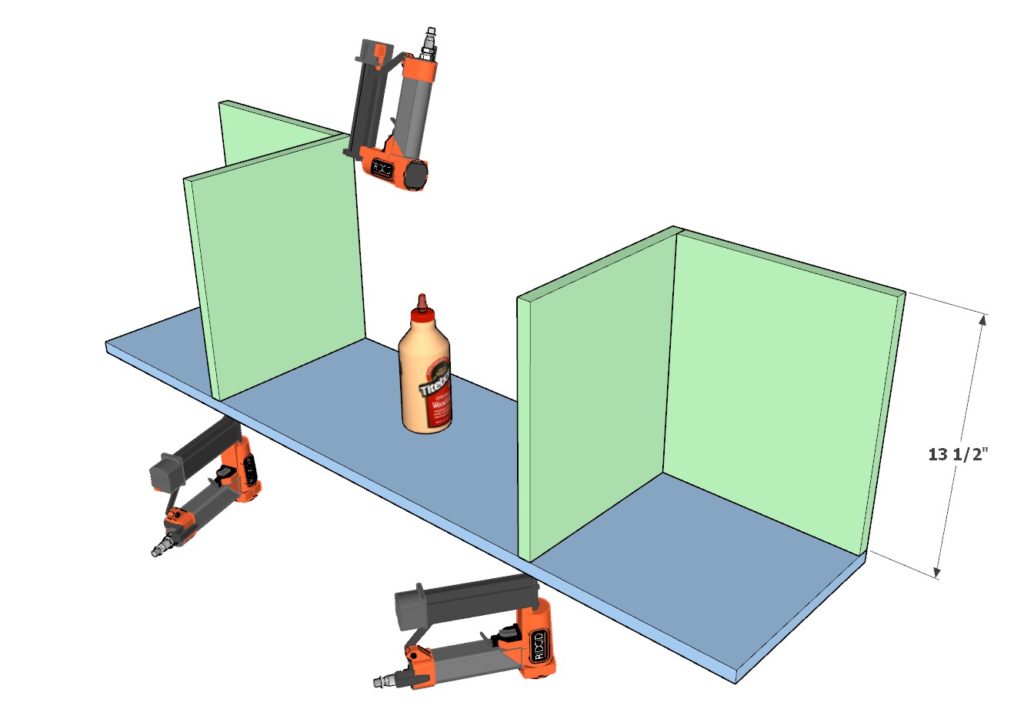
Since most of this craft table is made from plywood, there are two types of plywood cuts that will be commonly used in this guide. Their dimensions are illustrated in the first diagram below.
- The green plywood piece measures 11-1/2″ x 13-1/2″.
- The blue plywood piece measures 11-1/2″ x 48″.
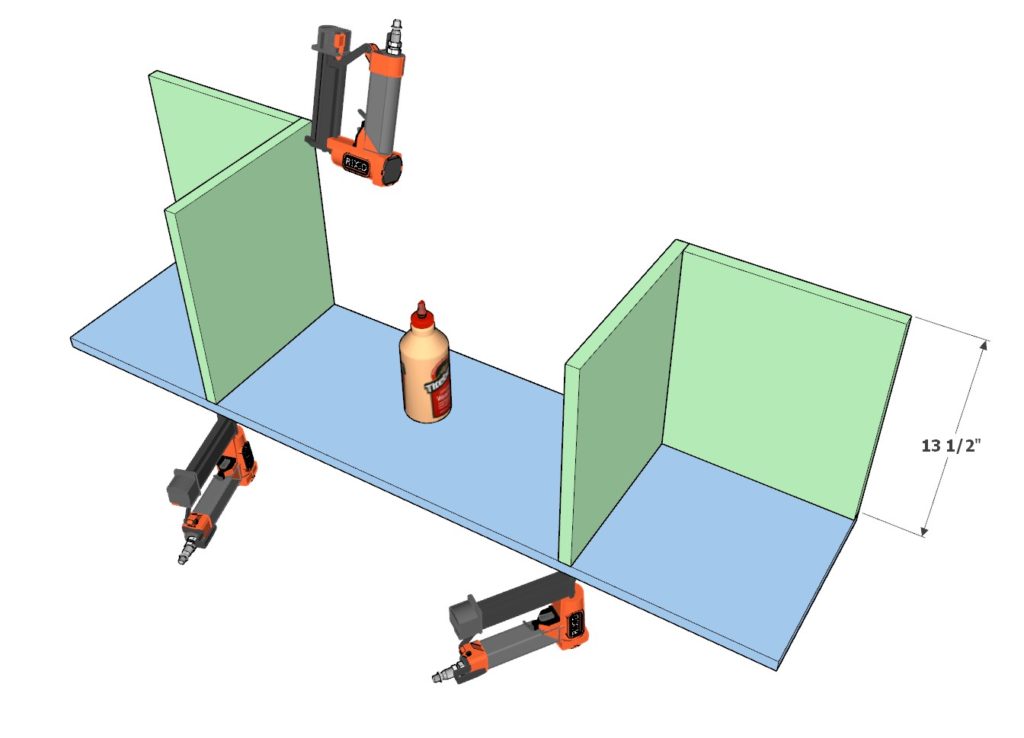
Kickstart the assembly of the cubby by taking four green pieces and one blue piece as illustrated in the second diagram. Secure these pieces together using 1.5-inch long pin nails and wood glue.
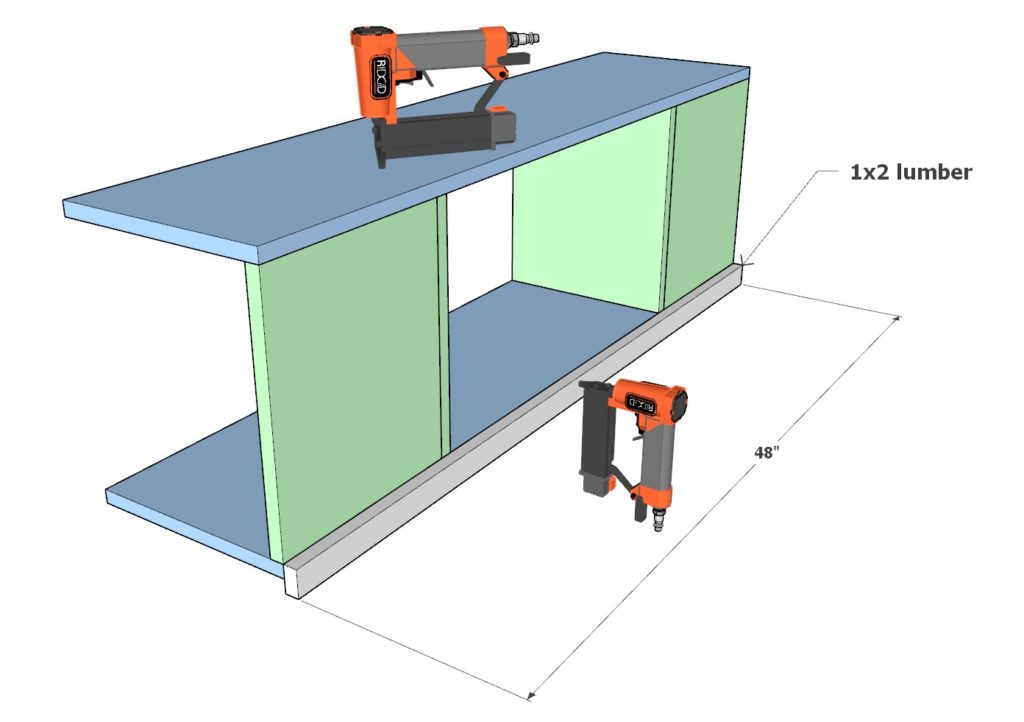
Next, position a 48-inch long 1×2 lumber piece as depicted in the last diagram of this step. Ensure it’s aligned correctly before securing it with pin nails and wood glue.
Tip: Opting for thin nails makes them less noticeable, eliminating the need for cover-up work. However, if you prefer, you can use thicker nails and cover the holes later with wood putty for a smooth finish.
Step 2: Extending the Cubby Frame
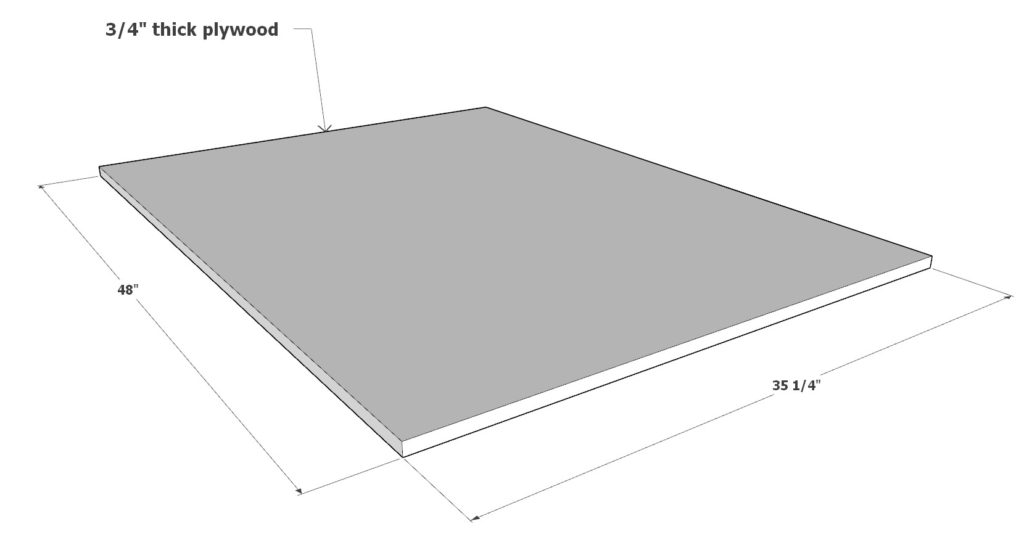
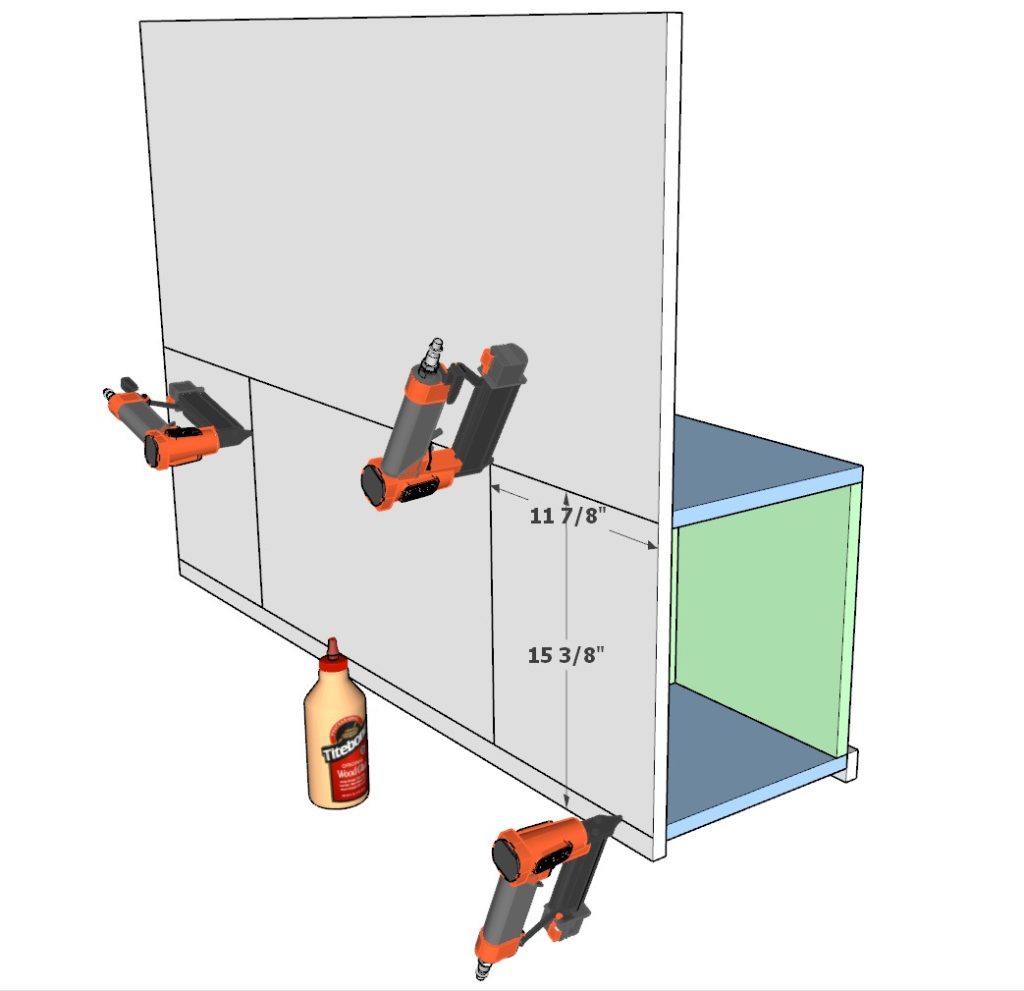
Continue with the assembly by adding a 48″ x 35-1/4″ (3/4″ thick) plywood sheet to the cubby frame you constructed in the previous step.
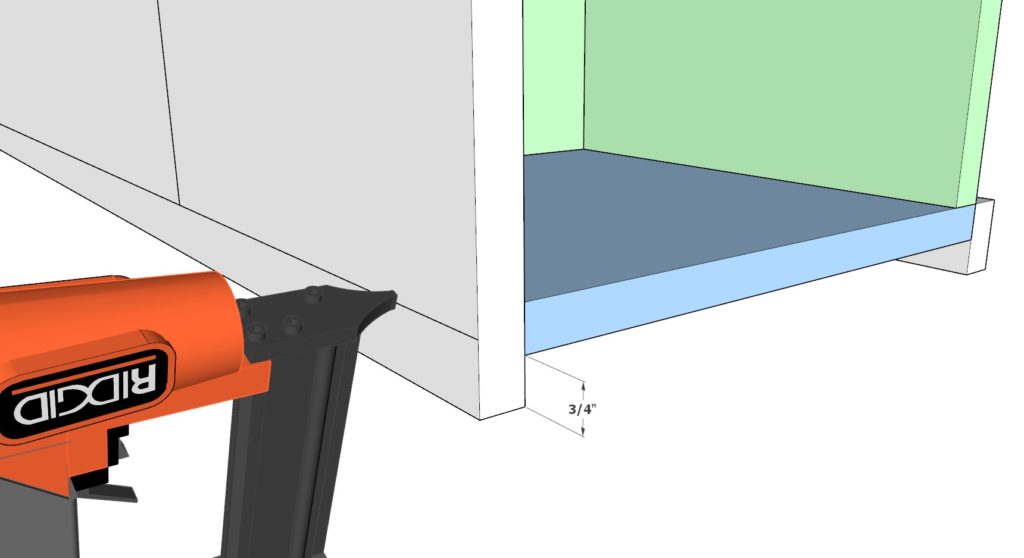
As you place the plywood sheet, ensure it’s properly aligned with the correct 3/4″ overhang as illustrated in the last diagram of this step. Secure the sheet in place using pin nails and wood glue, ensuring a solid connection with the existing frame.
Tip: Double-check the alignment before securing the plywood sheet. Misalignments can cause issues in subsequent steps, so it’s crucial to get it right.
Tip: A handy guide for nail placement is to lightly draw lines on the wood where the nails should go, as indicated in the diagrams. These lines can be erased after nailing to maintain a clean, professional finish on your project. This precaution helps to prevent nails from poking through the wrong side, ensuring a smoother construction process.
Step 3: Building and Attaching the Second Cubby
Now, it’s time to create another cubby assembly similar to the one in the first step. Take four green pieces and one blue piece, align them as before, and attach using wood glue and pin nails.
Following that, position this second cubby assembly on top of the first. Secure them together using pin nails and glue.
Note: Some components may feel like they are not entirely secured at this point. Don’t worry; this will be resolved when adding the additional outer trim pieces in the upcoming steps.
Tip: Ensure that the cubbies are aligned properly before securing them together to maintain a uniform structure as you progress with the build.


Step 4: Installing Storage Separators
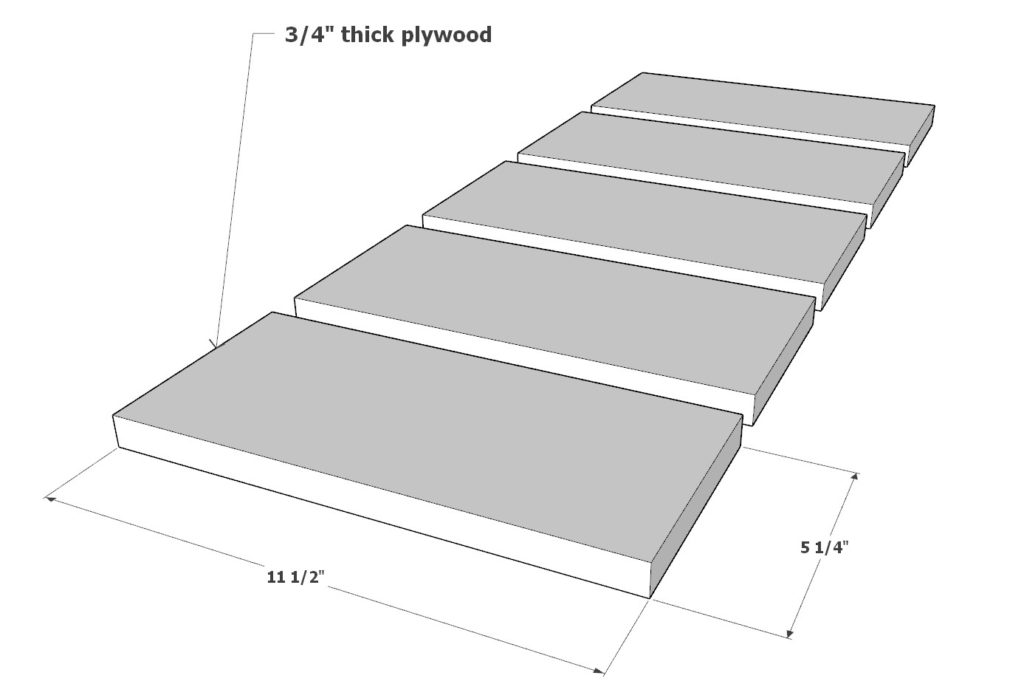
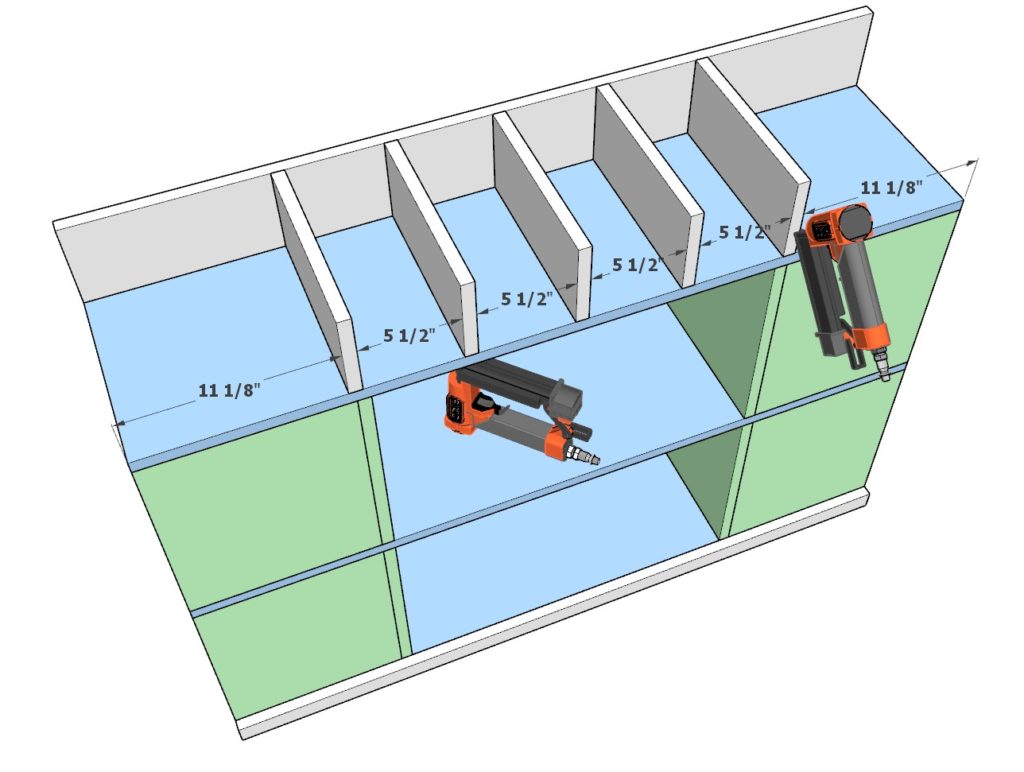
In this step, you’ll be adding storage separators to further structure your cubbies. These separators are also made of 3/4″ thick plywood and measure 11-1/2″ x 5-1/4″.
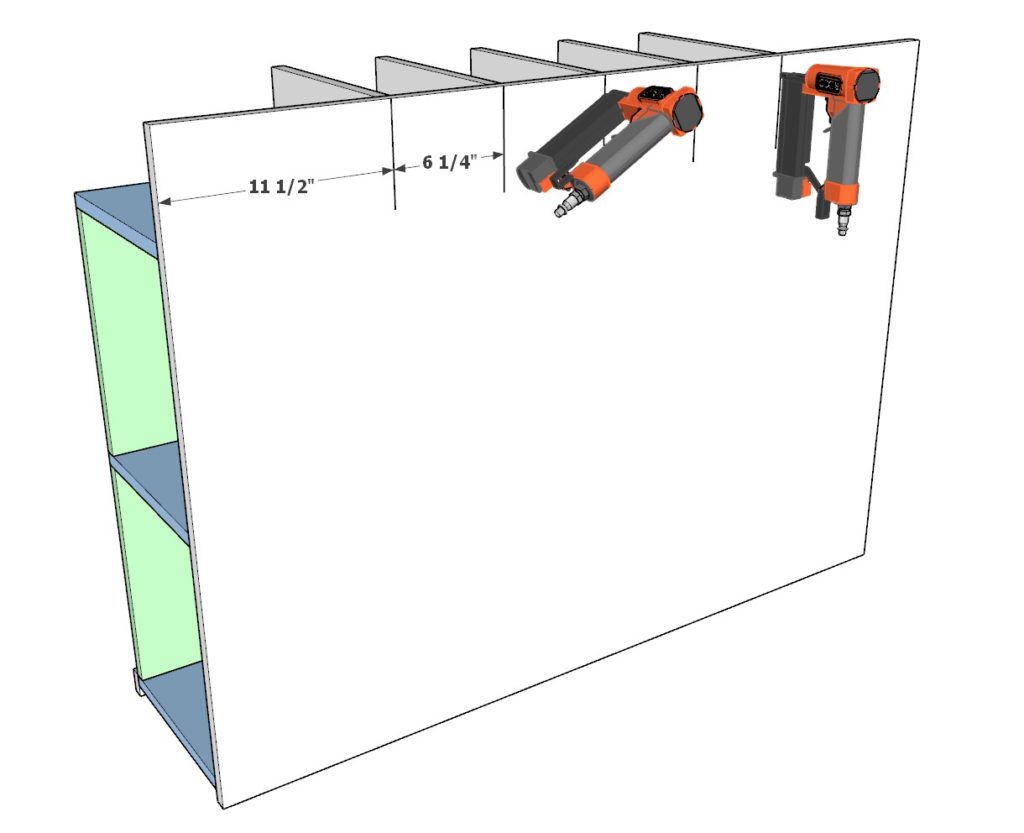
You will need a total of five separators. Position and secure them as illustrated in the 2nd diagram of this step. Use pin nails and glue to fasten them firmly from the front, the back, and the bottom.
Tip: A handy guide for nail placement is to lightly draw lines on the wood where the nails should go, as indicated in the diagrams. These lines can be erased after nailing to maintain a clean, professional finish on your project. This precaution helps to prevent nails from poking through the wrong side, ensuring a smoother construction process.
Step 5: Adding the Outer Trim (Cubby Exoskeleton)
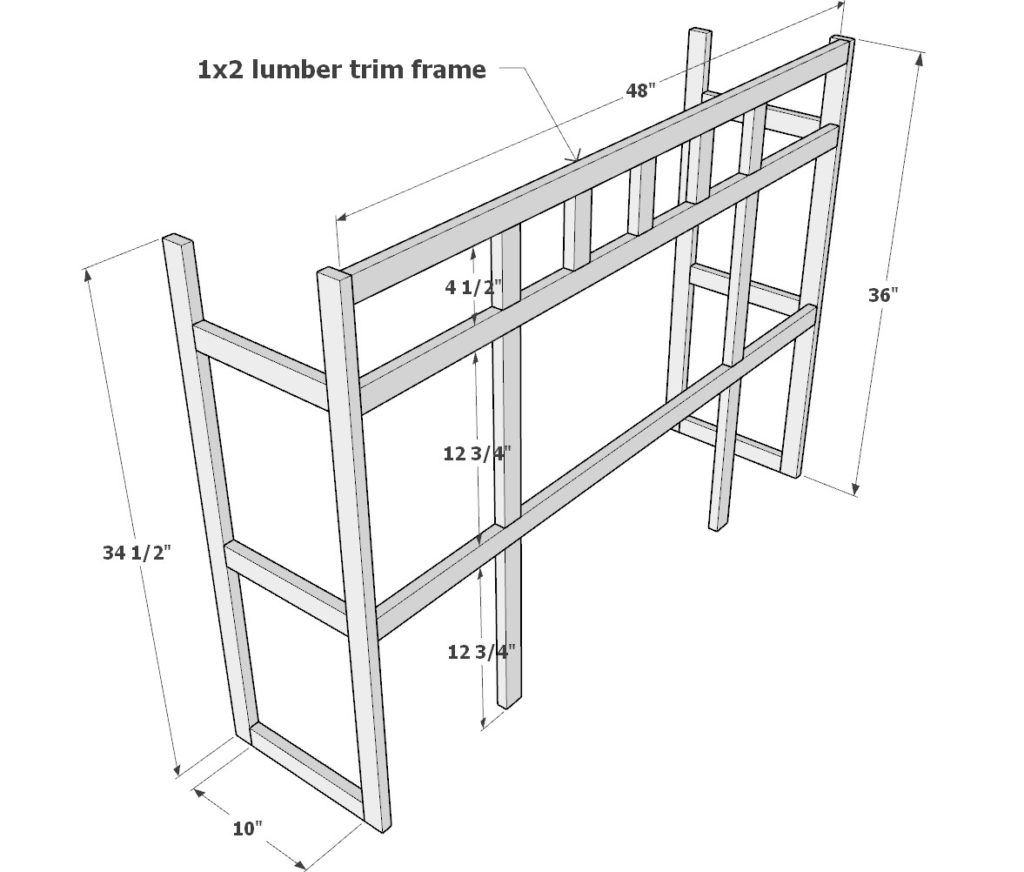
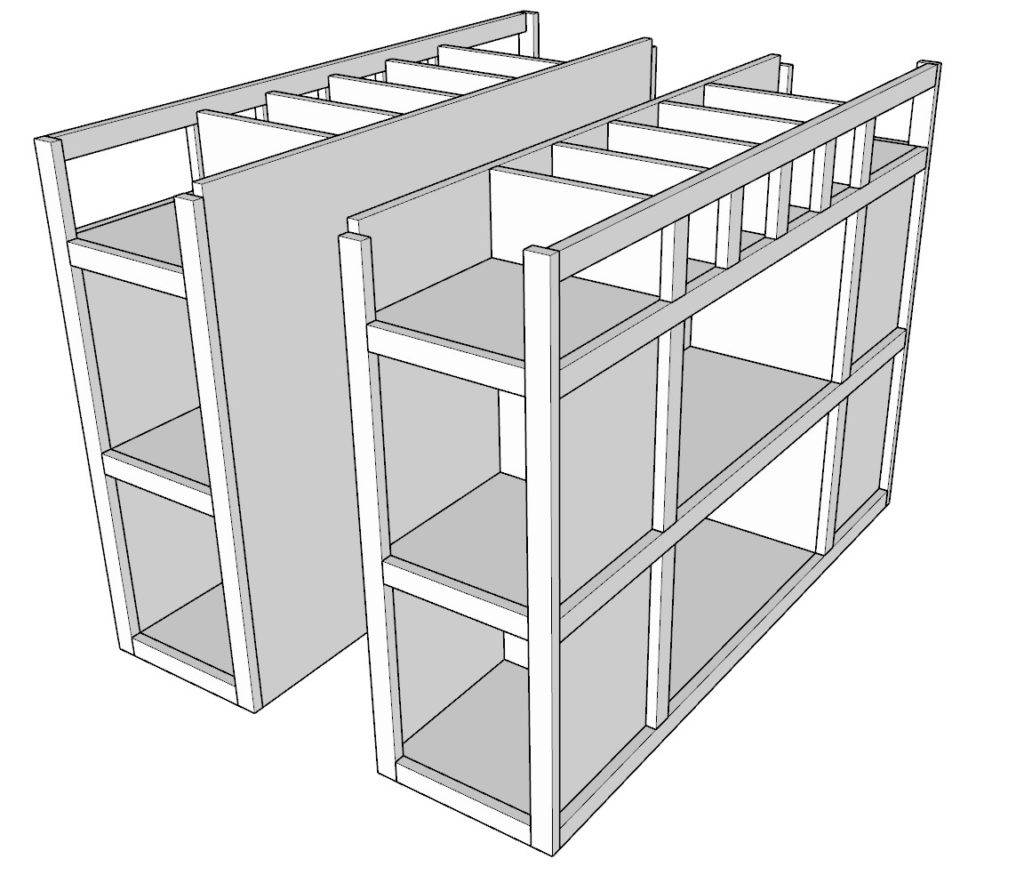
Now, it’s time to reinforce the structure by adding the outer trim, also referred to as the cubby exoskeleton. This trim is made entirely out of 1×2 lumber. Here are the pieces you’ll need:
- Two pieces of 34-1/2″ long
- Two pieces of 36″ long
- Six pieces of 10″ long
- Three pieces of 48″ long
- Five pieces of 4-1/2″ long
- Four pieces of 12-3/4″ long
Secure these pieces onto your cubby structure using pin nails and glue. At this stage, ensure everything is well integrated with no loose or moving parts. The structure should feel solid and sturdy.
Tip: Wood clamps can be very helpful to hold things securely in place while you use the nailer. It ensures a tight fit and makes the nailing process much easier.
After reinforcing the first cubby side, proceed to construct a second identical cubby side following the steps 1 through 5 as guided before. This way, you’ll have both sides of your craft table ready and reinforced.

Step 6: Assembling the Workbench Table Top
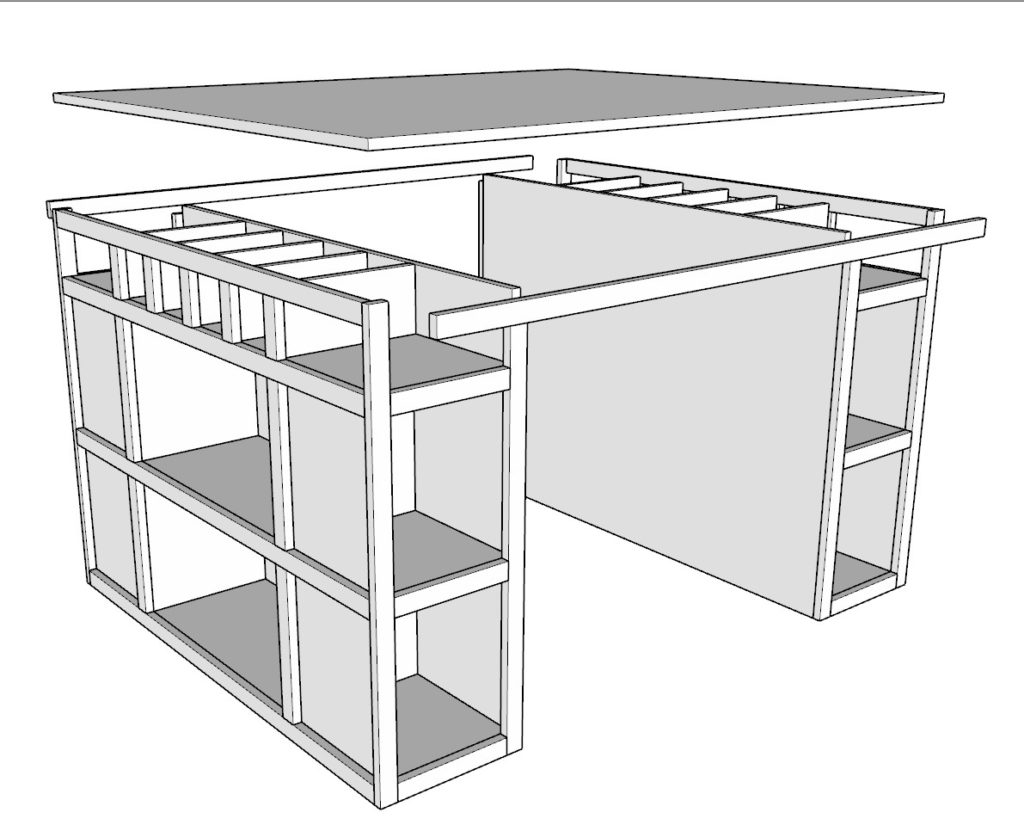
Now, transition to assembling the workbench table top. This step marks a shift in your assembly process as from now on, the assembly needs to be carried out in the room where the table will be placed. Given the table’s dimensions, it will become bulky and hard to move if assembled elsewhere.
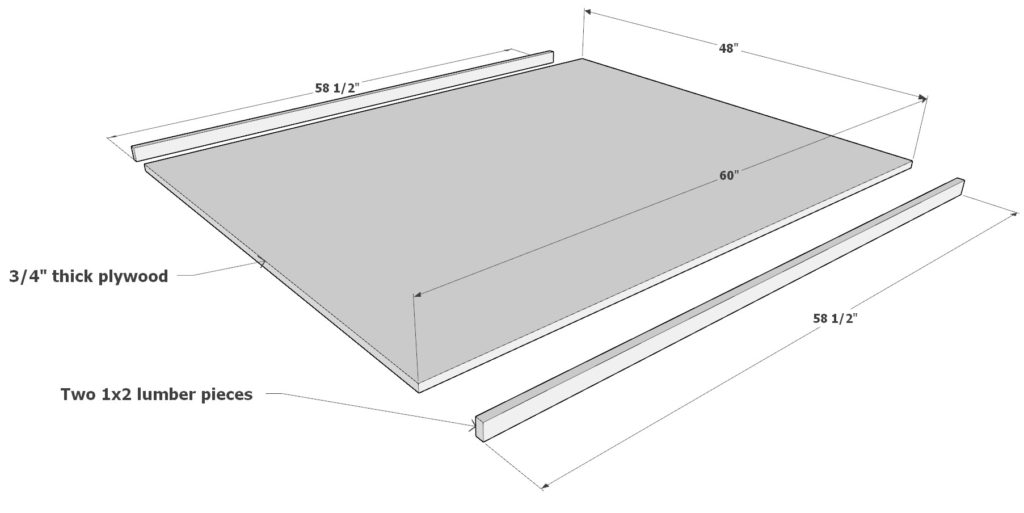
For this step, you will require a 48″x60″ (3/4″ thick) plywood sheet along with two identical 58-1/2″ long 1×2 lumber pieces.
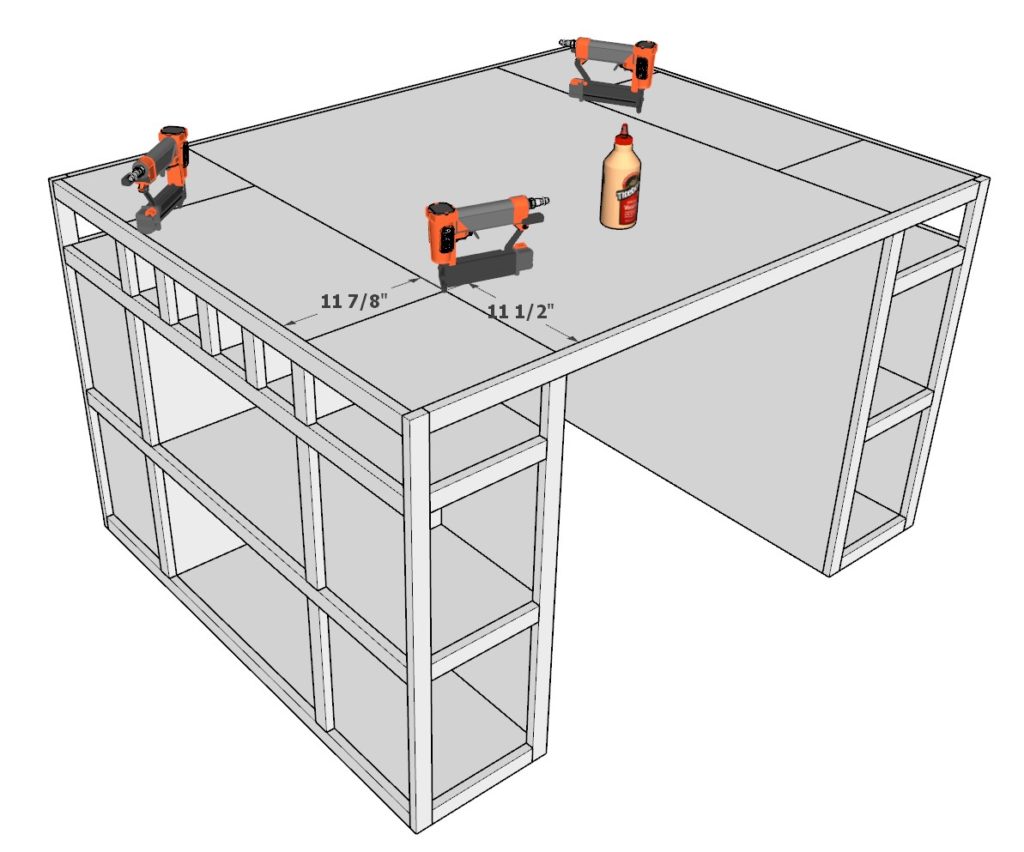
Combine these three components to form the table top, securing them together with pin nails and wood glue.
Tip: A handy guide for nail placement is to lightly draw lines on the wood where the nails should go, as indicated in the diagrams. These lines can be erased after nailing to maintain a clean, professional finish on your project. This precaution helps to prevent nails from poking through the wrong side, ensuring a smoother construction process.
Step 7: Constructing and Installing the Extension Cord Housing
Now, shift your focus to building the extension cord housing and installing it onto the table.
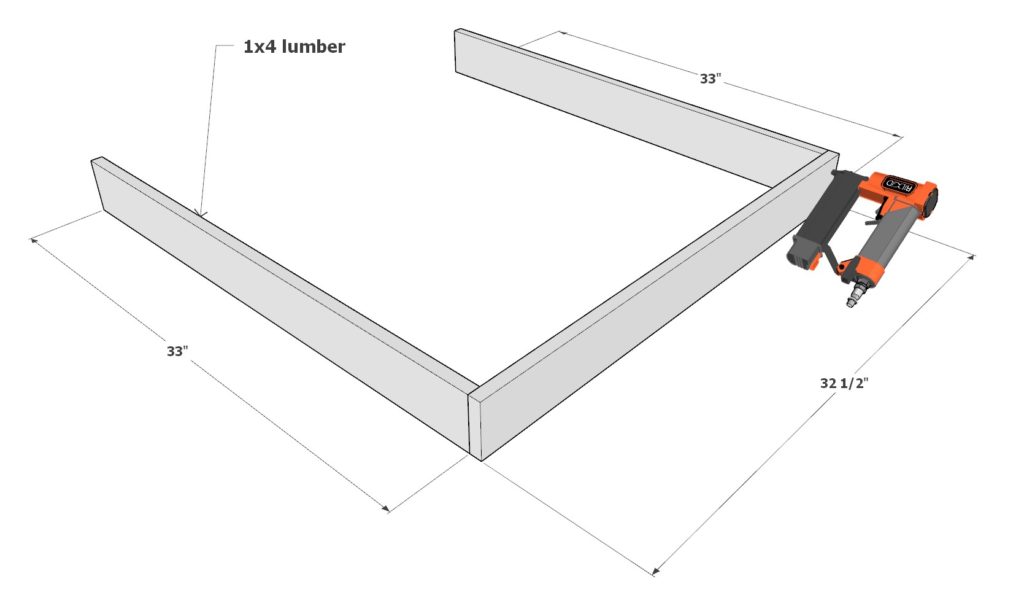
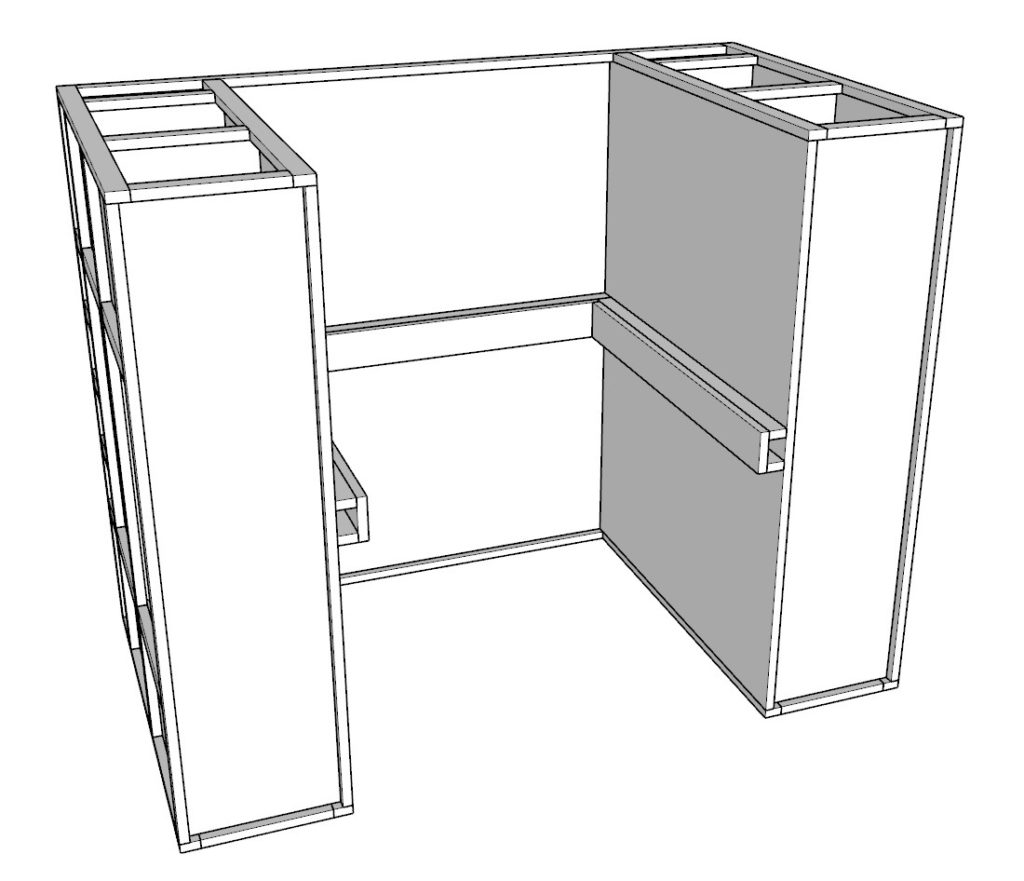
Start by taking two 33-inch 1×4 lumber pieces and one 32-1/2″ 1×4 lumber piece. Secure them together using nails and wood glue to form the base of the housing.
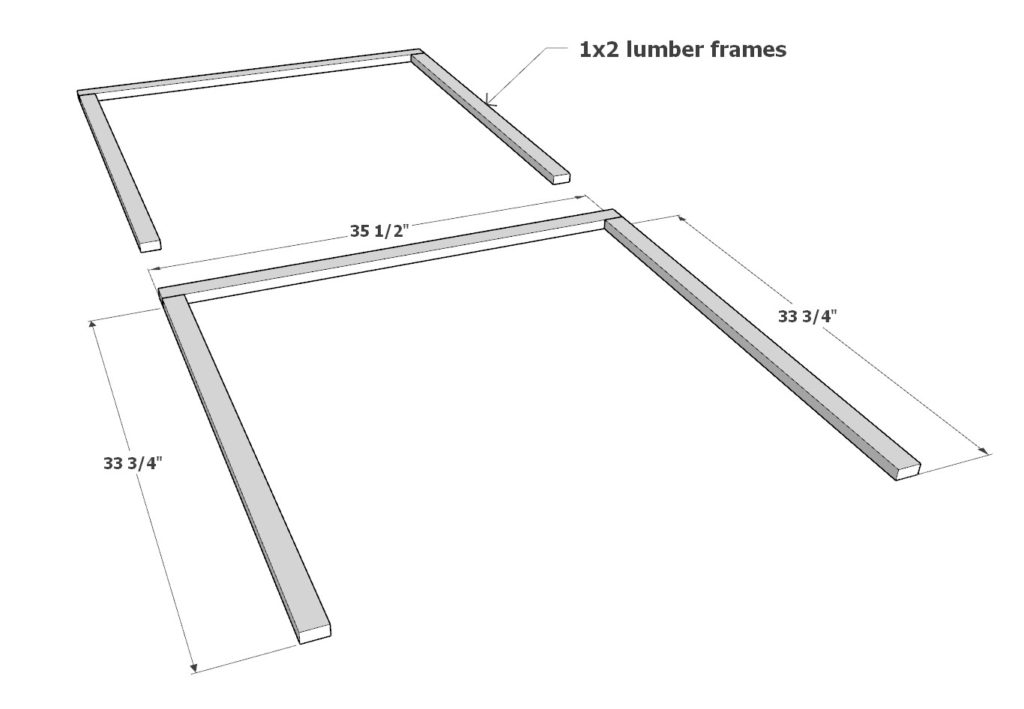
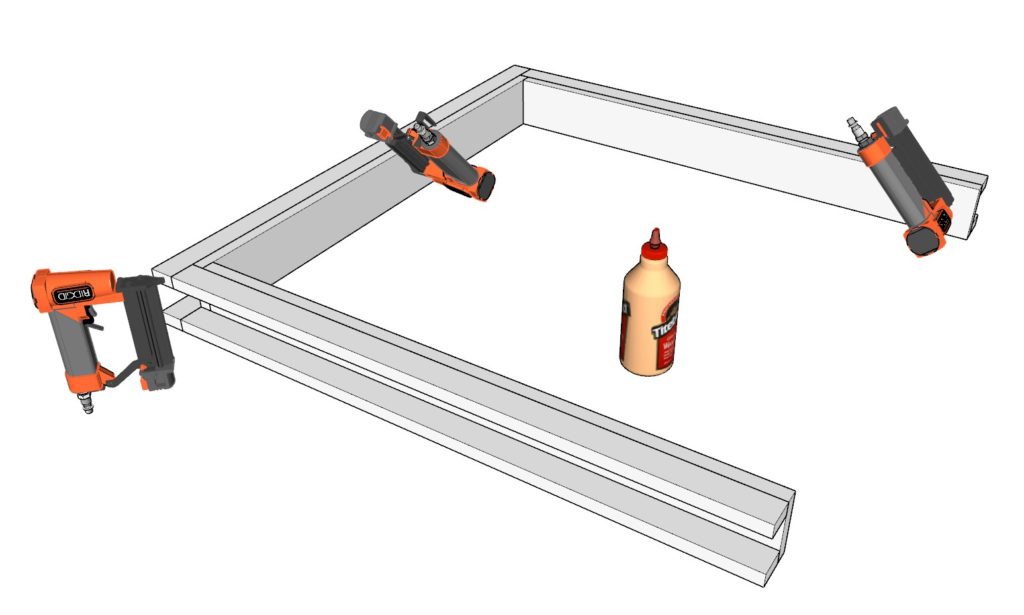
Next, create a 1×2 lumber frame to attach to the 1×4 lumber base. For this frame, you’ll need two 35-1/2″ 1×2 lumber pieces and four 33-3/4″ 1×2 lumber pieces. Secure these pieces with pin nails and wood glue.
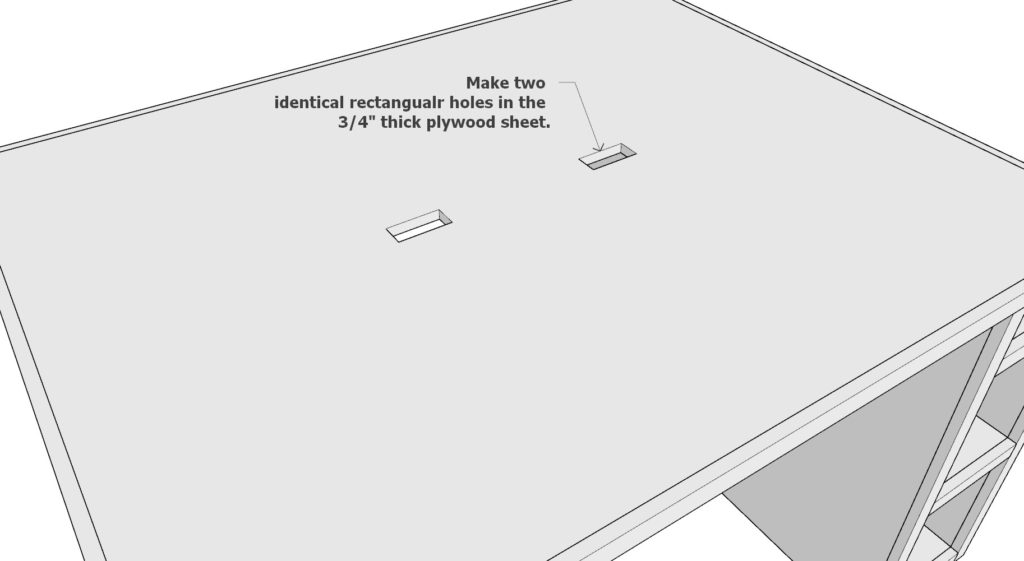
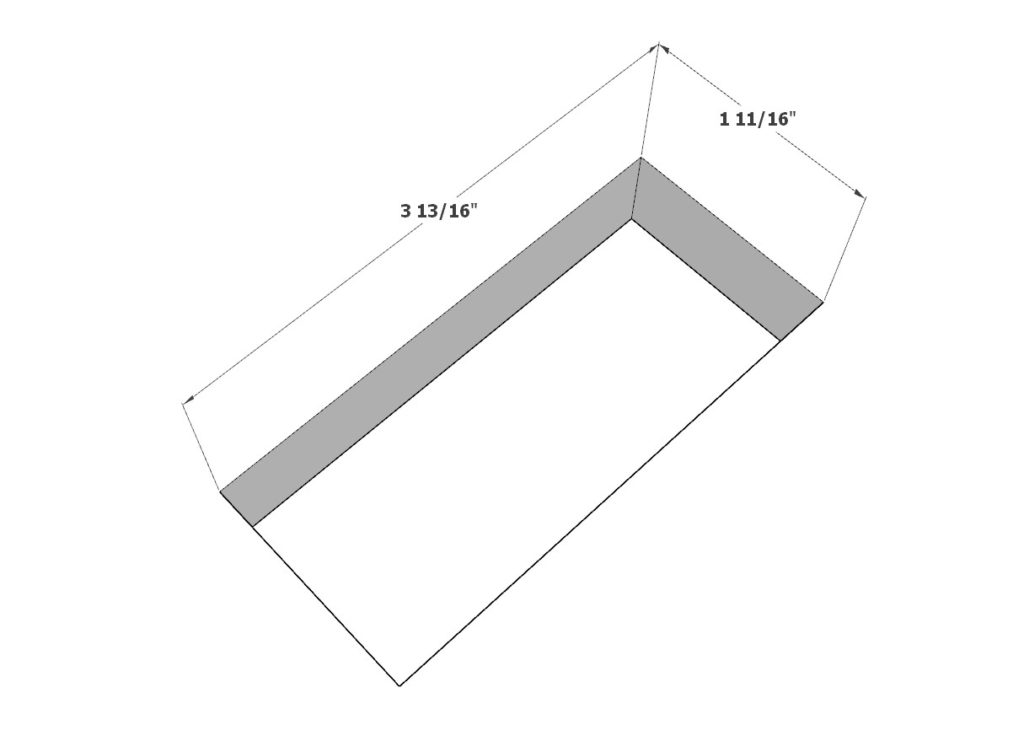
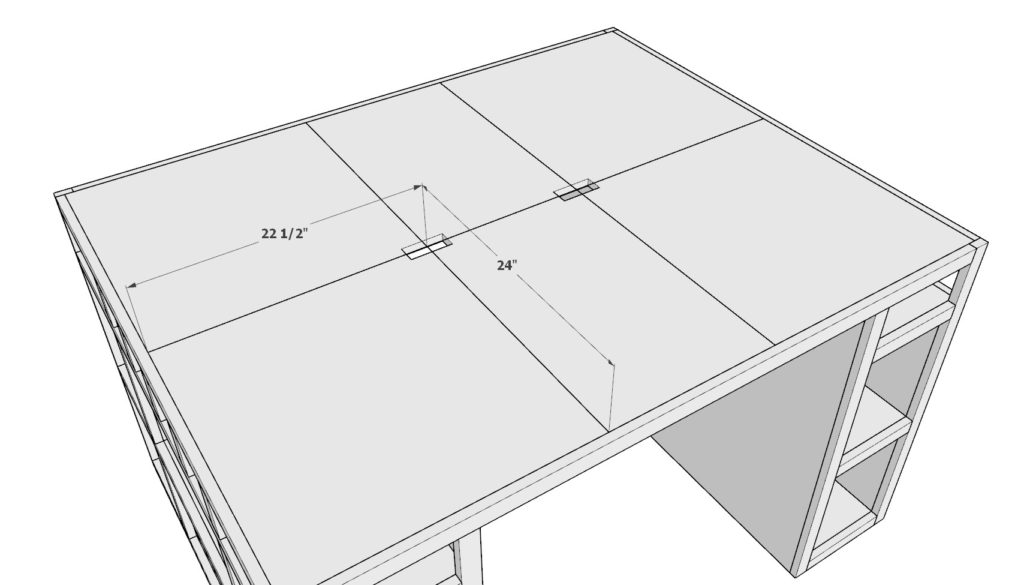
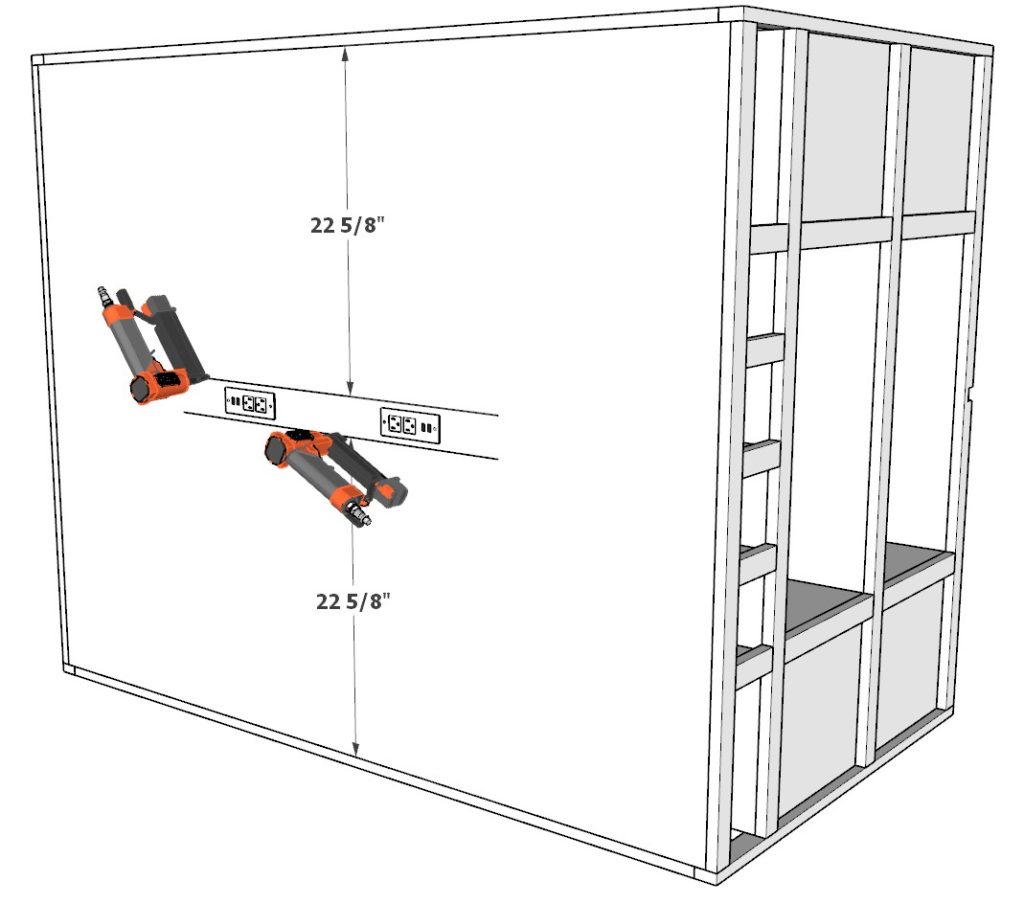
Now, it’s time to prepare the table top for the power strip by making two identical rectangular holes. If you’re using the Recessed Power Strip recommended from Amazon, the holes should measure approximately 3-13/16″ x 1-11/16″ each. (Note: If you’re using a different power strip, adjust the hole size according to its dimensions.)
- To make these holes, begin by drilling a hole at each corner of the rectangles directly into the plywood using a large diameter drill bit. Then, use a jigsaw or a small hand saw to cut out the rectangular holes.
- To make these holes, begin by drilling a hole at each corner of the rectangles directly into the plywood using a large diameter drill bit. Then, use a jigsaw or a small hand saw to cut out the rectangular holes.
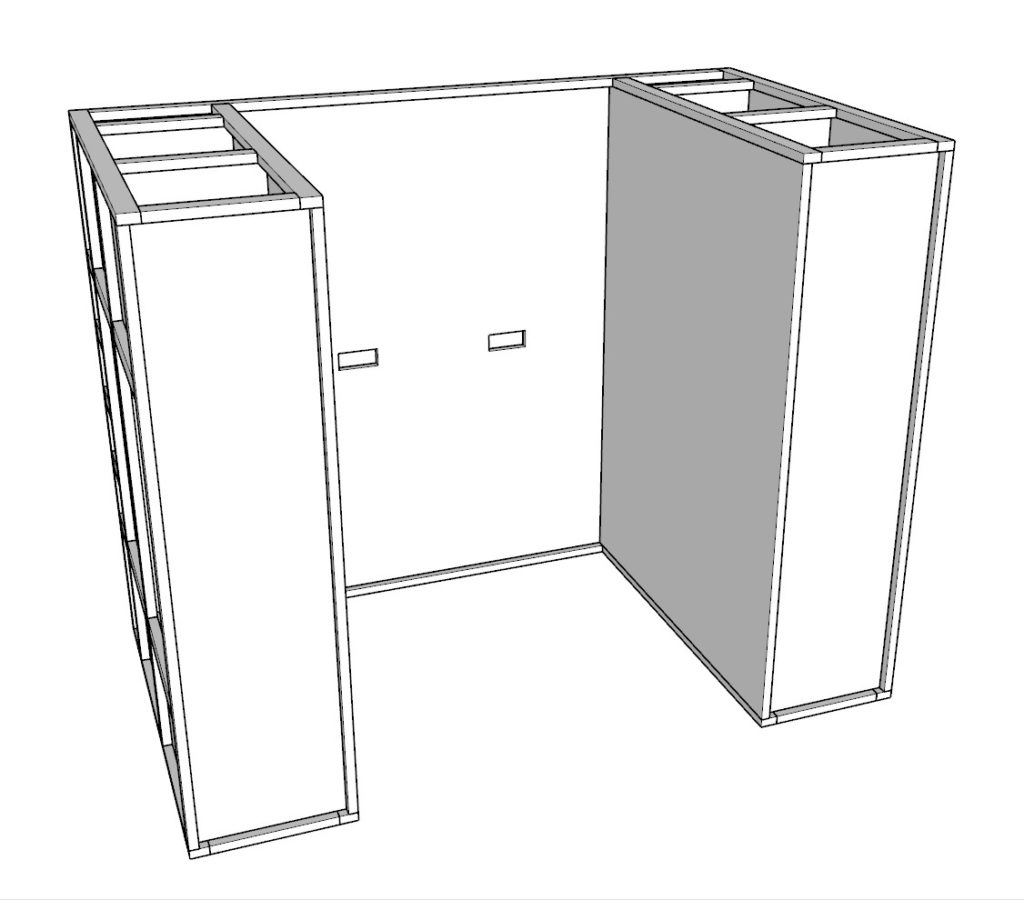
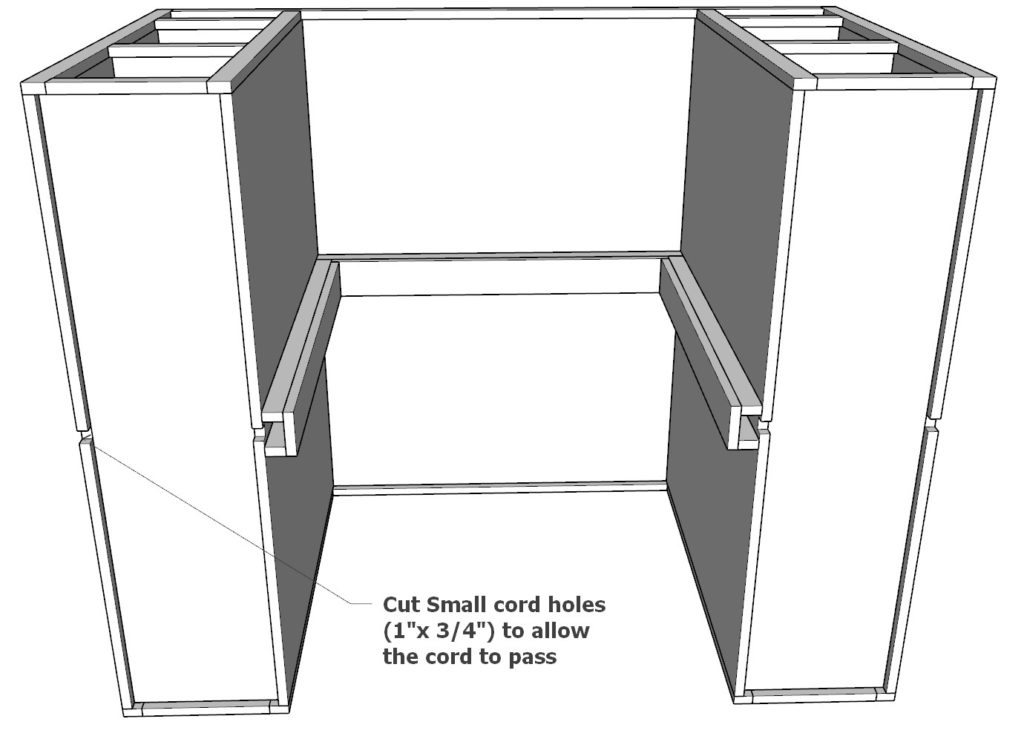
Turn the table on its side for easier access, and place the power cord housing in position. It’s advisable to run the power cord through the housing at this stage. Secure the housing to the table using glue and pin nails from all three sides.
- After securing the housing, check the power cord for any damage by tugging on it gently, ensuring it moves freely without resistance.
Lastly, create small cord holes measuring about 1″ x 3/4″ to allow the cord to pass through. Utilize a jigsaw, a small hand saw, or chisels to accomplish this task.
Tip: Always measure and double-check the dimensions before cutting or drilling to prevent any mistakes. Moreover, when nailing near the power cord, be cautious to avoid piercing or damaging the cord.

Step 8: Preparing and Finishing the Table
Before moving to the final assembly of your craft table, it’s crucial to apply finish to protect the wood and enhance its appearance. If you decide to paint or stain the table, this step should be performed outside the room to avoid fumes and mess. The components can then be brought into the room for final assembly once the finish is dry.
Staining Process:
Staining is a three-stage process that involves applying a pre-stain, stain, and then a clear coat to seal and protect the wood.
Pre-Stain Preparation:
- Start by sanding the wood to smooth out any rough edges or surfaces. It’s advisable to start with a coarse-grit sandpaper (like 80-grit) and then move to a finer grit (like 220-grit) for a smoother finish.
- Wipe down the wood with a tack cloth to remove any dust before proceeding.
Applying Pre-Stain:
- Pre-stain wood conditioner helps to ensure an even stain color. Apply it with a brush or cloth, allowing it to penetrate the wood for about 5 to 15 minutes.
- Wipe off any excess pre-stain using a clean cloth.
Staining:
- Stir the stain well before applying it with a brush or cloth in the direction of the grain.
- Allow the stain to penetrate the wood for about 5 to 15 minutes, then wipe off any excess stain.
Applying Clear Coat:
- Once the stain has dried (usually 24 hours), apply a clear coat like polyurethane to protect the wood and enhance its appearance.
- Follow the manufacturer’s instructions for application and drying times.
Painting Process:
Preparation:
- Similar to staining, begin by sanding the wood. Wipe it down with a tack cloth to remove any dust.
Priming:
- Apply a coat of primer to the wood to ensure better adhesion of paint and a more uniform color.
Painting:
- Once the primer is dry, apply your chosen paint color using a high-quality paintbrush or roller.
- Allow the paint to dry completely before assembling the table.
Additional Tips:
- Consider adding felt pads to the bottom of the table legs to protect your flooring and allow for easier movement.
- If you prefer a natural look, you can simply apply a clear wood finish or leave the wood untreated, though a finish will provide better protection.
- Always ensure proper ventilation when painting or staining, and follow the manufacturer’s safety instructions on all finishing products.
