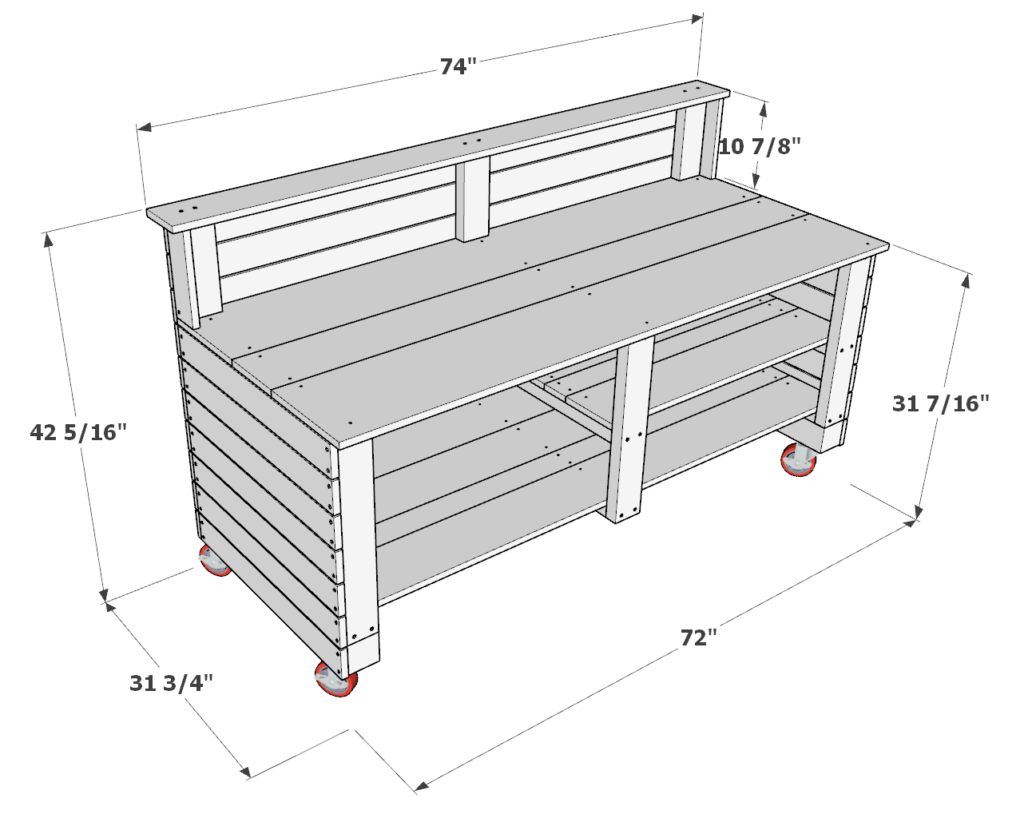
The DIY coffee bar
Sure, a coffee maker next to your other kitchen appliances gets the job done, but if you’re looking for an athletically pleasing and organized space to brew coffee then take a look at this ultimate DIY coffee bar design.
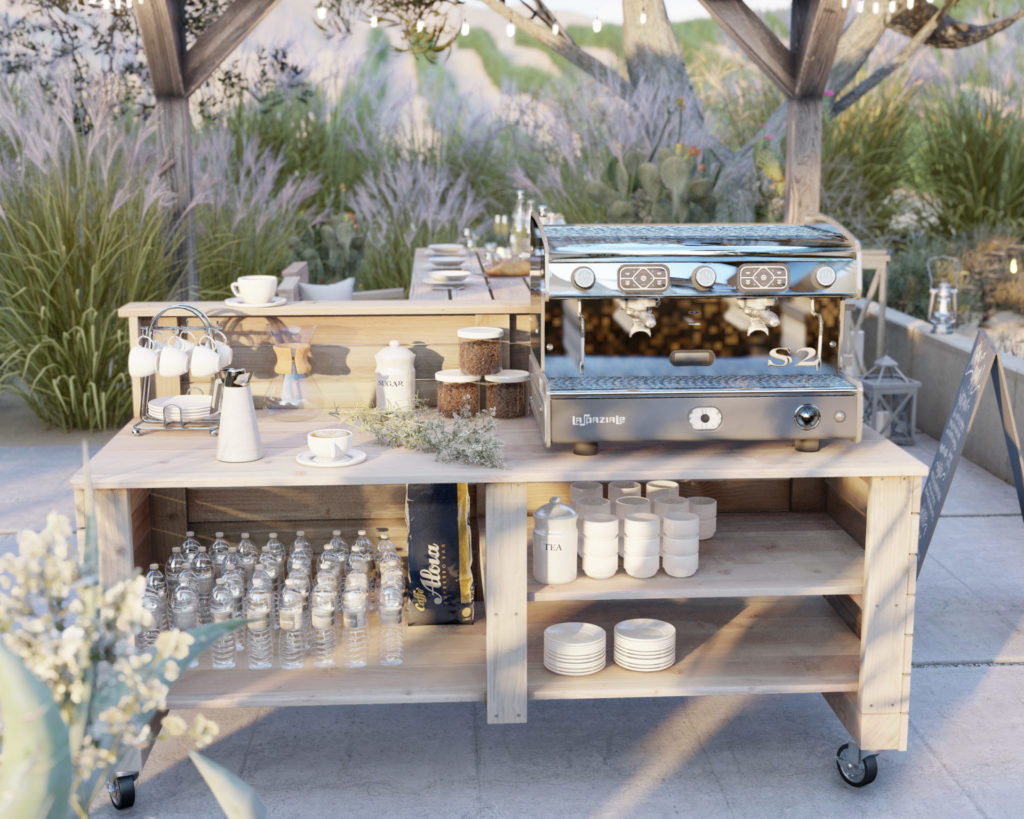
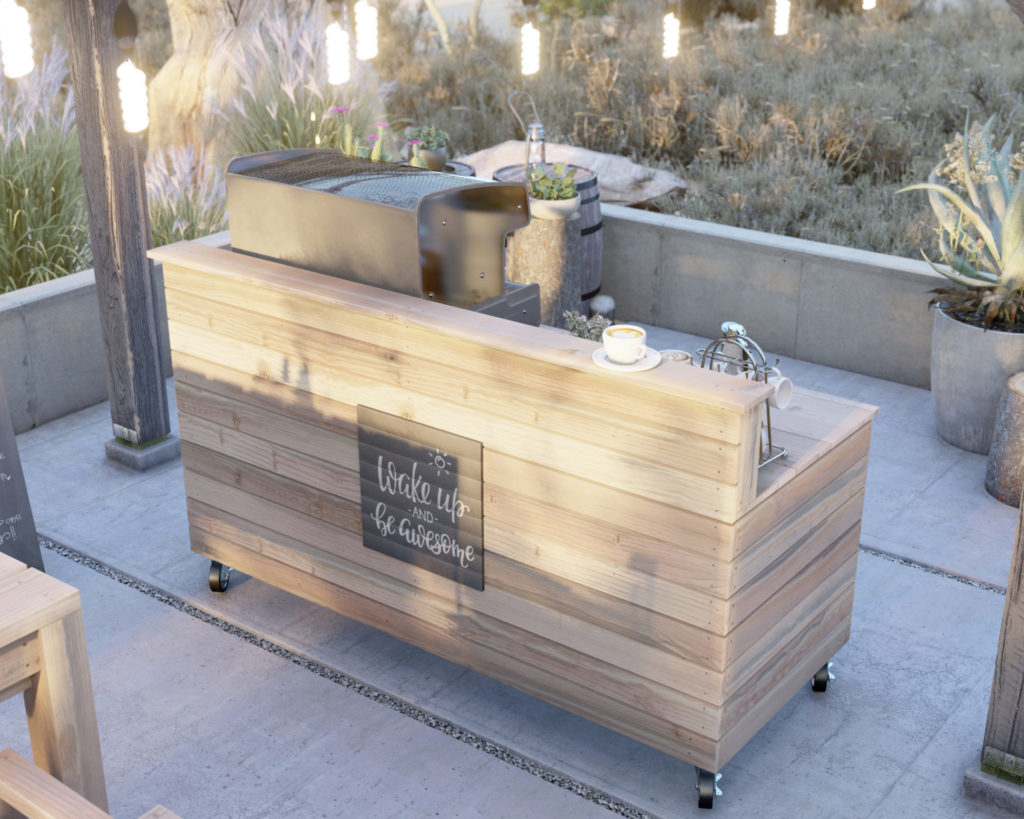
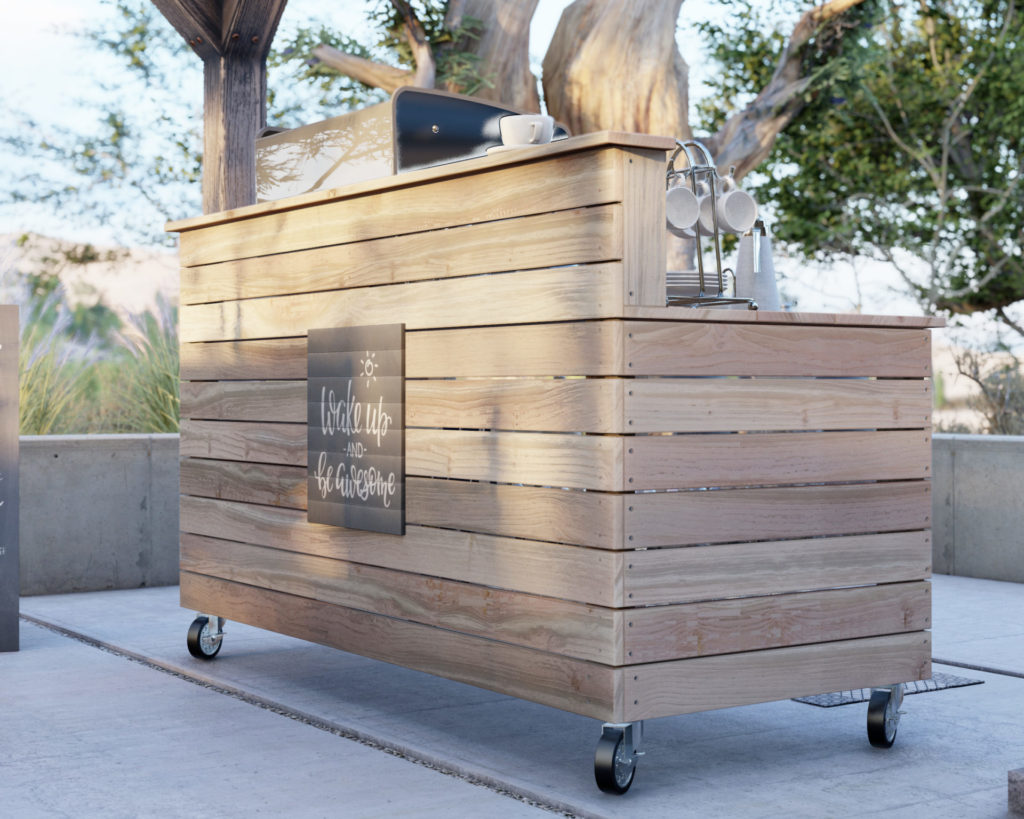
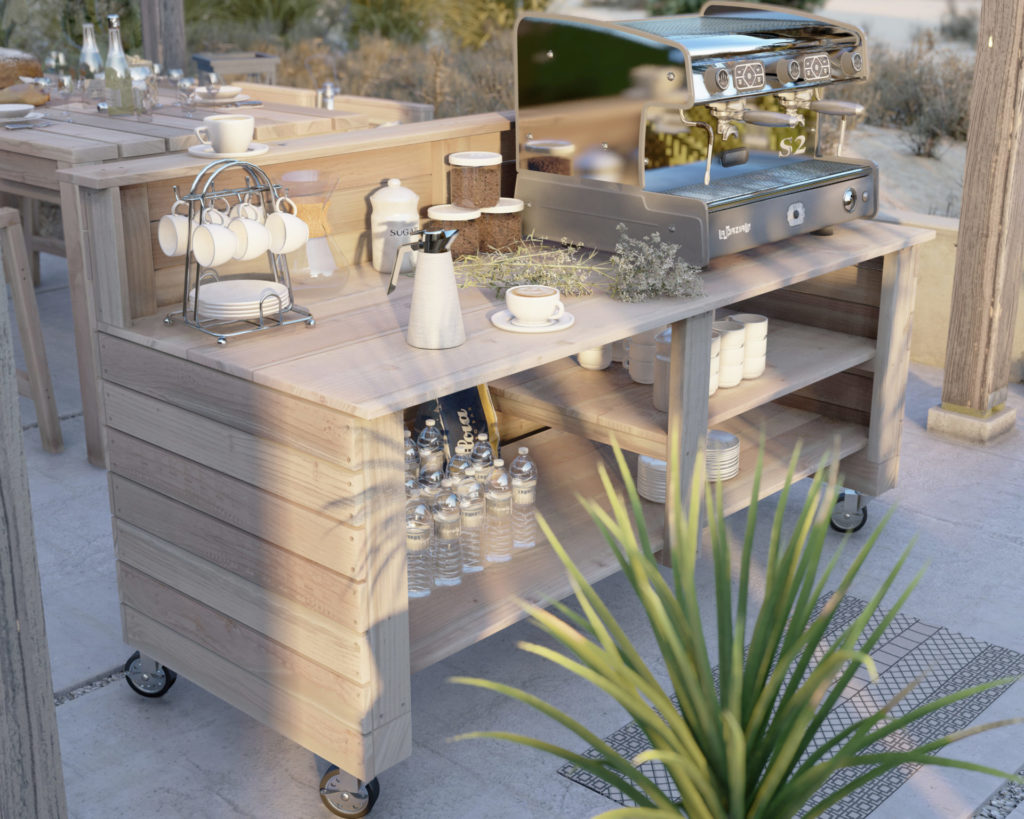
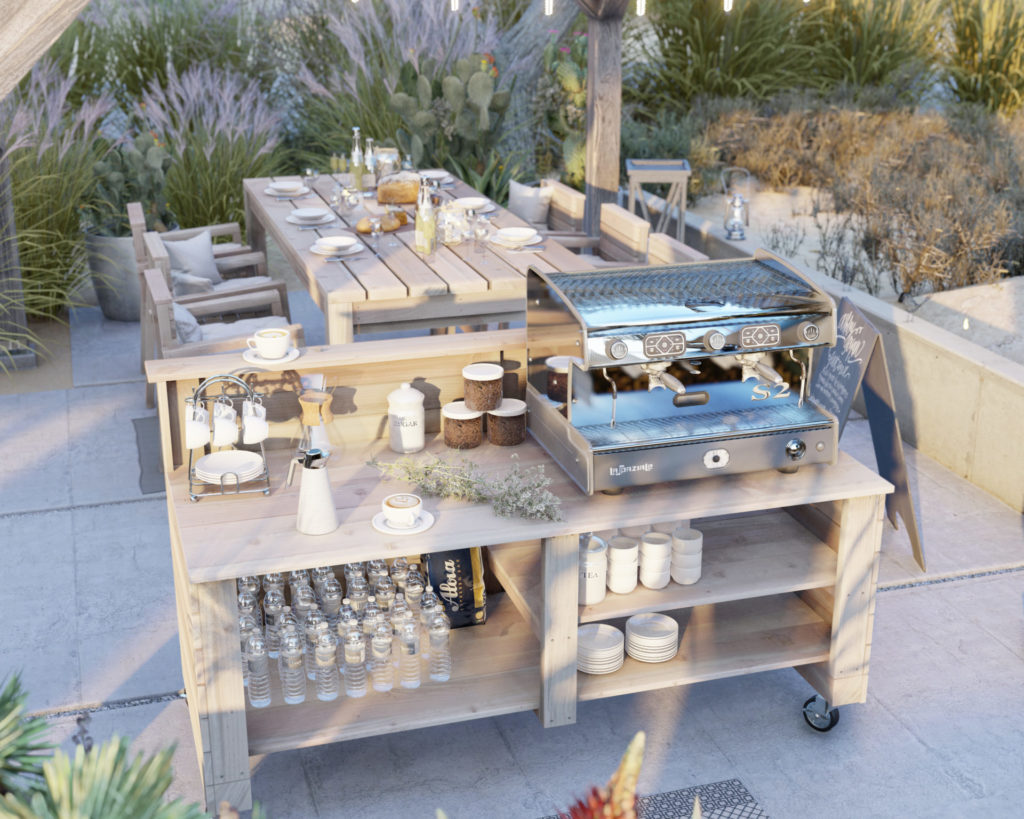
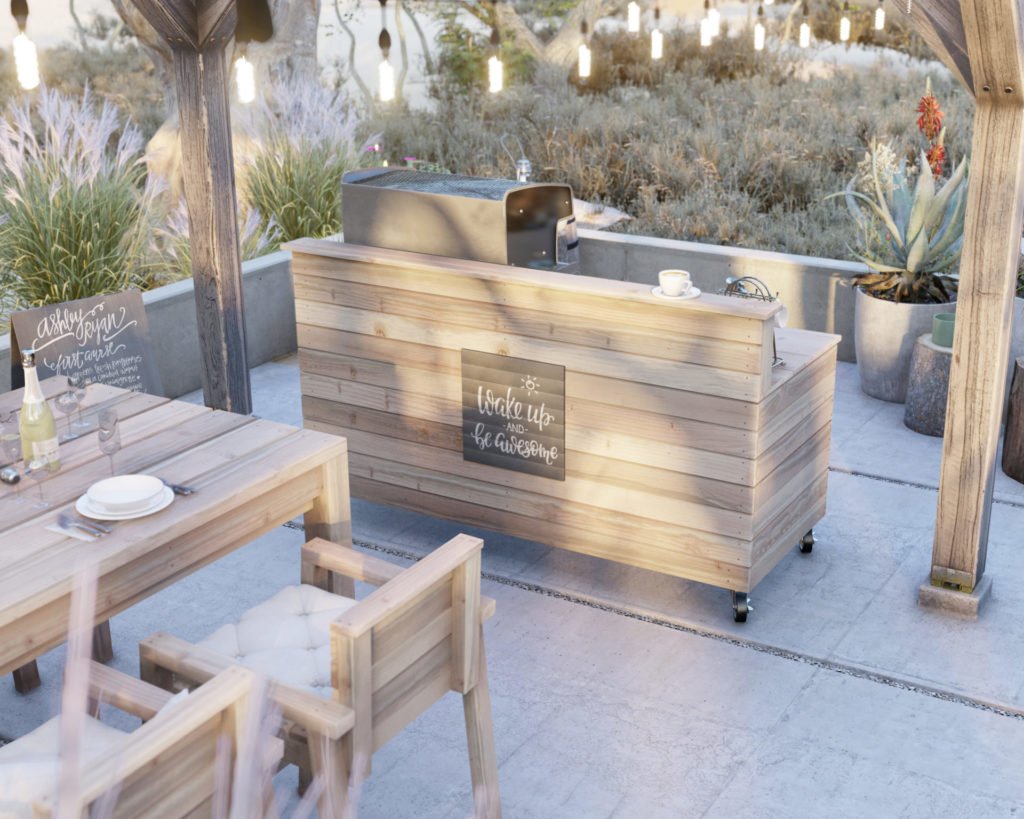
I love this DIY coffee bar design because it provides plenty of storage, fair amount of bar top working space, provides a serving area for drinks, and is mobile. Some of the amazing features of this design are further elaborated on below.
Why choose our design of the DIY coffee bar?
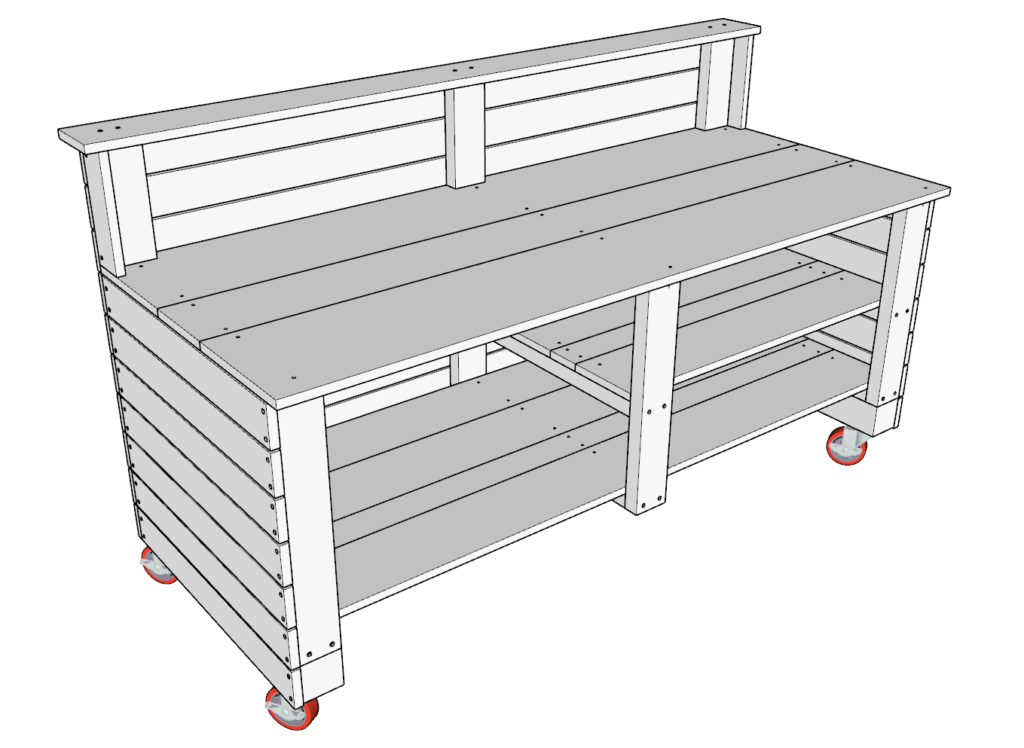
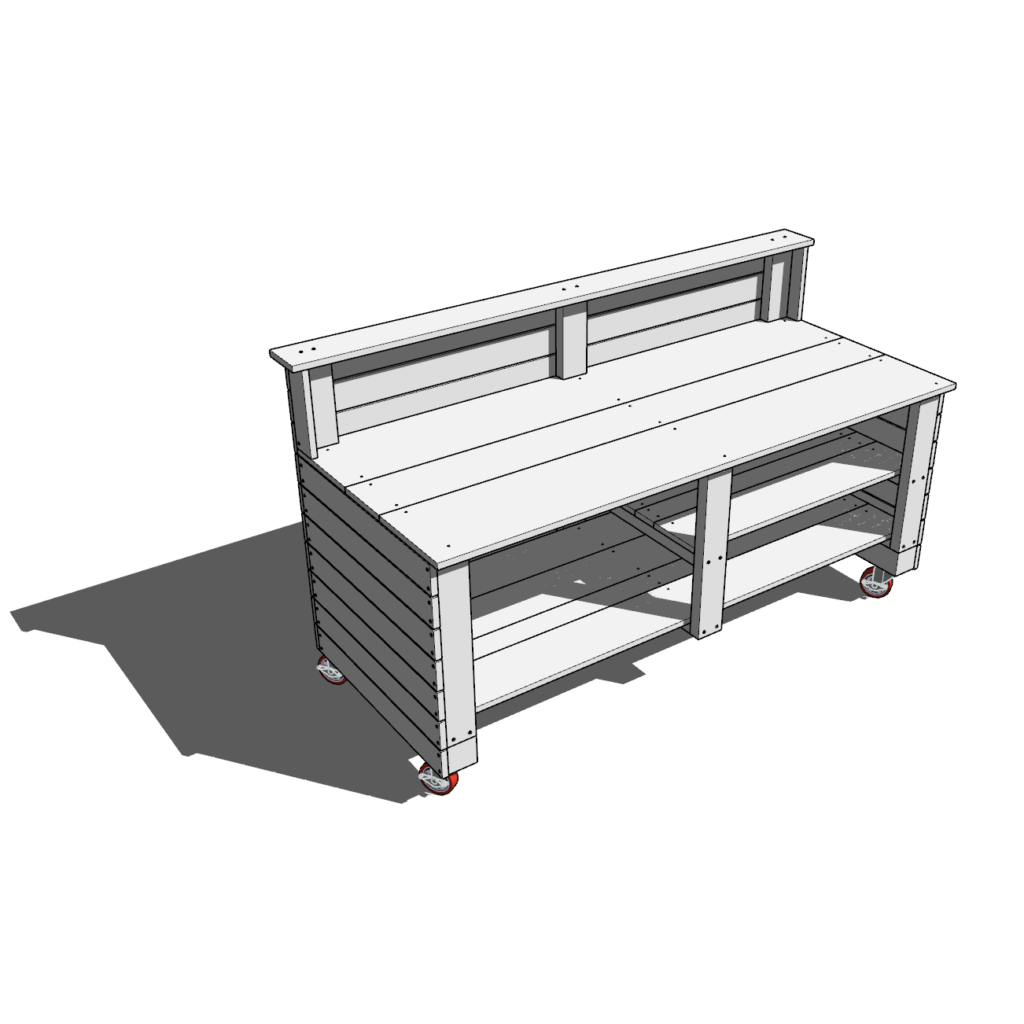
The storage shelves of the outdoor bar vary in size to accommodate small appliances, water storage, mugs, plates, bottles of flavored syrup, drink stirrers, beans, and other barista essentials.
The working counter of the outdoor bar provides a spacious area that can serve both as a working space and as storage for bar accessories. The area can accommodate even large espresso machines and serving trays for events. Coffee that is ready to be served can be placed on the serving counter.
This bar is on wheels, and this can be very useful if you have a limited space that needs to be reconfigured after an event. The wheels also allow for the outdoor bar to be transported to and from events, making the bar table more than just a home coffee bar and potentially a money maker.
How difficult is it to make this outdoor DIY coffee bar?
I think this would be a great project for anyone who is new to woodworking. The joints and cuts are simple and beginner friendly. If you follow the step-by-step instructions, you will be able to avoid mistakes, waste material, and in the end create the bar table without much hassle or worry.
What about the other furniture pieces I see in the pictures?
Besides this eye-catching coffee nook, you will also see other do-it-yourself items in the photos.
Plans for the full-size counter-height table and chairs can be found here.
Plans for the full-size standard-height table and chairs can be found here.
If you’re looking for bar stools, plans can be found here
Time to build
About 5 hours
Total cost of build
About $250
Skill level required
Beginner
Download the PDF plans
Outdoor coffee bar PDF plans
What is included in the PDF download?
- Easy to read step by step instructions
- Material list
- Tools needed
- Helpful links to materials and tools needed
Step-by-step instruction on building the coffee bar
Recommend tools and materials
- Saw (miter saw recommended for precision cuts)
- Drill
- Impact driver with bit for screws
- Sander
- wood countersink drill bit
- measuring tape
- pencil
- about 10lbs of 3.5 in long screws (highly recommend T25 Star Drive screws)
- about 15lbs of 1.5 in long screws (highly recommend T25 Star Drive screws)
- Wood glue
- Sand paper
- 4 inch caster wheels (Many other options work just fine as well)
- 5 inch screws for attaching the wheels and wheel support
lumber list and cut list
Available with purchase of PDF plans.
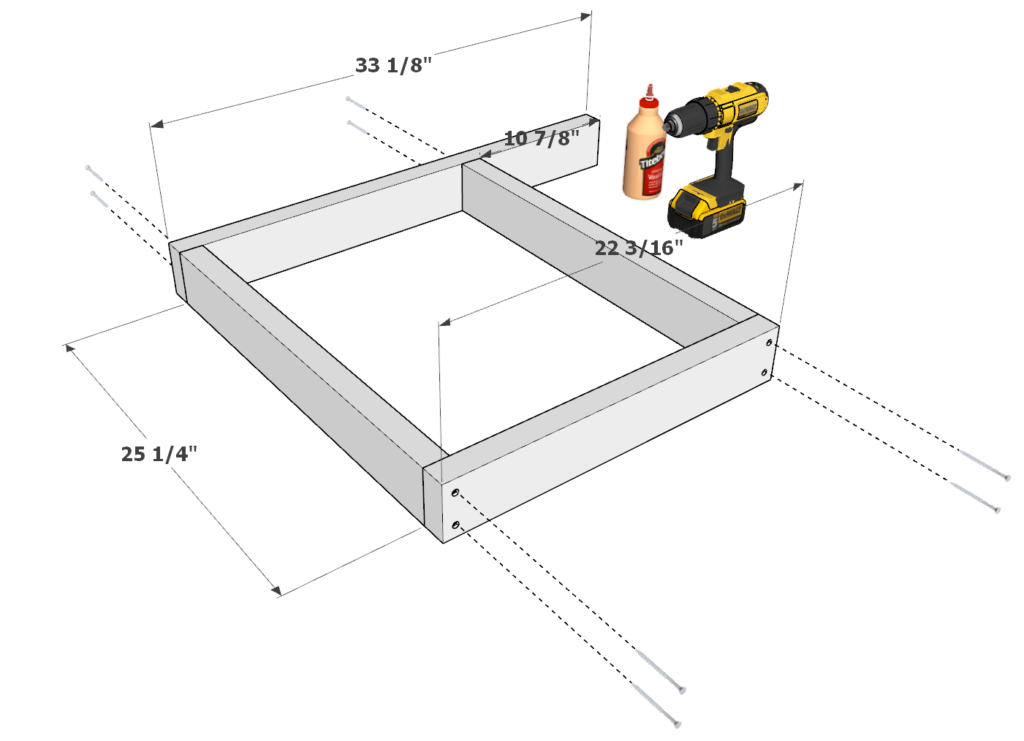
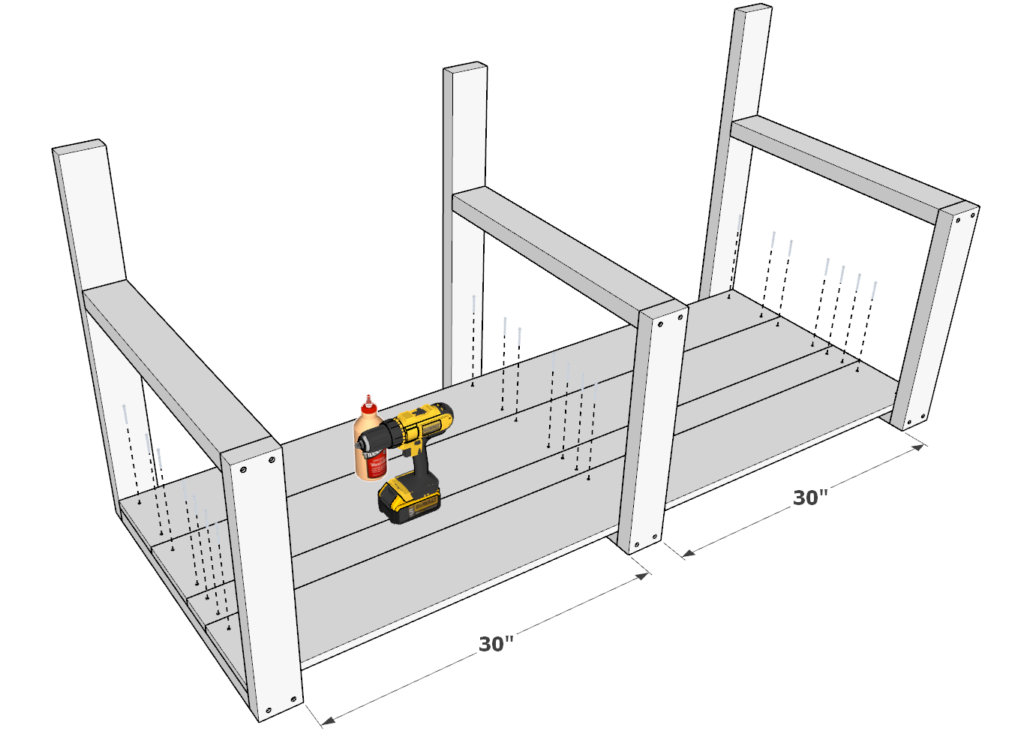
Step 1 (DIY coffee bar)
First, take two 25-1/4 inch 2×4 lumber pieces, one 22-3/16 inch 2×4 lumber pieces, and one 33-1/8 inch 2×4 lumber pieces and arrange them as shown below.
Add glue to the areas of the 2x4s that will be joined together, predrill (to prevent wood splitting), and add 3.5 inch screws.
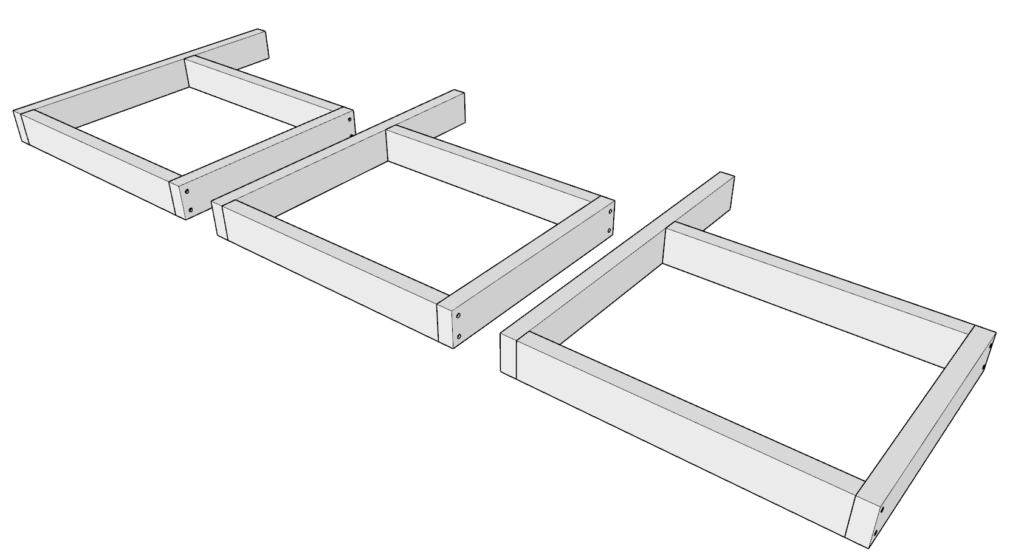
Repeat to make a total of three identical frame pieces.
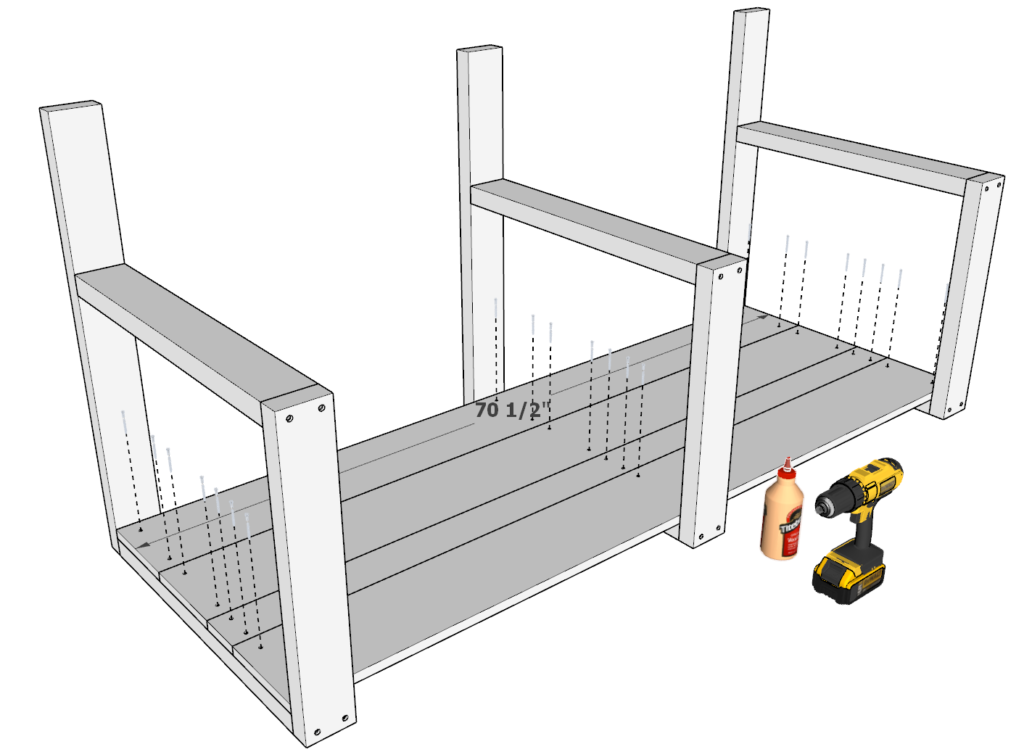
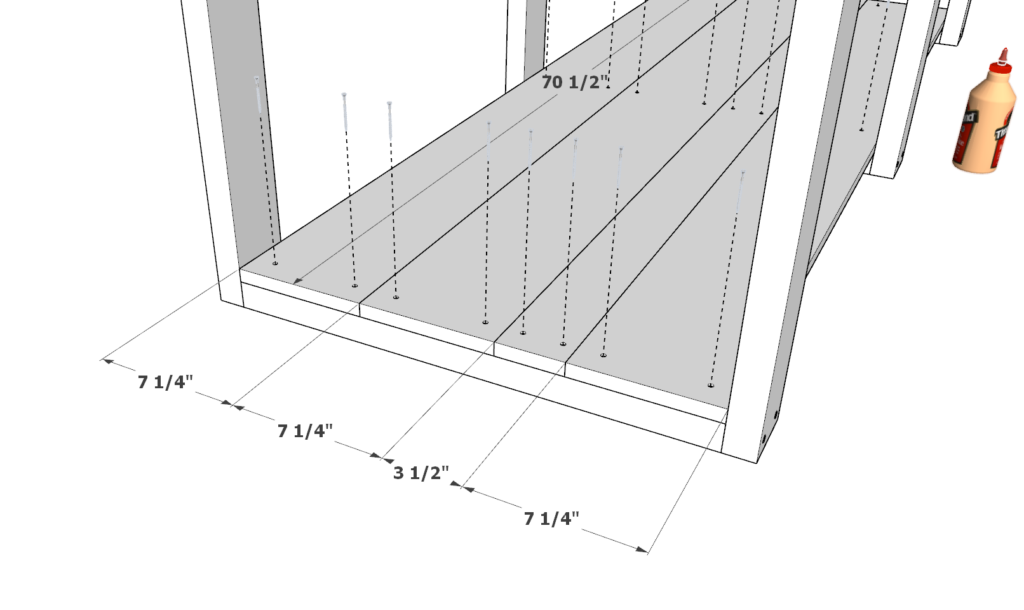
Step 2 (DIY coffee bar)
Next, take three 70-1/2 inch long 1×8 lumber pieces and one 78 inch long 1×4 lumber piece and arrange them as shown below. Add 1.5 inch long screws to and glue to secure the lumber to place. Predrill to prevent the wood from splitting.
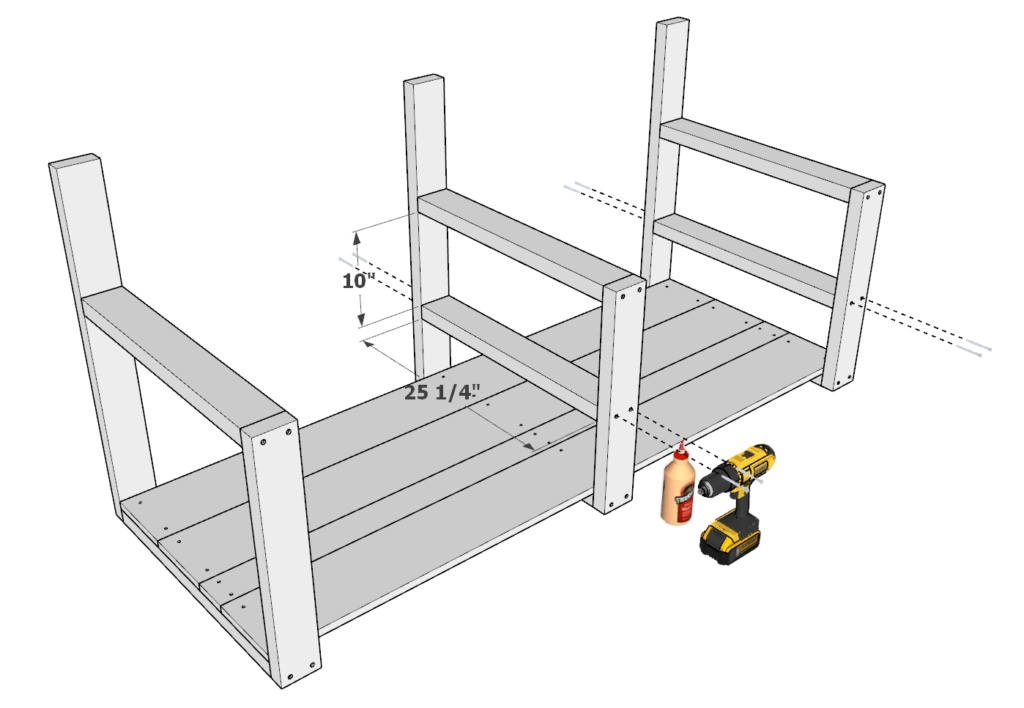
Step 3 (DIY coffee bar)
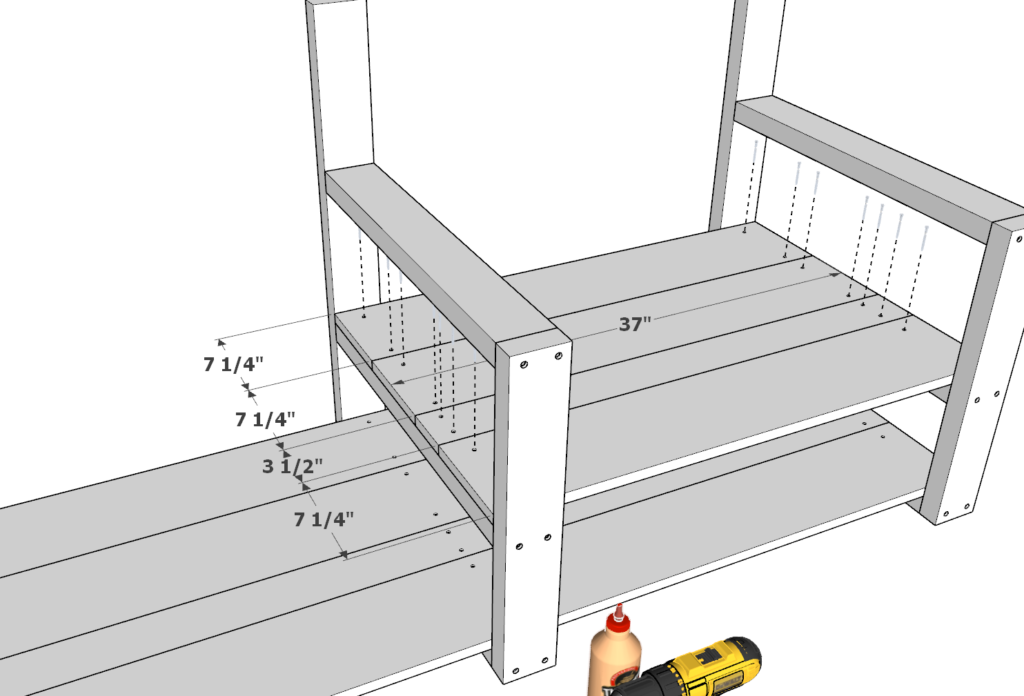
Next, take two 25-1/4 in 2×4 lumber pieces arranged them as shown below. The 10 inch spacing shown can be modified in order to accommodate small appliances, or specific item storage.
Add glue, predrill, and add 3.5 inch screws.
Next, add the 37 inch shelf decking pieces. You will need three 37 inch long 1×8 lumber pieces and one 37 inch long 1×4 lumber piece.
Add glue, predrill, and add 1.5 inch screws.
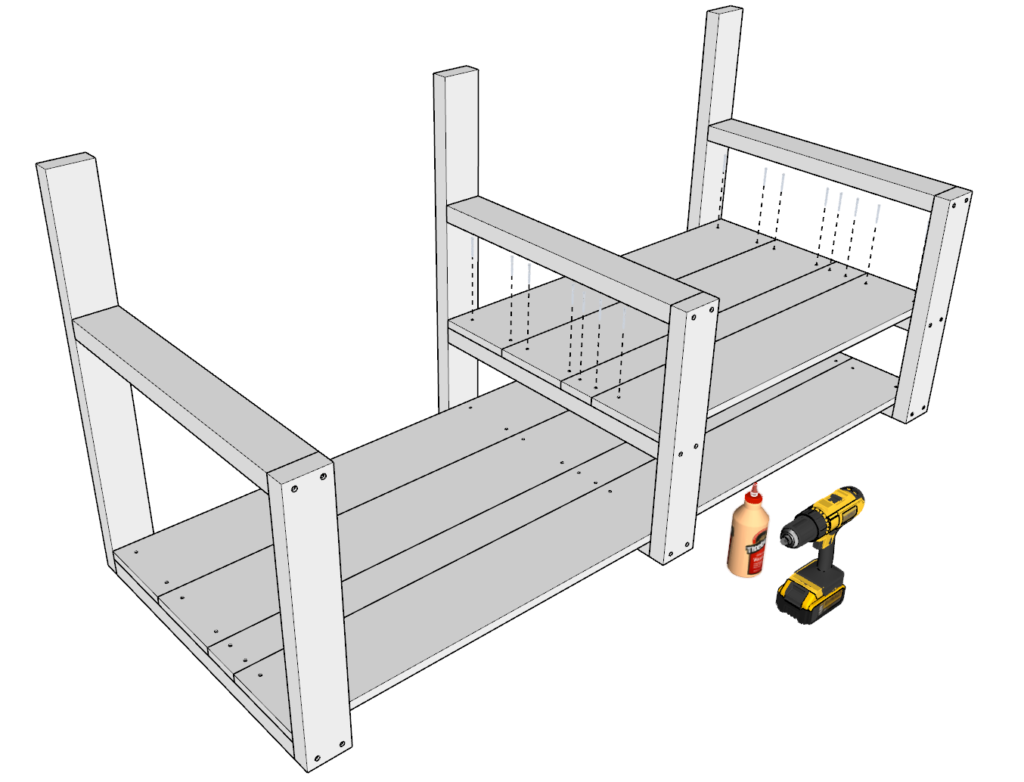
Step 4 (DIY coffee bar)
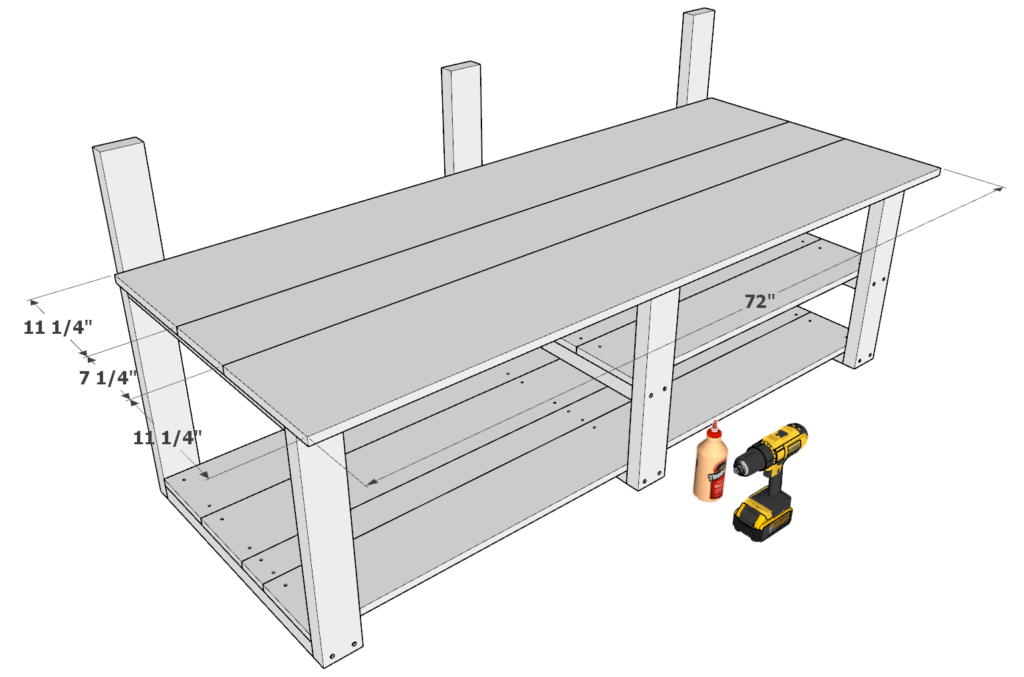
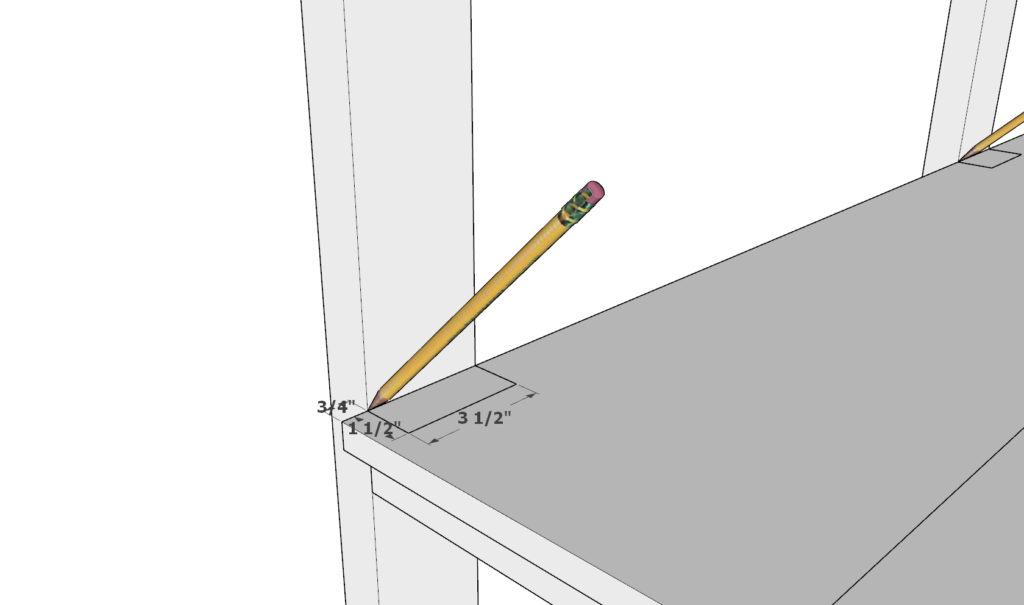
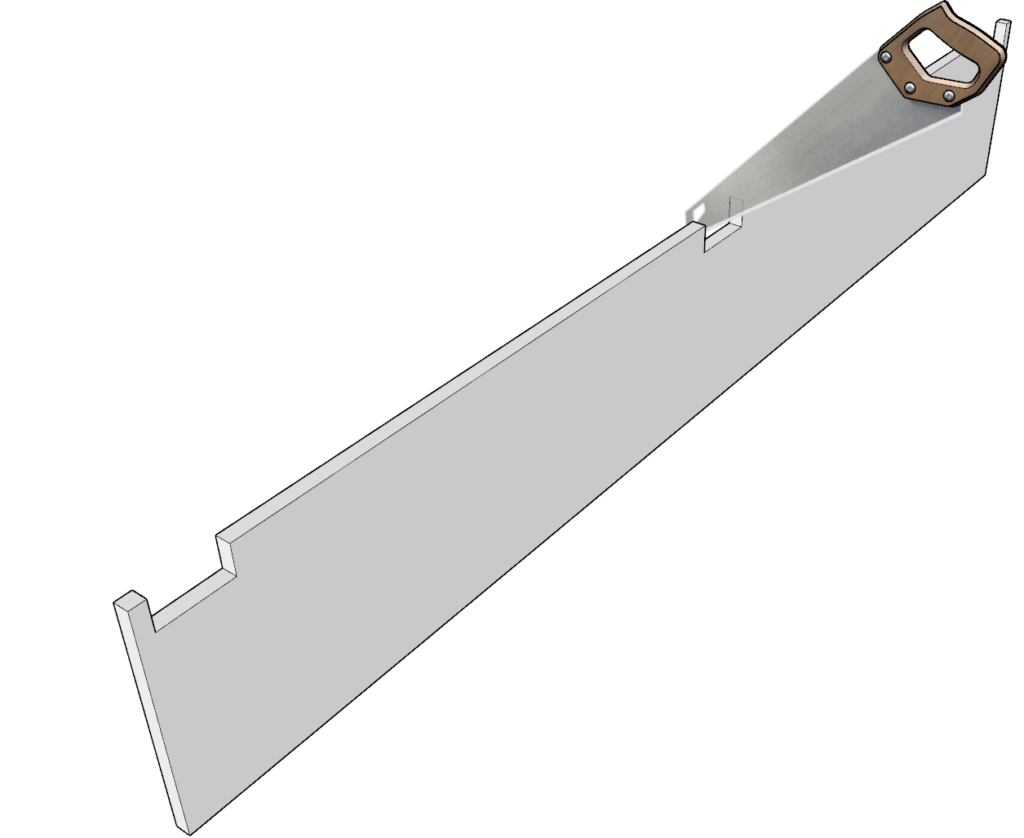
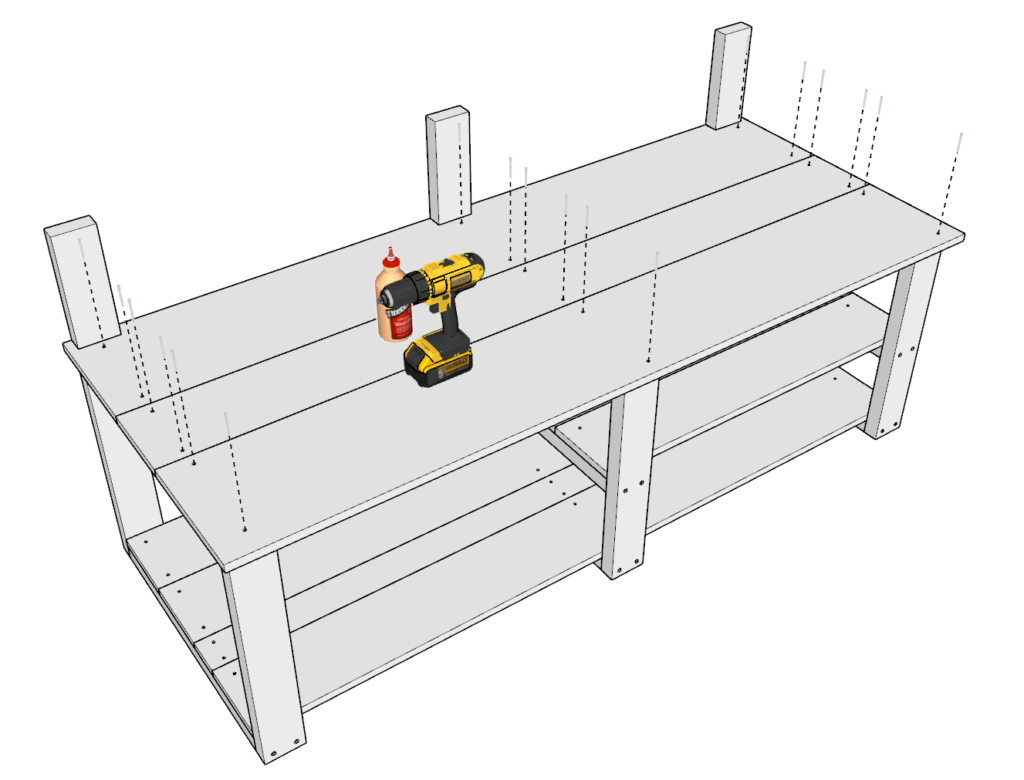
next, take two 72 inch 1×12 lumber pieces and one 72 inch 1×8 lumber pieces for the table top.
Lay them out as you see in the first picture. The board that will be making contact with the 2x4s needs to be cut in order to fit. Use a pencil to mark off the areas that need to be cut. Next, use a saw to take out the unwanted parts.
Tip: if one of the end pieces falls off during the cutting, just glue it back into place.
Next, predrill the board, add glue, and add 1.5 inch screws.
Step 5 (DIY coffee bar)
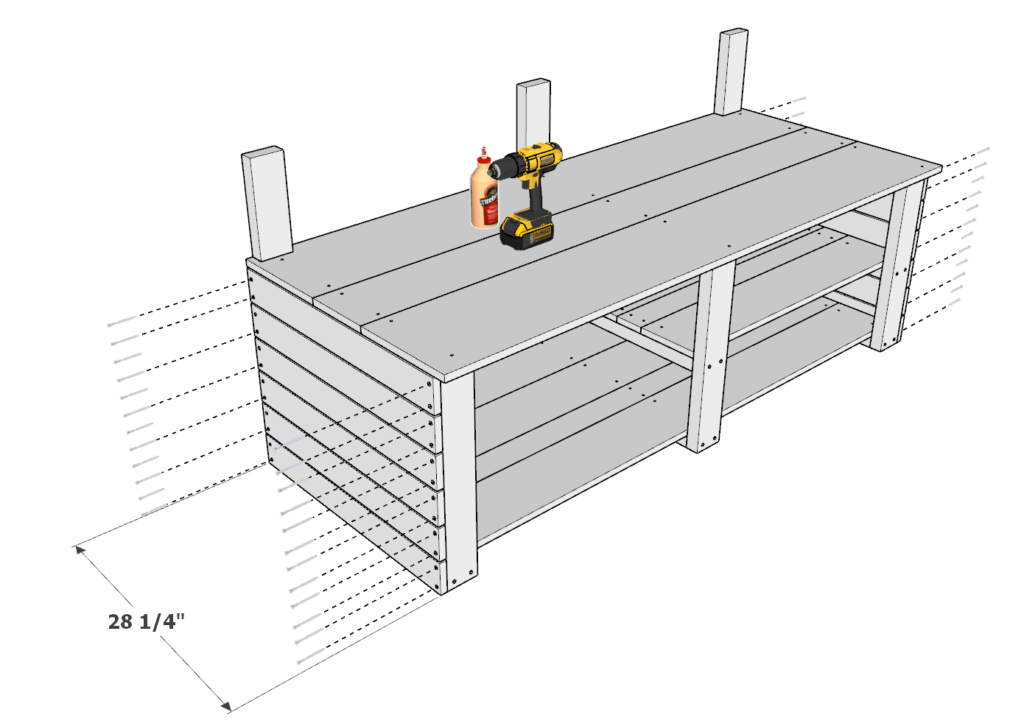
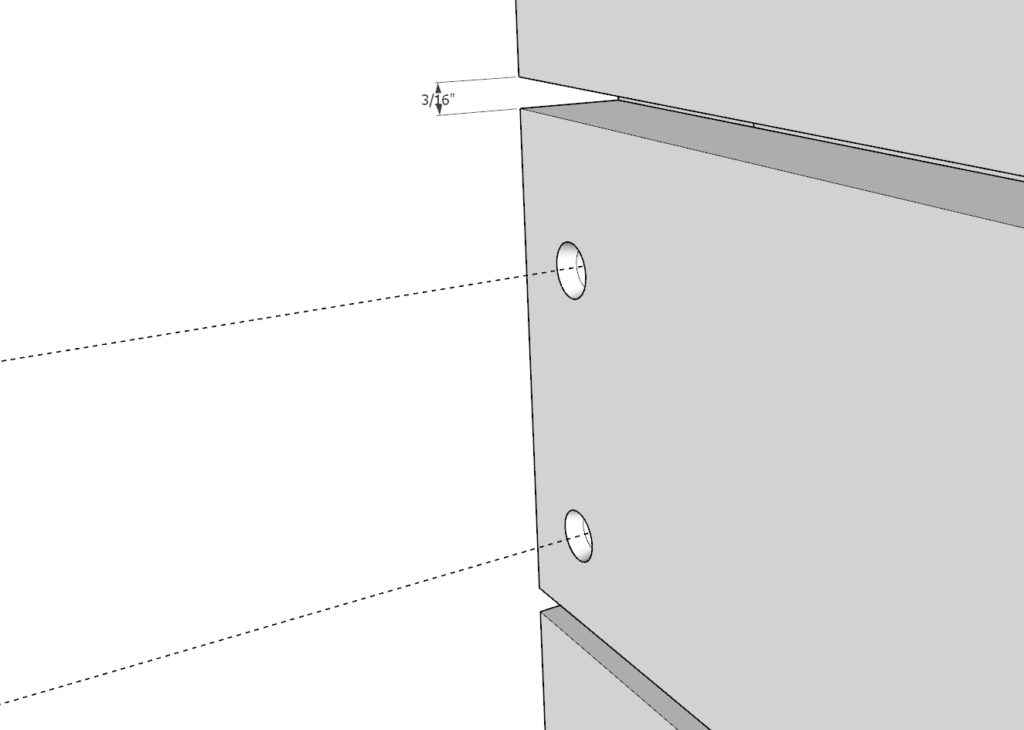
Next, add the siding pieces.
Take twelve 28-1/4 1×4 lumber pieces and add them to the coffee bar frame as shown below.
Separate the 1x4s with a 3/16 inch gap.
To space out the pieces evenly you can use a spacer. This spacer can be cut from a scrap piece of wood on hand.
As before, glue, predrill, and add 1.5 inch screws.
Step 6 (DIY coffee bar)
Next, add the siding pieces for the front of the coffee bar.
Take nine 72 inch 1×4 lumber pieces and add them to the coffee bar frame as shown below.
Separate the 1x4s with a 3/16 inch gap.
As before, glue, predrill, and add 1.5 inch screws.

Step 7 (DIY coffee bar)
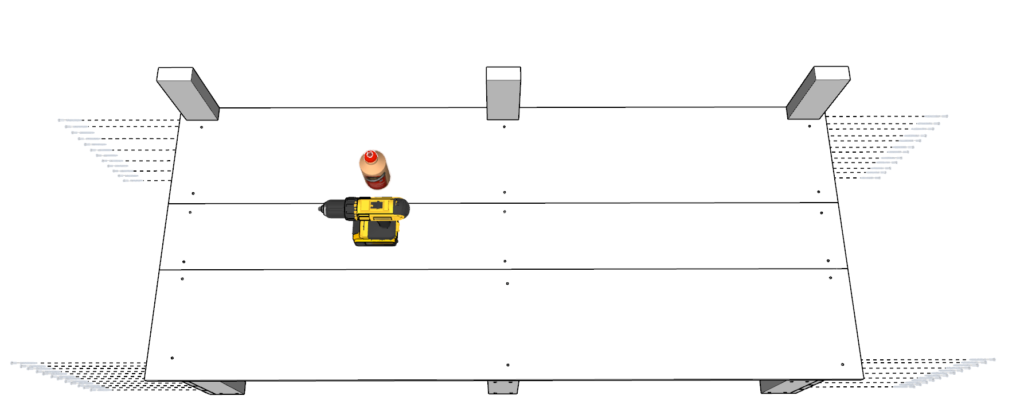
Next, add the Coffee bar serving counter top.
First, add two 10-1/8 inch 1×4 lumber pieces to enclose the sides of the bar as shown below. Predrill, add glue, and add 1.5 inch screws.
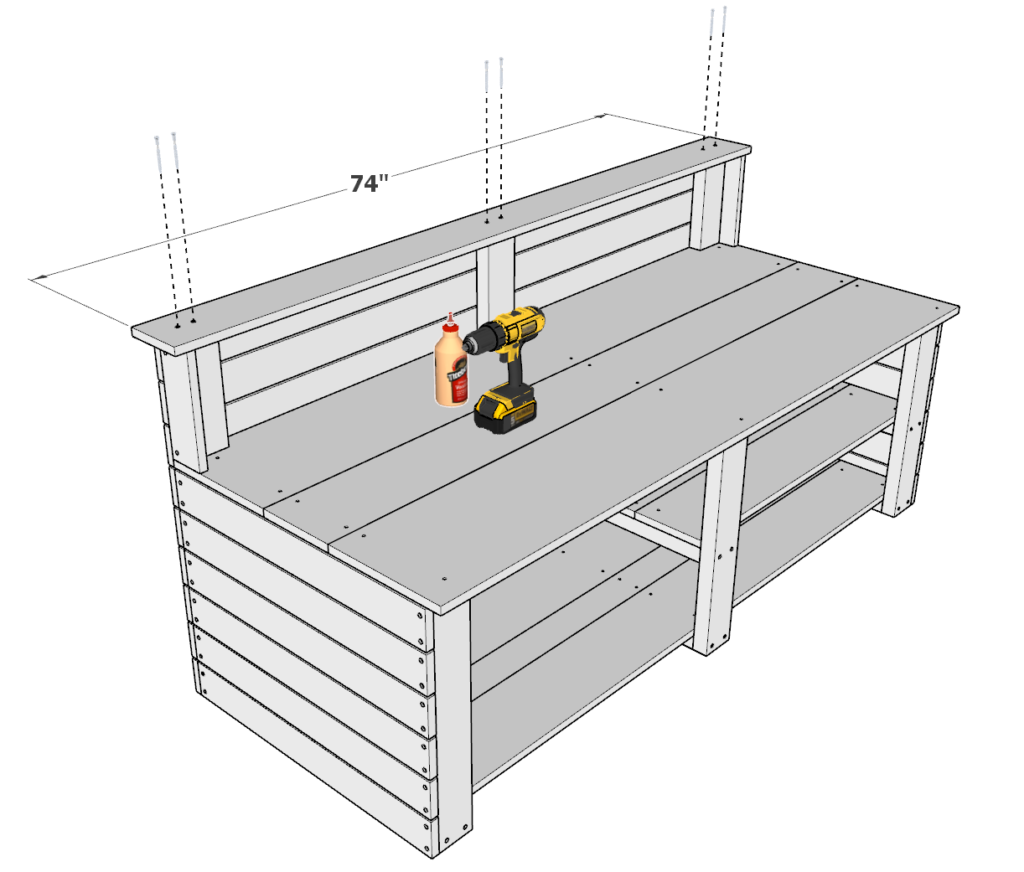
Next, add a 74 inch 1×6 lumber piece as the Coffee bar serving counter top. As before, add glue, predrill, and add 3.5 inch screws.
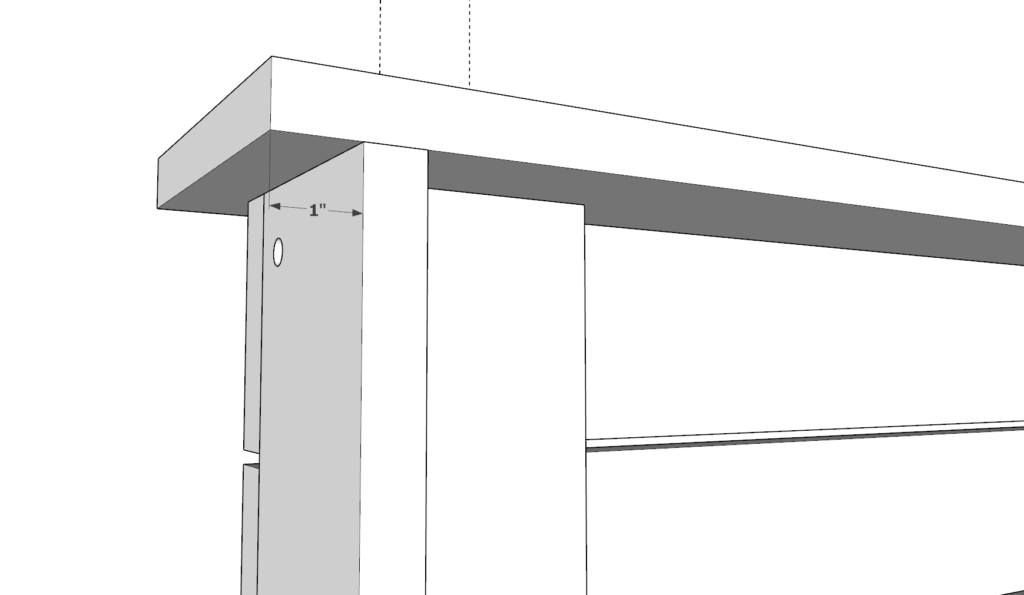
Make sure the serving counter top is correctly centered. It should have about a 1 inch overhang on the sides of the bar.

Step 8 (DIY coffee bar)
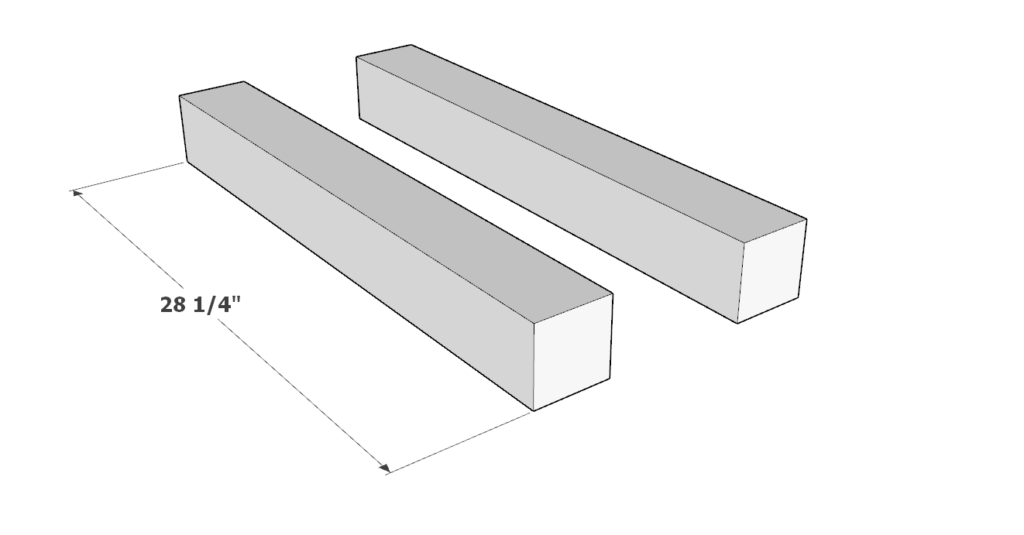
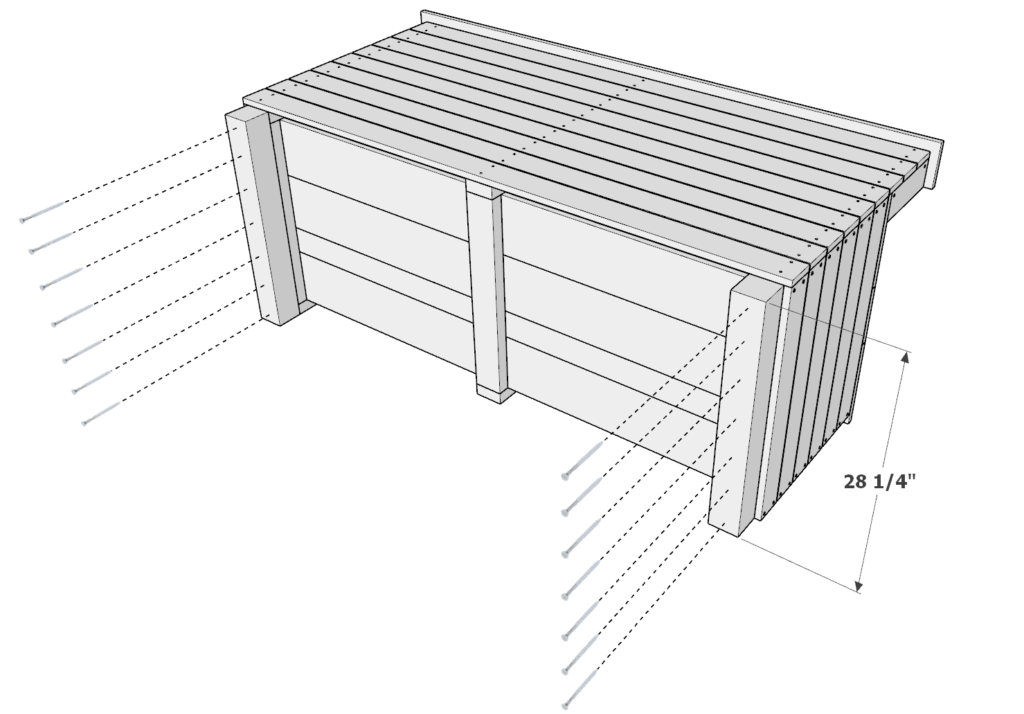
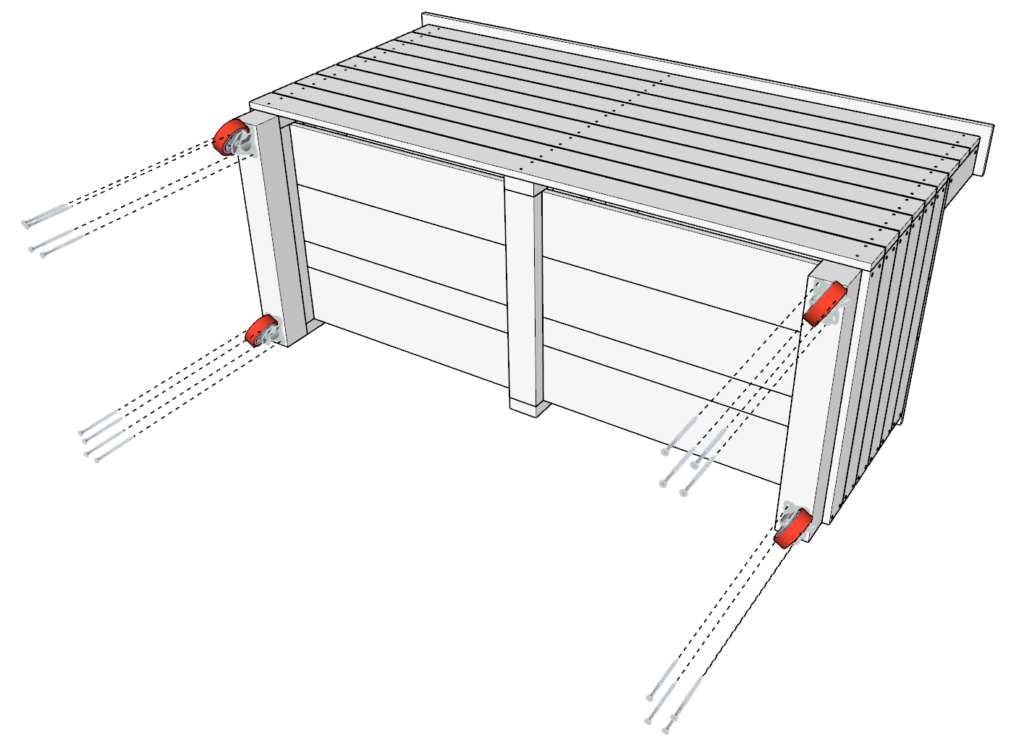
Next, take two 28-1/4 inch 4×4 lumber pieces and add them to the coffee bar as shown below.
Add glue, predrill (deeply), and add the large 5 inch screws (deeply but not so deep that they stick out on the other end).
Next, add the wheels and attach them using the 5 inch screws. Predrill deep and attach the wheels.
Lastly, ad the last set of siding. take one 72 inch 1×4 lumber piece and tow 28-1/4 inch 1×4 lumber pieces and arrange them as shown below. Space them 3/16 inch as before. Add glue, predrill, and add 1.5 inch screws.
Step 9 (DIY coffee bar)
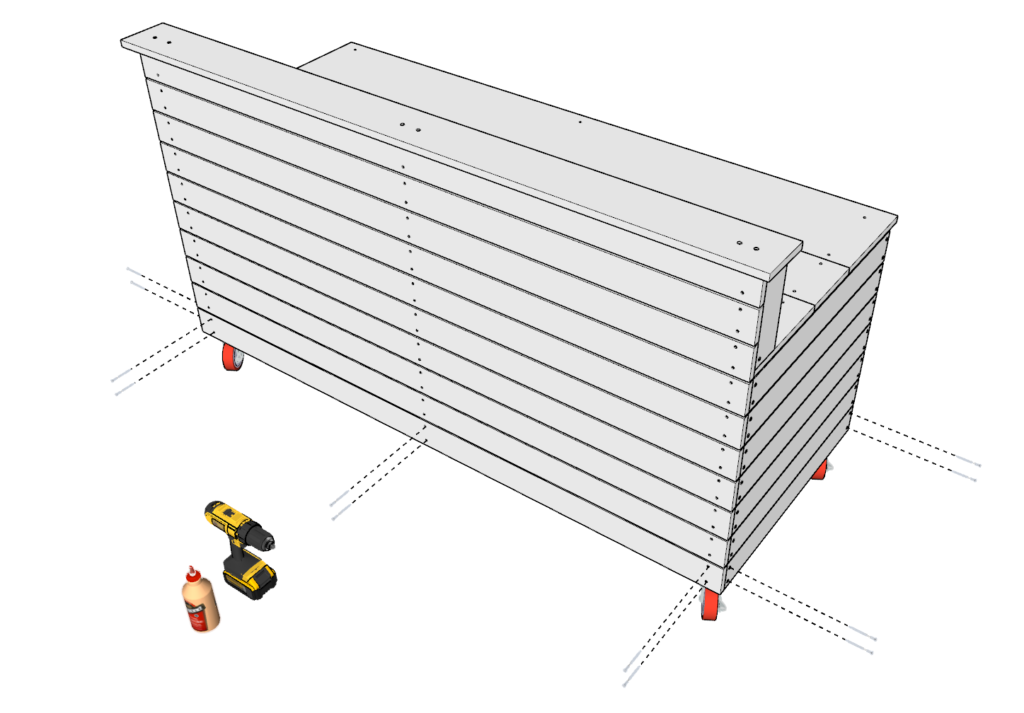
Lastly, sand down the whole coffee bar. I use an orbital sander to speed up the process
I use a rough 80 grit paper first and then finish it with a 220 grit paper.
Filling in the holes is optional.
At this point it is ready to be stained or painted!