What makes this DIY barstool design special?
This build is defiantly one that I am excited about and had a great time working on. These barstools are pretty and stylish, and it’s my pleasure to share the plans with you!
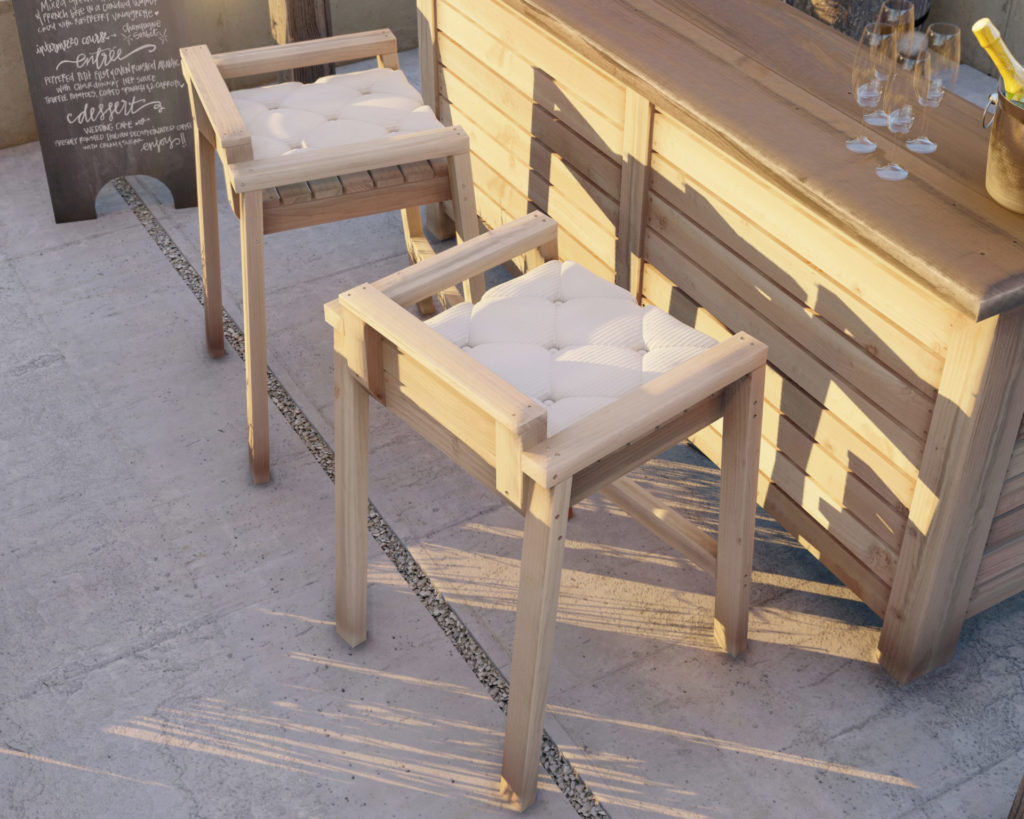
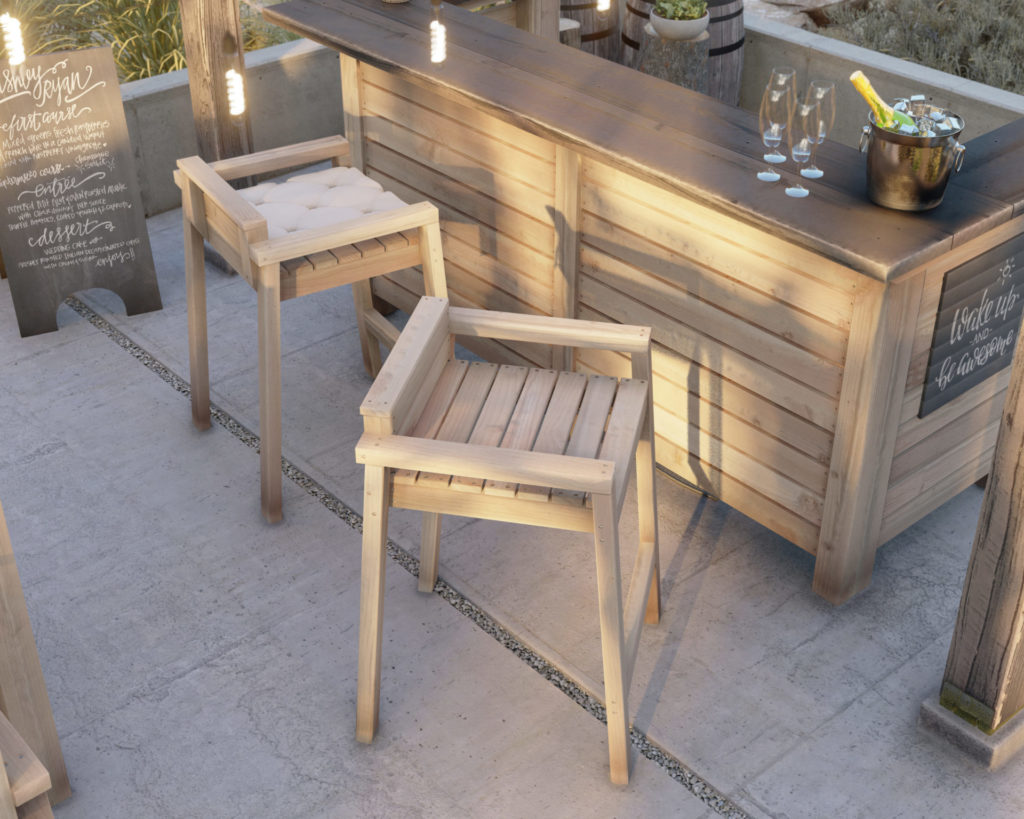
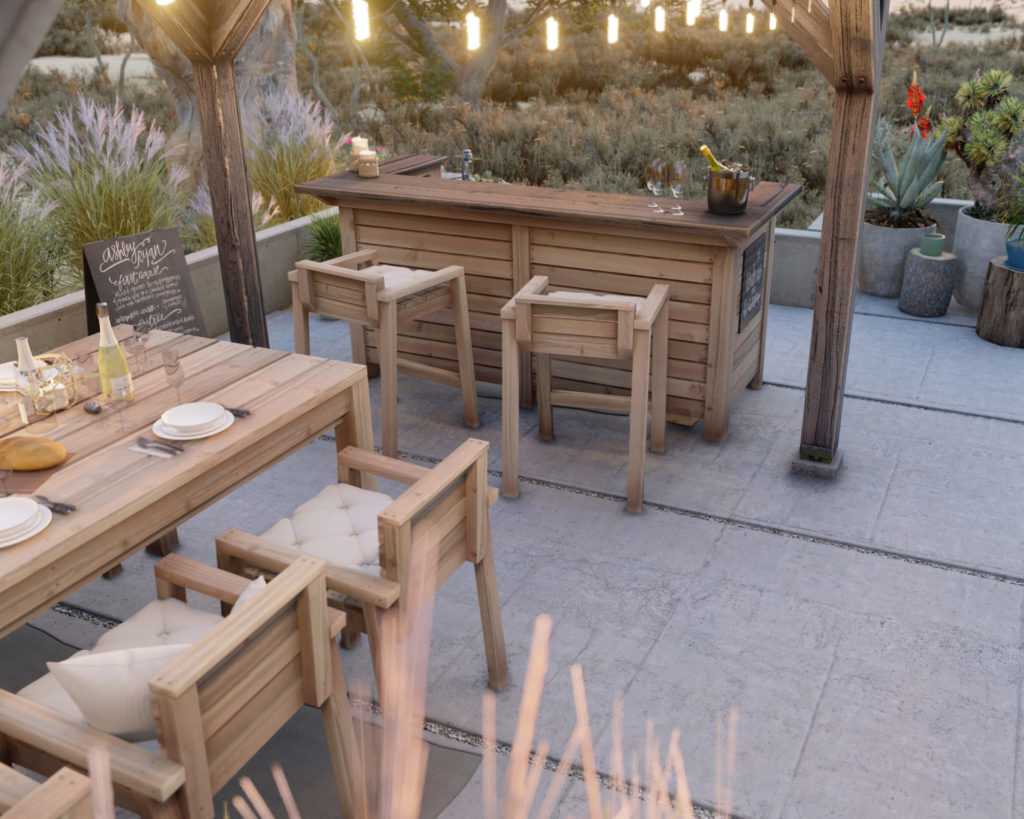
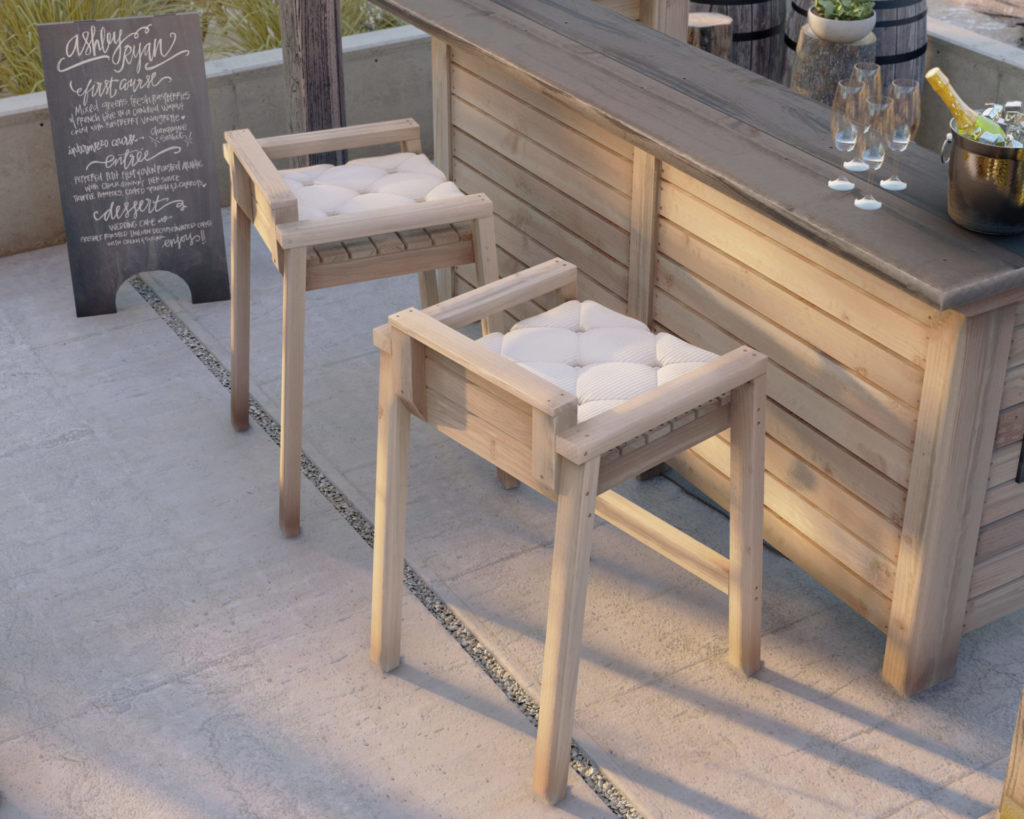
First, the barstools are a great addition to the outdoor bar and the counter-height dining table and chair set. Each piece works well together to give an overall cohesive and natural flow to the outdoor entertaining area.
Next, when designing the low back bar stool used the same backrest and seating board spacing as for the dining chairs in this set. The slats are also part of the bar and table design. These not only allow for rainwater to drain but also provide a unifying factor to the set.
Specifications of the DIY barstool.
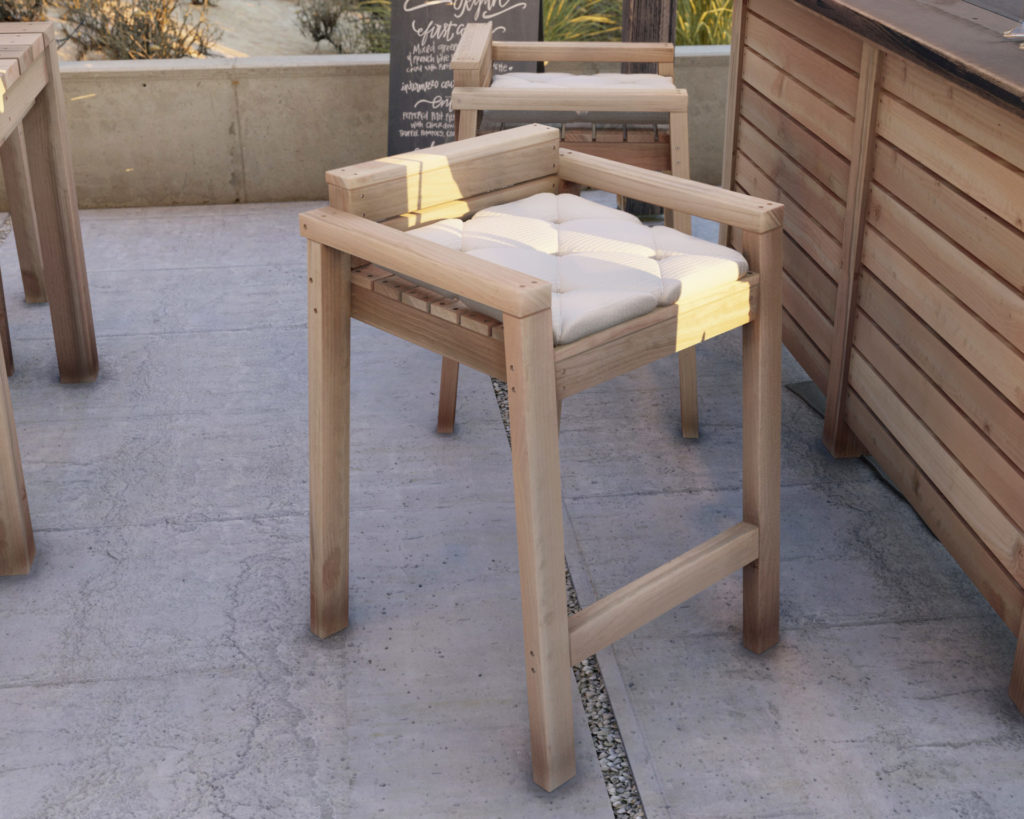
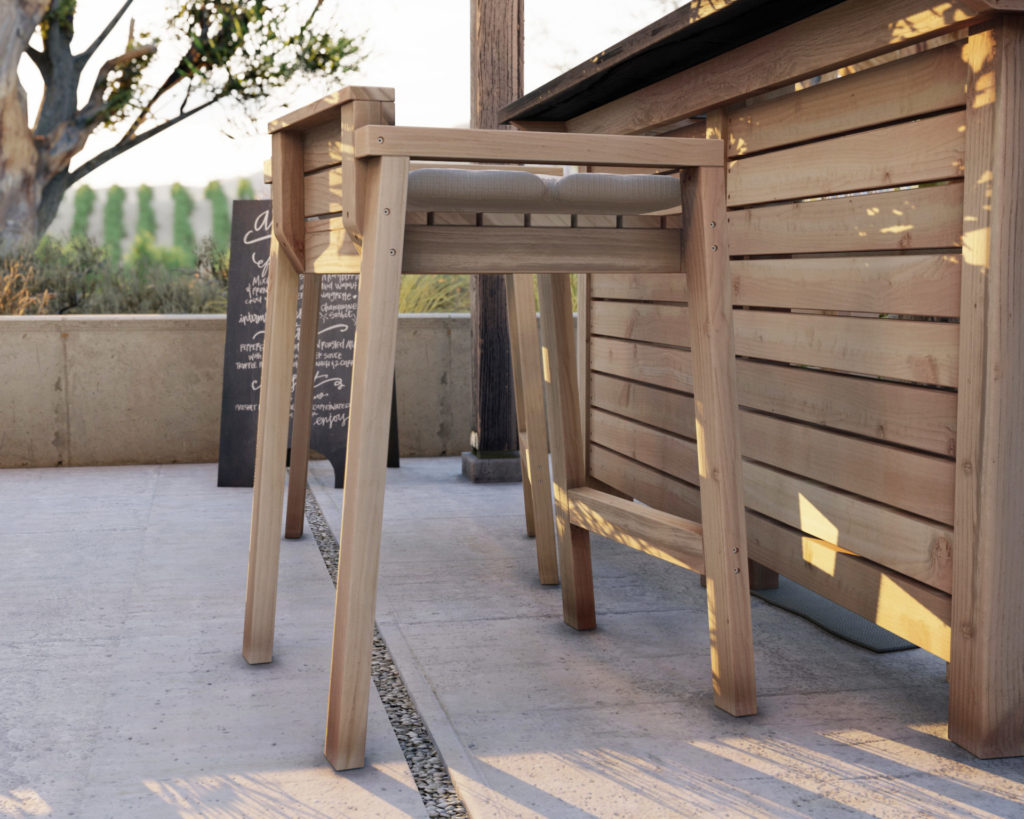
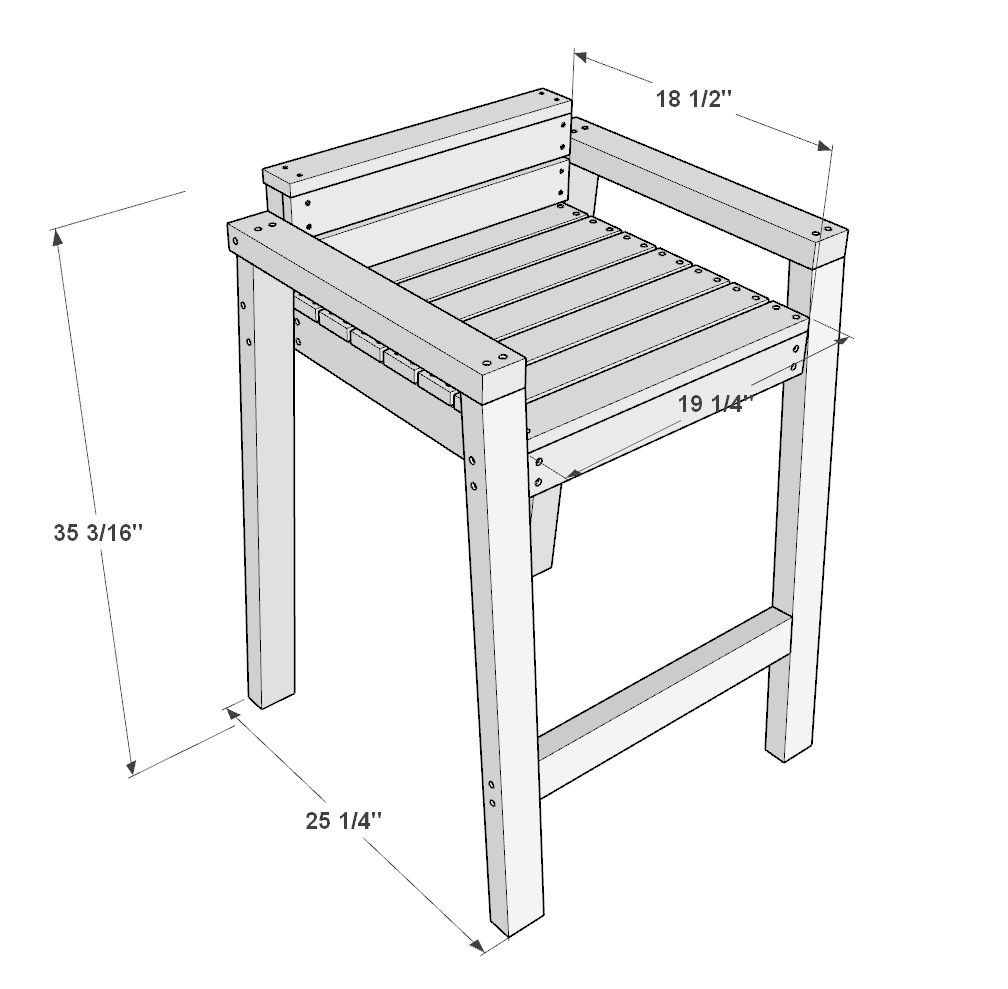
I have seen many DIY plans for barstools with sleight legs. This may work great for some, but for some it may be unsafe. The legs of this wooden bar stool are at a slight 5-degree angle to ensure safety. The higher the chair, the morse possibility of it toppling over. This design decreased the chance of a child, or unsteady adult falling from such a height, making your bar area safer.
Unlike my other counter-height, and standard height dining chairs, the barstool chairs seating platform is horizontal and laveered with the ground. This is to ensure a more comfortable sitting experience. A person sitting can easily get on and off the chair without sinking into the chair. One can sit while maintaining the bodies center of gravity directly underneath them without shifting it back.
These bar stools can be even more inviting and comfy if you throw on some seating pads. The seating platform is about 18 inches x 19 inches. The seating pad doesn’t need to be that exact size.
The DIY barstools indoors?
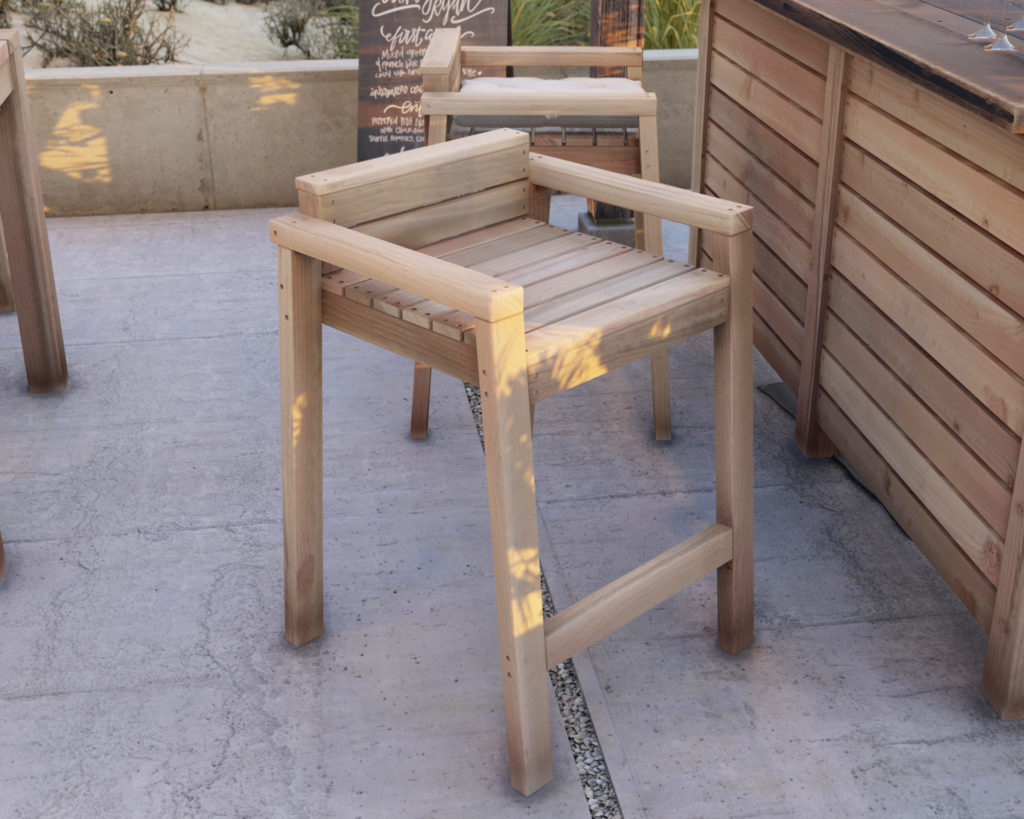
Lots of homes these days incorporate natural wood into their kitchen and dining areas. These would look great with white décor and a simple and cozy color pallet. Depending on your design preferences, these barstools can look both modern/minimalistic or warm, relaxing, and have that farmhouse charm so many incorporate into their homes.
I feel like these DIY bar stools can work great indoors as well as outdoor. Because barstools can be expensive, If you have a kitchen island, or a counter that is bar height, you might want to consider building DIY bar stools instead of buying. Even though this barstool design looks like a million bucks, the materials used in this build are cheap and readily available.
I’m excited! Who can build these barstools?
I would recommend this DIY project for any beginner to woodworking. The angles, cuts, joints, and materials used are simple and easy to implement. I purposefully try to make my plans easy and my step-by-step instructions simple to follow so that anyone who is willing to try can build a beautiful, affordable, and relaxing backyard, patio, kitchen, and deck entertaining spaces.
Beginners to woodworking don’t have to experiment or go through trial and error before making a chair. The plans include measurements, diagrams, material list, tool list, and more to ensure a proper, quick, and simple build.
What about the other furniture pieces I see in the pictures?
Time to build
About 2 hours per chair
Total cost of build
About $50 per chair
Skill level required
Beginner
Download the PDF plans
Outdoor bar stool PDF plans
What is included in the PDF download?
- Easy to read step by step instructions
- Material list
- Tools needed
- Helpful links to materials and tools needed
Step-by-step instruction on building the DIY outdoor bar
Recommend tools
- Saw (miter saw recommended for precision cuts)
- Drill
- Impact driver with bit for screws
- Sander
- wood countersink drill bit
- measuring tape
Material list and cut list
Available with purchase of PDF plans.
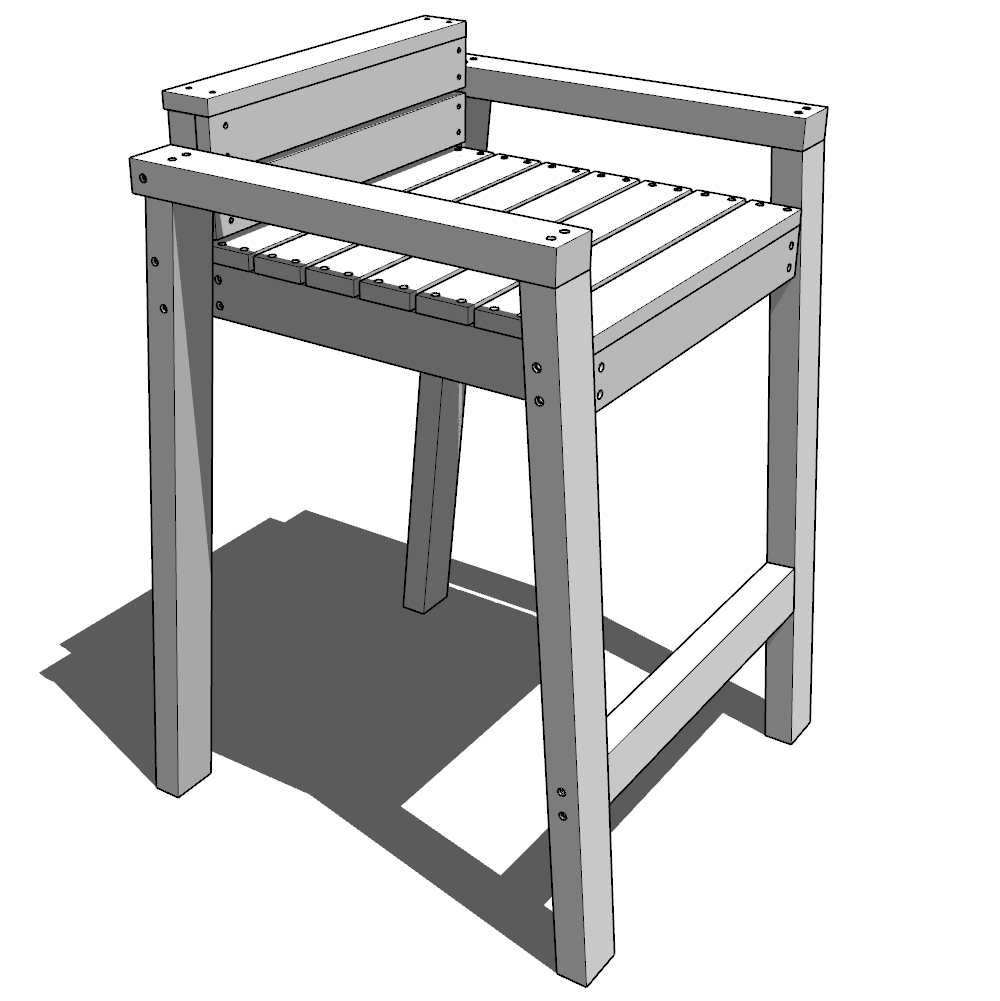
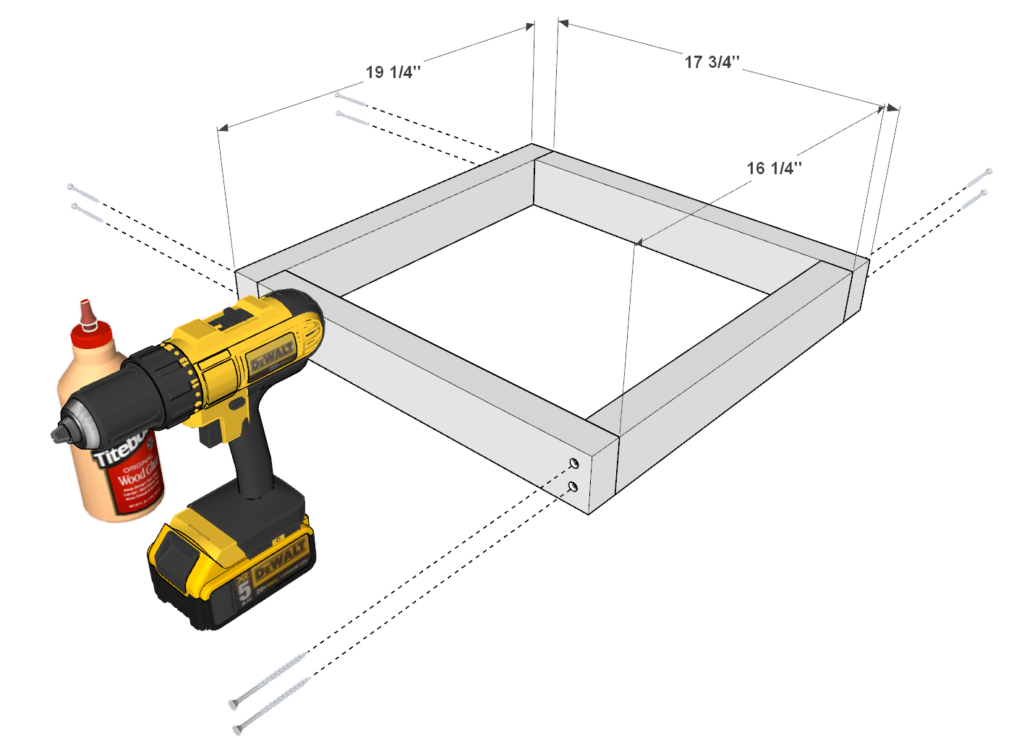
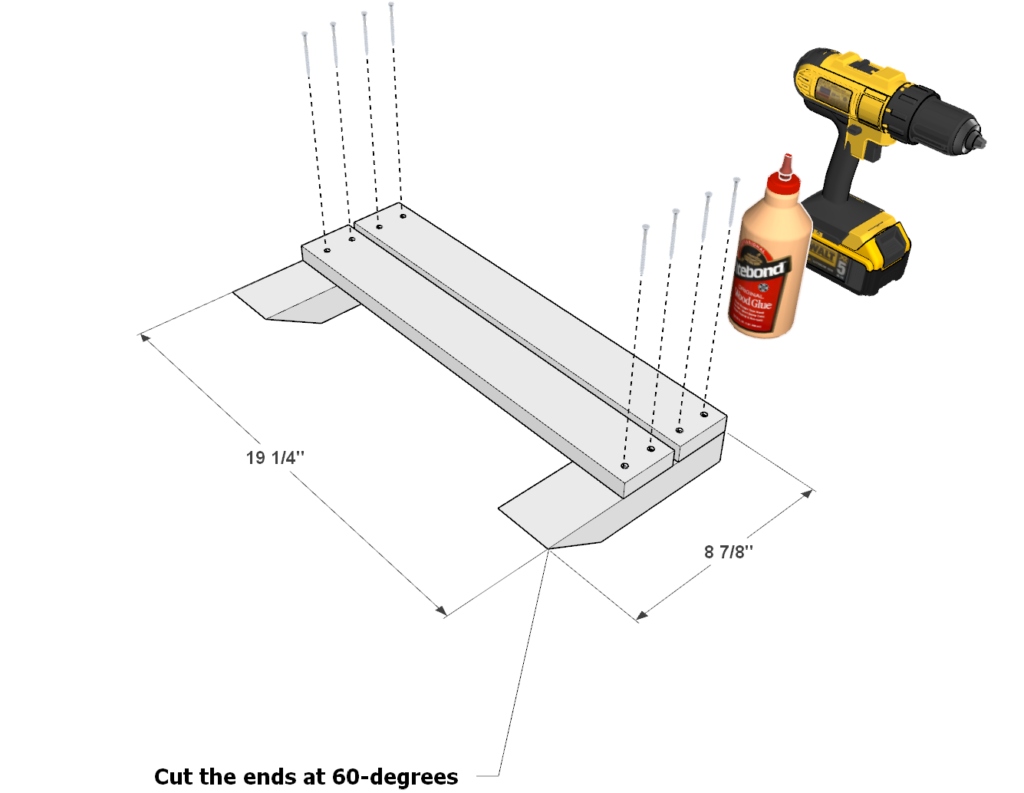
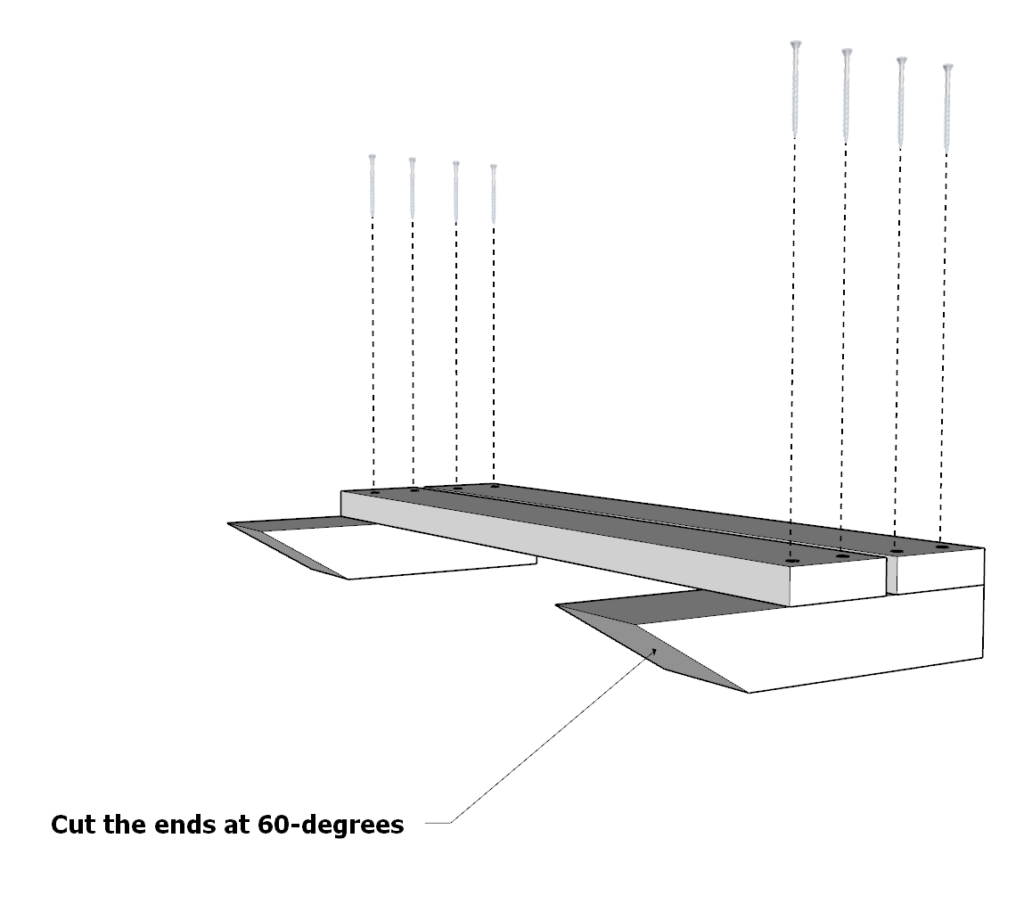
Step 1 (DIY barstool)
First, take two 17-3/4 inch 2×3 lumber pieces, one 19-1/4 inch 2×3 lumber piece, and one 16-1/4 inch 2×3 lumber piece and arrange them as shown below. Add glue to the areas of the 2x3s that will be joined together, predrill (to prevent wood splitting), and add 2.5 inch screws.
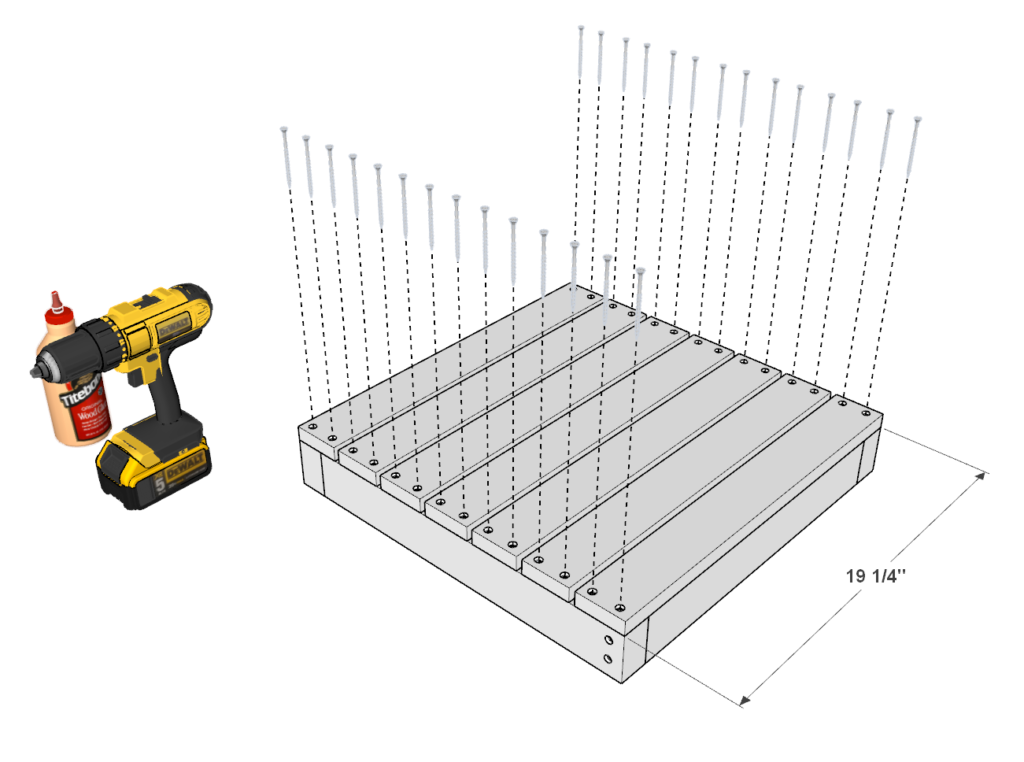
Step 2 (DIY barstool)
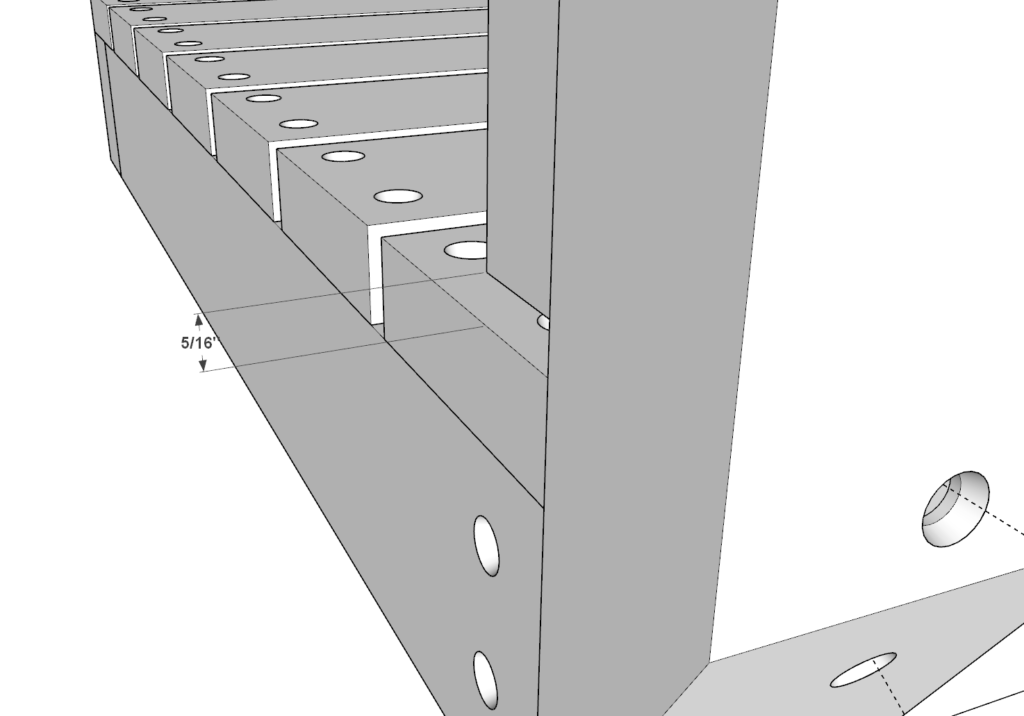
Next, add seven 19-1/4 inch 1×3 lumber decking pieces to the frame.
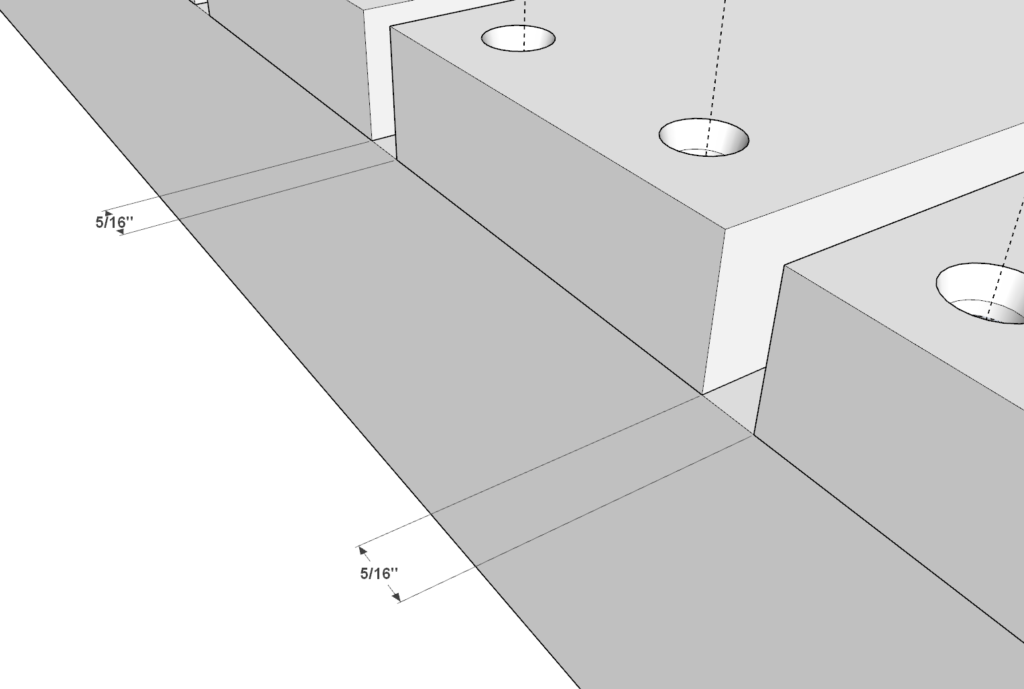
Space out the pieces about 5/16 inches apart. To have consistent spacing you might want to use a spacer. This can be a piece of lumber cut from scrap wood.
As before, add glue, predrill ,and add 2.5 inch screws.
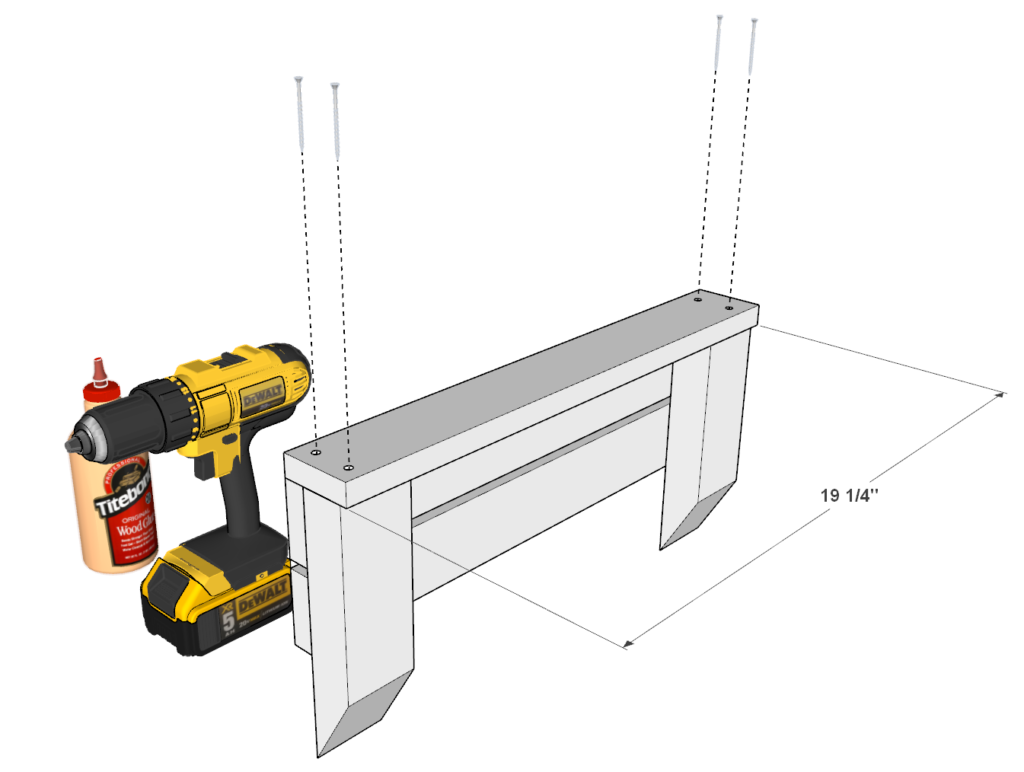
Step 3 (DIY barstool)
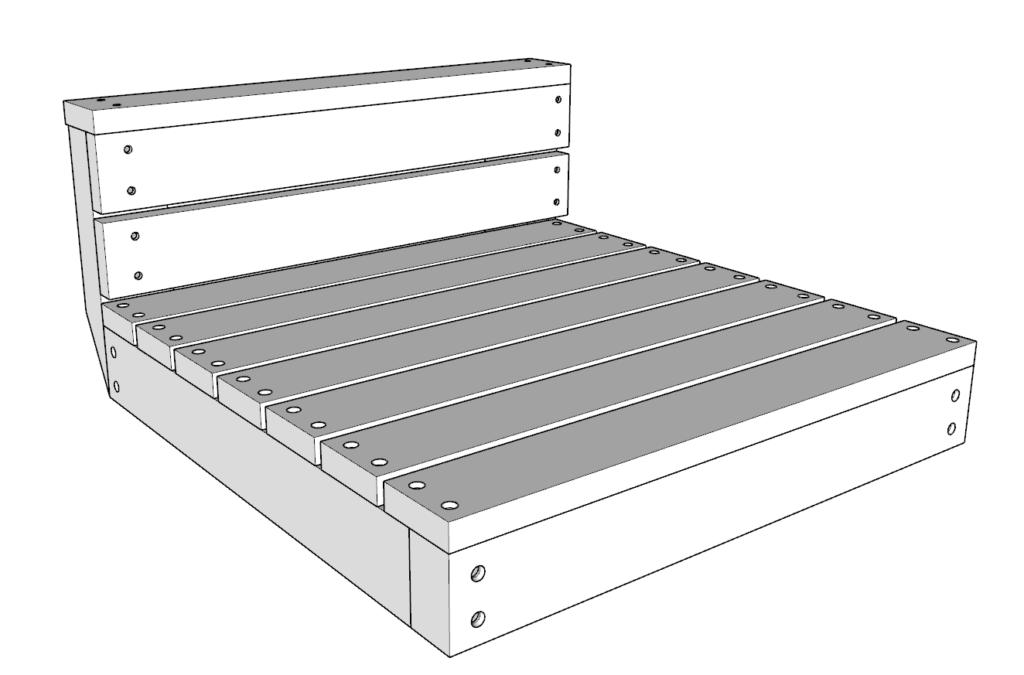
Next, assemble the backrest.
Take two of the 8-7/8 2×3 lumber pieces and two 19-1/4 inch 1×3 lumber pieces and arrange them as shown below.
Add glue, predrill, and add 1.5 inch screws. Use 1.5 inch screws to ensure the screws don’t stick out from the back.
Space out the two 1x3s 5/16 inches apart to match the seating platform plants.
Next, ad a 19-1/4 inch 1×3 lumber piece to the top of the back rest. Predrill, add glue, and add screws.
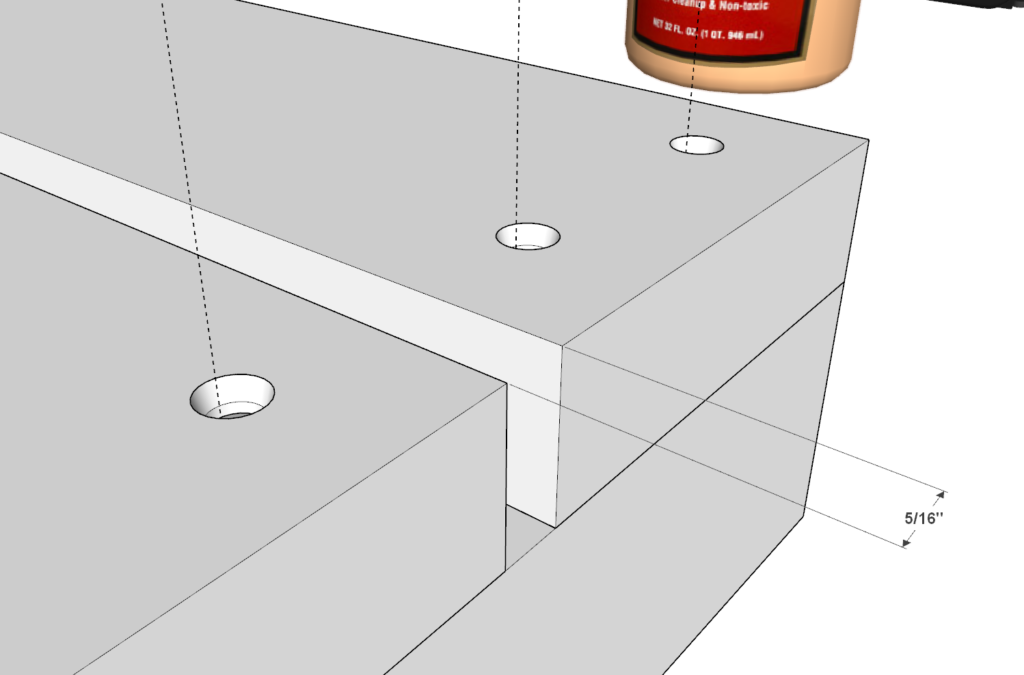
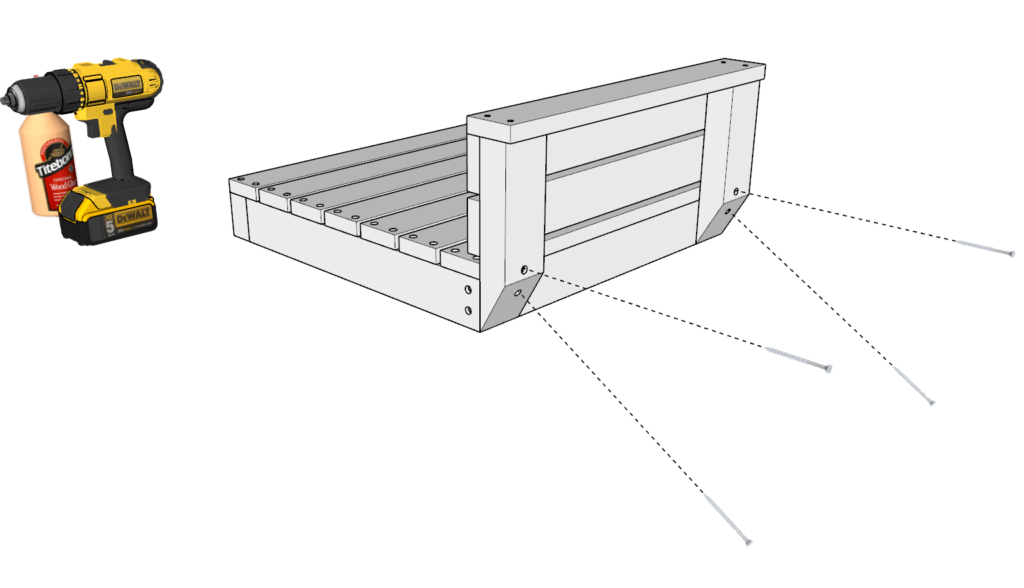
Next, attach the back rest to the seating platform. Ensure a 5/16 inch gap between the seating platform and the back rest as shown below.
Add plenty of glue, predrill, and add 2.5 inch screws to secure the backrest.
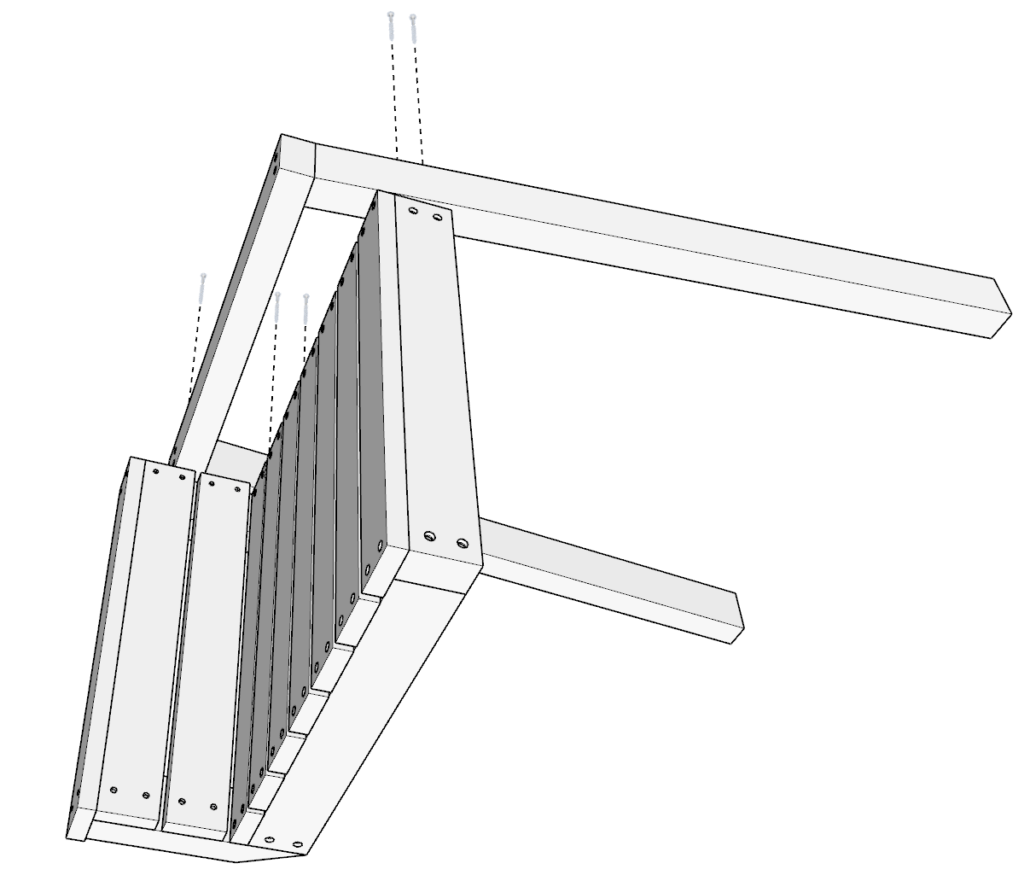
Step 4 (DIY barstool)
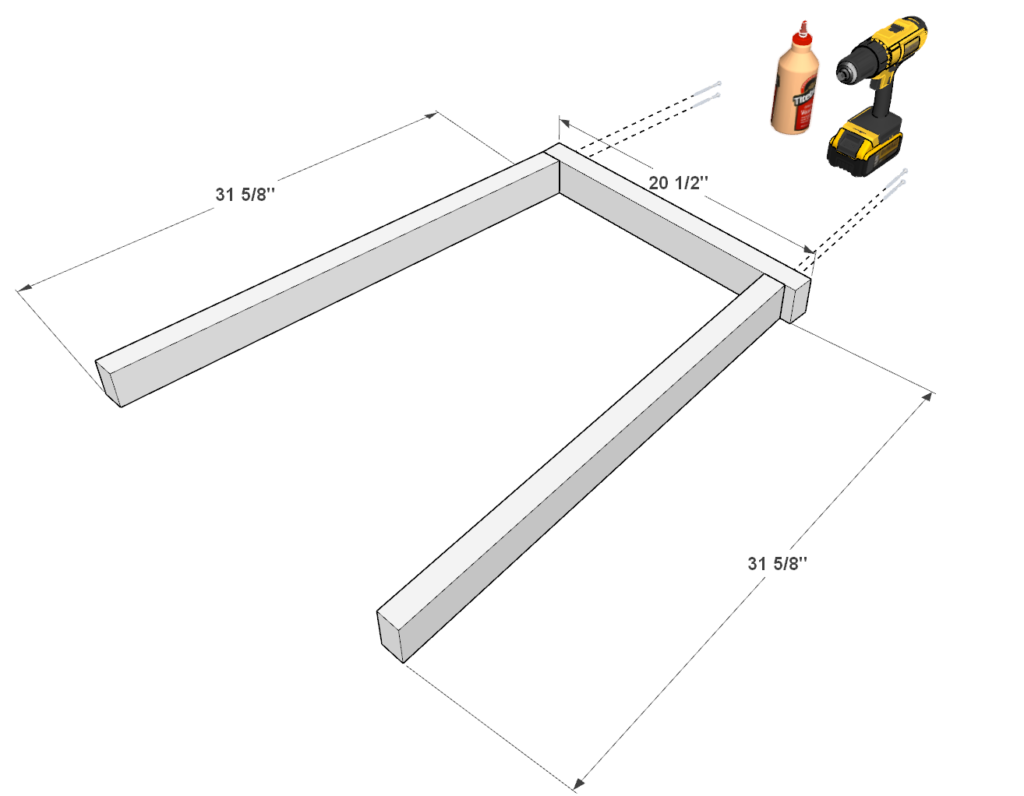
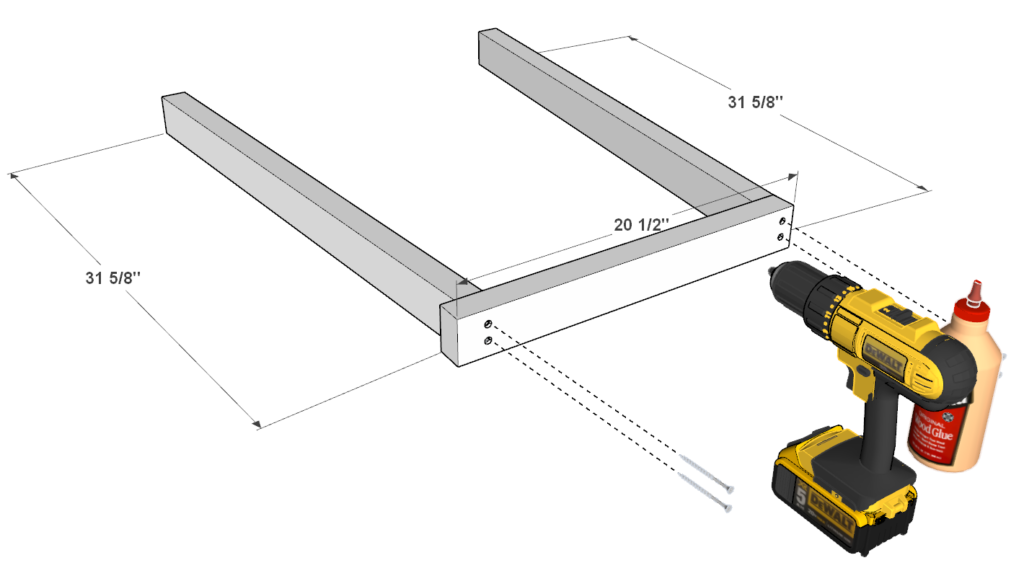
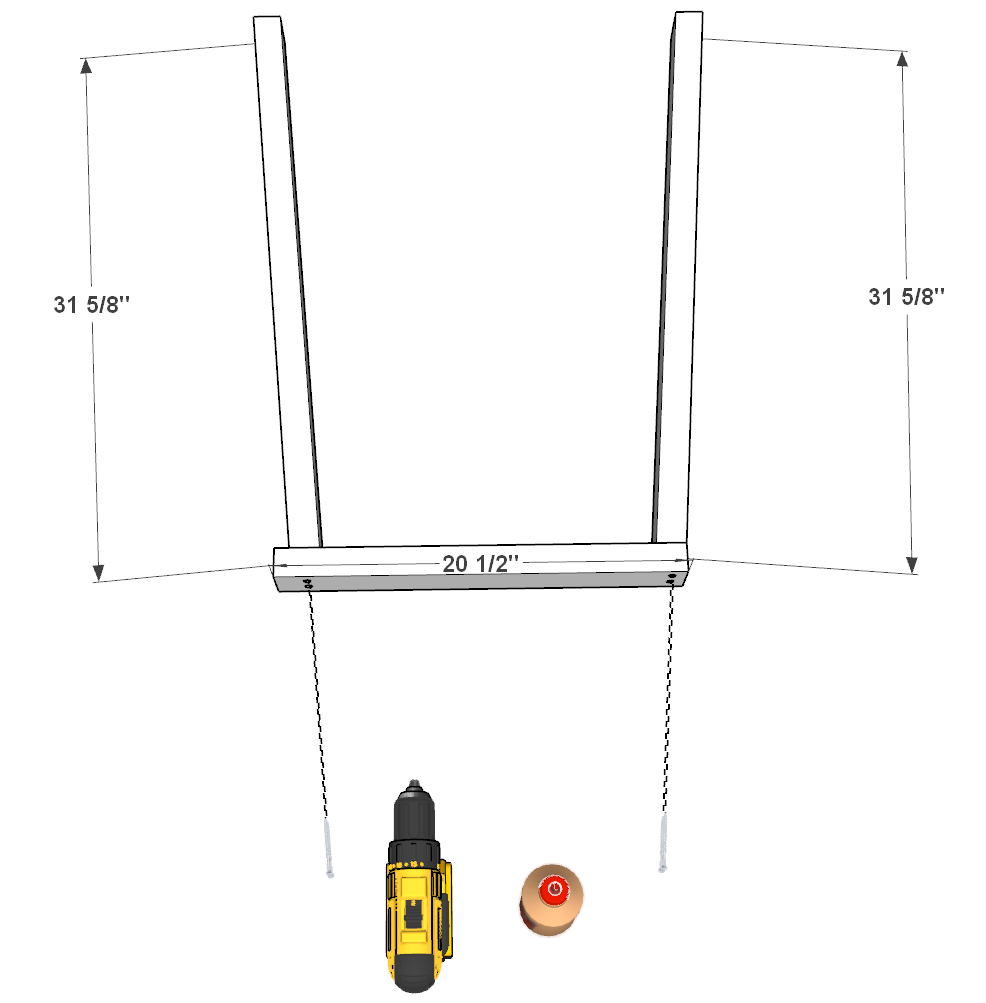
Next, assemble the two bar stool chair legs.
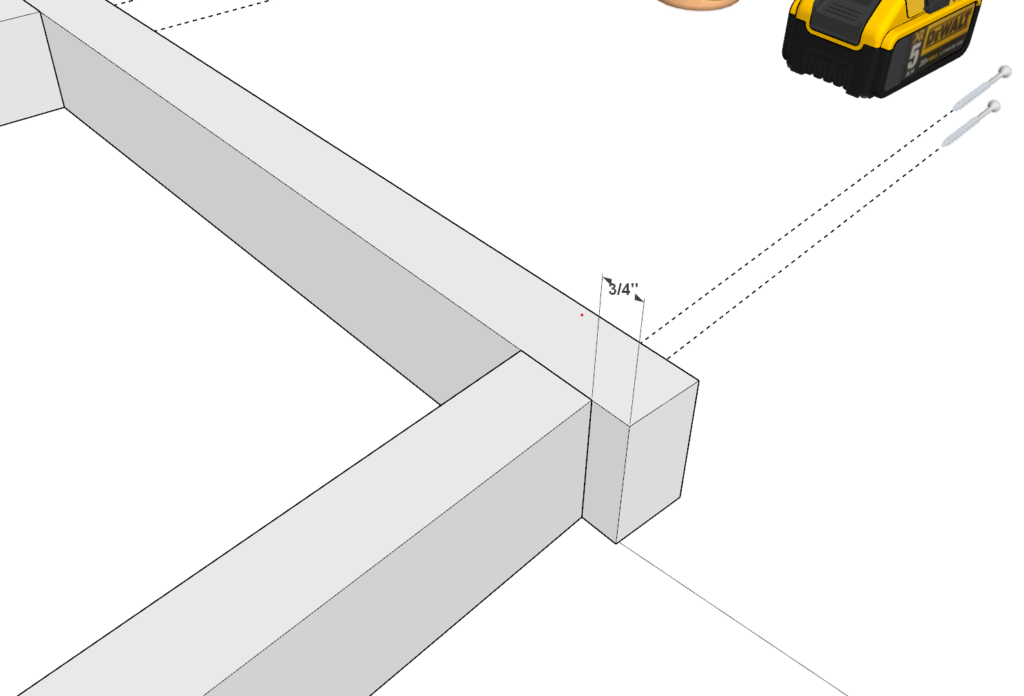
Start by taking two of the 31-5/8 inch 2×3 lumber pieces and one 20-1/2 lumber pieces and arrange them as shown below.
Make sure to indent one of the 31-5/8 inch 2×3 lumber pieces by 3/4 inch on one of the sides as shown below.
As before, add glue, predrill, and add 3.5 inch screws.
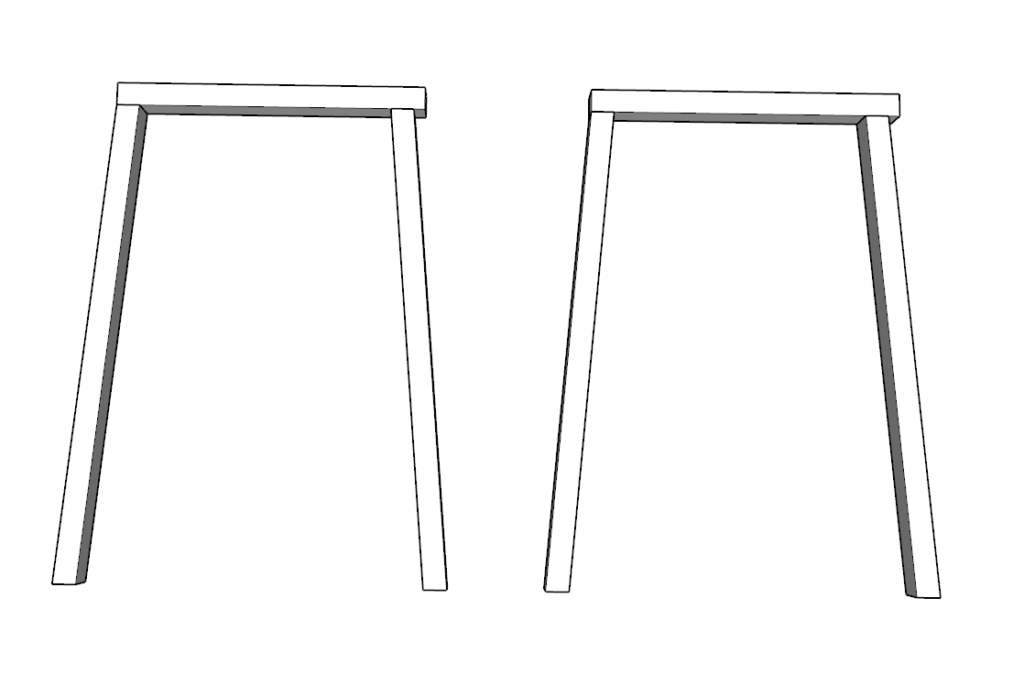
Repeat this step so that you end up with two leg sets total.

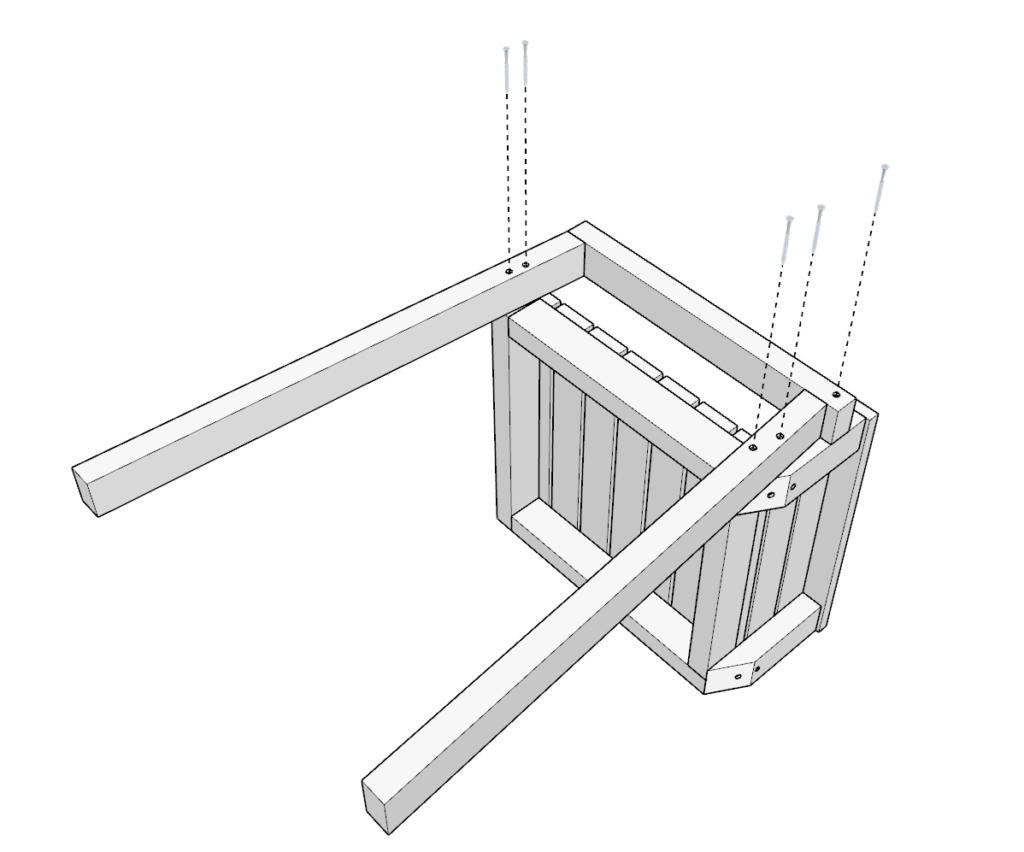
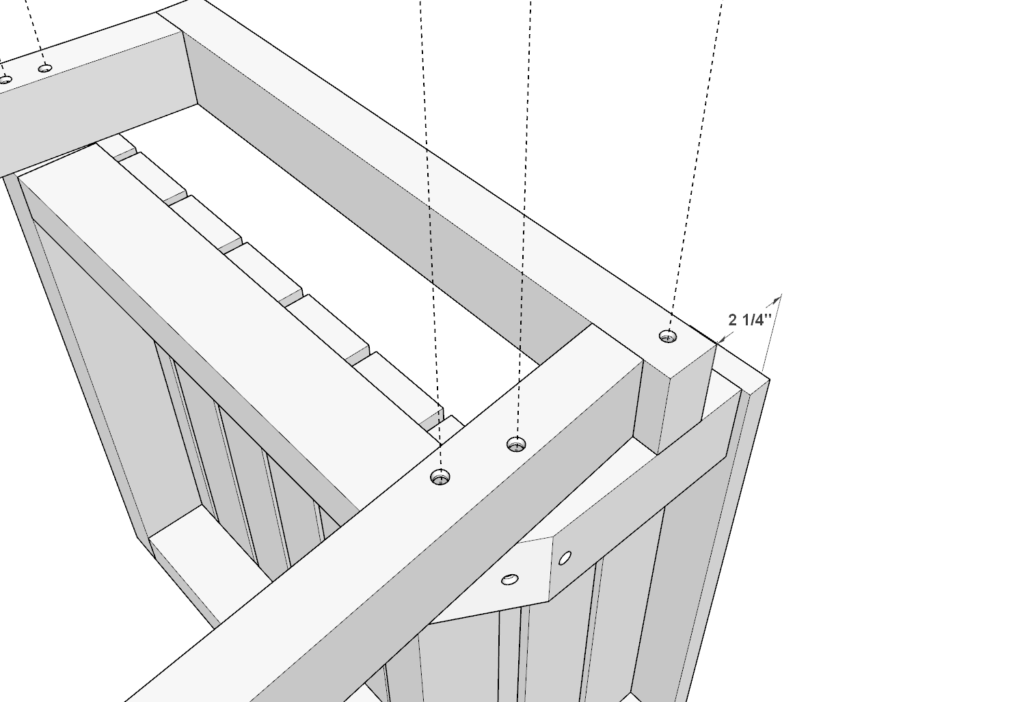
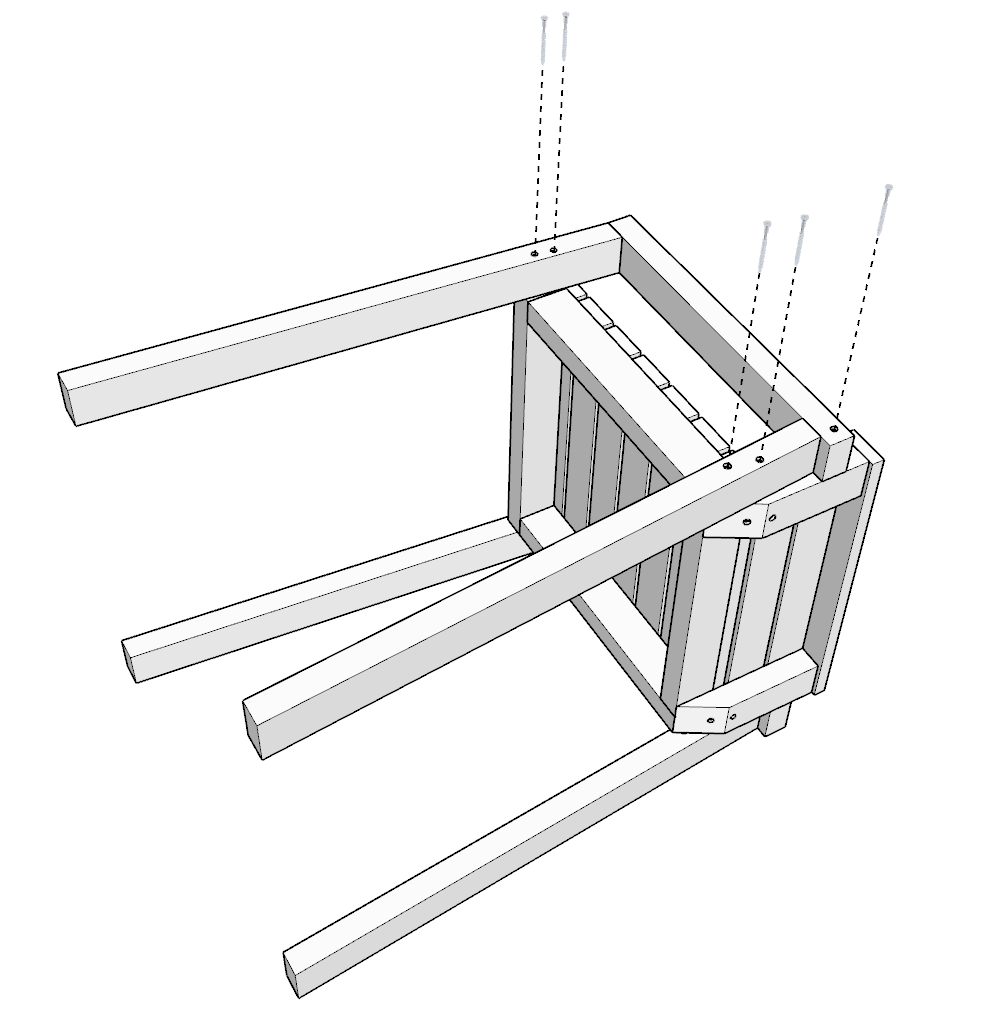
Step 5 (DIY barstool)
Next, add the armrest/leg pieces to the seating platform.
The arm rest should be parallel with the seating platform.
Make the seating platform sit higher then the arm rest by 2-1/4 inches as shown below.
When you have lay this out correctly, add glue, predrill, and add 3.5 inch screws. Use the longer 3.5 inch screws to ensure a secure joint. I would recommend going deep with the screws to ensure safety when sitting.
Repeat this for the other leg as well.
Step 6 (DIY barstool)
Lastly, sand down the whole chair. I use an orbital sander to speed up the process
I use a rough 80 grit paper first and then finish it with a 220 grit paper.
Filling in the holes is optional.
At this point it is ready to be stained or painted!